Author

Steven

Browsing

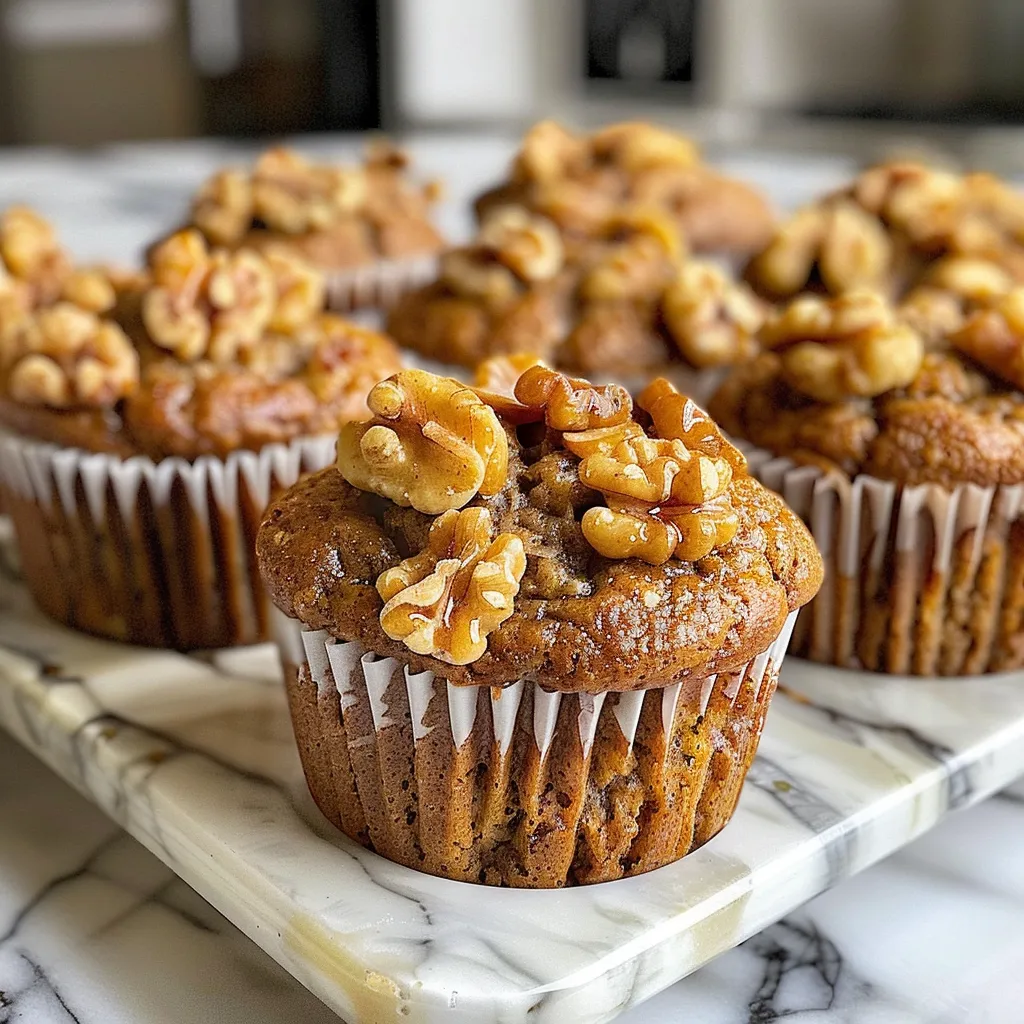
Welcome to Your New Favorite Muffin Recipe!

If you’ve ever craved a delicious, moist, and flavorful treat to start your day, you’re in the right place! These fluffy Vegan Banana Walnut Muffins are not only a delight for your taste buds but also incredibly easy to prepare. With simple, wholesome ingredients, this recipe transforms everyday pantry staples into a scrumptious breakfast or snack option. So, roll up your sleeves and get ready to bake some love into your kitchen!

Why You’ll Love This Recipe

These muffins are more than just a tasty treat. Here are five reasons why you’ll adore this vegan banana walnut creation:

  • Deliciously Nutty: The addition of walnuts gives these muffins a delightful crunch, balancing the softness of the bananas perfectly.
  • Healthy Ingredients: Made with whole foods like ripe bananas and brown sugar, these muffins provide a guilt-free indulgence.
  • Easy to Make: With simple steps and minimal prep time, even novice cooks can whip these up effortlessly.
  • Perfectly Fluffy: The combination of baking soda and baking powder ensures a light, airy muffin every time.
  • Versatile Enjoyment: Great for breakfast, snacks, or even dessert—these muffins fit any occasion!

Vegan Banana Walnut Muffins Ingredients

Here’s what you’ll need to create these delightful muffins:

  • 2 cups all-purpose flour: This is the backbone of your muffins. You can substitute with whole wheat flour for a healthier option.
  • 1 teaspoon baking soda: Helps the muffins rise and gives them a nice texture.
  • 1 teaspoon baking powder: Works alongside baking soda for the perfect rise.
  • 1/2 teaspoon salt: Enhances the flavors of the other ingredients.
  • 1 cup brown sugar (packed): Adds sweetness and moisture; feel free to use coconut sugar as a substitute!
  • 3 medium ripe bananas (mashed): The star ingredient! The riper, the better for maximum sweetness.
  • 1/3 cup melted coconut oil: Provides healthy fats and a subtle coconut flavor; you can use vegetable oil if preferred.
  • 1 teaspoon vanilla extract: For that warm, inviting aroma.
  • 1 cup plant-based milk: Almond, soy, or oat milk work beautifully.
  • 1 cup walnuts (chopped): A fantastic source of protein and healthy fats!

How to Make Vegan Banana Walnut Muffins

A scrumptious vegan banana walnut muffin displayed on a white plate, showcasing its fluffy texture and nutty topping.

Ready to bake? Follow these simple steps to create your muffins!

  1. Preheat your oven to 350°F (175°C) and line a muffin tin with paper liners or grease it with a bit of coconut oil.
  2. In a large mixing bowl, combine all the dry ingredients: all-purpose flour, baking soda, baking powder, and salt. Mix well.
  3. In another bowl, mash the ripe bananas with a fork until smooth. Then, add in the brown sugar, melted coconut oil, vanilla extract, and plant-based milk. Stir until combined.
  4. Pour the wet ingredients into the bowl of dry ingredients and mix gently until just combined—don’t overmix! Fold in the chopped walnuts.
  5. Scoop the batter into the prepared muffin tin, filling each cup about 2/3 full.
  6. Bake for 18-22 minutes or until a toothpick inserted into the center comes out clean. Allow to cool in the tin for a few minutes before transferring to a wire rack.

Expert Tips for Perfect Muffins

Want to elevate your muffin game? Here are some expert insights:

  • Use overripe bananas: The browner the bananas, the sweeter and more flavorful your muffins will be.
  • Don’t overmix: Mixing too much can lead to dense muffins. Mix until just combined.
  • Check for doneness: Ovens can vary, so check your muffins a couple of minutes before the timer goes off.
  • Let them cool: Allow muffins to cool in the tin for at least 5 minutes to prevent them from becoming soggy.
  • Try different nuts: If you’re not a fan of walnuts, pecans or even chocolate chips can make delightful substitutions.
  • Experiment with spices: A sprinkle of cinnamon or nutmeg can add a warm flavor to your muffins.
  • Use a cookie scoop: This helps to evenly distribute the batter into the muffin tin.
  • Store properly: For maximum freshness, store in an airtight container.

Common Mistakes and Troubleshooting

A few common pitfalls to avoid when making these muffins:

  • Too dry muffins: Ensure you’re measuring flour correctly—spoon it into your measuring cup instead of scooping it directly.
  • Flat muffins: Double-check that your baking soda and baking powder are fresh to ensure proper rising.
  • Burnt tops: If your muffins brown too quickly, consider lowering the oven temperature by 25°F and baking a bit longer.

Variations on the Classic Recipe

Want to switch things up? Here are some fun variations to try:

  • Chocolate Chip Banana Muffins: Add 1 cup of vegan chocolate chips for a sweet twist.
  • Blueberry Banana Muffins: Replace walnuts with 1 cup of fresh or frozen blueberries.
  • Coconut Banana Muffins: Stir in 1/2 cup of shredded coconut for a tropical flair.
  • Spiced Banana Muffins: Add 1 teaspoon of cinnamon and a pinch of nutmeg for a warm, cozy flavor.

How to Store and Freeze Vegan Banana Walnut Muffins

These muffins can be stored and enjoyed for longer periods with the right techniques:

  • Room Temperature: Keep in an airtight container for up to 3 days.
  • Refrigeration: For max freshness, store in the fridge for up to a week.
  • Freezing: Freeze muffins individually wrapped for up to 3 months. Thaw at room temperature or in the microwave.

Vegan Banana Walnut Muffins Recipe FAQs

Got questions? We’ve got answers:

  • Can I use whole wheat flour? Yes, you can substitute up to half of the all-purpose flour with whole wheat flour.
  • Can I make this gluten-free? Absolutely! Use a gluten-free all-purpose flour blend.
  • What can I substitute for coconut oil? Vegetable oil or melted vegan butter works well.
  • How do I know when they are done? Insert a toothpick in the center—if it comes out clean or with a few crumbs, they’re ready!
  • Can I make mini muffins? Yes! Adjust baking time to 10-15 minutes.
  • What if my bananas aren’t ripe enough? You can speed up ripening by placing them in a brown paper bag for a day or two.
  • Can I add other fruits? Yes! Chopped apples or pears can also be delicious in these muffins.
  • Do I need to use brown sugar? You can use white sugar or coconut sugar if you prefer.

Nutritional Benefits and Dietary Adaptations

These muffins not only taste great but also offer nutritional value:

  • Potassium-rich: Ripe bananas are a great source of potassium, which supports heart health.
  • Healthy fats: Walnuts provide omega-3 fatty acids, beneficial for brain health.
  • High fiber: The use of whole grains and fruits contributes to your daily fiber intake.

Essential Equipment for Making Muffins

Here’s what you’ll need to get started:

  • Muffin tin: Standard or silicone muffin tins work best.
  • Mixing bowls: Use at least two for separating dry and wet ingredients.
  • Measuring cups and spoons: Accurate measurements are key to perfect muffins!
  • Whisk and spatula: For mixing ingredients efficiently.

Serving Suggestions for Your Muffins

Enjoy your muffins in various ways:

  • With Jam: Spread some vegan butter or your favorite jam for added flavor.
  • With a Side of Fruit: Pair with fresh fruit for a wholesome breakfast.
  • As a Snack: Perfect for a mid-afternoon pick-me-up with a cup of tea or coffee.

Conclusion: Your Baking Adventure Awaits!

There you have it! Fluffy, delicious, and oh-so-satisfying Vegan Banana Walnut Muffins that are sure to become a staple in your home. With simple ingredients and easy steps, you’re well on your way to becoming a muffin master. Enjoy the process, savor each bite, and remember—it’s all about having fun in the kitchen. Happy baking!

Vegan Banana Walnut Muffins

Prep Time 10 minutes
Cook Time 20 minutes
Total Time 30 minutes
Servings 12 muffins
Calories 180
Delicious and healthy vegan banana walnut muffins perfect for breakfast or a snack.

Ingredients

Flour

  • 2 cups all-purpose flour

Baking soda

  • 1 teaspoon baking soda

Baking powder

  • 1 teaspoon baking powder

Salt

  • 1 1/2 teaspoons salt

Brown Sugar

  • 1 cup brown sugar packed

Bananas

  • 3 medium ripe bananas mashed

Coconut Oil

  • 1/3 cup coconut oil melted

Vanilla Extract

  • 1 teaspoon vanilla extract

Plant-based Milk

  • 1 cup plant-based milk

Walnuts

  • 1 cup chopped walnuts

Instructions 

  • Preheat oven to 350°F (175°C). Line a muffin tin with paper liners.
  • Mix dry ingredients: flour, baking soda, baking powder, salt.
  • In a separate bowl, mash bananas and mix with sugar, oil, vanilla, and milk.
  • Combine wet and dry ingredients, then fold in chopped walnuts.
  • Divide batter into muffin cups and bake for 20 minutes.

Notes

For extra flavor, add a handful of chocolate chips or dried fruit.
Calories: 180kcal
Cost: $10
Course: Breakfast
Cuisine: vegan
Keyword: Banana

Unleash Flavor with Effortless BBQ Chicken Flatbread

Are you looking for a quick and delicious meal that can please the whole family? Look no further! This BBQ Chicken Flatbread recipe brings together tender chicken, zesty BBQ sauce, and gooey cheese for a delightful weeknight feast. In under 30 minutes, you can create a satisfying dish that’s perfect for any occasion. Let’s dive into how to make this scrumptious meal that’s easy to customize and packed with flavor!

Why You’ll Love This Recipe

Here are five reasons why this BBQ Chicken Flatbread should be your go-to recipe:

  • Quick and Easy: With minimal prep and cooking time, you can whip this dish up in under 30 minutes, making it perfect for busy weeknights.
  • Customizable: Feel free to swap out ingredients or add your favorite toppings, ensuring that your chicken flatbread suits your taste perfectly.
  • Family-Friendly: The combination of BBQ chicken and cheese is a hit with both kids and adults, making it a great option for family meals.
  • Great for Meal Prep: Make multiple flatbreads ahead of time for easy lunches or dinners throughout the week.
  • Flavorful and Satisfying: The blend of savory chicken and tangy BBQ sauce provides a rich flavor that will leave everyone asking for more.

Ingredients: What You’ll Need

Here’s a detailed breakdown of the ingredients required for making BBQ Chicken Flatbread, along with some suggested substitutions:

  • Flatbread Crusts: 2 pieces, store-bought or homemade. Opt for naan or pita for a different texture.
  • BBQ Sauce: 1 cup, choose your favorite brand or make your own for a personal touch.
  • Grilled Chicken: 2 cups, diced or shredded rotisserie chicken works best for flavor and convenience.
  • Cheese: 3 cups of shredded Colby Jack cheese, or substitute with mozzarella or cheddar for different flavors.
  • Bell Peppers: 1 cup, chopped, for added crunch and nutrition. Consider using red, yellow, or green.
  • Garnish: Thinly sliced green onions to add a fresh touch before serving.

How to Make BBQ Chicken Flatbread Step-by-Step

A side perspective of BBQ Chicken Flatbread showcasing juicy chicken and green onion garnishes.

Follow these simple steps to create your delicious BBQ Chicken Flatbread:

  1. Preheat your oven: Set your oven to 400°F (200°C).
  2. Prepare the flatbread: Place the flatbread on a baking sheet lined with parchment paper.
  3. Spread the BBQ sauce: Evenly spread 1/2 cup of BBQ sauce over each flatbread, leaving a small border around the edges.
  4. Add the chicken: Sprinkle the diced grilled chicken evenly over the BBQ sauce.
  5. Top with cheese: Generously cover the chicken with shredded cheese.
  6. Sprinkle with bell peppers: Distribute the chopped bell peppers over the cheese for added flavor and color.
  7. Bake: Place the flatbreads in the oven and bake for about 10-12 minutes, or until the cheese is melted and bubbly.
  8. Garnish and serve: Remove from the oven, sprinkle with green onions, slice into pieces, and enjoy!

Expert Tips for the Best BBQ Chicken Flatbread

Here are some expert insights to help you achieve BBQ chicken flatbread perfection:

  • Use rotisserie chicken: For the best flavor and convenience, shredded rotisserie chicken is perfect.
  • Experiment with sauces: Don’t hesitate to mix different BBQ sauces or add hot sauce for a spicy kick.
  • Don’t overload the toppings: While it’s tempting to pile on the toppings, too many can make the flatbread soggy.
  • Broil for extra crispiness: For a crispy finish, broil the flatbread for the last 1-2 minutes of baking.
  • Let it cool slightly: Allow the flatbread to cool for a couple of minutes before slicing to keep the toppings intact.
  • Use a pizza cutter: For easier slicing, a pizza cutter works wonders on flatbreads.
  • Serve with sides: Pair your flatbread with a fresh salad or roasted vegetables for a balanced meal.

Common Mistakes and Troubleshooting

Here are some common pitfalls to avoid when making BBQ Chicken Flatbread:

  • Overcooking: Keep an eye on the flatbread; overcooking can lead to a dry texture.
  • Using cold ingredients: For best results, allow your chicken and toppings to come to room temperature before assembling.
  • Soggy flatbread: Avoid using too much sauce or wet toppings to prevent sogginess.
  • Skipping the preheat: Be sure to preheat your oven to ensure even cooking and crispy edges.

Delicious Variations

Feel free to mix things up with these tasty variations:

  • Mexican Fiesta: Use taco seasoning on the chicken and top with jalapeños, corn, and a drizzle of salsa.
  • Caprese Style: Swap BBQ sauce for pesto and top with fresh mozzarella, tomatoes, and basil.
  • Buffalo Chicken: Replace BBQ sauce with buffalo sauce for a spicy twist, and add blue cheese crumbles.
  • Veggie Delight: For a vegetarian option, load up on roasted vegetables like zucchini, mushrooms, and olives instead of chicken.

Storage and Make-Ahead Instructions

You can easily prepare BBQ Chicken Flatbread ahead of time:

  • Make-ahead: Assemble the flatbreads without baking them. Cover with plastic wrap and refrigerate for up to 24 hours.
  • Storing leftovers: Store leftover baked flatbreads in an airtight container in the fridge for up to 3 days.
  • Reheating: Reheat in the oven at 350°F (175°C) for 10-15 minutes to regain crispiness.

Comprehensive FAQ

Here are some frequently asked questions about BBQ Chicken Flatbread:

  • Can I use a different type of cheese? Absolutely! Mozzarella, cheddar, or even feta can work beautifully.
  • How do I make this recipe gluten-free? Use gluten-free flatbread or tortillas as a base.
  • Can I freeze BBQ Chicken Flatbread? Yes, freeze assembled but unbaked flatbreads. Thaw before baking.
  • What if I don’t have BBQ sauce? You can substitute with honey mustard, ranch dressing, or homemade sauces.
  • Can I prepare the chicken in advance? Yes, cooked chicken can be stored in the fridge and used within 3-4 days.
  • Is this recipe suitable for kids? Yes! It’s a fun and interactive meal that kids will love to eat.
  • How can I make this healthier? Use whole wheat flatbread and add more vegetables for added fiber.
  • What toppings can I add? Consider adding avocado, cilantro, or even pickled red onions for extra flavor.

Nutritional Tips and Dietary Adaptations

This BBQ Chicken Flatbread can be adapted to suit various dietary needs:

  • Low-carb option: Use a cauliflower flatbread or lettuce wraps instead of traditional crusts.
  • Dairy-free: Opt for dairy-free cheese or skip the cheese altogether for a lighter option.
  • Vegetarian: Replace chicken with roasted chickpeas or grilled portobello mushrooms.

Equipment Recommendations

To help you create the perfect BBQ Chicken Flatbread, here are some recommended tools:

  • Baking Sheet: A sturdy, non-stick baking sheet is essential for even cooking.
  • Parchment Paper: Ideal for preventing sticking and easy cleanup.
  • Pizza Cutter: For clean and quick slicing of your flatbreads.
  • Mixing Bowls: Use to combine your ingredients, especially for homemade sauces.

Serving Suggestions

Enhance your BBQ Chicken Flatbread experience with these serving suggestions:

  • Fresh Salad: Serve with a crisp green salad tossed in a light vinaigrette.
  • Dipping Sauces: Offer extra BBQ sauce, ranch, or a creamy garlic dip for added flavor.
  • Chips or Fries: Pair with sweet potato fries or tortilla chips for a satisfying crunch.

With its ease of preparation and mouthwatering flavors, this BBQ Chicken Flatbread is sure to become a favorite in your household. Don’t hesitate to experiment with different toppings and sauces to make it your own. Remember, cooking is about confidence and creativity—enjoy the process and happy cooking!

BBQ Chicken Flatbread

Prep Time 10 minutes
Cook Time 10 minutes
Total Time 20 minutes
Servings 4 pieces
Calories 550
Enjoy a delicious homemade BBQ chicken flatbread with melty cheese and fresh toppings, perfect for a quick and satisfying meal.

Ingredients

Flatbread Crusts

  • 2 pieces flatbread crusts (store-bought or homemade)
  • 1 cup BBQ sauce
  • 2 cups diced grilled chicken or shredded rotisserie chicken
  • 3 cups shredded Colby Jack cheese
  • 1 cup chopped bell peppers
  • to taste Thinly sliced green onions for garnish

Instructions 

  • Preheat oven to 400°F (200°C).
  • Spread BBQ sauce evenly over each flatbread.
  • Distribute diced chicken and chopped bell peppers over the sauce.
  • Sprinkle shredded cheese on top.
  • Bake for 10 minutes until cheese is melted and crust is crispy.
  • Garnish with sliced green onions before serving.

Notes

For extra flavor, brush the crust edges with garlic butter before baking.
Calories: 550kcal
Cost: $12
Course: Main Course
Cuisine: American
Keyword: BBQ Chicken

Welcome to a chocolate lover’s paradise! If you’re searching for a decadent treat to brighten your day, look no further than these Indulgent Double Chocolate Chip Muffins. In just a few simple steps, you can whip up a batch of moist, rich muffins that are perfect for breakfast or as a delightful snack. This recipe not only satisfies your chocolate cravings but also allows you to enjoy the comforting experience of homemade baking. So, preheat your oven and let’s dive into this easy double chocolate muffin recipe!

Why You’ll Love This Recipe

Here are five compelling reasons to embrace this double chocolate muffin recipe:

  • Irresistible Chocolate Flavor: With both cocoa powder and chocolate chips, these muffins deliver an overwhelmingly chocolatey experience.
  • Easy to Make: This recipe is straightforward, making it accessible for both novice and experienced bakers.
  • Perfect Texture: Enjoy muffins that are fluffy on the inside while remaining moist and rich thanks to the combination of sour cream and oil.
  • Customizable: Feel free to mix in your favorite nuts or substitute ingredients as you like!
  • Make-Ahead Friendly: You can prepare the batter the night before and bake fresh muffins in the morning for a delightful start to your day.

Ingredients for Double Chocolate Chip Muffins

This double chocolate muffin recipe requires simple ingredients that you might already have in your pantry. Here’s what you’ll need:

  • All-Purpose Flour: 1 and 3/4 cups. This forms the base of your muffins, providing structure.
  • Granulated Sugar: 1 cup. This adds the sweetness that balances out the rich cocoa.
  • Unsweetened Cocoa Powder: 2/3 cup. The star ingredient that gives these muffins their deep chocolate flavor.
  • Baking Powder: 2 teaspoons. This helps the muffins rise to fluffy perfection.
  • Baking Soda: 1/2 teaspoon. Works in tandem with baking powder to achieve a light texture.
  • Salt: 1/2 teaspoon. Enhances flavor and balances sweetness.
  • Large Eggs: 2. Essential for binding and moisture.
  • Milk: 3/4 cup. Adds moisture and richness.
  • Sour Cream or Greek Yogurt: 3/4 cup. This provides tenderness and a slight tang.
  • Vegetable Oil: 1/2 cup. Keeps the muffins moist and adds richness.
  • Vanilla Extract: 2 teaspoons. Infuses a warm flavor that complements the chocolate.
  • Semisweet Chocolate Chips: 2 cups, divided. For maximum chocolate indulgence, we sprinkle some on top before baking.

Instructions: How to Make Double Chocolate Chip Muffins

Follow these simple steps to create your double chocolate muffins:

  1. Preheat your oven to 375 degrees Fahrenheit. Line a 12-cup muffin tin with paper liners.
  2. Mix Dry Ingredients: In a large bowl, whisk together the flour, sugar, cocoa powder, baking powder, baking soda, and salt until well combined.
  3. Mix Wet Ingredients: In a separate bowl, whisk the eggs, milk, sour cream, oil, and vanilla extract until smooth.
  4. Combine Mixtures: Pour the wet ingredients into the dry mix and stir just until combined. Be careful not to overmix.
  5. Fold in Chocolate Chips: Gently stir in 1 and ½ cups of chocolate chips, saving the remaining ½ cup for topping.
  6. Fill Muffin Cups: Divide the batter among the muffin cups, filling each almost to the top. Sprinkle a few chocolate chips on each muffin for that extra touch.
  7. Bake: Place in the oven and bake for about 15 minutes, or until a toothpick inserted in the center comes out mostly clean with just a few crumbs.
  8. Cool: Allow the muffins to cool in the pan for 5 minutes before transferring them to a wire rack to cool completely.

Expert Tips for Perfect Results

Side view of a bakery-style double chocolate chip muffin, showcasing a fluffy texture and rich color.

Follow these pro tips to ensure your double chocolate muffins turn out beautifully:

  • Use Room Temperature Ingredients: Bringing eggs and milk to room temperature helps the batter combine more smoothly.
  • Don’t Overmix: Stir just until combined for fluffy muffins; overmixing can lead to dense results.
  • Use Quality Chocolate: Higher-quality chocolate chips will melt beautifully and enhance the flavor.
  • Measure Flour Correctly: Spoon and level your flour for accuracy; too much flour can lead to dry muffins.
  • Check Doneness Early: Oven temperatures can vary; start checking for doneness a minute or two early.
  • Let Them Rest: Allow muffins to rest in the pan for a few minutes to set before moving them to a wire rack.
  • Experiment with Mix-Ins: Try adding nuts, dried fruit, or other types of chocolate chips for a unique twist!
  • Use a Cookie Scoop: For evenly sized muffins, a cookie scoop makes filling muffin cups a breeze.

Common Mistakes and Troubleshooting

Here are some common pitfalls and solutions to ensure your muffins rise to perfection:

  • Dense Muffins: This often results from overmixing. Remember, mix just until combined!
  • Flat Muffins: Ensure your baking powder and baking soda are fresh. Old leavening agents can lead to flat baked goods.
  • Dry Muffins: Overbaking can dry out muffins; check them a few minutes early to avoid this.
  • Burnt Tops: If the tops are browning too quickly, cover loosely with aluminum foil halfway through baking.

Variations on Double Chocolate Chip Muffins

Here are some fun ways to customize this recipe:

  • Mint Chocolate Chip: Add 1 teaspoon of peppermint extract and use mint chocolate chips for a refreshing twist.
  • Nutty Chocolate Muffins: Mix in 1/2 cup of chopped walnuts or pecans for added crunch.
  • Peanut Butter Swirl: Drop a spoonful of peanut butter into the batter before baking and swirl for a delicious flavor combo.
  • Spiced Chocolate Muffins: Add 1 teaspoon of cinnamon or a pinch of cayenne pepper for a spicy kick!

Storage and Make-Ahead Instructions

Want to enjoy these muffins for days? Here’s how:

  • Room Temperature: Store in an airtight container for up to 3 days.
  • Refrigerator: For longer freshness, keep in the fridge for up to a week.
  • Freezer: Freeze muffins in a zip-top bag for up to 3 months. Thaw at room temperature or microwave for a quick snack.
  • Make Ahead: Prepare the batter the night before and store it in the fridge. Bake fresh muffins in the morning!

FAQs: Your Double Chocolate Muffin Questions Answered

Here are some common questions and helpful answers:

  • Can I use whole wheat flour? Yes, but expect a denser muffin. You might need to add a bit more liquid.
  • What if I don’t have sour cream? Greek yogurt is a great substitute, providing a similar texture and tang.
  • Can I make this recipe gluten-free? You can use a 1:1 gluten-free flour blend, ensuring it contains xanthan gum for structure.
  • How do I get tall muffin tops? Fill the muffin cups almost to the top and ensure your oven is at the correct temperature.
  • What’s the best way to store muffins? Keep them in an airtight container to maintain moisture and freshness.
  • Can I substitute chocolate chips? Absolutely! Feel free to use white chocolate or dark chocolate chips for a different flavor.
  • Why are my muffins sinking? This can happen if the batter is overmixed or if there’s not enough leavening agent. Check your ingredients!
  • What’s the secret to moist muffins? Using sour cream and not overbaking are essential for moist, delicious muffins!

Nutritional Tips and Dietary Adaptations

These muffins can cater to various dietary needs:

  • Lower Sugar Option: Reduce sugar to 3/4 cup for a less sweet muffin.
  • Dairy-Free: Use almond milk and dairy-free yogurt or sour cream.
  • Vegan Option: Substitute eggs with flax eggs (1 tbsp ground flaxseed + 2.5 tbsp water per egg) and use a vegan yogurt.
  • Portion Control: Consider making mini muffins for smaller portions, ideal for snacks!

Equipment Recommendations

To achieve the best results, here are some essential tools:

  • Muffin Tin: A non-stick muffin tin ensures easy release and even baking.
  • Mixing Bowls: Use a large mixing bowl for dry ingredients and a medium bowl for wet ingredients.
  • Whisk: A sturdy whisk will help you mix ingredients smoothly.
  • Measuring Cups and Spoons: Accurate measurements are key to successful baking!
  • Rubber Spatula: Great for folding ingredients gently without overmixing.

Serving Suggestions

These muffins are delightful on their own, but consider these serving ideas:

  • With Coffee or Tea: Pair your muffins with a hot beverage for a cozy treat.
  • Top with Butter: A pat of butter or a drizzle of honey adds a lovely richness.
  • Serve Warm: Enjoy them fresh out of the oven or reheated for a gooey chocolate experience.
  • With Fresh Fruit: Serve alongside berries or sliced bananas for a balanced snack.

In conclusion, these Indulgent Double Chocolate Chip Muffins are not just a recipe; they’re an invitation to enjoy the art of baking and the joy of delicious chocolate treats. So gather your ingredients and get ready to indulge. Happy baking!

Easy Double Chocolate Chip Muffins Bakery-Style!

Prep Time 10 minutes
Cook Time 15 minutes
Total Time 25 minutes
Servings 12 muffins
Calories 250
Enjoy these moist and decadent double chocolate muffins that are perfect for breakfast or a snack. They combine rich cocoa and chocolate chips for a bakery-style treat at home.

Ingredients

Dry Ingredients

  • 1 3/4 cups all-purpose flour
  • 1 cup granulated sugar
  • 2/3 cup unsweetened cocoa powder
  • 2 teaspoons baking powder
  • 1/2 teaspoon baking soda
  • 1/2 teaspoon salt

Wet Ingredients

  • 2 large eggs
  • 3/4 cup milk
  • 3/4 cup sour cream or Greek yogurt
  • 1/2 cup vegetable oil
  • 2 teaspoons vanilla extract

Chocolate Chips

  • 1 1/2 cups semisweet chocolate chips, divided

Instructions 

  • Preheat oven to 375°F (190°C). Line a 12-cup muffin tin with paper liners.
  • Mix dry ingredients: flour, sugar, cocoa powder, baking powder, baking soda, and salt.
  • Whisk eggs, milk, sour cream, oil, and vanilla; combine with dry ingredients just until blended.
  • Fold in 1 1/2 cups of chocolate chips; divide batter into muffin cups. Sprinkle remaining chips on top.
  • Bake for 15 minutes or until a toothpick comes out clean. Cool slightly before serving.

Notes

Do not overbake to keep muffins moist and tender.
Calories: 250kcal
Cost: $12
Course: Breakfast, Snack
Cuisine: American
Keyword: chocolate, muffins

Baking Joy with Almond Coconut Strawberry Cake

Welcome to the delightful world of baking! Today, we’re diving into a recipe that harmoniously blends the richness of **almond flour**, the tropical essence of **coconut**, and the refreshing sweetness of **fresh strawberries**. This **Almond Coconut Strawberry Cake** is not just a treat for the taste buds; it’s a feast for the eyes, making it perfect for any occasion, from birthdays to casual gatherings. With simple ingredients and clear steps, you’ll find baking this cake both enjoyable and rewarding.

Why You’ll Love This Recipe

  • Easy to Follow: The recipe is designed for bakers of all skill levels, so you can confidently create this delicious cake.
  • Versatile Ingredients: Using **almond flour** and **coconut**, it caters to gluten-free diets while still delivering fantastic flavor.
  • Fresh and Flavorful: The addition of **fresh strawberries** elevates the cake, making it a seasonal favorite that everyone will adore.
  • Beautiful Presentation: This cake is visually stunning with its layers of whipped cream and strawberries, making it a show-stopper at any gathering.
  • Make-Ahead Friendly: You can prepare components of this cake in advance, making it a stress-free option for entertaining.

Ingredient Breakdown and Substitutions

Let’s take a closer look at the ingredients that make this cake special and some possible substitutions to suit your needs:

  • Flour: 1 ¼ cups of **all-purpose flour** or **almond flour** for a gluten-free option. Almond flour will give the cake a denser texture.
  • Sugar: â…” cup of granulated sugar can be substituted with coconut sugar for a healthier twist.
  • Baking Powder: 1 tsp, essential for leavening.
  • Baking Soda: ½ tsp, which helps the cake rise.
  • Salt: ½ tsp enhances the overall flavor.
  • Butter: ¼ cup, softened; you can use **coconut oil** for a dairy-free version.
  • Milk: ½ cup of **Almond Breeze Unsweetened Original Almondmilk Coconutmilk** can be replaced with any plant-based milk.
  • Egg: 1 large egg at room temperature; for a vegan version, consider using flaxseed meal or a commercial egg replacer.
  • Greek Yogurt: ¼ cup for moisture; can be substituted with **coconut yogurt** for a dairy-free option.
  • Coconut Flakes: ½ cup adds texture and flavor; you can use unsweetened flakes for a healthier choice.
  • Heavy Cream: 2 cups for whipping; feel free to use coconut cream for a dairy-free alternative.
  • Strawberries: 1 lb, fresh and sliced for topping; you can also use other berries like raspberries or blueberries.

Step-by-Step Instructions

A detailed close-up of an Almond Coconut Strawberry Cake showcasing its layers and textures.

Ready to bake? Let’s go through the steps to create your **Almond Coconut Strawberry Cake**:

  1. Preheat your oven: Start by preheating your oven to 350°F (175°C).
  2. Prepare dry ingredients: In a large bowl, sift together the flour, sugar, baking powder, baking soda, and salt.
  3. Mix wet ingredients: In another bowl, blend the softened butter, **Almond Breeze** milk, and vanilla extract until smooth.
  4. Combine mixtures: Gradually add the wet ingredients to the dry ingredients, stirring until just combined.
  5. Add eggs and yogurt: Mix in the egg, Greek yogurt, and coconut flakes until evenly incorporated.
  6. Transfer to pan: Pour the batter into a well-greased 8-inch or 9-inch cake pan, smoothing the top.
  7. Bake: Place in the oven and bake for 25-30 minutes or until a toothpick inserted into the center comes out clean.
  8. Cool: Once baked, transfer the cake to a cooling rack and let it cool completely.
  9. Prepare whipped cream: In a large bowl, whip the heavy cream and sugar until soft peaks form, about 4-6 minutes.
  10. Assemble: Once cooled, top the cake with a generous layer of whipped cream and fresh strawberry slices for a delightful finish.

Pro Tips for Perfecting Your Cake

  • Room Temperature Ingredients: Ensure all your ingredients are at room temperature for better mixing and a smoother batter.
  • Don’t Overmix: Stir your batter just until combined; this will help keep your cake light and fluffy.
  • Check for Doneness: Ovens can vary, so start checking your cake a few minutes before the suggested baking time.
  • Use Fresh Strawberries: Opt for **fresh strawberries** for the best flavor and texture; frozen strawberries can make the cake soggy.
  • Experiment with Flavors: Add a splash of almond extract for an extra almondy flavor that complements the coconut.
  • Layer It Up: For added visual appeal, consider slicing the cake in half and layering with whipped cream and strawberries.
  • Chill Before Serving: Refrigerate the assembled cake for about 30 minutes to set the whipped cream before serving.
  • Storage: Keep any leftovers in an airtight container in the fridge for up to 3 days.

Common Mistakes and Troubleshooting

Even seasoned bakers make mistakes! Here are some common pitfalls and how to avoid them:

  • Dry Cake: Overbaking can lead to a dry cake. Ensure to check for doneness with a toothpick.
  • Flat Cake: Ensure your baking powder is fresh and not expired for proper rising.
  • Too Sweet: If the cake ends up too sweet, consider reducing the sugar next time or using tart berries to balance the flavor.

Variations to Try

If you’re feeling adventurous, here are some fun variations you can try:

  • Nutty Addition: Add chopped nuts like **walnuts** or **pecans** for added crunch and flavor.
  • Chocolate Twist: Incorporate cocoa powder into the batter for a chocolate almond coconut cake.
  • Berry Blast: Use a mix of **berries** for a colorful and vibrant cake.
  • Spiced Up: Add spices like cinnamon or nutmeg for a warm flavor profile.

Storage and Make-Ahead Instructions

This cake is perfect for making ahead of time:

  • Make Ahead: You can bake the cake a day in advance and store it in the fridge until you’re ready to assemble.
  • Storing Leftovers: Keep any leftover cake in an airtight container in the refrigerator for up to 3 days.
  • Freezing: To freeze, wrap the cooled cake tightly in plastic wrap and foil. It can be frozen for up to 3 months. Thaw in the refrigerator before serving.

Frequently Asked Questions

Here are some common questions about the Almond Coconut Strawberry Cake:

  • Can I use frozen strawberries? Yes, but fresh strawberries are recommended for the best flavor and texture.
  • How can I make this cake vegan? Substitute the egg with a flax egg and use coconut cream instead of heavy cream.
  • What can I use instead of Greek yogurt? Coconut yogurt works perfectly as a dairy-free alternative.
  • Is it necessary to use almond flour? No, you can use all-purpose flour if you prefer.
  • Can I add other fruits? Absolutely! Feel free to mix in or top the cake with your favorite fruits.
  • How do I know when the cake is done? Insert a toothpick into the center; if it comes out clean, the cake is ready.
  • Can I make this cake gluten-free? Yes, by using almond flour or a gluten-free flour blend.
  • What’s the best way to serve this cake? Serve chilled with extra strawberries and whipped cream for a delightful treat.

Nutritional Tips and Dietary Adaptations

This cake can be a part of a balanced diet with a few adaptations:

  • Healthy Fats: The use of almond flour and coconut adds healthy fats to the cake.
  • Low Sugar Options: For a healthier version, use less sugar or natural sweeteners like honey or maple syrup.
  • Increased Fiber: Adding whole grains or oats can increase the fiber content of your cake.

Recommended Equipment

To make your baking experience smoother, here’s a list of tools you’ll need:

  • Mixing Bowls: A set of various sizes for mixing wet and dry ingredients.
  • Measuring Cups and Spoons: Accurate measurements are crucial for baking success.
  • Cake Pan: An 8-inch or 9-inch round cake pan will suffice.
  • Electric Mixer: A hand mixer or stand mixer will help blend ingredients effortlessly.
  • Cooling Rack: Essential for cooling your cake evenly after baking.

Serving Suggestions

Your Almond Coconut Strawberry Cake is a show-stopper on its own, but you can enhance your presentation:

  • Garnish with Mint: Fresh mint leaves add a pop of color and freshness.
  • Drizzle with Chocolate: A chocolate drizzle can elevate the flavor profile.
  • Serve with Ice Cream: A scoop of vanilla ice cream pairs beautifully with the cake.

In conclusion, this delicious **Almond Coconut Strawberry Cake** is more than just a dessert; it’s an experience that brings joy, flavor, and a sense of accomplishment. Remember, cooking is about confidence, creativity, and having fun in the kitchen. So, roll up your sleeves, gather your ingredients, and let’s create something wonderful together!

Almond Coconut Strawberry Cake Recipe

Prep Time 20 minutes
Cook Time 30 minutes
Total Time 50 minutes
Servings 8 slices
Calories 450
A delicious layered cake combining almond, coconut, and fresh strawberries, perfect for special occasions or a delightful treat.

Ingredients

Baking ingredients

  • 1 ¼ cups flour
  • â…” cup sugar
  • 1 tsp baking powder
  • ½ tsp baking soda
  • ½ tsp salt
  • ¼ cup butter, softened and cubed
  • ½ cup Almond Breeze Unsweetened Original Almondmilk Coconutmilk
  • 1 tsp vanilla
  • 1 egg egg, at room temperature
  • ¼ cup plain Greek yogurt
  • ½ cup coconut flakes
  • 2 cups heavy cream
  • ¼ cup sugar (for whipped cream)
  • 1 lb strawberries (sliced for topping)

Instructions 

  • Preheat oven to 350°F (175°C). Sift flour, sugar, baking powder, baking soda, and salt; mix well. Combine butter, almond milk, and vanilla; mix until smooth. Add egg, Greek yogurt, and coconut flakes; blend thoroughly. Pour batter into greased 8-inch or 9-inch pan and bake for 25-30 minutes. Cool completely, then top with sliced strawberries and whipped cream.

Notes

Ensure the cake is fully cooled before adding toppings for best presentation.
Calories: 450kcal
Cost: $15
Course: Dessert
Cuisine: Fusion
Keyword: cake

Kickstart Your Day with a Delicious 5-Minute Smoothie Bowl

Are you looking for a quick, delicious, and nutritious way to start your day? This 5-minute smoothie bowl is here to elevate your breakfast game! Packed with vibrant flavors and wholesome ingredients, it’s the perfect canvas for your favorite toppings. Whether you’re rushing to work or enjoying a leisurely weekend brunch, this recipe is your go-to for a nourishing start. Let’s dive into the world of smoothie bowls!

Why You’ll Love This Smoothie Bowl Recipe

This recipe isn’t just another breakfast option; it’s a powerhouse of nutrition and flavor! Here are some reasons why you’ll fall in love with it:

  • Quick and Easy: Ready in just 5 minutes—perfect for busy mornings!
  • Nutrient-Rich: Packed with vitamins, minerals, and antioxidants to fuel your day.
  • Customizable: Swap ingredients and toppings to suit your taste and dietary needs.
  • Kid-Friendly: A fun, colorful dish that kids will love to help make and eat!
  • Great for Meal Prep: Make ahead and store in the fridge for quick breakfasts all week.

Ingredients for Your Smoothie Bowl

Let’s gather everything we need to whip up this smoothie bowl. Here’s what you’ll require:

  • 1 ripe banana: This adds natural sweetness and creaminess.
  • 1 cup frozen strawberries: These provide a refreshing flavor and vibrant color.
  • 1/3 cup frozen pineapple chunks: A tropical twist that’s irresistible!
  • 1/2 cup vanilla Greek yogurt: Offers protein and a creamy texture; choose whole or low-fat.

Now, let’s talk toppings! Here are some delicious options to consider:

  • Sliced strawberries: For a fresh burst of flavor.
  • Sliced bananas: A classic choice that adds extra sweetness.
  • Fresh blueberries: Packed with antioxidants and a pop of color.
  • Granola: For that delightful crunch.
  • Shredded coconut: Adds a tropical flair.
  • Slivered almonds or walnuts: For healthy fats and a satisfying bite.
  • Sunflower seeds or chia seeds: Boosts the nutritional profile.

How to Make This Smoothie Bowl

Close up of a vibrant smoothie bowl with Greek yogurt and a variety of toppings.

Follow these simple steps to create your smoothie bowl:

  1. Chop the banana into 1-inch pieces and freeze for at least 1-2 hours (or overnight for best results).
  2. Add the frozen banana, strawberries, pineapple, and Greek yogurt to a food processor fitted with a standard S blade.
  3. Process for 2-4 minutes, stopping to scrape down the sides with a plastic spatula as needed, until everything is smooth and creamy.
  4. Scoop the mixture into a bowl and add your desired toppings.
  5. Enjoy immediately for the best texture and flavor!

Pro Tips for the Perfect Smoothie Bowl

To ensure your smoothie bowl is a success every time, consider these expert insights:

  • Use frozen fruit: This gives your smoothie bowl that thick, creamy texture. Fresh fruit can make it too runny.
  • Adjust sweetness: If you like it sweeter, add a drizzle of honey or maple syrup.
  • Experiment with yogurt: Greek yogurt is great for protein, but you can also use dairy-free alternatives!
  • Blend in greens: Spinach or kale can be added for a nutrient boost without altering the flavor.
  • Don’t over-process: Blend just until smooth to maintain a thick consistency.
  • Chill your bowl: Pre-chill your serving bowl for an extra refreshing experience.
  • Try different milks: Almond milk, coconut milk, or oat milk can be used to adjust the creaminess.
  • Layer toppings: Create a beautiful presentation by layering toppings rather than just scattering them on top.

Common Mistakes and Troubleshooting

Even the best cooks make mistakes! Here’s how to troubleshoot common issues:

  • Too thin? Add more frozen fruit or a handful of ice to thicken it up.
  • Too thick? Add a splash of milk to loosen it up.
  • Not sweet enough? Blend in a bit of honey, agave, or a splash of fruit juice.
  • Too icy? Ensure your fruit is properly frozen and not just icy from frost.

Fun Variations to Try

Get creative! Here are some variations to keep your smoothie bowl exciting:

  • Chocolate Banana Bowl: Add cocoa powder and top with dark chocolate shavings.
  • Tropical Paradise Bowl: Swap pineapple for mango and add shredded coconut.
  • Berry Blast Bowl: Use mixed berries like blueberries, raspberries, and blackberries.
  • Peanut Butter Delight: Add a tablespoon of peanut butter for a nutty flavor and extra protein.

Storage and Make-Ahead Instructions

This recipe is perfect for meal prep! Here’s how to store it:

  • Fridge: Store in an airtight container for 1-2 days. It may separate; just stir before eating.
  • Freezer: Freeze smoothie mix in an airtight container for up to a month. Thaw overnight in the fridge before blending.

Nutritional Tips and Dietary Adaptations

To make this smoothie bowl fit various dietary needs, consider these tips:

  • Vegan: Use plant-based yogurt and honey alternatives.
  • Low-carb: Replace fruit with avocado for creaminess and add unsweetened cocoa powder.
  • Protein-packed: Add protein powder or nut butter for an energy boost.

Equipment Recommendations

Having the right tools makes all the difference! Here’s what you’ll need:

  • Food Processor or Blender: A powerful appliance ensures smooth blending.
  • Spatula: Great for scraping down the sides.
  • Measuring Cups: For accurate ingredient measurements.
  • Mixing Bowls: For preparing and serving your smoothie bowl.

Serving Suggestions

Enhance your smoothie bowl experience with these serving ideas:

  • Pair with Toast: Serve with whole grain toast topped with avocado or nut butter for a balanced meal.
  • Enjoy with a Side of Fresh Fruit: Extra fruit on the side adds color and nutrition.
  • Top with a Drizzle: A drizzle of nut butter or honey can elevate the flavor.

FAQs About Smoothie Bowls

Curious about smoothie bowls? Here are some commonly asked questions:

  • Can I use fresh fruit instead of frozen? While fresh fruit can be used, frozen fruit creates a thicker texture.
  • How do I store leftovers? Store in an airtight container in the fridge for up to 2 days.
  • Are smoothie bowls good for weight loss? They can be a healthy option, especially when made with low-calorie toppings.
  • Can I add protein powder? Yes! Adding protein powder can boost the nutritional content.
  • How can I make it vegan? Use plant-based yogurt and avoid honey.
  • What’s the best blender for smoothie bowls? A high-speed blender or food processor works best for a creamy consistency.
  • Can I make it ahead of time? Yes! You can prepare the base in advance and add toppings later.
  • How do I make it thicker? Use more frozen fruit and less liquid for a thick texture.

Final Thoughts

With this 5-minute smoothie bowl recipe, you’re now equipped to create a delicious and nutritious meal in no time. Remember, cooking is about enjoying the process and making it your own. So get creative with toppings, experiment with flavors, and most importantly, have fun in the kitchen. You’ve got this!

5-Minute Smoothie Bowl for One with Greek Yogurt

Prep Time 5 minutes
Total Time 5 minutes
Servings 1 bowl
Calories 350
A quick and delicious smoothie bowl perfect for a nutritious breakfast or snack, loaded with fresh fruit, yogurt, and toppings.

Ingredients

Fruits

  • 1 piece banana (ripe, sliced)
  • 1 cup frozen strawberries
  • 0.75 cup frozen pineapple chunks

Dairy & Toppings

  • 0.5 cup vanilla Greek yogurt (whole milk or low-fat)
  • sliced strawberries sliced strawberries (for topping)
  • sliced bananas sliced bananas (for topping)
  • handful fresh blueberries (for topping)

Crunchy Toppings

  • 1/4 cup granola
  • 2 tbsp shredded coconut
  • 2 tbsp slivered almonds
  • 2 tbsp chopped walnuts
  • 1 tbsp sunflower seeds
  • 1 tsp chia seeds

Instructions 

  • Chop banana into 1-inch pieces and freeze for 1-2 hours or overnight.
  • Add all ingredients to a food processor and process for 2-4 minutes, scraping sides as needed.
  • Once smooth, scoop into a bowl and add desired toppings. Serve immediately.

Notes

Feel free to customize toppings for added flavor and texture.
Calories: 350kcal
Cost: $10
Course: Breakfast
Cuisine: American
Keyword: Fruit, Smoothie, Yogurt

Unlock the Secrets to the Perfect Grilled Chicken Wrap

Welcome to the ultimate guide on creating delicious grilled chicken wraps that will transform your weeknight dinners into something truly special. Whether you’re a busy professional or a home cook looking for a quick meal, these wraps are packed with flavor, nutrition, and freshness. In this comprehensive article, we will explore everything you need to know about making grilled chicken wraps—from the ingredients to expert tips and variations that will keep your meals exciting!

With a combination of juicy grilled chicken, crisp vegetables, and a creamy garlic sauce, these wraps are not just easy to make but are also a fun way to enjoy a healthy dinner. Let’s dive into what makes this recipe a must-try!

Why You’ll Love This Recipe

  • Quick and Easy: Ready in under 30 minutes, perfect for busy weeknights.
  • Customizable: Tailor the flavors and ingredients to suit your taste preferences or dietary needs.
  • Healthy Ingredients: Packed with lean protein and fresh veggies, these wraps are a nutritious choice.
  • Great for Meal Prep: Make several wraps ahead of time for quick lunches or dinners throughout the week.
  • Kid-Friendly: A fun and interactive meal that’s perfect for getting kids involved in the kitchen.

Ingredient Breakdown

Here’s everything you need to prepare these mouthwatering grilled chicken wraps:

  • Chicken Breasts or Thighs: 2 boneless, skinless chicken breasts or thighs. You can substitute with tofu or tempeh for a vegetarian option.
  • Olive Oil: 2 tablespoons for marinating the chicken and grilling. Use avocado oil for a higher smoke point.
  • Lemon Juice: 1 tablespoon to add acidity and brighten the flavors.
  • Garlic Cloves: 2, minced, for a rich flavor burst.
  • Spices: 1 teaspoon each of paprika, cumin, and oregano. Smoked paprika is optional for an extra depth of flavor.
  • Salt and Pepper: To taste, enhancing the overall flavor profile.
  • Tortillas: 4 large flour tortillas (white or whole wheat). You can also use gluten-free tortillas.
  • Fresh Veggies: 1 cup of chopped romaine or iceberg lettuce, 1 medium diced tomato, 1 small thinly sliced cucumber, and 1 small thinly sliced red onion.
  • Avocado: Sliced, for creaminess and healthy fats.
  • Cheese: 1/2 cup shredded cheddar or mozzarella cheese for added richness.
  • Garlic Sauce: Combine 1/2 cup Greek yogurt or mayonnaise with 1 tablespoon lemon juice, 1 tablespoon olive oil, 1 minced garlic clove, and optional Dijon mustard. Adjust salt and pepper to taste.

Pro Tips for Perfect Grilled Chicken Wraps

Side angle of a juicy grilled chicken wrap filled with vegetables and cheese.
  • Marinating Time: Allow the chicken to marinate for at least 30 minutes and up to 2 hours for maximum flavor infusion.
  • Grill Temperature: Preheat your grill to medium-high heat to achieve perfect grill marks and juicy chicken.
  • Use a Meat Thermometer: Ensure the chicken reaches an internal temperature of 165°F for safe consumption.
  • Let It Rest: After grilling, let the chicken rest for 5 minutes before slicing to retain juices.
  • Wrap Technique: Tuck in the sides of the tortilla while rolling to prevent fillings from spilling out.
  • Layer Wisely: Start with sauce, then veggies, followed by chicken and cheese for even distribution of flavors.
  • Experiment with Spices: Feel free to add your favorite spices or herbs to the marinade for a personalized touch.
  • Serve Fresh: Enjoy the wraps immediately for the best texture and flavor.

Common Mistakes and Troubleshooting

Even the best cooks can run into a few hiccups. Here are some common mistakes to avoid and tips for troubleshooting:

  • Overcooking the Chicken: Keep an eye on the cooking time to prevent dry chicken. Use a meat thermometer for accuracy.
  • Skipping the Marinade: Don’t rush this step—marinating adds the essential flavor that makes the chicken pop!
  • Too Much Sauce: Be mindful of the quantity of sauce used; too much can make the wrap soggy.
  • Not Using Fresh Ingredients: Fresh veggies and good-quality tortillas will elevate your wrap. Freshness matters!

Delicious Variations to Try

Want to mix things up? Here are some creative variations to keep your grilled chicken wraps exciting:

  • Spicy Chipotle Chicken Wrap: Add chipotle pepper in adobo sauce to the marinade for a smoky heat.
  • Mediterranean Chicken Wrap: Incorporate feta cheese, Kalamata olives, and tzatziki sauce instead of the garlic sauce.
  • BBQ Chicken Wrap: Marinate the chicken in your favorite BBQ sauce for a sweet and tangy twist.
  • Buffalo Chicken Wrap: Toss grilled chicken in buffalo sauce and add celery and blue cheese for a kick.

Storage and Make-Ahead Instructions

These wraps are perfect for meal prep! Here’s how to store and prepare them ahead of time:

  • In the Refrigerator: Store assembled wraps in an airtight container for up to 2 days. Keep sauce separate to prevent sogginess.
  • Make-Ahead Chicken: Grill extra chicken and store in the fridge for up to 4 days. Reheat before assembling your wrap.
  • Freezing: Freeze unassembled wraps in plastic wrap and then foil for up to 3 months. Thaw in the fridge overnight before grilling the chicken.

Comprehensive FAQ

Here are some frequently asked questions about grilled chicken wraps:

  • Can I use other meats instead of chicken? Yes! Turkey, beef, or even seafood can be great alternatives.
  • Are these wraps gluten-free? You can use gluten-free tortillas for a gluten-free option.
  • Can I make these wraps vegan? Absolutely! Substitute chicken with grilled tofu and use vegan yogurt or mayo.
  • What can I serve with these wraps? Pair with a side salad, sweet potato fries, or fresh fruit for a balanced meal.
  • Can I reheat the wraps? Yes, but it’s best to reheat the chicken separately to avoid soggy tortillas.
  • How can I make these wraps spicier? Add jalapeños or use a spicier sauce in the marinade.
  • How long do they take to make? The entire process takes about 30 minutes from prep to plate.
  • Can I grill the chicken indoors? Yes! A grill pan on the stovetop works just as well.

Nutrition Tips and Dietary Adaptations

Making healthy choices while enjoying your grilled chicken wraps is easy. Here are some nutrition tips:

  • Lean Protein: Opt for skinless chicken breasts or thighs to keep the fat content low.
  • Veggies Galore: Load up on fresh vegetables to increase fiber and nutrient intake.
  • Portion Control: Use smaller tortillas or less filling to manage portion sizes easily.
  • Low-Fat Options: Choose low-fat cheese or yogurt for a lighter wrap without sacrificing flavor.

Essential Equipment for Making Grilled Chicken Wraps

Here’s what you’ll need to successfully make these wraps:

  • Grill or Grill Pan: For cooking the chicken to perfection.
  • Meat Thermometer: To ensure your chicken is cooked safely.
  • Mixing Bowls: For marinating and preparing the sauce.
  • Cutting Board and Knife: For chopping veggies and slicing the chicken.
  • Spatula or Tongs: To handle the chicken on the grill.

Serving Suggestions

To enhance your grilling experience, consider these serving ideas:

  • Pair with Dips: Serve with hummus, guacamole, or salsa for added flavor.
  • Garnish: Fresh herbs like cilantro or parsley can brighten up your wraps.
  • Side Salad: A simple green salad can complement the wraps nicely.
  • Drinks: Pair with iced tea or a refreshing lemonade to cool down.

Conclusion

Your journey into the world of grilled chicken wraps begins here! With this ultimate guide, you’re equipped with everything you need to create mouthwatering wraps that are sure to impress family and friends. Remember, cooking is about having fun and expressing your creativity in the kitchen. So gather your ingredients, fire up that grill, and enjoy the deliciousness you’ve created. Happy cooking!

Grilled Chicken Wrap

Prep Time 15 minutes
Cook Time 15 minutes
Total Time 30 minutes
Servings 4 servings
Calories 550
A flavorful and healthy grilled chicken wrap packed with fresh vegetables and creamy sauce, perfect for a quick lunch or dinner.

Ingredients

Marinade

  • 2 pieces boneless, skinless chicken breasts or thighs
  • 2 tablespoons olive oil
  • 1 tablespoon lemon juice
  • 2 cloves garlic, minced
  • 1 teaspoon paprika
  • 1 teaspoon cumin
  • 1 teaspoon dried oregano
  • 0.5 teaspoon smoked paprika (optional)
  • 0.5 teaspoon black pepper
  • 0.5 teaspoon salt

Wraps

  • 4 large flour tortillas (white or wheat)

Vegetables

  • 1 cup romaine or iceberg lettuce, chopped
  • 1 medium tomato, diced
  • 1 small cucumber, sliced thinly
  • 1 small red onion, thinly sliced
  • 1 each avocado, sliced

Cheese

  • 0.5 cup shredded cheddar or mozzarella cheese

Sauce

  • 0.5 cup Greek yogurt or mayonnaise
  • 1 tablespoon lemon juice
  • 1 tablespoon olive oil
  • 1 clove garlic, minced
  • 1 teaspoon Dijon mustard (optional)

Seasoning

  • to taste Salt and pepper

Instructions 

  • Mix olive oil, lemon juice, minced garlic, paprika, cumin, oregano, smoked paprika (if using), salt, and pepper to create the marinade.
  • Coat chicken with marinade and refrigerate for 30 minutes to 2 hours.
  • Grill chicken over medium-high heat for 6-7 minutes per side until cooked through, then rest and slice into strips.
  • Prepare the sauce by mixing Greek yogurt, lemon juice, olive oil, minced garlic, and mustard; season with salt and pepper.
  • Assemble wraps by spreading sauce on tortillas, adding vegetables, avocado, chicken, and cheese; then roll and slice diagonally.

Notes

For extra flavor, marinate the chicken longer and add fresh herbs to the sauce.
Calories: 550kcal
Cost: $15
Course: Main Course
Cuisine: International
Keyword: Chicken, Grilled, Wrap

Why You’ll Absolutely Love This Creamy Banana Peach Smoothie

Are you ready to elevate your smoothie game? This Banana Peach Smoothie is not just a drink; it’s a delightful experience that combines the sweet, velvety goodness of ripe bananas and juicy peaches. Perfect for breakfast or a refreshing midday boost, this recipe is all about simplicity and flavor. Let’s dive into why you should make this smoothie a staple in your kitchen!

  • Nutrition-packed: This smoothie is loaded with vitamins, minerals, and healthy fats, making it a perfect choice for a nutritious breakfast or snack.
  • Quick and easy: With just a few simple ingredients, you can whip up this smoothie in under 10 minutes, making it ideal for busy mornings.
  • Customizable: You can easily adjust the ingredients based on your preferences or dietary needs, leaving endless possibilities for flavor combinations.
  • Kid-friendly: The sweet, fruity taste is a hit with kids, making it an excellent way to sneak in some nutrients without any fuss.
  • Refreshing taste: The combination of bananas and peaches creates a smooth, creamy texture that is both satisfying and refreshing, especially on warm days.

Essential Ingredients for Your Banana Peach Smoothie

Now that you’re excited about this delicious smoothie, let’s break down the key ingredients you’ll need. Each one plays a vital role in creating that perfect blend of flavors and textures.

  • 1 cup of milk of choice: Whether you prefer dairy or plant-based, this adds creaminess to the mix.
  • 0.5 cup of orange juice: For a vibrant citrus kick that enhances the sweetness of the fruit.
  • 1 large overripe banana: A must for natural sweetness and that creamy texture.
  • 1.5 cups of frozen peach slices: The frozen aspect is key for a refreshing, cool drink.
  • 0.5 tsp of pure vanilla extract: This adds depth and a hint of warmth to the flavor profile.
  • 1 tbsp of ground flaxseeds: For added fiber and healthy omega-3s.

Step-by-Step Instructions to Create Your Smoothie

Making this Banana Peach Smoothie is as easy as 1-2-3! Follow these steps for a delicious outcome every time:

  1. The Liquid Bottom Layering: Pour 1 cup of milk and 0.5 cup of orange juice into the blender base first. This creates a slip for the blades so they don’t get stuck on the frozen fruit.
  2. The Soft to Hard Build: Break 1 large overripe banana into 3 or 4 chunks and drop them into the liquid.
  3. Add the Extras: Measure out 1 tbsp of ground flaxseeds and 0.5 tsp of vanilla extract, adding them directly into the center of the liquid.
  4. The Frozen Crown: Top the mixture with 1.5 cups of frozen peach slices. The weight of the frozen fruit helps push the other ingredients down into the blades.
  5. Seal the Lid: Double-check that your lid is secure. There is nothing worse than a peach-colored ceiling!
  6. The Low Speed Start: Turn the blender on its lowest setting for 10 seconds to break the larger frozen chunks into smaller pebbles.
  7. The High Speed Vortex: Increase to the highest speed for 30 to 45 seconds until the texture is velvety and uniform.
  8. The Consistency Check: Stop the blender and stir with a spoon. If you see any unblended flaxseeds or peach bits, blend for another 10 seconds.
  9. The Final Pour: Divide the mixture into two glasses. Serve immediately while the frost is still active!

Expert Tips for the Perfect Banana Peach Smoothie

Close-up view of a vibrant Banana Peach Smoothie next to fresh peaches.

Here are some expert insights to ensure your smoothie turns out perfectly every time:

  • Use ripe bananas: Overripe bananas are sweeter and blend more smoothly.
  • Frozen fruit is key: It not only keeps your smoothie cold but also adds thickness.
  • Experiment with liquids: For a tropical twist, try coconut milk instead of regular milk.
  • Pro tip for creaminess: Add a spoonful of Greek yogurt for extra creaminess and protein.
  • Balance sweetness: Adjust the amount of orange juice based on how sweet your bananas and peaches are.
  • Mind the blades: Always layer liquids first to prevent the blades from getting stuck.
  • Mix in greens: Add a handful of spinach for an extra nutritional boost without altering the taste.
  • Make ahead: Pre-pack smoothie ingredients in freezer bags for quick assembly on busy mornings.

Common Mistakes and Troubleshooting

Even the best of us can make mistakes in the kitchen! Here are some common pitfalls to avoid and solutions:

  • Too thick? Add a splash more milk or juice to loosen it up and blend again.
  • Too watery? Ensure you’re using enough frozen fruit. If using fresh, consider adding ice.
  • Unblended ingredients? If you notice chunks after blending, give it another quick blend until smooth.
  • Flavor not balanced? Taste as you go! You can add a little honey or maple syrup if it’s not sweet enough.

Delicious Variations to Try

Feeling adventurous? Here are some variations to mix things up:

  • Berry Bliss: Substitute half the peaches with frozen mixed berries for a berry twist.
  • Peach Mango Fusion: Add 1 cup of frozen mango for a tropical flair.
  • Green Smoothie: Toss in a handful of kale or spinach for extra nutrients.
  • Nutty Banana Peach: Add 1 tablespoon of almond butter or peanut butter for a protein boost!

Storage and Make-Ahead Instructions

Want to save time? Here’s how to prep for future smoothies:

  • Make-ahead packs: Portion out all ingredients except for the liquids into freezer bags and freeze. When you’re ready, just add the liquids and blend!
  • Storage: If you have leftovers, store in an airtight container in the fridge for up to 24 hours. Note that the texture may change slightly.

Frequently Asked Questions

Have more questions? Here are some FAQs about the Banana Peach Smoothie:

  • Can I use fresh peaches instead of frozen? Yes, but add a handful of ice to achieve the right texture.
  • Is this smoothie vegan? Yes, simply use plant-based milk and skip any dairy ingredients.
  • How can I make this smoothie lower in sugar? Use unsweetened almond milk and reduce the amount of orange juice.
  • Can I add protein powder? Absolutely! Just blend it in with the other ingredients.
  • What if I’m allergic to nuts? Omit any nut-based ingredients, or use seeds like sunflower seeds instead.
  • How long does it take to make? This smoothie can be ready in just 5-10 minutes!
  • Can I make this smoothie in advance? Yes, but it’s best enjoyed fresh for optimal texture and flavor.
  • What’s the best way to clean my blender? Fill it halfway with warm water and a drop of dish soap, blend, and rinse!

Nutritional Tips and Dietary Adaptations

This smoothie is adaptable to fit various dietary needs:

  • For a protein boost: Consider adding Greek yogurt or a scoop of protein powder.
  • Low-carb option: Swap out the orange juice for unsweetened almond milk and reduce the amount of banana.
  • Dairy-free: Use coconut milk or almond milk instead of regular milk.
  • Fiber-rich: Enhance the recipe by adding chia seeds or more flaxseeds.

Equipment Recommendations

A good blender is essential for the perfect smoothie. Here are my top picks:

  • High-speed blender: If you want a super smooth texture, invest in a high-speed blender like a Vitamix or NutriBullet.
  • Standard blender: A regular blender will work, but you may need to blend longer to achieve the desired smoothness.
  • Measuring cups and spoons: For accurate ingredient measurements.
  • Spatula: To scrape down the sides of the blender for thorough mixing.

Serving Suggestions

Want to make your smoothie even more exciting? Here are a few serving ideas:

  • Top with granola: Add a sprinkle of granola on top for crunch.
  • Fresh fruit: Garnish with slices of banana or peach for a vibrant look.
  • Mint leaves: A few fresh mint leaves can elevate the flavor and presentation.
  • Serve in a fancy glass: Make it feel special by serving it in a mason jar or a smoothie glass.

Final Thoughts

There you have it—a comprehensive guide to mastering the art of making a delicious Banana Peach Smoothie. With its delightful taste and nutritional benefits, this smoothie is sure to become a favorite in your home. The best part? You can easily customize it to suit your tastes or dietary needs. So grab your ingredients, fire up that blender, and enjoy a refreshing drink that’s both healthy and satisfying. Happy blending!

Banana Peach Smoothie Creamy and Refreshing

Prep Time 5 minutes
Total Time 5 minutes
Servings 2 glasses
Calories 250
A delicious and refreshing smoothie combining ripe bananas and frozen peaches for a velvety texture and vibrant flavor.

Ingredients

Liquid Base

  • 1 cup milk of choice Dairy or Plant-based
  • 0.5 cup orange juice

Fruit

  • 1 large overripe banana (broken into chunks)
  • 1.5 cups frozen peach slices

Add-ins

  • 0.5 tsp pure vanilla extract
  • 1 tbsp ground flaxseeds

Instructions 

  • Pour 1 cup of milk and 0.5 cup of orange juice into the blender.
  • Add the banana chunks and frozen peach slices into the blender.
  • Add vanilla extract and ground flaxseeds into the center of the mixture.
  • Seal the lid and blend on low for 10 seconds, then on high for 30-45 seconds until smooth.
  • Stop and stir; blend for another 10 seconds if needed. Divide into glasses and serve immediately.

Notes

Use ripe bananas for extra sweetness and creaminess.
Calories: 250kcal
Cost: $8
Course: Beverage
Cuisine: Fusion
Keyword: Fruit, Healthy, Smoothie

Transform Your Weeknight Dinners with This Delicious Recipe

Are you tired of the same old weeknight meals? Let’s elevate your culinary game with a Spicy Ground Beef Stir-Fry Bowl that’s not only quick to prepare but also packed with flavor! This delightful dish combines tender ground beef, fresh vegetables, and a savory sauce that comes together in just 30 minutes. Perfect for busy evenings, this recipe will inspire confidence in the kitchen and excite your taste buds. Let’s dive into everything you need to know to create this flavorful masterpiece!

Why You’ll Love This Recipe

  • Quick and Easy: This stir-fry bowl is ready in under 30 minutes, making it a fantastic choice for busy weeknights.
  • Flavor Explosion: The combination of soy sauce, chili flakes, and garlic creates a vibrant flavor profile that will satisfy your cravings.
  • Customizable: You can easily swap out the vegetables or protein to suit your taste and dietary needs.
  • One-Pan Wonder: Minimal cleanup is required as everything cooks in one pan—perfect for the busy cook!
  • Healthy and Wholesome: Packed with veggies and lean protein, this dish can be a nutritious addition to your dinner repertoire.

Ingredients for Spicy Ground Beef Stir-Fry Bowl

Gather these ingredients for a delicious stir-fry:

  • 1 lb Ground Beef: Substitute with ground turkey or chicken for a leaner option.
  • 0.25 cup Soy Sauce: Use low-sodium for a healthier version.
  • 1 tsp Chili Flakes: Adjust according to spice preference; feel free to add more for heat!
  • 2 tbsp Brown Sugar: Honey or maple syrup can be used as alternatives for sweetness.
  • 2 tbsp Sesame Oil: Can substitute with vegetable oil for a different flavor.
  • 4 cloves Garlic: Fresh garlic enhances the dish’s flavor significantly.
  • 2 cups Broccoli Florets: Substitute with bok choy or snap peas for a different texture.
  • 1 medium Red Bell Pepper: Yellow or green are suitable substitutes.
  • 1 medium Zucchini: Can replace with eggplant or yellow squash to mix things up.
  • 1 cup Mushrooms: Any type works well, adding a savory depth to the dish.
  • 2 tbsp Olive Oil: Can use vegetable or canola oil instead for cooking.
  • 4 cups Steamed White Rice: Brown rice or quinoa can add fiber and nutrients.

How to Make Spicy Ground Beef Stir-Fry Bowl

Side view of a colorful beef stir-fry bowl served over steamed rice.

Follow these simple steps to create your stir-fry:

  1. Cook the Rice: Begin by cooking your rice according to package instructions. This can be done ahead of time to save you some effort.
  2. Brown the Beef: In a large skillet or wok, heat 1 tablespoon of olive oil over medium-high heat. Add the ground beef and cook until browned, breaking it apart with a spatula.
  3. Add Aromatics: Stir in the minced garlic and chili flakes. Cook for an additional minute until fragrant.
  4. Incorporate Vegetables: Add broccoli, bell pepper, zucchini, and mushrooms to the skillet. Stir-fry for about 5-7 minutes until the veggies are tender but still crisp.
  5. Mix in Sauce: In a small bowl, combine soy sauce and brown sugar. Pour this mixture over the cooked beef and vegetables, stirring well to coat everything evenly.
  6. Finish Cooking: Continue to stir-fry for another 2-3 minutes until everything is heated through and well combined.
  7. Serve: Spoon the stir-fry mixture over a bed of steamed rice and enjoy!

Expert Tips for Perfecting Your Stir-Fry

  • High Heat: Cooking on high heat allows for quick cooking and better texture. Ensure your pan is hot before adding ingredients.
  • Prep Ahead: Chop your vegetables and measure out sauces before starting to cook. This streamlines the cooking process.
  • Don’t Overcrowd: If your pan is too crowded, the beef and vegetables will steam instead of fry, losing that desired crispness.
  • Adjust Spice: If you’re cooking for kids or those sensitive to heat, reduce the chili flakes and serve extra on the side.
  • Use Fresh Ingredients: Fresh garlic and bright vegetables make a world of difference in flavor and nutrition.
  • Experiment with Sauces: Try adding a splash of oyster sauce or hoisin sauce for an extra layer of flavor.
  • Mix Up the Meat: You can easily use shrimp, chicken, or tofu for a different protein option.
  • Garnish Wisely: Consider garnishing with sesame seeds or chopped green onions for a lovely presentation.

Common Mistakes to Avoid

  • Not Prepping Ahead: Failing to prep ingredients can lead to chaos and overcooking.
  • Overcooking the Beef: Ground beef cooks quickly; watch it closely to avoid dryness.
  • Ignoring the Sauce: Not adequately coating the beef and veggies can lead to a bland stir-fry.
  • Using Old Ingredients: Stale spices or old vegetables can negatively impact flavor and texture.
  • Skipping the Rice: A stir-fry is best served over a wholesome grain; don’t skip this step!

Variations to Try

  • Chicken Stir-Fry: Substitute ground beef for ground chicken for a lighter dish.
  • Vegetarian Delight: Replace the beef with firm tofu or tempeh and add extra veggies.
  • Spicy Thai Version: Incorporate Thai basil and a splash of fish sauce for a unique twist.
  • Sweet and Sour: Add pineapple chunks and bell peppers for a sweet and tangy flavor profile.

Storing and Make-Ahead Instructions

You can prepare this dish ahead of time and store it for later:

  • Make Ahead: Cook the ground beef and vegetables in advance. Store in an airtight container in the fridge for up to 3 days.
  • Freezing: The stir-fry can be frozen for up to 2 months. Reheat thoroughly before serving.
  • Storing Rice: Cooked rice can be stored in the fridge for up to 5 days. Reheat and serve with the stir-fry.

FAQs

  • Can I use frozen vegetables? Yes! Frozen vegetables work well in stir-fries and can save time.
  • What if I don’t have sesame oil? You can substitute with any other cooking oil, but the flavor will vary.
  • How can I make this dish gluten-free? Use tamari or coconut aminos instead of soy sauce for a gluten-free option.
  • Can I add more spice? Absolutely! Consider adding sriracha or fresh chili peppers for an extra kick.
  • What vegetables are best? Any vegetables you have on hand work! Bell peppers, carrots, and snap peas are great additions.
  • How do I make this dish low-carb? Serve the stir-fry over cauliflower rice instead of traditional rice.
  • Is this recipe kid-friendly? Yes! You can adjust the spice level and include their favorite veggies.
  • Can I use leftover beef? Definitely! Leftover cooked beef can be used; just heat it through before serving.

Nutrition Tips and Dietary Adaptations

This recipe can easily adapt to various dietary needs:

  • Low-Carb: Use cauliflower rice instead of regular rice.
  • High-Protein: Add more protein-rich ingredients like edamame or chickpeas.
  • Low-Sodium: Opt for low-sodium soy sauce and skip the added salt.
  • Vegan: Swap ground beef for plant-based ground meat or tofu.

Essential Equipment

  • Large Skillet or Wok: Essential for stir-frying, ensuring even cooking.
  • Spatula: A must-have for flipping and stirring ingredients.
  • Measuring Cups and Spoons: For accurate ingredient measurements.
  • Rice Cooker: Optional but helpful for perfectly cooked rice.

Serving Suggestions

Enhance your stir-fry experience with these serving ideas:

  • Top with Fresh Herbs: Fresh cilantro or basil can add a burst of flavor.
  • Serve with Lime Wedges: A squeeze of lime brightens the dish beautifully.
  • Pair with Egg Rolls: Crunchy egg rolls make a delightful side dish.
  • Accompany with a Salad: A refreshing side salad balances the richness of the stir-fry.

Now that you have the ultimate guide to creating a Spicy Ground Beef Stir-Fry Bowl, it’s time to hit the kitchen and whip up this delightful dish! Remember, cooking is all about experimentation and enjoyment. Don’t be afraid to make it your own, and most importantly, have fun while you’re at it! Happy cooking!

Spicy Ground Beef Stir-Fry Bowl with Garlic Veggies Delight

Prep Time 10 minutes
Cook Time 15 minutes
Total Time 25 minutes
Servings 4 servings
Calories 550
A flavorful and healthy stir-fry featuring ground turkey or chicken with vibrant vegetables and a spicy sauce, served over steamed rice.

Ingredients

Protein

  • 1 lb Ground Beef Substitute (ground turkey or chicken)
  • 0.25 cup Soy Sauce (Use low-sodium for a healthier version)
  • 1 tsp Chili Flakes (Adjust according to spice preference)
  • 2 tbsp Brown Sugar (Honey or maple syrup can be used as alternatives)
  • 2 tbsp Sesame Oil (Can substitute with vegetable oil)
  • 4 cloves Garlic (Use fresh for the best flavor)
  • 2 cups Broccoli Florets (Substitute with bok choy or snap peas)
  • 1 medium Red Bell Pepper (Yellow or green are suitable substitutes)
  • 1 medium Zucchini (Can replace with eggplant or yellow squash)
  • 1 cup Mushrooms (Any type works well)
  • 2 tbsp Olive Oil (Can use vegetable or canola oil instead)
  • 4 cups Steamed White Rice (Brown rice or quinoa can add fiber)

Instructions 

  • Cook rice and set aside.
  • Heat sesame oil in a large skillet over medium-high heat. Add ground meat and cook until browned.
  • Add garlic, chili flakes, and vegetables; stir-fry until tender-crisp.
  • Mix soy sauce and brown sugar; pour over the stir-fry and cook for another 2-3 minutes.
  • Serve the stir-fry over steamed rice. Enjoy!

Notes

For a lower sodium option, reduce soy sauce or use a low-sodium version.
Calories: 550kcal
Cost: $15
Course: Main Course
Cuisine: Asian
Keyword: Stir Fry

Whip Up Irresistible Strawberry Muffins with a Crunchy Streusel Topping

Are you ready to transform your mornings with a burst of flavor? These Delightful Strawberry Muffins with a Crunchy Streusel Topping are not only easy to make but also a delightful way to start your day. Made with fresh strawberries, these muffins are perfect for breakfast or a sweet afternoon snack. In this guide, I’ll walk you through every step to ensure your baking journey is stress-free and enjoyable!

Why You’ll Love This Recipe

This recipe is more than just a muffin; it’s an experience! Here are five reasons why this recipe will become a favorite:

  • Easy to Follow: With simple steps, even novice bakers can master this recipe.
  • Fresh Ingredients: Using strawberries fresh from Florida means vibrant flavor in every bite.
  • Customizable: Feel free to add your twist, whether it’s nuts, chocolate chips, or spices.
  • Healthier Option: Greek yogurt adds moisture without excess fat, making these muffins a healthier treat.
  • Perfect for Meal Prep: Bake a batch on the weekend and enjoy them all week long!

Ingredient Breakdown

Let’s explore each ingredient that makes these muffins so special:

  • Fresh Strawberries: 2 cups diced fresh strawberries. For the best flavor, use strawberries from Florida, which are known for their sweetness.
  • Sugar: ½ cup granulated sugar for sweetness and ¼ cup brown sugar for a hint of caramel flavor.
  • Butter: ¼ cup softened butter adds richness; make sure it’s at room temperature.
  • Egg: 1 large egg binds the ingredients and adds moisture.
  • Vanilla Extract: 1 teaspoon enhances the muffins’ flavor profile.
  • Greek Yogurt: ½ cup non-fat vanilla Greek yogurt keeps the muffins moist and adds protein.
  • All-Purpose Flour: 1½ cups for structure; you can substitute with whole wheat flour for a healthier option.
  • Baking Powder: 2 teaspoons for leavening, ensuring your muffins rise beautifully.
  • Salt: A pinch to enhance the flavors.

Streusel Topping

Side view of freshly baked strawberry muffins, showcasing their soft texture and streusel topping.

Don’t forget the irresistible crunchy topping! Here’s what you’ll need:

  • Sugar: ¼ cup granulated sugar and ¼ cup brown sugar give the topping sweetness and depth.
  • Flour: â…“ cup all-purpose flour for structure.
  • Cinnamon: ½ teaspoon ground cinnamon for a warm, inviting flavor.
  • Cold Butter: ¼ cup cubed cold butter creates that perfect crumbly texture.

How to Make Strawberry Muffins

Ready to bake? Let’s get started!

Step-by-Step Instructions

  1. Preheat your oven: Start by preheating your oven to 375°F (190°C) and lining a muffin tin with paper liners.
  2. Prepare the streusel: In a small bowl, mix together the sugars, flour, cinnamon, and cold butter until crumbly. Set aside.
  3. Mix wet ingredients: In a large bowl, cream the softened butter and sugars until light and fluffy. Add the egg, vanilla extract, and Greek yogurt, mixing well.
  4. Combine dry ingredients: In another bowl, whisk together the flour, baking powder, and salt.
  5. Combine mixtures: Gradually add the dry ingredients to the wet mixture, stirring until just combined. Fold in the diced strawberries gently.
  6. Fill muffin tins: Spoon the muffin batter into the prepared muffin tin, filling each cup about 2/3 full. Sprinkle the streusel topping generously over each muffin.
  7. Bake: Bake in the preheated oven for 18-20 minutes or until a toothpick inserted into the center comes out clean.
  8. Cool and enjoy: Let the muffins cool in the pan for 5 minutes before transferring them to a wire rack to cool completely.

Pro Tips for Perfect Muffins

Here are some expert insights to ensure your muffins turn out perfectly every time:

  • Don’t Overmix: Mix the batter just until combined to keep your muffins tender.
  • Use Room Temperature Ingredients: This helps to create a smooth batter and better texture.
  • Fresh Strawberries: Use ripe, juicy strawberries for the best flavor and moisture.
  • Check for Doneness: Every oven is different; check a few minutes before the suggested baking time.
  • Let Them Rest: Allow muffins to cool completely for better texture and flavor.

Common Mistakes and Troubleshooting

Even with the best intentions, mistakes can happen. Here’s how to troubleshoot:

  • Dense Muffins: This usually indicates overmixing or too much flour. Use the spoon-and-level method when measuring flour.
  • Dry Muffins: Ensure you’re not overbaking and that you’re using the right amount of moisture-rich ingredients.
  • Underbaked Muffins: If the toothpick comes out wet, give them a couple more minutes in the oven.

Variations to Try

Feeling adventurous? Here are some fun variations to elevate your strawberry muffins:

  • Chocolate Chip Strawberry Muffins: Stir in ½ cup of chocolate chips for a sweet twist!
  • Nutty Strawberry Muffins: Add ½ cup of chopped nuts like walnuts or pecans for crunch.
  • Banana Strawberry Muffins: Replace half the strawberries with mashed bananas for a tropical flavor.
  • Vegan Version: Substitute the egg with a flax egg and use non-dairy yogurt.

Storage and Make-Ahead Instructions

Want to enjoy your muffins over several days? Here’s how to store them:

  • Room Temperature: Store in an airtight container for up to 3 days.
  • Refrigeration: For longer freshness, store in the fridge for up to a week.
  • Freezing: Freeze muffins in a zip-top bag for up to 3 months. Thaw at room temperature or microwave for a warm treat.

Comprehensive FAQ

Got questions? Here are some frequently asked ones:

  • Can I use frozen strawberries? Yes, but make sure to thaw and drain them before adding to the batter.
  • How do I know when the muffins are done? Insert a toothpick in the center; if it comes out clean, they’re done.
  • Can I make the batter ahead of time? It’s best to bake immediately for the best texture, but you can prepare the dry ingredients ahead.
  • What can I serve with these muffins? Pair with a dollop of whipped cream or a side of Greek yogurt for a delicious breakfast.
  • Can I add other fruits? Absolutely! Blueberries, raspberries, or chopped apples are great alternatives.
  • Do I have to use Greek yogurt? You can substitute with sour cream or regular yogurt if needed.
  • Why is my streusel topping soggy? If the butter is too soft, it may not create that desired crumble; ensure it’s cold!
  • How can I make these muffins gluten-free? Use a gluten-free all-purpose flour blend for a suitable substitute.

Nutritional Tips and Dietary Adaptations

Here’s how to modify the recipe to suit various dietary needs:

  • Lower Sugar: Reduce the sugar to â…“ cup and opt for ripe bananas for natural sweetness.
  • Gluten-Free: As mentioned, substitute with a gluten-free flour blend.
  • Dairy-Free: Use plant-based butter and yogurt alternatives.

Equipment Recommendations

To make your baking experience smoother, here are essential tools:

  • Mixing Bowls: A set of various sizes for mixing ingredients efficiently.
  • Muffin Tin: Non-stick or silicone muffin tins make for easy release.
  • Measuring Cups and Spoons: Accurate measurements are crucial for baking success!
  • Whisk and Spatula: For mixing and folding ingredients together without deflating the batter.

Serving Suggestions

These muffins shine on their own, but here are some delightful pairings:

  • Fresh Fruit Salad: A refreshing side of seasonal fruits complements the muffins.
  • Yogurt Parfait: Layer with yogurt and granola for a wholesome breakfast.
  • Tea or Coffee: A warm beverage enhances the cozy feel of enjoying these muffins.

Final Thoughts

These Delightful Strawberry Muffins with a Crunchy Streusel Topping are a game-changer for breakfast or an afternoon snack! With their fresh flavors and easy preparation, you’ll impress family and friends alike. Remember, cooking should be fun and stress-free, so don’t hesitate to experiment and make this recipe your own. Happy baking!

Easy Strawberry Muffins With Streusel Topping

Prep Time 15 minutes
Cook Time 20 minutes
Total Time 35 minutes
Servings 12 muffins
Calories 220
Delight in these moist strawberry muffins topped with a crunchy streusel for a perfect breakfast or snack.

Ingredients

Diced Fresh Strawberries

  • 2 cups diced fresh strawberries

Sugar

  • 0.5 cup sugar

Butter (softened)

  • 0.25 cup butter softened

Egg

  • 1 egg egg

Vanilla Extract

  • 1 teaspoon vanilla extract

Non-fat Vanilla Greek Yogurt

  • 0.5 cup non-fat vanilla Greek yogurt

All-purpose Flour

  • 1.5 cups all-purpose flour

Baking Powder

  • 2 teaspoons baking powder

Pinch of Salt

  • 1 pinch pinch of salt

Sugar

  • 0.25 cup sugar

Brown Sugar

  • 0.25 cup brown sugar

All-purpose Flour

  • 0.33 cup all-purpose flour

Ground Cinnamon

  • 0.5 teaspoon ground cinnamon

Cold Butter (cubed)

  • 0.25 cup cold butter cubed

Instructions 

  • Preheat oven to 375°F (190°C).
  • Mix dry ingredients and prepare streusel topping.
  • Combine wet ingredients and fold into dry ingredients with strawberries.
  • Fill muffin tins and sprinkle streusel on top.
  • Bake for 20 minutes or until golden brown.

Notes

Use fresh strawberries for best flavor and texture.
Calories: 220kcal
Cost: $8
Course: Breakfast
Cuisine: American
Keyword: Strawberry

Discover the Joy of Baking Berry Muffins in Just 15 Minutes!

Welcome to your new favorite recipe for **15-Minute Berry Muffins**! These delightful treats are perfect for busy mornings, snack time, or even as a sweet dessert. With fresh berries bursting with flavor and a hint of lemon zest, these muffins are simple to make and absolutely irresistible. Whether you’re a seasoned baker or a kitchen novice, this recipe will help you whip up delicious muffins that your family and friends will adore.

Why You’ll Love This Recipe

  • Quick and Easy: Baking these muffins takes only 15 minutes of prep time, making them perfect for a busy lifestyle.
  • Customizable: Use your favorite berries or even swap in chocolate chips for a fun twist!
  • Moist and Flavorful: The combination of butter and milk creates a tender muffin that’s rich in flavor.
  • Healthy Option: Packed with berries, these muffins provide antioxidants and vitamins.
  • Perfect for Any Occasion: Whether it’s breakfast, a snack, or dessert, these muffins fit seamlessly into your day.

Ingredients You’ll Need

Gather these simple ingredients to get started:

  • 2 cups All-Purpose Flour
  • 2 teaspoons Baking Powder
  • ½ teaspoon Salt
  • ¾ cup Granulated Sugar
  • ½ cup Butter, melted
  • 1 cup Milk
  • 2 large Eggs
  • 1 teaspoon Vanilla Extract
  • 1 ½ cups Assorted Berries (blueberries, raspberries, strawberries)
  • 1 teaspoon Lemon Zest (optional)

Ingredient Substitutions

Side angle of a delicious berry muffin revealing its fluffy texture and vibrant assortment of berries.

If you’re missing an ingredient or want to make some adjustments, here are some ideas:

  • Flour: Whole wheat flour can be used for a healthier option, though it may change the texture slightly.
  • Butter: Coconut oil or vegetable oil can be substituted for a dairy-free option.
  • Milk: Almond milk or oat milk works well for a lactose-free version.
  • Eggs: Flaxseed meal mixed with water can serve as a vegan replacement.
  • Berries: Feel free to use frozen berries if fresh ones are unavailable, just fold them in without thawing.

Step-by-Step Instructions

Now, let’s get baking! Follow these simple steps:

  1. Preheat your oven to 375°F (190°C). Line your muffin pan with paper liners or lightly grease it.
  2. In a large bowl, whisk together the flour, baking powder, and salt until well combined.
  3. In another bowl, beat the melted butter and sugar together until smooth. Add in the milk, eggs, and vanilla extract, whisking until everything is blended.
  4. Gently fold the wet ingredients into the dry ingredients, taking care not to overmix—this helps keep the muffins light and fluffy.
  5. Fold in the assorted berries and lemon zest, making sure they are evenly distributed throughout the batter.
  6. Evenly divide the batter into the muffin liners, filling each about two-thirds full.
  7. Bake in the preheated oven for 18-22 minutes, or until a toothpick inserted in the center comes out clean.
  8. Let the muffins cool in the pan for 5 minutes before transferring them to a wire rack to cool completely.

Pro Tips for Perfect Muffins

To ensure your muffins turn out perfectly every time, consider these expert tips:

  • Room Temperature Ingredients: Using room temperature eggs and milk helps create a smoother batter.
  • Don’t Overmix: Mixing too much can lead to tough muffins. Mix just until combined.
  • Check for Doneness: Ovens can vary, so start checking your muffins a few minutes before the recommended time.
  • Use Fresh Ingredients: Make sure your baking powder is fresh for optimal rise.
  • Experiment with Flavors: Add spices like cinnamon or nutmeg for extra warmth and flavor.
  • Cool Completely: Letting the muffins cool completely ensures they set properly.
  • Try a Muffin Scoop: Using a muffin scoop helps keep portion sizes consistent.
  • Storage: Store these muffins in an airtight container to retain moisture.

Common Mistakes and Troubleshooting

Here are some common pitfalls and how to avoid them:

  • Muffins are flat: This could be due to expired baking powder. Always check the freshness.
  • Muffins are dense: Overmixing the batter can create tough muffins. Mix gently!
  • Too much sweetness: If you find the muffins too sweet, reduce the sugar by a quarter cup next time.
  • Burnt tops: If the tops brown too quickly, cover them loosely with foil halfway through baking.

Delicious Variations

Get creative with these muffin variations:

  • Chocolate Chip Berry Muffins: Fold in ½ cup of chocolate chips for a sweet twist!
  • Lemon Poppy Seed Muffins: Add 2 tablespoons of poppy seeds and increase lemon zest for a zesty flavor.
  • Banana Berry Muffins: Substitute one mashed banana for the butter for added moisture and flavor.
  • Nutty Berry Muffins: Add ½ cup of chopped nuts like walnuts or pecans for extra crunch.

How to Store and Freeze

To keep your muffins fresh:

  • Room Temperature: Store in an airtight container for up to 3 days.
  • Refrigerator: For longer storage, keep in the fridge for up to a week.
  • Freezer: Freeze muffins for up to 3 months. Thaw at room temperature or pop them in the microwave for a quick warm-up.

Nutritional Information

Each muffin contains approximately 200 calories, with a balance of carbohydrates, fats, and proteins. Here’s a quick breakdown:

  • Calories: 200
  • Protein: 3g
  • Fat: 8g
  • Carbohydrates: 32g
  • Sugars: 12g

Frequently Asked Questions

Here are some common questions about berry muffins:

  • Can I use frozen berries? Yes! You can add frozen berries straight to the batter without thawing.
  • How do I know when the muffins are done? Insert a toothpick in the center; if it comes out clean, they’re ready!
  • Can I make these muffins ahead of time? Absolutely! You can prepare the batter the night before and bake them in the morning.
  • How can I make these muffins healthier? Try substituting half the flour with whole wheat flour and reducing the sugar slightly.
  • What can I serve with these muffins? Pair them with Greek yogurt and honey for a delicious breakfast or snack.
  • Can I double the recipe? Yes! Just increase all ingredients proportionately.
  • How do I prevent muffin tops from burning? Bake at a lower temperature if you find they’re browning too quickly.
  • Are these muffins freezer-friendly? Yes! They freeze well and can be reheated easily.

Equipment Recommendations

Here’s what you’ll need to make your baking experience smooth:

  • Muffin Pan: A non-stick muffin pan ensures easy release.
  • Mixing Bowls: Use large mixing bowls for easy mixing of ingredients.
  • Whisk: A good whisk helps combine wet and dry ingredients thoroughly.
  • Silicone Spatula: Perfect for folding in ingredients gently.

Serving Suggestions

These muffins are delicious on their own, but here are some fun serving ideas:

  • With Butter: Spread a little butter on warm muffins for a classic treat.
  • With Jam: Serve with your favorite jam or preserves for added sweetness.
  • On a Platter: Arrange them on a platter for a brunch gathering or afternoon tea.
  • With Ice Cream: For a dessert twist, serve warm muffins with a scoop of vanilla ice cream.

Final Thoughts

With this **15-Minute Berry Muffins** recipe, you’ll not only enjoy delicious, fluffy muffins but also the satisfaction of baking something special. Remember, cooking is about having fun and enjoying the process. So gather your ingredients, put on your favorite apron, and dive into the joy of baking. Happy cooking!

15-Minute Berry Muffins

Prep Time 10 minutes
Cook Time 20 minutes
Total Time 30 minutes
Servings 12 muffins
Calories 180
Enjoy quick and delicious berry muffins perfect for a fast breakfast or snack, bursting with fresh berries and a hint of lemon zest.

Ingredients

Dry Ingredients

  • 2 cups All-Purpose Flour
  • 2 teaspoons Baking Powder
  • ½ teaspoon Salt
  • ¾ cup Granulated Sugar

Wet Ingredients

  • ½ cup Butter, melted
  • 1 cup Milk
  • 2 large Eggs
  • 1 teaspoon Vanilla Extract

Berries & Zest

  • 1.5 cups Assorted Berries such as blueberries, raspberries, strawberries
  • 1 teaspoon Lemon Zest (optional) (for added zest)

Instructions 

  • Preheat oven to 375°F (190°C). Line muffin pan or grease lightly.
  • Whisk together flour, baking powder, and salt in a large bowl.
  • In another bowl, beat melted butter and sugar. Add milk, eggs, and vanilla, whisk until blended.
  • Fold wet ingredients into dry, then gently fold in berries and lemon zest.
  • Divide batter into muffin liners, filling two-thirds full. Bake 18-22 minutes until golden and a toothpick comes out clean.
  • Cool muffins in pan for 5 minutes, then transfer to a rack.

Notes

For extra flavor, sprinkle a little sugar on top before baking.
Calories: 180kcal
Cost: $10
Course: Breakfast
Cuisine: American
Keyword: Berries, muffins