Author

Steven

Browsing

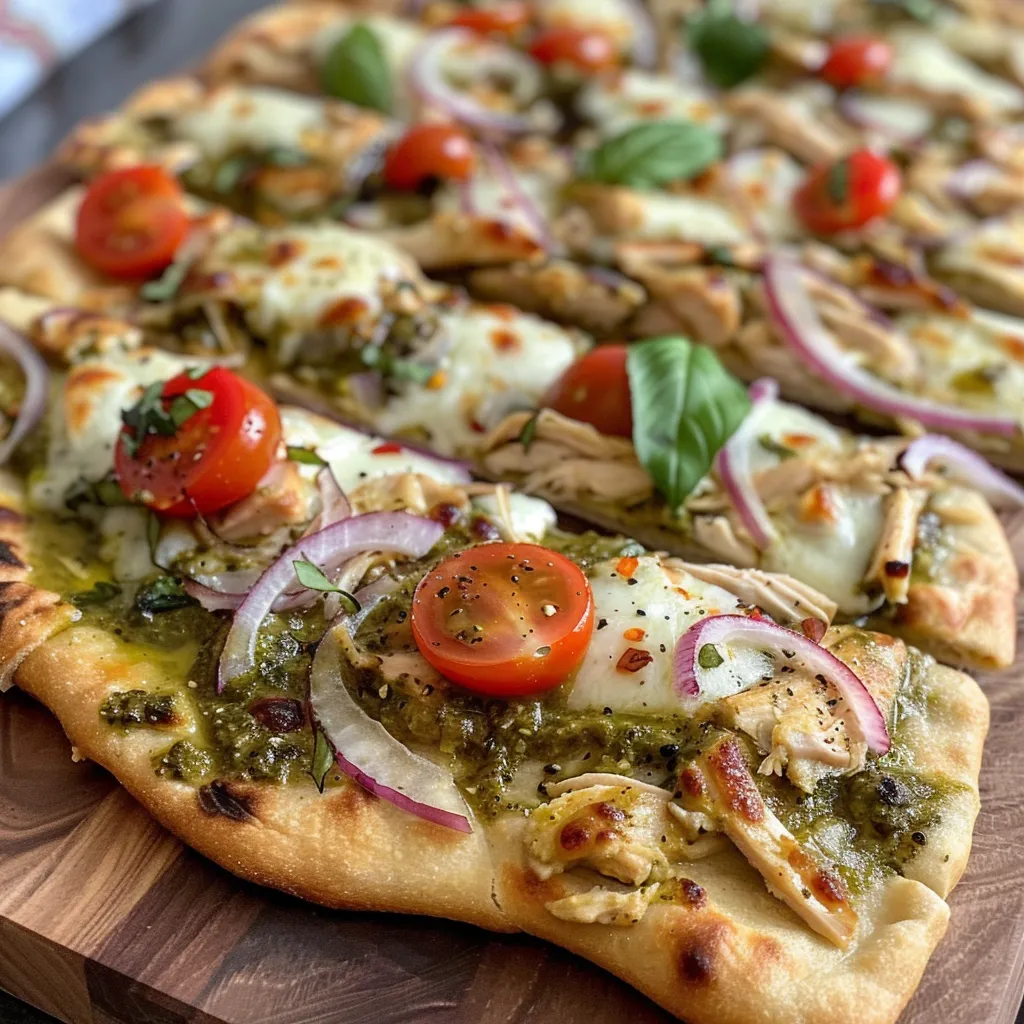
Why You’ll Adore This Chicken Garlic Butter Flatbread

When you’re looking for a dish that combines ease with incredible flavor, look no further than this Chicken Garlic Butter Flatbread. This recipe is perfect for busy weeknights or a casual get-together with friends. The best part? You can whip it up in no time without sacrificing taste. Here’s why you’ll absolutely love this dish:

  • Quick Preparation: Ready in under 30 minutes, making it ideal for spontaneous dinner plans.
  • Versatile Flavor: The combination of garlic butter and tender chicken provides a savory punch that pairs beautifully with your favorite sides.
  • Simple Ingredients: Made with everyday pantry staples, you likely have everything you need to create this delicious meal.
  • Customizable: Feel free to mix in your favorite toppings or herbs for a personal touch.
  • Family-Friendly: This dish is a hit with both kids and adults, ensuring everyone at the table is satisfied.

Ingredients for Chicken Garlic Butter Flatbread

Let’s dive into the ingredients that will make your flatbread a standout dish. Here’s what you need:

  • 2 cups all-purpose flour: The base for your flatbread. You can substitute with whole wheat flour for a healthier option.
  • 3/4 cup warm water: This helps activate the yeast.
  • 2 teaspoons active dry yeast: Essential for the dough to rise.
  • 1 teaspoon sugar: Feeds the yeast for a fluffy texture.
  • 1 teaspoon salt: Enhances the flavor of the flatbread.
  • 4 tablespoons melted butter: Adds richness and flavor to the flatbread.
  • 2 cloves garlic, minced: The star ingredient for that irresistible garlic butter taste.
  • 1 pound boneless, skinless chicken breasts: Provides protein and heartiness to the dish.
  • 2 tablespoons olive oil: For cooking the chicken and adding flavor.
  • 1/2 teaspoon black pepper: A seasoning to taste.
  • 1 teaspoon Italian herbs (optional): Adds an aromatic touch.
  • 1/4 cup fresh parsley, chopped: For garnishing.
  • 1/4 cup grated Parmesan cheese (optional): A finishing touch for an extra cheesy flavor.

Step-by-Step Instructions to Make Chicken Garlic Butter Flatbread

Let’s break down the process into simple, easy-to-follow steps. Follow along, and you’ll have a delicious flatbread ready in no time!

Step 1: Prepare the Dough

In a large bowl, combine warm water, sugar, and active dry yeast. Let it sit for about 5 minutes until it becomes frothy. This indicates that your yeast is active.

Step 2: Mix in Flour and Salt

Add the all-purpose flour and salt to the yeast mixture. Stir until a dough starts to form.

Step 3: Knead the Dough

On a lightly floured surface, knead the dough for about 5-7 minutes until smooth and elastic. Place it in a greased bowl, cover with a kitchen towel, and let it rise for 15-20 minutes.

Step 4: Cook the Chicken

While the dough is rising, heat olive oil in a skillet over medium heat. Season the chicken breasts with salt, pepper, and Italian herbs. Cook for 6-7 minutes on each side until golden brown and fully cooked. Remove from heat and let it rest before slicing.

Step 5: Prepare Garlic Butter

In a small bowl, mix the melted butter with minced garlic. This will be brushed over the flatbread before serving.

Step 6: Roll Out the Dough

Once risen, roll the dough into a large circle or rectangle, about 1/4 inch thick. Transfer to a baking sheet lined with parchment paper.

Step 7: Assemble and Bake

Spread the garlic butter mixture over the rolled dough. Top with sliced chicken and sprinkle with Parmesan cheese if using. Bake in a preheated oven at 400°F (200°C) for 15-20 minutes or until golden brown.

Step 8: Garnish and Serve

Once baked, remove from the oven and sprinkle with fresh parsley. Cut into slices and serve warm.

Common Mistakes and Troubleshooting

Side view of a delicious flatbread topped with seasoned chicken and melted butter.

Even the best cooks can run into a few hiccups when preparing flatbread. Here’s how to avoid common pitfalls:

  • Over-kneading the dough: This can make the flatbread tough. Knead just until smooth.
  • Not letting the dough rise: Don’t skip the rising time; it’s crucial for a light texture.
  • Too much flour: Keep the dough slightly sticky for the best results.
  • Undercooking the chicken: Always ensure the chicken is fully cooked to avoid foodborne illnesses.

Variations of Chicken Garlic Butter Flatbread

This recipe is super versatile! Here are some fun variations to try:

  • Vegetarian Option: Swap chicken for sautéed mushrooms, zucchini, or bell peppers.
  • Cheesy Garlic Bread: Add a mixture of mozzarella and cheddar cheese on top for an extra cheesy experience.
  • Spicy Chicken Flatbread: Add diced jalapeños or your favorite hot sauce to the chicken.
  • Pesto Chicken Flatbread: Spread pesto over the dough instead of garlic butter for a fresh twist.

How to Store and Make-Ahead Instructions

This flatbread is best served fresh, but here’s how to store any leftovers:

  • Storing: Keep any leftover flatbread in an airtight container in the fridge for up to 3 days.
  • Reheating: Warm in a skillet over medium heat for a few minutes on each side or in the oven at 350°F (175°C) until heated through.
  • Make-Ahead: You can prepare the dough and chicken a day in advance. Keep the dough tightly wrapped in plastic in the fridge.

Nutrition Tips and Dietary Adaptations

This recipe can easily be tailored to fit various dietary needs:

  • Gluten-Free: Use a gluten-free flour blend for the dough.
  • Dairy-Free: Substitute the butter with a dairy-free alternative and omit the cheese.
  • Lower Calorie: Use less butter and cheese to reduce calories without sacrificing taste.

Equipment Recommendations

Here are some kitchen tools that will make your cooking experience smoother:

  • Mixing Bowls: Use a large bowl for mixing the dough and a smaller one for the garlic butter.
  • Rolling Pin: Essential for rolling out the dough evenly.
  • Skillet: A non-stick skillet works best for cooking the chicken and assembling the flatbread.
  • Baking Sheet: Line with parchment paper for easy cleanup and to prevent sticking.

Serving Suggestions

This Chicken Garlic Butter Flatbread can be served alongside various sides for a complete meal:

  • Fresh Salad: A crisp green salad with a light vinaigrette complements the richness of the flatbread.
  • Roasted Vegetables: Serve with a side of seasoned roasted veggies for a wholesome addition.
  • Dip Options: Hummus or tzatziki work great as dips for added flavor.

Frequently Asked Questions

Curious about this recipe? Here are some common questions and their answers:

  • Can I make this flatbread ahead of time? Yes, you can prepare the dough and chicken in advance. Just store them separately in the fridge.
  • Can I freeze the flatbread? Absolutely! After baking, let it cool completely, then wrap in plastic and freeze for up to 3 months.
  • What toppings can I add? Feel free to customize with your favorite toppings such as spinach, olives, or feta cheese.
  • How do I make the flatbread crispier? Bake it longer or at a higher temperature for a crunchier texture.
  • Is it possible to make this recipe vegan? Yes, substitute chicken with chickpeas or tofu and use plant-based butter.
  • What type of flour works best? All-purpose flour is great, but whole wheat or gluten-free blends can also be used for variations.
  • How can I enhance the flavors? Adding herbs like rosemary or thyme can elevate the flavor profile beautifully.
  • What if my dough doesn’t rise? Ensure your yeast is fresh, and the water temperature is right; it should be warm but not hot.

With all these insights and tips, you’re now ready to create a delicious Chicken Garlic Butter Flatbread that will impress anyone at your table. Cooking doesn’t have to be stressful—instead, it can be a delightful experience filled with flavor and creativity. So roll up your sleeves, gather your ingredients, and enjoy the process of making this scrumptious dish!

Easy Chicken Garlic Butter Flatbread Recipe That Will Wow You

Prep Time 20 minutes
Cook Time 15 minutes
Total Time 35 minutes
Servings 4 people
Calories 650
This flavorful flatbread combines tender chicken, garlic butter, and fresh herbs for a delicious meal that impresses.

Ingredients

Dough

  • 2 cups all-purpose flour
  • 3/4 cup warm water
  • 2 teaspoons active dry yeast
  • 1 teaspoon sugar
  • 1 teaspoon salt

Garlic Butter

  • 4 tablespoons butter melted
  • 2 cloves garlic minced

Chicken

  • 1 pound boneless, skinless chicken breasts
  • 2 tablespoons olive oil
  • 1 teaspoon salt
  • 1/2 teaspoon black pepper
  • 1/4 cup fresh parsley chopped
  • 1/4 cup grated Parmesan cheese optional

Instructions 

  • Mix flour, yeast, sugar, and salt; add warm water and knead into dough. Let rise for 15 minutes.
  • Cook chicken with olive oil, salt, and pepper until cooked through. Shred or dice.
  • Roll out dough, spread garlic butter, and top with cooked chicken, parsley, and Parmesan if using.
  • Bake at 400°F (200°C) for 15 minutes until golden.

Notes

For extra flavor, brush the crust with additional garlic butter before baking.
Calories: 650kcal
Cost: $15
Course: Main Course
Cuisine: American
Keyword: Chicken, flatbread, Garlic

Discover the Joy of Garlic Butter Noodles

Welcome to your new favorite weeknight dinner! This Deliciously Simple Garlic Butter Noodles recipe combines the comforting richness of garlic and butter with fresh veggies to create a dish that is not only satisfying but also incredibly easy to whip up. Whether you’re a seasoned chef or a kitchen newbie, this recipe is designed to bring joy to your dinner table without the stress of complicated steps. Let’s dive in and explore why you’ll love this recipe!

Why You’ll Love This Recipe

  • Quick and Easy: This dish comes together in just 20 minutes, making it perfect for busy weeknights.
  • Versatile: You can easily customize the ingredients based on what you have on hand, whether it’s adding protein or different vegetables.
  • Flavor-Packed: The combination of garlic, butter, and fresh herbs creates an irresistible aroma and taste that will have everyone coming back for seconds.
  • Comfort Food: There’s something about butter noodles that hits the spot, making them a go-to choice for cozy dinners.
  • Family-Friendly: This recipe is a hit with both kids and adults, ensuring everyone at the table is happy!

Ingredients Breakdown

Here’s what you’ll need to make these delicious garlic butter noodles:

  • 1 pound pasta: Spaghetti, fettuccine, or your favorite noodles work well.
  • 8 tablespoons butter: For that rich flavor; feel free to use unsalted butter if you prefer.
  • 6 cloves garlic: Finely minced for a robust garlic flavor.
  • 1 zucchini: A fresh veggie to add texture and nutrition.
  • 1 bell pepper: Adds a pop of color and sweetness.
  • ½ head cauliflower: A great addition for fiber and crunch.
  • 1½ tablespoons olive oil: For sautéing the veggies.
  • Salt and pepper to taste: Essential for enhancing all the flavors.
  • 1 teaspoon each of Italian seasoning, garlic powder, onion powder: To elevate the taste profile.
  • Optional toppings: Parmesan cheese or fresh herbs to finish your dish.

Pro Tips for Perfect Garlic Butter Noodles

Side perspective of a bowl of Garlic Butter Noodles garnished with herbs.

Here are some expert insights to ensure your noodles turn out perfectly:

  • Don’t overcook the pasta: Follow package instructions and taste for al dente.
  • Save some pasta water: This starchy water can help adjust the sauce’s consistency later.
  • Customize your veggies: Feel free to add any seasonal vegetables you love; they’ll fit right in!
  • Use fresh herbs: Fresh parsley or basil can brighten up the dish when sprinkled on top.
  • Adjust garlic levels: For a milder taste, reduce the garlic or roast it beforehand.
  • Mix in protein: Sautéed shrimp, chicken, or tofu can turn this into a heartier meal.
  • Experiment with spices: Add red pepper flakes for a bit of heat or lemon zest for brightness.
  • Check seasoning: Always taste before serving and adjust salt and pepper as needed.

Common Mistakes and Troubleshooting

Even the best cooks encounter hiccups! Here’s how to avoid common pitfalls:

  • Too greasy: If your noodles are too oily, add a splash of pasta water to balance the butter.
  • Flavor too bland: Ensure you’re seasoning well at every step—don’t forget the salt!
  • Overcooked noodles: Keep an eye on your pasta; it should be tender but still firm.
  • Burnt garlic: Cook garlic on low heat to prevent it from burning—bitter garlic ruins the dish!

Delicious Variations to Try

Looking to change things up? Here are some tasty variations:

  • Garlic Shrimp Noodles: Add sautéed shrimp for a protein boost.
  • Creamy Garlic Butter Noodles: Stir in a splash of heavy cream for a richer sauce.
  • Pesto Garlic Butter Noodles: Incorporate your favorite pesto for a herby twist.
  • Spicy Garlic Butter Noodles: Mix in crushed red pepper flakes for a kick.

Storage and Make-Ahead Instructions

If you want to prepare ahead of time or save leftovers, here’s how:

  • Refrigeration: Store leftover garlic butter noodles in an airtight container in the fridge for up to 3 days.
  • Freezing: While not ideal due to the texture of the sauce, you can freeze leftovers for up to a month. Reheat gently.
  • Make-Ahead: Prepare the veggies and garlic butter sauce in advance. Cook the noodles fresh before serving.

Frequently Asked Questions

Got questions? Let’s clear them up!

  • Can I use gluten-free pasta? Absolutely! Gluten-free pasta works well in this recipe.
  • What type of noodles is best? Any type you love works, but spaghetti or fettuccine are classic choices.
  • Can I make this dish vegan? Yes! Substitute butter with vegan butter and use nutritional yeast for a cheesy flavor.
  • How do I reheat leftovers? Reheat gently on the stove with a splash of water or broth to revive the sauce.
  • Can I add more vegetables? Definitely! Broccoli, spinach, or asparagus are great additions.
  • What should I serve with garlic butter noodles? Pair with grilled chicken, a fresh salad, or garlic bread for a complete meal.
  • How can I make this dish spicy? Add crushed red pepper flakes or a dash of hot sauce to the butter.
  • Can I make this without garlic? You can omit it, but you’ll lose the signature flavor—try using garlic-infused oil instead!

Nutrition Tips and Dietary Adaptations

This dish can be tailored to fit various dietary needs:

  • Low-Carb: Swap traditional pasta for zucchini noodles or spaghetti squash.
  • Dairy-Free: Use vegan butter and skip cheese for a dairy-free option.
  • Higher Protein: Add beans or chickpeas for a plant-based protein boost.

Essential Equipment

To make your cooking experience seamless, here’s what you’ll need:

  • Large pot: For boiling pasta.
  • Colander: To drain the pasta.
  • Large skillet: For sautéing veggies and combining ingredients.
  • Wooden spoon: For stirring and mixing.

Serving Suggestions

Ready to serve your delicious creation? Here’s how to present your garlic butter noodles:

  • Garnish: Top with freshly grated Parmesan and a sprinkle of chopped parsley.
  • Pair with: A side salad or crusty bread for a balanced meal.
  • Serve warm: Ensure the dish is served immediately for the best flavor and texture.

Now that you have all the tools and tips to make the best garlic butter noodles, it’s time to get cooking! Remember, cooking is about enjoying the process and making something delicious for yourself and your loved ones. So, roll up your sleeves, grab your ingredients, and let’s create a meal that will brighten your week!

Garlic Butter Noodles

Prep Time 10 minutes
Cook Time 15 minutes
Total Time 25 minutes
Servings 4 servings
Calories 550
Delicious and easy garlic butter noodles with fresh vegetables, perfect for a quick and satisfying meal.

Ingredients

Vegetables

  • 1 piece zucchini
  • 1 piece bell pepper
  • 0.5 head cauliflower

Pasta

  • 1.5 tablespoons olive oil
  • 1 pound pasta

Dairy & Seasonings

  • 8 tablespoons butter (salted)
  • 0.5 cup Parmesan or other cheese (optional for topping)
  • 6 cloves garlic, finely minced
  • 1 teaspoon Italian seasoning
  • 1 teaspoon garlic powder
  • 1 teaspoon onion powder

Seasoning

  • Salt and pepper to taste Salt and pepper (added as needed)

Instructions 

  • Cook pasta according to package instructions; drain and set aside.
  • Sauté chopped vegetables in olive oil until tender.
  • Add minced garlic, Italian seasoning, garlic powder, and onion powder; cook for 1 minute.
  • Stir in cooked pasta and butter; toss to combine. Season with salt and pepper.
  • Serve topped with Parmesan cheese and fresh herbs if desired.

Notes

Use salted butter; adjust salt accordingly.
Calories: 550kcal
Cost: $12
Course: Main Course
Cuisine: American
Keyword: Pasta

Indulge in Decadent Delight: Your Go-To Ultimate Chocolate Cupcakes Recipe

Welcome to the ultimate guide for baking the most delicious chocolate cupcakes you’ll ever make! These Ultimate Chocolate Cupcakes are rich, moist, and bursting with a deep chocolate flavor that will impress any dessert lover. With a few simple ingredients and our easy-to-follow steps, you’ll be on your way to creating a delightful treat that’s perfect for any occasion. Whether you’re celebrating a birthday or just satisfying a sweet craving, these cupcakes are sure to become a favorite in your home. Let’s dive into why you’ll love this recipe!

Why You’ll Love This Recipe

This isn’t just any chocolate cupcake recipe. Here are five reasons why you’ll adore making these cupcakes:

  • Rich Chocolate Flavor: The combination of quality unsweetened cocoa powder and finely chopped semisweet chocolate ensures an intense chocolate experience in every bite.
  • Moist and Tender: Thanks to the addition of buttermilk and sour cream, these cupcakes have a delightful moistness that keeps them tender and fluffy.
  • Easy One-Bowl Method: Forget complicated processes! This recipe allows you to mix everything in just one bowl, making cleanup a breeze.
  • Versatile Toppings: Whether you prefer classic buttercream, cream cheese frosting, or a sprinkle of chocolate curls, the topping options are endless!
  • Perfect for Any Occasion: These cupcakes are ideal for celebrations, casual get-togethers, or just a sweet treat for yourself at home.

Ultimate Chocolate Cupcakes Recipe Ingredients

To make your cupcakes, gather the following ingredients:

  • 1½ c. all-purpose flour
  • 1½ c. granulated sugar
  • ¾ c. quality unsweetened cocoa powder
  • 1½ tsp. baking soda
  • ¾ tsp. baking powder
  • ¾ tsp. coarse kosher sea salt
  • 2 large eggs
  • ¼ c. sour cream
  • ½ c. buttermilk
  • ¾ c. warm water
  • ½ tsp. espresso powder (optional)
  • ¼ c. vegetable oil
  • 1½ tsp. vanilla extract
  • 2 oz. finely chopped semisweet chocolate

How to Make the Ultimate Chocolate Cupcakes

Side view of decadent chocolate cupcakes topped with a creamy chocolate frosting.

Follow these simple steps to create your delicious cupcakes:

  1. Preheat your oven: Set your oven to 350°F (175°C). Line a standard cupcake pan with 12 liners and prepare an additional four liners in another pan.
  2. Mix the dry ingredients: In a stand mixer bowl, whisk together the flour, sugar, cocoa powder, baking soda, baking powder, and salt on low speed until well combined.
  3. Add the wet ingredients: Add in the eggs, sour cream, buttermilk, warm water, vegetable oil, vanilla extract, and chopped chocolate. Beat on medium speed until the batter is smooth, about one minute.
  4. Fill the liners: Use a ¼ cup measuring cup (or a cookie scoop) to divide the batter evenly among the cupcake liners.
  5. Bake: Place the pans in the oven and bake for 18-22 minutes, or until the tops spring back when lightly touched.
  6. Cool: Allow the cupcakes to cool in the pans for 8 minutes before transferring them to a wire rack to cool completely.

Frosting and Decoration Options

Now that your cupcakes are baked and cooled, it’s time to make them even more irresistible with frosting! Here are some popular options:

  • Classic Vanilla Buttercream: A sweet and creamy topping that pairs perfectly with chocolate.
  • Cream Cheese Frosting: Adds a tangy flavor that beautifully complements the richness of the chocolate.
  • Chocolate Ganache: For the ultimate chocolate experience, drizzle warm ganache over each cupcake.
  • Whipped Cream and Berries: For a lighter touch, top with fresh whipped cream and seasonal berries.
  • Chocolate Curls or Sprinkles: Add a fun texture and visual appeal with mini chocolate chips or jimmies!

Expert Tips for Perfect Cupcakes

Want to ensure your cupcakes turn out perfectly every time? Here are some expert tips:

  • Use quality ingredients: Opt for high-quality cocoa powder and chocolate for the best flavor.
  • Room temperature ingredients: Make sure your eggs, buttermilk, and sour cream are at room temperature for a better batter consistency.
  • Don’t overmix: Mix just until smooth to avoid dense cupcakes.
  • Test for doneness: Use a toothpick inserted in the center; it should come out clean or with a few moist crumbs.
  • Cool completely: Let cupcakes cool completely before frosting to prevent melting.

Common Mistakes and Troubleshooting

Even the best bakers can make mistakes! Here’s how to troubleshoot common issues:

  • Dry cupcakes: This can happen if you overbake. Always check a few minutes before the timer goes off.
  • Sunken tops: This could be due to underbaking or opening the oven too early. Avoid opening the oven until the minimum baking time has passed.
  • Flavorless cupcakes: Ensure that you’re using quality cocoa powder and vanilla extract; they make a big difference!

Variations to Try

Feeling adventurous? Here are some variations to suit different tastes:

  • Chocolate Peanut Butter Cupcakes: Swirl in creamy peanut butter into the batter for a delicious twist.
  • Mint Chocolate Cupcakes: Add a few drops of mint extract to the batter for a refreshing flavor.
  • Spicy Chocolate Cupcakes: Incorporate a pinch of cayenne pepper for a subtle kick!
  • Vegan Chocolate Cupcakes: Substitute eggs with flaxseed meal and use non-dairy milk and yogurt.

Storage and Make-Ahead Instructions

Want to prepare cupcakes in advance? Here’s how to store them:

  • Room temperature: Store frosted cupcakes in an airtight container at room temperature for up to 2 days.
  • Refrigerator: For longer freshness, keep them in the fridge for up to a week. Just make sure to bring them back to room temperature before serving.
  • Freezer: Unfrosted cupcakes can be frozen for up to 3 months. Thaw completely before frosting.

FAQ: Your Chocolate Cupcake Questions Answered

Here are some common questions about making chocolate cupcakes:

  • Can I use milk instead of buttermilk? Yes, but for the best results, add a tablespoon of vinegar or lemon juice to regular milk and let it sit for 5 minutes.
  • What can I use instead of eggs? You can substitute each egg with 1/4 cup applesauce or a flax egg (1 tablespoon ground flaxseed + 2.5 tablespoons water).
  • How do I make my cupcakes rise higher? Make sure your oven is fully preheated and avoid overmixing the batter.
  • Can I add chocolate chips to the batter? Absolutely! Fold in mini chocolate chips for extra chocolatey goodness!
  • What type of cocoa powder should I use? Unsweetened cocoa powder is best for this recipe to maintain the right balance of sweetness.
  • Can I bake this in a cake pan instead? Yes! Just adjust the baking time to about 30-35 minutes.
  • How do I know when my cupcakes are done? Use a toothpick inserted in the center; it should come out clean or with a few moist crumbs.
  • Can I make these cupcakes gluten-free? Yes! Substitute with a gluten-free all-purpose flour blend.

Nutritional Tips and Dietary Adaptations

To make your chocolate cupcakes healthier or cater to dietary needs, consider these adaptations:

  • Reduced Sugar: Use less sugar or a sugar substitute like stevia.
  • Gluten-Free: As mentioned, use a gluten-free flour blend to accommodate those with gluten sensitivities.
  • Dairy-Free: Substitute buttermilk and sour cream with dairy-free alternatives.
  • Lower Fat: Replace some of the vegetable oil with unsweetened applesauce for a lower fat version.

Equipment Recommendations

Here’s what you’ll need to have on hand:

  • Stand mixer: Makes mixing the batter quick and easy.
  • Cupcake liners: Choose your favorite colors or styles to make your cupcakes festive.
  • Measuring cups and spoons: Accurate measurements are key for baking success.
  • Cooling rack: Essential for letting your cupcakes cool evenly.
  • Offset spatula: Great for frosting your cupcakes smoothly.

Serving Suggestions

When it comes time to serve your delightful chocolate cupcakes, consider these ideas:

  • Pair with coffee or tea: The rich chocolate flavor pairs beautifully with a warm beverage.
  • Serve at parties: Place them on a decorative platter for a stunning display.
  • Offer ice cream on the side: A scoop of vanilla or chocolate ice cream makes the perfect pairing!

Now that you have all the tips and tricks, it’s time to get baking! Enjoy the process and remember, the joy of cooking comes from creativity and confidence. Happy baking!

Ultimate Chocolate Cupcakes Recipe

Prep Time 20 minutes
Cook Time 20 minutes
Total Time 40 minutes
Servings 16 cupcakes
Calories 350
Indulge in rich, moist chocolate cupcakes topped with creamy frosting, perfect for any celebration or craving.

Ingredients

Dry Ingredients

  • 1.5 cups all-purpose flour
  • 1.5 cups granulated sugar
  • 0.75 cup unsweetened cocoa powder (quality)
  • 1.5 teaspoons baking soda
  • 0.75 teaspoon baking powder
  • 0.75 teaspoon coarse kosher sea salt (not fine)

Wet Ingredients

  • 2 large eggs
  • 0.25 cup sour cream
  • 0.5 cup buttermilk
  • 0.75 cup warm water
  • 0.5 teaspoon espresso powder (optional)
  • 0.25 cup vegetable oil
  • 1.5 teaspoons vanilla extract

Chocolate Add-ins

  • 2 oz finely chopped semisweet chocolate
  • 1.5 sticks unsalted butter, softened
  • 0.5 block cream cheese, softened
  • 0.75 cup powdered sugar (confectioners sugar)
  • 2 tablespoons whole milk or heavy cream
  • 0.375 cup chocolate curls or mini chocolate chips (sprinkles)

Instructions 

  • Preheat oven to 350°F (175°C). Line cupcake pans with liners.
  • Mix dry ingredients in a stand mixer on low until combined. Add wet ingredients and chopped chocolate; beat until smooth.
  • Divide batter evenly into liners using approximately ¼ cup per cupcake.
  • Bake for 18-22 minutes until tops spring back. Cool in pans for 8 minutes, then transfer to wire racks.

Notes

For extra flavor, add a shot of espresso to the batter.
Calories: 350kcal
Cost: $15
Course: Dessert
Keyword: chocolate

Start Your Day Right with Apple Cinnamon Oatmeal

Welcome to the ultimate guide for making a warm, comforting bowl of Apple Cinnamon Oatmeal! This delightful recipe combines fresh honey crisp apples with aromatic spices, offering you a nutritious breakfast that’s not just quick but also incredibly satisfying. Imagine starting your day with the cozy flavors of cinnamon and sweet apples, all wrapped up in a hearty serving of oatmeal. Let’s dive in and explore why this recipe is not just delicious, but also a fantastic addition to your morning routine!

Why You’ll Love This Recipe

There are countless reasons to fall in love with this Apple Cinnamon Oatmeal, but here are a few that stand out:

  • Quick & Easy: In just 20 minutes, you’ll have a wholesome breakfast ready to enjoy, making it perfect for busy mornings.
  • Customizable: You can adjust the sweetness and add your favorite toppings, such as nuts or dried fruit, to personalize your bowl.
  • Nostalgic Flavors: If you grew up enjoying those instant oatmeal packets, this homemade version will hit all the right notes while being healthier.
  • Nutritious: Packed with fiber and essential nutrients, this oatmeal will keep you full and energized throughout the day.
  • Meal Prep Friendly: You can make a big batch to enjoy throughout the week; just store it in an airtight container!

Ingredients Breakdown

Let’s take a closer look at the ingredients that make this recipe shine. Each component plays a key role in creating that perfect bowl of apple cinnamon goodness.

  • Unsalted Butter (1 tablespoon): Adds a rich, creamy flavor. Feel free to use coconut oil for a dairy-free option.
  • Kosher Salt (1/4 teaspoon): Enhances the sweetness of the apples and balances flavors.
  • Cinnamon (1 teaspoon): The star of the show! Adjust the amount to your taste if you love that warm spice.
  • Maple Syrup (1 tablespoon): Adds a natural sweetness. You can substitute with honey or agave if preferred.
  • Honey Crisp Apples (2 large, diced): Their crisp texture and sweet flavor are perfect for this recipe. You can leave the peel on for added nutrients!
  • Whole Milk (1.5 cups): Creamy and delicious! Feel free to swap for any milk of choice, including almond or oat milk.
  • Water (1.5 cups): Helps to cook the oats to the right consistency.
  • Brown Sugar (1-2 tablespoons): Optional, for an extra touch of sweetness.
  • Rolled Oats (1 cup): Old-fashioned oats work best, providing a great texture.
  • Chia Seeds (2 tablespoons, optional): Boosts nutrition and adds a nice texture.
  • Vanilla Extract (2 teaspoons): Enhances the overall flavor profile.

How to Make Apple Cinnamon Oatmeal

Close-up view of creamy Apple Cinnamon Oatmeal garnished with cinnamon and apple pieces.

Now that we have our ingredients ready, let’s walk through the steps to create a delicious bowl of Apple Cinnamon Oatmeal.

  1. Prepare the Apples: In a small saucepan, melt 1 tablespoon of unsalted butter over medium heat. Stir in 1 tablespoon of maple syrup, 1/4 teaspoon of kosher salt, and 1 teaspoon of cinnamon. Add the diced apples and sauté for a few minutes until they soften but still retain their shape. Set aside.
  2. Cook the Oatmeal: In a large saucepan or Dutch oven, combine 1.5 cups of water, 1.5 cups of milk, and 1/4 teaspoon of kosher salt. Bring to a soft boil over medium-low heat. Stir in 2 tablespoons of brown sugar until dissolved.
  3. Add the Oats: Incorporate 1 cup of rolled oats and 2 tablespoons of chia seeds, if using. Simmer for about 5-10 minutes, stirring occasionally, until thickened.
  4. Combine & Serve: Stir in 2 teaspoons of vanilla extract and 1.5 teaspoons of cinnamon, along with half of the cooked apples. Simmer for an additional 3-5 minutes to reach your desired consistency.
  5. Final Touch: Serve warm with a splash of fresh cream or extra milk, topped with the reserved apples and a sprinkle of cinnamon. Enjoy!

Pro Tips for Perfect Oatmeal

To elevate your oatmeal game, keep these tips in mind:

  • Choose the Right Oats: Use rolled oats for the best texture. Steel-cut oats will take longer to cook.
  • Don’t Overcook: Keep an eye on the oatmeal to avoid a mushy texture. Stir occasionally to ensure even cooking.
  • Adjust Sweetness: Taste as you go! You can always add more sweeteners, but it’s hard to take sweetness away.
  • Experiment with Spices: Besides cinnamon, consider adding nutmeg or ginger for a unique flavor twist.
  • Top Creatively: Try adding nuts, seeds, yogurt, or fresh fruit for added nutrients and flavor.
  • Make Ahead: Prepare a large batch on the weekend and store in an airtight container for quick breakfasts during the week.
  • Reheat Gently: When reheating, add a splash of milk or water to restore creaminess.
  • Mix It Up: Try different fruits or even pumpkin puree for seasonal variations!

Common Mistakes and Troubleshooting

A few common pitfalls can affect your oatmeal experience. Here’s how to avoid them:

  • Too Watery: If your oatmeal is too runny, cook it a bit longer to allow excess liquid to evaporate.
  • Mushy Oats: Stirring too frequently or cooking for too long can lead to mushy oats. Aim for a gentle simmer.
  • Not Sweet Enough: Always adjust sweetness to your taste. You can add a dash of maple syrup or brown sugar post-cooking.
  • Undercooked Apples: If your apples are too firm, sauté them longer before adding to the oats.
  • Burnt Bottom: Stir often to prevent sticking and burning at the bottom of the pan.

Delicious Variations to Try

Feeling adventurous? Here are some tasty variations on the classic Apple Cinnamon Oatmeal:

  • Peanut Butter Banana: Stir in a tablespoon of peanut butter and top with sliced bananas for a protein boost.
  • Berry Delight: Swap apples for mixed berries for a refreshing summer twist.
  • Nutty Oatmeal: Add your favorite nuts like almonds or walnuts for added crunch and nutrition.
  • Chocolate Chip: Stir in some dark chocolate chips for a decadent treat that feels indulgent.

Storage and Make-Ahead Instructions

Want to prepare this Apple Cinnamon Oatmeal ahead of time? Here’s how to store and reheat it:

  • Storage: Keep leftovers in an airtight container in the fridge for up to 4-5 days.
  • Reheating: When ready to eat, reheat gently in the microwave or on the stovetop, adding a splash of milk or water to restore creaminess.
  • Make-Ahead: You can cook a large batch, portion it out, and have a quick breakfast ready to go for busy weekdays!

Frequently Asked Questions

Here are some common questions about making Apple Cinnamon Oatmeal:

  • Can I use instant oats? Yes, but the cooking time will be shorter. Follow package instructions for timing.
  • Is this recipe gluten-free? Yes, if you use certified gluten-free oats.
  • Can I freeze oatmeal? It’s not recommended, as the texture may change upon thawing. Stick to the fridge for storage.
  • Can I make this in the microwave? Absolutely! Combine all ingredients in a microwave-safe bowl and cook in intervals, stirring until desired consistency.
  • How do I sweeten it naturally? You can use mashed bananas or unsweetened applesauce for a healthier sweetening option.
  • What other fruits work well? Pears, peaches, or berries can be delicious alternatives to apples.
  • Can I add protein powder? Yes! Stir in your favorite protein powder after cooking for an extra protein boost.
  • How do I know when it’s done? The oatmeal should be creamy and thick but not dry; it should hold its shape on a spoon.

Nutritional Tips and Dietary Adaptations

This Apple Cinnamon Oatmeal can fit into various dietary needs:

  • Vegan Option: Substitute the butter with coconut oil, and use plant-based milk.
  • High Protein: Add Greek yogurt or protein powder for an extra protein boost.
  • Low Sugar: Reduce or omit the sweeteners, and rely on the natural sweetness of the apples.
  • Heart-Healthy: Include chia seeds and nuts to increase omega-3 fatty acids.

Equipment Recommendations

To successfully whip up this Apple Cinnamon Oatmeal, you’ll need:

  • Medium Saucepan: For cooking the oatmeal and apples.
  • Wooden Spoon: Great for stirring and preventing scratches on your cookware.
  • Measuring Cups and Spoons: To ensure accurate ingredient measurements.
  • Storage Containers: Airtight containers for storing leftovers.

Serving Suggestions

Make your oatmeal even more delightful with these serving ideas:

  • Top with Fresh Fruit: Consider adding sliced bananas, fresh berries, or more diced apples.
  • Drizzle with Honey: A little extra honey or maple syrup on top can enhance sweetness.
  • Sprinkle with Nuts: Chopped walnuts or almonds add crunch and healthy fats.
  • Yogurt Swirl: A dollop of yogurt can add creaminess and extra protein.

In conclusion, this Apple Cinnamon Oatmeal is more than just a breakfast option; it’s a way to embrace cozy mornings and fill your day with warmth and nourishment. By following these easy steps and tips, you’ll not only master this recipe but also gain the confidence to experiment and make it your own. So gather your ingredients, and let’s get cooking! Enjoy every comforting bite!

Apple Cinnamon Oatmeal

Prep Time 5 minutes
Cook Time 20 minutes
Total Time 25 minutes
Servings 2 servings
Calories 350
A warm and comforting oatmeal topped with sweet apples and fragrant cinnamon, perfect for a cozy breakfast.

Ingredients

Dairy & Fats

  • 1 tablespoon unsalted butter
  • 1 ¼ teaspoon kosher salt
  • 1 teaspoon cinnamon (to taste)
  • 1 tablespoon maple syrup

Fruits

  • 2 large honey crisp apples (diced, peel on)

Liquids

  • 1.5 cups whole milk or milk of choice
  • 1.5 cups water

Sweeteners

  • 1-2 tablespoons brown sugar (to taste)

Grains & Seeds

  • 1 cup rolled oats (old fashioned oats)
  • 2 tablespoons chia seeds (optional)
  • 1.5 teaspoons ground cinnamon (to taste)
  • 2 teaspoons vanilla extract

Instructions 

  • In a small saucepan, melt butter, then stir in maple syrup, salt, and cinnamon. Add diced apples and sauté until slightly softened. Set aside.
  • Bring water, milk, and salt to a soft boil. Stir in brown sugar until dissolved.
  • Add oats and chia seeds; simmer for 5-10 minutes, stirring occasionally until thickened.
  • Stir in vanilla and cinnamon, then add half of the cooked apples. Simmer for another 3-5 minutes.
  • Serve topped with remaining apples, a splash of milk or cream, and additional cinnamon or toppings as desired.

Notes

Store leftovers in an airtight container in the fridge for 4-5 days. Reheat gently in microwave or on stovetop.
Calories: 350kcal
Cost: $10
Course: Breakfast
Keyword: apple, Cinnamon, oatmeal

Welcome to the World of Vegan Double Strawberry Muffins!

If you’re looking for a delightful treat that brings together the sweetness of strawberries and the joy of baking, you’ve landed on the right recipe! These Vegan Double Strawberry Muffins are not only easy to make but also incredibly moist and bursting with flavor. Whether you’re having a cozy brunch or a simple snack, these muffins are bound to steal the show. Let’s dive into why you’ll love this recipe!

Why You’ll Love This Recipe

  • Flavor Explosion: With both pureed and chopped strawberries, these muffins pack a juicy punch in every bite.
  • 100% Plant-Based: Free from eggs and dairy, these muffins are perfect for vegan diets while still being delicious.
  • Simple Ingredients: Made with pantry staples, you won’t need any exotic ingredients to whip these up.
  • Perfect for Any Occasion: Great for breakfast, snacks, or dessert, these muffins are versatile and crowd-pleasing.
  • Quick and Easy: With straightforward steps, you can prepare these muffins in no time, making them ideal for busy schedules.

Ingredients You’ll Need

Gather the following ingredients for your Vegan Double Strawberry Muffins. Don’t worry if you need to make substitutions; I’ll guide you through that too!

  • 2 cups (240g) ripe strawberries: Fresh or frozen (defrosted), weighed after stems have been removed.
  • 1 cup (200g) granulated sugar: For that perfect sweetness.
  • 2 ½ tablespoons (40g) dairy-free milk: Almond or soy milk works great.
  • ½ cup (125g) neutral flavored oil: Canola or grapeseed oil are excellent choices.
  • 2 teaspoons apple cider vinegar or lemon juice: Adds a nice tang; you can replace it with more dairy-free milk if preferred.
  • 1 teaspoon vanilla extract: Optional, but highly recommended for added flavor.
  • ½ teaspoon pink food coloring: Optional, for a vibrant touch.
  • 3 cups (375g) all-purpose flour: Substitute with gluten-free flour if needed.
  • 3 teaspoons baking powder: For that perfect rise.
  • ¼ teaspoon baking soda: Helps with leavening.
  • Pinch of salt: Enhances overall flavor.
  • 1 cup (120g) fresh strawberries, chopped: For texture and flavor bursts throughout the muffins.

Step-by-Step Instructions

Close-up of Vegan Double Strawberry Muffins with a focus on fluffy texture and strawberry pieces.

Now that you have everything ready, let’s get baking! Follow these simple steps to create your muffins:

  • Preheat your oven: Set it to 180°C (350°F). Line your muffin pans with muffin liners.
  • Prepare the strawberry puree: Blend 2 cups of ripe strawberries until smooth. This will be the base for your muffins.
  • Mix wet ingredients: In a bowl, whisk together the strawberry puree, dairy-free milk, sugar, oil, vinegar, and vanilla extract.
  • Combine dry ingredients: In another bowl, mix flour, baking powder, baking soda, and salt.
  • Merge wet and dry: Gradually add the dry mixture into the wet ingredients, stirring until just combined. Avoid overmixing.
  • Fold in chopped strawberries: Gently incorporate the chopped strawberries into the batter.
  • Portion the batter: Fill each muffin liner about ¾ full with the batter.
  • Top with extra strawberries: Add a few sliced strawberries on top for an attractive finish.
  • Bake: Place the muffin trays in the oven and bake for 20-25 minutes, or until a toothpick comes out clean.
  • Cool and enjoy: Let the muffins cool in the pan for 5 minutes before transferring them to a wire rack.

Pro Tips for Baking the Best Muffins

To ensure that your Vegan Double Strawberry Muffins turn out perfect every time, consider these expert tips:

  • Measure accurately: Use a kitchen scale for precise measurements, especially for flour and strawberries, to avoid dense muffins.
  • Don’t overmix: Stir just until combined; overmixing can lead to tough muffins.
  • Check doneness: Use a toothpick to check for doneness; it should come out clean or with a few crumbs.
  • Adjust baking time: Keep an eye on your muffins, as baking times can vary based on oven performance.
  • Cool completely: Let your muffins cool fully to enhance their moistness and flavor.
  • Experiment with flavors: Feel free to add spices like cinnamon or nutmeg for a twist.
  • Store properly: Keep them in an airtight container to maintain freshness.
  • Make them mini: Adjust cooking time and make mini muffins for bite-sized treats.

Common Mistakes and Troubleshooting

Even the best bakers can face challenges. Here are common mistakes to avoid when making Vegan Double Strawberry Muffins:

  • Using unripe strawberries: Always opt for ripe, sweet strawberries for the best flavor.
  • Overmixing the batter: This can lead to a denser texture. Stir gently!
  • Incorrect oven temperature: An oven thermometer can help ensure your oven is calibrated correctly.
  • Not enough leavening: Make sure your baking powder is fresh for optimal rise.
  • Skipping the cooling step: Allowing muffins to cool helps set their texture and flavor.

Delicious Variations

Want to switch things up? Try these fun variations for your muffins:

  • Chocolate Chip Delight: Add vegan chocolate chips for a sweet twist.
  • Nutty Banana Strawberry: Mix in mashed bananas for added moisture and flavor.
  • Lemon Zest Muffins: Add lemon zest for a refreshing citrus kick.
  • Berry Medley: Incorporate other berries like blueberries or raspberries for a mixed berry muffin.

Storage and Make-Ahead Instructions

Planning ahead? Here’s how to store and prepare your muffins:

  • Room temperature: Store in an airtight container for up to 3 days.
  • Refrigeration: Keep in the fridge for up to a week.
  • Freezing: Freeze muffins in a sealed bag for up to 3 months. Thaw at room temperature or warm in the microwave.
  • Make-ahead: Prepare the batter a day in advance and bake fresh muffins in the morning.

Frequently Asked Questions

Here are some common questions about Vegan Double Strawberry Muffins:

  • Can I use frozen strawberries? Yes! Just make sure to thaw and drain excess moisture before adding.
  • Are these muffins gluten-free? You can substitute all-purpose flour with a gluten-free blend.
  • How can I enhance the flavor? Adding spices like cinnamon or nutmeg can elevate the taste.
  • Can I use maple syrup instead of sugar? Yes, but you may need to adjust the liquid ratio in the recipe.
  • What if my muffins are too dense? Ensure you’re measuring flour accurately and don’t overmix the batter.
  • Can I add nuts? Absolutely! Walnuts or pecans make a great addition.
  • How long do these muffins last? They can be stored at room temperature for up to 3 days.
  • Can I make these muffins mini-sized? Definitely! Just adjust the baking time accordingly.

Nutritional Tips and Dietary Adaptations

These muffins are not only delicious but can also be tailored to meet various dietary needs:

  • Low sugar option: Reduce the sugar amount or use a sugar substitute.
  • Protein boost: Add vegan protein powder to the batter for an extra nutritional kick.
  • Heart-healthy: Substitute oil with applesauce for a lower-fat option.

Equipment Recommendations

Here’s what you’ll need to successfully bake these muffins:

  • Mixing bowls: For combining wet and dry ingredients.
  • Muffin pan: Standard or mini, depending on your preference.
  • Whisk: To mix ingredients thoroughly.
  • Measuring cups and spoons: For accuracy in your measurements.
  • Silicone spatula: Great for folding in ingredients without overmixing.

Serving Suggestions

These muffins are delightful on their own, but here are some serving ideas:

  • With a cup of tea or coffee: Perfect for a leisurely breakfast or afternoon snack.
  • Spread with vegan butter: A little spread adds richness to every bite.
  • Top with fresh fruit: Enhance the presentation and flavor with extra strawberries or a fruit compote.

Conclusion

Now that you have the ultimate recipe for Vegan Double Strawberry Muffins, it’s time to roll up your sleeves and get baking! Remember, cooking is all about enjoying the process and celebrating the flavors you create. Whether you’re baking for yourself or sharing with friends and family, these muffins are sure to bring joy and deliciousness to your table. Happy baking, and remember, confidence in the kitchen leads to the best flavors!

Vegan Double Strawberry Muffins

Prep Time 10 minutes
Cook Time 20 minutes
Total Time 30 minutes
Servings 12 muffins
Calories 180
Delight in these moist and fruity vegan muffins, bursting with fresh strawberries and a hint of vanilla. Perfect for a quick breakfast or snack!

Ingredients

Fruits

  • 240 g ripe strawberries (fresh or frozen, defrosted, stems removed)
  • 200 g granulated sugar
  • 40 g dairy-free milk (2 1/2 tablespoons)
  • 125 g neutral flavored oil (1/2 cup)
  • 2 tsp apple cider vinegar or lemon juice (or replace with more dairy-free milk)
  • 1 tsp vanilla extract (optional)
  • 0.5 tsp pink food coloring (optional)

Dry ingredients

  • 375 g all-purpose plain flour (or gluten-free alternative)
  • 3 tsp baking powder
  • 0.25 tsp baking soda
  • pinch salt
  • 120 g fresh strawberries, chopped (1 cup)

Instructions 

  • Preheat oven to 180°C (350°F). Line muffin pans with liners.
  • Mix dry ingredients in a bowl. In another, combine wet ingredients including strawberries.
  • Fold wet into dry until just combined, then gently fold in chopped strawberries.
  • Spoon batter into muffin liners, filling about 3/4 full.
  • Bake for 20 minutes or until golden and a toothpick comes out clean.

Notes

For extra flavor, add a splash of vanilla or a few drops of pink food coloring.
Calories: 180kcal
Cost: $12
Course: Breakfast, Snack
Cuisine: vegan
Keyword: muffins, Strawberry

Transform Your Weeknight Meals with Chicken Teriyaki Noodles

Are you looking for a quick and delicious dinner option that doesn’t compromise on flavor? Look no further! This easy Chicken Teriyaki Noodles recipe will become your go-to for busy weeknights. In under 30 minutes, you can whip up a bowl of chewy noodles coated in a savory sauce, with tender chicken that’s bursting with flavor. Perfect for those evenings when you want something satisfying yet effortless!

Why You’ll Love This Recipe

Here are five reasons why this Chicken Teriyaki Noodles dish will win your heart:

  • Quick and Easy: Ready in under 30 minutes, this recipe is perfect for busy weeknights.
  • Flavorful Sauce: The homemade teriyaki sauce is both sweet and savory, elevating the dish to restaurant quality.
  • Customizable: Swap in your favorite vegetables or noodles to make it your own!
  • Meal Prep Friendly: Make it ahead for a hassle-free dinner or lunch option.
  • Budget-Friendly: Simple ingredients that won’t break the bank, making it a great choice for families.

Ingredients Breakdown

Here’s what you’ll need to make this delicious dish:

  • 2 chicken breasts (about 400-500 g total), thinly sliced against the grain
  • 200 g noodles (udon, ramen, soba, or spaghetti)
  • 1/4 cup soy sauce
  • 1/4 cup mirin
  • 2 tablespoons granulated sugar or honey
  • 1 tablespoon sesame oil
  • 2 cloves garlic, minced
  • 1 teaspoon fresh ginger, minced
  • 1 tablespoon cornstarch (optional for thickening)
  • 2 green onions, thinly sliced (for garnish)
  • Sesame seeds (for garnish)

Ingredient Substitutions

If you don’t have all the ingredients, here are some substitutions you can use:

  • Gluten-Free: Use tamari instead of soy sauce and rice noodles for a gluten-free version.
  • Honey Alternative: Maple syrup can replace granulated sugar or honey for a vegan option.
  • Noodle Options: Feel free to experiment with different types of noodles like rice noodles or even zucchini noodles for a low-carb option.

Step-by-Step Instructions

A delicious plate of chicken teriyaki noodles, highlighting the tender chicken and glossy sauce.

Follow these simple steps to create your Chicken Teriyaki Noodles:

  1. In a medium bowl, whisk together soy sauce, mirin, sugar or honey, sesame oil, garlic, and ginger until the sugar is mostly dissolved.
  2. Add the thinly sliced chicken to the bowl and toss to coat. Cover and refrigerate for at least 30 minutes, up to 8 hours for maximum flavor.
  3. Bring a pot of salted water to a boil. Cook the noodles according to package directions until just tender. Drain and toss with a splash of neutral oil to prevent sticking.
  4. Heat a large skillet over medium-high heat. Add 1-2 teaspoons of neutral oil until shimmering.
  5. Spread chicken pieces in a single layer in the skillet. Cook for about 3-4 minutes per side until juices run clear and internal temperature reaches 165°F (74°C).
  6. If desired, pour reserved marinade into the skillet and bring to a simmer. Mix cornstarch with a splash of water to create a slurry, then stir into the sauce until it thickens.
  7. Add the cooked noodles to the pan and toss gently until everything is coated and heated through.
  8. Divide into bowls and garnish with sliced green onions and toasted sesame seeds. Serve immediately and enjoy!

Pro Tips for Success

Here are some expert insights to ensure your dish turns out perfectly:

  • Marination: For the best flavor, marinate the chicken for at least 2 hours, or overnight if you have time.
  • Cooking Chicken: Don’t overcrowd the pan; cook in batches if necessary to achieve a nice sear.
  • Thickening Sauce: If you prefer a thicker sauce, add a bit more cornstarch slurry until desired consistency is reached.
  • Vegetable Add-ins: Consider adding bell peppers, snap peas, or broccoli for extra nutrition and color.
  • Serving Temperature: Serve immediately to enjoy the best texture in your noodles!
  • Storage: Store leftovers in an airtight container in the fridge for up to 3 days.
  • Reheating: Reheat gently in a skillet or microwave to avoid overcooking the chicken.
  • Flavor Adjustment: Adjust the sweetness or saltiness of the sauce by varying the amount of sugar or soy sauce according to your taste.

Common Mistakes and Troubleshooting

Avoid these common pitfalls to ensure your dish is a success:

  • Overcooking Chicken: Keep an eye on the cooking time; overcooked chicken can become dry.
  • Undercooking Noodles: Make sure to cook noodles just until tender; they will continue to cook when tossed with the hot chicken.
  • Too Saucy: If the sauce is too thin, remember to use cornstarch to thicken, and vice versa.

Variations to Try

Feel free to mix things up with these fun variations:

  • Vegetable Teriyaki Noodles: Omit chicken and add your favorite vegetables like carrots, bell peppers, and zucchini.
  • Spicy Teriyaki Noodles: Add a splash of sriracha or red pepper flakes for a spicy kick.
  • Teriyaki Chicken Fried Rice: Substitute rice for noodles for a classic fried rice spin!
  • Teriyaki Chicken Bowls: Serve the chicken and noodles over steamed rice for a hearty bowl.

Storage and Make-Ahead Instructions

This dish is perfect for meal prep! Here’s how to store and prepare ahead:

  • Refrigeration: Store leftovers in an airtight container in the fridge for up to 3 days.
  • Freezing: You can freeze the chicken (uncooked) in the marinade for up to 3 months. Thaw overnight in the fridge before cooking.
  • Reheating: Gently reheat in a skillet with a splash of water or sauce to keep the noodles from drying out.

FAQs About Chicken Teriyaki Noodles

  • Can I use different types of noodles? Yes! Udon, ramen, and soba all work great in this recipe.
  • Is this recipe gluten-free? Yes, if you substitute soy sauce with tamari and use gluten-free noodles.
  • How can I make this vegetarian? You can substitute the chicken with tofu or tempeh and follow the same instructions.
  • What can I serve with Chicken Teriyaki Noodles? This dish pairs well with steamed vegetables, cucumber salad, or egg rolls.
  • How long can I store leftovers? Store leftovers in the fridge for up to 3 days.
  • Can I double the recipe? Absolutely! Just ensure you have a large enough skillet to accommodate the chicken and noodles.
  • What can I do if the sauce is too salty? If the sauce is too salty, you can add a splash of water or a little sugar to balance it out.
  • Can I make the sauce in advance? Yes! You can prepare the teriyaki sauce ahead of time and store it in the fridge for up to a week.

Nutrition Tips and Dietary Adaptations

This recipe is not only delicious but can also be tailored to fit various dietary needs:

  • Low-Carb: Swap out noodles for spiralized zucchini or cauliflower rice.
  • High-Protein: Add extra chicken or include edamame for an additional protein boost.
  • Vegan: Use tofu instead of chicken, and substitute honey with maple syrup.

Equipment Recommendations

To make this recipe seamlessly, consider having these kitchen tools handy:

  • Sharp Knife: For slicing chicken and vegetables efficiently.
  • Cutting Board: A sturdy board to work on will make prep easy.
  • Large Skillet or Wok: Ideal for stir-frying and ensuring even cooking.
  • Mixing Bowl: For marinating chicken and mixing your sauce.
  • Whisk: For blending ingredients smoothly.

Serving Suggestions

Enjoy your Chicken Teriyaki Noodles as a standalone dish, or pair it with:

  • Steamed Broccoli: A great side for a nutritious boost.
  • Cucumber Salad: Offers a refreshing crunch to balance the meal.
  • Egg Rolls: A deliciously crispy companion.

Now it’s time to roll up your sleeves and give this Chicken Teriyaki Noodles recipe a try! With a few simple steps, you’ll create a meal that not only satisfies your taste buds but also brings excitement back to your kitchen. Remember, cooking is about exploration and creativity—so don’t be afraid to make this dish your own!

Chicken Teriyaki Noodles

Prep Time 10 minutes
Cook Time 15 minutes
Total Time 25 minutes
Servings 4 servings
Calories 550
A quick and flavorful dish combining tender chicken, savory teriyaki sauce, and hearty noodles, perfect for a satisfying meal.

Ingredients

Protein

  • 400 g chicken breasts (about 400-500 g total, thinly sliced against the grain)
  • 200 g noodles (udon, ramen, soba, or spaghetti)

Sauces & Condiments

  • 0.25 cup soy sauce
  • 0.25 cup mirin
  • 2 tablespoons granulated sugar or honey
  • 1 tablespoon sesame oil
  • 2 cloves garlic, minced
  • 1 teaspoon fresh ginger, minced
  • 1 tablespoon cornstarch (optional for thickening)

Garnish

  • 2 green onions green onions, thinly sliced

Sesame seeds

Instructions 

  • Whisk soy sauce, mirin, sugar or honey, sesame oil, garlic, and ginger in a bowl until the sugar dissolves. Toss chicken slices in the marinade and refrigerate for 30 minutes.
  • Cook noodles in salted boiling water until just tender, then drain and toss with a splash of oil.
  • Heat oil in a skillet over medium-high heat. Cook chicken until browned and cooked through, about 3-4 minutes per side. Optional: pour reserved marinade into skillet and simmer, thickening with cornstarch slurry if desired.
  • Add cooked noodles to the skillet, toss to coat, and heat through. Divide into bowls and garnish with green onions and sesame seeds. Serve immediately.

Notes

For extra flavor, toast sesame seeds before garnishing.
Calories: 550kcal
Cost: $15
Course: Main Course
Cuisine: Asian
Keyword: Chicken, Noodles, Teriyaki

Welcome to a delightful culinary journey where we turn simple ingredients into an extraordinary meal! If you’re looking for a quick yet flavorful dish that impresses, you’ve landed in the right place. These zesty grilled shrimp caesar wraps are not only easy to make but also bursting with flavor, making them perfect for lunch or dinner. With just a handful of ingredients and straightforward steps, you’ll be ready to tantalize your taste buds and impress those you share it with!

Why You’ll Love This Recipe

These wraps are more than just a meal; they’re a celebration of flavor and convenience. Here’s what makes them special:

  • Quick Preparation: With only 15 minutes of prep, you can whip these wraps up even on the busiest days.
  • Flavor Explosion: The combination of grilled shrimp, zesty seasoning, and creamy caesar dressing creates a mouthwatering experience.
  • Healthy and Nutritious: Packed with protein, fresh veggies, and healthy fats, these wraps are a guilt-free choice.
  • Customizable: Swap ingredients to suit your tastes or dietary needs, making this recipe versatile.
  • Perfect for Meal Prep: These wraps store well, providing a delicious meal option for days to come.

Ingredient Breakdown

Let’s dive into the ingredients you’ll need for these grilled shrimp caesar wraps and some tasty substitutions to consider:

  • Shrimp: 1 lb, peeled and deveined. Substitute with grilled chicken or tofu for a different protein.
  • Olive Oil: 2 tablespoons. Avocado oil works great as a substitute.
  • Garlic Powder: 1 teaspoon. Fresh minced garlic can be used for a stronger flavor.
  • Paprika: 1 teaspoon. Smoked paprika adds a nice depth if you prefer a smoky flavor.
  • Salt and Pepper: To taste. Always adjust based on your preference.
  • Tortillas: 4 large. Whole wheat or gluten-free tortillas can be used for a healthier option.
  • Romaine Lettuce: 2 cups, chopped. Feel free to use spinach or mixed greens for variety.
  • Caesar Dressing: 1/2 cup. A homemade version can take it to the next level.
  • Parmesan Cheese: 1/4 cup, grated. Nutritional yeast can be a great vegan alternative.

How to Make Zesty Grilled Shrimp Caesar Wraps

Ready to cook? Follow these simple steps to create your delicious wraps:

  1. Preheat the Grill: Set your grill to medium-high heat, ensuring it’s hot enough for the shrimp.
  2. Prepare the Shrimp: In a bowl, toss the shrimp with olive oil, garlic powder, paprika, salt, and pepper until well-coated.
  3. Grill the Shrimp: Cook the shrimp for 2-3 minutes on each side until they’re pink and cooked through.
  4. Warm the Tortillas: Place tortillas on the grill for about 1 minute, just until they’re warm and pliable.
  5. Assemble the Wraps: Layer chopped romaine, grilled shrimp, Caesar dressing, and grated Parmesan on each tortilla.
  6. Wrap and Serve: Tightly wrap each tortilla, slice in half, and you’re ready to enjoy!

Expert Tips for Perfect Zesty Grilled Shrimp Caesar Wraps

Side view of a delicious shrimp caesar wrap, featuring grilled shrimp and fresh ingredients.

Here are some pro tips to ensure your wraps turn out perfectly every time:

  • Marinate for Flavor: Let the shrimp marinate for 30 minutes before grilling for an intense flavor boost.
  • Don’t Overcook: Shrimp cooks quickly; watch them closely to avoid a rubbery texture.
  • Experiment with Spices: Feel free to add your favorite spices or herbs to the shrimp for a unique twist.
  • Use Fresh Ingredients: Fresh romaine and quality Caesar dressing make a significant difference in flavor.
  • Layer Smart: Start with lettuce to create a barrier that prevents the tortilla from getting soggy.
  • Wrap Tightly: Ensure your wraps are tightly sealed to keep all the wonderful fillings inside.
  • Serve with a Side: Pair your wraps with a fresh salad or sweet potato fries for a complete meal.
  • Customize the Dressing: Try adding a touch of lemon juice or hot sauce to the dressing for an extra zing.

Common Mistakes and Troubleshooting

Even the best cooks have off days! Here are some common pitfalls and how to avoid them:

  • Soggy Wraps: If your wraps turn out soggy, try using less dressing or letting the shrimp cool slightly before assembling.
  • Over-seasoning: Start with less salt and pepper, and adjust according to taste as you go.
  • Burnt Shrimp: Ensure your grill is preheated but not too hot to avoid burning the shrimp.
  • Messy Assembly: Keep ingredients organized and layered correctly to minimize spills during wrapping.

Variations to Try

Get creative with these fun variations to keep your meals exciting:

  • Shrimp and Avocado Wrap: Add sliced avocado for creaminess and healthy fats.
  • Spicy Shrimp Wrap: Incorporate diced jalapeños or a spicy sauce for a kick.
  • Vegetarian Caesar Wrap: Substitute shrimp with grilled portobello mushrooms for a hearty vegetarian option.
  • Mediterranean Twist: Add olives, feta cheese, and a drizzle of tzatziki sauce for a Mediterranean flavor.

Storage and Make-Ahead Instructions

These wraps are perfect for meal prep! Here’s how to store them:

  • Refrigeration: Store assembled wraps in an airtight container in the fridge for up to 2 days.
  • Freezing: To freeze, wrap tightly in plastic wrap and place in a freezer-safe container for up to 3 months. Thaw overnight in the fridge before serving.
  • Make-Ahead: Prepare the shrimp and dressing ahead of time, and assemble when ready to eat for freshest results.

Frequently Asked Questions

Here are some commonly asked questions about these delicious wraps:

  • Can I use frozen shrimp? Yes, just make sure to thaw them completely before cooking.
  • What can I substitute for Caesar dressing? A homemade yogurt dressing is a great light alternative.
  • Can I make these wraps gluten-free? Absolutely! Use gluten-free tortillas and ensure your dressing is gluten-free.
  • How should I store leftovers? Wrap tightly and store in the fridge for up to 2 days.
  • Can I grill them instead of using a pan? Yes, grilling adds a wonderful smoky flavor!
  • What sides pair well with these wraps? A side salad or roasted vegetables complement these wraps perfectly.
  • How do I make my wraps less messy? Layer ingredients carefully and use less dressing to minimize spillage.
  • Can these wraps be served cold? Yes, they are delicious both warm and cold!

Nutritional Tips and Dietary Adaptations

Here are a few suggestions to maintain a balanced meal:

  • Boost Fiber: Add more fresh vegetables like bell peppers or cucumbers to increase fiber content.
  • Low-Calorie Option: Use less dressing or a lighter version to cut calories.
  • Protein Power: Combining shrimp with beans or lentils can enhance protein intake.
  • Healthy Fats: Incorporate avocado for healthy fats while keeping the dish nutritious.

Equipment Recommendations

Having the right tools makes all the difference. Here’s what you’ll need:

  • Grill or Grill Pan: For that perfect char and flavor.
  • Mixing Bowl: Essential for marinating the shrimp.
  • Spatula: Useful for flipping shrimp on the grill.
  • Tongs: Handy for assembling your wraps without making a mess.

Serving Suggestions

Serve your zesty grilled shrimp caesar wraps with these delightful pairings:

  • Chips and Salsa: A crunchy side that complements the freshness of the wraps.
  • Fruit Salad: A refreshing contrast to the savory flavors.
  • Coleslaw: Adds a crunchy texture and tangy flavor that balances the creamy wraps.

In conclusion, these zesty grilled shrimp caesar wraps are an incredible way to elevate your lunchtime routine. With easy-to-follow steps, expert tips, and endless variations, you’ll be well on your way to becoming a wrap connoisseur. Remember, cooking is about having fun and expressing creativity, so don’t hesitate to make this recipe your own. Happy cooking!

Zesty Grilled Shrimp Caesar Wraps that Will Ignite Your Tastebuds

Prep Time 10 minutes
Cook Time 10 minutes
Total Time 20 minutes
Servings 4 servings
Calories 350
Enjoy these flavorful grilled shrimp Caesar wraps, perfect for a quick and satisfying meal with a zesty kick.

Ingredients

Protein

  • 1 lb shrimp, peeled and deveined

Dressing

  • 2 tablespoons olive oil
  • 1 teaspoon garlic powder
  • 1 teaspoon paprika
  • Salt and pepper to taste Salt and pepper

Wraps and Fillings

  • 4 large tortillas
  • 2 cups romaine lettuce, chopped
  • 1/2 cup Caesar dressing
  • 1/4 cup grated Parmesan cheese

Instructions 

  • Preheat grill to medium-high heat.
  • Toss shrimp with olive oil, garlic powder, paprika, salt, and pepper.
  • Grill shrimp 2-3 minutes per side until cooked.
  • Warm tortillas on the grill for 1 minute.
  • Layer lettuce, shrimp, Caesar dressing, and Parmesan on each tortilla, then wrap and slice.

Notes

For extra flavor, add a squeeze of lemon before serving.
Calories: 350kcal
Cost: $15
Course: Main Course
Cuisine: American
Keyword: shrimp

Are you ready to elevate your baking game and bring joy to your kitchen? This Lemon Blueberry Yogurt Loaf is not just a recipe; it’s an experience that combines the bright flavors of lemon with the sweet burst of blueberries. Perfect for breakfast, brunch, or a delightful afternoon snack, this loaf is moist, flavorful, and incredibly easy to make. Let’s dive into how you can create this irresistible treat that’s sure to impress family and friends!

Why You’ll Love This Recipe

  • Quick to Prepare: With just a few simple steps, you can whip up this delicious loaf in no time, making it perfect for busy mornings.
  • Versatile and Adaptable: Whether you’re using fresh or frozen blueberries, this recipe can be easily adapted to fit your pantry staples.
  • Healthier Option: Incorporating Greek yogurt not only adds moisture but also boosts the protein content, making this a guilt-free indulgence.
  • Beautifully Moist: The combination of yogurt and vegetable oil ensures your loaf stays moist and tender, slice after slice.
  • Perfect for Any Occasion: From breakfast to dessert, this loaf fits perfectly into any meal, and it’s great for sharing!

Ingredient Breakdown

To create this delicious Lemon Blueberry Yogurt Loaf, you’ll need the following ingredients:

  • 1 ½ cups all-purpose flour: The base of your loaf, giving it structure. You can substitute with a gluten-free flour blend if needed.
  • 1 teaspoon baking powder: Helps the loaf rise to a perfect fluffy texture.
  • ½ teaspoon baking soda: Adds extra lift to your loaf.
  • ¼ teaspoon salt: Enhances the flavor of the bread.
  • 1 cup plain Greek yogurt: Provides moisture and a delicious tang; feel free to use dairy-free yogurt for a vegan option.
  • ½ cup granulated sugar: Sweetens the loaf perfectly; you can use coconut sugar for a lower glycemic alternative.
  • 2 large eggs: Binds the ingredients together and adds richness.
  • 1 tablespoon lemon zest: Infuses the loaf with bright lemon flavor.
  • 2 tablespoons fresh lemon juice: Adds acidity and enhances the lemony taste.
  • ½ cup vegetable oil: Keeps the loaf moist; substitute with melted coconut oil for a different flavor.
  • 1 cup fresh blueberries: Bursting with flavor; frozen blueberries work too, just do not thaw them beforehand.
  • Optional powdered sugar for dusting: For a beautiful presentation.

Step-by-Step Instructions

Making your Lemon Blueberry Yogurt Loaf is straightforward. Follow these steps for a perfect loaf every time:

  1. Preheat your oven: Set your oven to 350°F (175°C). Grease and flour a 9×5-inch loaf pan to ensure easy release.
  2. Combine Dry Ingredients: In a large bowl, whisk together the flour, baking powder, baking soda, and salt until well combined.
  3. Mix Wet Ingredients: In another bowl, mix the yogurt, sugar, eggs, lemon zest, lemon juice, and vegetable oil until smooth and creamy.
  4. Combine Mixtures: Gradually add the wet ingredients to the dry mixture, stirring gently until no dry streaks remain.
  5. Fold in Blueberries: Carefully fold in the blueberries, being cautious not to break them to keep the loaf beautiful.
  6. Pour Batter: Transfer the batter to your prepared loaf pan and smooth the top with a spatula.
  7. Bake: Place in the preheated oven and bake for 50-55 minutes, or until a toothpick inserted into the center comes out clean.
  8. Cool: Remove the loaf from the oven and allow it to cool in the pan for 10-15 minutes. Then, transfer it to a wire rack to cool completely.
  9. Optional Dusting: Once cooled, dust the top with powdered sugar for a lovely finish.

Pro Tips for Success

Close-up view of a lemon blueberry loaf, highlighting its golden crust and juicy blueberries, with a blurred background.
  • Room Temperature Ingredients: Ensure your eggs and yogurt are at room temperature for better mixing and a lighter loaf.
  • Don’t Overmix: Mix until just combined to avoid a dense loaf.
  • Test for Doneness: Use a toothpick to check for doneness; it should come out clean or with a few moist crumbs.
  • Storing Leftovers: Keep your loaf wrapped in plastic wrap at room temperature for up to 3 days, or refrigerate for a week.
  • Freezing for Later: Slice the loaf and wrap individual pieces in plastic wrap, then store in an airtight container in the freezer for up to 3 months.
  • Customize Your Flavors: Feel free to add nuts or chocolate chips for a different twist!
  • Use Fresh Ingredients: Fresh blueberries and lemons provide the best flavor.
  • Mind the Oven Temperature: Ensure your oven is properly calibrated for consistent baking results.

Common Mistakes and Troubleshooting

Even the best bakers can run into issues. Here are some common mistakes and how to avoid them:

  • Loaf Not Rising: Ensure your baking powder and baking soda are fresh. Old leavening agents can cause your loaf to not rise properly.
  • Overbaking: Keep an eye on your loaf towards the end of the baking time to prevent it from drying out.
  • Blueberries Sinking: Toss the blueberries in a little flour before folding them into the batter to help them stay suspended.
  • Dense Texture: This can happen if the batter is over-mixed; mix until just combined.

Flavor Variations

Feeling adventurous? Here are some delicious variations to try:

  • Lemon Poppy Seed Loaf: Add 2 tablespoons of poppy seeds to the batter for a delightful crunch.
  • Blueberry Lemon Bundt Cake: Use a bundt pan for a show-stopping dessert, and drizzle with a lemon glaze.
  • Berry Medley Loaf: Substitute blueberries with a mix of raspberries and blackberries for a different berry experience.
  • Vegan Option: Swap eggs for flax eggs and use a dairy-free yogurt to make this loaf vegan-friendly.

Storage and Make-Ahead Instructions

Want to make your baking life easier? Here’s how to prepare in advance:

  • Make Ahead: You can prepare the batter a day ahead and store it in the fridge. Just be sure to give it a quick stir before baking.
  • Storage: Wrap the cooled loaf tightly in plastic wrap and store it at room temperature for 3 days or in the refrigerator for up to a week.
  • Freezing: Slice the loaf and freeze individual pieces in an airtight container for up to 3 months—perfect for a quick treat later!

Frequently Asked Questions

Here are some common questions and answers to help you with your Lemon Blueberry Yogurt Loaf:

  • Can I use frozen blueberries? Yes, frozen blueberries work great! Just don’t thaw them before mixing.
  • What can I substitute for Greek yogurt? You can use sour cream or a dairy-free yogurt as alternatives.
  • How do I know when my loaf is done baking? A toothpick inserted into the center should come out clean or with a few moist crumbs.
  • Can I make this loaf gluten-free? Absolutely! Use a gluten-free flour blend as a substitute.
  • What should I serve with my loaf? It pairs beautifully with a cup of tea or coffee, and it makes for a great breakfast with some butter.
  • How can I add more lemon flavor? Increase the lemon zest or add a lemon glaze on top after baking.
  • Can I double the recipe? Yes, you can easily double the ingredients to make two loaves!
  • What’s the best way to store leftovers? Wrap in plastic and keep at room temperature or refrigerate for longer freshness.

Nutrition Tips and Dietary Adaptations

For a healthier twist, consider these adaptations:

  • Reduce Sugar: Cut back on the sugar by 1/4 cup for a less sweet loaf, especially if you’re using sweet blueberries.
  • Use Whole Wheat Flour: Substitute half of the all-purpose flour with whole wheat flour for added fiber.
  • Lower Fat Option: Replace half of the vegetable oil with unsweetened applesauce for a lower-fat version.

Equipment Recommendations

To make your baking experience seamless, consider these essential tools:

  • 9×5 Inch Loaf Pan: A reliable loaf pan ensures even baking and easy release.
  • Mixing Bowls: A set of various-sized mixing bowls will help you separate dry and wet ingredients efficiently.
  • Whisk & Spatula: A whisk is essential for combining your ingredients, while a spatula helps with folding and scraping.

Serving Suggestions

Looking to elevate your serving game? Here are some ideas:

  • Garnish with Fresh Berries: Top each slice with a few fresh blueberries for a beautiful presentation.
  • Pair with Cream Cheese: Spread a little cream cheese on a warm slice for a deliciously creamy addition.
  • Make it a Brunch Star: Serve alongside a fruit salad and mimosas for a fabulous brunch spread.

Conclusion

Now that you have all the tips and tricks, it’s time to get baking! This Lemon Blueberry Yogurt Loaf is not just a recipe; it’s a delightful journey into flavor and creativity in your kitchen. Remember, cooking is about enjoying the process and sharing your creations with loved ones. So, grab those ingredients, embrace your inner chef, and let this loaf brighten your day!

Lemon Blueberry Yogurt Loaf An Incredible Ultimate Recipe

Prep Time 15 minutes
Cook Time 55 minutes
Total Time 1 hour 10 minutes
Servings 8 slices
Calories 250
This Lemon Blueberry Yogurt Loaf is a moist, flavorful treat perfect for breakfast or dessert, combining fresh citrus and berries in every bite.

Ingredients

Dry Ingredients

  • 1.5 cups all-purpose flour
  • 1 teaspoon baking powder
  • 0.5 teaspoon baking soda
  • 0.25 teaspoon salt

Wet Ingredients

  • 1 cup plain yogurt
  • 0.5 cup granulated sugar
  • 2 large eggs
  • 1 tablespoon lemon zest
  • 2 tablespoons fresh lemon juice
  • 0.5 cup vegetable oil

Blueberries

  • 1 cup fresh blueberries or frozen (Use frozen if out of season)

Optional Topping

  • to taste powdered sugar for dusting (Optional)

Instructions 

  • Preheat oven to 350°F (175°C). Grease and flour a 9x5-inch loaf pan.
  • Whisk together dry ingredients. Mix yogurt, sugar, eggs, lemon zest, lemon juice, and oil until smooth. Combine wet and dry, then fold in blueberries.
  • Pour batter into prepared pan, smooth top, and bake for 50-55 minutes until a toothpick comes out clean.
  • Cool in pan for 10-15 minutes, then transfer to a wire rack to cool completely. Dust with powdered sugar if desired.

Notes

For best flavor, use fresh blueberries when in season.
Calories: 250kcal
Cost: $15
Course: Breakfast, Dessert
Cuisine: American
Keyword: Blueberry, lemon, Yogurt

Discover the Magic of Pesto Chicken Flatbread

If you’re looking for an effortless yet delicious meal, this **20-Minute Pesto Chicken Flatbread** is a game-changer. Perfect for busy weeknights or impromptu gatherings, this recipe combines the savory goodness of pesto and chicken with the creamy richness of mozzarella. In just 20 minutes, you can whip up a flavorful feast that’s sure to impress!

Why You’ll Love This Recipe

This Pesto Chicken Flatbread is not only quick and easy to make, but it also offers a multitude of benefits that make it a go-to recipe in any kitchen:

  • Quick Preparation: This dish comes together in just 20 minutes, making it ideal for busy evenings when you need dinner fast.
  • Flavor Explosion: The combination of basil pesto, juicy chicken, and melted mozzarella creates a flavor profile that is simply irresistible.
  • Customizable: You can easily swap out ingredients for your favorites or whatever you have on hand, making it versatile for any taste.
  • Healthy & Wholesome: Packed with protein from the chicken and nutrients from fresh toppings, this meal is both satisfying and nutritious.
  • Perfect for Any Occasion: Whether it’s a casual family dinner or a festive appetizer for a gathering, this flatbread fits the bill beautifully.

Ingredient Breakdown

Let’s dive into the ingredients that make this dish shine. Below is a detailed breakdown, along with some handy substitutions you can use if needed:

  • Flatbreads: 2 naan or flatbread rounds. You can use whole wheat or gluten-free options if preferred.
  • Basil Pesto: ½ cup. Store-bought or homemade works great; just make sure it’s fresh for the best flavor.
  • Cooked Chicken: 1 cup, shredded or chopped. Using rotisserie chicken can save time!
  • Mozzarella Cheese: 1 cup, shredded. Try fresh mozzarella for a creamier texture.
  • Cherry Tomatoes: ¼ cup, halved. They add a sweet burst of flavor and color.
  • Red Onion: 2 tbsp, thinly sliced. This adds a nice crunch and zest.
  • Olive Oil: For brushing. Use high-quality extra virgin for enhanced flavor.
  • Salt & Black Pepper: To taste.
  • Fresh Basil Leaves: For garnish. These add a fresh finish.
  • Optional Red Pepper Flakes or Balsamic Glaze: For those who like a little kick or extra sweetness.

Pro Tips for Success

Juicy Pesto Chicken Flatbread garnished with fresh basil and red onion on a wooden surface.

To ensure your Pesto Chicken Flatbread turns out perfectly every time, consider these expert insights:

  • Preheat the Oven: Always preheat your oven to 400°F (200°C) to achieve that crispy base.
  • Brush the Flatbreads: A light brush of olive oil prevents the bread from getting soggy and adds flavor.
  • Layer Thoughtfully: Spread the pesto evenly and layer toppings to ensure every bite is packed with flavor.
  • Watch the Baking Time: Keep an eye on the flatbread while it’s in the oven; bake for 10-12 minutes until the cheese is bubbly and edges are golden.
  • Fresh Ingredients Matter: Use fresh ingredients for the best flavor—especially the basil and chicken.
  • Experiment with Toppings: Feel free to add your favorite veggies or even a sprinkle of feta cheese for a twist.
  • Serve Immediately: This flatbread is best enjoyed fresh out of the oven while the cheese is melty.
  • Make Ahead: Prep the flatbreads in advance and store them in the refrigerator to save time at dinner.

Common Mistakes and Troubleshooting

Even the best cooks can run into issues. Here are some common mistakes and how to avoid them:

  • Overloading Toppings: Less is often more. Too many toppings can weigh down the flatbread, making it soggy.
  • Using Cold Ingredients: Cold chicken or cheese can lead to uneven melting. Ensure they are at room temperature.
  • Not Preheating: Skipping preheating can result in a chewy texture rather than a crisp base.
  • Ignoring Cooking Time: Ovens can vary; always check your flatbread a few minutes before the suggested time to prevent overcooking.

Delicious Variations to Try

Feel free to get creative with this recipe! Here are some variations to spice things up:

  • BBQ Chicken Flatbread: Swap pesto for BBQ sauce and add grilled chicken for a smoky twist.
  • Vegetarian Delight: Omit the chicken and load up on vegetables like spinach, bell peppers, and zucchini.
  • Spicy Pesto Flatbread: Use a spicy basil pesto or add jalapeños for a kick.
  • Hawaiian Style: Add pineapple chunks and swap mozzarella for provolone for a sweet and savory combo.

Storage and Make Ahead Instructions

If you want to prepare this flatbread ahead of time, here’s how to do it:

  • Make Ahead: Assemble the flatbreads up to a day in advance, cover them tightly, and refrigerate. Just bake when ready to eat.
  • Storage: Leftover flatbread can be stored in an airtight container in the fridge for up to 3 days.
  • Reheating: To reheat, place the flatbread in the oven at 350°F (175°C) for 5-10 minutes until warmed through.

Frequently Asked Questions

Here are some common questions about this Pesto Chicken Flatbread recipe:

  • Can I use store-bought pesto? Yes, store-bought pesto works great and saves time.
  • What type of chicken should I use? Rotisserie chicken is perfect for a quick option, but you can also grill or bake your chicken breast.
  • Can I freeze the flatbread? Yes, you can freeze the assembled flatbread before baking. Just make sure to wrap it well.
  • Is this recipe gluten-free? Use gluten-free flatbreads to make this recipe suitable for a gluten-free diet.
  • What can I substitute for mozzarella? You can use any cheese that melts well, like gouda or cheddar.
  • How do I make this dairy-free? Use dairy-free cheese alternatives and ensure the pesto is also dairy-free.
  • Can I add more vegetables? Absolutely! Feel free to add your favorite vegetables like bell peppers, spinach, or artichokes.
  • Can I make it spicy? Yes, add jalapeños or red pepper flakes for extra heat!

Nutritional Tips and Dietary Adaptations

This Pesto Chicken Flatbread is not only delicious but can also fit various dietary needs:

  • High Protein: Packed with chicken and cheese, it’s great for muscle repair and growth.
  • Low Carb: Use a low-carb flatbread to reduce the carbohydrate count.
  • Vegetarian Option: Omit the chicken and load up on veggies for a hearty vegetarian meal.
  • Balanced Meal: Pair with a side salad for a complete meal packed with nutrients.

Essential Equipment for Success

Having the right tools can make your cooking experience smoother:

  • Baking Sheet: Essential for crisping the flatbreads in the oven.
  • Parchment Paper: Prevents sticking and makes cleanup a breeze.
  • Sharp Knife: For slicing the cooked flatbread into perfect pieces.
  • Spatula: To help transfer the flatbreads from the baking sheet to your serving plate.

Serving Suggestions

Serve your Pesto Chicken Flatbread with a variety of sides to enhance the meal:

  • Fresh Salad: A light garden salad or a caprese salad pairs perfectly.
  • Dip Options: Serve with marinara sauce or a tangy yogurt dip for extra flavor.
  • Wine Pairing: A crisp white wine, like Sauvignon Blanc, complements the flavors beautifully.
  • Appetizer Style: Cut into smaller squares for a delicious appetizer at your next gathering.

In conclusion, the Pesto Chicken Flatbread is a versatile, flavorful, and quick dish that anyone can master. With easy steps and lots of customization options, you’ll be able to impress your friends and family in no time. So grab your ingredients, and let’s get cooking! Enjoy your culinary adventure!

Pesto Chicken Flatbread with Mozzarella Easy 20-minute dinner or appetizer loaded with flavor. Try it and pin it for later!

Prep Time 5 minutes
Cook Time 15 minutes
Total Time 20 minutes
Servings 2 servings
Calories 450
This flavorful flatbread combines pesto, chicken, and mozzarella for a quick and satisfying meal or appetizer in just 20 minutes.

Ingredients

Base

  • 2 pieces naan or flatbread rounds
  • 0.5 cup basil pesto
  • 1 cup cooked chicken breast, shredded or chopped
  • 1 cup shredded mozzarella cheese
  • 0.25 cup cherry tomatoes, halved
  • 2 tbsp red onion, thinly sliced
  • Olive oil for brushing
  • Salt and black pepper, to taste
  • Fresh basil leaves, for garnish
  • Optional red pepper flakes or balsamic glaze

Instructions 

  • Preheat oven to 400°F (200°C) and line a baking sheet with parchment paper.
  • Place naan on the sheet, brush lightly with olive oil, and spread pesto evenly over each.
  • Top with chicken, mozzarella, tomatoes, and red onion. Season with salt and pepper.
  • Bake for 10-12 minutes until cheese is melted and edges are golden. Garnish with basil, red pepper flakes, or balsamic glaze if desired. Slice and serve warm.

Notes

For extra flavor, add a drizzle of balsamic glaze or a sprinkle of red pepper flakes before serving.
Calories: 450kcal
Cost: $15
Course: Appetizer, Main Course
Keyword: Chicken, flatbread, Pesto

Welcome to your new favorite baking adventure! If you’ve been searching for a foolproof muffin recipe that delivers on both flavor and simplicity, you’ve landed in the right place. These **double chocolate chip muffins** are rich, fluffy, and bursting with chocolatey goodness. Whether you’re an experienced baker or a novice in the kitchen, this recipe breaks down each step, making it easy for anyone to whip up a batch of delightful muffins that will impress family and friends alike.

Why You’ll Love This Recipe

  • Irresistible Chocolate Flavor: The combination of cocoa powder and chocolate chips creates a deep, rich chocolate experience that satisfies any sweet tooth.
  • Perfectly Moist and Tender: With ingredients like sour cream and vegetable oil, these muffins stay soft and moist, making them a delightful treat any time of day.
  • Quick and Easy to Prepare: This recipe uses a simple mixing method that allows you to enjoy freshly baked muffins in just 30 minutes!
  • Customizable to Your Taste: Feel free to play around with add-ins like nuts, fruits, or even different types of chocolate to make these muffins your own.
  • Perfect for Meal Prep: Bake a batch and freeze them for quick breakfast options throughout the week. Muffins can be stored for up to three months in the freezer!

Ingredients You’ll Need

Gather these ingredients for your **double chocolate chip muffins**:

  • All-Purpose Flour (1 and 3/4 cups): The base for your muffins, ensuring they rise beautifully.
  • Granulated Sugar (1 cup): Sweetness that balances the rich cocoa flavor.
  • Unsweetened Cocoa Powder (2/3 cup): Essential for that deep chocolate taste.
  • Baking Powder (2 teaspoons): Gives your muffins the lift they need.
  • Baking Soda (1/2 teaspoon): Helps with the rise and texture.
  • Salt (1/2 teaspoon): Enhances the flavors in the muffins.
  • Large Eggs (2): Adds moisture and richness.
  • Milk (3/4 cup): Contributes to the muffin’s moisture content.
  • Sour Cream or Greek Yogurt (3/4 cup): Keeps the muffins tender and adds a slight tang.
  • Vegetable Oil (1/2 cup): Ensures a moist crumb.
  • Vanilla Extract (2 teaspoons): Elevates the flavor.
  • Semisweet Chocolate Chips (2 cups, divided): For that extra chocolatey bite! Reserve some for sprinkling on top before baking.

How to Make Double Chocolate Chip Muffins

Let’s bring these muffins to life! Follow these simple steps to create your delicious treats:

  • Step 1: Preheat Your Oven: Set your oven to 375°F (190°C) and line a 12-cup muffin tin with paper liners.
  • Step 2: Mix Dry Ingredients: In a large bowl, whisk together flour, sugar, cocoa powder, baking powder, baking soda, and salt until well combined.
  • Step 3: Combine Wet Ingredients: In a separate bowl, whisk together eggs, milk, sour cream, vegetable oil, and vanilla extract until smooth.
  • Step 4: Combine Wet and Dry Mixtures: Pour the wet mixture into the dry ingredients. Stir gently until just combined; be careful not to overmix.
  • Step 5: Add Chocolate Chips: Fold in 1 and 1/2 cups of chocolate chips, setting aside the remaining 1/2 cup for topping.
  • Step 6: Fill Muffin Cups: Divide the batter evenly among the muffin cups, filling them almost to the top. Sprinkle a few chocolate chips on each muffin.
  • Step 7: Bake: Bake for about 15 minutes, or until a toothpick inserted into the center comes out mostly clean with a few crumbs.
  • Step 8: Cool and Enjoy: Let the muffins cool in the tin for a few minutes before transferring them to a wire rack to cool completely.

Pro Tips for Making Double Chocolate Chip Muffins

Side view of bakery-style double chocolate chip muffins with a rich chocolate glaze.

Here are some expert tips to ensure your muffins turn out perfect every time:

  • Don’t Overmix: Mixing the batter too much can result in dense muffins. Stir until just combined for fluffy results.
  • Room Temperature Ingredients: Using room temperature eggs and milk helps create a smoother batter and better texture.
  • Experiment with Cocoa: Try using different types of cocoa powder (like Dutch-process) for unique flavor profiles.
  • Adjust for Altitude: If you’re baking at high altitude, you may need to adjust the baking powder and sugar for optimal results.
  • Cool in the Tin: Allowing the muffins to cool slightly in the tin helps them set and prevents sticking.
  • Use a Cookie Scoop: For even muffin sizes, a cookie scoop can help you portion the batter perfectly.
  • Check for Doneness Early: Ovens vary, so check your muffins a minute or two before the suggested baking time.
  • Let Them Rest: For the best flavor, allow your muffins to rest for at least 10 minutes after baking before digging in!

Common Mistakes and Troubleshooting

Even the best bakers can run into issues. Here are common mistakes and how to avoid them:

  • Muffins Are Dry: This often happens from overbaking. Keep an eye on your muffins as they bake!
  • Uneven Baking: Ensure your oven is preheated and use the center rack for even heat distribution.
  • Too Dense: Overmixing can lead to dense muffins. Remember, gentle mixing is key!
  • Chocolate Chips Sink: Toss chocolate chips in a bit of flour before adding them to the batter to help keep them suspended.

Variations to Try

Feel free to customize your muffins with these fun variations:

  • Nutty Addition: Stir in 1/2 cup of chopped walnuts or pecans for a crunchy texture.
  • Fruity Twist: Add 1 cup of raspberries or chopped strawberries for a fruity surprise.
  • Mint Chocolate Chip: Fold in 1/2 teaspoon of peppermint extract and use mint chocolate chips for a seasonal treat.
  • Spicy Chocolate: Mix in a pinch of cinnamon or cayenne pepper for a subtle spicy kick!

Storage and Make-Ahead Instructions

Here’s how to keep your muffins fresh and delicious:

  • Room Temperature: Store cooled muffins in an airtight container for up to 3 days.
  • Refrigerator: For longer storage, keep them in the fridge for up to a week.
  • Freezer: Muffins can be frozen for up to 3 months. Wrap each muffin tightly in plastic wrap and place them in a freezer bag.
  • Make-Ahead Batter: You can prepare the batter the night before and store it in the refrigerator. Just give it a quick stir before baking!

Frequently Asked Questions

Here are some common questions about making double chocolate chip muffins:

  • Can I use whole wheat flour? Yes, but the muffins may be denser. Consider a mix of all-purpose and whole wheat for better results.
  • What can I substitute for eggs? You can use flax eggs or applesauce (1/4 cup per egg) as a substitute for moisture and binding.
  • Can I make these gluten-free? Absolutely! Use a 1:1 gluten-free baking flour mix for a gluten-free option.
  • How do I know when they’re done? When a toothpick inserted in the center comes out clean or with a few crumbs, they’re ready!
  • Can I double this recipe? Yes, simply double all the ingredients and bake in batches if necessary.
  • How can I make them less sweet? Reduce the sugar slightly, but keep in mind that sugar also affects the texture.
  • Can I add more chocolate chips? Feel free! Just be mindful that too many can make the batter too runny.
  • How should I serve these muffins? They’re delightful warm from the oven, but also great with a smear of butter or cream cheese!

Nutritional Tips and Dietary Adaptations

For those watching their diet, here are some adaptations you can make:

  • Lower Sugar: Substitute half the sugar with a sugar alternative like stevia or monk fruit sweetener.
  • Increase Fiber: Add ground flaxseed or chia seeds to boost the fiber content.
  • Dairy-Free Option: Use almond milk or coconut milk instead of regular milk and substitute yogurt with dairy-free alternatives.

Equipment Recommendations

For best results, here’s what I recommend having on hand:

  • Muffin Tin: Use a standard 12-cup muffin tin for perfect muffin sizes.
  • Mixing Bowls: A set of mixing bowls in various sizes makes prep easier.
  • Whisk: A sturdy whisk helps combine your ingredients smoothly.
  • Rubber Spatula: Great for folding in chocolate chips and scraping down the bowl.
  • Cookie Scoop: For evenly portioned muffins, a cookie scoop is a baker’s best friend!

Serving Suggestions

These muffins are perfect for any occasion! Here are some ideas for serving:

  • Breakfast Delight: Enjoy them warm with a cup of coffee or tea for a cozy breakfast.
  • Brunch Treat: Serve as part of a brunch spread alongside fresh fruits and yogurt.
  • Snack Time: They make a great afternoon snack, especially with a glass of milk.
  • Gift Idea: Wrap them in a cute box for a delightful homemade gift!

In conclusion, baking these **decadent double chocolate chip muffins** is not only a fun activity but also a rewarding one. With their rich flavor and tender texture, they are bound to become a favorite in your household. So gather those ingredients, preheat your oven, and let’s make some delicious memories in the kitchen!

Easy Double Chocolate Chip Muffins Bakery-Style!

Prep Time 10 minutes
Cook Time 15 minutes
Total Time 25 minutes
Servings 12 muffins
Calories 250
Delight in these moist, bakery-style double chocolate muffins, perfect for a quick breakfast or snack.

Ingredients

Dry Ingredients

  • 1.75 cups all-purpose flour
  • 1 cup granulated sugar
  • 0.75 cup unsweetened cocoa powder
  • 2 teaspoons baking powder
  • 0.5 teaspoon baking soda
  • 0.5 teaspoon salt

Wet Ingredients

  • 2 large eggs
  • 0.75 cup milk
  • 0.75 cup sour cream or Greek yogurt
  • 0.5 cup vegetable oil
  • 2 teaspoons vanilla extract

Chocolate Chips

  • 1.5 cups semisweet chocolate chips, divided

Instructions 

  • Preheat oven to 375°F (190°C). Line a 12-cup muffin tin with paper liners.
  • Mix dry ingredients: flour, sugar, cocoa powder, baking powder, baking soda, and salt.
  • Whisk eggs, milk, sour cream, oil, and vanilla; combine with dry ingredients just until blended.
  • Fold in 1.5 cups of chocolate chips; reserve remaining 0.5 cup for topping.
  • Divide batter into muffin cups, top with chocolate chips, and bake for 15 minutes.

Notes

Do not overbake to keep muffins moist and tender.
Calories: 250kcal
Cost: $12
Course: Breakfast, Snack
Cuisine: American
Keyword: chocolate, muffins