Author

Steven

Browsing

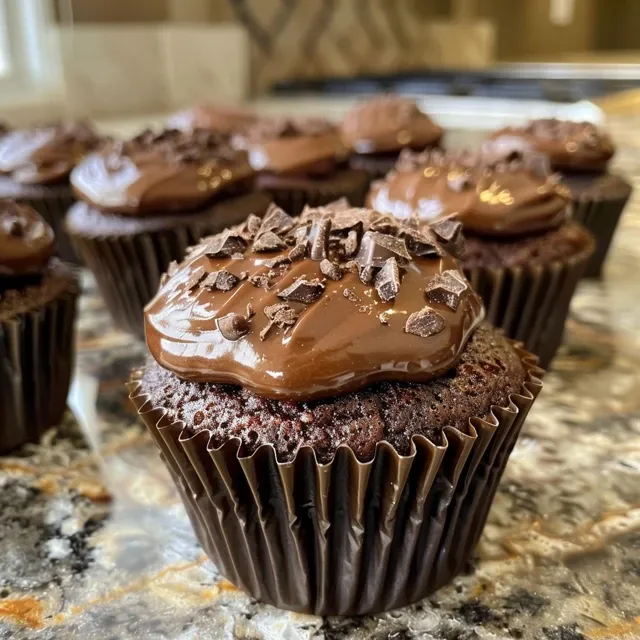
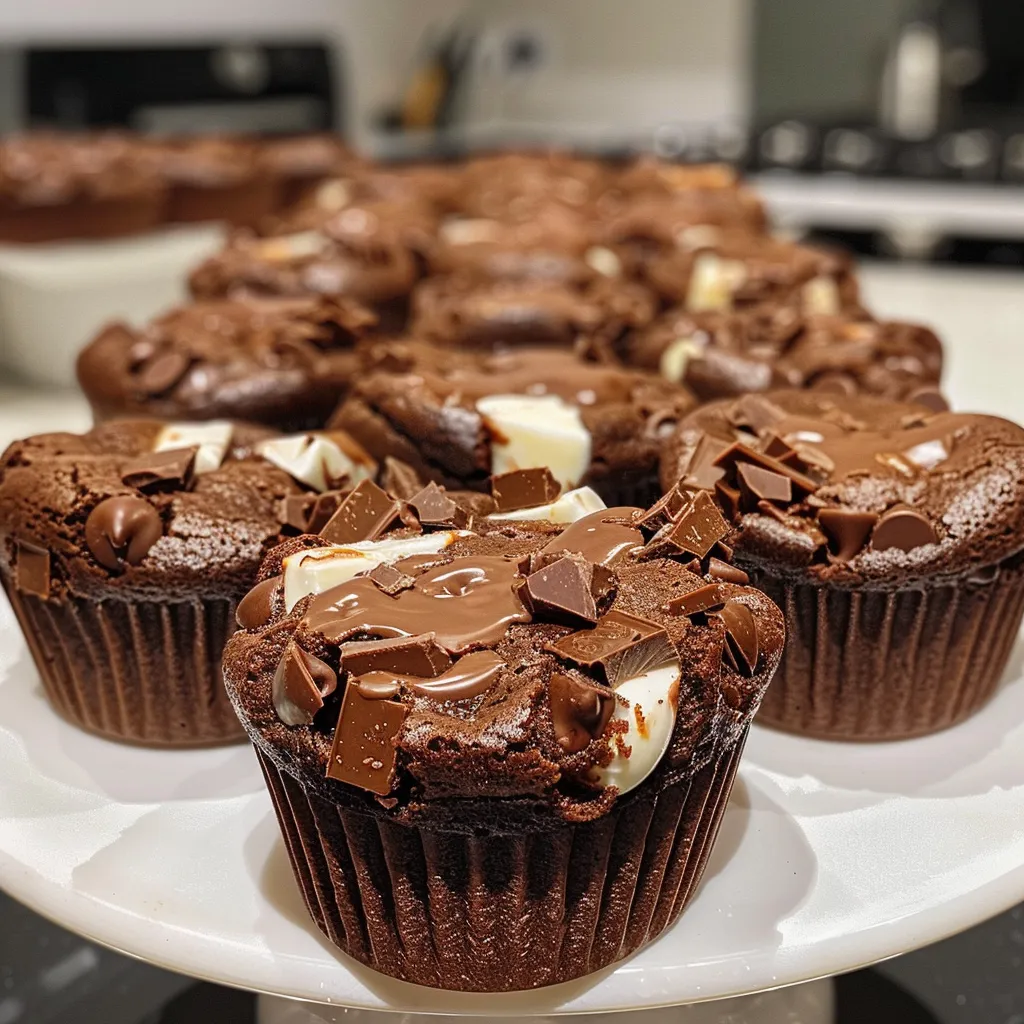
Indulge in Triple-Chocolate Brownie Cups: A Decadent Delight

If you’re a chocolate lover, you’re in for a treat! These Triple-Chocolate Brownie Cups are the perfect blend of rich flavors and delightful textures that will satisfy your sweet tooth. With three types of chocolate—bittersweet, milk, and white—these brownie cups are not only easy to make but also an impressive dessert for any occasion. Let’s dive into how you can whip these up in no time!

Why You’ll Love This Recipe

  • Quick and Easy: In about 30 minutes, you can have a batch of these delicious brownie cups baked and cooling on your counter.
  • Perfect for Sharing: Each cup is a single serving, making them ideal for parties, gatherings, or just a cozy movie night at home.
  • Rich Chocolate Flavor: The combination of bittersweet, milk, and white chocolate gives you a deep, satisfying chocolate experience in every bite.
  • Customizable: You can easily adapt these brownie cups with your favorite mix-ins or toppings, like nuts or caramel.
  • Great for Any Occasion: Whether it’s a holiday feast or a casual weeknight, these brownie cups are a hit!

Ingredients Breakdown

Here’s everything you need to create these delightful brownie cups:

  • 1 stick unsalted butter: Provides moisture and richness. You can substitute with coconut oil for a dairy-free version.
  • 6 ounces bittersweet chocolate: Coarsely chopped, this is essential for the deep chocolate flavor. Dark chocolate can also be used for a more intense taste.
  • 1.5 cups sugar: Sweetens the brownie cups; you can use brown sugar for a richer flavor.
  • 3 large eggs: Adds structure and moisture. For a vegan option, use flax eggs (1 tablespoon flaxseed meal + 2.5 tablespoons water per egg).
  • 0.25 cup unsweetened cocoa powder: Enhances the chocolate flavor. Make sure to use high-quality cocoa for the best results.
  • 0.5 teaspoon kosher salt: Balances the sweetness and enhances the chocolate flavor.
  • 0.5 cup plus 2 tablespoons unbleached all-purpose flour: Provides the necessary structure for the brownie cups.
  • 1 cup milk chocolate chips: Melts beautifully into the batter, adding sweetness and creaminess.
  • 1 cup white chocolate chips: Adds a delightful contrast in flavor and sweetness.

How to Make Triple-Chocolate Brownie Cups

A side view of a decadent brownie cup filled with chocolate chips, showing its rich texture.

Ready to bake? Follow these simple steps to create your brownie cups:

  1. Preheat your oven to 350°F (175°C).
  2. Line twelve 2.5-inch muffin cups with paper bake cups.
  3. In a heatproof bowl set over a pot of simmering water, melt the butter and bittersweet chocolate, stirring until smooth.
  4. Remove from heat and whisk in the sugar until fully combined.
  5. Add the eggs one at a time, whisking well after each addition.
  6. Stir in the cocoa powder and salt until incorporated.
  7. Fold in the flour until just combined.
  8. Gently stir in all the chocolate chips.
  9. Fill each muffin cup nearly full with batter.
  10. Bake for 20-25 minutes, or until the tops appear set and the edges are slightly puffed. The centers may dip upon cooling.
  11. Let cool in the pan for 15 minutes before transferring to a wire rack to cool completely.

Pro Tips for the Perfect Brownie Cups

  • Don’t Overbake: For fudgy brownie cups, keep an eye on them in the oven. They should look set but slightly soft in the center.
  • Use Quality Chocolate: Good-quality chocolate makes all the difference in flavor.
  • Let Them Cool: Allow the brownie cups to cool fully for the best texture.
  • Experiment with Mix-ins: Add nuts or flavored chips to customize your brownie cups.
  • Serve Them Warm: Enjoy them fresh out of the oven or warm them up in the microwave for a melty treat!
  • Use a Muffin Tin: A standard muffin tin works perfectly for portion control and easy serving.

Common Mistakes and Troubleshooting

Even the best of us can run into hiccups while baking. Here are some common issues and how to fix them:

  • Brownies are too dry: This usually happens from overbaking. Keep an eye on them in the last few minutes of baking.
  • Uneven baking: Ensure your muffin tin is placed in the center of the oven for even heat distribution.
  • Brownies stick to the liners: Make sure to use quality liners or spray them lightly with non-stick spray.
  • Too sweet: If you find them overly sweet, consider using bittersweet chocolate chips next time.

Variations to Try

Want to switch things up? Here are a few variations you can try:

  • Nutty Brownie Cups: Add 1/2 cup of chopped walnuts or pecans for a delightful crunch.
  • Mint Chocolate Brownie Cups: Mix in 1 teaspoon of peppermint extract for a refreshing twist.
  • Caramel Swirl Brownie Cups: Drizzle caramel sauce on top before baking for a gooey surprise.
  • Spicy Chocolate Brownie Cups: Add a pinch of cayenne pepper or chili powder for a kick!

Storage and Make-Ahead Instructions

These brownie cups can be made ahead of time and stored properly:

  • Room Temperature: Store in an airtight container for up to 3 days.
  • Refrigerator: They can last up to a week in the fridge. Just let them come to room temperature before serving.
  • Freezing: Freeze in an airtight container for up to 3 months. Thaw overnight in the fridge before serving.

Comprehensive FAQ

  • Can I use gluten-free flour? Yes! Substitute with a 1:1 gluten-free flour blend for a gluten-free option.
  • What can I use instead of eggs? Flax eggs work well. Mix 1 tablespoon of flaxseed meal with 2.5 tablespoons of water per egg.
  • How do I know when they’re done? The tops should look set, and a toothpick inserted should come out with a few moist crumbs.
  • Can I double the recipe? Absolutely! Just ensure you have enough muffin tins and adjust baking time as needed.
  • Why did my brownies sink in the middle? This can happen if they’re underbaked or if the oven temperature is too low.
  • Can I substitute the chocolate types? Yes, feel free to use any chocolate you prefer!
  • What’s the best way to serve them? They’re delicious warm with a scoop of ice cream or drizzled with chocolate sauce!
  • Can I add fruit? Chopped strawberries or raspberries can be added for a fruity twist.

Nutritional Tips and Dietary Adaptations

If you’re conscious about nutrition, here are some tips:

  • Use Dark Chocolate: Opt for dark chocolate for a healthier option with antioxidants.
  • Reduce Sugar: Try cutting back on sugar by using a sugar substitute or reducing the amount by a quarter.
  • Swap Butter for Applesauce: For a lower-fat version, use unsweetened applesauce in place of butter.

Equipment Recommendations

To make these brownie cups, here’s what you’ll need:

  • Muffin Tin: A standard muffin tin is perfect for portion control.
  • Mixing Bowls: Have a set of mixing bowls for easy ingredient mixing.
  • Whisk: A sturdy whisk will help incorporate the ingredients smoothly.
  • Heatproof Bowl: For melting chocolate, a heatproof bowl is essential to avoid burns.

Serving Suggestions

These brownie cups are delightful on their own, but here are some serving ideas:

  • With Ice Cream: Serve warm with a scoop of vanilla or mint chocolate chip ice cream.
  • Drizzled with Sauce: Top with chocolate or caramel sauce for an extra indulgent treat.
  • Fruit Compote: Pair with a berry compote for a fresh contrast to the rich chocolate.

Conclusion

And there you have it! These Triple-Chocolate Brownie Cups are not just a treat—they’re an experience. With their rich chocolate flavor and delightful texture, they are sure to impress anyone you share them with. Remember, cooking is about enjoying the process and having fun, so don’t stress about perfection. Get in the kitchen, embrace your creativity, and most importantly, enjoy every bite! Happy baking!

Triple-Chocolate Brownie Cups

Prep Time 15 minutes
Cook Time 25 minutes
Total Time 40 minutes
Servings 12 pieces
Calories 250
Indulge in rich, fudgy brownie cups loaded with three types of chocolate for a decadent treat.

Ingredients

Dough

  • 1 stick unsalted butter (cut into large pieces)
  • 6 ounces bittersweet chocolate (coarsely chopped)
  • 1 cup unsweetened cocoa powder
  • 1.5 cups sugar
  • 3 large eggs
  • 0.25 cup unsweetened cocoa powder
  • 0.5 teaspoon kosher salt
  • 0.5 cup unbleached all-purpose flour
  • 2 tablespoons unbleached all-purpose flour
  • 6 ounces milk-chocolate chips
  • 6 ounces white-chocolate chips

Instructions 

  • Preheat oven to 350°F (175°C). Line muffin cups with paper liners.
  • In a heatproof bowl over simmering water, melt butter and bittersweet chocolate, stirring until smooth. Remove from heat and whisk in sugar.
  • Whisk in eggs one at a time, then add cocoa powder and salt. Fold in flour and stir until combined. Mix in all chocolate chips.
  • Fill muffin cups nearly full with batter. Bake for 20-25 minutes until set. Cool in pan for 15 minutes, then transfer to wire rack to cool completely.

Notes

Use high-quality chocolate for best flavor.
Calories: 250kcal
Cost: $12
Course: Dessert
Keyword: chocolate

Are you looking to transform your lunch routine into something vibrant and delicious? This veggie sandwich is not just a meal; it’s an experience. Packed with fresh ingredients, a zesty kick from chimichurri, and creamy avocado, this sandwich is bursting with flavor. Perfect for a quick lunch or a light dinner, you’ll find that this recipe makes cooking enjoyable without stress. Let’s dive into the details and elevate your sandwich game!

Why You’ll Love This Recipe

This veggie sandwich is not only tasty but also offers a range of benefits that make it a must-try:

  • Quick and Easy: With just a handful of ingredients and simple steps, you can whip up this sandwich in under 20 minutes.
  • Flavor Explosion: The combination of tangy chimichurri and creamy avocado gives this sandwich a unique flavor profile that excites your taste buds.
  • Healthy Ingredients: Loaded with fresh vegetables, this sandwich is a great way to incorporate more greens into your diet.
  • Versatile: You can easily customize this sandwich with your favorite veggies or sauces, making it suitable for any palate.
  • Meal Prep Friendly: Perfect for make-ahead lunches, this sandwich can be prepared in advance without losing its flavor.

Ingredient Breakdown

Let’s take a closer look at the ingredients you’ll need for this delightful veggie sandwich:

  • 1 personal size ciabatta roll: A sturdy bread that holds up well against fillings. Substitute with whole grain or sourdough for different flavors.
  • Olive oil: Adds richness and helps with grilling the bread. Use extra virgin for a more robust flavor.
  • Chimichurri: A fresh sauce made with parsley, garlic, vinegar, and oil. You can use store-bought or make your own for a personal touch.
  • Spicy mayo: A creamy spread that adds heat. Mix mayonnaise with sriracha for a quick homemade version.
  • 1/2 cup loosely packed spinach: Provides a nutritious green base. Feel free to substitute with arugula or mixed greens.
  • 1/4 lemon, juiced: Brightens up the flavors of the sandwich.
  • Black pepper: For seasoning. Freshly cracked is best!
  • 1/4 cup shredded carrots: Adds crunch and sweetness. You can also use sliced bell peppers.
  • 1/2 mini cucumber: Thinly sliced for freshness. Regular cucumber works too.
  • 2 slices tomato: Use ripe, juicy tomatoes for the best flavor.
  • Pickled onion: Adds tanginess. Use store-bought or quick-pickle your own.
  • 1/8 cup pepperoncinis: These add a zesty kick. You can also use jalapeños for more heat.
  • 1 slice havarti cheese: Creamy and mild, it complements the other flavors. Substitute with a dairy-free cheese for a vegan option.
  • 1/4-1/2 avocado: Sliced or smashed, it adds creaminess and healthy fats.

Step-by-Step Instructions

Here’s how to assemble your delicious veggie sandwich:

  1. Cut the ciabatta roll lengthwise, then brush the cut side of each slice with olive oil.
  2. Grill or pan-fry on medium heat cut side down until golden brown. To keep it simple, you can toast the bread instead.
  3. Toss chopped spinach with lemon juice and a dash of black pepper in a small bowl.
  4. Smear one slice of bread with a hearty helping of chimichurri and the other with spicy mayo.
  5. Spread avocado over one or both slices, smashing it into the bread with a fork. This keeps the avocado from sliding out while you eat.
  6. Layer the sandwich with spinach, shredded carrots, cucumber, tomato, pickled onion, pepperoncinis, and a slice of havarti cheese.
  7. Close the sandwich and enjoy your creation!

Pro Tips for Perfecting Your Veggie Sandwich

A vibrant veggie sandwich showcasing layers of spinach, tomatoes, and creamy avocado.

Here are some expert insights to elevate your sandwich-making skills:

  • Grill the bread: Grilling the bread enhances flavor and texture. It adds a delightful crunch that complements the fillings.
  • Customize your veggies: Feel free to swap in your favorite vegetables or whatever you have on hand. Roasted vegetables can add a delicious depth.
  • Use fresh ingredients: The quality of your ingredients makes a significant difference in the final flavor. Fresh greens and ripe tomatoes are key!
  • Experiment with sauces: Don’t hesitate to try different spreads like hummus, pesto, or flavored aiolis for varied tastes.
  • Pay attention to layering: Layering ingredients thoughtfully can enhance the structure and prevent the sandwich from becoming soggy.
  • Make it a meal: Serve your sandwich with a side of soup or salad to create a satisfying and balanced meal.
  • Use a sandwich press: If you have one, a sandwich press can help achieve an even grill and melt the cheese perfectly.
  • Keep it fresh: If preparing in advance, store ingredients separately to maintain freshness until you’re ready to eat.

Common Mistakes and Troubleshooting

Here are a few pitfalls to avoid while making your veggie sandwich:

  • Overloading with fillings: While it’s tempting to add lots of ingredients, too many can make the sandwich hard to manage.
  • Soggy bread: If using wet ingredients like tomatoes, consider patting them dry before adding to your sandwich to prevent sogginess.
  • Not seasoning: Don’t forget to season your veggies! A little salt and pepper can elevate the overall flavor.
  • Skipping the grilling step: Grilling the bread not only adds flavor but also helps seal in the moisture of the fillings.
  • Ignoring the avocado: If not smashed properly, the avocado may slide out. Ensure it’s well-mashed into the bread.

Variations to Try

Looking to mix things up? Here are some fun variations to try:

  • Caprese Veggie Sandwich: Swap the chimichurri for pesto and add fresh mozzarella, basil, and balsamic glaze.
  • Spicy Southwest Sandwich: Add sliced jalapeños, black beans, and avocado, with chipotle mayo for a spicy kick.
  • Mediterranean Delight: Include feta cheese, kalamata olives, and roasted red peppers, using tzatziki sauce for a refreshing twist.
  • Breakfast Veggie Sandwich: Add a fried egg or tofu scramble and some sliced avocado for a breakfast twist!

Storage and Make-Ahead Instructions

This sandwich is perfect for meal prep!

  • Refrigeration: Store ingredients separately in airtight containers in the fridge for up to 3 days. Assemble just before eating.
  • Freezing: If you want to freeze components, consider freezing the bread and unassembled veggies separately. Avoid freezing the avocado.
  • Pre-assembled sandwiches: If you choose to pre-assemble, wrap tightly in plastic wrap and consume within 24 hours for best freshness.

Frequently Asked Questions

Here are some common questions about this veggie sandwich:

  • Can I make this sandwich vegan? Yes! Simply omit the cheese or use a vegan cheese alternative and ensure your mayo is egg-free.
  • What bread can I use? Any sturdy bread works well. Ciabatta, sourdough, or whole grain are all excellent choices.
  • How long does this sandwich last in the fridge? If properly stored, it can last up to 3 days. However, for the best taste, consume it fresh.
  • Can I use other sauces instead of chimichurri? Absolutely! Experiment with different spreads like hummus, pesto, or even a tangy mustard.
  • What are some good side dishes to serve with this sandwich? A simple salad, vegetable chips, or a bowl of soup pairs wonderfully with your sandwich.
  • Is this sandwich gluten-free? You can make it gluten-free by using gluten-free bread or wraps.
  • What’s the best way to cut the veggies? Make sure to slice the veggies thinly for optimal layering and ease of eating.
  • Can I add protein to this sandwich? Definitely! Consider adding grilled tofu, chickpeas, or even a hard-boiled egg for extra protein.

Nutrition Tips and Dietary Adaptations

For a healthful twist on this sandwich:

  • Increase the fiber: Add more veggies like bell peppers or sprouts for added fiber and nutrients.
  • Low-carb option: Use lettuce wraps instead of bread for a low-carb alternative.
  • Boost with healthy fats: Include seeds like sunflower or pumpkin seeds for extra crunch and nutrition.

Equipment Recommendations

For the best results, consider having the following tools handy:

  • Griddle or skillet: Ideal for grilling the bread and ensuring a crispy texture.
  • Sharp knife: For slicing veggies and the ciabatta roll with ease.
  • Mixing bowls: To toss your ingredients and prepare sauces.

Serving Suggestions

To complete your meal, consider these serving ideas:

  • Pair with a light salad: A simple green salad with vinaigrette complements the sandwich beautifully.
  • Serve with soup: Tomato soup or a light vegetable broth make excellent companions.
  • Offer a side of chips: Homemade veggie chips or whole grain chips add a satisfying crunch.

In conclusion, this best veggie sandwich is not just a meal; it’s a delightful experience that brings together the best of fresh flavors and hearty textures. With easy steps, customizable ingredients, and a variety of serving options, you’ll find yourself reaching for this recipe time and again. Enjoy cooking, and remember, it’s all about having fun in the kitchen—happy cooking!

The Best Veggie Sandwich

Prep Time 10 minutes
Cook Time 10 minutes
Total Time 20 minutes
Servings 1 sandwich
Calories 450
A vibrant and satisfying veggie sandwich packed with fresh ingredients and bold flavors, perfect for a quick lunch or snack.

Ingredients

Bread

  • 1 piece personal size ciabatta roll or other sturdy bread
  • 2 tablespoons olive oil
  • 2 tablespoons chimichurri (homemade or store-bought)
  • 1 tablespoon spicy mayo
  • 0.5 cup chopped spinach
  • 0.25 cup lemon juice (from 1/4 lemon)
  • to taste black pepper black pepper
  • 0.25 cup shredded carrots
  • 0.25 cup thinly sliced mini cucumber or 1/4 of a regular cucumber
  • 2 slices tomato
  • pickled onion pickled onion (homemade or store-bought, or thinly sliced red onion)
  • 0.125 cup pepperoncinis
  • 1 slice Havarti cheese
  • 0.25 avocado sliced avocado (sliced or smashed)

Instructions 

  • Cut the ciabatta roll lengthwise and brush cut sides with olive oil. Grill or pan-fry until golden brown.
  • Mix chopped spinach, lemon juice, and black pepper in a small bowl.
  • Spread chimichurri on one bread slice and spicy mayo on the other. Spread sliced avocado over one or both slices.
  • Layer spinach, carrots, cucumber, tomato, onion, pepperoncini, and havarti on one slice. Close the sandwich and serve.

Notes

Feel free to customize with your favorite veggies or spreads for added flavor.
Calories: 450kcal
Cost: $12
Course: Lunch
Cuisine: American
Keyword: Sandwich, Vegetarian, Veggies

Discover the Joy of Cooking with Our Grilled Vegetable Panini Recipe

If you’re craving a delicious and satisfying meal that’s also quick and easy to prepare, look no further! This Grilled Vegetable Panini recipe combines fresh, vibrant vegetables with gooey mozzarella, all nestled between crispy, golden bread. Perfect for busy weeknights or cozy lunches, this dish is not just about filling your belly; it’s about enjoying the experience of cooking. Let’s dive into the wonderful world of flavors and textures that make this vegetable panini a delightful addition to your culinary repertoire!

Why You’ll Love This Recipe

Here are just a few reasons to get excited about making this Grilled Vegetable Panini:

  • Quick & Easy: Prepare this meal in under 30 minutes, making it perfect for those hectic days.
  • Loaded with Flavor: Infuse your panini with the rich flavors of grilled vegetables and aromatic pesto.
  • Customizable: Use seasonal veggies or whatever you have on hand for endless variations.
  • Healthy & Nutritious: Packed with vitamins from fresh vegetables, it’s a wholesome meal option.
  • Family-Friendly: Kids and adults alike will love the cheesy goodness and colorful presentation!

Essential Ingredients for Your Grilled Vegetable Panini

Let’s break down the key ingredients for this dish, along with some handy substitutions to suit your taste or dietary needs:

  • 1 medium zucchini: Slice it thinly for even grilling. Substitute: Yellow squash for a similar texture and taste.
  • 1 whole red bell pepper: Adds sweetness and color. Substitute: Any color bell pepper or roasted red peppers from a jar.
  • 1 whole yellow bell pepper: Brings a slight crunch and sweetness. Substitute: Orange bell pepper for a different flavor profile.
  • 1 small eggplant: Grilled eggplant adds a creamy texture. Substitute: Portobello mushrooms if you prefer a meaty alternative.
  • 1 cup fresh spinach: A great way to sneak in some greens! Substitute: Arugula for a peppery kick or kale for a sturdier option.
  • 4 slices whole grain bread: Provides a hearty base. Substitute: Ciabatta or sourdough for a more artisan feel.
  • 4 tablespoons pesto: For that burst of flavor. Substitute: Hummus or olive tapenade for a different twist.
  • 1 cup mozzarella cheese, shredded: Melts beautifully for that gooey texture. Substitute: Provolone or cheddar cheese for a stronger flavor.
  • 2 tablespoons olive oil: Essential for grilling. Substitute: Avocado oil for a higher smoke point.
  • Salt and pepper: To taste. Optional: A drizzle of balsamic glaze adds a sweet tang!

Step-by-Step Instructions to Create Your Perfect Panini

Side angle of a delicious grilled vegetable panini with visible layers of zucchini, bell peppers, and mozzarella.

Let’s get cooking! Follow these steps for a delicious grilled vegetable panini:

  1. Preheat your grill: Set your grill or grill pan to medium heat.
  2. Toss your vegetables: In a bowl, combine the zucchini, bell peppers, and eggplant slices with olive oil, salt, and pepper until evenly coated.
  3. Grill the veggies: Place the coated vegetables on the grill. Grill for about 5-7 minutes on each side, or until tender and marked with lovely grill lines.
  4. Assemble the panini: Spread 1 tablespoon of pesto on one side of each slice of bread. Layer the grilled vegetables, fresh spinach, and mozzarella cheese on two slices of bread (pesto side up). Top with the remaining slices (pesto side down).
  5. Grill the sandwiches: Heat a panini press or skillet over medium heat. If using a skillet, add a drizzle of olive oil. Place the assembled sandwiches in the pan or press. Grill until golden brown and the cheese is melted, about 3-4 minutes per side.
  6. Serve: Once toasted and cheesy, remove from the grill, cut in half diagonally, and drizzle with balsamic glaze if desired.

Expert Tips for a Perfect Grilled Vegetable Panini

To elevate your panini game, check out these pro tips:

  • Use a hot grill: Ensure your grill is adequately heated to achieve those nice grill marks and prevent sticking.
  • Don’t overcrowd: Grill vegetables in batches if necessary; overcrowding can lead to steaming instead of grilling.
  • Press down: If using a skillet, gently press down on the sandwich with a spatula to help the cheese melt evenly.
  • Keep it simple: Use fresh, high-quality ingredients for the best flavor.
  • Experiment: Try different spreads or cheese to find your favorite combination!
  • Let it rest: Allow the panini to sit for a minute before cutting to prevent the fillings from spilling out.
  • Grilling technique: If you like, you can also use a grill pan for added char marks.

Common Mistakes and Troubleshooting Tips

Even the best home cooks can run into issues. Here are some common mistakes and how to fix them:

  • Vegetables not cooked through: Make sure to slice them thinly and grill them long enough to achieve tenderness.
  • Sandwich falling apart: Ensure you’re layering ingredients evenly and not overstuffing.
  • Cheese not melting: Check your heat settings; medium heat is ideal for melting without burning.

Delicious Variations to Try

Feel free to switch things up! Here are a few variations to keep your panini exciting:

  • Caprese Panini: Add fresh basil and slices of tomato for an Italian twist.
  • Spicy Veggie Panini: Incorporate jalapeños or pepper jack cheese for extra heat.
  • Mediterranean Panini: Use olives, feta cheese, and artichokes for a Mediterranean flair.
  • Breakfast Panini: Add a fried egg and some avocado for a hearty breakfast option.

Storing and Make-Ahead Instructions

If you want to prepare your panini in advance, here’s how:

  • Refrigerate: Assemble the sandwiches without grilling, wrap them in plastic wrap, and store them in the refrigerator for up to 24 hours.
  • Freeze: You can freeze ungrilled sandwiches. Just wrap tightly and store for up to a month. Thaw in the fridge before grilling.
  • Reheat: To reheat, grill them directly from the fridge or thawed for best results.

Frequently Asked Questions

Got questions? We’ve got answers!

  • What vegetables work best for a grilled vegetable panini? Any firm vegetables like zucchini, bell peppers, and eggplants work great! Feel free to experiment.
  • Can I use gluten-free bread for my panini? Absolutely! Gluten-free bread works well; just be mindful of the grilling times, as they may vary.
  • How do I make my panini extra crispy? Brush the outside of the bread with olive oil before grilling for a golden, crispy crust.
  • What’s the best cheese for a panini? Mozzarella is traditional, but provolone or Swiss cheese also melt beautifully.
  • Can I add meat to my panini? Yes! Grilled chicken, turkey, or even slices of prosciutto can add extra protein.
  • How do I store leftover panini? Wrap them tightly in foil or plastic wrap and refrigerate for up to two days.
  • How can I elevate the flavor? Try adding a spread like aioli or tapenade for a unique twist!
  • Can I grill the panini on a stovetop? Yes! A skillet works perfectly; just make sure to press down slightly while grilling.

Nutritional Tips and Dietary Adaptations

This Grilled Vegetable Panini can fit into various dietary preferences:

  • Vegetarian: Naturally vegetarian; perfect for meatless meals.
  • Vegan: Substitute cheese with vegan cheese and use eggplant or mushrooms for heartiness.
  • Gluten-Free: Use gluten-free bread to make this panini accessible to everyone.
  • Low-Calorie: Load up on veggies and use less cheese for a lighter option.

Essential Equipment for Making Your Panini

To achieve the best results, consider using the following tools:

  • Panini Press: An excellent investment for perfectly grilled sandwiches.
  • Grill Pan: If you don’t have a panini press, a grill pan works beautifully!
  • Spatula: For pressing down the sandwich while grilling.
  • Cutting Board: Essential for prepping your ingredients.

Serving Suggestions

Pair your Grilled Vegetable Panini with:

  • A side salad: A fresh garden salad or a Caesar salad complements the panini beautifully.
  • Chips or fries: Serve with your favorite chips for a classic combo!
  • Soup: Tomato basil or a hearty vegetable soup makes for a comforting pairing.

Conclusion

There you have it! A comprehensive guide to making a delicious Grilled Vegetable Panini that’s not only easy to prepare but also bursting with flavor. With simple steps and a wealth of ideas to customize your panini, you can enjoy cooking in a way that’s relaxing and creative. So gather your ingredients, fire up that grill, and get ready to savor the flavor of your own homemade panini. Happy cooking!

Grilled Vegetable Panini

Prep Time 10 minutes
Cook Time 15 minutes
Total Time 25 minutes
Servings 4 pieces
Calories 450
A delicious and hearty sandwich featuring grilled vegetables, melted cheese, and fresh pesto, perfect for a quick lunch or dinner.

Ingredients

Vegetables

  • 1 medium zucchini (sliced)
  • 1 whole red bell pepper (sliced)
  • 1 whole yellow bell pepper (sliced)
  • 1 small eggplant (sliced)
  • 1 cup fresh spinach
  • 4 slices whole grain bread
  • 4 tablespoons pesto
  • 1 cup mozzarella cheese (shredded)
  • 2 tablespoons olive oil
  • to taste salt and pepper
  • optional balsamic glaze (for drizzling)

Instructions 

  • Preheat grill or grill pan over medium heat. Toss sliced vegetables with olive oil, salt, and pepper.
  • Grill vegetables for 5-7 minutes per side until tender and marked. Remove and set aside.
  • Spread pesto on one side of each bread slice. Layer grilled vegetables, spinach, and cheese on two slices. Top with remaining bread slices.
  • Heat panini press or skillet over medium. Grill sandwiches until golden and cheese melts, about 3-4 minutes per side.
  • Cut sandwiches diagonally, drizzle with balsamic glaze if desired, and serve.

Notes

For extra flavor, add fresh basil or a drizzle of balsamic glaze before serving.
Calories: 450kcal
Cost: $12
Course: Dinner, Lunch
Cuisine: Italian
Keyword: Panini, Vegetables

Transform Your Weeknight Dinner with a Simple Spicy Chicken Sandwich

If you’re looking to spice up your dinner routine, look no further! This simple spicy chicken sandwich recipe is not just delicious; it’s a game-changer that brings bold flavors to your table with minimal effort. Made with a few quality ingredients, this dish delivers a symphony of taste that will please both the spice lovers and the cautious eaters alike. Perfect for busy weeknights, this sandwich is your ticket to a quick yet satisfying meal.

Let’s dive into why this recipe is not just another chicken sandwich, but an experience you’ll cherish and want to recreate time and time again.

Why You’ll Love This Recipe

  • Quick and Easy: With just a few straightforward steps, you can whip up a restaurant-quality sandwich in under 30 minutes.
  • Flavor Explosion: The combination of spices and marinated chicken brings a depth of flavor that’s hard to resist.
  • Customizable Heat: Adjust the spiciness level by tweaking the hot sauce or cayenne pepper to suit your taste.
  • Perfect for Meal Prep: This recipe can easily be doubled or made ahead, making it a great choice for busy weeks.
  • Kid-Friendly Option: Serve the spicy chicken with a side of cooling ranch or creamy mayo to cater to younger palates.

Ingredients You’ll Need

Gathering the right ingredients is the first step to making this amazing spicy chicken sandwich. Here’s what you’ll need:

  • 2 boneless, skinless chicken breasts: Ensure they’re patted dry for optimal browning.
  • 1/2 cup buttermilk: This is key for a juicy, tender chicken.
  • 1 teaspoon hot sauce: Optional, but adds a delightful kick!
  • 1 cup all-purpose flour: For dredging, giving your chicken that perfect crispy coating.
  • 1 teaspoon paprika: Adds flavor and beautiful color.
  • 1/2 teaspoon garlic powder: A must for depth of flavor.
  • 1/2 teaspoon cayenne pepper: Adjust according to your spice tolerance.
  • Salt and pepper: To taste, enhancing all the flavors.
  • Vegetable oil: For frying, use something with a high smoke point.
  • 2 sandwich buns or rolls: Choose your favorite type.
  • Lettuce leaves, tomato slices, pickles: For freshness and crunch.
  • Mayonnaise or spicy mayo: To spread on the buns and add a creamy element.

Preparation Steps

Side view of a fried chicken sandwich topped with pickles and mayonnaise.

Now that you have all your ingredients ready, let’s break down the cooking process into simple steps:

  • Marinate the Chicken: In a bowl, combine the buttermilk and hot sauce. Add the chicken breasts and let them marinate in the refrigerator for at least 30 minutes, or up to 2 hours for extra flavor.
  • Prepare the Coating: In a separate bowl, mix together the flour, paprika, garlic powder, cayenne pepper, salt, and pepper.
  • Dredge the Chicken: Remove the chicken from the marinade and dredge each piece in the seasoned flour until fully coated.
  • Heat the Oil: In a skillet over medium-high heat, add enough vegetable oil to cover the bottom of the pan.
  • Fry the Chicken: Fry the chicken breasts for 4-5 minutes on each side, or until golden brown and cooked through (internal temperature should reach 165°F or 75°C). Drain on paper towels.
  • Toast the Buns: Optionally, lightly toast the buns for added texture.
  • Assemble the Sandwich: Spread mayonnaise or spicy mayo on the buns, layer with lettuce, tomato slices, pickles, and top with the crispy spicy chicken. Close the sandwich and serve hot.

Pro Tips for Making the Best Spicy Chicken Sandwich

  • Perfect Texture: Ensure the oil is hot enough before frying to achieve a crispy crust without absorbing too much oil.
  • Don’t Rush the Marinade: Allowing the chicken to marinate longer will enhance the flavor and tenderness.
  • Experiment with Spices: Feel free to add your favorite spices to the flour mixture for a unique twist.
  • Slicing Chicken: Let the chicken rest for a few minutes after frying before slicing to retain juices.
  • Serving Suggestions: Pair with a side of fries, coleslaw, or a fresh salad for a complete meal.
  • Make It a Meal: This sandwich can be served with a side of sweet potato fries or a refreshing coleslaw for an added crunch.
  • Leftover Chicken: Use leftover chicken in salads or wraps for a quick lunch option.
  • Adjust for Allergies: Substitute gluten-free flour if you have a gluten intolerance.

Common Mistakes and Troubleshooting

Here are a few common pitfalls to avoid when making your spicy chicken sandwich:

  • Not Prepping Ingredients: Always have everything ready before you start cooking to streamline the process.
  • Overcrowding the Pan: Fry chicken in batches if necessary to ensure even cooking and crispiness.
  • Inadequate Heat: If your oil isn’t hot enough, the chicken will absorb excess oil, leading to a soggy texture.

Flavor Variations

Here are some creative spins on the classic spicy chicken sandwich:

  • Cajun Spicy Chicken Sandwich: Use Cajun seasoning in the marinade for a southern twist.
  • Sriracha Chicken Sandwich: Mix Sriracha into the mayo for an extra kick and serve with pickled vegetables.
  • Jerk Chicken Sandwich: Marinate the chicken in jerk seasoning for a Caribbean flair.
  • Buffalo Chicken Sandwich: Toss fried chicken in buffalo sauce before assembling for a tangy, spicy delight.

Storage and Make-Ahead Instructions

This spicy chicken sandwich is perfect for meal prep! Here’s how to store and reheat:

  • Refrigerator: Store leftover chicken in an airtight container for up to 3 days.
  • Freezer: Freeze cooked chicken for up to 2 months. Thaw in the refrigerator before reheating.
  • Reheating: Reheat in the oven at 350°F (175°C) for 10-15 minutes to keep the chicken crispy.

Frequently Asked Questions

Here are some common questions about making this spicy chicken sandwich:

  • Can I use chicken thighs instead of breasts? Absolutely! Chicken thighs will add extra juiciness.
  • How do I make my sandwich less spicy? Reduce the amount of cayenne pepper and opt for a milder hot sauce.
  • What type of buns work best? Brioche or potato buns are excellent choices for their softness and flavor.
  • How can I make this sandwich gluten-free? Substitute all-purpose flour with a gluten-free flour blend.
  • Can I bake the chicken instead of frying? Yes! Bake at 400°F (200°C) for about 20-25 minutes for a healthier option.
  • What sides pair well with this sandwich? Consider serving it with sweet potato fries or a crisp salad.
  • How do I store leftovers? Keep in an airtight container in the fridge for up to 3 days.
  • Can I make the spicy mayo ahead of time? Yes, you can prepare it in advance and store it in the refrigerator for up to a week.

Nutritional Tips and Dietary Adaptations

This spicy chicken sandwich can be adapted to fit various dietary needs:

  • Low-Carb Option: Serve the chicken without the bun and add to a salad for a low-carb meal.
  • Dairy-Free Version: Substitute buttermilk with a non-dairy milk and a splash of lemon juice.
  • Whole Grain Buns: Use whole grain or sprouted grain buns for added fiber and nutrients.

Essential Equipment Recommendations

Here’s a quick list of kitchen tools that will help you master this spicy chicken sandwich:

  • Skillet: A heavy-bottomed skillet ensures even heat distribution for frying.
  • Meat Thermometer: Check for doneness to guarantee your chicken is perfectly cooked.
  • Mixing Bowls: Having multiple bowls on hand makes marinating and mixing easier.
  • Spatula: A sturdy spatula will help you flip the chicken without breaking it apart.

Serving Suggestions

When it comes to enjoying your delicious spicy chicken sandwich, here are some ideas:

  • With a Side of Fries: Crispy fries complement the sandwich perfectly.
  • Coleslaw: A refreshing coleslaw balances the heat of the chicken.
  • Pickled Vegetables: Add a tangy crunch with some pickled cucumbers or carrots.

In conclusion, this simple spicy chicken sandwich is more than just a meal; it’s a delightful cooking experience that brings flavor and excitement to your dinner table. So, roll up your sleeves, gather your ingredients, and get ready to impress your family with this incredible dish. Remember, cooking is about having fun and experimenting—enjoy the process, and happy cooking!

Simple Spicy Chicken Sandwich

Prep Time 10 minutes
Cook Time 10 minutes
Total Time 20 minutes
Servings 2 servings
Calories 650
A quick and flavorful spicy chicken sandwich perfect for a satisfying meal. Crispy chicken paired with fresh toppings makes it a crowd-pleaser.

Ingredients

Marinade

  • 2 pieces boneless, skinless chicken breasts
  • 0.5 cup buttermilk
  • 1 teaspoon hot sauce (optional)

Breading

  • 1 cup all-purpose flour
  • 1 teaspoon paprika
  • 0.5 teaspoon garlic powder
  • 0.5 teaspoon cayenne pepper
  • to taste Salt and pepper

Frying

  • as needed Vegetable oil (for frying)

Assembly

  • 2 pieces sandwich buns or rolls
  • to taste Lettuce leaves
  • to taste Tomato slices
  • to taste Pickles
  • to taste Mayonnaise or spicy mayo

Instructions 

  • Combine buttermilk and hot sauce in a bowl. Marinate chicken for 30 minutes.
  • Mix flour, paprika, garlic powder, cayenne, salt, and pepper in a bowl.
  • Dredge chicken in seasoned flour, then fry in hot oil for 4-5 minutes per side until golden and cooked through.
  • Toast buns lightly, spread mayo or spicy mayo, add lettuce, tomato, pickles, and chicken. Assemble and serve hot.

Notes

For extra spice, add more hot sauce or cayenne pepper to the marinade and breading.
Calories: 650kcal
Cost: $12
Course: Main Course
Cuisine: American
Keyword: Chicken

Welcome to the wonderful world of baking, where every cupcake is a little piece of joy! If you’re looking for a simple yet absolutely delicious treat, these mini chocolate cupcakes topped with a luscious chocolate cream cheese frosting are just the ticket. Whether you’re celebrating a birthday, hosting a gathering, or simply indulging your sweet tooth, these delightful mini chocolate cupcakes will impress every guest. Let’s dive into this easy-to-make recipe that will have you baking like a pro!

Why You’ll Love This Recipe

Here are just a few reasons why this recipe is destined to become a favorite in your kitchen:

  • Quick and Easy: With simple ingredients and straightforward steps, you can whip up a batch of these mini chocolate cupcakes in no time!
  • Incredibly Moist: Thanks to the addition of sour cream and vegetable oil, these cupcakes are moist and tender, making them irresistibly yummy.
  • Customizable Toppings: While the chocolate cream cheese frosting is divine, feel free to get creative with different toppings or frostings.
  • Perfect for Any Occasion: These mini cupcakes are ideal for birthdays, baby showers, or just a sweet treat at home.
  • Kid-Friendly: Smaller portions mean they’re great for kids’ parties, allowing everyone to enjoy a sweet without overindulging.

Grab Your Ingredients

Before we start baking, let’s gather our ingredients. You’ll find everything you need to create these delectable mini chocolate cupcakes right here:

  • 1 cup all-purpose flour
  • 1 cup sugar
  • ½ cup Dutch-processed cocoa powder
  • ½ teaspoon baking powder
  • ½ teaspoon baking soda
  • ½ teaspoon kosher salt
  • 2 large eggs (room temperature)
  • ½ cup vegetable oil
  • 1 teaspoon vanilla extract
  • ½ cup sour cream (room temperature)
  • 1 teaspoon espresso powder
  • ½ cup hot water
  • 6 tablespoons unsalted butter (room temperature)
  • 2 cups confectioners sugar
  • ½ teaspoon vanilla extract (for frosting)
  • ¼ teaspoon kosher salt (for frosting)
  • 2 oz cold cream cheese
  • ¼ cup Dutch-processed cocoa powder (for frosting)
  • ½ tablespoon heavy cream (optional)

How to Make Mini Chocolate Cupcakes

Let’s get started with baking these delicious mini chocolate cupcakes!

Step-by-Step Instructions

  1. Preheat your oven to 350°F (175°C) and line a mini muffin tin with cupcake liners.
  2. In a large mixing bowl, whisk together the dry ingredients: flour, sugar, cocoa powder, baking powder, baking soda, and salt.
  3. In another bowl, mix the wet ingredients: eggs, vegetable oil, vanilla extract, sour cream, and espresso powder.
  4. Gradually combine the wet ingredients with the dry ingredients, stirring until just combined.
  5. Slowly add in the hot water, mixing until the batter is smooth. (Don’t worry if it looks a bit thin!)
  6. Fill each cupcake liner about 2/3 full with batter.
  7. Bake for 12-15 minutes, or until a toothpick inserted comes out clean.
  8. Allow the cupcakes to cool completely in the tin before transferring them to a wire rack.

Make the Chocolate Cream Cheese Frosting

Mini chocolate cupcakes with a rich dark frosting, showcasing a delicious creamy texture.

While your cupcakes are cooling, it’s time to prepare the frosting!

  1. In a large bowl, beat the room temperature butter and cream cheese together until creamy.
  2. Gradually add in the confectioners sugar, cocoa powder, vanilla extract, and salt. Beat until smooth and fluffy.
  3. If the frosting is too thick, add a splash of heavy cream to reach your desired consistency.
  4. Once the cupcakes are completely cool, frost them generously with the chocolate cream cheese frosting.

Pro Tips for Perfect Mini Cupcakes

Want to ensure your mini chocolate cupcakes are absolutely perfect? Here are some expert insights:

  • Room Temperature Ingredients: Ensure your eggs and sour cream are at room temperature for better mixing and texture.
  • Don’t Overmix: Mix until just combined to avoid dense cupcakes.
  • Check Oven Temperature: Use an oven thermometer to ensure your oven is at the correct temperature for even baking.
  • Cooling: Allow the cupcakes to cool completely before frosting to prevent melting.
  • Frosting Variations: Experiment with different flavors by adding peanut butter, mint extract, or fruit puree to your frosting!

Common Mistakes and Troubleshooting

We all make mistakes in the kitchen sometimes! Here’s how to avoid common pitfalls:

  • Dry Cupcakes: This can happen if you overbake. Keep an eye on them and do the toothpick test!
  • Flat Cupcakes: Ensure your baking powder and baking soda are fresh and properly measured.
  • Frosting Too Runny: If your frosting is too runny, add a bit more powdered sugar to thicken it up.

Variations & Substitutions

Feel free to customize your mini chocolate cupcakes with these fun variations:

  • Different Flours: Swap out all-purpose flour for almond or coconut flour for a gluten-free option.
  • Chocolate Chips: Fold in chocolate chips or nuts for added texture.
  • Fruit Flavoring: Add pureed strawberries or raspberries to the batter for a fruity twist.
  • Frosting Swaps: Use vanilla buttercream, whipped cream, or a fruit glaze instead of chocolate frosting.

Storage and Make-Ahead Instructions

Want to prepare your mini chocolate cupcakes in advance? Here’s how:

  • Storage: Store unfrosted cupcakes in an airtight container at room temperature for up to 3 days or in the fridge for up to a week.
  • Make-Ahead: You can bake the cupcakes a day ahead and frost them on the day of your event for maximum freshness.

Comprehensive FAQ

Got questions about making mini chocolate cupcakes? Here are some common inquiries:

  • Can I use different types of cocoa powder? Yes! Just ensure it’s unsweetened cocoa powder for the best results.
  • How do I know when the cupcakes are done? Insert a toothpick into the center; if it comes out clean, they’re ready!
  • Can I freeze these cupcakes? Absolutely! Freeze unfrosted cupcakes in a single layer and then store in an airtight container.
  • What’s the best way to frost mini cupcakes? Use a piping bag for a neat and professional look!
  • Can I make this recipe into regular-sized cupcakes? Yes! Just adjust the baking time to around 18-20 minutes.
  • What if I don’t have espresso powder? You can omit it, but it enhances the chocolate flavor.
  • How can I make these cupcakes dairy-free? Substitute dairy products with vegan alternatives like almond milk and coconut oil.
  • What toppings can I use? Sprinkles, nuts, or fresh fruits work great on top of your frosting!

Nutrition Tips and Dietary Adaptations

For those watching their diets, here are some tips:

  • Reduced Sugar: Substitute with a sugar alternative like Stevia or monk fruit for a lower-calorie option.
  • Gluten-Free: Use a gluten-free all-purpose flour blend to make these cupcakes gluten-free.
  • Less Fat: You can replace some of the oil with applesauce for a lighter version.

Equipment Recommendations

Ensure you have the right tools for the job:

  • Mini Muffin Tin: Essential for creating perfectly sized mini cupcakes.
  • Mixing Bowls: A set of mixing bowls in various sizes will help with ingredient mixing.
  • Whisk: A good whisk is crucial for combining your ingredients smoothly.
  • Piping Bags: For easy and beautiful frosting application.

Serving Suggestions

Here are some delightful ways to serve your mini chocolate cupcakes:

  • Platter Display: Arrange them on a decorative platter for parties.
  • With Ice Cream: Serve alongside a scoop of vanilla ice cream for a delicious dessert combo.
  • Giftable Treats: Package them in a box for a sweet homemade gift!

Final Thoughts

These mini chocolate cupcakes are sure to bring a smile to anyone’s face and are perfect for any occasion. Remember, cooking should be fun and creative. Don’t stress over perfection—focus on enjoying the process and savoring the delicious results. Now it’s your turn to bake, so roll up your sleeves and let’s get those ovens preheating!

Mini Chocolate Cupcakes with Chocolate Cream Cheese Frosting

Prep Time 20 minutes
Cook Time 15 minutes
Total Time 35 minutes
Servings 24 pieces
Calories 150
Delight in these rich and moist mini chocolate cupcakes topped with creamy chocolate cream cheese frosting, perfect for any celebration.

Ingredients

Dry ingredients

  • 1 cup all purpose flour
  • 1 cup sugar
  • ½ cup cocoa powder dutch processed
  • ½ teaspoon baking powder
  • ½ teaspoon baking soda
  • ½ teaspoon kosher salt

Wet ingredients

  • 2 large eggs (room temperature)
  • ½ cup vegetable oil
  • 1 teaspoon vanilla extract
  • ½ cup sour cream (room temperature)
  • 1 teaspoon espresso powder
  • ½ cup hot water

Frosting ingredients

  • 6 tablespoons unsalted butter (room temperature)
  • 2 cups confectioners sugar
  • ½ teaspoon vanilla extract
  • ¼ teaspoon kosher salt
  • 2 oz cream cheese (cold)
  • ¼ cup dutch processed cocoa powder
  • ½ tablespoon heavy cream (optional)

Instructions 

  • Preheat oven to 350°F (175°C) and line mini muffin tins with paper liners.
  • Mix dry ingredients in a bowl. In a separate bowl, whisk eggs, oil, vanilla, sour cream, espresso, and hot water until smooth.
  • Combine wet and dry ingredients until just blended. Fill muffin tins about 2/3 full.
  • Bake for 12-15 minutes, then cool completely.
  • Beat butter, confectioners sugar, vanilla, salt, cream cheese, cocoa, and cream until fluffy. Frost cooled cupcakes.

Notes

For extra flavor, add a sprinkle of cocoa powder on top of the frosting.
Calories: 150kcal
Cost: $15
Course: Dessert
Keyword: chocolate

Are you ready to bake the most delightful banana muffins that will fill your kitchen with warmth and sweet aromas? This easy banana muffin recipe not only results in moist and fluffy muffins but also turns your overripe bananas into a delicious treat! Perfect for breakfast, snacks, or even dessert, these muffins are a crowd-pleaser that everyone will love. Let’s dive in and discover why you’ll want to make these banana muffins today!

Why You’ll Love This Recipe

This banana muffin recipe is more than just a way to use up ripe bananas; it’s a gateway to simple, delicious baking! Here are five specific benefits of this recipe:

  • Quick and Easy: With just a few basic ingredients and minimal prep time, you’ll have a batch of warm muffins ready in no time.
  • Perfect for Ripe Bananas: This recipe is designed to use those overripe bananas that you might otherwise throw away, giving them a second life!
  • Customizable: You can easily tweak the ingredients to suit your taste—add chocolate chips, nuts, or dried fruits for a personal touch.
  • Freezer-Friendly: These muffins freeze beautifully, making them an ideal make-ahead snack or breakfast option for busy mornings.
  • Kid-Friendly: With their naturally sweet flavor and soft texture, these muffins are a hit with kids and adults alike!

Ingredient Breakdown

Let’s take a closer look at the key ingredients in this banana muffin recipe:

  • All-Purpose Flour: The backbone of the recipe, providing structure. You can substitute with whole wheat flour for a healthier option.
  • Baking Powder & Baking Soda: These leavening agents give the muffins their fluffy texture. Make sure they are fresh for the best results!
  • Ground Cinnamon: Adds a warm spice flavor that complements the sweetness of the bananas. Feel free to adjust based on your preference.
  • Granulated Sugar: Sweetens the muffins. You can substitute with brown sugar or maple syrup for a richer flavor.
  • Ripe Bananas: The star ingredient! The riper the bananas, the sweeter and more flavorful your muffins will be.
  • Unsalted Butter: Adds moisture and richness. You can replace it with vegetable oil if you prefer.
  • Egg: Helps bind the ingredients together. For a vegan option, use a flaxseed egg or applesauce.
  • Vanilla Extract: Enhances the overall flavor; don’t skip it!

Pro Tips for Perfect Muffins

Here are some expert insights to ensure your banana muffins turn out perfectly every time:

  • Use Overripe Bananas: The more brown spots on your bananas, the sweeter and more flavorful your muffins will be.
  • Don’t Overmix: When combining wet and dry ingredients, mix just until incorporated to keep your muffins light and fluffy.
  • Check for Doneness: Use a toothpick to test the center of a muffin—if it comes out clean, they’re ready!
  • Cool Properly: Let the muffins cool in the pan for 5 minutes, then transfer to a wire rack to prevent sogginess.
  • Experiment with Add-ins: Chocolate chips, nuts, or berries can elevate your muffins—just be mindful of how they may change the baking time.
  • Adjust Baking Time: If using mini muffin tins, reduce the baking time to about 15-20 minutes.
  • Store Correctly: Keep muffins in an airtight container at room temperature for up to 3 days, or freeze for longer storage.
  • Use Muffin Liners: They help with easy removal and make cleanup a breeze.

Common Mistakes and Troubleshooting

Side view of freshly baked banana muffins, showcasing their fluffy tops.

Even the best bakers can run into issues. Here’s how to troubleshoot common banana muffin mishaps:

  • Dense Muffins: Overmixing the batter can lead to dense muffins. Mix just until combined.
  • Dry Muffins: This can happen if you add too much flour. Make sure to spoon and level your flour instead of scooping it directly from the bag.
  • Burnt Tops: If the tops are browning too quickly, cover the muffins with foil midway through baking.
  • Unbalanced Flavor: If your muffins taste bland, try adding a pinch of salt or increasing the spices for more flavor.

Delicious Variations

Make this recipe your own with these fun variations:

  • Chocolate Chip Banana Muffins: Stir in 1 cup of semi-sweet chocolate chips for a sweet twist.
  • Nutty Banana Muffins: Add 1 cup of chopped walnuts or pecans for a delightful crunch.
  • Blueberry Banana Muffins: Fold in 1 cup of fresh or frozen blueberries for a fruity addition.
  • Banana Bread Muffins: For a denser muffin, reduce the baking powder and add an extra banana for moisture.

Storage and Make-Ahead Instructions

These banana muffins are perfect for meal prep! Here’s how to store and enjoy them later:

  • Room Temperature: Store in an airtight container for up to 3 days.
  • Freezing: Wrap each muffin in plastic wrap and place them in a freezer-safe bag for up to 3 months. Thaw overnight in the fridge or at room temperature.
  • Reheating: Warm muffins in the microwave for 15-20 seconds or in the oven at 350°F (175°C) for about 10 minutes.

Comprehensive FAQ

Here are some frequently asked questions about banana muffins:

  • Can I use frozen bananas? Yes! Just thaw them and drain any excess liquid before mashing.
  • How do I know when the muffins are done? Use a toothpick in the center of a muffin; if it comes out clean, they’re done.
  • Can I make mini muffins with this recipe? Absolutely! Just reduce the baking time to about 15-20 minutes.
  • What can I substitute for sugar? You can use honey, maple syrup, or coconut sugar as alternatives.
  • Do I need to mash the bananas? Yes, for the best texture, bananas should be mashed until smooth.
  • Can I make these muffins gluten-free? Yes! Substitute the all-purpose flour with a gluten-free blend.
  • How long can I store these muffins? They last up to 3 days at room temperature or 3 months in the freezer.
  • What’s the best way to eat banana muffins? Enjoy them warm with a pat of butter, or as is for a quick snack!

Nutritional Tips and Dietary Adaptations

These banana muffins can easily fit into various dietary preferences:

  • Lower Sugar: Reduce the sugar by half and use ripe bananas for natural sweetness.
  • Vegan Option: Replace the egg with a flaxseed egg and use plant-based butter.
  • Gluten-Free: Use a gluten-free flour blend for those with gluten sensitivities.

Equipment Recommendations

Here’s what you’ll need to make these fantastic banana muffins:

  • Muffin Pan: A standard 12-cup muffin pan works best.
  • Muffin Liners: These are optional but highly recommended for easy removal.
  • Mixing Bowls: Use one large bowl for wet ingredients and another for dry.
  • Whisk: Essential for mixing ingredients smoothly.
  • Measuring Cups and Spoons: Accurate measurements ensure the best results.

Serving Suggestions

These muffins are versatile and can be enjoyed in many ways:

  • Breakfast Delight: Pair with a hot cup of coffee or tea for a cozy morning.
  • Snack Time: Perfect for mid-afternoon snacks, especially for kids!
  • Brunch Treat: Serve alongside yogurt and fresh fruit for a delightful brunch spread.
  • Gift Idea: Wrap in a cute box or bag for a thoughtful homemade gift!

Now that you have the ultimate guide to making delicious banana muffins, it’s time to get baking! Remember, the joy of cooking is all about creativity and fun. Embrace the process, and don’t worry about perfection. Enjoy the delightful aroma of your kitchen as you whip up these easy banana muffins, and share them with family and friends. Happy baking!

Banana Muffins

Prep Time 10 minutes
Cook Time 25 minutes
Total Time 35 minutes
Servings 12 muffins
Calories 200
Delicious moist banana muffins perfect for breakfast or a snack, combining ripe bananas with warm spices.

Ingredients

Dry ingredients

  • 1.5 cups all purpose flour
  • 1 teaspoon baking powder
  • 1 teaspoon baking soda
  • 0.5 teaspoon ground cinnamon
  • 0.25 teaspoon salt

Wet ingredients

  • 0.5 cup granulated sugar
  • 1 large egg
  • 3 large ripe bananas mashed
  • 0.25 cup melted unsalted butter
  • 1 teaspoon pure vanilla extract

Instructions 

  • Preheat oven to 350°F (180°C) and line a muffin pan with liners.
  • Combine dry ingredients in a bowl and set aside.
  • Whisk together sugar, egg, mashed bananas, melted butter, and vanilla in a large bowl.
  • Add dry ingredients to wet and stir until just combined.
  • Divide batter evenly into muffin liners and bake for 25-30 minutes.
  • Cool muffins on a rack and serve at room temperature.

Notes

Use ripe bananas for best flavor and sweetness.
Calories: 200kcal
Cost: $8
Course: Breakfast
Cuisine: American
Keyword: Banana

Discover the Joy of Baking: Apple Crisp Bars

If you’re looking for a delightful treat that encapsulates the essence of autumn and is perfect for any occasion, then you’ve landed in the right place! These Apple Crisp Bars are not only simple to make but they are also bursting with flavor and texture. Packed with sweet, tender apples and a crunchy oat topping, this recipe brings the warm flavors of apple pie into a convenient bar form. Let’s dive into how you can create these mouthwatering bars right in your kitchen!

Why You’ll Love This Recipe

Here are five reasons to get excited about baking these Apple Crisp Bars:

  • Quick and Easy: This recipe takes less than an hour from prep to baking, making it a fantastic option for busy weeknights or last-minute gatherings.
  • Perfect for All Occasions: Whether it’s a family gathering, a potluck, or just a cozy night in, these bars are sure to impress.
  • Make Ahead: You can prepare these bars in advance and store them, making them perfect for meal prep!
  • Customizable: Use your favorite apples or add in nuts or dried fruit to give a personal twist to the recipe.
  • Deliciously Satisfying: The combination of sweet apples and crunchy topping is irresistibly delicious!

Ingredient Breakdown

Let’s take a closer look at the ingredients needed to whip up these scrumptious bars:

Essential Ingredients

  • 3 cups apples: Peeled and diced. Choose tart varieties like Granny Smith for a delicious balance of sweetness and tartness.
  • 1 tablespoon lemon juice: Helps to brighten the flavor of the apples.
  • 3/4 cup granulated sugar: Sweetens the apple filling.
  • 1 teaspoon ground cinnamon: Adds warmth and depth to the flavors.
  • 1/2 teaspoon ground nutmeg: Complements the cinnamon and enhances the apple flavor.
  • 1 1/2 cups old-fashioned rolled oats: Provides the base for the crumble topping.
  • 1 cup all-purpose flour: Helps bind the crumble together.
  • 3/4 cup packed brown sugar: Adds moisture and a rich flavor.
  • 1/2 teaspoon salt: Balances the sweetness.
  • 3/4 cup unsalted butter, melted: Binds the crumble mixture and adds richness.

Substitutions

  • Apples: Feel free to mix different varieties of apples or even use pears for a different flavor profile.
  • Oats: For a gluten-free option, substitute with certified gluten-free oats.
  • Butter: Coconut oil or vegan butter can be used for a dairy-free version.
  • Sugar: Maple syrup or honey can replace granulated sugar for a natural sweetener.

How to Make Apple Crisp Bars

Side view of a slice of Apple Crisp Bar, showcasing juicy apple filling.

Now that we have our ingredients ready, let’s get baking! Follow these simple steps to create your Apple Crisp Bars:

  • Preheat the oven: Set it to 350°F (175°C) and grease a 9×13 inch baking pan.
  • Toss the apples: In a mixing bowl, combine diced apples with lemon juice, granulated sugar, cinnamon, and nutmeg. Set aside to let the flavors meld.
  • Prepare the crumble: In another bowl, mix oats, flour, brown sugar, and salt. Stir in melted butter until the mixture resembles a crumbly texture.
  • Assemble the bars: Press half of the oat mixture firmly into the bottom of the prepared pan. Spread the apple mixture evenly over the crust. Sprinkle the remaining oat mixture on top of the apples.
  • Bake: Place the pan in the oven and bake for 40 to 45 minutes, or until the top is golden brown and the apples are tender.
  • Cool and cut: Allow the bars to cool in the pan before cutting them into squares or rectangles.

Pro Tips for Perfect Apple Crisp Bars

To ensure your Apple Crisp Bars turn out perfectly every time, consider these expert tips:

  • Use tart apples: Tart apples like Granny Smith will balance the sweetness of the sugar.
  • Don’t overmix: When combining the topping ingredients, mix just until crumbly to maintain that delightful texture.
  • Let them cool: Allow the bars to cool completely before cutting, which helps them hold their shape.
  • Add a glaze: Drizzle a simple icing over the top for an extra touch of sweetness.
  • Try different spices: Experiment with spices like cardamom or ginger for a unique flavor twist.
  • Use a sharp knife: A sharp knife helps to cut clean lines in the bars once they’ve cooled.
  • Store properly: Keep the bars in an airtight container to maintain freshness.
  • Serve warm: These bars are delightful when served warm, perhaps with a scoop of vanilla ice cream!

Common Mistakes and Troubleshooting

If you encounter any issues while making your Apple Crisp Bars, here are some common mistakes and troubleshooting tips:

  • Bars are too crumbly: Ensure you’re pressing the oat mixture firmly into the pan.
  • Filling is too watery: Allow the apples to drain slightly after mixing with sugar and spices before adding them to the bars.
  • Burnt edges: If the edges are browning too quickly, cover them with foil while baking.
  • Too sweet: Adjust the sugar levels based on the tartness of your apples.

Delicious Variations to Try

Want to mix it up? Here are some fun variations to customize your Apple Crisp Bars:

  • Nutty Addition: Incorporate chopped walnuts or pecans into the crumble for added crunch and flavor.
  • Dried Fruits: Add raisins or cranberries to the apple filling for a chewy texture.
  • Peach Crisp Bars: Substitute half of the apples with diced peaches for a fruity twist.
  • Chocolate Drizzle: Melt some chocolate and drizzle it over the cooled bars for a decadent touch.

Storage and Make-Ahead Instructions

These Apple Crisp Bars can be made ahead of time and stored easily:

  • Room Temperature: Keep the bars in an airtight container at room temperature for up to 3 days.
  • Refrigerator: For longer storage, these bars can be stored in the fridge for up to a week.
  • Freezer: To freeze, wrap the bars tightly in plastic wrap and aluminum foil. They can last in the freezer for up to 3 months. Thaw overnight in the fridge before serving.

Frequently Asked Questions

Here are some common questions about making Apple Crisp Bars:

  • Can I use frozen apples? Yes, but thaw and drain them well to prevent excess moisture.
  • What’s the best way to serve these bars? These bars are delicious on their own or served warm with a scoop of ice cream.
  • Can I make these bars gluten-free? Absolutely! Substitute the all-purpose flour with a gluten-free flour blend.
  • How can I tell when the bars are done baking? The top should be golden brown, and the apples should be tender.
  • Can I double this recipe? Yes, you can double the ingredients and use a larger baking pan.
  • What type of oats should I use? Old-fashioned rolled oats work best for the crumble topping.
  • Can I add more spices? Feel free to experiment with additional spices like allspice or cloves for more flavor!
  • How do I know if my bars are too sweet? If you’re using sweet apples, consider reducing the sugar in the filling.

Nutritional Tips and Dietary Adaptations

This recipe can be adjusted to fit various dietary needs:

  • Lower Sugar: Reduce the amount of sugar used or substitute with a sugar alternative.
  • Vegan: Replace the butter with coconut oil or a vegan butter substitute.
  • High Fiber: Use whole wheat flour instead of all-purpose flour for added fiber.

Essential Equipment for Baking

To make the process smooth and easy, here’s what you’ll need:

  • 9×13 inch baking pan: Essential for holding all the delicious layers of your bars.
  • Mixing bowls: For combining ingredients efficiently.
  • Measuring cups and spoons: Accurate measurements are key to baking success.
  • Sharp knife: For cutting the bars into neat squares after baking.

Serving Suggestions

These Apple Crisp Bars are versatile and can be served in many delightful ways:

  • With Ice Cream: A scoop of vanilla ice cream on top makes for an indulgent dessert.
  • Drizzled with Caramel: Drizzle warm caramel sauce over the bars for extra sweetness.
  • Accompanied by Coffee: Pair these bars with a cup of hot coffee or tea for a cozy treat.

In conclusion, baking these Apple Crisp Bars is not just about following a recipe; it’s about creating something wonderful that you can share with loved ones. So, roll up your sleeves and get ready to enjoy a delightful treat that will fill your home with warmth and happiness. Happy baking!

Apple Crisp Bars Recipe

Prep Time 15 minutes
Cook Time 40 minutes
Total Time 55 minutes
Servings 12 bars
Calories 250
Delicious and easy-to-make apple crisp bars perfect for a sweet treat or dessert.

Ingredients

Fruits and Spices

  • 3 cups apples, peeled and diced
  • 1 tablespoon lemon juice
  • 3/4 cup granulated sugar
  • 1 teaspoon ground cinnamon
  • 1/2 teaspoon ground nutmeg
  • 1 1/2 cups old-fashioned rolled oats
  • 1 cup all-purpose flour
  • 3/4 cup packed brown sugar
  • 1/2 teaspoon salt
  • 3/4 cup unsalted butter, melted

Instructions 

  • Preheat oven to 350°F (175°C). Grease a 9x13 inch baking pan.
  • Toss apples with lemon juice, sugar, cinnamon, and nutmeg. Set aside.
  • Mix oats, flour, brown sugar, and salt; stir in melted butter until crumbly.
  • Press half of oat mixture into the pan. Spread apple mixture over crust. Top with remaining oat mixture.
  • Bake for 40-45 minutes until golden brown. Cool before cutting into bars.

Notes

Store in an airtight container for up to 3 days.
Calories: 250kcal
Cost: $12
Course: Dessert
Keyword: apple, bars, dessert

Are you ready to transform your weeknight dinners into delicious culinary experiences? This Honey Mustard Chicken Wrap is not just a meal; it’s a celebration of flavor that comes together in no time! Perfect for busy evenings or a satisfying lunch, this wrap is both easy to make and packed with wholesome ingredients. With juicy chicken, fresh vegetables, and a homemade honey mustard sauce, you’ll be wrapping yourself in flavor that you can feel good about. Let’s dive into this delightful recipe!

Why You’ll Love This Recipe

  • Quick and Easy: This recipe takes only 30 minutes from start to finish, making it ideal for busy nights.
  • Flavor-Packed: The combination of honey mustard sauce and juicy chicken makes for an irresistible flavor profile.
  • Customizable: You can easily adapt this recipe to suit your taste preferences or dietary needs.
  • Healthy Ingredients: Packed with fresh vegetables and lean protein, this wrap is a wholesome choice for any meal.
  • Fun to Make: Wrapping your own ingredients is a fun activity that kids and adults alike will enjoy!

Ingredient Breakdown

To create the perfect honey mustard chicken wraps, you’ll need a variety of fresh ingredients. Here’s what you’ll need:

  • Chicken Breast: 1 lb of boneless, skinless chicken breast filets for juicy, tender protein.
  • Corn Flakes: 3 cups, crushed to create a crispy coating for the chicken tenders.
  • Eggs: 2 medium eggs to help the cornflakes adhere to the chicken.
  • Coleslaw Mix: 1 cup for a crunchy texture and added flavor.
  • Lettuce: 1 cup, thinly sliced for freshness.
  • Radishes: ¼ cup, thinly sliced for a peppery kick.
  • Cherry Tomatoes: ½ cup, sliced for sweetness and color.
  • Cheddar Cheese: ½ cup, shredded for creaminess.
  • Pickles: 2, diced for an extra crunch.
  • Whole Wheat Tortillas: 2 (10 inches) for a healthy wrap base.
  • Honey Mustard Sauce Ingredients: 2 Tbsp plain Greek yogurt, 1 Tbsp mayonnaise, 1 Tsp grainy Dijon mustard, 2 Tsp honey, 2 Tsp white vinegar.

Substitutions and Variations

You can easily swap out ingredients to cater to your taste or dietary requirements. Here are some great options:

  • Protein Alternatives: Use turkey, tofu, or leftover rotisserie chicken for a quick protein source.
  • Tortilla Options: Swap whole wheat tortillas for spinach or gluten-free tortillas to suit your diet.
  • Vegetable Mix: Add or substitute with bell peppers, spinach, or cucumber for a different crunch.
  • Sauce Variations: Try using a spicy mustard or a honey barbecue sauce for a different flavor twist.

Step-by-Step Instructions

Side view of a juicy Honey Mustard Chicken Wrap featuring chicken, lettuce, and colorful veggies.

Now, let’s get cooking! Follow these simple steps to create your Honey Mustard Chicken Wraps:

  1. Prepare the Chicken: Preheat your air fryer to 400°F. Season chicken tenders with garlic and onion powder.
  2. Coat the Chicken: In one bowl, whisk the eggs. In another, place the crushed cornflakes. Dip each chicken piece in egg, then coat with cornflakes.
  3. Air Fry: Place chicken in the air fryer basket in a single layer. Cook for about 12 minutes, flipping halfway, until crispy and cooked through.
  4. Make the Honey Mustard Sauce: In a small bowl, whisk together yogurt, mayonnaise, Dijon mustard, honey, and vinegar until smooth.
  5. Mix the Vegetables: In a large bowl, combine coleslaw mix, lettuce, pickles, radishes, and cherry tomatoes. Drizzle with ¾ of the honey mustard sauce and mix well.
  6. Assemble the Wraps: Place half of the vegetable mixture on each tortilla, add two chicken strips, sprinkle with cheese, and drizzle with remaining sauce.
  7. Wrap It Up: Fold the sides of the tortilla over the filling, then roll tightly from the bottom up to secure.
  8. Enjoy: Slice in half and serve with extra honey mustard sauce for dipping!

Pro Tips for Perfect Honey Mustard Chicken Wraps

  • Chicken Temperature: Ensure your chicken is cooked to an internal temperature of 165°F for safety.
  • Warm Tortillas: Warm your tortillas in the microwave for 10-15 seconds to prevent tearing while wrapping.
  • Don’t Overfill: Less is more! Overfilling can make wrapping difficult and lead to spills.
  • Chill the Sauce: For a refreshing twist, chill the honey mustard sauce before serving.
  • Meal Prep: Prepare the ingredients ahead of time for a quick assembly during busy weeknights.

Common Mistakes and Troubleshooting

  • Chicken Not Crispy: Ensure the air fryer is preheated and avoid crowding the basket to ensure even cooking.
  • Soggy Wraps: Use a dry coleslaw mix and avoid adding too much sauce to prevent sogginess.
  • Tortilla Breaks: If your tortillas are too cold, they may crack. Warm them slightly before wrapping.

Storage and Make-Ahead Instructions

If you have leftovers, here’s how to store them:

  • Refrigerate: Store assembled wraps in an airtight container for up to 2 days.
  • Make Ahead: Prepare the chicken and sauce in advance, but assemble the wraps just before serving to maintain freshness.
  • Freezing Tips: You can freeze the cooked chicken tenders separately and thaw them when needed.

Frequently Asked Questions

  • Can I use pre-cooked chicken for this recipe? Yes, pre-cooked chicken works great! Just add it to the wraps with the other ingredients.
  • How do I store leftovers? Keep any leftover wraps in an airtight container in the refrigerator for up to 2 days.
  • Can I make Honey Mustard Chicken Wraps ahead of time? Yes! You can prepare the chicken and sauce in advance, but assemble the wraps just before serving.
  • What can I use instead of honey? Maple syrup or agave syrup can be great substitutes for honey in the sauce.
  • Can I add more vegetables? Absolutely! Feel free to add any fresh vegetables you love.
  • Are these wraps gluten-free? They can be! Use gluten-free tortillas and ensure your mustard and other ingredients are gluten-free.
  • How can I make this recipe spicier? Add a dash of hot sauce to the honey mustard sauce for a spicy kick!
  • What should I serve with these wraps? Pair them with a fresh salad or sweet potato fries for a complete meal.

Nutrition Tips and Dietary Adaptations

This recipe can easily accommodate various dietary needs:

  • Low-Carb Option: Use lettuce wraps instead of tortillas for a low-carb meal.
  • Vegan Adaptation: Replace chicken with grilled tofu or tempeh and use vegan mayonnaise in the sauce.
  • Low-Fat Version: Use Greek yogurt and reduce the amount of mayonnaise in the honey mustard sauce.

Equipment Recommendations

  • Air Fryer: Perfect for making crispy chicken tenders without excess oil.
  • Food Processor: Great for crushing cornflakes quickly and easily.
  • Bowls: Use medium and large mixing bowls for easy preparation and mixing.

Serving Suggestions

These wraps are perfect for any occasion! Here are some serving ideas:

  • Picnic Perfect: Cut them into smaller pieces for easy sharing at picnics or gatherings.
  • Lunch Box Friendly: Pack them in lunch boxes with some fruit for a balanced meal.
  • Pair with Dips: Serve with extra honey mustard sauce or a yogurt dip for added flavor.

In conclusion, this Honey Mustard Chicken Wrap is a delightful and simple recipe that’s sure to become a favorite in your home. With its incredible flavors, easy preparation, and endless customization options, you can’t go wrong. So grab your ingredients, roll up those wraps, and enjoy a meal that’s as fun to make as it is to eat! Happy cooking!

Honey Mustard Chicken Wrap

Prep Time 10 minutes
Cook Time 12 minutes
Total Time 22 minutes
Servings 2 wraps
Calories 850
A delicious and crispy chicken wrap with fresh vegetables and a tangy honey mustard sauce, perfect for a quick lunch or dinner.

Ingredients

Main ingredients

  • 3 cups corn flakes
  • 1 Tsp garlic powder
  • ½ Tsp onion powder
  • 1 lb chicken breast filets
  • 2 medium eggs
  • ½ batch air fryer chicken tenders without buffalo sauce
  • 1 cup bagged coleslaw mix
  • 1 cup lettuce, thinly sliced
  • ¼ cup radishes, thinly sliced
  • ½ cup cherry tomatoes, sliced
  • ½ cup shredded cheddar cheese
  • 2 diced pickles
  • 2 10 inch whole wheat tortillas
  • 2 Tbsp plain Greek yogurt
  • 1 Tbsp mayonnaise
  • 1 Tsp grainy dijon mustard
  • 2 Tsp honey
  • 2 Tsp white vinegar

Instructions 

  • Preheat the air fryer to 400°F (200°C).
  • Pulse cornflakes until breadcrumb-like or crush in a bag. Season chicken with garlic and onion powder. Dip in beaten eggs, then coat with crushed cornflakes.
  • Arrange chicken in the air fryer, cook for 12 minutes, flipping halfway, until crispy and cooked through.
  • Whisk together honey, mustard, mayonnaise, yogurt, and vinegar to make sauce.
  • Mix coleslaw, lettuce, radishes, and tomatoes; toss with ¾ of the honey mustard sauce. Fill tortillas with the mixture, chicken, cheese, and drizzle with remaining sauce. Roll tightly and serve.

Notes

For extra crunch, double coat the chicken in cornflakes.
Calories: 850kcal
Cost: $15
Course: Main Course
Cuisine: American
Keyword: Chicken, honey mustard, Wrap

Effortless Chicken Avocado Quesadillas: Your New Weeknight Hero!

Welcome to your new favorite weeknight meal: Chicken Avocado Quesadillas! These delicious quesadillas are not only quick to prepare but also packed with flavor and customizable to your taste. If you’re looking for an easy recipe that the whole family will love, you’re in the right place. In this guide, I’ll walk you through everything you need to know about making the perfect quesadillas, from ingredient breakdowns to expert tips and variations. Let’s get cooking!

Why You’ll Love This Recipe

  • Quick Preparation: In under 30 minutes, you can have a delicious meal ready, making it perfect for busy weeknights.
  • Flavor-Packed: The combination of spices and fresh ingredients ensures that every bite is bursting with flavor.
  • Customizable: Whether you prefer more veggies, extra cheese, or different proteins, feel free to adapt the recipe to suit your preferences!
  • Kid-Friendly: These quesadillas are not only easy to make, but they’re also fun to eat, making them a hit with the kids.
  • Perfect for Meal Prep: Make a batch ahead of time, and you’ll have delicious leftovers ready to go!

Ingredient Breakdown

Let’s take a closer look at the ingredients you’ll need to whip up these mouthwatering quesadillas:

  • 2 tablespoons olive oil: Use high-quality olive oil for sautéing; it adds a rich flavor.
  • 1 pound chicken breast: Thinly sliced for quick cooking. You can substitute with turkey or cooked chicken for convenience.
  • Salt and pepper: Essential seasonings to enhance the chicken’s flavor.
  • 1 teaspoon chili powder: Adds warmth and depth to the dish.
  • 1 teaspoon cumin: Provides a nice earthy flavor that complements the other spices.
  • 1/2 teaspoon garlic powder: For a hint of garlicky goodness.
  • 1/2 teaspoon paprika: Adds a subtle smokiness.
  • 1 large onion: Sliced for sweetness and texture. You can also use red onions for a bolder flavor.
  • 1 large avocado: Optional but recommended for creaminess and freshness.
  • 1 bell pepper: Any color works! Adds crunch and sweetness.
  • 8 flour tortillas: Medium size for easy folding. Whole wheat or corn tortillas are great alternatives.
  • 2 cups shredded cheese: A mix of Mexican blend or cheddar and Monterey Jack for the best melt.
  • Optional toppings: Serve with sour cream, salsa, or guacamole for an extra flavor boost.

Pro Tips for Perfect Quesadillas

Side view of a delicious chicken and avocado quesadilla, showcasing layers of ingredients and toasted tortilla.

To ensure your quesadillas are nothing short of perfection, keep these expert tips in mind:

  • Cook chicken thoroughly: Ensure your chicken is fully cooked; juices should run clear. This guarantees juicy and safe-to-eat quesadillas.
  • Don’t overload the filling: While it’s tempting to pack in lots of ingredients, too much filling can make it difficult to cook evenly.
  • Preheat your skillet: A hot skillet ensures a crispy tortilla while the cheese melts perfectly.
  • Use a mix of cheeses: Combining different cheeses enhances flavor and meltability—try cheddar with Monterey Jack!
  • Let the filling cool slightly: This prevents the tortillas from becoming soggy when folded.
  • Press down while cooking: Gently pressing the quesadilla with a spatula helps it cook evenly and creates a crispy texture.
  • Cut with a pizza cutter: For clean, precise wedges, a pizza cutter is the way to go!
  • Experiment with spices: Feel free to add cayenne or smoked paprika if you like a little kick!

Common Mistakes and Troubleshooting

Even the best cooks make mistakes, so here are some common pitfalls and how to avoid them:

  • Too soggy: If your quesadillas are soggy, it may be due to excess moisture from ingredients. Make sure to pat vegetables dry before adding.
  • Uneven cooking: If one side is browner than the other, your skillet may not be at an even temperature. Adjust heat as needed and cook in batches if necessary.
  • Cheese not melted: If your cheese isn’t melting, try covering the skillet with a lid for a minute to trap heat and steam.
  • Filling spills out: If your quesadilla is bursting at the seams, use less filling and remember to fold it gently.

Delicious Variations

Want to switch things up? Here are some tasty variations to try:

  • Vegetarian Quesadillas: Replace chicken with black beans, corn, and extra veggies like spinach or mushrooms.
  • Spicy Chicken Quesadillas: Add diced jalapeños or a dash of hot sauce to the chicken mixture for extra heat.
  • BBQ Chicken Quesadillas: Use shredded rotisserie chicken and mix with BBQ sauce for a tangy twist.
  • Breakfast Quesadillas: Add scrambled eggs and breakfast sausage for a hearty breakfast option.

Storage and Make-Ahead Instructions

Planning to make these quesadillas ahead of time? Here’s how to store them:

  • Refrigerator: Store cooked quesadillas in an airtight container for up to 3 days.
  • Freezer: Freeze uncooked quesadillas wrapped in plastic wrap and placed in a freezer bag for up to 2 months. Cook from frozen, adding a few extra minutes to the cooking time.
  • Reheating: To reheat, place quesadillas in a skillet over low heat until warmed through, or microwave for 30-60 seconds.

Frequently Asked Questions

Here are some common questions you might have:

  • Can I use leftover chicken? Absolutely! Shredded rotisserie chicken works great in this recipe.
  • What type of cheese is best? A mix of cheddar and Monterey Jack is ideal for melting, but feel free to experiment!
  • How can I make these quesadillas healthier? Use whole wheat tortillas and add more veggies to boost nutrition.
  • What can I serve with quesadillas? A side of salsa, guacamole, or a fresh salad pairs wonderfully!
  • Can I make these quesadillas gluten-free? Yes, just use gluten-free tortillas, and you’ll have a delicious meal!
  • What’s the best way to cut quesadillas? Use a pizza cutter for clean, even slices.
  • How do I know when they’re done? Look for a golden-brown tortilla and melted cheese inside!
  • Can I bake these instead of frying? Yes! Brush with olive oil and bake at 400°F (200°C) for 10-15 minutes.

Nutrition Tips and Dietary Adaptations

Want to make this meal even healthier? Here are some tips:

  • Increase Fiber: Add black beans or chickpeas to boost fiber content.
  • Low-Calorie Option: Use low-fat cheese and whole grain tortillas.
  • Gluten-Free: Opt for corn tortillas or any gluten-free wrap.
  • Vegan Option: Substitute chicken with tofu or tempeh, and use vegan cheese.

Equipment Recommendations

Here are some kitchen tools that will help you create the best quesadillas:

  • Non-stick skillet: A good quality skillet prevents sticking and ensures even cooking.
  • Spatula: Use a wide spatula to flip and serve the quesadillas easily.
  • Pizza cutter: For quick and clean cuts, a pizza cutter is a must-have.

Serving Suggestions

To elevate your quesadilla experience, consider these serving ideas:

  • Top with fresh cilantro: A sprinkle of chopped cilantro adds freshness.
  • Serve with a side of colorful slaw: A crunchy slaw adds texture and balances the meal.
  • Offer a variety of dips: Provide salsa, guacamole, and sour cream for added flavor.

In conclusion, these Chicken Avocado Quesadillas are a versatile and delicious dish perfect for any occasion. With the tips, variations, and expert advice provided, you’re ready to create a meal that not only satisfies your taste buds but also brings joy to your kitchen. Remember, cooking is all about exploration and enjoying the process, so have fun and make this recipe your own. Happy cooking!

Chicken Avocados Quesadillas

Prep Time 10 minutes
Cook Time 15 minutes
Total Time 25 minutes
Servings 4 servings
Calories 550
Delicious and cheesy quesadillas filled with seasoned chicken and fresh avocados, perfect for a quick meal.

Ingredients

Main ingredients

  • 2 tablespoons olive oil
  • 1 pound chicken breast, thinly sliced
  • Salt and pepper Salt and pepper (to taste)
  • 1 teaspoon chili powder
  • 1 teaspoon cumin
  • 1/2 teaspoon garlic powder
  • 1/2 teaspoon paprika
  • 1 large onion, sliced
  • 1 large avocado, sliced (optional) (optional)
  • 1 any color bell pepper, sliced
  • 8 medium flour tortillas
  • 2 cups shredded cheese (Mexican blend or cheddar and Monterey Jack)
  • Optional sour cream, salsa, guacamole (for serving)

Instructions 

  • Season chicken with chili powder, cumin, garlic powder, paprika, salt, and pepper. Cook in olive oil until fully cooked, then shred or chop.
  • Lay a tortilla flat, sprinkle with cheese, add chicken and optional ingredients, then top with more cheese and fold in half.
  • Cook folded quesadilla in a skillet over medium heat until golden and cheese melts, about 2-3 minutes per side. Cut into wedges and repeat.

Notes

Feel free to add sautéed onions, peppers, or jalapeños for extra flavor.
Calories: 550kcal
Cost: $15
Course: Main Course
Cuisine: Mexican
Keyword: Chicken, Quesadilla

Transform Your Weeknight Dinners with Chicken Pesto Flatbread

Are you ready to elevate your weeknight dinners with a dish that’s not only delicious but also a breeze to make? Look no further! This Chicken Pesto Flatbread is the answer to your busy evenings, combining tender chicken, vibrant pesto, and gooey mozzarella cheese into a meal that comes together in just minutes. In this comprehensive guide, I’ll walk you through every step, share essential tips, and inspire you with delicious variations that will leave your family craving more.

Why You’ll Love This Recipe

This Chicken Pesto Flatbread is more than just a meal; it’s an experience! Here’s why you’ll fall in love with this recipe:

  • Quick and Easy: Ready in under 30 minutes, perfect for those busy weeknights when you need a satisfying meal without the hassle.
  • Flavorful Combination: The harmonious blend of basil pesto, tender chicken, and melted mozzarella creates a taste sensation that’s hard to resist.
  • Customizable: Feel free to adapt the toppings to match your preferences or whatever you have on hand, making it a versatile dish.
  • Crowd-Pleaser: Ideal for family dinners, gatherings, or even a cozy night in—everyone will love it!
  • Comforting and Satisfying: There’s something deeply comforting about a warm, crisp flatbread fresh out of the oven, especially when topped with your favorite ingredients.

Ingredients for Chicken Pesto Flatbread

To create this delectable flatbread, gather the following ingredients:

  • 2 flatbreads: Store-bought or homemade, both work beautifully.
  • 1 cup cooked chicken breast: Shredded or chopped. Rotisserie chicken is a great time-saver!
  • 1/2 cup basil pesto: Store-bought or homemade; both options burst with flavor.
  • 1 1/2 cups shredded mozzarella cheese: The cheese is key for that gooey, melty goodness.
  • 1/4 cup cherry tomatoes: Halved for a pop of sweetness.
  • 1/4 red onion: Thinly sliced to add a hint of sharpness.
  • 1 tablespoon olive oil: For drizzling on the flatbread to enhance crispiness.
  • Salt and pepper: To taste.
  • Optional: Arugula or fresh basil leaves for garnish, adding freshness to your dish.

How to Make Chicken Pesto Flatbread

Side view of Chicken Pesto Flatbread showcasing its layers of ingredients and vibrant colors.

Follow these simple steps to create your Chicken Pesto Flatbread:

Step 1: Preheat the Oven

Start by heating your oven to 425°F (220°C). If you have a pizza stone, place it in the oven to preheat; it’ll help make your flatbread extra crispy.

Step 2: Prepare the Flatbread Base

Lay your flatbreads on a baking sheet lined with parchment paper. Drizzle each one lightly with olive oil, spreading it across the surface to help crisp the crust.

Step 3: Add the Pesto

Spoon the basil pesto onto each flatbread, spreading it evenly all the way to the edges. The smell alone at this stage is irresistible!

Step 4: Layer on the Toppings

Distribute the shredded or chopped cooked chicken over the pesto layer. Follow with mozzarella cheese, ensuring everything is well covered for that perfect cheesy melt. Add halved cherry tomatoes and thinly sliced red onions for added color and sweetness.

Step 5: Bake to Perfection

Slide the baking sheet into the oven and bake for 10-12 minutes, or until the cheese is melted, bubbly, and starting to brown, and the edges of the flatbread are golden and crisp.

Step 6: Garnish and Serve

Remove from the oven and let cool for a couple of minutes. Sprinkle with fresh arugula or basil leaves, slice, and serve immediately! Enjoy your delicious creation!

Pro Tips for the Best Chicken Pesto Flatbread

  • Use rotisserie chicken: For quicker prep, rotisserie chicken is a game-changer. Just shred it and you’re ready to go!
  • Experiment with pesto: Whether you prefer homemade or store-bought, both can bring unique flavors to your flatbread.
  • Don’t overdo the toppings: Less is often more; too many toppings can lead to soggy flatbread.
  • Try different cheeses: Feel free to mix mozzarella with provolone or goat cheese for a different flavor profile.
  • Use a pizza stone: If you have one, it can help achieve a restaurant-quality crispiness.
  • Keep an eye on the cheese: Every oven is different; watch for that perfect golden-brown color.
  • Incorporate vegetables: Add spinach, bell peppers, or mushrooms for extra nutrition and flavor.
  • Slice before garnishing: For easier serving, slice your flatbread before adding fresh herbs.

Common Mistakes and Troubleshooting

Here are a few common pitfalls and how to avoid them:

  • Soggy flatbread: Ensure your flatbreads are prepped with olive oil and don’t overload with toppings.
  • Cheese not melting properly: Check your oven temperature; higher heat helps achieve that gooey texture.
  • Flatbread burning: Keep an eye on it as it bakes; every oven cooks differently.

Delicious Variations

Feel free to get creative with these variations:

  • Vegetarian Delight: Swap chicken for grilled zucchini or mushrooms for a hearty vegetarian option.
  • BBQ Chicken Pesto: Replace pesto with BBQ sauce for a smoky twist, and top with grilled chicken.
  • Spicy Kick: Add jalapeños or red pepper flakes for a heat boost.
  • Breakfast Flatbread: Top with scrambled eggs and avocado for a delightful brunch option.

Storage and Make-Ahead Instructions

This Chicken Pesto Flatbread can be stored or prepared in advance:

  • Storing: Keep leftover flatbread in an airtight container in the refrigerator for up to 3 days.
  • Reheating: Reheat in the oven at 350°F (175°C) for about 10 minutes for a crisp texture.
  • Make-Ahead: Prepare the flatbreads up to the baking stage and store in the fridge for up to 24 hours.

Frequently Asked Questions

  • Can I use store-bought pesto? Absolutely! It saves time and still delivers amazing flavor.
  • What type of flatbread should I use? You can use pita, naan, or even homemade flatbread.
  • Can I freeze the flatbread? Yes, you can freeze the assembled flatbread before baking; just thaw and bake when ready.
  • Is this recipe gluten-free? Use gluten-free flatbread to make it suitable for gluten-sensitive diets.
  • Can I add other proteins? Definitely! Try adding shrimp or turkey for variation.
  • What can I serve with it? A crisp salad or soup pairs wonderfully with this dish.
  • How do I make it dairy-free? Use dairy-free cheese options and ensure your pesto is dairy-free.
  • Can I make this in advance? Yes, prepping toppings ahead of time makes assembly quick and easy!

Nutritional Tips and Dietary Adaptations

This Chicken Pesto Flatbread can easily fit into various dietary preferences:

  • Low-Carb: Use cauliflower flatbreads or zucchini slices instead of traditional flatbread.
  • Dairy-Free: Substitute with plant-based cheese and ensure your pesto is dairy-free.
  • High-Protein: Add extra chicken or chickpeas for a protein boost.

Essential Equipment Recommendations

To make this Chicken Pesto Flatbread, you’ll need:

  • Baking sheet: A sturdy sheet for even baking.
  • Parchment paper: To prevent sticking and aid in cleanup.
  • Pizza stone (optional): For achieving a perfectly crispy crust.

Serving Suggestions

Here are some ideas to elevate your serving experience:

  • Pair with a fresh salad: A light arugula salad with lemon vinaigrette complements the richness of the flatbread.
  • Add a side of dips: Serve with marinara or a creamy garlic sauce for extra flavor.
  • Garnish creatively: Top with additional fresh herbs or a drizzle of balsamic glaze for that gourmet touch.

In conclusion, this Chicken Pesto Flatbread recipe is not just a meal; it’s a canvas for your culinary creativity. With its quick prep time, rich flavors, and endless customization options, you’ll find yourself making it again and again. So, roll up your sleeves, gather your ingredients, and let’s make dinner exciting again!

Chicken Pesto Flatbread

Prep Time 10 minutes
Cook Time 12 minutes
Total Time 22 minutes
Servings 4 pieces
Calories 450
A delicious and easy-to-make flatbread topped with chicken, pesto, cheese, and fresh vegetables, perfect for a quick meal or snack.

Ingredients

Flatbreads

  • 2 pieces flatbreads (store-bought or homemade)
  • 1 cup cooked chicken breast, shredded or chopped
  • 0.5 cup basil pesto
  • 1.5 cups shredded mozzarella cheese
  • 0.25 cup cherry tomatoes, halved
  • 0.25 red onion red onion, thinly sliced
  • 1 tablespoon olive oil

Salt and pepper

  • to taste Salt and pepper

Garnish

  • optional arugula or fresh basil leaves (for garnish)

Instructions 

  • Preheat oven to 425°F (220°C). Place a pizza stone in the oven if available.
  • Lay flatbreads on a parchment-lined baking sheet. Lightly drizzle with olive oil.
  • Spread pesto evenly over each flatbread. Top with chicken, cheese, cherry tomatoes, and red onions.
  • Bake for 10-12 minutes until cheese is bubbly and edges are golden.
  • Remove from oven, garnish with arugula or basil if desired, slice, and serve.

Notes

For extra flavor, add a drizzle of balsamic glaze before serving.
Calories: 450kcal
Cost: $15
Course: Main Course
Cuisine: American
Keyword: Chicken, flatbread, Pesto