Author

Steven

Browsing

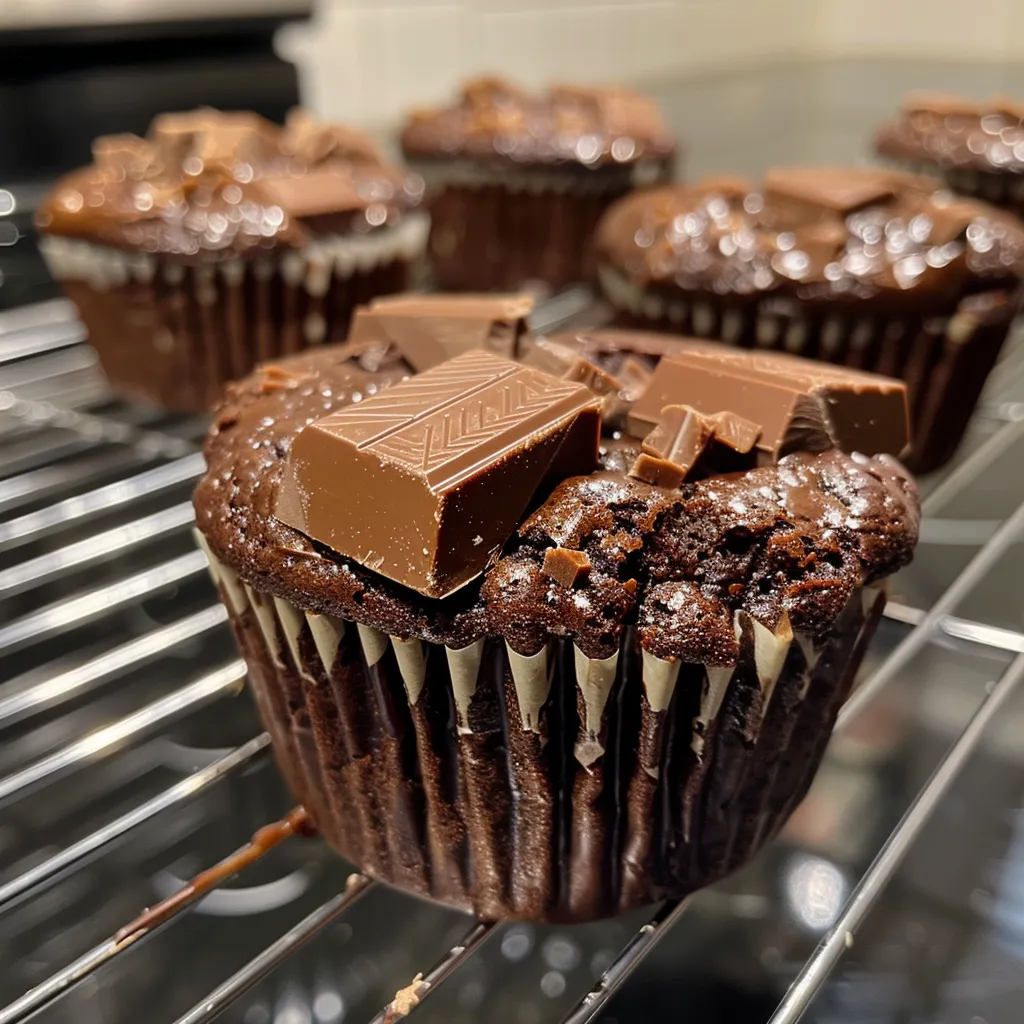
Welcome to the delightful world of baking, where simple ingredients come together to create something truly magical! Today, we’re diving into the rich, moist, and utterly delicious realm of double chocolate banana bread. This recipe is perfect for any time of day, whether you’re enjoying it as a cozy breakfast treat, a sweet afternoon snack, or an indulgent dessert. With its luscious chocolate flavor and soft texture, this bread is sure to become a beloved staple in your kitchen!

In this guide, we’ll explore everything you need to know to make the best double chocolate banana bread, from the ingredients to tips for achieving that perfect bake. So, roll up your sleeves, and let’s get started!

Why You’ll Love This Recipe

  • Decadent flavor: The combination of ripe bananas and rich chocolate creates a moist and flavorful bread that is hard to resist.
  • Simple ingredients: This recipe uses common pantry staples, making it easy to whip up whenever a chocolate craving strikes.
  • Perfectly moist: Thanks to the bananas and yogurt, the bread remains moist for days, ensuring that you can savor every slice.
  • Freezes well: You can easily freeze this bread for later enjoyment, making it a great make-ahead option for busy weeks.
  • Customizable: Add your favorite nuts, chocolate chips, or even a swirl of peanut butter for extra flavor and texture!

Ingredients Breakdown

Here’s everything you’ll need to create this scrumptious double chocolate banana bread:

  • All-purpose flour: 1 and 1/4 cups (156g), spooned and leveled. For a gluten-free option, substitute with a 1:1 gluten-free flour blend.
  • Cocoa powder: 1/2 cup (41g) of unsweetened natural cocoa powder. Avoid Dutch-process cocoa for the best flavor.
  • Baking soda: 1 teaspoon, for that perfect rise.
  • Salt: 1/2 teaspoon, to enhance the flavors.
  • Chocolate chips: 3/4 cup (135g) semi-sweet chocolate chips plus 2 tablespoons (22g) for topping. Feel free to use dark chocolate for a richer taste.
  • Unsalted butter: 1/2 cup (113g), softened to room temperature for easy mixing.
  • Granulated sugar: 3/4 cup (150g) to balance the bitterness of the cocoa.
  • Eggs: 2 large eggs, at room temperature, for better emulsification.
  • Plain yogurt or sour cream: 1/4 cup (60g), at room temperature, to add moisture.
  • Mashed bananas: 1 and 1/2 cups (345g) which is about 4 medium or 3 large ripe bananas. The riper, the better!
  • Vanilla extract: 1 teaspoon to enhance the overall flavor.
  • Hot water: 2 tablespoons (30ml) to help dissolve the cocoa powder and bring out the chocolate flavor.

Pro Tips for Perfect Banana Bread

  • Use ripe bananas: The more spots on your bananas, the sweeter and more flavorful your bread will be.
  • Don’t over-mix: Mix until just combined to avoid a dense texture. A few lumps are okay!
  • Check for doneness: Start checking the bread at the 60-minute mark. It’s done when a toothpick inserted in the center comes out clean with just a few moist crumbs.
  • Cool properly: Let the bread cool in the pan for at least 1-2 hours before slicing to ensure clean cuts.
  • Experiment with flavors: Add chopped nuts, dried fruit, or spices like cinnamon for a unique twist.
  • Store properly: Keep your banana bread covered at room temperature for up to 5 days, or in the fridge for up to a week.
  • Freeze for later: Wrap slices in plastic wrap and store in an airtight container for up to 3 months.
  • Use quality chocolate: Opt for high-quality chocolate chips for the best melting and flavor experience.

Common Mistakes and Troubleshooting

Deliciously moist double chocolate banana bread showcasing rich chocolate layers and banana texture.

Even the best bakers can make mistakes, so here are some common pitfalls and how to avoid them:

  • Dense bread: This often happens if you over-mix the batter. Remember, mix until just combined!
  • Dry texture: Overbaking can lead to dryness. Make sure to check for doneness early.
  • Too sweet: If you find the bread too sweet, try reducing the sugar by 1/4 cup next time.
  • Not chocolatey enough: Feel free to increase the amount of cocoa powder or chocolate chips to suit your taste!

Variations to Try

Want to mix things up? Here are some delicious variations of this double chocolate banana bread:

  • Nutty chocolate banana bread: Add 1 cup of chopped walnuts or pecans for extra crunch.
  • Peanut butter swirl: Swirl 1/2 cup of peanut butter into the batter before baking for a nutty twist.
  • Chocolate chip banana muffins: Use the same batter to make muffins, adjusting the bake time to 18-20 minutes.
  • Mint chocolate banana bread: Add 1/2 teaspoon of peppermint extract for a refreshing flavor.

Storage and Make-Ahead Instructions

This banana bread is perfect for make-ahead baking! Here’s how to store it:

  • Room temperature: Store in an airtight container at room temperature for up to 5 days.
  • Refrigerator: It can be kept in the fridge for up to 1 week.
  • Freezer: Wrap tightly in plastic wrap and place in an airtight container or freezer bag for up to 3 months. Thaw overnight in the fridge or at room temperature.

Frequently Asked Questions

  • Can I use frozen bananas? Yes! Just thaw them and drain any excess liquid before mashing.
  • What if I don’t have yogurt? You can substitute it with sour cream or even applesauce for a lighter version.
  • Can I make this vegan? Yes! Substitute the eggs with flax eggs and use non-dairy yogurt and butter.
  • How do I know when my banana bread is done? Insert a toothpick in the center; it should come out clean with a few moist crumbs.
  • Can I use whole wheat flour? Absolutely! Just note that it may change the texture slightly.
  • What can I add to enhance flavor? Spices like cinnamon or nutmeg, or even espresso powder for a mocha flavor.
  • How do I prevent my bread from sticking? Greasing the pan well and using parchment paper can help prevent sticking.
  • Can I customize the chocolate? Yes! Feel free to mix dark, milk, or even white chocolate chips for a fun twist.

Nutrition Tips and Dietary Adaptations

This double chocolate banana bread can be easily adapted to meet various dietary needs:

  • Gluten-free: Use a gluten-free flour blend.
  • Lower sugar: Reduce the sugar and use ripe bananas for natural sweetness.
  • Vegan: Substitute eggs with flax eggs and dairy with plant-based alternatives.
  • Nut-free: Omit any nuts added to the recipe to make it safe for nut allergies.

Equipment Recommendations

To achieve the best results, here are some essential tools you’ll need:

  • Loaf pan: A 9×5-inch nonstick loaf pan is ideal for even baking.
  • Mixing bowls: Use a large bowl for dry ingredients and another for wet ingredients.
  • Handheld or stand mixer: For easy mixing of the batter, a mixer will save you time and effort.
  • Measuring cups and spoons: Precision is key in baking, so make sure you have the right tools!

Serving Suggestions

Once your delicious double chocolate banana bread is baked and cooled, it’s time to serve! Here are some delightful ideas:

  • Spread with butter: A thin layer of butter can add richness to each slice.
  • Top with whipped cream: A dollop of whipped cream adds an airy contrast to the dense bread.
  • Pair with coffee: Enjoy a slice alongside a hot cup of coffee or tea for a perfect pairing.
  • Serve warm: Warm slices straight from the oven with melting chocolate chips make a decadent treat.

In conclusion, baking your own double chocolate banana bread is not just about creating a delicious treat; it’s about embracing the joy of cooking and sharing love through food. Whether you’re a seasoned pro or a beginner, this recipe is designed to empower you to create something special in your kitchen. So grab those ripe bananas and get ready to indulge in a slice (or two) of this chocolaty goodness. Happy baking!

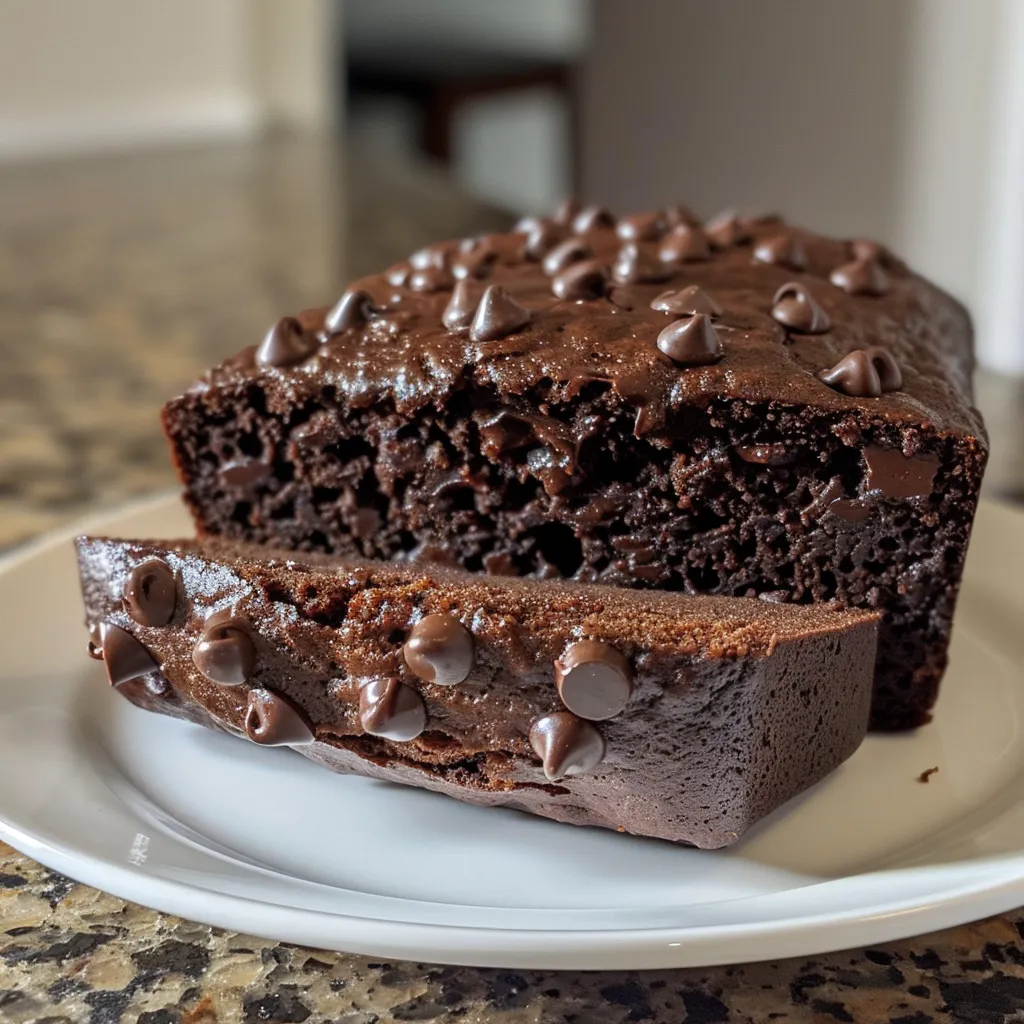
Double Chocolate Banana Bread

Prep Time 15 minutes
Cook Time 1 hour 5 minutes
Total Time 1 hour 20 minutes
Servings 10 slices
Calories 350
A rich and moist banana bread infused with cocoa and chocolate chips, perfect for a decadent treat.

Ingredients

Dry Ingredients

  • 1.75 cups all-purpose flour (spooned leveled)
  • 0.5 cup unsweetened natural cocoa powder (not Dutch process)
  • 1 teaspoon baking soda
  • 0.5 teaspoon salt
  • 0.75 cup semi-sweet chocolate chips
  • 2 tablespoons additional chocolate chips (for topping)

Wet Ingredients

  • 0.5 cup unsalted butter (softened to room temperature)
  • 0.75 cup granulated sugar
  • 2 large eggs (at room temperature)
  • 0.25 cup plain yogurt or sour cream (at room temperature)
  • 1.5 cups mashed bananas (about 4 medium or 3 large ripe bananas)
  • 1 teaspoon vanilla extract (pure)
  • 2 tablespoons hot water

Instructions 

  • Preheat oven to 350°F (177°C). Grease a 9.5-inch loaf pan with nonstick spray.
  • Whisk dry ingredients and 2 tablespoons chocolate chips; set aside.
  • Cream butter and sugar until smooth. Add eggs one at a time, then mix in yogurt, bananas, and vanilla. Add dry ingredients and hot water; mix until just combined.
  • Pour batter into prepared pan, sprinkle remaining chocolate chips on top, and bake for 60-65 minutes. Cover with foil halfway through baking.
  • Cool in pan for 1-2 hours before removing. Store at room temperature for 5 days or refrigerate up to 1 week.

Notes

For best flavor, let the banana bread sit for a day before slicing.
Calories: 350kcal
Cost: $12
Course: Dessert
Cuisine: American
Keyword: Banana, bread, chocolate

Welcome to Your New Favorite Baking Adventure!

Are you ready to elevate your baking game with a treat that’s rich, fudgy, and utterly delightful? In this comprehensive guide, we’ll explore how to make the ultimate brownie muffins—a perfect blend of a brownie’s decadence and a muffin’s convenience. This recipe is designed to be approachable, ensuring that both novice and experienced bakers can achieve delicious results. Let’s dive into the world of brownie muffins!

Why You’ll Love This Recipe

These brownie muffins aren’t just a treat; they are an experience. Here are five reasons why you’ll love making them:

  • Decadent Flavor: Each muffin is bursting with rich chocolate flavor that satisfies even the most intense sweet tooth.
  • Perfect Portion Size: Enjoy the indulgence of brownies in a convenient muffin form that’s great for on-the-go snacking.
  • Simple Ingredients: With basic pantry staples, you can whip these up anytime the craving strikes.
  • Quick Baking Time: In just about 15 minutes, you can have fresh, warm muffins ready to enjoy.
  • Versatile Treat: These muffins are perfect for breakfast, dessert, or any time you want a chocolate fix.

Ingredients Breakdown

Before we get into the baking, let’s take a closer look at the ingredients you’ll need and some easy substitutions:

  • Chocolate: Use 2 3/4 cups (113g) of bittersweet or semisweet chocolate, coarsely chopped. If you prefer, you can substitute half of the chocolate with chocolate chips for added texture.
  • Butter: ½ cup (113g) unsalted butter, cut into small pieces. For a healthier option, consider using coconut oil or unsweetened applesauce.
  • Flour: 1 3/4 cups (55g) all-purpose flour. If you need a gluten-free option, almond flour or a gluten-free flour blend works well.
  • Cocoa Powder: 1/3 cup (35g) of Dutch-process unsweetened cocoa powder is essential for that rich chocolate flavor.
  • Salt: A pinch of salt enhances the chocolate flavors, balancing the sweetness.
  • Eggs: 2 large eggs, which provide structure and moisture to the muffins.
  • Sugar: ¾ cup (150g) granulated sugar adds sweetness. You can substitute with brown sugar for a deeper flavor.

Step-by-Step Instructions

A delicious brownie muffin showcasing a rich chocolate texture and shiny surface.

Now that you have your ingredients ready, it’s time to get baking! Follow these detailed steps to create your brownie muffins:

  • Step 1: Preheat the Oven: Set your oven to 350°F (180°C) and line a 12-cup muffin pan with muffin liners. This ensures easy removal of the muffins after baking.
  • Step 2: Melt the Chocolate and Butter: In a medium heatproof bowl, combine the chopped chocolate and butter. Heat this mixture in the microwave in 20-second intervals, stirring in between, until fully melted. Alternatively, you can melt them together in a double boiler.
  • Step 3: Prepare Dry Ingredients: In a separate bowl, sift together the flour, cocoa powder, and salt. This step helps to remove any lumps and ensures even distribution.
  • Step 4: Whisk Eggs and Sugar: Using an electric mixer on high speed, whisk the eggs and sugar together until the mixture is thick and pale—about 4 minutes. This will create a light and airy batter.
  • Step 5: Combine Mixtures: Reduce the mixer speed to low and gradually add in the melted chocolate mixture. Stop the mixer and gently fold in the dry ingredients using a rubber spatula until just combined. Remember, don’t overmix!
  • Step 6: Fill the Muffin Cups: Divide the batter evenly among the muffin cups, filling them about ¾ full. For extra indulgence, sprinkle additional chopped chocolate on top before baking.
  • Step 7: Bake to Perfection: Place the muffin pan in the preheated oven and bake for 13-15 minutes. To test for doneness, insert a toothpick into the center; it should come out with moist crumbs, not dry.
  • Step 8: Cool and Enjoy: Allow the muffins to cool in the pan for 10 minutes before transferring them to a wire rack to cool completely. This helps them set and makes them easier to handle.

Pro Tips for Perfect Brownie Muffins

To ensure your brownie muffins turn out perfectly every time, here are some expert tips to keep in mind:

  • Use Quality Ingredients: The quality of your chocolate can make a significant difference in flavor. Opt for high-quality chocolate for the best results.
  • Don’t Overbake: Keep a close watch as the muffins bake. Overbaking will lead to dry muffins, while underbaking gives you that gooey, fudgy texture we love.
  • Let Them Cool: Allowing the muffins to cool completely helps them firm up and makes them easier to remove from the liners.
  • Experiment with Mix-ins: Feel free to fold in nuts, dried fruit, or even a swirl of peanut butter for added flavor and texture.
  • Make Ahead: These muffins can be made ahead of time and stored in an airtight container for up to 3 days. They also freeze well!
  • Check for Doneness: If you’re unsure whether the muffins are done, err on the side of caution. It’s better to underbake slightly than to overbake.
  • Use Room Temperature Ingredients: If possible, make sure your eggs and butter are at room temperature for better mixing.
  • Try Different Cocoa Powders: Experiment with different types of cocoa powder (such as dark or raw) to find your favorite flavor profile.

Common Mistakes and Troubleshooting

Even the best bakers can run into issues from time to time. Here are some common mistakes and how to avoid them:

  • Dry Muffins: This usually happens from overbaking. Keep an eye on the muffins towards the end of the baking time.
  • Dense Texture: Overmixing the batter can lead to dense muffins. Mix just until combined to maintain a light texture.
  • Sticking to Muffin Liners: If your muffins are sticking, try greasing the liners lightly or using a non-stick muffin pan.
  • Uneven Baking: Make sure your oven is properly preheated and use an oven thermometer to ensure accuracy.

Variations to Try

Feel free to get creative with your brownie muffins! Here are four delicious variations to consider:

  • Nutty Brownie Muffins: Fold in 1 cup of chopped walnuts or pecans for a crunchy texture.
  • Mint Chocolate Chip Muffins: Add 1 teaspoon of peppermint extract and 1 cup of chocolate chips for a refreshing twist.
  • Peanut Butter Swirl Muffins: Swirl in ½ cup of creamy peanut butter before baking for a rich and nutty flavor.
  • Spicy Mexican Brownie Muffins: Add a pinch of cayenne pepper and a teaspoon of cinnamon for a unique flavor kick!

Storing and Make-Ahead Instructions

These brownie muffins are perfect for meal prep! Here’s how to store them:

  • Room Temperature: Store in an airtight container at room temperature for up to 3 days.
  • Refrigerator: For longer storage, keep them in the fridge for up to a week.
  • Freezing: Freeze muffins in an airtight container or zip-top bag for up to 3 months. Thaw at room temperature or warm them in the microwave for a quick treat.

Frequently Asked Questions

Here are some common questions about brownie muffins:

  • Can I make these muffins gluten-free? Yes! Substitute with gluten-free flour and ensure all other ingredients are gluten-free.
  • What can I use instead of eggs? You can use flax eggs or applesauce as a substitute for eggs in this recipe.
  • Can I add frosting to these muffins? Absolutely! A light chocolate ganache or cream cheese frosting would pair perfectly.
  • How do I know when the muffins are done baking? Insert a toothpick into the center; it should come out with moist crumbs.
  • Can I double the recipe? Yes! Simply double all ingredients and use a larger muffin pan or bake in batches.
  • What if I don’t have cocoa powder? You can use additional flour, but the flavor will be different. It’s best to use cocoa powder if possible.
  • How do I store leftover muffins? Store in an airtight container at room temperature or in the fridge.
  • Can I make these ahead of time for a party? Absolutely! These muffins are great for making ahead of time and serve well at room temperature.

Nutritional Tips and Dietary Adaptations

If you’re looking to make these brownie muffins a bit healthier, here are some suggestions:

  • Reduce Sugar: Cut the sugar by a quarter for a less sweet muffin.
  • Substitute Ingredients: Use unsweetened applesauce instead of butter for a lighter option.
  • Whole Grain Flour: Swap all-purpose flour for whole wheat flour to increase fiber content.
  • Monitor Portions: Enjoy smaller muffins by using a mini muffin pan for lower calorie options.

Essential Equipment Recommendations

To make your baking experience seamless, here’s a list of essential tools:

  • Muffin Pan: A standard 12-cup muffin pan or a silicone muffin pan for easy removal.
  • Mixing Bowls: Several mixing bowls in different sizes for combining ingredients.
  • Electric Mixer: For whisking eggs and sugar effectively.
  • Spatula: A rubber spatula for folding in ingredients without overmixing.
  • Cooling Rack: To cool muffins evenly after baking.

Serving Suggestions

These brownie muffins are delicious on their own, but they can be dressed up in various ways:

  • Serve Warm: Enjoy them warm with a scoop of vanilla ice cream on the side.
  • Drizzle with Caramel: A drizzle of caramel sauce adds an indulgent touch.
  • Pair with Fresh Berries: Serve with fresh raspberries or strawberries for a refreshing contrast.
  • Garnish with Whipped Cream: Top with whipped cream for an easy dessert option.

Conclusion

There you have it—your complete guide to making delicious brownie muffins! With their rich chocolate flavor and moist texture, these muffins are sure to become a favorite in your home. Remember, cooking is all about experimenting and having fun. So, roll up your sleeves, gather your ingredients, and start baking these delightful treats! Thank you for joining me on this baking adventure, and happy cooking!

Ultimate Brownie Muffins

Prep Time 10 minutes
Cook Time 15 minutes
Total Time 25 minutes
Servings 12 muffins
Calories 250
Delight in rich, fudgy brownie muffins with a chocolate topping, perfect for satisfying your sweet tooth.

Ingredients

Chocolate and Butter

  • 113 g bittersweet or semisweet chocolate, coarsely chopped (plus more for topping)
  • 113 g unsalted butter, cut into small pieces
  • 55 g all-purpose flour (3/4 cup plus 2 tablespoons)
  • 35 g unsweetened cocoa powder Dutch-process (1/3 cup)
  • 0.125 teaspoon salt
  • 2 large eggs
  • 150 g granulated sugar (3/4 cup)

Instructions 

  • Preheat oven to 350°F (180°C). Line 12 muffin cups with liners.
  • In a heatproof bowl, melt chocolate and butter in the microwave in 20-second intervals, stirring until smooth.
  • In a small bowl, sift together flour, cocoa powder, and salt.
  • Whisk eggs and sugar until thick and pale, then fold in melted chocolate mixture. Gently fold in dry ingredients just until combined.
  • Divide batter evenly into muffin liners, filling about ¾ full. Top with chopped chocolate if desired. Bake for 13-15 minutes, then cool on a wire rack.

Notes

Be careful not to overbake to keep muffins moist and fudgy.
Calories: 250kcal
Cost: $15
Course: Dessert
Cuisine: American
Keyword: brownie, chocolate, muffin

Discover the Joy of Cheesy BBQ Chicken Pizza Rolls

Welcome to your new favorite snack: Cheesy BBQ Chicken Pizza Rolls! These delightful rolls combine tender, shredded chicken, gooey mozzarella, and zesty BBQ sauce—all wrapped up in a soft, homemade pizza dough. Perfect for game days, family gatherings, or even a cozy movie night, this recipe is easy to follow and a joy to make. Whether you’re a seasoned cook or just starting out, you’ll find that whipping up these rolls is a fun and rewarding experience. Let’s dive into why you’ll love making these cheesy goodies!

Why You’ll Love This Recipe

  • Quick and Easy: With just a few simple steps, you can have these delicious rolls ready to bake in no time.
  • Customizable Flavors: Feel free to tweak the ingredients to suit your taste—add veggies, change the sauce, or even use different cheeses!
  • Perfect for Any Occasion: Whether it’s a game day snack or a weeknight dinner, these rolls are sure to impress.
  • Great for Meal Prep: Make a big batch and freeze them for quick snacks or meals later on.
  • Fun to Make with Family: Get the kids involved in assembling the rolls—cooking together creates lasting memories!

Ingredient Breakdown

Understanding your ingredients is key to making the best BBQ chicken pizza rolls. Here’s what you’ll need:

  • All-Purpose Flour: 2 cups, plus more for dusting. This creates the base for our pizza dough.
  • Sugar: 1 tablespoon, to help activate the yeast and add a hint of sweetness.
  • Salt: 1 teaspoon, for flavor enhancement.
  • Instant Yeast: 1 packet (about 2 ¼ teaspoons) ensures a quick rise.
  • Warm Water: ¾ cup, ideally around 110°F (43°C) to activate the yeast.
  • Olive Oil: 2 tablespoons, for a rich flavor and to keep the dough moist.
  • BBQ Sauce: 1 cup, plus more for serving. Choose your favorite brand or homemade variety!
  • Cooked Chicken: 2 cups, shredded. Rotisserie chicken works great for a quick option.
  • Shredded Mozzarella Cheese: 1 ½ cups, for that gooey, cheesy goodness.
  • Diced Red Onion: ½ cup (optional), for a bit of crunch and flavor.

Step-by-Step Instructions

Side view of delicious BBQ chicken pizza rolls, with melted cheese and chopped red onions visible.

Now that we have our ingredients prepped, let’s walk through the steps to create these scrumptious pizza rolls.

1. Prepare the Dough

In a large bowl, combine the flour, sugar, salt, and yeast. Mix well. Add the warm water and olive oil, stirring until a dough forms. Knead on a floured surface for about 5 minutes until smooth. Let the dough rest for 10 minutes.

2. Roll Out the Dough

On a floured surface, roll the dough into a 14×9 inch rectangle, ensuring it’s evenly thick.

3. Add Filling

Spread BBQ sauce over the dough, leaving a small border. Top with shredded chicken, mozzarella cheese, and optional diced red onion.

4. Roll and Cut

Starting from the long edge, roll the dough tightly. Cut the rolled dough into 12 equal pieces.

5. Let Rise

Place the rolls in a greased baking dish, cover, and let them rise for 30 minutes.

6. Bake

Preheat your oven to 375°F (190°C). Bake the rolls for 25 minutes, or until golden brown.

7. Serve

Serve warm, with extra BBQ sauce for dipping. Enjoy!

Pro Tips for Perfect Pizza Rolls

  • Use Fresh Ingredients: Fresh dough and quality ingredients enhance the flavor significantly.
  • Experiment with Sauces: Try different BBQ sauces for varied flavors—smoky, spicy, or sweet!
  • Don’t Overfill: Be cautious not to overstuff the rolls; this can lead to messy baking.
  • Brush with Olive Oil: For a golden finish, brush the tops of the rolls with olive oil before baking.
  • Temperature is Key: Ensure your water is warm, not hot, to keep the yeast active without killing it.
  • Let Them Cool Slightly: Allow the rolls to cool for a few minutes before serving to avoid burning your mouth!
  • Use a Pizza Stone: If you have one, a pizza stone can help achieve a crispy bottom.
  • Make-Ahead Option: Prepare the rolls, cover, and refrigerate overnight before baking for an easy breakfast or snack.

Common Mistakes and Troubleshooting

  • Dry Dough: If your dough is too dry, add a bit more warm water until it reaches a soft, pliable consistency.
  • Yeast Not Rising: If your dough doesn’t rise, the yeast might be old or the water too hot. Always check the expiration date on your yeast.
  • Burnt Bottoms: If the bottoms burn before the tops are golden, try baking on a lower rack or using a baking sheet.
  • Filling Leaking Out: Make sure to roll the dough tightly, and don’t overfill each roll.

Delicious Variations to Try

  • Buffalo Chicken Rolls: Substitute BBQ sauce with buffalo sauce and add blue cheese crumbles.
  • Vegetarian Option: Replace chicken with sautéed bell peppers, mushrooms, and spinach for a veggie delight.
  • BBQ Pulled Pork Rolls: Use pulled pork instead of chicken, paired with a sweet BBQ sauce.
  • Cheesy Spinach Rolls: Add fresh spinach and ricotta for a creamy, cheesy twist.

Storage and Make-Ahead Instructions

These pizza rolls can be made ahead and stored in the fridge or freezer:

  • Refrigerator: Store cooked rolls in an airtight container for 3-4 days.
  • Freezer: Freeze unbaked rolls on a baking sheet, then transfer to a freezer bag. Bake from frozen, adding a few extra minutes to the cooking time.
  • Reheating: Reheat in the oven at 350°F (175°C) for 10-15 minutes, or in the microwave for a quick snack.

Comprehensive FAQ

  • Can I use store-bought dough? Absolutely! Store-bought pizza dough is a great time-saver.
  • What can I substitute for BBQ sauce? You can use marinara, ranch dressing, or a homemade sauce for a different flavor.
  • How do I know when they’re done? They should be golden brown on top and sound hollow when tapped.
  • Can I make these gluten-free? Yes, use a gluten-free all-purpose flour to make the dough.
  • What goes well with these rolls? Serve with a side salad, or pair with ranch or blue cheese dressing for dipping.
  • Can I add extra cheese? Definitely! Feel free to add more cheese for an extra cheesy experience.
  • How do I store leftovers? Keep in an airtight container in the fridge for up to 4 days.
  • Can I make these ahead of time? Yes, prepare and store in the fridge overnight before baking.

Nutritional Tips and Dietary Adaptations

These rolls can fit into various dietary preferences:

  • Low-Carb Option: Use cauliflower crust or low-carb tortillas instead of dough.
  • Dairy-Free: Substitute cheese with a dairy-free alternative and ensure your BBQ sauce is dairy-free.
  • High-Protein: Add more chicken or even beans for a protein boost.

Essential Equipment Recommendations

  • Mixing Bowl: A large bowl is essential for mixing your dough.
  • Rolling Pin: For rolling out the dough evenly.
  • Baking Dish: A 9×13 inch dish is perfect for baking these rolls.
  • Pizza Cutter: Makes cutting the rolls into equal pieces a breeze.

Serving Suggestions

These rolls are perfect for any gathering! Serve them warm with:

  • Extra BBQ sauce: For dipping, of course!
  • Ranch dressing: A cool, creamy complement to the spicy BBQ.
  • Fresh Veggies: Serve with a side of celery and carrot sticks for crunch.

Final Thoughts

Making Cheesy BBQ Chicken Pizza Rolls is not just about satisfying your hunger; it’s about creating an experience. From the first mix of dough to the last bite dipped in BBQ sauce, you’ll find joy in every step. Remember, cooking is about confidence and creativity. So gather your ingredients, invite some friends or family to help, and enjoy the process. Happy cooking!

Cheesy BBQ Chicken Pizza Rolls

Prep Time 20 minutes
Cook Time 25 minutes
Total Time 45 minutes
Servings 12 pieces
Calories 250
Delight in these savory pizza rolls filled with BBQ chicken and melted cheese, perfect for a quick snack or party appetizer.

Ingredients

Dough

  • 2 cups all-purpose flour (plus more for dusting)
  • 1 tablespoon sugar
  • 1 teaspoon salt
  • 1 packet instant yeast (about 2 ¼ teaspoons)
  • ¾ cup warm water
  • 2 tablespoons olive oil

Filling

  • 1 cup BBQ sauce (plus more for serving)
  • 2 cups cooked and shredded chicken
  • 1 ½ cups shredded mozzarella cheese
  • ½ cup diced red onion (optional)

Instructions 

  • Mix flour, sugar, salt, and yeast; add warm water and olive oil, then knead until smooth. Rest for 10 minutes.
  • Roll dough into a 14x9 inch rectangle on a floured surface.
  • Spread BBQ sauce over dough, add chicken, cheese, and red onion. Roll tightly and cut into 12 pieces.
  • Place rolls in a greased dish, cover, and let rise for 30 minutes.
  • Preheat oven to 375°F (190°C). Bake rolls for 25 minutes until golden.
  • Serve warm with extra BBQ sauce for dipping.

Notes

For a crispier crust, bake a few extra minutes or brush with butter before baking.
Calories: 250kcal
Cost: $15
Course: Appetizer
Cuisine: American
Keyword: BBQ, Chicken, Pizza

Start Your Day Right with an Apple Banana Oat Smoothie

Are you looking for a quick breakfast that packs a punch of nutrition and flavor? Look no further! This Apple Banana Oat Smoothie is your perfect morning companion. Not only is it easy to make, but it also combines wholesome ingredients that will energize your day. In less than five minutes, you can enjoy a delicious blend of apples, bananas, and oats that’s as satisfying as it is nutritious. Let’s dive into why this smoothie should be your go-to breakfast choice!

Why You’ll Love This Recipe

This smoothie isn’t just tasty; it offers a multitude of benefits that will make you fall in love with your mornings. Here are just a few reasons why this Apple Banana Oat Smoothie is a fantastic choice:

  • Quick and Easy: Perfect for busy mornings, this smoothie takes just minutes to prepare.
  • Nutrient-Rich: Packed with vitamins, minerals, and fiber from the apples and oats.
  • Satisfying and Filling: The combination of oats and fruits keeps you full longer, making it an excellent breakfast option.
  • Versatile Ingredients: You can easily customize it with different fruits or add-ins.
  • Deliciously Sweet: Naturally sweetened with ripe bananas and apples, no added sugars necessary!

Ingredients You Will Need

To whip up your Apple Banana Oat Smoothie, gather the following ingredients:

  • 1 Apple: Choose your favorite variety, whether it’s sweet Fuji, tart Granny Smith, or any kind you have on hand.
  • 1 Banana: A ripe banana adds creaminess and natural sweetness.
  • 1/2 Cup Oats: Use old-fashioned oats for the best texture; quick oats work too if that’s what you have.
  • 1/2 Cup Milk: Any type of milk will work—dairy, almond, oat, or soy.
  • 3-4 Cubes of Ice: For a refreshing chill, especially if you want a thicker consistency.

How to Make a Banana Apple Oat Smoothie

An iPhone 15 Pro capture of a delicious smoothie made from apple, banana, and oats, showcasing a thick texture.

Follow these simple steps to create your smoothie:

  1. Chop up the apple and banana. You can leave the apple skin on for extra nutrients or peel it if you prefer.
  2. Mix all the ingredients in a blender and blend until smooth. Adjust the thickness by adding more milk or ice as desired.
  3. Serve immediately and enjoy your energizing breakfast!

Pro Tips for the Best Smoothie

Enhance your smoothie-making skills with these expert tips:

  • Use Frozen Fruits: For a creamier texture, freeze your bananas beforehand.
  • Add Greens: Spinach or kale can be blended in for an extra nutrient boost without altering the flavor significantly.
  • Mix in Nut Butters: A tablespoon of almond or peanut butter can add healthy fats and protein.
  • Experiment with Flavors: Add a pinch of cinnamon, vanilla extract, or ginger for an exciting flavor twist.
  • Blend in Chia Seeds: For additional fiber and omega-3s, add a tablespoon of chia seeds.
  • Use Cold Ingredients: Starting with cold milk and frozen bananas can enhance the smoothie’s chill factor.
  • Adjust Sweetness: If you prefer a sweeter smoothie, add a drizzle of honey or maple syrup.
  • Don’t Overstuff the Blender: Leave enough room for the ingredients to mix well to achieve a smooth consistency.

Common Mistakes and Troubleshooting

Even the best of us can make mistakes in the kitchen! Here are a few common issues and how to avoid them:

  • Too Thick: If your smoothie is too thick, add more milk gradually until it reaches your desired consistency.
  • Not Blending Smoothly: Make sure to cut your ingredients into smaller pieces to ensure they blend evenly.
  • Too Sweet or Not Sweet Enough: Adjust sweetness by adding more or fewer fruits, or use a sweetener of your choice.
  • Oxidation: If you’re not drinking it immediately, store it in an airtight container in the fridge to prevent browning.

Variations to Try

Tired of the same flavor? Here are some delicious variations to keep things exciting:

  • Chocolate Banana Oat Smoothie: Add a tablespoon of cocoa powder for a chocolatey twist.
  • Berry Banana Oat Smoothie: Replace apples with mixed berries for a refreshing berry smoothie.
  • Nutty Banana Oat Smoothie: Incorporate a tablespoon of almond butter or walnuts for added crunch and flavor.
  • Coconut Banana Oat Smoothie: Use coconut milk and add shredded coconut for a tropical flair.

Storage and Make-Ahead Instructions

Planning ahead is key for busy mornings!

  • Make Ahead: You can prepare your smoothie ingredients the night before. Simply chop the fruits and store them in an airtight container in the fridge.
  • Freezing: Portion out your smoothie ingredients into freezer bags. When you’re ready to blend, just toss everything in the blender without needing to thaw first!
  • Storage: If you have leftovers, store the smoothie in the fridge for up to 24 hours. Give it a quick stir before drinking, as it may separate.

Frequently Asked Questions

Here are some common questions about the Apple Banana Oat Smoothie:

  • Can I use quick oats instead of old-fashioned oats? Yes, but old-fashioned oats are recommended for better texture.
  • Is this smoothie vegan? Yes, just use plant-based milk and avoid any honey.
  • Can I add protein powder? Absolutely! Just mix in a scoop during blending.
  • How many servings does this recipe make? This recipe makes one generous serving but can easily be doubled.
  • Can I use a different fruit? Definitely! Feel free to swap in your favorite fruits.
  • Is it okay to include the apple skin? Yes, the skin contains additional nutrients and fiber.
  • Can I make this smoothie without milk? Yes, you can use water or juice instead!
  • How can I make it sweeter? Try adding more banana, honey, or a natural sweetener of your choice.

Nutrition Tips and Dietary Adaptations

This smoothie is not only delicious but also nutritious. Here are some tips to maximize its health benefits:

  • Fiber Boost: Add chia or flax seeds for an extra fiber kick.
  • Protein Power: Consider adding Greek yogurt or protein powder to keep you energized throughout the morning.
  • Low-Calorie Option: Use unsweetened almond milk and reduce the amount of oats for a lighter version.
  • Heart-Healthy Fats: Incorporate avocado for creamy texture and healthy fats.

Equipment Recommendations

To make this smoothie, you’ll need:

  • High-Speed Blender: A powerful blender ensures a smooth and creamy texture.
  • Measuring Cups: Accurate measurements help achieve the perfect balance of ingredients.
  • Cutting Board and Knife: Essential for chopping your fruits.

Serving Suggestions

Serve your Apple Banana Oat Smoothie in a tall glass or a mason jar for a trendy look! You can also top it with:

  • Granola: For added crunch and texture.
  • Fresh Fruit: A few slices of banana or apple on top make for a lovely presentation.
  • Nut Butter: A drizzle of almond or peanut butter can enhance the flavor.

Enjoy every sip of this delicious smoothie and feel confident knowing you’re nourishing your body! Happy blending!

Apple Banana Oat Smoothie

Prep Time 5 minutes
Total Time 5 minutes
Servings 2 cups
Calories 250
A delicious and healthy smoothie combining fresh apples, bananas, oats, and milk for a quick breakfast or snack.

Ingredients

Fruits

  • 1 piece Apple (any variety)
  • 1 piece Banana (ripe)

Oats

  • 0.5 cup Old Fashioned Oats

Dairy

  • 0.5 cup Milk

Ice

  • 3-4 cubes Cubes of Ice

Instructions 

  • Chop the apple and banana.
  • Place all ingredients in a blender.
  • Blend until smooth.
  • Pour into glasses and serve.

Notes

Feel free to add honey or cinnamon for extra flavor.
Calories: 250kcal
Cost: $5
Course: Breakfast, Snack
Keyword: Fruit, Smoothie

Welcome to Your New Favorite Recipe: Savory Chicken and Cheese Flatbreads with a Kick

If you’re looking for a delicious and easy way to elevate your weeknight dinners, you’ve come to the right place! This recipe for Savory Chicken and Cheese Flatbreads combines tender chicken, gooey cheese, and a zesty spicy sauce that will transform your comfort food experience. Whether you’re hosting a casual gathering or just want to treat yourself after a long day, this dish promises to delight your taste buds and make cooking fun again.

With straightforward steps and easily found ingredients, you’ll find that making these flatbreads is not just achievable, but also exciting! Let’s dive into why you’ll love this recipe and what you need to get started.

Why You’ll Love This Recipe

  • Quick and Easy: From prep to plate, you can whip up these chicken and cheese flatbreads in about an hour, making them a perfect choice for a weeknight dinner.
  • Flavor-Packed: The combination of spices in the chicken mixture, paired with the creamy sauce, creates layers of flavor that will leave everyone asking for seconds.
  • Customizable: You can easily adjust the toppings or spice levels, ensuring that this dish suits everyone’s preferences—perfect for family dinners!
  • Great for Leftovers: These flatbreads taste fantastic reheated, making them a convenient option for meal prep or lunch the next day.
  • Fun to Make: Involving the whole family in assembling the flatbreads can turn cooking into a bonding experience!

Ingredients You’ll Need

Here’s what you’ll need to gather to make these delicious flatbreads:

Dough Ingredients

  • 3/4 cup water: Warm water helps activate the yeast.
  • 1 tbsp sugar: This feeds the yeast for a better rise.
  • 2 1/4 tsp instant yeast: Quick-acting yeast for easy dough preparation.
  • 1/4 cup vegetable oil: For moisture and richness in the dough.
  • 1/4 cup Greek yogurt: Adds tang and moisture, making the dough tender.
  • 3 1/2 cups all-purpose flour: The base for your flatbreads.
  • 1 tsp salt: Enhances flavor and strengthens the dough.

Topping Ingredients

  • 1 cup shredded cheese: A mix of mozzarella and cheddar works beautifully.
  • 1 small yellow onion, finely chopped: Adds sweetness and depth to the flavor.
  • 1/2 cup cream cheese: For a creamy base that complements the toppings.
  • Crushed chips for garnish: Adds a delightful crunch to each bite.

Chicken Mixture Ingredients

  • 1 tbsp vegetable oil: For cooking the chicken and onions.
  • 1 small yellow onion, chopped: Provides a flavorful base for the chicken.
  • 3/4 lb chicken breast, diced: The star protein of this dish.
  • 1 tsp garlic powder: Adds savory depth to the chicken.
  • 1 tsp onion powder: Enhances the overall flavor profile.
  • 1 1/2 tsp poultry seasoning: A blend that complements chicken beautifully.
  • 1/2 tsp curry powder: Introduces a hint of warmth and complexity.
  • 1 tsp paprika: Adds color and a mild smokiness.
  • 1/4 tsp cayenne pepper: For those who love a little heat!

Sauce Ingredients

  • 1/4 cup mayonnaise: Creamy base for the sauce.
  • 1/4 cup spicy sauce (like sriracha): For that necessary kick!
  • 2 1/2 tbsp chili sauce: Adds sweetness and depth.

Step-by-Step Instructions

Close-up of delicious flatbreads filled with chicken and cheese, garnished with crushed chips and drizzled with sauce.

Let’s break down the process into simple, doable steps!

Step 1: Prepare the Dough

  • In a large bowl, combine water, sugar, and yeast. Let sit for about 5 minutes until it becomes frothy.
  • Add oil, Greek yogurt, flour, and salt. Mix until a dough forms.
  • Knead the dough for about 5-7 minutes until smooth. Cover and let rise in a warm place for 1 hour or until doubled in size.

Step 2: Cook the Chicken Mixture

  • Heat vegetable oil in a large skillet over medium heat.
  • Add the chopped onion and sauté for about 2 minutes until softened.
  • Stir in the diced chicken and cook until browned, about 6-8 minutes.
  • Season with garlic powder, onion powder, poultry seasoning, curry powder, paprika, and cayenne pepper. Stir to coat and cook for an additional 2 minutes. Remove from heat and set aside.

Step 3: Make the Sauce

  • In a small bowl, combine mayonnaise, spicy sauce, and chili sauce. Stir until smooth and set aside.

Step 4: Assemble the Flatbreads

  • Preheat the oven to 400°F (200°C).
  • Punch down the dough and divide it into 8 equal portions. Roll each portion into a small circle or oval.
  • Place on a baking sheet lined with parchment paper.
  • Spread a small amount of cream cheese on each dough circle.
  • Evenly distribute the cooked chicken mixture on top of each flatbread.
  • Sprinkle with shredded cheese and finely chopped onion.

Step 5: Bake

  • Place the flatbreads in the oven and bake for 12-15 minutes, or until edges are golden and cheese is melted.

Step 6: Garnish and Serve

  • Remove the flatbreads from the oven and drizzle with the prepared sauce.
  • Top with crushed chips and fresh lettuce if desired. Serve immediately.

Pro Tips for the Perfect Flatbreads

  • Use Fresh Ingredients: Fresh chicken and vegetables will elevate the flavor of your flatbreads.
  • Don’t Rush the Dough: Allowing the dough to rise properly is crucial for light and fluffy flatbreads.
  • Experiment with Cheese: Try different types of cheese for varied flavors—pepper jack for spice or feta for a tangy twist!
  • Control the Spice: Adjust the amount of cayenne pepper in the chicken mixture or sauce for a milder flavor.
  • Batch Cooking: Make extra flatbreads and freeze them for quick meals later on.
  • Get Creative with Toppings: Add fresh herbs, olives, or even sun-dried tomatoes for added flavor.
  • Serve with Sides: Pair these flatbreads with a fresh salad or homemade coleslaw for a complete meal.
  • Rest Before Serving: Allow the flatbreads to cool slightly to enhance the flavors before serving.

Common Mistakes and Troubleshooting

Even the best of us make mistakes in the kitchen! Here are some common pitfalls and how to avoid them:

  • Too Dry: If your flatbreads come out dry, you may have overbaked them. Keep an eye on the time!
  • Not Crispy Enough: For a crispier texture, bake the flatbreads a little longer, or try preheating your baking sheet.
  • Overcooked Chicken: Use a meat thermometer to ensure your chicken is cooked to 165°F without overcooking.
  • Undercooked Dough: Make sure the dough rises sufficiently and is cooked through; a doughy center can ruin the dish.
  • Flavor Balance: If your flatbreads lack flavor, consider marinating the chicken before cooking for added depth.

Flavor Variations

If you’re in the mood to switch things up, here are some fun variations you can try:

  • BBQ Chicken Flatbreads: Substitute BBQ sauce for the spicy sauce for a smoky twist.
  • Veggie-Loaded Flatbreads: Add bell peppers, spinach, or mushrooms to the chicken mixture for more veggies.
  • Buffalo Chicken Flatbreads: Use buffalo sauce instead of spicy sauce for a fiery kick!
  • Cheesy Pesto Flatbreads: Spread pesto on the dough before adding toppings for a fresh flavor boost.

Storage and Make-Ahead Instructions

You can prep these flatbreads in advance to save time:

  • Make-Ahead Dough: Prepare the dough, let it rise, then refrigerate it for up to 2 days before using.
  • Cooked Flatbreads: Store baked flatbreads in an airtight container in the refrigerator for up to 3 days.
  • Freezing: Freeze uncooked flatbreads by placing them on a baking sheet until firm, then transfer them to a freezer bag. Bake straight from frozen; add a few extra minutes to the baking time.

Frequently Asked Questions (FAQs)

  • Can I use a different type of meat? Absolutely! Ground turkey or beef can be great substitutes.
  • What if I don’t have Greek yogurt? Sour cream is a fantastic alternative!
  • How can I make these gluten-free? Use a gluten-free all-purpose flour blend for the dough.
  • Can I prepare the sauce in advance? Yes, the sauce can be made up to 2 days ahead and stored in the refrigerator.
  • Are these flatbreads spicy? They have a kick from the sauce; feel free to adjust the spiciness to your preference.
  • What sides pair well with these flatbreads? A crisp green salad or roasted vegetables complement the flavors wonderfully.
  • How can I keep leftovers fresh? Store leftovers in an airtight container in the fridge for up to 3 days.
  • Can I grill these flatbreads? Yes! You can grill the assembled flatbreads for a smoky flavor.

Nutritional Tips and Dietary Adaptations

Whether you’re looking to lighten up your meal or adapt it for dietary needs, here are some tips:

  • Lower Calories: Use reduced-fat cheese and Greek yogurt.
  • Vegetarian Option: Substitute the chicken with grilled vegetables or beans.
  • Whole Grain: Use whole wheat flour for a nutritious twist on the dough.
  • Low-Carb Option: Consider using cauliflower crusts for a gluten-free and low-carb alternative.

Equipment Recommendations

To make your cooking experience smoother, here’s a quick list of essential tools:

  • Mixing Bowl: A large bowl for mixing the dough and ingredients.
  • Baking Sheet: A sturdy baking sheet lined with parchment paper for easy cleanup.
  • Skillet: A non-stick skillet for cooking the chicken and onions.
  • Rolling Pin: For rolling out the dough to the desired thickness.
  • Meat Thermometer: To ensure your chicken is cooked to perfection.

Serving Suggestions

How you serve your chicken and cheese flatbreads can enhance the experience:

  • Garnish: Fresh herbs like cilantro or parsley add a pop of color and flavor.
  • Dip Options: Serve with ranch or blue cheese dressing for dipping!
  • Pair with Drinks: A chilled lemonade or iced tea pairs beautifully with these flatbreads.

In conclusion, these Savory Chicken and Cheese Flatbreads with a Kick are not only simple to prepare but also a delightful way to bring excitement back into your kitchen. With a little creativity and the right ingredients, you can enjoy a meal that’s both comforting and full of flavor. So roll up your sleeves, gather your loved ones, and let’s get cooking—great food doesn’t require perfection, just a willingness to try!

Savory Chicken and Cheese Flatbreads with Spicy Sauce A Flavorful Twist on Comfort Food

Prep Time 20 minutes
Cook Time 15 minutes
Total Time 35 minutes
Servings 8 pieces
Calories 650
Enjoy these cheesy flatbreads topped with savory chicken, zesty sauce, and crunchy chips for a hearty and flavorful meal.

Ingredients

Dough

  • 3/4 cup water
  • 1 tbsp sugar
  • 2 1/4 tsp instant yeast
  • 1/4 cup vegetable oil
  • 1/4 cup Greek yogurt
  • 3 1/2 cups all-purpose flour
  • 1 tsp salt

Topping

  • 1 cup shredded cheese
  • 1 small yellow onion, finely chopped
  • 1/2 cup cream cheese

Crushed chips for garnish

Chicken Mixture

  • 1 tbsp vegetable oil
  • 1 small yellow onion, chopped
  • 3/4 lb chicken breast, diced
  • 1 tsp garlic powder
  • 1 tsp onion powder
  • 1 1/2 tsp poultry seasoning
  • 1/2 tsp curry powder
  • 1 tsp paprika
  • 1/4 tsp cayenne pepper

Sauce

  • 1/4 cup mayonnaise
  • 1/4 cup spicy sauce such as sriracha
  • 2 1/2 tbsp chili sauce

Extra

  • optional Fresh lettuce

Instructions 

  • Combine water, sugar, and yeast; let sit 5 minutes. Add oil, yogurt, flour, and salt; knead and let rise 1 hour.
  • Sauté onion, cook chicken with spices until browned, then set aside.
  • Mix mayonnaise, spicy sauce, and chili sauce for the spicy sauce.
  • Divide dough into 8, roll into circles, top with cream cheese, chicken, cheese, and onion.
  • Bake at 400°F (200°C) for 12-15 minutes until golden and cheese melts.
  • Drizzle with sauce, garnish with crushed chips and lettuce if desired, then serve.

Notes

For best results, use fresh ingredients and ensure the dough doubles in size before baking.
Calories: 650kcal
Cost: $15
Course: Main Course
Cuisine: American
Keyword: Cheese, Chicken, flatbread

Discover the Ultimate Veggie Sandwich: A Fresh Take on a Classic

Are you ready to elevate your lunch game? With the Ultimate Veggie Sandwich, you can turn simple ingredients into a deliciously satisfying meal. Perfect for a quick lunch, this sandwich is packed with fresh flavors and nutrients, making it an excellent choice for anyone looking to enjoy a hearty yet healthy bite. Let’s dive into this recipe and explore why it’s a must-try!

Why You’ll Love This Recipe

This isn’t just another sandwich; it’s a celebration of vibrant flavors and textures. Here are five compelling reasons to try the Ultimate Veggie Sandwich:

  • Healthy Ingredients: Packed with fresh vegetables and herbs, this sandwich is a powerhouse of vitamins and minerals.
  • Quick and Easy: With simple steps and readily available ingredients, you can whip this up in under 30 minutes.
  • Customizable: Make it your own! Swap ingredients based on your preferences or dietary needs.
  • Perfect for Meal Prep: Assemble ahead of time for a quick grab-and-go lunch throughout the week.
  • Deliciously Satisfying: The combination of creamy spreads and crunchy vegetables will leave you full and happy.

Ingredients Breakdown

Here’s what you’ll need for the Ultimate Veggie Sandwich, along with some great substitutions:

  • Red Onion: Adds a sharp bite; try using shallots for a milder flavor.
  • Lime or Lemon Juice: Brightens up the flavors; vinegar can be used as an alternative.
  • Salt and Pepper: Essential for flavor enhancement.
  • Cream Cheese: Provides creaminess; use vegan cream cheese for a dairy-free option.
  • Greek Yogurt: Adds tanginess; you can replace it with a dairy-free yogurt.
  • Fresh Herbs (Dill, Parsley, Chives): For a burst of freshness; mix and match based on your taste.
  • Onion Powder: Enhances the onion flavor; garlic powder works well too.
  • Sourdough Bread: A hearty base; whole grain or gluten-free bread are great alternatives.
  • Butter (optional): For toasting; use olive oil for a healthier option.
  • Avocado: Adds creaminess; substitute with hummus for a different flavor.
  • Heirloom Tomatoes: For juiciness and color; any ripe tomato variety works.
  • Cucumber: Provides crunch; consider zucchini for a fun twist.
  • Spinach: A healthy green; kale or arugula can also be used.
  • Microgreens: For an extra nutrient boost; sprouts are a great substitute.
  • Havarti Cheese (optional): Adds richness; use a dairy-free cheese for a vegan version.

Pro Tips for the Perfect Veggie Sandwich

Side view of a hearty Ultimate Veggie Sandwich showcasing layers of vegetables and herbs.

Here are some expert insights to ensure your Ultimate Veggie Sandwich turns out perfectly:

  • Don’t Rush the Toasting: Allow the bread to become golden and crispy for the best texture.
  • Layer Strategically: Start with spreads, then vegetables, to prevent sogginess.
  • Season as You Go: Each ingredient benefits from a sprinkle of salt and pepper during prep.
  • Use Fresh Ingredients: Quality produce makes a noticeable difference in flavor.
  • Chill Your Ingredients: Cold vegetables add a refreshing crunch.
  • Experiment with Spreads: Try adding pesto or hummus for a flavor twist.
  • Pay Attention to Texture: Combine crunchy, creamy, and juicy elements for a satisfying bite.
  • Wrap It Up: If you’re on the go, wrap your sandwich tightly in parchment paper to keep it fresh.
  • Make it a Platter: Serve your sandwich alongside fresh fruit or a light salad for a complete meal.
  • Embrace Variations: Don’t hesitate to try different combinations of veggies and spreads.

Common Mistakes and Troubleshooting

Even the best cooks make mistakes! Here’s how to avoid some common pitfalls:

  • Too Wet: If your sandwich is soggy, consider drying your vegetables with paper towels.
  • Flavorless Spread: Don’t forget to season your cream cheese and yogurt mix well.
  • Overstuffed Sandwich: Too many ingredients can make it hard to eat. Keep it balanced.
  • Stale Bread: Always use fresh bread for the best flavor and texture.
  • Missing Ingredients: If you don’t have an ingredient, don’t fret! Substitute wisely based on what you have.

Delicious Variations

Feel free to mix things up with these tasty variations of the Ultimate Veggie Sandwich:

  • Southwestern Style: Add black beans, corn, and chipotle mayo for a spicy kick.
  • Mediterranean Twist: Include feta cheese, olives, and roasted red peppers for a flavorful change.
  • Asian-Inspired: Use sesame dressing, cucumber, and shredded carrots for a fresh take.
  • Breakfast Delight: Add a fried egg and avocado for a hearty morning version.

Storage and Make-Ahead Instructions

Want to prepare your Ultimate Veggie Sandwich in advance? Here’s how:

  • Assemble and Chill: You can prepare the sandwich a few hours ahead. Just wrap it tightly in plastic wrap.
  • Separate Ingredients: For longer storage, keep spreads and veggies separate until you’re ready to eat.
  • Store in the Fridge: If made in advance, consume within 2 days for optimal freshness.

Frequently Asked Questions

Here are some common questions about the Ultimate Veggie Sandwich:

  • Can I make this sandwich vegan? Yes! Substitute cream cheese and cheese with plant-based options.
  • What can I use instead of hummus? Avocado or a bean spread can work well.
  • How can I add more protein? Try adding chickpeas, tofu, or a sprinkle of nuts.
  • Can I use frozen vegetables? Fresh is best, but if you have to use frozen, make sure they’re thawed and drained.
  • What type of bread works best? Sourdough, whole grain, or rye are all fantastic choices.
  • How do I prevent my sandwich from getting soggy? Layer spreads on one side and veggies on the other.
  • Can I add fruits to my sandwich? Absolutely! Slices of apple or pear can add a nice sweetness.
  • How can I enhance the flavor? Fresh herbs and spices are key! Experiment with different combinations.

Nutritional Tips and Dietary Adaptations

This sandwich is not only delicious but also nutritious! Here are some tips to make it even healthier:

  • Whole Grains: Opt for whole grain bread for added fiber.
  • Healthy Fats: Incorporate avocado for healthy fats that keep you full.
  • Load Up on Veggies: The more colorful your sandwich, the more nutrients it contains.
  • Mind the Portions: Be mindful of spreads; a little goes a long way in flavor.

Equipment Recommendations

Gather these essential tools to make your sandwich-making experience smooth:

  • Sharp Knife: For clean cuts of your veggies and bread.
  • Cutting Board: A sturdy surface for chopping and assembling.
  • Mixing Bowl: For preparing your spreads.
  • Mandolin or Vegetable Peeler: For perfectly thin cucumber slices.

Serving Suggestions

Not sure how to serve your Ultimate Veggie Sandwich? Here are some ideas:

  • On a Platter: Serve with a side of fresh fruit or a light salad.
  • Cut into Triangles: Make it more appealing by cutting your sandwich into fun shapes.
  • Pair with a Dip: A side of hummus or tzatziki can elevate your meal.

Conclusion

With its fresh ingredients and delightful combinations, the Ultimate Veggie Sandwich is sure to become a staple in your kitchen. Embrace the creativity of cooking and enjoy the process. Remember, it’s all about confidence in the kitchen! Now, gather your ingredients and get ready to relish every crunchy, creamy bite of this delightful sandwich. Happy cooking!

Ultimate Veggie Sandwich

Prep Time 15 minutes
Cook Time 4 minutes
Total Time 19 minutes
Servings 2 servings
Calories 450
A vibrant and crunchy veggie sandwich layered with creamy spreads, fresh vegetables, and toasted sourdough bread for a satisfying meal.

Ingredients

Vegetables

  • 1 small Red onion (Thinly sliced)
  • 1 tablespoon Lime or lemon juice
  • to taste Salt
  • to taste Pepper

Dairy Spreads

  • 2 tablespoons Cream cheese (Softened)
  • 2 tablespoons Greek yogurt
  • 1 teaspoon Onion powder

Herbs

  • 1 tablespoon Fresh dill, parsley, chives (Chopped)

Bread & Spreads

  • 4 slices Sourdough bread (Toasted)
  • optional Butter (For spreading on bread)
  • 1 avocado Avocado (Mashed with lemon juice and salt)
  • 2 heirloom tomatoes Tomatoes (Sliced and seasoned)
  • 1 cucumber Cucumber (Thinly sliced)
  • a handful Spinach
  • a handful Microgreens
  • optional Havarti cheese (Sliced)

Instructions 

  • Mix thinly sliced red onion with lime or lemon juice, salt, and pepper. Stir occasionally.
  • Combine softened cream cheese with Greek yogurt, onion powder, and chopped herbs until smooth.
  • Preheat broiler and toast sourdough slices, optionally buttered, until golden.
  • Slice tomatoes and season with salt and pepper. Slice cucumber thinly. Mash avocado with lemon juice and salt.
  • Spread cream cheese on one toasted bread slice, mashed avocado on the other. Layer tomatoes, cucumber, microgreens, pickled onions, optional cheese, and spinach. Assemble the sandwich, cut, and serve immediately.

Notes

For extra flavor, add a squeeze of lemon or lime over the vegetables before assembling.
Calories: 450kcal
Cost: $15
Course: Lunch, Sandwich
Cuisine: American
Keyword: bread, Healthy, Vegetables

Start Your Day Right with Apple Cinnamon Oatmeal

Are you ready to transform your breakfast game? This cozy apple cinnamon oatmeal recipe is not just about taste; it’s about starting your morning with warmth and nourishment. Packed with wholesome ingredients and bursting with flavors, this dish is a perfect way to fuel your day. Whether you’re rushing out the door or enjoying a leisurely weekend brunch, this oatmeal is quick to prepare and delightful to eat!

Why You’ll Love This Recipe

  • Quick and Easy: Ready in just 20 minutes, making it perfect for busy mornings.
  • Customizable: Feel free to adjust the ingredients based on what’s in your kitchen.
  • Health Benefits: Oats provide essential fiber, helping you feel full and satisfied.
  • Family-Friendly: Kids love the sweet, comforting flavors, making it a hit for the whole family.
  • Meal Prep Friendly: Make a big batch to enjoy throughout the week or freeze for later.

Ingredients Breakdown

This apple cinnamon oatmeal recipe is simple yet flavorful. Here’s what you’ll need:

  • 1 apple: Core removed and diced; any variety works, but Honeycrisp or Granny Smith are favorites for their sweetness and tartness.
  • 1 tablespoon butter: Adds richness; can substitute with coconut oil for dairy-free.
  • 1 1/2 teaspoons ground cinnamon: Essential for that warm cinnamon flavor.
  • 1/8 teaspoon ground allspice: Adds depth; can be omitted if unavailable.
  • Pinch of salt: Enhances flavor.
  • 1 cup old-fashioned oats: Provides the hearty base.
  • 1 cup water: For cooking the oats.
  • 1 cup milk of choice: Almond, cow’s, or oat milk all work beautifully.
  • 2 tablespoons maple syrup: Sweetens the oatmeal naturally.
  • 1/2 teaspoon vanilla: A touch of sweetness and flavor.
  • Chopped pecans: Optional, for topping; adds crunch.

Expert Tips for Perfect Oatmeal

Side angle of steaming apple cinnamon oatmeal with diced apples and spices visible.

Follow these tips to ensure your oatmeal turns out perfectly every time:

  • Use Old-Fashioned Oats: They create a better texture compared to instant oats.
  • Don’t Rush the Cooking: Allow the oats to absorb the liquid fully for creaminess.
  • Experiment with Spices: Add nutmeg or ginger for a unique twist.
  • Adjust Sweetness: Taste before serving and add more maple syrup if desired.
  • Top Creatively: Try adding yogurt, berries, or a dollop of almond butter for extra nutrition.
  • Make it Vegan: Simply replace butter with coconut oil and use plant-based milk.
  • Stir Often: This helps prevent the oats from sticking to the bottom of the pot.
  • Prep Ingredients Ahead: Chop apples and measure out spices the night before for quick assembly in the morning.

Common Mistakes and Troubleshooting

Even the best recipes can go awry sometimes. Here are some issues and how to fix them:

  • Too Watery: If your oatmeal is too runny, cook it a little longer, stirring frequently.
  • Too Thick: Add a splash more milk or water to reach your desired consistency.
  • Apples Not Softening: If they’re still crunchy after cooking, cover the skillet and let them steam for a few minutes.
  • Flavor Lacking: Always taste as you go; you can add more spices or sweetness based on your preference.

Variations to Try

Mix things up with these fun variations:

  • Overnight Oats: Combine all ingredients in a jar and refrigerate overnight for a grab-and-go breakfast.
  • Peanut Butter Banana: Swap the apples for bananas and stir in peanut butter for added protein and flavor.
  • Baked Oatmeal: Prepare the mixture and bake in a preheated oven for a fluffy, cake-like version.
  • Nut-Free Version: Omit nuts and replace with sunflower seeds for crunch.

Storage and Make-Ahead Instructions

Want to prepare your oatmeal in advance? Here’s how:

  • Refrigeration: Store leftover oatmeal in an airtight container for up to 5 days.
  • Reheating: Simply add a splash of milk or water to loosen it up before microwaving.
  • Freezing: Freeze individual portions in freezer-safe containers; thaw in the fridge overnight before reheating.

Frequently Asked Questions

  • Can I use quick oats instead of old-fashioned? Yes, but be aware that the texture will be different—quicker oats can turn mushy.
  • Is this oatmeal gluten-free? Use certified gluten-free oats to ensure your dish is safe for those with gluten sensitivities.
  • Can I make it in the microwave? Absolutely! Combine all ingredients in a microwave-safe bowl and heat in 1-minute increments until done.
  • What can I add for extra protein? Consider stirring in Greek yogurt or protein powder after cooking.
  • How do I make it dairy-free? Use plant-based milk and substitute coconut oil for butter.
  • Is it okay to skip the sweetener? Yes, especially if your apples are sweet enough on their own.
  • Can I add other fruits? Definitely! Berries, peaches, or pears can all make delicious additions.
  • How can I spice it up? Try adding cardamom or vanilla extract for a different flavor profile.

Nutrition Tips and Dietary Adaptations

This apple cinnamon oatmeal is not only delicious but also nutritious. Here are some tips to enhance its health benefits:

  • Increase Fiber: Add chia seeds or flaxseeds for an extra boost.
  • Lower Sugar: Use mashed bananas instead of maple syrup for natural sweetness.
  • Protein Boost: Incorporate nuts or seeds for added protein and healthy fats.
  • Whole Grains: Ensure your oats are whole grain for maximum nutrients.

Recommended Equipment

To make this recipe as easy as possible, here’s what you’ll need:

  • Non-stick skillet: Ideal for cooking the apple mixture without sticking.
  • Medium saucepan: Perfect for simmering oats.
  • Measuring cups and spoons: Essential for accuracy in your ingredients.
  • Spoon or spatula: For stirring and serving.

Serving Suggestions

Make your oatmeal even more delightful with these serving ideas:

  • Top with Fresh Fruit: Slices of banana or berries add a fresh touch.
  • Add a Dollop of Yogurt: Greek yogurt or dairy-free yogurt can add creaminess.
  • Drizzle with Honey or Extra Maple Syrup: For those who enjoy a sweeter taste.
  • Sprinkle with Additional Cinnamon: A little more spice enhances the flavor.

Conclusion

Your mornings deserve a treat that’s both nourishing and satisfying. This apple cinnamon oatmeal recipe is not only easy to prepare, but it also allows you to enjoy the comforting flavors of home-cooked goodness. Whether you enjoy it as is or try one of the variations, you’re sure to love this cozy breakfast that warms your heart and fills your belly. So grab your ingredients and get ready to enjoy a delicious start to your day!

Apple Cinnamon Oatmeal Recipe

Prep Time 5 minutes
Cook Time 15 minutes
Total Time 20 minutes
Servings 2 servings
Calories 350
A warm and comforting oatmeal topped with cinnamon apples, pecans, and maple syrup, perfect for a cozy breakfast.

Ingredients

Fruits and Spices

  • 1 piece apple, core removed and diced
  • 1 tablespoon butter
  • 1/2 teaspoon ground cinnamon
  • 1/8 teaspoon ground allspice
  • Pinch salt
  • 1 cup old fashioned oats
  • 1 cup water
  • 1 cup milk of choice
  • 2 tablespoons maple syrup
  • 1/2 teaspoon ground cinnamon
  • 1/8 teaspoon ground allspice
  • 1/4 teaspoon kosher salt
  • 1/2 teaspoon vanilla

Toppings

  • Chopped pecans and extra maple syrup for serving chopped pecans and extra maple syrup (for topping)

Instructions 

  • Melt butter in a skillet over medium heat. Add apples, cinnamon, allspice, and salt; cook until apples soften.
  • Meanwhile, combine oats, water, and milk in a saucepan; bring to a low boil. Stir in maple syrup, salt, cinnamon, and allspice, then reduce heat.
  • Cook for 5 minutes until oats are creamy and liquid is absorbed. Remove from heat and stir in vanilla.
  • Divide oatmeal into bowls, top with cinnamon apples, chopped pecans, and drizzle with extra maple syrup if desired.

Notes

For added flavor, toast the pecans before adding as a topping.
Calories: 350kcal
Cost: $10
Course: Breakfast
Cuisine: American
Keyword: apple, Cinnamon, oatmeal

Unleash Flavor with Grilled Lemon Chicken Flatbread Wraps

Welcome to your next culinary adventure! If you’re looking for a quick, delicious, and satisfying meal, you’re in the right place. These Grilled Lemon Chicken Flatbread Wraps are not just a feast for the taste buds; they’re also packed with flavor and easy to make. With juicy grilled chicken marinated in a vibrant lemon and spice blend, wrapped up with fresh greens and a zesty garlic sauce, this recipe is perfect for a busy weeknight or a relaxed weekend gathering.

In this article, we’ll explore why you’ll love this recipe, break down the ingredients, share expert tips, and even offer some fun variations. With over 2500 words of culinary goodness, you’ll leave feeling confident and ready to tackle this delightful dish!

Why You’ll Love This Recipe

  • Quick Preparation: This recipe comes together in under 30 minutes, making it ideal for busy weeknights.
  • Flavor Explosion: The marinade infuses the chicken with zesty lemon and aromatic spices, creating a mouthwatering experience.
  • Customizable: You can easily tailor the wraps to your liking by swapping out flatbreads or adding your favorite toppings.
  • Healthy & Nutritious: Packed with lean protein and fresh vegetables, these wraps are a wholesome choice for any meal.
  • Great for Meal Prep: The chicken and sauce can be made ahead of time, making lunchtime or dinner a breeze.

Ingredients Breakdown

Here’s a detailed look at the ingredients you’ll need to create these delicious wraps:

  • 1 pound skinless, boneless chicken breasts: Cut into bite-sized pieces. For a leaner option, you can use turkey or tofu.
  • Olive oil: Essential for marinating. Feel free to substitute with avocado oil for a different flavor.
  • 2 cloves garlic: Pressed for flavor; fresh garlic is the way to go!
  • Zest of 1 lemon: About 1 tablespoon. The zest adds a bright citrus flavor.
  • 1 tablespoon lemon juice: Freshly squeezed lemon juice is best for this recipe.
  • Spices: 1 teaspoon salt, a pinch of black pepper, 1/2 teaspoon dried oregano, 1/2 teaspoon ground cumin, 1/4 teaspoon coriander, and 1/4 teaspoon paprika. These spices create a wonderful flavor profile.
  • 4 Middle Eastern-style flatbreads: You can also use pita bread or tortillas if you prefer.
  • Fresh greens: Arugula adds a peppery kick, but feel free to use spinach or mixed greens.
  • Sliced tomatoes: Adds freshness and color to the wraps.
  • Spicy garlic sauce: Made with 1/2 cup mayonnaise, 1/2 cup sour cream or plain Greek yogurt, 3 cloves of garlic, 1 tablespoon tahini, 2 to 3 teaspoons sriracha, 1 teaspoon salt, and spices to taste.

Expert Tips for Success

Juicy grilled lemon chicken wraps on flatbreads, garnished with arugula and fresh vegetables.

To ensure your wraps turn out perfectly every time, check out these expert tips:

  • Marinate Longer: For even more flavor, marinate the chicken overnight.
  • Use a Hot Grill: Preheat your grill pan or outdoor grill to medium-high heat for the best sear.
  • Don’t Overcrowd: When grilling, ensure the chicken pieces are not touching so they cook evenly.
  • Rest Your Chicken: Allow the chicken to rest after cooking to retain its juices.
  • Make the Sauce Ahead: Prepare the spicy garlic sauce in advance and store it in the fridge for convenience.
  • Experiment with Toppings: Add your favorite vegetables or different sauces to customize your wraps.
  • Use Fresh Ingredients: Fresh herbs and vegetables will elevate the flavor of your wraps significantly.
  • Watch Cooking Time: Chicken should be cooked to an internal temperature of 165°F. Use a meat thermometer for accuracy.

Common Mistakes and Troubleshooting

Even the best chefs make mistakes! Here’s how to avoid common pitfalls:

  • Dry Chicken: If you find your chicken is dry, it may have been cooked too long. Use a meat thermometer to check for doneness.
  • Unbalanced Flavors: If your wraps taste bland, consider adding more salt or lemon juice to the marinade.
  • Too Spicy: If the garlic sauce is too spicy, add a little more mayo or yogurt to balance it out.
  • soggy Wraps: If your wraps are soggy, consider toasting the flatbreads lightly before assembling.
  • Marinade Not Absorbed: If the chicken didn’t absorb enough flavor, try marinating for longer next time.

Delicious Variations

Want to switch things up? Try these exciting variations:

  • BBQ Chicken Wrap: Replace the lemon marinade with your favorite BBQ sauce for a smoky twist.
  • Veggie-Loaded Wrap: Add more veggies like bell peppers, cucumbers, or shredded carrots for crunch.
  • Asian-Inspired Wrap: Use soy sauce, ginger, and sesame oil in the marinade and add sliced cucumbers and carrots.
  • Spicy Southwest Wrap: Incorporate chipotle peppers in the sauce and add black beans and corn to the filling.

Storage and Make-Ahead Instructions

Want to prepare these wraps in advance? Here’s how to store them:

  • Store Chicken: Cooked chicken can be stored in an airtight container in the fridge for up to 3 days.
  • Make Sauce Ahead: The spicy garlic sauce can be made up to a week in advance and stored in the fridge.
  • Assemble Fresh: For the best texture, assemble wraps just before serving to avoid sogginess.
  • Freeze for Later: Cooked chicken can be frozen for up to 3 months. Thaw before using.

Frequently Asked Questions (FAQ)

Here are some common questions and answers about the Grilled Lemon Chicken Flatbread Wraps:

  • Can I use frozen chicken? Yes, just be sure to thaw it completely before marinating.
  • What can I substitute for flatbreads? Tortillas or pita bread work well in place of flatbreads.
  • How spicy is the garlic sauce? The spice level can be adjusted based on the amount of sriracha you use.
  • Can I grill the chicken outside? Absolutely! Just ensure your grill is preheated and follow the same cooking times.
  • How do I know when the chicken is done? The internal temperature should reach 165°F for safe consumption.
  • Can I make this vegetarian? Yes, substitute chicken with grilled vegetables or tofu for a tasty alternative.
  • What’s the best way to reheat leftovers? Reheat in a microwave or skillet until warmed through, adding a splash of water to keep moisture.
  • How long do these wraps last? Wrapped tightly, they can last in the fridge for about 2-3 days.

Nutritional Tips and Dietary Adaptations

Want to make this recipe fit your dietary needs? Here are some suggestions:

  • Lower Calorie: Use Greek yogurt instead of mayonnaise for a lighter sauce.
  • Gluten-Free: Opt for gluten-free flatbreads or lettuce wraps.
  • Keto-Friendly: Replace flatbreads with low-carb wraps or lettuce.
  • Protein Boost: Add chickpeas or lentils alongside the chicken for an extra protein punch.

Recommended Equipment

Here’s what you’ll need to make these tasty wraps:

  • Grill Pan or Outdoor Grill: Essential for achieving that perfect grilled flavor.
  • Mixing Bowls: Useful for marinating chicken and preparing sauces.
  • Bamboo Skewers: Great for grilling chicken pieces evenly.
  • Meat Thermometer: Helps ensure your chicken is cooked to perfection.

Serving Suggestions

Here are some ideas on how to serve your Grilled Lemon Chicken Flatbread Wraps:

  • With a Side Salad: Pair with a fresh arugula or mixed greens salad for a balanced meal.
  • Chips and Dip: Serve with tortilla chips and salsa for a fun, casual dining experience.
  • Fruit Salad: A refreshing fruit salad can complement the flavors wonderfully.
  • Drinks: Pair with a light lemonade or iced tea for a refreshing beverage option.

Now that you have all the information you need, it’s time to get cooking! These Grilled Lemon Chicken Flatbread Wraps are sure to impress family and friends with their vibrant flavors and satisfying textures. Remember, cooking is all about experimentation and enjoying the process. So, roll up your sleeves, and let’s make something delicious together!

Happy cooking!

Grilled Lemon Chicken Flatbread Wraps

Prep Time 20 minutes
Cook Time 10 minutes
Total Time 30 minutes
Servings 4 servings
Calories 650
Delicious grilled chicken wrapped in flatbread with fresh greens, tomatoes, and a spicy garlic sauce for a flavorful meal.

Ingredients

Chicken

  • 1 pound skinless, boneless chicken breasts (about 2 large breasts, cubed)
  • 2 cloves garlic (pressed)
  • 1 tablespoon lemon zest (about 1 tablespoon)
  • 1 tablespoon lemon juice
  • 1 teaspoon salt
  • Pinch black pepper
  • 0.5 teaspoon dried oregano
  • 0.5 teaspoon ground cumin
  • 0.25 teaspoon coriander
  • 0.25 teaspoon paprika

Flatbreads

  • 4 pieces middle eastern-style flatbreads (or pita bread)

Greens

  • to taste Arugula greens

Tomatoes

  • to taste sliced tomatoes
  • 0.5 cup mayonnaise
  • 0.5 cup sour cream or Greek yogurt (full-fat, plain)
  • 3 cloves garlic (pressed)
  • 1 tablespoon tahini
  • 2-3 teaspoons sriracha (adjust to taste)
  • 1 teaspoon salt
  • Pinch black pepper
  • Pinch cayenne pepper (adjust to spice preference)
  • 0.5 teaspoon lemon juice

Instructions 

  • Toss chicken with olive oil, garlic, lemon zest, lemon juice, salt, pepper, oregano, cumin, coriander, and paprika. Marinate for 20 minutes.
  • Skewer chicken and grill over medium-high heat for 6-8 minutes, turning until charred and cooked through. Rest for 5-10 minutes, then remove from skewers.
  • Prepare garlic sauce by whisking together mayonnaise, sour cream, garlic, tahini, sriracha, salt, pepper, cayenne, and lemon juice. Keep refrigerated.
  • Assemble wraps by spreading garlic sauce on flatbread, adding greens, tomato slices, and chicken. Fold to form a wrap, using parchment or foil if desired.

Notes

Soak skewers in water before grilling to prevent burning. Adjust spice levels to taste.
Calories: 650kcal
Cost: $15
Course: Main Course
Cuisine: Mediterranean
Keyword: Chicken, flatbread, lemon

Whip Up a Creamy Spinach Pasta Sauce That’s Ready in a Flash

Welcome to your new go-to recipe for a creamy spinach pasta sauce! This delightful dish brings together fresh ingredients like spinach, herbs, and mascarpone cheese, creating a flavor explosion that’s perfect for quick weeknight dinners. Not only is this recipe simple, but it also elevates your pasta game effortlessly, making it a true culinary gem. Let’s dive into why you’ll love it and how to master this sauce in no time!

Why You’ll Love This Recipe

  • Quick and Easy: This creamy spinach pasta sauce can be whipped up in under 30 minutes, making it perfect for busy weeknights.
  • Versatile Ingredients: You can easily substitute or add ingredients like kale or different herbs to suit your taste.
  • Health Boost: Spinach is packed with nutrients, providing you with vitamins A, C, and K, plus iron and fiber.
  • Kid-Friendly: The creamy texture and mild flavor make this dish appealing to both kids and adults.
  • Make-Ahead Friendly: You can prepare this sauce in advance and store it for later use, making meal prep a breeze.

Ingredients Breakdown

Here’s what you’ll need to create this delicious creamy spinach pasta sauce:

  • 5 ounces fresh spinach: Rinsed thoroughly for a vibrant color and health benefits. You can use frozen spinach if fresh isn’t available.
  • 3 tablespoons extra virgin olive oil: Divided for sautéing and finishing the sauce.
  • 1 yellow onion: Peeled and diced to add sweetness and depth of flavor.
  • 4 cloves garlic: Peeled and roughly chopped for aromatic goodness.
  • ½ cup basil: Loosely packed, plus a few leaves for garnish, elevating the sauce’s freshness.
  • ½ cup parsley: Loosely packed to add a bright, herby flavor.
  • ¼ cup unsalted pistachios: Shelled, for a unique crunch and nutty flavor.
  • 1 lemon: Juiced for acidity that brightens the dish.
  • ½ cup mascarpone cheese: For a rich and creamy texture; ricotta can be a good substitute.
  • ¾ cup Parmigiano-Reggiano: Finely grated, divided for flavor and creaminess.
  • 12 ounces tagliatelle: This pasta holds the sauce beautifully; feel free to use your favorite type.
  • 1 cup pasta cooking water: To help emulsify the sauce and achieve the perfect consistency.
  • Salt and pepper: To taste, enhancing all the flavors.

How to Make Creamy Spinach Pasta Sauce

Side view of a bowl filled with creamy spinach sauce, showcasing its rich texture and herbs.

Get ready to create your new favorite pasta sauce with these easy steps:

Step 1: Cook the Pasta

1. Bring a large pot of boiling water to a rolling boil. Add a generous amount of salt to the water, then cook the tagliatelle according to package instructions until al dente. Reserve 1 cup of the pasta cooking water, then drain the pasta.

Step 2: Sauté the Aromatics

2. In a large skillet, heat 2 tablespoons of extra virgin olive oil over medium heat. Add the diced onion and sauté until translucent, about 3-5 minutes. Next, add the garlic and cook until fragrant, around 1 minute.

Step 3: Add the Spinach

3. Add the fresh spinach to the skillet and sauté until wilted, about 2-3 minutes. Stir in the basil and parsley, allowing their flavors to meld together.

Step 4: Blend the Sauce

4. Transfer the spinach mixture to a food processor or blender. Add the mascarpone cheese, pistachios, lemon juice, and half of the Parmigiano-Reggiano. Blend until smooth, adding reserved pasta water as needed to achieve your desired consistency.

Step 5: Combine

5. Return the blended sauce to the skillet over medium heat. Add the cooked tagliatelle and toss to combine. Adjust seasoning with salt and pepper to taste. If the sauce is too thick, add more reserved pasta water until it reaches the desired creaminess.

Step 6: Serve and Enjoy

6. Serve immediately, garnished with remaining Parmigiano-Reggiano and fresh herbs. Enjoy your creamy spinach pasta sauce!

Pro Tips for Perfecting Your Sauce

  • Choosing the Right Pasta: Opt for pasta shapes that hold sauce well, such as fusilli or penne, for a delightful eating experience.
  • Fresh Herbs Are Key: Using fresh herbs like basil and parsley enhances the flavor significantly; dried herbs won’t provide the same vibrancy.
  • Don’t Skip the Lemon: A splash of lemon juice brightens the sauce, balancing the creaminess with acidity.
  • Adjust Consistency: Always reserve pasta water. It’s starchy and helps emulsify the sauce, achieving a luscious texture.
  • Experiment with Nuts: While pistachios add a unique flavor, other nuts like walnuts or almonds can also work beautifully.
  • Keep It Creamy: For extra creaminess, consider adding a splash of heavy cream or more mascarpone.
  • Make It Vegan: Substitute the cheese with cashew cream or nutritional yeast for a plant-based option.
  • Leftover Makeovers: Use any leftover sauce as a spread for sandwiches or a base for soups.

Common Mistakes and Troubleshooting

Even the best cooks can make mistakes. Here’s how to avoid common pitfalls:

  • Overcooking the Spinach: Cook just until wilted to retain its vibrant color and nutrients.
  • Too Thick Sauce: If your sauce turns out too thick, gradually add more pasta water until it reaches the right consistency.
  • Unbalanced Flavor: If the sauce lacks flavor, consider adding more salt, pepper, or a splash of vinegar for brightness.
  • Not Enough Creaminess: If the sauce isn’t creamy enough, incorporate more mascarpone or a splash of cream.

Variations to Try

Mix things up with these fun variations!

  • Spicy Spinach Pasta Sauce: Add a pinch of red pepper flakes for a spicy kick.
  • Cheesy Spinach Sauce: Incorporate different cheeses like goat cheese or feta for a tangy twist.
  • Mushroom Spinach Sauce: Sauté sliced mushrooms with the onions for added depth and a savory flavor.
  • Pasta Primavera: Toss in seasonal veggies like cherry tomatoes or zucchini for extra color and nutrition.

Storage and Make-Ahead Instructions

You can prepare this creamy spinach pasta sauce ahead of time for convenience:

  • Refrigerating: Store in an airtight container in the refrigerator for up to 3 days.
  • Freezing: Freeze the sauce for up to 3 months; thaw overnight in the fridge before reheating.
  • Reheating: Gently reheat on the stovetop, adding a splash of pasta water to restore creaminess.

Frequently Asked Questions

  • Can I use frozen spinach? Yes! Just make sure to thaw and drain it well before using.
  • Is this sauce gluten-free? You can make it gluten-free by using gluten-free pasta.
  • Can I make this sauce vegan? Absolutely! Substitute the cheese with cashew cream or nutritional yeast.
  • What can I serve this sauce with? It pairs wonderfully with any pasta, grilled chicken, or over roasted vegetables.
  • Can I add protein to this dish? Yes! Try adding grilled chicken, shrimp, or chickpeas for a protein boost.
  • How can I make the sauce thicker? Add more mascarpone or a splash of cream for a thicker consistency.
  • Can I use other nuts? Yes! Feel free to experiment with walnuts or almonds for different flavors.
  • What’s the best way to store leftovers? Store in an airtight container in the fridge for up to 3 days or freeze for longer storage.

Nutrition Tips and Dietary Adaptations

This creamy spinach pasta sauce not only delights the taste buds, but it can also be adapted to fit your dietary needs:

  • Low-Carb Option: Use zucchini noodles or spaghetti squash instead of traditional pasta.
  • High-Protein Version: Add cooked chicken or chickpeas for extra protein.
  • Low-Fat Adaptation: Substitute mascarpone with Greek yogurt for a lighter sauce.
  • Nut-Free Version: Omit pistachios and use sunflower seeds or leave out nuts altogether.

Equipment Recommendations

To make this creamy spinach pasta sauce, you’ll need a few essential tools:

  • Large Pot: For boiling the pasta.
  • Skillet: A large skillet for sautéing the aromatics and combining everything.
  • Food Processor or Blender: To blend the sauce until smooth.
  • Measuring Cups and Spoons: For accurate ingredient measurements.
  • Wooden Spoon: For stirring and combining ingredients.

Serving Suggestions

This creamy spinach pasta sauce is incredibly versatile! Here are some ideas:

  • Pair with Grilled Protein: Serve alongside grilled chicken, shrimp, or tofu for a complete meal.
  • Mix with Vegetables: Toss in some roasted or sautéed vegetables for added nutrition and flavor.
  • Garnish with Fresh Herbs: Fresh basil or parsley makes a beautiful and flavorful garnish.
  • Serve with Crusty Bread: A side of crusty bread is perfect for soaking up any leftover sauce.

With this recipe in your arsenal, you’ll always have a quick, flavorful option for dinner. Enjoy the journey of cooking and the joy of sharing delicious meals with loved ones. Happy cooking!

Creamy Spinach Pasta Sauce

Prep Time 10 minutes
Cook Time 15 minutes
Total Time 25 minutes
Servings 4 servings
Calories 550
A rich and flavorful sauce combining spinach, herbs, and cheese, perfect for tossing with pasta for a quick and satisfying meal.

Ingredients

Vegetables and Herbs

  • 5 ounces spinach (rinsed thoroughly)
  • 1 yellow onion yellow onion (peeled and diced)
  • 4 cloves garlic (peeled and roughly chopped)
  • ½ cup basil (loosely packed, plus a few leaves for garnish)
  • ½ cup parsley (loosely packed)
  • ¼ cup pistachios (shelled, unsalted)
  • 1 lemon lemon (juiced)
  • ½ cup mascarpone cheese (or ricotta cheese)
  • ¾ cup Parmigiano-Reggiano (finely grated, divided)
  • 12 ounces tagliatelle
  • 1 cup pasta cooking water

Salt and pepper

Instructions 

  • Sauté diced onion and garlic in 1.5 tablespoons of olive oil until fragrant.
  • Add spinach, basil, and parsley; cook until wilted.
  • Stir in pistachios, lemon juice, mascarpone, and half of the cheese; season with salt and pepper.
  • Cook pasta until al dente; reserve 1 cup of pasta water.
  • Toss pasta with sauce, adding reserved water to loosen if needed; sprinkle with remaining cheese and garnish with basil leaves.

Notes

Use fresh herbs for the best flavor and adjust seasoning to taste.
Calories: 550kcal
Cost: $12
Course: Main Course
Cuisine: Italian
Keyword: Spinach

Discover the Joy of Making a Strawberry Yogurt Smoothie

Welcome to the delightful world of smoothies, where fresh flavors meet creamy goodness! If you’re looking for a quick, nutritious treat that can be enjoyed for breakfast or as a refreshing snack, you’ve landed in the right place. In this guide, I’ll walk you through the steps to create a delicious strawberry yogurt smoothie that’s not only simple but also absolutely satisfying. Using fresh strawberries, creamy Greek yogurt, and a touch of sweetness, this recipe is sure to become a staple in your kitchen.

Why You’ll Love This Recipe

Let’s dive into the reasons why this smoothie is a game-changer:

  • Quick and Easy: This smoothie takes less than 10 minutes to prepare, making it perfect for busy mornings.
  • Nutrient-Packed: With fresh strawberries and Greek yogurt, you’re getting a dose of vitamins and probiotics.
  • Customizable: You can easily adjust the sweetness or swap ingredients based on what you have on hand.
  • Kid-Friendly: This smoothie is a hit with kids. They’ll love the sweet, creamy flavor!
  • Refreshing and Satisfying: It’s a perfect way to cool down on hot days while keeping hunger at bay.

Key Ingredients and Substitutions

Here’s what you’ll need to whip up your strawberry yogurt smoothie, along with some handy substitutions:

  • Fresh or Frozen Strawberries: 1 1/2 cups. If you’re using frozen strawberries, you can skip the ice cubes!
  • Plain Greek Yogurt: 1/2 cup. Swap with any yogurt you prefer—dairy or non-dairy!
  • Milk: 1/2 cup. Use dairy milk, almond milk, or oat milk based on your dietary needs.
  • Sweetener: 1 tsp honey or maple syrup (optional). Adjust based on your taste preference!
  • Vanilla Extract: 1/2 tsp for a flavor boost. Feel free to omit if you prefer a more straightforward taste.
  • Ice Cubes: 1/2 cup, only if using fresh strawberries for that cold, refreshing texture.

Step-by-Step Instructions

Close-up of a pink strawberry yogurt smoothie with a straw, garnished with a strawberry slice.

Let’s get blending! Follow these simple steps to create your smoothie:

  1. If using fresh strawberries, thoroughly wash them and remove the green tops. If using frozen, you can skip this step.
  2. Add the milk and Greek yogurt to the blender first, which helps the blades move freely.
  3. Layer the strawberries, honey or maple syrup, and vanilla extract on top of the yogurt and milk.
  4. Blend on high speed for 30-45 seconds until the mixture is a vibrant pink and perfectly smooth.
  5. If you’re using fresh strawberries, add the ice cubes and blend again until fully incorporated.
  6. Pour into a glass and, for an extra touch, garnish with a whole strawberry on the rim.

Pro Tips for the Perfect Smoothie

To elevate your smoothie-making game, here are some expert tips:

  • Texture Matters: For a creamier texture, use full-fat Greek yogurt instead of low-fat.
  • For Extra Protein: Add a scoop of your favorite protein powder to make it more filling.
  • Experiment with Flavors: Try adding a handful of spinach or kale for a green smoothie boost!
  • Sweetness to Taste: If you prefer a sweeter smoothie, add a little more honey or a ripe banana.
  • Frozen Fruits: For an even thicker consistency, use frozen strawberries instead of fresh.
  • Mix and Match: Substitute strawberries with other fruits like blueberries or mango for a different flavor profile.
  • Layering Ingredients: Always add liquids first to prevent ingredients from sticking to the bottom of the blender.
  • Blend in Batches: If you’re making multiple servings, blend in batches for a smoother mix.

Common Mistakes and Troubleshooting

Even simple recipes can have their hiccups. Here’s how to tackle common issues:

  • Too Thick: Add a splash more milk to loosen up the mixture.
  • Not Sweet Enough: Blend in a little more honey or maple syrup to enhance the flavor.
  • Chunky Texture: Ensure you’re blending long enough to achieve a smooth consistency.
  • Too Watery: Reduce the amount of milk or increase the amount of yogurt or fruit to thicken it up.

Delicious Variations to Try

If you’re feeling adventurous, here are some fun variations to customize your smoothie:

  • Berry Blast: Incorporate a mix of berries like blueberries and raspberries for a berry medley.
  • Tropical Twist: Substitute strawberries with pineapple or mango for a tropical flavor.
  • Nutty Addition: Add a tablespoon of almond butter or peanut butter for a nutty flavor and extra protein.
  • Chocolate Delight: Blend in a tablespoon of cocoa powder for a chocolatey treat.

Storage and Make-Ahead Instructions

If you want to prepare your smoothie in advance, here’s how to store it:

  • Refrigeration: Store in an airtight container in the fridge for up to 24 hours. Give it a good shake before drinking!
  • Freezing: Pour into ice cube trays and freeze for easy smoothie packs. Blend with milk when you’re ready to enjoy.

FAQs About Strawberry Yogurt Smoothies

Here are some common questions I receive about this delightful smoothie:

  • Can I use frozen strawberries? Yes, using frozen strawberries is a great way to make your smoothie thick and cold without ice!
  • Is this smoothie vegan? You can make it vegan by using non-dairy yogurt and milk.
  • Can I add greens to my smoothie? Absolutely! Spinach or kale can be added without affecting the flavor too much.
  • How can I make this smoothie more nutritious? Consider adding chia seeds or a scoop of protein powder for an additional nutrient boost.
  • Can I use flavored yogurt? Yes, flavored yogurts can add an extra layer of taste, but make sure to adjust the sweetness accordingly.
  • How long does it take to prepare? This smoothie takes less than 10 minutes to prepare and blend!
  • Can I use a different type of milk? Yes, feel free to use almond milk, oat milk, or any milk you prefer.
  • What’s the best way to serve this smoothie? Serve it chilled in a tall glass, and don’t forget the garnish for that touch of elegance!

Nutritional Insights and Dietary Adaptations

This smoothie is not only a treat but also a nutritious option. Here’s what you can expect:

  • High in Protein: Greek yogurt provides a healthy dose of protein, perfect for muscle recovery.
  • Rich in Vitamins: Strawberries are loaded with vitamin C, aiding your immune system.
  • Low in Sugar: By controlling the amount of sweetener, you can keep the sugar content low.
  • Dairy-Free Options: Easily make this smoothie dairy-free with plant-based yogurt and milk.

Essential Equipment for Smoothie Making

Here’s what you’ll need to create your perfect smoothie:

  • High-Speed Blender: A high-quality blender makes a big difference in achieving a smooth consistency.
  • Measuring Cups: For accurately measuring your ingredients.
  • Spatula: Useful for scraping down the sides of the blender to ensure everything is blended well.

Serving Suggestions and Pairings

Enhance your smoothie experience with these serving suggestions:

  • With Breakfast: Pair your smoothie with whole-grain toast or oatmeal for a balanced breakfast.
  • As a Snack: Serve it alongside a handful of nuts or a granola bar for a satisfying snack.
  • For a Treat: Add toppings like granola, coconut flakes, or sliced fruit for an indulgent touch.

Conclusion

There you have it, your ultimate guide to making a strawberry yogurt smoothie that’s both delicious and nutritious! With just a few simple ingredients and steps, you can create a refreshing drink that will brighten your day. Remember, cooking is all about confidence and creativity—don’t hesitate to make this recipe your own! Enjoy your smoothie adventures, and happy blending!

Strawberry Yogurt Smoothie

Prep Time 5 minutes
Total Time 5 minutes
Servings 2 cups
Calories 150
A refreshing and healthy smoothie perfect for breakfast or a snack, blending fresh or frozen strawberries with creamy yogurt and milk.

Ingredients

Fruits

  • 1.5 cups strawberries (fresh or frozen)
  • 0.5 cup plain Greek yogurt
  • 0.5 cup milk (dairy or almond)
  • 1 tsp honey or maple syrup (optional)
  • 0.5 tsp vanilla extract
  • 0.5 cup ice cubes (if using fresh fruit)

Instructions 

  • Wash fresh strawberries and remove green hulls, or use frozen strawberries directly.
  • Add milk and yogurt to the blender, then add strawberries, honey, and vanilla.
  • Blend on high for 30-45 seconds until smooth and vibrant pink.
  • If using fresh strawberries, add ice and blend again until chilled and smooth.
  • Pour into a glass and garnish with a whole strawberry if desired.

Notes

For a thicker smoothie, add more ice or frozen strawberries.
Calories: 150kcal
Cost: $8
Course: Breakfast, Snack
Cuisine: American
Keyword: Smoothie, Strawberry, Yogurt