Author

Steven

Browsing

Unleash Your Baking Passion with Mini Cupcakes!

Welcome to the delightful world of mini cupcakes! These bite-sized treats are not just adorable; they’re also a perfect canvas for creativity in the kitchen. If you’re looking to elevate your baking skills and impress your friends and family with something that’s both fun to make and delicious to eat, you’ve landed in the right place. In this ultimate guide, we’ll explore everything you need to know about making mini cupcakes that are packed with flavor and joy.

Why You’ll Love This Mini Cupcake Recipe

This mini cupcake recipe is a game-changer for any baking enthusiast. Here are just a few reasons why:

  • Perfect for Any Occasion: Whether it’s a birthday party, a wedding, or just a celebration of life, these mini cupcakes are your go-to sweet treat!
  • Easy to Make: With simple ingredients and straightforward steps, you can whip these up in no time, making them ideal for busy schedules.
  • Customizable Flavors: Want to try something new? Our recipe allows for variations, so you can create flavors that suit your taste buds.
  • Kid-Friendly Fun: Baking is a wonderful activity to share with children. They’ll love decorating their own mini cupcakes!
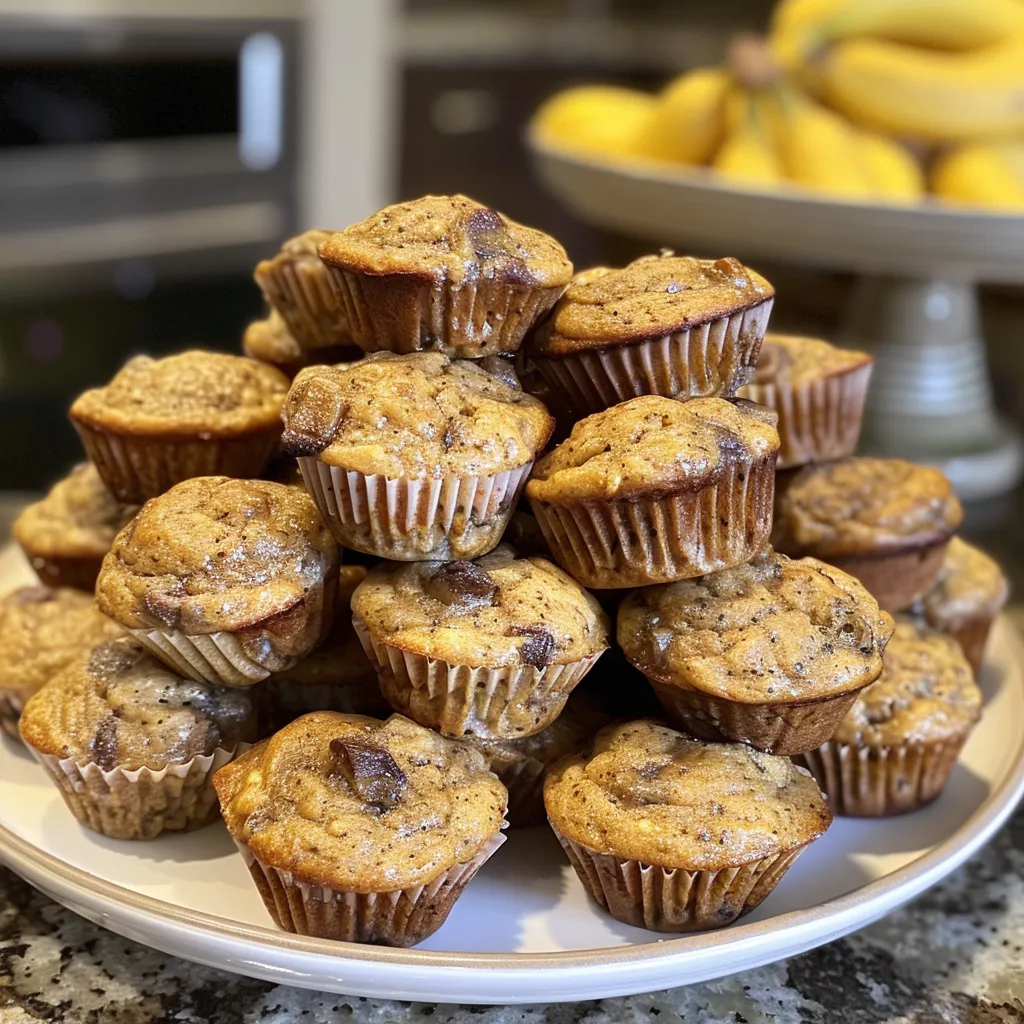
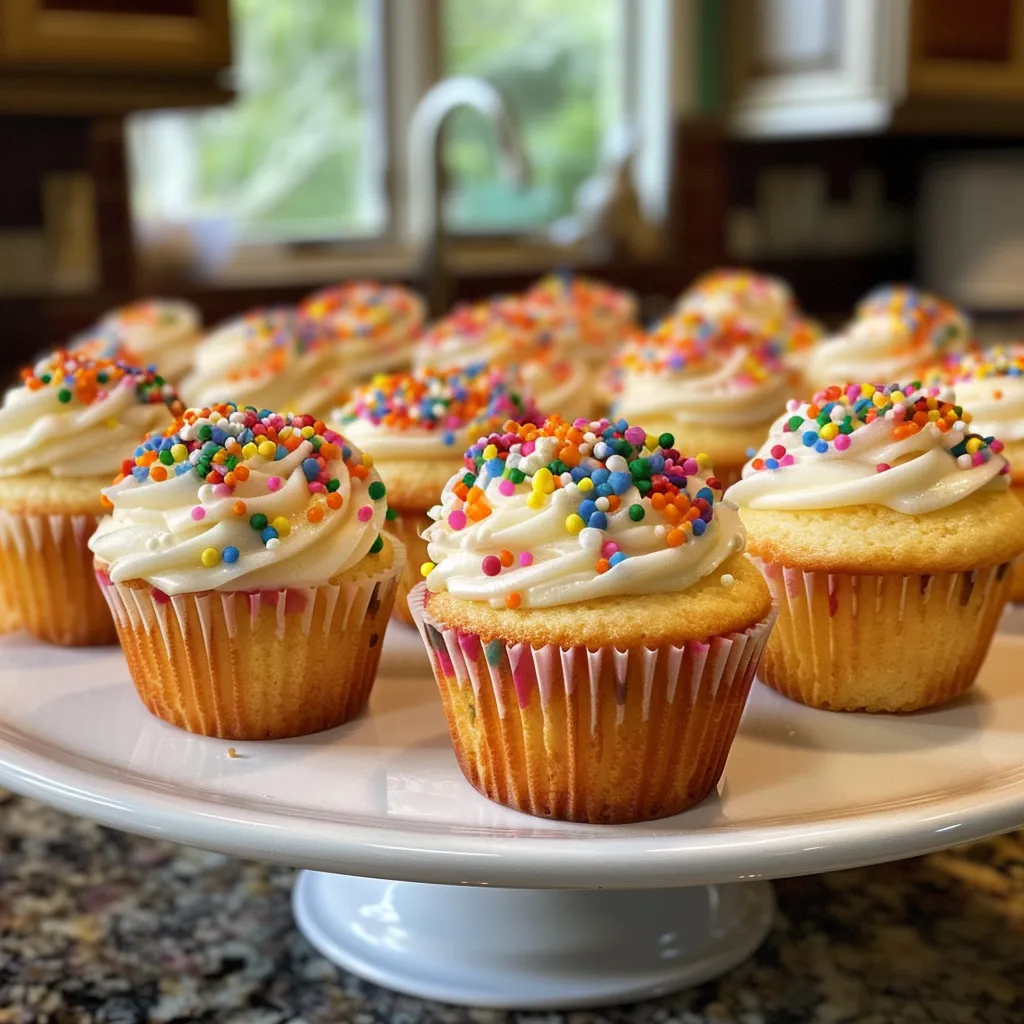
  • Impressive Presentation: Serve them on a platter, and watch as everyone admires your culinary skills. They look as good as they taste!

Ingredients You’ll Need

Ready to bake? Here’s what you’ll need for our mini vanilla cupcakes:

  • All-purpose flour: 3/4 cup (108g) – scoop and level to measure.
  • Baking powder: 1 tsp – this helps the cupcakes rise perfectly.
  • Salt: 1/4 tsp – balances the sweetness.
  • Unsalted butter: 5 Tbsp (71g), brought to room temperature – for a rich, creamy texture.
  • Granulated sugar: 6 Tbsp (77g) – sweetens the batter.
  • Large egg: 1, brought to room temperature – binds the ingredients.
  • Vanilla extract: 1 tsp – adds that sweet vanilla flavor.
  • Milk: 1/3 cup, brought to room temperature – keeps the batter moist.
  • Powdered sugar: 1 3/4 cups (210g) – for frosting.
  • Unsalted butter: 1/2 cup (113g), brought to room temperature – for a fluffy frosting.
  • Heavy cream: 2 Tbsp – adds richness to your frosting.
  • Pinch of salt: enhances flavors in the frosting.

Ingredient Substitutions

If you’re missing an ingredient or need to make substitutions, don’t worry! Here are some suggestions:

  • Flour: You can use cake flour for a lighter texture.
  • Dairy-Free Option: Substitute milk with almond or oat milk, and use dairy-free butter for frosting.
  • Sweetener Swap: For a healthier alternative, consider using coconut sugar or a sugar substitute.
  • Vegan Option: Replace the egg with a flax egg (1 tbsp flaxseed meal + 2.5 tbsp water) and use plant-based butter.

How to Make Mini Cupcakes: Step-by-Step

Delicious mini cupcakes displayed with vibrant frosting in a side view.

Let’s get baking! Follow these steps for perfect mini cupcakes:

  1. Preheat the Oven: Set your oven to 350 degrees F (175 degrees C). Line a 24-well mini muffin pan with paper liners.
  2. Mix Dry Ingredients: In a medium mixing bowl, whisk together the flour, baking powder, and salt. Set aside.
  3. Cream Butter and Sugar: In a large mixing bowl, beat the softened butter with granulated sugar using an electric mixer on low speed. Gradually increase to high and whip until pale and fluffy, about 3-4 minutes.
  4. Add Egg and Vanilla: Mix in the egg and vanilla extract until fully incorporated.
  5. Combine Dry and Wet Ingredients: Add half of the flour mixture and mix on low speed just until combined. Then add the milk and mix until smooth. Finally, add the remaining flour mixture and mix until just combined.
  6. Prepare the Muffin Pan: Scoop the batter into your prepared mini muffin pan, filling each liner about 2/3 full.
  7. Bake: Bake for 9-10 minutes or until a toothpick inserted into a cupcake comes out clean.
  8. Cool Down: Allow the cupcakes to cool in the pan for a few minutes, then transfer them to a wire rack to cool completely.

Frosting Your Mini Cupcakes

Now, let’s make that luscious frosting!

  1. Whip Ingredients Together: In a mixing bowl, combine all frosting ingredients. Start mixing on low speed to avoid a powdered sugar cloud, then increase to high speed and whip until light and fluffy, about 4-5 minutes.
  2. Decorate: Transfer frosting to a piping bag fitted with a star tip and pipe onto cupcakes, or simply spread it with a spatula.

Pro Tips for Perfect Mini Cupcakes

Here are some of my top tips to ensure your mini cupcakes come out perfectly every time:

  • Room Temperature Ingredients: Make sure your butter, egg, and milk are at room temperature for better emulsification.
  • Don’t Overmix: Mix until just combined to keep the cupcakes light and fluffy.
  • Check for Doneness: Oven temperatures can vary, so check your cupcakes a minute or two early.
  • Use a Toothpick: Insert a toothpick in the center; if it comes out clean, they’re done!
  • Cool Completely: Allow cupcakes to cool completely before frosting to prevent melting.
  • Experiment with Flavors: Feel free to infuse your batter or frosting with different extracts or zest for extra flavor!
  • Storage Tips: Store any leftover cupcakes in an airtight container at room temperature or refrigerate for longer freshness.
  • Make-Ahead Option: You can bake the cupcakes a day or two in advance, just frost them on the day of serving.

Common Mistakes and Troubleshooting

Every baker faces challenges. Here are some common mistakes and how to avoid them:

  • Dense Cupcakes: This usually happens from overmixing the batter or using cold ingredients. Always ensure everything is at room temperature and mix gently.
  • Overbaked Cupcakes: Keep a close eye on them as they bake. Remember, they continue to cook in the pan after being removed from the oven.
  • Dry Cupcakes: This can occur if too much flour is used. Always measure carefully and use the scoop and level method.
  • Frosting Melting: If your frosting is too soft, refrigerate it for a bit before piping.

Delicious Variations to Try

Once you’ve mastered the basic recipe, why not try some fun variations? Here are four ideas:

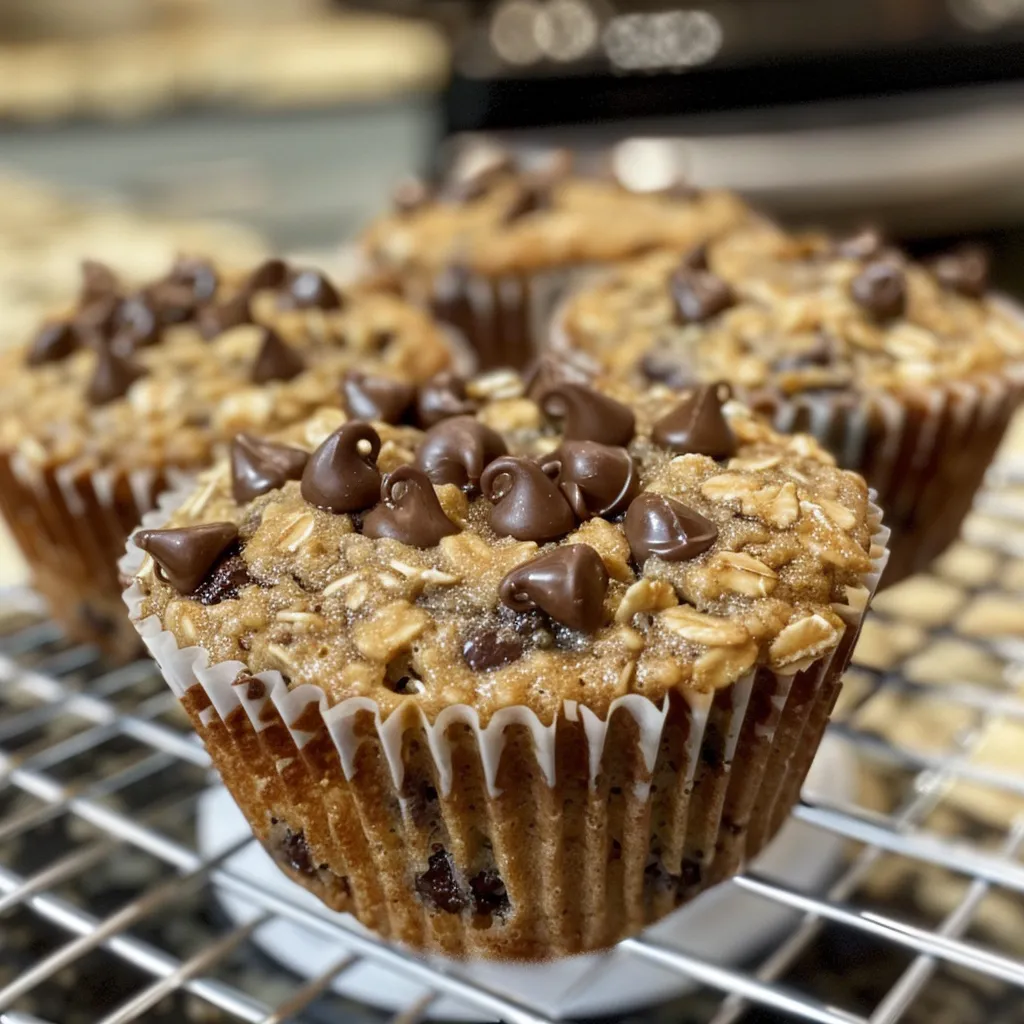
  • Chocolate Mini Cupcakes: Substitute half of the flour with cocoa powder for rich chocolate flavor.
  • Red Velvet Mini Cupcakes: Add cocoa powder and red food coloring for a festive twist.
  • Lemon Zest Mini Cupcakes: Incorporate lemon zest into the batter for a refreshing flavor.
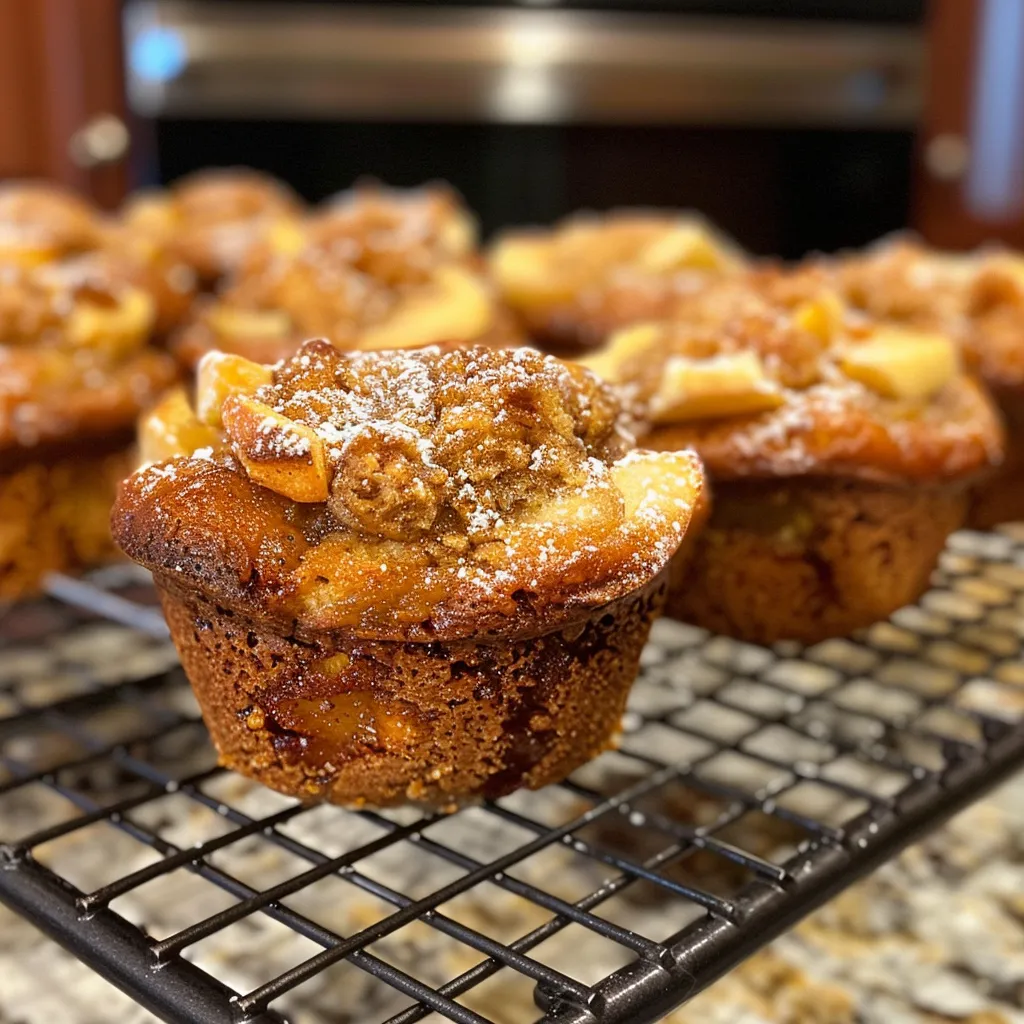
  • Carrot Cake Mini Cupcakes: Stir in grated carrots and spices for a deliciously moist cupcake.

Storage and Make-Ahead Instructions

These mini cupcakes can be stored and made ahead of time with ease:

  • Room Temperature Storage: Keep them in an airtight container for up to 3 days.
  • Refrigeration: For longer freshness, store in the refrigerator for up to a week.
  • Freezing Option: Freeze un-frosted cupcakes in a single layer, then transfer to an airtight container for up to 3 months.
  • Frost After Freezing: Frost them after thawing to ensure the best texture.

Frequently Asked Questions (FAQ)

  • Can I use a regular muffin pan instead of a mini muffin pan? Yes, just increase the baking time to about 15-20 minutes.
  • How can I make my mini cupcakes more flavorful? Consider adding spices, extracts, or zests to the batter.
  • Can I use store-bought frosting? Absolutely! It’s a great time-saver.
  • What’s the best way to frost mini cupcakes? Use a piping bag for a pretty finish or spread it with a knife for a rustic look.
  • Can I make these mini cupcakes gluten-free? Yes, substitute all-purpose flour with a gluten-free blend.
  • What’s the difference between regular and mini cupcakes? Mini cupcakes are smaller, typically baked in a mini muffin pan, making them perfect for portion control.
  • How can I decorate my mini cupcakes? Top with sprinkles, fruit, or edible glitter to add a fun touch!
  • How do I know when my mini cupcakes are done baking? They are done when a toothpick inserted comes out clean.

Nutrition Tips and Dietary Adaptations

Want to make your mini cupcakes a bit healthier? Here are some tips:

  • Reduce Sugar: Try cutting the sugar by 1/4 to 1/2 without significantly affecting the taste.
  • Use Whole Wheat Flour: Substitute half of the all-purpose flour with whole wheat for added fiber.
  • Incorporate Fruits: Add mashed bananas or applesauce for natural sweetness and moisture.
  • Healthy Frosting Options: Consider using yogurt or cream cheese for a lighter frosting alternative.

Essential Baking Equipment

To ensure your baking experience is smooth and enjoyable, here’s a list of essential tools:

  • Mini Muffin Pan: Invest in a high-quality non-stick mini muffin pan for easy release.
  • Mixing Bowls: A variety of mixing bowls for combining ingredients.
  • Electric Mixer: A hand mixer or stand mixer will make creaming butter and sugar a breeze.
  • Piping Bags and Tips: For decorating your cupcakes beautifully.
  • Measuring Cups and Spoons: Accurate measurements are crucial for baking success.

Serving Suggestions

When it comes to serving your mini cupcakes, presentation is key! Here are some fun ideas:

  • Cupcake Stands: Use a tiered stand for an impressive display at parties.
  • Individual Boxes: Package them in cute boxes for party favors.
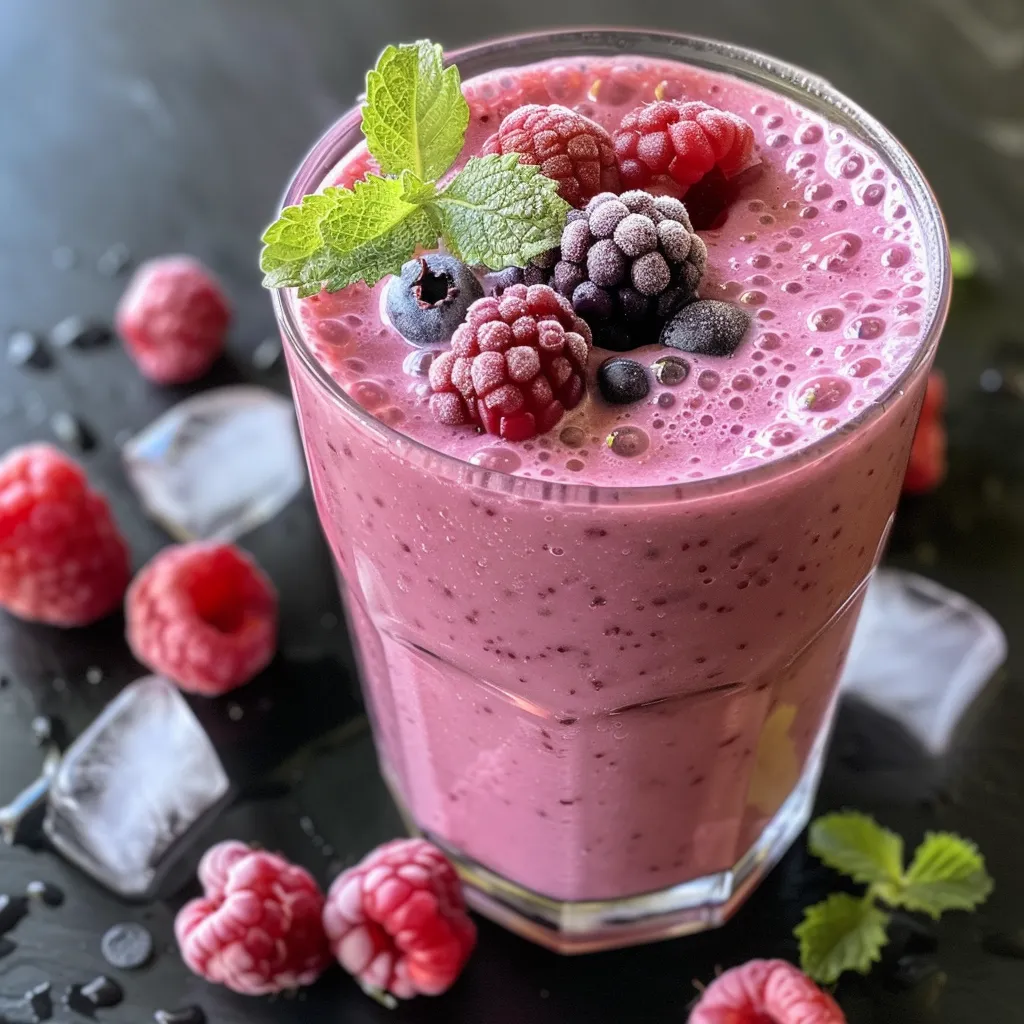
  • Garnishes: Top with fresh berries, mint leaves, or edible flowers for an eye-catching look.
  • Pair with Beverages: Serve with coffee, tea, or a sweet dessert wine for a complete experience.

Final Thoughts

And there you have it—everything you need to know to create delightful mini cupcakes that are perfect for any occasion! Remember, baking should be fun and rewarding. Don’t stress about perfection; instead, focus on enjoying the process and sharing your treats with loved ones. So grab your ingredients, gather your friends or family, and start your baking adventure today! You’ll be amazed at how these mini cupcakes can bring joy to your kitchen and your gatherings. Happy baking!

Mini Cupcakes

Prep Time 15 minutes
Cook Time 10 minutes
Total Time 25 minutes
Servings 24 pieces
Calories 150
Delight in these fluffy mini cupcakes topped with creamy frosting, perfect for any occasion.

Ingredients

Batter

  • 0.5 cup all-purpose flour (scooped and leveled)
  • 1 tsp baking powder
  • 0.25 tsp salt
  • 5 Tbsp unsalted butter (brought to room temperature)
  • 6 Tbsp granulated sugar
  • 1 large egg (brought to room temperature)
  • 1 tsp vanilla extract
  • 0.33 cup milk (brought to room temperature)

Frosting

  • 1.75 cups powdered sugar
  • 0.5 cup unsalted butter (brought to room temperature)
  • 2 Tbsp heavy cream
  • 1 tsp vanilla extract
  • pinch salt

Instructions 

  • Preheat oven to 350°F (175°C). Line mini muffin pan with paper liners.
  • Mix flour, baking powder, and salt. Cream butter and sugar until fluffy. Add egg and vanilla, then alternate adding flour mixture and milk. Fold to combine.
  • Fill liners 2/3 full and bake for 9-10 minutes. Cool completely.
  • Beat frosting ingredients until light and fluffy. Pipe or spread over cooled cupcakes.

Notes

Store in an airtight container at room temperature or in the fridge.
Calories: 150kcal
Cost: $10
Course: Dessert
Keyword: cupcakes

Discover the Joy of Baking Apple Fritter Muffins

Welcome to your next baking adventure! If you’re looking for a delightful treat that combines the comforting flavors of fall with the ease of a muffin, you’ve come to the right place. These Apple Fritter Muffins are not only simple to make but also incredibly satisfying, perfect for cozy mornings or as a sweet afternoon snack. With fresh apples, warm spices, and a sweet glaze, let’s dive into how to whip up this delicious recipe that’s faster than your morning coffee run!

Why You’ll Love This Recipe

  • Quick and Easy: With just a few simple steps, you can have these muffins ready to enjoy in under 30 minutes.
  • Flavorful Ingredients: Using fresh apples and spices elevates the taste, making these muffins a delightful treat.
  • Perfect for Any Occasion: Whether it’s a casual breakfast or a special brunch, these muffins fit right in.
  • Customizable: Add your favorite nuts, dried fruits, or spices to make them your own.
  • Kid-Friendly: Kids love the sweet flavors, and it’s a great way to get them involved in baking!

Ingredients You’ll Need

Gather the following ingredients to create these delicious Apple Fritter Muffins. Don’t worry if you’re missing something; substitutions are easy!

  • Apples: 2 large Granny Smith or Honeycrisp, peeled, cored, and diced. You can also use Fuji or Gala apples for a sweeter option.
  • All-Purpose Flour: 2 cups. For a gluten-free version, substitute with almond or oat flour.
  • Brown Sugar: 3/4 cup packed. This adds moisture and a slight caramel flavor; feel free to use coconut sugar as a healthier alternative.
  • Baking Powder: 2 teaspoons. Essential for leavening the muffins.
  • Ground Cinnamon: 1 1/2 teaspoons. This warm spice enhances the flavor profile.
  • Salt: 1/2 teaspoon. Balances out the sweetness.
  • Eggs: 2 large. They help bind the ingredients together.
  • Whole Milk: 1/2 cup. You can use almond milk or any non-dairy milk as an alternative.
  • Unsalted Butter: 1/4 cup, melted. Replacing it with coconut oil adds a unique flavor.
  • Vanilla Extract: 1 teaspoon. A must for that aromatic touch.
  • Powdered Sugar: 2 tablespoons for the glaze. You can use honey or maple syrup for a healthier glaze option.
  • Additional Milk: 1 to 2 tablespoons to adjust glaze consistency.

Step-by-Step Instructions

Side view of a warm Apple Fritter Muffin, showcasing its fluffy texture and cinnamon specks.

Follow these simple steps to create your muffins:

  1. Preheat your oven to 350°F (175°C) and grease a 12-cup muffin tin or line each cup with paper liners.
  2. In a large mixing bowl, whisk together the flour, brown sugar, baking powder, cinnamon, and salt until well combined.
  3. In a separate bowl, whisk together the eggs, milk, melted butter, and vanilla extract until thoroughly blended.
  4. Pour the wet ingredients into the dry mixture and fold gently with a rubber spatula until just combined. Avoid overmixing to maintain tender muffins.
  5. Gently fold the diced apples into the batter until evenly distributed.
  6. Divide the batter evenly among the muffin cups, filling each about two-thirds full.
  7. Bake for 20 to 25 minutes, or until a toothpick inserted into the center comes out clean.
  8. Allow the muffins to cool in the pan for 5 minutes, then carefully transfer them to a wire rack to cool completely.
  9. For the glaze, mix powdered sugar with 1 tablespoon of milk, adding more milk teaspoon by teaspoon until you reach your desired drizzling consistency.
  10. Drizzle the prepared glaze over the cooled muffins just before serving.

Expert Tips for Baking Success

Before you start baking, keep these tips in mind to make the most out of your muffins:

  • Room Temperature Ingredients: Ensure your eggs and milk are at room temperature for the best texture.
  • Don’t Overmix: Overmixing can lead to dense muffins; mix just until incorporated.
  • Test for Doneness: Use a toothpick; if it comes out clean, your muffins are perfect!
  • Cooling Time: Allow muffins to cool completely on a wire rack for the best texture.
  • Glaze Timing: Drizzle the glaze on cooled muffins to prevent it from soaking in.
  • Mix-Ins: Consider adding chopped nuts or chocolate chips for added texture and flavor.
  • Batch Baking: Double the recipe and freeze half for busy days!
  • Spice It Up: Feel free to experiment with nutmeg or ginger for a flavor twist.

Common Mistakes and Troubleshooting

Here are some common pitfalls and how to avoid them:

  • Dense Muffins: This usually happens from overmixing. Remember to fold gently!
  • Too Sweet: If the muffins are too sweet for your taste, reduce the brown sugar slightly in the next batch.
  • Dry Muffins: Ensure you measure the flour correctly; too much can lead to dryness. Spoon and level it out!

Delicious Variations to Try

Mix things up with these tasty variations:

  • Nutty Apple Fritters: Add 1/2 cup of chopped walnuts or pecans for crunch.
  • Cinnamon Roll Muffins: Swirl in cinnamon sugar before baking for a sweet surprise.
  • Caramel Drizzle: Top with caramel sauce instead of glaze for a decadent treat.
  • Chocolate Chip: Add 1/2 cup of chocolate chips for a sweet twist on the classic muffin.

Storage and Make-Ahead Instructions

Keep your muffins fresh and delicious with these storage tips:

  • Room Temperature: Store in an airtight container for up to 3 days.
  • Refrigeration: For longer storage, keep muffins in the fridge for up to a week.
  • Freezing: Freeze muffins in a zip-top bag for up to 3 months. Thaw overnight in the fridge or at room temperature.
  • Make-Ahead: Prepare the batter the night before and refrigerate; bake fresh in the morning!

Frequently Asked Questions

Here are some questions you might have:

  • Can I use other fruits? Absolutely! Pears or berries work great.
  • What’s the best way to freeze muffins? Allow them to cool completely, then wrap individually in plastic wrap before placing in a freezer bag.
  • Can I make these muffins without eggs? Yes! Substitute with flax eggs or applesauce for a vegan option.
  • How can I make the glaze thicker? Add more powdered sugar until you reach the desired consistency.
  • What can I serve with these muffins? Pair with coffee, tea, or a dollop of whipped cream for an indulgent touch.
  • Are these muffins healthy? They can be made healthier by reducing sugar or using whole wheat flour.
  • Can I add spices? Yes! Experiment with nutmeg or allspice for added flavor.
  • What’s the best way to reheat muffins? Microwave for 10-15 seconds or warm in the oven at a low temperature.

Nutritional Tips and Dietary Adaptations

For those watching their diet, consider these adaptations:

  • Gluten-Free: Use gluten-free flour blends to make these muffins suitable for gluten-sensitive individuals.
  • Lower Sugar: Reduce the brown sugar or substitute with a sugar alternative like stevia for a lighter version.
  • Vegan Option: Replace eggs with flaxseed meal or unsweetened applesauce and use plant-based milk.

Essential Equipment for Success

Having the right tools makes baking easier:

  • Muffin Tin: A sturdy, non-stick muffin tin ensures easy removal and even baking.
  • Mixing Bowls: Use large bowls for mixing dry and wet ingredients separately.
  • Whisk: A good whisk helps incorporate air into your batter, making it light and fluffy.
  • Rubber Spatula: Perfect for folding ingredients without overmixing.
  • Cooling Rack: Allows muffins to cool evenly after baking.

Serving Suggestions

These muffins are delightful on their own, but here are some serving ideas to elevate your experience:

  • With Coffee: Perfectly pairs with your morning coffee or tea.
  • With Whipped Cream: A dollop of fresh whipped cream adds a lovely touch.
  • With Yogurt: Serve alongside Greek yogurt for a balanced breakfast.
  • As a Dessert: Enjoy warm with a scoop of vanilla ice cream for a cozy dessert.

Final Thoughts

These Apple Fritter Muffins are not just a recipe; they are an invitation to enjoy baking and sharing delicious moments with family and friends. With their tender texture and sweet glaze, they are sure to become a staple in your home. So, roll up your sleeves, gather your ingredients, and let’s create something wonderful together! Happy baking!

Apple Fritter Muffins

Prep Time 10 minutes
Cook Time 20 minutes
Total Time 30 minutes
Servings 12 muffins
Calories 250
Delight in these moist, cinnamon-spiced muffins loaded with fresh apples and topped with a sweet glaze.

Ingredients

Fruits

  • 2 large apples (Granny Smith or Honeycrisp) (peeled, cored, and diced)

Dry ingredients

  • 2 cups all-purpose flour
  • 3/4 cup packed brown sugar
  • 2 teaspoons baking powder
  • 1 1/2 teaspoons ground cinnamon
  • 1/2 teaspoon salt

Wet ingredients

  • 2 large eggs
  • 1/2 cup whole milk
  • 1/4 cup unsalted butter, melted
  • 1 teaspoon vanilla extract

Glaze

  • 2 tablespoons powdered sugar
  • 1 to 2 tablespoons whole milk (for glazing)

Instructions 

  • Preheat oven to 350°F (175°C). Grease or line a 12-cup muffin tin.
  • Mix dry ingredients: flour, brown sugar, baking powder, cinnamon, and salt.
  • Whisk eggs, milk, melted butter, and vanilla. Combine with dry ingredients.
  • Gently fold in diced apples. Divide batter into muffin cups.
  • Bake for 20-25 minutes. Cool slightly, then drizzle with glaze.

Notes

For best results, use fresh apples and avoid overmixing the batter.
Calories: 250kcal
Cost: $12
Course: Breakfast, Snack
Cuisine: American
Keyword: apple, muffin

Kickstart Your Mornings with These Flavor-Packed Muffins

Are you ready to transform your breakfast routine? These Deliciously Easy Oatmeal Chocolate Chip Muffins are here to save the day! Packed with wholesome oats and sweet chocolate chips, they’re not just a treat but a nutritious kickstart to your mornings. In this guide, you’ll discover how to make these muffins effortlessly with clear steps, helpful tips, and plenty of variations to keep things exciting. Let’s dive in!

Why You’ll Love This Recipe

  • Quick and Easy: With a simple prep time of just 10 minutes, you can have these muffins ready to bake in no time!
  • Meal Prep Friendly: Bake a batch on Sunday and enjoy fresh muffins throughout the week—perfect for busy mornings!
  • Customizable: This recipe is versatile! You can easily swap out ingredients to suit your taste or dietary needs.
  • Nutritious Ingredients: Incorporating oats not only adds heartiness but also makes these muffins a source of fiber to help keep you satisfied.
  • Delicious Flavor: The combination of oats and chocolate chips creates a comforting and indulgent taste that everyone will love.

Essential Ingredients for Your Oatmeal Chocolate Chip Breakfast Muffins

Here’s what you’ll need to whip up these delightful muffins:

  • 1 ½ cups all-purpose flour: This forms the base of your muffins.
  • 1 cup rolled oats: Adds texture and fiber.
  • ½ cup granulated sugar: Sweetens the muffins; you can use brown sugar for a richer flavor.
  • 2 teaspoons baking powder: Helps the muffins rise.
  • ½ teaspoon baking soda: Works with the baking powder for an extra lift.
  • ½ teaspoon salt: Enhances the flavors.
  • 1 large egg: Binds the ingredients together.
  • 1 cup milk: Keeps the muffins moist; any type of milk works!
  • ¼ cup vegetable oil or melted butter: Adds richness; replace with coconut oil for a dairy-free option.
  • 1 teaspoon vanilla extract: For that wonderful aroma and flavor.
  • ¾ cup chocolate chips: The star ingredient—use semi-sweet, dark, or even white chocolate!

How to Make Your Hearty Oatmeal Chocolate Chip Breakfast Muffins

Side view of freshly baked oatmeal muffins packed with chocolate chips.

Follow these straightforward steps to bake your muffins:

  1. Preheat your oven: Set it to 375°F (190°C) and prepare a 12-cup muffin tin with liners or grease it well.
  2. Mix dry ingredients: In a large bowl, whisk together the flour, oats, sugar, baking powder, baking soda, and salt.
  3. Combine wet ingredients: In a medium bowl, whisk together the egg, milk, oil or butter, and vanilla extract.
  4. Combine wet and dry: Pour the wet mixture into the dry ingredients. Stir gently until just combined—don’t overmix; a few lumps are fine.
  5. Add chocolate chips: Fold in the chocolate chips gently.
  6. Fill the muffin cups: Divide the batter evenly among the 12 muffin cups.
  7. Bake: Place in the oven and bake for 18-22 minutes, or until a toothpick inserted in the center comes out clean.
  8. Cool: Let the muffins cool in the tin for a few minutes before transferring them to a wire rack to cool completely.

Expert Tips for Muffin-Making Success

  • Don’t overmix: Mix just until combined to avoid tough muffins.
  • Use fresh ingredients: Make sure your baking powder and baking soda are fresh for the best rise.
  • Room temperature ingredients: Use room temperature eggs and milk for smoother batter.
  • Cool completely: Let muffins cool completely before storing to avoid sogginess.
  • Customize flavors: Experiment with spices like cinnamon or nutmeg for a flavor twist!
  • Check doneness: Ovens vary; check a few minutes before the recommended time for perfect muffins.
  • Store properly: Allow muffins to cool completely before storing in an airtight container.
  • Use liners: Lining your muffin tin makes for easy removal and a clean presentation.
  • Consider dietary options: Substitute with gluten-free flour or plant-based milk for dietary needs.

Common Mistakes and Troubleshooting

Even the best bakers have hiccups! Here’s how to tackle common issues:

  • Muffins don’t rise: Check your baking powder and soda; they should be fresh.
  • Muffins are too dry: Ensure you’re measuring flour correctly—don’t pack it down.
  • Muffins are too crumbly: This could be due to overmixing; mix until just combined.
  • Burnt tops: If you notice this, consider covering them with foil halfway through baking.

Delicious Variations to Try

Make these muffins your own with these fun variations:

  • Fruit Add-ins: Toss in some blueberries or mashed bananas for a fruity twist.
  • Nuts: Fold in chopped walnuts or pecans for added crunch.
  • Spices: Add cinnamon or pumpkin spice for a seasonal flavor.
  • Nut Butter: Swirl in some peanut or almond butter before baking for richness.

Storage and Make-Ahead Instructions

Want to keep your muffins fresh? Here’s how:

  • Storing: Keep in an airtight container at room temperature for up to 3 days. For longer storage, refrigerate for up to a week.
  • Freezing: Freeze muffins in a single layer in a zip-top bag. They can last up to 3 months! Just thaw at room temperature or microwave for a quick snack.
  • Make-Ahead: You can prepare the batter a day before and store it in the fridge. Just bake when you’re ready!

Frequently Asked Questions About Oatmeal Chocolate Chip Muffins

  • Can I make these muffins ahead of time? Absolutely! These muffins keep well, making them perfect for meal prep.
  • How long do oatmeal chocolate chip muffins stay fresh? They stay fresh for about 3 days at room temperature and up to a week in the fridge.
  • Can I use instant oats for this recipe? While instant oats can work, rolled oats provide better texture and chew.
  • Can I reduce the sugar in these muffins? Yes! Feel free to cut back on the sugar if you prefer less sweetness.
  • Will vegan butter work for this muffin recipe? Yes! Vegan butter or coconut oil are great substitutes.
  • Can I add nuts or seeds? Definitely! They add wonderful texture and flavor.
  • What can I substitute for the egg? Use a flax egg (1 tablespoon ground flaxseed mixed with 2.5 tablespoons water) for an egg-free version!
  • Is it possible to make these gluten-free? Yes! Substitute all-purpose flour with a 1:1 gluten-free baking flour.

Nutritional Tips and Dietary Adaptations

For those watching their diet, here are some tips:

  • Whole grains: Substitute half of the all-purpose flour with whole wheat flour for added fiber.
  • Reduce sugar: Use natural sweeteners like honey or maple syrup instead of granulated sugar.
  • Increase fiber: Add chia seeds or flaxseeds to boost the nutritional profile.
  • Portion control: Consider making mini muffins for smaller portions!

Essential Equipment Recommendations

Here’s what you’ll need to make these muffins:

  • Muffin tin: A standard 12-cup muffin tin will work perfectly.
  • Mixing bowls: A large bowl for dry ingredients and a medium bowl for wet ingredients.
  • Whisk and spatula: For mixing ingredients together smoothly.
  • Measuring cups and spoons: Accurate measurements are key to great muffins!

Serving Suggestions

Enjoy your muffins warm or at room temperature. They pair perfectly with a cup of coffee or tea, and can be served with:

  • Yogurt: A dollop of Greek yogurt adds creaminess.
  • Fruit: Fresh fruit complements the muffins’ sweetness.
  • Nut butter: Spread some almond or peanut butter on top for a protein boost.

Your Muffin Adventure Awaits!

Now that you have everything you need to create your own Deliciously Easy Oatmeal Chocolate Chip Muffins, I hope you feel inspired to get baking! Remember, cooking is all about experimenting and having fun in the kitchen. Enjoy the process, and don’t stress about perfection. Happy baking!

Fearless 3-Day Oatmeal Chocolate Chip Breakfast Muffins

Prep Time 10 minutes
Cook Time 20 minutes
Total Time 30 minutes
Servings 12 muffins
Calories 180
Start your day with these delicious and easy-to-make oatmeal chocolate chip muffins, perfect for a quick breakfast or snack.

Ingredients

Dry Ingredients

  • 1.5 cups all-purpose flour
  • 1 cup rolled oats
  • 0.5 cup granulated sugar
  • 2 teaspoons baking powder
  • 0.5 teaspoon baking soda
  • 0.5 teaspoon salt

Wet Ingredients

  • 1 large egg
  • 1 cup milk
  • 0.25 cup vegetable oil or melted butter
  • 1 teaspoon vanilla extract
  • 0.75 cup chocolate chips

Instructions 

  • Preheat oven to 375°F (190°C). Line a 12-cup muffin tin.
  • Mix dry ingredients in a large bowl. Whisk wet ingredients in a separate bowl.
  • Combine wet and dry ingredients; stir until just mixed. Fold in chocolate chips.
  • Divide batter evenly into muffin cups. Bake for 18-22 minutes until golden and a skewer comes out clean.
  • Cool muffins in the tin for a few minutes, then transfer to a wire rack to cool completely.

Notes

For extra flavor, add a pinch of cinnamon or nutmeg to the dry ingredients.
Calories: 180kcal
Cost: $10
Course: Breakfast
Keyword: chocolate chips, oatmeal

Discover the Joy of Baking Mini Banana Muffins

Welcome to a world of delightful flavors and easy baking! Today, I’m thrilled to share this Mini Banana Muffins recipe that brings together the sweetness of ripe bananas and the warmth of home baking. Perfect for breakfast, snacks, or even dessert, these muffins are not only simple to make but also incredibly versatile. Join me as we dive into the wonderful world of mini muffins!

Why You’ll Love This Recipe

  • Quick and Easy: This recipe can be whipped up in just 10 minutes, with baking time of only 10 to 12 minutes!
  • Healthy Ingredients: Packed with ripe bananas and sweetened naturally with maple syrup, you can enjoy a guilt-free treat.
  • Customizable: Feel free to add your favorite mix-ins like chocolate chips, nuts, or dried fruits to make each batch unique.
  • Kid-Friendly: These mini muffins make a great snack for kids and are perfect for lunchboxes!
  • Perfect for Meal Prep: Bake a batch at the start of the week and enjoy fresh muffins all week long!

Ingredient Breakdown

Let’s take a closer look at what you’ll need to create these delightful mini banana muffins:

  • Ripe Bananas: Use 2 medium-large ripe bananas, mashed. The riper they are, the sweeter your muffins will be.
  • Maple Syrup: ⅓ cup for natural sweetness. You can substitute with brown sugar if desired.
  • Melted Butter: ⅓ cup. For a dairy-free option, use coconut oil or a dairy-free butter substitute.
  • Egg: 1 large egg helps bind the ingredients together.
  • Vanilla Extract: 1 teaspoon adds a warm flavor.
  • All-Purpose Flour: 1 cup. For gluten-free muffins, substitute with a gluten-free flour blend.
  • Baking Soda: 1 teaspoon for leavening.
  • Cinnamon: 1 teaspoon for a warm spice note.
  • Salt: ¼ teaspoon enhances all the flavors.
  • Mix-Ins (Optional): ¼ cup mini chocolate chips, chopped nuts, or chopped dates for added texture and flavor.

How to Make Mini Banana Muffins

Close-up of freshly baked mini banana muffins with a few chocolate chips on top.

Ready to get baking? Here’s a step-by-step guide:

  1. Preheat the Oven: Start by preheating your oven to 350°F (175°C). Mist a 24-count mini muffin pan with cooking spray or line with mini-cupcake paper liners.
  2. Mix Wet Ingredients: In a large bowl, stir together the mashed bananas, maple syrup, melted butter, egg, and vanilla extract until well combined.
  3. Combine Dry Ingredients: In another bowl, mix the flour, baking soda, cinnamon, and salt. Gradually fold this mixture into the wet ingredients until just combined. Avoid overmixing!
  4. Add Mix-Ins: If you’re using mix-ins, gently fold them into the batter at this stage.
  5. Portion the Batter: Using a large spoon or a 2-tablespoon cookie scoop, portion the batter into the prepared muffin cups. Don’t forget to sprinkle a few extra mix-ins on top for a beautiful finish!
  6. Bake: Bake in the preheated oven for 10 to 12 minutes, or until the muffins are lightly browned around the edges and a toothpick inserted in the center comes out clean.
  7. Cool: Once baked, transfer the muffin pan to a wire rack and let the muffins cool for 5 minutes before removing them to cool completely.

Pro Tips for Perfect Mini Muffins

  • Perfect Bananas: The best bananas for this recipe are those that are heavily speckled or even blackened. They are sweeter and easier to mash!
  • Don’t Overmix: Mix the batter just until combined for fluffy muffins. Overmixing can lead to dense muffins.
  • Storage Tips: Store leftover muffins in an airtight container at room temperature for up to 3 days, or freeze for longer storage.
  • Experiment with Spices: Feel free to add nutmeg or ginger for an extra flavor kick!
  • Keep an Eye on Baking: Every oven is different; check your muffins a minute or two before the recommended baking time.
  • Use a Cookie Scoop: For even-sized muffins, a cookie scoop is a great tool!
  • Mix-Ins Galore: Try adding shredded coconut, dried cranberries, or even peanut butter chips for a delightful twist!
  • Double the Batch: These muffins freeze well, so consider making a double batch to have on hand!

Common Mistakes and Troubleshooting

Even the best bakers face challenges sometimes, so here are a few common mistakes and how to avoid them:

  • Dense Muffins: This typically happens due to overmixing. Mix just until combined!
  • Burnt Muffins: Make sure to check your muffins a few minutes early, as oven temperatures can vary.
  • Too Dry: Ensure your bananas are ripe enough and measure your flour correctly. Using a kitchen scale can help!
  • Sticking Muffins: If your muffins are sticking, make sure your muffin pan is well greased or lined.

Delicious Variations

Let’s have some fun with these muffins! Here are a few delicious variations to consider:

  • Chocolate Chip Banana Muffins: Add ½ cup of mini chocolate chips for a sweet touch.
  • Nutty Banana Muffins: Fold in ½ cup of chopped walnuts or pecans for a delightful crunch.
  • Banana Oat Muffins: Substitute ½ cup of flour with rolled oats for a heartier texture.
  • Banana Coconut Muffins: Add ½ cup of shredded coconut for a tropical twist!

Storage and Make-Ahead Instructions

These muffins are perfect for meal prep! Here’s how to store and enjoy them later:

  • Room Temperature: Store in an airtight container for up to 3 days.
  • Freezing: Freeze muffins in a single layer, then transfer to a zip-top bag for up to 3 months. Thaw at room temperature or microwave for a quick treat!
  • Make-Ahead: Prepare the batter the night before and store it in the fridge. Bake fresh muffins in the morning!

Frequently Asked Questions

  • Can I use frozen bananas? Yes! Just thaw them first and mash before using.
  • Can I make these muffins gluten-free? Absolutely! Substitute the all-purpose flour with a gluten-free flour blend.
  • Can I substitute the egg? Yes! Use a flax egg or applesauce as a replacement.
  • How do I know when the muffins are done? Insert a toothpick into the center; if it comes out clean, they’re ready!
  • What can I use instead of maple syrup? Brown sugar or honey can work great as alternatives.
  • How do I store leftovers? Keep them in an airtight container or freeze them for later!
  • Can I add yogurt? Yes! Adding ¼ cup of yogurt can make them even more moist.
  • How do I make mini chocolate banana muffins? Simply add mini chocolate chips to the batter!

Nutrition Tips and Dietary Adaptations

These muffins can fit into various dietary needs:

  • Vegan: Use a flax egg and a dairy-free butter substitute!
  • Lower Sugar: Reduce the amount of maple syrup or use a sugar substitute.
  • High Fiber: Add some whole wheat flour or oats for extra fiber.

Equipment Recommendations

To make your baking experience smooth, consider these tools:

  • Mini Muffin Pan: A high-quality non-stick mini muffin pan is essential.
  • Mixing Bowls: A set of mixing bowls in different sizes will make your prep easier.
  • Measuring Cups and Spoons: Accurate measurements lead to better results!
  • Cooling Rack: A cooling rack helps muffins cool evenly and prevents sogginess.

Serving Suggestions

Serve your mini banana muffins with:

  • Butter: Spread a little butter for a rich flavor.
  • Fruit: Pair with fresh fruit or a fruit compote for a delightful breakfast.
  • Yogurt: Serve with yogurt for a healthy snack or breakfast option.

Conclusion: Bake with Love!

Thank you for joining me on this delicious journey! I hope you feel inspired to try this Mini Banana Muffins recipe and share the joy of baking with your family and friends. Remember, cooking is about experimenting and having fun, so don’t hesitate to make these muffins your own. Happy baking!

Mini Banana Muffins Recipe

Prep Time 10 minutes
Cook Time 12 minutes
Total Time 22 minutes
Servings 24 muffins
Calories 150
Enjoy these moist and flavorful mini banana muffins, perfect for a quick snack or breakfast treat.

Ingredients

Fruits

  • 2 medium-large ripe bananas, mashed
  • 1 cup pure maple syrup (may sub brown sugar)
  • cup melted butter (see notes for dairy free)
  • 1 egg egg
  • 1 teaspoon pure vanilla extract
  • 1 cup all-purpose flour (see notes for gluten free)
  • 1 teaspoon baking soda
  • 1 teaspoon ground cinnamon
  • ¼ teaspoon fine salt
  • ¼ cup mix-ins (such as mini chocolate chips, chopped nuts, or chopped dates plus more for sprinkling over batter)

Instructions 

  • Preheat oven to 350°F (175°C). Line a 24-mini muffin pan with liners or spray with cooking spray.
  • Mix mashed bananas, maple syrup, melted butter, egg, and vanilla in a large bowl.
  • Stir in flour, baking soda, cinnamon, salt, and optional mix-ins until just combined.
  • Portion batter into muffin cups using a spoon or scoop. Add toppings if desired.
  • Bake for 10-12 minutes until edges are lightly browned. Cool for 5 minutes in pan, then transfer to wire rack to cool completely.

Notes

For dairy-free, substitute melted coconut oil for butter. For gluten-free, use a gluten-free flour blend.
Calories: 150kcal
Cost: $10
Course: Breakfast, Snack
Cuisine: American
Keyword: Banana, muffins

Embrace the Joy of Cooking with This Greek Yogurt Berry Smoothie

Welcome to your ultimate guide for crafting a Greek Yogurt Berry Smoothie that not only tantalizes your taste buds but also nourishes your body! If you’re like me and love experimenting in the kitchen, you’ll find this smoothie recipe to be a delightful addition to your morning routine or a refreshing snack. Packed with vibrant flavors and nutrients, this smoothie is a fantastic way to kickstart your day or recharge after a workout.

In this article, we’ll explore the benefits of this smoothie, break down the ingredients, share expert tips, provide variations, and answer some common questions to ensure your smoothie experience is nothing short of perfect. So, grab your blender, and let’s dive in!

Why You’ll Love This Greek Yogurt Berry Smoothie

  • Nutritious Boost: Packed with protein from Greek yogurt and antioxidants from berries, this smoothie supports your health goals.
  • Quick and Easy: Ready in just minutes, it’s perfect for busy mornings or a quick afternoon pick-me-up.
  • Customizable: With various ingredient options, you can tailor the smoothie to your taste preferences and dietary needs.
  • Natural Sweetness: The combination of fruits and honey provides a delightful sweetness without the need for added sugars.
  • Versatile: Enjoy it as a breakfast option, snack, or even dessert—this yogurt berry smoothie fits any occasion!

Ingredients You’ll Need

Gathering the right ingredients is essential for a delicious smoothie. Here’s what you need:

  • Greek Yogurt: Provides creaminess and protein. Use plain for a tangy flavor or vanilla for extra sweetness.
  • Mixed Berries: Fresh or frozen berries like strawberries, blueberries, and raspberries offer vibrant flavors and health benefits. If you prefer, a mix of frozen berries works wonderfully.
  • Banana: Adds natural sweetness and a creamy texture. Choose a ripe banana for the best flavor.
  • Honey: A touch of honey enhances the sweetness. You can substitute with maple syrup or agave for a vegan option.
  • Milk or Almond Milk: Use any milk of your choice to achieve the desired consistency. Almond milk is a great dairy-free option.
  • Ice Cubes: Optional for an extra chilled smoothie; great for hot days!

How to Make Greek Yogurt Berry Smoothie

Side view of a berry smoothie with layers of yogurt and colorful mixed berries in a clear glass.

Let’s break down the steps to create your Greek Yogurt Berry Smoothie:

  • Step 1: Gather Ingredients: Ensure all your ingredients are ready. Wash the berries and peel the banana.
  • Step 2: Blend Ingredients: In a blender, combine Greek yogurt, mixed berries, banana, honey, and milk. Blend until smooth and creamy.
  • Step 3: Adjust Consistency: If you prefer a thicker smoothie, add more yogurt or a few ice cubes and blend again.
  • Step 4: Serve: Pour the smoothie into a glass and enjoy immediately for the best flavor and texture.

Expert Tips for Perfect Results

Here are some pro tips to elevate your smoothie-making game:

  • Use Frozen Fruits: If using fresh berries, add a few ice cubes for a refreshing chill. Frozen fruits can create a thicker texture.
  • Layer Ingredients Wisely: Start with liquids at the bottom, followed by yogurt and then solids. This helps achieve a smooth blend.
  • Taste as You Go: Adjust sweetness by adding more honey or banana depending on your preference.
  • Experiment with Add-ins: Consider adding spinach for added nutrients or protein powder for a post-workout boost.
  • Clean Your Blender Promptly: To make cleanup easier, rinse your blender immediately after use.

Common Mistakes and Troubleshooting

Even the best of us encounter hiccups in the kitchen! Here are some common mistakes and how to avoid them:

  • Too Thick?: Add a splash more milk or water to thin it out.
  • Too Thin?: Blend in more yogurt or a frozen banana to thicken the smoothie.
  • Not Sweet Enough?: Add a little more honey or consider using a sweeter variety of yogurt.
  • Unpleasant Texture?: Ensure your blender is powerful enough to fully blend the ingredients; consider blending longer.

Delicious Variations of Greek Yogurt Berry Smoothie

Feel free to switch things up! Here are some tasty variations to try:

  • Tropical Twist: Replace mixed berries with pineapple and mango for a tropical flavor.
  • Chocolate Delight: Add a tablespoon of cocoa powder or chocolate protein powder for a chocolatey treat.
  • Nutty Banana: Incorporate almond butter for added creaminess and a nutty flavor.
  • Green Berry Smoothie: Add a handful of spinach or kale for a nutrient boost without compromising flavor.

Storage and Make-Ahead Instructions

If you want to prepare your smoothie in advance, here’s how:

  • Make-Ahead: Pre-portion ingredients in bags and freeze. In the morning, just blend with milk!
  • Storage: If you have leftovers, store in an airtight container in the fridge for up to 24 hours. Stir well before drinking.

Frequently Asked Questions (FAQ)

Got questions? I’ve got answers! Here are some common inquiries:

  • Can I use non-dairy yogurt? Absolutely! Almond, coconut, or soy yogurt work great as substitutes.
  • Is this smoothie kid-friendly? Yes! It’s a fun and nutritious option for children.
  • How can I make it vegan? Use plant-based yogurt and sweeteners like maple syrup.
  • Can I add protein powder? Yes! It’s a great way to boost the protein content, especially post-workout.
  • What if I don’t have fresh berries? Frozen berries are a perfect alternative and often more convenient.
  • How can I make it lower in sugar? Skip the honey or use a sugar substitute.
  • Can I add greens? Yes! Spinach or kale can easily be blended in without altering the taste.
  • What is the best way to clean my blender? Fill it with warm water and a drop of dish soap, then blend on high for a minute.

Nutrition Tips and Dietary Adaptations

This Greek Yogurt Berry Smoothie not only tastes great but is also quite nutritious. Here are some tips to enhance its health benefits:

  • Protein Boost: Using Greek yogurt adds protein, which is great for muscle repair and keeping you full.
  • Fiber-Rich: Berries and bananas provide fiber, promoting healthy digestion.
  • Healthy Fats: Adding nut butter can provide healthy fats that are essential for your body.
  • Calcium Source: The yogurt offers a good source of calcium, which is important for bone health.

Recommended Equipment

To make your smoothie-making process seamless, consider these essentials:

  • High-Speed Blender: Ideal for achieving a smooth consistency.
  • Measuring Cups and Spoons: For precise ingredient measurements.
  • Spatula: Helps scrape down the sides of the blender for thorough mixing.

Serving Suggestions

Presenting your smoothie can be just as fun as making it! Here are some creative serving ideas:

  • Garnish with Berries: Top with a few whole berries for a beautiful presentation.
  • Drizzle of Honey: A light drizzle of honey adds an appealing touch.
  • Serve in a Mason Jar: It’s a cute and eco-friendly way to enjoy your smoothie.
  • Pair with Snacks: Serve alongside granola bars or whole grain toast for a balanced meal.

With this comprehensive guide, you’re well-equipped to make the best Greek Yogurt Berry Smoothie ever! Cooking should be a joyful experience, and I hope this recipe inspires you to enjoy every moment in the kitchen. Remember, great food doesn’t require perfection—just a willingness to try. So go ahead, blend up a glass of wholesome bliss, and relish the deliciousness!

Greek Yogurt Berry Smoothie

Prep Time 5 minutes
Total Time 5 minutes
Servings 2 cups
Calories 250
A delicious and healthy smoothie combining Greek yogurt and fresh berries for a refreshing treat.

Ingredients

Dairy

  • 1 cup Greek yogurt
  • 1.5 cups Mixed berries (fresh or frozen)
  • 1 medium Banana
  • 1 tbsp Honey
  • 1 cup Milk or almond milk
  • 0.5 cup Ice cubes (optional) (Add for extra coldness)

Instructions 

  • Gather all ingredients and wash berries if fresh.
  • Place Greek yogurt, berries, banana, honey, and milk into the blender.
  • Blend until smooth and creamy.
  • If desired, add ice cubes and blend again until crushed.
  • Pour into a glass and serve immediately.

Notes

You can use frozen berries for an even colder smoothie.
Calories: 250kcal
Cost: $8
Course: Breakfast, Snack
Cuisine: Greek
Keyword: Berries, Smoothie, Yogurt

Discover the Joy of Cooking: Creamy Smothered Chicken and Rice

Welcome to a delightful culinary adventure! This creamy smothered chicken and rice recipe is your ticket to a comforting meal that feels both indulgent and homey. Perfect for busy weeknights, this dish combines tender chicken, a rich and creamy sauce, and fluffy rice, creating a symphony of flavors that will have everyone at the table asking for seconds. In just a little over an hour, you’ll transform simple ingredients into a cozy family favorite that’s sure to impress.

Why You’ll Love This Recipe

This recipe isn’t just delicious; it’s designed to make your cooking experience enjoyable. Here are five reasons why this creamy smothered chicken and rice will win your heart:

  • Versatile Ingredients: Most of the ingredients are pantry staples, making it easy to whip up on a whim.
  • One-Pan Wonder: Cook everything in one skillet, ensuring minimal cleanup while maximizing flavor.
  • Quick and Easy: With straightforward steps, you’ll have dinner ready in under an hour.
  • Customizable: Easily adapt the recipe to suit your preferences or dietary needs.
  • Family-Friendly: The creamy sauce and tender chicken appeal to even the pickiest eaters.

Ingredients for Creamy Smothered Chicken and Rice

Let’s gather our ingredients! The beauty of this recipe lies in its simplicity. Here’s what you’ll need:

  • 2 boneless, skinless chicken breasts or 4 chicken thighs
  • 1 tablespoon olive oil
  • 1 tablespoon butter
  • ½ teaspoon garlic powder
  • ½ teaspoon paprika
  • ½ teaspoon salt
  • ¼ teaspoon black pepper
  • 1 tablespoon butter (for the sauce)
  • ½ small onion, diced
  • 3 cloves garlic, minced
  • 1 cup chicken broth
  • ½ cup heavy cream or half-and-half
  • ¼ cup Parmesan cheese, grated
  • 1 teaspoon Italian seasoning
  • ½ teaspoon salt
  • ¼ teaspoon black pepper
  • 1 cup white or brown rice
  • 2 cups chicken broth or water (for rice)
  • 2 tablespoons chopped fresh parsley (for garnish)
  • Extra Parmesan cheese (for serving)

Step-by-Step Instructions for Making Creamy Smothered Chicken and Rice

Juicy chicken breasts drenched in creamy sauce with rice on the side.

Now, let’s dive into the cooking process! Follow these steps for a delicious outcome:

Step 1: Cook the Rice

In a medium saucepan, bring 2 cups of broth or water to a boil. Stir in the rice and salt. Cover, reduce heat to low, and let it simmer for:

  • 15-18 minutes for white rice
  • 35 minutes for brown rice

Fluff with a fork and set aside.

Step 2: Season and Sear the Chicken

Pat the chicken dry and season with garlic powder, paprika, salt, and pepper. In a large skillet, heat olive oil and butter over medium-high heat. Sear the chicken for:

  • 4-5 minutes per side until golden brown.

Remove from the pan and set aside.

Step 3: Make the Creamy Sauce

In the same skillet, melt 1 tablespoon of butter. Sauté the onions for:

  • 2 minutes

Then add garlic and cook for:

  • 30 seconds

Pour in the chicken broth, scraping any browned bits from the pan. Stir in the cream, Parmesan, Italian seasoning, salt, and pepper. Let it simmer until slightly thickened.

Step 4: Simmer and Smother

Return the chicken to the skillet. Spoon the sauce over the top, cover, and let it simmer on low heat for:

  • 5-7 minutes until the chicken is fully cooked through (165°F internal temperature).

Pro Tips for Perfect Creamy Smothered Chicken

To elevate this dish even further, consider these expert insights:

  • Use Bone-In Chicken: For richer flavor, bone-in thighs can be used instead of breasts.
  • Room Temperature Ingredients: Allow your ingredients to come to room temperature for smoother blending.
  • Thicken with Flour: If you prefer a thicker sauce, whisk in a tablespoon of flour with the butter before adding the broth.
  • Fresh Herbs: Incorporate fresh herbs like thyme or basil for added flavor.
  • Alternative Creams: Swap heavy cream for Greek yogurt for a lighter option.
  • Spice It Up: Add a pinch of red pepper flakes for a kick!
  • Let It Rest: Allow the dish to sit for a few minutes before serving to let the flavors meld.
  • Pair with Sides: Serve with steamed vegetables or a fresh salad for a complete meal.

Common Mistakes and Troubleshooting

Even the best cooks can encounter hiccups. Here are some common mistakes and how to avoid them:

  • Overcooking the Chicken: Keep an eye on the cooking time to ensure the chicken remains juicy.
  • Clumpy Sauce: Make sure to whisk thoroughly when adding cream to avoid lumps.
  • Undercooking the Rice: Follow the instructions carefully for perfect rice.
  • Flavorless Sauce: Adjust seasoning as needed; taste as you go!

Variations on Creamy Smothered Chicken and Rice

Feel free to get creative with this recipe! Here are some delicious variations you might enjoy:

  • Vegetarian Version: Substitute chicken with hearty vegetables like mushrooms or eggplant.
  • Spicy Mexican Twist: Add jalapeños and serve with cilantro for a flavorful kick.
  • Asian-Inspired: Use soy sauce instead of broth and add ginger for an Asian flair.
  • Curry Flavor: Stir in curry powder for a warm, spicy aroma.

Storage and Make-Ahead Instructions

This dish can easily be made ahead of time and stored for later enjoyment:

  • Refrigeration: Store leftovers in an airtight container for up to 3 days.
  • Freezing: Freeze for up to 2 months; reheat gently in a skillet.
  • Make-Ahead: Prepare the sauce and sear the chicken a day in advance; then combine before serving.

Frequently Asked Questions

Before you dive in, let’s address some common questions:

  • Can I use brown rice instead of white? Yes, brown rice adds a nutty flavor but requires a longer cooking time.
  • What can I substitute for heavy cream? Half-and-half, whole milk, or Greek yogurt can be good alternatives.
  • How do I know when the chicken is fully cooked? Use a meat thermometer to ensure it reaches 165°F internally.
  • Can I use frozen chicken? Yes, but ensure it’s fully thawed before cooking for even results.
  • What can I serve with this dish? Steamed broccoli, a simple green salad, or garlic bread pair nicely.
  • Is this dish kid-friendly? Absolutely! The creamy sauce and tender chicken appeal to kids of all ages.
  • How long does it take to make? The total time is approximately 45 minutes to an hour.
  • Can I make this dish dairy-free? Yes, substitute cream with coconut milk or a dairy-free alternative.

Nutrition Tips and Dietary Adaptations

This dish can be adapted to fit various dietary needs:

  • Low-Carb Option: Serve over zucchini noodles or cauliflower rice.
  • Gluten-Free: Ensure all ingredients (like broth) are certified gluten-free.
  • Low-Calorie: Use less butter and cream, and increase veggies for bulk.

Equipment Recommendations

To make this recipe a breeze, here’s what you’ll need:

  • Skillet: A large, non-stick skillet works best for searing and sauce-making.
  • Medium Saucepan: Essential for cooking your rice perfectly.
  • Meat Thermometer: To ensure your chicken is cooked to perfection.
  • Sharp Knife: For easy cutting and prep.

Serving Suggestions

Serve your creamy smothered chicken and rice with:

  • Chopped Fresh Herbs: Like parsley or basil for a pop of color.
  • Extra Parmesan: A sprinkle on top adds a delicious, savory finish.
  • Side Salad: A light green salad with vinaigrette balances the richness of the dish.

In conclusion, this creamy smothered chicken and rice recipe is not just a meal; it’s an experience filled with warmth and comfort. With its straightforward steps and delicious flavors, you’ll feel confident in your cooking skills. So gather your ingredients, roll up your sleeves, and let’s create something delicious together! Cooking should be fun, and this dish is sure to bring joy to your kitchen.

Creamy Smothered Chicken and Rice

Prep Time 10 minutes
Cook Time 35 minutes
Total Time 45 minutes
Servings 4 servings
Calories 650
A comforting dish featuring tender chicken smothered in a creamy sauce served over flavorful rice. Perfect for a hearty, satisfying meal.

Ingredients

Protein

  • 2 pieces boneless, skinless chicken breasts (or 4 chicken thighs)
  • 2 tablespoons olive oil
  • 2 tablespoons butter
  • 0.5 teaspoon garlic powder
  • 0.5 teaspoon paprika
  • 0.5 teaspoon salt
  • 0.25 teaspoon black pepper
  • 0.5 small onion, diced
  • 3 cloves garlic, minced
  • 1 cup chicken broth
  • 0.5 cup heavy cream or half-and-half
  • 0.25 cup Parmesan cheese, grated
  • 1 teaspoon Italian seasoning
  • 0.5 teaspoon salt
  • 0.25 teaspoon black pepper

Rice

  • 1 cup white or brown rice
  • 2 cups chicken broth or water
  • 0.5 teaspoon salt

Garnish

  • 2 tablespoons chopped fresh parsley
  • Extra Parmesan cheese (for garnish)

Instructions 

  • Cook the rice: Bring 2 cups broth to a boil, add rice and salt, cover, and simmer for 15-18 minutes (white) or 35 minutes (brown). Fluff and set aside.
  • Season and sear the chicken: Pat dry, season with garlic powder, paprika, salt, and pepper. Sear in olive oil and butter for 4-5 minutes per side until golden. Remove and set aside.
  • Make the sauce: Melt butter, sauté onions for 2 minutes, add garlic, then pour in chicken broth. Stir in cream, Parmesan, Italian seasoning, salt, and pepper. Simmer until slightly thickened.
  • Return chicken to skillet, spoon sauce over, cover, and simmer for 5-7 minutes until cooked through. Serve over rice, garnished with parsley and extra Parmesan.

Notes

Ensure chicken reaches an internal temperature of 165°F (74°C) for safety.
Calories: 650kcal
Cost: $15
Course: Main Course
Cuisine: American
Keyword: Chicken, Creamy, rice

Transform Your Weeknight Dinners with Creamy Spinach Chicken Pasta

Welcome to your new favorite weeknight dinner! This Creamy Spinach Chicken Pasta is not just a meal; it’s a cozy embrace on a plate. Perfect for busy evenings, it combines tender chicken, fresh spinach, and a rich, creamy sauce that will have your family asking for seconds. In this article, you’ll find everything you need to make this dish a success—from detailed ingredients and substitutions to expert tips and variations. Let’s dive into the joy of cooking!

Why You’ll Love This Recipe

This delightful recipe comes with numerous benefits that make it a go-to for any home cook:

  • Quick and Easy: Ready in just 30 minutes, this recipe is perfect for those hectic weeknights.
  • Simple Ingredients: Uses everyday ingredients that you probably already have in your pantry.
  • Flavorful and Satisfying: The combination of creamy sauce, chicken, and spinach delivers a comforting meal that everyone will enjoy.
  • Customizable: Easily modify ingredients to suit your taste or dietary needs.
  • Great for Leftovers: Perfectly reheats, making it an excellent option for meal prep.

Ingredients You’ll Need

Before we get cooking, let’s go over the exact ingredients you’ll need to whip up this delicious Chicken Spinach Pasta. Here’s what you’ll gather:

  • 8 oz penne pasta: Choose your favorite pasta shape; penne holds sauce beautifully.
  • 2 boneless skinless chicken breasts: Cut into bite-sized pieces for quick cooking.
  • 3 tbsp all-purpose flour: For lightly coating the chicken and thickening the sauce.
  • 1 tbsp butter: Adds richness to the dish.
  • 1 tbsp olive oil: For cooking the chicken—use extra virgin for more flavor.
  • 4 cloves garlic, minced: Infuse the sauce with aromatic goodness.
  • 1 3 cup chicken broth: Provides depth of flavor; homemade or store-bought works well.
  • 1 tsp lemon juice: Brightens the dish and balances richness.
  • 1 2 tsp Dijon mustard: A hint of tanginess that enhances the sauce.
  • 1 4 tsp Italian seasoning: A blend of herbs that complements the chicken and spinach.
  • 1 cup heavy cream: For a luxuriously creamy sauce.
  • 5 oz fresh baby spinach: Nutrient-packed and adds color.
  • 1 2 cup freshly grated Parmesan cheese: A must for that cheesy goodness.
  • Salt and pepper: To taste—seasoning is key!

Step-by-Step Instructions

A mouthwatering dish of penne pasta coated in a creamy sauce, with fresh spinach and chicken visible.

Ready to get cooking? Follow these simple steps for a deliciously creamy pasta dish:

  • Cook the pasta: In a large pot of salted boiling water, cook the penne pasta until al dente, about 9-11 minutes. Reserve 1/2 cup of pasta water, then drain the rest.
  • Season the chicken: Lightly coat the chicken pieces with flour, shaking off the excess. Season with salt and pepper.
  • Sear the chicken: In a large skillet, heat butter and olive oil over medium-high heat. Cook the chicken for 4-5 minutes until golden and nearly cooked through, then transfer to a plate.
  • Build the flavor base: Add garlic to the skillet and sauté for about 30 seconds. Then add chicken broth, lemon juice, Dijon mustard, and Italian seasoning. Simmer for 1-2 minutes, scraping up any browned bits from the pan.
  • Create the cream sauce: Return the chicken to the skillet and stir in heavy cream and spinach. Simmer for about 5 minutes until the sauce thickens and the chicken reaches an internal temperature of 165°F.
  • Combine with pasta: Toss in the drained pasta and stir to coat with the sauce. If the sauce is too thick, add reserved pasta water a little at a time until you reach your desired consistency.
  • Finish with Parmesan: Stir in freshly grated Parmesan cheese and adjust seasoning with salt and pepper before serving.

Expert Tips for Success

To ensure your Creamy Spinach Chicken Pasta turns out perfectly every time, check out these expert tips:

  • Don’t overcook the pasta: Aim for al dente for the best texture. It will continue to cook slightly once added to the sauce.
  • Use fresh spinach: It wilts down beautifully and adds vibrant color.
  • Adjust creaminess: For a lighter version, substitute half-and-half or use less cream.
  • Season as you go: Tasting throughout the process helps build flavor.
  • Leftover chicken: If you have leftover cooked chicken, you can use it instead of raw—just add it at the end to warm through.
  • Experiment with cheese: Try adding mozzarella or goat cheese for a different flavor profile.
  • Garnish: Finish with fresh herbs like basil or parsley for a pop of freshness.
  • Make it spicy: Add red pepper flakes for a hint of heat.

Common Mistakes and Troubleshooting

Even the best of us can run into a few hiccups. Here’s how to troubleshoot:

  • Too thick sauce: If your sauce is too thick, gradually stir in reserved pasta water until you reach the desired consistency.
  • Overcooked chicken: If your chicken is tough, reduce the cooking time or ensure it’s not cooked over high heat for too long.
  • Pasta sticking together: Toss drained pasta with a little olive oil if it sticks after draining.

Delicious Variations

This recipe is versatile! Here are some tasty variations to consider:

  • Vegetarian Version: Substitute chicken with sautéed mushrooms or chickpeas for a hearty vegetarian dish.
  • Herbed Chicken: Marinate chicken in Italian herbs prior to cooking for added flavor.
  • Cheesy Spinach Bake: Combine cooked pasta with sauce and transfer to a baking dish. Top with more cheese and bake until bubbly.
  • Sun-Dried Tomato Twist: Add chopped sun-dried tomatoes for a burst of flavor and color.

Storage and Make-Ahead Instructions

Want to prep in advance? Here’s how to store and make this dish ahead of time:

  • Refrigerator: Store leftovers in an airtight container for up to 3 days.
  • Freezing: You can freeze the sauce without the pasta for up to 2 months. Reheat and cook fresh pasta when ready to eat.
  • Make-Ahead: Cook and prepare the sauce ahead of time, then add cooked pasta just before serving.

FAQs

Got questions? We’ve got answers! Here are some commonly asked questions:

  • Can I use a different type of pasta? Yes! Any pasta shape will work, just adjust cooking time accordingly.
  • Can I substitute heavy cream? For a lighter option, use half-and-half or even Greek yogurt (add off the heat).
  • How do I make this dish gluten-free? Use gluten-free pasta and ensure other ingredients are gluten-free.
  • Can I add more vegetables? Absolutely! Bell peppers, zucchini, or broccoli are great additions.
  • What can I serve with this pasta? A simple green salad or garlic bread pairs wonderfully.
  • Is it possible to make this dairy-free? Yes! Use coconut cream and nutritional yeast for a cheesy flavor.
  • How spicy is this recipe? It’s mild, but you can add red pepper flakes to adjust the heat to your liking.
  • Can I use frozen spinach? Yes, just ensure it’s thoroughly thawed and drained before adding.

Nutrition Tips and Dietary Adaptations

This recipe can be easily adapted to meet various dietary needs:

  • Low-Carb:** Use spiralized zucchini or cauliflower rice instead of pasta.
  • High-Protein:** Add extra chicken or include beans for more protein.
  • Dairy-Free:** Substitute heavy cream with coconut milk or a cashew cream.
  • Vegan:** Omit chicken and use tofu or tempeh instead, alongside dairy-free cream.

Essential Kitchen Equipment

Ensure you have the right tools to make this recipe a breeze:

  • Large pot: For boiling pasta.
  • Skillet: A large skillet is essential for cooking the chicken and sauce.
  • Measuring cups and spoons: Accuracy is key in cooking!
  • Wooden spoon: For stirring and scraping up those delicious browned bits.

Serving Suggestions

Make your meal complete with these serving ideas:

  • Garnish: Top with freshly grated Parmesan and a sprinkle of black pepper.
  • Accompaniments: Serve with a side of garlic bread or a crisp salad.
  • Beverage Pairing: A light white wine or sparkling water pairs beautifully with this dish.

In conclusion, this Creamy Spinach Chicken Pasta is not just a recipe; it’s your new weeknight hero! With its rich flavors and comforting texture, you’ll find yourself making it again and again. Remember, cooking should be fun and stress-free. Enjoy every bite, and happy cooking!

Creamy Spinach Chicken Pasta

Prep Time 10 minutes
Cook Time 20 minutes
Total Time 30 minutes
Servings 4 servings
Calories 650
A delicious and creamy pasta dish featuring tender chicken, fresh spinach, and Parmesan cheese, perfect for a satisfying meal.

Ingredients

Pasta

  • 8 oz penne pasta

Chicken

  • 2 pieces boneless skinless chicken breasts (cut into pieces)

Dry ingredients

  • 3 tbsp all-purpose flour
  • 1 tbsp butter
  • 1 tbsp olive oil

Garlic and liquids

  • 4 cloves garlic (minced)
  • 0.75 cup chicken broth
  • 1 tsp lemon juice
  • 0.5 tsp Dijon mustard
  • 0.25 tsp Italian seasoning

Cream and cheese

  • 1 cup heavy cream
  • 5 oz fresh baby spinach
  • 0.5 cup freshly grated Parmesan cheese

Seasoning

  • to taste salt
  • to taste black pepper

Instructions 

  • Cook penne pasta in salted boiling water until al dente, then drain and reserve 1/2 cup pasta water.
  • Season chicken with salt and pepper, coat with flour, then cook in a skillet with butter and olive oil until golden and cooked through. Remove and set aside.
  • Add garlic, chicken broth, lemon juice, Dijon mustard, and Italian seasoning to the skillet. Simmer briefly, scraping browned bits.
  • Return chicken to the skillet, add heavy cream and spinach, and simmer until sauce thickens and chicken reaches 165°F.
  • Add cooked pasta, toss to coat, stir in Parmesan, and season to taste before serving.

Notes

For extra flavor, sprinkle additional Parmesan or fresh herbs before serving.
Calories: 650kcal
Cost: $15
Course: Main Course
Cuisine: Italian
Keyword: Chicken, Pasta, Spinach

Transform Your Dinner with Quick and Flavorful Shrimp Pitas

Are you looking for an easy and delicious meal that brings the vibrant flavors of the Mediterranean right to your table? Look no further than these Quick and Flavorful Shrimp Pitas with homemade tzatziki sauce. This recipe is perfect for busy weeknights when you want something satisfying without spending hours in the kitchen. With juicy grilled shrimp, fresh vegetables, and creamy tzatziki, this meal is not only packed with flavor but also offers a refreshing twist that will have your taste buds dancing. Let’s dive into why this recipe is a must-try!

Why You’ll Love This Recipe

  • Quick and Easy: This recipe comes together in just 30 minutes, making it perfect for weeknight dinners.
  • Customizable: You can easily adapt the ingredients to suit your tastes or dietary preferences.
  • Fresh Ingredients: Packed with fresh vegetables like cucumber and tomato, you’re getting a healthy dose of nutrients.
  • Flavorful Tzatziki: The homemade tzatziki sauce adds a creamy, tangy element that perfectly complements the shrimp.
  • Meal Prep Friendly: You can prepare components in advance, making it great for meal prep!

Ingredients & Substitutions

Gathering your ingredients is the first step to making these delightful shrimp pitas. Here’s what you’ll need:

  • 1/4 cup olive oil: For grilling; can substitute with avocado oil for a different flavor.
  • 1 lemon, juiced: Fresh lemon juice brightens the dish; bottled juice can be used in a pinch.
  • 1/2 tsp dried oregano: Adds Mediterranean flavor; fresh oregano can be used if available.
  • 1/2 tsp dried dill: A key herb for tzatziki; fresh dill works beautifully as well.
  • 2 cloves garlic, minced: Essential for flavor; substitute with garlic powder if necessary.
  • 1/2 tsp sea salt: Enhances all flavors; adjust to taste.
  • 1/2 lb shrimp, peeled and deveined: Fresh or frozen shrimp can be used; thaw frozen shrimp before cooking.
  • 2 pitas: Whole wheat or gluten-free pitas are great alternatives.
  • Cucumber, sliced: Adds crunch; substitute with bell peppers for a different texture.
  • Tomato, sliced: Fresh tomatoes are best; canned diced tomatoes can work in a pinch.
  • Red onion, sliced: Provides a bit of sharpness; green onions can be a milder option.
  • 1 cup Greek yogurt: The base for tzatziki; can substitute with dairy-free yogurt for a vegan option.
  • 1/2 cucumber, grated: For tzatziki; this adds texture and moisture.
  • 1/4 tsp salt: For tzatziki; adjust to taste.
  • 1/2 lemon, juiced: Brightens tzatziki; similar to above, bottled juice is a backup.
  • 1 clove garlic, minced: For tzatziki, same as above, adjust for taste.
  • 1 tbsp fresh dill weed, chopped: For a fresh taste; dried dill can also be used.

Essential Equipment

Juicy shrimp pitas displayed with sliced cucumbers and tomatoes.

To make the process smooth and enjoyable, gather the following kitchen tools:

  • Grill or Grill Pan: Essential for cooking the shrimp to perfection.
  • Mixing Bowls: For marinades and tzatziki preparation.
  • Whisk: To combine ingredients smoothly.
  • Knife and Cutting Board: For chopping vegetables and preparing shrimp.

How to Make Shrimp Pitas

Ready to bring these flavors together? Follow these simple steps:

  1. In a small bowl, whisk together the olive oil, lemon juice, dried oregano, dried dill, minced garlic, and sea salt until fully combined.
  2. Place the peeled and deveined shrimp in the bowl with the marinade and toss to coat. Cover with plastic wrap and let it marinate in the refrigerator for 15 minutes.
  3. While the shrimp is marinating, preheat your grill or grill pan over medium heat.
  4. Once heated, place the shrimp on the grill and cook for 3-4 minutes on one side. Flip and cook for another 2-3 minutes, or until the shrimp are pink and opaque.
  5. Remove the shrimp from the grill and set aside.
  6. Cut the pitas in half and spread a generous amount of tzatziki sauce inside each pita.
  7. Fill the pitas with sliced cucumber, tomato, and red onion, then top with the grilled shrimp.
  8. For an extra touch, crumble some feta cheese on top before enjoying!

Variations to Try

Feel free to get creative with these shrimp pitas! Here are some delicious variations:

  • Spicy Shrimp Pitas: Add a pinch of red pepper flakes to the marinade for a spicy kick.
  • Vegetable Medley: Include grilled zucchini and bell peppers for added nutrition and flavor.
  • Avocado Addition: Add sliced avocado for creaminess and healthy fats.
  • Whole Grain Pitas: Use whole grain or gluten-free pitas for a healthier twist.

Pro Tips for Perfect Pitas

Want to elevate your shrimp pitas even further? Consider these expert insights:

  • Marinate Longer: For deeper flavor, marinate the shrimp for up to 30 minutes.
  • High Heat Grill: Ensure your grill is hot enough to achieve a good sear on the shrimp.
  • Rest the Shrimp: Let the shrimp sit for a minute after grilling for juiciness.
  • Fresh Ingredients: Always use fresh vegetables for the best texture and taste.
  • Make Ahead: Prepare tzatziki a day in advance for enhanced flavor.
  • Experiment with Herbs: Try different herbs like mint or parsley for a unique twist.
  • Test Shrimp doneness: Shrimp should be pink and opaque when fully cooked.
  • Warm Pitas: Lightly warm the pitas before filling for a better texture.

Common Mistakes and Troubleshooting

Even the best cooks can run into challenges. Here are some common mistakes and how to avoid them:

  • Overcooking Shrimp: Shrimp cook quickly; keep an eye on them to prevent rubbery texture.
  • Dry Tzatziki: If your tzatziki is too thick, add a splash of water or more lemon juice to thin it out.
  • Soggy Pitas: Avoid adding too much tzatziki to prevent sogginess; serve extra on the side.
  • Unseasoned Marinade: Taste your marinade before using it; adjust salt and spices as needed.

Storing and Make-Ahead Instructions

Want to prep ahead? Here’s how to store and make these shrimp pitas in advance:

  • Storing Cooked Shrimp: Keep cooked shrimp in an airtight container in the refrigerator for up to 3 days.
  • Making Tzatziki Ahead: Tzatziki can be made 1-2 days in advance; just store it in the fridge.
  • Assembling Pitas: It’s best to assemble pitas fresh, but you can prep ingredients in advance.

FAQ: Your Shrimp Pita Questions Answered

Have some questions? Here’s a comprehensive FAQ to help you out:

  • Can I use frozen shrimp? Yes, just ensure they’re fully thawed before marinating.
  • What can I use instead of tzatziki? You can use hummus or a yogurt-based dip as alternatives.
  • How can I make this recipe gluten-free? Use gluten-free pitas or lettuce wraps instead.
  • Can I grill the shrimp indoors? Yes, using a grill pan on the stove works perfectly.
  • Is this recipe kid-friendly? Absolutely! Adjust the spices to suit your child’s taste.
  • What other side dishes pair well? Serve with a Greek salad or roasted veggies.
  • How do I know when shrimp are done? They should be pink and opaque; no longer translucent.
  • Can I make these pitas vegetarian? Yes, substitute shrimp with grilled vegetables or falafel.

Nutritional Considerations & Dietary Adaptations

This recipe can be adapted to fit various dietary needs:

  • Low-Carb Option: Serve shrimp over a bed of greens instead of in pita.
  • Dairy-Free: Use dairy-free yogurt for tzatziki to accommodate lactose intolerance.
  • High-Protein: Add more shrimp or chickpeas for a protein boost.

Serving Suggestions

For a complete meal, consider pairing your shrimp pitas with:

  • Greek Salad: A refreshing side filled with tomatoes, olives, and feta.
  • Roasted Veggies: Seasonal vegetables drizzled with olive oil and herbs.
  • Tabbouleh: A light and zesty salad made with parsley, mint, and bulgur.

With these Quick and Flavorful Shrimp Pitas, you’ll have a dish that’s not only delicious but also simple to prepare. Enjoy the process and the delightful flavors that come together in every bite. Cooking should be a joyful experience, and I hope this recipe inspires you to get creative in your kitchen. Happy cooking!

Shrimp Pitas with Tzatziki

Prep Time 10 minutes
Cook Time 8 minutes
Total Time 18 minutes
Servings 4 servings
Calories 350
Enjoy flavorful grilled shrimp tucked inside pita bread with fresh vegetables and creamy tzatziki sauce for a delicious Mediterranean-inspired meal.

Ingredients

Marinade

  • 0.125 cup olive oil
  • 0.5 lemon lemon juice
  • 0.5 tsp dried oregano
  • 0.5 tsp dried dill
  • 2 cloves garlic minced
  • 0.5 tsp sea salt
  • 0.25 lb shrimp peeled and deveined, tails removed
  • 2 pitas pitas

Vegetables

  • to taste Cucumber sliced
  • to taste Tomato sliced
  • to taste Red onion sliced
  • 1 cup Greek yogurt
  • 0.25 cup grated cucumber
  • 0.25 tsp salt
  • 0.5 lemon lemon juice
  • 1 clove garlic minced
  • 1 tbsp fresh dill weed chopped (or 1 tsp dried dill weed)

Instructions 

  • Whisk together olive oil, lemon juice, oregano, dill, garlic, and salt to make marinade.
  • Toss shrimp in marinade, cover, and refrigerate for 15 minutes.
  • Preheat grill or grill pan. Grill shrimp 3-4 minutes per side until pink and opaque.
  • Cut pitas in half, spread tzatziki inside, and fill with vegetables and grilled shrimp.
  • Top with crumbled feta and serve.

Notes

For extra flavor, add fresh herbs or a squeeze of lemon before serving.
Calories: 350kcal
Cost: $15
Course: Main Course
Cuisine: Mediterranean
Keyword: shrimp

Are you tired of the same old weeknight meals? Do you want to enjoy something delicious and satisfying without spending hours in the kitchen? Look no further! This recipe for Healthy Chicken Taco Bowls is not only simple to make but is also packed with flavor and nutrition. In just 30 minutes, you can whip up a meal that’s perfect for busy evenings, whether you’re cooking for yourself or your entire family. Let’s dive into why this recipe is a must-try!

Why You’ll Love This Recipe

This recipe is more than just a meal; it’s a versatile and delicious solution for your weeknight dinner dilemmas. Here are a few reasons why you’ll love making Healthy Chicken Taco Bowls:

  • Quick Preparation: Ready in just 30 minutes, perfect for busy weeknights.
  • Nutritious Ingredients: Packed with lean protein, fiber, and fresh vegetables to keep you satisfied.
  • Customizable: Easily adjust ingredients to suit your taste or dietary needs.
  • Meal Prep Friendly: Great for making ahead of time, perfect for lunches throughout the week.
  • Kid-Approved: A fun way to enjoy tacos that kids will love!

Ingredients Breakdown

Before you start cooking, let’s gather everything you need. Here’s a detailed list of ingredients along with some helpful substitutions:

  • 1 pound boneless, skinless chicken breasts: You can substitute with chicken thighs or even tofu for a vegetarian option.
  • 1 cup quinoa (uncooked): For a gluten-free alternative, use brown rice or cauliflower rice.
  • 2 cups low-sodium chicken broth or water: Vegetable broth works well for a vegetarian version.
  • 1 tablespoon olive oil: Feel free to use avocado oil or any neutral oil.
  • Spices: 1 teaspoon chili powder, 1 teaspoon cumin, 1 teaspoon garlic powder, ½ teaspoon paprika, ½ teaspoon salt, ½ teaspoon black pepper. Adjust spices based on your heat preference!
  • 1 cup black beans: Canned, drained, and rinsed; you can also use pinto beans.
  • 1 cup corn: Fresh or frozen corn works; both are delicious.
  • 1 red bell pepper, diced: Feel free to swap for green or yellow bell peppers.
  • 1 cup cherry tomatoes, halved: Any fresh tomato will do.
  • 1 avocado, diced: For creaminess; omit if you prefer a lower-fat option.
  • ½ cup red onion, diced: Red onion adds a nice crunch, but you can use green onions for a milder flavor.
  • 1 lime, juiced: Essential for that zesty kick!
  • Fresh cilantro, for garnish: Optional, but it really brightens the dish.
  • Optional toppings: Shredded cheese, sour cream, or salsa.

Step-by-Step Instructions

Creating Healthy Chicken Taco Bowls is straightforward if you follow these steps:

  • Rinse the quinoa: Under cold water, then combine it with chicken broth or water in a medium saucepan.
  • Cook the quinoa: Bring to a boil, reduce heat to low, cover, and simmer for 15 minutes or until liquid is absorbed. Fluff with a fork and set aside.
  • Season the chicken: While the quinoa cooks, season the chicken breasts with chili powder, cumin, garlic powder, salt, and black pepper.
  • Cook the chicken: In a large skillet, heat olive oil over medium heat. Add the seasoned chicken and cook for 6-7 minutes on each side, or until fully cooked. Remove from heat and let it rest before slicing.
  • Sauté vegetables: In the same skillet, add diced red bell pepper and corn. Sauté for about 3-4 minutes until tender.
  • Assemble the bowls: In each bowl, layer cooked quinoa, sliced chicken, black beans, sautéed vegetables, cherry tomatoes, avocado, and red onion.
  • Add fresh lime juice: Drizzle lime juice over the top of each bowl for added flavor.
  • Garnish: Finish with fresh cilantro and any optional toppings like shredded cheese, sour cream, or salsa.
  • Serve: Enjoy your Healthy Chicken Taco Bowls immediately, or store them in the fridge for meal prep.

Pro Tips for Perfect Taco Bowls

Side view of a delicious chicken taco bowl filled with colorful ingredients like black beans, corn, and diced avocado.

Here are some expert insights to ensure your taco bowls turn out amazing:

  • Perfect seasoning: Don’t skimp on the spices! They’re key to elevating the flavors of the chicken.
  • Cook quinoa perfectly: Make sure it’s fluffy; rinsing helps remove bitterness.
  • Rest your chicken: Letting it rest after cooking keeps it juicy.
  • Veggie crunch: Sauté veggies just until tender to maintain their crunch.
  • Flavor boost: Mix lime juice with some of the taco seasoning for an extra flavor punch!
  • Presentation matters: Layering ingredients not only looks beautiful but also enhances the eating experience.
  • Batch cooking: Make extra quinoa and chicken for use in other meals throughout the week.
  • Experiment: Try different toppings and ingredients to keep things interesting!

Common Mistakes and Troubleshooting

Even simple recipes can go awry sometimes. Here are some common pitfalls and how to avoid them:

  • Underseasoned chicken: Always taste your spices before using. Adjust to your preference!
  • Overcooked quinoa: Keep an eye on the cooking time; it can go from perfect to mushy quickly.
  • Dry chicken: Ensure you don’t overcook the chicken; use a meat thermometer if needed.
  • Too much liquid: If your quinoa is too wet, it can make the bowl soggy. Drain excess liquid before serving.

Variations to Try

Don’t be afraid to mix things up! Here are some delicious variations:

  • Vegetarian Delight: Use black beans or chickpeas in place of chicken, and add extra veggies.
  • Spicy Chicken Taco Bowl: Add jalapeños or spicy salsa to amp up the heat!
  • Mediterranean Taco Bowl: Substitute quinoa with couscous and add olives, feta, and tzatziki.
  • Breakfast Taco Bowl: Top with scrambled eggs and avocado for a hearty breakfast option.

Storage and Make-Ahead Instructions

Planning ahead is key to a stress-free week! Here’s how you can store and prepare your taco bowls:

  • Meal Prep: Make a batch of quinoa and chicken ahead of time and store separately in airtight containers in the fridge for up to 4 days.
  • Refrigeration: Store assembled bowls in the fridge for up to 3 days. Keep toppings separate to maintain freshness.
  • Reheating: Microwave bowls for about 1-2 minutes until warmed through. Add fresh toppings afterward.

Frequently Asked Questions

Got questions? We’ve got answers! Here are some frequently asked questions about taco bowls:

  • Can I use frozen chicken? Yes! Just ensure it’s fully thawed before cooking.
  • How do I prevent my chicken from drying out? Cooking it just until it reaches 165°F and letting it rest helps.
  • What can I use instead of taco seasoning? You can mix your spices as listed above or use a premade blend.
  • Are taco bowls healthy? Absolutely! They’re loaded with lean protein and veggies.
  • Can I make this dish vegan? Yes! Substitute chicken with tofu or tempeh and use vegetable broth.
  • How can I adjust the spice level? Add more or less chili powder based on your preference.
  • What’s the best way to meal prep taco bowls? Assemble the components separately and combine when ready to eat.
  • Can I freeze taco bowls? It’s best to freeze components separately to maintain texture, especially the avocado.

Nutritional Tips and Dietary Adaptations

To make your taco bowls even healthier, consider these tips:

  • Go Whole Grain: Swap quinoa for brown rice or farro for added fiber.
  • Increase Veggies: Load up on any veggies you love; they add nutrients and volume!
  • Healthy Fats: Use avocado and nuts for healthy fat sources.

Equipment Recommendations

Here are some tools that can make your cooking experience even smoother:

  • Medium saucepan: For cooking quinoa.
  • Large skillet: For sautéing chicken and veggies.
  • Cutting board & knife: Essential for chopping vegetables and chicken.
  • Meat thermometer: Ensures chicken is cooked perfectly!

Serving Suggestions

These bowls are delicious on their own, but here are some great serving suggestions:

  • Add crunch: Serve with tortilla chips for a satisfying crunch.
  • Serve with salsa: Fresh salsa or pico de gallo adds a refreshing touch.
  • Pair with drinks: A light beer or sparkling water can complement the meal beautifully.

In conclusion, these Healthy Chicken Taco Bowls are not only a feast for the taste buds but also a fantastic way to bring excitement back to your weeknight dinners. With endless customization options, you can easily adapt this recipe to suit your family’s tastes and dietary needs. So gather your ingredients and get ready to enjoy a colorful, delicious, and nutritious meal that will leave everyone coming back for seconds!

Healthy Chicken Taco Bowls An Incredible Ultimate Recipe for 4

Prep Time 10 minutes
Cook Time 30 minutes
Total Time 40 minutes
Servings 4 servings
Calories 550
Enjoy a nutritious and flavorful bowl packed with lean chicken, quinoa, and fresh vegetables, perfect for a quick and healthy meal.

Ingredients

Protein

  • 1 pound boneless, skinless chicken breasts
  • 1 cup quinoa uncooked
  • 2 cups low-sodium chicken broth or water
  • 1 tablespoon olive oil
  • 1 teaspoon chili powder
  • 1 teaspoon cumin
  • 1 teaspoon garlic powder
  • ½ teaspoon paprika
  • ½ teaspoon salt
  • ½ teaspoon black pepper
  • 1 cup black beans canned, drained, and rinsed
  • 1 cup corn fresh or frozen
  • 1 red bell pepper, diced
  • 1 cup cherry tomatoes, halved
  • 1 avocado diced
  • ½ cup red onion, diced
  • 1 lime juiced

Fresh cilantro, for garnish

Optional toppings

  • to taste shredded cheese, sour cream, salsa (Optional toppings)

Instructions 

  • Rinse the quinoa under cold water. Combine quinoa and chicken broth in a saucepan, bring to a boil, then simmer for 15 minutes. Fluff and set aside.
  • Season chicken with chili powder, cumin, garlic powder, salt, and black pepper. Cook in a skillet with olive oil for 6-7 minutes per side until cooked through. Rest and slice.
  • Sauté diced red bell pepper and corn in the same skillet for 3-4 minutes until tender. Assemble bowls with quinoa, sliced chicken, black beans, sautéed vegetables, cherry tomatoes, avocado, and red onion. Drizzle lime juice, garnish with cilantro, and add optional toppings.

Notes

For extra flavor, squeeze fresh lime juice just before serving.
Calories: 550kcal
Cost: $15
Course: Main Course
Cuisine: Mexican
Keyword: Chicken, Healthy, quinoa

Kickstart Your Day with the Creamy Apple Banana Bliss Smoothie

Are you ready to transform your mornings with a delicious and nutritious treat? The Creamy Apple Banana Bliss Smoothie is here to revitalize your breakfast routine! This delightful smoothie is not only easy to make, but it also packs a flavor punch that will leave you feeling refreshed and energized. Combining ripe bananas, crisp apples, and creamy Greek yogurt, this smoothie is perfect for busy days when you need a quick, healthy meal. Let’s dive into why you’ll love this smoothie and how to whip it up in no time!

Why You’ll Love This Recipe

  • Quick and Easy Preparation: In just 5 minutes, you can create a delicious smoothie that’s perfect for busy mornings or a refreshing afternoon snack.
  • Nutrient-Packed Goodness: This smoothie is loaded with vitamins, minerals, and fiber from fresh fruits, helping you stay healthy and satisfied.
  • Adaptable and Customizable: Feel free to adjust the ingredients based on your dietary preferences or what you have on hand.
  • Great for the Whole Family: Kids and adults alike will love the sweet and creamy flavors, making it a fantastic family-friendly option.
  • Deliciously Satisfying: The combination of apples and bananas creates a naturally sweet taste that’s both refreshing and fulfilling.

Ingredient Breakdown

Let’s take a closer look at the key ingredients that make this smoothie a morning favorite:

  • Ripe Banana (1): The star ingredient that provides natural sweetness and creaminess.
  • Medium Apple (1, peeled, cored, and chopped): Adds a crisp texture and a burst of refreshing flavor.
  • Greek Yogurt (1/2 cup): Rich in protein, it makes the smoothie thick and creamy while delivering gut-friendly probiotics.
  • Almond Milk (1/2 cup): A dairy-free option that keeps the smoothie light and adds a nutty flavor. Substitute with any milk of your choice!
  • Honey (1 tablespoon, optional): For those who like it a bit sweeter, honey is a great natural sweetener. Adjust according to taste!
  • Ground Cinnamon (1/4 teaspoon): Adds warmth and depth, enhancing the overall flavor profile.

How to Make Your Smoothie

Side view of a delicious smoothie featuring apples and bananas in a clear glass.

Making this smoothie is as easy as 1-2-3! Follow these simple steps:

  1. In a blender, combine the ripe banana, chopped apple, Greek yogurt, almond milk, honey (if using), and ground cinnamon.
  2. Blend on high until smooth and creamy, stopping to scrape down the sides if necessary.
  3. Taste and adjust sweetness if desired, then pour into a glass and enjoy immediately!

Pro Tips for the Perfect Smoothie

  • Use Frozen Fruit: For a colder, thicker smoothie, consider using frozen bananas or apples.
  • Add Greens: Sneak in some spinach or kale for an extra nutrient boost without altering the flavor.
  • Experiment with Flavors: Try adding a splash of vanilla extract or a tablespoon of nut butter for a richer taste.
  • Pre-Chill Ingredients: Keep your yogurt and almond milk in the fridge for an extra refreshing smoothie.
  • Blend in Stages: To ensure a smooth consistency, start blending the fruits and yogurt before adding the milk.
  • Use a High-Powered Blender: This ensures all ingredients are well-blended and creamy.
  • Double the Recipe: Make extra smoothies for quick breakfasts throughout the week!
  • Serve Immediately: For the best taste and texture, enjoy your smoothie right after blending.

Common Mistakes and Troubleshooting

Even the best of us can make mistakes in the kitchen! Here are some common pitfalls and how to avoid them:

  • Too Thick? Add a splash more almond milk and blend until you reach your desired consistency.
  • Too Sweet? Balance it out with a bit more yogurt or a squeeze of fresh lemon juice.
  • Not Enough Flavor? Consider adding more cinnamon or a dash of vanilla extract to enhance the overall taste.
  • Grainy Texture? Ensure your blender is powerful enough or blend longer to achieve a smooth consistency.

Delicious Variations to Try

Feeling adventurous? Here are some fun variations of the Creamy Apple Banana Bliss Smoothie to keep your mornings exciting:

  • Apple Banana Oat Smoothie: Add 1/4 cup of rolled oats for a heartier version that’s perfect for a filling breakfast.
  • Apple Banana Pineapple Vanilla Smoothie: Toss in some pineapple chunks and a splash of vanilla for a tropical twist!
  • Chocolate Banana Smoothie: Mix in a tablespoon of cocoa powder for a chocolatey treat that’s still healthy.
  • Nutty Banana Smoothie: Add a tablespoon of almond or peanut butter for added protein and healthy fats.

Storage and Make-Ahead Instructions

If you’re busy during the week, consider these handy tips for storing your smoothie:

  • Make-Ahead Packs: Pre-chop your apples and bananas, and store them in freezer bags for quick blending.
  • Store in the Fridge: If you have leftovers, store your smoothie in an airtight container in the fridge for up to 24 hours. Give it a good shake before enjoying.
  • Freeze for Later: Pour your smoothie into ice cube trays or freezer-safe bags for a quick, nutritious snack later on.

Frequently Asked Questions (FAQs)

Here are some common questions about the Creamy Apple Banana Bliss Smoothie:

  • Can I use other fruits? Absolutely! Feel free to mix in other fruits like berries or peaches.
  • Is it possible to make this smoothie vegan? Yes! Simply use a plant-based yogurt and sweetener.
  • How can I increase the protein content? Add more Greek yogurt or include protein powder of your choice.
  • Can I use frozen bananas? Yes! Frozen bananas make the smoothie even creamier.
  • How long does the smoothie last? Best enjoyed fresh, but it can be stored in the fridge for up to 24 hours.
  • What’s the best time to drink this smoothie? It’s perfect for breakfast, post-workout, or as a snack any time of day!
  • Can I add supplements? Yes! Consider adding chia seeds, flaxseeds, or any dietary supplements you enjoy.
  • What’s the nutritional value of this smoothie? It varies based on ingredients but expect a good mix of protein, fiber, and healthy fats.

Nutritional Tips and Dietary Adaptations

This smoothie is not just tasty; it’s also packed with nutrients! Here are some tips to enhance its health benefits:

  • Fiber Boost: Keep the apple skin on for added fiber and nutrients.
  • Low Sugar Option: Skip the honey if you’re watching sugar intake, as the fruits provide enough natural sweetness.
  • Dairy-Free Alternative: Use coconut yogurt for a dairy-free version that’s just as creamy.

Essential Equipment Recommendations

To make your smoothie adventure even easier, here are some essential tools:

  • High-Powered Blender: A good blender ensures a smooth, creamy texture.
  • Measuring Cups and Spoons: For accurate ingredient measurements.
  • Cutting Board and Knife: For prepping your fruits with ease.

Serving Suggestions

Enjoy your smoothie as is, or consider these fun serving ideas:

  • Top with Nuts or Seeds: Sprinkle some chopped nuts or seeds for added crunch and nutrition.
  • Serve in a Fun Glass: Make it visually appealing by using a fun glass or mason jar.
  • Pair with a Healthy Snack: Enjoy your smoothie with whole-grain toast or a piece of fruit for a balanced meal.

With the Creamy Apple Banana Bliss Smoothie, mornings just got a whole lot brighter! Remember, cooking doesn’t have to be complicated—just simple, tasty, and fun. So grab your ingredients and give this delightful smoothie a try. You’ll be amazed at how a few basic ingredients can transform your breakfast routine. Happy blending!

Creamy Apple Banana Bliss Smoothie

Prep Time 5 minutes
Total Time 5 minutes
Servings 2 cups
Calories 250
A delicious and nutritious smoothie combining the sweetness of apples and bananas with creamy Greek yogurt and warm cinnamon.

Ingredients

Fruits

  • 1 piece medium apple (peeled, cored, chopped)
  • 1 piece ripe banana

Dairy & liquids

  • 1/2 cup Greek yogurt
  • 1/2 cup almond milk
  • 1 tablespoon honey (optional)
  • 1/4 teaspoon ground cinnamon

Instructions 

  • Add the apple, banana, Greek yogurt, almond milk, honey, and cinnamon to a blender.
  • Blend until smooth and creamy.
  • Pour into glasses and serve immediately.

Notes

For extra sweetness, add more honey or a splash of vanilla extract.
Calories: 250kcal
Cost: $5
Course: Breakfast, Snack
Cuisine: American
Keyword: Fruit, Healthy, Smoothie