Author

Steven

Browsing

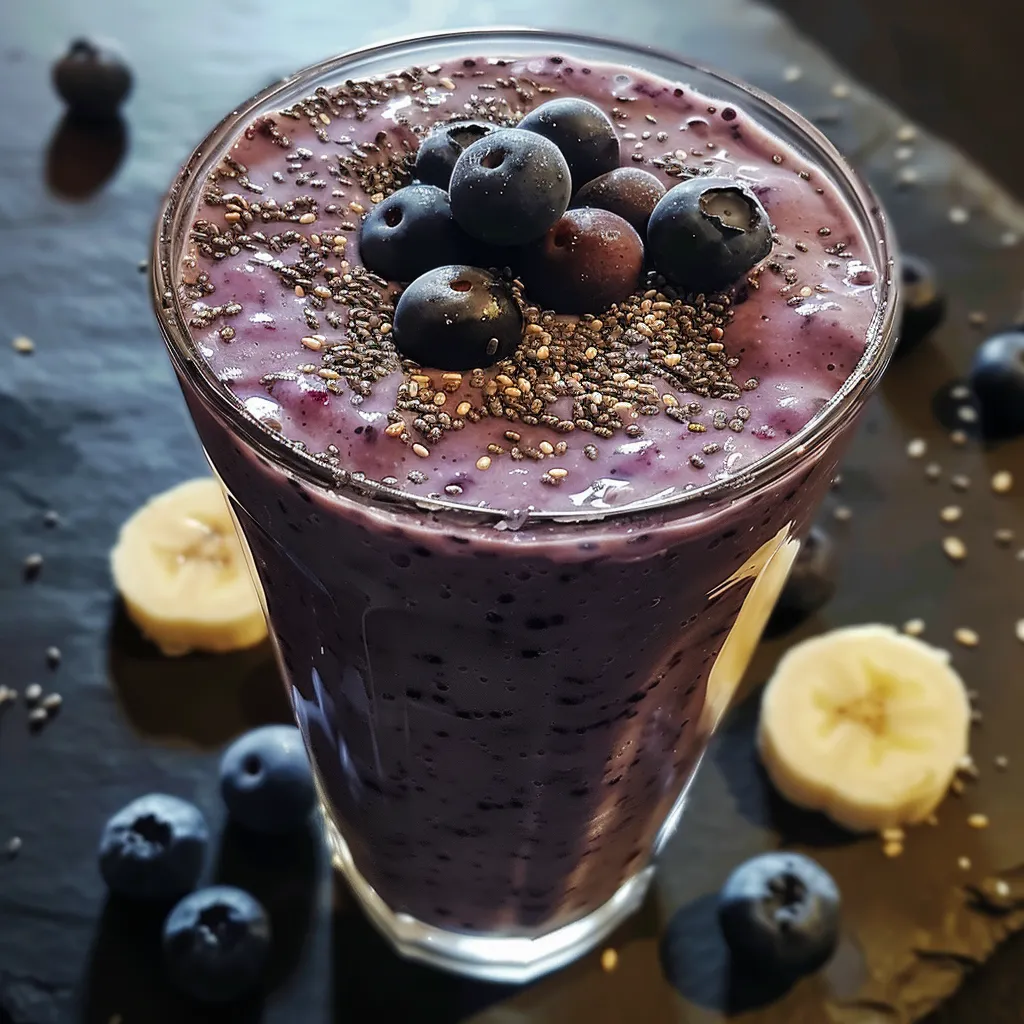
Why You’ll Love This Energizing Blueberry Banana Smoothie

If you’re looking for a quick and nutritious pick-me-up, this Energizing Blueberry Banana Smoothie is exactly what you need! Packed with flavor and goodness, this smoothie is not just a drink—it’s a boost of energy and vibrancy in your day. Let’s dive into why this smoothie is a must-try!

  • Quick to Make: This smoothie can be whipped up in under 5 minutes, making it perfect for busy mornings or an afternoon snack.
  • Nutritious Ingredients: Combining blueberries, bananas, and yogurt means you’re getting a healthy dose of vitamins, antioxidants, and protein.
  • Versatile Recipe: Feel free to customize it! You can add your favorite protein powder, nut butter, or even greens like spinach for an extra health boost.
  • Great for Meal Prep: This smoothie is perfect for making ahead of time. Just blend and store in the fridge for a quick grab-and-go option.
  • Kid-Friendly: With its naturally sweet taste, it’s a great way to sneak in some healthy ingredients your kids will love.

Gather Your Ingredients

This smoothie recipe is simple, requiring just a handful of ingredients. Here’s what you’ll need:

  • ½ cup frozen blueberries
  • ½ cup frozen banana slices or fresh
  • ½ cup frozen riced cauliflower (for creaminess without the carbs!)
  • ⅓ cup favorite high-protein yogurt (plant-based or traditional, Skyr or Greek)
  • 1 teaspoon raw honey (optional, for sweetness)
  • 1 tablespoon creamy peanut butter (or cashew, or almond butter)
  • ½ cup unsweetened non-dairy milk (plus more to thin to desired consistency)

How to Make Your Smoothie

Making this blueberry banana smoothie is as easy as 1-2-3! Follow these steps:

  1. Add all ingredients into your blender.
  2. Blend until smooth and creamy.
  3. Check the consistency; add more non-dairy milk if you prefer a thinner smoothie.

Expert Tips for the Best Smoothie

Close-up view of a blueberry banana smoothie with an inviting blend of blue and yellow hues.

To ensure your smoothie comes out perfectly, consider these expert tips:

  • Frozen Fruits: Using frozen blueberries and bananas not only enhances the texture but also eliminates the need for ice, resulting in a creamier smoothie.
  • Texture Preference: Adjust the amount of non-dairy milk to achieve your desired thickness. For a thicker smoothie, use less milk.
  • Protein Boost: If you want to increase the protein content, consider adding a scoop of your favorite protein powder.
  • Sweetness Level: Taste the smoothie before serving; adjust sweetness with honey or a splash of maple syrup if needed.
  • Nut Butter Alternatives: If you’re allergic to nuts, feel free to substitute with sunflower seed butter or omit it altogether.
  • Add Greens: For an added nutritional kick, toss in a handful of spinach or kale. You won’t taste it, but it boosts the health benefits!
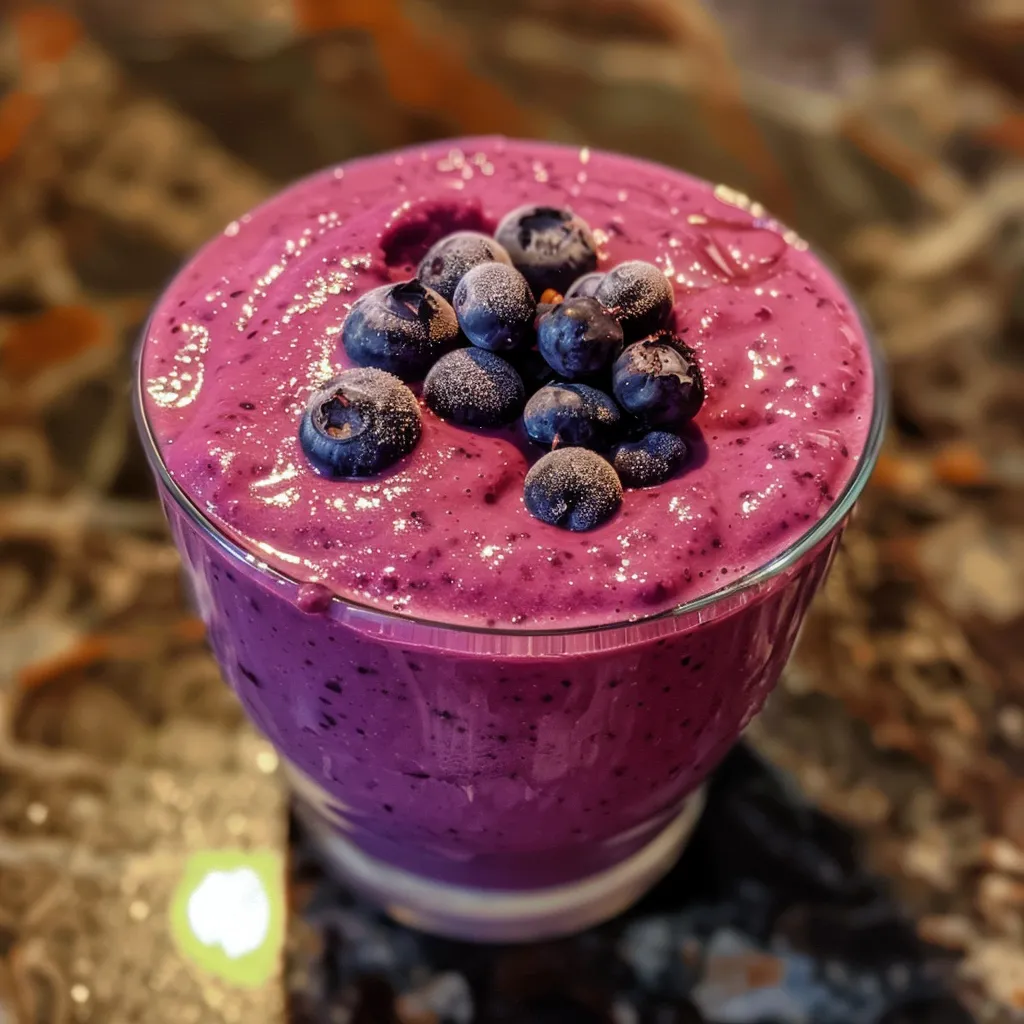
  • Serving Suggestions: Serve in a chilled glass and top with a few fresh blueberries or banana slices for a beautiful presentation.
  • Storage Tip: If you have leftovers, store the smoothie in an airtight container in the fridge for up to 24 hours. Shake well before drinking.

Common Mistakes to Avoid

Even the best recipes can go wrong sometimes! Here are some common smoothie-making mistakes to watch out for:

  • Overloading Ingredients: Too many ingredients can lead to an unbalanced flavor. Stick to the recipe for the best results!
  • Not Blending Enough: Ensure you blend long enough to achieve a smooth consistency. Lumpy smoothies aren’t as enjoyable.
  • Ignoring Texture Preferences: Don’t forget to adjust the liquid content based on your personal texture preference.
  • Skipping the Taste Test: Always taste your smoothie before serving, as flavors can vary based on the sweetness of your fruits.

Delicious Variations to Try

Looking for something different? Here are some fun variations to make this blueberry banana smoothie your own:

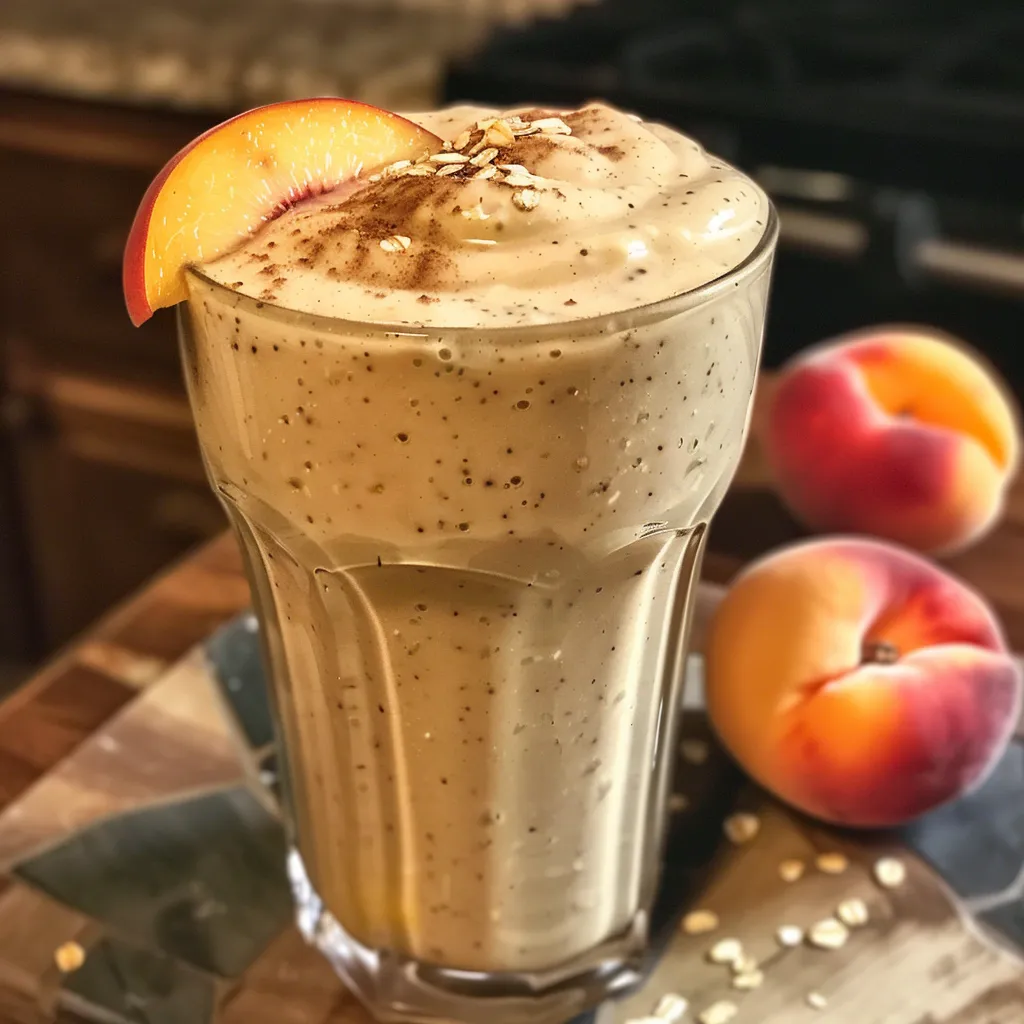
  • Blueberry Coconut Delight: Add a splash of coconut milk and a tablespoon of shredded coconut for a tropical twist.
  • Chocolate Banana Bliss: Mix in a tablespoon of cocoa powder or chocolate protein powder for a chocolatey treat.
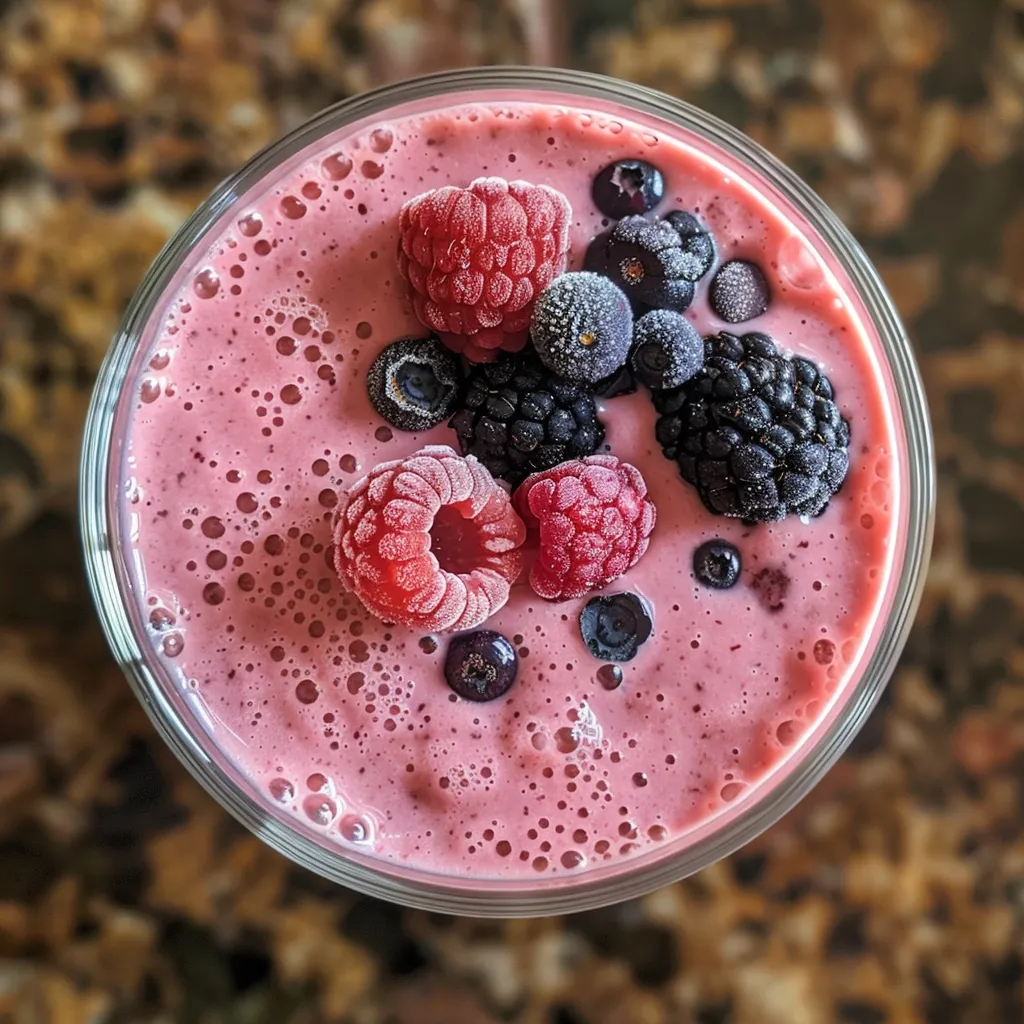
  • Berry Medley: Replace blueberries with a mix of other berries like strawberries or raspberries for a colorful smoothie.
  • Green Power Smoothie: Add a handful of spinach or kale to boost your greens intake without changing the taste significantly.

Storage and Make-Ahead Instructions

For busy days, this smoothie can be made ahead of time:

  • Make the smoothie and store it in an airtight container in the refrigerator for up to 24 hours.
  • If you prefer, you can prep your ingredients the night before. Just blend in the morning for a quick breakfast!

Frequently Asked Questions (FAQ)

Here are some common questions about this blueberry banana smoothie:

  • Can I use fresh blueberries instead of frozen? Yes! Fresh blueberries can be used, but frozen ones offer a thicker, creamier texture.
  • Can I make this smoothie without yogurt? Absolutely! You can substitute with more non-dairy milk or add avocado for creaminess.
  • How do I make this smoothie vegan? Use plant-based yogurt and non-dairy milk to keep it vegan-friendly.
  • Can I add greens to this smoothie? Yes! Spinach or kale can be added without altering the flavor significantly.
  • What if my smoothie is too thick? Simply add more non-dairy milk until you reach your desired consistency.
  • Can I freeze the smoothie? Yes, you can freeze it in ice cube trays and blend later for a quick treat!
  • How can I enhance the flavor? Adding a splash of vanilla extract or a sprinkle of cinnamon can elevate the taste.
  • What’s the nutritional value of this smoothie? It’s packed with vitamins, fiber, and protein, making it a nutritious choice for any meal.

Nutrition Tips and Dietary Adaptations

To make this smoothie even more nutritious, consider these dietary adaptations:

  • High-Protein Option: Use Greek yogurt or a high-protein plant-based yogurt for more protein.
  • Low-Carb Version: Substitute riced cauliflower for bananas or reduce the amount of fruit.
  • Gluten-Free: This smoothie is naturally gluten-free, so you can enjoy it without worry!
  • Added Fiber: Consider adding a tablespoon of chia seeds or flaxseed for an extra fiber boost.

Essential Equipment

Here’s what you’ll need to make this smoothie:

  • Blender: A high-speed blender is ideal for achieving a smooth consistency.
  • Measuring Cups: Accurate measurements will help ensure delicious results.
  • Serving Glasses: Choose fun and colorful glasses to make your smoothie experience enjoyable!

Final Thoughts

This Energizing Blueberry Banana Smoothie is not only delicious but also incredibly versatile. Whether you’re in need of a quick breakfast, a post-workout snack, or just something to brighten your day, this smoothie delivers on all fronts. Remember to experiment and make this recipe your own—cooking should be a joyful and creative process! So grab those ingredients and blend your way to a delightful treat!

Blueberry Banana Smoothie

Prep Time 5 minutes
Total Time 5 minutes
Servings 1 cup
Calories 250
A delicious and nutritious smoothie combining berries, banana, and plant-based protein for a perfect start to your day.

Ingredients

Fruits and Vegetables

  • 0.5 cup frozen blueberries
  • 0.5 cup frozen banana slices or fresh
  • 0.5 cup frozen riced cauliflower
  • 0.33 cup favorite high-protein yogurt plant based or traditional, Skyr or Greek
  • 1 teaspoon raw honey
  • 1 tablespoon creamy peanut butter or cashew, or almond butter
  • 0.5 cup unsweetened non-dairy milk plus more to thin to desired consistency

Instructions 

  • Add all ingredients into blender and blend until smooth.

Notes

You can adjust the amount of non-dairy milk to reach your preferred consistency.
Calories: 250kcal
Cost: $8
Course: Breakfast
Keyword: Fruit, Protein, Smoothie

Kickstart Your Mornings with This Energizing Blueberry Banana Oat Smoothie

Are you ready to transform your busy mornings into a time of refreshing energy and vibrant health? If you’re looking for a quick, nourishing option that packs a punch, look no further than this delightful Blueberry Banana Oat Smoothie. This recipe is not only simple to prepare but also loaded with flavor, making it perfect for both breakfast and a midday snack. With just a few wholesome ingredients, you’ll have a delicious smoothie that supports your busy lifestyle while keeping your taste buds happy.

Why You’ll Love This Recipe

This smoothie is more than just a pretty drink. Here are some compelling reasons to blend it into your routine:

  • Quick Preparation: Ready in under 10 minutes, it’s a perfect grab-and-go breakfast.
  • Nutrient-Rich: Packed with antioxidants from blueberries and fiber from oats, it promotes overall health.
  • Versatile Ingredients: Customize it with your favorite milk, sweeteners, or add-ins to suit your tastes.
  • Energy Boost: The combination of oats and bananas provides lasting energy to power through your morning.
  • Great for Meal Prep: Make a batch ahead of time and store it for busy days.

Ingredient Breakdown

Let’s dive deeper into what makes this smoothie not just delicious, but also a powerhouse of nutrition.

  • Blueberries: 1 cup of fresh or frozen blueberries offers a burst of flavor and is loaded with antioxidants that can help reduce inflammation and support heart health.
  • Banana: 1 ripe banana adds natural sweetness and creaminess, while also providing potassium, essential for muscle function.
  • Oat Milk: 1 cup of oat milk (or any milk of your choice) gives a smooth texture and is an excellent source of fiber. You can substitute with almond, soy, or regular dairy milk.
  • Chia Seeds: 1 tablespoon of chia seeds (optional) enhances fiber content and adds omega-3 fatty acids for brain health.
  • Sweetener: 1 tablespoon of honey or maple syrup (optional) can be added for extra sweetness, but the natural sugars from the fruit are often enough.
  • Ice Cubes: Optional for those who prefer a thicker, colder smoothie.

Pro Tips for the Perfect Smoothie

Luscious Blueberry Banana Oat Smoothie topped with chia seeds, served in a stylish glass.

A few expert tips can elevate your smoothie-making experience:

  • Use Frozen Fruit: For a thicker texture, use frozen blueberries and bananas instead of fresh ones.
  • Ripeness Matters: The riper the banana, the sweeter your smoothie will be—choose those with some brown spots!
  • Blend in Stages: Start by blending the oats and milk until smooth before adding the fruits to ensure a creamy consistency.
  • Adjust Consistency: If your smoothie is too thick, simply add more milk; if it’s too thin, add more oats or banana.
  • Try Different Milks: Experiment with different plant milks to find your favorite flavor combination.
  • Layer Ingredients Wisely: Add softer ingredients like banana and blueberries on top of denser items for a smoother blend.
  • Keep It Fresh: Smoothies are best enjoyed immediately, but you can store leftovers in the fridge for up to a day.
  • Flavor Boosters: Add a pinch of cinnamon or vanilla extract for extra flavor.

Avoid Common Mistakes

Even seasoned smoothie makers can make small errors. Here’s how to avoid them:

  • Over-blending: Blend just until combined to keep the texture light and avoid a watery smoothie.
  • Missing Nutritional Balance: Ensure you include proteins (like yogurt or nut butter) for a balanced breakfast.
  • Ignoring Portion Sizes: Stick to recommended serving sizes to manage calorie intake while enjoying your smoothie.
  • Using Low-Quality Ingredients: Always opt for fresh, organic ingredients when possible to maximize flavor and health benefits.

Variations to Explore

Feeling adventurous? Try these creative twists on the classic blueberry banana oat smoothie:

  • Peanut Butter Banana Smoothie: Add 2 tablespoons of peanut butter for a protein-packed version.
  • Green Power Smoothie: Toss in a handful of spinach or kale for an added nutrient boost.
  • Chocolate Blueberry Smoothie: Incorporate 1 tablespoon of cocoa powder for a chocolatey twist.
  • Protein-Packed Version: Mix in a scoop of your favorite protein powder for post-workout nutrition.

Storage and Make-Ahead Instructions

Want to save time on busy mornings? Here’s how to prep:

  • Make-Ahead Smoothie Packs: Pre-package your smoothie ingredients (excluding the liquid) in freezer bags. Just add milk and blend when ready!
  • Refrigeration: If you have leftovers, store the smoothie in an airtight container in the fridge for up to 24 hours. Stir well before drinking.

Frequently Asked Questions (FAQ)

Got questions? Here are some common inquiries about the Blueberry Banana Oat Smoothie:

  • Can I use other fruits? Absolutely! Feel free to substitute with your favorite berries or tropical fruits.
  • Is this smoothie vegan? Yes, if you use oat milk and maple syrup, it’s completely vegan!
  • How can I make it thicker? Add more frozen fruit or oats to achieve your desired thickness.
  • What if I don’t have oats? You can omit them or replace them with rolled oats or ground flaxseed for a similar effect.
  • Can I add greens? Yes! Spinach or kale can be added without altering the flavor significantly.
  • What’s the best way to sweeten it? Honey, maple syrup, or even dates work well, depending on your preference.
  • Can I use a regular blender? Yes! Just blend longer to ensure everything is smooth and creamy.
  • How often can I drink this smoothie? Enjoy it daily as part of a balanced diet for optimal health benefits.

Nutritional Tips and Dietary Adaptations

You can easily adapt this smoothie to fit your dietary needs:

  • Gluten-Free: Use certified gluten-free oats to make this smoothie suitable for gluten sensitivity.
  • Nut-Free: Omit peanut butter or any nut milk to make it nut-free.
  • Low-Sugar Option: Skip added sweeteners and rely on the natural sweetness of the fruits.
  • Dairy-Free: Use plant-based milk alternatives to keep it dairy-free.

Essential Equipment for Smoothie Success

To make the best smoothie, here are some must-have tools:

  • High-Powered Blender: A good quality blender ensures a smooth texture without chunks.
  • Measuring Cups: For precise ingredient measurements, especially if you’re following a specific diet.
  • Spatula: Helpful for scraping down the sides of the blender to incorporate all ingredients.

Serving Suggestions

Here are some fun ways to serve your smoothie:

  • In a Bowl: Pour it into a bowl and top with granola, sliced fruits, and nuts for a smoothie bowl experience.
  • Garnish: Add a sprinkle of chia seeds or a few whole blueberries on top for visual appeal.
  • With a Straw: Serve in a tall glass with a colorful straw for added fun!

Conclusion: Blend Your Way to a Healthier Morning

This Energizing Blueberry Banana Oat Smoothie is a fantastic addition to your morning routine, combining nutrition, flavor, and convenience. With easy-to-follow steps and endless variations, you’ll find yourself looking forward to breakfast every day. So grab your blender, gather your ingredients, and let’s make your mornings vibrant and delicious!

Blueberry Banana Oat Bliss Smoothie

Prep Time 5 minutes
Total Time 5 minutes
Servings 2 cups
Calories 250
Enjoy a nutritious and delicious smoothie packed with berries, banana, and oats for a perfect start to your day.

Ingredients

Fruits

  • 1 cup blueberries (fresh or frozen)
  • 1 piece ripe banana

Liquid

  • 1 cup oat milk (or any milk of your choice)

Add-ins

  • 1 tablespoon chia seeds (optional for added fiber)
  • 1 tablespoon honey or maple syrup (optional for extra sweetness)
  • to taste Ice cubes (optional for a thicker texture)

Instructions 

  • Add blueberries, banana, oat milk, chia seeds, and honey to a blender.
  • Blend until smooth and creamy.
  • Add ice cubes if desired and blend again for a thicker texture.
  • Pour into glasses and serve immediately.

Notes

This smoothie is perfect for a quick, healthy breakfast or snack.
Calories: 250kcal
Cost: $8
Course: Breakfast
Keyword: Fruit, Healthy, Smoothie

Discover the Joy of Baking: Delightfully Easy Apple Muffins

Welcome to a world where baking becomes a delightful experience! If you’re looking for a simple yet delicious way to brighten your morning, you’ve come to the right place. These Apple Muffins with Fresh Apples are not only easy to make but also bursting with flavor. This comprehensive guide will walk you through each step, ensuring that you feel confident and excited to bake.

Why You’ll Love This Recipe

  • Perfectly Moist: Each muffin is crafted to be wonderfully moist, thanks to the fresh apples, ensuring you enjoy a delightful texture with every bite.
  • Flavorful Experience: The combination of cinnamon and fresh apples creates a sweet-tart explosion that elevates your morning routine.
  • Simple Ingredients: Made with everyday pantry staples, you can whip these muffins up without a trip to the store.
  • Quick Preparation: With straightforward instructions, you can have these muffins ready in under an hour—perfect for busy mornings!
  • Versatile Recipe: Enjoy these muffins as a breakfast treat, a sweet snack, or even a delightful dessert. The options are endless!

Essential Ingredients for Apple Muffins

Here’s what you’ll need to create these delightful muffins:

  • 2 cups all-purpose flour: The base of your muffins, providing structure.
  • 2 teaspoons baking powder: A crucial ingredient for that perfect rise.
  • ½ teaspoon kosher salt: Enhances the flavors of the other ingredients.
  • 2 teaspoons ground cinnamon: Adds a warm, comforting spice.
  • 2 cups diced fresh apples: The star of the show! For best results, use a mix of sweet and tart varieties like Honeycrisp and Granny Smith.
  • ½ cup unsalted butter: Adds richness and moisture to the batter.
  • 1 cup granulated sugar: Sweetens the muffins perfectly.
  • 2 large eggs: Provides structure and helps bind the ingredients together.
  • 2 teaspoons vanilla extract: Enhances the overall flavor profile.
  • ½ cup milk: Keeps the batter moist and tender.

Step-by-Step Instructions for Making Apple Muffins

Juicy apple muffins displayed from the side, showcasing chunks of apples in the batter.

Ready to start baking? Follow these easy steps:

  1. Preheat your oven: Set it to 375º F (190º C). Prepare your muffin tins by spraying with baking spray or greasing with shortening or butter, then dust with flour.
  2. Mix the dry ingredients: In a medium bowl, sift together the flour, baking powder, salt, and cinnamon. Set aside.
  3. Prepare the apples: Toss the diced apples in a small bowl with 2 teaspoons of flour and a bit of cinnamon to coat them. This helps prevent them from sinking in the batter.
  4. Cream butter and sugar: In a large bowl, beat the butter and sugar together until light and fluffy, about 3 minutes. Add the eggs one at a time, mixing well after each addition. Stir in the vanilla.
  5. Combine wet and dry ingredients: Gradually add the flour mixture to the butter mixture, alternating with the milk. Mix until just combined.
  6. Fold in the apples: Gently incorporate the coated diced apples into the batter.
  7. Fill the muffin tins: Spoon the batter into the prepared muffin tins, filling them about 2/3 to 3/4 full.
  8. Bake: Place in the oven and bake for about 30 minutes or until a toothpick inserted into the center comes out clean.
  9. Cool and coat: Allow the muffins to cool slightly in the tin before transferring them to a wire rack. For a delicious topping, brush the tops with melted butter and dip them in a mixture of sugar and cinnamon.

Pro Tips for Bakery-Style Apple Muffins

  • Use room-temperature ingredients: This helps create a smooth batter that incorporates air better, leading to lighter muffins.
  • Don’t overmix: Gently fold the ingredients together until just combined to keep your muffins tender.
  • Choose the right apples: Opt for a mix of sweet and tart apples for the best flavor balance.
  • Test for doneness: Stick a toothpick in the center; it should come out clean or with a few crumbs, not wet batter.
  • Cool completely: Allow muffins to cool on a rack to maintain their texture and prevent sogginess.
  • Experiment with spices: Feel free to add nutmeg or even cloves for a more complex flavor profile.
  • Make them mini: Adjust baking time and make mini muffins for bite-sized treats!
  • Use a cookie scoop: For evenly sized muffins, a cookie scoop can make filling the tins easier.

Troubleshooting Common Mistakes

Even the best bakers face challenges. Here’s how to avoid common pitfalls:

  • Dense muffins: This can happen if you overmix the batter. Aim for gentle folding.
  • Apple bits sinking: Coating apples in flour helps, but ensure your batter is thick enough to support them.
  • Burnt tops: If your muffins are browning too quickly, cover them loosely with foil during baking.
  • Dry muffins: Make sure not to overbake! Keep an eye on them towards the end of the baking time.

Variations to Try

  • Gluten-Free Apple Muffins: Substitute all-purpose flour with a gluten-free blend.
  • Vegan Apple Muffins: Use flax eggs in place of eggs and substitute butter with coconut oil or a vegan butter alternative.
  • Nutty Apple Muffins: Add ½ cup of chopped walnuts or pecans for added texture and flavor.
  • Chocolate Chip Apple Muffins: Stir in ½ cup of chocolate chips for a sweet twist!

Storage and Make-Ahead Instructions

If you want to bake these muffins in advance, here’s how to do it:

  • Room temperature: Store in an airtight container for up to 3 days.
  • Refrigerator: For longer freshness, keep in the fridge for up to a week.
  • Freezing: Freeze muffins in a single layer, then transfer to a zip-top bag for up to 3 months. Reheat in the oven or microwave when ready to enjoy!

FAQs About Apple Muffins

  • Can I use other fruits? Yes! Pears or berries can also be used in place of apples.
  • What’s the best way to dice apples? Cut them into small, even pieces to ensure they bake evenly.
  • Can I use brown sugar? Absolutely! It will add a deeper flavor to your muffins.
  • How do I know when muffins are done? A toothpick inserted into the center should come out clean.
  • Can I make these muffins mini? Yes! Just reduce the baking time to about 15-20 minutes.
  • What if I don’t have milk? You can substitute with almond milk, oat milk, or even yogurt.
  • Can I add frosting? While not traditional, a light cream cheese frosting would be delicious!
  • What’s the nutritional information? Typically, each muffin has around 200 calories, depending on ingredients used.

Nutritional Tips and Dietary Adaptations

For those watching their calorie intake or looking for healthier options, consider these adaptations:

  • Reduce sugar: You can cut the sugar by 1/4 cup without compromising the taste.
  • Add whole grains: Substitute half of the all-purpose flour with whole wheat flour for added fiber.
  • Use unsweetened applesauce: Replace half of the butter with applesauce for a lighter muffin.
  • Incorporate seeds: Chia or flax seeds can boost nutrition without sacrificing flavor.

Recommended Equipment

  • Muffin tins: Non-stick or silicone options work best for easy release.
  • Mixing bowls: A set of mixing bowls in various sizes will simplify the process.
  • Measuring cups and spoons: Accurate measurements are key to baking success.
  • Whisk and spatula: Essential tools for mixing and folding ingredients.

Serving Suggestions

How about some delicious ideas to enjoy your muffins? Try serving them with:

  • Butter: A pat of butter on a warm muffin makes for a comforting treat.
  • Jam: Pair with apple or cinnamon jam for an extra flavor kick.
  • Yogurt: A side of Greek yogurt adds creaminess and protein.
  • Tea or Coffee: Enjoy with a hot beverage for a perfect morning routine.

Conclusion

And there you have it—your definitive guide to making Delightfully Easy Apple Muffins that are perfect for any occasion! With these clear steps, helpful tips, and variations, you can create a batch that’s uniquely yours. Remember, cooking is about enjoying the process, so have fun and don’t stress about perfection. Happy baking!

Apple Muffins With Fresh Apples Easy Recipe!

Prep Time 15 minutes
Cook Time 30 minutes
Total Time 45 minutes
Servings 12 muffins
Calories 250
Enjoy these moist and flavorful apple muffins, perfect for a quick breakfast or snack, featuring fresh apples and warm cinnamon.

Ingredients

Dry Ingredients

  • 2 cups all-purpose flour
  • 1.5 teaspoons baking powder
  • 0.5 teaspoon kosher salt
  • 2 teaspoons ground cinnamon

Coating Apples

  • 2 teaspoons ground cinnamon for coating apples
  • 2 cups diced apples

Wet Ingredients

  • 0.5 cup unsalted butter, room temperature
  • 1 cup granulated sugar
  • 2 large eggs, room temperature
  • 2 teaspoons vanilla extract
  • 0.5 cup milk

Additional Butter & Sugar for Topping

  • 0.25 cup melted butter
  • 0.25 cup granulated sugar
  • 0.25 cup ground cinnamon

Instructions 

  • Preheat oven to 375º F (190º C). Prepare muffin tins with spray or butter and flour.
  • Sift together flour, baking powder, salt, and cinnamon. Toss diced apples with cinnamon-flour mixture to coat.
  • Cream butter and sugar until light, then add eggs one at a time, mixing well. Stir in vanilla.
  • Fold in flour mixture alternately with milk. Gently mix in coated apples. Fill muffin tins 2/3 to 3/4 full and bake for 30 minutes.
  • Melt butter for topping. Brush muffins with melted butter, then dip into cinnamon sugar mixture. Cool before serving.

Notes

For best results, use fresh apples and do not overmix the batter to keep muffins light and fluffy.
Calories: 250kcal
Cost: $10
Course: Breakfast
Cuisine: American
Keyword: apple

The Ultimate Guide to Crafting the Perfect Banana Smoothie

Welcome to the ultimate resource for banana smoothie enthusiasts! If you’re looking for a quick energy boost, look no further than this banana smoothie recipe. It combines frozen bananas, creamy Greek yogurt, and a splash of vanilla to deliver a refreshing treat that’s perfect for busy mornings or a healthy snack. In this comprehensive guide, we’ll explore everything you need to know about making the best banana smoothie, from ingredients to tips and variations. Let’s get blending!

Why You’ll Love This Recipe

This banana smoothie is not just delicious; it also offers numerous benefits that make it a fantastic choice for any time of the day:

  • Quick and Easy: With minimal ingredients and simple steps, this smoothie can be whipped up in minutes, making it ideal for busy mornings.
  • Nutritious Fuel: Packed with vitamins and minerals, this smoothie provides an energy boost to kickstart your day or recharge after a workout.
  • Customizable: You can easily modify the recipe to suit your taste preferences or dietary needs by swapping ingredients.
  • Creamy Texture: The combination of frozen bananas and Greek yogurt creates a smooth, creamy consistency that’s incredibly satisfying.
  • Delicious Flavor: The natural sweetness of ripe bananas, paired with a hint of vanilla, makes each sip a delightful experience.

Banana Smoothie Ingredients

Let’s dive into the ingredients that make this banana smoothie a must-try!

  • Frozen Bananas: About 1 cup, or one large banana, sliced and frozen for optimal creaminess.
  • Greek Yogurt: ¼ cup, either plain or vanilla, for added protein and creaminess.
  • Milk: ¼ cup, which can be dairy, almond, oat, or any milk of your choice.
  • Vanilla Extract: ¼ teaspoon adds a subtle sweetness and depth to the flavor.

Ingredient Substitutions

Side view of a delicious banana smoothie, showcasing its thick texture and vibrant color.

Don’t have all the ingredients? No problem! Here are some substitutions you can try:

  • Yogurt Alternatives: Substitute Greek yogurt with coconut yogurt or a dairy-free version for a vegan option.
  • Milk Options: Use coconut milk for a tropical twist or cashew milk for a nutty flavor.
  • Sweeteners: If you prefer a sweeter smoothie, add a drizzle of honey or maple syrup.
  • Flavor Additions: Incorporate peanut butter or cocoa powder for a delicious chocolate peanut butter banana smoothie.

How to Make a Banana Smoothie

Ready to get blending? Follow these simple steps:

  1. Place all the ingredients in a blender.
  2. Blend until smooth, adding more milk if needed to reach your desired consistency.
  3. Serve immediately and enjoy!

Pro Tips for the Best Banana Smoothie

To elevate your smoothie game, consider these expert tips:

  • Use Ripe Bananas: Look for bananas with brown spots as they are sweeter and more flavorful.
  • Freeze Bananas Properly: Slice bananas before freezing to make blending easier.
  • Adjust Consistency: Add more milk gradually if you prefer a thinner smoothie.
  • Chill Your Glasses: For a refreshing experience, chill your glasses in the freezer before serving.
  • Experiment with Add-ins: Try adding spinach for a green smoothie or protein powder for an extra boost.
  • Blend in Batches: If you’re making multiple servings, blend in batches to ensure everything is mixed well.
  • Use a High-Powered Blender: A high-quality blender ensures a smooth consistency without chunks.
  • Garnish Creatively: Top your smoothie with sliced bananas, nuts, or granola for added texture and flavor.

Common Mistakes and Troubleshooting

Even the best recipes can hit a snag! Here are some common mistakes and how to fix them:

  • Too Thick: If your smoothie is too thick, add a bit more milk and blend again until smooth.
  • Too Sweet: If your smoothie is overly sweet, balance it out with a tablespoon of unsweetened yogurt or a splash of lemon juice.
  • Flavor Imbalance: If the flavor isn’t quite right, adjust by adding a pinch of salt or a dash more vanilla extract.
  • Too Chunky: Make sure your bananas are adequately frozen and blend thoroughly to avoid chunks.

Recipe Variations

Want to switch things up? Here are some delicious variations of this banana smoothie:

  • Peanut Butter Banana Smoothie: Add 2 tablespoons of peanut butter for a protein-packed treat.
  • Chocolate Banana Smoothie: Mix in 1 tablespoon of cocoa powder for a rich, chocolatey flavor.
  • Berry Banana Smoothie: Toss in ½ cup of mixed berries for a fruity twist.
  • Green Banana Smoothie: Add a handful of spinach or kale for a nutrient boost without altering the taste.

Storage and Make-Ahead Instructions

Want to prep ahead? Here’s how to store your banana smoothie:

  • Make-Ahead: Prepare your smoothie ingredients in advance and freeze them in individual bags for quick blending later.
  • Storing Leftovers: If you have leftover smoothie, store it in an airtight container in the fridge for up to 24 hours. Stir well before drinking, as separation may occur.
  • Freezing Smoothies: Pour leftovers into ice cube trays and freeze. Blend the cubes later for a quick smoothie on-the-go.

Frequently Asked Questions

Got questions? Here are some common queries about banana smoothies:

  • Can I use fresh bananas instead of frozen? Yes, but frozen bananas yield a creamier texture.
  • Is this banana smoothie vegan? Yes, by substituting Greek yogurt with a plant-based yogurt and using non-dairy milk.
  • Can I add protein powder? Absolutely! It’s a great way to boost the protein content.
  • How can I make this smoothie dairy-free? Use non-dairy yogurt and milk alternatives.
  • What’s the best time to enjoy a banana smoothie? Morning is ideal, but it also makes a great post-workout snack.
  • Can I add other fruits? Yes! Feel free to mix in your favorite fruits for added flavor.
  • How do I make a thicker smoothie? Use less milk or add more frozen bananas.
  • Can I prepare this smoothie the night before? Yes, just store it in the fridge, but it’s best enjoyed fresh.

Nutrition Tips and Dietary Adaptations

Want to make this smoothie fit your dietary needs? Here are some suggestions:

  • Low-Calorie Option: Reduce the amount of yogurt and use unsweetened almond milk.
  • High-Protein Version: Add a scoop of protein powder or use higher-protein yogurt.
  • For Weight Management: Stick to the basic recipe and avoid sweeteners for a healthier choice.
  • Gluten-Free: This recipe is naturally gluten-free; just ensure any add-ins are gluten-free as well.

Essential Equipment for Making Banana Smoothies

To make your smoothie experience smoother, consider using these tools:

  • High-Powered Blender: A good blender is crucial for achieving a creamy consistency.
  • Measuring Cups and Spoons: Accurate measurements ensure consistent flavor and texture.
  • Spatula: Useful for scraping down the sides of the blender to ensure all ingredients are well mixed.
  • Glass or Mason Jar: Perfect for serving your smoothie and minimizing waste.

Serving Suggestions

Here are some fun ideas for enjoying your banana smoothie:

  • Top with Granola: Add a sprinkle of granola for crunch and extra fiber.
  • Garnish with Nuts: Chopped nuts like almonds or walnuts add healthy fats and protein.
  • Pair with Toast: Enjoy your smoothie with whole-grain toast topped with avocado for a balanced breakfast.
  • Serve in a Fun Glass: Make it special by using colorful or themed glasses to enhance your breakfast experience.

Conclusion

There you have it—the ultimate banana smoothie guide! Whether you’re rushing out the door or enjoying a leisurely morning, this smoothie is an easy, nutritious choice. With its creamy texture, delightful flavor, and endless customization options, you’ll fall in love with this recipe. Now, it’s time to grab those bananas and get blending. Happy cooking, my friends!

Best Banana Smoothie

Prep Time 5 minutes
Total Time 5 minutes
Servings 1 cup
Calories 210
A quick and delicious banana smoothie perfect for a healthy snack or breakfast.

Ingredients

Fruits

  • 1 large banana (frozen is best)
  • 0.25 cup Greek yogurt plain or vanilla
  • 0.25 cup milk dairy, almond, oat milk, etc.
  • 0.25 teaspoon vanilla extract

Instructions 

  • Place all ingredients in a blender.
  • Blend until smooth, adding more milk if needed.
  • Serve immediately.

Notes

Using frozen banana makes the smoothie creamier and colder.
Calories: 210kcal
Cost: $3
Course: Breakfast, Snack
Keyword: Banana

Indulgent Treats Made Simple: A Guide to Chocolate Chip Cookie Dough Truffles

Welcome to the delightful world of Chocolate Chip Cookie Dough Truffles! If you’re looking to satisfy your sweet tooth with an easy and fun recipe, you’ve landed in the right place. These truffles are not just delicious; they are also safe to eat and perfect for any occasion. In this comprehensive guide, we will break down everything you need to know about making these indulgent treats, from ingredients to expert tips, ensuring you feel confident in your kitchen. So, grab your apron and let’s get started!

Why You’ll Love This Recipe

This Chocolate Chip Cookie Dough Truffles recipe is more than just a treat; it’s a little piece of heaven that you can create at home. Here are five reasons why you’ll love making these truffles:

  • Easy to Make: With simple ingredients and straightforward steps, you can whip these up in no time, even after a long day.
  • A Safe-to-Eat Treat: By heat-treating the flour, these cookie dough truffles are safe for everyone to enjoy, including those who are typically cautious about raw cookie dough.
  • Customizable Flavors: Feel free to experiment with different mix-ins like nuts, dried fruits, or flavored chocolate to suit your taste.
  • Perfect for Any Occasion: Whether it’s a birthday party, holiday gathering, or just a cozy night in, these truffles are sure to impress.
  • Fun to Make with Family: Involve your kids or friends and make it a fun activity! Rolling the dough into balls is a great way to bond.

Ingredients for Chocolate Chip Cookie Dough Truffles

Before diving into the making process, let’s gather our ingredients. Here’s what you’ll need:

  • 1 cup all-purpose flour (heat treated, explained below)
  • ½ cup unsalted butter, softened
  • ½ cup brown sugar
  • ¼ cup white sugar
  • 2 tablespoons milk
  • 1 teaspoon vanilla extract
  • ½ teaspoon salt
  • 1 cup mini chocolate chips
  • 2 cups chocolate melting wafers or chocolate chips (for coating)

Ingredient Breakdown and Substitutions

Understanding your ingredients can elevate your cooking. Here’s a closer look at each component and some possible substitutions:

  • All-purpose flour: Can be substituted with almond flour for a gluten-free version, but ensure it’s heat-treated.
  • Unsalted butter: You can use coconut oil or margarine for a dairy-free alternative.
  • Brown sugar: For a deeper flavor, try using dark brown sugar.
  • Milk: Any milk works, including almond or oat milk for dairy-free options.
  • Chocolate chips: Use dark, milk, or even white chocolate chips according to your preference.

How to Make Chocolate Chip Cookie Dough Truffles

Side view of delectable chocolate chip cookie dough truffles, showcasing their creamy texture.

Now that we have our ingredients ready, let’s dive into the steps to make these delightful truffles:

Step 1: Heat Treatment of Flour

The first thing you need to do is to heat treat the flour. Spread the flour on a baking sheet and bake at 350°F (175°C) for 5 minutes. This step makes the flour safe to eat. Let it cool before using.

Step 2: Cream the Butter and Sugars

In a large bowl, combine the softened butter, brown sugar, and white sugar. Beat until creamy and smooth. This is a crucial step for achieving a fluffy dough!

Step 3: Add Milk, Vanilla, and Salt

Pour in the milk, vanilla extract, and salt. Mix everything together until it achieves a soft, cookie dough-like consistency.

Step 4: Incorporate the Flour

Slowly add the cooled, heat-treated flour to the bowl. Stir until a dough-like consistency is formed, ensuring there are no dry lumps of flour.

Step 5: Mix in Chocolate Chips

Fold the mini chocolate chips into the dough until they are evenly distributed throughout the mixture.

Step 6: Roll into Dough Balls

Take small portions of dough (about 1 tablespoon each) and roll them into smooth balls. Place them on a baking sheet lined with parchment paper.

Step 7: Chill the Dough Balls

Freeze the dough balls for 15-20 minutes. This helps them hold their shape when dipping.

Step 8: Melt the Chocolate Coating

In a microwave-safe bowl, melt the chocolate chips or wafers in batches for 20 seconds, stirring between each batch until smooth.

Step 9: Dip the Truffles

Using a fork, dip each cooled dough ball into the melted chocolate. Remove any excess chocolate and place the truffles back on the parchment paper.

Step 10: Cool and Set

Place the coated truffles in the refrigerator for at least 15 minutes until the chocolate coating is completely set. Once set, serve and enjoy!

Expert Tips for Making the Best Cookie Dough Truffles

To ensure your Chocolate Chip Cookie Dough Truffles come out perfectly, consider these expert tips:

  • Chill the Dough: Don’t skip chilling the dough balls! This step helps keep their shape when you dip them in chocolate.
  • Quality Chocolate: Use high-quality chocolate for dipping to enhance the flavor of the truffles.
  • Experiment with Toppings: After dipping, consider rolling the truffles in crushed nuts, sprinkles, or cocoa powder for added texture and flavor.
  • Keep a Watchful Eye: When melting chocolate, be careful not to overheat it, as this can cause it to seize.
  • Make Ahead: You can prepare the dough balls ahead of time and keep them in the freezer until you’re ready to dip them in chocolate.

Common Mistakes and Troubleshooting

Even the best cooks make mistakes! Here are some common pitfalls and how to avoid them:

  • Overmixing the Dough: Mix just until combined to prevent tough truffles.
  • Too Soft Dough: If your dough is too soft, try chilling it longer before rolling into balls.
  • Chocolate Seizing: If your chocolate seizes, try adding a small amount of vegetable oil to thin it out.

Variations on Chocolate Chip Cookie Dough Truffles

Feeling adventurous? Here are some fun variations you can try:

  • Nutty Delight: Add chopped nuts like walnuts or pecans to the dough for an extra crunch.
  • Minty Fresh: Incorporate peppermint extract and use dark chocolate for a mint chocolate experience.
  • Cookie Butter: Mix in cookie butter for a spiced flavor twist.
  • Fruit Fusion: Add dried fruits such as cranberries or cherries for a chewy texture.

Storage and Make-Ahead Instructions

These truffles can be stored easily. Here’s how:

  • Storage: Keep them in an airtight container in the refrigerator for up to a week.
  • Freezing: You can freeze the truffles for up to 3 months. Just ensure they are well-wrapped to prevent freezer burn.
  • Make-Ahead: Prepare the dough up to a week in advance and refrigerate until you’re ready to roll and dip.

Frequently Asked Questions

Let’s answer some common questions about making Chocolate Chip Cookie Dough Truffles:

  • Can I use regular flour instead of heat-treated? No, regular flour should not be eaten raw. Always heat-treat it first.
  • Can I use other types of chocolate? Absolutely! Feel free to use milk, dark, or white chocolate depending on your preference.
  • How do I know when the chocolate coating is set? The chocolate should be firm to the touch and no longer sticky.
  • Can I add flavors to the chocolate coating? Yes! You can add extracts like vanilla or almond to the melted chocolate for added flavor.
  • What if my dough is too crumbly? If your dough is crumbly, try adding a little more milk, one teaspoon at a time, until it comes together.
  • Are these truffles suitable for kids? Yes! They are a fun treat for kids, especially when they help make them.
  • How can I make these truffles vegan? Use vegan butter, dairy-free chocolate chips, and plant-based milk for a vegan-friendly option.
  • What’s the best way to serve these truffles? You can serve them as is, or create a dessert platter with various toppings for a fun presentation.

Nutrition Tips and Dietary Adaptations

For those looking to adapt the recipe, here are some nutrition tips:

  • Healthier Sweetener: Substitute sugars with alternatives like honey or maple syrup for a more natural sweetness.
  • Gluten-Free Version: Use gluten-free flour blends to cater to gluten-sensitive individuals.
  • Lower Calorie Option: Reduce the amount of chocolate used for coating or opt for a lighter chocolate.

Equipment Recommendations

Here’s what you’ll need to make these truffles:

  • Mixing Bowls: A set of mixing bowls in various sizes for all your mixing needs.
  • Baking Sheet: A baking sheet lined with parchment paper for easy cleanup.
  • Microwave-Safe Bowl: For melting chocolate safely.
  • Fork: A fork is essential for dipping the truffles into the chocolate.

Serving Suggestions

To make your presentation pop, consider these serving ideas:

  • Truffle Platter: Arrange the truffles on a decorative platter with various toppings surrounding them.
  • Gift Packaging: Place truffles in a cute box or jar tied with a ribbon for a delightful homemade gift.
  • Pair with Beverages: These truffles pair wonderfully with milk, coffee, or even a dessert wine for a special treat.

Conclusion

Making Chocolate Chip Cookie Dough Truffles is a fun and rewarding experience that can bring joy to any occasion. With this comprehensive guide, you’re now equipped with everything you need to create these delicious treats. Remember, cooking is about having fun and experimenting, so feel free to put your own spin on this recipe. Enjoy the process and, most importantly, savor the indulgent results!

Chocolate Chip Cookie Dough Truffles

Prep Time 20 minutes
Cook Time 5 minutes
Total Time 25 minutes
Servings 12 pieces
Calories 150
Delight in these no-bake cookie dough truffles coated in rich chocolate, perfect for a sweet treat.

Ingredients

Heat-treated flour

  • 1 cup all purpose flour (heat treated as below)
  • ½ cup unsalted butter, softened
  • ½ cup brown sugar
  • ¼ cup white sugar
  • 2 tablespoons milk
  • 1 teaspoon vanilla extract
  • ½ teaspoon salt
  • 1 cup mini chocolate chips
  • 2 cups chocolate melting wafers or chocolate chips for coating

Instructions 

  • Heat treat the flour by spreading on a baking sheet and baking at 350°F (175°C) for 5 minutes. Let cool.
  • Cream together softened butter, brown sugar, and white sugar until smooth. Add milk, vanilla, and salt; mix well.
  • Gradually mix in cooled, heat-treated flour until dough forms. Fold in chocolate chips.
  • Form dough into 1 tablespoon balls, place on parchment-lined tray, and freeze for 15-20 minutes.
  • Melt chocolate wafers in microwave in 20-second bursts, stirring until smooth. Dip each frozen dough ball into chocolate, then place back on parchment. Chill for 15 minutes until set.

Notes

Chilling the dough balls before coating helps them hold their shape.
Calories: 150kcal
Cost: $10
Course: Dessert
Cuisine: American
Keyword: chocolate, cookie dough

Why You’ll Love This Colorful Vegetarian Pita Sandwich

Are you ready to elevate your lunch game with something that’s not just delicious but also bursting with nutrition? This vegetarian pita sandwich is your answer! Filled with vibrant vegetables, fresh herbs, and a touch of creamy dressing, it’s the perfect meal for any time of day. Let’s explore why this recipe is a must-try!

  • Quick and Easy: This recipe takes less than 30 minutes to prepare, making it ideal for busy weekdays or a relaxed weekend lunch.
  • Customizable: Whether you prefer crunchy veggies or tangy sauces, you can personalize your veggie pita sandwich to suit your taste.
  • Nutrition-Packed: Loaded with a variety of vegetables, this sandwich is a great source of vitamins, minerals, and fiber.
  • Perfect for Meal Prep: Make a batch in advance and store them in the fridge for quick, grab-and-go meals throughout the week.
  • Kid-Friendly: With its colorful ingredients, this pita sandwich is appealing to kids and a great way to sneak in healthy veggies.

Key Ingredients Breakdown

Understanding what goes into your pita sandwiches can really enhance your cooking experience. Here’s a detailed look at the key ingredients along with some ideas for substitutions!

  • Pita Bread: Choose between white or whole wheat for a hearty base. You can also use gluten-free pita if you have dietary restrictions.
  • Fresh Vegetables: The heart of any veggie pita. Feel free to swap out ingredients; for example, use spinach instead of lettuce or add avocado for creaminess.
  • Cheese: Sharp cheddar cheese adds a wonderful flavor, but you can substitute with feta or leave it out for a vegan option.
  • Dressing: A creamy Italian dressing ties all the flavors together. For a homemade version, check out our dressing recipe linked in the post!
  • Fresh Herbs: Don’t skip the herbs! They add freshness and complexity; consider basil, mint, or dill for different flavor profiles.

Recipe for Colorful Vegetarian Pita Sandwiches

Now that we’ve covered the ingredients, it’s time to dive into the recipe! This is where the magic happens.

Ingredients

  • 2 white or whole wheat pita breads
  • 1 cup bean sprouts
  • 1 carrot, peeled and julienned
  • 1 orange bell pepper, seeded and diced
  • 1 small broccoli floret, chopped
  • 1 cup cauliflower florets, chopped
  • 1 cup cherry tomatoes, halved
  • 2 green onions, diced
  • 1 red onion, thinly shaved
  • 1 cup cremini mushrooms, thinly sliced
  • 1 zucchini, diced
  • 1 cup chopped fresh herbs (basil, mint, parsley, dill)
  • 1 cup sharp cheddar cheese, grated
  • 1 cup creamy Italian dressing (see link to recipe in post)

Steps

  1. **Prepare dressing**: See link to dressing recipe for ingredients and instructions.
  2. **Prepare vegetables**: Rinse and clean all vegetables under cool water. Pat dry with a paper towel. Prepare the vegetables as needed to create bite-sized pieces. Transfer to a large bowl and sprinkle with chopped herbs, then toss gently to combine.
  3. **Assemble vegetable mix**: Sprinkle veggies and herbs with almost all of the cheese, reserving a small quantity for garnish. Add about ½ cup of dressing (or more to taste). Toss gently to combine.
  4. **Assemble sandwiches**: Cut pita bread in half, gently pulling pockets open. Add a generous portion of the vegetable mixture, then sprinkle with the reserved cheese and additional dressing.
  5. **Serve immediately** with potato chips or a light salad on the side for a complete meal.

Pro Tips for Perfecting Your Veggie Pita Sandwich

Side view of a freshly prepared vegetarian pita bread sandwich loaded with vibrant ingredients.

These expert insights will help you avoid common pitfalls and enhance your sandwich-making skills!

  • Chill your ingredients: Keeping your veggies cold not only maintains their crunch but also makes your sandwich more refreshing.
  • Mix and match: Experiment with different vegetables based on what’s in season, or try roasted vegetables for a different flavor profile.
  • Layer wisely: Start with a layer of dressing, then veggies, to prevent the pita from getting soggy.
  • Use high-quality pita: Fresh, soft pita bread will make a world of difference in texture and flavor.
  • Garnish creatively: A sprinkle of sesame seeds or sunflower seeds on top can add a delightful crunch.
  • Make it a meal: Pair your sandwich with a hearty soup or a side salad for a balanced meal.
  • Don’t overstuff: While it’s tempting to pile on the ingredients, too much filling can lead to a messy sandwich.
  • Let it rest: Allowing the assembled sandwich to sit for a few minutes can help the flavors meld together beautifully.

Common Mistakes and How to Avoid Them

Even the best chefs make mistakes! Here are some common issues and how to troubleshoot them:

  • Too soggy: If your sandwich turns out soggy, make sure to pat your vegetables dry and avoid over-saturating with dressing.
  • Pita tears easily: If your pita bread tears, try warming it slightly in the oven to make it more pliable.
  • Flavorless filling: Season your veggies well! A little salt and pepper can elevate the flavors significantly.
  • Hard to eat: If your sandwich is falling apart, try using larger pita breads or wrapping them in foil to hold everything together.

Variations to Try

Don’t hesitate to get creative! Here are four delicious variations to inspire your next veggie pita:

  • Greek-style: Add olives, feta cheese, and cucumber for a Mediterranean twist.
  • Spicy Southwest: Incorporate jalapeños, avocado, and a chipotle mayo for a kick.
  • Asian-inspired: Use sesame dressing, add shredded cabbage, and top with cilantro for a fresh take.
  • Breakfast pita: Fill with scrambled eggs, spinach, and feta for a hearty breakfast option.

Storage and Make-Ahead Instructions

Want to prepare your sandwich ahead of time? Here’s how to store it properly:

  • Wrap your assembled sandwiches tightly in plastic wrap or foil to prevent drying out.
  • Store in the refrigerator for up to 2 days. However, for the best texture, enjoy them fresh.
  • Consider storing the filling separately from the pita if you plan to make them a day or two in advance.

Frequently Asked Questions

Got questions? Here are some common queries about veggie pita sandwiches:

  • Can I make these sandwiches vegan? Yes, simply omit the cheese and use a vegan dressing.
  • What type of dressing works best? A creamy Italian dressing or a tangy vinaigrette pairs wonderfully with the fresh veggies.
  • How can I make this a gluten-free meal? Use gluten-free pita bread and ensure your dressing is gluten-free as well.
  • What vegetables work best? Any fresh vegetables work well, but favorites include cucumbers, bell peppers, and leafy greens.
  • Can I add protein to my sandwich? Absolutely! Grilled chicken, chickpeas, or tofu are great options for extra protein.
  • How do I prevent my pita from getting soggy? Always pat your veggies dry before assembling and add dressing sparingly.
  • Can I freeze these sandwiches? It’s not recommended to freeze assembled sandwiches, but you can freeze the filling and assemble fresh pitas later.
  • What should I serve with veggie pita sandwiches? Pair them with a light salad, soup, or some potato chips for a satisfying meal.

Nutritional Tips and Dietary Adaptations

For a healthier version of your veggie pita, consider these tips:

  • Low-Fat Cheese: Opt for low-fat cheese to reduce calories without sacrificing flavor.
  • Extra Veggies: Load up on extra vegetables to increase fiber and nutrient intake.
  • Whole Grains: Always choose whole wheat pita for added fiber and health benefits.
  • Watch the Dressing: Use a lighter dressing or make your own to control calories and ingredients.

Essential Equipment for Making Veggie Pita Sandwiches

Having the right tools can make your sandwich preparation easier:

  • Cutting Board: A sturdy cutting board is essential for chopping your veggies.
  • Sharp Knife: A sharp knife will make slicing your ingredients much easier and safer.
  • Mixing Bowl: A large bowl is perfect for tossing your veggies and dressing together.
  • Measuring Cups and Spoons: Accurate measurements ensure your ingredients are perfectly balanced.

Serving Suggestions for Your Veggie Pita

Enhance your meal with these serving ideas:

  • Side Salad: A fresh side salad with a light vinaigrette complements the sandwich beautifully.
  • Chips or Crisps: Crunchy potato chips or veggie crisps provide a satisfying contrast to the soft pita.
  • Fruit Plate: Fresh seasonal fruit adds a sweet touch to your meal.
  • Herbal Tea: A refreshing herbal tea pairs nicely with the flavors of the sandwich.

With these tips, tricks, and variations, you’re well on your way to mastering the art of the veggie pita sandwich. Enjoy the vibrant flavors and the satisfaction of creating something delicious and healthy!

Vegetarian Pita Bread Sandwiches

Prep Time 15 minutes
Total Time 15 minutes
Servings 4 servings
Calories 350
A fresh and colorful vegetarian pita sandwich packed with crunchy vegetables, herbs, and cheese, perfect for a quick and healthy meal.

Ingredients

pita breads

  • 1 cup bean sprouts
  • 1 carrot carrot, peeled and julienned
  • 1 orange orange bell pepper, seeded and diced
  • 1 cup small broccoli florets, chopped
  • 1 cup cauliflower florets, chopped
  • 0.5 cup cherry tomatoes, halved
  • 2 green onions diced green onions
  • 0.5 red onion red onion, thinly shaved
  • 1 cup cremini mushrooms, thinly sliced
  • 1 cup zucchini, diced
  • 0.5 cup chopped fresh herbs (basil, mint, parsley, dill)
  • 0.5 cup sharp cheddar cheese, grated
  • 0.5 cup creamy Italian dressing (see link in post)

Instructions 

  • Prepare the dressing by mixing ingredients as per the recipe.
  • Rinse and chop all vegetables; toss with herbs and a portion of cheese.
  • Add dressing and remaining cheese to the vegetable mixture; toss gently.
  • Cut pita breads in half and open pockets gently.
  • Stuff pita pockets with vegetable mixture, sprinkle with extra cheese and dressing, then serve.

Notes

Use fresh vegetables for best flavor and texture.
Calories: 350kcal
Cost: $15
Course: Main Course
Cuisine: Vegetarian
Keyword: Pita, Sandwich, Vegetables

Welcome to your new morning ritual! If you’re looking for a delicious and nutritious way to kick-start your day, you’ve come to the right place. This smoothie recipe is not only simple but also incredibly adaptable, allowing you to create the perfect blend that suits your taste buds and nutritional needs. With just a few ingredients, you can whip up a creamy, satisfying smoothie that will keep you energized and ready to tackle whatever lies ahead.

Why You’ll Love This Recipe

This smoothie is a game-changer for your mornings, and here’s why:

  • Quick and Easy: It takes just minutes to prepare—perfect for busy mornings.
  • Nutrient-Packed: With yogurt and banana, you’re getting protein, fiber, and essential vitamins.
  • Customizable: You can easily tweak the ingredients based on what you have at home.
  • Great Taste: The natural sweetness of the banana combined with creamy yogurt makes for an irresistible flavor.
  • Perfect for Any Time: Enjoy it as a breakfast option or a refreshing snack post-workout.

What You’ll Need

Gather the following ingredients to create your smoothie masterpiece:

  • 1 ripe banana: Fresh or frozen works—frozen bananas add extra creaminess.
  • 3/4 cup yogurt: Plain or vanilla Greek yogurt is ideal for that protein boost.
  • 1/2 to 3/4 cup milk: Use dairy or any plant-based milk like almond or oat.
  • 1-2 teaspoons honey or maple syrup: Optional for added sweetness, adjust based on banana ripeness.
  • 1/2 teaspoon vanilla extract: Optional, but it enhances the flavor beautifully.
  • Pinch of cinnamon: Adds warmth and depth—totally optional!
  • Ice cubes: Optional for a thicker, frostier texture.
  • Optional boosts: Consider adding nut butter, chia seeds, spinach, protein powder, or frozen berries for extra nutrition.

Step-by-Step Instructions

Follow these simple steps to create your smoothie:

  • Prep your banana: If using fresh, peel and break it into chunks. For extra creaminess, opt for a frozen banana.
  • Add the liquids first: Pour the milk into the blender to help the blending process.
  • Add yogurt and banana: Spoon in the yogurt and add the banana pieces.
  • Sweeten and flavor: If your banana isn’t very ripe, add honey or maple syrup. Include vanilla and a pinch of cinnamon if desired.
  • Boost if desired: Add nut butter for richness, seeds for fiber, greens for extra nutrients, or berries for a fruity twist.
  • Blend until smooth: Start on low, then increase to high for 30-45 seconds until creamy.
  • Taste and adjust: Check sweetness and texture. Add more sweetener or cinnamon if needed.
  • Serve immediately: Pour into a glass and enjoy while it’s cold and creamy.

Pro Tips for Smoothie Success

Side shot of a refreshing smoothie made with yogurt and banana garnished with a slice of banana.

Here are some expert insights to elevate your smoothie game:

  • Use overripe bananas: They’re sweeter and add more flavor to your smoothie.
  • Don’t skip the yogurt: It not only adds creaminess but also gives a protein boost.
  • Blend in stages: Start with liquids first, then add solids to ensure everything blends smoothly.
  • Experiment with textures: Add ice for a thicker smoothie or more milk for a thinner consistency.
  • Pre-pack smoothie bags: Prepare ingredients in advance and freeze them for a quick grab-and-blend option.
  • Use a high-power blender: It ensures a silky-smooth texture without any lumps.
  • Don’t overload with add-ins: Keep it simple to maintain balance in flavor and texture.
  • Make it a meal: Add oats or protein powder to make it more filling if you’re on the go.

Common Mistakes and Troubleshooting

Here’s how to avoid common pitfalls when making your smoothie:

  • Too thick?: Add a splash more milk to reach your desired consistency.
  • Too sweet?: Balance it out with a squeeze of lemon juice or a handful of spinach.
  • Not creamy enough?: Ensure you’re using a ripe banana and enough yogurt.
  • Too icy?: Use less ice or blend for a bit longer to achieve a smoother texture.
  • Flavor off?: Adjust with a pinch of salt or additional vanilla extract to enhance taste.

Delicious Variations to Try

Looking to switch things up? Here are some fun variations:

  • Berry Blast: Add a handful of mixed berries for a fruity twist.
  • Chocolate Delight: Incorporate a tablespoon of cocoa powder or chocolate protein powder.
  • Green Smoothie: Add a handful of spinach or kale for a nutrient boost without altering the flavor much.
  • Nutty Banana: Incorporate a tablespoon of almond or peanut butter for added richness.

Storage and Make-Ahead Instructions

Want to prepare ahead of time? Here’s how:

  • Make-ahead: Pre-pack your smoothie ingredients in freezer bags. Just blend with milk in the morning.
  • Storage: If you have leftovers, store in an airtight container in the fridge for up to 24 hours. Give it a good shake before drinking.

Frequently Asked Questions

Here are some common questions about this smoothie:

  • Can I use a different fruit? Absolutely! Feel free to swap in your favorite fruits like mango or strawberries.
  • Is this smoothie vegan? Yes, if you use plant-based yogurt and milk.
  • Can I make this smoothie without yogurt? You can, but it will lose some creaminess and protein; try using avocado instead.
  • How can I increase the protein content? Add protein powder, nut butter, or extra yogurt for a boost.
  • Is this smoothie good for meal prep? Yes, you can prepare the ingredients ahead of time and blend them fresh in the morning.
  • What can I do with leftover bananas? Use them in baking, freeze for smoothies, or make banana pancakes!
  • How do I make a smoothie thicker? Add more frozen fruit or ice, or reduce the amount of liquid.
  • Can I add supplements? Yes, feel free to add supplements like collagen or greens powder as desired.

Nutrition Tips and Dietary Adaptations

This smoothie is naturally nutritious, but here are some tips to tailor it to your needs:

  • Low-Sugar Option: Use unsweetened yogurt and skip the sweeteners.
  • Dairy-Free: Substitute with coconut yogurt and almond milk for a dairy-free version.
  • High-Fiber Boost: Add chia seeds or flaxseeds for an extra fiber kick.
  • Protein-Packed: Use Greek yogurt or add a scoop of your favorite protein powder.

Equipment Recommendations

To make your smoothie experience even smoother, consider using:

  • High-Speed Blender: A quality blender ensures a creamy consistency without chunks.
  • Measuring Cups: Helps with precision in ingredient amounts for consistent results.
  • Storage Containers: Airtight containers are essential for keeping leftovers fresh.

Serving Suggestions

Enhance your smoothie experience with these serving ideas:

  • Garnish with nuts: Top with chopped nuts or seeds for added crunch.
  • Add a sprinkle of granola: For a bit of texture and more fiber.
  • Pair with toast: Serve alongside whole-grain toast for a balanced meal.

With this comprehensive guide, you’re all set to create a smoothie that not only tastes amazing but also fuels your day. Enjoy the process of blending and experimenting with flavors, and remember that cooking is all about having fun and trying new things. Happy blending!

Smoothie Recipe With Yogurt and Banana

Prep Time 5 minutes
Total Time 5 minutes
Servings 2 cups
Calories 250
A delicious and nutritious smoothie combining banana, yogurt, and optional add-ins for a customizable treat.

Ingredients

Fruits and Dairy

  • 1 piece ripe banana (fresh or frozen) (peel and break into chunks if fresh)
  • 3/4 cup plain or vanilla Greek yogurt (for extra protein)
  • 1/2 to 3/4 cup milk (dairy or non-dairy) (almond, oat, or soy milk)
  • 1/2 teaspoon honey or maple syrup (optional, adjust to taste)
  • 1/2 teaspoon vanilla extract (optional, boosts flavor)
  • a pinch cinnamon (optional, adds warmth)
  • optional Ice cubes (for a thicker, frostier texture)

Optional Boosts

  • 1 tablespoon nut butter
  • 1 tablespoon chia or flax seeds
  • a handful spinach (for extra nutrients)
  • 1 scoop protein powder (optional)
  • a few frozen berries (optional, for brightness)

Instructions 

  • Peel and break the banana into chunks if fresh, or use frozen banana for creaminess.
  • Pour the milk into the blender, then add yogurt and banana.
  • Add honey or maple syrup, vanilla, and cinnamon if desired.
  • Include optional boosts like nut butter, seeds, greens, or berries.
  • Blend until smooth, then taste and adjust sweetness or spice as needed. Serve immediately.

Notes

Use ripe bananas for natural sweetness and adjust liquid for desired consistency.
Calories: 250kcal
Cost: $8
Course: Breakfast, Snack
Keyword: Banana, Smoothie, Yogurt

Welcome to your new favorite dish! This baked vegetable flatbread is not just delicious; it’s a perfect choice for anyone looking to whip up a quick, healthy meal with simple, wholesome ingredients. Imagine biting into a warm, crispy flatbread topped with a medley of fresh vegetables like zucchini, cherry tomatoes, and onions. It’s a comforting dish that’s full of flavor and easy to prepare, making it ideal for busy weeknights or casual gatherings with friends. Let’s dive into the details of this delightful recipe!

Why You’ll Love This Recipe

  • Quick and simple: This recipe takes less than an hour from start to finish, making it a perfect weeknight meal.
  • Versatile toppings: Customize your flatbread with your favorite veggies or leftovers, ensuring no two flatbreads are the same!
  • Health-conscious: Packed with vegetables, this flatbread is a great way to incorporate more nutrients into your diet.
  • Family-friendly: Kids love the fun shape and toppings, making it an enjoyable meal for everyone.
  • Plant-based delight: Suitable for vegans and vegetarians, this dish is a wonderful addition to any diet.

Ingredients for Baked Vegetable Flatbread

Let’s gather our ingredients! Here’s what you will need:

  • 2 medium zucchinis: Grated for moisture and texture.
  • 7 oz cherry tomatoes: Diced to add sweetness and color.
  • 1 medium onion: Diced to enhance flavor.
  • 1 medium potato: Grated to provide a hearty base.
  • 2 ½ cups flour: Plus extra for dusting.
  • Salt and pepper: To taste.
  • Olive oil: For drizzling and adding richness.

How to Make Baked Vegetable Flatbread

Follow these simple steps to create your delicious baked vegetable flatbread:

Step 1: Prepare Your Veggies

Grate the zucchinis and potato, and dice the onions and cherry tomatoes. Make sure to squeeze out excess moisture from the grated zucchini to prevent a soggy flatbread!

Step 2: Make the Dough

In a large mixing bowl, combine the flour, salt, and pepper. Gradually add water until a dough forms. Incorporate the grated veggies into the dough and mix until well combined.

Step 3: Shape and Bake

Preheat your oven to 400°F (200°C). Roll out the dough on a floured surface to your desired thickness. Transfer to a baking sheet lined with parchment paper. Drizzle with olive oil and spread the diced tomatoes and onions evenly over the top. Bake for about 25-30 minutes or until golden brown.

Pro Tips for Perfect Flatbread

Close-up shot of a freshly baked flatbread featuring a colorful mix of vegetables, including onion and potato.
  • Don’t skip resting: Allow the dough to rest for 10-15 minutes before rolling for better texture.
  • Experiment with spices: Add Italian herbs or spices for an extra flavor boost.
  • Check doneness: Look for a golden color and slight crispiness on the edges.
  • Use a pizza stone: For an even crispier base, bake your flatbread on a preheated pizza stone.
  • Make it personal: Feel free to add cheese, spinach, or other favorite toppings!

Common Mistakes and Troubleshooting

  • Too much moisture: Ensure you squeeze out excess water from vegetables to avoid a soggy flatbread.
  • Under-seasoned dough: Don’t be shy with salt; it enhances the overall flavor.
  • Overbaking: Keep an eye on the flatbread; it can go from perfect to overdone quickly!

Variations on Your Flatbread

Feel free to get creative! Here are some delicious variations:

  • Herbed Flatbread: Add fresh herbs like basil or oregano into the dough for an aromatic twist.
  • Cheesy Delight: Sprinkle shredded cheese on top before baking for a gooey texture.
  • Spicy Kick: Add sliced jalapeños or a sprinkle of crushed red pepper for heat.
  • Garden Medley: Top with a mix of seasonal vegetables such as bell peppers, spinach, or mushrooms.

Storage and Make-Ahead Instructions

This baked vegetable flatbread is best enjoyed fresh, but you can store leftovers in an airtight container in the fridge for up to 3 days. To reheat, place it back in the oven at 350°F (175°C) for about 10 minutes to restore crispiness.

Comprehensive FAQ

  • Can I freeze baked vegetable flatbread? Yes! Wrap tightly in foil or plastic wrap, and freeze for up to 2 months.
  • What can I serve with flatbread? Pair it with a fresh salad, hummus, or your favorite dip for a complete meal.
  • Is this recipe gluten-free? You can substitute all-purpose flour with a gluten-free blend for a gluten-free option.
  • How can I customize the toppings? The flatbread is versatile—feel free to use any vegetables or protein you have on hand!
  • Can I add protein to this recipe? Absolutely! Cooked chicken, beans, or crumbled tofu can be excellent additions.
  • How do I enhance the flavor? Incorporate spices and herbs right into the dough for a richer taste.
  • What’s the best way to serve it? Slice into wedges and serve warm with a drizzle of olive oil or balsamic glaze.
  • How do I know when it’s done? Look for a golden-brown color and a crispy texture on the edges.

Nutrition Tips and Dietary Adaptations

This baked vegetable flatbread is not only tasty but also nutritious! Each serving is packed with vitamins from fresh vegetables. You can easily adapt this recipe to fit various dietary needs:

  • Vegan: This recipe is naturally vegan, making it a great option for plant-based diets.
  • Low-carb: Substitute flour with almond flour or chickpea flour for a low-carb version.
  • Dairy-free: Omit cheese or use a dairy-free alternative for a completely dairy-free dish.

Equipment Recommendations

To make your cooking experience smoother, here are some essential tools:

  • Mixing bowls: A set of different sizes for mixing ingredients.
  • Grater: For easily preparing your vegetables.
  • Baking sheet: A sturdy, non-stick baking sheet is ideal for even cooking.
  • Parchment paper: To prevent sticking and make cleanup a breeze.

Serving Suggestions

Serve your baked vegetable flatbread warm, garnished with fresh herbs, a drizzle of balsamic glaze, or along with a refreshing salad. It’s perfect for a casual dinner or as an appetizer at gatherings. Enjoy!

With this comprehensive guide, you’re now equipped to create a delicious and satisfying baked vegetable flatbread that will impress your family and friends. Remember, cooking is all about confidence and creativity—so have fun with it! Happy cooking!

Baked Vegetable Flatbread

Prep Time 15 minutes
Cook Time 20 minutes
Total Time 35 minutes
Servings 4 pieces
Calories 250
A delicious and healthy flatbread topped with fresh vegetables, perfect for a quick meal or snack.

Ingredients

Vegetables

  • 2 sized Zucchinis (grated)
  • 7 oz Cherry Tomatoes (diced)
  • 1 medium Onion (diced)
  • 1 medium Potato (grated)

Dry Ingredients

  • 2 1/2 cups Flour (plus extra if needed)
  • to taste Salt and Pepper

Other

  • as needed Olive Oil (for drizzling)

Instructions 

  • Preheat oven to 400°F (200°C).
  • Mix grated vegetables with flour, salt, and pepper to form a dough.
  • Divide dough into portions and flatten into rounds on a baking sheet.
  • Top with diced cherry tomatoes and drizzle with olive oil.
  • Bake for 20 minutes until golden and crispy.

Notes

You can add herbs like basil or oregano for extra flavor.
Calories: 250kcal
Cost: $12
Course: Main Course
Cuisine: International
Keyword: Vegetables

Brighten Your Day with a Refreshing Peach Pie Smoothie

Are you looking for a delightful way to kickstart your mornings or refresh your afternoons? Look no further than this Peach Pie Smoothie! Packed with flavor and nutrition, this smoothie combines the sweetness of frozen peaches, the creaminess of yogurt, and the goodness of oats to create a drink that feels indulgent yet healthy. In just a few minutes, you’ll have a thick, frosty treat that’s perfect for any time of the day!

Why You’ll Love This Recipe

This Peach Pie Smoothie is not just another drink; it’s a blend of flavors and nutrition that will leave you feeling satisfied and energized. Here are some reasons why you’ll love it:

  • Quick and Easy: This recipe comes together in just a few minutes, making it a perfect choice for busy mornings.
  • Nutritious Ingredients: With frozen peaches, yogurt, and oats, you’re getting a healthy dose of vitamins, minerals, and fiber.
  • Customizable: Feel free to tweak the ingredients based on your preferences or dietary needs!
  • Deliciously Thick: The addition of oats gives the smoothie a satisfying texture, making it feel like a treat.
  • Kid-Friendly: This peach pie smoothie is a fun and fruity way to get kids excited about healthy eating.

Ingredient Breakdown

Let’s dive into the ingredients that make this smoothie shine. Understanding each component can help you make the best choices for your taste and dietary requirements.

  • Frozen Peach Slices: These provide natural sweetness and a rich peach flavor. If you can’t find frozen peaches, fresh ones can work too; just add a little ice to achieve that frosty texture.
  • Vanilla Yogurt: This adds creaminess and flavor. You can substitute it with Greek yogurt or a dairy-free alternative if needed.
  • Milk: I use oat milk for a subtle flavor, but feel free to choose any milk you prefer, such as almond milk or cow’s milk.
  • Small Banana: A banana adds natural sweetness and creaminess to the smoothie. If you don’t have a banana, you can use a little honey or maple syrup instead.
  • Pure Vanilla Extract: This enhances the overall flavor profile, giving it that delightful hint of vanilla.
  • Ground Cinnamon: A dash of cinnamon complements the peach flavor beautifully, making it feel like a slice of pie.
  • Rolled Oats: These thicken the smoothie and add fiber. If you’re gluten-sensitive, be sure to use certified gluten-free oats.

Pro Tips for the Perfect Smoothie

Side view of a vibrant Peach Pie Smoothie topped with oats, placed on a wooden surface.

To ensure your peach pie smoothie turns out perfectly every time, consider these expert insights:

  • Blend in Stages: If your blender struggles with ice, blend the yogurt and milk first, then add the rest of the ingredients.
  • Adjust Consistency: If your smoothie is too thick, add a splash more milk. If it’s too thin, toss in a few ice cubes.
  • Perfect for Meal Prep: You can prep the ingredients ahead of time. Just store them in a freezer bag, and blend when ready.
  • Add Protein: For an extra boost, consider adding a scoop of protein powder or nut butter.
  • Check Sweetness: Taste before serving and adjust sweetness with a little honey or maple syrup if necessary.
  • Garnish Wisely: Sprinkle a little extra cinnamon on top or add a few slices of fresh peach for an appealing presentation.
  • Experiment: Don’t hesitate to try different fruits or add-ins like chia seeds for a nutritional boost.
  • Enjoy Immediately: This smoothie is best enjoyed fresh, as it can lose its thickness over time.

Common Mistakes and Troubleshooting

Even though this smoothie is simple to make, here are a few common pitfalls and how to avoid them:

  • Too Thick: If your smoothie turns out too thick, simply add more milk or a little water to achieve the desired consistency.
  • Not Blending Enough: Make sure to blend for the full 30 seconds to 1 minute to ensure a smooth and creamy texture.
  • Flavor Imbalance: If the smoothie lacks flavor, consider adding a pinch more cinnamon or a splash of vanilla extract.
  • Using Watery Fruits: If using fresh peaches, ensure they aren’t overly ripe or watery, as this can dilute the flavor.

Variations to Try

Feel free to get creative with your smoothie! Here are some variations you might enjoy:

  • Berry Bliss: Substitute peaches with mixed berries for a tangy twist.
  • Nutty Delight: Add a tablespoon of almond or peanut butter for a nutty flavor and added protein.
  • Green Smoothie: Toss in a handful of spinach or kale for a nutrient boost without altering the taste significantly.
  • Chocolate Peach: Add a tablespoon of cocoa powder for a chocolatey version of this smoothie.

Storage and Make-Ahead Instructions

If you want to prepare your smoothie in advance, here’s how to store it:

  • Refrigerate: You can store the blended smoothie in an airtight container in the fridge for up to 24 hours. However, it’s best enjoyed fresh!
  • Freeze: For longer storage, freeze individual portions in freezer bags. Just blend and enjoy when you’re ready!

Comprehensive FAQ

Here are some frequently asked questions about this peach pie smoothie:

  • Can I use fresh peaches instead of frozen? Yes, but add ice to achieve the desired frosty texture.
  • How can I make it vegan? Use plant-based yogurt and milk; both options work great!
  • Is this smoothie gluten-free? Yes, as long as you use gluten-free oats.
  • Can I add supplements to this smoothie? Absolutely! Protein powder, flaxseed, or chia seeds can enhance nutrition.
  • What’s the best milk to use? Oat milk is great, but feel free to use almond, soy, or cow’s milk based on your preference.
  • How long does it take to make? This smoothie takes about 5 minutes from start to finish.
  • Can I make it without banana? Yes, just add a touch of honey or maple syrup for sweetness.
  • How many servings does this recipe make? This recipe serves one, but you can easily double or triple it!

Nutrition Tips and Dietary Adaptations

This smoothie not only tastes great but can also fit into various dietary needs. Here are some tips:

  • Lower Calorie Option: Use non-fat yogurt and skip the sweeteners if you’re watching your calories.
  • Dairy-Free: Stick to plant-based yogurt and milk for a completely dairy-free smoothie.
  • Protein-Packed: Add a scoop of protein powder for a post-workout recovery drink.

Equipment Recommendations

To make this smoothie, you’ll need a few essential tools:

  • High-Speed Blender: A good blender will ensure your smoothie is perfectly smooth.
  • Measuring Cups: Accurate measurements will help achieve the best flavor and texture.
  • Spatula: Use a spatula to scrape down the sides of the blender to ensure everything is well mixed.

Serving Suggestions

Here are some fun ideas for enjoying your smoothie:

  • Garnish: Top with a sprinkle of cinnamon or some granola for added texture.
  • Pairing: Serve it alongside a light breakfast like whole-grain toast or a fruit salad.
  • Presentation: Pour into a mason jar for a cute and rustic look, perfect for social media snaps!

Wrapping It Up

This Peach Pie Smoothie is not only delicious and refreshing; it’s also a great way to fuel your day with healthy ingredients. Whether you’re sipping it on the go or enjoying it at home, this smoothie is sure to become a favorite. Remember, the key to great cooking—and great smoothies—is to keep experimenting and having fun. So grab your blender, and let’s make some magic happen! Enjoy your peach pie smoothie today!

Peach Pie Smoothie

Prep Time 5 minutes
Total Time 5 minutes
Servings 2 cups
Calories 180
A delicious and creamy peach smoothie perfect for a quick breakfast or snack, blending fresh flavors with wholesome ingredients.

Ingredients

Fruits

  • 1 cup frozen peach slices
  • 0.75 cup vanilla yogurt
  • 0.75 cup milk (I use oat milk, but any milk will do)
  • 1 small banana
  • 0.5 teaspoon pure vanilla extract
  • 0.25 teaspoon ground cinnamon
  • 2-3 tablespoons rolled oats (uncooked)

Instructions 

  • Add all ingredients to your blender: frozen peaches, yogurt, milk, banana, vanilla extract, and cinnamon.
  • Blend until smooth and creamy, about 30 seconds to 1 minute.
  • If too thick, add a splash more milk; if too thin, toss in a couple of ice cubes and blend again.
  • Pour into glasses, sprinkle with a pinch of cinnamon if desired, and enjoy!

Notes

This smoothie is quick to prepare and perfect for a nutritious start to your day.
Calories: 180kcal
Cost: $8
Course: Breakfast, Snack
Cuisine: American
Keyword: Peach, Smoothie

Revitalize Your Morning with a Creamy Mixed Berry Yogurt Smoothie

Welcome to a delightful way to kickstart your day! Imagine waking up to a vibrant Mixed Berry Yogurt Smoothie that’s not only delicious but also packed with nutrients. This easy recipe combines frozen berries, creamy yogurt, and a hint of vanilla for a nutritious breakfast or snack, perfect for busy mornings. Let’s dive into the world of smoothies and discover why this one is a must-try!

Why You’ll Love This Recipe

Here are five reasons to get excited about this berry yogurt smoothie:

  • Quick and Easy: Ready in just a few minutes, this smoothie is a speedy solution for busy mornings.
  • Customizable Ingredients: Use your favorite frozen berries and yogurt types to make this recipe your own.
  • Nutritious Boost: Packed with vitamins and antioxidants, this smoothie supports your health while satisfying your taste buds.
  • Kid-Friendly: A delicious treat that kids will love, making it a great way to sneak in some nutrients!
  • Perfect for Any Time: Whether it’s breakfast, a snack, or a post-workout boost, this smoothie fits any occasion.

Ingredients Breakdown

Let’s take a closer look at the ingredients that make this smoothie special:

  • 1.5 cups frozen berries: A mix of strawberries, raspberries, blueberries, and/or blackberries is ideal. These berries not only provide flavor but also offer numerous health benefits.
  • 1 small banana (optional): This adds extra creaminess and natural sweetness. If you’re avoiding bananas, feel free to skip it or substitute with a tablespoon of honey or agave syrup.
  • 1 cup unsweetened non-dairy yogurt: Choose plain or vanilla varieties. This gives the smoothie a creamy texture without added sugars.
  • 1/2 cup unsweetened almond milk: Plain or vanilla works—the almond milk keeps the smoothie light and dairy-free. You can also use any other non-dairy milk or dairy milk if you prefer.
  • 1 teaspoon vanilla extract: This optional ingredient enhances the flavor, making your smoothie taste even more delightful.

How to Make Your Smoothie

A delicious mixed berry smoothie with visible layers of fruit and yogurt.

Follow these simple steps to create your smoothie:

  1. Gather all your ingredients and a blender.
  2. Start by adding the frozen berries to the blender.
  3. If using, add the banana for creaminess.
  4. Pour in the yogurt and almond milk.
  5. Finally, add the vanilla extract.
  6. Blend on high until smooth and creamy. If it’s too thick, add a splash more almond milk until you reach your desired consistency.
  7. Taste your smoothie! If you’d like it sweeter, consider adding a drizzle of honey or agave syrup.
  8. Pour into a glass and enjoy immediately for the best flavor and texture!

Pro Tips for the Perfect Smoothie

Here are some expert insights to elevate your smoothie-making:

  • Use frozen fruits: They not only chill your smoothie but also make it creamier without needing ice.
  • Layer your ingredients: Start with liquids at the bottom and frozen fruits on top for thorough blending.
  • Adjust sweetness: If your smoothie isn’t sweet enough, add a ripe banana or a splash of maple syrup.
  • Blend in stages: Blend for 30 seconds, stop to scrape down the sides, then blend again for a smoother finish.
  • Experiment with flavors: Add a pinch of cinnamon or a handful of spinach for extra nutrients without altering the taste.
  • Portioning: Make a double batch and store leftovers in the fridge for up to 24 hours—just give it a quick blend before serving.
  • Storage: You can freeze leftover smoothies in ice cube trays for quick smoothie pops!
  • Garnish: Top with some fresh berries or granola for a beautiful presentation.

Common Mistakes and Troubleshooting

Here’s how to avoid common pitfalls:

  • Too thick: Add more almond milk, a little at a time, until you reach the desired consistency.
  • Too sweet: Balance out sweetness by adding a splash of lemon juice or a handful of greens.
  • Not cold enough: Use frozen fruits and chill your almond milk beforehand for a refreshing smoothie.
  • Unbalanced flavors: Taste as you go! Adjust flavors by adding more fruits or yogurt as needed.

Creative Variations

Feeling adventurous? Here are four delicious variations to try:

  • Green Berry Smoothie: Add a handful of spinach or kale for a nutrient boost without compromising flavor.
  • Peanut Butter Berry Smoothie: Toss in a tablespoon of peanut butter for a delicious, protein-packed twist.
  • Coconut Berry Smoothie: Use coconut yogurt and add shredded coconut for a tropical vibe.
  • Chocolate Berry Smoothie: Add a tablespoon of cocoa powder for a rich, indulgent treat.

Storage and Make-Ahead Instructions

This smoothie is best enjoyed fresh, but here’s how to store it if needed:

  • In the fridge: Keep in an airtight container for up to 24 hours. Shake or blend again before drinking.
  • In the freezer: Freeze in ice cube trays or freezer-safe containers for up to 3 months. Blend with a little extra almond milk when you’re ready to enjoy!

FAQs About Mixed Berry Yogurt Smoothies

Here are answers to some common questions:

  • Can I use fresh berries instead of frozen? Yes, but you may need to add some ice to achieve the desired thickness.
  • Is this smoothie vegan? Yes, if you use non-dairy yogurt and milk.
  • Can I add protein powder? Absolutely! Just blend it in with the other ingredients for a protein boost.
  • How can I make it less sweet? Use less banana or add more yogurt to balance the sweetness.
  • What’s the best way to clean my blender? Fill it halfway with warm water and a drop of dish soap, then blend on high for a few seconds and rinse.
  • Can I double the recipe? Yes, just double all ingredients and blend in batches if necessary.
  • What other fruits can I add? Berries work great, but you can also add mango, pineapple, or peaches for a different flavor.
  • How can I make this smoothie more filling? Consider adding oats or a scoop of nut butter for extra fiber and protein.

Nutrition Tips and Dietary Adaptations

Maintaining a balanced diet is crucial, and this smoothie can adapt to fit various dietary needs:

  • For a protein boost: Add Greek yogurt or protein powder.
  • For a gluten-free option: Ensure any added ingredients are certified gluten-free.
  • Low-sugar option: Use less banana and choose unsweetened yogurt and almond milk.
  • Fiber-rich: Add a tablespoon of chia seeds or flaxseeds for extra fiber and omega-3s.

Equipment Recommendations

To make your smoothie-making process easy and enjoyable, here are some essential tools:

  • High-speed blender: A quality blender will ensure a smooth, creamy texture.
  • Measuring cups: Precision in measuring your ingredients can help achieve the best results.
  • Spatula: Useful for scraping down the sides of the blender to ensure everything is blended evenly.

Serving Suggestions

This smoothie pairs wonderfully with:

  • Granola: Sprinkle some homemade or store-bought granola on top for crunch.
  • Whole grain toast: Serve with whole grain toast or a bagel for a satisfying breakfast.
  • Fresh fruit: Add additional fresh berries on the side for a colorful presentation.

Now you’re equipped with all the knowledge to make the perfect Mixed Berry Yogurt Smoothie. Enjoy the process, and most importantly, have fun in the kitchen! Cooking is about confidence and creativity, and this smoothie is just the beginning of your culinary adventure.

Mixed Berry Yogurt Smoothie

Prep Time 5 minutes
Total Time 5 minutes
Servings 2 cups
Calories 180
A delicious and nutritious smoothie combining mixed berries, banana, and non-dairy yogurt for a refreshing treat.

Ingredients

Fruits

  • 2 cups frozen berries mix strawberries, raspberries, blueberries, and blackberries
  • 1 small banana (optional but adds extra creaminess)
  • 1 cup unsweetened non-dairy yogurt plain or vanilla
  • 0.5 cup unsweetened almond milk plain or vanilla
  • 1 teaspoon vanilla extract or ground vanilla bean powder (optional)

Instructions 

  • Add all ingredients to a blender.
  • Blend until smooth and creamy.
  • Pour into glasses and serve immediately.

Notes

You can customize the sweetness by adding a touch of honey or maple syrup if desired.
Calories: 180kcal
Cost: $8
Course: Breakfast, Snack
Cuisine: American
Keyword: Berry, Smoothie, Yogurt