Author

Steven

Browsing

Kickstart Your Mornings with Energizing Banana Oat Protein Pancakes

If you’re looking for a quick, nutritious breakfast that tastes delightful, you’ve landed in the right place! These Banana Oat Protein Pancakes are not just easy to whip up; they’re packed with wholesome ingredients that will fuel your day. Made with just a few simple components like bananas, oats, and eggs, these pancakes deliver a punch of flavor and nutrition that will satisfy your cravings and keep you energized. Ready to dive into a recipe that transforms ordinary mornings into extraordinary ones? Let’s get cooking!

Why You’ll Love This Recipe

  • Quick Prep: These pancakes come together in just 10 minutes, perfect for busy mornings when you need to get out the door.
  • Healthy Ingredients: With ripe bananas and oats, you’re getting natural sweetness and fiber that help keep you full longer.
  • Protein-Packed: With eggs included in the recipe, these pancakes are high in protein, making them a great option for those looking to build muscle or stay satiated.
  • Customizable: You can easily add ingredients like chocolate chips, nuts, or even protein powder to suit your taste preferences.
  • Dietary-Friendly: These pancakes can be made gluten-free by using certified gluten-free oats, making them suitable for a wide range of dietary needs.

Ingredients Breakdown

Here’s what you’ll need to make these delicious pancakes:

  • 1 medium ripe banana: The star of the show, providing natural sweetness and moisture.
  • 2 large eggs: Adds protein and helps bind the ingredients together.
  • 1/3 cup old-fashioned oats: A great source of fiber; you can substitute with gluten-free oats if needed.
  • 1/4 tsp ground cinnamon: For a warm, comforting flavor that complements the banana perfectly.
  • 1 tsp vegetable or coconut oil: Used for greasing the skillet, ensuring your pancakes don’t stick.

Step-by-Step Instructions

Plate of warm banana oat protein pancakes, showcasing their fluffy texture.

Follow these simple steps to bring your pancake dreams to life:

  1. Mash the ripe banana in a bowl until smooth.
  2. Add the eggs and whisk until fully combined.
  3. Blend the oats into a fine flour consistency using a blender or food processor.
  4. Mix the oat flour and cinnamon into the banana-egg mixture until well combined.
  5. Heat a skillet over medium heat and grease it with oil.
  6. Pour 1/4 cup portions of the batter onto the skillet and cook for about 1.5 minutes on each side or until golden brown.
  7. Serve warm with your favorite toppings, such as maple syrup, fresh fruits, or yogurt.

Pro Tips for Perfect Pancakes

  • Watch the Heat: Cooking on medium heat gives you the best chance for a golden brown finish without burning.
  • Don’t Overmix: Mix just until combined. Overmixing can lead to dense pancakes.
  • Use Fresh Bananas: The riper the banana, the sweeter your pancakes will be.
  • Make Ahead: You can prepare the batter the night before and refrigerate it for quick cooking in the morning.
  • Store Leftovers: Keep any leftover pancakes in an airtight container in the fridge for up to 3 days or freeze them for later.
  • Experiment with Flavors: Try adding vanilla extract or even a splash of almond milk for extra flavor.
  • Protein Boost: If you want to increase the protein content further, feel free to add a scoop of your favorite protein powder to the batter.
  • Toppings Matter: Experiment with different toppings—nut butter, berries, or a dollop of Greek yogurt can elevate your pancakes to a new level.

Common Mistakes and Troubleshooting

Even the best cooks can run into issues. Here’s how to avoid common pitfalls:

  • Pancakes are too dense: This can happen if you overmixed the batter. Aim for a light stir until just combined.
  • Pancakes are sticking to the pan: Ensure your skillet is hot enough and well-greased before pouring the batter.
  • Pancakes are too dry: If you find the pancakes dry, try adding a little extra banana or a splash of milk to the batter.
  • Inconsistent cooking: Make sure your skillet is evenly heated. You can test it by sprinkling a few drops of water; if they sizzle, it’s ready!

Variations to Try

Get creative with your pancakes! Here are some fun variations:

  • Chocolate Chip Banana Pancakes: Add a handful of mini chocolate chips to the batter for a sweet twist.
  • Nutty Banana Pancakes: Stir in chopped walnuts or pecans for a crunchy texture.
  • Blueberry Banana Pancakes: Fold in fresh or frozen blueberries for a burst of fruity flavor.
  • Spiced Pumpkin Pancakes: Swap the banana for pumpkin puree and add pumpkin spice for a seasonal treat.

Storage and Make-Ahead Instructions

If you want to enjoy these pancakes throughout the week, here’s how to do it:

  • Refrigerator: Store leftover pancakes in an airtight container in the fridge for up to 3 days.
  • Freezer: Freeze pancakes in a single layer on a baking sheet, then transfer to a zip-top bag. They will last for up to 2 months.
  • Reheating: Reheat pancakes in the microwave for about 30 seconds or in a toaster for a crispy finish.

Nutrition Tips and Dietary Adaptations

These pancakes are not only delicious but also nutritious! Here’s how to make them even better:

  • Boost Fiber: Add a tablespoon of ground flaxseed or chia seeds to the batter for added fiber.
  • Reduce Sugar: If you prefer less sweetness, you can reduce the banana or omit any added sugars in your toppings.
  • Vegan Option: Substitute eggs with flax eggs (1 tablespoon flaxseed meal + 2.5 tablespoons water per egg) and use plant-based milk.

Equipment Recommendations

To make your cooking experience smooth, here’s what I recommend:

  • Non-stick Skillet: A good non-stick skillet ensures easy flipping and minimal sticking.
  • Mixing Bowls: Use medium-sized mixing bowls for combining your ingredients easily.
  • Blender or Food Processor: Ideal for turning oats into flour; if you don’t have one, you can use pre-ground oat flour.

Serving Suggestions

These pancakes are versatile and can be served in various delightful ways:

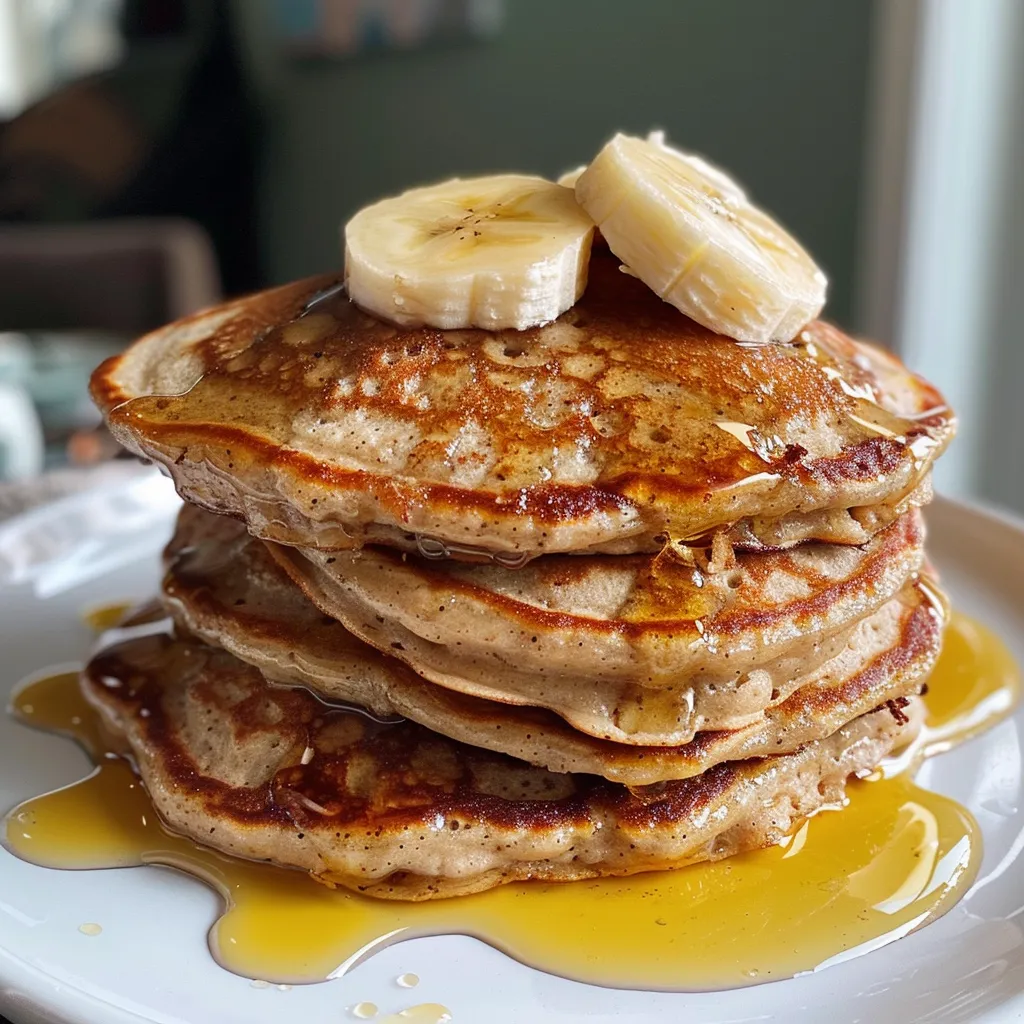
  • Fruit Toppings: Top with sliced bananas, berries, or a drizzle of honey for extra sweetness.
  • Yogurt: A dollop of Greek yogurt can add creaminess and protein.
  • Nut Butters: Spread almond or peanut butter on top for a rich, satisfying flavor.
  • Syrups and Sauces: Maple syrup, agave, or a homemade fruit compote are all great choices.

Frequently Asked Questions

  • Can I use a different type of flour? Yes! You can use whole wheat flour or gluten-free flour blends if you prefer.
  • How do I know when to flip the pancakes? Look for bubbles forming on the surface; this is a sign they are ready to flip.
  • Can I make these pancakes ahead of time? Absolutely! You can prepare the batter and refrigerate it overnight for quick cooking in the morning.
  • What can I use instead of eggs? Flax eggs or unsweetened applesauce work well as substitutes.
  • Are these pancakes suitable for freezing? Yes! Freeze them in a single layer and store them in a zip-top bag for later use.
  • How many pancakes does this recipe make? This recipe typically yields about 4-6 pancakes, depending on the size.
  • Can I add protein powder? Yes! Feel free to mix in a scoop of protein powder to enhance the protein content.
  • How should I store leftovers? Store in an airtight container in the fridge for up to 3 days or freeze for up to 2 months.

Now that you have all the tools and tips needed, it’s time to bring these energizing banana oat protein pancakes into your kitchen! Whether you’re prepping for a busy week or enjoying a leisurely brunch, these pancakes are sure to delight your taste buds and fuel your body. Happy cooking, and remember: cooking should be fun and stress-free—just like this recipe!

Banana Oat Protein Pancakes

Prep Time 5 minutes
Cook Time 5 minutes
Total Time 10 minutes
Servings 2 pancakes
Calories 250
Delicious and healthy banana oat protein pancakes perfect for a quick breakfast or snack.

Ingredients

Main

  • 1 medium ripe banana
  • 2 large eggs
  • 1/3 cup old-fashioned oats (or gluten-free oats)
  • 1/4 tsp ground cinnamon
  • 1 tsp vegetable or coconut oil (for greasing)

Instructions 

  • Mash the banana until smooth.
  • Add eggs and whisk until combined.
  • Blend oats into a fine flour.
  • Mix oat flour and cinnamon into banana-egg mixture.
  • Cook 1/4 cup batter on a greased skillet for 1.5 minutes per side until golden.
  • Serve warm with toppings.

Notes

Use ripe bananas for best flavor and sweetness.
Calories: 250kcal
Cost: $8
Course: Breakfast
Cuisine: American
Keyword: Banana, Healthy, pancakes

Unlock the Secrets of Effortless Chicken Fajita Rice Bowls

If you’re a busy home cook looking to whip up something delicious without spending hours in the kitchen, you’re in the right place! These Chicken Fajita Rice Bowls are not only quick to prepare but also packed with flavor and nutrients. Perfect for casual family dinners or a meal prep option for the week ahead, this recipe combines juicy chicken, vibrant veggies, and fluffy rice in a way that’s satisfying and easy to follow. Let’s dive into why you’ll love this dish!

Why You’ll Love This Recipe

  • Speedy Preparation: This recipe takes only 30 minutes from start to finish, making it ideal for busy weeknights.
  • Flavor Explosion: The marinade infuses the chicken with zesty lime and spicy fajita seasoning, elevating your meal to restaurant-quality.
  • Health-Conscious: Loaded with lean protein and colorful vegetables, these bowls are nutritious without compromising on taste.
  • Meal Prep Friendly: You can easily make a week’s worth of meals in advance, and they store beautifully for easy reheating.
  • Customizable: Tailor the recipe to your taste preferences by adding different proteins, veggies, or toppings.

Ingredient Breakdown

Here’s what you’ll need for these Chicken Fajita Rice Bowls:

  • 1.5 lbs boneless, skinless chicken breasts: A lean protein that cooks quickly and absorbs flavors well.
  • 2 tablespoons olive oil: For marinating and sautéing, providing healthy fats.
  • 1 tablespoon lime juice: Freshly squeezed adds a bright, zesty flavor.
  • 1 packet fajita seasoning: A blend of spices that brings the authentic fajita taste.
  • 1 large onion: Adds sweetness and texture to the dish.
  • 3 bell peppers (assorted colors): For vibrant color and crunch.
  • 1.5 cups uncooked long-grain white rice: The hearty base of your bowl.
  • 3 cups chicken broth or water: For cooking the rice, enhancing its flavor.

Expert Tips for Perfect Bowls

Detailed look at a Chicken Fajita Rice Bowl with glistening chicken and fresh toppings.
  • Marinate Properly: Letting the chicken marinate for at least 15 minutes (or up to 2 hours) maximizes flavor.
  • Rinse the Rice: This step ensures your rice turns out fluffy and not sticky.
  • Cook Chicken Thoroughly: Ensure the chicken is cooked to an internal temperature of 165°F for safety.
  • Use a Hot Skillet: Searing the chicken and veggies at high heat creates a lovely char and enhances flavor.
  • Experiment with Toppings: Consider adding avocado, sour cream, salsa, or fresh cilantro for extra flavor.
  • Store Wisely: Keep the ingredients separate for meal prep to maintain freshness.
  • Try Different Rice Varieties: Swap out white rice for brown rice or quinoa for added nutrients.
  • Make It a Burrito Bowl: Serve over lettuce or in a tortilla for a fun twist!

Step-by-Step Instructions

Now, let’s get cooking!

  1. Marinate the Chicken: In a mixing bowl, combine olive oil, lime juice, fajita seasoning, and any additional spices you like. Add the chicken strips and let them marinate for at least 15 minutes.
  2. Cook the Rice: Rinse the rice until the water runs clear. Combine with chicken broth in a pot or rice cooker and cook according to package instructions until fluffy.
  3. Sauté Vegetables: Heat olive oil in a skillet over medium heat. Sauté sliced onions and bell peppers for about 5–7 minutes until tender.
  4. Cook the Chicken: In the same skillet, add the marinated chicken strips and cook for about 6–8 minutes until fully cooked and slightly charred.
  5. Assemble Bowls: Serve the cooked rice topped with sautéed vegetables and chicken. Add desired toppings such as sour cream, guacamole, salsa, or cheese.

Variations to Try

These Chicken Fajita Rice Bowls can easily be adapted to suit your taste:

  • Protein Swap: Substitute chicken with shrimp, steak, or tofu for a different flavor profile.
  • Vegetarian Version: Use black beans or chickpeas instead of chicken and load up on extra veggies.
  • Spicy Kick: Add jalapeños or a dash of hot sauce to the marinade for a spicy twist.
  • Grain Alternatives: Use quinoa, cauliflower rice, or farro as the base for a new texture and flavor.

Storage and Make-Ahead Instructions

For those busy nights, these bowls are a great meal prep option:

  • Refrigerate: Store leftovers in airtight containers in the fridge for up to 4 days.
  • Freeze: For longer storage, freeze individual portions for up to 3 months. Thaw overnight in the fridge before reheating.
  • Reheat: Warm in the microwave or on the stovetop, adding a splash of water or broth to keep the rice moist.

Frequently Asked Questions

Here are some common questions about making Chicken Fajita Rice Bowls:

  • Can I use frozen chicken? Yes, just ensure it’s thawed before marinating.
  • What if I don’t have fajita seasoning? You can make your own with chili powder, cumin, garlic powder, and paprika.
  • How do I make this dish gluten-free? Ensure your fajita seasoning and chicken broth are gluten-free.
  • Can I add beans? Absolutely! Black beans or pinto beans make great additions.
  • What toppings do you recommend? Try avocado, cheese, sour cream, and fresh cilantro for a delicious finish.
  • How do I store leftovers? Keep in airtight containers in the fridge for up to 4 days.
  • Is this recipe kid-friendly? Yes! It’s colorful and flavorful, making it appealing to kids.
  • Can I make it vegan? Yes, swap the chicken for tofu or tempeh and use vegetable broth.

Nutrition Tips and Dietary Adaptations

This recipe is not only delicious, but it can also align with various dietary preferences:

  • Low-Carb Option: Substitute rice with cauliflower rice for a low-carb meal.
  • High-Protein: Add extra chicken or beans to increase protein content.
  • Low-Calorie: Use less oil and skip high-calorie toppings to keep it light.

Equipment Recommendations

To make your cooking experience seamless, here are some essential tools:

  • Non-stick Skillet: For sautéing the chicken and veggies with ease.
  • Rice Cooker: Makes cooking rice a breeze and ensures perfect results every time.
  • Mixing Bowls: For marinating chicken and mixing ingredients.

Serving Suggestions

These Chicken Fajita Rice Bowls can be enjoyed in various ways:

  • As a Bowl: Serve as a traditional rice bowl topped with all your favorites.
  • In a Wrap: Roll everything in a tortilla for a tasty wrap.
  • Over Salad: Serve over a bed of greens for a refreshing salad option.

In conclusion, these Chicken Fajita Rice Bowls are not just a meal; they’re an experience that brings flavor and joy to your kitchen. With simple ingredients and easy steps, you can impress your family and friends while enjoying the art of cooking. Remember, cooking should be fun and stress-free, so don’t hesitate to experiment and make it your own. Happy cooking!

Chicken Fajita Rice Bowls

Prep Time 15 minutes
Cook Time 30 minutes
Total Time 45 minutes
Servings 4 servings
Calories 550
Enjoy a flavorful and colorful bowl of chicken fajitas served over fluffy rice, perfect for a quick and satisfying meal.

Ingredients

Protein

  • 1.5 lbs boneless, skinless chicken breasts
  • 2 tablespoons olive oil
  • 1 tablespoon lime juice
  • 1 packet fajita seasoning

Vegetables

  • 1 large onion
  • 3 bell peppers bell peppers (assorted colors)
  • 1.5 cups uncooked long-grain white rice
  • 3 cups chicken broth or water

Instructions 

  • Marinate chicken with olive oil, lime juice, and fajita seasoning for 15 minutes.
  • Cook rice in chicken broth until fluffy, about 15 minutes.
  • Sauté sliced onions and peppers in olive oil for 5–7 minutes.
  • Add chicken to skillet and cook until fully cooked, about 6–8 minutes.
  • Assemble bowls with rice, vegetables, and chicken. Add toppings as desired.

Notes

Feel free to add your favorite toppings like sour cream or cheese for extra flavor.
Calories: 550kcal
Cost: $15
Course: Main Course
Cuisine: Mexican
Keyword: Chicken, Fajita, rice

Discover the Magic of Spinach Wraps

Welcome to your new favorite low-carb meal: spinach wraps! These quick and wholesome wraps are not only delicious but also packed with nutrients. If you’re tired of traditional tortillas or looking to add a healthy twist to your meals, this recipe is for you. With just three simple ingredients, you can create a versatile wrap that’s perfect for busy weeknights or a healthy snack. Let’s dive into how to make these delightful spinach wraps!

Why You’ll Love This Recipe

Here are five compelling reasons to give these spinach wraps a try:

  • Quick and Easy: Ready in under 15 minutes, these wraps are perfect for those hectic days.
  • Low Carb and Nutrient-Dense: A fantastic option for those following a low-carb diet, providing essential vitamins and minerals.
  • Customizable: Fill them with your favorite ingredients, from grilled chicken to roasted vegetables, making each wrap unique.
  • Kid-Friendly: A great way to sneak in veggies for picky eaters without them noticing!
  • Gluten-Free: Made entirely from fresh spinach and eggs, these wraps are safe for gluten-sensitive diets.

Ingredients Breakdown

Here’s what you’ll need to make these delicious spinach wraps:

  • 1½ cup fresh spinach: Use fresh spinach for the best flavor and texture. Frozen spinach can make the batter too watery.
  • 3 eggs: The binding agent that gives these wraps their structure. You can substitute with flax eggs for a vegan option.
  • ½ tsp Himalayan salt: Enhances the flavor. Feel free to use sea salt or kosher salt as alternatives.

Step-by-Step Instructions

A juicy low-carb spinach wrap captured from the side, with visible spinach and a soft egg interior.

Ready to get cooking? Follow these simple steps to make your spinach wraps:

  1. Place the spinach, eggs, and salt in a blender.
  2. Blend until smooth. The mixture may seem watery but trust the process; it works!
  3. Heat a tablespoon of olive oil on a non-stick skillet and turn the heat to high. Once at high heat, reduce to medium.
  4. Fill a soup ladle with the batter and pour it onto the skillet.
  5. Tilt the pan in a circular motion so the batter coats the surface evenly.
  6. Cook until the top of the spinach tortilla is no longer wet, is a deep green color, and the bottom is browning. Use a larger silicone spatula to flip the spinach wrap.
  7. Cook on the other side for about 2-3 minutes. Repeat with the remaining batter.

Pro Tips for Perfect Spinach Wraps

To ensure your spinach wraps come out perfectly every time, consider these expert tips:

  • Master the Heat: Keep your skillet at medium heat for even cooking and to avoid burning.
  • Use Fresh Ingredients: Fresh spinach is crucial for flavor; avoid using frozen.
  • Don’t Overmix: Blend just until smooth—overmixing can lead to tough wraps.
  • Experiment with Add-ins: Consider adding herbs or spices to the batter for extra flavor.
  • Storage Matters: Store wraps in parchment paper to prevent sticking.
  • Try Different Oils: Olive oil works well, but avocado or coconut oil can add unique flavors.
  • Use a Non-Stick Skillet: This ensures easy flipping and prevents sticking.
  • Make a Batch: Double the recipe and freeze for quick meals later on.

Common Mistakes and Troubleshooting

Even the best cooks make mistakes! Here are some common pitfalls to avoid:

  • Too Watery: If your batter is too thin, add a bit more spinach to thicken it up.
  • Burning Wrappers: If you notice burning, lower the heat to medium-low and adjust cooking time.
  • Sticking to the Pan: Ensure your skillet is well-oiled and preheated before adding the batter.

Variations to Spice Things Up

Don’t hesitate to experiment with your spinach wraps! Here are four delicious variations:

  • Herbed Spinach Wraps: Add fresh herbs like basil or dill into the batter for an aromatic twist.
  • Spicy Spinach Wraps: Mix in a pinch of cayenne pepper or chili flakes for a kick.
  • Cheesy Spinach Wraps: Stir in some grated cheese to the batter for extra flavor and richness.
  • Vegetable-Infused Wraps: Blend in other greens like kale or Swiss chard for a nutrient boost.

Storage and Make-Ahead Instructions

These wraps can be made ahead of time and stored for convenience:

  • Refrigeration: Store in an airtight container in the fridge for up to 3 days.
  • Freezing: Place parchment paper between wraps and freeze for up to 2 months. Thaw in the refrigerator before using.
  • Reheating: Warm them in a skillet over low heat or in the microwave for a quick meal.

Comprehensive FAQ

Got questions? Here are some common queries about spinach wraps:

  • Can I use frozen spinach? It’s best to use fresh spinach; frozen can make the batter watery.
  • Are these wraps gluten-free? Yes, they are naturally gluten-free!
  • How do I store leftovers? Keep in an airtight container in the fridge for up to 3 days.
  • Can I make these wraps vegan? Yes, substitute eggs with flax eggs for a vegan alternative.
  • What can I fill these wraps with? Fill them with anything from meats to veggies—let your creativity shine!
  • Can I prepare the batter ahead of time? Yes, the batter can be stored in the fridge for up to 24 hours.
  • How thick should I make the wraps? Aim for a thin layer for the best texture, but adjust to your preference.
  • Are these wraps suitable for meal prep? Absolutely! They’re perfect for quick meals throughout the week.

Nutritional Benefits and Dietary Adaptations

These spinach wraps not only taste great but also offer numerous health benefits:

  • Low in Carbs: Ideal for those on a keto or low-carb diet.
  • High in Nutrients: Spinach is rich in vitamins A, C, and K, along with iron and magnesium.
  • Protein-Packed: Eggs add protein, making these wraps filling and satisfying.
  • Versatile for Diets: Easily adaptable for gluten-free, keto, and vegan diets.

Essential Equipment Recommendations

To make the process smoother, here are a few kitchen tools you’ll need:

  • Blender: A good-quality blender is essential for achieving a smooth batter.
  • Non-Stick Skillet: This makes cooking and flipping much easier.
  • Spatula: A silicone spatula is perfect for flipping the wraps without tearing.
  • Ladle: A ladle helps pour the right amount of batter onto the skillet.

Serving Suggestions

Now that you’ve got your spinach wraps, how can you serve them? Here are some delicious ideas:

  • Wrap it up: Fill them with grilled chicken, hummus, and veggies for a complete meal.
  • Dip it: Serve with tzatziki or salsa for a tasty dipping option.
  • Breakfast Style: Add scrambled eggs and avocado for a hearty breakfast wrap.
  • Snack Attack: Roll them with cream cheese and smoked salmon for a quick snack.

These spinach wraps are a fantastic addition to your meal rotation, offering flexibility, nutrition, and flavor. So gather your ingredients and give this recipe a try! You’ll find that cooking can be both fun and rewarding. Enjoy your culinary adventure!

Low carb Spinach Wrap Recipe

Prep Time 5 minutes
Cook Time 10 minutes
Total Time 15 minutes
Servings 2 wraps
Calories 150
A healthy and delicious low-carb spinach wrap made with fresh ingredients, perfect for a quick meal or snack.

Ingredients

Vegetables

  • 1.5 cups fresh spinach
  • 3 eggs eggs
  • 0.5 tsp himalayan salt

Instructions 

  • Blend spinach, eggs, and salt until smooth.
  • Heat olive oil in a skillet over medium heat.
  • Pour batter into skillet and cook until set, then flip.
  • Cook the other side for 2-3 minutes, then repeat with remaining batter.

Notes

This recipe is quick to prepare and perfect for a low-carb diet.
Calories: 150kcal
Cost: $8
Course: Breakfast, Lunch
Cuisine: Healthy
Keyword: Low-Carb, Spinach

There’s nothing quite like a warm bowl of creamy pumpkin soup to comfort your soul, especially as the days grow shorter and the air gets crisper. This creamy pumpkin soup recipe is not just about indulging in delicious flavors; it’s also about the joy of cooking something simple yet satisfying. With just a handful of ingredients, you can create a dish that warms you from the inside out, making it perfect for weeknight dinners or special occasions. Let’s dive into the world of pumpkin soup and explore why this comforting bowl should be a staple in your kitchen!

Why You’ll Love This Recipe

  • Quick and Easy: With minimal prep and cooking time, this soup can be ready in under 30 minutes, making it a perfect choice for busy evenings.
  • Flavorful Comfort: The combination of sweet pumpkin, savory onion, and fragrant garlic creates a rich flavor profile that is both comforting and satisfying.
  • Versatile Ingredients: Use fresh pumpkin or canned puree, and adjust the spices to your liking. This recipe is flexible, allowing you to make it your own!
  • Creamy Texture: The addition of cream or half-and-half gives this soup a luxuriously creamy texture that is sure to impress.
  • Nutritious and Wholesome: Packed with vitamins and nutrients from pumpkin, this soup is not only delicious but also a healthy option for you and your family.

Ingredients Breakdown

This recipe calls for simple ingredients that you may already have in your kitchen. Here’s a detailed breakdown:

  • 2 cups fresh pumpkin chunks or 1 can pure pumpkin puree: If using fresh pumpkin, opt for sugar pumpkins or pie pumpkins for the best flavor. Canned pumpkin is a convenient alternative, just ensure it’s pure pumpkin, not pie filling.
  • 1 medium onion, chopped: Adds sweetness and depth to the flavor base. You can substitute with shallots for a milder taste.
  • 2 cloves garlic, minced: A must for enhancing the overall flavor. You can use garlic powder in a pinch, but fresh is best.
  • 4 cups chicken or vegetable broth: Provides a flavorful base. Homemade broth is great if you have it, but store-bought works just fine!
  • 1 cup heavy cream or half and half: This is what makes the soup deliciously creamy. For a lighter version, you can use coconut milk or a non-dairy substitute.
  • 2 tablespoons butter or olive oil: For sautéing the onion and garlic, choose your favorite fat. Olive oil makes it vegan-friendly.
  • Salt and black pepper, to taste: Essential for enhancing the flavors.
  • 1 pinch nutmeg or cinnamon (optional): These spices add warmth and depth to the soup, making it feel extra cozy.

How to Make Creamy Pumpkin Soup

Ready to make your own creamy pumpkin soup? Follow these simple steps:

  • Step 1: Sauté the Aromatics: In a large pot, melt butter or warm olive oil over medium heat. Add chopped onion and a pinch of salt, cooking until soft and sweet-smelling, about 5-8 minutes. Stir in minced garlic and cook for an additional 30 seconds.
  • Step 2: Add the Pumpkin: Add the pumpkin to the pot, stirring to coat the cubes in the onion and butter.
  • Step 3: Simmer: Pour in the broth until the pumpkin is mostly covered. Bring to a gentle simmer and cook until the pumpkin is very tender, about 15-25 minutes.
  • Step 4: Blend: Blend the mixture until smooth using an immersion blender or a regular blender in batches.
  • Step 5: Finish: Stir in the cream, warm it through, and adjust seasoning with salt and pepper as needed.

Pro Tips for Perfect Pumpkin Soup

A delicious serving of pumpkin soup, showcasing fresh ingredients and spices.
  • Choose the Right Pumpkin: Opt for smaller, sweeter varieties like sugar pumpkins for the best flavor in your soup.
  • Don’t Skip the Simmer: Allowing the soup to simmer ensures the flavors meld beautifully, resulting in a richer taste.
  • Adjust the Creaminess: Feel free to adjust the amount of cream based on your preference. For a lighter soup, reduce the cream or add more broth.
  • Garnish Creatively: Top your pumpkin soup with roasted pumpkin seeds, a drizzle of cream, or a sprinkle of fresh herbs for a beautiful presentation.
  • Use Fresh Herbs: Adding fresh herbs like thyme or parsley can elevate the flavor profile and add a pop of color.
  • Consider a Spice Blend: Add a pinch of cayenne or smoked paprika for an unexpected kick!
  • Make it Ahead: Pumpkin soup stores well in the fridge for 3-4 days, making it a great make-ahead option!
  • Freeze for Later: This soup freezes beautifully, so you can enjoy it long after the pumpkins are out of season.

Common Mistakes and Troubleshooting

A few common pitfalls can affect your pumpkin soup’s flavor and texture. Here’s how to avoid them:

  • Overcooking the Pumpkin: Make sure not to overcook the pumpkin or it may become mushy. Aim for tender cubes that still hold their shape.
  • Skipping the Seasoning: Always taste and adjust seasoning as needed. A little salt and pepper can make a big difference!
  • Using Low-Quality Broth: The broth is a key ingredient; use a high-quality chicken or vegetable broth for the best flavor.
  • Ignoring Texture: If your soup is too thick, add a bit more broth or water. If it’s too thin, simmer it a little longer to reduce.

Variations to Try

Let’s explore some fun variations of this creamy pumpkin soup that you can make:

  • Spicy Pumpkin Soup: Add a teaspoon of cayenne pepper or diced jalapeños for a spicy kick.
  • Coconut Pumpkin Soup: Substitute the cream with coconut milk for a tropical twist that pairs wonderfully with pumpkin.
  • Curried Pumpkin Soup: Add curry powder or paste during the simmering stage for an exotic flavor profile.
  • Roasted Garlic Pumpkin Soup: Roast garlic alongside the pumpkin for a deeper, sweeter flavor.

Storage and Make-Ahead Instructions

This creamy pumpkin soup is perfect for meal prep!

  • Refrigeration: Store leftovers in an airtight container in the fridge for up to 4 days. Reheat gently on the stovetop.
  • Freezing: Allow the soup to cool completely before transferring it to a freezer-safe container. It can be frozen for up to 3 months.
  • Thawing: Thaw in the fridge overnight before reheating. Stir well before serving.

Frequently Asked Questions

Here are some common questions about making creamy pumpkin soup:

  • Can I use canned pumpkin? Yes! Canned pumpkin puree is a great time-saver and works perfectly in this recipe.
  • What’s the best pumpkin to use? Sugar pumpkins and pie pumpkins are ideal for making soups due to their sweetness and texture.
  • Can I make it vegan? Absolutely! Use vegetable broth and substitute the cream with coconut milk or a plant-based cream.
  • How do I thicken the soup? If you prefer a thicker consistency, blend in additional pumpkin or reduce the broth slightly.
  • What can I serve with pumpkin soup? It pairs well with crusty bread, a fresh salad, or grilled cheese sandwiches for a comforting meal.
  • How long does pumpkin soup last? In the fridge, it lasts about 3-4 days. In the freezer, up to 3 months.
  • Do I have to blend the soup? Blending is recommended for a creamy texture, but you can leave it chunky if you prefer.
  • Can I add more spices? Definitely! Feel free to experiment with spices like nutmeg, cinnamon, or even herbs like sage for added flavor.

Nutrition Tips and Dietary Adaptations

This creamy pumpkin soup can be adapted to fit various dietary needs:

  • Low-Carb: Skip the cream or use a low-carb alternative.
  • Dairy-Free: Use coconut milk or almond milk instead of cream.
  • Gluten-Free: This recipe is naturally gluten-free, ensuring everyone can enjoy it!

Equipment Recommendations

For making this creamy pumpkin soup, you will need:

  • Large Pot: A heavy-bottomed pot or Dutch oven is best for even cooking.
  • Immersion Blender: Perfect for blending the soup directly in the pot for easy cleanup.
  • Measuring Cups and Spoons: Accurate measurements ensure the best flavor.
  • Cutting Board and Knife: Essential for chopping your ingredients efficiently.

Serving Suggestions

Serve your creamy pumpkin soup with:

  • Crusty Bread: Perfect for dipping and soaking up all that delicious soup.
  • Fresh Herbs: A sprinkle of fresh parsley or chives can brighten up the presentation.
  • Roasted Pumpkin Seeds: Add a crunchy texture contrast by topping with roasted seeds.
  • Drizzle of Olive Oil: A light drizzle adds flavor and makes it look extra inviting.

In conclusion, this creamy pumpkin soup recipe is a delightful addition to your cooking repertoire. It’s simple, delicious, and adaptable to your tastes. Whether you’re enjoying it on a chilly evening or serving it at a gathering, this soup is sure to warm your heart. So gather your ingredients, follow the steps, and enjoy a comforting bowl of happiness! Happy cooking!

Creamy Pumpkin Soup

Prep Time 10 minutes
Cook Time 25 minutes
Total Time 35 minutes
Servings 4 servings
Calories 250
A warm and comforting soup perfect for fall, blending fresh pumpkin with cream for a smooth, flavorful dish.

Ingredients

Main

  • 2 cups fresh pumpkin chunks or pure pumpkin puree
  • 1 medium onion, chopped
  • 2 cloves garlic, minced
  • 4 cups chicken or vegetable broth
  • 1 cup heavy cream or half and half
  • 2 tablespoons butter or olive oil
  • to taste Salt
  • to taste Black pepper
  • 1 pinch nutmeg or cinnamon (optional)

Instructions 

  • Melt butter or warm olive oil in a large pot over medium heat. Add chopped onion and cook until soft, about 5-8 minutes. Add garlic and cook for 30 seconds.
  • Add pumpkin to the pot, stirring to coat.
  • Pour in broth, bring to simmer, and cook until pumpkin is tender, about 15-25 minutes.
  • Blend until smooth using an immersion or regular blender.
  • Stir in cream, warm through, and season with salt and pepper.

Notes

For a richer flavor, roast the pumpkin before adding to the soup.
Calories: 250kcal
Cost: $12
Course: Soup
Cuisine: American
Keyword: pumpkin

Welcome to a delightful culinary adventure! Today, we’re diving into the world of vibrant flavors with a Citrus Chicken Quinoa Salad that’s perfect for those busy weeknight dinners. This salad is not just a meal; it’s a celebration of fresh ingredients that come together to create a dish full of zest and nutrition. In just a few simple steps, you’ll learn how to prepare a wholesome meal that’s both satisfying and refreshing, making it a staple in your recipe rotation.

Whether you’re an experienced home cook or a beginner just stepping into the kitchen, this recipe will inspire confidence and creativity. By the end of this article, you’ll be equipped with all the tips and tricks you need to master this delicious chicken quinoa salad!

Why You’ll Love This Recipe

  • Quick and Easy: Perfect for busy weeknights, this meal can be prepared in under 30 minutes, making dinner stress-free.
  • Nutrient-Dense: Packed with protein from chicken and quinoa, along with vitamins from fresh veggies, it’s a healthful choice.
  • Flavor Explosion: The combination of citrus juices and fresh herbs adds a zesty kick that brightens up your meal.
  • Customizable: Feel free to personalize your salad with different veggies, proteins, or dressings according to your taste.
  • Meal Prep Friendly: Make this salad in advance, store it in the fridge, and enjoy it throughout the week!

Ingredients Breakdown

Let’s explore the ingredients that make this Citrus Chicken Quinoa Salad so special. Each component plays a vital role in delivering flavor and nutrition.

  • Chicken: 2 boneless, skinless chicken breasts provide lean protein. For a quicker option, you can use rotisserie chicken or grilled chicken strips.
  • Quinoa: 1 cup of cooked quinoa not only adds texture but is also a complete protein source. Substitute with brown rice or farro if desired.
  • Citrus: Freshly squeezed juice from 1 orange and zest from 1 lemon infuse the salad with bright flavors. Feel free to mix in lime juice for a different twist.
  • Greens: 2 cups of arugula bring a peppery note, but you can use spinach or mixed greens as alternatives.
  • Avocado: 1 sliced avocado adds creaminess and healthy fats; you can replace it with diced cucumbers if you prefer.
  • Red Cabbage: 0.5 cup shredded red cabbage contributes color and crunch. Other options include shredded carrots or bell peppers.
  • Pomegranate Seeds: 0.25 cup for a pop of sweetness and juiciness, can be swapped with nuts like almonds or walnuts.
  • Dressing: Made from 1 tbsp olive oil, 1 tsp Dijon mustard, and 1 minced garlic clove, this dressing ties all the flavors together. You can experiment with honey or balsamic vinegar for additional depth.

Step-by-Step Instructions

Ready to create your own Citrus Chicken Quinoa Salad? Let’s break it down into simple, actionable steps:

  1. Marinate the chicken in a mixture of orange juice, lemon zest and juice, minced garlic, Dijon mustard, and olive oil for at least 30 minutes. This ensures maximum flavor and tenderness.
  2. Grill or sear the chicken over medium heat until it’s cooked through and golden brown, about 6-7 minutes per side. Let the chicken rest for a few minutes before slicing it into strips.
  3. In a small bowl, whisk together the dressing ingredients: citrus juices, olive oil, and seasonings to taste. Adjust the flavors as needed.
  4. In a large bowl, layer the cooked quinoa, arugula, shredded cabbage, sliced avocado, and pomegranate seeds.
  5. Top with the sliced chicken and drizzle with the prepared dressing just before serving. Toss gently to combine.

Pro Tips for the Perfect Salad

Detailed view of a Citrus Chicken Quinoa Salad with arugula and shredded cabbage.
  • Marination Time: Don’t rush the marination! Allowing the chicken to soak up the flavors for longer enhances the overall taste.
  • Cook Quinoa Properly: Rinse quinoa before cooking to remove bitterness, and use a 2:1 water-to-quinoa ratio for fluffy results.
  • Fresh Ingredients: Always opt for fresh, high-quality ingredients to elevate the flavors of your dish.
  • Customize Your Dressing: Experiment with different herbs and spices in your dressing for a unique twist each time.
  • Use Leftovers Creatively: Transform leftover salad into a wrap or add it to tacos for another delicious meal.
  • Store Dressing Separately: If meal prepping, store the dressing separately to keep your greens fresh.
  • Season to Taste: Don’t shy away from seasoning your salad with salt and pepper to enhance the flavors.
  • Garnish Wisely: Consider garnishing with fresh herbs like cilantro or parsley for an added layer of freshness.

Common Mistakes to Avoid

Even the best cooks can make mistakes. Here are a few common pitfalls to watch out for:

  • Overcooking Chicken: Keep an eye on the chicken as it cooks to avoid dryness—use a meat thermometer to check for doneness (165°F).
  • Using Too Much Dressing: Start with a small amount of dressing and add more as needed to avoid sogginess.
  • Skipping the Marination: Marinating the chicken is crucial for flavor—don’t skip this step!
  • Not Rinsing Quinoa: Failing to rinse quinoa can result in a bitter flavor; always rinse before cooking.

Variations of Citrus Chicken Quinoa Salad

Get creative! Here are some delicious variations you can try:

  • Spicy Twist: Add sliced jalapeños or a dash of cayenne pepper to the dressing for a spicy kick.
  • Asian-Inspired: Swap the dressing for a sesame soy vinaigrette and include edamame and mandarin oranges.
  • Protein Swap: Use grilled shrimp or tofu instead of chicken for a different protein option.
  • Seasonal Veggies: Incorporate seasonal vegetables like roasted sweet potatoes or zucchini for a hearty touch.

Storage and Make-Ahead Instructions

This salad is excellent for meal prep! Here’s how to store it:

  • Refrigerate: Store the salad in an airtight container for up to 3-4 days. Keep the dressing separate until ready to serve.
  • Make Ahead: Prepare the quinoa, chop the veggies, and marinate the chicken a day in advance to save time.

Frequently Asked Questions

Got questions? Here are some common inquiries about this salad:

  • Can I make this salad vegan? Absolutely! Substitute chicken with chickpeas or grilled tofu and use a vegan dressing.
  • How do I keep quinoa from getting mushy? Rinse quinoa before cooking and use the right water-to-quinoa ratio.
  • What can I use instead of pomegranate seeds? Diced apples, raisins, or dried cranberries work wonderfully as substitutes.
  • Can I use frozen chicken? Yes, but ensure it’s fully thawed before marinating and cooking.
  • Is quinoa gluten-free? Yes, quinoa is a gluten-free grain, making it perfect for those with gluten sensitivities.
  • How can I add more flavor to the chicken? Consider using a spice rub or additional herbs in the marinade for an extra flavor boost.
  • What if I don’t have Dijon mustard? You can use yellow mustard or skip it entirely; the salad will still be delicious!
  • Can this salad be frozen? It’s best enjoyed fresh; freezing may change the texture of the veggies.

Nutritional Tips and Dietary Adaptations

This Citrus Chicken Quinoa Salad not only tastes great but also offers a variety of health benefits:

  • High Protein: With chicken and quinoa, this salad is packed with protein to keep you full and energized.
  • Rich in Fiber: The inclusion of vegetables and quinoa adds fiber, promoting digestion and health.
  • Healthy Fats: Avocado provides monounsaturated fats that are good for heart health.
  • Gluten-Free Option: Perfect for gluten-sensitive individuals, as all ingredients are naturally gluten-free.

Equipment Recommendations

Here are some kitchen tools that can make your cooking experience smoother:

  • Grill Pan: A good grill pan helps achieve those perfect grill marks on your chicken.
  • Meat Thermometer: Essential for ensuring your chicken is cooked to perfection without drying out.
  • Whisk: A simple whisk is perfect for mixing up salad dressings evenly.
  • Cutting Board: A sturdy cutting board is important for chopping vegetables safely and efficiently.

Serving Suggestions

Serve your salad with a variety of accompaniments to enhance the meal:

  • Pair with Bread: Serve alongside warm pita or crusty bread for a complete meal.
  • Top with Cheese: Crumbled feta or goat cheese adds a creamy, tangy element to the salad.
  • Fresh Herbs: Garnish with fresh herbs like cilantro or basil for an aromatic finish.
  • Enjoy Cold or Warm: This salad is delicious served cold or at room temperature, making it versatile for any occasion.

Conclusion

Your journey to mastering the Citrus Chicken Quinoa Salad is just the beginning. With its vibrant flavors and nutritious ingredients, this dish truly shines as a go-to option for any meal. Remember, cooking is all about experimenting and having fun. Don’t hesitate to make this recipe your own—whether it’s adding your favorite veggies or tweaking the dressing. Enjoy the process, and happy cooking!

Citrus Chicken Quinoa Salad

Prep Time 15 minutes
Cook Time 20 minutes
Total Time 35 minutes
Servings 4 servings
Calories 450
A fresh and vibrant salad combining grilled chicken, quinoa, and citrus flavors for a healthy, satisfying meal.

Ingredients

Main

  • 2 pieces chicken breasts (boneless, skinless)
  • 1 cup cooked quinoa
  • 1 orange orange (juiced)
  • 1 lemon lemon (zested and juiced)
  • 2 cups arugula
  • 1 avocado avocado (sliced)
  • 0.5 cup red cabbage (shredded)
  • 0.25 cup pomegranate seeds
  • 1 tbsp olive oil
  • 1 tsp Dijon mustard
  • 1 clove garlic (minced)
  • to taste salt & pepper

Instructions 

  • Marinate chicken in citrus juice, zest, garlic, mustard, and oil for 30 minutes.
  • Grill or sear chicken until cooked, then rest and slice.
  • Whisk together citrus juices, oil, and seasonings to make dressing.
  • Layer cooked quinoa, arugula, cabbage, avocado, and pomegranate in a bowl.
  • Add sliced chicken on top and drizzle with dressing before serving.

Notes

Use fresh citrus for the best flavor and adjust seasoning as needed.
Calories: 450kcal
Cost: $15
Course: Salad
Cuisine: Fusion
Keyword: Chicken, Citrus, quinoa

Start Your Day Right with a Delicious Berry Protein Smoothie

If you’re looking for a quick, nutritious, and delicious way to fuel your mornings, you’ve come to the right place! Our Ultimate Triple Berry Protein Smoothie not only tastes great but also packs a punch with essential nutrients. This berry smoothie is perfect for breakfast or as a post-workout snack. With just a few simple ingredients, you can whip up a drink that’s both satisfying and energizing. Let’s dive into this healthy berry protein smoothie recipe that will give your day the boost it needs!

Why You’ll Love This Recipe

This smoothie isn’t just a treat for your taste buds; it’s loaded with benefits that make it a fantastic choice for any time of the day. Here are five reasons why you’ll love our Triple Berry Protein Smoothie:

  • Nutrient-Rich: It’s packed with antioxidants from mixed berries that help combat free radicals and support overall health.
  • High in Protein: With the addition of Greek yogurt and protein powder, this smoothie offers a satisfying protein boost that keeps you full longer.
  • Quick & Easy: Ready in under five minutes, this smoothie is perfect for busy mornings or a quick snack.
  • Customizable: Feel free to swap ingredients or add extra superfoods to make it your own!
  • Deliciously Flavorful: The blend of mixed berries and vanilla creates a smooth, sweet flavor that’s irresistible.

Ingredients Breakdown

Let’s take a closer look at the ingredients that make this smoothie a winner!

  • 1 cup frozen mixed berries: A combination of blueberries, raspberries, and strawberries provides a burst of flavor and a wealth of vitamins.
  • ¾ cup unsweetened almond milk: This dairy-free alternative keeps the smoothie creamy without added sugars.
  • ½ cup vanilla Greek yogurt: Adds protein and creaminess, making the smoothie rich and satisfying.
  • 1 scoop vanilla protein powder: Enhances the protein content, perfect for post-workout recovery.
  • 1 tsp honey or maple syrup (optional): Sweeten to taste if you prefer a sweeter smoothie.
  • ½ cup ice cubes (optional): For an extra thick and icy texture.

Expert Tips for the Perfect Smoothie

Refreshing protein smoothie showcasing blueberries, raspberries, and strawberries.

To ensure your smoothie is smooth, creamy, and utterly delicious, here are some expert tips:

  • Add liquid first: Pour the almond milk into the blender first; this helps the blades move smoothly and prevent clumping.
  • Use frozen fruit: Frozen berries not only add thickness but also keep your smoothie cold and refreshing.
  • Blend in stages: If your blender struggles, blend the liquid and yogurt first, then add the frozen berries.
  • Customize sweetness: Adjust the sweetness by tasting as you blend. You can always add more honey or maple syrup.
  • Experiment with superfoods: Add chia seeds, flaxseeds, or spinach for an extra nutrient boost.
  • Store extras wisely: If you make too much, store extra smoothie in an airtight container in the fridge for up to 24 hours.
  • Consider a smoothie bowl: Pour your smoothie into a bowl and top with fresh fruit, nuts, and seeds for added texture.
  • Choose quality protein powder: Opt for a natural protein powder without additives for the healthiest option.

Common Mistakes to Avoid

Even the best recipes can go wrong! Here are some common mistakes and how to avoid them:

  • Using too much liquid: This can make your smoothie watery instead of creamy. Stick to the recommended amounts.
  • Not blending long enough: Ensure you blend until smooth; chunks of fruit can be unappetizing.
  • Choosing low-quality ingredients: Invest in good-quality yogurt and protein powder for the best flavor.
  • Skipping the ice: If you prefer a cold smoothie, don’t forget the ice cubes!
  • Ignoring texture preferences: Adjust the thickness by adding more liquid or frozen fruit as desired.

Variations to Try

This recipe is super versatile! Here are some fun variations you can try:

  • Chocolate Berry Protein Smoothie: Substitute chocolate protein powder for vanilla for a richer flavor.
  • Berry Banana Smoothie: Add half a banana for added creaminess and natural sweetness.
  • Green Berry Smoothie: Toss in a handful of spinach or kale for a nutrient boost without sacrificing flavor.
  • Nutty Berry Smoothie: Add a tablespoon of almond butter or peanut butter for a nutty twist and extra protein.

Storage and Make-Ahead Instructions

If you want to prep ahead, here are some handy tips:

  • Make smoothie packs: Pre-portion your frozen berries and other ingredients in freezer bags. Just add liquid and blend when you’re ready!
  • Store in the fridge: If you have leftover smoothie, store it in an airtight container in the fridge for up to 24 hours. Shake well before drinking.
  • Freeze leftovers: If you want to keep it longer, freeze the smoothie in ice cube trays. Blend the cubes later for a quick treat!

Frequently Asked Questions

Here are some frequently asked questions about our Triple Berry Protein Smoothie:

  • Can I use fresh berries instead of frozen? Yes, but you may need to add ice to achieve the desired thickness.
  • What can I substitute for almond milk? You can use any milk of your choice, such as cow’s milk, oat milk, or soy milk.
  • How can I make this smoothie dairy-free? Use dairy-free yogurt and a non-dairy milk alternative.
  • Is this smoothie good for meal prep? Yes, it’s perfect for meal prep! Just blend fresh ingredients when you’re ready to enjoy.
  • How many servings does this recipe make? This recipe yields one generous serving or two smaller servings.
  • Can I include other fruits? Absolutely! Feel free to mix in your favorite fruits like mango or pineapple.
  • How do I make it less sweet? Reduce the amount of honey or syrup, or opt for unsweetened yogurt.
  • What’s the best time to drink this smoothie? It’s great for breakfast, a snack, or post-workout recovery!

Nutrition Tips and Dietary Adaptations

For those watching their nutrition, here are some additional tips:

  • Low-carb option: Skip the honey and use unsweetened yogurt to keep carbs low.
  • Boost fiber: Add a tablespoon of chia seeds or flaxseeds for extra fiber and omega-3 fatty acids.
  • Vegan version: Use plant-based yogurt and protein powder for a vegan-friendly option.

Equipment Recommendations

Here are some kitchen tools that will make blending your smoothie easier:

  • High-speed blender: A powerful blender ensures everything blends smoothly without chunks.
  • Measuring cups: Accurate measurements help achieve the perfect consistency.
  • Spatula: Use this to scrape down the sides of the blender for thorough mixing.

Serving Suggestions

Ready to enjoy your smoothie? Here are some fun ways to serve it:

  • In a glass: Enjoy it straight from a glass for a refreshing drink.
  • As a smoothie bowl: Pour into a bowl and top with fresh berries, seeds, and nuts for added texture.
  • With a straw: A reusable straw makes it easy to sip on the go!

With this comprehensive guide to our Ultimate Triple Berry Protein Smoothie, you’re well-equipped to create a delicious and nutritious drink that’s perfect for any occasion. Remember, cooking is about having fun and being creative, so don’t hesitate to experiment with flavors and textures. Enjoy the process and the delicious results!

The Best Triple Berry Protein Smoothie Recipe – A Healthy Berrylicious Shake

Prep Time 5 minutes
Total Time 5 minutes
Servings 1 cup
Calories 250
This delicious and nutritious berry smoothie is perfect for a quick breakfast or post-workout boost, packed with antioxidants and protein.

Ingredients

Fruits

  • 1 cup frozen mixed berries (blueberries, raspberries, strawberries)
  • 0.75 cup unsweetened almond milk
  • 0.5 cup vanilla Greek yogurt
  • 1 scoop vanilla protein powder
  • 1 tsp honey or maple syrup (optional) (optional)
  • 0.5 cup ice cubes (optional) (optional)

Instructions 

  • Pour almond milk into the blender.
  • Add berries, yogurt, protein powder, and sweetener if using.
  • Blend on high for 30–45 seconds until smooth.
  • Add more almond milk or berries to adjust thickness.
  • Pour into a glass and enjoy immediately.

Notes

For a creamier texture, add more yogurt or ice.
Calories: 250kcal
Cost: $10
Course: Breakfast, Snack
Cuisine: Healthy
Keyword: Berry, Protein

Kickstart Your Morning with This Flavorful High Protein Smoothie

Welcome, fellow kitchen adventurers! If you’ve ever struggled with busy mornings and the task of fueling your day with something nutritious, you’re in the right place. Today, we’re blending up a delightful High Protein Peanut Butter Banana Smoothie that’s not only easy to whip up but also packed with flavor and nutrients. This smoothie is perfect for a quick breakfast on the go or as a satisfying post-workout boost. With just a handful of ingredients, you’ll have a delicious drink that energizes your day and keeps you feeling good.

Why You’ll Love This Recipe

This smoothie is more than just a tasty treat—it’s a powerhouse of nutrition. Here are five reasons you’ll absolutely adore it:

  • Quick and Easy: With a prep time of just 5 minutes and no cooking required, this smoothie fits perfectly into your hectic schedule.
  • High Protein Content: Each serving is loaded with protein, thanks to the peanut butter and optional protein powder, making it ideal for muscle recovery and energy.
  • Nutritious Ingredients: Packed with potassium from bananas and omega-3s from chia or flaxseeds, this smoothie offers a range of health benefits in every sip.
  • Customizable Flavor: You can easily tweak this recipe to suit your taste by adding ingredients like cocoa powder or spinach for an extra nutritional boost.
  • Kid-Friendly: This smoothie is perfect for kids, making it a great way to sneak in some healthy ingredients while still tasting delicious.

Ingredient Breakdown

Let’s dive into the ingredients that make this smoothie a winner!

  • 1 medium ripe banana: The star of the show! Bananas provide natural sweetness and a creamy texture.
  • 2 tablespoons peanut butter: Choose unsweetened peanut butter for a rich flavor without added sugars. This ingredient also brings in healthy fats and protein.
  • 1 cup milk: Use your preferred type—dairy, soy, or almond milk—to achieve the desired creaminess.
  • 1 tablespoon chia seeds or flaxseeds: These tiny seeds are packed with nutrients and add a fun texture to your smoothie.
  • 1 teaspoon honey or date syrup (optional): For those who like a bit of extra sweetness, this is a great optional addition.
  • Ice cubes (optional): If you want your smoothie to be extra cold and refreshing, toss in some ice cubes!

How to Make a High Protein Peanut Butter Banana Smoothie

Vibrant Peanut Butter Banana Smoothie in a glass, with a ripe banana and honey jar placed nearby.

Follow these simple steps to create your smoothie:

  1. Add the banana, peanut butter, milk, and seeds to a blender.
  2. Blend until smooth and creamy, ensuring all ingredients are well incorporated.
  3. Taste the smoothie and add honey or date syrup if needed to adjust sweetness.
  4. Pour into a glass and serve immediately for the best flavor and texture.

Pro Tips for the Perfect Smoothie

To ensure your smoothie turns out perfectly every time, keep these tips in mind:

  • Add liquids first: This helps your blender to mix more easily, resulting in a smoother texture.
  • Use frozen bananas: For an extra creamy and cool smoothie, freeze your bananas ahead of time.
  • Don’t over-blend: Blend just until smooth to avoid a watery consistency.
  • Experiment with flavors: Try adding a tablespoon of cocoa powder or a handful of spinach for extra nutrition.
  • Protein boost: Consider adding a scoop of your favorite protein powder to increase the protein content even further.
  • Chill your glass: For a refreshing experience, chill your glass in the freezer before pouring in your smoothie.
  • Storage tips: Make a double batch and store half in the fridge for up to 24 hours; just give it a good shake before enjoying.
  • Blend with care: If using a high-powered blender, start on low and gradually increase to high to avoid splashing.

Common Mistakes and Troubleshooting

Even the best of us make mistakes in the kitchen. Here are some common pitfalls and how to avoid them:

  • Too thick?: If your smoothie turns out thicker than you like, simply add a splash more milk and blend again.
  • Too sweet?: Balance out excessive sweetness with a pinch of salt or a bit of unsweetened cocoa powder.
  • Not enough flavor?: Experiment with spices like cinnamon or vanilla extract to enhance the overall taste.
  • Separation?: If your smoothie separates after sitting, just give it a good shake before drinking.

Delicious Variations

Here are some fun twists on the classic peanut butter banana smoothie that you can try:

  • Chocolate Peanut Butter Banana Smoothie: Add 1 tablespoon of cocoa powder for a delicious chocolate twist.
  • Green Protein Smoothie: Toss in a handful of spinach for added vitamins without compromising flavor.
  • Berry Banana Smoothie: Blend in ½ cup of mixed berries for a fruity and vibrant smoothie.
  • Nutty Banana Smoothie: Substitute peanut butter with almond or cashew butter for a different nutty flavor.

Storage and Make-Ahead Instructions

Want to prepare this smoothie in advance? Here’s how:

  • Make-Ahead Packs: Pre-portion your ingredients into freezer bags (banana, peanut butter, seeds) and store them in the freezer. Just add milk and blend when you’re ready!
  • Refrigerate: If you make a batch ahead of time, store it in an airtight container in the fridge and consume within 24 hours for the best taste.

Frequently Asked Questions (FAQ)

Got questions? We’ve got answers! Here are some of the most common inquiries about this smoothie:

  • Can I use other nut butters? Yes! Almond butter or sunflower seed butter are great alternatives.
  • Is this smoothie vegan? Absolutely! Just use a plant-based milk and ensure your peanut butter is vegan-friendly.
  • Can I add greens? Definitely! Spinach or kale can be added without affecting the flavor significantly.
  • How can I make it lower in calories? Use less peanut butter and opt for unsweetened almond milk for a lighter version.
  • What if I don’t have chia seeds? You can substitute with flaxseeds or omit them altogether.
  • Is this good for weight loss? Yes, it’s a satisfying snack that can help curb hunger without excess calories.
  • Can I use flavored protein powder? Yes, flavored protein powder can add an extra layer of taste!
  • How long does it take to make? This smoothie takes less than 5 minutes to prepare!

Nutritional Tips and Dietary Adaptations

This smoothie can easily fit into various dietary plans. Here are some tips:

  • For a low-carb version: Use unsweetened almond milk and reduce the banana to half.
  • High-fiber option: Add a tablespoon of oats to increase fiber content.
  • For added calcium: Use fortified plant milk or add a scoop of yogurt.
  • Nut-free alternative: Replace peanut butter with sunflower seed butter for a nut-free option.

Equipment Recommendations

To make your smoothie-making experience seamless, here are some essential tools:

  • High-powered blender: A good blender will ensure a smooth and creamy texture.
  • Measuring cups and spoons: For accurate ingredient measurements.
  • Spatula: Useful for scraping down the sides of the blender to incorporate all ingredients.

Serving Suggestions

This smoothie is not just a drink; it’s a versatile dish! Here are some serving ideas:

  • Enjoy as a quick breakfast: Pair with a slice of whole-grain toast for a balanced meal.
  • Post-workout recovery: Perfect after a workout to replenish energy and protein.
  • Kid-friendly snack: Serve in fun cups with colorful straws to make it appealing for kids.

And there you have it! This High Protein Peanut Butter Banana Smoothie is not just a recipe; it’s a way to transform your mornings and enjoy a nutritious boost that fits seamlessly into your lifestyle. So grab your blender and start creating something delicious today. Happy blending!

High Protein Peanut Butter Banana Smoothie

Prep Time 5 minutes
Total Time 5 minutes
Servings 1 serving
Calories 350
A delicious and nutritious smoothie packed with protein, perfect for a quick breakfast or snack.

Ingredients

Fruits

  • 1 medium ripe banana

Nut Butters

  • 2 tablespoons peanut butter (unsweetened is best)

Liquids

  • 1 cup milk (dairy, soy, or almond milk)

Seeds & Sweeteners

  • 1 tablespoon chia seeds or flaxseeds
  • 1 teaspoon honey or dates syrup (optional)

Ice (optional)

  • Ice cubes Ice cubes (optional)

Instructions 

  • Add the banana, peanut butter, milk, and seeds to a blender.
  • Blend until smooth and creamy.
  • Taste and add honey if needed.
  • Pour into a glass and serve immediately.

Notes

For extra creaminess, add a few ice cubes before blending.
Calories: 350kcal
Cost: $5
Course: Breakfast, Snack
Cuisine: American
Keyword: Protein, Smoothie

Are you looking for a quick, nutritious, and satisfying lunch option that doesn’t skimp on flavor? Look no further! This Creamy Chicken Salad Wrap is not only easy to prepare but also packed with protein and fresh ingredients that will make your taste buds dance. Perfect for busy weekdays or leisurely weekends, this wrap is a delightful way to enjoy a classic dish with a modern twist. In this comprehensive guide, we’ll explore everything from the ingredients to expert tips for a perfect wrap, ensuring you have all the tools you need to create this delicious meal.

Why You’ll Love This Recipe

  • Quick and Easy: This recipe takes just 15-20 minutes to prepare, making it ideal for busy days when you need something satisfying without the hassle.
  • Versatile Ingredients: You can customize the chicken salad mixture to suit your taste, using whatever fresh ingredients you have on hand.
  • Nutritious and Filling: With a balance of protein from chicken and healthy fats from yogurt and mayonnaise, this wrap will keep you energized throughout the day.
  • Perfect for Meal Prep: Make a batch ahead of time, and enjoy it for lunches all week long—just store it in an airtight container!
  • Kid-Friendly: This wrap is a hit with both kids and adults, making it a fantastic option for family lunches or picnics.

Ingredient Breakdown

To create the perfect chicken salad wrap, you’ll need the following ingredients:

  • 14 oz cooked and shredded chicken: This can be rotisserie, poached, or leftover grilled chicken. It provides a hearty base for your salad mixture.
  • 1.5 tsp Dijon mustard: Adds a tangy flavor that enhances the overall taste. You can substitute with whole grain mustard for a different twist.
  • 2 oz plain yogurt: Unsweetened or Greek yogurt adds creaminess while keeping it lighter than using all mayonnaise.
  • 4 oz mayonnaise: Preferably Hellmann’s or a low-fat version, it brings richness and flavor to the chicken salad.
  • 0.5 tsp dried dill: For a fresh, herby note. Fresh dill or parsley can also be used for an updated flavor.
  • 1 oz Parmesan cheese: Grated or nutritional yeast for a dairy-free option adds depth and flavor.
  • 2 green onions: Thinly sliced for a mild onion flavor and crunch.
  • 0.5 carrot: Grated to add sweetness and texture.
  • 1.5 oz spinach: Roughly chopped to infuse freshness and nutrients.
  • 1 oz tomatoes: Diced or halved cherry tomatoes to introduce juiciness and flavor.
  • 1 stalk celery: Finely diced to add crunch and freshness.
  • 6 flour or whole wheat tortillas: Or gluten-free tortillas to wrap everything up.
  • 0.5 lemon zest and juice: From half a lemon or lime to brighten the flavors.
  • 1 pinch black pepper: To season to taste.

Step-by-Step Instructions for Your Creamy Chicken Salad Wrap

Follow these simple steps to create your delicious chicken salad wrap:

  1. In a large bowl, combine the shredded chicken, Dijon mustard, yogurt, mayonnaise, dried dill, and Parmesan cheese. Mix well until all ingredients are combined.
  2. Add in the green onions, grated carrot, chopped spinach, diced tomatoes, and finely diced celery. Stir gently to incorporate.
  3. Season the mixture with lemon zest, lemon juice, and black pepper, adjusting to taste.
  4. Lay out your tortilla on a clean surface, and spoon a generous amount of chicken salad mixture onto the center.
  5. Wrap the tortilla tightly around the filling, folding in the sides as you roll it up from the bottom. Cut in half if desired.
  6. Serve immediately, or wrap in foil or parchment paper for an on-the-go meal.

Expert Tips for the Best Chicken Salad Wrap

Tasty creamy chicken salad wrap featuring shredded chicken and fresh greens.
  • Choose Quality Ingredients: Fresh, quality ingredients make a significant difference in flavor. Opt for high-quality mayonnaise and fresh vegetables.
  • Adjust to Your Taste: Feel free to add other ingredients you love, such as nuts for crunch or fruits like grapes for sweetness.
  • Texture Matters: Incorporate a variety of textures—crunchy veggies, creamy dressing, and tender chicken create a satisfying bite.
  • Chill Before Serving: Let the chicken salad sit in the fridge for about 30 minutes before serving to allow the flavors to meld.
  • Wrap It Up: When wrapping, ensure it’s tight to prevent the filling from spilling out.
  • Don’t Overmix: Gently fold the ingredients to maintain the chicken’s texture and prevent it from becoming mushy.
  • Experiment with Spices: Try adding spices like smoked paprika or cayenne for a little kick.
  • Perfect for Leftovers: Use leftover grilled chicken or any cooked chicken you have for a quick meal solution.

Common Mistakes and Troubleshooting

Even seasoned cooks make mistakes. Here are some common pitfalls and how to avoid them:

  • Too Watery: If your chicken salad is too watery, reduce the amount of mayonnaise or yogurt, or add more dry ingredients like chopped veggies.
  • Flavorless Mixture: Always taste your chicken salad before serving. Adjust seasonings, adding more lemon juice or mustard for zing.
  • Wrapping Issues: If your wraps fall apart, ensure you’re rolling tightly and don’t overfill.

Variations to Try

Don’t hesitate to mix things up! Here are some tasty variations on the classic chicken salad wrap:

  • Buffalo Chicken Salad Wrap: Add buffalo sauce and blue cheese crumbles for a spicy twist.
  • Avocado Chicken Salad Wrap: Incorporate mashed avocado for creaminess and healthy fats.
  • Tropical Chicken Salad Wrap: Mix in diced pineapple or mango for a sweet and tangy flavor.
  • Greek Chicken Salad Wrap: Add feta cheese, olives, and a splash of lemon juice for a Mediterranean flavor.

Storage and Make-Ahead Instructions

This chicken salad wrap is perfect for meal prep! Here’s how to store it for maximum freshness:

  • In the Fridge: Keep the chicken salad mixture in an airtight container for up to 3 days. When ready to eat, wrap in tortillas.
  • Make-Ahead: You can prepare the chicken salad mixture a day in advance, storing it in the fridge. Just assemble the wraps when you’re ready to serve.
  • Freezing: For longer storage, freeze the chicken salad mixture in an airtight container for up to a month. Thaw in the fridge before serving.

Frequently Asked Questions

  • Can I use canned chicken? Yes, canned chicken is a convenient option; just drain and shred it before mixing.
  • Is this recipe gluten-free? Use gluten-free tortillas to ensure the wraps are suitable for a gluten-free diet.
  • What can I substitute for mayonnaise? You can use more yogurt or avocado for a lighter alternative.
  • Can I add fruits to the salad? Absolutely! Grapes, apples, or dried cranberries can add a nice sweetness.
  • How can I make this dish dairy-free? Substitute the Parmesan cheese with nutritional yeast and use dairy-free yogurt.
  • What’s the best way to serve this wrap? Serve chilled or at room temperature, alongside a fresh salad or chips.
  • How long does the chicken salad keep? The chicken salad mixture can last for 3 days in the fridge if stored correctly.
  • Can I make this vegetarian? Yes! Substitute chicken with chickpeas for a protein-packed vegetarian option.

Nutrition Tips and Dietary Adaptations

This recipe can easily be adapted to fit various dietary needs:

  • Low-Carb: Use lettuce wraps instead of tortillas for a low-carb option.
  • Higher Protein: Add more chicken or incorporate hard-boiled eggs into the salad mixture.
  • Vegan: Replace chicken with chickpeas or tofu, and use vegan mayo and yogurt.
  • Low-Calorie: Use low-fat mayonnaise and Greek yogurt to cut calories without sacrificing flavor.

Recommended Equipment

To make your chicken salad wrap, you’ll need:

  • Mixing Bowls: For combining your ingredients efficiently.
  • Spatula: To gently fold your chicken salad mixture.
  • Knife and Cutting Board: For chopping veggies and slicing the wraps.
  • Measuring Cups and Spoons: To ensure accurate ingredient amounts.

Serving Suggestions

Pair your delicious chicken salad wrap with:

  • Fresh Fruit Salad: A medley of seasonal fruits adds a refreshing touch.
  • Crispy Vegetable Chips: For crunch and a satisfying side.
  • Simple Green Salad: A light salad complements the richness of the wrap.
  • Soup: A warm bowl of soup makes for a comforting combination.

With this Creamy Chicken Salad Wrap recipe in your repertoire, you’ll be ready to tackle lunch with confidence and creativity. Whether you’re meal prepping for the week or whipping up a quick meal, this wrap is sure to become a favorite. Don’t forget to experiment with flavors and ingredients to make it your own. Happy cooking!

Creamy Chicken Salad Wrap: A Nutritious Lunch Delight

Prep Time 10 minutes
Total Time 10 minutes
Servings 4 servings
Calories 450
Enjoy a delicious and healthy chicken salad wrapped in tortillas, perfect for a quick lunch or snack.

Ingredients

Protein

  • 14 oz cooked and shredded chicken (rotisserie, poached, or leftover grilled)
  • 1.5 tsp Dijon mustard (or whole grain mustard)
  • 2 oz plain yogurt (unsweetened or Greek yogurt)
  • 4 oz mayonnaise (preferably Hellmann's or low-fat mayo)
  • 0.5 tsp dried dill (fresh dill or parsley can be used)
  • 1 oz Parmesan cheese (or nutritional yeast for dairy-free)
  • 2 green onions green onions (thinly sliced)
  • 0.5 carrot carrot (grated)
  • 1.5 oz spinach (roughly chopped)
  • 1 oz tomatoes (diced or cherry tomatoes)
  • 1 celery stalk celery (finely diced stalk)
  • 6 tortillas flour or whole wheat tortillas (or gluten-free tortillas)
  • 0.5 lemon lemon zest and juice (from 1/2 lemon or lime)
  • 1 pinch black pepper

Instructions 

  • Mix shredded chicken with mustard, yogurt, mayonnaise, dill, Parmesan, green onions, grated carrot, spinach, tomatoes, celery, lemon zest, lemon juice, and black pepper.
  • Divide the mixture evenly among the tortillas.
  • Roll up each tortilla to form wraps.
  • Slice in half if desired and serve immediately.

Notes

For a dairy-free version, substitute Parmesan with nutritional yeast and use dairy-free mayonnaise.
Calories: 450kcal
Cost: $15
Course: Lunch
Cuisine: American
Keyword: Chicken, Healthy, Wrap

Start Your Day Right with a Berry Smoothie with Oatmeal!

Looking for a delicious and nutritious way to kickstart your day? This Berry Smoothie with Oatmeal is the perfect answer! Packed with flavor and wholesome ingredients, this smoothie is easy to make and will keep you energized throughout the morning. Whether you’re rushing out the door or enjoying a leisurely breakfast at home, this recipe is here to elevate your morning routine.

This creamy delight combines the goodness of oats, the sweetness of frozen berries, and the smoothness of almond milk. In just a few minutes, you can whip up a breakfast that’s not only satisfying but also full of vibrant flavors. Let’s dive into why you’ll love this recipe!

Why You’ll Love This Recipe

  • Quick and Easy: This smoothie can be prepared in under 10 minutes, making it perfect for busy mornings.
  • High in Fiber: The oats provide a rich source of dietary fiber, helping you feel full and satisfied.
  • Customizable: You can easily adjust the ingredients to suit your taste preferences or dietary needs.
  • Nutritious: Packed with vitamins and minerals from the berries, this smoothie supports your overall health.
  • Deliciously Creamy: Using soaked oats creates a silky texture that makes this smoothie feel indulgent without the guilt.

Berry Smoothie with Oatmeal Ingredients

Before we get started on the recipe, let’s take a closer look at the ingredients you’ll need:

  • 1 cup Rolled Oats: Soaked for a smoother texture; these oats are a great source of fiber.
  • 1-2 cups Almond Milk: This can be substituted with coconut milk for a tropical twist.
  • 1 cup Ice: Adds chill and thickness, making each sip refreshing.
  • 1-2 tablespoons Honey or Brown Sugar: Use maple syrup for a vegan option; this adds a touch of sweetness.
  • 1-2 cups Frozen Berries: A mix of blackberries, strawberries, and raspberries offers vibrant flavor and nutrients.

Step-by-Step Instructions for Your Berry Smoothie

A refreshing berry smoothie with oatmeal, showcasing a blend of colorful frozen berries.

Let’s break down the steps to create your delicious smoothie:

  1. Soak the Oats: Begin by soaking the rolled oats in water for at least 20 minutes. This step is crucial for achieving a creamy texture.
  2. Blend Ingredients: In a blender, combine the soaked oats, almond milk, ice, honey (or sweetener), and frozen berries.
  3. Blend Until Smooth: Blend on high speed until all ingredients are well combined and the texture is creamy.
  4. Taste and Adjust: Taste your smoothie and adjust sweetness if needed. You can add more berries or a splash of almond milk for desired consistency.
  5. Serve Immediately: Pour the smoothie into a glass and enjoy right away for the best flavor and texture.

Pro Tips for the Best Berry Smoothie

  • Soak for Success: Soaking the oats not only improves texture but also helps your body absorb nutrients better.
  • Frozen Fruits: Using frozen berries eliminates the need for ice and adds thickness to your smoothie.
  • Protein Boost: For an extra protein punch, consider adding a scoop of your favorite protein powder or a dollop of Greek yogurt.
  • Sneaky Greens: If you want to up your nutrient game, toss in a handful of spinach or kale; the flavor will be masked by the berries!
  • Flavor Enhancements: A dash of cinnamon or vanilla extract can elevate your smoothie to a new level of deliciousness.
  • Make It Vegan: Substitute honey with maple syrup or agave nectar for a fully vegan smoothie.
  • Serving Size: This recipe can easily be doubled or halved depending on how many servings you need.
  • Mix and Match: Don’t hesitate to experiment with different fruits; bananas and mangoes also work wonderfully!

Common Mistakes and Troubleshooting

Even the best recipes can have hiccups. Here are a few common mistakes to avoid:

  • Not Soaking Oats: Skipping the soaking step can lead to a gritty texture. Always soak for best results!
  • Too Much Liquid: If your smoothie is too runny, add more oats or frozen fruit to thicken it up.
  • Over-Blending: Blend just until smooth; over-blending can lead to a watery consistency.
  • Ignoring Sweetness: Always taste before serving! Adjust sweetness to ensure your smoothie is just right.

Variations of Your Berry Smoothie

Feeling adventurous? Here are some fun variations to try:

  • Chocolate Berry Smoothie: Add a tablespoon of cocoa powder to the mix for a chocolatey twist!
  • Nutty Banana Berry: Include a banana and a tablespoon of almond butter for extra creaminess and flavor.
  • Green Power Berry: Throw in a handful of spinach or kale for added nutrients without altering the taste.
  • Tropical Paradise: Substitute half the berries with frozen mango or pineapple for a tropical vibe.

Storage and Make-Ahead Instructions

Want to prep your smoothies in advance? Here’s how:

  • Make-Ahead: Blend your smoothie and store it in an airtight container in the refrigerator for up to 24 hours. Shake well before serving.
  • Freezing: You can also freeze your smoothie in portion-sized containers. When you’re ready to enjoy, thaw overnight in the fridge and blend again for a fresh taste.

Frequently Asked Questions

  • Can I use regular milk instead of almond milk? Yes, you can use any milk of your choice!
  • What if I don’t have rolled oats? Quick oats can be used, but they may create a slightly different texture.
  • Can I add protein powder? Absolutely! Adding protein powder is a great way to make it a more filling meal.
  • How do I make this smoothie dairy-free? Simply use almond milk or any dairy-free milk alternative and a vegan sweetener.
  • Is this smoothie suitable for kids? Yes! It’s a healthy and tasty option for kids; just adjust the sweetness to their liking.
  • How long can I store leftover smoothie? You can store it for up to 24 hours in the fridge, but it’s best fresh.
  • Can I substitute fresh berries for frozen? Yes, but you’ll want to add more ice to achieve that thick smoothie texture.
  • What’s the best way to thicken my smoothie? Adding more oats or frozen fruits will help thicken your smoothie without watering it down.

Nutrition Tips and Dietary Adaptations

This smoothie is naturally nutritious, but here are some tips to enhance its health benefits:

  • Opt for Whole Ingredients: Use whole, organic ingredients when possible to maximize nutrient intake.
  • Incorporate Healthy Fats: Adding nut butters or seeds can provide healthy fats that keep you full longer.
  • Watch the Sweeteners: Consider using ripe bananas or dates as natural sweeteners instead of processed sugars.
  • Stay Hydrated: Pair your smoothie with a glass of water or herbal tea to keep hydrated throughout the day.

Essential Equipment Recommendations

To make your smoothie, you’ll need:

  • High-Speed Blender: A good blender ensures a perfectly smooth texture.
  • Measuring Cups: For accurate ingredient measurements.
  • Strainer (optional): If you prefer a smoother texture, you can strain the smoothie after blending.

Serving Suggestions

Pair your Berry Smoothie with:

  • Whole Grain Toast: Perfect for a well-rounded breakfast.
  • Yogurt Parfait: Layer with granola and fresh fruit for a delightful side.
  • Nut Bars: A homemade or store-bought nut bar can complement your smoothie nicely.

Conclusion

So there you have it—your go-to Berry Smoothie with Oatmeal recipe that is not just quick and easy, but also filled with nutritious ingredients. Remember, cooking is about confidence and creativity, so feel free to experiment with different flavors and textures. Enjoy this delightful smoothie, and make every morning a delicious adventure!

Berry Smoothie with Oatmeal: A Creamy, Healthy Delight

Prep Time 10 minutes
Total Time 10 minutes
Servings 2 cups
Calories 250
Enjoy a nutritious and delicious berry smoothie blended with soaked oats for a creamy, satisfying treat that's perfect for breakfast or a snack.

Ingredients

Oats

  • 1 cup Rolled Oats (Soaked for a smoother texture)

Liquid

  • 1.5 cups Almond Milk (Can substitute with coconut milk)

Ice

  • 1 cup Ice (For chill and thickness)

Sweetener

  • 1.5 tablespoons Honey or Brown Sugar (Use maple syrup for a vegan option)

Frozen Berries

  • 1.5 cups Frozen Berries (Mix blackberries, strawberries, and raspberries)

Instructions 

  • Soak the oats in water for at least 10 minutes, then drain.
  • Add soaked oats, almond milk, ice, honey, and frozen berries to a blender.
  • Blend until smooth and creamy.
  • Pour into glasses and serve immediately.

Notes

You can substitute honey with agave syrup or maple syrup for a vegan version.
Calories: 250kcal
Cost: $8
Course: Breakfast
Cuisine: Healthy
Keyword: Berry, oatmeal

Transform Your Snack Time with Cottage Cheese Toast

Are you ready to elevate your snack game? If you’re looking for something simple, nutritious, and bursting with flavor, you’ve come to the right place! This Low-Carb Cottage Cheese Toast is not just a meal; it’s a delightful experience that’ll make your mornings feel special. Perfect for busy days or leisurely weekends, this recipe is a celebration of creamy cottage cheese and crunchy low-carb bread that will leave you feeling satisfied and energized. Let’s dive into the wonderful world of cottage cheese toast!

Why You’ll Love This Recipe

  • Quick and Easy: This recipe can be whipped up in under 10 minutes, making it ideal for busy mornings.
  • Nutritious: Packed with protein from the cottage cheese, this toast provides a healthy start to your day.
  • Versatile: Customize your toast with a variety of toppings to suit your taste buds or dietary needs.
  • Low-Carb Delight: Perfect for those following a low-carb diet, this recipe doesn’t skimp on flavor.
  • Comforting and Satisfying: The combination of creamy cheese and crispy bread brings a sense of comfort that’s hard to resist.

Ingredient Breakdown: Key Components

Understanding the ingredients is essential for creating the perfect low-carb cottage cheese toast. Here’s what you’ll need:

  • Low-Carb Bread: Choose seed-based or almond flour bread for a satisfying crunch. Sliced about 1 cm thick, it forms the perfect base.
  • Cottage Cheese: Full-fat cottage cheese is preferred for its creamy texture, but you can opt for low-fat if you’re watching calories.
  • Lemon Juice: Freshly squeezed lemon juice adds a bright, zesty flavor that elevates the dish.
  • Salt and Pepper: A pinch of sea salt and freshly ground pepper enhances the flavors beautifully.
  • Olive Oil or Butter: Drizzling with olive oil or melting butter adds richness and depth.
  • Fresh Herbs: Optional but recommended! Chopped dill or chives can introduce a fresh, herbal note.

Notes for Ingredient Swaps

Juicy Low-Carb Cottage Cheese Toast displayed on a rustic table, highlighting the texture of the ingredients.

Don’t have all the ingredients? Here are some simple swaps:

  • Alternative Breads: Use cloud bread or any low-carb bread of your choice.
  • Cheese Variations: Try ricotta or Greek yogurt for a different texture and flavor.
  • Citrus Alternatives: If you don’t have lemons, a splash of vinegar or lime juice works too!
  • Herb Options: Experiment with basil or parsley for different flavor profiles.

Step-by-Step Guide to Cottage Cheese Toast

Now that you’re familiar with the ingredients, let’s move on to making your delicious low-carb cottage cheese toast:

  • Toast the Bread: Start by toasting the slices of low-carb bread until golden brown and crispy, about 3-4 minutes at 200°C (390°F).
  • Mix the Cottage Cheese: In a small bowl, combine the cottage cheese with a squeeze of lemon juice, a pinch of salt, and chopped herbs if using. Stir until well combined and slightly creamy.
  • Spread the Mixture: Spread a generous layer of the cottage cheese mixture over each toasted slice while still warm, allowing it to melt slightly into the bread.
  • Heat in the Skillet: Heat a non-stick skillet over medium heat and place the topped toasts in, cheese side down if you prefer a slightly crispy top. Warm for 1-2 minutes until the cheese begins to bubble.
  • Flip and Finish: Gently flip the toasts and cook for another 30 seconds to 1 minute until the cheese is bubbly and the edges are golden.
  • Drizzle and Serve: Remove from the skillet, let rest for a minute, and drizzle with olive oil or add extra herbs for a fresh finishing touch. Serve immediately!

Pro Tips for Perfect Cottage Cheese Toast

  • Choose the Right Bread: Sturdy bread will hold up better under the creamy topping.
  • Experiment with Textures: For added crunch, consider adding toppings like nuts or seeds.
  • Don’t Skip the Herbs: Fresh herbs brighten up the dish and add an aromatic element.
  • Temperature Matters: Serve the toast warm for the best flavor and texture experience.
  • Play with Seasoning: Customize the seasoning to your liking—try garlic powder or smoked paprika!
  • Make it a Meal: Add sliced avocado or smoked salmon to turn your toast into a hearty meal.
  • Mind the Cooking Time: Keep an eye on the skillet to prevent burning—golden is the goal!
  • Plate with Care: Serve on a beautiful plate to elevate the dining experience.

Common Mistakes and How to Fix Them

Even the best chefs make mistakes! Here are common pitfalls and how to avoid them:

  • Too Soft Bread: If your bread isn’t crispy enough, try toasting it longer or using a sturdier variety.
  • Overwhelming Flavors: Balance is key—don’t overdo the toppings or seasonings.
  • Messy Spreading: Let the cottage cheese sit at room temperature for a few minutes to make spreading easier.
  • Burnt Cheese: Adjust the skillet temperature if you notice the cheese browning too quickly.

Variations to Try

Here are a few delicious variations to keep your cottage cheese toast exciting:

  • Italian Style: Top with roasted tomatoes and fresh basil for a Mediterranean twist.
  • Spicy Kick: Add a sprinkle of red pepper flakes or sliced jalapeños for some heat.
  • Sweet Version: Swap cottage cheese for ricotta and top with honey and fresh berries for a dessert-like treat.
  • Breakfast Delight: Add a poached egg on top for a protein-packed breakfast option.

Storage and Make-Ahead Instructions

Want to prep in advance? Here’s how to store and reheat:

  • Storage: Store leftover toast in an airtight container in the fridge for up to 2 days. Note: the bread may become soggy.
  • Make-Ahead: Prepare the cottage cheese mixture a day in advance and store it separately in the fridge.
  • Reheating: Reheat in a toaster or skillet for that crunchy texture again!

Frequently Asked Questions

  • Can I make this toast ahead of time? Yes, you can prepare the cottage cheese mixture in advance and toast the bread just before serving.
  • What can I use instead of cottage cheese? Ricotta cheese or Greek yogurt can be good substitutes.
  • Is this recipe gluten-free? If you use gluten-free bread, yes!
  • Can I eat this for lunch? Absolutely! It’s a great option for a light lunch or snack.
  • How do I make it vegan? Use a vegan cream cheese alternative and your choice of bread.
  • What toppings work best? Sliced avocado, smoked salmon, or sautéed vegetables are all fantastic choices!
  • How do I store leftovers? Keep the mixture and bread stored separately to maintain texture.
  • Can I freeze it? It’s best to freeze the bread separately; cottage cheese doesn’t freeze well.

Nutritional Tips and Dietary Adaptations

This low-carb cottage cheese toast is not just delicious; it’s also a healthful option. Here are some nutritional tips:

  • Protein-Packed: Cottage cheese is high in protein, making it a filling snack that can help with muscle recovery.
  • Low-Calorie Option: This toast is low in calories compared to traditional toast and spreads, making it a great choice for weight management.
  • Healthy Fats: Olive oil provides healthy fats that can support heart health.
  • Customizable for Dietary Needs: Easily adapt this recipe to fit vegan or gluten-free diets.

Equipment Recommendations

To make your preparation seamless, here’s a list of recommended kitchen tools:

  • Toaster or Oven: For perfect toast every time.
  • Non-Stick Skillet: Essential for warming the cheesy toast without sticking.
  • Mixing Bowl: For combining your cottage cheese and seasonings.
  • Spatula: A must-have for flipping and serving your toast.

Serving Suggestions

Want to impress at your next gathering? Here’s how to serve your low-carb cottage cheese toast:

  • Garnish with Fresh Herbs: A sprinkle of fresh herbs adds color and flavor.
  • Pair with a Salad: Serve alongside a fresh green salad for a complete meal.
  • Offer a Variety: Create a toast bar with different toppings for guests to customize their experience.
  • Perfect for Brunch: This dish makes an impressive centerpiece for any brunch table!

In conclusion, this Low-Carb Cottage Cheese Toast is more than just a quick snack—it’s a versatile dish that can adapt to any meal of the day. With its delightful flavors and endless customization options, you’ll never get bored. So grab your ingredients, and let’s make something wonderful together! Happy cooking!

Low-Carb Cottage Cheese Toast

Prep Time 5 minutes
Cook Time 5 minutes
Total Time 10 minutes
Servings 2 servings
Calories 250
A quick and healthy low-carb toast topped with creamy cottage cheese and fresh herbs, perfect for a nutritious snack or breakfast.

Ingredients

Bread

  • 2 slices low-carb bread (seed-based or almond flour) (sliced about 1 cm thick)

Dairy

  • 0.25 cup cottage cheese (full-fat preferred for creaminess)

Fruits

  • 1 lemon lemon juice (freshly squeezed)

Seasonings

  • to taste salt (preferably sea salt)
  • to taste pepper (freshly ground)

Oils & Fats

  • 1-2 tablespoons olive oil (or butter for drizzling)

Optional herbs

  • optional fresh herbs (dill or chives) (chopped)

Instructions 

  • Toast the bread slices until golden, about 3-4 minutes at 200°C.
  • Mix cottage cheese with lemon juice, salt, and herbs if using until creamy.
  • Spread the cottage cheese mixture over warm toast, allowing it to melt slightly.
  • Heat a skillet and place the topped toasts, cheese side down, for 1-2 minutes until bubbly.
  • Flip and cook for another 30 seconds to 1 minute, then remove and rest.
  • Drizzle with olive oil, add herbs if desired, and serve immediately.

Notes

Use full-fat cottage cheese for extra creaminess and flavor.
Calories: 250kcal
Cost: $8
Course: Breakfast, Snack
Cuisine: Healthy
Keyword: Cottage Cheese, Low-Carb