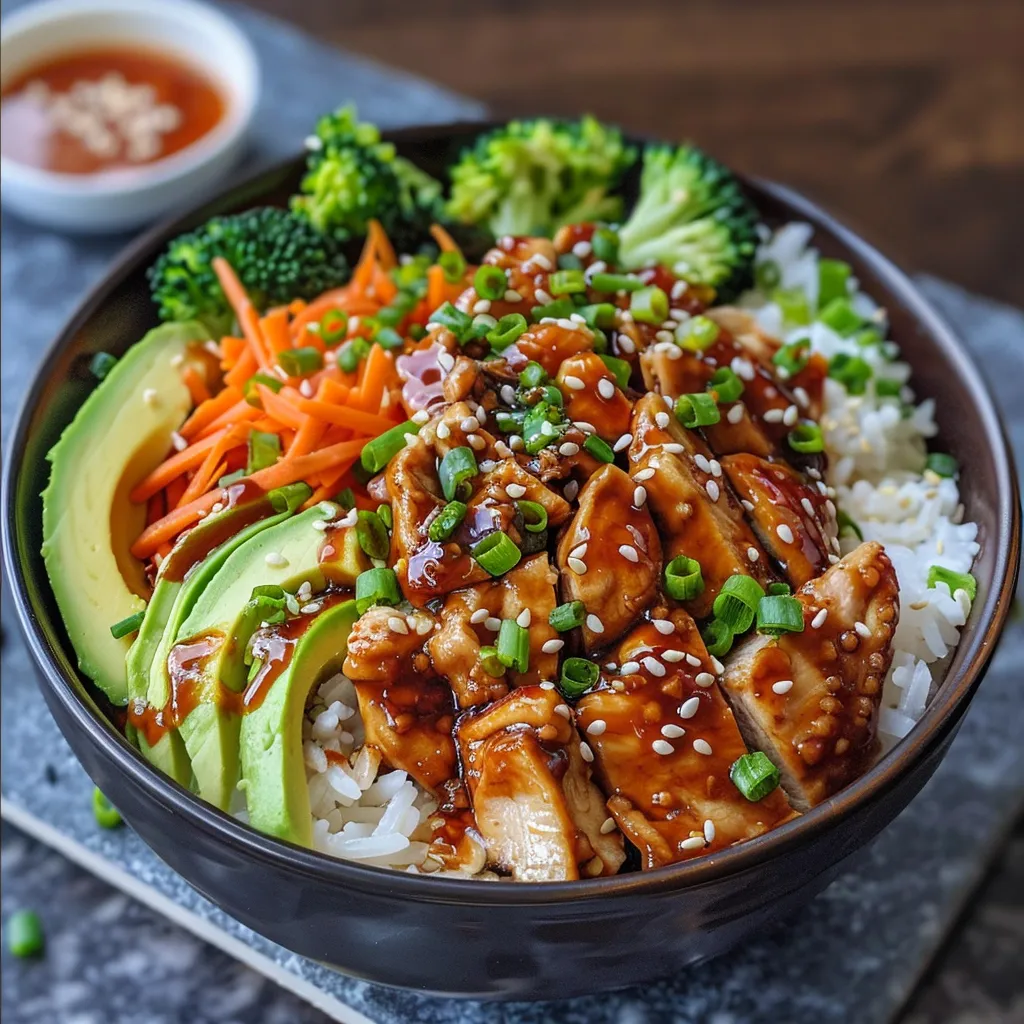
Whip up a vibrant and satisfying Chicken Burrito Bowl with fresh ingredients and bold flavors. Perfect for busy weeknights, this easy recipe combines juicy chicken thighs, zesty rice, and colorful toppings to create a meal that feels special yet simple. Let’s dive into why you’ll love this recipe and how to make it shine in your kitchen!
Why You’ll Love This Recipe
- Quick and Easy: This chicken burrito bowl recipe takes less than 30 minutes to prepare, making it perfect for weeknight dinners.
- Customizable: Feel free to swap out ingredients based on your preferences; this chicken burrito bowl can easily cater to your taste.
- Healthy Ingredients: Packed with fresh vegetables, lean protein, and wholesome grains, this bowl is a nutritious choice.
- Meal Prep Friendly: Make a big batch at the beginning of the week and enjoy leftovers all week long!
- Family Favorite: With its colorful presentation and delicious flavors, everyone will love this burrito bowl.
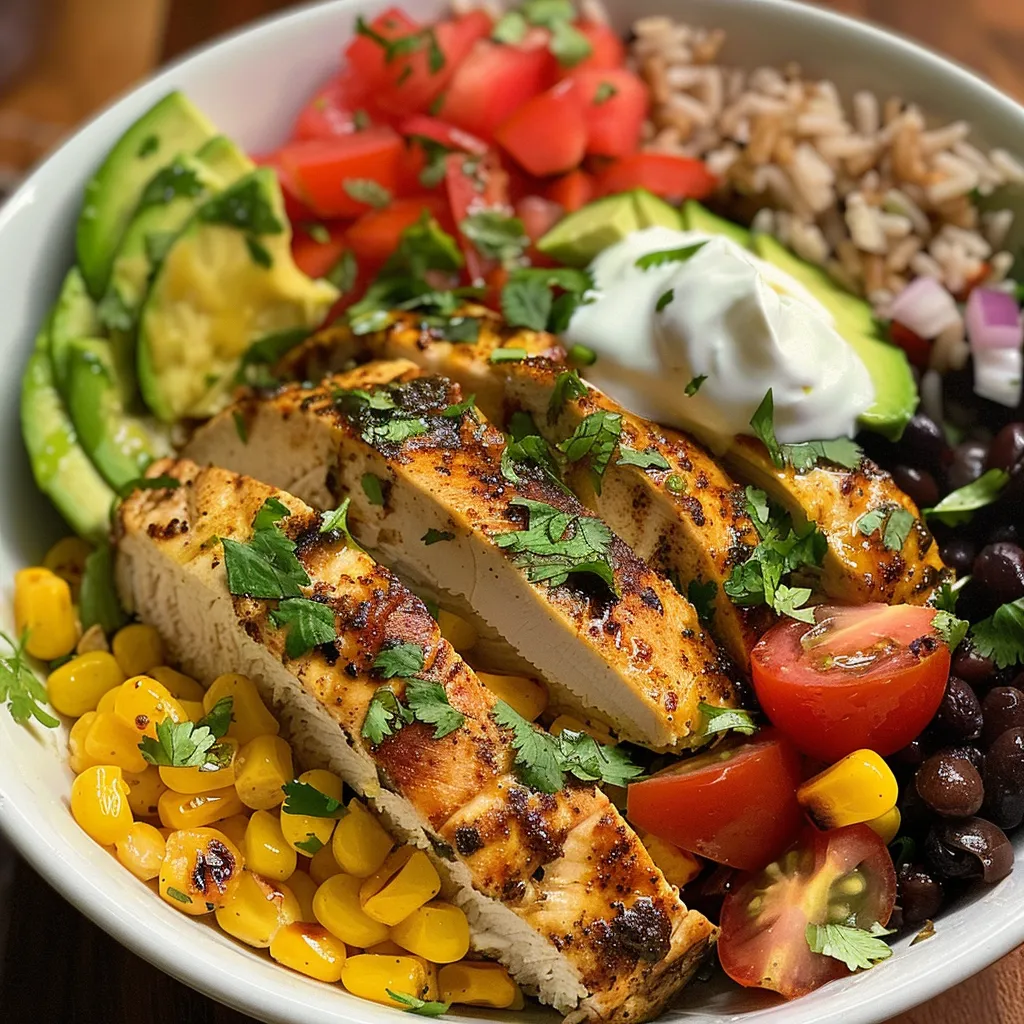
Ingredient Breakdown
Let’s gather the ingredients for this delightful chicken burrito bowl, ensuring you have everything you need for a flavor-packed experience!
- 3 Tbsp fresh lime juice: Adds zesty brightness to the dish.
- 3 Tbsp olive oil (divided): Use to marinate the chicken and for cooking.
- 1 Tbsp chili powder: A key spice that brings warmth and depth.
- 2 tsp ground cumin: Provides an earthy flavor that complements the chicken.
- 1 1/2 tsp minced garlic: Fresh garlic enhances the overall taste.
- Salt and black pepper (to taste): Essential for seasoning.
- 1 3/4 lbs. boneless skinless chicken thighs: Juicy and flavorful, perfect for this recipe.
- Cilantro lime rice (1 batch): The base of the bowl, bringing freshness and zest.
- 2 ears fresh corn: Sweet corn adds a burst of flavor and texture.
- 1 1/2 cans black beans (with liquid undrained): A hearty addition, rich in protein and fiber.
- 1 cup shredded cheddar cheese: Melts beautifully for a creamy texture.
- 2 roma tomatoes (chopped): Freshness and color to the dish.
- 2 medium avocados (chopped): Creamy and rich, they balance the flavors.
- 6 Tbsp chopped red onion: Adds crunch and a sharp bite.
- 1/2 cup sour cream (or Mexican crema): Creaminess that enhances all the flavors.
- Mexican hot sauce: A kick of heat that can be adjusted to your taste.
Pro Tips for a Perfect Burrito Bowl
- Marinate the Chicken: For the best flavor, marinate the chicken for at least one hour, or even overnight.
- Use a Cast Iron Skillet: It provides great heat retention and helps achieve a nice sear on the chicken.
- Warm the Beans: This enhances their flavor and makes them more palatable.
- Layering is Key: Start with rice, then add beans, chicken, and toppings to ensure a balanced bite.
- Fresh Ingredients: Using fresh produce will elevate the flavors and textures.
- Customize Your Toppings: Feel free to add jalapeños, lime wedges, or different cheeses to make it your own.
- Adjust Spice Levels: If you prefer a milder flavor, reduce the chili powder and use a milder hot sauce.
- Let It Rest: Allow the chicken to rest after cooking for juicier results.
- Use Leftover Chicken: Shredded rotisserie chicken works great if you’re short on time.
- Vegetarian Option: Replace chicken with grilled veggies or tofu for a delicious twist!
Common Mistakes and Troubleshooting
Even the best cooks can run into snags. Here are some common issues and how to avoid them:
- Overcooking the Chicken: Always use a meat thermometer to ensure the chicken reaches 165°F without drying out.
- Too Much Liquid: If your bowl is soggy, drain excess liquid from the beans and avoid overcooking the rice.
- Flavorless Rice: Make sure to season the rice with lime juice and cilantro for an extra flavor boost.
- Skipping Marination: Don’t skip marinating the chicken; it’s crucial for flavor.
Variations to Try
Want to change things up? Here are some delicious variations on the classic chicken burrito bowl:
- Southwest Chicken Burrito Bowl: Add black olives, corn salsa, and swap the cheese for queso fresco.
- BBQ Chicken Burrito Bowl: Use BBQ sauce instead of the marinade and top with coleslaw.
- Spicy Chicken Burrito Bowl: Add diced jalapeños or spicy salsa for an extra kick.
- Mexican Street Corn Chicken Burrito Bowl: Top with cotija cheese, cilantro, and a drizzle of lime crema.
Storage and Make-Ahead Instructions
This chicken burrito bowl is great for meal prep! Here’s how to store it:
- Refrigerate: Store leftover bowls in an airtight container for up to 4 days.
- Freeze: You can freeze the marinated chicken (uncooked) for up to 3 months. Thaw overnight before cooking.
- Reheat: Warm the components separately in a microwave or on the stovetop for best results.
Comprehensive FAQ
Got questions? We’ve got answers!
- Can I use chicken breasts instead of thighs? Yes, but they may dry out more easily; adjust cooking time accordingly.
- How do I make this recipe vegan? Substitute the chicken with grilled vegetables or beans and use dairy-free alternatives for cheese and sour cream.
- What can I use instead of lime juice? Lemon juice can be used as a substitute, though the flavor will be slightly different.
- Can I add more spices? Absolutely! Feel free to experiment with taco seasoning, smoked paprika, or cayenne pepper.
- How do I prevent the avocados from browning? Squeeze lime juice over the cut avocado to slow oxidation.
- What’s the best way to reheat the rice? Add a splash of water and microwave to keep it moist.
- Can I use frozen corn? Yes! Just thaw and drain before adding it to the bowl.
- Is this recipe gluten-free? Yes, it is naturally gluten-free. Just ensure your hot sauce and any additional toppings are gluten-free.
Nutrition Tips and Dietary Adaptations
This chicken burrito bowl is not only delicious but can also be tailored to fit various dietary needs:
- Low Carb: Skip the rice and use cauliflower rice instead.
- High Protein: Add extra beans or chicken for a protein boost.
- Dairy-Free: Use dairy-free cheese and omit sour cream for a lactose-free version.
- Low Sodium: Use low-sodium black beans and limit added salt to keep sodium levels down.
Equipment Recommendations
To make your cooking experience smoother, here are some kitchen essentials:
- Cast Iron Skillet: Ideal for searing chicken to perfection.
- Meat Thermometer: Ensures your chicken is cooked safely and accurately.
- Cutting Board: A sturdy surface for chopping veggies and prepping ingredients.
- Airtight Containers: Perfect for storing leftovers and meal prep.
Serving Suggestions
This chicken burrito bowl is a meal in itself, but you can enhance your presentation and flavor with these suggestions:
- Fresh Herbs: Garnish with additional cilantro for a pop of color and flavor.
- Lime Wedges: Serve with lime wedges for an extra squeeze of freshness.
- Chips and Salsa: Pair with tortilla chips and your favorite salsa for added crunch.
- Mocktail or Beverage Pairing: Enjoy with a refreshing mocktail or your favorite beverage to complement the meal.
Conclusion
Now that you have all the insights and tips to make the perfect Chicken Burrito Bowl, it’s time to roll up your sleeves and get cooking! Remember, cooking is all about having fun and experimenting with flavors. Enjoy this colorful, nutritious meal that you can tailor to your preferences, and most importantly, savor every bite! Happy cooking!
Chicken Burrito Bowl
Ingredients
Marinade
- 3 Tbsp fresh lime juice
- 3 Tbsp olive oil (divided)
- 1 Tbsp chili powder
- 2 tsp ground cumin
- 1.5 tsp minced garlic
- Salt and black pepper (to taste) Salt and black pepper
- 1.75 lbs boneless skinless chicken thighs (trimmed of excess fat)
Other ingredients
- 1 batch cilantro lime rice
- 2 ears fresh corn (shucked and kernels cut from cobs)
- 1.5 cans black beans (with liquid undrained)
- 1 cup shredded cheddar cheese (or more to taste)
- 2 roma tomatoes (chopped)
- 2 medium avocados (chopped)
- 6 Tbsp chopped red onion
- 0.5 cup sour cream (or Mexican crema)
- 6 Tbsp Mexican hot sauce (e.g., Tapatio or Valentino)
Instructions
- Combine lime juice, 2 Tbsp olive oil, chili powder, cumin, garlic, salt, and pepper in a large bowl.
- Add chicken thighs to marinade, coat well, cover, and refrigerate for at least 1 hour.
- Heat a skillet over medium-high heat, add 1/2 Tbsp olive oil, and sear chicken for 6 minutes per side until cooked through. Rest the chicken.
- Warm black beans in a saucepan over medium-low heat, season with salt.
- Cook corn in the skillet for 3-4 minutes until golden. Assemble bowls with rice, chicken, corn, beans, cheese, tomatoes, avocados, red onion, sour cream, and hot sauce.