Author

Steven

Browsing

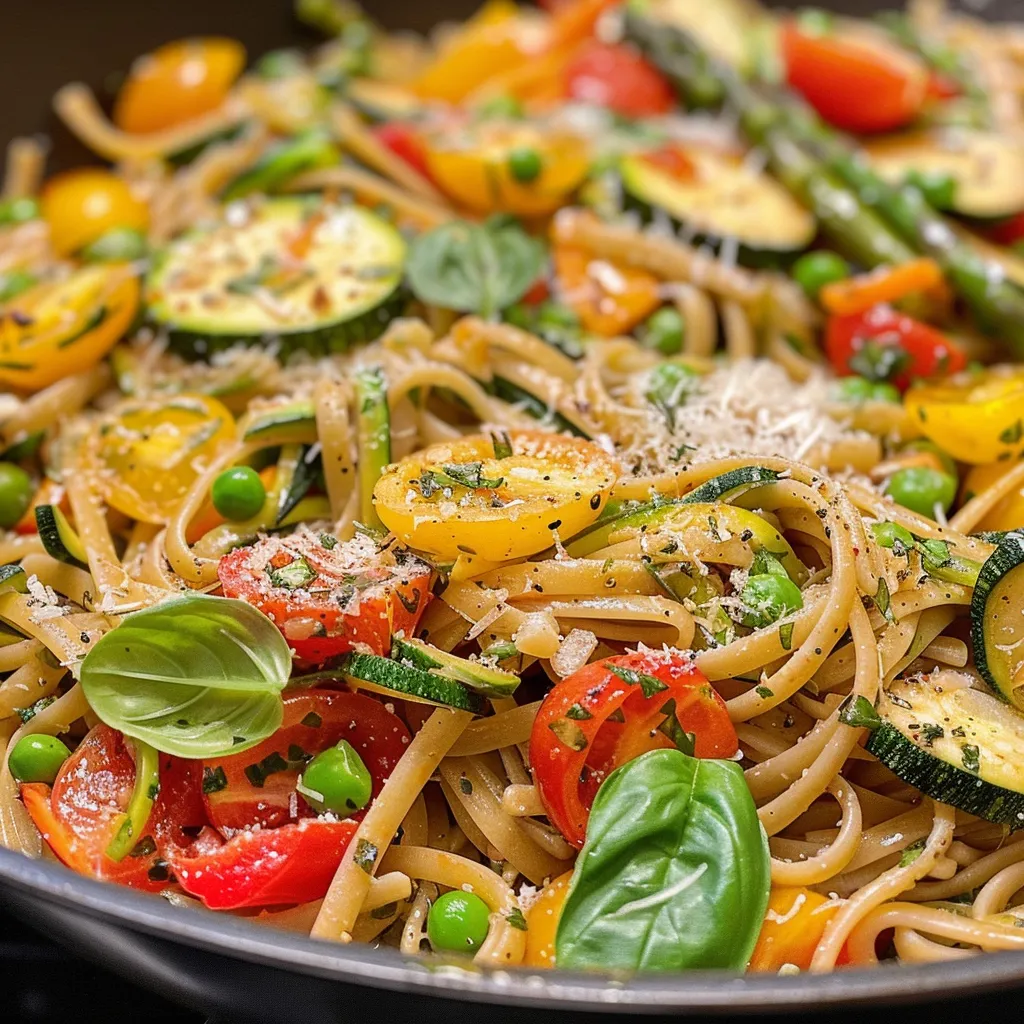
Discover the Joy of Whole Wheat Pasta Primavera

Spring is a season of renewal and freshness, and what better way to embrace it than with a vibrant Whole Wheat Pasta Primavera? This delightful dish not only showcases an array of colorful, fresh vegetables but also provides a wholesome, nutritious meal perfect for busy weeknights. In this comprehensive guide, we’ll explore every detail of making this dish, from the ingredients you need to expert tips, variations, and more. Let’s dive in and make cooking exciting and approachable!

Why You’ll Love This Recipe

  • Quick and Easy: This pasta primavera can be prepared in under 30 minutes, making it ideal for those hectic evenings.
  • Nutrient-Packed: Loaded with fresh vegetables, this dish is a fantastic way to increase your vegetable intake while enjoying delicious flavors.
  • Versatile: With endless variations, you can easily customize the recipe to suit your taste or dietary needs.
  • Meal Prep Friendly: This pasta dish stores well, making it perfect for meal prep or leftovers throughout the week.
  • Family-Friendly: Even picky eaters will love the colorful presentation and the delightful taste of this comforting dish.

Ingredients You Will Need

To create a delicious Whole Wheat Pasta Primavera, gather the following ingredients:

  • 300g whole wheat pasta: Any shape, like fusilli or penne, works well.
  • 2 tablespoons olive oil: Adds healthy fats and flavor.
  • 2 cloves garlic, minced: A must for aromatic depth.
  • 1 small red bell pepper, sliced: Sweet and crunchy for texture.
  • 1 small yellow bell pepper, sliced: Adds vibrant color and sweetness.
  • 1 medium zucchini, sliced into half-moons: Provides a tender, mild flavor.
  • 1 medium carrot, julienned: A touch of sweetness and crunch.
  • 1 cup cherry tomatoes, halved: Juicy bursts of flavor.
  • 1 cup asparagus, cut into 2-inch pieces: A springtime favorite that adds elegance.
  • 1/2 cup frozen peas: Sweet and nutritious, easy to use.
  • 1 teaspoon dried oregano: A classic herb that enhances flavor.
  • 1/2 teaspoon red pepper flakes (optional): For a bit of heat.
  • Salt and black pepper to taste: Essential for seasoning.
  • 1/4 cup grated Parmesan cheese: For a creamy finish.
  • 2 tablespoons fresh basil, chopped: Adds a fresh, aromatic touch.
  • 1 tablespoon fresh lemon juice: Brightens the dish with acidity.

How to Make Whole Wheat Pasta Primavera: Step by Step

Juicy whole wheat pasta primavera with a variety of fresh vegetables and herbs.

Follow these simple steps to create your own Whole Wheat Pasta Primavera:

  1. Cook the whole wheat pasta according to package instructions; reserve 1/4 cup of pasta water before draining.
  2. In a large skillet, heat the olive oil over medium heat. Sauté the minced garlic for about 1 minute until fragrant.
  3. Add the sliced red and yellow bell peppers, zucchini, and carrot to the skillet. Cook for 5–7 minutes until they start to soften.
  4. Stir in the asparagus and cherry tomatoes, cooking for an additional 3–4 minutes until tender but still crisp.
  5. Finally, add the frozen peas and season with oregano, red pepper flakes, salt, and black pepper to taste.
  6. Toss the cooked pasta with the sautéed vegetables, adding reserved pasta water as necessary to create a light sauce.
  7. Finish the dish by stirring in the lemon juice, grated Parmesan, and chopped fresh basil. Serve hot, and enjoy!

Pro Tips for the Perfect Pasta Primavera

  • Use seasonal vegetables: This recipe shines with fresh, seasonal produce. Feel free to swap in your favorites!
  • Don’t overcook the pasta: Aim for al dente for the best texture and flavor.
  • Customize the protein: Add grilled chicken, shrimp, or chickpeas for a protein boost.
  • Make it creamy: Stir in a splash of cream or a dollop of ricotta for a richer sauce.
  • Experiment with herbs: Try adding fresh thyme or parsley for a unique flavor.
  • Adjust spice levels: Modify the amount of red pepper flakes based on your heat preference.
  • Save some pasta water: This starchy water helps bind the sauce and pasta together.
  • Top with nuts: Sprinkle toasted pine nuts or walnuts for added crunch and flavor.

Common Mistakes and Troubleshooting

  • Overcooking vegetables: Aim for a tender-crisp texture to maintain vibrant colors and flavors.
  • Not reserving pasta water: This step is crucial for creating a cohesive sauce.
  • Skipping seasoning: Don’t forget to taste and adjust the seasoning as you go.
  • Using old ingredients: Fresh vegetables make a world of difference in flavor and texture!

Delicious Variations

Feel free to get creative! Here are some fun variations you can try:

  • Protein-Packed Primavera: Add grilled chicken or shrimp for a heartier meal.
  • Vegan-Friendly: Omit cheese and use nutritional yeast instead for a cheesy flavor.
  • Spicy Kick: Add diced jalapeños or sriracha for a fiery version.
  • Summer Garden Delight: Incorporate zucchini blossoms or sun-dried tomatoes for a seasonal twist.

Storage and Make-Ahead Instructions

This Whole Wheat Pasta Primavera is perfect for meal prep!

  • Refrigerate: Store leftovers in an airtight container in the fridge for up to 4 days.
  • Freeze: You can freeze the pasta primavera for up to 3 months. Just be sure to omit any cheese before freezing.
  • Reheat: Warm in a skillet over medium heat, adding a splash of water to help revive the sauce.

Frequently Asked Questions

  • Can I use gluten-free pasta? Absolutely! Substitute with your favorite gluten-free pasta for a similar experience.
  • What vegetables can I add? Feel free to include broccoli, spinach, or snap peas for added nutrition.
  • Can I make this dish ahead of time? Yes, just make sure to undercook the pasta slightly, as it will continue to cook when reheated.
  • Is this recipe suitable for meal prep? Yes, it stores well and is easy to reheat!
  • Can I add a protein? Certainly! Grilled chicken, shrimp, or chickpeas are great additions.
  • How can I make it more flavorful? Enhance flavors with fresh herbs, zests, or a splash of white wine.
  • What’s the best way to serve this dish? Serve it warm, garnished with fresh basil and a sprinkle of Parmesan cheese.
  • Can I use dried herbs instead of fresh? Yes, but remember that dried herbs are more concentrated, so adjust quantities accordingly.

Nutritional Tips and Dietary Adaptations

This Whole Wheat Pasta Primavera is not only delicious but also nutritious. Here are some tips:

  • Whole Grains: Using whole wheat pasta increases fiber content, which is great for digestion.
  • Colorful Veggies: Aim for a rainbow of vegetables to maximize vitamins and minerals.
  • Healthy Fats: Olive oil provides essential fatty acids for heart health.
  • Portion Control: Keep an eye on serving sizes, especially if you’re watching your carbohydrate intake.

Essential Equipment for Cooking

Here’s what you’ll need to make this dish:

  • Large pot: For boiling pasta.
  • Skillet: For sautéing vegetables and combining flavors.
  • Colander: For draining pasta.
  • Measuring cups and spoons: To ensure accurate ingredient amounts.
  • Sharp knife: For chopping vegetables efficiently.

Serving Suggestions

This dish is delightful on its own, but you can elevate it by:

  • Pairing it with a crisp green salad dressed with lemon vinaigrette.
  • Serving alongside crusty whole grain bread for a satisfying meal.
  • Garnishing with additional fresh herbs or a squeeze of lemon juice for brightness.

Conclusion

Now that you have a complete guide to making Whole Wheat Pasta Primavera, it’s time to get cooking! Embrace the fresh flavors of spring, and remember that cooking should be fun and fulfilling. With these simple steps and helpful tips, you’ll create a delicious meal that not only nourishes but also brings joy to your table. Happy cooking!

Whole Wheat Pasta Primavera for Healthy Spring Dinners

Prep Time 10 minutes
Cook Time 15 minutes
Total Time 25 minutes
Servings 4 servings
Calories 450
A vibrant and healthy pasta dish packed with fresh vegetables, perfect for a light spring dinner.

Ingredients

Pasta

  • 300 g whole wheat pasta
  • 2 tablespoons olive oil
  • 2 cloves garlic, minced
  • 1 small red bell pepper, sliced
  • 1 small yellow bell pepper, sliced
  • 1 medium zucchini, sliced into half-moons
  • 1 medium carrot, julienned
  • 1 cup cherry tomatoes, halved
  • 1 cup asparagus, cut into 2-inch pieces
  • 0.5 cup frozen peas
  • 1 teaspoon dried oregano
  • 0.5 teaspoon red pepper flakes (optional)
  • to taste Salt and black pepper
  • 0.25 cup grated Parmesan cheese
  • 2 tablespoons fresh basil, chopped
  • 1 tablespoon fresh lemon juice

Instructions 

  • Cook pasta according to package; reserve 1/4 cup water, then drain.
  • Heat olive oil; sauté garlic for 1 minute.
  • Add bell peppers, zucchini, and carrot; cook 5–7 minutes until tender.
  • Add asparagus and cherry tomatoes; cook 3–4 minutes. Stir in peas last.
  • Season with oregano, red pepper flakes, salt, and black pepper. Toss pasta with vegetables, adding reserved water as needed. Finish with lemon juice, Parmesan, and basil; toss and serve.

Notes

Use fresh vegetables for best flavor. Adjust seasoning to taste.
Calories: 450kcal
Cost: $15
Course: Main Course
Cuisine: Healthy
Keyword: Pasta

Transform Your Weeknight Dinners with a Creamy Spinach Pasta Sauce

If you’re looking to elevate your weeknight meals effortlessly, this creamy spinach pasta sauce is the solution you’ve been waiting for! In just 10 minutes, you can whip up a delicious and nutritious sauce that pairs perfectly with your favorite pasta. Whether you’re a busy parent, a student, or just someone who loves good food without the fuss, this recipe is designed to fit seamlessly into your lifestyle. Let’s dive into why this recipe is a must-try!

Why You’ll Love This Recipe

Here are five reasons why this spinach pasta sauce will become a staple in your kitchen:

  • Quick and Easy: With just a few simple steps, you can make this sauce in under 10 minutes, making it perfect for busy weeknights.
  • Nutritious Boost: Packed with vitamins and minerals from fresh spinach and basil, this sauce is a healthy choice for you and your family.
  • Dairy-Free Delight: Made with light coconut milk, this creamy sauce is entirely dairy-free, catering to various dietary needs.
  • Versatile Pairing: This sauce complements not just pasta, but also grains, potatoes, and even veggies!
  • Kid-Friendly: The creamy texture and mild flavors make it a hit with kids, helping you sneak in those greens without any fuss.

Ingredient Breakdown

Here’s what you’ll need to create this delightful spinach sauce for pasta, along with some substitution ideas to suit your pantry:

  • Fresh Spinach (3 oz): The star ingredient providing vibrant color and health benefits. You can substitute it with thawed frozen spinach if needed.
  • Fresh Basil (1 handful): Adds a fresh, aromatic flavor. If you don’t have fresh basil, you can use dried basil, but reduce the quantity.
  • Coconut Milk (1 cup, canned): For a creamy texture without dairy. Other dairy-free milks like almond or oat milk can work, but they may alter the flavor slightly.
  • Nutritional Yeast (2 tbsp): This ingredient gives a cheesy flavor while being vegan. You can skip it if you prefer a lighter sauce.
  • Cornstarch (1 tbsp): Helps thicken the sauce. Potato starch can be used as an alternative.
  • Garlic (2 cloves): Enhances overall flavor. Adjust to your preference or omit for a milder taste.
  • Onion Powder (1 tsp): Adds depth to the sauce. Fresh onions can be sautéed and blended for a more robust flavor.
  • Salt (⅓-½ tsp): Adjust to taste, keeping in mind that certain ingredients like nutritional yeast can add saltiness.
  • Black Pepper (to taste): Freshly ground pepper gives a nice kick. You can also use red pepper flakes for a spicier version.
  • Nutmeg (1 pinch): A secret ingredient that enhances sweetness and flavor. Omit if you’re not a fan!

How to Make Spinach Pasta Sauce?

Follow these simple steps to create your creamy spinach pasta sauce:

  1. Blend all ingredients in a blender until completely smooth. You can watch the short video for visual instructions.
  2. Transfer the mixture to a saucepan and bring it to a boil, stirring regularly.
  3. Let it simmer for 1-2 minutes, stirring frequently, until it reaches your desired thickness.
  4. Serve over cooked pasta (or grains/potatoes) and enjoy!

Expert Tips for Perfecting Your Spinach Sauce

To ensure your sauce turns out perfectly every time, keep these expert insights in mind:

  • Use Fresh Ingredients: Fresh spinach and basil yield the best flavor and nutritional benefits.
  • Don’t Overcook: Simmering for too long can alter the taste and color of your sauce. Keep it brief!
  • Adjust Consistency: If your sauce is too thick, add a splash of water or more coconut milk for a creamier texture.
  • Season to Taste: Always taste your sauce before serving and adjust salt and pepper as needed.
  • Experiment with Spices: Feel free to add your favorite herbs or spices to customize the flavor profile!
  • Make It Ahead: The sauce can be made in advance and stored in the refrigerator for up to 3 days.
  • Freeze It: This sauce freezes well! Store it in an airtight container for up to 3 months.
  • Pair with Protein: Add grilled chicken, chickpeas, or tofu for a complete meal.
  • Mix with Pasta: Combine the sauce with cooked pasta directly in the pan for better flavor absorption.
  • Presentation Matters: Serve with a sprinkle of nutritional yeast or fresh basil for an appealing look!

Common Mistakes and Troubleshooting

Even the best cooks can make mistakes. Here’s how to avoid some common pitfalls:

  • Over-blending: Avoid over-blending the spinach, which can lead to a dull color. Blend just until smooth.
  • Too Thick: If your sauce is too thick, simply add more liquid gradually until you achieve the desired consistency.
  • Flavorless Sauce: Always taste and adjust seasoning. Don’t shy away from adding more herbs or spices!
  • Burnt Sauce: Keep an eye on the sauce as it simmers; stirring regularly can help prevent sticking.

Variations of Spinach Pasta Sauce

Looking to mix things up? Here are four delicious variations:

  • Almond Spinach Sauce: Replace coconut milk with almond milk for a different flavor profile.
  • Spicy Spinach Sauce: Add red pepper flakes or minced jalapeños for a kick of heat.
  • Lemon Spinach Sauce: Squeeze a bit of fresh lemon juice at the end for a zesty twist.
  • Cheesy Spinach Sauce: Stir in some vegan cream cheese or nutritional yeast for an even creamier, cheesier version.

Storage and Make-Ahead Instructions

You can make this sauce ahead of time and store it for later use:

  • Refrigerate: Store in an airtight container in the fridge for up to 3 days.
  • Freeze: Pour into freezer-safe containers, leaving some space for expansion. Freeze for up to 3 months.
  • Reheat: To reheat, thaw in the refrigerator overnight and reheat on the stovetop over low heat, stirring occasionally.

Common FAQs

Here are some frequently asked questions about the creamy spinach pasta sauce:

  • Can I use frozen spinach? Yes! Thawed frozen spinach works just as well as fresh.
  • Is this sauce gluten-free? Yes, as long as you use gluten-free pasta.
  • How do I make it nut-free? Simply use oat milk instead of coconut milk.
  • Can I add protein to this sauce? Absolutely! Grilled chicken, shrimp, or chickpeas make great additions.
  • How do I store leftovers? Store in an airtight container in the fridge for up to 3 days.
  • Can I adjust the creaminess? Yes, add more or less coconut milk based on your preference.
  • What pasta pairs best with this sauce? Any pasta works, but long noodles like fettuccine or linguine hold the sauce beautifully.
  • Can I serve this hot or cold? While it’s typically served hot, it can be enjoyed cold as a pasta salad!

Nutrition Tips and Dietary Adaptations

This creamy spinach pasta sauce is not only delicious but also nutritious:

  • Vegan-Friendly: All ingredients are plant-based, making it suitable for vegans and vegetarians.
  • Low-Calorie Option: Use less coconut milk to reduce calories, or substitute with a low-calorie dairy-free milk.
  • High in Fiber: Spinach and nutritional yeast contribute to your daily fiber intake, promoting digestive health.
  • Packed with Vitamins: Spinach is a great source of vitamins A, C, and K, along with iron and calcium.

Equipment Recommendations

To prepare this creamy spinach pasta sauce, you’ll need:

  • High-Speed Blender: A powerful blender ensures a smooth sauce.
  • Non-Stick Saucepan: Ideal for simmering without sticking.
  • Measuring Cups and Spoons: For accurate ingredient measurements.
  • Wooden Spoon: Perfect for stirring your sauce as it cooks.

Serving Suggestions

Once your creamy spinach pasta sauce is ready, here are some delightful serving ideas:

  • Pasta Pairing: Toss with your favorite pasta for a quick meal.
  • Grain Bowl: Serve over quinoa or brown rice for a hearty lunch.
  • Veggie Dip: Use as a dip for fresh veggies or pita chips.
  • Pizza Base: Spread it on pizza dough for a unique twist on pizza night.
  • Stuffed Peppers: Pour over stuffed peppers before baking for extra flavor.

Conclusion

This creamy spinach pasta sauce is a game-changer for your weeknight dinners! Quick, nutritious, and incredibly versatile, it proves that cooking can be simple without sacrificing flavor. With just a handful of ingredients, you can create a dish that your family will love and appreciate. So grab your blender and get ready to whip up this delightful sauce! Happy cooking!

Spinach Pasta Sauce

Prep Time 5 minutes
Cook Time 10 minutes
Total Time 15 minutes
Servings 4 servings
Calories 150
A vibrant and dairy-free spinach pasta sauce that's quick to make and packed with flavor.

Ingredients

Main ingredients

  • 3 oz fresh spinach
  • 1 handful fresh basil
  • 1 cup light coconut milk (canned)
  • 2 tbsp nutritional yeast
  • 1 tbsp cornstarch (or potato starch)
  • 2 cloves garlic
  • 1 tsp onion powder
  • ⅓-½ tsp salt (to taste)
  • to taste Black pepper
  • 1 pinch nutmeg

Instructions 

  • Blend all ingredients until smooth.
  • Transfer to a saucepan and bring to a boil, stirring.
  • Simmer for 1-2 minutes, stirring frequently.
  • Serve with cooked pasta or grains.

Notes

You can adjust salt and pepper to taste for best flavor.
Calories: 150kcal
Cost: $8
Course: Sauce
Cuisine: Vegetarian
Keyword: Spinach

Start Your Day Right with High Protein Pancakes

Are you ready to fuel your mornings with a delicious and nutritious breakfast? If you’re looking for a simple yet satisfying way to kickstart your day, these High Protein Pancakes are the perfect solution! Packed with protein and bursting with flavor, this recipe is not only easy to follow but also customizable to suit your taste. In less than 30 minutes, you can whip up a stack of fluffy pancakes that will keep you energized throughout the morning. Let’s dive into the details!

Why You’ll Love This Recipe

There are countless reasons to fall in love with these pancakes, but here are five standout benefits:

  • High in Protein: With the combination of whey protein and Greek yogurt, each pancake is loaded with protein to help you feel full and satisfied.
  • Quick and Easy: This recipe takes just a few minutes to prepare and cook, perfect for busy mornings or a cozy brunch.
  • Customizable: Feel free to add your favorite mix-ins like berries, nuts, or chocolate chips to make these pancakes your own.
  • Low in Sugar: The use of stevia glycerite means you can enjoy a sweet breakfast without the extra sugar crash.
  • Healthy Ingredients: Made with wholesome ingredients, these pancakes are a nutritious choice for any meal.

Ingredients You’ll Need

Let’s gather what you need to make these delicious High Protein Pancakes:

  • 2 large eggs: Provides structure and moisture to the pancakes.
  • 1 tablespoon vanilla extract: Adds a delightful flavor.
  • 1 teaspoon stevia glycerite: A natural sweetener that keeps sugar low.
  • ½ cup plain Greek yogurt: Adds creaminess and protein.
  • 2 scoops unsweetened whey protein powder: The star ingredient for extra protein.
  • 1 teaspoon baking powder: Helps the pancakes rise and become fluffy.
  • Avocado oil cooking spray: For a healthy non-stick cooking option.

If you have dietary restrictions or preferences, here are some suggested substitutions:

  • Eggs: You can substitute with flax eggs for a vegan option (1 tablespoon flaxseed meal + 2.5 tablespoons water = 1 egg).
  • Greek yogurt: Use dairy-free yogurt for a lactose-free option.
  • Whey protein powder: Try plant-based protein powder if you’re vegan.
  • Avocado oil: Coconut oil or any neutral oil works too!

How to Make High Protein Pancakes

Now that we have our ingredients ready, let’s walk through the steps to make these fantastic pancakes:

  1. In a medium bowl, whisk together the eggs, vanilla extract, stevia, and Greek yogurt until smooth.
  2. Add the whey protein powder and whisk until completely smooth. Don’t forget to scrape the sides with a rubber spatula as needed!
  3. Whisk in the baking powder. Let the batter rest for 1–2 minutes while heating the griddle—it will slightly thicken.
  4. Heat a nonstick griddle or 12-inch skillet over medium heat (or medium-low for electric stoves). Lightly spray with avocado oil.
  5. Use a 1.5-tablespoon cookie scoop to pour small mounds of batter onto the griddle. Since the batter is thin, it spreads out easily, making small pancakes easier to flip.
  6. Cook for about 1 minute, or until bubbles form on top and the edges look set. Flip gently and cook for just 10–20 seconds on the second side. Do not overcook—this causes dryness.
  7. Transfer the cooked pancakes to a plate, cover loosely with foil, and repeat with the remaining batter. Serve immediately!

Pro Tips for Perfect Protein Pancakes

To ensure your pancakes turn out perfectly every time, consider these expert insights:

  • Rest the batter: Allowing the batter to rest for a few minutes helps to create fluffier pancakes.
  • Don’t overmix: Mix until just combined to keep the pancakes light and airy.
  • Use a nonstick skillet: This prevents sticking and makes flipping a breeze!
  • Watch the heat: Too high heat can burn the pancakes. Medium heat is usually perfect.
  • Experiment with flavors: Try adding cinnamon or nutmeg for a warm spice flavor.
  • Keep them warm: Place cooked pancakes in a low oven to keep warm while you finish the batch.
  • Use a cookie scoop: This helps create uniform-sized pancakes for even cooking.
  • Don’t rush the flip: Wait until you see bubbles before flipping to ensure they are set.

Delicious Variations

Looking to shake things up? Here are some tasty variations you can try:

  • Chocolate Chip Pancakes: Fold in a handful of dark chocolate chips for a sweet treat.
  • Blueberry Pancakes: Stir in fresh or frozen blueberries before cooking for a fruity twist.
  • Banana Protein Pancakes: Mash a ripe banana into the batter for natural sweetness and extra moisture.
  • Nutty Pancakes: Add a tablespoon of almond or peanut butter into the batter for a nutty flavor boost.

Storage and Make-Ahead Instructions

Want to prepare these pancakes in advance? Here’s how:

  • Refrigerator: Store leftover pancakes in an airtight container in the fridge for up to 4 days.
  • Freezer: Freeze pancakes in a single layer on a baking sheet, then transfer to a zip-top bag. They can be stored for up to 2 months!
  • Reheating: Reheat pancakes in the microwave for about 30 seconds or on the stovetop over low heat until warmed through.

Frequently Asked Questions

Here are some answers to common questions about these High Protein Pancakes:

  • Can I use a different type of protein powder? Yes! Any flavor of protein powder works, just adjust the sweetness as needed.
  • Can I make these pancakes vegan? Absolutely! Substitute eggs with flax eggs and use plant-based protein powder and yogurt.
  • Why are my pancakes dry? Ensure you’re not overcooking them, and consider adding a bit more Greek yogurt to the batter.
  • How can I make these pancakes fluffier? Letting the batter rest and not over-mixing are key to fluffiness!
  • What toppings do you recommend? Fresh fruit, yogurt, maple syrup, or nut butter are all fantastic options!
  • Can I add oats to the batter? Yes! You can blend oats into flour and replace part of the protein powder for added texture.
  • What’s the best way to store leftovers? Store in an airtight container in the refrigerator or freeze for later enjoyment.
  • Can I meal prep these pancakes? Definitely! You can make a batch ahead of time and freeze them for quick breakfasts during the week.

Nutrition Tips and Dietary Adaptations

To ensure you’re getting the most out of your pancakes, consider these nutrition tips:

  • Balance your plate: Pair your pancakes with a source of healthy fat such as nut butter and some fresh fruit for a balanced meal.
  • Watch portion sizes: While packed with protein, keep an eye on serving sizes if you’re monitoring your calorie intake.
  • Gluten-free option: Substitute oat flour or gluten-free protein powder to make these pancakes gluten-free.
  • Low-carb option: Use almond flour instead of regular flour for a low-carb version.

Essential Equipment

To whip up these pancakes, be sure you have the following tools handy:

  • Mixing bowls: For blending the ingredients smoothly.
  • Whisk: To combine the ingredients efficiently.
  • Nonstick griddle or skillet: Essential for cooking the pancakes without sticking.
  • Rubber spatula: Great for scraping down the sides of bowls and flipping the pancakes.
  • Measuring cups and spoons: For accurate ingredient measurements.

Serving Suggestions

To elevate your pancake experience, consider these serving ideas:

  • Top with yogurt: Add a dollop of Greek yogurt for creaminess and extra protein.
  • Fresh fruit: Serve with a side of sliced bananas, strawberries, or blueberries for freshness.
  • Nut butter drizzle: Drizzle almond or peanut butter on top for a nutty flavor.
  • Maple syrup: A light drizzle of pure maple syrup adds sweetness without being overpowering.

With these High Protein Pancakes, you’re not just making breakfast; you’re creating a delightful experience that fuels your body and energizes your day. So gather your ingredients, follow these straightforward steps, and enjoy a stack of pancakes that are as nutritious as they are delicious. Happy cooking!

High Protein Pancakes Recipe

Prep Time 5 minutes
Cook Time 10 minutes
Total Time 15 minutes
Servings 4 pancakes
Calories 250
Delicious and nutritious high-protein pancakes perfect for a healthy breakfast.

Ingredients

Eggs

  • 2 large eggs
  • 1 tablespoon vanilla extract
  • 1 teaspoon stevia glycerite
  • ½ cup plain Greek yogurt
  • 2 scoops unsweetened whey protein powder
  • 1 teaspoon baking powder
  • 1.5 tablespoons avocado oil cooking spray

Instructions 

  • Whisk eggs, vanilla, stevia, and Greek yogurt until smooth.
  • Add whey protein and whisk until smooth; scrape sides as needed.
  • Mix in baking powder and let batter rest for 1-2 minutes.
  • Heat skillet over medium, spray with avocado oil.
  • Use 1.5-tbsp scoop to pour batter; cook until bubbles form, then flip and cook briefly.
  • Serve immediately after cooking.

Notes

For best results, do not overmix the batter to keep pancakes fluffy.
Calories: 250kcal
Cost: $15
Course: Breakfast
Keyword: pancakes

Welcome to a culinary adventure that transforms simple ingredients into an aromatic masterpiece! If you’re looking for a dish that’s not just delicious but also easy to prepare, you’ve landed in the right spot. This baked salmon in foil recipe, infused with garlic, rosemary, and thyme, is perfect for any occasion, whether it’s a weeknight dinner or a special gathering. Let’s dive into why you’ll love this recipe and how you can make it your own.

Why You’ll Love This Recipe

  • Quick and Easy Preparation: With minimal prep time, you can have a stunning salmon dish ready in about 30 minutes, making it perfect for busy weeknights.
  • Health-Conscious Meal: This recipe is not only delicious but also aligns with popular diets such as Whole30 and Keto, keeping your meals healthy without sacrificing flavor.
  • Flavorful and Moist: Baking salmon in foil locks in moisture and infuses the fish with aromatic herbs, ensuring a rich taste and tender texture.
  • Customizable Ingredients: Easily swap out herbs or add your favorite spices to make this dish your own. The flexibility allows for creativity in the kitchen!
  • Minimal Cleanup: Using foil means less mess and easy cleanup, allowing you to enjoy your meal without worrying about washing a lot of dishes.

Ingredients Breakdown

Let’s take a closer look at what you need to create this delightful dish. Here’s the list of ingredients along with some suggested substitutions:

  • 3 lb PrimeWaters Salmon Fillet: Fresh, high-quality salmon is key. If unavailable, you can use frozen salmon; just ensure it’s fully thawed before cooking.
  • Sea salt and black pepper: Essential for enhancing the flavor. Feel free to use any other seasoning blends you enjoy.
  • 6 Tbsp ghee (melted): This adds a rich flavor and is a great alternative to butter. You can substitute with olive oil for a lighter option.
  • 4 cloves Garlic (minced): Fresh garlic provides a robust flavor. If you’re short on time, you can use garlic powder instead.
  • 2 tsp fresh rosemary (minced): Fresh herbs elevate the dish. Dried rosemary can work as a substitute, but use less as it’s more concentrated.
  • 2 tsp fresh thyme leaves: Like rosemary, fresh is best, but dried thyme can also be used.
  • 1 Tbsp Lemon juice: Fresh lemon juice brightens the dish. Lime juice can be a zesty alternative.
  • 1 Tbsp parsley (minced, for garnish): This adds a pop of color and freshness. You can also use cilantro or chives.

Step-by-Step Instructions

Follow these simple steps to bake your salmon to perfection:

  1. Preheat your oven to 400° F and line a large baking sheet with foil, making sure it’s long enough to wrap the salmon later on. Spray the foil with avocado oil cooking spray to prevent sticking.
  2. In a bowl, whisk together the ghee, minced garlic, rosemary, and thyme. Pat the salmon dry with paper towels and season generously on both sides with sea salt and black pepper.
  3. Pour the ghee mixture over the salmon, ensuring it’s evenly coated. Don’t forget to rub some ghee on the skin side to help it crisp up nicely.
  4. Sprinkle the lemon juice over the salmon for that extra zing.
  5. Wrap the salmon tightly with the foil, using extra foil to cover the top. Place it in the preheated oven and bake for about 18-20 minutes or until just cooked through. Cooking time will vary depending on the thickness of your salmon fillet.
  6. Once done, carefully unwrap the foil so the top is exposed. Switch your oven to the broil setting and broil the salmon for about 3-4 minutes, watching closely to prevent burning. You want the top to be browned to your liking.
  7. Remove from the oven, sprinkle with minced parsley, and serve immediately. Enjoy your meal! For leftovers, store in a sealed container in the refrigerator for up to 3-4 days.

Pro Tips for the Perfect Baked Salmon

Juicy salmon fillet baked with garlic, displayed in a foil wrap with herbs.
  • Check for Doneness: The salmon is perfectly cooked when it reaches an internal temperature of 145° F and flakes easily with a fork.
  • Use Fresh Ingredients: Fresh herbs and quality salmon make a significant difference in flavor. Whenever possible, opt for fresh!
  • Experiment with Seasonings: Feel free to mix and match herbs and spices. Dill, tarragon, or even a touch of cumin could add a unique twist.
  • Don’t Overcook: Keep a close eye on your salmon while broiling to ensure it doesn’t dry out. A little attention goes a long way!
  • Let it Rest: Allow the salmon to rest for a few minutes before serving. This helps to lock in moisture and enhances the flavor.
  • Make it a Meal: Pair your salmon with roasted vegetables, quinoa, or a fresh salad for a complete, healthy meal.
  • Garnish for Flair: Fresh herbs, lemon slices, or a drizzle of balsamic reduction can elevate your presentation.
  • Batch Cooking: Consider making extra for meal prep. Baked salmon holds up well in the fridge and can be added to salads or grain bowls.

Common Mistakes and Troubleshooting

Even the best cooks can run into issues. Here are some common mistakes and how to avoid them:

  • Overcooking: Keep an eye on your salmon, especially during the broiling step. If it’s overcooked, it will be dry.
  • Not Using Enough Seasoning: Don’t skimp on salt and pepper! They enhance the overall flavor of the dish.
  • Forgetting to Preheat: Make sure your oven is fully preheated before placing your salmon inside for even cooking.
  • Poor Foil Wrapping: Ensure your salmon is tightly wrapped in foil to keep the moisture in. If it’s loosely wrapped, it may dry out.

Variations to Try

Want to mix things up? Here are some delicious variations on this baked salmon recipe:

  • Asian-Inspired Salmon: Use soy sauce, ginger, and sesame oil for a delightful twist.
  • Spicy Cajun Salmon: Add Cajun seasoning and a squeeze of lime for a kick of flavor.
  • Honey Mustard Salmon: Brush with a mixture of honey and Dijon mustard before baking for a sweet and tangy glaze.
  • Mediterranean Salmon: Top with olives, sun-dried tomatoes, and feta cheese for a Mediterranean flair.

Storage and Make-Ahead Instructions

This baked salmon is a fantastic option for meal prep. Here’s how to store it effectively:

  • Refrigeration: Store cooled salmon in an airtight container in the fridge for up to 3-4 days. It’s perfect for quick lunches!
  • Freezing: You can freeze leftover salmon for up to 3 months. Just ensure it’s well-wrapped in foil or freezer-safe containers.
  • Reheating: To reheat, thaw overnight in the refrigerator and then warm gently in the oven at 350° F until heated through.

Frequently Asked Questions

  • Can I use frozen salmon? Yes, just make sure it’s fully thawed before cooking for even results.
  • What’s the best way to know when salmon is done? Use a food thermometer to check for an internal temperature of 145° F.
  • Can I use other types of fish? Absolutely! This foil-baking method works well for other fish like trout or tilapia.
  • How long do leftovers last? Leftover salmon can be stored in the fridge for 3-4 days.
  • Can I add vegetables to the foil? Yes, just make sure they cook at the same rate as the salmon; thinly sliced vegetables work best.
  • Is this recipe gluten-free? Yes! As long as you use gluten-free ghee or oil, it’s gluten-free.
  • Can I make this recipe ahead of time? Yes, you can prepare the salmon and wrap it in foil. Store it in the fridge and bake it when ready.
  • What should I serve with this salmon? Roasted vegetables, rice, or a fresh salad make excellent pairings.

Nutrition Tips and Dietary Adaptations

This baked salmon recipe is not only delicious but also packed with nutrients. Salmon is an excellent source of omega-3 fatty acids, which are beneficial for heart health. Here are some additional nutrition tips:

  • Low-Carb Option: Pair with non-starchy vegetables for a low-carb meal.
  • High-Protein Meal: Salmon is rich in protein, making it a perfect post-workout dish.
  • Fiber Boost: Serve with quinoa or a side of leafy greens to increase fiber intake.

Equipment Recommendations

To make your cooking experience smoother, here are some tools I recommend:

  • Baking Sheet: A sturdy baking sheet is essential for even cooking.
  • Aluminum Foil: Use high-quality foil to prevent tearing while wrapping the salmon.
  • Meat Thermometer: This tool ensures your salmon is cooked perfectly every time.
  • Mixing Bowl: A medium-sized bowl is great for preparing your ghee and herb mixture.

Serving Suggestions

This baked salmon pairs wonderfully with a variety of sides. Here are some ideas to complete your meal:

  • Garlic Mashed Potatoes: Creamy mashed potatoes make a comforting side.
  • Roasted Asparagus: The nutty flavor of roasted asparagus complements the salmon beautifully.
  • Quinoa Salad: A light quinoa salad adds a nutritious touch.
  • Fresh Garden Salad: Crisp greens with a light vinaigrette balance the richness of the salmon.

In conclusion, this baked salmon in foil with garlic, rosemary, and thyme is not just a meal; it’s an experience. With its ease of preparation and rich flavors, you’ll find yourself coming back to this recipe time and time again. Remember, cooking should be a joyful adventure, so embrace the process and enjoy every bite! Happy cooking!

Baked Salmon in Foil with Garlic, Rosemary and Thyme {Whole30, Keto}

Prep Time 10 minutes
Cook Time 20 minutes
Total Time 30 minutes
Servings 4 servings
Calories 450
A flavorful and healthy baked salmon recipe infused with garlic, rosemary, and thyme, perfect for Whole30 and keto diets.

Ingredients

Protein

  • 3 lb PrimeWaters Salmon Fillet (**)
  • 1 Tbsp Sea salt and black pepper
  • 6 Tbsp ghee (melted)
  • 4 cloves Garlic (minced)
  • 2 tsp fresh rosemary (minced)
  • 2 tsp fresh thyme leaves
  • 1 Tbsp Lemon juice
  • 1 Tbsp parsley (minced, for garnish)

Instructions 

  • Preheat oven to 400°F (200°C). Line a baking sheet with foil and spray with oil.
  • Mix ghee, garlic, rosemary, and thyme. Pat salmon dry, season with salt and pepper, then coat with ghee mixture.
  • Pour lemon juice over salmon, wrap with foil, and bake for 18-20 minutes.
  • Unwrap salmon, broil for 3-4 minutes until browned, then garnish with parsley and serve.

Notes

Ensure not to overcook the salmon for best texture and flavor.
Calories: 450kcal
Cost: $15
Course: Main Course
Keyword: Salmon

Welcome to Your New Baking Adventure!

Have you ever wanted to bake fluffy, delicious muffins that are not only easy to make but also healthy? Look no further! These Fluffy Oat Flour Muffins are your answer. With a delightful texture and endless customization options, they’re perfect for breakfast, snacks, or even dessert. Plus, they’re gluten-free and packed with wholesome ingredients. Let’s dive into why you’ll love this recipe and how to make it your own!

Why You’ll Love This Recipe

  • Healthy Ingredients: Made with oat flour, these muffins are a fantastic alternative to traditional flour. Oat flour is high in fiber and nutrients, making these muffins a guilt-free treat.
  • Quick and Easy: This recipe is straightforward, allowing you to whip up a batch in no time, even on busy mornings!
  • Customizable Flavor: You can personalize these muffins with your favorite mix-ins like chocolate chips, nuts, or fruits, ensuring there’s a version for everyone.
  • Perfectly Fluffy: Thanks to the combination of baking powder and yogurt, these muffins rise beautifully, resulting in a light and airy texture.
  • Gluten-Free Option: Using oat flour makes these muffins gluten-free, suitable for those with dietary restrictions.

Ingredients and Substitutions

Let’s break down the ingredients you’ll need to make these delightful muffins, along with some useful substitutions:

  • 2 and 1/3 cups oat flour*: If you don’t have oat flour, you can easily make your own by blending rolled oats in a blender until fine.
  • 1/2 cup coconut sugar (or brown sugar): Substitute with maple syrup or honey for a liquid sweetener, adjusting other liquids accordingly.
  • 1/3 cup cornstarch: This helps create a lighter texture. You can replace it with arrowroot or leave it out for denser muffins.
  • 2 teaspoons baking powder: Essential for leavening. Make sure it’s fresh for the best rise.
  • 1/2 teaspoon baking soda: This works in tandem with baking powder for a fluffy texture.
  • 1/2 teaspoon salt: Enhances flavor. You can reduce it if watching sodium intake.
  • 1/2 teaspoon cinnamon (optional): A warm spice that adds depth. Feel free to omit or replace with nutmeg.
  • 2 large eggs: They provide structure. For a vegan option, use flax eggs or applesauce.
  • 2/3 cup milk (any type): Dairy or non-dairy milk works well here. Almond or oat milk are great alternatives.
  • 2/3 cup Greek yogurt (regular or vanilla): This keeps muffins moist. You can substitute with unsweetened applesauce or non-dairy yogurt.
  • 1/3 cup olive oil (or canola/vegetable oil): Adds moisture; you can also use melted coconut oil.
  • 2 teaspoons vanilla extract: Enhances flavor; look for pure extract for the best taste.
  • 1 cup mix-ins*: Chocolate chips, nuts, or dried fruits are all excellent choices!

How to Make These Easy Oat Flour Muffins

Ready to bake? Here’s a step-by-step guide to making these muffins:

  1. Preheat your oven to 375ºF and position the rack in the upper third of the oven. This helps the muffins rise better and brown evenly. Line a standard 12-cup muffin tin with paper liners and spray with non-stick spray for easy removal.
  2. In a large mixing bowl, whisk together the oat flour, coconut sugar, cornstarch, baking powder, baking soda, salt, and cinnamon. Set the dry ingredients aside.
  3. In another bowl, whisk the eggs, milk, yogurt, olive oil, and vanilla extract until smooth and well combined.
  4. Pour the wet mixture into the dry ingredients, stirring gently with a large spoon or spatula until just combined. Fold in your chosen mix-ins, such as dark chocolate chips.
  5. Distribute the batter evenly among the muffin cups. If you like a bit of crunch on top, sprinkle with turbinado sugar before baking.
  6. Bake for 14-16 minutes or until a toothpick inserted into the center comes out clean or with a few moist crumbs.
  7. Allow the muffins to cool in the pan for 5 minutes before transferring them to a wire rack to cool completely.
  8. If you enjoyed these muffins, please leave a star rating in the recipe card—it helps others discover this recipe!

Pro Tips for Perfect Muffins

To ensure your muffins turn out perfectly every time, check out these expert tips:

  • Measure Your Ingredients Accurately: Use a kitchen scale for precise measurements, especially for the oat flour. Too much flour can lead to dense muffins.
  • Room Temperature Ingredients: Let your eggs and milk sit at room temperature for 30 minutes before using. This helps create a smoother batter.
  • Don’t Overmix: Mix until just combined to avoid tough muffins. A few lumps are okay!
  • Cool Properly: Let muffins cool in the pan briefly. This helps them set and prevents sticking.
  • Experiment with Flavors: Try different spices or extracts to create unique flavor profiles.
  • Use Fresh Ingredients: Ensure your baking powder and soda are fresh for the best rise.
  • Check for Doneness: Ovens can vary, so start checking a few minutes before the suggested time.
  • Store Properly: If you have leftovers, store them in an airtight container to maintain freshness.

Common Mistakes and Troubleshooting

Even the best bakers make mistakes. Here are common pitfalls and how to avoid them:

  • Dense Muffins: This can happen if you add too much flour or overmix the batter. Stick to the measurements and mix gently!
  • Dry Muffins: Overbaking is the usual culprit. Keep an eye on them towards the end of the baking time.
  • Sticking to the Pan: Ensure you use liners and spray them with non-stick spray for easy removal.
  • Uneven Baking: Make sure your oven is preheated and avoid opening the oven door too often while baking.

Delicious Variations

Want to mix things up? Here are some creative variations to try:

  • Chocolate Chip Oat Flour Muffins: Add 1 cup of dark chocolate chips for a rich, decadent treat.
  • Blueberry Oat Flour Muffins: Fold in 1 cup of fresh or frozen blueberries for a fruity twist.
  • Banana Oat Flour Muffins: Replace the yogurt with mashed bananas for a naturally sweet flavor.
  • Pumpkin Spice Oat Flour Muffins: Add 1 cup of pumpkin puree and spices like nutmeg and ginger for a fall-inspired treat.

Storage and Make-Ahead Instructions

These muffins are great for meal prep and can be stored easily:

  • Room Temperature: Store in an airtight container for up to 3 days.
  • Refrigerator: Keep them in the fridge for up to a week if you want them to last longer.
  • Freezer: Freeze muffins in a single layer, then transfer to a zip-top bag for up to 3 months. Thaw at room temperature or microwave for a quick snack.

Comprehensive FAQ

Here are some frequently asked questions to help you get the best results:

  • Can I use a different flour instead of oat flour? Yes, but keep in mind that the texture and flavor will change. Almond flour or whole wheat flour can be good alternatives.
  • How do I know when the muffins are done? Insert a toothpick in the center; if it comes out clean or with a few moist crumbs, they’re done!
  • What can I substitute for Greek yogurt? Unsweetened applesauce or non-dairy yogurt are great substitutes.
  • Can I make these muffins vegan? Yes! Use flax eggs instead of regular eggs and non-dairy yogurt and milk.
  • How do I store leftover muffins? Keep them in an airtight container at room temperature or refrigerate for longer freshness.
  • Can I add nuts or seeds? Absolutely! Chopped walnuts or sunflower seeds make excellent additions.
  • Will these muffins freeze well? Yes, they freeze nicely. Just make sure to store them properly to avoid freezer burn.
  • How can I make these muffins lower in sugar? Reduce the amount of sugar or use a sugar substitute like stevia.

Nutritional Tips and Dietary Adaptations

To make these muffins fit your dietary needs:

  • Gluten-Free: Ensure you use certified gluten-free oats and oat flour.
  • Low-Calorie: Substitute sugar with a low-calorie sweetener and use applesauce to replace some of the oil.
  • High-Protein: Add protein powder to the mix or use Greek yogurt for moisture.

Equipment Recommendations

To make your baking experience smoother, here are some essential tools:

  • Muffin Tin: A standard 12-cup muffin tin is perfect for this recipe.
  • Mixing Bowls: Have at least two good mixing bowls—one for dry ingredients and one for wet.
  • Whisk: A sturdy whisk helps combine the wet ingredients smoothly.
  • Rubber Spatula: Ideal for folding in mix-ins without overmixing the batter.
  • Cookie Scoop: For even muffin portions, a cookie scoop is a game-changer!

Serving Suggestions

These muffins are versatile and can be enjoyed in various ways:

  • With Butter or Nut Butter: Spread a little butter or your favorite nut butter for extra richness.
  • With Fresh Fruit: Serve alongside fresh fruit for a balanced breakfast.
  • With Coffee or Tea: Pair these muffins with your morning beverage for a delightful treat.

Now that you have everything you need to create these Delightfully Fluffy Oat Flour Muffins, it’s time to get baking! Remember, cooking is about having fun and experimenting. Don’t worry if they don’t turn out perfect the first time—just enjoy the process! Happy baking!

Fluffy Oat Flour Muffins (Easy, Healthy & Customizable)

Prep Time 10 minutes
Cook Time 15 minutes
Total Time 25 minutes
Servings 12 muffins
Calories 180
These light and healthy oat flour muffins are quick to make, customizable with your favorite mix-ins, and perfect for a nutritious breakfast or snack.

Ingredients

Dry ingredients

  • 2 and 1/3 cups oat flour (*)
  • 1/2 cup coconut sugar ((or brown sugar))
  • 1/3 cup cornstarch
  • 2 teaspoons baking powder
  • 1/2 teaspoon baking soda
  • 1/2 teaspoon salt
  • 1/2 teaspoon cinnamon ((optional))

Wet ingredients

  • 2 large eggs
  • 2/3 cup milk (any type)
  • 2/3 cup Greek yogurt (regular or vanilla)
  • 1/3 cup olive oil ((canola or vegetable oil works too))
  • 2 teaspoons vanilla extract
  • 1 cup mix-ins (e.g., dark chocolate chips)

Instructions 

  • Preheat oven to 375ºF (190ºC). Line a 12-cup muffin tin with paper liners and spray with non-stick spray.
  • Mix dry ingredients in a large bowl. Whisk wet ingredients in a separate bowl.
  • Combine wet and dry mixtures, then fold in your mix-ins.
  • Distribute batter evenly into muffin cups. Bake for 14-16 minutes until a toothpick comes out clean.
  • Cool muffins in the pan for 5 minutes, then transfer to a wire rack to cool completely.

Notes

For best rise, bake in the upper third of the oven. Feel free to customize with your favorite mix-ins!
Calories: 180kcal
Cost: $10
Course: Breakfast
Cuisine: American
Keyword: Healthy, muffins, Oat

Experience the Zest: Your Ultimate Guide to Lemon Olive Oil Cake

Welcome to a culinary adventure that combines the bright, zesty flavors of lemon with the rich and fruity notes of olive oil! This Lemon Olive Oil Cake is not just a dessert; it’s an experience that elevates your baking game. With a moist texture and a burst of lemony goodness, this cake is perfect for any occasion, be it a casual family dinner or a more formal gathering. In this comprehensive guide, we’ll walk through the ingredients, method, and tips to ensure your cake turns out perfectly every time. Let’s dive into the delightful world of this Italian classic!

Why You’ll Love This Recipe

  • Simple Ingredients: Made with just a few staple items, this cake uses ingredients you likely already have at home.
  • Moist and Flavorful: The olive oil ensures a moist texture and adds a depth of flavor that butter simply can’t match.
  • Versatile Dessert: Perfect for any occasion, from birthdays to brunches, and pairs beautifully with fresh fruit or a scoop of ice cream.
  • Easy to Make: With straightforward steps, even novice bakers will feel confident tackling this recipe.
  • Healthier Option: Olive oil is a healthier fat choice, rich in antioxidants and heart-healthy fats.

Ingredients Breakdown

Gathering the right ingredients is key to making your Lemon Olive Oil Cake shine. Here’s what you’ll need:

  • 1 cup olive oil: Choose a high-quality extra virgin olive oil for the best flavor.
  • 3 large eggs: Eggs provide structure and moisture.
  • 1 1/2 cups granulated sugar: Sweetens the cake and helps create a tender crumb.
  • 2 tsp vanilla extract: Adds warmth and depth to the flavor profile.
  • 1/2 cup lemon juice: Freshly squeezed juice is best for vibrant flavor.
  • Zest from 3 lemons: Enhances the lemon flavor and adds aromatic oils.
  • 1 tsp salt: Balances the sweetness and enhances all flavors.
  • 1/2 tsp baking powder: Helps the cake rise.
  • 1/2 tsp baking soda: Works with the acid from the lemon juice to create a light texture.
  • 2 cups all-purpose flour: The base of your cake; makes it hearty.
  • 1 cup whole milk: Adds moisture and richness.
  • Powdered sugar for dusting (optional): For a beautiful finishing touch.

How to Make Lemon Olive Oil Cake

Let’s get baking! Follow these simple steps to create your delicious cake:

  1. Preheat your oven to 350°F (175°C). Prepare a 9″ springform pan by greasing the bottom and sides well. For added protection against leaks, wrap the outside with foil.
  2. Mix the wet ingredients: In a large mixing bowl, whisk together the olive oil, eggs, and sugar until well combined.
  3. Add flavor boosters: Incorporate the vanilla extract, lemon zest, and lemon juice into the mixture, whisking briefly to combine.
  4. Combine dry ingredients: In a separate bowl, sift together the salt, baking powder, baking soda, and flour.
  5. Mix the batter: Gradually add the dry ingredients to the wet mixture, alternating with the milk. Be careful not to over-mix; just combine until no dry flour remains.
  6. Prepare for baking: Pour the batter into the prepared springform pan and sprinkle 2 tablespoons of granulated sugar evenly over the top.
  7. Bake the cake: Place in the oven and bake for 50-55 minutes. The cake should be risen and golden brown. If it begins to brown too quickly, loosely cover it with foil.
  8. Cool and serve: Allow the cake to cool in the pan for about 10 minutes before gently removing it. Let it cool completely on a wire rack and dust with powdered sugar before serving.

Pro Tips for Perfecting Your Cake

  • Use fresh ingredients: Fresh lemons yield the best juice and zest. Avoid bottled lemon juice if possible.
  • Don’t overmix the batter: Overmixing can lead to a dense cake. Mix just until combined.
  • Check for doneness: Use a toothpick inserted in the center; it should come out clean or with a few crumbs.
  • Cool completely: Allow the cake to cool completely before dusting with powdered sugar to prevent it from melting into the cake.
  • Experiment with flavors: Don’t hesitate to add herbs like rosemary or thyme for a unique twist.
  • Use a scale: Weighing your ingredients can improve accuracy, especially with flour.
  • Store properly: Keep the cake covered at room temperature for up to 3 days or refrigerate for longer freshness.
  • Make ahead: This cake can be made a day in advance, allowing flavors to meld.

Common Mistakes and Troubleshooting

Even the best bakers can encounter hiccups. Here are some common mistakes and how to fix them:

  • Cake is too dry: This could be due to overbaking or too much flour. Ensure you measure accurately and keep an eye on the baking time.
  • Cake is too dense: Overmixing the batter or not incorporating enough air can lead to density. Mix gently and avoid over-mixing.
  • Flavor is muted: Always use fresh ingredients for the best taste. If using bottled lemon juice, it may lack the freshness needed to shine.
  • Cake doesn’t rise: Make sure your baking powder and baking soda are fresh for the best leavening.

Delicious Variations

Looking to shake things up? Here are some delightful variations of the classic Lemon Olive Oil Cake:

  • Blueberry Lemon Olive Oil Cake: Add 1 cup of fresh or frozen blueberries to the batter for a sweet and tart addition.
  • Glazed Lemon Olive Oil Cake: Drizzle a simple lemon glaze made from powdered sugar and lemon juice over the cooled cake for extra sweetness.
  • Almond Lemon Olive Oil Cake: Substitute half of the all-purpose flour with almond flour for a nutty flavor and slightly denser texture.
  • Herbed Lemon Olive Oil Cake: Add fresh herbs like rosemary or thyme for a savory twist that pairs well with savory meals.

Storage and Make-Ahead Instructions

Your Lemon Olive Oil Cake can be enjoyed fresh or stored for later. Here’s how:

  • Room Temperature: Store the cooled cake in an airtight container at room temperature for up to 3 days.
  • Refrigeration: For longer storage, wrap the cake tightly in plastic wrap and refrigerate for up to a week.
  • Freezing: You can freeze the cake for up to 3 months. Wrap it tightly in plastic wrap and aluminum foil before freezing. Thaw in the refrigerator overnight before serving.

Frequently Asked Questions

Here are some common questions about Lemon Olive Oil Cake:

  • Can I substitute olive oil with another oil? Yes, you can use vegetable or canola oil, but you will lose the unique flavor of olive oil.
  • Is it normal for the cake to crack? Yes, a slight crack on top is normal and adds to the rustic charm of the cake.
  • Can I use a different size pan? Yes, but adjust the baking time accordingly. A larger pan may require less time, while a smaller pan may require more.
  • What should I serve with this cake? Fresh berries, whipped cream, or a scoop of vanilla ice cream make great accompaniments.
  • How can I make this cake gluten-free? Substitute all-purpose flour with a gluten-free flour blend.
  • Can I add nuts to the batter? Absolutely! Chopped walnuts or almonds can add a delightful crunch.
  • What’s the best way to zest a lemon? Use a microplane or a fine grater to get the zest without the bitter white pith.
  • Can I make this cake a day ahead? Yes! In fact, it tastes even better the next day as the flavors meld.

Nutritional Considerations

This cake can be a part of a balanced diet when enjoyed in moderation. Here are a few tips:

  • Control portions: Consider slicing the cake into smaller pieces to enjoy the flavors without overindulging.
  • Pair with fruit: Serve with a side of fresh fruit to add nutrients and fiber to your dessert.
  • Consider substitutions: For a lower sugar option, reduce the amount of sugar or use a sugar substitute suitable for baking.

Equipment Recommendations

Having the right equipment can make the baking process smoother:

  • Springform pan: Ideal for easy release and presentation.
  • Mixing bowls: A set of varying sizes will help in managing your ingredients.
  • Whisk: A good whisk is crucial for incorporating air into your wet ingredients.
  • Spatula: Use a rubber spatula to gently fold in the dry ingredients without overmixing.

Serving Suggestions

When it comes to serving your cake, a few simple touches can elevate the experience:

  • Garnish with zest: A sprinkle of lemon zest on top adds a fresh finish.
  • Pair with cream: A dollop of whipped cream or crème fraîche complements the cake beautifully.
  • Fresh berries: Serve with a side of mixed berries or a berry compote for a pop of flavor.
  • Tea or coffee: This cake pairs wonderfully with a cup of tea or coffee, making it a perfect afternoon treat.

Conclusion

Now that you have all the tools and tips to create a stunning Lemon Olive Oil Cake, it’s time to get baking! Remember, the most important ingredient is your enthusiasm. This cake is a celebration of flavor, simplicity, and the joy of baking. Enjoy every bite and share it with loved ones. Happy baking!

Lemon Olive Oil Cake

Prep Time 15 minutes
Cook Time 55 minutes
Total Time 1 hour 10 minutes
Servings 8 pieces
Calories 350
A moist and flavorful cake featuring the bright citrus notes of lemon and the richness of olive oil, perfect for any occasion.

Ingredients

Main

  • 1 cup olive oil (see notes in the post about choosing an olive oil for this recipe)
  • 3 large eggs
  • 1.5 cups granulated sugar (plus 2 tbsp for sprinkling the top)
  • 2 tsp vanilla extract
  • 0.5 cup lemon juice
  • zest from 3 lemons lemon zest
  • 1 tsp salt
  • 0.5 tsp baking powder
  • 0.5 tsp baking soda
  • 2 cups all purpose flour
  • 1 cup whole milk
  • powdered sugar powdered sugar for dusting (optional)

Instructions 

  • Preheat oven to 350°F (175°C). Grease a 9" springform pan and wrap with foil.
  • Whisk together olive oil, eggs, and sugar. Add vanilla, lemon zest, and lemon juice; mix briefly.
  • Sift salt, baking powder, baking soda, and flour. Alternately add dry ingredients and milk to wet mixture, mixing gently.
  • Pour batter into pan, sprinkle with 2 tbsp sugar. Bake for 50-55 minutes until golden and risen.
  • Cool for 10 minutes, then remove from pan and cool completely. Dust with powdered sugar if desired.

Notes

Use high-quality extra virgin olive oil for best flavor.
Calories: 350kcal
Cost: $15
Course: Dessert
Cuisine: American
Keyword: cake, lemon, olive oil

Your Ultimate Guide to Energizing Oatmeal Protein Pancakes

If you’re looking for a delicious and nutritious way to kickstart your day, look no further than these Oatmeal Protein Pancakes. Packed with the goodness of banana and whey protein, they’re not just easy to make but also a fantastic source of energy. In this guide, I’ll take you through everything you need to know to make these pancakes a staple in your breakfast routine. From ingredient breakdowns to expert tips, read on for the ultimate pancake experience!

Why You’ll Love This Recipe

These Oatmeal Protein Pancakes are not just another breakfast option; they come with a host of benefits:

  • High Protein Content: With the addition of whey protein, these pancakes help keep you full and satisfied, making them perfect for active mornings.
  • Whole Grain Goodness: Using rolled oats instead of traditional flour means you’re getting more fiber, which supports digestive health.
  • Easy to Customize: Feel free to add your favorite fruits, nuts, or seeds to modify flavors and nutrients according to your preference.
  • Quick Preparation: Whipping these up takes only about 15 minutes, making them a great option for busy mornings.
  • Family-Friendly: Kids love them! Their sweet banana flavor makes them a breakfast hit for the whole family.

Detailed Ingredient Breakdown

Let’s dive deeper into the ingredients for these Oatmeal Protein Pancakes and see how you can customize them.

  • 1 ripe banana, mashed: Provides natural sweetness and moisture. You can substitute with unsweetened applesauce if desired.
  • 1 cup rolled oats, ground into flour: This forms the base of the pancakes. If you’re gluten-free, use certified gluten-free oats.
  • 1 scoop vanilla whey protein (about 30 g): Adds protein; feel free to use plant-based protein if you prefer.
  • 1 teaspoon baking powder: Helps the pancakes rise. Don’t skip this ingredient!
  • 1 pinch fine salt: Enhances flavor; sea salt works wonderfully.
  • 1 teaspoon pure vanilla extract: Adds depth of flavor; avoid artificial extracts for best results.
  • 1 large egg: Binds the ingredients; for a vegan option, use a flax egg.
  • 3/4 cup milk (dairy or unsweetened almond): Adjust the liquid based on desired pancake thickness.
  • 1 teaspoon neutral oil or butter for the pan: Prevents sticking; coconut oil adds a nice flavor.

How to Make Your Oatmeal Protein Pancakes

Follow these simple steps for fluffy and delicious pancakes:

  1. Grind the oats in a blender to make a fine flour. Add the mashed banana, egg, whey protein, baking powder, salt, vanilla extract, and milk. Blend until the mixture is smooth and thick but still pourable.
  2. Heat a nonstick pan over medium heat and lightly grease the surface. A drop of batter should sizzle when the pan is ready.
  3. Pour small rounds of batter onto the pan. Cook until the edges look set and small bubbles form on the surface. Flip once and cook until the centers spring back to a gentle tap.
  4. Transfer pancakes to a warm plate and let them rest for one minute for the steam to finish cooking.
  5. Serve warm with fresh fruit, Greek yogurt, or a light drizzle of maple syrup. Enjoy!

Pro Tips for Perfect Pancakes

  • Rest the Batter: Allow the blended batter to sit for 5 minutes. This helps the oats absorb moisture and results in a fluffier pancake.
  • Medium Heat is Key: Cooking on medium heat prevents burning while allowing the pancakes to cook evenly.
  • Don’t Overmix: Blend until just combined. Overmixing can lead to dense pancakes.
  • Flip with Care: Wait for bubbles to form before flipping to ensure the pancake is cooked through.
  • Experiment with Flavors: Add cinnamon, nutmeg, or cocoa powder for different flavor profiles.
  • Batch Cooking: Make a double batch and freeze extras for busy mornings!
  • Use a Cookie Scoop: For even pancakes, use a cookie scoop to portion out the batter.
  • Keep Warm: Place cooked pancakes in a warm oven (200°F) while finishing the batch.

Common Mistakes and Troubleshooting

Here are some common pitfalls and how to avoid them:

  • Pancakes are too dense: Ensure you’ve blended the batter just until combined and used the right amount of baking powder.
  • Sticking to the pan: Make sure your pan is adequately greased and preheated before adding the batter.
  • Pancakes are burnt on the outside, raw on the inside: Lower your heat and cook them longer; patience is key!
  • Flavor is lacking: Adjust your vanilla extract or add a pinch of cinnamon for added depth.

Variations to Try

Here are some fun twists to make these pancakes even more exciting:

  • Chocolate Chip Oatmeal Pancakes: Add a handful of dark chocolate chips to the batter for a sweet treat.
  • Berry Blast Pancakes: Fold in fresh or frozen berries for a burst of flavor and color.
  • Nutty Banana Pancakes: Stir in chopped nuts like walnuts or pecans for extra crunch and nutrients.
  • Spiced Pumpkin Pancakes: Substitute half the banana for pumpkin puree and add pumpkin pie spice for a seasonal delight.

Storage and Make-Ahead Instructions

Want to save time in the mornings? Here’s how to prepare:

  • Refrigerate: Store cooked pancakes in an airtight container in the fridge for up to 3 days.
  • Freeze: Place pancakes in a single layer on a baking sheet, freeze until solid, then stack in a freezer bag for up to 2 months.
  • Reheat: Microwave for 30 seconds or toast in a toaster for a quick warm-up.

Frequently Asked Questions

Here are answers to some common questions about these Oatmeal Protein Pancakes:

  • Can I use a different kind of oats? Yes, but make sure to use rolled oats or quick oats for the best texture.
  • What can I use instead of whey protein? You can substitute with plant-based protein powder or leave it out entirely for a lower protein option.
  • Can I make these pancakes vegan? Absolutely! Use a flax egg and non-dairy milk for a vegan-friendly version.
  • How do I know when to flip the pancakes? Look for bubbles forming on the surface and edges that look set.
  • What toppings do you recommend? Fresh fruit, Greek yogurt, nut butter, or a drizzle of honey or maple syrup work wonderfully.
  • Can I double the recipe? Yes! Simply double all ingredients for a larger batch.
  • How do I store leftover pancakes? Store them in an airtight container in the fridge or freezer as mentioned above.
  • Are these pancakes gluten-free? Yes, if you use certified gluten-free oats and ensure no cross-contamination.

Nutrition Tips and Dietary Adaptations

These pancakes are not only delicious but also adaptable to fit various dietary needs:

  • Low-Carb Option: Substitute oats with almond flour for a low-carb version.
  • Increase Fiber: Add chia seeds or flaxseeds to the batter for added fiber.
  • Reduce Sugar: The natural sweetness from bananas can help you cut back on added sugars.
  • Boost Omega-3s: Use flaxseed meal instead of some of the oats to increase omega-3 fatty acids.

Equipment Recommendations

To make the best Oatmeal Protein Pancakes, here are a few kitchen tools to consider:

  • High-Powered Blender: Essential for grinding oats and creating a smooth batter.
  • Nonstick Skillet: A good quality nonstick skillet ensures pancakes cook evenly without sticking.
  • Spatula: A thin, flexible spatula helps in flipping pancakes without breaking them.
  • Mixing Bowl: A large mixing bowl for easily combining all ingredients.

Serving Suggestions

Enjoy your pancakes in a variety of ways:

  • Classic Style: Stack them up and serve with a drizzle of maple syrup and fresh fruit.
  • Breakfast Bowl: Crumble pancakes into a bowl, top with yogurt and berries for a delicious breakfast bowl.
  • On the Go: Wrap pancakes in foil or parchment for a quick breakfast you can take anywhere.
  • Pair with Smoothies: These pancakes go wonderfully with a refreshing smoothie for a balanced meal.

With these tips, variations, and comprehensive insights, you’re all set to create the ultimate Oatmeal Protein Pancakes experience. Happy cooking, and remember—cooking is about having fun and enjoying the process. Let’s make breakfast exciting again!

Oatmeal Protein Pancakes | Banana Whey And Oats

Prep Time 5 minutes
Cook Time 10 minutes
Total Time 15 minutes
Servings 2 pancakes
Calories 250
Enjoy fluffy, protein-packed pancakes made with oats, banana, and whey for a healthy breakfast.

Ingredients

Main

  • 1 large ripe banana (mashed)
  • 1 cup rolled oats ground into flour
  • 1 scoop vanilla whey protein (about 30 g)
  • 1 teaspoon baking powder
  • 1 pinch fine salt
  • 1 teaspoon pure vanilla extract
  • 1 large egg
  • 3/4 cup milk dairy or unsweetened almond
  • 1 teaspoon neutral oil or butter for the pan

Instructions 

  • Blend oats into a fine flour, then add banana, egg, whey, baking powder, salt, vanilla, and milk. Blend until smooth.
  • Heat a nonstick pan over medium and lightly grease. Pour batter in small rounds.
  • Cook until edges are set and bubbles form, then flip and cook until centers are firm.
  • Transfer to a plate and let rest for one minute before serving.
  • Serve warm with your favorite toppings like fruit or yogurt.

Notes

For extra flavor, add a sprinkle of cinnamon or top with fresh berries.
Calories: 250kcal
Cost: $8
Course: Breakfast
Cuisine: American
Keyword: Banana, Healthy, Protein

Welcome to a flavor explosion that encapsulates the essence of summer in every bite! This burrata bruschetta recipe is not just a dish; it’s a celebration of fresh ingredients, simplicity, and the joy of cooking. With just a few straightforward steps, you can create a mouthwatering appetizer or a light meal that will impress friends and family alike. Let’s dive into this delightful culinary adventure!

Why You’ll Love This Recipe

Here are some reasons why this burrata bruschetta will find a permanent spot in your recipe repertoire:

  • Quick & Easy: With only a handful of ingredients, you can whip this up in under 30 minutes!
  • Fresh Flavors: The combination of ripe tomatoes, creamy burrata, and fragrant basil offers a taste of summer year-round.
  • Versatile Dish: Perfect as an appetizer, a light lunch, or even a brunch treat, this bruschetta fits any occasion.
  • Impressive Presentation: Beautifully layered and vibrant, this dish is sure to draw admiration at any gathering.
  • Healthful Ingredients: Packed with fresh veggies and healthy fats, this dish is not only delicious but nutritious!

Ingredients & Preparation: Building Layers of Flavor

To create the perfect burrata bruschetta, here’s what you’ll need:

  • 8 slices ciabatta bread: Any crusty bread will do; think focaccia or baguette for a twist.
  • 1 tablespoon olive oil: Use high-quality olive oil to elevate the flavors.
  • 2 cups cherry tomatoes (halved): Fresh, ripe tomatoes are key; consider heirloom for extra color and flavor.
  • 1 clove garlic (minced): Adds a subtle kick that complements the creaminess of burrata.
  • 1/4 teaspoon salt: Enhances the natural flavors of the ingredients.
  • 1/4 teaspoon black pepper: A touch of spice to balance the sweetness of the tomatoes.
  • 10 leaves fresh basil (chopped): Fresh basil is essential for that authentic Italian taste.
  • 8 ounces burrata cheese: Use fresh for the best taste; it’s the star of the dish!
  • Balsamic glaze (optional): Drizzling this on adds a sweet tang that complements the dish beautifully.

Step-by-Step: How to Make Burrata Bruschetta

Ready to get cooking? Follow these simple steps for a delicious burrata bruschetta:

  1. Preheat: Start by preheating your oven to 400°F (200°C).
  2. Prep the Bread: Arrange slices of ciabatta on a baking sheet and brush one side with olive oil.
  3. Toast: Bake for about 5-7 minutes until golden brown, then let them cool slightly.
  4. Mix Ingredients: In a bowl, combine halved cherry tomatoes, minced garlic, salt, pepper, and chopped basil. Toss gently.
  5. Assemble: On each toasted bread slice, place a generous amount of the tomato mixture.
  6. Add Burrata: Tear burrata cheese into pieces and place on top of the tomatoes.
  7. Drizzle: Add balsamic glaze if desired, and sprinkle with extra salt and pepper.
  8. Serve: Enjoy immediately on a beautiful platter!

Pro Tips: Elevate Your Burrata Bruschetta

Want to take your burrata bruschetta to the next level? Here are some expert insights:

  • Room Temperature Burrata: Let the burrata sit at room temperature before serving for a creamier texture.
  • Marinate Tomatoes: For extra flavor, let your tomatoes marinate in olive oil and balsamic for 15-30 minutes before using.
  • Grill the Bread: For a smokier flavor, grill the bread instead of baking it.
  • Fresh Herbs: Experiment with different herbs like oregano or thyme for a unique twist.
  • Add Protein: Feel free to top with prosciutto or grilled chicken for a heartier meal!
  • Serve with a Side: Pair this bruschetta with a light salad or your favorite antipasto platter.
  • Make Ahead: Prepare the tomato mixture ahead of time but assemble right before serving for best results.
  • Experiment with Flavors: Consider adding a splash of lemon juice or chili flakes for an extra kick!

Common Mistakes & Troubleshooting

Even the best recipes can have their hiccups! Here are common mistakes and how to avoid them:

  • Over-toasting Bread: Keep a close eye on the bread while it’s in the oven to avoid burning.
  • Using Old Ingredients: Always use fresh tomatoes and herbs for the best flavor.
  • Skipping Seasoning: Don’t forget to season the tomato mixture; it makes all the difference!
  • Cold Burrata: Avoid serving cold burrata; it should be warm and creamy.

Variations to Try

Feeling adventurous? Here are some fun variations of burrata bruschetta:

  • Caprese Twist: Add slices of fresh mozzarella and a drizzle of pesto.
  • Mediterranean Style: Top with olives, sun-dried tomatoes, and feta cheese.
  • Spicy Kick: Add jalapeños or a sprinkle of red pepper flakes for heat.
  • Seasonal Fruits: Swap tomatoes for sliced peaches or figs for a unique flavor profile.

Storage & Make-Ahead Instructions

Want to prep ahead? Here’s how to store and reheat your burrata bruschetta:

  • Storage: Store leftover tomato mixture in an airtight container in the fridge for up to 2 days.
  • Reheating: If you have leftover bread, reheat it in the oven before serving to restore crispness.
  • Make Ahead: Prepare all components separately and assemble just before serving.

FAQ: Burrata Bruschetta Questions, Answered

Here are answers to some common questions about making burrata bruschetta:

  • Can I use other types of cheese? Absolutely! Try goat cheese or ricotta for a different flavor.
  • Is burrata the same as mozzarella? No, burrata is creamier and richer than traditional mozzarella.
  • How do I choose ripe tomatoes? Look for tomatoes that are slightly soft to the touch with a sweet aroma.
  • Can I make bruschetta without baking? Yes, you can grill or pan-fry the bread instead!
  • What’s the best way to cut burrata? Use a sharp knife to delicately slice or tear it for serving.
  • How long does burrata last? Fresh burrata is best consumed within 2-3 days for optimal taste.
  • Can I freeze burrata? Freezing is not recommended as it can alter the texture.
  • What should I serve with bruschetta? Pair it with a light salad or a selection of antipasto for a delightful meal.

Nutrition Tips & Dietary Adaptations

This burrata bruschetta can easily be adapted for various dietary needs:

  • Gluten-Free: Use gluten-free bread options to enjoy this dish.
  • Dairy-Free: Substitute burrata with a vegan cheese alternative.
  • Low-Carb: Serve the tomato mixture over cucumber slices or bell pepper halves.

Equipment Recommendations

Here’s what you need to get started:

  • Baking Sheet: For toasting the bread.
  • Mixing Bowl: To combine the tomato mixture.
  • Sharp Knife: For slicing the burrata and bread.

Serving Suggestions

How to make your presentation pop:

  • Garnish: Add extra basil leaves or microgreens for a beautiful touch.
  • Platter Presentation: Arrange bruschetta on a wooden board for a rustic look.
  • Pairing Drinks: Serve with a glass of chilled white wine or sparkling water.

Conclusion: A Simple Recipe That Feels Like a Celebration

There you have it! This effortless burrata bruschetta is not just a recipe; it’s an experience that brings people together. With its fresh flavors and simple preparation, you’re sure to impress anyone who takes a bite. So gather your ingredients, invite some friends over, and enjoy a delightful culinary adventure that reminds you of sunny days and good company. Happy cooking!

Burrata Bruschetta

Prep Time 10 minutes
Cook Time 7 minutes
Total Time 17 minutes
Servings 4 pieces
Calories 350
A delicious appetizer featuring toasted bread topped with fresh tomatoes, creamy burrata, and basil, drizzled with balsamic glaze.

Ingredients

Bread

  • 8 slices ciabatta bread (or any crusty bread)
  • 1 tablespoon olive oil

Tomatoes

  • 2 cups cherry tomatoes (halved)
  • 1 clove garlic (minced)
  • 0.25 teaspoon salt
  • 0.25 teaspoon black pepper
  • 10 leaves fresh basil (chopped)
  • 8 ounces burrata cheese (use fresh for best taste)
  • to taste balsamic glaze balsamic glaze (for drizzling (optional))

Instructions 

  • Preheat oven to 400°F (200°C).
  • Arrange bread slices on a baking sheet, brush with olive oil, and toast for 5-7 minutes until golden.
  • Mix cherry tomatoes, garlic, salt, pepper, and basil in a bowl.
  • Spread tomato mixture on toasted bread slices, top with torn burrata, and drizzle with balsamic glaze if desired.

Notes

Serve immediately for the best taste and texture.
Calories: 350kcal
Cost: $15
Course: Appetizer
Cuisine: Italian
Keyword: Burrata

Welcome to the world of quick and delicious cooking! If you’re looking for a meal that sings with flavor yet can be prepared in under 20 minutes, you’ve landed in the right spot. This pasta with spinach is not just a dish; it’s a celebration of simplicity and taste that brightens up your weeknight dinners. With fresh spinach and just a handful of ingredients, this recipe is ideal for busy home cooks wanting to whip up something nutritious and satisfying without the fuss.

Why You’ll Love This Recipe

This spinach pasta recipe stands out for several reasons:

  • Quick and Easy: In less than 20 minutes, you can create a delightful dinner, making it perfect for those hectic weeknights.
  • Nutrient-Packed: Fresh spinach adds a vibrant green color and is loaded with essential vitamins and minerals, making this dish both tasty and healthy.
  • Flavor Harmony: The combination of garlic, olive oil, and Parmesan cheese creates a rich flavor profile that elevates the dish without overwhelming it.
  • Versatile Ingredients: You can easily swap the pasta or add proteins like chicken or shrimp, making it adaptable to what you have on hand.
  • Minimal Cleanup: With just one skillet, you save time on cooking and cleaning, allowing you to relax and enjoy your meal.

Everything You’ll Need for Pasta with Spinach

Gather these ingredients for a delightful cooking experience:

  • 8 ounces (225 grams) pasta: Choose your favorite type, like spaghetti or penne.
  • 6 cups (6 ounces) fresh spinach: Opt for organic if possible for the best flavor.
  • 2 tablespoons olive oil: Extra virgin is recommended for its rich flavor.
  • 3 cloves garlic, minced: Fresh garlic will provide the best aroma and taste.
  • ½ teaspoon red pepper flakes (optional): For a touch of heat.
  • ¼ cup grated Parmesan cheese: This adds a creamy texture and savory depth.
  • Salt and black pepper, to taste: Essential for seasoning.
  • ¼ cup reserved pasta water (optional): This starchy liquid can enhance the sauce’s consistency.
  • Lemon wedges (optional): A squeeze of fresh lemon brightens the dish beautifully.

How to Make Pasta with Spinach in Minutes

Let’s jump into the cooking process! Follow these simple steps to create your dish:

  1. Boil the Pasta: Prepare a generously salted pot of water and bring it to a vigorous boil. Submerge the pasta, cooking until it reaches a tender yet firm texture, following package instructions. Reserve a modest portion of starchy cooking liquid before draining the pasta.
  2. Awaken Garlic Flavors: In a spacious skillet, warm olive oil over moderate heat. Introduce the minced garlic and optional red pepper flakes, allowing them to dance and release their aromatic essence without scorching.
  3. Embrace the Spinach: Carefully tumble the fresh spinach leaves into the fragrant oil. Gently coax them to surrender and collapse into a vibrant emerald mass. Season with a delicate whisper of salt and freshly cracked black pepper.
  4. Marry Pasta and Spinach: Slide the drained pasta into the wilted spinach, creating a harmonious blend. If the mixture appears parched, splash in the reserved cooking liquid to restore moisture and silkiness. Scatter Parmesan cheese throughout, ensuring each strand receives a coating of creamy goodness.
  5. Plate and Enjoy: Transfer the verdant pasta to waiting plates, adorning with an extra flourish of Parmesan. For those desiring brightness, crown the dish with a zesty squeeze of lemon juice just before serving.

Pro Tips for the Best Spinach Pasta

Here are some expert insights to elevate your cooking:

  • Perfect Texture: Always cook pasta al dente to ensure it holds up when combined with the spinach.
  • Freshness Matters: Use fresh spinach for the best flavor and texture; frozen spinach can be too watery.
  • Reserve Pasta Water: This starchy liquid can help emulsify the sauce, giving it a creamier texture.
  • Don’t Rush the Garlic: Let the garlic cook gently; if it burns, it can turn bitter, ruining the dish.
  • Experiment with Cheeses: Try using Pecorino Romano or nutritional yeast for a twist on the classic flavor.
  • Add Protein: Grilled chicken, shrimp, or chickpeas can be added for a heartier meal.
  • Adjust the Heat: Modify the amount of red pepper flakes based on your spice tolerance.
  • Garnish Creatively: Fresh herbs like basil or parsley can add an extra pop of color and flavor.

Common Mistakes to Avoid

Even simple recipes can have pitfalls. Here’s what to watch for:

  • Overcooking Pasta: Ensure you follow the recommended cooking time on the package for the best texture.
  • Neglecting to Salt the Water: A well-salted water enhances the pasta’s flavor significantly.
  • Using Dried Spinach: Dried spinach lacks the flavor and texture of fresh spinach, so always opt for fresh.
  • Skipping the Reserve: Always reserve some pasta water! It’s a game-changer for sauce consistency.
  • Rushing the Garlic: Garlic needs time to infuse its flavor; don’t rush this step.

Delicious Variations to Try

Mix it up! Here are some fun variations to this basic recipe:

  • Spinach and Feta: Add crumbled feta cheese for a Mediterranean twist.
  • Creamy Spinach Pasta: Stir in a splash of heavy cream or plant-based cream for a richer sauce.
  • Spinach and Lemon: Increase the lemon juice and zest for a bright and zesty flavor.
  • Nutty Addition: Toss in toasted pine nuts or walnuts for added crunch and nutrition.

Storage and Make-Ahead Instructions

This dish is perfect for meal prepping. Here’s how to store it:

  • Refrigeration: Store leftovers in an airtight container for up to 3 days.
  • Freezing: While not ideal, you can freeze the dish for up to a month. Reheat gently on the stovetop.
  • Make-Ahead: Prepare the pasta and spinach mixture a day in advance; reheat and add the cheese just before serving.

Frequently Asked Questions

Got questions? We’ve got answers!

  • Can I use frozen spinach? Yes, but be sure to thaw and drain it well to avoid excess moisture.
  • What pasta works best? Any pasta shape works well—choose based on your preference!
  • Is this recipe gluten-free? Absolutely! Use gluten-free pasta for a delicious alternative.
  • Can I add meat? Yes! Grilled chicken or shrimp make great additions.
  • How do I make it vegan? Substitute Parmesan with nutritional yeast and use plant-based cream.
  • Can I double the recipe? Yes, just ensure you have a large enough skillet or pot.
  • What can I serve this with? Consider a side salad or garlic bread for a complete meal.
  • How spicy is this dish? It can be adjusted based on the amount of red pepper flakes you use.

Nutritional Tips and Dietary Adaptations

For a well-rounded meal, consider these tips:

  • Add Protein: Include lean meats or legumes to make this dish heartier.
  • Boost the Veggies: Throw in other vegetables like bell peppers or mushrooms for added nutrition.
  • Control the Salt: Adjust salt based on dietary needs, especially if you’re watching sodium intake.

Equipment Recommendations

To make this dish, you’ll need:

  • Large Pot: For boiling pasta.
  • Skillet: A wide skillet is ideal for sautéing and combining ingredients.
  • Measuring Cups and Spoons: Essential for accuracy in ingredients.
  • Colander: For draining pasta effectively.

Serving Suggestions

Consider these ideas to elevate your meal:

  • Garnish: Fresh herbs like parsley or basil add a touch of color and flavor.
  • Pair with Wine: A crisp white wine complements the flavors beautifully.
  • Accompany with Bread: Serve with crusty bread for a delightful combination.
  • Include a Side Salad: A simple green salad can balance the meal and add freshness.

Conclusion

Cooking doesn’t have to be complicated to be delicious! This quick and flavorful pasta with spinach is a testament to that, proving that with just a few quality ingredients, you can create a meal that’s both satisfying and nutritious. So, roll up your sleeves and dive into this recipe tonight—your taste buds will thank you!

Pasta With Spinach: Easy & Quick Recipe

Prep Time 10 minutes
Cook Time 15 minutes
Total Time 25 minutes
Servings 4 servings
Calories 450
A quick and flavorful pasta dish featuring fresh spinach and Parmesan, perfect for a wholesome meal in minutes.

Ingredients

Pasta

  • 8 ounces pasta (spaghetti, penne, or your choice)

Fresh Spinach

  • 6 cups fresh spinach

Olive Oil

  • 2 tablespoons olive oil

Garlic

  • 3 cloves garlic, minced

Red Pepper Flakes

  • ½ teaspoon red pepper flakes (optional)

Parmesan Cheese

  • ¼ cup grated Parmesan cheese (plus more for garnish)

Salt and Black Pepper

  • to taste Salt and black pepper

Pasta Water

  • ¼ cup reserved pasta water (optional)

Lemon Wedges

  • optional Lemon wedges

Instructions 

  • Cook pasta in salted boiling water until al dente, then drain, reserving some pasta water.
  • Heat olive oil in a skillet, add minced garlic and red pepper flakes, cook briefly.
  • Add spinach to the skillet, season with salt and pepper, cook until wilted.
  • Combine pasta with spinach, add reserved water if needed, then stir in Parmesan cheese. Garnish with extra cheese and lemon if desired.

Notes

For added flavor, squeeze fresh lemon juice over the dish before serving.
Calories: 450kcal
Cost: $12
Course: Main Course
Cuisine: Italian
Keyword: Pasta, Spinach

A Slice of Sunshine: The Ultimate Orange Creamsicle Cake Recipe

Welcome to the delightful world of baking, where today we’re diving into a refreshing treat that embodies summer in every bite: the Orange Creamsicle Cake! This cake, bursting with vibrant orange and lemon flavors, is not just a feast for the taste buds but also a visual delight. Perfectly gluten-free, Paleo, and Keto-friendly, this recipe is designed to make your cooking experience enjoyable and stress-free. Whether you’re celebrating a special occasion or just want to treat yourself and your loved ones, this Orange Creamsicle Cake promises to impress. Let’s get started!

Why You’ll Love This Recipe

  • Easy to Make: With straightforward steps and simple ingredients, this recipe is perfect for bakers of all levels.
  • Gluten-Free Goodness: Made with coconut flour, this cake caters to those with gluten sensitivities without compromising on taste.
  • Low Carb Options: Use a low-carb sweetener for a guilt-free dessert that fits your dietary needs.
  • Flavor Explosion: The combination of fresh orange and lemon juices creates a refreshing, zesty flavor that’s irresistibly delicious.
  • Versatile Frosting: Top it with cream cheese frosting or a whipped topping for a creamy finish that enhances the cake’s flavors.

Ingredient Breakdown

To create this delicious Orange Creamsicle Cake, you’ll need the following ingredients:

  • Coconut Flour: ½ cup. A fantastic gluten-free alternative that gives the cake a light texture.
  • Eggs: 4 large. Essential for binding the ingredients and providing moisture.
  • Honey or Low Carb Sweetener: ⅓ cup. Use honey for a natural sweetness or low-carb options for a Keto-friendly version.
  • Butter or Coconut Oil: ⅓ cup. Choose butter for richness or coconut oil for a dairy-free option.
  • Fresh Orange Juice: 2 tablespoons. This is the secret to that vibrant, refreshing flavor.
  • Fresh Lemon Juice: 2 tablespoons. Adds brightness and balances the sweetness.
  • Vanilla Extract: 1½ teaspoons. A must-have for enhancing flavors.
  • Baking Soda: ½ teaspoon. Helps the cake rise beautifully.
  • Sea Salt: ½ teaspoon. Enhances overall flavor.
  • Orange Oil: ⅛ teaspoon (or 2 drops of orange essential oil). For a concentrated orange flavor.

For the frosting, gather:

  • Room Temperature Butter: ½ cup. Softened for easy mixing.
  • Room Temperature Cream Cheese: 8 ounces. Provides a rich and creamy texture.
  • Powdered Sweetener: 2 tablespoons. For a smooth, sweet frosting.
  • Vanilla Extract: ½ teaspoon. Complements the cream cheese.
  • Orange Oil: 1/16 teaspoon (or 1 drop of orange essential oil). Boosts the orange flavor in the frosting.

Step-by-Step Instructions

Ready to bake? Follow these simple steps to create your Orange Creamsicle Cake:

  • Prepare the Pan: Grease an 8-inch round or square baking pan. For easier removal, line with parchment paper. Preheat your oven to 350°F (175°C).
  • Mix Dry Ingredients: In a large mixing bowl, stir together the coconut flour, sweetener (if using a granulated low-carb option), baking soda, and sea salt.
  • Combine Wet Ingredients: In a separate bowl, whisk together the eggs, honey (or liquid low-carb sweetener), melted fat (butter or coconut oil), orange juice, lemon juice, vanilla extract, and orange oil.
  • Blend Together: Pour the wet ingredients into the dry ingredients. Stir until fully combined, being careful not to over-mix. The reaction between the baking soda and citrus juice will help the batter rise.
  • Bake: Pour the batter into the prepared pan(s). Bake for 20 to 25 minutes, or until a toothpick inserted in the center comes out clean and the edges are lightly browned.
  • Cool: Allow the cake to cool completely in the pan. For easier frosting, chill the cake in the refrigerator before applying the frosting.

Pro Tips for Success

Here are some expert insights to ensure your cake turns out perfectly:

  • Don’t Overmix: Gently combine the ingredients to prevent a dense cake.
  • Use Fresh Ingredients: Fresh orange and lemon juice will significantly enhance the flavor compared to bottled alternatives.
  • Room Temperature Ingredients: Ensure butter and cream cheese are at room temperature for a smooth frosting.
  • Chill Before Frosting: Chilling the cake makes frosting easier and helps achieve a cleaner finish.
  • Experiment with Flavor: Add a teaspoon of orange zest to the batter for an extra citrus punch.
  • Frosting Variations: Consider using whipped coconut cream for a dairy-free option.
  • Double the Recipe: Planning for a special occasion? Double the recipe to make a layered cake.
  • Check for Doneness: Ovens vary; perform the toothpick test a minute or two before the recommended time.

Common Mistakes and Troubleshooting

Here are some common pitfalls and how to avoid them:

  • Dense Cake: Overmixing or using too much coconut flour can lead to a heavy texture. Stick to the measurements and mix gently!
  • Dry Cake: Overbaking can dry out the cake. Keep an eye on it as it approaches the 20-minute mark.
  • Frosting Issues: If your frosting is too runny, add more powdered sweetener until you reach your desired consistency.
  • Flavorless Cake: Ensure your baking soda is fresh and your ingredients are of good quality for the best flavor.

A Few Variations to Try

Looking to mix things up? Here are some fun variations:

  • Chocolate Orange Cake: Add cocoa powder to the batter for a delightful chocolate twist.
  • Orange Creamsicle Cupcakes: Use the same batter to make cupcakes. Adjust baking time to 15-20 minutes.
  • Carrot Orange Cake: Incorporate shredded carrots for a moist, flavorful cake with added nutrition.
  • Orange Almond Cake: Replace coconut flour with almond flour for a different flavor profile and texture.

Storage and Make-Ahead Instructions

Want to prepare ahead? Here’s how to store your cake:

  • Room Temperature: Store covered at room temperature for 1-2 days.
  • Refrigerator: For longer storage, keep the cake in the fridge for up to a week.
  • Freezer: Freeze slices wrapped in plastic wrap and then foil for up to 3 months. Thaw in the fridge before serving.

Comprehensive FAQ

Here are some common questions you might have:

  • Can I use fresh oranges instead of juice? Absolutely! Freshly squeezed orange juice is recommended for the best flavor.
  • Can I make this cake ahead of time? Yes, you can make the cake a day in advance and frost it just before serving.
  • What if I don’t have pudding mix? You can omit it entirely; just ensure the cake has enough moisture from the liquids.
  • Can I use homemade cake batter? Sure! Just follow the same baking instructions for the best results.
  • Does this cake need to be refrigerated? It can be stored at room temperature, but refrigeration will help it last longer.
  • Can I substitute coconut flour with almond flour? Yes, but you may need to adjust the liquid ingredients as almond flour absorbs moisture differently.
  • How can I make this cake dairy-free? Use coconut oil in the batter and whipped coconut cream for the frosting.
  • What’s the best way to serve this cake? Serve chilled with a dollop of whipped cream or a scoop of vanilla ice cream for a delightful dessert experience.

Nutritional Tips and Dietary Adaptations

This Orange Creamsicle Cake is not only delicious but also adaptable to various dietary needs:

  • Gluten-Free: Made with coconut flour, it’s a safe choice for those avoiding gluten.
  • Keto-Friendly: Substituting honey for a low-carb sweetener allows for a low-carb treat.
  • Paleo Compliant: All ingredients align with Paleo guidelines, focusing on whole foods.
  • Low Sugar Options: Using a sugar substitute can reduce the overall sugar content significantly.

Equipment Recommendations

To make your baking experience easier, here are some essential tools:

  • Mixing Bowls: A set of mixing bowls in various sizes makes ingredient preparation a breeze.
  • Whisk: An essential tool for mixing wet ingredients smoothly.
  • Baking Pan: A good quality 8-inch round or square pan ensures even baking.
  • Measuring Cups and Spoons: Accurate measurements are crucial for baking success.
  • Spatula: For scraping down the sides of bowls and spreading frosting evenly.

Serving Suggestions

Enjoy your Orange Creamsicle Cake in various delightful ways:

  • With Fresh Berries: Serve slices with a side of fresh strawberries or blueberries for a pop of color and flavor.
  • Ice Cream Pairing: A scoop of vanilla ice cream complements the citrus flavors beautifully.
  • Garnished with Zest: Top with additional orange zest for a beautiful presentation and extra flavor.
  • As Cupcakes: Transform the cake into cupcakes for a fun, portable treat at parties.

With this ultimate Orange Creamsicle Cake recipe, you’re set to create a show-stopping dessert that’s both delicious and visually stunning. Remember, cooking should be a joyful experience, so don’t stress about perfection—just enjoy the process! Happy baking!

Orange Creamsicle Cake (Gluten-free, Paleo, Keto, GAPS)

Prep Time 15 minutes
Cook Time 25 minutes
Total Time 40 minutes
Servings 8 slices
Calories 350
A deliciously tangy and creamy cake that combines citrus flavors with a moist, gluten-free base, perfect for paleo, keto, and GAPS diets.

Ingredients

Dry ingredients

  • 0.5 cup coconut flour
  • 4 eggs eggs
  • 1/3 cup honey (or low carb sweetener)
  • 1/3 cup butter (or coconut oil) (melted)
  • 2 tablespoons orange juice (fresh, squeezed)
  • 2 tablespoons lemon juice (fresh, squeezed)
  • 1-1/2 teaspoons vanilla extract
  • 1/2 teaspoon baking soda (sifted)
  • 1/2 teaspoon sea salt
  • 1/8 teaspoon orange oil (or 2 drops orange essential oil)
  • 0.5 cup butter (room temperature)
  • 8 ounces cream cheese (room temperature)
  • 2 tablespoons powdered sweetener
  • 1/2 teaspoon vanilla extract
  • 1/16 teaspoon orange oil (or 1 drop orange essential oil)

Instructions 

  • Preheat oven to 350°F (175°C). Grease an 8-inch pan and line with parchment if desired.
  • Mix dry ingredients: coconut flour, sweetener, baking soda, sea salt.
  • Whisk wet ingredients: eggs, honey, melted butter, orange and lemon juice, vanilla, orange oil.
  • Combine wet and dry, stir until just mixed. Pour into pan.
  • Bake 20-25 minutes until a toothpick comes out clean. Cool completely and chill before frosting.

Notes

Chill the cake before frosting for easier handling.
Calories: 350kcal
Cost: $15
Course: Dessert
Keyword: cream, Gluten-Free, orange