Author

Steven

Browsing

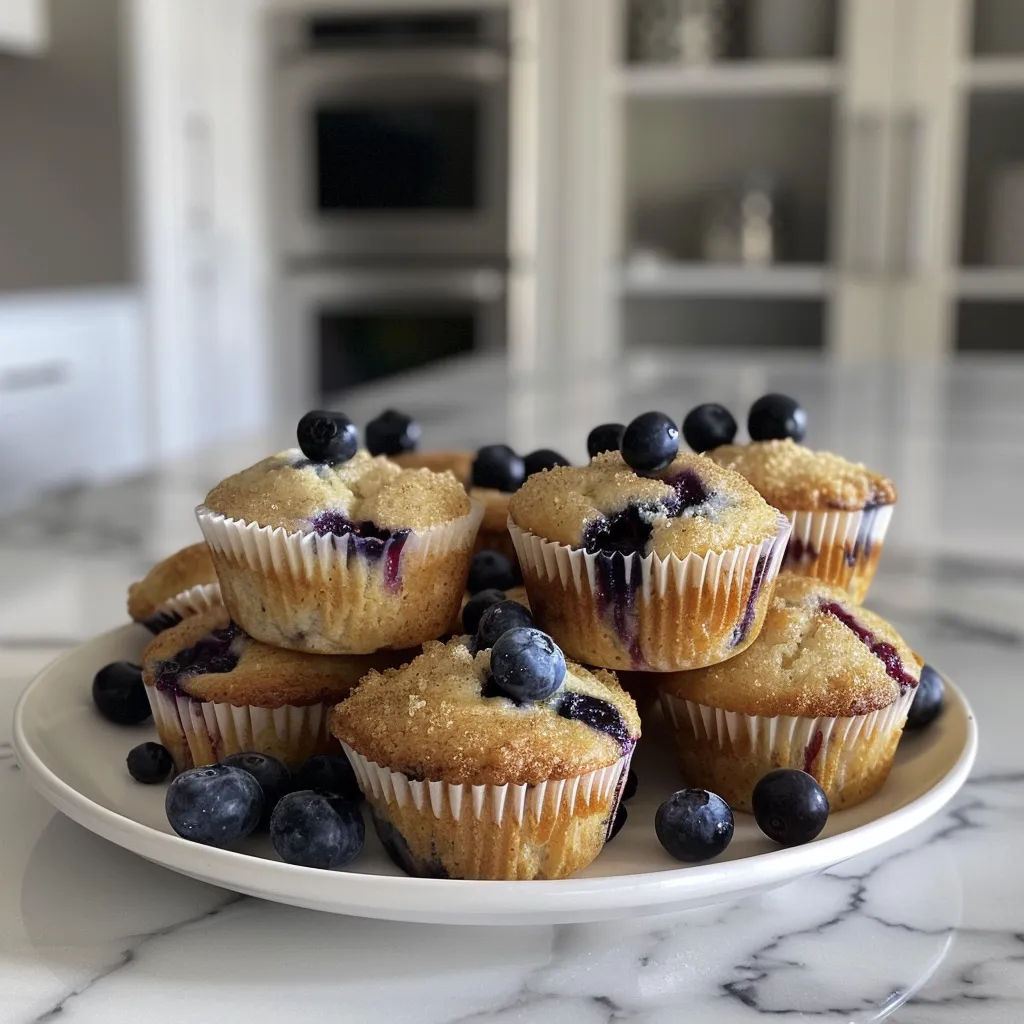
Start Your Day Right with Wholesome Blueberry Muffins

There’s something magical about biting into a warm, freshly baked blueberry muffin in the morning. Not only do these muffins taste incredible, but they’re also packed with wholesome ingredients to fuel your day. Whether you’re enjoying them as a breakfast treat or an afternoon snack, these healthy blueberry muffins are sure to please!

In this guide, we’ll explore everything you need to know about making the perfect blueberry muffins, including ingredient breakdowns, expert tips, and variations to suit any palate. Let’s jump in and get ready to bake!

Why You’ll Love This Recipe

  • Simple Ingredients: Made with pantry staples and fresh blueberries, you can whip these muffins up any time.
  • Healthy Twist: These muffins are lower in sugar and use olive oil, making them a nutritious option compared to traditional recipes.
  • Quick and Easy: With minimal prep time and straightforward steps, you’ll have delicious muffins ready in under an hour.
  • Customizable: This recipe allows for various substitutions, so you can modify it to suit dietary preferences.
  • Freezes Well: Make a batch and freeze for later! These muffins maintain their flavor and texture when reheated.

Ingredient Breakdown

Let’s take a closer look at the ingredients that make these healthy blueberry muffins shine, along with some helpful substitutions.

Main Ingredients

  • All-Purpose Flour (3 cups, 360g): This provides the bulk and structure. For a gluten-free option, consider using a 1:1 gluten-free flour blend.
  • Granulated Sugar (¾ cup, 149g): Adds sweetness. You can substitute with coconut sugar or maple syrup for a healthier alternative.
  • Baking Powder (3 tsp): Helps the muffins rise. Ensure it’s fresh for the best results.
  • Salt (½ tsp): Balances the sweetness and enhances flavor.
  • Cinnamon (1 tsp): Adds warmth and depth of flavor.
  • Eggs (2 large): Acts as a binder. For a vegan option, flax eggs can work well.
  • Olive Oil or Avocado Oil (⅓ cup, 70g): Keeps the muffins moist. You can use melted coconut oil if preferred.
  • Buttermilk (¾ cup, 171g): Provides acidity for tenderness. Substitute with almond milk mixed with a tablespoon of vinegar.
  • Greek Yogurt (½ cup, 125g): Adds moisture and protein. Use dairy-free yogurt for a vegan version.
  • Milk (3 tbsp, 46g): Any type works, including almond or oat milk.
  • Vanilla Extract (2 tsp): Adds flavor. Opt for pure vanilla extract for the best taste.
  • Fresh Blueberries (2 cups, 280-320g): The star of the show! If using frozen blueberries, do not thaw them.

How to Make Healthy Blueberry Muffins

Juicy blueberry muffins with a golden-brown crust and visible blueberries, displayed on a light surface.

Follow these easy steps to create your own delicious blueberry muffins:

  1. In a medium bowl, combine the flour, granulated sugar, baking powder, salt, and cinnamon. Stir the mixture until well combined and set aside.
  2. In a larger mixing bowl, whisk together the eggs, olive oil, buttermilk, Greek yogurt, milk, and vanilla extract until smooth.
  3. Gradually add the dry mixture to the wet ingredients, stirring gently until just combined. Be careful not to overmix; the batter will be thick.
  4. Gently fold in the fresh blueberries, ensuring they are evenly distributed throughout the batter.
  5. Let the batter rest for 15 minutes while preheating your oven to 425ºF (220ºC).
  6. Prepare a muffin pan by lining 6 muffin cups with liners or spraying with non-stick spray. Fill every other cup with about ½ heaping cup of batter and top with a few extra blueberries if desired.
  7. Bake for 7 minutes at 425ºF, then lower the temperature to 350ºF (175ºC) without opening the oven door. Bake for an additional 16-23 minutes, or until a toothpick inserted in the center comes out clean.
  8. Once baked, let the muffins cool in the pan for a few minutes before transferring them to a wire rack to cool completely. Repeat the process with any remaining batter.

Pro Tips for Perfect Muffins

  • Resting the Batter: Allowing the batter to rest helps create a better texture. It allows the flour to hydrate fully.
  • Don’t Overmix: Mix until just combined to ensure a light and fluffy muffin.
  • Use Quality Ingredients: Fresh blueberries and pure vanilla extract make a noticeable difference in flavor.
  • Check Doneness: Use a toothpick to check for doneness; the muffins are ready when it comes out clean.
  • Experiment with Spices: Add nutmeg or cardamom for a different flavor profile.
  • Top with Oats: For a crunchy topping, sprinkle oats on top before baking.
  • Cool Completely: Let the muffins cool completely before storing to prevent sogginess.
  • Use a Muffin Scoop: For evenly sized muffins, use an ice cream scoop or muffin scoop.

Common Mistakes and Troubleshooting

Even the best bakers encounter challenges. Here are some common mistakes and how to avoid them:

  • Muffins are too dense: This often happens from overmixing the batter. Remember, mix until combined!
  • Burnt tops: If the tops are browning too quickly, try lowering the oven temperature slightly.
  • Blueberries sinking to the bottom: Coat the blueberries in a little flour before folding them into the batter to help keep them suspended.
  • Dry muffins: Ensure you’re measuring your flour correctly; too much flour can lead to dry muffins.

Variations on Blueberry Muffins

Don’t hesitate to mix things up! Here are some fun variations to consider:

  • Chocolate Chip Blueberry Muffins: Fold in some dark chocolate chips for a sweet twist.
  • Banana Blueberry Muffins: Add a mashed ripe banana to the wet ingredients for extra moisture and flavor.
  • Lemon Blueberry Muffins: Add the zest of one lemon for a bright, citrusy flavor.
  • Whole Wheat Blueberry Muffins: Substitute half or all of the all-purpose flour with whole wheat flour for added fiber.

Storage and Make-Ahead Instructions

These muffins store beautifully! Here’s how to keep them fresh:

  • Room Temperature: Store in an airtight container for up to 3 days.
  • Refrigerator: They can last up to a week in the fridge, but may lose some moisture.
  • Freezing: Place muffins in a freezer-safe bag and freeze for up to 3 months. Thaw at room temperature or reheat in the microwave.

Frequently Asked Questions

  • Can I use frozen blueberries? Yes, if using frozen blueberries, do not thaw them before mixing into the batter.
  • Can I make these muffins gluten-free? Absolutely! Use a gluten-free flour blend in place of all-purpose flour.
  • How can I reduce the sugar in the recipe? You can substitute granulated sugar with a natural sweetener like honey or maple syrup.
  • How long can I keep these muffins fresh? They stay fresh for about 3 days at room temperature or up to a week in the fridge.
  • What if I don’t have buttermilk? You can make a substitute by mixing regular milk with a tablespoon of vinegar or lemon juice.
  • Can I add nuts or seeds? Yes! Chopped walnuts or flax seeds can add a nice crunch and nutrition.
  • What’s the best way to reheat frozen muffins? Microwave them for 15-30 seconds or place them in a warm oven until heated through.
  • Are these muffins suitable for kids? Yes! They are a great snack for kids, packed with healthy ingredients and naturally sweetened.

Nutrition Tips and Dietary Adaptations

For those focused on nutrition, these muffins can easily fit into various dietary needs:

  • Low Sugar: By using natural sweeteners, these muffins can cater to those watching their sugar intake.
  • High Protein: Adding extra Greek yogurt or protein powder can enhance the protein content.
  • Dairy-Free: Substitute all dairy ingredients with plant-based options to make these muffins dairy-free.
  • Heart-Healthy: Using olive oil and whole grains contributes to heart health, making these muffins a smart choice.

Essential Equipment for Baking Muffins

To make your baking experience seamless, consider these essential tools:

  • Muffin Pan: A standard 12-cup muffin pan works perfectly for this recipe.
  • Mixing Bowls: Having both medium and large bowls will help keep your ingredients organized.
  • Whisk: A good whisk is essential for mixing wet ingredients thoroughly.
  • Measuring Cups and Spoons: Accurate measurements are crucial for baking success.
  • Silicone Spatula: Perfect for folding in blueberries and scraping the batter from bowls.

Serving Suggestions

Enjoy your blueberry muffins in various ways:

  • With Butter: Spread a little butter on warm muffins for a delicious treat.
  • With Jam: Serve with your favorite jam or marmalade for added sweetness.
  • Alongside Yogurt: Pair with Greek yogurt for a wholesome breakfast.
  • As a Snack: These muffins are great as a quick snack on the go!

With this comprehensive guide, you’re now equipped to bake the most delightful healthy blueberry muffins that will impress your family and friends. Remember, the joy of cooking lies in trying new things and making the recipe your own. Happy baking!

Healthy Blueberry Muffins

Prep Time 15 minutes
Cook Time 23 minutes
Total Time 38 minutes
Servings 6 muffins
Calories 180
Enjoy these moist and flavorful blueberry muffins made with wholesome ingredients, perfect for a nutritious breakfast or snack.

Ingredients

Dry Ingredients

  • 3 cups all-purpose flour
  • ¾ cup granulated sugar
  • 3 tsp baking powder
  • ½ tsp salt
  • 1 tsp cinnamon

Wet Ingredients

  • 2 large eggs
  • cup olive oil or avocado oil
  • ¾ cup buttermilk
  • ½ cup plain whole milk Greek yogurt
  • 3 tbsp milk, whole, 2%, 1%, or almond milk
  • 2 tsp vanilla extract
  • 2 cups blueberries (if frozen, do not thaw)

Instructions 

  • Mix dry ingredients in a bowl and set aside.
  • Whisk eggs, oil, buttermilk, yogurt, milk, and vanilla until combined.
  • Gradually add dry mixture to wet, stirring just until combined.
  • Gently fold in blueberries with a spatula.
  • Rest batter for 15 minutes; preheat oven to 425ºF.
  • Divide batter into muffin liners, bake at 425ºF for 7 min, then reduce to 350ºF and bake 16-23 min. Cool and serve.

Notes

For extra flavor, sprinkle some additional blueberries on top before baking.
Calories: 180kcal
Cost: $10
Course: Breakfast
Cuisine: American
Keyword: Blueberry, Healthy, muffins

Welcome to a culinary adventure that will transform your lunch experience! If you’re looking for a dish that’s not only delicious but also easy to prepare, you’ve landed in the right place. This recipe for Zesty Grilled Shrimp Caesar Wraps combines the savory flavors of grilled shrimp with the crunch of fresh romaine lettuce and the creamy goodness of Caesar dressing, all wrapped up in warm tortillas. Let’s dive into the details and discover why this meal will become your go-to for quick lunches or even casual dinners.

Why You’ll Love This Recipe

These wraps are more than just a meal—they’re an experience! Here are five compelling reasons to try them:

  • Flavor Explosion: Each bite bursts with zesty flavors that balance the smoky shrimp and creamy dressing, making your taste buds dance.
  • Quick and Easy: With just a few simple steps, you can whip up this meal in under 30 minutes, perfect for busy days.
  • Customizable: Feel free to adapt the ingredients according to your preferences or what you have on hand, ensuring you can make these wraps any time.
  • Healthy Ingredients: Packed with protein from the shrimp and nutrients from the romaine, these wraps fit well into a balanced diet.
  • Perfect for Meal Prep: Make a batch ahead of time for easy grab-and-go lunches throughout the week.

Ingredients Breakdown

Let’s take a closer look at the ingredients you’ll need to create these zesty grilled shrimp Caesar wraps:

  • 1 lb shrimp: Peeled and deveined, the star of this dish! You can swap these for chicken or tofu for a different protein experience.
  • 2 tablespoons olive oil: Helps the shrimp marinate and adds richness to the wraps. Consider using avocado oil for a different flavor profile.
  • 1 teaspoon garlic powder: Enhances the shrimp with a savory note. Fresh minced garlic works too!
  • 1 teaspoon paprika: Adds a nice smoky flavor and a hint of color. For more heat, use smoked paprika.
  • Salt and pepper to taste: Essential for bringing all the flavors together.
  • 4 large tortillas: Whole wheat or corn tortillas work well. Feel free to use gluten-free tortillas if needed.
  • 2 cups romaine lettuce, chopped: Provides a crunchy texture. You can also use spinach or mixed greens.
  • 1/2 cup Caesar dressing: Creamy and tangy, this dressing ties the wrap together beautifully. Make your own for an extra touch!
  • 1/4 cup grated Parmesan cheese: Adds a salty, nutty flavor. Try a dairy-free alternative if you’re lactose intolerant.

Step-by-Step Instructions

Now that we have our ingredients, let’s walk through the steps to create these delicious wraps:

  • Step 1: Preheat the grill to medium-high heat. This ensures the shrimp cook evenly and develop a nice char.
  • Step 2: In a bowl, toss the shrimp with olive oil, garlic powder, paprika, salt, and pepper until they’re well-coated.
  • Step 3: Grill the shrimp for 2-3 minutes on each side until they are pink and opaque. Remove them from the grill and let them rest.
  • Step 4: Warm the tortillas on the grill for about 1 minute or until they are pliable.
  • Step 5: Layer chopped romaine, grilled shrimp, Caesar dressing, and Parmesan cheese on each tortilla.
  • Step 6: Wrap tightly, slice in half, and serve immediately!

Pro Tips for Perfect Wraps

Juicy grilled shrimp wrapped in tortillas with romaine lettuce and Caesar dressing.

Here are some expert insights to elevate your Zesty Grilled Shrimp Caesar Wraps:

  • Marinate the shrimp: For an extra layer of flavor, marinate the shrimp in the olive oil, garlic powder, and paprika for 30 minutes before grilling.
  • Don’t overcrowd the grill: Give the shrimp space on the grill to ensure they get a nice char and cook evenly.
  • Use fresh ingredients: Fresh romaine and quality Caesar dressing can significantly enhance the taste of your wraps.
  • Experiment with toppings: Try adding avocado slices, cherry tomatoes, or even bacon bits for additional flavor.
  • Serve with a side: Pair your wraps with a light quinoa salad or sweet potato fries for a complete meal.
  • Double the recipe: Make extra wraps for lunches throughout the week. They store well when assembled without dressing.
  • Try different tortillas: Switch it up by using spinach or sun-dried tomato tortillas for added flavor and nutrition.
  • Garnish with herbs: Fresh parsley or basil can brighten up the dish and add a refreshing touch.

Common Mistakes and Troubleshooting

Even the best cooks run into issues sometimes! Here are some common mistakes and how to avoid them:

  • Overcooked shrimp: Keep an eye on your shrimp; they cook quickly and can become rubbery if overcooked. Aim for a firm, opaque texture.
  • Dry wraps: If your wraps feel dry, consider adding more dressing or a squeeze of fresh lemon juice.
  • Unruly wraps: If your wraps are too full, they may fall apart. Start with less filling and adjust as needed.
  • Grill marks that burn: Make sure your grill is at the right temperature. If it’s too hot, the shrimp will char before cooking through.

Recipe Variations

Feeling adventurous? Here are some variations to consider:

  • Spicy Shrimp Wraps: Add diced jalapeños or a splash of hot sauce to the shrimp for a spicy kick.
  • Vegetarian Caesar Wraps: Substitute shrimp with grilled eggplant or portobello mushrooms for a hearty vegetarian option.
  • Mediterranean Style: Replace Caesar dressing with tzatziki sauce, and add cucumbers and olives for a Mediterranean twist.
  • BBQ Shrimp Wraps: Use BBQ sauce instead of Caesar dressing for a smoky, sweet flavor profile.

Storage and Make-Ahead Instructions

If you want to prepare your Zesty Grilled Shrimp Caesar Wraps ahead of time, here’s how:

  • Refrigeration: Store assembled wraps in an airtight container in the fridge for up to 2 days. Keep the dressing separate until ready to eat to prevent sogginess.
  • Freezing: Wrap tightly in foil and freeze for up to one month. Thaw in the fridge overnight before grilling again.
  • Meal Prep: Prepare the shrimp and chop the veggies, then assemble the wraps fresh each day for optimal taste and texture.

Nutritional Benefits

These wraps are not just tasty; they also offer several nutritional benefits:

  • High Protein: Shrimp is a great source of lean protein, essential for muscle repair and maintenance.
  • Low in Calories: This dish is low in calories, making it a great option for those watching their weight.
  • Rich in Vitamins: Romaine lettuce provides vitamins A, C, and K, along with fiber to aid digestion.
  • Healthy Fats: Olive oil and Parmesan cheese provide healthy fats that are important for heart health.

Equipment Recommendations

To make your cooking experience smooth and enjoyable, consider these tools:

  • Grill or Grill Pan: A good quality grill or grill pan is essential for achieving those perfect char marks on the shrimp.
  • Mixing Bowls: Use different sizes for marinating and tossing ingredients.
  • Spatula: A sturdy spatula helps flip the shrimp easily on the grill.
  • Knife and Cutting Board: Essential for chopping your lettuce and preparing other ingredients.

Serving Suggestions

Pair your Zesty Grilled Shrimp Caesar Wraps with these sides for a delightful meal:

  • Quinoa Salad: A light, refreshing quinoa salad complements the wraps perfectly.
  • Sweet Potato Fries: Crispy fries add a satisfying crunch and sweetness.
  • Fresh Fruit: Serve with a side of seasonal fruit for a sweet finish.
  • Chips and Salsa: For a casual touch, pair with tortilla chips and your favorite salsa.

Frequently Asked Questions

Got questions? We’ve got answers!

  • Can I use frozen shrimp? Yes! Just ensure they are fully thawed before marinating and grilling.
  • What can I substitute for Caesar dressing? You can use ranch dressing or a homemade vinaigrette for a different flavor.
  • How do I make this gluten-free? Use gluten-free tortillas and ensure your Caesar dressing is also gluten-free.
  • Can I grill the shrimp indoors? Absolutely! A grill pan or stovetop grill works well for indoor cooking.
  • How long do leftovers last? Stored properly, leftovers can last in the refrigerator for up to 2 days.
  • Can I add more veggies? Definitely! Feel free to mix in bell peppers, cucumbers, or any of your favorite vegetables.
  • Is this recipe kid-friendly? Yes! The flavors are mild and can be adjusted to suit younger palates.
  • Can I make this vegan? Yes! Swap shrimp for a plant-based protein and use a vegan Caesar dressing.

In conclusion, your lunch game will never be the same once you try these Zesty Grilled Shrimp Caesar Wraps. Not only are they easy and quick to prepare, but they also burst with flavor and can be adapted to suit any preference or dietary need. So grab your ingredients, fire up the grill, and enjoy a meal that’s not just satisfying but also makes you feel accomplished in the kitchen. Trust me, you’ll want to make these again and again!

Zesty Grilled Shrimp Caesar Wraps that Will Ignite Your Tastebuds

Prep Time 10 minutes
Cook Time 10 minutes
Total Time 20 minutes
Servings 4 servings
Calories 350
Enjoy these flavorful grilled shrimp wraps with crisp lettuce and creamy Caesar dressing for a delightful meal.

Ingredients

Protein

  • 1 lb shrimp, peeled and deveined

Dressing

  • 2 tablespoons olive oil
  • 1 teaspoon garlic powder
  • 1 teaspoon paprika
  • Salt and pepper to taste

Wraps and Fillings

  • 4 large tortillas
  • 2 cups romaine lettuce, chopped
  • 1/2 cup Caesar dressing
  • 1/4 cup grated Parmesan cheese

Instructions 

  • Preheat grill to medium-high heat.
  • Toss shrimp with olive oil, garlic powder, paprika, salt, and pepper.
  • Grill shrimp 2-3 minutes per side until cooked.
  • Warm tortillas on the grill for 1 minute.
  • Layer lettuce, shrimp, Caesar dressing, and Parmesan on each tortilla, then wrap and slice.

Notes

For extra flavor, add a squeeze of lemon before serving.
Calories: 350kcal
Cost: $15
Course: Main Course
Cuisine: American
Keyword: shrimp

Unleash Your Inner Chef with Energizing Chocolate Protein Bliss Balls

Welcome to a delicious adventure in your kitchen! Today, we’re diving into the world of Chocolate Protein Bliss Balls—these delightful, no-bake energy bites are not only easy to make but are also packed with nutrients. Perfect for a quick snack or a post-workout treat, these bliss balls will keep your energy levels high and your cravings satisfied. Let’s explore how to make these scrumptious bites, and I’ll share tips and variations that will make this recipe your new go-to!

Why You’ll Love This Recipe

These Chocolate Protein Bliss Balls are more than just a snack—they’re a game changer! Here are some reasons you’ll absolutely adore them:

  • Quick and Easy: They require minimal prep time and no baking, making them perfect for busy days!
  • Nutritious Boost: Packed with protein from peanut butter and protein powder, they’ll keep you feeling full and energized.
  • Customizable Flavors: With endless ingredient variations, you can personalize these bliss balls to suit your taste.
  • Guilt-Free Indulgence: Enjoy the rich chocolate flavor without the guilt—these bites are naturally sweetened with maple syrup.
  • Meal Prep Friendly: Make a batch ahead of time, store them in the refrigerator, and have a quick snack ready whenever you need it!

Essential Ingredient Guide

Before we start cooking, let’s break down the ingredients you’ll need to create these bliss balls:

  • Rolled Oats (1 ½ cups): Provides a hearty base. You can use gluten-free oats if needed.
  • Chocolate Protein Powder (½ cup): Choose your favorite brand! This is key for the protein content.
  • Unsweetened Cocoa Powder (¼ cup): Adds a rich chocolate flavor without sugar.
  • Chia Seeds (2 tablespoons): A fantastic source of omega-3 fatty acids. Feel free to substitute with flaxseeds.
  • Sea Salt (¼ teaspoon): Enhances the sweetness and balances the flavors.
  • Creamy Natural Peanut Butter (½ cup): This is what binds everything together—opt for a brand with no added sugars or oils.
  • Pure Maple Syrup (⅓ cup): Serves as a natural sweetener; honey can be used as an alternative.
  • Vanilla Extract (1 teaspoon): A splash of vanilla adds warmth and depth.
  • Water (2-3 tablespoons): Adjust as needed to get the right consistency.
  • Optional Add-ins: Additional cocoa powder or shredded coconut for rolling.

Complete Cooking Process

A side view of healthy energy bites made from chocolate and oats.

Ready to whip up these delicious bites? Follow these simple steps:

  1. In a medium bowl, whisk together the rolled oats, chocolate protein powder, cocoa powder, chia seeds, and sea salt until well combined.
  2. Add the peanut butter, maple syrup, and vanilla extract. Mix with a spatula or your hands until a thick dough forms.
  3. If the mixture seems too dry, add water one tablespoon at a time until it holds together when squeezed.
  4. Cover the bowl and let the mixture rest for about 10 minutes. This allows the oats to soften slightly.
  5. Using a small cookie scoop or tablespoon, portion the mixture and roll into 1-inch balls between your palms.
  6. If desired, roll the balls in additional cocoa powder or shredded coconut for added flavor and texture.
  7. Place on a parchment-lined baking sheet and refrigerate for at least 1 hour before serving.

Pro Tips for Perfect Bliss Balls

To ensure your bliss balls turn out perfectly every time, here are some expert tips:

  • Mixing Technique: For a more uniform texture, use a food processor to combine the dry ingredients before adding the wet ones.
  • Consistency Check: The mixture should be moldable and hold its shape. If it’s too crumbly, a little more peanut butter or water can help!
  • Experiment with Proteins: Try different protein powders, like plant-based options, for varied flavors and nutrition profiles.
  • Chill Time: Allowing the energy bites to chill in the refrigerator for at least an hour helps them firm up nicely.
  • Batch Size: Make a double batch and store some in the freezer for quick snacks later.
  • Flavor Boost: Add spices like cinnamon or nutmeg for an extra layer of flavor.
  • Nut Alternatives: If you’re allergic to peanuts, swap out the peanut butter for almond or sunflower seed butter.
  • Coating Options: Get creative with coatings—try crushed nuts, seeds, or even sprinkles for a fun twist!

Common Mistakes and Troubleshooting

Even the best cooks can run into hiccups. Here’s how to avoid common pitfalls:

  • Too Dry: If the mixture is too crumbly, gradually add a bit more water or peanut butter until it sticks together.
  • Too Sticky: If your hands are getting too sticky while rolling, lightly coat them with a bit of coconut oil.
  • Flavor Lacking: If you find the flavor isn’t rich enough, add a pinch more salt or a splash of vanilla extract.

Variations to Try

Why stick to one flavor when you can have many? Here are some fun variations to consider:

  • Nut-Free Bliss Balls: Replace peanut butter with sunflower seed butter for a nut-free version.
  • Chocolate Chip Delight: Fold in some dark chocolate chips for a sweet surprise!
  • Fruit and Nut: Add dried cranberries or raisins for a chewy texture and fruity flavor.
  • Spicy Kick: Incorporate a dash of cayenne or chili powder for a surprising heat!

Storage and Make-Ahead Instructions

These bliss balls are perfect for meal prep! Here’s how to store them:

  • Refrigerator: Store in an airtight container in the refrigerator for up to 2 weeks.
  • Freezer: You can also freeze them for up to 3 months. Just thaw in the refrigerator before enjoying.
  • Make-Ahead: Feel free to prepare them a few days before you plan to serve them!

Frequently Asked Questions

Let’s tackle some common questions about these energy bites:

  • Can I use almond butter instead of peanut butter? Absolutely! Almond butter or any nut/seed butter works perfectly.
  • How long do they stay fresh? In the refrigerator, they can last up to 2 weeks; in the freezer, up to 3 months.
  • Can I use a plant-based protein powder? Yes, feel free to use your favorite plant-based protein powder!
  • What if my mixture is too crumbly? Just add a bit of water or peanut butter until it holds together.
  • Can I add other ingredients? Of course! Get creative with mix-ins like nuts, seeds, or dried fruits.
  • Are these gluten-free? Yes, as long as you use certified gluten-free oats.
  • How do I know when they’re done? They should be firm and able to hold their shape after chilling.
  • Can I roll them in something? Yes! Rolling them in cocoa powder or shredded coconut adds a nice touch.

Nutritional Tips and Dietary Adaptations

Whether you’re looking to boost your nutrition or cater to dietary restrictions, here’s how to adapt this recipe:

  • Protein Boost: For an extra protein kick, add a tablespoon of hemp seeds or more protein powder.
  • Lower Sugar: Reduce the amount of maple syrup or substitute with a low-calorie sweetener like stevia.
  • Vegan Option: Ensure your protein powder and maple syrup are vegan, and you’re good to go!

Equipment Recommendations

To whip up these bliss balls, you’ll need:

  • Mixing Bowl: For blending the ingredients.
  • Measuring Cups and Spoons: For accurate ingredient amounts.
  • Spatula: Great for mixing and scraping down the sides.
  • Cookie Scoop: Perfect for portioning out the mixture.
  • Parchment Paper: Use it to line your baking sheet for easy removal.

Serving Suggestions

These bliss balls are versatile and can be enjoyed in various ways:

  • On-the-Go Snack: Perfect for a quick energy boost during the day.
  • Post-Workout Treat: Replenish your energy levels after a workout.
  • Kids’ Lunchbox Treat: A healthy alternative to sugary snacks for children.
  • Sweet Tooth Satisfaction: Enjoy them as a guilt-free dessert option!

Conclusion

Now that you have all the tools to create these Energizing Chocolate Protein Bliss Balls, it’s time to get cooking! Remember, cooking is all about creativity and fun. Don’t hesitate to experiment with flavors and make this recipe your own. Enjoy the process, and most importantly, savor each blissful bite. Happy cooking!

Chocolate Protein Bliss Balls - Healthy Energy Bites

Prep Time 15 minutes
Total Time 25 minutes
Servings 12 pieces
Calories 150
These delicious and nutritious energy bites are perfect for a quick snack or post-workout treat, combining oats, chocolate protein, and natural peanut butter.

Ingredients

Dry ingredients

  • 1.5 cups rolled oats
  • 0.5 cup chocolate protein powder
  • 0.25 cup unsweetened cocoa powder
  • 2 tablespoons chia seeds
  • 0.25 teaspoon sea salt

Wet ingredients

  • 0.5 cup creamy natural peanut butter
  • 0.33 cup pure maple syrup
  • 1 teaspoon vanilla extract
  • 2-3 tablespoons water (as needed)
  • 2 tablespoons additional cocoa powder (optional)
  • 2 tablespoons shredded coconut (optional)

Instructions 

  • Mix oats, protein powder, cocoa powder, chia seeds, and salt until combined.
  • Add peanut butter, maple syrup, and vanilla; mix until a thick dough forms. Add water if too dry.
  • Rest the mixture for 10 minutes to soften the oats.
  • Portion and roll into 1-inch balls. Optional: coat in cocoa powder or shredded coconut.
  • Place on a parchment-lined sheet and refrigerate for at least 1 hour before serving.

Notes

Store in an airtight container in the fridge for up to a week.
Calories: 150kcal
Cost: $10
Course: Snack
Cuisine: Healthy
Keyword: Energy Bites, Protein

Discover the Joy of Mini Cupcakes: A Delightful Baking Adventure

Welcome to the world of mini cupcakes, where sweet dreams come true in bite-sized portions! If you’re looking for a fun, easy dessert that will brighten any occasion, you’ve landed in the right place. These delightful mini cupcakes are perfect for parties, celebrations, or simply indulging in a little treat after dinner. In this guide, we’ll explore everything you need to know to create these delectable bites, from ingredients to variations. Let’s dive in and make your next baking experience enjoyable and stress-free!

Why You’ll Love This Recipe

Mini cupcakes are not just adorable; they pack a punch of flavor and fun! Here are five reasons you’ll adore making these sweet treats:

  • Bite-sized indulgence: Perfectly sized for a quick sweet fix, these mini cupcakes are ideal for portion control without sacrificing flavor.
  • Easy to make: With simple ingredients and straightforward steps, even novice bakers can whip these up in no time.
  • Versatile flavors: You can easily customize these mini cupcakes with your favorite flavors and toppings, making them suitable for any occasion.
  • Great for sharing: Perfect for parties, gatherings, or as gifts, these bite-sized treats make sharing easy and fun.
  • Impressive presentation: Decorate them with colorful frosting and sprinkles, and you’ll have a stunning dessert that looks as good as it tastes!

Essential Ingredients for Mini Cupcakes

Let’s take a closer look at the ingredients you’ll need to make these delightful mini cupcakes, along with some helpful substitutions.

  • All-purpose flour: 3/4 cup (108g), spooned and leveled. For a lighter texture, consider using cake flour instead.
  • Baking powder: 1 tsp. This ingredient is crucial for helping your cupcakes rise to perfection.
  • Salt: 1/4 tsp. A pinch of salt enhances the sweetness and balances the flavors.
  • Unsalted butter: 5 Tbsp (71g), brought to room temperature. This helps create a rich, buttery flavor.
  • Granulated sugar: 6 Tbsp (77g). Sweetness is key, but feel free to experiment with less sugar for a healthier option.
  • Large egg: 1, brought to room temperature. Eggs help bind the ingredients together.
  • Vanilla extract: 1 tsp. Use pure vanilla for a deeper flavor.
  • Milk: 1/3 cup, brought to room temperature. You can substitute with almond milk or oat milk for a dairy-free version.
  • Powdered sugar: 1 3/4 cups (210g) for frosting. This gives the frosting its sweet, fluffy texture.
  • Heavy cream: 2 Tbsp for frosting. This adds richness; you can use milk for a lighter frosting.
  • Pinch of salt: A small amount helps balance the sweetness in the frosting.

Step-by-Step Instructions for Perfect Mini Cupcakes

Side view of delicious mini cupcakes topped with creamy frosting.

Follow these simple steps to create your mini cupcakes:

  1. Preheat your oven to 350 degrees Fahrenheit (175 degrees Celsius). Line a 24-well mini muffin pan or two 12-well pans with paper liners.
  2. Prepare the dry ingredients: In a medium mixing bowl, whisk together the flour, baking powder, and salt. Set aside.
  3. Cream the butter and sugar: In a large mixing bowl, cream together 5 Tbsp of butter with the granulated sugar using an electric mixer. Start on low speed, then increase to high and whip until pale and fluffy (about 3-4 minutes).
  4. Add egg and vanilla: Mix in the egg and vanilla extract until well combined.
  5. Incorporate dry ingredients and milk: Gradually add half of the flour mixture, mixing on low speed until just combined. Then, add the milk and mix until combined, followed by the remaining flour mixture.
  6. Fold the batter: Use a rubber spatula to scrape down the bowl and gently fold the mixture to ensure even distribution.
  7. Fill the muffin pan: Scoop the batter into the prepared muffin pan, filling the liners about 2/3 full.
  8. Bake: Place in the preheated oven and bake for 9-10 minutes, or until a toothpick inserted into the center comes out clean.
  9. Cool the cupcakes: Allow them to cool in the pan for a few minutes, then transfer to a wire rack to cool completely (about 30 minutes).

Making the Frosting

The frosting can elevate your mini cupcakes to the next level! Here’s how to make a simple buttercream frosting:

  1. Combine frosting ingredients: In a mixing bowl, add the powdered sugar, 1/2 cup (113g) of unsalted butter, heavy cream, vanilla extract, and a pinch of salt.
  2. Mix: Using an electric mixer, start on low speed to combine, then increase to high speed and whip until light and fluffy (about 4-5 minutes).
  3. Decorate: Transfer the frosting to a piping bag fitted with a star tip or use an offset spatula to spread it over your cooled mini cupcakes.

Pro Tips for Baking Success

Here are some expert insights to ensure your mini cupcakes turn out perfectly every time:

  • Room temperature ingredients: Make sure your butter, egg, and milk are at room temperature for better mixing and texture.
  • Don’t overmix: Mix just until combined to keep your cupcakes light and fluffy.
  • Check for doneness: Ovens can vary, so keep an eye on your cupcakes and perform the toothpick test a minute or two earlier than recommended.
  • Cool completely before frosting: Allowing cupcakes to cool completely ensures that the frosting doesn’t melt.
  • Experiment with flavors: Try adding lemon zest, cocoa powder, or spices to the batter for unique flavor variations.
  • Use high-quality extracts: Investing in good vanilla or flavor extracts can make a noticeable difference in taste.
  • Store properly: Keep your mini cupcakes in an airtight container to maintain freshness.
  • Practice your piping: If you’re new to frosting, practice on parchment paper before decorating your cupcakes.

Common Mistakes and Troubleshooting

If you encounter challenges while making mini cupcakes, don’t worry! Here are some common mistakes and how to avoid them:

  • Dense cupcakes: This often occurs from overmixing the batter. Mix just until combined for a lighter texture.
  • Dry cupcakes: Ensure you measure your flour correctly and don’t overbake them.
  • Frosting too runny: If your frosting is too thin, add more powdered sugar until you reach the desired consistency.
  • Uneven baking: Make sure to rotate your pan halfway through baking to ensure even cooking.

Delicious Variations to Try

Get creative with these fun and tasty mini cupcake variations:

  • Chocolate Mini Cupcakes: Replace 1/4 cup of flour with cocoa powder for a rich chocolate flavor.
  • Red Velvet Mini Cupcakes: Add cocoa powder and red food coloring to create a classic red velvet treat.
  • Lemon Zest Mini Cupcakes: Incorporate lemon zest and a splash of lemon juice for a refreshing twist.
  • Funfetti Mini Cupcakes: Fold in colorful sprinkles to the batter for a festive touch!

Storage and Make-Ahead Instructions

To keep your mini cupcakes fresh:

  • Room temperature: Store in an airtight container at room temperature for up to 3 days.
  • Refrigeration: For longer storage, keep frosted mini cupcakes in the fridge for up to one week.
  • Freezing: Unfrosted mini cupcakes can be frozen for up to 3 months. Thaw before frosting and serving.

Frequently Asked Questions

Here are some common questions about mini cupcakes:

  • Can I double the recipe?: Absolutely! Just ensure you have enough muffin pans ready for the batter.
  • What can I use instead of eggs?: You can substitute one egg with 1/4 cup unsweetened applesauce or a flax egg.
  • How do I make mini cupcakes without a mini muffin pan?: You can use a regular muffin pan, but adjust the baking time accordingly.
  • Can I use gluten-free flour?: Yes, gluten-free flour can be used, but ensure it’s a 1:1 baking blend for the best results.
  • How can I make my frosting more colorful?: Add food coloring gradually to achieve your desired shade!
  • What are some other topping ideas?: Consider crushed cookies, fresh fruit, or chocolate ganache for delightful toppings.
  • What’s the best way to store leftover frosting?: Store leftover frosting in an airtight container in the fridge for up to two weeks.
  • Can I make these cupcakes ahead of time?: Yes! You can bake and freeze them, then frost when ready to serve.

Nutritional Tips and Dietary Adaptations

To make these mini cupcakes fit various dietary needs:

  • Lower sugar options: Substitute granulated sugar with coconut sugar or a sugar alternative like stevia.
  • Dairy-free: Use almond or coconut milk and dairy-free butter in the recipe.
  • Vegan friendly: Replace eggs with flax eggs and use plant-based butter and milk.

Recommended Equipment

Here’s what you’ll need to make your mini cupcakes:

  • Mini muffin pan: Essential for shaping your cupcakes perfectly.
  • Electric mixer: For easy and efficient mixing of your batter and frosting.
  • Piping bags and tips: These make decorating your cupcakes a breeze.
  • Rubber spatula: Ideal for folding ingredients together without deflating your batter.

Serving Suggestions

To make your mini cupcakes even more special, consider these serving ideas:

  • Elegant display: Arrange them on a tiered cake stand for an eye-catching centerpiece.
  • Pair with beverages: Serve alongside coffee or milk for a delightful treat pairing.
  • Decorate for occasions: Top with themed decorations for birthdays, holidays, or celebrations!

Conclusion

Now that you have everything you need to create the most delightful mini cupcakes, it’s time to get baking! Remember, the key to success is confidence, creativity, and a willingness to enjoy the process. Have fun experimenting with flavors, decorating, and sharing your creations with loved ones. Happy baking, and may your mini cupcakes bring joy and sweetness to every occasion!

Mini Cupcakes

Prep Time 15 minutes
Cook Time 10 minutes
Total Time 25 minutes
Servings 24 pieces
Calories 150
Delight in these fluffy mini cupcakes topped with creamy frosting, perfect for any celebration or sweet craving.

Ingredients

Cupcake Batter

  • 0.108 g all-purpose flour (scoop and level to measure)
  • 1 tsp baking powder
  • 0.25 tsp salt
  • 5 Tbsp unsalted butter (brought to room temperature)
  • 6 Tbsp granulated sugar
  • 1 large egg (brought to room temperature)
  • 1 tsp vanilla extract
  • 0.33 cup milk (brought to room temperature)

Frosting

  • 1.75 cups powdered sugar
  • 0.5 cup unsalted butter (brought to room temperature)
  • 2 Tbsp heavy cream
  • 1 tsp vanilla extract
  • pinch salt

Instructions 

  • Preheat oven to 350°F (175°C). Line mini muffin pan with paper liners.
  • Mix flour, baking powder, and salt. Cream butter and sugar, then add egg and vanilla. Alternate adding flour mixture and milk, folding to combine.
  • Fill liners 2/3 full and bake for 9-10 minutes. Cool completely.
  • Beat frosting ingredients until fluffy. Pipe or spread over cooled cupcakes.

Notes

Ensure ingredients are at room temperature for best results.
Calories: 150kcal
Cost: $10
Course: Dessert
Keyword: cupcakes

Start Your Day Right with a Blueberry Banana Oatmeal Power Smoothie

Are you searching for a breakfast that’s not only delicious but also packed with nutrients to kickstart your day? Look no further! This Blueberry Banana Oatmeal Power Smoothie combines the goodness of fresh fruits, wholesome oats, and creamy yogurt, offering a delightful way to energize your mornings. Whether you’re rushing out the door or enjoying a leisurely breakfast, this smoothie is a perfect fit for any lifestyle.

Why You’ll Love This Recipe

This smoothie isn’t just another breakfast option; it’s a game-changer. Here are five specific reasons why you’ll adore this recipe:

  • Quick and Easy: Ready in under 10 minutes, making it perfect for busy mornings.
  • Nutritious Ingredients: Packed with antioxidants from blueberries and fiber from oats for a balanced meal.
  • Versatile Base: Can be customized with different fruits or dairy alternatives to suit your taste.
  • Filling and Satisfying: The combination of oats and yogurt keeps you full longer, helping you power through the morning.
  • Kid-Friendly: A fun way to get kids excited about healthy eating!

Ingredients Breakdown

Let’s dive into the ingredients! Each component plays a vital role in this smoothie:

  • Fresh or Frozen Blueberries (1/2 cup): Bursting with flavor and antioxidants. If you don’t have fresh, frozen works perfectly!
  • Ripe Banana (1): Adds natural sweetness and creaminess. If you’re out of bananas, you can use mango for a tropical twist.
  • Rolled Oats (1/4 cup): Provides fiber and helps thicken the smoothie. You can substitute with quick oats if that’s what you have on hand.
  • Greek Yogurt (1/2 cup): Offers protein and creaminess. Use plant-based yogurt for a dairy-free option.
  • Almond Milk (1/2 cup): A light base for your smoothie. Feel free to use any milk of your choice, like oat milk or cow’s milk.
  • Chia Seeds (1 tablespoon, optional): Boosts fiber and omega-3s. You could swap with flaxseeds if preferred.
  • Honey or Maple Syrup (1 teaspoon, optional): For those who prefer a sweeter taste. Adjust to your liking!
  • Ice Cubes (optional): For a frostier texture.

Step-by-Step Instructions

Ready to blend? Here’s how to make your smoothie:

  1. In a blender, combine the blueberries, banana, rolled oats, Greek yogurt, and almond milk.
  2. Add chia seeds and honey or maple syrup if using.
  3. Blend on high until smooth, adding ice cubes for a thicker consistency.
  4. Taste and adjust sweetness if needed.
  5. Pour into a glass and enjoy immediately!

Pro Tips for the Perfect Smoothie

To elevate your smoothie game, consider these expert tips:

  • Frozen Fruit: Using frozen blueberries and bananas creates a creamier texture.
  • Texture Control: For a thicker smoothie, add more oats or reduce the liquid.
  • Flavor Boost: Toss in a scoop of peanut butter or a sprinkle of cinnamon for extra flavor.
  • Prep Ahead: Pre-portion your ingredients in freezer bags for a quick breakfast option.
  • Don’t Over-Blend: Blend just enough to combine ingredients; over-blending can make it watery.
  • Customize: Feel free to add spinach or kale for a green smoothie twist without altering flavor.
  • Presentation Matters: Garnish with a few extra blueberries or a slice of banana on top for visual appeal.
  • Keep it Cold: Chill your glasses beforehand to maintain the smoothie’s temperature longer.

Common Mistakes and Troubleshooting

Even seasoned smoothie makers can run into hiccups. Here’s how to avoid common pitfalls:

  • Too Thick: Add a splash more milk to thin it out.
  • Too Sweet: Balance with a squeeze of lemon juice or more yogurt.
  • Unpleasant Texture: Ensure all ingredients are blended thoroughly—no one likes chunky smoothies!
  • Flavorless: If it tastes bland, consider adding a pinch of salt or vanilla extract.

Delicious Variations

Want to switch things up? Here are four fun variations:

  • Tropical Paradise: Replace blueberries with pineapple and add coconut milk for a tropical vibe.
  • Chocolate Lover: Blend in a tablespoon of cocoa powder or chocolate protein powder.
  • Berry Blast: Use a mix of your favorite berries like strawberries and raspberries.
  • Nutty Banana: Add a tablespoon of almond butter or peanut butter for a nutty flavor.

Storage and Make-Ahead Instructions

If you’re short on time during the week, here’s how to prepare ahead:

  • Refrigerate: Store in an airtight container in the fridge for up to 24 hours. Give it a good shake before consuming!
  • Freeze: Freeze the blended smoothie in ice cube trays. Blend with a little milk when ready to enjoy.

Frequently Asked Questions

Got questions? Here are answers to some common inquiries:

  • Can I use other fruits? Absolutely! Any fruit that you love can be swapped in.
  • Is it okay to skip the oats? Yes, but oats add fiber and make the smoothie more filling.
  • Can I make this vegan? Definitely! Use plant-based yogurt and a dairy-free milk option.
  • How can I make it sweeter? Add more honey or a ripe banana for natural sweetness.
  • Is it healthy? Yes! This smoothie is nutrient-dense, full of vitamins, and provides energy without excess sugar.
  • Can I add protein powder? Yes, adding protein powder can enhance the nutritional value.
  • What if I don’t have a blender? You can use an immersion blender or mash the ingredients for a chunkier texture.
  • Can I use instant oats? Yes, instant oats can be used in a pinch, just be aware they may blend differently.

Nutritional Tips and Dietary Adaptations

This smoothie is naturally nutritious, but here are ways to adapt it further:

  • High-Protein: Incorporate a scoop of protein powder or a few extra tablespoons of Greek yogurt.
  • Low-Carb: Swap out oats for flaxseeds or chia seeds to reduce carbohydrates.
  • Dairy-Free: Use almond or coconut yogurt for a dairy-free option.

Essential Equipment

No need for fancy equipment! Here’s what you’ll need:

  • Blender: A high-speed blender will give you the smoothest texture.
  • Measuring Cups: For accurate ingredient measurements.
  • Glass or Mason Jar: Perfect for serving and storing your smoothie.

Serving Suggestions

Enjoy your smoothie on its own or pair it with:

  • Whole Grain Toast: Spread with avocado or nut butter for a complete breakfast.
  • Fruit Salad: A side of mixed fruit can complement your power smoothie.
  • Granola: Sprinkle some on top for added crunch and fiber.

Final Thoughts

Now that you have a go-to recipe for a Blueberry Banana Oatmeal Power Smoothie, you’re all set to energize your mornings! Remember, cooking and creating in the kitchen is all about having fun. So gather your ingredients, blend away, and enjoy your delicious creation. Happy cooking!

Blueberry Banana Oatmeal Power Smoothie

Prep Time 5 minutes
Total Time 5 minutes
Servings 2 cups
Calories 250
Start your day with this nutritious and delicious smoothie packed with berries, banana, oats, and yogurt for sustained energy.

Ingredients

Fruits and Grains

  • 0.5 cup blueberries (fresh or frozen)
  • 1 piece ripe banana
  • 0.25 cup rolled oats
  • 0.5 cup Greek yogurt or plant-based yogurt (for dairy-free option)
  • 0.5 cup almond milk or milk of choice
  • 1 tablespoon chia seeds (optional for extra fiber and omega-3s)
  • 1 teaspoon honey or maple syrup (optional for added sweetness)
  • to taste none Ice cubes (optional for thicker texture)

Instructions 

  • Add blueberries, banana, oats, yogurt, and milk to a blender.
  • Blend until smooth and creamy.
  • Add chia seeds, honey, and ice cubes if desired, then blend again.
  • Pour into glasses and serve immediately.

Notes

You can customize the sweetness by adjusting honey or maple syrup to taste.
Calories: 250kcal
Cost: $8
Course: Breakfast
Cuisine: American
Keyword: Smoothie

Master the Art of Chicken Caesar Wraps

Welcome to the ultimate guide for making delicious and satisfying Chicken Caesar Wraps! If you’re looking for a quick and easy weeknight meal that’s packed with flavor, you’ve come to the right place. These wraps are perfect for any night of the week and offer a delightful combination of tender chicken, crisp romaine, and creamy Caesar dressing, all wrapped up in a soft tortilla. In this article, we’ll explore every aspect of this recipe, ensuring you can confidently prepare and enjoy these wraps at home.

Why You’ll Love This Recipe

Here are five reasons why this Chicken Caesar Wrap recipe will become your go-to:

  • Quick preparation: You can have this meal ready in just 30 minutes, making it perfect for busy weekdays.
  • Versatile ingredients: This recipe allows for various substitutions and additions, so you can customize it to your taste.
  • Healthy and filling: With lean chicken and fresh vegetables, these wraps are both nutritious and satisfying.
  • Great for meal prep: Make a batch ahead of time and enjoy them throughout the week for lunch or dinner.
  • Kid-friendly: The flavors are mild and appealing, making them a hit with children and adults alike!

Ingredient Breakdown

Let’s take a closer look at the ingredients needed for making Chicken Caesar Wraps, along with some suggested substitutions:

  • Mayonnaise: 1/2 cup (Avocado oil mayo is preferred for a healthier option. You can substitute with Greek yogurt for a lighter dressing.)
  • Lemon juice: 2 tablespoons (Freshly squeezed lemon juice enhances the flavor, but bottled juice can be used in a pinch.)
  • Dijon mustard: 1 tablespoon (Adds tang; feel free to use yellow mustard if that’s what you have.)
  • Garlic: 2 cloves, minced (Fresh garlic gives the dressing a zesty kick, but garlic powder can work in a hurry.)
  • Worcestershire sauce: 1 teaspoon (This adds depth to the dressing; consider soy sauce as an alternative.)
  • Anchovy paste: 1/2 teaspoon (Optional, but it enhances the umami flavor of the dressing. If you prefer not to use it, simply omit it.)
  • Parmesan cheese: 1/4 cup, grated (For the dressing. A sprinkle over the wraps adds flavor, too.)
  • Chicken breasts: 2 boneless, skinless (About 1 lb total. You can also use rotisserie chicken for convenience.)
  • Olive oil: 2 tablespoons (For cooking the chicken; feel free to substitute with avocado oil.)
  • Garlic powder: 1 teaspoon (Great for seasoning the chicken.)
  • Salt and black pepper: To taste (Essential for flavoring both the chicken and the dressing.)
  • Tortillas: 4 large flour tortillas (Burrito-sized are best; whole wheat or spinach tortillas are great alternatives.)
  • Romaine lettuce: 4 cups, chopped (For crunch; iceberg lettuce can also work.)
  • Cherry tomatoes: 1 cup, halved (Optional, but they add a delicious burst of flavor.)
  • Croutons: 1/4 cup, crushed (For added crunch; you can use store-bought or homemade ones.)

Step-by-Step Instructions

Side view of a Chicken Caesar Wrap, filled with romaine lettuce, chicken, and dressing.

Now let’s get into the heart of the recipe! Follow these simple steps to create your Chicken Caesar Wraps:

  1. In a medium bowl, whisk together the mayonnaise, lemon juice, Dijon mustard, minced garlic, Worcestershire sauce, and anchovy paste until completely smooth. Add the Parmesan cheese and season with salt and pepper to taste. Set aside.
  2. Pat the chicken breasts dry with paper towels and season both sides evenly with garlic powder, salt, and black pepper. For thicker breasts, pound them to an even ½-inch thickness for even cooking.
  3. Heat olive oil in a large skillet over medium-high heat until shimmering. Add the chicken breasts and cook for 7-8 minutes per side without moving them until they reach a golden crust and an internal temperature of 165°F.
  4. Transfer the cooked chicken to a cutting board and let it rest for 5 minutes before slicing into thin strips.
  5. Warm the tortillas in a dry skillet or microwave until pliable. Spread 2-3 tablespoons of the Caesar dressing down the center of each tortilla, leaving 2 inches at the top and bottom.
  6. Layer with romaine lettuce, sliced chicken, cherry tomatoes, Parmesan cheese, and crushed croutons. Don’t overfill or the wraps won’t close properly!
  7. Fold in the sides of the tortilla, then roll from the bottom up tightly, ensuring everything stays inside. Cut in half diagonally and serve immediately.

Pro Tips for Perfect Wraps

To ensure your Chicken Caesar Wraps turn out perfectly every time, consider these expert tips:

  • Choose the right tortillas: Opt for burrito-sized tortillas for easy rolling. For a healthier twist, try whole wheat or spinach options.
  • Don’t skip the resting time: Allowing the chicken to rest after cooking helps retain its juices, resulting in a more tender bite.
  • Customize the filling: Feel free to add extra ingredients like avocado, bacon, or bell peppers to enhance flavor and texture.
  • Keep lettuce crisp: Store your chopped romaine in the crisper drawer until you’re ready to assemble to ensure it stays fresh.
  • Use a sharp knife: For clean cuts after rolling, use a sharp knife to slice the wraps in half.
  • Experiment with dressings: If you’re feeling adventurous, try different dressings like ranch or blue cheese for a unique twist.
  • Make it a meal: Pair your wraps with a side of sweet potato fries or a light salad for a complete meal.

Common Mistakes and Troubleshooting

Even the best cooks can run into issues. Here are some common mistakes and how to avoid them:

  • Overcooking the chicken: Keep an eye on the internal temperature; overcooked chicken can become dry. Aim for 165°F.
  • Too much filling: Fill with just enough ingredients to allow for easy rolling. Overstuffing can lead to messy wraps.
  • Not seasoning enough: Don’t forget to season your ingredients well! A pinch of salt and pepper can elevate flavors significantly.

Delicious Variations

Want to mix things up? Here are four tasty variations of Chicken Caesar Wraps:

  • Buffalo Chicken Caesar Wrap: Swap out the regular chicken for shredded buffalo chicken for a spicy kick!
  • Vegetarian Caesar Wrap: Substitute the chicken with grilled vegetables such as zucchini, bell peppers, and mushrooms.
  • Greek Caesar Wrap: Add feta cheese and kalamata olives for a Mediterranean twist.
  • Southwestern Caesar Wrap: Incorporate black beans, corn, and avocado for a hearty variation.

Storage and Make-Ahead Instructions

Want to prepare your Chicken Caesar Wraps in advance? Here’s how:

  • Make-ahead: You can prepare the filling and dressing a day in advance. Store them separately in airtight containers in the refrigerator.
  • Storage: Wrapped in plastic wrap or foil, these wraps can be stored in the fridge for up to 3 days. However, for best texture, it’s recommended to consume them within 1-2 days.
  • Freezing: Although the wraps can be frozen, the texture may change after thawing. If you choose to freeze, assemble without the lettuce and tomatoes, and add them fresh when ready to serve.

Frequently Asked Questions

Here are some common questions about Chicken Caesar Wraps:

  • Can I make these wraps vegetarian? Yes! Simply replace the chicken with your favorite grilled veggies or plant-based protein.
  • How do I keep the lettuce crisp? Store the lettuce in the crisper drawer of your fridge and add it to the wrap just before serving.
  • Can I use store-bought Caesar dressing? Absolutely! For a quicker option, store-bought dressing works perfectly.
  • How do I store leftovers? Wrap them tightly in plastic wrap or foil and keep them in the refrigerator for up to 3 days.
  • Can I use a different type of meat? Yes! Feel free to substitute grilled shrimp, turkey, or even beef for a different flavor profile.
  • What kind of tortillas should I use? Burrito-sized flour tortillas are ideal, but you can use any type you prefer.
  • How can I make these wraps spicier? Add sliced jalapeños or a drizzle of hot sauce to the filling for an extra kick!
  • What sides pair well with Chicken Caesar Wraps? Consider serving alongside sweet potato fries, a light salad, or vegetable sticks for a complete meal.

Nutritional Information and Dietary Adaptations

These Chicken Caesar Wraps are not only tasty but also offer a great balance of macronutrients:

  • Protein: Each wrap contains about 30 grams of protein, depending on the chicken portion.
  • Carbohydrates: The wraps provide a good source of carbohydrates from tortillas and veggies, making them a filling option.
  • Healthy fats: With the use of olive oil and mayonnaise, these wraps contain healthy fats to keep you satisfied.

For dietary adaptations, consider the following:

  • Gluten-free: Use gluten-free tortillas to make this recipe suitable for those with gluten sensitivities.
  • Dairy-free: Replace the Parmesan cheese with nutritional yeast for a dairy-free option.

Equipment Recommendations

To make your cooking experience smoother, here are some recommended kitchen tools:

  • Skillet: A non-stick or cast iron skillet is great for cooking the chicken evenly.
  • Whisk: Essential for mixing the dressing smoothly.
  • Cutting board: A sturdy board is vital for slicing your chicken.
  • Sharp knife: For precise cutting and assembly of the wraps.

Serving Suggestions

Chicken Caesar Wraps are versatile and can be served in a variety of ways:

  • As a meal: Enjoy them with a side of sweet potato fries or a light salad.
  • For lunch: Pack them in a lunchbox for a satisfying midday meal.
  • At parties: Cut them into smaller pieces for easy finger food at gatherings.

Your Culinary Adventure Awaits!

Now that you have all the tools and tips to create your Chicken Caesar Wraps, it’s time to get cooking! Remember, the key to a great wrap is quality ingredients, a little creativity, and a lot of love. Enjoy the process, and don’t hesitate to experiment with flavors that excite you. Happy cooking!

Chicken Caesar Wraps

Prep Time 15 minutes
Cook Time 20 minutes
Total Time 35 minutes
Servings 4 servings
Calories 650
Delicious and easy-to-make Chicken Caesar Wraps perfect for a quick lunch or dinner, combining tender chicken, crisp lettuce, and creamy Caesar dressing in a soft tortilla.

Ingredients

Dressing

  • 0.5 cup mayonnaise (avocado oil mayo preferred)
  • 2 tablespoons lemon juice (fresh)
  • 1 tablespoon Dijon mustard
  • 2 cloves garlic (minced)
  • 1 teaspoon Worcestershire sauce
  • 0.5 teaspoon anchovy paste (optional)
  • 0.25 cup Parmesan cheese (for dressing)
  • to taste Salt and black pepper

Chicken

  • 2 pieces boneless, skinless chicken breasts (about 1 lb total)
  • 2 tablespoons olive oil
  • 1 teaspoon garlic powder
  • 0.5 teaspoon salt
  • 0.25 teaspoon black pepper

Wraps

  • 4 large flour tortillas (burrito-size)

Vegetables & Cheese

  • 4 cups chopped romaine lettuce
  • 1 cup cherry tomatoes (halved)
  • 0.5 cup grated Parmesan cheese (for wraps)
  • 0.25 cup croutons (crushed)

Instructions 

  • Whisk together mayonnaise, lemon juice, Dijon mustard, garlic, Worcestershire, and anchovy paste until smooth. Stir in Parmesan and season with salt and pepper.
  • Season chicken breasts with garlic powder, salt, and black pepper. Cook in olive oil over medium-high heat for 7-8 minutes per side until golden and internal temp reaches 165°F. Rest and slice into strips.
  • Warm tortillas briefly in a skillet or microwave. Spread dressing on each, add lettuce, chicken, tomatoes, Parmesan, and croutons. Roll tightly, cut in half, and serve.

Notes

Ensure not to overfill the wraps to keep them easy to roll and serve.
Calories: 650kcal
Cost: $15
Course: Main Course
Cuisine: American
Keyword: Caesar, Chicken, Wrap

Welcome to Your New Favorite Comfort Dish: Creamy Chicken Alfredo Pasta

If you’re looking to indulge in a deliciously creamy and rich pasta dish, look no further! This ultimate Chicken Alfredo recipe is not only super easy to make but also packed with flavor that will make it a family favorite. With just a handful of ingredients, you can whip up a restaurant-quality meal in no time. Perfect for busy weeknights or cozy gatherings, this dish truly embraces the essence of comfort food.

In this guide, we’ll break down everything you need to know to make the creamiest Chicken Alfredo Pasta, from the essential ingredients to expert tips for perfecting your sauce. Let’s dive in!

Why You’ll Love This Recipe

  • Quick and Easy: Whip this up in under 30 minutes, making it perfect for busy weeknights.
  • Simple Ingredients: No need for complicated pantry staples—chicken, cream, butter, and cheese are likely already in your kitchen.
  • Customizable: This recipe is versatile! Add in your favorite veggies or swap out proteins to suit your taste.
  • Comforting and Satisfying: The rich and creamy sauce is perfect for when you crave something hearty and fulfilling.
  • Impressive Presentation: Serve this dish to guests, and they’ll think you spent hours in the kitchen!

Ingredients You’ll Need

Here’s your complete grocery list for the creamiest Chicken Alfredo Pasta:

  • 1.5 lbs boneless, skinless chicken breasts, thinly sliced or cubed
  • 1 tsp salt
  • 1/2 tsp black pepper
  • 1 tsp paprika
  • 2 tbsp olive oil
  • 12 oz (340g) fettuccine or tagliatelle pasta
  • 4 tbsp (1/2 stick, 56g) unsalted butter
  • 1 tsp chopped garlic (2-3 cloves, minced)
  • 1 tbsp finely chopped onions or shallots
  • 2 cups double cream or heavy cream
  • 1/2 cup freshly grated Parmesan cheese
  • 2 cups (226g) shredded low-moisture, part-skim mozzarella cheese
  • 1 tsp fresh parsley, chopped, plus more for garnish
  • 1 cup reserved pasta water

Step-by-Step Instructions for Perfect Alfredo

Side view of a bowl filled with juicy chicken Alfredo pasta, garnished with parsley.
  1. Pat the chicken breasts dry and slice them into thin, even strips or bite-sized cubes. Season generously with 1 tsp salt, 1/2 tsp black pepper, and 1 tsp paprika.
  2. In a large skillet or Dutch oven, heat 2 tbsp of olive oil over medium-high heat. Add the chicken and cook for 5-7 minutes, stirring occasionally, until golden brown and cooked through. Remove the chicken from the skillet and set aside.
  3. While the chicken cooks, bring a large pot of salted water to a rolling boil. Add your fettuccine and cook according to package directions until al dente. Just before draining, carefully scoop out 1 cup of the starchy pasta water and set it aside. Drain the pasta.
  4. In the same skillet you used for the chicken (no need to wash it—those browned bits add flavor!), melt the 4 tbsp of butter over medium heat. Add the minced garlic and chopped onion. Sauté for about 1 minute until fragrant and translucent. Be careful not to burn the garlic.
  5. Pour the 2 cups of double cream into the skillet. Bring it to a gentle simmer, stirring occasionally. Do not let it come to a rapid boil; you should see small bubbles forming around the edges.
  6. Reduce the heat to low. Gradually whisk in the grated Parmesan and shredded mozzarella cheese, a handful at a time, stirring constantly. Continue stirring until the cheeses have fully melted and the sauce is smooth and uniform.
  7. Add the cooked, drained pasta and the reserved cooked chicken to the creamy sauce. Using tongs, toss everything to coat thoroughly.
  8. Begin adding the reserved pasta water, a few tablespoons at a time, tossing continuously. You likely won’t need the full cup. Add just enough until the sauce loosens to a silky, flowing consistency that coats the pasta perfectly.
  9. Stir in the teaspoon of fresh parsley. Give it a final taste and adjust seasoning with more salt or pepper if needed.

Pro Tips for Alfredo Perfection

  • Use the Right Cheese: For the best flavor and texture, go for freshly grated cheeses rather than pre-shredded varieties, which often contain anti-caking agents.
  • Don’t Rush the Cream: Allow the cream to simmer gently; this helps develop the flavors without curdling.
  • Pasta Water is Key: The starchy pasta water is essential for achieving that perfect sauce consistency. Use it wisely!
  • Season at Every Step: Taste and adjust your seasoning as you go, especially after adding the cheese.
  • Garnish Wisely: Fresh parsley not only adds a pop of color but also brightens the dish with a fresh flavor.
  • Make it Ahead: You can prepare the sauce ahead of time, just reheat gently and add the pasta and chicken just before serving.
  • Leftover Transformation: If you have leftovers, consider turning them into a delicious pasta bake by adding breadcrumbs and baking it until golden.
  • Pair with Wine: A crisp white wine like Pinot Grigio pairs beautifully with Chicken Alfredo, enhancing the creamy flavors.

Common Mistakes to Avoid

  • Overcooking the Chicken: Keep an eye on the chicken to prevent it from becoming dry; cook just until golden.
  • Boiling the Cream: Avoid boiling the cream aggressively; it can separate and ruin the sauce.
  • Skipping the Cheese: Don’t skip the cheese; it’s key to achieving that rich, creamy texture!
  • Not Reserving Pasta Water: Always reserve some pasta water before draining; it’s a game-changer for sauce consistency.

Delicious Variations to Try

  • Veggie Alfredo: Add sautéed broccoli, spinach, or mushrooms to boost nutrition and flavor.
  • Garlic Shrimp Alfredo: Swap chicken for shrimp for a delightful seafood twist.
  • Herbed Alfredo: Incorporate fresh herbs like basil or thyme for an aromatic burst.
  • Spicy Alfredo: Add a pinch of red pepper flakes for a little heat that complements the creaminess.

Storage and Make-Ahead Instructions

This Chicken Alfredo is best enjoyed fresh, but if you have leftovers, here’s how to store them:

  • Refrigerate: Store in an airtight container in the fridge for up to 3 days.
  • Reheat: Gently reheat in a skillet over low heat, adding a splash of milk or reserved pasta water to loosen the sauce.
  • Make-Ahead: Prepare the sauce in advance and store it in the fridge for up to 2 days. Cook the pasta fresh before serving.

Frequently Asked Questions

  • Can I use chicken thighs instead of breasts? Absolutely! Chicken thighs add more flavor and are more forgiving to cook.
  • Can I use half-and-half instead of heavy cream? Yes, but the sauce will be less rich and creamy.
  • How can I make this dish healthier? Consider using whole wheat pasta and reducing the amount of cheese.
  • Can I make this dish dairy-free? Yes, use a dairy-free cream and cheese alternative.
  • What can I serve with Chicken Alfredo? A side salad or garlic bread pairs wonderfully.
  • How do I prevent the sauce from separating? Make sure to keep the heat low when adding the cheese and stir continuously.
  • Can I freeze leftovers? It’s best to avoid freezing Alfredo, as the cream can separate when thawed.
  • What type of pasta works best? Fettuccine is traditional, but you can use any pasta you like!

Nutritional Information & Dietary Adaptations

This Chicken Alfredo is a comforting dish, but you can adapt it to fit various dietary needs:

  • Gluten-Free: Substitute regular pasta with gluten-free pasta.
  • Low-Carb: Use zucchini noodles or spaghetti squash for a lower-carb option.
  • Heart Healthy: Opt for low-fat dairy options and add more vegetables for fiber.

Essential Equipment for Cooking Alfredo

  • Large Skillet or Dutch Oven: Perfect for cooking the chicken and making the sauce.
  • Pot for Boiling Pasta: A large pot is essential for cooking your pasta evenly.
  • Measuring Cups and Spoons: Accurate measurements ensure consistent results.
  • Wooden Spoon or Whisk: Ideal for stirring the sauce without scratching your cookware.

Serving Suggestions

For a complete meal, consider pairing your Chicken Alfredo with:

  • Simple Green Salad: A fresh salad with a light vinaigrette balances the richness of the pasta.
  • Garlic Bread: Crispy garlic bread complements the creamy sauce perfectly.
  • Steamed Vegetables: Broccoli or asparagus can add a colorful and healthy touch.

Conclusion: Enjoy Your Cooking Journey!

There you have it—the ultimate guide to making creamy Chicken Alfredo Pasta! With these clear steps and expert tips, you’ll feel confident in whipping up this comforting dish. Remember, cooking is all about experimenting and enjoying the process. So, roll up your sleeves, gather your ingredients, and get ready to indulge in a delicious meal that will impress everyone around your table. Happy cooking!

Creamiest Chicken Alfredo Pasta

Prep Time 10 minutes
Cook Time 20 minutes
Total Time 30 minutes
Servings 4 servings
Calories 850
A rich and creamy chicken Alfredo pasta that combines tender chicken, silky sauce, and perfectly cooked pasta for a comforting meal.

Ingredients

Protein

  • 1.5 lbs boneless, skinless chicken breasts (thinly sliced or cubed)
  • 1 tsp salt
  • 1.5 tsp black pepper
  • 1 tsp paprika
  • 2 tbsp olive oil

Pasta

  • 12 oz fettuccine or tagliatelle pasta

Dairy & Cheese

  • 4 tbsp unsalted butter (½ stick, 56g)
  • 1 tsp chopped garlic (2-3 cloves, minced)
  • 1 tbsp finely chopped onions or shallots
  • 2 cups double cream or heavy cream
  • 0.5 cup freshly grated Parmesan cheese
  • 2 cups shredded low-moisture, part-skim mozzarella cheese
  • 1 tsp fresh parsley (chopped, plus more for garnish)
  • 1 cup reserved pasta water

Instructions 

  • Pat the chicken dry, slice into strips or cubes, and season with salt, pepper, and paprika.
  • Cook the chicken in olive oil until golden and cooked through, then set aside. Meanwhile, cook pasta until al dente, reserving 1 cup of pasta water before draining.
  • In the same skillet, melt butter, sauté garlic and onions until fragrant, then add cream and simmer gently. Gradually whisk in cheeses until smooth.
  • Add cooked pasta and chicken to the sauce, tossing to coat. Gradually add reserved pasta water until sauce reaches desired consistency.
  • Stir in parsley, taste, and adjust seasoning. Garnish with more parsley before serving.

Notes

For a richer flavor, use freshly grated Parmesan and high-quality cream.
Calories: 850kcal
Cost: $15
Course: Main Course
Cuisine: Italian
Keyword: Chicken, Creamy, Pasta

Discover how to whip up a delectable Chicken Teriyaki Noodles dish in no time! This simple recipe combines tender chicken, flavorful teriyaki sauce, and your favorite noodles for a comforting meal that’s perfect for busy evenings. Cooking can be a joyful experience, and I’m here to guide you every step of the way! Let’s dive into why this dish is a must-try.

Why You’ll Love This Recipe

  • Quick and Easy: This meal can be prepared in just 30 minutes, making it an ideal choice for those hectic weeknights.
  • Flavorful and Satisfying: The combination of sweet, savory, and umami flavors in the teriyaki sauce will leave your taste buds dancing.
  • Customizable: Feel free to adjust the ingredients based on dietary preferences or what you have on hand. You can easily swap proteins or noodles!
  • One-Pan Wonder: This recipe involves minimal cleanup as everything is cooked in one skillet or wok.
  • Great for Meal Prep: Make a double batch to enjoy leftovers for lunch or freeze for a future meal.

Ingredients Breakdown

Let’s gather what you need to make these mouthwatering Chicken Teriyaki Noodles:

  • 1 lb (450g) boneless, skinless chicken breasts or thighs: Thinly sliced for quick cooking. You can substitute with tofu or shrimp if preferred.
  • 8 oz (225g) noodles: Udon, soba, or any preferred noodles work beautifully. Gluten-free options are also available!
  • 2 tablespoons vegetable oil: For frying; feel free to use sesame oil for an extra flavor kick.
  • 1/4 cup soy sauce: The backbone of the teriyaki flavor. Tamari is a great gluten-free alternative.
  • 2 tablespoons honey or brown sugar: For a touch of sweetness that balances the savory elements.
  • 2 tablespoons rice vinegar: Adds brightness to the dish.
  • 2 tablespoons mirin: An optional sweet rice wine that enhances the flavor profile.
  • 1 teaspoon sesame oil: For a fragrant finish.
  • 2 garlic cloves, minced: Adds aromatic depth.
  • 1 tablespoon fresh ginger, grated: Essential for that zing!
  • 1 teaspoon cornstarch: Optional, for thickening the sauce.
  • 1/4 cup water: To help dissolve the cornstarch if used.
  • 1 tablespoon sesame seeds: For garnish and added crunch.
  • 2-3 green onions, chopped: For garnish and freshness.
  • 1/2 teaspoon chili flakes: Optional, for a spicy kick!

Step-by-Step Instructions

Now that we have our ingredients ready, let’s get cooking! Follow these easy steps to create your Chicken Teriyaki Noodles:

  1. Prepare the noodles according to the package instructions, drain, and set them aside. If using soba or udon noodles, rinse them under cold water to stop the cooking process and prevent sticking.
  2. In a large skillet or wok, heat the vegetable oil over medium-high heat. Add the sliced chicken and cook for 5-7 minutes until fully cooked and browned on the outside. Remove the chicken from the skillet and set it aside.
  3. In the same skillet, add a bit more oil if needed and sauté the garlic and ginger for about 30 seconds until fragrant.
  4. Add the soy sauce, honey or brown sugar, rice vinegar, mirin (if using), and sesame oil. Stir to combine.
  5. If you prefer a thicker sauce, dissolve the cornstarch in the water and add it to the sauce. Let the sauce simmer for 2-3 minutes until it thickens slightly.
  6. Return the cooked chicken to the skillet, followed by the cooked noodles. Toss everything together, ensuring the noodles are well-coated with the teriyaki sauce and the chicken is evenly distributed.
  7. Once heated through, transfer to serving plates and garnish with sesame seeds, chopped green onions, and chili flakes if using.

Pro Tips for Best Results

Side view of a bowl of Chicken Teriyaki Noodles, showcasing vibrant ingredients and glistening sauce.
  • Choose the Right Noodles: Udon noodles are thick and chewy, making them perfect for soaking up the teriyaki sauce.
  • Marinate the Chicken: For an extra flavor boost, marinate your chicken in the teriyaki sauce for 30 minutes before cooking.
  • Don’t Overcrowd the Skillet: Cook the chicken in batches if necessary to ensure even cooking and browning.
  • Adjust the Sweetness: If you prefer a sweeter sauce, feel free to add more honey or brown sugar to taste.
  • Use Fresh Ingredients: Fresh garlic and ginger make a noticeable difference in flavor compared to pre-minced options.
  • Keep an Eye on the Heat: Cooking on medium-high heat allows you to achieve that perfect sear without overcooking the chicken.
  • Garnish Generously: Don’t skip the garnishes! They add flavor and visual appeal to your dish.
  • Experiment with Veggies: Toss in some broccoli, bell peppers, or snap peas for added color and nutrition.

Common Mistakes and Troubleshooting

Even the best cooks make mistakes! Here are some common pitfalls and how to avoid them:

  • Overcooked Chicken: If the chicken turns out dry, reduce cooking time and ensure it is just cooked through.
  • Sauce Too Thin: If the sauce isn’t thickening, add more cornstarch mixed with water and simmer longer.
  • Noodles Sticking Together: Rinse cooked noodles with cold water to prevent sticking.
  • Uneven Flavor: Ensure you distribute the sauce evenly throughout the noodles and chicken.

Delicious Variations

Feeling adventurous? Here are some fun variations to try:

  • Spicy Teriyaki: Add a tablespoon of Sriracha or chili paste to the sauce for an extra kick.
  • Vegetarian Delight: Substitute chicken with tofu or a variety of your favorite vegetables for a satisfying vegetarian option.
  • Teriyaki Stir-Fry: Add mixed vegetables like bell peppers, carrots, and broccoli for a colorful stir-fry.
  • Sesame Chicken: Top with toasted sesame seeds and a drizzle of sesame oil for a rich finish.

Storage and Make-Ahead Instructions

If you want to enjoy this dish later, follow these storage tips:

  • Refrigeration: Store leftovers in an airtight container in the fridge for up to 3 days.
  • Freezing: You can freeze the chicken and sauce together for up to 3 months. Just reheat on the stove when ready to enjoy!
  • Make-Ahead: Prepare the sauce in advance and store it in the fridge. Cook the chicken and noodles fresh when you’re ready to eat.

Frequently Asked Questions

Here are some common questions about Chicken Teriyaki Noodles:

  • Can I use different types of noodles? Yes! Udon, soba, or even spaghetti can work well.
  • What’s the best way to reheat leftovers? Reheat in a skillet over medium heat, adding a splash of water to loosen the sauce.
  • Can I make the teriyaki sauce from scratch? Absolutely! Combine soy sauce, sugar, vinegar, and ginger to create a homemade version.
  • What can I serve with Chicken Teriyaki Noodles? Serve with steamed vegetables or a side salad for a complete meal.
  • Is this dish gluten-free? You can make it gluten-free by using gluten-free soy sauce and noodles.
  • How can I make this dish spicier? Add more chili flakes or Sriracha to the sauce for an extra kick!
  • Can I prepare this dish in an air fryer? Yes! Cook the chicken in the air fryer before adding it to the sauce.
  • How do I know when the chicken is cooked? The chicken should reach an internal temperature of 165°F (75°C) and be golden brown.

Nutritional Tips and Dietary Adaptations

This Chicken Teriyaki Noodles dish can be tailored to fit various dietary needs:

  • Low-Carb: Substitute noodles with spiralized zucchini or cauliflower rice.
  • Dairy-Free: This recipe is naturally dairy-free, making it suitable for those with lactose intolerance.
  • High-Protein: Add edamame or chickpeas for an additional protein boost.

Equipment Recommendations

Here’s what you’ll need to make this recipe:

  • Large Skillet or Wok: For cooking the chicken and noodles.
  • Cutting Board: To prepare your ingredients efficiently.
  • Chef’s Knife: A sharp knife makes slicing chicken and veggies a breeze.
  • Measuring Cups and Spoons: For precise ingredient measurements.

Serving Suggestions

Present your Chicken Teriyaki Noodles beautifully to impress your family or guests:

  • Garnish: Top with fresh green onions, sesame seeds, and chili flakes.
  • Serve with Sides: Pair with steamed broccoli or a fresh cucumber salad.
  • Drinks: Enjoy with a light iced tea or a refreshing sparkling water.

Cooking can be a rewarding experience, and I hope this Chicken Teriyaki Noodles recipe brings joy and flavor to your kitchen. Remember, the key to great meals is confidence and a willingness to try new things. Enjoy your cooking journey!

Chicken Teriyaki Noodles

Prep Time 10 minutes
Cook Time 15 minutes
Total Time 25 minutes
Servings 4 servings
Calories 550
Enjoy a flavorful and quick Chicken Teriyaki Noodles dish, perfect for a satisfying meal with tender chicken and savory sauce.

Ingredients

Protein

  • 1 lb boneless, skinless chicken breasts or thighs, thinly sliced

Noodles

  • 8 oz noodles (udon, soba, or preferred)

Sauce & Oils

  • 2 tablespoons vegetable oil
  • 0.25 cup soy sauce
  • 2 tablespoons honey or brown sugar
  • 2 tablespoons rice vinegar
  • 2 tablespoons mirin (optional) (for extra sweetness)
  • 1 teaspoon sesame oil
  • 2 cloves garlic, minced
  • 1 tablespoon fresh ginger, grated
  • 0.25 cup water

Garnishes

  • 1 tablespoon sesame seeds
  • 2-3 green onions chopped
  • 0.5 teaspoon chili flakes (optional) (for a spicy kick)

Instructions 

  • Cook the noodles according to package instructions, drain, rinse if needed, and set aside.
  • In a large skillet, heat oil and cook sliced chicken for 5-7 minutes until browned. Remove and set aside.
  • Sauté garlic and ginger in the same skillet for 30 seconds. Add soy sauce, honey, rice vinegar, mirin, and sesame oil. Dissolve cornstarch in water and add to sauce; simmer 2-3 minutes until thickened.
  • Return chicken to skillet, add noodles, and toss to coat evenly. Heat through.
  • Serve garnished with sesame seeds, chopped green onions, and chili flakes if desired.

Notes

For a spicier version, add more chili flakes or hot sauce.
Calories: 550kcal
Cost: $15
Course: Main Course
Cuisine: Asian
Keyword: Chicken, Noodles, Teriyaki

Discover the Joy of Making Apple Crumble in a Glass

Welcome to your next favorite dessert! This apple crumble in a glass recipe is not just a feast for the taste buds, but also a visually stunning treat that combines layers of sweet, caramelized apples, buttery crumbles, and fluffy whipped cream. In this comprehensive guide, you’ll learn how to create this delightful dessert step-by-step, ensuring that you feel confident and excited to whip it up in your kitchen.

With its comforting flavors and easy preparation, this dessert is perfect for any occasion, from a casual weeknight treat to a festive gathering with friends and family. Let’s dive into why you’ll absolutely love this recipe!

Why You’ll Love This Recipe

  • Quick and Easy: This dessert comes together in less than an hour, making it a perfect last-minute treat.
  • Layered Perfection: The beautiful layers create a stunning presentation that’s sure to impress your guests.
  • Customizable: Easily tailor the flavors and ingredients to suit your preferences or dietary needs.
  • Comforting Flavors: The combination of sweet apples and crunchy crumbles evokes a warm, nostalgic feeling with every bite.
  • Versatile Serving: Serve it as a dessert or a brunch treat; it’s delicious at any time of day!

Ingredients You’ll Need

To create this delightful apple crumble in a glass, you’ll need the following ingredients:

  • 3 apples: Choose your favorite type—Granny Smith for tartness or Fuji for sweetness.
  • 0.75 cup sugar (divided): This will sweeten both the apples and the crumble.
  • 0.5 cup flour: For the crumble base, providing structure and texture.
  • 0.5 cup rolled oats: Adds a delightful crunch to the crumble.
  • 5.25 tbsp cold butter (divided): Essential for a rich, buttery flavor.
  • 0.5 tbsp cinnamon: Introduces warmth and depth to the apple filling.
  • 1.5 tbsp apple vinegar: Enhances the apple flavor with a tangy kick.
  • 0.75 cup heavy cream: For whipping into a luscious topping.
  • 1 tbsp vanilla sugar: Adds sweetness and aroma to the whipped cream.
  • 0.66 cup yogurt: A creamy layer that balances the sweetness.

Step-by-Step Instructions

Side view of an apple crumble served in a transparent glass.

Follow these simple steps to create your apple crumble in a glass:

  • Step 1: Preheat your oven to 200°C (400°F). In a mixing bowl, combine 0.75 cup sugar, 0.5 cup flour, and 0.5 cup rolled oats. Mix well.
  • Step 2: Add 5.25 tbsp cold butter to the bowl and use your fingers to mix until large crumbs form. Transfer the mixture to a parchment-lined baking sheet and bake for approximately 15-20 minutes or until golden brown.
  • Step 3: While the crumble bakes, peel, core, and dice the 3 apples. In a frying pan, melt 5.25 tbsp butter over medium heat. Add the apples and sauté for about 5-7 minutes.
  • Step 4: Stir in 0.75 cup sugar, 0.5 tbsp cinnamon, and 1.5 tbsp apple vinegar. Toss to coat the apples, reduce heat to low, and let simmer for approximately 10-15 minutes until the apples are caramelized and golden brown.
  • Step 5: In a mixing bowl, add 0.75 cup heavy cream and beat with a stand mixer or hand mixer until soft peaks form. Add 1 tbsp vanilla sugar and continue to beat until stiff peaks form. Carefully fold in 0.66 cup yogurt.
  • Step 6: Layer the dessert in serving glasses starting with the apple mixture, followed by crumbles, and finally the whipped cream. Repeat the layers, finishing with a sprinkle of crumbles and apples on top. Refrigerate until ready to serve.

Expert Tips for Success

  • Ingredient Quality: Use fresh, high-quality apples for the best flavor and texture.
  • Butter Temperature: Ensure your butter is cold for a flakier crumble.
  • Don’t Skip the Vinegar: Apple vinegar enhances the apple flavor and adds a unique tang.
  • Whipping Cream: For the best results, chill your mixing bowl and beaters before whipping the cream.
  • Customize Sweetness: Adjust the sugar levels based on your apple varieties’ sweetness.
  • Layering Technique: Don’t rush the layering; take your time for a beautiful presentation.
  • Storage: Store any leftovers in the fridge, but for best texture, reassemble layers just before serving.
  • Use Seasonal Ingredients: Experiment with seasonal fruits like pears or berries for a twist.

Common Mistakes to Avoid

Here are some pitfalls to watch out for when making this recipe:

  • Overbaking the Crumble: Watch the crumble closely to avoid burning—golden brown is the goal!
  • Under-cooking the Apples: Make sure the apples are soft and caramelized for the best flavor.
  • Too Much Cream: Balance the cream and yogurt layers to avoid overpowering the flavors.
  • Not Letting it Chill: Refrigerating the layered dessert allows the flavors to meld beautifully.

Delicious Variations

Feel free to get creative! Here are some variations to try:

  • Berry Delight: Substitute apples with mixed berries for a refreshing twist.
  • Nutty Crunch: Add chopped nuts like pecans or almonds to the crumble for added texture.
  • Chocolate Drizzle: Top your dessert with a drizzle of melted chocolate for an indulgent touch.
  • Spiced Up: Add nutmeg or cardamom to the apple mixture for extra warmth and spice.

Storage and Make-Ahead Instructions

This apple crumble in a glass can be made ahead of time! Here’s how to store it:

  • Refrigeration: Keep the assembled dessert in the fridge for up to 3 days. Just be sure to cover it with plastic wrap.
  • Make-Ahead Crumble: Prepare the crumble and store it in an airtight container for up to a week.
  • Fresh Apples: Slice and prepare apples just before assembly to keep them fresh and flavorful.

Frequently Asked Questions

Got questions? Here are some common ones answered:

  • Can I use frozen apples? Yes, but make sure to thaw and drain excess moisture before using.
  • What can I substitute for heavy cream? You can use coconut cream or whipped coconut milk for a lighter option.
  • How can I make it gluten-free? Use gluten-free flour and oats for the crumble.
  • Can I freeze the dessert? It’s best served fresh, but you can freeze the crumble separately.
  • How do I make it vegan? Substitute butter with coconut oil and heavy cream with coconut cream or a vegan whipped topping.
  • What type of apples are best? Granny Smith, Honeycrisp, or Fuji apples work wonderfully!
  • Can I add other fruits? Absolutely! Pears and peaches are great additions.
  • How do I serve it? Serve it chilled or at room temperature, garnished with mint leaves for a fresh touch.

Nutritional Tips and Dietary Adaptations

This delightful dessert can fit into various dietary needs:

  • Lower Sugar: Reduce the sugar in the apple mixture if you prefer a less sweet dessert.
  • Protein Boost: Add Greek yogurt instead of regular yogurt for extra protein.
  • Dairy-Free Option: Choose non-dairy yogurt and whipped cream alternatives.

Recommended Equipment

To make your cooking experience smoother, here’s what you’ll need:

  • Baking Sheet: For baking the crumble.
  • Mixing Bowls: A set of different sizes for mixing ingredients.
  • Frying Pan: For sautéing the apples.
  • Stand Mixer or Hand Mixer: Essential for whipping the cream.
  • Serving Glasses: Choose clear glasses to showcase the beautiful layers of dessert.

Serving Suggestions

Here are a few ideas to elevate your serving:

  • Garnish: Top with fresh mint leaves or a dusting of cinnamon for an extra touch.
  • Accompaniments: Pair with vanilla ice cream or a dollop of crème fraîche for added creaminess.
  • Presentation: Use a trifle bowl for a stunning centerpiece at gatherings.

Enjoy Your Culinary Adventure!

Now that you have all the tools and knowledge, it’s time to create this delightful apple crumble in a glass. Remember, the joy of cooking comes from experimenting and enjoying the process. So roll up your sleeves, gather your ingredients, and let’s make something delicious that will impress everyone at the table. Happy cooking!

Apple crumble in a glass

Prep Time 15 minutes
Cook Time 20 minutes
Total Time 35 minutes
Servings 4 servings
Calories 350
A delightful layered dessert combining caramelized apples, crunchy crumble, and whipped cream, served in elegant glasses.

Ingredients

Apples

  • 3 pieces apples (peeled, cored, diced)
  • 0.75 cup sugar (divided)
  • 0.5 cup flour
  • 0.5 cup rolled oats
  • 5.25 tbsp butter (cold, divided)
  • 0.5 tbsp cinnamon
  • 1.5 tbsp apple vinegar
  • 0.75 cup heavy cream
  • 1 tbsp vanilla sugar
  • 0.66 cup yogurt

Instructions 

  • Preheat oven to 200°C (400°F). Mix sugar, flour, oats, cinnamon, and half the butter until crumbly. Spread on a baking sheet and bake for 15-20 minutes until golden.
  • Peel, core, and dice apples. Sauté in remaining butter with sugar, cinnamon, and vinegar for 5-7 minutes. Simmer until caramelized, about 10-15 minutes.
  • Whip heavy cream until soft peaks, add vanilla sugar, then beat to stiff peaks. Fold in yogurt gently.
  • Layer in glasses: apple mixture, crumble, whipped cream. Repeat layers and top with more crumbles and apples. Chill until serving.

Notes

Use cold butter for a crisp crumble. Prepare layers in advance for best flavor.
Calories: 350kcal
Cost: $12
Course: Dessert
Keyword: apple

Welcome, fellow food lovers! Are you ready to elevate your weeknight dinners with a dish that’s both delicious and stress-free? This BBQ Chicken Pizza is the answer to your culinary dreams. Combining tender chicken, tangy BBQ sauce, and gooey cheese, this pizza is perfect for busy evenings, game day gatherings, or any occasion that calls for a family-friendly meal. Let’s dive into this flavor-packed recipe that’s sure to become a new favorite!

Why You’ll Love This Recipe

There are so many reasons to love this BBQ Chicken Pizza. Here are just a few:

  • Quick and Easy Preparation: With pre-made pizza crust and simple ingredients, you can whip this up in under 30 minutes.
  • Flavor Explosion: The combination of BBQ sauce, shredded chicken, and melty cheese creates a mouthwatering experience.
  • Customizable: This recipe allows for plenty of variations—add your favorite toppings to make it your own!
  • Perfect for Sharing: Cut it into slices and watch it disappear at your next gathering.
  • Kid-Friendly: Even the pickiest eaters will love this cheesy, flavorful dish!

Ingredients Breakdown

Here’s what you need to create this delicious BBQ Chicken Pizza:

  • 1 pre-made pizza crust: Choose store-bought for convenience or try your hand at homemade.
  • 1 cup cooked chicken breast, shredded: Leftover rotisserie chicken works great!
  • 1/2 cup BBQ sauce: Select a brand you love or even make your own for a gourmet touch.
  • 1/2 cup red onion, thinly sliced: Adds a lovely crunch and sweetness.
  • 1/2 cup mozzarella cheese, shredded: The classic choice for pizza.
  • 1/2 cup cheddar cheese, shredded: For an extra layer of flavor.
  • 1/4 cup cilantro, chopped: Fresh herbs brighten up the dish.
  • 1 tablespoon olive oil: Helps the crust crisp up beautifully.
  • Salt and pepper to taste: Essential for seasoning.

Pro Tips for the Best BBQ Chicken Pizza

Want to take your pizza to the next level? Here are some expert insights:

  • Choose Quality Ingredients: Fresh toppings and good-quality BBQ sauce make a significant difference in flavor.
  • Preheat Your Oven: Ensure your oven reaches 400°F (200°C) for a perfectly baked crust.
  • Let the Chicken Cool: If using freshly cooked chicken, let it cool before shredding for easier handling.
  • Layer Wisely: Spread the BBQ sauce evenly, then add the chicken and toppings for balanced flavor.
  • Watch the Bake Time: Keep an eye on your pizza to prevent overcooking—the cheese should be bubbly and golden.
  • Add Fresh Herbs After Baking: Sprinkle cilantro on just before serving to keep it vibrant and fresh.
  • Experiment with Cheese: Try adding gouda or feta for a unique twist!
  • Use a Pizza Stone: If you have one, it can enhance the crust’s crispiness.

Common Mistakes and Troubleshooting

Even the best cooks make mistakes! Here’s how to avoid common pitfalls:

  • Too Much Sauce: Avoid soggy pizza by using just enough BBQ sauce to coat the chicken.
  • Undercooked Crust: If your crust isn’t browning, consider increasing the oven temperature for the last few minutes.
  • Overloading Toppings: Less is often more—too many toppings can lead to a soggy pizza.
  • Skipping the Preheat: Always preheat your oven to ensure your pizza cooks evenly.

Variations to Try

Feel free to mix things up! Here are some fun variations:

  • Buffalo Chicken Pizza: Substitute BBQ sauce with buffalo sauce for a spicy kick.
  • Veggie BBQ Pizza: Add bell peppers, mushrooms, and spinach for a veggie-packed option.
  • Hawaiian BBQ Pizza: Throw in some pineapple chunks for a sweet and savory twist.
  • BBQ Chicken Flatbread: Use flatbread instead of pizza crust for a thinner, crispier version.

Storage and Make-Ahead Instructions

Want to prepare in advance? Here’s how to store and make this pizza ahead of time:

  • Make-Ahead: Assemble the pizza but don’t bake it. Cover it tightly and store it in the fridge for up to 24 hours.
  • Storing Leftovers: Keep leftover pizza in an airtight container in the refrigerator for up to 3 days.
  • Reheating: For the best results, reheat in the oven at 350°F (175°C) until warmed through.

Frequently Asked Questions

Here are some common questions about making BBQ Chicken Pizza:

  • Can I use a different type of sauce? Absolutely! Feel free to experiment with different sauces like teriyaki or ranch.
  • What toppings go well with BBQ chicken? Consider adding jalapeños, bacon, or even avocado for an extra flavor boost.
  • Is this recipe gluten-free? You can use a gluten-free pizza crust to make it suitable for gluten-free diets.
  • Can I freeze BBQ Chicken Pizza? Yes! Freeze the assembled pizza before baking, then bake from frozen when ready.
  • What can I serve with BBQ Chicken Pizza? Pair it with a fresh salad or dips like ranch or garlic sauce.
  • How can I make this pizza healthier? Opt for a whole wheat crust, use less cheese, and load up on veggies.
  • Can I use raw chicken? Yes, but ensure it’s fully cooked before adding to the pizza.
  • How do I make my BBQ Chicken Pizza spicy? Add crushed red pepper flakes or spicy BBQ sauce for some heat.

Nutrition Tips and Dietary Adaptations

This BBQ Chicken Pizza can be adapted to fit various dietary needs:

  • Low-Carb Option: Replace the pizza crust with a cauliflower crust for a low-carb alternative.
  • Dairy-Free: Use dairy-free cheese substitutes and skip the cheese altogether for a lighter version.
  • Paleo-Friendly: Create a pizza using a crust made from almond flour or coconut flour.

Equipment Recommendations

Here’s what you’ll need:

  • Pizza Stone or Baking Sheet: For optimal baking results.
  • Mixing Bowl: To combine your chicken and BBQ sauce.
  • Sharp Knife: For slicing your pizza and toppings.

Serving Suggestions

To make your meal even more enjoyable, consider serving:

  • Fresh Salad: A crisp side salad balances the richness of the pizza.
  • Dips: Serve with ranch, blue cheese, or extra BBQ sauce for dipping.
  • Wine or Beer: Pair with a light beer or fruity wine to complement the flavors.

So, what are you waiting for? Get ready to impress your family and friends with this delightful BBQ Chicken Pizza. Whether it’s a weeknight dinner or a game day treat, this recipe is sure to be a hit. Enjoy cooking and have fun experimenting with flavors—great food doesn’t require perfection, just a little creativity and love!

BBQ Chicken Pizza

Prep Time 10 minutes
Cook Time 12 minutes
Total Time 22 minutes
Servings 4 pieces
Calories 350
A delicious homemade pizza topped with smoky BBQ chicken, cheese, and fresh cilantro for a flavorful twist.

Ingredients

Dough

  • 1 piece pre-made pizza crust (store-bought or homemade)
  • 1 cup cooked chicken breast, shredded
  • 0.5 cup BBQ sauce
  • 0.5 cup red onion, thinly sliced
  • 0.5 cup mozzarella cheese, shredded
  • 0.5 cup cheddar cheese, shredded
  • 0.25 cup cilantro, chopped
  • 1 tablespoon olive oil

To taste

  • Salt and pepper

Instructions 

  • Preheat oven to 400°F (200°C).
  • Spread olive oil over the crust and mix shredded chicken with BBQ sauce.
  • Distribute chicken mixture on the crust, then top with red onion, mozzarella, and cheddar.
  • Bake for 10-12 minutes until cheese is bubbly and golden.
  • Sprinkle with chopped cilantro, slice, and serve.

Notes

For extra flavor, add a drizzle of honey or hot sauce before serving.
Calories: 350kcal
Cost: $12
Course: Main Course
Cuisine: American
Keyword: BBQ, Chicken, Pizza