Author

Steven

Browsing

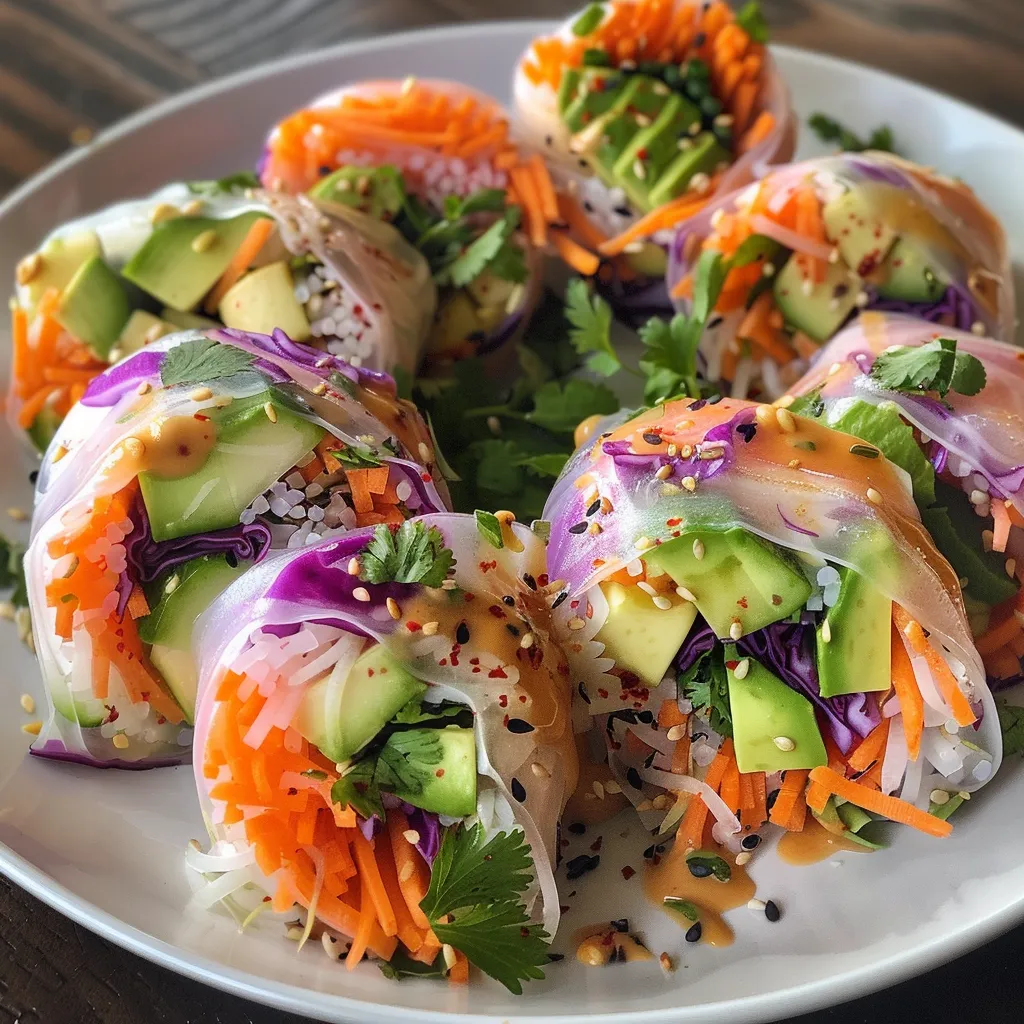
Welcome to a culinary journey that celebrates freshness and flavor! Rainbow Veggie Rice Paper Rolls are not just a treat for your taste buds; they also offer a visual feast. Packed with vibrant vegetables and served alongside a creamy peanut sauce, this recipe is perfect for quick, healthy meals that are as colorful as they are delicious. Let’s dive into the world of these delightful rolls filled with nutritious goodness!

Why You’ll Love This Recipe

  • Quick and Easy: These rolls can be prepared in under 30 minutes, making them an ideal choice for busy weeknights.
  • Customizable: Feel free to swap out veggies or add proteins like shrimp or chicken to suit your taste!
  • Healthy and Nutritious: Packed with fresh veggies, these rolls are low in calories and high in vitamins.
  • Perfect for Meal Prep: They can be made ahead of time and stored in the refrigerator for a quick grab-and-go meal.
  • Great for Entertaining: Impress your friends at gatherings with these stunning and delicious rolls!

Ingredients Needed

To make your Rainbow Veggie Rice Paper Rolls, gather the following ingredients:

  • 8 rice paper wrappers: Look for them in Asian grocery stores or the international aisle of your supermarket.
  • 1 cup shredded carrots: Adds sweetness and crunch.
  • 1 cup thinly sliced cucumber: Refreshing and hydrating.
  • 1 cup shredded purple cabbage: For a pop of color and added nutrients.
  • 1 cup fresh mint leaves: Provides a burst of freshness.
  • 1 cup fresh cilantro leaves: Enhances the flavor profile.
  • 1 avocado, thinly sliced: Creamy richness that complements the crunch of veggies.
  • 1 cup cooked rice vermicelli noodles: The perfect filling to make your rolls satisfying.

For the Peanut Sauce:

  • 1/4 cup peanut butter: The base of our delicious dipping sauce.
  • 2 tablespoons soy sauce: For umami flavor.
  • 1 tablespoon honey: Balances the sauce with sweetness.
  • 1 tablespoon lime juice: Adds brightness and acidity.
  • 1 clove garlic, minced: For a fragrant kick.
  • 1/4 cup water: To thin out the sauce to your desired consistency.

Step-by-Step Instructions

Side view of rainbow veggie rice paper rolls showcasing vibrant layers of carrots, cucumber, and cabbage.

Follow these easy steps to create your Rainbow Veggie Rice Paper Rolls:

  • Prep the Veggies and Herbs: Start by washing and cutting your vegetables and herbs as specified.
  • Cook the Rice Vermicelli Noodles: Prepare the noodles according to package instructions, then drain and set aside.
  • Soften the Rice Paper Wrapper: Fill a large shallow dish with warm water. Dip one rice paper wrapper into the water for about 5 seconds until it softens.
  • Assemble the Roll: Lay the softened wrapper flat on a clean surface. Layer a small amount of each vegetable, herb, avocado, and noodles in the center of the wrapper.
  • Roll It Up: Fold the sides of the wrapper inward, then roll tightly from the bottom to enclose the filling. Repeat with remaining wrappers and fillings.
  • Prepare the Peanut Sauce: In a bowl, whisk together peanut butter, soy sauce, honey, lime juice, minced garlic, and water until smooth.
  • Serve: Enjoy your rice paper rolls with the peanut sauce on the side for dipping!

Pro Tips for Perfect Rolls

  • Use Fresh Ingredients: Fresh veggies and herbs enhance the flavor and texture of your rolls.
  • Don’t Overfill: Less is more when it comes to filling your rolls to ensure they wrap easily.
  • Keep Wrappers Moist: If you’re assembling in batches, keep unused wrappers covered with a damp cloth to prevent them from drying out.
  • Experiment with Flavors: Try adding different sauces or spices to the peanut sauce for a unique twist!
  • Practice Makes Perfect: Don’t worry if your first few rolls don’t look perfect; with practice, you’ll master the technique!

Common Mistakes and Troubleshooting

  • Wrapper Too Stiff: Make sure to soak the wrapper long enough in warm water until it is pliable.
  • Filling Falls Out: Ensure you’re rolling tightly and securely to prevent any filling from escaping.
  • Veggies Too Wet: Pat down your veggies with a paper towel to remove excess moisture before assembling.
  • Flavor Lacking: Adjust the peanut sauce ingredients to suit your taste—add more lime juice for tang or honey for sweetness.

Delicious Variations to Try

Here are a few creative twists on the classic Rainbow Veggie Rice Paper Rolls:

  • Thai Peanut Chicken Rolls: Add sliced grilled chicken for extra protein and flavor.
  • Spicy Shrimp Rolls: Include cooked shrimp and a dash of sriracha for those who love heat.
  • Fruit-Filled Rolls: Add slices of mango or strawberries for a sweet twist on your rolls.
  • Quinoa Power Rolls: Substitute rice vermicelli noodles with cooked quinoa for added protein and texture.

Storage and Make-Ahead Instructions

To keep your rice paper rolls fresh:

  • Store any leftover rolls in an airtight container in the refrigerator for up to 2 days. Place parchment paper between layers to prevent sticking.
  • For meal prep, you can prepare all the ingredients and assemble the rolls just before serving.

Nutritional Snapshot

These Rainbow Veggie Rice Paper Rolls are not only delicious but also packed with nutrients:

  • Calories: Approximately 90 calories per roll.
  • Protein: 3g from veggies and peanut sauce.
  • Carbohydrates: 10g primarily from the rice and veggies.
  • Fat: 4g mainly from the peanut butter.
  • Vitamins: Rich in vitamins A, C, and K from the fresh vegetables.

Frequently Asked Questions

  • Can I use other types of wrappers? Yes! You can use other types of wrappers, but rice paper offers a unique texture.
  • How do I make these rolls gluten-free? Ensure your soy sauce is gluten-free and check the ingredients of your rice noodles.
  • Can I freeze rice paper rolls? It’s best to eat them fresh, but you can freeze unassembled ingredients separately.
  • What can I serve with these rolls? They pair beautifully with a variety of dipping sauces beyond peanut sauce, like hoisin or sweet chili sauce.
  • Are these rolls vegan? Yes, as long as you use a vegan-friendly peanut butter and soy sauce.
  • How long do they last in the fridge? They can last for about 2 days in an airtight container.
  • What if I don’t have mint or cilantro? You can substitute with other herbs like basil or omit them entirely!
  • Can I add cooked protein? Absolutely! Grilled chicken, shrimp, or tofu can be excellent additions.

Equipment Recommendations

  • Large Shallow Dish: For soaking rice paper.
  • Sharp Knife: For slicing veggies and herbs.
  • Cutting Board: A clean surface for assembling your rolls.
  • Mixing Bowl: For whisking up your peanut sauce.

Serving Suggestions

Serve your Rainbow Veggie Rice Paper Rolls on a vibrant platter, accompanied by a small bowl of peanut sauce for dipping. You can also garnish with sesame seeds or chopped nuts for added crunch!

Enjoy the vibrant flavors and the sense of accomplishment from creating these delightful rolls. Remember, cooking is about exploration and creativity, so feel free to make this recipe your own. Happy cooking!

Rainbow Veggie Rice Paper Rolls with Peanut Sauce

Prep Time 20 minutes
Cook Time 10 minutes
Total Time 30 minutes
Servings 4 pieces
Calories 250
Enjoy fresh and colorful rice paper rolls filled with crisp vegetables, herbs, and noodles, served with a creamy peanut sauce for dipping.

Ingredients

Rice Paper Wrappers

  • 1 cup shredded carrots
  • 1 cup thinly sliced cucumber
  • 1 cup shredded purple cabbage
  • 1 cup fresh mint leaves
  • 1 cup fresh cilantro leaves
  • 1 piece avocado, thinly sliced
  • 1 cup cooked rice vermicelli noodles
  • 0.25 cup peanut butter
  • 2 tablespoons soy sauce
  • 1 tablespoon honey
  • 1 tablespoon lime juice
  • 1 clove garlic, minced
  • 0.25 cup water

Instructions 

  • Prepare vegetables and herbs by washing and slicing as specified.
  • Cook rice vermicelli according to package, then drain.
  • Dip a rice paper in warm water for 5 seconds, then lay flat.
  • Place vegetables, herbs, avocado, and noodles in the center, then fold and roll tightly.
  • Repeat with remaining wrappers and fillings.
  • Mix peanut butter, soy sauce, honey, lime juice, garlic, and water to make the sauce.

Notes

Serve with peanut sauce on the side for dipping.
Calories: 250kcal
Cost: $12
Course: Appetizer
Cuisine: Asian
Keyword: Vegetables

Effortless Grilled Shrimp Skewers: Your Ultimate Guide to Flavor-Packed Evenings

Welcome to your next culinary adventure! If you’re looking to elevate your weeknight dinners or impress at weekend gatherings, these grilled shrimp skewers are the answer. In just a few simple steps, you’ll create mouthwatering skewers infused with savory soy sauce, sweet honey, and a delightful kick of hot sauce. This guide is designed to help you navigate every aspect of making grilled shrimp skewers, ensuring you feel confident and excited to cook.

Why You’ll Love This Recipe

  • Quick and Easy: These grilled shrimp skewers can be prepared in under 30 minutes, making them perfect for busy weeknights.
  • Flavor Explosion: The combination of soy sauce, honey, and garlic creates a delicious marinade that enhances the natural sweetness of the shrimp.
  • Versatile Dish: You can serve these skewers as an appetizer, main dish, or even toss them into salads for an extra protein boost.
  • Healthy Choice: Shrimp is high in protein and low in calories, making it a great option for health-conscious eaters.
  • Impressive Presentation: Grilled shrimp skewers look stunning on any plate, guaranteed to wow your guests!

Ingredient Breakdown

Let’s dive into the essential ingredients you’ll need to create these flavorful skewers:

  • Shrimp: 500g of medium to large shrimp, peeled and deveined. You can use fresh or frozen shrimp; just ensure they are properly thawed.
  • Soy Sauce: 1 tablespoon of soy sauce (light or dark). This adds saltiness and depth of flavor.
  • Honey: 2 tablespoons of honey for a touch of sweetness.
  • Garlic: 3 cloves, minced, which adds aromatic goodness. Substitute with 2 teaspoons of minced garlic or 1 tablespoon of garlic powder if needed.
  • Paprika: 1 teaspoon for a hint of smokiness.
  • Hot Sauce: 1 tablespoon of your favorite hot sauce to introduce some heat.
  • Oil: 2 tablespoons of oil (olive or vegetable) to keep the shrimp from sticking to the grill.
  • Salt: To taste, enhancing all the flavors.

How to Make Grilled Shrimp Skewers

Juicy shrimp skewers with a glaze of honey and spices.

Now that you have your ingredients ready, it’s time to put them to work! Here’s a simple step-by-step guide:

  1. Gather all the ingredients for the marinade.
  2. In a bowl, combine the soy sauce, honey, minced garlic, paprika, hot sauce, oil, and salt. Mix well.
  3. Taste the marinade and adjust flavors as needed. You can add more honey for sweetness or hot sauce for extra heat.
  4. Add the cleaned shrimp to the marinade, ensuring they are fully coated. Let them marinate for at least 20 minutes.
  5. While the shrimp soak up the flavors, soak your wooden skewers in water for 15 minutes. This prevents them from burning on the grill.
  6. Once marinated, thread 4-5 shrimp onto each skewer.
  7. Preheat your grill pan over medium-high heat for at least a minute. Brush some of the remaining marinade onto the shrimp.
  8. Place the skewers on the grill and cook for at least 2 minutes on each side, ensuring they are pink and opaque.
  9. Remove the skewers from the heat and serve them on a platter with lime wedges.

Pro Tips for Perfect Grilled Shrimp

  • Uniform Size: Make sure the shrimp are of uniform size for even cooking. This ensures that all shrimp cook through at the same rate.
  • Don’t Overcook: Shrimp cooks quickly! Be vigilant and do not grill for more than 2-3 minutes on each side to prevent rubbery texture.
  • Experiment with Marinades: Feel free to try different marinades, such as lemon-garlic or teriyaki, to customize your skewers.
  • Use Fresh Ingredients: Fresh garlic and high-quality shrimp can significantly enhance the flavor of your skewers.
  • Rest Before Serving: Let the skewers rest for a minute after grilling. This allows the juices to redistribute, making each bite juicy and flavorful.
  • Skewer Variations: Mix in vegetables like bell peppers, onions, and zucchini for a colorful twist.
  • Grill Temperature: Ensure your grill is hot enough before adding the skewers; this helps achieve those beautiful grill marks!
  • Use a Meat Thermometer: If unsure, a meat thermometer can help ensure that shrimp are cooked to the perfect temperature of 120°F.

Common Mistakes to Avoid

Even the best home cooks make mistakes! Here are some common pitfalls to watch out for:

  • Skipping the Marinade: Don’t rush the marinating process; it’s essential for flavor.
  • Using Cold Shrimp: Always let frozen shrimp thaw completely before marinating and grilling.
  • Overcrowding the Grill: Give your shrimp room to cook evenly; overcrowded skewers lead to steaming instead of grilling.
  • Neglecting to Soak Skewers: If using wooden skewers, always soak them to prevent burning.

Variations to Try

Feel free to mix it up! Here are some variations to explore:

  • Spicy Lime Shrimp: Add lime zest and juice for a fresh twist.
  • Herb-Infused Shrimp: Incorporate fresh herbs like cilantro or parsley into the marinade.
  • Asian-Inspired Shrimp: Use sesame oil and add sesame seeds for an Asian flair.
  • Garlic Butter Shrimp: Replace the marinade with a garlic butter sauce for rich flavor.

Storage and Make-Ahead Instructions

If you want to prepare ahead of time:

  • Marinated Shrimp: You can marinate shrimp up to 24 hours in advance. Just cover and refrigerate until ready to grill.
  • Cooked Shrimp: Leftover cooked shrimp can be stored in an airtight container for up to 3 days in the refrigerator.
  • Reheating: Gently reheat on low heat in a pan or microwave for best results.

FAQ about Grilled Shrimp Skewers

  • Can I use frozen shrimp? Yes, just make sure to thaw them completely before cooking.
  • How long should I marinate the shrimp? For best flavor, marinate for at least 20 minutes, but no more than 2 hours.
  • What type of shrimp is best for grilling? Medium to large shrimp work best because they are less likely to overcook.
  • Can I grill shrimp without skewers? Absolutely! You can grill shrimp directly on the grill or use a grill basket.
  • What to serve with shrimp skewers? They pair well with rice, salads, or grilled vegetables.
  • Can I make these shrimp skewers ahead of time? Yes, you can marinate them ahead of time and grill just before serving.
  • What if I don’t have a grill? A grill pan or broiler works perfectly for indoor grilling.
  • How do I know when the shrimp are done? They should turn pink and opaque, taking about 2-3 minutes on each side.

Nutritional Tips and Dietary Adaptations

This grilled shrimp skewers recipe is not only delicious but also nutritious! Here are some tips:

  • Low-Calorie Option: Shrimp is low in calories and high in protein, making it great for weight management.
  • Gluten-Free: Ensure your soy sauce is gluten-free if needed.
  • Low-Carb Meal: Pair with low-carb vegetables for a healthy meal.

Essential Equipment for Grilling

Here are a few tools to make your grilling experience easier:

  • Grill Pan: Ideal for indoor grilling, providing excellent heat distribution.
  • Wooden Skewers: Make sure to soak them to avoid burning.
  • Tongs: For flipping the skewers easily without losing shrimp.
  • Meat Thermometer: To check doneness and ensure perfect cooking.

Serving Suggestions

When your grilled shrimp skewers are ready, how you present them can elevate your dish:

  • Garnish: Serve with fresh lime wedges and chopped herbs for a pop of color.
  • Side Dishes: Pair with garlic rice, grilled corn, or a mixed green salad.
  • Dipping Sauce: Offer a tangy dipping sauce, like a spicy mayo or a cilantro yogurt dip.

In conclusion, these grilled shrimp skewers are not just a meal; they are an experience waiting to happen. With clear steps, flavorful ingredients, and plenty of room for creativity, you’ll be well on your way to impressing family and friends alike. Embrace your culinary journey, and remember, cooking is about enjoyment, so relax and have fun in the kitchen. Happy grilling!

grilled shrimp skewers

Prep Time 10 minutes
Cook Time 10 minutes
Total Time 20 minutes
Servings 4 servings
Calories 210
Enjoy these flavorful grilled shrimp skewers, perfect for a quick and delicious meal or appetizer.

Ingredients

shrimp

  • 500 g medium to large shrimp (deveined and cleaned)
  • 1 tablespoon soy sauce (light or dark)
  • 2 tablespoons honey
  • 3 cloves garlic minced (or 2 teaspoons minced garlic or 1 tablespoon garlic powder)
  • 1 teaspoon paprika
  • 1 tablespoon hot sauce (any type)
  • 2 tablespoons oil
  • to taste none salt (to season)

Instructions 

  • Mix all marinade ingredients in a bowl.
  • Add shrimp to marinade and marinate for 20 minutes.
  • Soak wooden skewers in water for 15 minutes.
  • Preheat grill pan, thread 4-5 shrimp per skewer, and grill for 2 minutes per side.
  • Brush with remaining marinade, serve with lime wedges.

Notes

Ensure shrimp are evenly marinated for best flavor.
Calories: 210kcal
Cost: $12
Course: Main Course
Cuisine: Seafood
Keyword: shrimp

Discover the Joy of Mini Banana Bread Loaf Cakes

Welcome to the world of delightful mini banana bread loaf cakes! These little treasures are not just adorable but also packed with flavor and versatility. Whether you’re looking to indulge in a sweet treat, gift a charming homemade present, or simply enjoy a cozy snack, this recipe has got you covered. Made with ripe bananas and simple ingredients, you can create these delicious mini loaves in no time. Let’s dive into the heart of this recipe and discover why it’s a must-try!

Why You’ll Love This Recipe

Here are just a few reasons why these mini banana bread loaf cakes will steal your heart:

  • Easy to Make: With straightforward steps, you’ll be able to whip up these mini loaves even on your busiest days.
  • Perfect for Sharing: Their bite-sized nature makes them ideal for gifts, parties, or just to share with friends and family.
  • Customizable: You can easily adjust the flavor by adding nuts, chocolate chips, or even spices to suit your taste.
  • Moist and Flavorful: The combination of ripe bananas and butter creates a rich, moist texture that’s irresistible.
  • Great for Meal Prep: These mini loaves freeze beautifully, making them a perfect make-ahead snack!

Ingredient Breakdown

To make these tasty mini banana bread loaves, you’ll need the following ingredients:

  • 125g unsalted butter: Softened for easy mixing, this adds richness to your loaves.
  • 150g light brown sugar: This sweetens your mini loaves and contributes to their moist texture.
  • 2 large eggs: Essential for binding the ingredients together and adding moisture.
  • 1 tsp vanilla extract: Enhances the overall flavor profile.
  • 3 ripe bananas: The star ingredient, providing natural sweetness and moisture. The more speckled they are, the better!
  • 190g self-raising flour: Ensures a lovely rise in your loaves.
  • 1/2 tsp baking soda: A leavening agent that helps the loaves rise.
  • 1/2 tsp salt: Balances out the sweetness.
  • 1 tsp ground cinnamon: Adds warmth and depth to the flavor.
  • 50ml whole milk: Ensures the batter is smooth and well combined.
  • Optional: 60g chopped walnuts or dark chocolate chips: For added texture and flavor, feel free to include these mix-ins!

Step-by-Step Instructions

Side view of moist mini banana bread loaves with a golden-brown crust.

Now, let’s get to the fun part—making the mini banana bread loaf cakes!

  1. Preheat your oven to 170°C (340°F) and grease 6 mini loaf tins or line them with parchment paper.
  2. In a large mixing bowl, cream together the butter and sugar until pale and fluffy.
  3. Add the eggs one at a time, beating well after each addition. Stir in the vanilla extract.
  4. Fold in the mashed bananas until well combined.
  5. In a separate bowl, sift together the flour, baking soda, salt, and cinnamon.
  6. Gradually add the dry ingredients to the wet mixture, alternating with the milk until everything is just combined.
  7. If using, fold in the walnuts or chocolate chips.
  8. Divide the batter evenly among the mini loaf tins, filling each about 3/4 full.
  9. Bake for 25-30 minutes or until a toothpick inserted into the center comes out clean.
  10. Allow to cool in the tins for 10 minutes before transferring to a wire rack to cool completely.

Expert Tips for Perfect Mini Loaves

Here are some expert insights to elevate your baking game:

  • Use ripe bananas: The riper the bananas, the sweeter and more flavorful your loaves will be.
  • Room temperature ingredients: Ensure that your butter and eggs are at room temperature for better mixing and texture.
  • Don’t overmix: Mix just until combined to keep your loaves tender and avoid a dense texture.
  • Check for doneness: Ovens vary, so start checking your loaves a few minutes before the recommended baking time.
  • Experiment with flavors: Try adding different spices like nutmeg or even a splash of rum for a unique twist!
  • Cool completely: Allowing the loaves to cool fully before slicing helps prevent them from becoming mushy.
  • Use parchment paper: Lining your tins with parchment makes for easy removal of the loaves.
  • Store properly: Keep your cooled mini loaves in an airtight container to maintain freshness.

Common Mistakes and How to Avoid Them

Even the best bakers can run into challenges. Here are some common mistakes and tips for troubleshooting:

  • Dense texture: This can happen if you overmix the batter. Mix just until the ingredients are combined.
  • Loaves not rising: Ensure your baking soda is fresh and that you’re using self-raising flour as the recipe calls for.
  • Burnt tops: If your loaves are browning too quickly, cover them loosely with aluminum foil during baking.
  • Sticky batter: If your batter seems too sticky, you may have added too much banana or not enough flour. Adjust accordingly next time.

Variations to Try

Feeling adventurous? Here are some tasty variations you can try:

  • Chocolate Chip Mini Loaves: Fold in 60g of dark chocolate chips for a sweet, chocolatey treat.
  • Nutty Banana Loaves: Add 60g of chopped pecans or walnuts for a delightful crunch.
  • Cinnamon Swirl Mini Loaves: Swirl in a mixture of cinnamon and sugar before baking for a sweet surprise.
  • Banana Coconut Loaves: Incorporate 50g of shredded coconut for a tropical twist.

Storage and Make-Ahead Instructions

These mini banana bread loaf cakes are perfect for meal prep! Here’s how to store and make them ahead:

  • Room Temperature: Store in an airtight container for up to 3 days.
  • Refrigerator: Keep them in the fridge for up to a week to maintain freshness.
  • Freezer: Wrap individual loaves in plastic wrap and freeze for up to 3 months. Thaw at room temperature before enjoying.
  • Make Ahead: You can prepare the batter a day in advance and store it in the refrigerator until you’re ready to bake.

Frequently Asked Questions

Here are some common questions about making mini banana bread loaf cakes:

  • Can I use frozen bananas? Yes! Just ensure they are thawed and well-drained before mashing.
  • What can I substitute for eggs? Use 1/4 cup of unsweetened applesauce or a flax egg (1 tbsp flaxseed meal + 2.5 tbsp water) as a substitute.
  • Can I use whole wheat flour? Yes, but consider mixing it with all-purpose flour for a lighter texture.
  • How do I know when they’re done? Insert a toothpick into the center of a loaf; it should come out clean or with a few crumbs.
  • Can I double the recipe? Absolutely! Just ensure you have enough mini loaf pans and adjust the baking time as needed.
  • What should I serve with these mini loaves? Pair them with a hot cup of coffee or tea for a delightful afternoon snack.
  • How can I make these gluten-free? Use a gluten-free flour blend that includes xanthan gum.
  • What’s the best way to gift these loaves? Wrap them in cellophane with a cute ribbon for a thoughtful homemade gift!

Nutritional Tips and Dietary Adaptations

For those looking to enjoy these mini loaves with a healthier twist, consider the following:

  • Reduce sugar: You can cut back on the sugar by about 1/4 without significantly affecting the taste.
  • Use coconut oil: Substitute butter with coconut oil for a dairy-free version.
  • Incorporate fruits: Add pureed fruits like applesauce or pumpkin for added moisture and sweetness.
  • Make it vegan: Use plant-based butter, flax eggs, and dairy-free milk for a vegan-friendly option.

Equipment Recommendations

To successfully make these mini banana bread loaf cakes, here’s what you’ll need:

  • Mini loaf pans: Essential for creating perfectly sized loaves.
  • Mixing bowls: At least two—one for wet ingredients and one for dry.
  • Measuring cups and spoons: Accurate measurements are key to baking success.
  • Electric mixer: Makes creaming butter and sugar a breeze.
  • Parchment paper: Helpful for easy removal of the loaves after baking.

Serving Suggestions

These mini banana bread loaf cakes are delicious on their own, but here are some serving ideas to enhance your experience:

  • Spread with butter: A pat of butter on a warm slice makes it extra comforting.
  • Top with cream cheese frosting: For a decadent treat, add a dollop of frosting on top.
  • Pair with fresh fruit: Serve alongside sliced strawberries or a fruit salad for a refreshing contrast.
  • Make a banana bread parfait: Layer crumbled loaf with yogurt and berries for a delightful breakfast or dessert.

With this comprehensive guide to creating mini banana bread loaf cakes, you’re all set to impress your friends and family. Remember, cooking is about joy and creativity—so don’t hesitate to put your own spin on this recipe. Happy baking, and enjoy every delicious bite!

Mini Banana Bread Loaf Cakes

Prep Time 15 minutes
Cook Time 30 minutes
Total Time 45 minutes
Servings 6 cakes
Calories 250
Delight in these moist and flavorful mini banana bread loaves, perfect for a quick snack or breakfast treat.

Ingredients

Butter

  • 125 g unsalted butter, softened

Sugar

  • 150 g light brown sugar

Eggs

  • 2 large large eggs

Vanilla Extract

  • 1 tsp vanilla extract

Bananas

  • 3 ripe bananas ripe bananas, mashed

Flour

  • 190 g self-raising flour

Baking Soda

  • 1.5 tsp baking soda

Salt

  • 0.5 tsp salt

Ground Cinnamon

  • 1 tsp ground cinnamon

Milk

  • 50 ml whole milk

Walnuts or Chocolate Chips (Optional)

  • 60 g chopped walnuts or dark chocolate chips (optional)

Instructions 

  • Preheat oven to 170°C (340°F) and prepare mini loaf tins.
  • Cream butter and sugar until pale. Add eggs one at a time, then vanilla.
  • Fold in mashed bananas. Sift dry ingredients and gradually add to wet mixture with milk, then fold in optional nuts or chocolate.
  • Divide batter into tins, bake for 25-30 minutes, cool in tins for 10 minutes, then transfer to wire rack.

Notes

Ensure not to overfill the mini loaf tins for even baking.
Calories: 250kcal
Cost: $10
Course: Dessert
Cuisine: American
Keyword: Banana

Discover the Joy of Shrimp Wraps: A Flavorful Adventure Awaits!

Welcome to a delightful culinary experience where we explore the magic of shrimp wraps. In just 16 minutes, you can create a delicious meal that’s perfect for busy weeknights or a quick lunch. With juicy grilled shrimp enveloped in a warm tortilla, fresh romaine lettuce, and creamy Caesar dressing, this recipe is not only satisfying but also packed with flavor. Join me, Steven, as we dive into this easy and mouthwatering dish that will impress your family and friends!

Why You’ll Love This Shrimp Wrap Recipe

This shrimp wrap recipe is a favorite for many reasons. Here are just a few:

  • Quick and Easy: Ready in just 16 minutes, making it ideal for busy evenings.
  • Flavor Explosion: Juicy grilled shrimp combined with crisp romaine and zesty Caesar dressing creates a taste sensation.
  • Customizable: Easily adapt the recipe to suit your dietary preferences or cravings.
  • Healthy Option: Packed with lean protein and fresh veggies, it’s a nutritious choice for any meal.
  • Impressive Presentation: These wraps look as good as they taste, perfect for entertaining guests!

Ingredient Breakdown: What You Need

Gather the following ingredients to make your shrimp wraps:

  • 1 lb large shrimp: Peeled and deveined for easy cooking.
  • 1 tbsp olive oil: Enhances flavor and aids in grilling.
  • 1 tsp smoked paprika: Adds a subtle smokiness to the shrimp.
  • 1/2 tsp garlic powder: For a hint of garlic goodness.
  • 1/2 tsp salt: Essential for seasoning.
  • 1/4 tsp black pepper: Adds a touch of warmth.
  • 4 large flour tortillas: Choose gluten-free almond flour tortillas for a healthier option.
  • 2 cups romaine lettuce: Chopped for crunch.
  • 1 large tomato: Diced for freshness.
  • 1/2 cup Caesar dressing: Store-bought or homemade for convenience.
  • 1/4 cup grated Parmesan cheese: A delightful finishing touch.
  • Fresh lemon wedges: Perfect for serving!

Step-by-Step Instructions to Create Your Shrimp Wraps

Side view of a delicious shrimp wrap, showcasing shrimp, lettuce, and tomato, on a plate with lemon wedges.

Follow these simple steps to whip up your shrimp wraps:

  1. In a medium bowl, toss the shrimp with olive oil, smoked paprika, garlic powder, salt, and black pepper until evenly coated.
  2. Preheat a grill pan or outdoor grill over medium-high heat.
  3. Place the shrimp on the grill and cook for 2-3 minutes per side until pink, opaque, and lightly charred. Remove and set aside.
  4. Warm the tortillas in a dry skillet for 20-30 seconds per side to make them more pliable.
  5. Lay the tortillas flat and spread Caesar dressing evenly across each one. Sprinkle with Parmesan cheese.
  6. Layer with romaine lettuce, diced tomato, and the grilled shrimp.
  7. Fold in the sides of each tortilla, roll tightly, and slice in half.
  8. Serve with fresh lemon wedges and enjoy your delicious creation!

Pro Tips for Making the Best Shrimp Wraps

To elevate your shrimp wraps, consider these expert insights:

  • Marinate for Extra Flavor: For an intense flavor boost, marinate the shrimp for 15-30 minutes before grilling.
  • Perfect Grilling: Ensure your grill is preheated for a nice char and to prevent sticking.
  • Warm Tortillas: Warming tortillas makes them easier to roll and prevents tearing.
  • Fresh Ingredients: Use fresh vegetables for the best crunch and flavor.
  • Experiment with Sauces: Try different dressings like ranch or a spicy aioli for a twist.
  • Use a Grill Basket: If grilling smaller shrimp, a grill basket can prevent them from falling through the grates.
  • Serve Immediately: Enjoy these wraps fresh for the best taste and texture.
  • Customize Your Fillings: Add avocado, bell peppers, or cucumbers for additional flavor and nutrition.

Common Mistakes and Troubleshooting

Here are some common pitfalls and how to avoid them:

  • Overcooking Shrimp: Shrimp cooks quickly—remove them from the grill as soon as they turn pink.
  • Not Preheating the Grill: A hot grill is crucial for a good sear.
  • Using Cold Tortillas: Always warm tortillas to enhance their flexibility.
  • Skipping the Seasoning: Don’t skip the seasoning; it makes all the difference in flavor.

Delicious Variations of Shrimp Wraps

Feeling creative? Try these variations:

  • Spicy Shrimp Wrap: Add diced jalapeños or a spicy sauce for a kick.
  • Tropical Shrimp Wrap: Include mango salsa and cilantro for a fresh twist.
  • Veggie-Packed Wrap: Load up with grilled zucchini, bell peppers, and onions.
  • Asian-Inspired Wrap: Use teriyaki sauce and slaw for a different flavor profile.

Storage and Make-Ahead Instructions

Want to prepare in advance? Here’s how:

  • Make-Ahead: You can marinate the shrimp a day ahead and store in the refrigerator.
  • Storage: Keep leftover wraps in an airtight container in the fridge for up to 2 days. Reheat in a skillet before serving.
  • Freezing: It’s best to freeze the shrimp before grilling, thawing them before cooking.

Frequently Asked Questions about Shrimp Wraps

Here are some common questions you might have:

  • Can I use frozen shrimp? Yes, just thaw them properly first before cooking.
  • What can I substitute for Caesar dressing? Ranch, blue cheese, or a vinaigrette work great!
  • Are shrimp wraps healthy? Absolutely! They are packed with protein, fresh veggies, and can be low in carbs if you choose the right tortillas.
  • How do I make homemade Caesar dressing? Combine mayo, lemon juice, garlic, parmesan, and anchovies for a quick version.
  • Can I use other proteins? Yes! Chicken, tofu, or even beans can be substituted for shrimp.
  • What’s the best way to grill shrimp? Grill them over medium-high heat for quick cooking without overcooking.
  • How should I serve these wraps? They are excellent alone or paired with a side salad or chips.
  • How long will leftovers last? Enjoy leftovers within 2 days for the best quality.

Nutrition Tips and Dietary Adaptations

For a healthier dish, consider these tips:

  • Low-Calorie Option: Use whole wheat tortillas or lettuce wraps for fewer calories.
  • Low-Carb Adaptation: Substitute tortillas with large lettuce leaves.
  • High-Protein Boost: Add legumes or extra shrimp for more protein.

Essential Equipment for Success

Having the right tools can make a difference:

  • Grill Pan or Outdoor Grill: Essential for cooking the shrimp perfectly.
  • Medium Bowl: For mixing the shrimp with seasonings.
  • Spatula or Tongs: To flip the shrimp easily on the grill.
  • Skillet: For warming the tortillas.

Serving Suggestions: Make It a Meal

Pair your shrimp wraps with:

  • Side Salad: A fresh green salad with lemon vinaigrette complements the wraps beautifully.
  • Chips: Serve with tortilla chips for a satisfying crunch.
  • Fruit Salad: A light fruit salad adds a refreshing contrast.

Cooking is about joy and creativity. I hope this shrimp wrap recipe inspires you to explore the kitchen and enjoy the process. Remember, great food doesn’t require perfection. With these clear steps and a little love, you’ll create a meal that delights!

Shrimp Wrap Recipe Easy 16-Minute Grilled Caesar Wrap

Prep Time 5 minutes
Cook Time 11 minutes
Total Time 16 minutes
Servings 4 servings
Calories 350
Enjoy a quick and delicious shrimp Caesar wrap, perfect for a satisfying lunch or dinner in just 16 minutes.

Ingredients

Protein

  • 1 lb large shrimp, peeled and deveined
  • 1 tbsp olive oil
  • 1 tsp smoked paprika
  • 1.5 tsp garlic powder
  • 1.5 tsp salt
  • 0.25 tsp black pepper

Carbohydrates

  • 4 large flour tortillas gluten-free option almond flour tortillas
  • 2 cups romaine lettuce, chopped
  • 1 large tomato, diced
  • 0.5 cup Caesar dressing store-bought or homemade
  • 0.25 cup grated Parmesan cheese

Fruits

  • as needed Fresh lemon wedges, for serving

Instructions 

  • Toss shrimp with olive oil, smoked paprika, garlic powder, salt, and black pepper until coated.
  • Preheat grill and cook shrimp 2-3 minutes per side until pink and lightly charred.
  • Warm tortillas in a skillet for 20-30 seconds each side.
  • Spread Caesar dressing on tortillas, sprinkle with Parmesan, then layer with lettuce, tomato, and shrimp.
  • Fold sides, roll tightly, slice in half, and serve with lemon wedges.

Notes

For extra flavor, add a squeeze of lemon before serving.
Calories: 350kcal
Cost: $15
Course: Main Course
Cuisine: American
Keyword: shrimp

Your Ultimate Guide to Making the Ocean Love Colada

Welcome to a tropical escape in a glass! Today, we’re diving into the delightful world of the Ocean Love Colada. This simple yet exquisite drink is a celebration of flavors, combining creamy coconut milk, vibrant pineapple juice, and a hint of banana, all topped off with a splash of vanilla. Perfect for warm days or any occasion where you want to bring a little sunshine into your life, this recipe will quickly become a favorite. Ready to whisk yourself away to a beach paradise? Let’s get started!

Why You’ll Love This Recipe

  • Quick and Easy: With just a handful of ingredients and a few simple steps, you can whip up this refreshing drink in no time.
  • Deliciously Creamy: The combination of coconut milk and banana creates a rich, smooth texture that is incredibly satisfying.
  • Tropical Flavor Explosion: Bursting with the sweetness of pineapple and the richness of coconut, each sip transports you to a sunny beach.
  • Customizable: Feel free to tweak the ingredients or add your favorite flavors to make this drink truly your own.
  • Perfect for Any Occasion: Whether it’s a summer party, a cozy night in, or a festive gathering, this drink fits right in!

Ingredient Breakdown

Let’s take a closer look at each ingredient in your Ocean Love Colada and explore potential substitutions to fit your taste!

  • Coconut Milk: This is the star of the show, providing a creamy, rich base. You can substitute with coconut cream for a thicker texture or use light coconut milk for a lower-calorie option.
  • Pineapple Juice: Adds sweetness and a tropical punch. Opt for fresh pineapple juice for the best flavor, or use canned juice if that’s what you have on hand.
  • Banana: This ingredient contributes to the smoothness and natural sweetness. If bananas aren’t your thing, you can swap in mango or even avocado for a creamy texture.
  • Ice Cubes: Essential for a refreshing, chilled drink. You can freeze some pineapple juice in advance to create ice cubes for added flavor!
  • Splash of Vanilla Extract: This adds depth and warmth to the flavor profile. Feel free to experiment with other extracts like almond or coconut for a unique twist.

How to Make the Ocean Love Colada

Side view of a creamy Ocean Love Colada cocktail, showcasing its vibrant yellow color and ice cubes.

Now that we’ve gathered our ingredients, it’s time to blend them into a glass of bliss! Follow these simple steps for your perfect Ocean Love Colada.

  • Step 1: Gather Your Ingredients: Collect 1 cup of coconut milk, 1 cup of pineapple juice, 1 banana, 1 cup of ice, and a splash of vanilla extract.
  • Step 2: Prepare Your Blender: Ensure your blender is clean and ready for action. This is where the magic happens!
  • Step 3: Add Ingredients to Blender: Pour in the coconut milk, pineapple juice, banana, and ice. Don’t forget that splash of vanilla extract for extra flavor!
  • Step 4: Blend Until Smooth: Secure the lid and blend on high until everything is smooth and creamy. You want a luscious texture!
  • Step 5: Taste and Adjust: Give it a taste! If you want it sweeter, add a little honey or agave syrup. Blend again if you add anything.
  • Step 6: Serve in a Fun Glass: Pour your Ocean Love Colada into a chilled glass. Feel free to use a fancy glass to make it extra special!
  • Step 7: Garnish and Enjoy: Add a slice of pineapple or a cherry on top for a beautiful garnish. Grab a straw and sip away!

Pro Tips for the Perfect Colada

  • Use Frozen Ingredients: For an extra frosty drink, freeze your banana or use frozen pineapple chunks.
  • Experiment with Flavors: Try adding a handful of spinach or kale for a green twist, or even a splash of rum for an adult version!
  • Chill Your Glass: Pop your glass in the freezer for a few minutes before serving for an extra refreshing experience.
  • Garnish Creatively: Get creative with your garnishes—consider adding shredded coconut, mint leaves, or even a tiny umbrella for fun!
  • Blend in Stages: If your blender struggles with ice, blend the liquids first, then add the ice to ensure a smooth consistency.
  • Adjust Sweetness: Depending on your preferences, you can control how sweet you want your colada by adjusting the amount of pineapple juice or adding a sweetener.
  • Make it Ahead: You can prepare the ingredients ahead of time and blend them when you’re ready to serve.
  • Sip Responsibly: If you’re adding alcohol, enjoy your tropical cocktail, but always drink responsibly!

Common Mistakes and Troubleshooting

Even the most seasoned cooks can run into some hiccups. Here are a few common mistakes and how to fix them:

  • Too Thick: If your colada is too thick, simply add a bit more coconut milk or pineapple juice until you reach the desired consistency.
  • Too Watery: If it ends up too watery, blend in a bit more banana or ice to thicken it up.
  • Not Sweet Enough: If you find your colada lacks sweetness, try adding a teaspoon of honey or agave syrup to enhance the flavor.
  • Texture Issues: If it’s gritty, ensure your blender is powerful enough or blend in stages to break down the ice and fruit properly.

Variations on the Ocean Love Colada

Want to mix things up? Here are some variations that can add a new twist to your Ocean Love Colada:

  • Berry Love Colada: Substitute half of the pineapple juice with mixed berry juice for a fruity explosion!
  • Pineapple Coconut Mocktail: Omit the banana and add sparkling water for a refreshing, bubbly drink.
  • Spiced Ocean Love: Add a dash of nutmeg or cinnamon for a warm, spiced flavor perfect for chilly evenings.
  • Chocolate Delight: Blend in a tablespoon of cocoa powder or chocolate syrup for a dessert-inspired colada.

Storage and Make-Ahead Instructions

You can enjoy your Ocean Love Colada today or save it for later! Here’s how:

  • Storage: Store any leftovers in an airtight container in the fridge for up to 24 hours. Stir or shake before serving.
  • Make Ahead: Pre-measure your ingredients and store them in the fridge. Blend when you’re ready to enjoy!

Frequently Asked Questions

Here’s a collection of common questions about the Ocean Love Colada:

  • Can I make this recipe without alcohol? Absolutely! This recipe is naturally non-alcoholic, but feel free to add rum if you want to create a cocktail.
  • How can I make this drink vegan? This recipe is already vegan as it uses coconut milk, but always check your ingredients to ensure they meet your dietary needs.
  • What if I don’t have a blender? You can use a food processor or an immersion blender to achieve a similar smoothie-like texture.
  • Can I freeze this drink? While it’s best enjoyed fresh, you can freeze it in an ice cube tray and blend it later for a quick treat.
  • Is there a way to make it lower in calories? Yes! Use light coconut milk or reduce the amount of sugar by cutting back on the pineapple juice.
  • How can I garnish this drink? Consider using fresh fruit, mint leaves, or even a tiny cocktail umbrella for a fun touch!
  • Can I add protein powder? Yes! A scoop of vanilla protein powder can be a great addition for a nutritious boost.
  • What’s the best way to serve it? Serve chilled in a fun glass, and enjoy it right away to experience the best texture and flavor!

Nutritional Tips and Dietary Adaptations

The Ocean Love Colada can fit into various dietary plans. Here are some tips:

  • Low-Calorie Option: Use light coconut milk and reduce the amount of pineapple juice for fewer calories.
  • High-Protein Boost: Add protein powder or Greek yogurt for a more filling drink.
  • Low-Sugar Version: Use unsweetened coconut milk and opt for fresh pineapple to control sugar content.
  • Dairy-Free: This recipe is naturally dairy-free, making it a great option for those avoiding dairy.

Equipment Recommendations

For the best results, here’s what you’ll need:

  • High-Powered Blender: A good blender is essential for achieving a smooth consistency.
  • Measuring Cups: Accurate measurements will help you achieve the perfect flavor balance.
  • Chilled Glasses: Serve your colada in chilled glasses for an extra refreshing experience.

Serving Suggestions

Pair your Ocean Love Colada with delicious snacks or meals:

  • Tropical Fruit Salad: A refreshing fruit salad complements the flavors beautifully.
  • Grilled Shrimp Tacos: The light, zesty flavors of shrimp tacos pair perfectly with your colada.
  • Chocolate Desserts: Anything chocolatey will contrast nicely with the tropical flavors.

With these tips and tricks, you’re fully equipped to make the perfect Ocean Love Colada. So gather your ingredients, blend away, and enjoy every delicious sip! Remember, cooking is all about confidence and creativity, so don’t hesitate to make this recipe your own. Cheers to your culinary adventure!

Ocean Love Colada

Prep Time 5 minutes
Total Time 5 minutes
Servings 2 glasses
Calories 250
A refreshing tropical drink perfect for a sunny day, blending coconut, pineapple, and banana for a creamy, delicious treat.

Ingredients

Dairy & Fruit

  • 1 cup Coconut Milk
  • 1 cup Pineapple Juice
  • 1 piece Banana
  • 1 cup Ice Cubes
  • splash Vanilla Extract

Instructions 

  • Gather your ingredients and add coconut milk, pineapple juice, banana, ice, and vanilla extract to the blender.
  • Blend until smooth and creamy.
  • Taste and adjust sweetness if desired, then blend again.
  • Pour into a chilled glass and garnish with a pineapple slice or cherry.
  • Serve with a straw and enjoy!

Notes

For a sweeter taste, add honey or agave syrup before blending.
Calories: 250kcal
Cost: $10
Course: Beverage
Cuisine: Tropical
Keyword: Banana, Coconut, Pineapple

Unlock the Flavor: The Ultimate Grilled Vegetable Panini with Vegan Mozzarella

Welcome to your next culinary adventure! If you’re looking for a recipe that combines vibrant flavors with a delightful crunch, you’ve landed in the right place. This Grilled Vegetable Panini is not just a meal; it’s an experience you’ll want to repeat again and again. Packed with fresh veggies, melty vegan mozzarella, and aromatic basil pesto, it’s perfect for a quick lunch or a cozy dinner. Let’s dive into why this recipe will become your new go-to!

Why You’ll Love This Recipe

Here are just a few reasons why this Grilled Vegetable Panini will win over your taste buds:

  • Quick & Easy: This recipe takes about 30 minutes from start to finish, making it an ideal choice for busy weeknights.
  • Flavor-Packed: The combination of grilled veggies and savory vegan mozzarella creates a taste explosion that satisfies every craving.
  • Customizable: You can easily switch up the vegetables or bread to suit your preferences and what’s in season.
  • Healthy & Nourishing: With fresh vegetables and plant-based ingredients, this panini is a wholesome choice that doesn’t compromise on flavor.
  • Perfect for Meal Prep: Make a batch ahead of time and store them for quick meals throughout the week.

Essential Ingredients

Let’s gather our ingredients for this delicious panini. Here’s what you’ll need:

  • 1 small zucchini, sliced lengthwise
  • 1 small eggplant, sliced lengthwise
  • 1 red bell pepper, sliced into strips
  • 1 yellow bell pepper, sliced into strips
  • 2 tbsp olive oil, for grilling
  • Salt and pepper, to taste
  • 4 ciabatta rolls, sliced in half
  • 1 2/3 cup vegan mozzarella cheese, shredded or sliced
  • 1/4 cup basil pesto, store-bought or homemade
  • Optional: Fresh basil leaves for garnish

Substitutions: Don’t hesitate to swap out the veggies based on your preferences or seasonal availability. For example, you can use mushrooms, spinach, or even roasted red peppers for a different twist. If you’re gluten-free, try using gluten-free bread or wraps.

Step-by-Step Instructions

Juicy grilled vegetable panini seen from the side, showcasing layers of zucchini, eggplant, and bell peppers with pesto.

Now that we have everything ready, let’s make our Grilled Vegetable Panini together!

1. Preheat the Grill

Preheat your grill or grill pan to medium-high heat. Making sure your grill is hot enough will give your vegetables those beautiful grill marks and enhance their flavor.

2. Prepare the Vegetables

In a large bowl, toss the zucchini, eggplant, and bell peppers with olive oil, salt, and pepper until evenly coated. This will ensure that the veggies not only taste great but also grill beautifully.

3. Grill the Vegetables

Place the vegetables on the preheated grill. Grill each side for about 3-4 minutes, or until tender and slightly charred. Once grilled, remove them from the heat and set aside.

4. Assemble the Panini

Spread a generous layer of basil pesto on the cut side of each ciabatta roll. Layer the grilled zucchini, eggplant, and bell peppers on the bottom halves. Sprinkle or lay the vegan mozzarella cheese evenly over the grilled vegetables. Top with the other halves of the ciabatta rolls.

5. Grill the Panini

Place the assembled sandwiches on the grill or a panini press. If using a grill, press the sandwiches with a heavy skillet or pan to flatten them. Grill for about 3-4 minutes per side, or until the bread is crispy and the cheese is melty.

6. Serve

Remove the panini from the grill, slice in half if desired, and serve immediately. Optionally, garnish with fresh basil leaves for an extra pop of flavor and color.

Pro Tips for Perfect Panini

Here are my top tips to ensure your Grilled Vegetable Panini turns out perfectly every time:

  • Don’t overcrowd the grill: Give your veggies space to cook evenly and achieve that perfect char.
  • Use fresh ingredients: Fresh veggies and high-quality vegan mozzarella will elevate the overall flavor.
  • Let the grill heat up: A properly heated grill is crucial for good sear and flavor.
  • Experiment with flavors: Feel free to add spices like smoked paprika or Italian herbs for an extra flavor kick.
  • Press down the panini: If using a skillet, pressing down helps to compress the sandwich and melt the cheese evenly.
  • Keep an eye on the time: Grilling too long can result in burnt bread and overcooked veggies.
  • Try different breads: Ciabatta is great, but focaccia, sourdough, or even whole wheat wraps work too!
  • Prep ahead: Grill your vegetables in advance for quick assembly during busy weeknights.

Common Mistakes & Troubleshooting

Here are a few common pitfalls to avoid:

  • Overcooking the vegetables: Keep an eye on the grill and remove veggies when they are tender, not mushy.
  • Using dry bread: Brush your ciabatta rolls with olive oil before grilling to prevent them from drying out.
  • Not seasoning enough: Make sure to season your veggies well to bring out their natural sweetness.
  • Skipping the pesto: The pesto adds moisture and flavor—don’t skip it!

Variations to Try

Want to switch things up? Here are some tasty variations:

  • Italian Twist: Add sun-dried tomatoes and arugula for a Mediterranean flair.
  • Spicy Kick: Incorporate jalapeños or a drizzle of sriracha for a spicy version.
  • Cheesy Delight: Mix vegan mozzarella with your favorite plant-based cheese for a melty extravaganza.
  • Herb Infusion: Add fresh herbs like thyme or oregano to the vegetables before grilling for added aroma.

Storage & Make-Ahead Instructions

If you want to prepare this dish ahead of time:

  • Assemble the panini and wrap them tightly in plastic wrap. Store in the fridge for up to 2 days.
  • For longer storage, freeze the assembled panini and grill them from frozen when you’re ready to eat.
  • Grilled vegetables can be stored in an airtight container in the fridge for up to 3 days.

Comprehensive FAQ

Here are answers to some common questions about this recipe:

  • What vegetables work best for a Grilled Vegetable Panini? Almost any vegetable can work, but zucchini, bell peppers, and eggplant are favorites due to their flavor and texture.
  • Can I use gluten-free bread? Absolutely! Gluten-free ciabatta or wrap options are widely available.
  • How do I make this recipe oil-free? You can grill your veggies using a non-stick grill pan or oven-roasting them with vegetable broth instead of oil.
  • Can I reheat leftovers? Yes! Reheat in a toaster oven or a skillet to maintain crispy bread.
  • Is this panini suitable for meal prep? Yes! This recipe is fantastic for meal prep, just grill the veggies ahead of time.
  • What can I serve with this panini? A side salad, sweet potato fries, or a hearty soup would pair beautifully.
  • How can I enhance the flavor? Try adding a drizzle of balsamic glaze or a sprinkle of nutritional yeast for extra flavor.
  • Can I make this recipe vegan? Yes! This recipe is already vegan with the use of vegan mozzarella and pesto.

Nutritional Tips & Dietary Adaptations

This recipe is naturally vegan and vegetarian-friendly. To make it more nutritious:

  • Incorporate whole grain ciabatta for added fiber.
  • Add leafy greens like spinach or kale for extra vitamins.
  • Consider using lower-fat vegan cheese options if you’re watching calories.

Equipment Recommendations

Here are a few tools that can help you create the perfect Grilled Vegetable Panini:

  • Grill or Grill Pan: A good quality grill or grill pan is essential for achieving those perfect grill marks.
  • Panini Press: If you have one, a panini press can simplify the grilling process.
  • Sharp Knife: A sharp chef’s knife will make slicing your veggies and bread a breeze.
  • Cutting Board: A sturdy cutting board for prepping ingredients is a must-have.

Serving Suggestions

Now that you have your delicious Grilled Vegetable Panini ready, consider serving it with:

  • A crisp salad: A simple mixed green salad with a light vinaigrette complements the richness of the panini.
  • Chips or fries: Sweet potato fries or a side of kettle chips add a fun crunch.
  • Soup: Pair it with a bowl of tomato basil soup for a classic comfort meal.

Enjoy your cooking journey! Remember, cooking is all about experimenting and finding what you love. Don’t hesitate to make this Grilled Vegetable Panini your own. Happy grilling!

Grilled Vegetable Panini with Vegan Mozzarella Basil Pesto Flavorful Satisfying Meal

Prep Time 10 minutes
Cook Time 15 minutes
Total Time 25 minutes
Servings 4 servings
Calories 450
A delicious and hearty vegan panini featuring grilled vegetables, vegan mozzarella, and flavorful basil pesto, perfect for a satisfying meal.

Ingredients

Vegetables

  • 1 small zucchini (sliced lengthwise)
  • 1 small eggplant (sliced lengthwise)
  • 1 red bell pepper sliced into strips
  • 1 yellow bell pepper sliced into strips
  • 2 tbsp olive oil
  • to taste Salt and pepper

Bread

  • 4 ciabatta rolls sliced in half
  • 1/2 cup vegan mozzarella cheese (shredded or sliced)
  • 1/4 cup basil pesto (store-bought or homemade)

Garnish

  • optional fresh basil leaves (for garnish)

Instructions 

  • Preheat your grill or grill pan to medium-high heat.
  • Toss the sliced vegetables with olive oil, salt, and pepper. Grill each side for 3-4 minutes until tender and charred.
  • Spread basil pesto on the cut sides of the bread. Layer grilled vegetables and vegan mozzarella on the bottom halves. Cover with top halves.
  • Grill the assembled sandwiches for 3-4 minutes per side until crispy and cheese melts. Slice and serve hot, garnished with basil leaves if desired.

Notes

Press the sandwiches firmly while grilling for a crispy exterior.
Calories: 450kcal
Cost: $15
Course: Main Course
Cuisine: Vegetarian
Keyword: Vegetables

Discover the Joy of Cooking Sizzling Garlic Butter Steak Bites

If you’re looking for a quick and delicious way to elevate your weeknight dinners, these Garlic Butter Steak Bites are the answer! With just a few simple ingredients and minimal prep time, you can create a dish that’s both satisfying and bursting with flavor. Perfect for busy nights or entertaining guests, this recipe is designed to help you enjoy cooking again. Let’s dive into the details of this mouthwatering dish and explore why you’ll love making it!

Why You’ll Love This Recipe

There are so many reasons to fall in love with these steak bites. Here are just a few:

  • Quick Preparation: With only 20 minutes from start to finish, this recipe is perfect for a busy weeknight dinner.
  • Rich Flavor: The combination of garlic and butter creates a sauce that elevates the dish, making it irresistible.
  • Versatile Serving Options: Enjoy these steak bites as an appetizer or pair them with your favorite sides for a complete meal.
  • Simple Ingredients: Made with everyday ingredients, you can whip up this dish without a trip to the grocery store.
  • Impressive Presentation: The vibrant colors and aroma will have your family and friends thinking you spent hours in the kitchen.

Essential Ingredients Breakdown

Let’s take a closer look at the ingredients you’ll need for these garlic butter steak bites and some substitutions you can make.

  • 1.5 pounds of sirloin steak or ribeye strip steak: Choose a cut with good marbling for tenderness. You can use flank steak as a budget-friendly alternative.
  • Salt and pepper to taste: Seasoning is crucial to enhance the flavor of the steak. Feel free to experiment with additional spices.
  • 1 tablespoon olive oil: This oil has a high smoke point, making it perfect for searing. You can substitute with canola or avocado oil.
  • 4 tablespoons butter (divided): Use unsalted butter for better control over the seasoning. You can also use ghee for a dairy-free option.
  • 4-5 cloves minced garlic: Fresh garlic adds a robust flavor. You can also use garlic powder in a pinch.
  • 1 tablespoon chopped fresh parsley: This is for garnish, adding a pop of color and freshness. Other herbs like thyme or chives can also work well.

How to Make Garlic Butter Steak Bites

Tender cubes of steak coated in garlic butter, showcasing a vibrant parsley garnish.

Now that we have our ingredients ready, let’s break down the cooking process into simple steps.

  1. Let the steak sit at room temperature for 30 minutes. Cut into 1-inch cubes and season with salt and pepper.
  2. Heat olive oil and 1 tablespoon of butter in a skillet over medium-high heat. Sear the steak bites in batches for about 2 minutes on each side until cooked to medium.
  3. Reduce heat to medium-low, add the remaining butter and minced garlic to the skillet, stirring until fragrant (about 1-2 minutes).
  4. Toss the cooked steak with the garlic butter and serve immediately, garnished with fresh parsley.

Pro Tips for Perfect Garlic Butter Steak Bites

Here are some expert insights to help you master this recipe:

  • Cut Against the Grain: For the most tender bites, always cut the steak against the grain.
  • Don’t Overcrowd the Pan: Sear the steak in batches to ensure even cooking and a nice sear.
  • Let the Steak Rest: Allow the cooked steak to rest for a few minutes before serving to keep it juicy.
  • Experiment with Seasonings: Feel free to add spices like smoked paprika or chili flakes for an extra kick.
  • Use a Cast Iron Skillet: This will give you the best sear and flavor.
  • Adjust Garlic to Taste: If you love garlic, feel free to add more for a stronger flavor.
  • Pair with Wine: A glass of red wine complements the rich flavors beautifully.
  • Make it a Meal: Serve with roasted vegetables or mashed potatoes for a complete dinner.

Common Mistakes and Troubleshooting

Even the best of us run into issues when cooking. Here’s how to avoid common pitfalls:

  • Steak is Tough: Ensure you’re using a well-marbled cut and not overcooking the steak.
  • Garlic Burns: Keep an eye on the garlic and reduce the heat to prevent burning.
  • Insufficient Flavor: Taste the garlic butter before tossing the steak and adjust seasoning as necessary.
  • Sticking to the Pan: Make sure your pan is properly preheated before adding the steak.

Delicious Variations to Try

Want to mix things up? Here are some creative variations to keep this recipe exciting:

  • Spicy Garlic Butter: Add crushed red pepper flakes for a spicy kick.
  • Herbed Butter: Mix in fresh herbs like rosemary or thyme for a fragrant twist.
  • Teriyaki Style: Toss the cooked steak bites with teriyaki sauce for an Asian-inspired flavor.
  • Mushroom Medley: Include sautéed mushrooms in the garlic butter for an earthy flavor.

Storage and Make-Ahead Instructions

If you want to prepare these steak bites in advance, here’s how to store and reheat them:

  • Make Ahead: You can marinate the steak bites a few hours before cooking for enhanced flavor.
  • Storing Leftovers: Store any leftovers in an airtight container in the fridge for up to 3 days.
  • Reheating: Gently reheat in a skillet over low heat to preserve tenderness.

Frequently Asked Questions

Here are some common questions people have about this recipe:

  • Can I use a different type of steak? Yes, you can use any cut of steak you prefer, but tender cuts like sirloin or ribeye work best.
  • How do I know when the steak is done? Use a meat thermometer: 130°F for medium-rare, 140°F for medium.
  • Can I freeze the steak bites? Yes, you can freeze cooked steak bites in an airtight container for up to 2 months.
  • What sides pair well with steak bites? Roasted vegetables, mashed potatoes, or a fresh salad complement this dish nicely.
  • Is this recipe gluten-free? Yes, it is naturally gluten-free; just check any sauces or seasonings for hidden gluten.
  • How can I make this recipe dairy-free? Substitute the butter with a dairy-free alternative like vegan butter or olive oil.
  • What can I do with leftover garlic butter? Use it to drizzle over vegetables or pasta for an added flavor boost.
  • Can I cook these on the grill? Absolutely! Just skewer the steak bites for easy grilling.

Nutritional Tips and Dietary Adaptations

For those monitoring their nutrition, here are some tips to keep in mind:

  • Control Portions: Stick to a serving size of about 4-6 ounces of steak per person.
  • Add Vegetables: Include a side of veggies to balance out the meal and increase fiber intake.
  • Choose Lean Cuts: Opt for leaner cuts of steak if you’re watching your fat intake.
  • Whole Grains: Serve with brown rice or quinoa for added fiber and nutrients.

Essential Kitchen Equipment

Having the right tools can make all the difference. Here’s what you’ll need:

  • Cast Iron Skillet: Ideal for achieving a perfect sear and even cooking.
  • Sharp Knife: A good quality knife is crucial for cutting the steak into uniform bites.
  • Meat Thermometer: Helps ensure you cook the steak to your desired doneness.
  • Spatula: A sturdy spatula is essential for flipping the steak bites without breaking them apart.

Serving Suggestions

Ready to impress? Here are some serving ideas:

  • Classic Pairing: Serve with garlic mashed potatoes and steamed broccoli for a comforting meal.
  • On a Skewer: Thread the steak bites onto skewers for a fun party appetizer.
  • With a Dipping Sauce: Accompany with a creamy garlic aioli or chimichurri sauce for an extra flavor boost.
  • In a Wrap: Use the steak bites in a wrap with fresh greens, avocado, and a drizzle of ranch dressing.

Cooking should be a joyful experience, and with these Garlic Butter Steak Bites, you can create something delicious without the stress. So gather your ingredients, follow these steps, and enjoy a delightful meal that’s sure to impress. Happy cooking!

Garlic Butter Steak Bites

Prep Time 10 minutes
Cook Time 10 minutes
Total Time 20 minutes
Servings 4 servings
Calories 350
Enjoy tender, flavorful steak bites cooked in garlic butter for a quick and delicious meal.

Ingredients

Meat

  • 1.5 pounds sirloin steak or ribeye strip steak
  • to taste none Salt pepper (to taste)
  • 1 tablespoon olive oil
  • 4 tablespoons butter divided
  • 4-5 cloves minced garlic
  • 1 tablespoon chopped fresh parsley

Instructions 

  • Let the steak sit at room temperature for 30 minutes, then cut into 1-inch cubes and season with salt and pepper.
  • Heat olive oil and 1 tablespoon of butter in a skillet over medium-high heat. Sear the steak bites in batches for about 2 minutes per side until cooked to medium.
  • Reduce heat to medium-low, add remaining butter and minced garlic, stirring until fragrant (1-2 minutes).
  • Toss cooked steak with garlic butter and garnish with chopped parsley. Serve immediately.

Notes

Ensure not to overcook the steak for tender bites.
Calories: 350kcal
Cost: $15
Course: Main Course
Cuisine: American
Keyword: Steak

Indulge in the Joy of Baking: Mini Banana Muffins

Welcome to the delightful world of mini banana muffins! These bite-sized treats are not just a scrumptious snack; they embody the essence of comfort baking. Using ripe bananas and a touch of pure maple syrup, this recipe transforms simple ingredients into a deliciously moist and flavorful muffin that everyone will love. Whether you’re a busy parent whipping up snacks for your little ones or a novice baker looking for an easy win, this recipe is your ticket to success. Let’s dive into the scrumptious details!

Why You’ll Love This Recipe

There are countless reasons to fall in love with these mini banana muffins. Here are just a few:

  • Quick and Easy: Ready in just 20 minutes, perfect for those busy days.
  • Healthy Ingredients: Made with real food, no refined sugars here—only natural sweeteners like maple syrup!
  • Kid-Friendly: Great option for toddlers and kids, packed with flavor and nutritious ingredients.
  • Versatile: Customize with your favorite mix-ins like chocolate chips, nuts, or dried fruits.
  • Perfect for Meal Prep: Make a batch ahead of time and freeze for quick snacks throughout the week.

Ingredient Breakdown

Understanding your ingredients is key to mastering this recipe. Here’s what you’ll need:

  • Ripe Bananas: Aim for medium-large, overripe bananas for the sweetest flavor. Approximately 2 bananas should yield 1 cup when mashed.
  • Pure Maple Syrup: A natural sweetener that enhances the banana flavor. You can substitute with brown sugar if necessary.
  • Melted Butter: For richness; can be replaced with coconut oil or dairy-free butter for a dairy-free version.
  • Egg: Binds the ingredients together; consider using a flax egg for a vegan option.
  • Vanilla Extract: Adds depth of flavor; use pure vanilla for the best taste.
  • All-Purpose Flour: The base of the muffins; swap with gluten-free flour for a gluten-free version.
  • Baking Soda: Helps the muffins rise; ensure it’s fresh for the best results.
  • Ground Cinnamon: A warm spice that complements the bananas beautifully.
  • Fine Salt: Balances the sweetness, enhancing all the flavors.
  • Optional Mix-Ins: Consider adding ¼ cup of mini chocolate chips, chopped nuts, or dried fruits for extra flavor.

How to Make Mini Banana Muffins

Side view of freshly baked mini banana muffins with a moist texture.

Follow these simple steps to create your delicious mini banana muffins:

  1. Preheat: Set your oven to 350°F (175°C) and prepare a 24-count mini muffin pan with cooking spray or mini cupcake liners.
  2. Mix Wet Ingredients: In a large mixing bowl, combine the mashed bananas, maple syrup, melted butter, egg, and vanilla extract. Stir until well mixed.
  3. Add Dry Ingredients: To the wet mixture, add the flour, baking soda, cinnamon, and salt. Stir until just combined; avoid overmixing!
  4. Incorporate Mix-Ins: If using, fold in your chosen mix-ins gently into the batter.
  5. Portion the Batter: Using a large spoon or cookie scoop, fill each muffin cup about 2/3 full. Optionally, sprinkle more mix-ins on top.
  6. Bake: Place in the oven and bake for 10-12 minutes, or until the muffins are lightly browned around the edges and a toothpick inserted comes out clean.
  7. Cool: Allow the muffins to cool in the pan for 5 minutes before transferring them to a wire rack to cool completely.

Pro Tips for Perfect Muffins

To ensure your mini banana muffins turn out perfectly every time, consider these expert insights:

  • Use Overripe Bananas: The more spots your bananas have, the sweeter and more flavorful your muffins will be.
  • Don’t Overmix: Mix just until combined to avoid dense muffins; a few lumps in the batter are okay!
  • Check Oven Temperature: Ovens can vary; use an oven thermometer to ensure accuracy.
  • Test for Doneness: Insert a toothpick in the center of a muffin; it should come out clean or with a few crumbs.
  • Let Them Cool: Cooling them slightly in the pan helps them firm up and makes them easier to remove.
  • Experiment with Flavors: Try different spices like nutmeg or ginger for a unique twist.
  • Portion Control: For larger muffins, simply adjust the baking time to 15-18 minutes.
  • Mix-Ins Galore: Get creative! Consider dried cranberries, coconut flakes, or even peanut butter chips.

Common Mistakes and Troubleshooting

Even the best bakers can run into issues. Here’s how to troubleshoot common problems:

  • Muffins are Too Dense: This often happens from overmixing the batter. Mix until just combined!
  • Muffins Won’t Rise: Ensure your baking soda is fresh and that you’re not using too much flour.
  • Burnt Edges: If your muffins are browning too quickly, reduce the oven temperature by 25°F.
  • Uneven Baking: Rotate your muffin pan halfway through baking for even cooking.

Variations of Mini Banana Muffins

These mini muffins are wonderfully versatile! Here are several variations to try:

  • Chocolate Chip Banana Muffins: Fold in mini chocolate chips for a sweet treat.
  • Nutty Banana Muffins: Add chopped walnuts or pecans for a delightful crunch.
  • Spiced Banana Muffins: Include a teaspoon of ground nutmeg or pumpkin spice for a seasonal twist.
  • Fruit-Infused Muffins: Mix in blueberries or raspberries for a fruity explosion.

Storage and Make-Ahead Instructions

These muffins are perfect for meal prep! Here’s how to store them:

  • Room Temperature: Keep in an airtight container for up to 3 days.
  • Refrigerator: Store for up to a week in a sealed container.
  • Freezer: Freeze muffins in a single layer, then transfer to a zip-top bag for up to 3 months. Thaw at room temperature or microwave for a quick snack.

Frequently Asked Questions

Here are some common questions and answers regarding mini banana muffins:

  • Can I use frozen bananas? Absolutely! Thaw them first and mash before using.
  • Are these muffins healthy? Yes! They contain wholesome ingredients and no refined sugars.
  • Can I make these dairy-free? Yes! Substitute melted butter with coconut oil or a dairy-free spread.
  • How do I know when they are done? A toothpick inserted into the center should come out clean.
  • Can I substitute eggs? Yes! Use 1/4 cup of unsweetened applesauce or a flax egg for a vegan option.
  • What can I use instead of flour? Gluten-free all-purpose flour works well as a substitute.
  • How do I enhance the flavor? Consider adding a pinch of nutmeg or a splash of almond extract.
  • What if my muffins are too dry? This can happen from overbaking; next time, reduce baking time slightly.

Nutrition Tips and Dietary Adaptations

For a healthier spin, here are a few tips:

  • Whole Wheat Flour: Substitute half of the all-purpose flour with whole wheat for added fiber.
  • Lower Sugar Option: Reduce maple syrup by a couple of tablespoons for less sweetness.
  • Incorporate Seeds: Add chia seeds or flaxseeds for extra nutrition.

Essential Tools for This Recipe

Here’s what you’ll need to get started:

  • Mixing Bowls: A set of mixing bowls for combining your ingredients.
  • Measuring Cups and Spoons: Accurate measurements are key to baking success!
  • Mini Muffin Pan: A non-stick mini muffin pan is ideal for perfect portions.
  • Spatula: Helpful for mixing and transferring the batter.
  • Cooling Rack: Essential for cooling your muffins evenly.

Serving Suggestions

These mini muffins can be enjoyed in various ways:

  • Breakfast Treat: Serve with yogurt and fresh fruit for a balanced breakfast.
  • Snack Time: Perfect as an on-the-go snack—great for lunchboxes!
  • Brunch Buffet: Add to a brunch spread alongside other mini pastries and fresh coffee.
  • Gifts: Wrap in cellophane and gift to friends or neighbors for a sweet surprise.

Conclusion

There you have it! A comprehensive guide to creating the most irresistible mini banana muffins that are sure to please any palate. With simple ingredients, easy steps, and endless variations, you’ll find yourself making these muffins time and time again. So gather your ingredients, roll up your sleeves, and let’s bake some joy into your day! Happy cooking!

Mini Banana Muffins Recipe

Prep Time 10 minutes
Cook Time 12 minutes
Total Time 22 minutes
Servings 24 muffins
Calories 150
Enjoy these moist and flavorful mini banana muffins, perfect for a quick snack or breakfast treat.

Ingredients

Fruits

  • 2 medium-large ripe bananas, mashed
  • 1 cup pure maple syrup (may substitute brown sugar)
  • cup melted butter (see notes for dairy free)
  • 1 egg egg
  • 1 teaspoon pure vanilla extract
  • 1 cup all-purpose flour (see notes for gluten free)
  • 1 teaspoon baking soda
  • 1 teaspoon ground cinnamon
  • ¼ teaspoon fine salt
  • ¼ cup mix-ins (such as mini chocolate chips, chopped nuts, or chopped dates plus more for sprinkling over batter)

Instructions 

  • Preheat oven to 350°F (175°C). Line a 24-mini muffin pan with liners or spray with cooking spray.
  • Mix mashed bananas, maple syrup, melted butter, egg, and vanilla in a large bowl.
  • Stir in flour, baking soda, cinnamon, salt, and optional mix-ins until just combined.
  • Portion batter into muffin cups using a spoon or scoop. Add toppings if desired.
  • Bake for 10-12 minutes until edges are lightly browned. Cool for 5 minutes in pan, then transfer to wire rack to cool completely.

Notes

For dairy-free, substitute melted coconut oil for butter. For gluten-free, use a gluten-free flour blend.
Calories: 150kcal
Cost: $10
Course: Breakfast, Snack
Cuisine: American
Keyword: Banana, muffins

Whip Up a Delicious Creamy Chicken and Rice Skillet

In today’s fast-paced world, finding a dish that balances flavor, ease, and comfort can feel daunting. However, let me introduce you to the **Easy Creamy Chicken and Rice Skillet**—your new go-to recipe for busy weeknights. This dish is packed with flavor and made from simple ingredients, ensuring that you can whip it up in no time, even after a long day. Let’s dive into why you’ll love this creamy delight!

Why You’ll Love This Recipe

This dish is not just another chicken and rice recipe; it’s a harmonious blend of flavors and textures that will bring joy to your dinner table. Here are five specific reasons to fall in love with this creamy chicken and rice skillet:

  • Quick and Easy: With minimal prep and cook time, you can have this comforting meal ready in under 30 minutes, perfect for those hectic nights.
  • Kid-Friendly: The creamy sauce and tender chicken make this dish a hit with children and adults alike—your loved ones will be asking for seconds!
  • Versatile Ingredients: Use whatever veggies you have on hand! Peas, spinach, or even broccoli can easily be added to enhance nutrition and flavor.
  • Meal Prep Friendly: This dish stores well in the fridge, making it ideal for meal prep. Enjoy delicious leftovers for lunch or dinner throughout the week.
  • Rich, Creamy Flavor: The combination of heavy cream and parmesan cheese results in a rich and comforting sauce that coats every grain of rice perfectly.

Ingredients Breakdown

Let’s take a closer look at the ingredients you’ll need to create this fantastic creamy chicken and rice skillet:

  • Chicken: 1 lb of boneless, skinless chicken breasts, cut into bite-sized pieces. You can substitute with thighs for extra juiciness.
  • Rice: 1 cup of long-grain rice, rinsed. Feel free to use brown rice for a healthier option, but note that it may require additional cooking time.
  • Chicken Broth: 2 cups of chicken broth—make sure to choose Halal-friendly options if needed.
  • Heavy Cream: 1 cup for a luscious, creamy sauce. For a lighter version, half-and-half or coconut cream can be used.
  • Vegetables: 1 cup of frozen peas or fresh peas if available, plus 1 medium onion, finely chopped, and 3 cloves of garlic, minced.
  • Cooking Oil: 2 tablespoons of olive oil or any Halal-friendly cooking oil for sautéing.
  • Seasonings: Salt and black pepper to taste, with an optional teaspoon of dried thyme for added flavor.
  • Cheese: 1/2 cup of grated parmesan cheese, optional but recommended for extra creaminess.
  • Garnish: Fresh parsley, chopped, to add a pop of color and freshness.

Step-by-Step Instructions

Side view of a skillet filled with juicy chicken, rice, and a creamy sauce, featuring green peas.

Now, let’s get cooking! Follow these straightforward steps to create your creamy chicken and rice skillet:

  1. Prep the Chicken: In a large skillet, heat the olive oil over medium-high heat. Season the chicken pieces with salt and pepper, then add them to the skillet. Sear until golden brown, about 5-7 minutes. Remove and set aside.
  2. Sauté the Aromatics: In the same skillet, add the chopped onion and garlic. Sauté until the onion becomes translucent, about 3-4 minutes.
  3. Toast the Rice: Add the rinsed rice to the skillet, stirring it with the onions and garlic for 1-2 minutes to toast it lightly.
  4. Add the Liquids: Pour in the chicken broth and heavy cream. Stir well to combine, ensuring no rice is sticking to the bottom of the skillet.
  5. Simmer: Return the seared chicken to the skillet, bring the mixture to a gentle simmer, and cover. Cook for about 15 minutes or until the rice is tender and has absorbed most of the liquid.
  6. Finish with Cheese: Stir in the frozen peas and grated parmesan cheese. Allow it to simmer for an additional 2-3 minutes until the peas are heated through and the cheese is melted.
  7. Garnish and Serve: Remove from heat, garnish with fresh parsley, and serve hot!

Pro Tips for Perfection

Here are some expert insights to help you perfect your creamy chicken and rice skillet:

  • Don’t Overcrowd: When searing the chicken, avoid overcrowding the skillet to ensure even browning.
  • Rinse the Rice: Rinsing the rice removes excess starch, leading to fluffier results.
  • Adjust Consistency: If the sauce is too thick, add a splash more chicken broth or cream to reach your desired consistency.
  • Flavor Boost: Consider adding a splash of lemon juice or zest at the end for a refreshing kick.
  • Make it Spicy: Add a pinch of red pepper flakes while sautéing the onions for a hint of heat.
  • Cheese Variations: Experiment with different cheeses like cheddar or gouda for varied flavors.
  • Fresh Herbs: Try adding fresh herbs like thyme or basil for a fragrant touch.
  • Meal Prep: To save time, chop your vegetables and chicken ahead of time for quick assembly during the week.

Common Mistakes and Troubleshooting

Even the best cooks can run into a few bumps along the way. Here are some common mistakes and how to avoid them:

  • Burning the Garlic: Garlic can burn quickly, so be sure to stir constantly and adjust the heat as necessary.
  • Undercooked Rice: Ensure the rice is simmering gently and covered for even cooking. If it remains tough, add a bit more liquid and cook longer.
  • Too Much Cream: If your sauce becomes overly rich, balance it with a bit of chicken broth or a splash of lemon juice.
  • Dry Chicken: Ensure you do not overcook the chicken by checking for doneness with a meat thermometer (165°F or 74°C).

Variations to Try

Feel free to experiment with these variations to keep your meals exciting:

  • Vegetarian Version: Substitute the chicken with sautéed mushrooms and add more vegetables like bell peppers or zucchini.
  • Spicy Chicken: Spice things up with diced jalapeños or a sprinkle of cayenne pepper.
  • Herb Infusion: Use a blend of fresh herbs like dill, rosemary, or basil for a burst of freshness.
  • One-Pot Wonder: Add diced tomatoes and beans for a heartier, one-pot meal experience.

Storage and Make-Ahead Instructions

Want to prepare ahead of time? Here’s how to store your creamy chicken and rice:

  • Refrigeration: Allow the skillet to cool completely before transferring it to an airtight container. It can be stored in the fridge for up to 4 days.
  • Freezing: You can freeze the dish for up to 2 months. However, note that the cream may change texture when reheated.
  • Reheating: To reheat, gently warm it on the stovetop, adding a splash of chicken broth or cream if needed.

Frequently Asked Questions

Here are some common questions about this recipe:

  • Can I use brown rice instead of white? Yes, just increase the cooking time and liquid accordingly.
  • How can I make this dish dairy-free? Substitute heavy cream with coconut milk and skip the cheese.
  • What can I serve with this dish? This creamy chicken and rice skillet pairs well with a side salad or steamed vegetables.
  • Can I add more vegetables? Absolutely! Feel free to include any vegetables you enjoy.
  • Is this recipe suitable for meal prep? Yes, it stores well and can be reheated easily.
  • How can I enhance the flavor? Consider adding herbs or spices like paprika or Italian seasoning.
  • What is the best way to reheat leftovers? Gently reheat on the stovetop over low heat, adding a bit of broth to restore creaminess.
  • Can I use frozen chicken? Yes, just ensure it’s fully cooked before serving.

Nutrition Tips and Dietary Adaptations

For a healthier twist, consider these tips:

  • Lean Protein: Swap chicken with turkey or tofu for a lighter option.
  • Whole Grains: Opt for brown rice or quinoa for added fiber and nutrients.
  • Low-Fat Dairy: Use low-fat cream or milk alternatives to reduce calories.

Essential Equipment Recommendations

To make your cooking experience smooth, here’s what you’ll need:

  • Large Skillet: A non-stick skillet works best for easy cooking and cleanup.
  • Wooden Spoon: Perfect for stirring and scraping the bottom of the skillet.
  • Meat Thermometer: To ensure your chicken is cooked to perfection.

Serving Suggestions

When it’s time to serve, consider these ideas:

  • Garnish: Sprinkle with fresh herbs or additional cheese for a beautiful presentation.
  • Accompaniments: Serve with a crisp green salad or garlic bread to complete the meal.
  • Family Style: Serve directly from the skillet for a cozy, family-style meal experience.

Conclusion

Your journey to a delightful dinner just got easier with this Easy Creamy Chicken and Rice Skillet. With its comforting flavors and straightforward preparation, it’s a dish that will surely become a staple in your home. Remember, cooking is about enjoying the process, so embrace the creativity and savor the moments spent in the kitchen. Happy cooking!

Easy Creamy Chicken and Rice Skillet

Prep Time 10 minutes
Cook Time 20 minutes
Total Time 30 minutes
Servings 4 servings
Calories 550
This creamy chicken and rice skillet is a quick and delicious one-pan meal perfect for busy weeknights. It combines tender chicken, flavorful rice, and a rich, cheesy sauce.

Ingredients

Protein

  • 1 lb boneless, skinless chicken breasts, cut into bite-sized pieces
  • 1 cup long-grain rice, rinsed
  • 2 cups chicken broth choose Halal-friendly options
  • 1 cup heavy cream
  • 1 cup frozen peas or fresh, if available
  • 1 medium onion, finely chopped
  • 3 cloves garlic, minced
  • 2 tablespoons olive oil or any Halal-friendly cooking oil
  • to taste Salt and black pepper
  • 1 teaspoon dried thyme (optional)
  • 1/2 cup grated parmesan cheese (optional, for extra creaminess)

Garnish

  • Fresh parsley, chopped, for garnish

Instructions 

  • Heat oil in a skillet over medium heat and cook chicken until browned. Remove and set aside.
  • Sauté onions and garlic until fragrant. Add rice and cook for 2 minutes.
  • Pour in chicken broth, heavy cream, and thyme. Bring to a boil.
  • Reduce heat, add chicken back to the skillet, cover, and simmer for 15 minutes until rice is tender.
  • Stir in peas and parmesan cheese (if using). Garnish with parsley before serving.

Notes

For extra flavor, add a squeeze of lemon or a dash of hot sauce.
Calories: 550kcal
Cost: $15
Course: Main Course
Cuisine: American
Keyword: Chicken, Creamy, rice

Start Your Day with an Energizing Almond Butter Banana Smoothie

Kickstart your morning with this delicious Almond Butter Banana Smoothie! Packed with wholesome ingredients, this creamy blend is perfect for breakfast or a midday boost. Whether you’re rushing out the door or taking a moment to unwind, this smoothie gives you the energy you need to tackle your day.

This smoothie is not just about flavor; it’s also a powerhouse of nutrition. The combination of almond butter and banana provides healthy fats and essential vitamins, making it a guilt-free indulgence you can enjoy any time of day. Ready to blend? Let’s dive into why you’ll love this recipe!

Why You’ll Love This Recipe

This smoothie isn’t just good for you; it’s also incredibly easy to make. Here are five reasons to whip it up today:

  • Packed with nutrients: Each serving is rich in potassium, magnesium, and healthy fats, contributing to heart health and muscle function.
  • Quick and easy: Ready in just 5 minutes, this smoothie is perfect for busy mornings!
  • Customizable: Adjust the sweetness or add your favorite protein powder for extra energy.
  • Family-friendly: Kids love the creamy texture and sweet taste, making it a hit for the whole family.
  • Supports weight management: The healthy fats and protein help keep you full longer, reducing the temptation to snack.

Ingredients Breakdown

Here’s what you’ll need to make this energizing smoothie:

  • 1 ripe banana: Choose one that’s well-ripened for natural sweetness.
  • 2 tablespoons almond butter: This adds creaminess and a rich, nutty flavor.
  • ¾ cup unsweetened almond milk: You can substitute with any milk of your choice.
  • ½ teaspoon cinnamon: This spice enhances flavor and adds health benefits.
  • 1 teaspoon chia seeds (optional): A great source of fiber and omega-3 fatty acids.
  • ½ teaspoon vanilla extract: For an extra flavor boost!
  • 4-5 ice cubes: This will give your smoothie a refreshing chill.

**Substitutions**: Don’t have almond butter? Feel free to use peanut butter or sunflower seed butter instead. For a dairy-free option, stick with almond milk or coconut milk. If you prefer a sweeter smoothie, add a drizzle of honey or agave syrup.

Step-by-Step Instructions

Side view of a smoothie made with almond butter and ripe banana, garnished with chia seeds.

Making your Almond Butter Banana Smoothie is a breeze! Follow these simple steps:

  1. Add all ingredients to a high-speed blender: banana, almond butter, almond milk, cinnamon, vanilla extract, chia seeds (if using), and ice cubes.
  2. Blend until smooth and creamy: Scrape down the sides as needed to ensure everything is well mixed.
  3. Taste and adjust: Add more almond milk for a thinner consistency or a drizzle of honey for extra sweetness.
  4. Serve immediately in a chilled glass: Enjoy your smoothie cold for the best experience!

Pro Tips for the Perfect Smoothie

Want to elevate your smoothie game? Here are some expert insights:

  • Use frozen bananas: For an extra creamy texture, freeze your bananas beforehand.
  • Experiment with flavors: Try adding a spoonful of cocoa powder or a handful of spinach for a chocolatey or green twist!
  • Blend in protein: A scoop of vanilla protein powder can turn this smoothie into a post-workout recovery drink.
  • Chill your glass: Serve in a chilled glass for a refreshing experience.
  • Prep ahead: Portion your ingredients in advance for quick morning preparation.
  • Don’t overload on sweeteners: The banana and almond butter provide natural sweetness, so taste before adding more.
  • Think about texture: If your smoothie is too thick, add a splash more almond milk until you reach your desired consistency.
  • Garnish for flair: Top with a sprinkle of chia seeds or a drizzle of almond butter for a beautiful finish.

Common Mistakes and Troubleshooting

Even the best recipes can go awry sometimes. Common issues include:

  • Too thick: Add more almond milk gradually until you achieve your desired consistency.
  • Not sweet enough: Blend in a little honey or maple syrup to adjust the sweetness.
  • Chunky texture: Ensure your blender is powerful enough to fully blend the ingredients; scrape down the sides if needed.

Delicious Variations

Feel free to switch up this recipe with these creative variations:

  • Chocolate Almond Butter Banana Smoothie: Add 1 tablespoon of cocoa powder for a chocolatey twist.
  • Green Smoothie: Toss in a handful of spinach or kale for added nutrients.
  • Protein-Packed Smoothie: Add a scoop of your favorite protein powder.
  • Berry Blast: Mix in a handful of mixed berries for a fruity flair!

Storage and Make-Ahead Instructions

Want to prepare your smoothie ahead of time? Here’s how:

  • **Make-ahead**: You can prepare the ingredients the night before and store them in the fridge or freezer. Just blend them in the morning!
  • **Storage**: If you have leftovers, store your smoothie in an airtight container in the fridge for up to 24 hours. The texture may change slightly, so give it a good shake or stir before drinking.

FAQs about Almond Butter Banana Smoothie

Got questions? Here are some common FAQs:

  • Can I use other nut butters? Yes! Feel free to substitute with peanut butter or cashew butter.
  • Is this smoothie vegan? Absolutely! All the ingredients are plant-based.
  • How many servings does this recipe make? This recipe makes one generous serving.
  • Can I add protein powder? Yes! A scoop of protein powder adds nutritional value and keeps you full longer.
  • What if I don’t have a blender? A food processor can work too, but it may take longer to achieve a smooth texture.
  • How can I make this smoothie sweeter? Add a splash of maple syrup or a few dates for added sweetness.
  • Does this smoothie keep well? It’s best enjoyed fresh, but can be stored in the fridge for up to 24 hours.
  • What are the health benefits? This smoothie is rich in healthy fats, protein, and fiber, supporting heart health and weight management.

Nutrition Tips and Dietary Adaptations

This smoothie not only tastes great but offers a wealth of health benefits:

  • Healthy fats: Almond butter is packed with healthy fats that support brain health.
  • Rich in potassium: The banana contributes to healthy muscle function.
  • Protein boost: Adding protein powder or chia seeds can help with muscle recovery after workouts.
  • Fiber-rich: The smoothie helps keep you feeling full and satisfied.

Equipment Recommendations

To make your smoothie, you’ll need:

  • High-speed blender: For a creamy, smooth texture.
  • Measuring cups and spoons: For precise ingredient measurements.
  • Chilled glass: To enjoy your smoothie cold.

Serving Suggestions

Serve your smoothie in a chilled glass and enjoy with a sprinkle of chia seeds or a drizzle of almond butter on top. For a complete breakfast, pair your smoothie with a slice of whole-grain toast or a handful of nuts.

Remember, cooking is all about experimenting and finding what you love. So, get in the kitchen, and let your creativity shine with this energizing Almond Butter Banana Smoothie!

Almond Butter Banana Smoothie

Prep Time 5 minutes
Total Time 5 minutes
Servings 1 serving
Calories 250
A creamy and nutritious smoothie perfect for a quick breakfast or snack, combining bananas, almond butter, and spices for a delicious treat.

Ingredients

Fruits and liquids

  • 1 piece ripe banana
  • 2 tablespoons almond butter
  • ¾ cup unsweetened almond milk
  • ½ teaspoon cinnamon
  • 1 teaspoon chia seeds (optional) (for extra fiber)
  • ½ teaspoon vanilla extract
  • 4 ice cubes ice cubes

Instructions 

  • Add all ingredients to a high-speed blender and blend until smooth.
  • Blend until creamy, scraping down sides as needed.
  • Taste and adjust with more almond milk or honey if desired.
  • Serve immediately in a chilled glass and enjoy cold!

Notes

For extra sweetness, add a drizzle of honey.
Calories: 250kcal
Cost: $8
Course: Breakfast, Snack
Cuisine: American
Keyword: Almond Butter, Banana