Author

Steven

Browsing

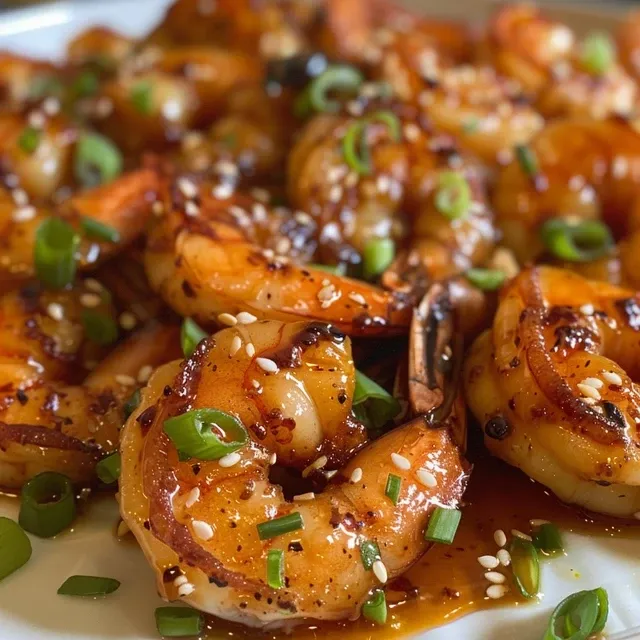
Discover the Joy of High-Protein Honey Garlic Shrimp

Welcome to your new favorite weeknight dinner! If you’re looking to elevate your meals with a quick, delicious, and healthy option, this High-Protein Honey Garlic Shrimp recipe is the perfect fit. Not only does it come together in under 30 minutes, but it’s also packed with flavor and essential nutrients. In this comprehensive guide, I’ll walk you through every step, from the ingredients to serving suggestions, ensuring you feel confident and excited to cook!

Why You’ll Love This Recipe

This recipe is more than just a meal; it’s a culinary experience that combines the sweetness of honey with the savory depth of garlic. Here are five specific benefits of making this dish:

  • Quick and Easy: Ready in just 20 minutes, making it ideal for busy weeknights.
  • High in Protein: One serving provides about 30g of protein, perfect for fueling your day.
  • Kid-Approved: The sweet and savory flavors are a hit with children, making dinner stress-free.
  • Versatile: Easily customizable with variations and substitutions to suit your taste.
  • Healthy Ingredients: Made with wholesome ingredients, it’s a nutritious addition to your dinner rotation.

Ingredients You’ll Need

Gather the following ingredients for a delightful dish:

  • 1 pound large shrimp: Peeled and deveined for quick cooking.
  • 1/4 cup honey: Adds natural sweetness and helps create a glossy sauce.
  • 4 cloves garlic, minced: Freshly minced for that aromatic flavor.
  • 2 tablespoons soy sauce: Provides a savory depth and umami flavor.
  • 1 tablespoon olive oil: For cooking the shrimp and enhancing flavor.
  • 1 teaspoon cornstarch (optional): For a thicker sauce, mix with water before adding.
  • Salt and pepper to taste: Enhances the overall flavor profile.
  • 2 green onions, sliced: For garnish, adding freshness and color.
  • Sesame seeds (optional): For a crunchy topping and added visual appeal.

Step-by-Step Instructions

Juicy shrimp coated in a shiny honey garlic sauce, displayed with fresh herbs.

Making High-Protein Honey Garlic Shrimp is straightforward. Follow these steps for the best results:

  1. Rinse the shrimp: Under cold water and pat dry with paper towels to ensure they sear properly.
  2. Mix the sauce: In a bowl, combine honey, minced garlic, soy sauce, and olive oil. If you prefer a thicker sauce, stir in cornstarch.
  3. Cook the shrimp: In a large skillet, heat some olive oil over medium-high heat. Add the shrimp in a single layer.
  4. Season the shrimp: Sprinkle with salt and pepper to taste. Cook for 2-3 minutes until they start turning pink.
  5. Add the sauce: Pour the honey garlic mixture over the shrimp. Toss to ensure all pieces are coated evenly.
  6. Let it simmer: Lower the heat and let the shrimp simmer in the sauce for an additional 3-5 minutes, or until cooked through and the sauce has thickened.
  7. Garnish: Remove from heat and garnish with sliced green onions and sesame seeds if desired.
  8. Serve: Enjoy your dish immediately while it’s still warm.

Pro Tips for Perfect High-Protein Honey Garlic Shrimp

To ensure your shrimp turn out perfectly every time, consider these expert insights:

  • Dry the shrimp: Patting them completely dry prevents steaming and helps achieve a nice sear.
  • Fresh ingredients: Use fresh garlic and high-quality honey for the best flavor.
  • Don’t overcrowd the pan: Cook shrimp in batches to avoid steaming; this ensures a beautiful sear.
  • Adjust sweetness: Feel free to modify the amount of honey based on your personal taste preferences.
  • Thicken the sauce: If you like a thicker sauce, remember to mix cornstarch with a little water before adding it to the skillet.
  • Experiment with spices: Don’t hesitate to add some red pepper flakes for a bit of heat!
  • Pair with sides: Serve over rice, quinoa, or steamed vegetables for a balanced meal.
  • Make it ahead: Prepping the sauce ahead of time can save you valuable minutes during dinner prep.

Common Mistakes and Troubleshooting

Here are some common pitfalls and how to avoid them:

  • Overcooking shrimp: Shrimp cooks quickly; check for a pink color and opaque texture to know they are done.
  • Sauce too thin: If the sauce isn’t thickening, ensure you mix cornstarch properly and allow it to simmer longer.
  • Too salty: Always taste and adjust seasoning as needed, especially if using soy sauce.
  • Burnt garlic: Garlic can burn easily; add it later in the cooking process if you’re cooking at high heat.

Recipe Variations and Substitutions

Feel free to mix it up! Here are some tasty variations to try:

  • Spicy Honey Garlic Shrimp: Add red pepper flakes or sriracha for some heat.
  • Ginger Garlic Shrimp: Incorporate minced ginger for a zesty twist.
  • Citrus Honey Shrimp: Squeeze in some lime or lemon juice for a refreshing zing.
  • Veggie-Packed Shrimp: Toss in bell peppers or snap peas for added nutrition and color.

Storage and Make-Ahead Instructions

This dish is best enjoyed fresh, but you can prep components ahead of time:

  • Storing leftovers: Keep any leftover shrimp in an airtight container in the refrigerator for up to 2 days.
  • Reheating: Gently reheat in a skillet over low heat to avoid overcooking.
  • Make the sauce ahead: You can mix the sauce in advance and store it in the fridge for up to a week.
  • Freezing: Freeze cooked shrimp for up to 3 months; thaw and reheat before serving.

Frequently Asked Questions

Here are some common queries about making High-Protein Honey Garlic Shrimp:

  • Can I use frozen shrimp? Yes! Just ensure they are completely thawed and patted dry before cooking.
  • What is the best way to cook shrimp? Searing in a hot skillet gives the best flavor and texture.
  • Can I substitute honey? Maple syrup or agave nectar can work as alternatives if you’re looking for a vegan option.
  • Is this recipe gluten-free? Yes, as long as you use gluten-free soy sauce.
  • How can I make this dish lower in sugar? Reduce the amount of honey or replace it with a sugar-free sweetener.
  • What sides pair well with shrimp? Rice, quinoa, or a fresh salad are all excellent choices!
  • Can I make this dish ahead of time? While best fresh, you can prepare the sauce in advance.
  • How do I know when shrimp are cooked? They should be pink and opaque; overcooked shrimp become rubbery.

Nutrition Tips and Dietary Adaptations

This recipe is naturally healthy, but here are some tips to enhance its nutritional profile:

  • Low-carb option: Serve with cauliflower rice or steamed vegetables instead of regular rice.
  • Protein boost: Pair the shrimp with edamame or chickpeas for additional protein.
  • Dairy-free: This recipe is dairy-free, making it suitable for lactose-intolerant individuals.
  • Whole30 compliant: Ensure you use compliant soy sauce alternatives like coconut aminos.

Equipment Recommendations

To make cooking easier, here are my top equipment picks:

  • Non-stick skillet: Ideal for cooking shrimp to prevent sticking.
  • Mixing bowls: For preparing sauces and marinades.
  • Measuring cups and spoons: For accurate ingredient measurements.
  • Wooden spoon or spatula: Perfect for tossing the shrimp without damaging them.

Serving Suggestions

Ready to serve your delicious High-Protein Honey Garlic Shrimp? Here are some great ideas:

  • Over rice: Spoon the shrimp and sauce over steamed jasmine or brown rice.
  • With noodles: Serve alongside rice noodles for an Asian-inspired twist.
  • On a salad: Toss with mixed greens for a light and healthy meal.
  • As a wrap: Use lettuce leaves as wraps filled with shrimp and fresh veggies.

Conclusion

Cooking doesn’t have to be complicated or time-consuming. With this High-Protein Honey Garlic Shrimp recipe, you can create a flavorful, nutritious meal that your whole family will love. Remember, the joy of cooking comes from experimenting and having fun in the kitchen. So, gather your ingredients, follow these simple steps, and enjoy the process! Happy cooking, my friend!

High-Protein Honey Garlic Shrimp An Amazing Ultimate Recipe

Prep Time 10 minutes
Cook Time 10 minutes
Total Time 20 minutes
Servings 4 servings
Calories 250
Enjoy this quick and flavorful high-protein shrimp dish with a sweet and savory honey garlic sauce, perfect for a healthy meal.

Ingredients

Protein

  • 1 pound large shrimp, peeled and deveined
  • 0.25 cup honey
  • 4 cloves garlic, minced
  • 2 tablespoons soy sauce
  • 1 tablespoon olive oil
  • 1 teaspoon cornstarch (optional, for thickening)
  • to taste Salt and pepper
  • 2 green onions sliced for garnish
  • for garnish Sesame seeds (optional)

Instructions 

  • Rinse shrimp and pat dry.
  • Mix honey, garlic, soy sauce, and olive oil; stir in cornstarch if desired.
  • Cook shrimp in a skillet with olive oil until pink, about 2-3 minutes.
  • Pour sauce over shrimp, toss to coat, and simmer for 3-5 minutes until thickened.
  • Garnish with green onions and sesame seeds, then serve immediately.

Notes

Adjust seasoning to taste and serve hot for best flavor.
Calories: 250kcal
Cost: $15
Course: Main Course
Cuisine: Asian
Keyword: shrimp

Discover the Magic of a Berry Greek Yogurt Smoothie

If you’re looking for a quick, nutritious, and delicious way to kickstart your day, you’ve come to the right place! This Berry Greek Yogurt Smoothie recipe is not only incredibly easy to make, but it also packs a punch of flavor and health benefits. In just 3 minutes, you can whip up a refreshing drink that’s perfect for busy mornings or a mid-afternoon snack. Let’s dive into why you’ll absolutely love this smoothie!

Why You’ll Love This Recipe

  • Quick and Easy: This smoothie takes only 3 minutes to prepare, making it ideal for those hectic mornings.
  • Nutrient-Rich: Packed with vitamins from the mixed berries and protein from the Greek yogurt, this smoothie is a powerhouse of nutrition.
  • Customizable: Adjust the ingredients to suit your taste—whether you prefer a sweeter smoothie or want to incorporate superfoods.
  • Great for Any Time of Day: Enjoy it for breakfast, as a snack, or even dessert!
  • Kid-Friendly: The vibrant colors and sweet flavors make it a hit with kids, ensuring they get their daily dose of fruits!

Ingredients You Need

Here’s what you’ll need to create your Berry Greek Yogurt Smoothie:

  • 1 frozen banana: This adds natural sweetness and creaminess. Make sure it’s ripe for the best flavor!
  • 1/2 cup mixed frozen berries: A blend of strawberries, blueberries, and raspberries works well. You can also use fresh berries if you prefer.
  • 1/2 cup vanilla Greek yogurt: I recommend using Fage for its thick, creamy texture and rich flavor.
  • 1/4-1/2 cup orange juice or water: This helps to thin out the smoothie. Adjust based on your desired consistency.
  • 1/4 cup rolled oats: They add fiber and will keep you feeling full longer.

How to Prepare Your Smoothie

Making this smoothie is as easy as 1-2-3! Follow these simple steps:

  1. Measure out the ingredients. If necessary, chop the frozen banana into smaller pieces for easier blending.
  2. Add all of the ingredients into a personal-sized blender like the Ninja or Nutribullet. Pulsing the blender first can help break up the larger chunks of banana.
  3. Blend until smooth and creamy. If the smoothie is too thick, you can add more orange juice or water to reach your preferred consistency.
  4. Pour the smoothie into a large glass or travel mug. Feel free to garnish with your favorite toppings, such as granola or fresh berries, and enjoy!

Pro Tips for the Perfect Smoothie

  • Use frozen fruit: This enhances the creaminess of the smoothie and keeps it cold without needing ice.
  • Experiment with flavors: Add a spoonful of nut butter for extra richness or a scoop of protein powder if you’re looking to boost your protein intake.
  • Don’t skip the oats: They provide a nice texture and help keep you full longer.
  • Adjust sweetness: If you find the smoothie isn’t sweet enough, you can add a drizzle of honey or a splash of maple syrup.
  • Blend in layers: For the best texture, start with the liquid ingredients, then add the yogurt, banana, and finally the frozen berries on top before blending.
  • Clean your blender immediately: Rinse it out right after use to prevent any sticky residue from setting in.
  • Try different yogurts: While Greek yogurt is my favorite, feel free to experiment with non-dairy options like coconut or almond yogurt for a different flavor profile.
  • Serve fresh: For the best taste and texture, enjoy your smoothie immediately after blending.

Common Mistakes and Troubleshooting

We all make mistakes in the kitchen, but don’t worry! Here are some common issues and how to fix them:

  • Too thick? If your smoothie is thicker than you’d like, simply add a bit more orange juice or water until you achieve the desired consistency.
  • Too sweet? If you accidentally added too much fruit or sweetener, balance it out with a splash of lemon juice or a handful of spinach.
  • Not blending well? If your blender struggles, try pulsing the ingredients or adding more liquid, as this will help everything blend more smoothly.
  • Flavor not strong enough? Boost the flavor by adding a pinch of salt, which can enhance the sweetness of the berries.
  • Too tart? If you find it too tart, consider adding a ripe banana or a bit of honey to sweeten it up.

Delicious Variations to Try

Feel free to switch things up with these fun variations:

  • Chocolate Berry Smoothie: Add a tablespoon of cocoa powder for a chocolate twist that kids will love!
  • Green Berry Smoothie: Toss in a handful of spinach or kale for added greens without compromising flavor.
  • Peanut Butter Berry Smoothie: Include a tablespoon of peanut butter or almond butter for a nutty flavor and extra protein.
  • Coconut Berry Smoothie: Replace the orange juice with coconut water for a tropical twist!

Storage and Make-Ahead Instructions

While smoothies are best enjoyed fresh, you can prepare them ahead of time:

  • In the fridge: Store leftovers in an airtight container in the fridge for up to 24 hours. Just give it a quick stir before drinking!
  • In the freezer: Prepare smoothie packs by portioning out the fruits, oats, and yogurt in freezer bags. When ready to enjoy, just add your desired liquid and blend!

Frequently Asked Questions

  • Can I use fresh berries instead of frozen? Yes, but you may need to add ice to achieve the same chilled texture.
  • Is this smoothie suitable for vegans? Absolutely! Just substitute the Greek yogurt with a dairy-free option.
  • How can I make this smoothie lower in calories? You can reduce the amount of yogurt and oats, or omit the oats altogether.
  • Can I replace orange juice with something else? Yes, water, almond milk, or coconut water can be great substitutes.
  • What can I add for extra protein? Consider adding protein powder, Greek yogurt, or nut butters.
  • How long does this smoothie stay fresh? For best flavor and quality, consume within 24 hours if refrigerated.
  • Can I add other fruits? Definitely! Feel free to mix in your favorite fruits like mango or pineapple for a different flavor profile.
  • What’s the best time to enjoy this smoothie? Morning, noon, or night! It’s a versatile drink that fits any time of the day.

Nutrition Tips and Dietary Adaptations

This Berry Greek Yogurt Smoothie can be easily adapted to fit various dietary needs:

  • Gluten-Free: Ensure your oats are certified gluten-free.
  • Dairy-Free: Use a dairy-free yogurt alternative like almond or coconut yogurt.
  • Low-Sugar: Opt for unsweetened yogurt and limit high-sugar fruits.
  • High-Protein: Add a scoop of protein powder or a serving of Greek yogurt for an extra protein boost.

Equipment Recommendations

To make blending a breeze, consider using:

  • High-Speed Blender: A powerful blender like a Vitamix or Ninja will ensure a smooth consistency.
  • Personal Blender: For single servings, a compact blender like Nutribullet is perfect and easy to clean.
  • Measuring Cups: Accurate measurements will help you replicate your favorite smoothie every time.

Serving Suggestions

Want to elevate your smoothie experience? Here are a few serving suggestions:

  • Top with fresh fruit: Add sliced strawberries, blueberries, or banana on top for a pop of color.
  • Sprinkle with granola: A handful of granola adds crunch and makes the smoothie more filling.
  • Enjoy with a side of toast: Pair it with whole-grain toast topped with almond butter for a balanced meal.

Conclusion

There you have it! A Berry Greek Yogurt Smoothie that’s not only delicious but also incredibly easy to make. With its refreshing taste and countless health benefits, this smoothie is sure to become a staple in your kitchen. So, grab your blender, and let’s get started on this delightful journey of flavors!

3 Minute Berry Greek Yogurt Smoothie

Prep Time 2 minutes
Cook Time 1 minute
Total Time 3 minutes
Servings 1 serving
Calories 250
A quick and delicious smoothie combining berries, banana, Greek yogurt, and oats for a nutritious treat in just minutes.

Ingredients

Fruits

  • 1 piece frozen banana
  • 0.5 cup mixed berries frozen
  • 0.5 cup vanilla Greek yogurt (Fage)
  • 0.25 cup orange juice or water
  • 0.25 cup rolled oats

Instructions 

  • Chop the banana into small pieces if needed.
  • Add all ingredients to a blender and pulse to break up the banana, then blend until smooth.
  • If needed, add more orange juice or water to thin the smoothie.
  • Pour into a glass or mug, garnish if desired, and enjoy!

Notes

Use frozen ingredients for best texture and convenience.
Calories: 250kcal
Cost: $8
Course: Breakfast, Snack
Keyword: Berries, Greek yogurt, Smoothie

Welcome to the vibrant world of the Caprese Stuffed Avocado! If you’ve ever wanted to bring the fresh, zesty flavors of a classic Caprese salad into a creamy avocado, you’ve landed in the right place. This recipe beautifully combines ripe, juicy tomatoes, soft mozzarella, and fragrant basil, all nestled inside perfectly ripe avocados. It’s a delightful dish that’s not only visually stunning but also incredibly easy to prepare. Whether you’re looking for a quick lunch, a healthy snack, or an impressive appetizer for guests, this recipe checks all the boxes. Let’s dive into the delicious details!

Why You’ll Love This Recipe

This Caprese Stuffed Avocado recipe is more than just a meal; it’s an experience! Here are five reasons why you’ll adore making this dish:

  • Quick and Easy: With minimal prep and no cooking required, it’s perfect for busy days or last-minute gatherings.
  • Healthy and Nutritious: Packed with healthy fats from avocados and antioxidants from tomatoes, this dish is a guilt-free indulgence.
  • Customizable: You can easily swap ingredients to suit your taste or dietary needs—there’s something for everyone!
  • Beautiful Presentation: The vibrant colors of this dish make it a feast for the eyes, ensuring it looks as good as it tastes.
  • Perfect for Sharing: This dish makes a great appetizer or party dish, allowing everyone to enjoy their own stuffed avocado.

Ingredient Breakdown and Substitutions

Let’s take a closer look at the ingredients you’ll need to create this delightful dish, along with some possible substitutions to tailor it to your preferences:

  • Grape or Cherry Tomatoes (1 1/2 cups): These small tomatoes are sweet and juicy, making them a perfect fit. You can substitute with diced heirloom tomatoes for a unique twist.
  • Baby Mozzarella Balls (4 oz): Known as bocconcini, these cheese balls provide a creamy texture. If unavailable, you can use diced mozzarella or feta cheese for a different flavor.
  • Basil Pesto (2 tablespoons): Use homemade or store-bought for convenience. If you prefer, you can substitute with a homemade avocado dip for a creamier texture.
  • Minced Garlic (1 teaspoon): Garlic enhances the flavor of the filling. If you’re sensitive to garlic, consider using garlic-infused oil instead.
  • Extra Virgin Olive Oil (1/4 cup): For drizzling, this adds richness. Avocado oil can be used as a substitute for a different flavor profile.
  • Ripe Avocados (2): Choose ripe avocados that yield slightly to pressure. For a twist, try using ripe peaches or nectarines instead.
  • Balsamic Glaze (2 tablespoons): This sweet drizzle elevates the dish. You can replace it with a simple balsamic vinegar if you prefer less sweetness.
  • Fresh Basil Leaves: Optional for garnish, but they add a lovely aroma. Feel free to use parsley or cilantro if you like a different herb flavor.

Pro Tips for the Perfect Caprese Stuffed Avocado

To ensure that your Caprese Stuffed Avocado turns out perfectly, consider these expert insights:

  • Choose Ripe Avocados: Look for avocados that yield to gentle pressure but aren’t overly soft. This ensures they hold their shape when stuffed.
  • Flavor Balance: Don’t skip on seasoning! A pinch of salt and freshly cracked pepper enhances the flavors of your ingredients.
  • Let It Rest: After mixing the filling, allow it to sit for a few minutes. This helps the flavors meld together beautifully.
  • Presentation Matters: For a stunning look, arrange the avocado halves on a platter and drizzle with balsamic glaze just before serving.
  • Make Ahead: Prepare the filling ahead of time and store it separately. Just stuff the avocados right before serving to keep them fresh.
  • Experiment with Cheeses: Try different cheeses like burrata or goat cheese for a delicious twist!
  • Extra Crunch: Add toasted pine nuts or walnuts for an extra layer of flavor and texture.
  • Temperature Matters: Serve your stuffed avocados chilled for a refreshing meal, especially on warm days.

Common Mistakes and Troubleshooting

Close-up of a Caprese Stuffed Avocado topped with balsamic glaze and fresh herbs.

Every cook makes mistakes, and that’s part of the journey! Here are some common pitfalls to avoid when making your Caprese Stuffed Avocado:

  • Overripe Avocados: If your avocados are too soft, they may fall apart. Ensure they are perfectly ripe for the best texture.
  • Too Much Liquid: If your filling is too watery, drain excess moisture from the tomatoes and mozzarella before mixing.
  • Skipping Seasoning: Don’t underestimate the power of salt and pepper. They enhance the overall flavor of the dish.
  • Forgetting the Garnish: Fresh basil adds a burst of flavor and color, so don’t skip this important step.

Variations to Try

Feeling adventurous? Here are some exciting variations to switch things up:

  • Mexican Twist: Replace the mozzarella with crumbled queso fresco and add diced jalapeños for a spicy kick.
  • Italian Caprese: Add sliced prosciutto and a sprinkle of Italian herbs for a classic flavor combination.
  • Vegan Delight: Swap mozzarella for a plant-based cheese and use a vegan pesto to make this dish fully plant-based.
  • Fruit Fusion: Incorporate diced mango or pineapple into the filling for a tropical twist.

Storage and Make-Ahead Instructions

This dish is best enjoyed fresh, but you can store any leftovers. Here’s how:

  • Storing Leftovers: Keep unused filling in an airtight container in the refrigerator for up to 2 days. Avoid stuffing avocados until you’re ready to serve to prevent browning.
  • Make Ahead: You can prepare the filling a day in advance. Just store it in the fridge, covered, and stuff the avocados right before serving.

Frequently Asked Questions

To help you on your culinary journey, here are some answers to common questions about the Caprese Stuffed Avocado:

  • Can I prepare this dish in advance? Yes, you can make the filling a day ahead and store it in the refrigerator. Just stuff the avocados before serving to avoid browning.
  • Are stuffed avocados healthy? Absolutely! They are rich in healthy fats, vitamins, and antioxidants, making them a nutritious choice.
  • What can I serve with stuffed avocados? Pair them with a light salad, crusty bread, or a refreshing soup for a complete meal.
  • Can I use different types of cheese? Yes, feel free to experiment with different cheeses like feta, goat cheese, or vegan alternatives.
  • How do I prevent avocados from browning? To minimize browning, you can drizzle the cut sides of the avocados with lemon juice.
  • Can I make this a full meal? Yes, you can serve these stuffed avocados alongside a protein like grilled chicken or shrimp for a heartier meal.
  • What’s the best way to ripen avocados? To speed up ripening, place avocados in a paper bag with a banana or apple. This traps ethylene gas and speeds the process.
  • Can I freeze stuffed avocados? It’s not recommended to freeze stuffed avocados as the texture of the avocados will change upon thawing.

Nutrition Tips and Dietary Adaptations

Whether you’re watching your diet or just looking to enhance the nutritional value of your meal, here are some tips:

  • Low-Carb Option: This recipe is naturally low in carbs, making it a great choice for keto or low-carb diets.
  • High-Protein Additions: Add grilled chicken, chickpeas, or quinoa to increase the protein content of your meal.
  • Gluten-Free: This dish is naturally gluten-free, ensuring everyone can enjoy it!
  • Vegan Adaptation: Use plant-based cheese and pesto to make this dish vegan-friendly.

Equipment Recommendations

To make your cooking experience smoother, here’s a list of helpful tools:

  • Sharp Knife: For cutting avocados and tomatoes effortlessly.
  • Mixing Bowl: A medium-sized bowl for combining your filling ingredients.
  • Spoon: Use a spoon to scoop out the avocado flesh and fill it easily.
  • Measuring Cups and Spoons: For precise measurements of your ingredients.

Serving Suggestions

Finally, here are some delightful ideas on how to serve your Caprese Stuffed Avocado:

  • Garnish with Fresh Herbs: Top with extra basil or parsley for a fresh touch.
  • Pair with Crusty Bread: Serve alongside fresh baguette slices for a satisfying crunch.
  • Enjoy with a Glass of Wine: A light, crisp white wine pairs beautifully with this dish.
  • Make a Salad Platter: Serve on a platter with mixed greens, olives, and other antipasti for a delightful spread.

In conclusion, the Caprese Stuffed Avocado is a versatile, delicious dish that’s sure to impress. With its simple yet flavorful ingredients, it’s perfect for any occasion—be it a casual lunch, a festive gathering, or a cozy dinner at home. So gather your ingredients, unleash your culinary creativity, and enjoy making this delightful recipe. Happy cooking!

Caprese Stuffed Avocado

Prep Time 10 minutes
Total Time 10 minutes
Servings 2 servings
Calories 250
A fresh and flavorful appetizer featuring creamy avocados filled with a vibrant Caprese salad mixture, drizzled with balsamic glaze.

Ingredients

Produce

  • 0.5 cup grape or cherry tomatoes, halved
  • 4 oz baby mozzarella balls (bocconcini)
  • 2 tablespoons basil pesto (homemade or store-bought)
  • 1 teaspoon minced garlic
  • 0.25 cup olive oil
  • to taste Salt and pepper (to season)
  • 2 ripe avocados, peeled, seeded, and halved
  • 2 tablespoons balsamic glaze reduction (to drizzle)
  • 2 tablespoons fresh basil, chopped

Instructions 

  • Combine tomatoes, mozzarella, pesto, garlic, olive oil, salt, and pepper in a bowl. Toss to combine.
  • Arrange avocado halves on a plate with basil leaves.
  • Spoon the Caprese mixture into each avocado half and drizzle with balsamic glaze. Top with chopped basil.

Notes

Serve immediately for the freshest flavor.
Calories: 250kcal
Cost: $12
Course: Appetizer
Cuisine: Italian-American
Keyword: Avocado, Mozzarella, Tomato

Why You’ll Love These Quick and Flavor-Packed Grilled Shrimp Kabobs

Welcome to a flavor-packed culinary adventure with these amazing grilled shrimp kabobs! In just 3 minutes, you can master a recipe that’s not only delicious but also incredibly easy to prepare. Whether you’re looking for a quick weeknight dinner or a show-stopping dish for your next gathering, this grilled shrimp recipe has got you covered. Let’s dive into the reasons you’ll adore this dish!

  • Speedy preparation: Ready in just 3 minutes, making it perfect for busy weeknights.
  • Flavor explosion: The smoky, savory marinade infuses shrimp with incredible flavor.
  • Versatile ingredients: Customize with your favorite vegetables or spices for a personal touch.
  • Healthy choice: Packed with protein and nutrients, shrimp kabobs are a guilt-free indulgence.
  • Easy cleanup: Minimal cooking equipment needed, making post-dinner chores a breeze.

Ingredients for Amazing Grilled Shrimp Kabobs

Let’s talk about the star players of this dish! Here’s what you’ll need to whip up these scrumptious shrimp kabobs:

  • 1 pound large shrimp: Peeled and deveined for easy handling.
  • 1 red bell pepper: Cut into chunks to add sweetness and color.
  • 1 yellow bell pepper: For a vibrant presentation and flavor contrast.
  • 1 red onion: Adds a mild sweetness and crunch.
  • 1/4 cup olive oil: The base of our marinade for moisture and richness.
  • 2 cloves garlic: Minced for a fragrant kick.
  • 1 tablespoon smoked paprika: Adds depth and a smoky flavor profile.
  • 1 teaspoon dried oregano: A classic herb that complements the shrimp beautifully.
  • 1/2 teaspoon dried thyme: Enhances the overall flavor with earthiness.
  • Salt and black pepper: To taste, elevating all the flavors.
  • Lemon wedges: For a zesty finish when serving.

Feel free to mix and match with your favorite veggies like zucchini, cherry tomatoes, or even mushrooms for a unique twist!

How to Prepare Grilled Shrimp Kabobs

Now, let’s get to the fun part—making the kabobs! Follow these simple steps for grilling perfection:

  1. Preheat your grill: Get your grill ready by heating it to medium-high.
  2. Soak wooden skewers: If using wooden skewers, soak them in water for at least 30 minutes to prevent burning.
  3. Mix the marinade: In a large bowl, combine olive oil, minced garlic, smoked paprika, oregano, thyme, salt, and pepper.
  4. Marinate the shrimp: Add the peeled and deveined shrimp to the marinade, tossing to coat evenly.
  5. Assemble the kabobs: Thread marinated shrimp, red and yellow bell pepper chunks, and red onion onto the skewers, alternating ingredients.
  6. Grill to perfection: Grill the kabobs for 2-3 minutes per side until shrimp are pink and opaque, and veggies are slightly charred.
  7. Serve hot: Remove from the grill, serve with lemon wedges, and enjoy!

Pro Tips for Perfect Grilled Shrimp Kabobs

Close-up of grilled shrimp kabobs featuring large shrimp and vibrant vegetables.

Want to elevate your grill game? Here are some expert insights to ensure your kabobs turn out perfectly:

  • Use fresh shrimp: Fresh shrimp provides the best texture and flavor; frozen shrimp works too but make sure to thaw completely.
  • Don’t over-marinate: 30 minutes is plenty; marinating too long can make shrimp mushy.
  • Check for doneness: Shrimp should be pink and opaque; avoid overcooking to keep them tender.
  • Experiment with spices: Feel free to add cayenne pepper for a spicy kick or replace smoked paprika with regular paprika for a milder flavor.
  • Preheat your grill well: This helps achieve those beautiful grill marks and ensures even cooking.
  • Keep an eye on the grill: Shrimp cooks quickly; don’t walk away or you might end up with overcooked kabobs!
  • Use metal skewers: If you have them, they can give you a better grilled finish and don’t require soaking.

Common Mistakes and Troubleshooting

Even the best cooks make mistakes! Here’s how to troubleshoot common issues:

  • Burnt shrimp: Ensure your grill is preheated but not too hot; medium-high is ideal.
  • Dry kabobs: Avoid overcooking; shrimp should be just opaque and firm.
  • Skewers falling apart: Ensure that you’re threading ingredients tightly, but not so tight that they can’t cook evenly.
  • Uneven cooking: Rotate skewers periodically to ensure all sides get cooked evenly.

Delicious Variations for Your Kabobs

Mix things up with these tasty variations that can bring new flavors to your grilled shrimp kabobs:

  • Pineapple shrimp kabobs: Add chunks of fresh pineapple for a sweet and tangy contrast.
  • Teriyaki shrimp kabobs: Marinate shrimp in teriyaki sauce for an Asian twist.
  • Spicy lime shrimp kabobs: Use lime juice and chili powder in the marinade for a zesty kick.
  • Herbed shrimp kabobs: Incorporate fresh herbs like cilantro or basil for a burst of freshness.

Storage and Make-Ahead Instructions

Want to prepare in advance? Here’s how to store your kabobs:

  • Make-ahead: Marinate shrimp and veggies up to 2 hours before grilling for enhanced flavor.
  • Storage: Store leftover kabobs in an airtight container in the fridge for up to 3 days.
  • Reheating: Warm kabobs in the oven at 350°F for about 10 minutes, or reheat gently on the grill.

Frequently Asked Questions (FAQs)

Got questions? Here are some common queries about grilled shrimp kabobs:

  • Can I use frozen shrimp? Yes! Just make sure to thaw them completely before marinating.
  • What type of shrimp should I use? Large shrimp, preferably peeled and deveined, work best for kabobs.
  • What other vegetables can I use? Feel free to add zucchini, cherry tomatoes, or bell peppers for variety!
  • How long should I marinate the shrimp? 30 minutes is ideal; avoid over-marinating to keep them from getting mushy.
  • Can I grill these kabobs indoors? Yes! You can use a grill pan on the stovetop if you don’t have an outdoor grill.
  • How do I know when the shrimp is done? They should be pink and opaque; they cook quickly, so keep an eye on them!
  • Can I make these kabobs in advance? Absolutely! You can marinate the ingredients a few hours ahead of grilling.
  • What should I serve with shrimp kabobs? Pair them with a fresh salad, rice, or grilled veggies for a complete meal.

Nutritional Tips and Dietary Adaptations

These grilled shrimp kabobs are not only delicious but also healthy! Here are some nutritional insights:

  • High in protein: Shrimp is a great source of lean protein, making it perfect for muscle recovery.
  • Low in calories: A serving of shrimp kabobs is light and won’t weigh you down.
  • Gluten-free: This recipe is naturally gluten-free, making it suitable for those with dietary restrictions.
  • Low-carb option: Ideal for keto or low-carb diets, especially when paired with non-starchy veggies.

Essential Equipment for Grilling Kabobs

To ensure your grilling experience is smooth, here’s a quick list of recommended equipment:

  • Grill: Charcoal or gas—both work well!
  • Skewers: Metal or soaked wooden skewers are ideal for grilling.
  • Grill tongs: For easy flipping and handling of the kabobs.
  • Basting brush: Useful for applying additional marinade while grilling.

Serving Suggestions for Your Grilled Shrimp Kabobs

To make your meal feel complete, consider these serving suggestions:

  • Fresh salads: Serve with a side of mixed greens or a refreshing cucumber salad.
  • Grain bowls: Pair with quinoa or brown rice for a hearty meal.
  • Dipping sauces: A side of garlic aioli or spicy mayo can elevate the experience.
  • Grilled bread: Serve with grilled pita or naan to soak up those delicious juices.

Now that you have everything you need to create mouth-watering grilled shrimp kabobs, it’s time to fire up that grill! Remember, cooking is all about enjoying the journey, so relax, have fun, and savor the delicious results. Happy grilling!

Amazing Grilled Shrimp Kabobs in 3 Minutes

Prep Time 5 minutes
Cook Time 5 minutes
Total Time 10 minutes
Servings 4 servings
Calories 250
Enjoy quick and flavorful grilled shrimp kabobs with colorful vegetables, perfect for a fast and delicious meal.

Ingredients

Protein

  • 1 pound large shrimp, peeled and deveined

Vegetables

  • 1 red bell pepper red bell pepper, cut into chunks
  • 1 yellow bell pepper yellow bell pepper, cut into chunks
  • 1 red onion red onion, cut into chunks

Marinade & Seasonings

  • 0.25 cup olive oil
  • 2 cloves garlic, minced
  • 1 tablespoon smoked paprika
  • 1 teaspoon dried oregano
  • 0.5 teaspoon dried thyme
  • to taste Salt and black pepper
  • for serving Lemon wedges

Instructions 

  • Preheat grill to medium-high heat. Soak wooden skewers in water for 30 minutes.
  • Mix olive oil, garlic, paprika, oregano, thyme, salt, and pepper to make marinade. Toss shrimp in marinade.
  • Thread shrimp and vegetables onto skewers, alternating ingredients.
  • Grill kabobs for 2-3 minutes per side until shrimp are pink and vegetables are tender.
  • Remove from grill, serve hot with lemon wedges.

Notes

Ensure shrimp are cooked until opaque for safety and best flavor.
Calories: 250kcal
Cost: $15
Course: Main Course
Cuisine: American
Keyword: shrimp

Unlock the Joy of Cooking with Effortless Chicken Taco Bowls

Welcome to a kitchen adventure that combines flavor, simplicity, and nourishment! In this guide, you’ll learn how to whip up a delightful Chicken Taco Bowl with Brown Rice that’s perfect for busy weeknights and satisfying any taco cravings. This recipe is not just easy to make; it’s also packed with nutrition and flavor, making it a fantastic option for meal prep or a cozy family dinner. Let’s dive into the delicious world of taco bowls!

Why You’ll Love This Recipe

  • Quick and Easy: In just under 30 minutes, you can prepare a wholesome meal that delights your taste buds.
  • Nutritious Ingredients: This recipe is rich in protein from the chicken and fiber from black beans and brown rice, keeping you full and energized.
  • Customizable: You can easily adapt this bowl with your favorite veggies or proteins, making it a versatile dish for any palate.
  • Meal Prep Friendly: Prepare a batch in advance for quick lunches or dinners throughout the week, saving you time and effort.
  • Flavorful and Satisfying: With spices and fresh toppings, every bite bursts with flavor, making it a hit for taco night!

Ingredient Breakdown

Here’s what you’ll need to create your Chicken Taco Bowl with Brown Rice:

  • 2 large boneless skinless chicken breasts (about 1 lb / 450 g): The lean protein base for your bowl. If you prefer, use chicken thighs for extra juiciness.
  • 1 tablespoon olive oil: Helps to keep the chicken moist and enhances flavor.
  • 1 tablespoon taco seasoning: For that classic taco flavor. You can use store-bought or make your own blend with spices like cumin, paprika, and chili powder.
  • 2 cups cooked brown rice: A hearty base that adds fiber and keeps you satisfied. Quinoa or cauliflower rice are great alternatives.
  • 1 cup canned black beans, drained and rinsed: Adds protein and creaminess to your bowl.
  • 1 cup corn kernels: Sweet pops of flavor and texture.
  • 1 cup cherry tomatoes, halved: Freshness and color, plus they’re rich in vitamins.
  • 1/2 cup red onion, diced: Adds crunch and a bit of zing.
  • 1 cup shredded lettuce: For a crisp finish.
  • 1 large avocado, sliced: Creamy goodness that brings everything together.
  • 1/2 cup plain Greek yogurt: A healthy alternative to sour cream, and it adds a nice tang.
  • 1 tablespoon lime juice: Brightens the flavors.
  • 2 tablespoons chopped fresh cilantro: A fresh herb that enhances the overall taste.

Pro Tips for Perfect Chicken Taco Bowls

  • Marinate the Chicken: For even more flavor, let your chicken marinate in the taco seasoning and olive oil for at least 30 minutes before cooking.
  • Cook Rice Ahead: Preparing your brown rice ahead of time makes assembly quick and easy when you’re ready to eat.
  • Use a Meat Thermometer: Ensure your chicken is perfectly cooked by checking for an internal temperature of 165°F (74°C).
  • Let Chicken Rest: Allow the chicken to rest for 5-10 minutes after cooking to retain its juices.
  • Customize Your Toppings: Feel free to add other toppings like jalapeños, cheese, or hot sauce to suit your taste.
  • Fresh Ingredients: Use fresh produce for the best flavor and nutritional value.
  • Double the Recipe: Make extra servings for leftovers or to share with friends!
  • Keep it Balanced: Aim for a mix of protein, carbs, and healthy fats in your bowl.

Avoid These Common Mistakes

  • Overcooking the Chicken: This leads to dry chicken. Stick to the recommended cooking times and check the temperature.
  • Skipping the Rinsing of Beans: Rinsing black beans helps reduce sodium and improves flavor.
  • Not Fluffing the Rice: Fluff your cooked rice with a fork to keep it from clumping together.
  • Using Dull Knives: A sharp knife makes chopping veggies easier and safer.

Variations on Your Taco Bowl

Here are some fun variations to try with your Chicken Taco Bowl:

  • Spicy Chicken Taco Bowl: Add diced jalapeños or a splash of hot sauce for a kick.
  • Vegetarian Taco Bowl: Substitute the chicken with grilled mushrooms or tofu, and add more beans.
  • Mediterranean Taco Bowl: Swap brown rice for quinoa and top with feta cheese and olives.
  • Creamy Avocado Taco Bowl: Mash the avocado and mix it with lime juice for a creamy dressing.

Storage and Make-Ahead Instructions

Your Chicken Taco Bowls can easily be prepared ahead of time:

  • Refrigerate: Store any leftovers in an airtight container for up to 3 days.
  • Freeze: You can freeze the chicken and rice separately for up to 3 months. Thaw in the fridge before reheating.
  • Meal Prep: Assemble bowls without toppings and store in individual containers for easy grab-and-go meals.

Frequently Asked Questions

Got questions? We’ve got answers! Here are some common queries regarding the Chicken Taco Bowl:

  • Can I use other grains instead of brown rice?: Yes! Feel free to use quinoa, white rice, or cauliflower rice based on your preference.
  • How can I make this dish gluten-free?: Ensure your taco seasoning is gluten-free, and you’re good to go!
  • What toppings do you recommend?: Try cheese, diced avocado, fresh salsa, or even a dollop of guacamole!
  • Can I make this bowl vegetarian?: Absolutely! Swap chicken for beans or grilled veggies.
  • How do I prevent my chicken from getting dry?: Marinate it, don’t overcook, and let it rest before slicing.
  • How spicy is the taco seasoning?: It depends on the brand. Adjust the amount to your spice preference!
  • What should I serve with this dish?: A side of tortilla chips or a fresh salad pairs well!
  • Can I use frozen vegetables?: Yes, frozen corn or other mixed veggies can be a convenient alternative!

Nutritional Tips and Dietary Adaptations

This Chicken Taco Bowl is a balanced meal that adheres to healthy eating principles:

  • Protein-Rich: Chicken and black beans provide ample protein for muscle maintenance.
  • High in Fiber: Brown rice and black beans are excellent sources of fiber, aiding digestion.
  • Healthy Fats: Avocado adds monounsaturated fats which are good for heart health.
  • Customizable for Dietary Needs: This recipe can be adjusted to fit various dietary preferences, including low-carb, vegetarian, or dairy-free diets.

Essential Equipment You’ll Need

To make your cooking experience smooth and enjoyable, here’s what you’ll need:

  • Oven or Skillet: For cooking chicken perfectly.
  • Meat Thermometer: To check the doneness of the chicken.
  • Rice Cooker or Pot: For perfectly fluffy brown rice.
  • Cutting Board and Sharp Knife: For prepping your veggies efficiently.
  • Mixing Bowl: For combining your yogurt and lime juice sauce.

Serving Suggestions

Your Chicken Taco Bowl with Brown Rice is best enjoyed fresh, but here are some fun serving ideas:

  • Layered Presentation: Serve in a clear bowl to showcase the colorful layers of ingredients.
  • Family Style: Place all ingredients on the table and let everyone customize their own bowls.
  • Garnish with Fresh Herbs: A sprinkle of cilantro or green onions adds a lovely finishing touch.

Now that you have all the tools and knowledge to create a delicious Chicken Taco Bowl, it’s time to bring your culinary skills to life! Remember, cooking should be enjoyable, and with this recipe, you can delight in the process and savor every bite. Happy cooking!

Chicken Taco Bowl with Brown Rice

Prep Time 10 minutes
Cook Time 25 minutes
Total Time 35 minutes
Servings 4 servings
Calories 550
A flavorful and healthy chicken taco bowl featuring seasoned chicken, brown rice, fresh vegetables, and a creamy Greek yogurt sauce.

Ingredients

Protein

  • 2 large boneless skinless chicken breasts (about 1 lb)
  • 1 tablespoon olive oil
  • 1 tablespoon taco seasoning

Grains

  • 2 cups cooked brown rice

Canned Goods

  • 1 cup canned black beans (drained and rinsed)
  • 1 cup corn kernels

Vegetables

  • 1 cup cherry tomatoes (halved)
  • 0.5 cup red onion (diced)
  • 1 cup shredded lettuce
  • 1 large avocado (sliced)

Dairy & Sauces

  • 0.5 cup plain Greek yogurt
  • 1 tablespoon lime juice
  • 2 tablespoons chopped fresh cilantro

Instructions 

  • Preheat oven to 400°F (200°C) or heat a skillet over medium heat.
  • Brush chicken with olive oil and coat evenly with taco seasoning. Bake for 20-25 minutes or cook in skillet 6-7 minutes per side until internal temperature reaches 165°F (74°C). Let rest, then slice or dice.
  • Cook brown rice according to package instructions and fluff with a fork. Drain and rinse black beans. Chop tomatoes, onion, and lettuce. Mix Greek yogurt with lime juice to make a sauce.
  • Assemble bowls with brown rice, sliced chicken, beans, corn, vegetables, avocado, sauce, and cilantro.

Notes

Feel free to customize with your favorite toppings or add hot sauce for extra flavor.
Calories: 550kcal
Cost: $15
Course: Main Course
Cuisine: Mexican
Keyword: Chicken, Healthy, Taco

Discover the Joy of Cooking with BBQ Pulled Chicken Burgers

Welcome to the ultimate guide on crafting BBQ Pulled Chicken Burgers that will transform your weeknight dinners into a deliciously memorable experience! Whether you’re a kitchen novice or a seasoned pro, this recipe is designed to inspire confidence and creativity. With just a handful of ingredients and a few simple steps, you’ll create mouthwatering burgers that are perfect for game day, summer cookouts, or a cozy family dinner. Dive in and let’s savor the flavor together!

Why You’ll Love This Recipe

This BBQ Pulled Chicken Burger recipe is more than just a meal; it’s a celebration of flavors and textures that everyone will enjoy. Here are five reasons to love it:

  • Flavor-packed: The combination of tender pulled chicken and tangy coleslaw creates a delightful contrast that tantalizes your taste buds.
  • Quick and easy: With a prep time of just 10 minutes and a cook time of 20 minutes, you can have dinner ready in no time.
  • Versatile: Customize your burger with various toppings, from pickles to jalapeños, to suit your taste.
  • Make-ahead friendly: Prepare the chicken and coleslaw ahead of time, making weeknight dinners stress-free.
  • Kid-approved: These burgers are a hit with kids and adults alike, making them perfect for family gatherings.

Ingredients: The Best BBQ Pulled Chicken Burger Combo

Gather the following ingredients to make your BBQ Pulled Chicken Burgers:

  • 2 lbs boneless skinless chicken thighs: Tender and juicy, perfect for pulling.
  • 1 tablespoon olive oil: For sautéing the aromatics.
  • 1 small yellow onion: Finely chopped, adds sweetness and depth.
  • 2 cloves garlic: Minced, for a flavorful punch.
  • 1 ½ cups barbecue sauce: Choose your favorite brand or homemade for the best flavor.
  • 1 tablespoon apple cider vinegar: Balances the sweetness of the sauce.
  • 1 teaspoon smoked paprika: Adds a subtle smoky flavor.
  • Salt and pepper to taste: Essential for seasoning.
  • Coleslaw: 3 cups green cabbage, 1 cup purple cabbage, 1 medium carrot, ½ cup mayonnaise, 1 tablespoon apple cider vinegar, 1 teaspoon sugar, salt and pepper.
  • 6 soft burger buns: For holding all that deliciousness!
  • Optional toppings: Pickles, extra BBQ sauce, jalapeño slices.

Step-by-Step Guide to Juicy Pulled Chicken Burgers with Crunchy Slaw

Side view of a delicious pulled chicken burger with vibrant coleslaw, showcasing its layers.

Let’s break down the cooking process so you can easily follow along:

Step 1: Sauté the Aromatics

In a large skillet, heat the olive oil over medium heat. Add the chopped onion and sauté until translucent, about 3-4 minutes. Stir in the minced garlic and cook for another minute until fragrant.

Step 2: Cook the Chicken

Add the boneless chicken thighs to the skillet, seasoning with salt, pepper, and smoked paprika. Pour in the barbecue sauce and apple cider vinegar. Cover and let it simmer for 20-25 minutes, until the chicken is cooked through.

Step 3: Shred the Chicken

Once cooked, remove the chicken from the skillet and shred it using two forks. Return the shredded chicken to the skillet, mixing it well with the sauce.

Step 4: Prepare the Coleslaw

In a large bowl, combine the shredded green and purple cabbage and grated carrot. In a separate bowl, whisk together the mayonnaise, apple cider vinegar, sugar, salt, and pepper. Pour the dressing over the cabbage mixture and toss until well combined.

Step 5: Assemble the Burgers

Toast the burger buns lightly, then layer each bun with the pulled chicken and top with coleslaw. Add any optional toppings you desire, and enjoy!

Pro Tips for Perfect BBQ Pulled Chicken Burgers

Here are some expert insights to elevate your burger game:

  • For extra heat: Add a pinch of cayenne pepper to the chicken mixture for a spicy kick.
  • Slow cooker option: Cook the chicken in a slow cooker on low for 6-8 hours for incredibly tender results.
  • Make it smoky: Use a smoked barbecue sauce to enhance the flavor even further.
  • Coleslaw secrets: Let the coleslaw chill for at least 30 minutes before serving to develop the flavors.
  • Freezing tips: The pulled chicken can be frozen for up to three months. Just thaw and reheat when ready to serve.
  • Always taste: Adjust seasonings based on personal preference; everyone’s taste is different!
  • Serving size: This recipe easily scales; double it for a crowd!
  • Garnish: Fresh herbs like cilantro or parsley can brighten the flavors.

Common Mistakes and Troubleshooting

Cooking is a journey, and mistakes can happen. Here are some common pitfalls and how to avoid them:

  • Overcooking the chicken: Keep an eye on the cooking time to prevent dryness. Chicken should be cooked to an internal temperature of 165°F.
  • Too much sauce: Start with less sauce and add more as needed to ensure the chicken is well-coated without drowning it.
  • Coleslaw too watery: Drain excess liquid from the cabbage before mixing in the dressing to avoid sogginess.
  • Buns falling apart: Toasting the buns helps prevent them from becoming soggy under the weight of the toppings.

Delicious Variations to Try

Want to mix things up? Here are some tasty variations:

  • Buffalo Chicken Burger: Swap BBQ sauce with buffalo sauce for a spicy twist.
  • Hawaiian Style: Add pineapple slices and teriyaki sauce for a tropical flavor.
  • BBQ Chicken Salad: Serve the pulled chicken over a bed of greens with coleslaw on top.
  • Loaded Chicken Fries: Top fries with pulled chicken, cheese, and coleslaw for a fun twist!

Storage and Make-Ahead Instructions

This recipe is fantastic for meal prep!

  • Refrigerate: Store any leftovers in an airtight container in the fridge for up to 3 days.
  • Freeze: The pulled chicken can be frozen for up to 3 months. Thaw in the fridge overnight before reheating.
  • Make-ahead coleslaw: Prepare the coleslaw a day in advance and store in the refrigerator to let the flavors meld.

BBQ Pulled Chicken Burger FAQs

Here are some common questions about BBQ Pulled Chicken Burgers:

  • Can I use chicken breasts instead of thighs? Yes, but thighs tend to be juicier and more forgiving when cooking.
  • What type of BBQ sauce should I use? Use your favorite brand or homemade for the best flavor.
  • Can I make this recipe in a slow cooker? Absolutely, just follow the same steps but cook on low for 6-8 hours.
  • How do I make the coleslaw healthier? Substitute Greek yogurt for mayonnaise for a lighter version.
  • Is this recipe gluten-free? Use gluten-free buns and ensure your BBQ sauce is also gluten-free.
  • What sides pair well with these burgers? Consider serving with sweet potato fries, corn on the cob, or a fresh garden salad.
  • Can I use frozen chicken? Yes, just adjust the cooking time as needed.
  • How spicy can I make it? Adjust the amount of hot sauce or add jalapeños to suit your taste.

Nutritional Tips and Dietary Adaptations

Here are some tips to adapt the recipe to meet dietary needs:

  • For a low-carb version: Serve the pulled chicken in lettuce wraps instead of buns.
  • Gluten-free: Use gluten-free buns or skip the bun altogether.
  • For a dairy-free option: Use dairy-free mayonnaise for the coleslaw.

Equipment Recommendations

To make this recipe, you’ll need the following equipment:

  • Large skillet: For sautéing and simmering the chicken.
  • Mixing bowls: For preparing the coleslaw.
  • Meat thermometer: To ensure your chicken is cooked through.
  • Shredding forks: For easily pulling apart the cooked chicken.

Serving Suggestions

Here are some delightful ways to serve your BBQ Pulled Chicken Burgers:

  • On the side: Pair with homemade fries or a fresh salad.
  • As a platter: Create a BBQ platter with various toppings and sides for a fun meal.
  • Garnished: Top with fresh herbs or a drizzle of additional BBQ sauce for extra flair.

Conclusion: Your Kitchen Adventure Awaits!

Now that you have the ultimate guide to making BBQ Pulled Chicken Burgers, it’s time to roll up your sleeves and get cooking! Remember, cooking is all about experimenting and finding joy in the process. Don’t hesitate to make this recipe your own, and enjoy the delicious rewards with family and friends. Happy cooking!

BBQ Pulled Chicken Burger With Coleslaw

Prep Time 15 minutes
Cook Time 30 minutes
Total Time 45 minutes
Servings 6 burgers
Calories 650
Enjoy tender pulled chicken smothered in barbecue sauce, topped with crunchy coleslaw, all nestled in a soft burger bun for a delicious meal.

Ingredients

Meat

  • 2 lbs boneless skinless chicken thighs
  • 1 tablespoon olive oil
  • 1 small yellow onion finely chopped
  • 2 cloves garlic minced
  • 1.5 cups barbecue sauce
  • 1 tablespoon apple cider vinegar
  • 1 teaspoon smoked paprika
  • to taste Salt and pepper

Coleslaw

  • 3 cups green cabbage finely shredded
  • 1 cup purple cabbage finely shredded
  • 1 medium carrot grated
  • 0.5 cup mayonnaise
  • 1 tablespoon apple cider vinegar
  • 1 teaspoon sugar
  • to taste Salt and pepper
  • 6 buns soft burger buns

Optional toppings

  • to taste Pickles, extra BBQ sauce, jalapeño slices (Optional toppings)

Instructions 

  • Cook chicken thighs with olive oil, onion, garlic, barbecue sauce, vinegar, paprika, salt, and pepper until tender and shredded.
  • Prepare coleslaw by mixing shredded cabbages, grated carrot, mayonnaise, vinegar, sugar, salt, and pepper.
  • Assemble burgers by placing pulled chicken on buns, topping with coleslaw, and adding optional toppings as desired.

Notes

For extra flavor, add pickles, BBQ sauce, or jalapeño slices as desired.
Calories: 650kcal
Cost: $15
Course: Main Course
Cuisine: American
Keyword: Barbecue, Burger, Chicken

Experience the Joy of Cooking with Vegan Veggie Wraps

Are you looking for a quick and delicious way to enjoy fresh vegetables? Look no further than these easy vegan veggie wraps! Packed with vibrant flavors, wholesome ingredients, and a creamy touch, these wraps are perfect for lunch, dinner, or even a snack. In this article, we will explore everything you need to know about making the best vegan wraps, including ingredient breakdowns, pro tips, delicious variations, and answers to your frequently asked questions.

Why You’ll Love This Recipe

These vegan veggie wraps are not just another meal option; they’re a culinary delight! Here are the top five reasons why you’ll love making and eating them:

  • Quick and Easy: Perfect for busy weeknights, this recipe takes just 15 minutes to prepare, allowing you to whip up a nutritious meal in no time.
  • Flavorful and Fresh: With a variety of fresh vegetables and creamy spreads, each bite is bursting with flavor and crunch.
  • Customizable: You can easily tailor the ingredients to suit your taste preferences or dietary needs, making it a versatile choice for any meal.
  • Health Benefits: This plant-based wrap is loaded with vitamins, minerals, and fiber, promoting a healthy lifestyle.
  • Perfect for Meal Prep: These wraps can be made ahead of time and stored, making them a great option for meal planning.

Ingredients You’ll Need

To create these vibrant vegan veggie wraps, gather the following ingredients:

  • 2 whole wheat tortillas: Whole wheat adds fiber and nutrients; you can also use gluten-free tortillas if needed.
  • 4 tablespoons hummus: A creamy base that adds flavor and moisture. Substitute with vegan cream cheese or tahini for variety.
  • 1 cup fresh spinach leaves: Spinach is rich in iron; feel free to substitute with kale or arugula for a different taste.
  • 1 medium carrot, grated: Adds crunch and sweetness; you can also use zucchini or cucumbers.
  • 1/2 cucumber, thinly sliced: Refreshing and hydrating; try other veggies like bell peppers or radishes.
  • 1/2 red bell pepper, thinly sliced: Provides color and mild sweetness.
  • 1/2 avocado, sliced: Creamy and rich in healthy fats.
  • 8 cherry tomatoes, halved: Adds juiciness and freshness; substitute with regular tomatoes if preferred.
  • 1 tablespoon lemon juice: Brightens the flavors; lime juice works as a substitute.
  • Salt and black pepper, to taste: Essential for enhancing flavor.
  • Sriracha or chili flakes: For a spicy kick, adjust according to your spice tolerance.
  • 1/2 cup chickpeas, black beans, or baked tofu: Adds a protein boost. You can use lentils or tempeh as alternatives.

Pro Tips for Perfect Veggie Wraps

Side view of juicy vegan wraps showcasing greens, vegetables, and a creamy spread.

To ensure your wraps are as delicious as possible, consider these expert tips:

  • Prep Ahead: Wash and slice your vegetables in advance to save time during meal prep.
  • Use Fresh Ingredients: For the best texture and flavor, choose the freshest produce available.
  • Layer Smartly: Place denser ingredients like chickpeas or tofu at the bottom to keep everything together.
  • Spread Evenly: Ensure the hummus is spread evenly across the tortilla for consistent flavor in every bite.
  • Roll It Tightly: A tight roll helps the wrap hold together better and makes it easier to eat.
  • Seal the Edge: Use a bit of hummus to seal the edge of the wrap to prevent it from unrolling.
  • Slice Diagonally: Cutting the wrap diagonally not only looks impressive but also makes it easier to handle.
  • Experiment with Flavors: Don’t hesitate to add different herbs or spices to personalize your wraps.

Common Mistakes to Avoid

To make sure your veggie wraps turn out perfectly every time, steer clear of these common pitfalls:

  • Too Much Filling: Overstuffing can lead to messy wraps that fall apart; use just enough to fill without overloading.
  • Skipping the Spread: Don’t forget to add a creamy element like hummus—this keeps the wrap moist.
  • Not Seasoning: Be generous with salt, pepper, and other seasonings to enhance the flavor.
  • Using Wilted Vegetables: Always use fresh vegetables to ensure your wrap is crisp and enjoyable.

Delicious Variations to Try

Feeling adventurous? Here are some tasty variations to customize your vegan veggie wraps:

  • Mediterranean Delight: Add olives, feta (or vegan feta), and sun-dried tomatoes for a Mediterranean twist.
  • Spicy Southwest: Include black beans, corn, diced jalapeños, and a chipotle dressing for a zesty kick.
  • Asian Fusion: Incorporate shredded cabbage, baked tofu, and peanut sauce for an Asian-inspired wrap.
  • Breakfast Wrap: Use scrambled tofu, avocado, and salsa for a hearty breakfast option.

Storage and Make-Ahead Instructions

You can easily prepare these wraps ahead of time. Here’s how:

  • Refrigeration: Store wraps in an airtight container in the fridge for up to 3 days.
  • Freezing: Wrap individually in foil or plastic wrap and freeze for up to 1 month. Thaw in the fridge before eating.
  • Make-Ahead Tips: Prepare all ingredients and assemble them the night before for a quick lunch the next day.

Comprehensive FAQ

Here are some frequently asked questions about vegan veggie wraps:

  • Can I use corn tortillas instead of whole wheat? Yes, corn tortillas are a great gluten-free option!
  • How do I keep my wraps from getting soggy? Use less spread or layer drier ingredients at the bottom.
  • What can I use instead of hummus? Vegan cream cheese, tahini, or guacamole are all excellent alternatives.
  • Are these wraps suitable for meal prep? Absolutely! They store well and can be made ahead of time.
  • How can I add more protein? Incorporate more chickpeas, lentils, or a protein-rich spread.
  • Can I use frozen vegetables? Yes, but fresh vegetables will provide a better texture and flavor.
  • What herbs can I add for extra flavor? Fresh herbs like basil, cilantro, or parsley can elevate the taste.
  • Are these wraps kid-friendly? Yes! They’re colorful and can be made with ingredients your kids enjoy.

Nutrition Tips and Dietary Adaptations

These wraps are not only delicious, but they can also be tailored to fit various dietary needs:

  • Gluten-Free: Use gluten-free tortillas or lettuce leaves for a low-carb option.
  • Low-Carb: Choose a low-carb tortilla or simply use large leaves of lettuce for the wrap.
  • Nut-Free: Ensure spreads are nut-free and use sunflower seed butter instead of nut butters.
  • High-Protein: Add extra chickpeas or use a protein-rich spread to increase the protein content.

Equipment Recommendations

Having the right tools can make your cooking experience smoother:

  • Cutting Board: A large, sturdy cutting board is essential for chopping vegetables.
  • Sharp Knife: A good knife ensures clean cuts and easy slicing of your veggies.
  • Grater: Use a box grater or a food processor for grating carrots quickly.
  • Mixing Bowl: A medium-sized bowl for mixing ingredients, especially the seasoned spinach.

Serving Suggestions

These wraps can be enjoyed in various ways:

  • With a Side Salad: Pair with a light salad for a complete meal.
  • Dipping Sauces: Serve with extra hummus, tahini, or your favorite dressing for dipping.
  • Make it a Platter: Arrange several wraps on a platter for an impressive appetizer or lunch spread.

Conclusion

Making your own vegan veggie wraps is not only easy but also a delightful way to enjoy healthy eating. With fresh ingredients, simple steps, and endless variations, you can create wraps that fit your taste and nutritional needs. So why wait? Gather your ingredients, roll it up, and enjoy a delicious, homemade meal that brightens your day!

Vegan Veggie Wraps

Prep Time 10 minutes
Total Time 10 minutes
Servings 2 wraps
Calories 350
Enjoy these fresh and colorful vegan veggie wraps, packed with nutritious ingredients and vibrant flavors.

Ingredients

Base

  • 2 pieces whole wheat tortillas
  • 4 tablespoons hummus
  • 1 cup fresh spinach leaves
  • 1 medium carrot, grated
  • 1/2 cucumber cucumber, thinly sliced
  • 1/2 red bell pepper red bell pepper, sliced into strips
  • 1/2 avocado sliced avocado
  • 8 cherry tomatoes halved cherry tomatoes
  • 1 tablespoon lemon juice
  • to taste Salt
  • to taste Black pepper
  • for spicy kick Sriracha or chili flakes
  • 1/2 cup chickpeas, black beans, or baked tofu (for protein boost)

Substitute greens

  • kale, arugula, or mixed greens greens (optional substitution)

Alternate spreads

  • pesto, tahini, or vegan cream cheese spread (optional alternative)

Add grilled veggies

  • zucchini, eggplant, mushrooms grilled vegetables (optional)

Instructions 

  • Wash and dry all produce. Slice cucumber, bell pepper, and tomatoes. Grate the carrot. Toss spinach with lemon juice, salt, and pepper.
  • Lay out a tortilla and spread hummus evenly across the surface.
  • Layer spinach, then add carrot, cucumber, bell pepper, avocado, and tomatoes. Add optional greens and grilled veggies if desired.
  • Fold in the sides and roll tightly. Seal with hummus if needed. Slice diagonally and serve.

Notes

Feel free to customize with your favorite veggies and spreads for variety.
Calories: 350kcal
Cost: $12
Course: Lunch, Snack
Cuisine: vegan
Keyword: Healthy, Vegetables, Wrap

Discover the Delight of Strawberry Shortcake Cups

Welcome to your next culinary adventure! Today, we’re diving into the world of Strawberry Shortcake Cups, a delightful treat perfect for any occasion. Whether you’re planning a summer picnic, a cozy family dinner, or just want to indulge in something sweet, this simple recipe is sure to impress your guests (and yourself!). With fresh strawberries, fluffy whipped cream, and a tender cake base, these cups are the perfect blend of flavors and textures. Let’s get started!

Why You’ll Love This Recipe

Here are just a few reasons why this strawberry shortcake recipe will become a favorite in your kitchen:

  • Quick and Easy: With straightforward steps, you can whip up these cups in no time, making them perfect for last-minute gatherings.
  • Fresh Ingredients: Using seasonal strawberries and homemade whipped cream elevates the flavor and texture, ensuring a quality dessert.
  • Customizable: Feel free to tweak the recipe with different fruits or flavors; it’s versatile and adaptable.
  • Impress Your Guests: The individual servings not only look beautiful but also make serving a breeze.
  • Perfect for Any Occasion: Whether it’s a birthday party, a summer barbecue, or a cozy family dinner, these cups fit right in!

Ingredients You’ll Need

Let’s break down the ingredients for this easy strawberry cake shortcake cups recipe:

  • All-Purpose Flour: 1 ½ cups. This forms the base of your cake. You can substitute with gluten-free flour if needed.
  • Baking Powder: 1 ½ tsp. This helps the cake rise.
  • Salt: ¼ tsp. Enhances the sweetness of the cake.
  • Unsalted Butter: ½ cup, softened. Use high-quality butter for the best flavor.
  • Granulated Sugar: 1 cup for the cake, plus ¼ cup for macerating the strawberries.
  • Large Eggs: 2. They provide moisture and richness.
  • Vanilla Extract: 1 tsp. A must-have for that classic flavor.
  • Buttermilk: ½ cup. This adds moisture and a slight tang to the cake; regular milk with a splash of vinegar can be a good substitute.
  • Fresh Strawberries: 2 lbs, hulled and sliced. The star of the show!
  • Heavy Whipping Cream: 1 cup, very cold. This will be whipped into fluffy goodness for topping.
  • Powdered Sugar: 2 tbsp. Sweetens the whipped cream.

Step-by-Step Directions

Follow these easy steps to create your delightful strawberry shortcake cups:

  1. Preheat your oven to 350°F (175°C). Prepare a 9×13 inch baking pan by lining it with parchment paper or greasing it.
  2. In a large mixing bowl, beat the softened butter and 1 cup of granulated sugar together until light and fluffy.
  3. Add the eggs one at a time, mixing well after each addition, then stir in the vanilla extract.
  4. In a separate bowl, whisk together the flour, baking powder, and salt. Gradually add this mixture to the butter mixture, alternating with the buttermilk, starting and ending with the flour. Mix just until combined.
  5. Pour the batter into the prepared pan and smooth the top. Bake for 18-22 minutes, or until a toothpick inserted into the center comes out clean.
  6. While the cake is baking, combine the sliced strawberries with the remaining ¼ cup of sugar and let them sit to create a natural strawberry glaze.
  7. Once the cake has cooled completely, use a small round cookie cutter to cut out cake circles.
  8. For the whipped cream, in a chilled bowl, whip the heavy cream with the powdered sugar and vanilla until soft peaks form.
  9. To assemble, place a cake circle in the bottom of each cup, top with a generous spoonful of strawberries and their juice, and add a dollop of whipped cream. Repeat the layers if desired.

Pro Tips for Perfect Strawberry Shortcake Cups

To ensure your strawberry shortcake cups turn out perfect every time, keep these expert tips in mind:

  • Chill Your Tools: For the best whipped cream, chill your mixing bowl and beaters before whipping.
  • Don’t Rush the Strawberries: Allow the strawberries to sit with sugar long enough to release their juices; this enhances their flavor.
  • Even Layers: For a beautiful presentation, try to create even layers of cake, strawberries, and whipped cream.
  • Use Fresh Ingredients: The quality of your strawberries and cream will significantly impact the final flavor.
  • Experiment with Flavors: Add a splash of liqueur to the strawberries for an adult twist, or try different fruits like peaches or raspberries.
  • Make-ahead Option: You can prepare the cake a day in advance and store it covered at room temperature to save time on the day of serving.
  • Try Different Containers: Use mason jars for a rustic look or clear plastic cups for casual gatherings.

Common Mistakes and Troubleshooting

Here are some pitfalls to avoid when making your strawberry shortcake cups:

  • Overmixing the Batter: This can lead to a dense cake. Mix just until combined!
  • Using Warm Strawberries: Ensure your strawberries are cold for a refreshing taste.
  • Too Much Whipped Cream: Be careful not to overwhelm the delicate cake and strawberries; a dollop goes a long way!
  • Not Letting the Cake Cool: Cutting warm cake can result in messy layers. Always let it cool completely.

Variations to Try

Get creative with these delicious variations for your strawberry shortcake cups:

  • Chocolate Strawberry Cups: Add melted chocolate to the whipped cream or drizzle over the layers.
  • Mixed Berry Cups: Substitute strawberries with a mix of berries like blueberries and raspberries.
  • Shortcake with Pound Cake: Use store-bought pound cake instead of baking a cake for a quicker option.
  • Vegan Version: Substitute eggs with flax eggs and use coconut cream for the whipped topping.

Storage and Make-Ahead Instructions

To keep your strawberry shortcake cups fresh, follow these storage tips:

  • Refrigeration: Store assembled cups in the refrigerator for up to 2 days. Cover lightly to prevent the cream from absorbing odors.
  • Freezing: For longer storage, freeze the cake layers separately. Thaw before assembling.
  • Make-Ahead: Bake the cake a day in advance and prepare the strawberries but whip the cream on the day of serving for best results.

Frequently Asked Questions (FAQs)

Here are some common questions about making strawberry shortcake cups:

  • Can I use frozen strawberries? Yes, just thaw and drain them before using.
  • What can I substitute for buttermilk? You can use regular milk with a splash of vinegar or lemon juice.
  • How do I make the whipped cream stable? Adding a tablespoon of cornstarch to the whipped cream can help it hold its shape longer.
  • Can I use a different type of cake? Absolutely! Angel food cake or sponge cake also works well.
  • How long can I store leftovers? They are best eaten within 2 days for optimal freshness.
  • Can I make these in advance? Yes, you can prepare the individual components ahead of time and assemble when ready.
  • What’s the best way to serve them? Serve chilled for the best experience!
  • Can I add other toppings? Feel free to top with chocolate shavings, nuts, or additional fruits!

Nutrition Tips and Dietary Adaptations

For those watching their nutrition, consider these adaptations:

  • Lower Sugar: Use a sugar substitute in the cake and whipped cream if desired.
  • Gluten-Free: Substitute all-purpose flour with a gluten-free blend.
  • Dairy-Free: Use coconut cream for whipped topping and plant-based milk for the cake.

Equipment Recommendations

To make your cooking experience smoother, here are some tools you’ll need:

  • Mixing Bowls: A set of different sizes for mixing ingredients.
  • Electric Mixer: A hand or stand mixer to whip cream and combine batter easily.
  • Measuring Cups and Spoons: Accurate measurements are crucial for baking success.
  • Cookie Cutter: A small round cutter for shaping your cake layers.
  • Piping Bag: Optional, for a more decorative whipped cream topping.

Serving Suggestions

For a lovely presentation, consider these serving ideas:

  • Layered Jars: Use mason jars for a rustic feel and easy transport.
  • Plated Dessert: Serve on dessert plates with a garnish of mint leaves for a pop of color.
  • With Coffee: Pair with a cup of freshly brewed coffee or tea for a delightful afternoon treat.

Conclusion

Now that you have all the tools and tips for making the perfect strawberry shortcake cups, it’s time to get cooking! Remember, the joy of cooking comes from experimenting and enjoying the process. Don’t stress about perfection; focus on the flavors and the fun. Happy baking, and enjoy your sweet creations!

Easy Strawberry Cake Shortcake Cups

Prep Time 20 minutes
Cook Time 20 minutes
Total Time 40 minutes
Servings 8 cups
Calories 350
A delightful layered dessert featuring moist cake, fresh strawberries, and whipped cream, perfect for summer gatherings.

Ingredients

Cake

  • 1.5 cups all-purpose flour
  • 1.5 tsp baking powder
  • 0.25 tsp salt
  • 0.5 cup unsalted butter, softened
  • 1 cup granulated sugar
  • 2 large eggs
  • 1 tsp pure vanilla extract
  • 0.5 cup buttermilk

Filling

  • 2 lbs fresh strawberries, hulled and sliced
  • 0.25 cup granulated sugar

Whipped Cream

  • 1 cup heavy whipping cream, very cold
  • 2 tbsp powdered sugar
  • 1 tsp vanilla extract

Instructions 

  • Preheat oven to 350°F (175°C). Line a 9x13 inch pan and prepare the batter.
  • Beat butter and sugar, add eggs and vanilla, then mix in dry ingredients alternately with buttermilk. Bake for 18-22 minutes.
  • Cool the cake, cut out circles, and prepare strawberries with sugar.
  • Whip the cold cream with powdered sugar and vanilla until soft peaks form.
  • Assemble cups with cake, strawberries, and whipped cream. Repeat layers if desired.

Notes

Use fresh strawberries for the best flavor and texture.
Calories: 350kcal
Cost: $15
Course: Dessert
Cuisine: American
Keyword: cake, Shortcake, Strawberry

Whip Up an Energizing Peanut Butter Banana Smoothie Bowl

Are you ready to elevate your breakfast game? The Peanut Butter Banana Smoothie Bowl is a delightful way to kickstart your day with energy and flavor! This creamy, nutritious bowl comes together in just minutes, making it the perfect choice for busy mornings or a satisfying snack. With its rich blend of bananas and peanut butter, it’s not just delicious; it’s also packed with essentials to fuel your body.

Why You’ll Love This Recipe

This Peanut Butter Banana Smoothie Bowl is more than just a pretty dish; it’s a powerhouse of flavor and nutrition! Here are five reasons to love it:

  • Quick and Easy: Ready in less than 10 minutes—perfect for those hectic mornings!
  • Nutritious Ingredients: Packed with healthy fats, fiber, and protein to keep you full longer.
  • Customizable: Endless topping options let you personalize your bowl to suit your taste.
  • Great for Meal Prep: Make it ahead of time for a quick breakfast during the week.
  • Kid-Friendly: A fun and delicious way to get kids involved in healthy eating!

Ingredients for the Perfect Peanut Butter Banana Smoothie Bowl

Here’s what you’ll need to create this delightful smoothie bowl:

  • 2 ripe bananas (frozen): Use well-ripened bananas for natural sweetness and creaminess.
  • 1 cup almond milk (or milk of choice): Choose your favorite milk—dairy or non-dairy works well!
  • 3 tablespoons natural peanut butter: Opt for varieties without added sugars or oils for the best flavor.
  • 1 tablespoon honey or maple syrup (optional): Add sweetness based on your preference.
  • 1/4 teaspoon vanilla extract: A dash of vanilla enhances the flavor beautifully.

How to Make Your Peanut Butter Banana Smoothie Bowl

Delicious peanut butter banana smoothie bowl with colorful toppings and a creamy texture.

Follow these simple steps to whip up your smoothie bowl:

  1. Start by placing the frozen bananas, almond milk, peanut butter, honey (if using), and vanilla extract in a blender.
  2. Blend on high speed until smooth and creamy, ensuring to scrape down the sides as necessary. Aim for a thick, scoopable consistency.
  3. Once blended, taste the mixture and adjust the sweetness if needed by adding more honey or maple syrup. Blend again to combine.
  4. Pour the smoothie base into a bowl.
  5. Add your favorite toppings: arrange sliced bananas, granola, chia seeds, and shredded coconut on top.
  6. Finish with a drizzle of peanut butter over the toppings for an extra burst of flavor and visual appeal.

Pro Tips for the Best Smoothie Bowl

To ensure you create the ultimate peanut butter banana smoothie bowl, keep these expert tips in mind:

  • Use Frozen Bananas: They provide a creamy texture and help keep the smoothie cold.
  • Don’t Over-Blend: Blend just until smooth to maintain that thick, ice cream-like consistency.
  • Experiment with Toppings: From nuts and seeds to fresh fruits and granola, the sky’s the limit!
  • Make it a Meal: Add protein powder or Greek yogurt for an extra nutrient boost.
  • Adjust Thickness: If your smoothie is too thick, add a splash more milk to reach your desired consistency.
  • Store Leftovers: If you have any leftovers, store them in the fridge for a quick snack later.
  • Presentation Matters: A beautifully arranged bowl is not only Instagram-worthy but also enhances the eating experience!
  • Try Different Nut Butters: Swap peanut butter for almond or cashew for a new flavor twist.

Common Mistakes to Avoid

Even simple recipes can have pitfalls! Here’s how to sidestep common mistakes:

  • Using Overripe Bananas: While ripe is good, overly brown bananas can lead to an off taste.
  • Too Much Liquid: Adding too much milk will make your smoothie runny; start with less and add more as needed.
  • Not Tasting: Always taste your mixture before serving, adjusting sweetness or flavors as you see fit.
  • Ignoring Texture: Blend until just combined; you want a thick and creamy texture, not a thin drink.

Delicious Variations to Try

Feeling adventurous? Here are some fun variations to switch up your smoothie bowl:

  • Chocolate Peanut Butter: Add 1 tablespoon of cocoa powder for a chocolatey twist.
  • Berry Blast: Toss in a handful of mixed berries for a fruity flavor boost.
  • Green Power: Blend in a handful of spinach or kale for added nutrients.
  • Nutty Delight: Top with mixed nuts and seeds for an extra crunch and protein boost.

Storage and Make-Ahead Instructions

If you want to prepare your smoothie bowl in advance, here’s how:

Store any leftover smoothie in an airtight container in the refrigerator for up to 24 hours. For longer storage, freeze the smoothie base in ice cube trays and blend with a little milk when you’re ready to enjoy it again.

Frequently Asked Questions

Here are answers to some common questions about the peanut butter banana smoothie bowl:

  • Can I use fresh bananas instead of frozen? Yes, but the texture will be less creamy. For best results, use frozen bananas.
  • Is this smoothie bowl gluten-free? Absolutely! Just ensure your toppings are gluten-free.
  • Can I make it vegan? Yes, use maple syrup instead of honey and choose plant-based milk.
  • How can I make it lower in sugar? Skip the sweeteners and use ripe bananas for natural sweetness.
  • Can I add protein powder? Yes! It’s a great way to boost the protein content.
  • What can I use instead of peanut butter? Almond butter, cashew butter, or sunflower seed butter all work well.
  • How do I make it thicker? Use less milk and more frozen bananas for a thicker texture.
  • Is this a good post-workout option? Absolutely! It’s packed with protein, carbs, and healthy fats to help recovery.

Nutritional Tips and Dietary Adaptations

This peanut butter banana smoothie bowl is not only delicious but also offers various health benefits:

  • High in Fiber: Bananas are a great source of dietary fiber, aiding digestion.
  • Rich in Healthy Fats: Peanut butter provides heart-healthy fats that keep you satiated.
  • Great Source of Protein: Adding yogurt or protein powder can enhance the protein content.
  • Low in Added Sugars: By using ripe bananas and natural sweeteners, you can keep sugar levels in check.

Essential Equipment for Smoothie Bowls

Before you start blending, make sure you have the right tools:

  • High-Speed Blender: For smooth, creamy results, a high-powered blender is a must.
  • Measuring Cups and Spoons: Accurate measurements ensure consistent results.
  • Serving Bowls: Choose wide bowls for easy topping arrangements.
  • Spoons: A good set of spoons makes serving and enjoying more enjoyable!

Serving Suggestions

To enhance your smoothie bowl experience, consider these serving ideas:

  • Colorful Toppings: Use a variety of fruits, nuts, and seeds to make your bowl visually appealing.
  • Serve with a Side: Pair with a glass of your favorite juice or herbal tea for a complete breakfast.
  • Garnish with Herbs: Fresh mint or basil can add a refreshing twist to your bowl.
  • Add a Crunch: Incorporate granola or toasted coconut for added texture.

Final Thoughts

The Peanut Butter Banana Smoothie Bowl is a wonderful way to enjoy a nutritious breakfast or snack that’s bursting with flavor. With its creamy base and endless topping possibilities, it’s a dish that invites creativity and personalization. So grab your blender, gather your ingredients, and start crafting your own energizing bowl today. Remember, cooking is all about experimentation and fun—don’t hesitate to tweak the recipe to make it your own!

Peanut Butter Banana Smoothie Bowl A Delightful Treat!

Prep Time 10 minutes
Total Time 10 minutes
Servings 2 servings
Calories 350
A delicious and nutritious smoothie bowl featuring bananas, peanut butter, and tasty toppings, perfect for a quick breakfast or snack.

Ingredients

Fruits and liquids

  • 2 pieces ripe bananas, frozen
  • 1 cup almond milk or milk of choice
  • 3 tablespoons natural peanut butter
  • 1 tablespoon honey or maple syrup (optional)
  • 1/4 teaspoon vanilla extract

Toppings

  • sliced banana
  • granola
  • chia seeds
  • shredded coconut
  • drizzle of peanut butter

Instructions 

  • Place frozen bananas, almond milk, peanut butter, honey (if using), and vanilla extract in a blender.
  • Blend on high until smooth and thick, scraping sides as needed.
  • Taste and add more honey if desired, then blend again.
  • Pour into a bowl and top with sliced bananas, granola, chia seeds, and shredded coconut.
  • Finish with a drizzle of peanut butter for extra flavor.

Notes

Use ripe bananas for best flavor and adjust sweetness with honey or maple syrup.
Calories: 350kcal
Cost: $10
Course: Breakfast
Keyword: Banana, peanut butter, Smoothie

Start Your Day Right with a Spicy Mango Yogurt Bowl

Welcome to your new favorite breakfast! The Spicy Mango Yogurt Bowl is not just a meal; it’s an experience that brings together the creamy richness of Greek yogurt with the vibrant sweetness of ripe mango, all topped with an exciting kick from Tajín seasoning. In just a few minutes, you can whip up this refreshing bowl that’s perfect for busy mornings or a nourishing snack. Let’s dive into why this recipe is a must-try!

Why You’ll Love This Recipe

  • Quick & Easy: Whip this up in less than 10 minutes, making it perfect for those hectic mornings or a last-minute snack.
  • Nutritious Boost: Packed with protein from Greek yogurt and vitamins from fresh mango, this bowl is a guilt-free treat.
  • Customizable: Easily adjust ingredients and toppings based on what you have on hand or your dietary preferences.
  • Flavor Explosion: The combination of sweet mango, zesty lime, and spicy Tajín creates a delightful contrast that your taste buds will love.
  • Visually Stunning: With its vibrant colors, this yogurt bowl is a feast for the eyes, making it ideal for sharing on social media!

Ingredient Breakdown

Let’s take a closer look at the ingredients that make this yogurt bowl sing:

  • 1 cup plain Greek yogurt: Use full-fat or 2% Greek yogurt for a creamy, protein-packed base.
  • 1 ripe mango: Sweet, juicy mangoes are key. Choose mangoes that give slightly when pressed for optimal ripeness.
  • 1 tsp Tajín seasoning: This adds a zesty kick. Feel free to adjust to your taste or substitute with chili powder if needed.
  • 1 tbsp honey or maple syrup: Sweeten to your liking; honey has a floral note, while maple syrup offers a deep, earthy flavor.
  • Zest and juice of ½ lime: The lime adds brightness and balances the sweetness.
  • Optional toppings: Enhance your bowl with granola for crunch, shredded coconut for tropical flair, or chia seeds for added nutrition.

Pro Tips for the Perfect Mango Yogurt Bowl

Close-up view of a Spicy Mango Yogurt Bowl topped with mango, honey, and lime zest.
  • Choose the right mango: Look for mangoes that are slightly soft and fragrant for the best flavor.
  • Layering technique: Spoon the yogurt into your bowl and use the back of a spoon to create a swirl before adding mango for a beautiful presentation.
  • Chill the yogurt: For an extra refreshing bowl, chill your yogurt before serving, especially in warm weather.
  • Experiment with spices: If Tajín isn’t available, try a pinch of cayenne or paprika for a different flavor profile.
  • Keep it fresh: Make sure to consume the bowl immediately to enjoy the vibrant flavors and textures.
  • Adjust sweetness: Taste the yogurt and mango before adding honey or syrup; some mangoes are sweeter than others.
  • Use a microplane: For lime zest, a microplane provides fine shavings that blend well into the yogurt.
  • Make it a meal: Add a scoop of protein powder or serve it with a side of hard-boiled eggs for a filling breakfast.

Common Mistakes and Troubleshooting

  • Mango too hard: If your mango isn’t ripe, it won’t be as sweet. Allow it to ripen at room temperature.
  • Overly sweet: Adjust the honey or syrup according to the sweetness of the mango; you can always add more but can’t take it out!
  • Too watery: If your yogurt seems runny, opt for a thicker Greek yogurt or strain regular yogurt through cheesecloth.
  • Not enough flavor: Don’t skip the Tajín! It’s essential for that spicy zing that complements the sweetness.

Delicious Variations

Feel free to mix things up with these fun variations:

  • Tropical Twist: Add fresh pineapple or banana for a tropical flavor explosion.
  • Berry Delight: Swap the mango for mixed berries like strawberries, blueberries, or raspberries.
  • Nuts & Seeds: Top with your favorite nuts or seeds for an extra crunch and nutritional boost.
  • Herbal Infusion: Add a sprinkle of fresh mint or basil for a refreshing herbal note.

Storage and Make-Ahead Instructions

This Spicy Mango Yogurt Bowl is best enjoyed fresh, but you can prepare some elements in advance:

  • Make Ahead: Pre-chop your mango and store it in an airtight container in the fridge for up to 2 days.
  • Yogurt base: You can portion out Greek yogurt into bowls and cover them with plastic wrap for quick assembly.
  • Storage: If you have leftovers, store them in an airtight container for up to 24 hours. However, the texture may change slightly.

FAQ: Your Questions Answered

  • Can I use regular yogurt instead of Greek yogurt? Yes, but Greek yogurt provides a thicker texture and more protein.
  • What if I don’t have Tajín? Chili powder or a mix of cayenne and lime zest can be a good substitute.
  • Is this recipe gluten-free? Absolutely! All ingredients are gluten-free.
  • Can I freeze this yogurt bowl? It’s best enjoyed fresh, but you can freeze the yogurt and mango separately.
  • How can I make this vegan? Substitute Greek yogurt with coconut yogurt and honey with maple syrup.
  • What can I serve with this yogurt bowl? Try pairing it with hard-boiled eggs or a slice of whole-grain toast for a complete meal.
  • How do I know when my mango is ripe? A ripe mango will yield slightly to pressure and have a fragrant aroma.
  • Can I add protein powder to this bowl? Yes, stir in your favorite protein powder for an added boost!

Nutritional Tips and Dietary Adaptations

This Spicy Mango Yogurt Bowl is not only delicious but also packs a nutritional punch:

  • Protein-rich: Greek yogurt is high in protein, making it a filling breakfast choice.
  • Low in calories: This bowl is a low-calorie option that satisfies your sweet tooth without the guilt.
  • Fiber boost: Add chia seeds or granola for extra fiber, which is great for digestion.
  • Customizable: Adjust toppings to suit dietary needs, such as gluten-free or dairy-free options.

Essential Equipment for Your Yogurt Bowl

Here’s what you’ll need to make this recipe a breeze:

  • Microplane: For zesting the lime easily.
  • Mixing bowls: To prepare your yogurt and toppings.
  • Serving spoon: For the perfect portioning of your yogurt and mango.

Serving Suggestions

For a delightful breakfast experience, consider pairing your Spicy Mango Yogurt Bowl with:

  • Hard-boiled eggs: A great source of protein that complements the bowl.
  • Rice cakes: Light and crispy for a satisfying crunch alongside your yogurt.
  • Fresh fruit: Add seasonal fruits for extra variety and nutrition.

With this comprehensive guide, you’re well on your way to creating the ultimate Spicy Mango Yogurt Bowl that will not only fuel your body but also please your taste buds. Cooking doesn’t have to be a chore; it’s about enjoying the process and the delicious results. Happy cooking, and enjoy your vibrant breakfast adventure!

Spicy Mango Yogurt Bowl

Prep Time 10 minutes
Total Time 10 minutes
Servings 1 bowl
Calories 250
A vibrant and refreshing yogurt bowl featuring ripe mango, lime, and a spicy kick of Tajín, perfect for a quick healthy snack or breakfast.

Ingredients

Dairy

  • 1 cup plain Greek yogurt (full fat or 2%)
  • 1 piece ripe mango (peeled and diced)

Seasonings

  • 1 tsp Tajín seasoning (or more to taste)
  • 1 tbsp honey or maple syrup
  • 0.5 lime zest of lime
  • 0.5 lime lime juice (from half a lime)

Toppings (optional)

  • to taste granola, shredded coconut, chia seeds (for topping)

Instructions 

  • Peel and dice the mango into small cubes.
  • Zest half a lime with a microplane, then juice that half into the bowl.
  • Spoon the Greek yogurt into a bowl and spread evenly.
  • Add the diced mango over the yogurt, then drizzle lime juice, sprinkle lime zest, Tajín, and honey.
  • Add optional toppings like granola, shredded coconut, or chia seeds. Serve immediately.

Notes

Use ripe mango for the best flavor and adjust Tajín to your spice preference.
Calories: 250kcal
Cost: $8
Course: Breakfast, Snack
Cuisine: Fusion
Keyword: Mango, Spicy, Yogurt