Author

Steven

Browsing

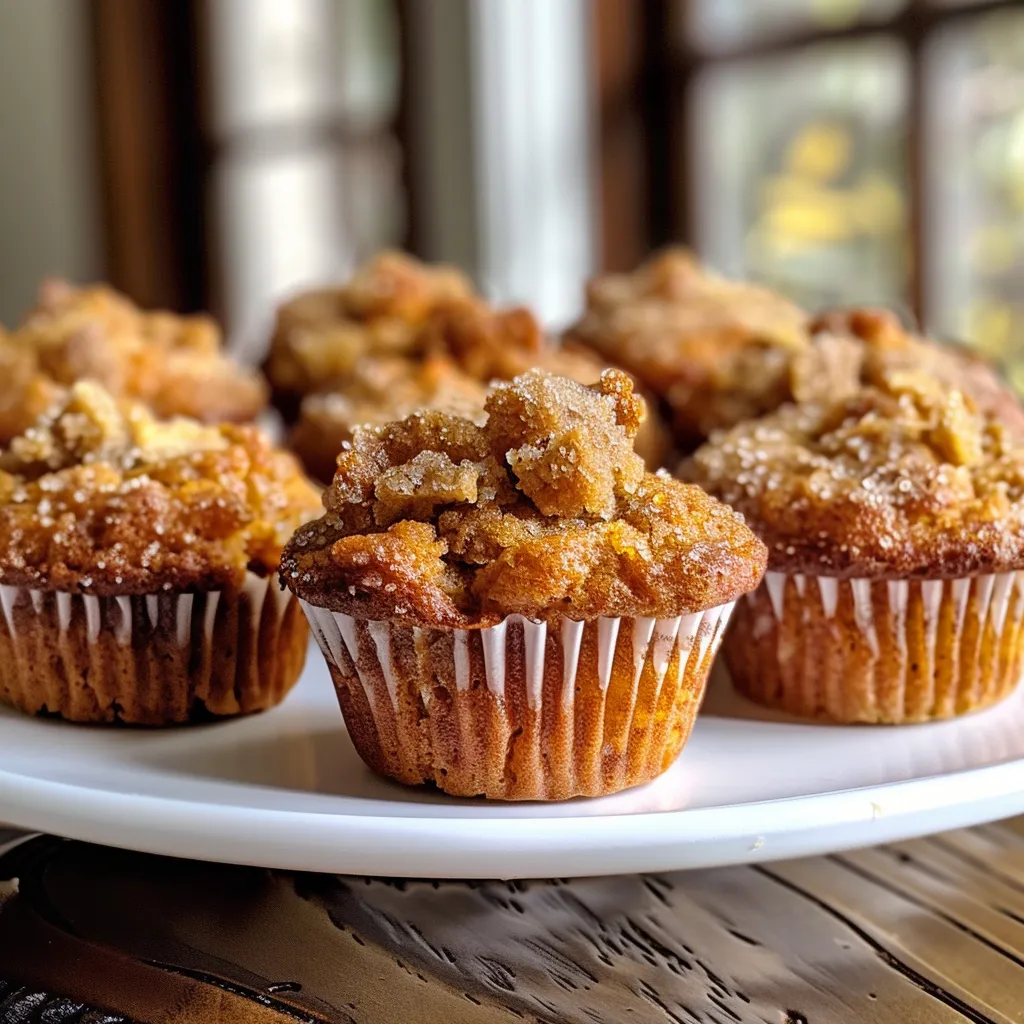
Welcome to your new favorite recipe! These Apple Cinnamon Sweet Potato Mini Muffins are not just delicious; they’re packed with nutrition and flavor. Perfect for breakfast, an afternoon snack, or even dessert, these muffins will quickly become a staple in your kitchen. With a delightful mix of sweet potatoes and cinnamon, they bring warmth and comfort to your home. Let’s dive into why you’re going to love this recipe!

Why You’ll Love This Recipe

Here are just a few reasons why these mini muffins will win your heart:

  • Nutrient-Packed: Sweet potatoes add fiber, vitamins A and C, and a touch of natural sweetness.
  • Versatile: Enjoy these muffins anytime—breakfast, snack, or dessert!
  • Easy to Make: Simple, straightforward steps make this recipe perfect for cooks of any skill level.
  • Customizable: With various substitutions, you can adapt the recipe to fit dietary needs.
  • Kid-Approved: With a sweet flavor and fluffy texture, they’re sure to please even picky eaters!

Ingredients Breakdown

Let’s take a closer look at what you’ll need to whip up these delightful muffins and some potential substitutions to consider:

  • 2 cups all-purpose flour: For a healthier twist, consider using half whole wheat flour.
  • 1/2 cup granulated sugar: Feel free to substitute with coconut sugar or a sugar alternative.
  • 1/2 cup light brown sugar: Adds moisture and depth; can be replaced with maple syrup (reduce liquid elsewhere).
  • 1 teaspoon ground cinnamon: Essential for that warm, cozy flavor.
  • 3/4 teaspoon baking powder: Helps your muffins rise to fluffy perfection.
  • 1/2 teaspoon baking soda: Works with the acids in the recipe for an extra lift.
  • 1/4 teaspoon salt: Balances sweetness and enhances flavor.
  • 2 large eggs: Binds the ingredients together; for a vegan option, use flax eggs.
  • 1/2 cup canola or vegetable oil: Keeps muffins moist; you could substitute with applesauce for a lighter version.
  • 2/3 cup unsweetened applesauce: Adds moisture and sweetness; can be replaced with pureed banana.
  • 1 teaspoon vanilla extract: Enhances overall flavor.
  • 1 1/2 cups grated raw sweet potato or carrot: The star of the show! Carrots can be used as an alternative.
  • 1 apple, coarsely grated: Adds texture and natural sweetness; any variety of apple will work!

Step-by-Step Instructions

Ready to bake? Here’s how to make your muffins:

  1. Preheat your oven to 350 degrees F (175 degrees C). Line your muffin tins with paper liners (24 mini or 12 regular).
  2. In a large mixing bowl, combine the dry ingredients: flour, sugars, cinnamon, baking powder, baking soda, and salt.
  3. In a separate bowl, whisk together the wet ingredients: eggs, oil, applesauce, and vanilla extract.
  4. Pour the wet ingredients into the dry ingredients and stir until just combined. Avoid overmixing for a tender muffin.
  5. Gently fold in the grated sweet potato and apple until evenly distributed throughout the batter.
  6. Spoon the batter into your prepared muffin tins, filling each cup about 3/4 full.
  7. Bake for 13-15 minutes for mini muffins or 20-25 minutes for regular muffins, until they are golden brown and spring back when touched.
  8. Let cool in the pan for a few minutes before transferring to a wire rack to cool completely. Enjoy!

Pro Tips for Muffin Mastery

Side view of freshly baked Apple Cinnamon Sweet Potato Mini Muffins with a hint of cinnamon and apple peeking through.

To ensure your muffins turn out perfectly every time, consider these expert insights:

  • Don’t Overmix: Stir until ingredients are just combined to keep your muffins light and fluffy.
  • Room Temperature Ingredients: Use eggs and applesauce at room temperature for better mixing.
  • Check for Doneness: Insert a toothpick into the center; it should come out clean or with a few moist crumbs.
  • Cool Completely: Letting the muffins cool before storing helps maintain their texture.
  • Use a Cookie Scoop: This ensures even portions and helps prevent mess.
  • Experiment with Add-Ins: Consider adding nuts, seeds, or dried fruits for extra texture and flavor.
  • Adjust Baking Time: Ovens vary greatly; keep an eye on your muffins as they bake.
  • Fresh Ingredients: Ensure your baking powder and soda are fresh for the best rise.

Common Mistakes and Troubleshooting

Sometimes things don’t go as planned. Here’s how to avoid common pitfalls:

  • Dense Muffins: If your muffins are too dense, you may have overmixed the batter or used expired leavening agents.
  • Dry Muffins: Overbaking can lead to dryness; check for doneness a few minutes early.
  • Sticking to the Pan: Ensure you use paper liners or grease your muffin tins well to avoid sticking.
  • Flavorless Muffins: Properly measure your ingredients, especially sugar and spices, to enhance flavor.

Variations to Try

Feel free to get creative! Here are some delicious variations of the recipe:

  • Chocolate Chip Apple Muffins: Add a handful of chocolate chips for a decadent treat.
  • Nutty Sweet Potato Muffins: Fold in chopped walnuts or pecans for added crunch.
  • Spiced Pumpkin Muffins: Substitute pumpkin puree for sweet potato for a seasonal twist.
  • Berry-Infused Muffins: Mix in blueberries or cranberries for a fruity explosion.

Storage and Make-Ahead Instructions

Keep your muffins fresh and tasty with these storage tips:

  • Room Temperature: Store in an airtight container for up to 3 days.
  • Refrigerator: For longer shelf life, keep in the fridge for up to a week.
  • Freezer: Freeze muffins individually wrapped for up to 3 months. Thaw before enjoying!
  • Make Ahead: Batter can be prepared a day in advance; just give it a quick stir before baking.

Frequently Asked Questions

Here are some common questions that may help you along the way:

  • Can I make these muffins gluten-free? Absolutely! Use a gluten-free flour blend in place of all-purpose flour.
  • Can I use sweet potato puree instead of grated sweet potato? Yes, but reduce the liquid ingredients slightly to maintain the right batter consistency.
  • What can I use instead of eggs? Flax eggs or applesauce are great substitutes for binding.
  • How can I make these muffins less sweet? Reduce the sugar amounts or use unsweetened applesauce.
  • Can I add spices? Yes! Try adding nutmeg or ginger for a flavor twist.
  • What if I don’t have cinnamon? You can use pumpkin pie spice or omit it altogether.
  • How do I know when the muffins are done baking? Use the toothpick test; if it comes out clean, they’re ready!
  • Can I double the recipe? Yes, just be sure to adjust your baking time accordingly.

Nutritional Tips and Dietary Adaptations

These muffins can fit various dietary needs:

  • Low-Calorie Option: Reduce sugar and replace oil with applesauce.
  • Vegan-Friendly: Substitute eggs with flax eggs and ensure all ingredients are plant-based.
  • Nut-Free: Omit any nuts and double-check all ingredient labels.

Equipment Recommendations

Here’s what you’ll need to make these muffins:

  • Muffin Tins: Use mini or standard tins based on your preference.
  • Mixing Bowls: A large bowl for dry ingredients and a smaller one for wet.
  • Whisk: Essential for mixing wet ingredients and achieving a lump-free batter.
  • Measuring Cups and Spoons: Accurate measurements are key to successful baking.
  • Spatula: A rubber spatula helps gently fold in your ingredients without overmixing.

Serving Suggestions

Serve these muffins warm or at room temperature with:

  • Butter or Coconut Oil: A spread of butter adds richness.
  • Yogurt: Greek yogurt on the side for a protein boost.
  • Fresh Fruit: Pair with a side of fresh fruit for a wholesome breakfast.

Conclusion

There you have it! Your guide to creating the best Apple Cinnamon Sweet Potato Mini Muffins. Easy to make, nutritious, and utterly delicious, these muffins are sure to add joy to your kitchen. Bake a batch today and share the love of great food with friends and family!

Apple Cinnamon Sweet Potato Mini Muffins

Prep Time 10 minutes
Cook Time 15 minutes
Total Time 25 minutes
Servings 24 muffins
Calories 150
Delight in these moist and flavorful mini muffins combining apple, cinnamon, and sweet potato for a wholesome treat.

Ingredients

Dry ingredients

  • 2 cups all-purpose flour or half all-purpose, half whole wheat
  • 1 1/2 cups granulated sugar
  • 1 1/2 cups light brown sugar
  • 1 teaspoon ground cinnamon
  • 3/4 teaspoon baking powder
  • 1/2 teaspoon baking soda
  • 1/4 teaspoon salt

Wet ingredients

  • 2 large eggs
  • 1/2 cup canola or vegetable oil
  • 2/3 cup unsweetened applesauce
  • 1 teaspoon vanilla extract

Fruits and vegetables

  • 1 1/2 cups finely grated raw sweet potato or carrot
  • 1 apple coarsely grated apple

Instructions 

  • Preheat oven to 350°F (175°C). Line muffin cups with paper liners.
  • Mix dry ingredients in a large bowl. Whisk eggs, oil, applesauce, and vanilla in a separate bowl.
  • Combine wet and dry ingredients, then fold in grated sweet potato and apple.
  • Spoon batter into muffin cups, filling 3/4 full. Bake for 13-15 minutes for mini muffins or 20-25 minutes for regular muffins until golden.
  • Let cool slightly before serving. Enjoy!

Notes

For added flavor, sprinkle with cinnamon before baking.
Calories: 150kcal
Cost: $12
Course: Breakfast, Snack
Cuisine: American
Keyword: apple, muffins, sweet potato

Unlocking the Magic of Indian-Style Vegetable Quesadillas

Welcome to the flavorful world of Indian-style vegetable quesadillas! If you’re looking to elevate your dinner game with a dish that’s as comforting as it is exciting, you’ve come to the right place. This recipe transforms simple, everyday ingredients into a vibrant, mouthwatering meal that’s perfect for both weeknight dinners and quick lunches. In just a few simple steps, you’ll learn how to make these delicious quesadillas that are packed with nutrition, flavor, and a touch of spice.

Join me on this culinary adventure as we explore the delightful combination of spices, fresh vegetables, and ooey-gooey cheese that will make your taste buds dance. Let’s dive in!

Why You’ll Love This Recipe

This Indian-style vegetable quesadilla is more than just a meal; it’s an experience! Here’s why you’ll fall in love with it:

  • Easy to Prepare: This recipe is straightforward and can be made in under 30 minutes, making it ideal for busy weeknights.
  • Customizable: You can easily adjust the ingredients based on what you have on hand or your personal preferences.
  • Packed with Nutrition: Filled with a variety of colorful vegetables, this quesadilla is not only delicious but also a great source of vitamins and minerals.
  • Kid-Approved: The cheesy goodness and fun shape make it a hit with kids, ensuring they get their veggies without a fuss.
  • Perfect for Meal Prep: Make a batch ahead of time, freeze them, and reheat for a quick meal whenever you need it!

Ingredients Breakdown

Here’s what you’ll need to create these delightful quesadillas. Each ingredient plays a vital role in achieving the perfect flavor and texture:

  • Wheat Flour: About 1-1.5 cups, this forms the outer covering. Whole wheat flour can be used for a nuttier flavor.
  • Salt: Just a pinch to enhance the flavors.
  • Oil: You’ll need 3-4 tablespoons for cooking. Use olive oil or vegetable oil for a mild flavor.
  • Onion: 1 medium-sized, finely chopped for sweetness and depth of flavor.
  • Delhi Carrot: 1 medium-sized, grated for sweetness and crunch.
  • Cabbage: 1/2 cup, chopped fine for added texture.
  • Capsicum: 1/2 of each red and yellow capsicum, chopped for color and flavor.
  • Cauliflower: 1/4 cup, finely chopped to add a subtle earthiness.
  • Broccoli: 1/4 cup, finely chopped for a nutritious boost.
  • Cheese: 3 cubes, grated for that melty goodness. Use a mild cheese like cheddar or mozzarella.

Pro Tips for Perfect Quesadillas

Side view of a juicy Indian-style vegetable quesadilla, showcasing its vibrant filling and golden crust.

Let’s ensure your quesadillas turn out perfectly every time with these expert tips:

  • Don’t Overfill: While it’s tempting to pile on the filling, too much can make it hard to flip. Aim for a generous but manageable amount.
  • Preheat Your Pan: A hot pan ensures the quesadilla crisps up beautifully without burning the filling.
  • Experiment with Spices: Feel free to adjust the spice levels! If you love heat, add extra red chili powder or diced jalapeños.
  • Keep It Crisp: Use a light hand with oil to avoid greasiness. Just enough to coat the pan is perfect.
  • Let Them Rest: After cooking, let quesadillas sit for a minute before cutting. This helps the cheese set slightly, making for cleaner slices.
  • Use Fresh Ingredients: Whenever possible, use fresh vegetables for the best flavor and texture.
  • Try Different Cheeses: Mixing cheeses can create a unique flavor profile. Consider adding feta or pepper jack for a twist!
  • Store Properly: If you have leftovers, allow them to cool before storing in an airtight container in the fridge.

Common Mistakes and Troubleshooting

Even the best cooks encounter mishaps! Here are some common mistakes and how to avoid them:

  • Burnt Quesadillas: If your quesadillas are burning, lower the heat and cook them a bit longer to allow the filling to warm through without overcooking the tortilla.
  • Filling Oozing Out: If your filling is spilling out, try using less filling or ensure the edges are sealed well before cooking.
  • Cheese Not Melting: If your cheese isn’t melting well, try using a different type of cheese or grating it finely for better results.

Delicious Variations to Try

Once you master the basic recipe, feel free to switch things up with these fun variations:

  • Mexican Style: Use black beans, corn, and jalapeños for a spicy twist!
  • Cheesy Spinach: Add fresh spinach and ricotta for a creamy, green filling.
  • Mushroom Medley: Sauté mushrooms with garlic and herbs for an earthy flavor.
  • Sweet Potato Bliss: Replace the veggies with roasted sweet potatoes and black beans for a sweet and savory combination.

Storage and Make-Ahead Instructions

These quesadillas are perfect for meal prep! Here’s how to store and reheat them:

  • Refrigeration: Store cooked quesadillas in an airtight container in the fridge for up to 3 days.
  • Freezing: Quesadillas freeze well! Place them in a single layer in a freezer-safe container, separated by parchment paper, for up to 2 months.
  • Reheating: Reheat in a skillet over medium heat for a few minutes on each side, or use the microwave for a quick option (though they won’t be as crispy).

Frequently Asked Questions (FAQs)

Here are some common questions about making Indian-style vegetable quesadillas:

  • Can I make this recipe vegan?: Absolutely! Swap the cheese for a plant-based alternative and use oil instead of butter.
  • What if I don’t have wheat flour?: You can use all-purpose flour or even gluten-free flour blends.
  • Can I add meat?: Yes! Feel free to add cooked chicken, beef, or shrimp to the filling for a non-vegetarian option.
  • How do I make the quesadillas spicy?: Increase the amount of red chili powder or add diced green chilies to the filling.
  • What are the best dips for quesadillas?: Pair your quesadillas with salsa, guacamole, or sour cream for a delicious contrast.
  • How do I know when they’re done?: They are ready when the cheese is melted, and the outside is golden brown and crispy.
  • Can I bake quesadillas instead of frying?: Yes! Place them on a baking sheet and bake at 400°F (200°C) for about 10-15 minutes, flipping halfway through.
  • What can I serve with quesadillas?: Serve with a side salad, rice, or a light soup for a complete meal.

Nutritional Insights and Dietary Adaptations

This recipe is not only delicious but also offers several nutritional benefits:

  • High in Fiber: The vegetables and whole wheat flour provide fiber, aiding in digestion.
  • Rich in Vitamins: Packed with a variety of vegetables, this quesadilla is a great source of vitamins A, C, and K.
  • Protein Boost: With the addition of cheese and optional beans or meat, you’ll get a good amount of protein.

Essential Equipment for Success

Before you start cooking, make sure you have the right tools:

  • Non-stick Skillet: Ideal for cooking quesadillas without sticking.
  • Spatula: A sturdy spatula will help you flip the quesadillas easily.
  • Mixing Bowl: For preparing the dough and mixing the filling.
  • Grater: A grater for cheese and vegetables makes prep quick and easy.

Serving Suggestions to Delight

When it comes time to serve, consider these ideas:

  • Garnish with Fresh Herbs: Top with chopped cilantro or parsley for a fresh kick.
  • Serve with Dips: Pair with salsa, guacamole, or a refreshing yogurt dip for added flavor.
  • Accompany with a Salad: A light green salad can balance the richness of the quesadillas.

In conclusion, this Indian-style vegetable quesadilla recipe is a canvas for creativity and flavor. Whether you’re cooking for yourself, family, or friends, it brings joy to the table with its delightful taste and satisfying crunch. I hope you feel inspired to try this recipe, tweak it to your liking, and enjoy the process. Remember, cooking is about exploration and having fun, so roll up your sleeves and get started—you’ve got this!

Indian-Style Vegetable Quesadilla

Prep Time 15 minutes
Cook Time 10 minutes
Total Time 25 minutes
Servings 4 pieces
Calories 350
A flavorful and nutritious Indian-inspired vegetable quesadilla, perfect for a quick and satisfying meal.

Ingredients

Dough

  • 2 cups wheat flour (for dough)
  • Salt to taste salt (for dough)
  • 3/4 tablespoon oil (for dough)

Vegetable Filling

  • 1 medium onion (chopped)
  • 1 medium Delhi carrot (chopped)
  • 1/2 cup chopped cabbage
  • 1/2 small red capsicum (chopped)
  • 1/2 small yellow capsicum (chopped)
  • 1/4 cup finely chopped cauliflower
  • 1/4 cup finely chopped broccoli
  • 1/2 tablespoon oil (for sautéing vegetables)
  • Salt to taste salt (for vegetables)
  • 1/4 teaspoon turmeric powder
  • Red chilli powder to taste red chilli powder
  • 1 1/2 teaspoons Singapore curry powder (or to taste)
  • 1 tablespoon jaggery powder (or to taste)
  • 1 teaspoon amchoor powder (or to taste)
  • 1 tablespoon finely chopped fresh coriander

Additional oil for cooking

  • a few tablespoons oil (as needed for cooking)
  • 3 cubes cheese (grated)

Instructions 

  • Mix wheat flour and salt, add water to form a soft dough, knead in oil, and let sit covered.
  • Chop vegetables and grate cheese.
  • Sauté vegetables in oil, add spices, and cook until crunchy. Mix in jaggery, amchoor, and coriander.
  • Roll out dough into discs, cook on hot pan until done on both sides.
  • Assemble quesadilla with vegetable filling and cheese, fold, and cook until crisp and cheese melts.
  • Serve hot.

Notes

You can customize the vegetables and spice levels as per your preference.
Calories: 350kcal
Cost: $12
Course: Main Course
Cuisine: Indian
Keyword: Quesadilla, Vegetables

Unlock the Secrets to the Perfect Slow Cooker Garlic Butter Steak Bites with Potatoes

Are you ready to transform your weeknight dinners into something spectacular? With this slow cooker garlic butter steak bites recipe, you’ll discover how easy it is to create a mouthwatering meal with minimal effort. This dish combines tender steak bites, buttery garlic goodness, and perfectly cooked baby potatoes, all cooked together in one pot. Get ready to impress your family and friends with flavors that melt in your mouth!

Why You’ll Love This Recipe

This recipe is not just another dinner option; it’s a culinary experience that brings comfort and joy to your table. Here are several reasons why you’ll fall in love with these garlic butter steak bites:

  • Effortless Preparation: Just toss everything into the slow cooker and let it do the work. No fuss, no stress!
  • Flavor Explosion: The combination of garlic and butter infuses the steak and potatoes, creating a rich and savory dish.
  • Time-Saving Meal: Perfect for busy weeknights, this recipe allows you to set it and forget it, freeing up your time for other activities.
  • Kid-Friendly: The tender steak and soft potatoes are usually a hit with the little ones, making it a great family meal.
  • Customizable: Easily adapt the recipe to suit your taste preferences or dietary needs.

Essential Ingredients You’ll Need

To create these butter steak bites and potatoes, gather the following ingredients. You can also find some great substitutions to make this recipe work for you:

  • 1½ pounds sirloin steak: Cut into bite-sized pieces for even cooking. You can substitute with chuck steak for a richer flavor.
  • 1½ pounds baby potatoes: Halved to absorb more flavor; Yukon Gold or red potatoes work well too.
  • 4 tablespoons unsalted butter: Adds richness and flavor; you can use garlic-infused butter for an extra kick.
  • 4 cloves garlic: Minced for a robust taste; feel free to adjust based on your garlic preference.
  • 1 tablespoon olive oil: Drizzled over potatoes to enhance their flavor.
  • 1 teaspoon salt: Essential for seasoning; kosher salt is recommended.
  • ½ teaspoon black pepper: Adds a subtle heat; adjust to your taste.
  • 1 teaspoon paprika: For a hint of smokiness; smoked paprika can also be used.
  • 1 teaspoon dried Italian seasoning: A blend of herbs that complements the dish beautifully.
  • 2 tablespoons fresh parsley: Chopped for garnishing; fresh herbs brighten the dish.

Step-by-Step Instructions

Juicy steak pieces with golden potatoes, garnished with parsley.

Follow these simple steps to create your slow cooker garlic butter steak bites and potatoes:

  1. Prepare the Ingredients: Cut your sirloin steak into even, bite-sized pieces, trimming any excess fat for tenderness. Halve the baby potatoes to ensure they cook evenly and soak up all the flavor.
  2. Season the Steak: In a large bowl, combine the steak bites with salt, pepper, paprika, and Italian seasoning. Toss everything until the beef is evenly coated, enhancing the natural flavors of the meat.
  3. Layer in the Slow Cooker: Place the halved potatoes at the bottom of your slow cooker, drizzle with olive oil, and toss gently. Then, layer the seasoned steak bites on top.
  4. Add the Garlic Butter: In a small bowl, mix the melted butter with minced garlic. Pour this mixture evenly over the steak and potatoes, allowing the flavors to meld during cooking.
  5. Cook Low and Slow: Cover and cook on LOW for 6-7 hours or HIGH for 3-4 hours. This is where the magic happens—the beef becomes tender, and the potatoes soften while absorbing all that rich buttery goodness.
  6. Finish and Serve: Once cooked, gently stir everything together to coat each piece in the sauce. Sprinkle freshly chopped parsley on top for a burst of color and freshness. Serve hot, straight from the slow cooker, and enjoy every comforting bite!

Pro Tips for Perfect Steak Bites

Enhance your cooking experience with these expert insights:

  • Use a hot skillet for searing: For added flavor, consider searing the steak bites in a hot skillet before adding them to the slow cooker. This will give you a nice crust.
  • Don’t overcrowd the cooker: Ensure there’s enough space for the steam to circulate, which helps cook everything evenly.
  • Adjust seasoning to taste: Feel free to tweak the seasoning based on your preference; adding a pinch of cayenne can give it a nice kick!
  • Let it rest before serving: Allow the dish to sit for a few minutes after cooking; this helps the flavors meld even more.
  • Garnish with more than parsley: Consider adding a squeeze of lemon juice or a sprinkle of grated cheese before serving for an extra flavor boost.
  • Use leftover steak for sandwiches: If you have leftovers, use the steak bites in sandwiches or salads for a delicious next-day meal.
  • Cook with wine: For a deeper flavor, consider adding a splash of red wine to the slow cooker.
  • Monitor cooking times: Every slow cooker is different, so check for doneness based on your appliance’s specific cooking times.

Common Mistakes and Troubleshooting

Here are a few pitfalls to avoid while making your slow cooker garlic butter steak bites and potatoes:

  • Not cutting ingredients evenly: Ensure all pieces are uniform in size for consistent cooking.
  • Skipping the seasoning: Don’t overlook this step; proper seasoning is key to enhancing flavors.
  • Overcooking the steak: Keep an eye on the cooking time; overcooked steak can become tough and chewy.
  • Neglecting texture: If the potatoes aren’t soft enough, try cutting them smaller next time or adjusting the cooking time.
  • Not using enough butter: The garlic butter is the star here; don’t skimp on it for maximum flavor!

Delicious Variations to Try

Feeling adventurous? Here are some variations to keep things exciting:

  • Spicy Steak Bites: Add diced jalapeños or a splash of hot sauce to bring the heat.
  • Mushroom and Onion Medley: Sauté sliced mushrooms and onions before adding to the slow cooker for added depth of flavor.
  • Herb-Infused Butter: Experiment with different herbs such as thyme or rosemary for a unique twist.
  • BBQ Style: Mix in your favorite BBQ sauce for a tangy and sweet flavor profile.

Storage Solutions and Make-Ahead Instructions

Planning ahead? Here’s how to store your garlic butter steak bites:

  • Refrigeration: Store leftovers in an airtight container in the fridge for up to 3 days. Reheat gently in the microwave or on the stovetop.
  • Freezing: Freeze in individual portions for up to 3 months. Thaw overnight in the fridge before reheating.
  • Make-Ahead: Prep the steak and potatoes the night before and refrigerate. Just add them to the slow cooker in the morning!

Frequently Asked Questions

Got questions? Here are answers to some common inquiries about this recipe:

  • Can I use a different cut of steak for this recipe? Yes, cuts like flank or ribeye can also work well, but adjust cooking times accordingly.
  • Is it possible to cook this on high instead of low? Absolutely! Cooking on high for 3-4 hours will yield similar results.
  • Can I add other vegetables? Yes, carrots, bell peppers, or green beans would be excellent additions.
  • What should I serve with garlic butter steak bites? Consider serving with a side salad or over rice for a complete meal.
  • How can I make this dish gluten-free? Ensure all spices and sauces used are certified gluten-free.
  • Can I prepare this recipe without a slow cooker? Yes, you can adapt it for stovetop cooking, but the timing will differ.
  • What if I don’t have fresh parsley? Dried parsley can be used; just remember it’s more concentrated, so use less.
  • What is the best way to reheat leftovers? Gently reheat on the stove or in the microwave, adding a splash of water or broth to keep it moist.

Nutritional Tips and Dietary Adaptations

For those watching their diet, here are some tips:

  • Low-Carb Option: Substitute potatoes with cauliflower for a low-carb alternative.
  • Dairy-Free: Swap butter for dairy-free margarine or olive oil.
  • Protein Boost: Add beans or lentils to increase protein content and fiber.

Equipment Recommendations

To make this dish, you’ll need:

  • Slow Cooker: A reliable slow cooker is essential for this recipe. Consider one with programmable settings for convenience.
  • Cutting Board and Knife: For prepping your ingredients.
  • Measuring Cups and Spoons: Precision is key for seasoning.

Serving Suggestions

Here’s how to serve your garlic butter steak bites and potatoes:

  • Garnish: Top with additional parsley or a sprinkle of parmesan cheese for added flavor.
  • Pairing: Serve alongside a fresh green salad or steamed veggies to balance the richness of the dish.
  • Presentation: For a beautiful presentation, serve in a rustic bowl or on a wooden platter.

With this ultimate guide, you’re well on your way to mastering the art of slow cooker garlic butter steak bites with potatoes. Cooking doesn’t have to be stressful, and I hope this recipe inspires you to create delicious meals with confidence. Remember, every bite should be a celebration of flavor and comfort. Happy cooking!

🍽 Looking for More Recipes to Cook Every Day?

Get my full cookbook with 50 Recipes You’ll Want to Cook Again and Again perfect for busy days and family dinners.

🍗 Download Your Cookbook Now

Instant download • 50 tested recipes

Slow Cooker Garlic Butter Steak Bites and Potatoes

Prep Time 15 minutes
Cook Time 6 hours
Total Time 6 hours 15 minutes
Servings 4 servings
Calories 650
A flavorful and tender dish featuring seasoned steak bites and potatoes cooked slowly in garlic butter, perfect for a comforting meal.

Ingredients

Meat

  • 1.5 pounds sirloin steak (cut into bite-sized pieces)
  • 1.5 pounds baby potatoes (halved)

Dairy

  • 4 tablespoons unsalted butter (melted)
  • 4 cloves garlic (minced)

Oils & Seasonings

  • 1 tablespoon olive oil
  • 1 teaspoon salt
  • 0.5 teaspoon black pepper
  • 1 teaspoon paprika
  • 1 teaspoon dried Italian seasoning

Herbs

  • 2 tablespoons fresh parsley (chopped)

Instructions 

  • Cut the sirloin steak into bite-sized pieces and halve the baby potatoes.
  • Toss the steak with salt, pepper, paprika, and Italian seasoning until evenly coated.
  • Layer potatoes in the slow cooker, drizzle with olive oil, then add seasoned steak on top.
  • Mix melted butter with minced garlic and pour over the ingredients in the slow cooker.
  • Cook on LOW for 6-7 hours or HIGH for 3-4 hours, then stir and sprinkle with parsley before serving.

Notes

Ensure to cut the steak into uniform pieces for even cooking.
Calories: 650kcal
Cost: $15
Course: Main Course
Keyword: Potatoes, Slow Cooker, Steak

Discover Your New Favorite Fried Chicken Tenders Recipe

Welcome to the ultimate guide to making irresistibly crunchy fried chicken tenders! This recipe combines juicy chicken with a perfectly seasoned, crunchy coating that both kids and adults will love. Whether you’re looking for a quick weeknight dinner or a delicious snack, these chicken tenders are the answer. Let’s dive in and make cooking fun and stress-free!

Why You’ll Love This Fried Chicken Tenders Recipe

  • Family-Friendly Flavor: These chicken tenders are a hit with everyone at the table, making them perfect for family dinners or gatherings.
  • Quick and Easy: With simple ingredients and straightforward steps, you can have a plate of crispy tenders ready in under 30 minutes.
  • Versatile Cooking Methods: Whether you prefer deep-frying, air-frying, or baking, this recipe adapts to your cooking style.
  • Customizable Seasoning: Adjust the spices to suit your taste—add more cayenne for heat or herbs for freshness!
  • Perfect for Meal Prep: These tenders can be made ahead of time and stored, making them great for meal prep or quick snacks.

Ingredients for Crispy Fried Chicken Tenders

Gather these ingredients to create the perfect crispy fried chicken tenders:

  • 1½ lb chicken tenders: Look for fresh, high-quality chicken for the best flavor.
  • 1 cup buttermilk: This adds moisture and tenderness. Use milk with a splash of vinegar if you don’t have buttermilk.
  • 1 large egg: Helps bind the coating to the chicken.
  • 1½ cups all-purpose flour: The base of your crispy coating.
  • ¼ cup cornstarch: Enhances the crunchiness of the coating.
  • 1 tsp garlic powder: Adds depth of flavor.
  • 1 tsp onion powder: Complements the garlic beautifully.
  • 1 tsp smoked paprika: Provides a subtle smokiness.
  • 1¼ tsp kosher salt: For seasoning, adjust to taste.
  • ½ tsp black pepper: Adds a bit of heat.
  • About 3 cups neutral oil: Canola or peanut oil works best for frying.
  • ¼ tsp cayenne pepper: Optional, for those who like a kick.
  • ½ tsp dried oregano: For a touch of herby flavor.

Step-by-Step: How to Make Crispy Fried Chicken Tenders at Home

Side view of juicy chicken tenders, highlighting the crispy texture and seasoning.

Marinate the Chicken

Start by marinating your chicken tenders:

  • In a bowl, whisk together the buttermilk, egg, and ¼ tsp salt.
  • Add the chicken tenders, ensuring they are fully submerged. Let them soak for at least 15 minutes (or up to overnight in the fridge for maximum tenderness).

Prepare the Coating

While the chicken is marinating, prepare the coating:

  • In a shallow bowl, mix the flour, cornstarch, garlic powder, onion powder, smoked paprika, remaining salt, and black pepper.
  • Set this mixture aside; it will create the crispy exterior you crave!

Heat the Oil

Now it’s time to heat the oil:

  • Pour the oil into a deep skillet or pot and heat to 350°F (175°C). Use a thermometer for accuracy.
  • It’s crucial to maintain this temperature for perfectly fried tenders.

Dredge the Chicken

Get your chicken ready for frying:

  • Take each tender out of the marinade and let any excess drip off.
  • First, dip it into the flour mixture, then back into the buttermilk, and finally coat it again in the flour mixture. This double dredging is key for extra crunch!
  • Set the coated tenders aside on a rack while you repeat with the remaining chicken.

Fry in Batches

Now, it’s frying time!

  • Carefully place the chicken tenders into the hot oil, ensuring not to overcrowd the pan.
  • Fry for about 3-4 minutes on each side or until golden brown and fully cooked (internal temperature should reach 165°F).
  • Use a slotted spoon to remove them and let them drain on a wire rack to keep them crispy.

Drain and Serve

After frying, let your chicken tenders rest:

  • Allow them to cool slightly on the rack before serving.
  • Serve hot alongside your favorite dipping sauces, like ranch or honey mustard, and enjoy!

Pro Tips for Perfectly Crispy Chicken Tenders

  • Maintain Oil Temperature: Keep your oil at 350°F throughout the frying process; too hot will burn the coating, while too cool will make them greasy.
  • Use a Wire Rack: Letting the fried tenders rest on a wire rack prevents steam from making them soggy.
  • Don’t Skip the Marinade: Marinating in buttermilk is crucial for juicy, flavorful chicken.
  • Experiment with Spices: Feel free to add your favorite spices to the flour mixture for a unique twist.
  • Batch Cooking: Fry in small batches to ensure even cooking and crispiness.
  • Freezing for Later: You can freeze cooked tenders; just reheat in the oven for a quick meal.
  • Use Fresh Ingredients: Fresh spices and high-quality chicken make all the difference in flavor.
  • Let the Oil Rest: Allow the oil to return to temperature between batches for consistent frying.

Common Mistakes and Troubleshooting

Even seasoned cooks can run into issues. Here are solutions to common mistakes:

  • Overcooking: Use a meat thermometer to avoid dry chicken. Remove tenders as soon as they hit 165°F.
  • Greasy Texture: Ensure your oil temperature is correct. Too low will result in grease absorption.
  • Soggy Coating: Let the tenders rest on a wire rack instead of paper towels to maintain crispiness.

Delicious Variations to Try

Want to switch things up? Here are some tasty variations:

  • Buffalo Chicken Tenders: Toss cooked tenders in buffalo sauce for a spicy kick.
  • Parmesan Crusted Tenders: Add grated Parmesan cheese to the flour mixture for cheesy flavor.
  • Herb-Infused Tenders: Mix fresh herbs like thyme or rosemary into the breading for a garden-fresh taste.
  • Asian-Inspired Tenders: Use Panko breadcrumbs and add sesame seeds to the coating for an Asian twist.

How to Store and Reheat Fried Chicken Tenders

For those who want to enjoy these tenders later, here’s how:

  • Storing: Place leftover tenders in an airtight container in the fridge for up to 3 days.
  • Freezing: Freeze cooked tenders in a single layer on a baking sheet, then transfer to a freezer bag for up to 3 months.
  • Reheating: Bake in the oven at 375°F for 10-15 minutes until heated through and crispy again.

Frequently Asked Questions

  • Can I use chicken breasts instead of tenders? Yes, but you’ll need to slice them into strips.
  • What oil is best for frying chicken? Canola, peanut, or vegetable oil works well due to their high smoke points.
  • How do I know when the chicken is done? Use a meat thermometer; the internal temperature should reach 165°F.
  • Can I air fry these chicken tenders? Absolutely! Air fry at 400°F for about 10-12 minutes, flipping halfway through.
  • What dipping sauces pair well? Honey mustard, ranch, barbecue sauce, or even a spicy aioli are fantastic options.
  • Can I skip the buttermilk? You can use regular milk with a tablespoon of vinegar as a substitute.
  • How do I make these gluten-free? Swap the all-purpose flour for a gluten-free flour blend or cornstarch.
  • Can I make these in advance? Yes! Prepare them ahead of time and simply reheat when ready to serve.

Nutrition Tips and Dietary Adaptations

Thinking about nutrition? Here are some tips:

  • Low-Fat Option: Bake instead of frying for a healthier alternative.
  • Gluten-Free: Use gluten-free flour and ensure all ingredients are certified gluten-free.
  • Protein Boost: Serve these tenders with a side of quinoa or a salad for added nutrition.

Equipment Recommendations

To make the cooking process seamless, here’s what you’ll need:

  • Deep Skillet or Dutch Oven: Essential for frying to achieve that perfect crispness.
  • Meat Thermometer: Ensures your chicken is cooked to perfection without drying out.
  • Wire Rack: Keeps tenders crispy while they cool.
  • Mixing Bowls: For marinating and coating your chicken.

Serving Suggestions for Your Chicken Tenders

Want to elevate your meal? Here are some great serving ideas:

  • Serve with a Side: Pair with crispy fries, a fresh salad, or roasted vegetables.
  • Make a Wrap: Wrap the tenders in a tortilla with lettuce, tomato, and your favorite sauce for a delicious lunch.
  • Platter Style: Create a fun platter with multiple dipping sauces for a party or game day!

Conclusion

There you have it—your guide to making irresistibly crunchy chicken tenders! With this recipe, you’ll not only impress your family and friends but also discover the joy of cooking something delicious at home. Remember, cooking is all about experimenting and having fun. So don’t be afraid to make this recipe your own. Happy cooking!

Crispy Fried Chicken Tenders Recipe You ll Crave

Prep Time 20 minutes
Cook Time 10 minutes
Total Time 30 minutes
Servings 4 servings
Calories 350
Enjoy irresistibly crispy and flavorful chicken tenders, perfect for a satisfying meal or snack.

Ingredients

Chicken

  • 1.5 lb chicken tenders
  • 1 cup buttermilk
  • 1 large egg
  • 1.5 cups all-purpose flour
  • 0.25 cup cornstarch
  • 1 tsp garlic powder
  • 1 tsp onion powder
  • 1 tsp smoked paprika
  • 1.25 tsp kosher salt divided
  • 0.5 tsp black pepper
  • 3 cups neutral oil (canola or peanut)
  • 0.25 tsp cayenne pepper
  • 0.5 tsp dried oregano

Instructions 

  • Whisk buttermilk, egg, and 1/4 tsp salt. Marinate chicken for 15 minutes.
  • Mix flour, cornstarch, garlic powder, onion powder, paprika, remaining salt, and pepper in a shallow bowl.
  • Heat oil in a deep skillet to 350°F (175°C).
  • Dredge chicken tenders in flour mixture, then in buttermilk, and again in flour. Set aside on a rack.
  • Fry tenders in batches for 3-4 minutes per side until golden brown and internal temperature reaches 165°F (74°C). Drain on paper towels.
  • Let tenders rest briefly, then serve hot with sauces or sides.

Notes

Ensure oil reaches proper temperature for crispy results.
Calories: 350kcal
Cost: $15
Course: Main Course
Cuisine: American
Keyword: chicken tenders

Unlock the Flavor: Your Guide to Spicy Buffalo Chicken Wraps

If you love bold flavors and easy meals, you’re in for a treat! These Spicy Buffalo Chicken Wraps are a quick and delicious option for dinner, combining perfectly cooked chicken with zesty hot sauce and fresh veggies. Ideal for a cozy night in or a casual lunch, this recipe is super simple to whip up and packed with flavor. Let’s dive into why you’ll love this recipe and how to make it a standout dish!

Why You’ll Love This Recipe

  • Quick to Prepare: With just a few simple ingredients and minimal cooking time, you can have these wraps ready in under 30 minutes.
  • Customizable: Tailor the ingredients to your taste! Whether you prefer more veggies or different sauces, the options are endless.
  • Perfect for Two: This recipe is designed for two servings, making it ideal for a romantic dinner or a quick lunch for two.
  • Flavor Explosion: The combination of spicy buffalo sauce and creamy ranch dressing creates a mouthwatering flavor that’s hard to resist.
  • Easy Cleanup: With minimal dishes required, you can enjoy your meal without the stress of a messy kitchen!

Ingredients for Spicy Buffalo Chicken Wraps

Here’s what you’ll need to make these flavorful wraps:

  • 2 medium chicken breasts (about 12 oz total): Cooked and shredded. If you don’t have cooked chicken, you can poach or grill raw chicken breasts.
  • 1/3 cup (80ml) hot sauce: Frank’s RedHot is a classic, but feel free to use your favorite brand.
  • 2 tablespoons (30g) unsalted butter: Melted to mix with the hot sauce for added richness.
  • 1 teaspoon garlic powder: Adds a savory depth of flavor.
  • 2 large flour tortillas (10-inch): Use burrito-sized for the best wrap experience.
  • 1 cup (50g) shredded lettuce: For a fresh crunch.
  • 1/2 cup (60g) shredded cheddar cheese: Adds creaminess and a touch of richness.
  • 1/4 cup (60ml) ranch dressing: Balances the spice of the buffalo sauce.
  • 1 small carrot (about 50g): Julienned for extra crunch.
  • 1 stalk celery (about 40g): Thinly sliced to add freshness.

Step-by-Step Instructions

Juicy Spicy Buffalo Chicken Wraps showcasing vibrant colors of lettuce, cheese, and carrots, ready to eat.

Follow these simple steps to create your delicious buffalo chicken wraps:

  • Step 1: Cook the Chicken: If you don’t have pre-cooked chicken, poach or grill your chicken breasts. Simmer them in salted water for about 12 minutes until fully cooked, then let cool before shredding.
  • Step 2: Prepare the Sauce: In a medium bowl, melt the butter and whisk it together with the hot sauce and garlic powder until smooth. Toss in your shredded chicken and stir until everything is evenly coated.
  • Step 3: Chop Your Veggies: While the chicken marinates in that tasty sauce, chop the lettuce, celery, and julienne the carrots.
  • Step 4: Warm the Tortillas: Lay out your tortillas and warm them in the microwave for 10 seconds to make them more pliable.
  • Step 5: Assemble the Wrap: Spread ranch dressing down the center of each tortilla. Layer half the chicken mixture on top, followed by the lettuce, carrots, celery, and cheddar cheese.
  • Step 6: Roll It Up: Fold the bottom of the tortilla over the filling, then fold in the sides and roll tightly to close. Cut in half diagonally for easier eating. If you like, toast the seam side down in a hot skillet for a little extra crunch.

Pro Tips for Perfect Buffalo Chicken Wraps

  • Use Rotisserie Chicken: For even quicker prep, rotisserie chicken works wonders—just shred and toss it with the sauce!
  • Adjust the Spice Level: If you like it spicier, add more hot sauce. For a milder version, use less hot sauce or substitute with a milder wing sauce.
  • Experiment with Cheeses: Try blue cheese or pepper jack for a twist on flavor.
  • Don’t Overfill: Make sure not to overstuff your wraps, as it can make them difficult to roll up.
  • Toast for Extra Flavor: Toasting the wraps in a skillet gives them a delightful crunch and enhances the flavors.
  • Make It a Meal: Serve with a side of celery sticks and extra ranch for dipping!
  • Prep Ahead: You can prepare the chicken and sauce ahead of time, storing them separately in the fridge for a quick meal later.
  • Fresh Herbs: Adding fresh herbs like cilantro or parsley can brighten up the flavors!

Common Mistakes and Troubleshooting

Even the best recipes can have hiccups! Here are a few tips to avoid common mistakes:

  • Too Spicy? If you find your wraps too spicy, add a dollop of sour cream or more ranch dressing to balance the heat.
  • Wraps Falling Apart? Ensure your tortillas are soft and pliable. If they’re too stiff, warm them a bit longer.
  • Dry Chicken? Make sure not to overcook the chicken if you’re starting from raw. Keep an eye on it while cooking for perfect tenderness.

Variations on Buffalo Chicken Wraps

Looking to mix things up? Here are some fun variations to try:

  • BBQ Chicken Wrap: Substitute buffalo sauce with your favorite BBQ sauce for a smoky twist.
  • Vegetarian Option: Replace chicken with grilled veggies or tofu, and use a spicy sauce for flavor.
  • Greek-Inspired Wrap: Swap ranch for tzatziki, and add cucumber and feta cheese for a Mediterranean flair.
  • Breakfast Wrap: Add scrambled eggs and breakfast sausage to the mix for a hearty morning meal!

Storage and Make-Ahead Instructions

Want to prepare these wraps ahead of time? Here’s how:

  • Make Ahead: Prepare the chicken and sauce a day in advance and store them in airtight containers in the fridge.
  • Storage: Store leftover wraps in the fridge for up to 2 days. To reheat, warm in a skillet or microwave until heated through.
  • Freezing: Wraps can be frozen before cooking. Just thaw in the fridge overnight and cook as directed.

Frequently Asked Questions

  • Can I use other types of meat? Absolutely! Grilled turkey or even shrimp can be delicious options.
  • What can I serve with these wraps? Pair them with celery sticks, carrot sticks, or a fresh salad for a complete meal.
  • How can I make it gluten-free? Use gluten-free tortillas and ensure your hot sauce is gluten-free.
  • Is this recipe kid-friendly? Yes! Adjust the spice level to suit your kids’ preferences.
  • Can I make these wraps in advance? Yes, you can prep the filling and assemble the wraps a few hours prior to serving.
  • How do I reheat leftovers? Reheat in a skillet or microwave until warmed through. You can also enjoy them cold!
  • What’s the best way to store leftovers? Store leftovers in an airtight container in the fridge for up to 2 days.
  • Can I add more veggies? Definitely! Feel free to add any veggies you love, such as bell peppers or avocado.

Nutritional Tips and Dietary Adaptations

These wraps can be adapted to fit various dietary needs:

  • Low Carb: Use lettuce wraps instead of tortillas to keep it low-carb and fresh.
  • Dairy-Free: Substitute cheese and ranch dressing with dairy-free alternatives.
  • High Protein: Add additional shredded chicken or beans for an extra protein boost.

Equipment Recommendations

To make your cooking experience even easier, here are a few recommended tools:

  • Shredding Tool: A hand mixer or stand mixer can make shredding chicken a breeze!
  • Non-stick Skillet: Perfect for toasting your wraps and keeping food from sticking.
  • Measuring Cups and Spoons: Essential for accurately measuring your ingredients.
  • Sharp Knife: For easy chopping of vegetables and slicing the wraps.

Serving Suggestions

To enhance your meal, consider these serving ideas:

  • Garnishes: Top your wraps with additional ranch dressing, fresh herbs, or even crumbled blue cheese for an extra kick!
  • Side Dishes: Serve with a crisp side salad, sweet potato fries, or even a light soup for a complete meal.
  • Beverages: Pair your wraps with a cold drink, like iced tea or a light beer, to complement the spicy flavors.

Conclusion

Now that you’ve got all the tips and tricks for making the ultimate Spicy Buffalo Chicken Wraps, it’s time to roll up your sleeves and get cooking! Remember, cooking is about enjoying the process, so have fun experimenting with flavors and ingredients. These wraps are not just a meal; they’re an experience waiting to happen. Happy cooking, and I can’t wait to hear how your wraps turn out!

Spicy Buffalo Chicken Wraps for Two

Prep Time 10 minutes
Cook Time 15 minutes
Total Time 25 minutes
Servings 2 servings
Calories 650
Enjoy these flavorful spicy buffalo chicken wraps, perfect for a quick and satisfying meal for two.

Ingredients

Chicken

  • 12 oz chicken breasts, cooked and shredded
  • 0.75 cup hot sauce
  • 30 g unsalted butter, melted
  • 1 teaspoon garlic powder
  • 2 large flour tortillas, 10-inch
  • 50 g shredded lettuce
  • 60 g shredded cheddar cheese
  • 60 ml ranch dressing
  • 50 g small carrot, julienned
  • 40 g celery stalk, thinly sliced

Instructions 

  • If you don t have cooked chicken, poach or grill the chicken breasts in salted water for 12 minutes, then cool and shred.
  • Melt butter, whisk with hot sauce and garlic powder. Toss in shredded chicken to coat.
  • Chop lettuce, carrots, and celery. Warm tortillas in microwave for 10 seconds.
  • Spread ranch dressing on tortillas, add chicken mixture, then top with lettuce, carrots, celery, and cheese. Roll up and cut in half.
  • Optionally, toast seam side down in a skillet for a crispy finish.

Notes

For extra flavor, toast the wraps after rolling.
Calories: 650kcal
Cost: $15
Course: Main Course
Cuisine: American
Keyword: Buffalo, Chicken, Wraps

Are you ready to transform your weeknight dinners into something truly spectacular? Say goodbye to boring meals and hello to our delicious Chicken Burrito Bowls! These flavorful bowls are perfect for busy evenings, packed with vibrant ingredients and easy to prepare. In just under an hour, you’ll have a meal that even the pickiest eaters will love. Let’s dive into how to create these delightful burrito bowls at home!

Why You’ll Love This Recipe

Here are just a few reasons why this Chicken Burrito Bowl recipe will become a staple in your kitchen:

  • Quick Preparation: With a total cook time of only 30-40 minutes, you can whip up these bowls even on the busiest evenings.
  • Customizable Ingredients: Adapt this recipe to suit your family’s preferences—swap out proteins, add extra veggies, or change up the toppings!
  • Meal Prep Friendly: These burrito bowls can be made in advance, making them perfect for lunch or dinner throughout the week.
  • Healthy & Nutritious: Packed with lean chicken, fresh veggies, and wholesome grains, this dish is both satisfying and nutritious.
  • Flavor Explosion: The combination of spices, fresh ingredients, and creamy chipotle mayo creates a delightful taste that will keep you coming back for more.

Ingredient Breakdown

Let’s take a closer look at the ingredients needed for these delicious Chicken Burrito Bowls, along with some suggested substitutions:

  • Chicken Breast: 400 g boneless, skinless chicken breast, diced into 2 cm (¾ inch) pieces. For a vegetarian option, swap with grilled tofu or chickpeas.
  • Olive Oil: 3 tbsp for cooking. Can be replaced with avocado oil for a different flavor.
  • Minced Garlic: 1 tsp for added flavor. Use garlic powder if fresh is unavailable.
  • Sea Salt Flakes: 1 tsp to enhance taste. Regular salt works, but adjust the amount to your taste.
  • Dried Oregano, Ground Cumin, Sweet Paprika, Onion Powder: Each 1 tsp for seasoning. Feel free to experiment with taco seasoning for a different twist!
  • Tomato Paste: 1 tbsp for richness. Can be substituted with fresh diced tomatoes if desired.
  • Chipotle Chili in Adobo Sauce: 1 tbsp for a smoky kick. For a milder flavor, use smoked paprika instead.
  • Fresh Tomatoes: 2, finely diced. Cherry tomatoes are a great alternative!
  • Onion: 1 small, finely diced. Red onion adds a nice crunch and color.
  • Cilantro: ⅓ bunch, finely shredded, plus extra for garnish. Substitute with parsley for a different flavor.
  • Lime: 1, juiced for freshness.
  • Microwave Rice: 450 g packet of long-grain, brown, or Mexican rice. Quinoa is an excellent gluten-free option!
  • Avocado: 1, mashed for creaminess.
  • Corn Kernels: 150 g, fresh, frozen, or canned.
  • Black Beans: 180 g, rinsed and drained for added protein.
  • Corn Chips: 100 g for crunch.
  • Jalapeno: 1, sliced for heat. Omit if you prefer milder flavors.
  • Whole-Egg Mayonnaise: 125 g for the chipotle mayo. Greek yogurt can be used for a healthier version!
  • Black Pepper: ¼ tsp for seasoning.

Step-by-Step Instructions

Now that you have your ingredients ready, let’s get cooking! Follow these simple steps for mouthwatering Chicken Burrito Bowls:

  1. Marinate the Chicken: In a large bowl, combine the chicken with all the marinade ingredients. Coat the chicken evenly and set aside for at least 15 minutes.
  2. Make the Pico de Gallo: In a separate bowl, combine diced tomatoes, onion, cilantro, lime juice, and season with salt. Mix well and set aside.
  3. Prepare the Chipotle Mayo: In a medium bowl, combine mayonnaise, chipotle chili, lime juice, salt, and black pepper. Mix until smooth and set aside.
  4. Cook the Chicken: Heat a large, heavy-based pan over medium-high heat. Add the marinated chicken and cook for 6-8 minutes, stirring occasionally. If necessary, add 1-2 tablespoons of water to prevent the marinade from burning.
  5. Assemble the Bowls: Divide the cooked rice among four bowls. Top each with chicken, mashed avocado, corn, black beans, pico de gallo, and jalapeno slices. Drizzle with chipotle mayo and finish with a squeeze of lime.

Pro Tips for the Perfect Burrito Bowl

Side angle of a chicken burrito bowl filled with rice, beans, and vibrant toppings.
  • Let the Chicken Marinate: Allowing the chicken to marinate for at least 15 minutes enhances flavor significantly.
  • Use Fresh Ingredients: Fresh veggies and herbs will elevate the taste and texture of your bowls.
  • Don’t Overcook the Chicken: Aim for a juicy texture by cooking the chicken until just done.
  • Experiment with Toppings: Add your favorite toppings like cheese, sour cream, or salsa for added flavor.
  • Adjust Spice Levels: Tailor the heat by adding more or fewer jalapenos according to your taste.
  • Serve Immediately: For the best experience, serve the bowls right after assembling.
  • Use Leftovers Creatively: Transform leftovers into burritos, tacos, or salads!
  • Keep It Balanced: Aim for a good mix of proteins, grains, and veggies in every bowl.

Common Mistakes and Troubleshooting

Even the best of us can make mistakes in the kitchen. Here’s how to troubleshoot common issues:

  • Dry Chicken: If your chicken turns out dry, it may have been overcooked. Keep an eye on it while cooking, aiming for an internal temperature of 165°F.
  • Too Spicy: If the dish is too spicy, balance it out with cooling ingredients like sour cream or avocado.
  • Watery Salsa: If your pico de gallo is too watery, drain some of the excess liquid before serving.
  • Flavorless Rice: Cook the rice in broth instead of water for added flavor.

Variations to Try

Mix things up with these fun variations:

  • Southwest Style: Add black olives, corn, and diced bell peppers for a southwestern twist.
  • Vegetarian Option: Substitute chicken with roasted vegetables or grilled portobello mushrooms.
  • Breakfast Bowl: Include scrambled eggs, avocado, and salsa for a hearty breakfast burrito bowl.
  • Mediterranean Twist: Swap chicken for grilled lamb, and add tzatziki sauce and feta cheese.

Storage and Make-Ahead Instructions

You can prepare parts of this recipe ahead of time for easy meal prep:

  • Chicken: Marinate and cook chicken a day in advance. Store it in an airtight container in the fridge.
  • Rice: Cook rice and store in the fridge. Reheat before serving.
  • Vegetables: Chop veggies for pico de gallo and store them in a sealed container for freshness.

To store assembled bowls, keep components separate to maintain freshness. Assembled burrito bowls can be kept in the fridge for up to 3 days.

Frequently Asked Questions

Here are some commonly asked questions about Chicken Burrito Bowls:

  • Can I use frozen chicken? Yes, but it’s best to thaw it first for even cooking.
  • How can I make this recipe gluten-free? Use gluten-free rice and ensure all other ingredients are certified gluten-free.
  • What can I substitute for rice? Quinoa, cauliflower rice, or even lettuce wraps work great!
  • Can I freeze the chicken? Yes, cooked chicken can be frozen for up to 3 months.
  • Is this recipe kid-friendly? Absolutely! You can adjust spices and toppings to suit your kids’ tastes.
  • How do I make this spicier? Add more chipotle chili or fresh jalapenos for heat.
  • What’s the best way to reheat leftovers? Use the microwave or a skillet over low heat to warm without drying out.
  • Can I make this vegan? Yes, use tofu or tempeh instead of chicken and substitute mayo with vegan options.

Nutrition Tips and Dietary Adaptations

This Chicken Burrito Bowl recipe can easily be tailored to fit various dietary needs:

  • Low-Carb: Replace rice with cauliflower rice and skip the corn chips.
  • High-Protein: Add additional black beans or chickpeas for a protein boost.
  • Dairy-Free: Omit the mayonnaise or use a dairy-free alternative.
  • Heart-Healthy: Use skinless chicken breast and incorporate more veggies.

Equipment Recommendations

Here’s a quick list of equipment that will make your cooking experience smoother:

  • Large Bowl: For marinating the chicken and mixing pico de gallo.
  • Heavy-Based Pan: Ideal for cooking chicken evenly without burning.
  • Cutting Board: Essential for dicing vegetables safely.
  • Sharp Knife: For easy chopping of ingredients.
  • Measuring Cups and Spoons: Ensure precise ingredient measurements for the best results.

Serving Suggestions

Here are some ideas for serving your Chicken Burrito Bowls:

  • With a Side Salad: Pair with a refreshing green salad for a light meal.
  • Top with Cheese: Sprinkle with shredded cheese for added flavor.
  • Offer Extra Toppings: Set up a toppings bar with various salsas, guacamole, and chips.
  • Serve with Tortillas: Serve with warm tortillas for a complete burrito experience.

These Chicken Burrito Bowls are not just a meal; they’re an experience! Enjoy the vibrant flavors and customizable nature of this dish. Remember, cooking is all about experimenting and having fun. So, don’t hesitate to make this recipe your own. Enjoy your cooking adventure!

Chicken Burrito Bowls

Prep Time 15 minutes
Cook Time 10 minutes
Total Time 25 minutes
Servings 4 servings
Calories 650
Enjoy a flavorful and customizable chicken burrito bowl packed with fresh ingredients and bold spices.

Ingredients

Marinade

  • 400 g boneless, skinless chicken breast, diced approximately 2 cm ¾ inch pieces
  • 3 tbsp olive oil
  • 1 tsp minced garlic
  • 1 tsp sea salt flakes
  • 1 tsp dried oregano
  • 1 tsp ground cumin
  • 1 tsp sweet paprika
  • 1 tsp onion powder
  • 1 tbsp tomato paste
  • 1 tbsp diced chipotle chilli in adobo sauce (can be substituted with 1 tsp smoked paprika or omitted)
  • 2 tomatoes finely diced (see note 1)
  • 1 small onion (finely diced)
  • 0.33 bunch coriander (cilantro), finely shredded (plus extra for garnish)
  • 0.5 tsp sea salt flakes
  • 1 each lime, juiced

Cooked Rice

  • 450 g microwave rice (long-grain, brown, or Mexican)

Toppings

  • 1 each avocado, mashed
  • 150 g corn kernels (fresh, frozen, or canned)
  • 180 g canned black beans, rinsed and drained
  • 100 g corn chips
  • 1 each jalapeno, sliced (optional)
  • to taste lime wedges (optional)

Chipotle Mayo

  • 125 g whole-egg mayonnaise
  • 1 tbsp diced chipotle chilli in adobo sauce (can be substituted with ½ tsp smoked paprika)
  • 0.5 tsp sea salt flakes
  • 0.25 tsp freshly cracked black pepper
  • 1 tbsp fresh lime juice

Instructions 

  • Marinate the chicken with all marinade ingredients, coating evenly, then set aside.
  • Make pico de gallo by mixing diced tomatoes, onion, cilantro, lime juice, and salt. Set aside.
  • Prepare chipotle mayo by mixing mayonnaise with chipotle, salt, pepper, and lime juice. Set aside.
  • Cook the chicken in a pan over medium-high heat for 6-8 minutes until cooked through, adding water to scrape up sticky bits.
  • Divide rice and chicken among bowls, then top with avocado, corn, black beans, chips, pico de gallo, jalapenos, and drizzle with chipotle mayo and extra lime if desired.

Notes

For extra flavor, let the chicken marinate longer or add your favorite toppings.
Calories: 650kcal
Cost: $15
Course: Main Course
Cuisine: Mexican
Keyword: burrito, Chicken, Mexican

Discover the Flavors of Morocco with this Exquisite Chicken Couscous Recipe

Welcome to a culinary adventure that will transport your taste buds straight to Morocco! Today, we’re diving into a delightful recipe for Moroccan-Inspired Chicken Couscous, a dish that beautifully marries succulent chicken thighs with aromatic spices, sweet dates, and fluffy pearl couscous. This comforting meal is not only easy to prepare but also makes for a satisfying dinner option that you can whip up any night of the week. In less than an hour, you can enjoy a plate brimming with flavors that are both exotic and familiar, making it a perfect choice for food lovers everywhere.

Whether you’re a seasoned chef or a novice in the kitchen, this recipe will guide you through each step with clarity. Let’s embark on this flavorful journey together!

Why You’ll Love This Recipe

  • Quick and Easy: This dish comes together in under an hour, making it perfect for busy weeknights when you want something delicious without spending hours in the kitchen.
  • Flavorful and Aromatic: The use of spices like cumin, cinnamon, and turmeric infuses the chicken and couscous with rich, warm flavors that will transport you to North Africa.
  • Healthy Ingredients: Packed with lean protein from chicken thighs, fiber from couscous, and natural sweetness from dates, this meal is as nutritious as it is delicious.
  • Versatile Dish: You can easily customize this recipe by adding your favorite vegetables or adjusting the spices to suit your taste, ensuring a new experience with each preparation.
  • Great for Leftovers: This dish stores well, making it a perfect option for meal prep. Enjoy it for lunch the next day or serve it at a gathering!

Ingredients: What You’ll Need

Gathering quality ingredients is the first step to creating a memorable dish. Here’s what you’ll need for our Moroccan-Inspired Chicken Couscous:

  • Chicken Thighs: 1.5 lbs, boneless and skinless for easy cooking.
  • Pearl Couscous: 1 cup, which provides a lovely texture and absorbs flavors beautifully.
  • Sweet Dates: ½ cup, chopped for a touch of sweetness that pairs perfectly with savory spices.
  • Cumin: 1 tsp, to add depth and warmth.
  • Cinnamon: ½ tsp, for a hint of sweetness and warmth.
  • Turmeric: ½ tsp, not only for flavor but also for its vibrant color.
  • Fresh Mint: ¼ cup, chopped for an aromatic, refreshing finish.
  • Garlic: 2 cloves, minced to enhance the overall flavor profile.

How to Make Moroccan-Inspired Chicken Couscous

Juicy chicken thighs nestled in flavorful pearl couscous with spices and dates.

Now that we have our ingredients ready, let’s dive into the cooking process. Follow these simple steps to create a dish that your family will love:

Step 1: Sear the Chicken Thighs

In a large skillet over medium-high heat, add a splash of olive oil. Once hot, add the chicken thighs and sear them for about 5-7 minutes on each side until they are golden brown. This step locks in the juices and flavor.

Step 2: Simmer with Couscous and Spices

Once the chicken is browned, reduce the heat to medium. Add the chopped dates, cumin, cinnamon, turmeric, minced garlic, and 2 cups of water to the skillet. Stir to combine, then add the pearl couscous. Bring to a gentle simmer.

Step 3: Cook Until Tender

Cover the skillet and let everything simmer for about 15-20 minutes, or until the couscous is tender and has absorbed most of the liquid. Check the chicken for doneness; it should reach an internal temperature of 165°F (75°C).

Step 4: Finishing Touches

Once cooked, remove the skillet from heat. Fluff the couscous with a fork and stir in the chopped fresh mint. This adds a burst of brightness to the dish!

Pro Tips for Making Moroccan Chicken Couscous

  • Use Bone-In Chicken: For even more flavor, consider using bone-in chicken thighs. Just adjust the cooking time to ensure the chicken is cooked through.
  • Don’t Skip the Searing: Searing the chicken is crucial for developing flavor, so don’t rush this step!
  • Adjust the Spice Level: If you prefer a bit of heat, add a pinch of cayenne pepper or some harissa to the mix.
  • Try Different Dates: Medjool dates are plump and sweet, but you can use any variety you like.
  • Cook Couscous Separately: If you prefer a firmer texture, you can cook the couscous separately and then mix it in.
  • Experiment with Vegetables: Toss in some bell peppers, zucchini, or carrots for added nutrition and color.
  • Let It Rest: Allowing the dish to sit for a few minutes after cooking enhances the flavors.
  • Keep it Fresh: Always add fresh herbs at the end to maintain their vibrant flavor and aroma.

Common Mistakes and Troubleshooting

Even the best chefs make mistakes. Here are some common pitfalls and how to avoid them:

  • Overcooking the Chicken: Keep an eye on the chicken’s internal temperature to prevent it from drying out.
  • Too Much Liquid: If the couscous is too watery, remove the lid and let it simmer uncovered for a few minutes to evaporate excess moisture.
  • Not Fluffing the Couscous: Fluffing the couscous after cooking is essential to achieve that light, airy texture—don’t skip this step!

Variations of Moroccan Chicken Couscous

Want to switch things up? Here are some variations to try:

  • Vegetarian Option: Replace chicken with chickpeas or roasted vegetables for a hearty vegetarian dish.
  • Spicy Moroccan Couscous: Add chopped jalapeños or a splash of hot sauce for an extra kick.
  • Nutty Couscous: Stir in some toasted almonds or pine nuts for a crunchy texture.
  • Fruit-Infused Couscous: Incorporate dried apricots or raisins for a sweet twist.

Storage and Make-Ahead Instructions

This Moroccan chicken couscous is perfect for meal prep! Here’s how to store and reheat it:

  • Refrigeration: Store leftovers in an airtight container in the fridge for up to 4 days.
  • Freezing: You can freeze the dish for up to 3 months. Just ensure it’s cooled completely before freezing.
  • Reheating: Reheat in the microwave or on the stovetop, adding a splash of water to regain moisture.

FAQs

  • Can I use regular couscous instead of pearl couscous? Yes, but you may need to adjust the cooking time as regular couscous cooks faster.
  • Is this dish gluten-free? To make it gluten-free, substitute couscous with quinoa or a gluten-free grain.
  • How can I make it dairy-free? This recipe is naturally dairy-free, so you’re all set!
  • What can I serve with Moroccan chicken couscous? Pair it with a simple salad or roasted vegetables for a complete meal.
  • Can I make this dish in advance? Absolutely! This dish stores well and flavors improve as it sits.
  • What’s the best way to chop dates? Use kitchen scissors or a sharp knife to chop dates easily.
  • Can I add other proteins? Yes, feel free to substitute chicken with lamb or shrimp for a different flavor profile.
  • What should I do if my couscous is too mushy? If the couscous turns mushy, try adding some cooked grains or nuts to absorb excess moisture.

Nutrition Tips and Dietary Adaptations

This Moroccan chicken couscous is not only delicious but also offers several nutritional benefits:

  • High in Protein: Chicken thighs provide a great source of protein necessary for muscle repair and growth.
  • Rich in Fiber: Couscous and dates add fiber, which aids digestion and promotes a healthy gut.
  • Antioxidants Galore: Spices like turmeric and cinnamon are loaded with antioxidants that can help reduce inflammation.
  • Low in Saturated Fat: Using skinless chicken thighs keeps the saturated fat content lower, making it a heart-healthy option.

Equipment Recommendations

To make this recipe even easier, consider having these kitchen tools on hand:

  • Large Skillet: A non-stick skillet is ideal for even cooking and easy cleanup.
  • Meat Thermometer: To ensure your chicken is cooked to perfection.
  • Measuring Cups and Spoons: Accurate measurements ensure your flavors are spot on.
  • Sharp Knife: For chopping ingredients efficiently.

Serving Suggestions

When it’s time to serve, consider these ideas to elevate your dining experience:

  • Garnish: Top with additional fresh mint and a squeeze of lemon for a bright finish.
  • Side Dishes: Serve alongside a refreshing cucumber salad or some warm pita bread.
  • Presentation: Serve in a large bowl for a communal feel, encouraging sharing and conversation.

In Conclusion, this Moroccan-Inspired Chicken Couscous is a versatile, flavorful, and easy-to-make dish that everyone will love. It’s perfect for a family dinner or a casual gathering with friends. Remember, the joy of cooking is all about experimenting and making the dish your own. So, roll up your sleeves, gather your ingredients, and let’s create something wonderful together! Happy cooking!

Moroccan-Inspired Chicken Couscous

Prep Time 10 minutes
Cook Time 30 minutes
Total Time 40 minutes
Servings 4 servings
Calories 550
A flavorful dish combining tender chicken thighs with aromatic spices and sweet dates, served over pearl couscous with fresh mint.

Ingredients

Protein

  • 4 pieces chicken thighs
  • 1.5 cups pearl couscous
  • 1/2 cup sweet dates

Spices

  • 1 teaspoon cumin
  • 1/2 teaspoon cinnamon
  • 1/2 teaspoon turmeric

Fresh herbs & aromatics

  • 2 cloves garlic (minced)
  • 1/4 cup fresh mint (chopped)

Instructions 

  • Sear the chicken thighs until browned.
  • Simmer the chicken with pearl couscous, sweet dates, spices, garlic, and water until cooked through and flavors meld.
  • Finish with chopped fresh mint and a garlic topping before serving.

Notes

For extra flavor, toast the spices before adding to the dish.
Calories: 550kcal
Cost: $15
Course: Main Course
Cuisine: Moroccan
Keyword: Chicken, couscous, spices

Whip Up Delightful Mini Donuts: The Ultimate Recipe Guide

Welcome to the world of delightful mini donuts! If you’re craving a sweet treat that’s easy to make and hard to resist, you’ve come to the right place. This comprehensive guide will walk you through the process of making fluffy, delicious mini donuts that are perfect for any occasion. Whether it’s a cozy breakfast, a fun snack for the kids, or a sweet addition to a party spread, mini donuts are sure to impress. Let’s dive in and discover how to create these tasty bites of joy!

Why You’ll Love This Recipe

There’s so much to adore about these mini donuts! Here are just a few reasons to get excited:

  • Quick and Easy: This recipe is straightforward, requiring minimal effort and time, making it perfect for busy days.
  • Customizable Toppings: You can top your donuts with a variety of icings, sprinkles, or even chocolate glaze to suit everyone’s taste.
  • Perfect for Sharing: Mini donuts are bite-sized delights that make sharing easy and fun, perfect for gatherings.
  • Kid-Friendly: Kids will love helping to make and decorate these mini treats, making it a fun family activity.
  • Versatile Base: The basic donut recipe can be adapted with different flavors and ingredients to keep things exciting.

Ingredients Breakdown

Let’s take a closer look at what you’ll need to create these delightful mini donuts. Here’s the ingredient list along with some substitution options:

  • All-Purpose Flour: 1 cup. You can substitute with whole wheat flour for a healthier option.
  • Granulated Sugar: 1 3/4 cup. For a lower-calorie option, try using coconut sugar or a sugar substitute.
  • Baking Powder: 1 tsp. A must for that fluffy texture!
  • Baking Soda: 1/4 tsp. This helps the donuts rise perfectly.
  • Salt: 1/4 tsp. Enhances the flavor.
  • Buttermilk: 1/2 cup. You can use regular milk with a splash of vinegar as a substitute.
  • Egg: 1 large. If you’re looking for an egg-free option, try using a flax egg.
  • Unsalted Butter: 2 tbsp, melted. Substitute with coconut oil for a dairy-free option.
  • Vanilla Extract: 1 tsp. Adds lovely flavor, but you can experiment with almond extract for a different twist.
  • Optional Toppings: Cinnamon sugar, powdered sugar, chocolate glaze, sprinkles.

How to Make Mini Donuts

Side view of several mini donuts showcasing a glazed finish and colorful sprinkles.

Ready to get cooking? Follow these simple steps to whip up your mini donuts:

  1. Preheat your oven to 350°F (175°C).
  2. Grease a mini donut pan lightly to ensure easy release.
  3. In a large bowl, whisk together the flour, sugar, baking powder, baking soda, and salt.
  4. In another bowl, whisk the buttermilk, egg, melted butter, and vanilla until smooth.
  5. Combine the wet and dry ingredients just until mixed—be careful not to overmix!
  6. Fill the mini donut pan about 2/3 full using a spoon or piping bag.
  7. Bake for 8-10 minutes, or until the donuts spring back when touched.
  8. Allow to cool slightly before removing from the pan.
  9. Top with your favorite glaze or coating while still slightly warm for the best adherence.

Pro Tips for Perfect Mini Donuts

To ensure your mini donuts turn out perfectly every time, keep these pro tips in mind:

  • Don’t Overmix: Mixing too much can lead to dense donuts. Mix until just combined.
  • Room Temperature Ingredients: Using room temperature eggs and buttermilk helps achieve a better rise.
  • Use a Piping Bag: For neat filling of the donut pan, a piping bag can make the process cleaner and easier.
  • Watch the Baking Time: Oven temperatures can vary; start checking at 8 minutes to avoid overbaking.
  • Customize Your Flavors: Add spices like nutmeg or cinnamon directly into the batter for extra flavor.
  • Experiment with Toppings: Get creative with your toppings! Try a maple glaze or a nutty topping for variety.
  • Cool Before Glazing: Allow your donuts to cool slightly before glazing to prevent the icing from melting.
  • Store Properly: Keep leftover donuts in an airtight container to maintain freshness.

Common Mistakes to Avoid

Even the best cooks can run into hiccups. Here are some common mistakes to watch out for:

  • Overfilling the Pan: Filling the pan too much can lead to overflowing donuts. Stick to the 2/3 full rule.
  • Skipping the Cooling Step: Glazing too soon can lead to messy results. Allow the donuts to cool slightly first.
  • Ignoring Texture: If your donuts are too dense, double-check your mixing and baking times.
  • Using Cold Ingredients: Cold ingredients can affect the rise. Always use room temperature items when possible.

Flavor Variations

Want to switch things up? Here are some fun variations you can try:

  • Chocolate Mini Donuts: Add cocoa powder to the batter for a rich chocolate flavor.
  • Pumpkin Spice Donuts: Incorporate pumpkin puree and pumpkin spice for a seasonal twist.
  • Maple Glazed: Create a maple glaze using powdered sugar and maple syrup for a delicious finish.
  • Coconut-Lime Mini Donuts: Add shredded coconut and lime zest to the batter for a tropical flavor.

Storage and Make-Ahead Instructions

Want to prepare your mini donuts in advance? Here’s how to store them:

  • Room Temperature: Store in an airtight container for up to 2 days.
  • Refrigerator: Keep for up to a week in the fridge, but note that they may lose some freshness.
  • Freezing: You can freeze unglazed donuts for up to 3 months. Thaw at room temperature before glazing.

Frequently Asked Questions

Got questions? Here are some answers to common concerns:

  • Can I use a regular donut pan? Yes, but baking time may vary. Check for doneness around the 10-minute mark.
  • How do I know when my donuts are done? They should spring back when touched and have a golden-brown color.
  • Can I make these donuts gluten-free? Absolutely! Substitute the all-purpose flour with a gluten-free blend.
  • What can I use instead of buttermilk? You can use plain yogurt or regular milk with a splash of vinegar.
  • How can I make these donuts healthier? Substitute half of the sugar with applesauce and use whole wheat flour.
  • Can I bake these mini donuts in an air fryer? Yes, reduce the temperature to 325°F (160°C) and check for doneness around 5-7 minutes.
  • What’s the best way to glaze my donuts? Dip them while they’re still warm for the best coverage.
  • How do I make my donuts fluffier? Ensure your baking powder and soda are fresh, and don’t overmix the batter.

Nutrition Tips and Dietary Adaptations

Want to enjoy your mini donuts while being mindful of nutrition? Here are some tips:

  • Lower Sugar: Reduce sugar or use a substitute to decrease calories.
  • Whole Grains: Use whole wheat flour instead of all-purpose for added fiber.
  • Vegan Option: Replace the egg with a flax egg and use plant-based milk and butter.
  • Low-Calorie Glaze: Use a mix of powdered sugar and water for a lighter glaze.

Equipment Recommendations

To make your donut-making experience easier, here are some essentials:

  • Mini Donut Pan: A must-have for perfectly shaped mini donuts.
  • Piping Bag: Great for filling the donut pan neatly.
  • Whisk: For mixing your dry and wet ingredients thoroughly.
  • Baking Sheet: Useful for cooling your donuts after baking.

Serving Suggestions

Now that your mini donuts are ready, here are some fun serving ideas:

  • Donut Bar: Set up a donut bar with various toppings and icings for a fun party atmosphere.
  • Pair with Coffee: Serve with a hot cup of coffee or tea for a delightful breakfast treat.
  • Gift Them: Package them in cute boxes as a thoughtful homemade gift for friends.
  • Mix and Match: Create a variety pack with different flavors and toppings for a fun dessert spread.

In Conclusion, making delightful mini donuts is not only rewarding but also a fun activity that can bring friends and family together. With this recipe and all the tips provided, you’re well on your way to becoming a mini donut master! Remember, the joy of cooking comes from the experience, so embrace the process and enjoy every bite of your sweet creations. Happy baking!

Mini Donuts

Prep Time 10 minutes
Cook Time 10 minutes
Total Time 20 minutes
Servings 12 pieces
Calories 150
Delight in these quick and easy mini donuts, perfect for a sweet snack or breakfast treat.

Ingredients

Dry Ingredients

  • 1 cup all-purpose flour
  • 1 3/4 cup granulated sugar
  • 1 tsp baking powder
  • 0.25 tsp baking soda
  • 0.25 tsp salt

Wet Ingredients

  • 0.5 cup buttermilk
  • 1 egg egg
  • 2 tbsp unsalted butter melted
  • 1 tsp vanilla extract

Optional Toppings

  • Cinnamon sugar (optional)
  • Powdered sugar (optional)
  • Chocolate glaze (optional)
  • Sprinkles (optional)

Instructions 

  • Preheat oven to 350°F (175°C). Lightly grease a mini donut pan.
  • Mix dry ingredients: flour, sugar, baking powder, baking soda, and salt.
  • Whisk wet ingredients: buttermilk, egg, melted butter, and vanilla.
  • Combine wet and dry just until mixed. Fill donut pan 2/3 full.
  • Bake 8-10 minutes until donuts spring back. Cool slightly and add toppings.

Notes

Use a piping bag for easier filling of the donut pan.
Calories: 150kcal
Cost: $8
Course: Dessert
Cuisine: American
Keyword: Donuts

The Joy of Fluffy Greek Yogurt Pancakes

Welcome to a culinary journey that transforms your mornings! If you’re looking for a breakfast that not only satisfies your cravings but also brings joy to your plate, you’re in the right place. These Fluffy Greek Yogurt Pancakes are not just pancakes; they are a delightful way to start your day. With their soft, airy texture and rich flavor, they are destined to become a favorite in your breakfast repertoire. In this guide, we will dive into everything you need to know about making the perfect pancakes, ensuring that every bite is a burst of happiness.

Why You’ll Love This Recipe

These pancakes aren’t just delicious; they come packed with benefits that make them a must-try:

  • Fluffiness Guaranteed: The combination of Greek yogurt and baking powder ensures a light and airy texture that melts in your mouth.
  • Protein Power: With Greek yogurt as a star ingredient, these pancakes pack a protein punch, keeping you full and energized throughout the morning.
  • Simple Ingredients: Most of the items are pantry staples, making this recipe quick and easy to whip up anytime.
  • Customizable: You can easily adapt the recipe by adding fruits, spices, or even swapping for gluten-free flour.
  • Meal Prep Friendly: These pancakes can be made in advance and stored, making them a perfect solution for busy mornings.

Ingredients You’ll Need

To create these fluffy delights, gather the following ingredients:

  • 1 cup all-purpose flour: This serves as the foundation for perfectly fluffy pancakes.
  • 2 tablespoons granulated sugar: Optional, for those who prefer a less sweet start.
  • 2 teaspoons baking powder: Essential for lightness and fluffiness.
  • 1/4 teaspoon salt: This balances the flavors beautifully.
  • 1 cup plain Greek yogurt: The star ingredient that adds moisture and a lovely tang.
  • 1/2 cup milk: Whole milk adds richness; you can substitute with almond milk for a dairy-free option.
  • 1 large egg: This binds the mixture together.
  • 2 tablespoons melted butter: For richness and to prevent sticking.
  • 1 cup fresh berries: A flavorful topping that adds freshness.
  • Maple syrup: Drizzle generously for a sweet finish.
  • Powdered sugar: Optional, for an extra touch of sweetness.

How to Make Fluffy Greek Yogurt Pancakes

Side view of golden-brown pancakes with a drizzle of maple syrup and powdered sugar.

Follow these simple steps to create your pancakes:

  • Step 1: Mix Dry Ingredients: In a bowl, whisk together the flour, sugar, baking powder, and salt until well combined.
  • Step 2: Combine Wet Ingredients: In another bowl, mix the Greek yogurt, milk, egg, and melted butter until smooth.
  • Step 3: Fold Together: Gently fold the wet ingredients into the dry ingredients, taking care not to overmix; lumps are okay!
  • Step 4: Cook the Pancakes: Heat a non-stick skillet over medium heat. Pour 1/4 cup of batter for each pancake. Cook until bubbles form on the surface, then flip and cook until golden brown.
  • Step 5: Keep Warm: Place cooked pancakes on a plate covered with a clean kitchen towel to keep them warm while you finish cooking the rest.

Pro Tips for Perfect Pancakes

Here are some expert insights to elevate your pancake game:

  • Don’t Overmix: Stir until just combined. Overmixing can lead to dense pancakes.
  • Use Room Temperature Ingredients: Allow your eggs and dairy to sit out for a few minutes to help them blend more evenly.
  • Preheat Your Pan: Make sure your skillet is hot enough to create a nice sear without burning.
  • Experiment with Flavors: Add vanilla extract or spices like cinnamon to the batter for extra flavor.
  • Keep a Warm Oven: If making a larger batch, keep pancakes warm in an oven set to low.
  • Use a Measuring Cup: A 1/4 cup measuring cup helps ensure evenly sized pancakes.
  • Try Different Toppings: Fresh fruit, yogurt, or nuts can enhance the pancake experience.
  • Freeze for Later: Make a big batch and freeze them in an airtight container for quick breakfasts!

Common Mistakes and Troubleshooting

Even the best cooks can encounter hiccups. Here’s how to troubleshoot:

  • Pancakes are too dense: This is often due to overmixing the batter. Remember, lumps are okay!
  • Burnt pancakes: If the outside is burning before the inside is cooked, lower the heat and allow more cooking time.
  • Pancakes stick to the pan: Ensure your pan is adequately greased and heated before adding the batter.
  • Flavor is lacking: Don’t forget the salt and sugar; they enhance the overall taste.

Variations to Try

Looking to mix things up? Here are some fun variations:

  • Banana Pancakes: Add 1 mashed banana to the batter for a sweet banana flavor.
  • Chocolate Chip Pancakes: Fold in chocolate chips for a decadent twist.
  • Blueberry Pancakes: Mix in fresh or frozen blueberries for a burst of flavor.
  • Spiced Pumpkin Pancakes: Add 1/2 cup pumpkin puree and spices (cinnamon, nutmeg) for a seasonal treat.

Storage and Make-Ahead Instructions

If you want to prepare these pancakes in advance, here’s how:

  • Refrigerate: Store cooled pancakes in an airtight container in the fridge for up to 3 days.
  • Freeze: Layer pancakes between sheets of wax paper in an airtight container and freeze for up to 2 months.
  • Reheat: To reheat, pop them in the toaster or microwave until warmed through.

Frequently Asked Questions

Have questions? Here are some common inquiries:

  • Can I use whole wheat flour?: Yes, whole wheat flour can be used for a healthier option, though the texture may be denser.
  • What if I don’t have Greek yogurt?: You can substitute with regular yogurt or even buttermilk, adjusting the flour slightly if needed.
  • Are these pancakes gluten-free?: Use a gluten-free flour blend to make them gluten-free.
  • Can I make these pancakes dairy-free?: Substitute Greek yogurt and milk with dairy-free alternatives.
  • How can I make these pancakes vegan?: Use a flax egg and a dairy-free yogurt substitute.
  • What toppings do you recommend?: Fresh fruits, yogurt, nuts, or a drizzle of honey or maple syrup all work beautifully.
  • How thick should the batter be?: The batter should be thick but pourable. Adjust with a bit more milk if needed.
  • Can I double the recipe?: Absolutely! Just double all ingredients for more fluffy pancakes.

Nutrition Tips and Dietary Adaptations

Here are some tips for making these pancakes even healthier:

  • Reduce Sugar: You can cut down on the sugar or use natural sweeteners like honey or maple syrup.
  • Add Protein: Mix in some protein powder for an extra boost.
  • Incorporate Flaxseed: Adding ground flaxseed can enhance the fiber content.

Equipment Recommendations

Before you get cooking, gather the following tools:

  • Non-Stick Skillet: A quality skillet ensures even cooking and easy flipping.
  • Mixing Bowls: Have both large and medium-sized bowls for mixing ingredients.
  • Whisk: A whisk is essential for combining your wet and dry ingredients effectively.
  • Spatula: A good spatula will help you flip those pancakes with ease.

Serving Suggestions

These pancakes are versatile! Here are some serving ideas:

  • With Fresh Berries: Top with a mix of strawberries, blueberries, and raspberries for a fruity finish.
  • Maple Syrup Drizzle: A generous drizzle of maple syrup adds sweetness and richness.
  • Whipped Cream: A dollop of whipped cream can elevate your pancake experience.
  • Nut Butter: Spread almond or peanut butter for added protein and flavor.

In conclusion, making Fluffy Greek Yogurt Pancakes is not just about following a recipe; it’s about creating a moment of joy in your kitchen. Whether you’re cooking for yourself, family, or friends, these pancakes promise to delight and satisfy. So grab your ingredients, and let’s make breakfast magical!

Fluffy Greek Yogurt Pancakes Easy Delicious

Prep Time 10 minutes
Cook Time 15 minutes
Total Time 25 minutes
Servings 4 servings
Calories 350
Enjoy these light and fluffy Greek yogurt pancakes, perfect for a quick and satisfying breakfast.

Ingredients

Dry ingredients

  • 1 cup all-purpose flour (The foundation for perfectly fluffy pancakes.)
  • 2 tablespoons granulated sugar (Optional for a less sweet start.)
  • 2 teaspoons baking powder (For lightness and fluffiness.)
  • 0.25 teaspoon salt (To balance flavors.)

Wet ingredients

  • 1 cup plain Greek yogurt (The star ingredient for moisture.)
  • 0.5 cup milk (Whole milk adds richness.)
  • 1 large egg (Binds the mixture.)
  • 2 tablespoons melted butter (For richness and to prevent sticking.)

Toppings

  • 1 cup fresh berries (A flavorful topping.)
  • to taste none maple syrup (Drizzle generously.)
  • to taste none powdered sugar (Optional for sweetness.)

Instructions 

  • Mix dry ingredients in a bowl.
  • Whisk wet ingredients together.
  • Combine wet and dry ingredients until just mixed.
  • Pour batter onto a hot griddle; cook until bubbles form, then flip.
  • Serve topped with berries, syrup, and powdered sugar if desired.

Notes

For extra fluffiness, let the batter rest for 5 minutes before cooking.
Calories: 350kcal
Cost: $10
Course: Breakfast
Cuisine: Greek
Keyword: pancakes

Revitalize Your Mornings with a Creamy Peach Yogurt Smoothie

Kickstart your day with this refreshing and nutritious Peach Yogurt Smoothie! A delightful blend of fresh or frozen peaches, creamy Greek yogurt, and a drizzle of honey, this smoothie is not only incredibly easy to make, but it also packs a punch of flavor and nourishment. Perfect for busy mornings or a mid-day pick-me-up, this recipe is sure to become a staple in your kitchen.

Why You’ll Love This Recipe

This Peach Yogurt Smoothie is a game-changer for your morning routine. Here are five reasons why you’ll absolutely adore it:

  • Quick and Easy: This smoothie can be whipped up in just minutes, making it ideal for those hectic mornings when you’re short on time.
  • Nutrient-Rich: Packed with protein from Greek yogurt and vitamins from fresh or frozen peaches, this smoothie is a nutritional powerhouse.
  • Customizable: You can easily tweak the ingredients to suit your taste preferences or dietary needs, whether you’re looking for dairy-free options or additional toppings.
  • Deliciously Satisfying: The combination of creamy yogurt and sweet peaches creates a rich, satisfying texture that keeps you full longer.
  • Perfect for Any Time: Enjoy it for breakfast, as a snack, or even as a light dessert—this smoothie fits into any part of your day!

Ingredient Breakdown

Let’s take a closer look at the ingredients you’ll need to make this delightful Peach Yogurt Smoothie, along with some handy substitutions.

  • Frozen Peach Slices: 5 oz of frozen peaches provide a sweet, fruity base. If you don’t have frozen peaches, you can use about 1 large fresh peach, sliced, along with 3 ice cubes for that cold, refreshing taste.
  • Plain Greek Yogurt: 1 cup of Greek yogurt adds creaminess and protein. For a lighter version, consider using non-fat yogurt or a plant-based yogurt alternative.
  • Milk of Choice: 2-3 tablespoons of your preferred milk (dairy or non-dairy) help achieve the desired consistency. Almond milk, oat milk, or coconut milk work wonderfully!
  • Honey: 1 tablespoon of honey sweetens the deal. If you prefer, you can substitute agave syrup or maple syrup for a vegan option.

Pro Tips for the Perfect Smoothie

Side view of a peach yogurt smoothie in a tall glass, showcasing its smooth texture and vibrant color.

Here are some expert insights to ensure your Peach Yogurt Smoothie turns out perfectly every time:

  • Blend Order Matters: Start by blending the yogurt and milk first, then gradually add in the peaches for a smoother consistency.
  • Adjust Thickness: If you like a very thick smoothie, use less milk. For a thinner texture, add more.
  • Sweetness Level: Taste your smoothie before adding more honey. The sweetness of the peaches can vary!
  • Frozen vs. Fresh: Using frozen peaches will result in a thicker smoothie, while fresh peaches yield a lighter texture.
  • Add-ins: For an extra nutrient boost, consider adding spinach, chia seeds, or protein powder.
  • Chill Your Ingredients: For the best flavor and texture, ensure your ingredients are cold. This smoothie is best enjoyed chilled!
  • Don’t Over-Blend: Blend just until smooth to avoid a watery consistency.
  • Garnish Creatively: Top with sliced peaches, granola, or nuts for added texture and flavor.

Common Mistakes and Troubleshooting

Even the best cooks can run into issues. Here are some common mistakes to avoid, along with solutions:

  • Too Thick: If your smoothie ends up too thick, simply add a splash more milk and blend again until smooth.
  • Too Sweet: If you find it’s overly sweet, add a squeeze of lemon juice to balance the flavors.
  • Grainy Texture: This can occur if the yogurt isn’t blended thoroughly. Ensure you blend long enough for a creamy finish.
  • Flavor Flatness: If the flavor seems dull, consider adding a pinch of salt or vanilla extract to enhance the overall taste.

Delicious Variations to Try

Feeling adventurous? Here are some fun variations to mix up your Peach Yogurt Smoothie experience:

  • Peach & Strawberry: Substitute half of the peaches with fresh or frozen strawberries for a delicious twist.
  • Peach Banana Bliss: Add half a ripe banana for a creamier texture and an extra layer of flavor.
  • Green Peach Smoothie: Toss in a handful of spinach or kale for a nutrient boost without compromising the peach flavor.
  • Peach Protein Punch: Mix in a scoop of your favorite protein powder for a post-workout recovery drink.

Storage and Make-Ahead Instructions

This smoothie is best enjoyed fresh, but if you have leftovers or want to prepare in advance, here’s how:

  • Refrigeration: Store any leftover smoothie in an airtight container in the refrigerator for up to 24 hours. Give it a good stir before enjoying.
  • Freezing: Freeze individual portions in ice cube trays or freezer-safe bags. Simply blend with milk when you’re ready to enjoy!

Frequently Asked Questions

Here are some common questions about making the Peach Yogurt Smoothie:

  • Can I use canned peaches? Yes, canned peaches can be used! Just drain them well to avoid a watery smoothie.
  • Is this smoothie vegan? It can be made vegan by using a plant-based yogurt and sweetener.
  • What other fruits can I add? Feel free to experiment with other fruits like mango, berries, or kiwi!
  • Can I add greens? Absolutely! Spinach or kale blends well with this smoothie.
  • How can I make it more filling? Add oats, nut butter, or protein powder for a more substantial smoothie.
  • What’s the best yogurt to use? Greek yogurt is thick and creamy, but any yogurt will work based on your preference.
  • Can I use a blender instead of a food processor? Yes, a blender is perfect for smoothies!
  • How can I make this smoothie more nutritious? Consider adding chia seeds, flaxseeds, or a scoop of your favorite protein powder.

Nutrition Tips and Dietary Adaptations

This Peach Yogurt Smoothie not only tastes great, but it can also fit into various dietary needs:

  • Protein Boost: Use high-protein yogurt or add protein powder to enhance the nutritional value.
  • Dairy-Free Options: Substitute Greek yogurt with a dairy-free yogurt alternative and use almond or coconut milk.
  • Low-Carb Option: Use unsweetened almond milk and a sugar-free sweetener to keep carbs low.

Equipment Recommendations

To make your smoothie-making experience smooth and fuss-free, here’s what you’ll need:

  • High-Powered Blender: A good blender is essential for achieving that creamy texture.
  • Measuring Cups: For accurate ingredient measurements, always use the right measuring cups.
  • Spatula: A spatula comes in handy for scraping down the sides of your blender bowl.

Serving Suggestions

To elevate your smoothie experience, consider these serving ideas:

  • Garnish: Top with a sprinkle of granola, sliced almonds, or fresh fruit for added crunch.
  • Pairing: Serve alongside a slice of whole-grain toast with nut butter for a balanced breakfast.
  • Presentation: Use clear glasses to showcase the vibrant color of the smoothie, making it visually appealing!

Conclusion

Making a Peach Yogurt Smoothie is not only a delightful way to start your day but also a simple way to nourish your body. With its creamy texture, sweet flavor, and numerous health benefits, this smoothie is sure to become a favorite in your household. Remember, cooking should be fun and stress-free, so don’t hesitate to experiment and make this recipe your own. Enjoy your smoothie, and happy blending!

Peach Yogurt Smoothie

Prep Time 5 minutes
Total Time 5 minutes
Servings 1 cup
Calories 180
A refreshing and healthy peach yogurt smoothie perfect for a quick breakfast or snack.

Ingredients

Fruits

  • 5 oz frozen peach slices (or about 1 large fresh peach, sliced with 3 ice cubes if using fresh)
  • 1 cup plain Greek yogurt
  • 2-3 TBS milk of choice
  • 1 TBS honey

Instructions 

  • Add all ingredients to a blender.
  • Blend until smooth.

Notes

You can adjust the sweetness by adding more honey or use fresh peaches for a more vibrant flavor.
Calories: 180kcal
Cost: $4
Course: Breakfast, Snack
Keyword: Peach, Smoothie, Yogurt