Author

Steven

Browsing

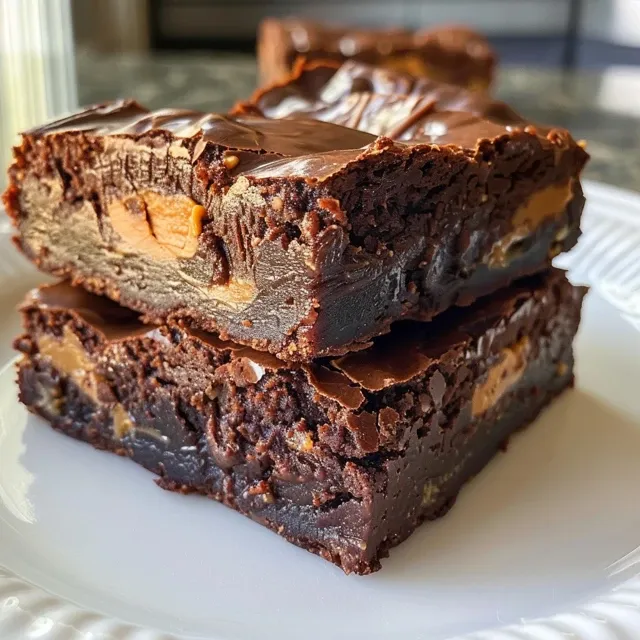
Indulge in Decadent Chocolate Brownies

Welcome to the world of **decadent chocolate brownies** that you can whip up in no time! This recipe is perfect for anyone looking to create a rich, fudgy treat that satisfies the chocolate cravings without stressing you out. Whether you’re hosting a gathering, treating yourself, or surprising your family, these brownies will surely impress. Let’s dive into why this recipe is a must-try and how you can master it.

Why You’ll Love This Recipe

There are countless recipes for brownies out there, but this one stands out for several reasons:

  • Quick and Easy: With simple ingredients and straightforward steps, this brownie recipe comes together in about 30 minutes, making it perfect for those last-minute dessert cravings.
  • Rich Flavor: The combination of **chocolat noir** and **beurre demi-sel** gives these brownies a deep, indulgent chocolate flavor that’s hard to resist.
  • Fudgy Texture: Say goodbye to dry brownies! This recipe ensures a beautifully fudgy interior with a slight crust on top.
  • Endless Customization: You can easily add your favorite mix-ins like nuts, chocolate chips, or even caramel to make your brownies uniquely yours.
  • Perfect for Any Occasion: Whether it’s a birthday party, a picnic, or just a cozy night in, these brownies are versatile enough for any setting.

Ingredient Breakdown

Let’s take a closer look at what you’ll need for this brownie recipe, along with some fantastic substitutions:

  • 200g de chocolat noir: Dark chocolate provides richness; you can substitute with semi-sweet chocolate if preferred.
  • 70g de beurre demi-sel: Unsalted butter works too; just add a pinch of salt if you go this route.
  • 2 œufs: Eggs help bind the ingredients; for a vegan option, use flax eggs.
  • 150g de sucre roux: This recipe benefits from the depth of brown sugar, but regular granulated sugar can be used as well.
  • Une pincée de vanille en poudre: Vanilla enhances flavor; feel free to use vanilla extract instead.
  • 115g de farine de blé: All-purpose flour is ideal; you can substitute with gluten-free flour if necessary.
  • 25g de maïzena: Cornstarch helps create a soft texture; it can be omitted if you prefer.
  • 1/2 sachet de levure chimique: Baking powder gives lift; make sure it’s fresh for the best results.
  • Fleur de sel: A sprinkle on top enhances flavor; omit if you prefer a sweeter brownie.

Pro Tips for Perfect Brownies

Close-up of rich, dark chocolate brownies with a glossy surface and a sprinkle of sea salt.

Ready to become a brownie master? Here are some expert insights:

  • Room Temperature Ingredients: Ensure your eggs and butter are at room temperature for a smoother batter.
  • Don’t Overmix: Mix just until combined. Overmixing can lead to tough brownies.
  • Check for Doneness: Insert a toothpick into the center; it should come out with a few moist crumbs, not wet batter.
  • Let Them Cool: Allow brownies to cool completely in the pan before cutting for cleaner squares.
  • Use Parchment Paper: Line your baking pan for easy removal and cleanup.
  • Experiment with Mix-Ins: Try adding nuts, chocolate chips, or even peanut butter for an extra flavor boost!
  • Store Properly: Keep brownies in an airtight container to maintain freshness.
  • Calculate Baking Time: Depending on your oven, baking times may vary; adjust as needed.

Common Mistakes and Troubleshooting

Even the best of us can run into a few hiccups. Here’s how to avoid common pitfalls:

  • Dry Brownies: This can happen from overbaking; always check them a few minutes before the suggested baking time.
  • Too Fudgy: If your brownies are too gooey, they likely need a few extra minutes in the oven.
  • Cracked Tops: This can be a sign of too much air in the batter; mix gently to avoid this.
  • Sticking to the Pan: Ensure your pan is well-greased or lined with parchment paper.

Brownie Variations to Try

Feel like shaking things up? Here are some variations to consider:

  • Nutty Brownies: Add chopped walnuts or pecans for a delightful crunch.
  • Cheesecake Swirl Brownies: Blend cream cheese with sugar and vanilla, then swirl it into the brownie batter.
  • Mint Chocolate Brownies: Add peppermint extract to the batter for a refreshing twist.
  • Brownie Sundae: Serve warm brownies topped with ice cream, chocolate syrup, and whipped cream.

Storage and Make-Ahead Instructions

Got leftovers? Here’s how to store your brownies:

  • Room Temperature: Store in an airtight container for up to 3 days.
  • Refrigerate: For longer storage, keep in the fridge for up to a week.
  • Freeze: Brownies freeze well! Wrap in plastic wrap and store in a freezer bag for up to 3 months. Thaw at room temperature when ready to enjoy.

Frequently Asked Questions

Here are answers to some common questions about making brownies:

  • Can I use cocoa powder instead of chocolate? Yes! Use about 50g of cocoa powder and increase the butter by 25g.
  • Why are my brownies not rising? Ensure your baking powder is fresh and that you’re not overmixing the batter.
  • Can I make these brownies dairy-free? Absolutely! Substitute the butter with coconut oil and use dairy-free chocolate.
  • What’s the best way to cut brownies? Use a sharp knife and wipe it clean between cuts for neat squares.
  • Can I add fruit to the brownies? Yes! Chopped cherries or raspberries can add a lovely tartness.
  • How do I know when my brownies are done? Look for a set edge and a slightly soft center; a toothpick should come out with moist crumbs.
  • Can I double the recipe? Yes, just use a larger pan and adjust baking time accordingly.
  • What to do if I overbake the brownies? If they’re too dry, serve with ice cream or a drizzle of chocolate sauce to add moisture.

Nutrition Tips and Dietary Adaptations

If you’re watching your nutrition, here are some tips:

  • Reduce Sugar: You can cut the sugar by a third for a less sweet brownie.
  • Whole Grain Option: Substitute half the all-purpose flour with whole wheat flour for added nutrients.
  • Protein Boost: Add a scoop of protein powder to the batter for a healthier treat.

Equipment Recommendations

To make the process smoother, here’s what you’ll need:

  • Mixing Bowls: A large bowl for mixing the batter and a smaller one for melting chocolate.
  • Spatula: A silicone spatula is great for folding in the ingredients.
  • Baking Pan: An 8×8 inch square pan works perfectly for this recipe.
  • Measuring Cups and Spoons: Accurate measurements ensure the best results.

Serving Suggestions

When it’s time to serve, consider these delightful options:

  • With Ice Cream: A scoop of vanilla ice cream on top creates a delicious contrast with warm brownies.
  • Chocolate Sauce: Drizzle some warm chocolate sauce for an extra indulgent treat.
  • Fresh Berries: Add a side of fresh berries for a refreshing touch.
  • Whipped Cream: Light and fluffy whipped cream works beautifully with brownies.

Conclusion

There you have it! A comprehensive guide to making **decadent chocolate brownies** that will not only satisfy your sweet tooth but also impress your guests. Remember, cooking is all about experimenting and enjoying the process. So gather your ingredients, follow these simple steps, and get ready to indulge in the rich, fudgy goodness of homemade brownies. Happy baking!

Brownie au Chocolat

Prep Time 10 minutes
Cook Time 20 minutes
Total Time 30 minutes
Servings 8 pieces
Calories 350
Indulge in rich, fudgy chocolate brownies with a hint of vanilla and a touch of fleur de sel for added flavor.

Ingredients

Chocolate and Butter

  • 200 g chocolat noir
  • 70 g beurre demi-sel

Eggs and Sugar

  • 2 units œufs
  • 150 g sucre roux

Vanilla

  • a pinch notes pincée de vanille en poudre

Dry ingredients

  • 115 g farine de blé
  • 25 g maïzena
  • 1/2 sachet levure chimique

Fleur de sel

  • to taste fleur de sel

Instructions 

  • Preheat oven to 180°C.
  • Melt chocolate and butter together.
  • Beat eggs and sugar until mousse-like, then add melted chocolate mixture and vanilla.
  • Mix dry ingredients and fold into wet mixture.
  • Pour batter into a greased mold, sprinkle with fleur de sel, and bake for 20-25 minutes. Cool before cutting.

Notes

For extra flavor, add a pinch of sea salt on top before baking.
Calories: 350kcal
Cost: $12
Course: Dessert
Cuisine: French
Keyword: chocolate

Start Your Day Right with a Peach Mango Protein Smoothie Bowl

Are you ready to kickstart your morning with a burst of energy and flavor? This Peach Mango Protein Smoothie Bowl is not only refreshing but also packed with nutrients that make it the perfect breakfast or snack option. Combining the sweetness of frozen mango and peach with the creaminess of Greek yogurt, this smoothie bowl is sure to awaken your taste buds and fuel your day. Let’s dive into the delicious details and discover why this recipe should become a staple in your kitchen!

Why You’ll Love This Recipe

  • Quick and Easy: This smoothie bowl takes just 5 minutes to make, perfect for busy mornings.
  • Nutrient-Packed: Filled with vitamins and protein, it’s a healthy way to start your day.
  • Customization: You can easily swap ingredients to suit your taste or dietary needs.
  • Deliciously Satisfying: Enjoy a thick, creamy texture that feels indulgent without the guilt.
  • Perfect for Meal Prep: Make it ahead of time and store it for busy days!

Ingredients Breakdown

Let’s go over the ingredients you’ll need to create this delicious Peach Mango Protein Smoothie Bowl:

  • 1 cup frozen mango chunks: Provides natural sweetness and a tropical flavor.
  • 1 cup frozen peach slices: Adds a floral sweetness to enhance the mango flavor.
  • 1/2 cup Greek yogurt: Opt for plain or vanilla to boost creaminess and protein.
  • 1/2 medium banana: Fresh or frozen, it helps thicken the smoothie and adds natural sweetness.
  • 1/4 cup milk of choice: Adjust to achieve your desired consistency.
  • 1 scoop vanilla protein powder (optional): Extra protein boost if you’re looking for a post-workout meal.
  • 1 tsp honey (optional): Sweeten to taste, especially if your fruits aren’t very ripe.
  • 1/4 cup granola: For topping, adds crunch and texture.
  • 1 tbsp shredded coconut (optional): For a tropical twist.
  • 1 tbsp chopped nuts (optional): Choose your favorite for added protein and healthy fats.

How to Make Your Smoothie Bowl

Delicious smoothie bowl featuring layers of peach and mango with toppings of granola and nuts.

Follow these simple steps to whip up your Peach Mango Protein Smoothie Bowl:

  • Add frozen mango, frozen peaches, Greek yogurt, banana, and milk to a blender.
  • Blend until thick and smooth, stopping to scrape down the sides as needed.
  • If it won’t blend, add 1-2 tablespoons more milk and blend again to maintain a thick consistency.
  • Taste your smoothie and add honey if you desire extra sweetness.
  • Spoon the mixture into a bowl and add your favorite toppings right away.

Pro Tips for the Perfect Smoothie Bowl

  • Use Frozen Fruits: They help create a thick and creamy texture, making your bowl more satisfying.
  • Experiment with Liquid: Adjust the milk to get your preferred consistency; less for thicker bowls, more for thinner.
  • Layer Toppings: Create a beautiful presentation by layering your toppings for visual appeal.
  • Chill Your Bowl: Freeze your bowl for a few minutes before serving to keep your smoothie cold.
  • Mix Up Your Proteins: Try different protein powders or even nut butters for a unique twist.
  • Don’t Skip the Toppings: They add flavor and texture, making your smoothie bowl a well-rounded meal.
  • Make It Vegan: Substitute Greek yogurt with a plant-based yogurt and use maple syrup instead of honey.
  • Storage: If you have leftovers, store in an airtight container in the fridge for up to 24 hours.

Common Mistakes and Troubleshooting

Here are some common mistakes to avoid when making your smoothie bowl:

  • Too Thin: If your smoothie is too thin, add more frozen fruit or reduce the amount of liquid.
  • Not Blending Well: Make sure your blender is powerful enough. If it struggles, stop and scrape down the sides.
  • Over-Sweetening: Taste your smoothie before adding sweeteners, as the fruits can be sweet enough.
  • Skipping Toppings: Toppings enhance flavor and nutrition; don’t skip them!

Variations of Your Smoothie Bowl

Feel free to get creative with these variations:

  • Tropical Twist: Add a handful of spinach and substitute pineapple for some of the mango.
  • Berry Bliss: Use mixed berries instead of mango and peach for a different flavor profile.
  • Nutty Banana: Replace the banana with almond butter for a nutty flavor and extra protein.
  • Chocolate Delight: Add cocoa powder or chocolate protein powder for a chocolatey version.

Storage and Make-Ahead Instructions

For those busy mornings, you can easily prepare this smoothie bowl ahead of time:

  • Combine all ingredients except for toppings in a blender and blend until smooth.
  • Pour into an airtight container and store in the fridge for up to 24 hours.
  • Before serving, give it a good stir and add your desired toppings.

Frequently Asked Questions

  • Can I use fresh fruit instead of frozen? Yes, but your smoothie bowl may be thinner. Consider adding ice for thickness.
  • How can I make this smoothie bowl vegan? Substitute Greek yogurt with a plant-based yogurt and honey with maple syrup.
  • What other toppings can I add? Fresh fruit, seeds, nut butters, or cacao nibs work well!
  • Can I meal prep this smoothie bowl? Absolutely! Just prepare the base and add toppings before serving.
  • Is this smoothie bowl filling? Yes! The protein and healthy fats will keep you satisfied.
  • How long does it last in the fridge? Store in an airtight container for up to 24 hours.
  • Can I add greens to this smoothie bowl? Yes! Spinach or kale can be blended in for added nutrients.
  • What’s the best way to serve this smoothie bowl? Serve immediately topped with your favorite toppings for the best texture and flavor.

Nutrition Tips and Dietary Adaptations

This Peach Mango Protein Smoothie Bowl is not only delicious but also highly nutritious:

  • High in Protein: Greek yogurt and protein powder boost your protein intake for muscle recovery.
  • Rich in Vitamins: Packed with vitamins A and C from the fruits, it supports your immune system.
  • Healthy Fats: Toppings like nuts and seeds provide healthy fats that keep you full longer.
  • Gluten-Free: Naturally gluten-free, this recipe is great for those with gluten sensitivities.

Equipment Recommendations

To create your smoothie bowl, you’ll need a few essential pieces of equipment:

  • High-Powered Blender: For smooth blending, a high-quality blender is key.
  • Measuring Cups and Spoons: Accurate measurements ensure the perfect balance of flavors.
  • Bowl and Spoon: Choose a fun bowl and a spoon to enjoy your smoothie in style!

Serving Suggestions

Enjoy your Peach Mango Protein Smoothie Bowl as a delightful breakfast or snack:

  • Pair with a slice of whole-grain toast for a balanced meal.
  • Enjoy as a post-workout recovery meal with added protein.
  • Share with friends or family for a fun brunch option!

Now that you have the ultimate guide to creating a Peach Mango Protein Smoothie Bowl, it’s time to get cooking. Remember, cooking is about enjoying the process and experimenting with flavors. Don’t be afraid to make this recipe your own, and most importantly, have fun in the kitchen. Happy cooking!

Peach Mango Protein Smoothie Bowl

Prep Time 5 minutes
Total Time 5 minutes
Servings 2 bowls
Calories 250
A delicious and nutritious smoothie bowl combining fresh fruits, Greek yogurt, and protein for a satisfying breakfast or snack.

Ingredients

Fruits

  • 1 cup frozen mango chunks
  • 1 cup frozen peach slices
  • 0.5 medium banana (fresh or frozen)

Dairy & Liquids

  • 0.5 cup Greek yogurt (plain or vanilla)
  • 0.25 cup milk of choice (add more if needed)

Supplements & Sweeteners

  • 1 scoop vanilla protein powder (optional)
  • 1 tsp honey (optional, to taste)

Toppings

  • 0.25 cup granola
  • 1 tbsp shredded coconut (optional)
  • 1 tbsp chopped nuts (optional)

Instructions 

  • Add frozen mango, frozen peaches, Greek yogurt, banana, and milk to a blender.
  • Blend until thick and smooth, stopping to scrape down sides as needed. If it won t blend, add more milk and blend again.
  • Taste and add honey if desired for extra sweetness.
  • Spoon into bowls and add toppings immediately.

Notes

Feel free to customize toppings for added flavor and texture.
Calories: 250kcal
Cost: $10
Course: Breakfast
Cuisine: Healthy
Keyword: Fruit, Protein, Smoothie

Unlock the Secrets to Effortless Garlic Herb Roasted Chicken

Welcome, fellow home cooks! If you’re looking to elevate your dinner game with an impressive yet simple dish, you’ve come to the right place. This Garlic Herb Roasted Chicken is a showstopper, perfect for busy weeknights or special occasions. In just a few straightforward steps, you’ll create a mouthwatering meal that will have everyone asking for seconds. Let’s dive in and explore why this recipe will become your new favorite!

Why You’ll Love This Recipe

  • Effortless preparation: With minimal hands-on time, you can set it and forget it while your oven works its magic.
  • Flavor-packed: The combination of garlic, fresh herbs, and lemon creates an aromatic experience that fills your kitchen.
  • Perfectly crispy skin: Thanks to the dry brining technique, you’ll achieve that coveted crispy skin that everyone loves.
  • Flexible serving options: This dish pairs beautifully with various sides, making it versatile for any meal.
  • Great for meal prep: Leftovers can be used in salads, sandwiches, and more, giving you a delicious meal ready for busy days.

Essential Ingredients for Garlic Herb Roasted Chicken

Understanding the components of this dish is crucial for achieving the best results. Here’s what you’ll need:

  • 4 to 5 pound whole spatchcocked chicken: A spatchcocked chicken cooks evenly and reduces cooking time.
  • Kosher salt and freshly ground black pepper: These are essential for seasoning and enhancing the natural flavors of the chicken.
  • 1/4 cup extra-virgin olive oil: Adds richness and helps the herbs stick to the chicken.
  • 1 tablespoon dried parsley: Provides a mild, aromatic flavor that complements the fresh herbs.
  • 1 tablespoon dried thyme: Adds a depth of flavor that pairs well with poultry.
  • 1 tablespoon fresh rosemary, finely chopped: Fresh herbs elevate the dish significantly.
  • 4 garlic cloves, minced or grated: Garlic is the star here, infusing the chicken with incredible flavor.
  • 1 head of garlic, halved: Roasting whole garlic mellows its bite and adds sweetness.
  • 1 whole large lemon, halved: Lemon brightens the dish and keeps the chicken juicy.

Step-by-Step Instructions to Roast Your Chicken

Whole spatchcocked chicken sprinkled with garlic and herbs, side view.

Ready to start cooking? Follow these easy steps for a delicious roasted chicken:

  1. Pat your chicken dry with paper towels. Season with kosher salt and freshly ground black pepper on all sides and inside the chicken cavity.
  2. Place on a large sheet tray lined with parchment paper and dry brine for 2 hours or overnight in the fridge. This step is optional but highly recommended for flavor and tenderness.
  3. When ready to roast, preheat your oven to 425 degrees Fahrenheit. If available, use convection for even cooking.
  4. In a small bowl, mix together your extra-virgin olive oil, parsley, thyme, rosemary, and grated garlic. Season with kosher salt and black pepper to taste.
  5. In a large baking dish or cast iron skillet, place your chicken and add the halved garlic and lemon around it. Pour the herb mixture over the chicken, ensuring it is well coated.
  6. Roast in the preheated oven for 40 to 50 minutes, or until the skin is crispy and the internal temperature reaches 165 degrees at the thickest part of the breast.
  7. Halfway through cooking, baste the chicken with the pan juices and rotate the pan to ensure even crispiness.
  8. Once fully cooked, remove from the oven and let rest for about 15 minutes before carving. Serve with the roasted garlic and a squeeze of lemon for extra flavor.

Pro Tips for the Perfect Garlic Herb Roasted Chicken

  • Dry brining: This technique enhances flavor and moisture—don’t skip it!
  • Use fresh herbs: They make a noticeable difference in flavor compared to dried herbs.
  • Invest in a meat thermometer: This is the best way to ensure your chicken is perfectly cooked.
  • Baste regularly: Basting helps keep the chicken moist and flavorful.
  • Let it rest: Resting allows the juices to redistribute, making for a juicier chicken.
  • Experiment with flavors: Feel free to add spices or herbs you love to the herb mixture.
  • Alternative cooking methods: Try cooking in an air fryer or on a grill for a different flavor profile.
  • Save the carcass: Use it to make homemade chicken stock once you’ve enjoyed your meal.

Common Mistakes and Troubleshooting

Even the best cooks can encounter hiccups. Here are some common mistakes to avoid:

  • Not drying the chicken: A wet chicken won’t crisp up properly.
  • Skipping the resting period: Cutting too soon can result in dry chicken.
  • Not seasoning enough: A well-seasoned chicken is key to great flavor.
  • Overcooking: Use a meat thermometer to avoid dry meat.
  • Ignoring the oven temperature: Make sure your oven is preheated for even cooking.

Flavor Variations to Try

Feel free to get creative with this recipe! Here are some delicious variations:

  • Herb Butter Roasted Chicken: Mix softened butter with herbs and garlic, then spread under the skin for extra flavor.
  • Spicy Garlic Herb Chicken: Add crushed red pepper flakes or cayenne to the herb mixture for a kick.
  • Honey Lemon Garlic Chicken: Drizzle honey over the chicken before roasting for a sweet glaze.
  • Mustard Herb Chicken: Mix Dijon mustard into the herb mixture for a tangy twist.

How to Store and Make-Ahead Instructions

This roasted chicken is perfect for meal prep! Here’s how to store it:

  • Storage: Store any leftovers in an airtight container in the fridge for up to 4 days.
  • Freezing: You can freeze the cooked chicken for up to 3 months. Just ensure it’s well-wrapped to prevent freezer burn.
  • Make-ahead: You can prepare the herb mixture a day in advance and store it in the fridge.

Frequently Asked Questions (FAQs)

  • Can I prepare the herb butter ahead of time? Yes, you can make it up to 24 hours in advance and store it in the fridge.
  • How do I ensure the skin is crispy? Make sure to dry-brine the chicken and dry it thoroughly before seasoning.
  • What’s the best way to tell if the chicken is fully cooked? Use a meat thermometer—165°F is the safe internal temperature.
  • Can I use bone-in, skin-on pieces instead of a whole chicken? Absolutely! Just adjust cooking time accordingly.
  • Can I roast vegetables alongside the chicken? Yes, just ensure they are cut into similar sizes for even cooking.
  • What should I serve with Garlic Herb Roasted Chicken? This dish pairs well with roasted vegetables, mashed potatoes, or a fresh salad.
  • Can I make this recipe with a different type of meat? Yes! The herb mixture works well with turkey, duck, or even pork.
  • How do I reheat leftovers? Reheat in the oven at a low temperature to keep the chicken moist.

Nutritional Tips and Dietary Adaptations

This Garlic Herb Roasted Chicken is naturally gluten-free and can be adapted for various dietary needs:

  • Low-carb: Serve with a side of roasted vegetables for a low-carb meal.
  • Dairy-free: This recipe is naturally dairy-free; just be mindful of any sides.
  • Whole30 compliant: Simply omit any added sugars or non-compliant ingredients.

Recommended Equipment

  • Meat thermometer: Essential for ensuring perfect doneness.
  • Roasting pan or cast iron skillet: Provides an even cooking surface for the chicken.
  • Parchment paper: Makes cleanup a breeze and prevents sticking.

Serving Suggestions

To complement your Garlic Herb Roasted Chicken, consider these delicious serving options:

  • Garlic Mashed Potatoes: Creamy and comforting, they pair perfectly with the juices from the chicken.
  • Seasonal Roasted Vegetables: Toss your favorite veggies in olive oil and roast alongside the chicken for a complete meal.
  • Simple Green Salad: A fresh salad with a light vinaigrette balances the richness of the chicken.
  • Crusty Bread: Serve with a loaf of crusty bread to soak up the delicious pan juices.

Conclusion

And there you have it! This Effortless Garlic Herb Roasted Chicken is not just a recipe; it’s a way to bring joy and flavor to your kitchen. With its simple ingredients and straightforward instructions, you’ll feel empowered and excited to serve this dish to your family and friends. So, gather your ingredients, preheat that oven, and let’s make magic happen in the kitchen. Happy cooking!

Garlic Herb Roasted Chicken

Prep Time 15 minutes
Cook Time 45 minutes
Total Time 1 hour
Servings 4 servings
Calories 450
Enjoy a flavorful, crispy-skinned roasted chicken infused with herbs and garlic, perfect for a hearty meal.

Ingredients

Main

  • 4-5 pounds whole spatchcocked chicken
  • 1 tablespoon kosher salt
  • 1 teaspoon freshly ground black pepper
  • 0.25 cup extra-virgin olive oil
  • 1 tablespoon dried parsley
  • 1 tablespoon dried thyme
  • 1 tablespoon fresh rosemary, finely chopped
  • 4 cloves garlic, minced or grated
  • 1 head garlic, halved
  • 1 large lemon, halved

Instructions 

  • Pat the chicken dry, season with salt and pepper, and dry brine for 2 hours or overnight.
  • Preheat oven to 425°F (220°C). Mix olive oil, parsley, thyme, rosemary, and garlic; season with salt and pepper.
  • Place chicken in a baking dish with halved garlic and lemon, coat with herb mixture, and distribute evenly.
  • Roast for 40-50 minutes until internal temperature reaches 165°F (74°C) and skin is crispy. Baste halfway and rotate for even crispness.
  • Rest for 15 minutes, then carve, serve with pan juices, lemon, and roasted garlic.

Notes

For extra crisp skin, dry the chicken thoroughly before roasting.
Calories: 450kcal
Cost: $20
Course: Main Course
Cuisine: American
Keyword: Chicken

Are you looking to kickstart your day with a nutritious and delicious breakfast? This Greek Yogurt Berry Smoothie is the perfect solution! Combining the creamy texture of Greek yogurt with the vibrant flavors of mixed berries, this smoothie not only tastes amazing but also provides a healthy dose of vitamins and minerals. Let’s dive into why this smoothie will quickly become your go-to breakfast option!

Why You’ll Love This Greek Yogurt Berry Smoothie

There are countless reasons to adore this Greek Yogurt Berry Smoothie. Here are just a few:

  • Quick & Easy: This smoothie can be whipped up in just 5 minutes, making it perfect for busy mornings.
  • Nutritious: Packed with protein from Greek yogurt and antioxidants from berries, it’s a health powerhouse.
  • Customizable: You can easily switch up the ingredients based on what you have on hand or your dietary preferences.
  • Natural Sweetness: The natural sweetness of the banana and berries means you won’t need added sugars.
  • Deliciously Creamy: Greek yogurt provides a rich and satisfying texture, making this smoothie a treat for your taste buds.

Ingredients You’ll Need

To create your delicious Greek Yogurt Berry Smoothie, gather the following ingredients:

  • Greek yogurt: 1 cup (plain or flavored, your choice!)
  • Mixed berries: 1 cup (fresh or frozen; strawberries, blueberries, raspberries, and blackberries all work well)
  • Banana: 1 ripe banana for sweetness and creaminess
  • Honey: 1 tablespoon (optional, adjust to taste)
  • Milk or almond milk: 1/2 cup (for blending; use non-dairy alternatives if desired)
  • Ice cubes: Optional, for a frosty texture

Ingredient Substitutions

  • Dairy-free option: Use coconut yogurt or almond yogurt instead of Greek yogurt.
  • Different fruits: Swap the banana for mango or avocado for a unique twist.
  • Sweetener alternatives: Maple syrup or agave nectar can replace honey.
  • Nut milk variations: Any milk, such as oat or soy milk, can be used.

How to Make Your Greek Yogurt Berry Smoothie

Making this delicious smoothie is as simple as it gets! Follow these easy steps:

  • Gather Ingredients: Start by gathering all your ingredients. Make sure your berries are washed and ready to go.
  • Blend: Place the Greek yogurt, mixed berries, banana, honey, and milk into your blender. Blend until smooth and creamy.
  • Adjust Texture: If you prefer a thicker smoothie, add a bit more yogurt. For a thinner consistency, add more milk.
  • Chill: If you like it extra cold, toss in a few ice cubes and blend again until well mixed.
  • Serve: Pour your Greek Yogurt Berry Smoothie into a glass and enjoy immediately!

Pro Tips for the Best Smoothie

Side angle of a refreshing Greek yogurt smoothie with layers of colorful berries and a drizzle of honey on top.

To take your smoothie to the next level, check out these expert tips:

  • Use frozen fruit: Using frozen berries instead of fresh can make your smoothie colder and thicker.
  • Layering ingredients: Place yogurt at the bottom of the blender followed by the softer ingredients and then the harder ones for perfect blending.
  • Balance flavors: Taste your smoothie before serving; you can adjust sweetness or add more fruit as needed.
  • Keep it fresh: Use fresh ingredients for the best flavor and nutritional value.
  • Prep ahead: Prepare smoothie bags by portioning out ingredients in advance for quick blending in the morning.
  • Don’t over-blend: Blend just enough to mix everything, as over-blending can make the smoothie warm.

Common Mistakes and Troubleshooting

Even the best of us can make mistakes in the kitchen! Here are some common pitfalls and how to avoid them:

  • Too thick: Add more milk or a splash of juice to thin out the smoothie.
  • Too sweet: If it’s too sweet, adding a squeeze of lemon or lime juice can help balance the flavors.
  • Unblended chunks: If chunks remain, make sure to layer the ingredients properly and blend longer.

Delicious Variations of Greek Yogurt Berry Smoothie

Feeling adventurous? Here are some delightful twists you can try!

  • Green Goddess: Add a handful of spinach or kale for a nutrient boost without sacrificing flavor.
  • Peanut Butter Bliss: Toss in a tablespoon of peanut butter or almond butter for a protein-packed twist.
  • Coconut Dream: Add a tablespoon of shredded coconut for a tropical flair.
  • Chocolate Berry Delight: Blend in a tablespoon of cocoa powder for a chocolatey spin.

Storage and Make-Ahead Instructions

Want to prepare your smoothie ahead of time? Here’s how to store it:

  • Refrigerate: Store any leftover smoothie in an airtight container in the fridge for up to 24 hours. Stir or shake before serving.
  • Freeze: You can freeze smoothie portions in ice cube trays or freezer bags to use later. Just blend again to enjoy!

Comprehensive FAQ

Got questions? Here are some answers to common inquiries:

  • Can I use non-dairy yogurt? Absolutely! Coconut or almond yogurt works great.
  • What can I substitute for banana? You can use a small avocado or mango for creaminess.
  • How can I make it more filling? Add oats or chia seeds for added fiber and protein.
  • Is this smoothie good for weight loss? Yes! It’s low-calorie and filling, making it a great choice for weight management.
  • Can I add protein powder? Yes! Add a scoop of your favorite protein powder for an extra boost.
  • What are the best berries to use? Any berries work well! Strawberries, blueberries, raspberries, and blackberries are all excellent choices.
  • How can I make this smoothie dairy-free? Use dairy-free yogurt and non-dairy milk alternatives.
  • Can I make this smoothie without a blender? A food processor can work, but a blender is recommended for a smooth texture.

Nutrition Tips and Dietary Adaptations

This Greek Yogurt Berry Smoothie is naturally packed with nutrients:

  • High in protein: Greek yogurt provides a significant amount of protein, crucial for muscle repair.
  • Rich in antioxidants: Berries are loaded with antioxidants, which help combat oxidative stress.
  • Low in calories: This smoothie is a great low-calorie option to start your day.

Equipment Recommendations

To make this smoothie, you’ll need:

  • High-speed blender: A good quality blender will create a smooth and creamy texture.
  • Measuring cups: For accurate ingredient portions.
  • Glass or smoothie cup: To enjoy your delicious creation!

Serving Suggestions

Serve your Greek Yogurt Berry Smoothie with:

  • A sprinkle of granola: To add a satisfying crunch.
  • Fresh fruit on top: For a beautiful presentation.
  • A drizzle of honey: For added sweetness.

In conclusion, this Greek Yogurt Berry Smoothie is not just a breakfast option but a delightful way to embrace a healthier lifestyle. With its simple ingredients and easy preparation, you’ll find yourself drinking this smoothie every morning. Now, go ahead and blend your way to a revitalized morning!

Greek Yogurt Berry Smoothie

Prep Time 5 minutes
Total Time 5 minutes
Servings 2 cups
Calories 250
A delicious and healthy smoothie combining Greek yogurt and fresh berries for a refreshing treat.

Ingredients

Dairy

  • 1 cup Greek yogurt
  • 1.5 cups Mixed berries (fresh or frozen)
  • 1 medium Banana
  • 1 tbsp Honey
  • 1 cup Milk or almond milk
  • 0.5 cup Ice cubes (optional) (Add for extra coldness)

Instructions 

  • Gather all ingredients and wash berries if fresh.
  • Place Greek yogurt, berries, banana, honey, and milk into the blender.
  • Blend until smooth and creamy. Add ice cubes if desired and blend again.
  • Pour into a glass and serve immediately.

Notes

For a thicker smoothie, add more frozen berries or ice.
Calories: 250kcal
Cost: $8
Course: Breakfast, Snack
Cuisine: Greek
Keyword: Berries, Smoothie, Yogurt

Start Your Day Right with Delightful Chocolate Chip Pancakes

There’s nothing quite like a stack of fluffy chocolate chip pancakes to brighten your morning. With their perfect balance of sweetness and texture, these pancakes are not just a breakfast staple; they’re an experience! This chocolate chip pancakes recipe is designed with simplicity in mind, ensuring that even the busiest home cooks can whip up a delicious meal without stress. Let’s dive into the delightful world of pancakes that will make your mornings feel extra special.

Why You’ll Love This Recipe

Here are just a few reasons why this chocolate chip pancake recipe is a must-try:

  • Quick and Easy: With straightforward steps, you can make these pancakes in under 30 minutes, perfect for those busy mornings.
  • Fluffy Texture: Thanks to the right mixing technique, these pancakes maintain a fluffy texture, making each bite a delight.
  • Customizable: Use dark, semi-sweet, or even white chocolate chips to put your spin on these pancakes.
  • Family-Friendly: Kids and adults alike love these pancakes, making them a hit during family breakfasts or brunch gatherings.
  • Make Ahead: You can prepare the batter ahead of time, saving you time in the morning.

Ingredients You’ll Need for Chocolate Chip Pancakes

Here’s what you’ll need to create these delightful chocolate chip pancakes:

  • 1 ½ cups all-purpose flour: The base of your pancakes; ensure it’s fresh for the best results.
  • 2 tablespoons sugar: Adds a touch of sweetness that complements the chocolate chips.
  • 1 tablespoon baking powder: This is the magic ingredient that helps your pancakes rise to fluffy perfection.
  • ½ teaspoon salt: Balances the sweetness and enhances flavors.
  • 1 ¼ cups milk: Use whole milk for creaminess or any non-dairy alternative.
  • 1 large egg: Binds the ingredients together for a smooth batter.
  • ¼ cup melted butter or oil: Adds richness and moisture; melted butter provides a fantastic flavor.
  • 2 teaspoons vanilla extract: For that sweet, aromatic flavor that takes these pancakes to the next level.
  • 1 ¾ cups chocolate chips: Choose your favorite type—semi-sweet, dark, or milk chocolate.

How to Make Chocolate Chip Pancakes

Delicious chocolate chip pancakes on a plate, showcasing a golden-brown surface with chocolate chips.

Ready to get cooking? Follow these simple steps:

  • Step 1: Combine Dry Ingredients: In a large bowl, whisk together the flour, sugar, baking powder, and salt until well blended.
  • Step 2: Mix Wet Ingredients: In a separate bowl, whisk together the milk, egg, melted butter, and vanilla extract until fully combined.
  • Step 3: Combine Mixtures: Create a well in the center of the dry ingredients and pour in the wet mixture. Gently fold together with a rubber spatula until just combined; a few lumps are okay!
  • Step 4: Add Chocolate Chips: Carefully fold in the chocolate chips, making sure they are evenly distributed throughout the batter.
  • Step 5: Cook to Golden Perfection: Heat a greased skillet or non-stick pan over medium heat. Pour ¼ cup portions of batter onto the skillet. Cook until the edges appear dry and bubbles form on the surface, about 2 minutes. Flip and cook for another 1-2 minutes until golden brown.
  • Step 6: Serve Your Masterpiece: Serve warm with maple syrup, whipped cream, or your favorite toppings!

Pro Tips for Perfect Pancakes

To take your pancake game to the next level, consider these expert tips:

  • Don’t Overmix: Mixing too much can lead to tough pancakes. Aim for a few lumps in the batter.
  • Adjust the Heat: If your pancakes are browning too quickly, lower the heat slightly to ensure they cook through without burning.
  • Use a Non-Stick Pan: This will help prevent sticking and make flipping your pancakes a breeze.
  • Let the Batter Rest: Allowing the batter to sit for about 5 minutes can yield fluffier pancakes.
  • Keep Them Warm: If cooking in batches, keep the pancakes warm in a low oven while you finish the rest.
  • Experiment with Add-Ins: Try adding nuts, berries, or spices like cinnamon for extra flavor.
  • Use Fresh Ingredients: Always check the expiration dates on your baking powder and baking soda for the best results.
  • Perfect Portioning: Use a measuring cup or ice cream scoop for evenly sized pancakes.

Common Mistakes and Troubleshooting

Even the best of us can make a mistake in the kitchen. Here’s how to troubleshoot:

  • Pancakes Too Dense: This is often due to overmixing or using too much flour. Measure carefully and mix gently.
  • Burnt Exteriors: If the outside is burnt but the inside is raw, your heat is too high. Lower it to medium or medium-low.
  • Flat Pancakes: This can happen if your baking powder is expired or not enough is used. Always check freshness!
  • Sticking to the Pan: Ensure your skillet is adequately preheated and greased before pouring in the batter.

Delicious Variations to Try

Feeling adventurous? Here are some variations to switch things up:

  • Banana Chocolate Chip Pancakes: Mash a ripe banana into the batter for added sweetness and flavor.
  • Peanut Butter Chocolate Chip Pancakes: Swirl in some peanut butter for a nutty twist.
  • Coconut Chocolate Chip Pancakes: Add shredded coconut for a tropical vibe.
  • Spiced Apple Chocolate Chip Pancakes: Fold in diced apples and a sprinkle of cinnamon for a fall-inspired pancake.

Storage and Make-Ahead Instructions

If you want to save some pancakes for later, follow these tips:

  • Refrigeration: Store leftover pancakes in an airtight container in the fridge for up to 3 days.
  • Freezing: For longer storage, freeze pancakes individually on a baking sheet before transferring to a freezer bag. They can last up to 2 months.
  • Reheating: Reheat pancakes in the microwave for 30-60 seconds or in a toaster for a crispy finish.

Frequently Asked Questions (FAQs)

Here are some common questions about chocolate chip pancakes:

  • Can I use whole wheat flour? Yes! Whole wheat flour can be substituted for all-purpose flour, though the texture may be denser.
  • Can I make these pancakes vegan? Absolutely! Substitute the egg with a flax egg and use plant-based milk and butter.
  • What can I use instead of chocolate chips? Try using fruit, nuts, or even yogurt for a different flavor.
  • How do I know when my pancakes are done? Look for dry edges and bubbles forming in the center before flipping.
  • Can I double the recipe? Yes! Simply double all the ingredients for a larger batch.
  • What toppings go well with chocolate chip pancakes? Maple syrup, whipped cream, fresh berries, or a sprinkle of powdered sugar are all great choices!
  • Can I add protein powder to the batter? Yes, just adjust the liquid slightly to maintain the right batter consistency.
  • What should I do if my batter is too thick? Add a splash more milk until you reach your desired consistency.

Nutritional Tips and Dietary Adaptations

For health-conscious cooks, consider these adaptations:

  • Reduce Sugar: Cut back the sugar amount for a less sweet pancake.
  • Use Greek Yogurt: Substitute some milk with Greek yogurt for added protein and creaminess.
  • Gluten-Free Option: Substitute all-purpose flour with a gluten-free blend for a gluten-free version.
  • Check Ingredients: Always check labels for added sugars or preservatives in pre-made ingredients.

Equipment Recommendations

To make the best chocolate chip pancakes, you’ll need:

  • Non-Stick Skillet: Ensures easy flipping and minimal sticking.
  • Mixing Bowls: A set of various sizes will help with ingredient prep.
  • Whisk: Essential for smoothly combining ingredients.
  • Spatula: A rubber spatula is perfect for folding the batter.
  • Measuring Cups and Spoons: For accurate ingredient measurements to ensure perfect pancakes every time.

Serving Suggestions for Your Pancakes

Make your pancake breakfast even more special with these serving suggestions:

  • Maple Syrup: A classic choice that pairs perfectly with the chocolate.
  • Fresh Fruit: Top with strawberries, bananas, or blueberries for a refreshing burst.
  • Whipped Cream: Adds a light, fluffy touch to each bite.
  • Chopped Nuts: Add some crunch with walnuts or pecans sprinkled on top.

There you have it! A complete guide to making delightful chocolate chip pancakes that will make your mornings brighter. With these tips, tricks, and variations, you’re well on your way to mastering this classic recipe. Enjoy cooking and remember, it’s all about the joy of sharing delicious meals with those you love. Happy cooking!

Chocolate Chip Pancakes Recipe

Prep Time 10 minutes
Cook Time 10 minutes
Total Time 20 minutes
Servings 4 servings
Calories 250
Delight in fluffy pancakes loaded with chocolate chips, perfect for a sweet breakfast treat.

Ingredients

Dry Ingredients

  • 1.5 cups all-purpose flour
  • 2 tablespoons sugar
  • 1 tablespoon baking powder
  • 0.5 teaspoon salt

Wet Ingredients

  • 1.25 cups milk
  • 1 large egg
  • 0.25 cup melted butter or oil
  • 2 teaspoons vanilla extract
  • 0.75 cup chocolate chips (semi-sweet, dark, or milk)

Instructions 

  • Whisk dry ingredients together in a large bowl.
  • Mix wet ingredients in a separate bowl until combined.
  • Pour wet into dry, fold gently until just combined, with some lumps remaining.
  • Fold in chocolate chips evenly.
  • Cook ¼ cup batter portions on a greased skillet over medium heat until golden, about 2-3 minutes per side.
  • Serve warm with toppings of choice.

Notes

For fluffier pancakes, do not overmix the batter.
Calories: 250kcal
Cost: $10
Course: Breakfast
Cuisine: American
Keyword: chocolate chips, pancakes

Are you ready to take your weeknight dinners to a whole new level of excitement? This veggie burrito bowl is the perfect solution for busy evenings when you want something quick, healthy, and absolutely delicious. With vibrant colors and fresh ingredients, this dish is not just a feast for the eyes but also a celebration of flavors. Plus, it’s easy to customize based on what you have on hand. Let’s dive into this healthy burrito bowl recipe that will leave everyone at the table satisfied!

Why You’ll Love This Recipe

  • Quick and Easy: Perfect for a busy weeknight, this recipe comes together in under 30 minutes!
  • Customizable: Feel free to swap in your favorite veggies, grains, or proteins for a unique twist every time.
  • Nutrition-Packed: Loaded with fresh vegetables and beans, this bowl is high in fiber and essential nutrients.
  • Meal Prep Friendly: Make a big batch and store it in the fridge for easy lunches throughout the week.
  • Family-Friendly: Kids will love assembling their own burrito bowls, making mealtime fun!

Ingredient Breakdown

Let’s explore the ingredients that make this veggie burrito bowl a delightful dish:

  • Tortilla: Use a soft tortilla or tortilla chips for that crunch. Substitutes include pita bread or lettuce wraps for a low-carb option.
  • Lime Coriander Rice: This fragrant rice provides a zesty base. If you’re short on time, use pre-cooked rice or quinoa instead.
  • Red Kidney Beans: These beans add protein and creaminess. Feel free to replace them with black beans or chickpeas if you prefer.
  • Sour Cream: A dollop of sour cream enhances the flavors. For a dairy-free option, try cashew cream or avocado.
  • Greens: Fresh lettuce, spinach, or kale adds a nutritious crunch. Use any leafy greens you love!
  • Sweet Corn: Adds sweetness and texture. You can use canned, frozen, or fresh corn depending on availability.
  • Tomatoes: Juicy, fresh tomatoes brighten up the bowl. Substitute with salsa for an extra kick!
  • Red Onion: Adds a sharp flavor that balances the sweetness of corn and the creaminess of beans.
  • Guacamole: A must-have for richness! If you’re low on avocados, substitute with a tahini dressing.

How to Make a Veggie Burrito Bowl

Now, let’s get cooking! Follow these simple steps for a delicious veggie burrito bowl:

  1. Prepare the Rice: Cook your lime coriander rice according to package instructions. Add lime zest and chopped cilantro for flavor.
  2. Heat the Beans: Warm the red kidney beans in a saucepan over medium heat, seasoning them with a pinch of salt and pepper.
  3. Chop the Veggies: Dice the tomatoes and red onions, and prepare your greens and corn.
  4. Assemble the Bowl: In a large bowl, layer the rice, beans, corn, greens, and chopped veggies.
  5. Add Toppings: Finish with a generous dollop of sour cream or guacamole on top.
  6. Serve: Enjoy your veggie burrito bowl right away, or pack it for lunch!

Pro Tips for the Best Veggie Burrito Bowl

Close-up of a Veggie Burrito Bowl with vibrant layers of greens, rice, and guacamole.
  • Cook Rice Perfectly: Rinse your rice before cooking to remove excess starch and achieve a fluffy texture.
  • Season Generously: Don’t be shy with spices! Cumin, chili powder, or paprika can elevate the flavors significantly.
  • Fresh Herbs: Garnish with extra cilantro or green onions for a fresh burst of flavor.
  • Texture Variations: Incorporate roasted veggies for added depth and crunch. Consider bell peppers, zucchini, or sweet potatoes.
  • Make it Spicy: Add jalapeños or a drizzle of hot sauce for those who enjoy some heat.
  • Mix Up the Grains: Try quinoa, brown rice, or cauliflower rice for a different base.
  • Prep Ahead: Chop veggies in advance and store them in the fridge to save time during the week.
  • Don’t Skip the Acidity: A squeeze of lime juice just before serving brightens up all the flavors and adds freshness.

Common Mistakes and Troubleshooting

Even the best cooks make mistakes! Here are some common pitfalls and how to avoid them:

  • Overcooked Rice: Keep an eye on your rice while cooking. Follow the package instructions closely for perfect results.
  • Bland Flavor: Always taste and adjust seasoning as you go! If it feels flat, a little extra salt, lime juice, or spices can make a world of difference.
  • Too Much Liquid: If your bowl ends up soupy, drain excess liquid from canned beans and corn to keep it balanced.
  • Wrong Textures: Make sure to use fresh, crisp veggies and avoid soggy greens by adding them last.

Variations to Try

Here are some fun ways to switch up your veggie burrito bowl:

  • Fiesta Bowl: Add taco-seasoned ground turkey or beef for a heartier option.
  • Mediterranean Bowl: Swap in couscous, feta cheese, olives, and roasted red peppers.
  • Southeast Asian Bowl: Use jasmine rice, top with shredded carrots, cucumber, and a peanut sauce.
  • Breakfast Bowl: Top with scrambled eggs and salsa for a breakfast twist!

Storage and Make-Ahead Instructions

Want to enjoy this veggie burrito bowl throughout the week? Here’s how to store and prepare it ahead:

  • Fridge Storage: Store assembled bowls in airtight containers for up to 3 days. Keep toppings separate to maintain freshness.
  • Make-Ahead: Cook the rice and beans in advance, and chop veggies. Assemble the bowl just before serving for the best texture.
  • Freezing: Freeze cooked rice and beans in portions for a quick base on busy nights. Just thaw and heat before assembling!

FAQs About Veggie Burrito Bowls

Here are some common questions about making veggie burrito bowls:

  • Can I make this recipe vegan? Absolutely! Just use a vegan sour cream alternative and skip the cheese.
  • What can I use instead of rice? Quinoa, cauliflower rice, or even polenta are great alternatives for a base.
  • How do I make this gluten-free? Use corn tortillas or lettuce wraps to serve instead of regular tortillas.
  • Can I use frozen vegetables? Yes! Just sauté them briefly before adding to your bowl for best results.
  • What’s the best way to reheat leftovers? Reheat in the microwave or on the stove, but avoid reheating greens to keep them crisp.
  • How can I add more protein? Consider adding grilled chicken, tofu, or tempeh for a protein boost!
  • Can I serve this as a salad? Yes! Just skip the rice and use more greens as a base for a delicious salad.
  • What’s the best way to serve this? Allow everyone to build their own bowl with a toppings bar for a fun family meal!

Nutrition Tips and Dietary Adaptations

This veggie burrito bowl is not only tasty but also adaptable to various dietary needs:

  • Low-Carb: Skip the rice and use shredded zucchini or cauliflower rice for a lighter option.
  • High-Protein: Add grilled chicken, chickpeas, or a sprinkle of hemp seeds to boost protein content.
  • Low-Fat: Use Greek yogurt in place of sour cream and skip the guacamole.

Equipment Recommendations

Here’s what you’ll need to whip up your veggie burrito bowl:

  • Cutting Board: A sturdy cutting board for chopping veggies and prep work.
  • Sharp Knife: A good chef’s knife will make chopping quick and easy.
  • Medium Saucepan: For cooking your rice and heating beans.
  • Mixing Bowls: Use various sizes for assembling and storing your ingredients.

Serving Suggestions

Make your meal complete with these serving ideas:

  • Pair with Chips: Serve with tortilla chips for added crunch and flavor.
  • Fresh Salsa: A side of fresh salsa can enhance the flavors and add freshness.
  • Refreshing Drink: Consider pairing with a light beverage like sparkling water or iced tea.

Now that you have all the tools and tips you need, it’s time to get cooking! Enjoy the process, embrace the flavors, and most importantly, have fun in the kitchen as you create your very own veggie burrito bowl masterpiece. Happy cooking!

Veggie Burrito Bowl Mexican Rice Bowl

Prep Time 10 minutes
Cook Time 15 minutes
Total Time 25 minutes
Servings 2 servings
Calories 450
A vibrant and flavorful bowl combining rice, beans, fresh vegetables, and toppings for a satisfying meal.

Ingredients

tortilla or tortilla pita chips

  • 1 cup lime coriander rice (or your favorite rice grain)
  • 0.5 cup red kidney beans (pre-cooked)
  • 2 Tbsp sour cream or vegan alternative
  • 1 dried chili optional
  • 1 cup lettuce or spinach, kale, other greens
  • 0.5 cup sweet corn
  • 2 tomatoes fresh tomatoes
  • 1 red onion red onions
  • 0.5 cup guacamole

Instructions 

  • Cook the rice according to package instructions.
  • Warm the beans and prepare chopped vegetables.
  • Assemble the bowl with rice, beans, vegetables, and toppings.
  • Add sour cream, guacamole, and chili if desired.
  • Serve immediately and enjoy!

Notes

You can customize the toppings and greens to suit your taste.
Calories: 450kcal
Cost: $12
Course: Main Course
Cuisine: Mexican
Keyword: Vegetables

Delicious Buffalo Chicken Wraps: A Quick and Flavor-Packed Recipe

Whip up these irresistible Buffalo Chicken Wraps in no time! Perfect for busy weeknights, this recipe combines tender chicken, zesty buffalo sauce, and fresh veggies, all wrapped up in a soft tortilla. A crowd-pleaser that’s both simple and satisfying, these wraps are ideal for anyone looking to bring excitement to their evening meals without the stress. Let’s dive in and discover why you’ll love this recipe!

Why You’ll Love This Recipe

  • Quick Preparation: You can have these wraps ready in just 20 minutes, making them a perfect choice for busy nights.
  • Flavor Explosion: The combination of buffalo sauce and fresh ingredients creates a deliciously bold taste that will satisfy your cravings.
  • Versatile Ingredients: Use whatever chicken you have on hand—this recipe works great with rotisserie chicken, leftovers, or freshly cooked chicken.
  • Customizable: Feel free to tweak the toppings and sauces to suit your taste, from adding more veggies to choosing your favorite dressing.
  • Healthy Option: Packed with protein and fresh produce, these wraps are a flavorful way to maintain a balanced diet.

Ingredient Breakdown

Here’s what you’ll need to create these tasty Buffalo Chicken Wraps:

  • 2 cups cooked chicken, shredded: About 2 medium chicken breasts. You can substitute with rotisserie chicken for convenience.
  • 1/4 cup buffalo wing sauce: Choose your favorite brand or make your own for a personalized touch.
  • 1/2 cup romaine lettuce, chopped: This adds a fresh crunch. You can swap with spinach or kale if desired.
  • 1/4 cup diced tomatoes: Fresh tomatoes bring a burst of flavor. Use cherry tomatoes for a sweeter option.
  • 1/4 cup shredded cheese: Cheddar or blue cheese pairs perfectly with buffalo sauce.
  • 1/4 cup ranch dressing: This creamy component balances the heat of the buffalo sauce. You can also use blue cheese dressing if you prefer.
  • 4 large flour tortillas: Any type of wrap works, including whole wheat or gluten-free options.
  • Salt and pepper: Season to taste.

Step-by-Step Instructions

Juicy Buffalo Chicken Wrap showing colorful ingredients like romaine lettuce and diced tomatoes from a side angle.

Now that you have your ingredients gathered, let’s put everything together:

  1. In a large skillet over medium heat, combine the shredded chicken and buffalo wing sauce. Stir until the chicken is evenly coated and heated through, about 5-7 minutes. Season with salt and pepper as needed.
  2. While the chicken is heating, prepare the wrap fillings. In a mixing bowl, combine the chopped romaine lettuce, diced tomatoes, and shredded cheese. Toss gently to mix.
  3. Lay a tortilla flat on a clean surface. Spoon some of the buffalo chicken mixture onto the center of the tortilla, followed by a portion of the lettuce mixture.
  4. Drizzle ranch dressing over the fillings.
  5. Fold the sides of the tortilla inwards, then roll the bottom up tightly to enclose the fillings. Secure with aluminum foil or parchment paper if necessary.
  6. Repeat the process for the remaining tortillas.
  7. Serve immediately or refrigerate for up to 1 hour before serving.

Pro Tips for Perfect Buffalo Chicken Wraps

  • Choose the Right Chicken: For the most flavorful wraps, use chicken that has been marinated or seasoned before cooking.
  • Don’t Skip the Seasoning: Ensure to season your chicken with salt and pepper; it elevates the overall flavor.
  • Experiment with Sauces: If you like heat, add a bit more buffalo sauce or try a different hot sauce for variety.
  • Make Ahead: Prep the chicken and veggies ahead of time and store them in the fridge. Assemble the wraps just before serving.
  • Use Fresh Ingredients: The fresher your veggies, the better the crunch and flavor.
  • Toast the Tortilla: Lightly toasting the tortilla in a skillet adds a nice texture and warmth.
  • Cut for Sharing: If serving for a group, cut the wraps in half for easy sharing.
  • Garnish Wisely: Fresh herbs or a sprinkle of extra cheese can enhance presentation and flavor.

Common Mistakes and Troubleshooting

  • Overcooking the Chicken: Avoid dry chicken by ensuring you only heat it through, not cook it again.
  • Too Much Sauce: If your wraps are soggy, use less buffalo sauce or drain excess liquid from the chicken.
  • Filling Overload: Stuffing too much into the wrap can make it hard to roll. Keep fillings balanced.
  • Cold Tortillas: Cold tortillas can crack. Warm them slightly before assembling.

Variations to Try

Want to mix things up? Here are some delicious variations:

  • Buffalo Chicken Salad Wrap: Add greens and skip the tortilla for a low-carb option.
  • Spicy Buffalo Shrimp Wrap: Swap out chicken for shrimp marinated in buffalo sauce.
  • Veggie-Loaded Wrap: Incorporate more veggies like bell peppers or cucumbers for a refreshing twist.
  • BBQ Chicken Wrap: Substitute buffalo sauce with your favorite BBQ sauce for a different flavor profile.

Storage and Make-Ahead Instructions

If you want to prepare these wraps ahead of time, here’s how:

  • In the Fridge: Store assembled wraps in an airtight container for up to 1 hour before serving. If making ahead, keep chicken and veggies separate until ready to assemble.
  • Reheating: If you need to reheat, do so in a skillet over low heat to maintain the texture.

Comprehensive FAQ

  • Can I use frozen chicken? Yes! Just ensure it’s fully cooked and shredded before mixing with the sauce.
  • What can I substitute for ranch dressing? Blue cheese dressing works great, or try a yogurt-based dressing for a healthier option.
  • How do I make these wraps gluten-free? Use gluten-free tortillas and ensure your sauces are also gluten-free.
  • Can I freeze these wraps? While it’s not recommended to freeze assembled wraps, you can freeze the chicken mixture.
  • How spicy are these wraps? The spice level depends on the buffalo sauce you choose. Adjust according to your taste.
  • Can I add cheese to the chicken mixture? Absolutely! Mixing in shredded cheese with the chicken can make it extra creamy.
  • What sides go well with buffalo chicken wraps? Consider serving with carrot sticks, celery, or a fresh garden salad.
  • How do I reheat leftovers? Reheat in a skillet or microwave until warmed through, but avoid overcooking.

Nutrition Tips and Dietary Adaptations

For those mindful of their nutrition:

  • Lower Calorie Options: Use low-fat ranch dressing and reduced-fat cheese to cut calories.
  • Increase Fiber: Opt for whole grain tortillas and add more vegetables to boost fiber content.
  • Protein-Packed: Incorporate beans or legumes for an extra protein kick without adding meat.
  • Dairy-Free: Substitute cheese and ranch with dairy-free options for a vegan-friendly wrap.

Equipment Recommendations

To make your cooking experience seamless, consider using:

  • Large Skillet: Essential for heating the chicken and mixing flavors effectively.
  • Mixing Bowl: A large bowl to combine your fresh veggies and toppings.
  • Sharp Knife: For chopping vegetables and shredding chicken efficiently.
  • Tortilla Press (optional): If you want to make homemade tortillas for an extra special touch.

Serving Suggestions

Complete your meal with these delightful serving suggestions:

  • Pair with Sides: Serve with crunchy veggie sticks, chips, or a light salad for a balanced meal.
  • Garnish: Consider adding fresh herbs like cilantro or parsley for a pop of color and flavor.
  • Dip Options: Provide additional ranch or blue cheese dressing on the side for dipping.

Now that you have all the details, you’re ready to create these Buffalo Chicken Wraps that are sure to impress! Remember, cooking is all about confidence and creativity—so don’t be afraid to experiment and make this recipe your own. Happy cooking!

Buffalo Chicken Wraps

Prep Time 10 minutes
Cook Time 10 minutes
Total Time 20 minutes
Servings 4 wraps
Calories 450
Enjoy these flavorful buffalo chicken wraps, perfect for a quick lunch or dinner with a spicy kick and fresh toppings.

Ingredients

Chicken

  • 2 cups cooked chicken, shredded (About 2 medium chicken breasts)
  • 0.25 cup buffalo wing sauce

Vegetables

  • 0.5 cup romaine lettuce, chopped
  • 0.25 cup diced tomatoes
  • 0.25 cup shredded cheese (Cheddar or blue cheese)
  • 0.25 cup ranch dressing
  • 4 large flour tortillas
  • to taste salt and pepper (Season as needed)

Instructions 

  • Combine shredded chicken with buffalo wing sauce in a skillet; heat for 5-7 minutes, season with salt and pepper.
  • Mix chopped lettuce, diced tomatoes, and shredded cheese in a bowl.
  • Lay a tortilla flat, add chicken mixture, then top with vegetable mixture.
  • Drizzle ranch dressing over fillings, fold sides, and roll tightly.
  • Repeat with remaining tortillas and serve immediately or refrigerate for up to 1 hour.

Notes

For extra flavor, add a dash of hot sauce or serve with extra ranch dressing.
Calories: 450kcal
Cost: $12
Course: Main Course
Cuisine: American
Keyword: Chicken

Discover the Creamy Goodness of Avocado Smoothies

Welcome to the world of avocado smoothies, where creamy texture meets vibrant flavor! This avocado smoothie is a delightful way to start your day or recharge during a busy afternoon. Not only is it easy to whip up, but it’s also packed with nutrients that will keep you energized. Whether you’re a seasoned smoothie lover or new to the game, this post will guide you through everything you need to know about making the perfect avocado smoothie. Let’s dive in!

Why You’ll Love This Recipe

This avocado smoothie is more than just a delicious drink; it’s a powerhouse of nutrition and versatility that can elevate your smoothie game. Here are five compelling reasons to make this smoothie your new go-to:

  • Nutrient-Rich: This smoothie is loaded with healthy fats from avocados, fiber from spinach and bananas, and essential vitamins and minerals.
  • Quick and Easy: With just a few ingredients and a blender, you can whip this smoothie up in under 5 minutes!
  • Family-Friendly: Kids love the creamy texture and sweet banana flavor, making it a hit for breakfast or snack time.
  • Customizable: Feel free to modify ingredients based on your preferences or what you have on hand. This smoothie can easily adapt to suit your taste.
  • Great for Meal Prep: Make a batch ahead of time, and store it in the fridge for a quick, nutritious option on busy days.

Ingredients Breakdown

Here’s what you’ll need for your avocado smoothie:

  • 1 medium frozen avocado, sliced: Frozen avocados offer a creamy texture and chill your smoothie perfectly.
  • 1 cup spinach, packed: Spinach adds a nutritional punch without overpowering the flavor.
  • ½ frozen large banana: Bananas naturally sweeten your smoothie and contribute to a luscious consistency.
  • 1 cup unsweetened almond milk: This serves as a smooth base; you can substitute with any plant-based or dairy milk.

Feel free to get creative! You can swap the almond milk for coconut milk for a tropical twist or add in some protein powder for an extra boost.

How to Make Your Avocado Smoothie

Close-up shot of a vibrant green avocado smoothie in a clear glass with a straw.

Follow these simple steps to create your creamy avocado smoothie:

  1. Place all ingredients into a high-speed blender.
  2. Blend on high until smooth. If the smoothie is too thick, add more almond milk until desired consistency is reached.
  3. Serve immediately and top with your favorite toppings like chia seeds, nuts, or fresh fruit.

Pro Tips for the Perfect Avocado Smoothie

Here are some expert insights to ensure your avocado smoothie turns out perfectly every time:

  • Choose ripe avocados: Make sure your avocados are ripe for the best flavor and texture. They should yield slightly to gentle pressure.
  • Blend in stages: If your blender struggles, start by blending the spinach and almond milk first, then add the banana and avocado.
  • Adjust sweetness: Taste your smoothie before serving. If you prefer it sweeter, consider adding a touch of honey or maple syrup.
  • Keep it cold: Use frozen fruits to maintain that chill factor. You can even freeze your almond milk in ice cube trays for an extra frosty smoothie.
  • Experiment with add-ins: Try adding a tablespoon of nut butter for creaminess and protein, or toss in some flaxseeds for added fiber.

Common Mistakes and Troubleshooting

Even the best of us can run into hiccups while blending up smoothies. Here’s how to troubleshoot common issues:

  • Too thick? Add more liquid slowly until you reach the desired consistency.
  • Too sweet? Balance it out with a squeeze of lemon juice or a handful of greens.
  • Too leafy? If your smoothie is grainy from the spinach, blend it longer or start blending it with the liquid first.

Delicious Variations to Try

Feeling adventurous? Here are four tasty variations of your avocado smoothie:

  • Chocolate Avocado Smoothie: Add 2 tablespoons of cocoa powder and a splash of vanilla extract for a rich, indulgent treat.
  • Tropical Avocado Smoothie: Incorporate ½ cup of frozen pineapple for a refreshing, island-inspired flavor.
  • Berry Avocado Smoothie: Toss in a cup of mixed berries for a colorful and antioxidant-packed version.
  • Protein-Packed Avocado Smoothie: Add a scoop of your favorite protein powder and a tablespoon of chia seeds for an energizing post-workout drink.

Storage and Make-Ahead Instructions

This avocado smoothie is best enjoyed fresh, but you can certainly prepare it in advance:

  • Refrigeration: Store leftover smoothie in an airtight container in the fridge for up to 24 hours. Be sure to shake or stir before drinking.
  • Freezing: Pour the smoothie into ice cube trays for a refreshing treat later. Blend the cubes with a splash of almond milk for a quick smoothie fix.

Frequently Asked Questions

Here are some common questions about avocado smoothies answered:

  • Can I use fresh avocados instead of frozen? Yes, but you might want to add some ice to achieve that creamy texture.
  • Is this smoothie vegan? Absolutely! It’s made with plant-based ingredients.
  • How can I make my smoothie thicker? Add more frozen fruits or a scoop of Greek yogurt for a thicker consistency.
  • What are the health benefits of avocado? Avocados are rich in healthy fats, fiber, and various vitamins that support heart health and digestion.
  • Can I use other leafy greens? Yes! Kale or Swiss chard can be used as substitutes for spinach.
  • How long does an avocado smoothie last? It’s best consumed immediately, but can be kept in the fridge for up to 24 hours.
  • Can I add protein powder? Yes, adding protein powder can enhance the smoothie’s nutritional content, especially post-workout.
  • What toppings work well with avocado smoothies? Toppings like granola, nuts, seeds, or fresh fruit can add texture and additional nutrients.

Nutrition Tips and Dietary Adaptations

This avocado smoothie is naturally nutrient-dense, but here are some tips to make it even more tailored to your dietary needs:

  • Gluten-Free: This smoothie is naturally gluten-free and can be enjoyed by those with gluten sensitivities.
  • Low-Carb: For a low-carb version, reduce the banana or use unsweetened coconut yogurt instead.
  • Nut-Free: Substitute almond milk with oat milk or rice milk to accommodate nut allergies.

Equipment Recommendations

To achieve the best results when making your avocado smoothie, consider using the following equipment:

  • High-Speed Blender: A high-speed blender will give you that velvety smooth texture.
  • Measuring Cups and Spoons: For accurately measuring out your ingredients.
  • Spatula: Helpful for scraping down the sides of the blender to ensure everything is well blended.

Serving Suggestions

Your avocado smoothie can stand alone as a nutritious drink or be paired with various meals. Here are some serving suggestions:

  • Breakfast: Serve it alongside whole grain toast topped with avocado or almond butter for a balanced meal.
  • Snack: Enjoy it as a refreshing afternoon pick-me-up.
  • Dessert: Top it with granola and fresh fruits for a healthier dessert option.

Conclusion

Now that you have all the tools and knowledge to create an incredible avocado smoothie, it’s time to get blending! Remember, cooking is all about enjoyment and experimentation, so feel free to tweak this recipe until it’s just right for you. With a few simple ingredients and a blender, you can create a nutritious, delicious smoothie that fits perfectly into your lifestyle. Happy blending, my friend!

Avocado Smoothie Recipe

Prep Time 5 minutes
Total Time 5 minutes
Servings 2 cups
Calories 250
A creamy and nutritious avocado smoothie perfect for a quick breakfast or snack. Packed with healthy fats and greens, it's both delicious and energizing.

Ingredients

Fruits and Vegetables

  • 1 medium frozen avocado slices
  • 0.5 cup spinach, packed
  • 0.5 large frozen banana

Liquid Ingredients

  • 1 cup unsweetened almond milk

Instructions 

  • Place all ingredients into a high-speed blender.
  • Blend on high until smooth, adding more almond milk if needed.
  • Serve immediately and enjoy with your favorite toppings.

Notes

For a creamier texture, add a splash of water or more almond milk.
Calories: 250kcal
Cost: $8
Course: Breakfast, Snack
Cuisine: Healthy
Keyword: Avocado

Dive Into the Joy of Baking Chocolate Love Muffins

Welcome to the delightful world of baking! Today, we’re whipping up **Chocolate Love Muffins**—a scrumptious treat that combines the rich flavors of dark chocolate with the refreshing zest of orange juice. These muffins are not only a chocolate lover’s dream but also incredibly easy to make, making them perfect for any occasion! Whether you’re hosting a brunch, craving a sweet snack, or just looking to brighten your day, this recipe has got you covered. Let’s get started and bring some joy into your kitchen!

Why You’ll Love This Recipe

  • Quick and Easy: You can whip up these muffins in just 30 minutes, making them a perfect solution for last-minute cravings or busy schedules.
  • Moist and Rich: The combination of **orange juice** and **dark chocolate** ensures these muffins are incredibly moist and packed with flavor.
  • Customizable: Feel free to add your favorite mix-ins like nuts or dried fruits to make these muffins uniquely yours!
  • Perfect for Any Occasion: These muffins are versatile enough for breakfast, dessert, or a delightful snack. They’re great for packing in school lunches or enjoying with a cup of tea.
  • Healthier Ingredients: Using **whole-wheat flour** and **rolled oats** makes these muffins a more nutritious choice without sacrificing taste.

Ingredient Breakdown with Substitutions

Understanding the ingredients is key to mastering this recipe. Here’s what you’ll need:

  • 1 cup orange juice: Freshly squeezed is best, but you can use store-bought.
  • 1/2 cup coconut oil: Warmed. You can substitute with melted butter or a neutral oil if preferred.
  • 1/2 cup firmly packed brown sugar: For a deeper flavor. You can also use coconut sugar for a healthier option.
  • 2 cups white whole-wheat flour: This gives the muffins a great texture; all-purpose flour can be used as a substitute.
  • 1/2 cup rolled oats: Adds heartiness. Quick oats will also work well.
  • 1/2 teaspoon salt: Enhances flavor.
  • 1 teaspoon baking powder: For rise.
  • 1/2 teaspoon baking soda: Helps with leavening.
  • 1/4 cup cocoa powder: Use unsweetened for the best results.
  • 1/2 teaspoon ground cinnamon: Adds warmth and depth.
  • 3/4 cup dark chocolate, coarsely chopped: Feel free to use dairy-free chocolate for a vegan option!

Pro Tips for Perfect Muffins

Side view of freshly baked chocolate love muffins with a moist texture.
  • Don’t overmix: When combining the wet and dry ingredients, mix just until moistened. Overmixing can lead to dense muffins.
  • Use room temperature ingredients: This helps in achieving a more even batter consistency.
  • Bake in a preheated oven: Preheating ensures even cooking and proper rise.
  • Check for doneness: Use a toothpick; it should come out clean or with a few moist crumbs.
  • Cool in the pan: Let them cool for 10 minutes in the pan before transferring to a wire rack to maintain moisture.
  • Experiment with flavors: Try adding a teaspoon of vanilla extract or a splash of espresso for a flavor boost.
  • Use silicone muffin liners: They make for easy removal and cleanup.
  • Store properly: Keep muffins in an airtight container to maintain freshness.

Common Mistakes and Troubleshooting

  • Too dry muffins: This can happen if you overbake or don’t add enough moisture. Keep an eye on baking time and ensure accurate measurements.
  • Dense muffins: Overmixing the batter can lead to dense texture. Stir just enough to combine the ingredients.
  • Uneven baking: Make sure your oven is properly calibrated. An oven thermometer can help ensure accurate temperatures.
  • Muffins sticking to the pan: Ensure your muffin pan is well-greased or use liners to prevent sticking.

Delicious Variations You Can Try

Feeling adventurous? Here are some tasty variations to switch things up:

  • Chocolate Chip Muffins: Add a cup of chocolate chips for an extra chocolatey treat.
  • Nutty Banana Muffins: Incorporate 1 mashed banana and 1/2 cup chopped walnuts for a fruity twist.
  • Berry Bliss Muffins: Fold in 1 cup of fresh or frozen berries for a burst of color and flavor.
  • Spiced Pumpkin Muffins: Replace cocoa powder with pumpkin puree and add pumpkin spice for a seasonal treat.

Storage and Make-Ahead Instructions

These muffins can be made ahead and stored for later enjoyment:

  • Room Temperature: Keep in an airtight container for up to 3 days.
  • Refrigerator: Store in an airtight container for up to a week.
  • Freezer: You can freeze these muffins for up to 3 months. Allow to cool completely before wrapping individually in plastic wrap and placing in a freezer bag.
  • Reheating: To enjoy, simply microwave for 20-30 seconds or warm in the oven until heated through.

Frequently Asked Questions (FAQs)

  • Can I freeze these muffins? Yes! These muffins freeze beautifully. Just ensure they’re cooled and stored in an airtight container.
  • How should I store leftovers? Keep leftover muffins in an airtight container at room temperature for up to 3 days.
  • Can I use another type of flour? Absolutely! All-purpose flour can be used, but incorporating whole grains adds nutrition.
  • What can I serve these with? They pair wonderfully with coffee, tea, or a scoop of your favorite ice cream for dessert!
  • Is this recipe suitable for every diet? You can make these muffins dairy-free and vegan by using plant-based ingredients.
  • Can I substitute the sugar? Yes! Coconut sugar or a sugar substitute can be used, but it may alter the taste slightly.
  • What if I don’t have orange juice? You can substitute with another fruit juice, such as apple or pineapple.
  • How can I make these muffins gluten-free? Use a gluten-free flour blend in place of the whole-wheat flour.

Nutritional Tips and Dietary Adaptations

To make these muffins even healthier, consider the following tips:

  • Add more fiber: Incorporate ground flaxseed or chia seeds for additional nutrients.
  • Reduce sugar: You can experiment with reducing the sugar by a quarter without greatly affecting the taste and texture.
  • Use nut milks: Swap the coconut oil for nut-based milks to enhance flavor and nutrition.
  • Vegan options: Use flax eggs or applesauce as egg substitutes for a vegan-friendly version.

Essential Equipment You’ll Need

Here’s what you’ll need to create these delightful muffins:

  • Muffin pan: A standard 12-cup muffin pan works perfectly.
  • Mixing bowls: Having both large and medium-sized bowls is ideal for mixing ingredients.
  • Stand mixer: While not necessary, a stand mixer can make blending easier.
  • Measuring cups and spoons: Accurate measurements are crucial for baking success.
  • Wire rack: For cooling your muffins evenly after baking.

Serving Suggestions

Once your muffins are baked and cooled, consider these serving ideas:

  • Garnish with a dusting of powdered sugar: This adds a lovely touch of sweetness and presentation.
  • Pair with fresh fruit: Fresh berries or slices of citrus complement the rich chocolate flavor beautifully.
  • Serve warm: These muffins are best enjoyed fresh from the oven or warmed up for a gooey treat.
  • Enjoy with a dollop of whipped cream or yogurt: This adds a creamy texture that balances the richness of the chocolate.

Conclusion

Now that you have the ultimate guide to making **Chocolate Love Muffins**, I hope you’re feeling inspired and ready to bake! Remember, cooking is all about having fun and experimenting. Don’t worry about perfection—focus on the joy of creating something delicious. Enjoy the process and share these muffins with loved ones for a delightful treat that spreads happiness and warmth. Happy baking!

Chocolate love muffins

Prep Time 10 minutes
Cook Time 20 minutes
Total Time 30 minutes
Servings 12 muffins
Calories 220
Delight in these moist and chocolaty muffins with a hint of orange and cinnamon, perfect for a sweet treat.

Ingredients

Liquid ingredients

  • 1 cup orange juice
  • 1/2 cup coconut oil, warmed
  • 1/2 cup firmly packed brown sugar

Dry ingredients

  • 2 cups white whole-wheat flour
  • 1/2 cup rolled oats
  • 1/2 teaspoon salt
  • 1 teaspoon baking powder
  • 1/2 teaspoon baking soda
  • 1/4 cup cocoa powder
  • 1/2 teaspoon ground cinnamon
  • 3/4 cup dark chocolate, coarsely chopped

Instructions 

  • Preheat oven to 350°F (175°C) and spray muffin pan.
  • Mix orange juice, coconut oil, and brown sugar until well combined.
  • Whisk together flour, oats, salt, baking powder, baking soda, cocoa, and cinnamon.
  • Combine dry ingredients with wet mixture, then fold in chopped chocolate.
  • Divide batter into muffin cups and bake for 18-20 minutes. Cool on wire rack.

Notes

For extra flavor, add a pinch of orange zest to the batter.
Calories: 220kcal
Cost: $12
Course: Dessert
Keyword: chocolate

Welcome to your new favorite meal! If you’re looking for a quick, flavorful dish to impress your family or friends, look no further than these easy shrimp tacos. Packed with fresh ingredients and bursting with flavor, this recipe is perfect for busy evenings or casual gatherings. In just 30 minutes, you can create a delicious meal that feels special without the fuss. Let’s dive into why you’ll love this recipe!

Why You’ll Love This Recipe

These shrimp tacos are not just easy to make; they’re also versatile and packed with benefits. Here’s why you’ll want to whip them up tonight:

  • Quick preparation: Ready in just 30 minutes, making it ideal for weeknight dinners or last-minute guests.
  • Flavor explosion: Seasoned shrimp combined with fresh toppings create a fiesta of flavors in every bite.
  • Customizable: Tailor the toppings and salsas to fit your taste. You can make these shrimp tacos as spicy or mild as you like!
  • Healthy option: Packed with protein and fresh veggies, these tacos are a wholesome choice that doesn’t skimp on flavor.
  • Fun to assemble: Get everyone involved! Let family and friends build their own tacos for a fun, interactive meal.

Ingredients for Easy Shrimp Tacos

To make these delicious shrimp tacos, you’ll need the following ingredients. Don’t worry if you can’t find something; I’ll provide substitutions!

Essential Ingredients

  • Shrimp: 1 pound peeled and deveined shrimp. Medium to large shrimp are ideal for great texture.
  • Olive oil: 2 tablespoons for cooking the shrimp. You can also use avocado oil for a different flavor.
  • Seasonings: 1 tablespoon chili powder, 1 teaspoon cumin, 1 teaspoon garlic powder, and 1/2 teaspoon paprika. Feel free to adjust these to match your spice preference.
  • Tortillas: 8 small corn or flour tortillas. Corn gives a traditional feel, while flour offers a softer bite.

Optional Ingredients

  • Cabbage: 1 cup shredded green or purple cabbage adds crunch and freshness.
  • Cilantro: 1/2 cup chopped fresh cilantro for a burst of flavor.
  • Avocado: 1 whole avocado, sliced, for creaminess.
  • Lime wedges: For serving, adding a zesty finish to your tacos.
  • Sour cream or Greek yogurt: 1/2 cup for a creamy topping.
  • Honey: 1 teaspoon for a touch of sweetness in the lime crema (optional).

Directions for Making Easy Shrimp Tacos

Let’s get cooking! Follow these simple steps to create your shrimp tacos.

Step 1: Prepare the Shrimp

In a mixing bowl, combine the shrimp, olive oil, chili powder, cumin, garlic powder, paprika, salt, and pepper. Toss until the shrimp are well coated.

Step 2: Cook the Shrimp

Heat a skillet over medium-high heat. Add the shrimp and cook for about 2-3 minutes per side, until they are pink and opaque. Remove from heat.

Step 3: Make the Lime Crema

In a small bowl, mix together the sour cream or yogurt, lime zest, lime juice, honey (if using), and salt. Stir until smooth to create your zesty lime crema.

Step 4: Warm the Tortillas

While the shrimp is cooking, warm the tortillas in a separate skillet or microwave until soft and pliable.

Step 5: Assemble the Tacos

On each tortilla, place a few shrimp, top with shredded cabbage, fresh cilantro, and avocado slices. Drizzle generously with lime crema and serve with lime wedges on the side.

Pro Tips for Perfect Shrimp Tacos

Side view of shrimp tacos topped with cabbage and avocado.

Here are some expert insights to elevate your taco game:

  • Quality shrimp: Use fresh or properly thawed shrimp for the best texture and flavor.
  • Don’t overcook: Shrimp cooks quickly; remove it from the heat once it turns pink and opaque to prevent rubberiness.
  • Serve immediately: These tacos are best enjoyed fresh. Assemble just before serving for the best experience.
  • Experiment with spices: Feel free to add cayenne or chipotle powder for an extra kick!
  • Make it a meal: Serve with a side of Mexican rice or beans for a complete dinner.
  • Prep ahead: You can marinate the shrimp a few hours before cooking for deeper flavor.
  • Double the recipe: If you’re hosting, double the ingredients to ensure everyone gets their fill!
  • Fresh toppings: Use seasonal vegetables or fruits like mango or pineapple for unique flavor combinations.

Common Mistakes and Troubleshooting

Even the best cooks can run into hiccups. Here’s how to avoid common mistakes:

  • Overcooking shrimp: Keep a close eye on the shrimp as it cooks; it can go from perfect to overdone in seconds.
  • Dry tacos: If you find your tacos lacking moisture, consider adding more lime crema or a salsa.
  • Messy assembly: Warm your tortillas well; this helps them stay intact and prevents tearing when filled.

Variations on Easy Shrimp Tacos

Feel free to mix things up! Here are a few variations to keep your taco nights exciting:

  • Spicy Chipotle Shrimp Tacos: Use chipotle seasoning instead of chili powder for a smoky kick.
  • Tropical Shrimp Tacos: Add diced mango and jalapeño for a sweet and spicy twist.
  • Garlic Butter Shrimp Tacos: Sauté shrimp in garlic butter instead of olive oil for a rich flavor.
  • Veggie-Loaded Tacos: Add grilled peppers and onions for a heartier filling.

Storage and Make-Ahead Instructions

If you have leftovers or want to prep ahead, here’s how to store your shrimp tacos:

  • Storing leftovers: Keep the shrimp and toppings separate in airtight containers in the fridge for up to 2 days.
  • Reheating shrimp: Gently reheat shrimp in a skillet over low heat. Avoid microwaving to preserve texture.
  • Make-ahead shrimp: You can season the shrimp and store it in the fridge for up to 4 hours before cooking.

Frequently Asked Questions

Got questions? Here are some common ones about shrimp tacos:

  • What size shrimp should I use for tacos? Medium to large shrimp (31-40 count per pound) work best for tacos.
  • Can I use frozen shrimp? Yes! Just ensure they’re fully thawed before cooking.
  • How do I make shrimp tacos spicy? Add cayenne pepper or spicy salsa to kick up the heat.
  • Can I use flour tortillas instead? Absolutely! Flour tortillas are softer and can hold more filling.
  • What can I serve with shrimp tacos? Consider serving with Mexican rice, refried beans, or a fresh salad.
  • How long do shrimp tacos last? Store cooked shrimp in the fridge for up to 2 days.
  • Can I make shrimp tacos ahead of time? Yes, prepare the shrimp and toppings separately and assemble just before serving.
  • What’s the best way to reheat shrimp? Reheat shrimp gently in a skillet to maintain their texture.

Nutrition Tips and Dietary Adaptations

If you’re looking to adapt this recipe for dietary needs, here are some tips:

  • Gluten-free: Use corn tortillas or gluten-free tortillas.
  • Dairy-free: Substitute sour cream with a dairy-free alternative or avocado for creaminess.
  • Low-carb: Serve the shrimp with a salad instead of tortillas or use lettuce wraps.

Equipment Recommendations

Having the right tools can make your cooking experience smoother:

  • Skillet: A non-stick skillet works best for cooking shrimp quickly and evenly.
  • Mixing bowls: Use for marinating shrimp and mixing toppings.
  • Spatula: A good spatula helps flip the shrimp without breaking them.

Serving Suggestions

Once your tacos are assembled, it’s time to serve! Here are some ideas:

  • Garnishes: Top with extra cilantro, diced red onion, or jalapeños for added flavor.
  • Side dishes: Serve with a fresh corn salad or guacamole for a complete meal.
  • Beverage pairings: Pair with a light beer or a refreshing margarita to complement the flavors.

Conclusion

And there you have it—quick and delicious shrimp tacos that anyone can make! With just a few simple ingredients and steps, you’ll be creating a meal that’s not only satisfying but also bursting with flavor. Remember, cooking should be fun and stress-free, so don’t hesitate to play around with the ingredients. Enjoy the process, and soon you’ll be the go-to taco master in your kitchen! Happy cooking!

Easy Shrimp Tacos

Prep Time 10 minutes
Cook Time 10 minutes
Total Time 20 minutes
Servings 4 servings
Calories 350
Delicious and quick shrimp tacos packed with fresh flavors and vibrant toppings, perfect for a weeknight dinner.

Ingredients

Protein

  • 1 pound shrimp, peeled and deveined

Oil

  • 2 tablespoons olive oil

Spices and Seasonings

  • 1 tablespoon chili powder
  • 1 teaspoon cumin
  • 1 teaspoon garlic powder
  • 1.5 teaspoons paprika
  • to taste salt and pepper

Tortillas

  • 8 small corn or flour tortillas

Vegetables and Toppings

  • 1 cup shredded cabbage (green or purple)
  • 0.5 cup chopped fresh cilantro
  • 1 whole avocado, sliced
  • to taste lime wedges for serving
  • 0.5 cup sour cream or Greek yogurt
  • 1 whole lime, zest and juice
  • 1 teaspoon honey (optional)
  • to taste salt

Instructions 

  • Combine shrimp, olive oil, chili powder, cumin, garlic powder, paprika, salt, and pepper. Toss to coat.
  • Cook shrimp in a skillet over medium-high heat for 2-3 minutes per side until pink and opaque. Remove from heat.
  • Mix sour cream or yogurt with lime zest, lime juice, honey (if using), and salt to make lime crema.
  • Warm tortillas until soft and pliable.
  • Assemble tacos with shrimp, cabbage, cilantro, avocado, drizzle with lime crema, and serve with lime wedges.

Notes

For extra flavor, add a squeeze of lime over the tacos before serving.
Calories: 350kcal
Cost: $15
Course: Main Course
Cuisine: Mexican
Keyword: shrimp