Author

Steven

Browsing

Why You’ll Love This Nourishing Protein Granola

If you’re on the hunt for a delicious and versatile snack or breakfast option, look no further! This protein granola recipe is packed with flavor and nutrition, making it your new go-to for busy mornings or afternoon pick-me-ups. Here are just a few reasons why you’ll adore this recipe:

  • High Protein Boost: Each serving provides a substantial amount of protein thanks to the addition of protein powder and nuts, keeping you satisfied and energized throughout the day.
  • Simple Ingredients: Made with wholesome ingredients like rolled oats and natural peanut butter, this granola is easy to prepare and customize to your liking.
  • Quick to Make: In under 30 minutes, you can have a fresh batch of granola ready to enjoy, perfect for those busy mornings.
  • Versatile Serving Options: Enjoy it with yogurt, as a topping on smoothie bowls, or simply grab a handful as a snack on the go!
  • Customizable Flavors: Whether you love chocolate, berries, or nuts, this recipe allows you to mix and match ingredients to create your own unique blend.

Ingredients and Substitutions

To make your own high protein granola, gather the following ingredients:

  • 2 cups rolled oats
  • 1 cup mixed nuts and seeds (e.g., almonds, walnuts, pumpkin seeds)
  • ½ cup vanilla protein powder (vegan options available)
  • ÂĽ cup natural creamy peanut butter
  • ÂĽ cup coconut oil (can substitute with olive oil for a different flavor)
  • 3 tablespoons honey or maple syrup
  • ½ teaspoon cinnamon powder
  • A good pinch of salt

Substitution Tips: If you’re allergic to nuts, consider using seeds like sunflower or flaxseeds. For a nut-free option, replace the peanut butter with sunflower seed butter.

How to Make Protein Granola

Follow these simple steps to create your own delicious granola:

  1. Preheat your oven to 325°F (170°C). In a large mixing bowl, combine the rolled oats, mixed nuts, protein powder, cinnamon, and salt. Stir well to mix all the dry ingredients.
  2. In a separate small bowl, combine the peanut butter, coconut oil, and honey or maple syrup. Microwave for 20-30 seconds until softened, then whisk until smooth.
  3. Pour the wet mixture into the dry ingredients and stir well, ensuring everything is well-coated. If the mixture appears too dry, add an additional tablespoon of oil or maple syrup.
  4. Transfer the granola mixture onto a baking sheet lined with parchment paper, spreading it out evenly.
  5. Bake for 8-10 minutes, then remove from the oven and stir the granola. Spread it out evenly again and bake for an additional 5-8 minutes, watching closely to ensure it doesn’t burn.
  6. Once golden and fragrant, remove from the oven and let cool completely. The granola will become crunchier as it cools.
  7. Serve with yogurt, milk, or as a standalone snack. Enjoy!

Pro Tips for Perfect Granola
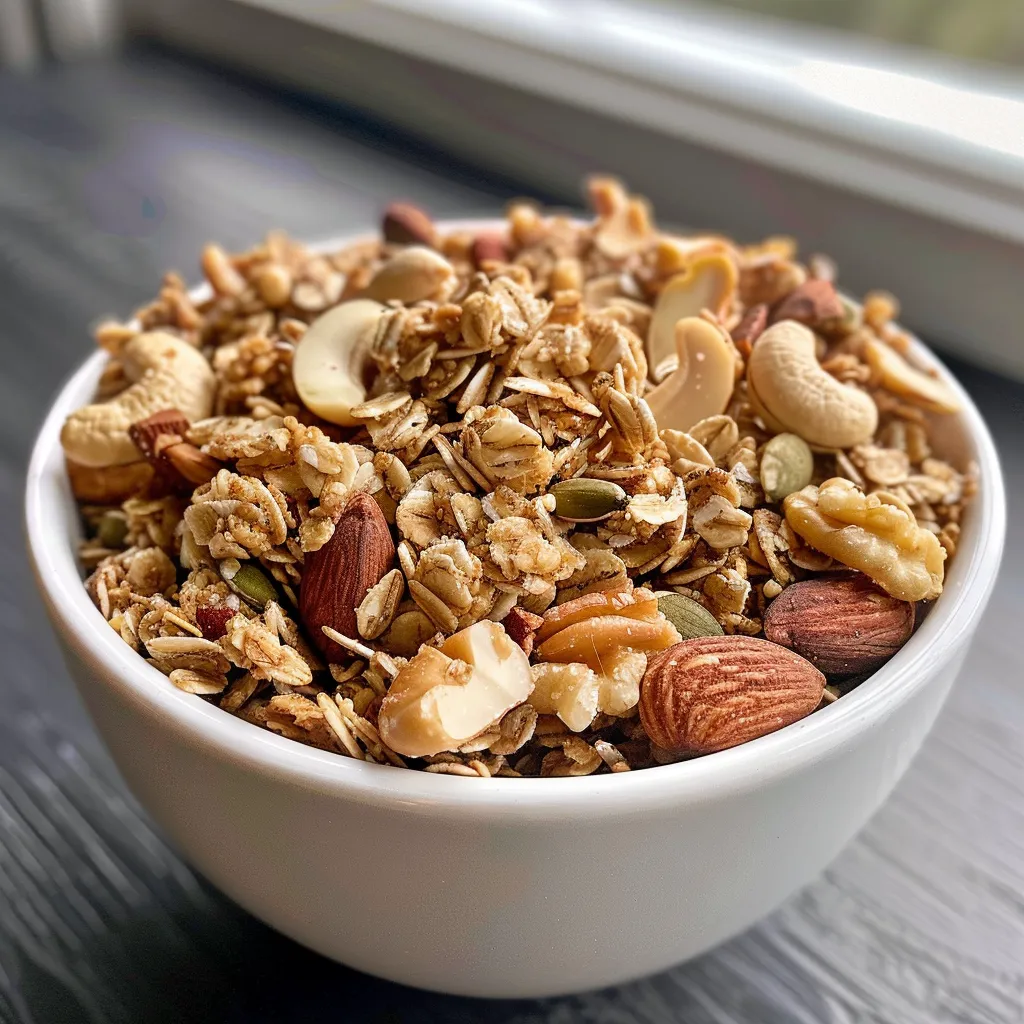
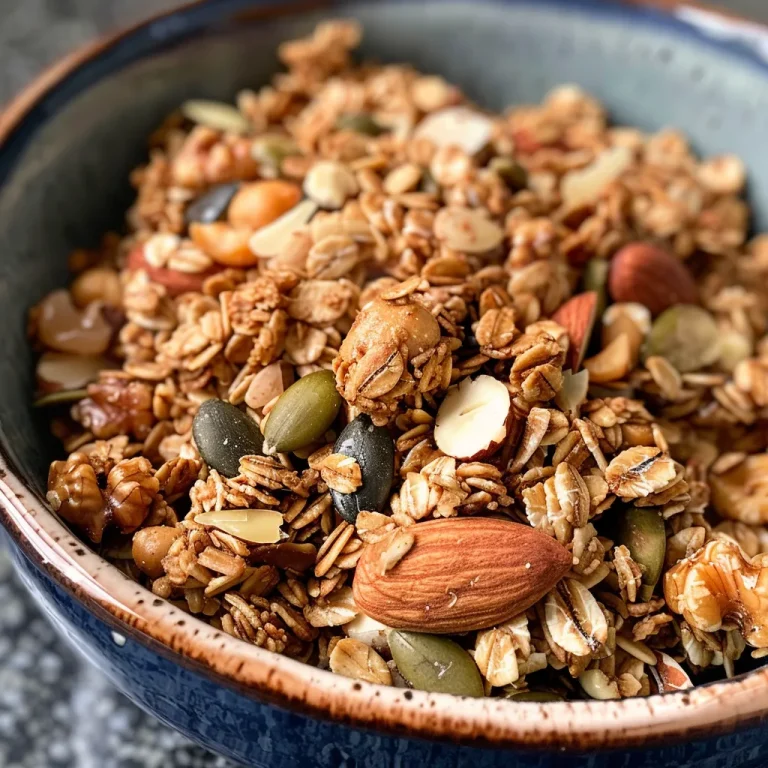
Side angle of a vibrant dish showcasing chunky protein granola with nuts and seeds.

To ensure your granola turns out perfectly every time, consider these expert tips:

  • Mixing Bowl: Use a large mixing bowl to allow enough space for stirring without spilling.
  • Even Baking: Spread the granola in a single layer on the baking sheet for even cooking and to avoid sogginess.
  • Cooling Time: Allow the granola to cool completely on the baking sheet to achieve that crunchy texture.
  • Storage: Store your granola in an airtight container to keep it fresh for up to 2 weeks.
  • Customize Flavors: Feel free to experiment with flavors—add cocoa powder for a chocolatey twist or dried fruits like cranberries for added sweetness.
  • Batch Size: Consider doubling the recipe to have granola on hand for the week ahead.
  • Oven Temperature: Ensure your oven is correctly calibrated; even slight variations can affect baking time.
  • Ingredient Quality: Use high-quality ingredients, especially your protein powder and nut butter, for the best flavor and texture.

Common Mistakes and Troubleshooting

Making granola can be straightforward, but here are common pitfalls to avoid:

  • Granola Too Soft: If your granola isn’t crunchy, it may need more baking time. Just keep an eye on it to prevent burning.
  • Uneven Flavor: Make sure to mix the dry and wet ingredients thoroughly to ensure every bite is flavorful.
  • Burnt Granola: Always check your granola a few minutes before the recommended baking time is up, as ovens can vary.
  • Dried Out Granola: If your granola feels too dry, increase the amount of honey or oil slightly next time to maintain moisture.

Variations on Your Protein Granola

Why stick to one flavor when you can mix it up? Here are some fun variations to try:

  • Chocolate Chip Granola: Stir in dark chocolate chips after baking for a sweet treat.
  • Berry Blast: Add dried blueberries or cranberries for a fruity flavor.
  • Coconut Delight: Include shredded coconut for a tropical twist.
  • Spicy Granola: Add a pinch of cayenne or chili powder for a bit of heat and a unique flavor profile.

Storage and Make-Ahead Instructions

This high protein granola can be made ahead of time and stored properly:

  • Store in an airtight container at room temperature for up to 2 weeks.
  • For longer storage, keep it in the refrigerator for up to a month.
  • You can also freeze granola for up to 3 months. Just make sure to use a freezer-safe container.

Frequently Asked Questions

Got questions? Here are some common inquiries about protein granola:

  • Can I use quick oats instead of rolled oats? Yes, but the texture may be different. Rolled oats provide a chewier texture.
  • Is this recipe gluten-free? Yes, as long as you use certified gluten-free oats.
  • What can I use instead of honey? Maple syrup or agave nectar make great substitutes.
  • Can I make this granola vegan? Absolutely! Use maple syrup and a plant-based protein powder.
  • How can I make my granola clumpier? Try adding a bit more sweetener or pressing the mixture down firmly before baking.
  • What is the best way to enjoy granola? It’s delicious with yogurt, on top of smoothie bowls, or just as a snack!
  • How much protein does each serving contain? Each serving can contain around 15 grams of protein depending on the protein powder used.
  • Can I add fresh fruit to my granola? Fresh fruit can be added when serving but is not recommended for storage.

Nutrition Tips and Dietary Adaptations

This nutty granola breakfast isn’t just tasty; it can also fit into various dietary needs:

  • Low-Calorie Option: Reduce the amount of nut butter and sweetener to lower calories.
  • Protein-Packed: Use a high-quality protein powder to boost the protein content significantly.
  • Nut-Free Version: Substitute nuts with seeds to cater to allergies.
  • Lower Carb Adaptation: Use unsweetened coconut flakes and reduce the amount of oats.

Equipment Recommendations

To make your granola smoothly, here are some helpful tools:

  • Mixing Bowls: A large mixing bowl is essential for easy stirring.
  • Baking Sheet: Use a rimmed baking sheet to prevent spills.
  • Parchment Paper: This will help prevent sticking and make cleanup easier.
  • Measuring Cups and Spoons: Accurate measurements are crucial for consistent results.

Serving Suggestions

Once your granola is ready, here are some fantastic ways to serve it:

  • With Yogurt: Layer your granola with Greek yogurt and fresh fruits for a satisfying parfait.
  • On Smoothie Bowls: Sprinkle over smoothie bowls for added texture and nutrition.
  • As a Cereal: Enjoy it with milk or a dairy-free alternative for a crunchy cereal experience.
  • Snack Time: Keep a jar of granola on hand for a quick and healthy snack anytime.

In conclusion, this protein granola recipe is not only simple to make but also incredibly versatile and nourishing. Whether you enjoy it as a breakfast option, a snack, or a topping, you’ll be satisfying your cravings while fueling your body with the nutrients it needs. So grab your ingredients and give this recipe a try—you won’t regret it!
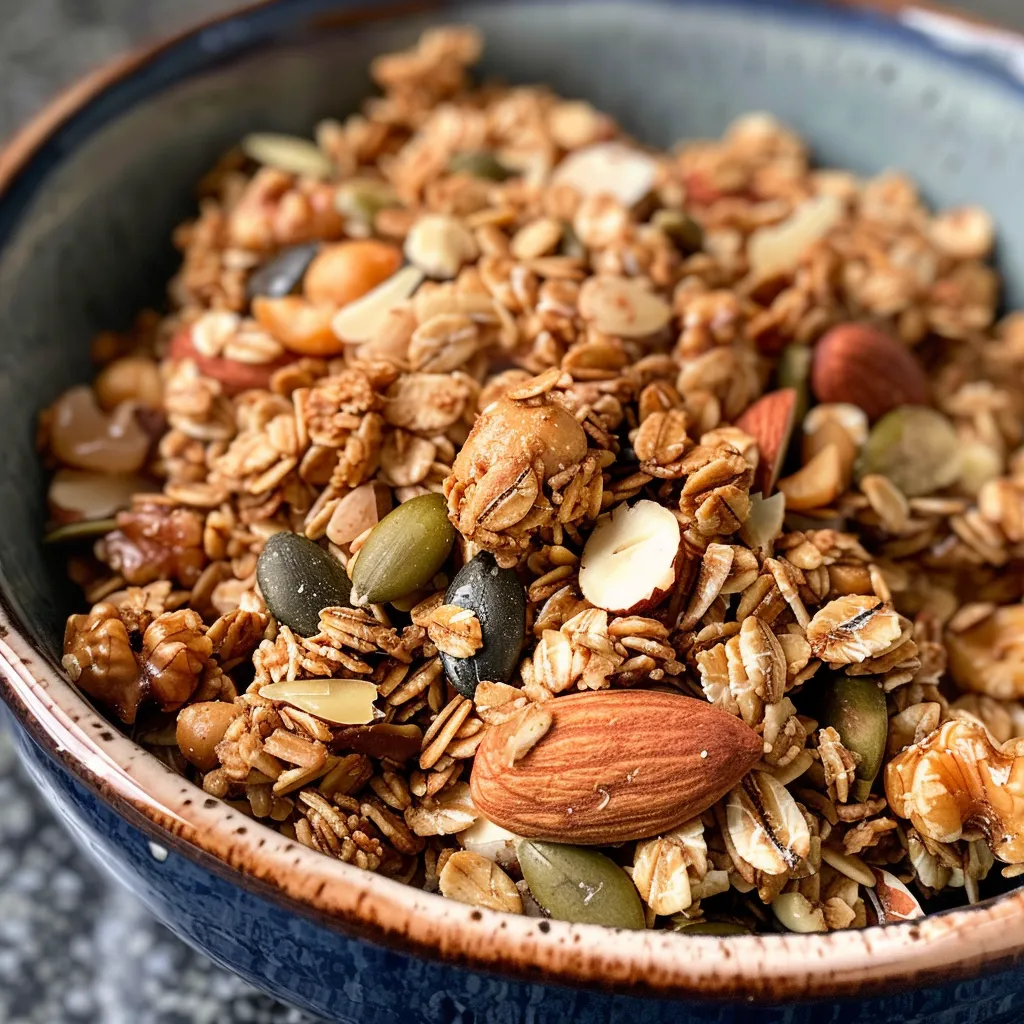
Protein Granola (Healthy Breakfast or Snack)

Prep Time 10 minutes
Cook Time 15 minutes
Total Time 25 minutes
Servings 8 servings
Calories 350
A nutritious and delicious homemade granola perfect for breakfast or a snack, packed with protein and wholesome ingredients.

Ingredients

Dry ingredients

  • 2 cups rolled oats
  • 1 cup mixed nuts and seeds (almonds, walnuts, cashews, pumpkin seeds)
  • 0.5 cup vanilla protein powder (vegan protein)
  • 0.25 cup natural creamy peanut butter
  • 0.25 cup coconut oil
  • 3 tablespoons honey or maple syrup
  • 0.5 teaspoon cinnamon powder

Salt

  • 1 pinch salt (good pinch)

Instructions 

  • Preheat oven to 170°C (325°F). Mix dry ingredients in a bowl.
  • Warm peanut butter, coconut oil, and honey; whisk until smooth.
  • Combine wet and dry ingredients, adjusting with extra oil or syrup if needed.
  • Spread mixture on a parchment-lined baking sheet and bake for 8-10 minutes.
  • Stir, spread again, and bake for another 5-8 minutes. Cool completely.
  • Enjoy with yogurt, milk, or over oats for a healthy breakfast or snack.

Notes

Store in an airtight container for up to two weeks.
Calories: 350kcal
Cost: $15
Course: Breakfast, Snack
Keyword: Granola, Healthy, Protein

Are you ready to transform your autumn dessert game? With the unique blend of warm chai spices and the comforting flavors of pumpkin, this Chai Spice Pumpkin Pie is a delightful twist on a classic favorite. Perfect for gatherings, holiday dinners, or just a cozy night in, this pie is not just a treat; it’s an experience. In this article, I’ll walk you through every step to create a pie that’s not only delicious but also impressively easy to make!

Why You’ll Love This Recipe

Here are just a few reasons why this chai pumpkin pie is bound to become a staple in your baking repertoire:

  • Unique Flavor Profile: The addition of chai spices like cardamom, cinnamon, and cloves adds an aromatic twist, making every bite a flavorful adventure.
  • Easy to Prepare: With simple ingredients and straightforward steps, even novice bakers can confidently whip up this delicious pie.
  • Perfect for Any Occasion: Whether it’s Thanksgiving or a casual get-together, this pie is sure to be the star of the dessert table.
  • Make-Ahead Friendly: You can prepare this pie in advance, freeing up your time on the day of your event.
  • Customizable: From the crust to the spices, you can easily adapt this recipe to suit your taste preferences.

Ingredients Breakdown

Let’s gather our ingredients! Here’s what you’ll need to make this scrumptious chai pumpkin pie, along with some substitution suggestions:

  • 2 cups canned pumpkin: Use **pure pumpkin** for the best results; avoid pumpkin pie mix which contains added sugars and spices.
  • 1 and 1/2 cups sweetened condensed milk: This ingredient adds richness. If you prefer a lighter version, you can use evaporated milk.
  • 2 large eggs: Ensure they are at room temperature for optimal mixing.
  • 2/3 cup light brown sugar: This adds a lovely caramel flavor. You can substitute with coconut sugar for a healthier option.
  • 1 teaspoon vanilla extract: Enhances the overall flavor; use pure vanilla extract for the best taste.
  • Chai spices: This includes 1 teaspoon ground cardamom, 1/8 teaspoon black pepper, 1 and 1/2 teaspoons ground cinnamon, 1/2 teaspoon ground ginger, 1/2 teaspoon ground nutmeg, and 1/4 teaspoon ground cloves. Feel free to adjust the spice levels to your taste.
  • 1 (9 inch) all-butter pie crust: A homemade crust is ideal, but a store-bought one works well if you’re short on time.

Step-by-Step Instructions

Now, let’s get to the fun part—baking! Follow these easy steps to create your chai pumpkin pie:

  1. Preheat your oven to 400 degrees Fahrenheit.
  2. On a well-floured surface, roll out your pie dough to a 12-inch round. Carefully place it in a 9-inch pie pan. Trim or crimp the edges as desired, and refrigerate while you prepare the filling.
  3. In a large mixing bowl, combine the pumpkin, sweetened condensed milk, eggs, brown sugar, vanilla, and the chai spices. Using a hand mixer or stand mixer, beat at medium speed for about 2 minutes until well mixed.
  4. Remove the pie crust from the fridge and pour the filling into the crust.
  5. Bake at 400 degrees for 15 minutes. Then, reduce the temperature to 350 degrees and bake for an additional 50 minutes. The pie is done when the edges are set and the center is slightly wobbly.
  6. Allow the pie to cool on a wire rack for at least one hour before slicing. This cooling time is essential for the filling to set properly.
  7. Serve warm or at room temperature, topped with whipped cream or a scoop of vanilla ice cream for an extra treat!

Expert Tips for Success

A deliciously spiced pumpkin pie with a flaky crust, captured from the side.

To ensure your chai pumpkin pie turns out perfectly, here are some expert tips:

  • Use Fresh Spices: Freshly ground spices can elevate the flavor significantly compared to pre-ground options.
  • Check for Doneness: If the edges are browning too quickly, cover them with foil to prevent burning.
  • Chill Your Crust: Keeping your pie crust cold before baking helps it maintain its shape and flakiness.
  • Let It Cool: Cooling the pie allows the filling to finish setting, preventing a runny slice.
  • Add a Splash of Cream: For an extra rich filling, add a splash of heavy cream to the mixture.
  • Experiment with Toppings: Try adding a sprinkle of chai spice on top of the whipped cream for a beautiful presentation.
  • Use a Pie Shield: If you have one, a pie shield can help prevent the crust from over-baking.
  • Make It Gluten-Free: Substitute the all-butter pie crust for a gluten-free version to accommodate dietary needs.

Common Mistakes and Troubleshooting

Even the best bakers can run into issues! Here are some common mistakes you might encounter and how to fix them:

  • Runny Filling: If your pie filling is too runny, ensure that you bake it long enough and allow for adequate cooling time.
  • Overbaked Crust: If your crust is too dark, consider using a pie shield as mentioned earlier.
  • Uneven Spices: If your pie lacks flavor, double-check the freshness and quantity of your spices.
  • Crust Shrinking: This can happen if the dough is overworked. Be gentle when rolling and handling your dough.

Delicious Variations

Want to mix things up? Here are some fun variations to try with your chai pumpkin pie:

  • Chocolate Chai Pumpkin Pie: Swirl in some melted chocolate for a decadent touch.
  • Nutty Crust: Use crushed nuts mixed with butter for a flavorful crust alternative.
  • Coconut Chai Pumpkin Pie: Mix in shredded coconut for added texture and flavor.
  • Maple Syrup Sweetened: Substitute brown sugar with pure maple syrup for a different sweetness profile.

Storage and Make-Ahead Instructions

This chai pumpkin pie can be prepared ahead of time, making it perfect for busy schedules. Here’s how to store it:

  • Refrigeration: Store leftover pie in the refrigerator for up to 4 days. Cover it with plastic wrap or aluminum foil to keep it fresh.
  • Freezing: You can freeze the baked pie for up to 2 months. Wrap it tightly in plastic wrap and then foil. Thaw in the fridge before serving.
  • Make-Ahead: The pie filling can be prepared up to a day in advance. Store it in the refrigerator, and assemble the pie just before baking.

Frequently Asked Questions

Here are some common questions regarding your chai pumpkin pie:

  • Can I use fresh pumpkin instead of canned? Yes, but it requires extra steps for cooking and pureeing the pumpkin.
  • What can I serve with this pie? Whipped cream, vanilla ice cream, or even a caramel drizzle make great accompaniments.
  • Can I make this pie vegan? Yes, use a vegan pie crust and substitute the eggs with flax eggs and the sweetened condensed milk with coconut cream.
  • How do I know when the pie is done? The edges should be set, and the center will have a slight jiggle when you gently shake it.
  • What’s the best way to slice the pie? Use a sharp knife and clean it between slices for perfect pieces.
  • Can I add more spices? Absolutely! Adjust the spices to suit your taste preferences.
  • Is it necessary to cool the pie? Yes, cooling helps the filling set properly for cleaner slices.
  • How long should I bake the pie? Bake it for a total of about 65 minutes—15 minutes at 400°F and then 50 minutes at 350°F.

Nutrition Tips and Dietary Adaptations

For a healthier version of your chai pumpkin pie, consider these adaptations:

  • Lower Sugar: Reduce the brown sugar or substitute with a sugar alternative like stevia.
  • Healthier Fat: Use coconut oil in place of butter for a dairy-free option.
  • Rich in Fiber: This pie contains pumpkin, which is high in fiber and vitamins, making it a nutritious dessert choice.

Equipment Recommendations

No special equipment is needed, but here are some handy tools that can make your baking experience easier:

  • Pie Dish: A good quality 9-inch pie dish ensures even baking.
  • Mixing Bowls: Have a few different sizes for mixing ingredients.
  • Whisk or Mixer: For combining your filling ingredients smoothly.
  • Pie Shield: This can help protect your crust from over-browning.

Serving Suggestions

Here are some ideas to elevate your pie presentation:

  • Garnish with Nuts: Toasted pecans or walnuts on top add a delightful crunch.
  • Drizzle with Caramel: A caramel sauce drizzled over the pie makes for a beautiful and tasty touch.
  • Pair with Tea: Serve with a cup of chai tea to complement the flavors of the pie.

In conclusion, this chai spice pumpkin pie is not just a dessert; it’s a comforting hug in a slice. With its rich flavors and inviting aromas, it’s bound to become a cherished recipe in your home. So gather your ingredients, embrace your inner baker, and enjoy the process. Happy baking!

Chai Spice Pumpkin Pie

Prep Time 20 minutes
Cook Time 1 hour 5 minutes
Total Time 1 hour 25 minutes
Servings 8 slices
Calories 350
A flavorful pumpkin pie infused with warm chai spices, perfect for fall celebrations.

Ingredients

Pumpkin Filling

  • 2 cups canned pumpkin (not pumpkin pie mix)
  • 1.5 cups sweetened condensed milk
  • 2 large eggs (at room temperature)
  • 2/3 cup light brown sugar, packed
  • 1 teaspoon vanilla extract
  • 1 teaspoon ground cardamom
  • 1/8 teaspoon black pepper
  • 1.5 teaspoons ground cinnamon
  • 1.5 teaspoons ground ginger
  • 1.5 teaspoons ground nutmeg
  • 1.25 teaspoons ground cloves

Pie Crust

  • 1 9-inch foolproof all-butter pie crust

Instructions 

  • Preheat oven to 400°F (200°C).
  • Roll out the pie dough to a 12-inch circle, fit into a 9-inch pie pan, and chill.
  • Mix pumpkin, condensed milk, eggs, sugar, vanilla, and spices until well combined.
  • Pour filling into chilled crust and bake at 400°F for 15 minutes, then reduce to 350°F and bake 50 minutes.
  • Cool on a wire rack for at least one hour before serving with whipped cream or ice cream.

Notes

For best results, chill the pie before slicing.
Calories: 350kcal
Cost: $15
Course: Dessert
Cuisine: American
Keyword: chai, pie, pumpkin

Start Your Day with a Boost: The Maple Cinnamon Protein Latte

Are you looking for a delightful way to energize your mornings? This Maple Cinnamon Protein Latte is not only delicious but also packed with nutrients to fuel your day. Imagine starting your day with a warm cup of rich coffee, a hint of maple sweetness, and a sprinkle of warm cinnamon. With the addition of protein powder and collagen peptides, this latte becomes a powerhouse drink that supports your health and satisfies your taste buds. Let’s dive into the wonderful world of this latte and discover why it’s a must-try!

Why You’ll Love This Recipe

  • Quick and Easy: This latte can be prepared in just 10 minutes, making it perfect for busy mornings.
  • Protein-Packed: With the addition of vanilla protein powder and collagen peptides, you’ll be getting a nutritious boost in every sip.
  • Warm and Comforting: The combination of cinnamon and maple syrup creates a cozy flavor profile that’s perfect for any time of year.
  • Versatile: Customize your drink with various milk options and add-ins to suit your taste.
  • Healthy Indulgence: This latte is a guilt-free way to enjoy a cafe-style drink at home, packed with flavor and nutrients.

Ingredients for Your Maple Cinnamon Protein Latte

Here’s what you’ll need to whip up this delicious latte:

  • 1 cup brewed coffee or 2 shots espresso
  • 1 cup milk of your choice (dairy, almond, oat, or coconut)
  • 1 scoop vanilla protein powder
  • 1 tablespoon collagen peptides
  • 1 scoop unflavored creatine monohydrate
  • 1 tablespoon pure maple syrup
  • 1 teaspoon ground cinnamon
  • ½ teaspoon vanilla extract
  • Pinch of sea salt
  • Whipped cream and extra cinnamon for garnish (optional)

Feel free to substitute the milk with your favorite non-dairy option or adjust the sweetness according to your taste!

How to Make a Maple Cinnamon Protein Latte

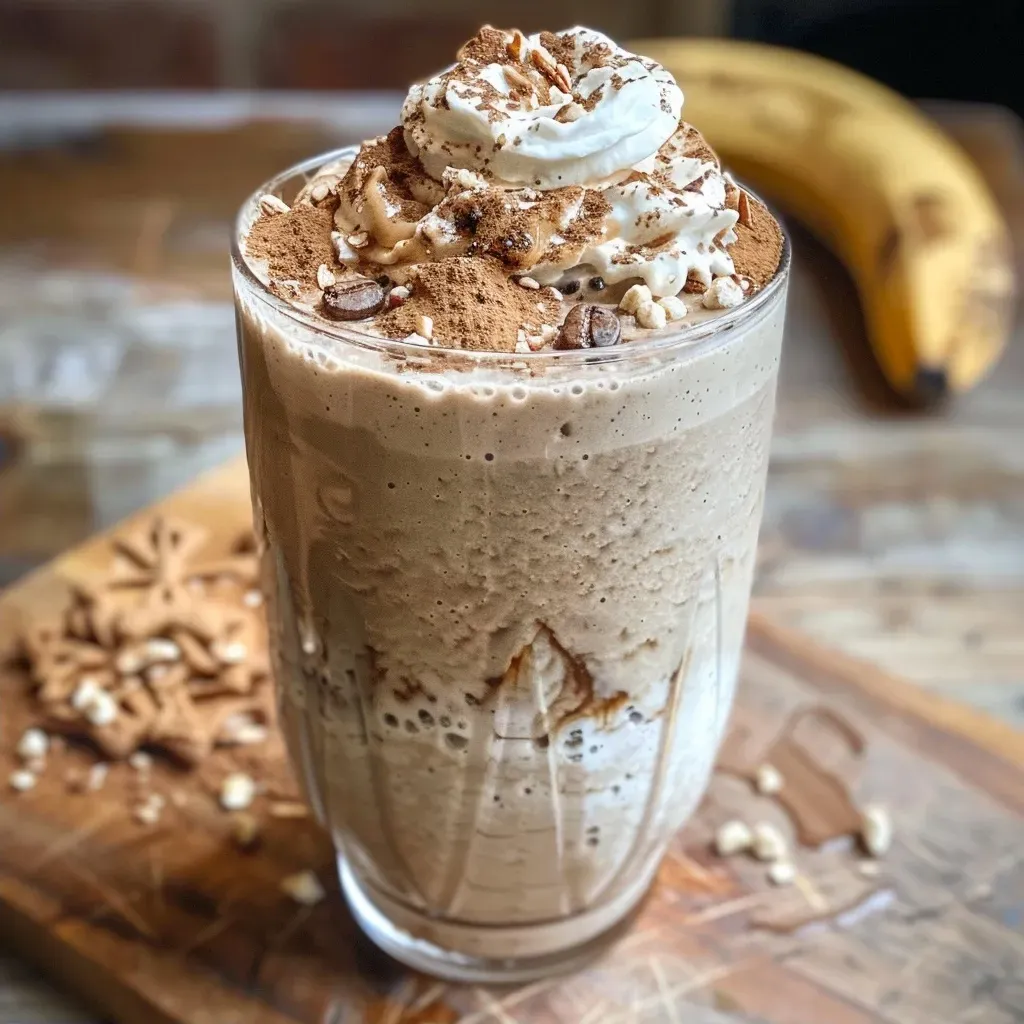
Side angle of a creamy latte topped with whipped cream and dusted with cinnamon, showcasing its rich color.

Follow these simple steps to create your delicious latte:

  • Step 1: Prepare one cup of strong coffee or two shots of espresso.
  • Step 2: In a blender, combine the coffee, milk, protein powder, collagen peptides, creatine, maple syrup, cinnamon, vanilla, and sea salt.
  • Step 3: Blend for 20–30 seconds until smooth and frothy.
  • Step 4: If desired, gently warm the latte over medium-low heat; avoid boiling.
  • Step 5: Pour into your favorite mug and enjoy!
  • Step 6: Top with whipped cream, a sprinkle of cinnamon, and a drizzle of maple syrup if desired.

Pro Tips for the Perfect Latte

To ensure your Maple Cinnamon Protein Latte shines, keep these tips in mind:

  • Use Fresh Ingredients: Freshly brewed coffee and high-quality maple syrup will enhance the flavor significantly.
  • Experiment with Milk: Try different milk options to find your favorite texture and taste.
  • Blend Thoroughly: Ensure all ingredients are well-blended to avoid clumps of protein powder or cinnamon.
  • Adjust Sweetness: Taste your latte before serving and adjust the sweetness with more maple syrup if needed.
  • Froth for Texture: If you prefer a frothy texture, use a milk frother or a blender to aerate the milk.
  • Garnish Wisely: A little whipped cream and cinnamon on top can elevate your drink to a cafe-level experience.
  • Make it Iced: For a refreshing twist, blend with ice instead of heating the ingredients.
  • Store Leftovers: Keep any leftover latte base in the fridge for up to 2 days; just reheat before serving.

Common Mistakes and Troubleshooting

If you encounter any issues, here are some solutions:

  • Too Sweet: If your latte is too sweet, add a pinch of sea salt to balance the flavors.
  • Cinnamon Clumps: To prevent clumping, mix the cinnamon with the maple syrup before adding it to the blender.
  • Flat Texture: If the latte lacks froth, blend for a bit longer or use a milk frother.
  • Overheating: Be cautious not to boil the mixture; it can affect the taste and texture.

Variations to Try

Here are some fun variations to switch up your Maple Cinnamon Protein Latte:

  • Chocolate Maple Latte: Add 1 tablespoon of cocoa powder for a mocha twist.
  • Iced Maple Cinnamon Latte: Blend with ice instead of heating for a refreshing summer drink.
  • Spiced Pumpkin Latte: Substitute half of the cinnamon with pumpkin pie spice for a seasonal flavor.
  • Nutty Hazelnut Latte: Add a splash of hazelnut extract for a nutty flavor boost.

Storing and Make-Ahead Instructions

If you’re short on time, you can prepare the latte base ahead of time:

  • Store the blended mixture in the fridge for up to 2 days. Just reheat before serving.
  • For longer storage, freeze the latte base in ice cube trays and blend with fresh coffee when ready to enjoy.

Frequently Asked Questions

  • Can I use any protein powder? Yes, feel free to use your preferred protein powder, but vanilla works best for this recipe.
  • Is this latte vegan? You can make it vegan by using plant-based milk and omitting the collagen peptides.
  • Can I make this latte without coffee? Yes, you can substitute the coffee with hot chocolate or a chai latte for a different flavor.
  • What if I don’t have collagen peptides? You can simply omit them; the latte will still be delicious!
  • How can I make it lower in calories? Use unsweetened almond milk and reduce the maple syrup.
  • Can I use flavored protein powder? Absolutely! A cinnamon or vanilla flavored protein powder will enhance the latte’s flavor.
  • What’s the best way to sweeten the latte? Pure maple syrup is recommended for its rich flavor, but you can also use stevia or honey.
  • How does this latte help with workout recovery? The protein and collagen support muscle recovery and joint health, making it a great post-workout drink.

Nutrition Tips and Dietary Adaptations

This Maple Cinnamon Protein Latte can easily fit into various dietary preferences:

  • Gluten-Free: Ensure your protein powder and other ingredients are certified gluten-free.
  • Low-Carb: Use a low-carb sweetener instead of maple syrup for a keto-friendly option.
  • Dairy-Free: Substitute any dairy milk with almond, oat, or coconut milk for a dairy-free option.

Essential Equipment

For the best results, consider having the following equipment:

  • Blender: A good quality blender will ensure a smooth and frothy consistency.
  • Coffee Maker or Espresso Machine: For brewing fresh coffee or espresso shots.
  • Milk Frother: Optional, but a frother can enhance the texture of your latte.

Serving Suggestions

To elevate your Maple Cinnamon Protein Latte experience, consider these serving suggestions:

  • Pair with Breakfast: Enjoy your latte alongside oatmeal or a protein-packed breakfast bowl.
  • Garnish Creatively: Experiment with different toppings like cocoa powder, nutmeg, or even a chocolate drizzle.
  • Host a Latte Bar: Set up a latte bar for friends, offering various milk options and flavor add-ins.

Conclusion

In conclusion, the Maple Cinnamon Protein Latte is a delicious and nutritious way to kickstart your day. With its rich flavors and protein-packed ingredients, it’s sure to become a favorite in your morning routine. So grab your blender, brew some coffee, and enjoy this delightful drink that not only satisfies your taste buds but also supports your health goals. Happy sipping!

Maple Cinnamon Protein Latte

Prep Time 5 minutes
Cook Time 5 minutes
Total Time 10 minutes
Servings 1 cup
Calories 250
A delicious and nutritious coffee latte infused with maple and cinnamon, perfect for a morning boost or an afternoon treat.

Ingredients

Coffee and espresso

  • 1 cup brewed coffee or 2 shots espresso

Milk

  • 1 cup milk of your choice

Protein and supplements

  • 1 scoop vanilla protein powder
  • 1 tablespoon collagen peptides
  • 1 scoop unflavored creatine monohydrate

Sweetener and spices

  • 1 tablespoon pure maple syrup
  • 1 teaspoon ground cinnamon
  • ½ teaspoon vanilla extract
  • Pinch sea salt

Garnish (optional)

  • whipped cream and extra cinnamon (for garnish)

Instructions 

  • Prepare one cup of strong coffee or two shots of espresso.
  • Add all ingredients to a blender and blend for 20–30 seconds until smooth and frothy.
  • If needed, gently warm the latte over medium-low heat without boiling.
  • Pour into a mug and top with whipped cream, cinnamon, and maple syrup if desired.

Notes

Enjoy this protein-packed latte as a energizing start to your day or a satisfying afternoon treat.
Calories: 250kcal
Cost: $15
Course: Beverage
Keyword: coffee, maple, Protein

Warm Up with a Cozy Bowl of Spicy Chili Beer Cheese Soup

Are you ready to warm your heart and home with a comforting bowl of Spicy Chili Beer Cheese Soup? In just 45 minutes, you can whip up this delicious dish that combines sharp cheddar cheese, savory ground beef, and a delightful kick of chili powder. This soup is not only perfect for chilly nights, but it’s also an excellent choice for weeknight dinners or gatherings with friends. With rich flavors and creamy textures, this soup is bound to become a family favorite!

Why You’ll Love This Recipe

This Spicy Chili Beer Cheese Soup is more than just a meal—it’s a culinary experience that brings warmth and satisfaction. Here are some reasons why you’ll fall in love with this recipe:

  • Quick and Easy: In just 45 minutes, you can create a hearty meal that’s ready to serve. Minimal prep and cooking time make it ideal for busy weeknights.
  • Flavor Explosion: The combination of spicy chili, creamy cheese, and rich beer creates an unforgettable taste experience that tantalizes your taste buds.
  • Customizable: This recipe allows for various ingredients and toppings, making it easy to adjust to your preferences or dietary needs.
  • Perfect for Leftovers: This soup stores well, meaning you can enjoy it for seconds or even as a delicious lunch the next day.
  • Kid-Friendly: With its cheesy goodness and mild spice, this soup is sure to please both kids and adults alike!

Essential Ingredients

Here’s what you’ll need to create this irresistible soup. Each ingredient plays a crucial role in building the flavors:

  • 1 cup lager or pale ale: This adds depth and a hint of bitterness that balances the richness of the cheese. Feel free to use any beer you enjoy!
  • 2 cups sharp cheddar cheese, shredded: The star of the show! Sharp cheddar provides a robust flavor that enhances the soup’s creaminess.
  • 2 tsp chili powder: Adds the perfect level of heat and spices. Adjust to your liking if you prefer more or less spice.
  • 1 cup heavy cream: For that velvety texture that makes the soup luxurious and satisfying.
  • 1 lb ground beef or turkey: A protein-packed addition. Turkey offers a lighter option without sacrificing flavor.
  • 1 medium onion, diced: Provides sweetness and depth to the base of the soup.
  • 3 cloves garlic, minced: Enhances flavor and aroma.
  • 1 cup bell peppers, diced: Adds color and crunch. Feel free to mix different colored peppers for visual appeal.

Let’s Make It Together

Side view of a creamy, yellow-orange spicy chili beer cheese soup with chunks of meat and vegetables.

Now, let’s dive into the cooking process! Follow these simple steps to create your Spicy Chili Beer Cheese Soup:

  1. In a large pot over medium heat, sauté onions in olive oil until soft.
  2. Add ground meat; cook until browned. Season with salt and pepper to enhance the flavor.
  3. Stir in garlic, chili powder, and bell peppers; cook for 2 minutes to release their aromas.
  4. Slowly pour in the beer while scraping the pot’s bottom to incorporate any flavorful bits.
  5. Gradually add heavy cream and stir until smooth.
  6. Reduce heat to low and mix in cheddar cheese until melted and creamy.
  7. Serve warm with optional toppings like green onions or extra cheese for added flavor!

Perfecting the Cooking Process

For even better results, consider these expert tips:

  • Use Quality Ingredients: Fresh vegetables and high-quality cheese elevate the flavor of your soup.
  • Control the Heat: Adjust the chili powder and add diced jalapeños for a spicier kick.
  • Don’t Rush the Cheese: Allow the cheese to melt slowly over low heat for a creamy texture.
  • Scrape the Pot: When adding the beer, make sure to scrape the bottom of the pot for added flavor from the browned bits.
  • Add Fresh Herbs: Garnish with cilantro or parsley for a fresh touch that brightens up the dish.
  • Experiment with Beer: Different beers will impart unique flavors; feel free to try various types!
  • Store Properly: Let the soup cool completely before transferring it to an airtight container.
  • Reheat Gently: When reheating, do so over low heat to avoid curdling the cheese.

Common Mistakes and Troubleshooting

Even the best cooks can make mistakes. Here are some common pitfalls and how to avoid them:

  • Too Thick: If your soup is too thick, add a bit more broth or cream to reach your desired consistency.
  • Curdled Cheese: If the cheese curdles, it’s likely due to high heat. Reheat gently and stir continuously to help smooth it out.
  • Too Spicy: If you find it too spicy, add more cream or cheese to balance the flavors.
  • Lack of Flavor: Don’t forget to season properly with salt and pepper throughout the cooking process.

Variations to Try

Feeling adventurous? Here are some tasty variations to customize your soup:

  • Vegetarian Version: Swap ground meat for lentils or black beans and use vegetable broth for a meatless option.
  • Cheesy Broccoli: Add steamed broccoli florets for a nutrition boost and extra flavor.
  • Spicy Sausage: Use spicy sausage instead of ground beef for added flavor and heat.
  • Smoky Flavor: Incorporate smoked paprika or chipotle peppers for a smoky twist.

Storage and Make-Ahead Instructions

This soup is perfect for meal prep! Here’s how to store and enjoy it later:

  • Refrigerator: Store in an airtight container for up to 3 days. Reheat gently on the stove.
  • Freezer: Freeze in portions for up to 3 months. Thaw overnight in the fridge before reheating.
  • Make-Ahead: Prepare the soup ahead of time and allow the flavors to meld overnight for an even richer taste!

Comprehensive FAQ

Got questions? We’ve got answers! Here are some common inquiries regarding Spicy Chili Beer Cheese Soup:

  • What type of beer should I use? Lager or pale ale works best, but feel free to experiment with your favorites!
  • Can I make this soup vegetarian? Absolutely! Substitute the meat with beans or lentils and use vegetable broth.
  • How do I make this soup spicier? Add more chili powder or diced jalapeños to kick up the heat.
  • Can I use different types of cheese? Yes! Feel free to mix different cheeses like Monterey Jack or Gouda for unique flavors.
  • How can I thicken the soup? If you prefer a thicker consistency, add a cornstarch slurry or more cheese.
  • Can I add vegetables? Definitely! Corn, zucchini, or even spinach can be great additions.
  • How long does this soup last in the fridge? It can be stored for up to 3 days in an airtight container.
  • Can I freeze the soup? Yes! Freeze it in portions for easy meals later on.

Nutritional Tips and Dietary Adaptations

This soup can be adapted to fit various dietary needs:

  • Low-Carb: Use cauliflower instead of potatoes for a low-carb version.
  • Dairy-Free: Substitute heavy cream with coconut milk and use dairy-free cheese alternatives.
  • Gluten-Free: Ensure that the beer you choose is gluten-free, or simply use beef broth instead.

Equipment Recommendations

To make this Spicy Chili Beer Cheese Soup, you’ll need:

  • Large Pot: A heavy-bottomed pot is ideal for even heat distribution.
  • Wooden Spoon: Perfect for stirring without scratching your pot.
  • Measuring Cups and Spoons: For accurate ingredient measurements.
  • Immersion Blender (optional): If you prefer a smoother soup, this handy tool can make blending easy!

Serving Suggestions

This soup is delightful on its own, but here are some great serving ideas:

  • With Crusty Bread: Serve with a side of crusty bread or garlic bread for dipping.
  • Garnished: Top with green onions, sour cream, or additional cheese for extra flavor.
  • On a Salad: Pair with a fresh salad for a complete meal.

Enjoying cooking is all about confidence and creativity. With this Spicy Chili Beer Cheese Soup, you’re not just making a meal—you’re crafting a cozy, flavorful experience that everyone will love. So gather your ingredients, roll up your sleeves, and let’s make some delicious memories together!

Delicious Spicy Chili Beer Cheese Soup Recipe in 45 Minutes

Prep Time 15 minutes
Cook Time 30 minutes
Total Time 45 minutes
Servings 4 servings
Calories 650
A hearty and spicy cheese soup infused with beer, perfect for a quick and satisfying meal.

Ingredients

Beverages

  • 1 cup lager or pale ale

Dairy

  • 2 cups sharp cheddar cheese, shredded
  • 1 cup heavy cream

Meat & Vegetables

  • 1 lb ground beef or turkey
  • 1 medium onion, diced
  • 3 cloves garlic, minced
  • 1 cup bell peppers, diced

Instructions 

  • SautĂ© diced onions in olive oil until soft.
  • Add ground meat; cook until browned. Season with salt and pepper.
  • Stir in garlic, chili powder, and bell peppers; cook for 2 minutes.
  • Pour in beer while scraping the pot's bottom.
  • Add heavy cream and stir until smooth. Mix in cheddar cheese until melted.
  • Serve warm with optional toppings like green onions or extra cheese.

Notes

For extra spice, add hot sauce or more chili powder to taste.
Calories: 650kcal
Cost: $15
Course: Main Course
Cuisine: American
Keyword: Beer, Cheese, Chili

Discover the Joy of Cooking with Our Protein-Packed Coleslaw

Welcome to a culinary adventure! If you’re looking for a refreshing and nutritious side dish, you’ve come to the right place. This Protein Coleslaw ohne Mayo is not just a salad; it’s a vibrant mix of flavors and textures that will elevate any meal. Whether you’re planning a summer barbecue or a cozy weeknight dinner, this recipe is your perfect companion!

In less than 30 minutes, you can whip up a delicious coleslaw that’s healthy, easy to make, and absolutely delightful. Let’s dive into why you’ll love this recipe and how it can fit into your cooking routine.

Why You’ll Love This Recipe

  • Healthy Ingredients: Packed with fresh veggies and protein-rich dressing, this coleslaw is a nutritious choice that keeps you feeling full.
  • Quick to Prepare: With just a few simple steps, you can have this dish ready in no time, making it perfect for busy weeknights.
  • Customizable: Feel free to experiment with different vegetables or dressings to suit your taste!
  • Mayo-Free Delight: Enjoy all the creaminess without the heaviness of traditional mayo, making it lighter and healthier.
  • Great for Meal Prep: This coleslaw stores well, allowing you to make it ahead of time for easy lunches or side dishes throughout the week.

Ingredients Breakdown

Here’s what you’ll need to create this delicious Protein Coleslaw ohne Mayo. We’ve also included some substitutions to help you customize the recipe to your liking.

  • 600 g WeiĂźkohl (finest geschnitten): You can substitute with green or red cabbage for a different flavor and color.
  • 40 g Karotte (fein geraspelt): Feel free to use shredded broccoli or bell peppers for added crunch.
  • 40 g Zwiebel (finest geschnitten): Red onion can be a great substitute for a milder taste.
  • Salz: Essential for drawing out the moisture from the cabbage, enhancing flavors.
  • 150 g HĂĽttenkäse: Use ricotta or silken tofu for a dairy-free option.
  • 100 g Griechischer Joghurt (10% Fett): Regular yogurt works too; just check the consistency.
  • 1 EL Apfelessig: Substitute with lemon juice for a different tang.
  • 1 TL Senf (mittelscharf): Dijon mustard adds a lovely kick.
  • 2 TL Erythrit (zu Puder gemahlen): Honey or maple syrup can be used for sweetness.
  • 1 TL Zitronensaft: Freshly squeezed is best for flavor.
  • 0.5 TL Salz (fĂĽr das Dressing): Adjust to taste.
  • Pfeffer: Add to your liking for extra flavor.

Step-by-Step Instructions

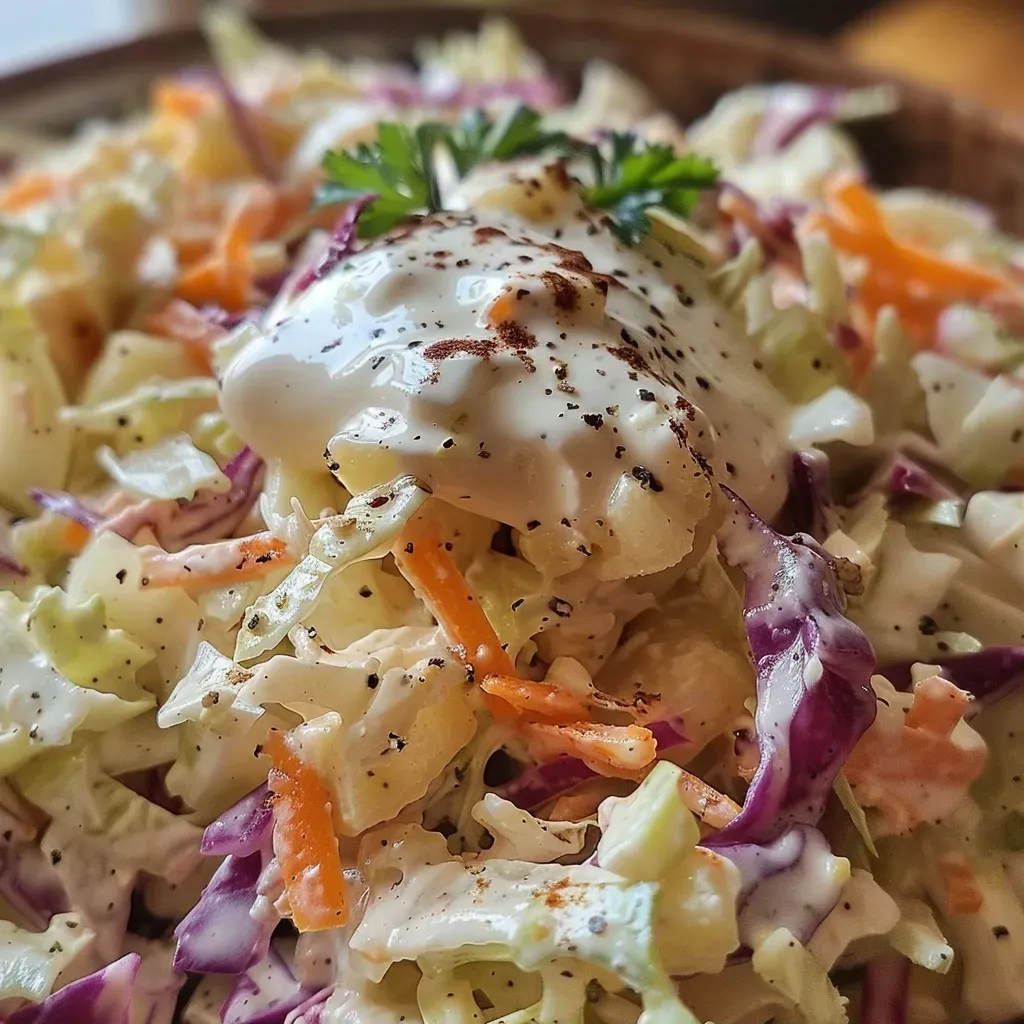
Side view of colorful protein coleslaw served in a bowl, showcasing fresh ingredients without mayonnaise.

Let’s get into the nitty-gritty of making this tasty Protein Coleslaw ohne Mayo. Follow these simple steps for a perfect outcome!

  1. Prepare the Cabbage: Slice the WeiĂźkohl into very fine strips and place it in a large bowl. Lightly sprinkle with salt.
  2. Massage the Cabbage: Using your hands, knead the salted cabbage for 2-3 minutes to help release its moisture.
  3. Add Veggies: Grate the Karotte and finely chop the Zwiebel. Add both to the bowl with the cabbage.
  4. Make the Dressing: In a tall container, combine the Hüttenkäse, Griechischer Joghurt, Apfelessig, Senf, Erythrit, Zitronensaft, Salz, and Pfeffer.
  5. Blend Until Smooth: Use an immersion blender to mix the dressing until you have a smooth consistency.
  6. Combine: Pour the creamy dressing over the cabbage and veggies, mixing thoroughly until everything is well coated.
  7. Chill: Cover the coleslaw and let it sit in the fridge for at least one hour to allow the flavors to meld.
  8. Serve and Enjoy: Before serving, give it a good stir and taste. Adjust seasoning with salt and pepper as desired.

Pro Tips for Perfect Coleslaw

  • Freshness Matters: Always use the freshest ingredients for the best flavor and crunch.
  • Let It Rest: Allowing the coleslaw to chill enhances its flavor significantly.
  • Adjust Seasoning: Don’t be afraid to taste and adjust the seasoning as you go!
  • Experiment with Textures: Consider adding nuts or seeds for extra crunch.
  • Make Ahead: This coleslaw can be made a day in advance; just stir it well before serving.
  • Use Quality Yogurt: Look for high-quality Greek yogurt to enhance the creaminess of the dressing.
  • Mix It Up: Try adding different herbs like cilantro or parsley for a fresh twist.
  • Keep It Colorful: Using a mix of colorful vegetables not only looks great but also increases nutrient diversity.
  • Serve Cold: This coleslaw is best enjoyed cold, making it a refreshing dish for warm days.
  • Pair Wisely: This dish goes well with grilled meats, sandwiches, or even as a topping for tacos!

Common Mistakes and Troubleshooting

Even the best cooks make mistakes. Here are some common pitfalls and how to avoid them:

  • Too Salty: If your coleslaw turns out too salty, add a bit more yogurt or cabbage to balance the flavors.
  • Soggy Texture: Make sure to massage the cabbage just enough to release moisture without overdoing it.
  • Flavorless Dressing: If your dressing lacks flavor, don’t hesitate to add more vinegar, mustard, or spices until it’s just right.
  • Not Enough Crunch: Add more fresh vegetables or some nuts to enhance the crunch factor.
  • Storing Issues: Always store in an airtight container to maintain freshness.

Delicious Variations

If you’re feeling adventurous, here are some fun variations to try:

  • Spicy Kick: Add diced jalapeños or a dash of hot sauce for a spicy twist.
  • Fruity Delight: Incorporate diced apples or raisins for a sweet contrast.
  • Asian Fusion: Use sesame oil and soy sauce in the dressing and add shredded carrots and bell peppers.
  • Herbed Version: Mix in fresh herbs like dill or parsley for a fresh flavor boost.

Storage and Make-Ahead Instructions

This coleslaw can be made in advance and stored in the refrigerator for up to 5 days. To keep it fresh:

  • Store in an airtight container to prevent moisture loss and maintain crispness.
  • If making ahead, consider keeping the dressing separate until ready to serve to avoid sogginess.

Comprehensive FAQ

Got questions? We’ve got answers!

  • Can I make this coleslaw vegan? Absolutely! Substitute HĂĽttenkäse with silken tofu and use a plant-based yogurt.
  • How long can I store this coleslaw? It can be stored in the fridge for up to 5 days.
  • Is this coleslaw gluten-free? Yes, all listed ingredients are gluten-free!
  • Can I add protein to this coleslaw? Yes! Grilled chicken or chickpeas make excellent additions.
  • What should I serve with this coleslaw? It pairs wonderfully with grilled meats, sandwiches, or as a topping for tacos.
  • Can I use a different type of cabbage? Definitely! Red cabbage or savoy cabbage can add unique flavors and colors.
  • How can I adjust the sweetness? Feel free to add more or less Erythrit depending on your taste preference.
  • Is this recipe suitable for meal prep? Yes, it’s perfect for meal prep as it stores well in the fridge!

Nutrition Tips and Dietary Adaptations

This coleslaw is not only delicious but also nutritious. Here are some tips to enhance its health benefits:

  • High Protein: The combination of HĂĽttenkäse and Greek yogurt provides a protein boost, making it a satisfying side.
  • Low Calorie: By avoiding mayo, you significantly reduce the calorie count while keeping the flavor intact.
  • Rich in Fiber: The vegetables provide essential fiber, aiding digestion and promoting satiety.
  • Customizable for Diets: Easily adapt this recipe to suit keto, low-carb, or paleo diets by choosing appropriate sweeteners and dairy alternatives.

Equipment Recommendations

To make this recipe effortless, here’s a list of useful kitchen tools:

  • Sharp Knife: For finely slicing the cabbage and vegetables.
  • Cutting Board: A sturdy surface to chop your ingredients efficiently.
  • Large Mixing Bowl: Essential for tossing all your ingredients together.
  • Immersion Blender: Ideal for making the dressing smooth and creamy.
  • Airtight Container: Perfect for storing leftovers and keeping them fresh.

Serving Suggestions

Here are some tasty ideas for serving your coleslaw:

  • On the Side: Perfect alongside grilled chicken, burgers, or fish tacos.
  • As a Topping: Use it to top sandwiches or wraps for added crunch.
  • In a Salad Bowl: Add to a mixed salad for a colorful and flavorful addition.
  • For Meal Prep: Portion it out for quick and healthy lunches throughout the week!

Conclusion

Cooking should be enjoyable and stress-free. With this Refreshing Protein-Packed Coleslaw ohne Mayo, you can create a delicious and nutritious side that everyone will love. Remember, cooking is all about experimenting and finding what works for you. So gather your ingredients, roll up your sleeves, and enjoy the process! Happy cooking!

Protein Coleslaw ohne Mayo

Prep Time 15 minutes
Total Time 15 minutes
Servings 4 people
Calories 250
A healthy and creamy coleslaw made with fresh vegetables and a protein-rich dressing, perfect for a light meal or side dish.

Ingredients

Vegetables

  • 600 g WeiĂźkohl (finest geschnitten)
  • 40 g Karotte (fein geraspelt)
  • 40 g Zwiebel (finest geschnitten)

Dressing

  • 150 g HĂĽttenkäse
  • 100 g Griechischer Joghurt (10% Fett)
  • 1 EL Apfelessig
  • 1 TL Senf (mittelscharf)
  • 2 TL Erythrit (zu Puder gemahlen)
  • 1 TL Zitronensaft (frisch gepresst)
  • 0.5 TL Salz (fĂĽr das Dressing)

nach Belieben

  • Pfeffer (nach Belieben)

Instructions 

  • Fein den WeiĂźkohl schneiden und mit Salz leicht bestreuen. 2–3 Minuten kräftig mit den Händen durchkneten.
  • Karotte fein raspeln und Zwiebel in kleine StĂĽcke schneiden. Beides zum Kohl geben.
  • Dressing aus HĂĽttenkäse, Joghurt, Essig, Senf, Erythrit, Zitronensaft, Salz und Pfeffer im Mixer glatt pĂĽrieren.
  • Dressing zum GemĂĽse geben und gut vermengen. Mindestens eine Stunde kĂĽhlen.
  • Vor dem Servieren nach Geschmack mit Salz und Pfeffer abschmecken.

Notes

Für eine cremigere Konsistenz kannst du den Joghurt durch mehr Hüttenkäse ersetzen.
Calories: 250kcal
Cost: $8
Course: Side Dish
Cuisine: German
Keyword: Coleslaw, Healthy, Protein

Beat the heat with our delightful Candy Corn Popsicles! Made with creamy coconut Greek yogurt and fruity juices, these popsicles are a refreshing treat perfect for any occasion. Simple to make and bursting with flavor, they’re sure to be a hit! Whether you’re looking to impress at a summer gathering or simply want to enjoy a cool snack at home, this recipe is your go-to.

Why You’ll Love This Recipe

  • Fun & Festive: These popsicles are not only delicious but also visually appealing, making them a perfect treat for Halloween or any fun gathering.
  • Healthy Ingredients: With Greek yogurt as a base, these popsicles are rich in protein and probiotics, offering a nutritious option for a sweet treat.
  • Customizable Flavors: You can easily swap out juices or add your favorite fruits to create unique flavor combinations.
  • Easy to Make: This recipe involves straightforward steps, making it accessible for cooks of all skill levels.
  • Great for Kids: These popsicles are a fun way to get kids involved in the kitchen, allowing them to mix and layer their favorite flavors!

Ingredients: A Breakdown

Here’s what you’ll need to make these delightful candy corn popsicles:

  • 1 cup Coconut Greek Yogurt: Creamy and rich, Greek yogurt adds protein and a delicious tang. You can substitute with regular yogurt if desired.
  • 1/4 cup Whole Milk: This helps to thin out the yogurt. Almond or coconut milk can be used as dairy-free alternatives.
  • 1 cup Orange, Peach, Mango Juice: A blend of these juices creates a vibrant orange hue. Feel free to use 100% juice without added sugars for a healthier option.
  • 1 drop Red & Yellow Dye (As Needed for Orange Hue): This is optional if you want a brighter color, but not necessary for taste.
  • 1 cup Pineapple Juice: Adds a tropical twist; you can substitute with any fruit juice you enjoy!

Step-by-Step Instructions

Follow these easy steps to create your Candy Corn Popsicles:

  • Mix the Base: In a mixing bowl, combine the coconut Greek yogurt and whole milk. Stir until it reaches a smooth, soupy consistency—add more milk as needed.
  • First Layer: Pour a small amount of the yogurt mixture into the bottom of your popsicle mold. Freeze for about 30 minutes until set.
  • Second Layer: Mix the orange juice with a drop of red and yellow dye until it reaches your desired color. Pour this juice over the yogurt layer, filling it approximately 2/3 of the way. Freeze for 1 hour.
  • Final Layer: Top off the molds with pineapple juice and insert popsicle sticks. Freeze for another 2 hours until completely solid.
  • Serve: To remove, run warm water over the outside of the mold for a few seconds. Gently pull the popsicles out and enjoy!

Pro Tips for Perfect Popsicles

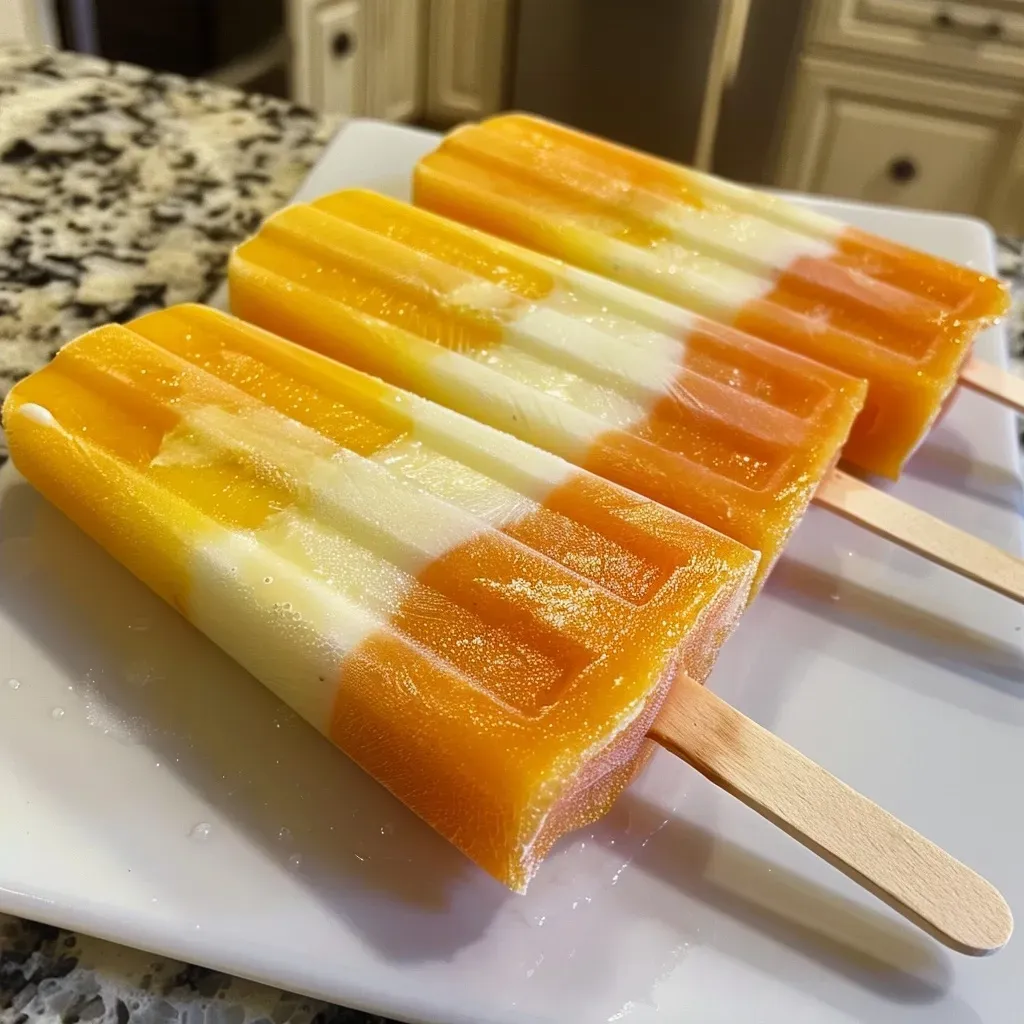
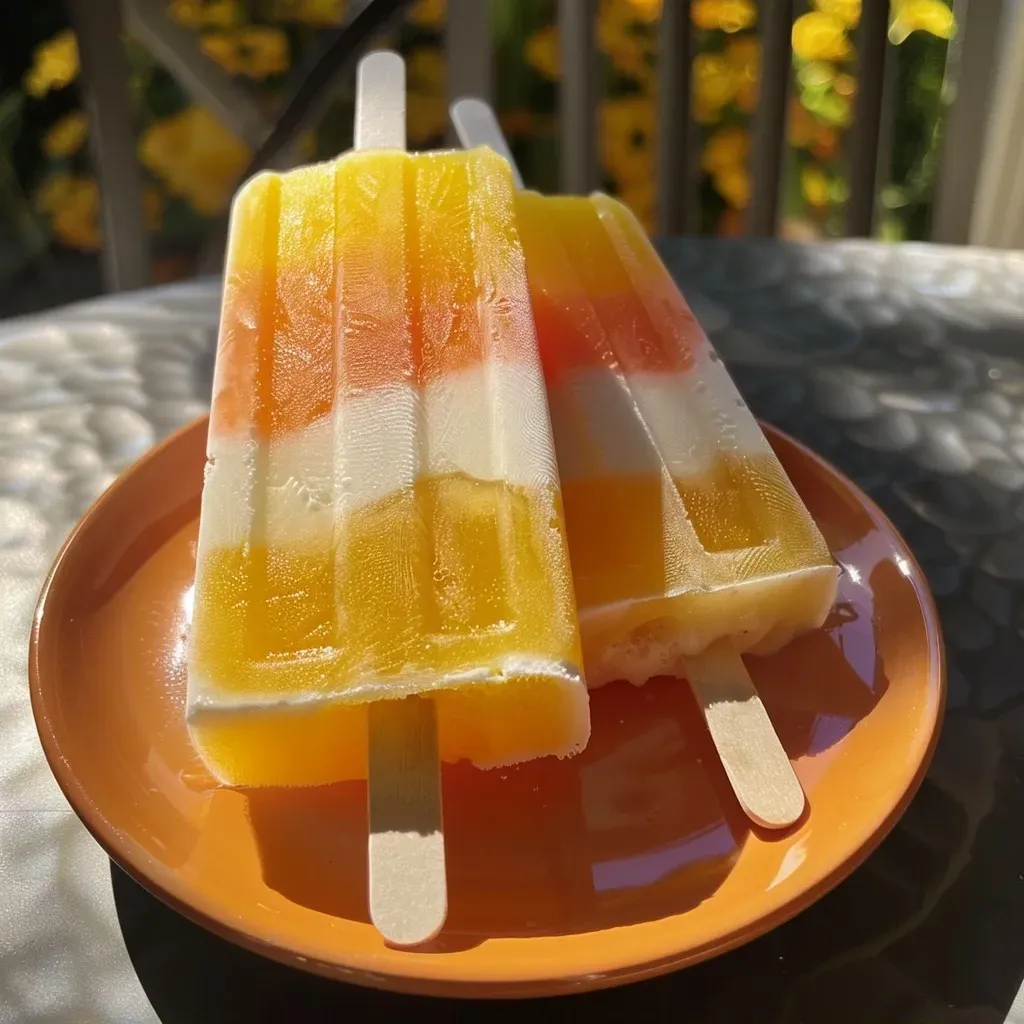
Side view of vibrant Candy Corn Popsicles, showcasing their layered colors.
  • Freeze Between Layers: Allow each layer to freeze adequately before adding the next to create distinct layers.
  • Use Fresh Juice: Freshly squeezed juice enhances flavor and nutrition compared to bottled options.
  • Experiment with Flavors: Don’t hesitate to mix different fruit juices or add pureed fruits for added texture and taste.
  • Keep It Cool: Make sure your freezer is set to a low enough temperature to freeze the popsicles quickly without ice crystals forming.
  • Storage Tips: Store popsicles in airtight bags or containers to prevent freezer burn and maintain flavor.
  • Try Different Molds: Various popsicle molds can create fun shapes and sizes, making them more appealing for kids.
  • Adjust Sweetness: Taste your juice before pouring; if it’s too sweet, balance it with unsweetened yogurt.
  • Check for Doneness: If unsure, insert a toothpick into the popsicle; it should come out clean when they’re fully frozen.

Common Mistakes and Troubleshooting

Here are some common pitfalls and how to avoid them:

  • Popsicles Won’t Come Out: If they’re stuck, run warm water over the outside of the mold for a few seconds to loosen.
  • Layers Blending: Ensure each layer is frozen solid before adding the next; otherwise, they will blend together.
  • Too Icy: If your popsicles are icy rather than creamy, try adding more yogurt or using less juice in your mixture.
  • Flavor Too Mild: Adjust the juice ratio to balance the flavors better; sometimes a splash of lemon juice can brighten it up.

Variations to Try

Feel free to get creative! Here are some fun variations:

  • Berry Bliss: Replace the orange juice with blended strawberries and blueberries for a berry version.
  • Tropical Paradise: Use coconut milk instead of Greek yogurt and add layers of mango and passionfruit juice.
  • Chocolate Delight: Mix in a tablespoon of cocoa powder into the yogurt for a chocolatey twist.
  • Nutty Flavor: Add a spoonful of almond or cashew butter to the yogurt for a nutty and creamy texture.

Storage and Make-Ahead Instructions

These popsicles can be made ahead of time and stored in your freezer:

  • Storage: Keep popsicles in an airtight container or freezer-safe bag for up to 2 months.
  • Make Ahead: You can prepare these popsicles a week in advance for parties or family gatherings.

Nutrition Tips and Dietary Adaptations

If you have dietary preferences or restrictions, consider these adaptations:

  • Dairy-Free: Use coconut yogurt and almond or oat milk to create a completely dairy-free option.
  • Low Sugar: Opt for unsweetened yogurt and natural fruit juice without added sugars.
  • High Protein: Add protein powder to the yogurt mixture to boost the protein content.

Equipment Recommendations

To make these popsicles, here’s what you’ll need:

  • Popsicle Molds: Choose silicone molds for easy removal, or classic plastic molds that work just as well.
  • Mixing Bowl: A medium-sized bowl for mixing the ingredients comfortably.
  • Measuring Cups: Accurate measurements ensure the best results, so have these handy.
  • Blender (optional): If you want to puree fruits or mix juices, a blender makes it easier.

Serving Suggestions

Here are some fun ways to serve your candy corn popsicles:

  • Decorative Plates: Serve on colorful plates with a sprinkle of edible glitter for a festive touch.
  • Fruit Garnish: Pair with fresh fruit slices or a drizzle of honey for added flavor.
  • Party Treats: Place popsicles in a bucket of ice for a fun centerpiece at summer parties.

Frequently Asked Questions

Here are some common questions about making Candy Corn Popsicles:

  • Can I use different fruits? Absolutely! Feel free to swap in your favorite fruits or juices.
  • How long do they take to freeze? Generally, about 4 hours total, but check after each layer.
  • Can I make these ahead of time? Yes, they can be made up to two weeks in advance and stored in the freezer.
  • What if I don’t have popsicle sticks? You can use small spoons or even fruit skewers as an alternative.
  • Can I add alcohol for adults? Yes! Adding a splash of rum or vodka to the juice layer can create a fun adult treat.
  • What’s the best way to store leftovers? Keep them in an airtight container or bag in the freezer.
  • Do these popsicles melt quickly? Like most popsicles, they will melt quickly, so enjoy them immediately!
  • Can I use frozen fruit? Yes, frozen fruit can be pureed and added to the layers for added flavor.

So there you have it! A comprehensive guide to making the best Candy Corn Popsicles. With simple ingredients, easy steps, and endless variations, you’ll be a popsicle pro in no time. Grab your ingredients, gather your loved ones, and let’s make some sweet memories in the kitchen!

Candy Corn Popsicles

Prep Time 10 minutes
Cook Time 3 minutes
Total Time 13 minutes
Servings 4 pieces
Calories 150
Enjoy these colorful, sweet popsicles that mimic the look of candy corn with layers of coconut yogurt, orange juice, and pineapple juice.

Ingredients

Dairy & Liquids

  • 1 cup Coconut Greek Yogurt
  • 1/4 cup Whole Milk
  • 1 cup Orange, Peach, Mango Juice
  • 1 drop Red & Yellow Dye (As Needed for Orange Hue)
  • 1 cup Pineapple Juice

Instructions 

  • Mix yogurt with milk until smooth, adding 1 tablespoon of milk at a time until it drips from the spoon.
  • Pour a small layer into the mold and freeze for 30 minutes.
  • Add dye to orange juice until it is orange, then pour on top of yogurt layer, filling 2/3 of the mold. Freeze for 1 hour.
  • Fill with pineapple juice, insert sticks, and freeze for 2 hours.
  • Enjoy your colorful candy corn popsicles!

Notes

Use a small amount of dye to achieve the perfect orange hue.
Calories: 150kcal
Cost: $10
Course: Dessert
Cuisine: American
Keyword: popsicles

Discover the Joy of Homemade Cranberry Nut Granola

Are you ready to elevate your breakfast game? If you’re looking for a wholesome, satisfying start to your day, look no further than this homemade cranberry nut granola. Packed with nutritious ingredients like jumbo oats, mixed nuts, and tart cranberries, this granola is not just delicious; it’s also incredibly easy to make. Say goodbye to store-bought options filled with additives—let’s dive into the world of making your own delightful granola!

Why You’ll Love This Recipe

  • Customizable: Tailor the ingredients to your taste. Swap nuts or dried fruits based on what you have on hand.
  • Nutritious: This granola is loaded with healthy fats, fiber, and antioxidants, making it a nutritious choice for breakfast or snacks.
  • Cost-effective: Making your own granola is often cheaper than purchasing store-bought versions, especially when you buy ingredients in bulk.
  • Freshness guaranteed: You control the freshness—enjoy the incredible aroma of freshly baked granola that fills your kitchen!
  • Perfect for meal prep: Make a large batch and enjoy it throughout the week, whether on its own, with yogurt, or as a topping for smoothie bowls.

Ingredient Breakdown

Before you start, let’s look at what you’ll need to create this delicious cranberry nut granola. Here’s a detailed list with potential substitutions:

  • 225 g jumbo oats: These oats provide a hearty texture. If you prefer, you can use rolled oats, but avoid instant oats for the best result.
  • 45 g mixed nuts: Use your favorites like pecans, almonds, or walnuts. For a nut-free version, substitute with seeds like sunflower or pumpkin seeds.
  • 45 g coconut: Shredded coconut adds sweetness and flavor. If you’re not a fan, you can leave it out or replace it with additional nuts.
  • 3 tbsp vegetable oil: Any neutral oil works, but coconut oil adds a rich flavor—melt it before mixing.
  • 80 ml maple syrup: This natural sweetener enhances flavor. Honey or agave syrup can be used as alternatives.
  • 1 tbsp fresh lemon juice: Adds brightness and balances sweetness. Lime juice works too!
  • 1 orange (zest only): For a citrusy zing. If you don’t have an orange, lemon zest is a great substitute.
  • 1/2 tsp cinnamon: This spice warms up the flavors. Feel free to experiment with nutmeg or ginger for a different twist.
  • 100 g dried cranberries: These provide a delightful tartness. Any dried fruit like cherries or raisins can be used.
  • 2 tbsp pumpkin seeds: These add crunch and nutrition. Swap for sunflower seeds or omit if desired.

Step-by-Step Instructions

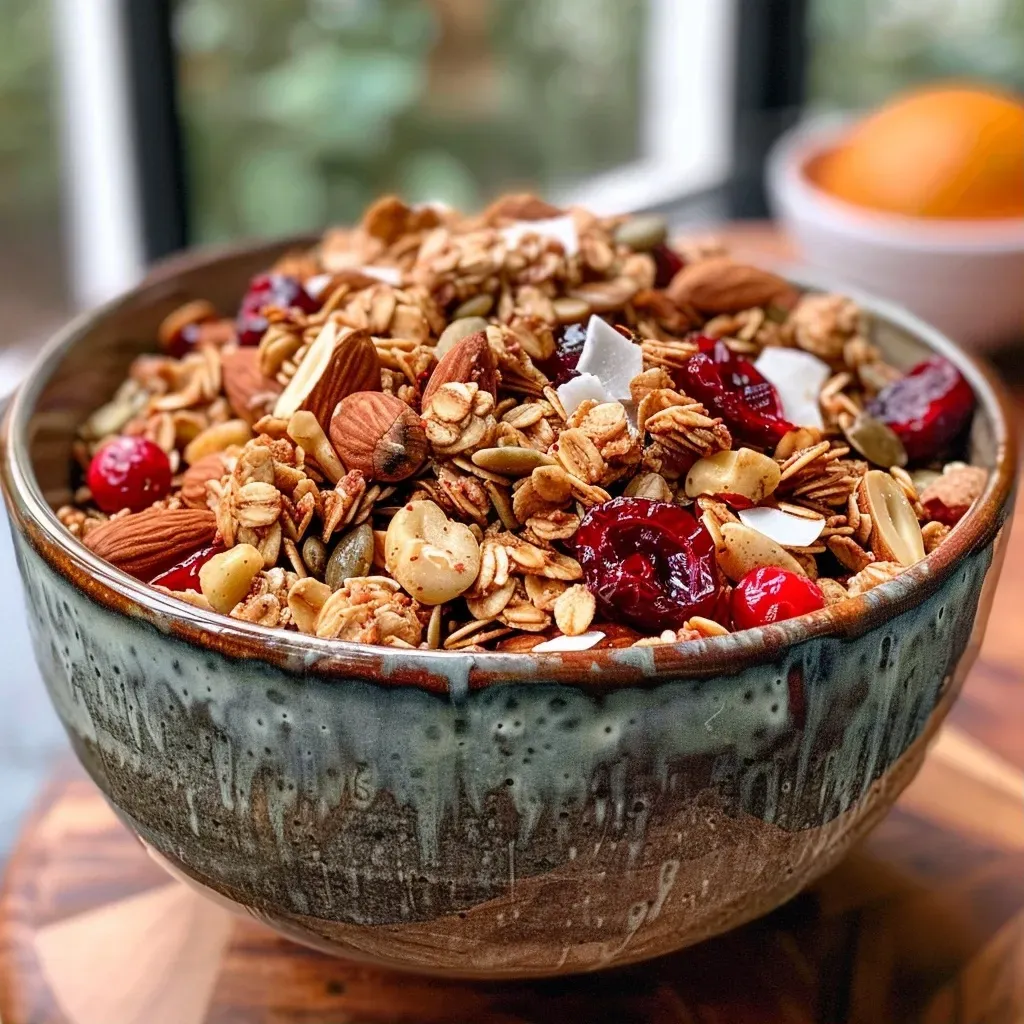
Side view of crunchy Cranberry Nut Granola with a blend of nuts and dried fruits.

Let’s get cooking! Here’s how to make your own homemade granola:

  1. Preheat your oven to 140°C (280°F) or 120°C (fan oven).
  2. In a large bowl, combine 225 g jumbo oats, 45 g mixed nuts, and 45 g coconut.
  3. In a medium saucepan, heat 3 tbsp vegetable oil, 80 ml maple syrup, 1 tbsp fresh lemon juice, zest of 1 orange, and 1/2 tsp cinnamon until warm.
  4. Pour the warm mixture over the oat blend and stir until everything is evenly coated.
  5. Spread the granola mixture onto a baking tray lined with parchment paper, ensuring it’s in a single layer.
  6. Bake in the preheated oven for 40 minutes, stirring every 10 minutes to achieve an even golden color.
  7. Once done, remove from the oven, allow to cool, and then mix in 100 g dried cranberries and 2 tbsp pumpkin seeds.
  8. Store your granola in an airtight container, where it will keep for up to 2 weeks.

Pro Tips for Perfect Granola

  • Watch the oven: Keep an eye on your granola towards the end of baking to prevent burning. Ovens can vary.
  • Mix-ins: Feel free to add other ingredients like chocolate chips or spices to personalize your granola.
  • Cool completely: Allow the granola to cool completely before storing; this helps it crisp up.
  • Even baking: Stirring every 10 minutes ensures even baking and prevents clumping.
  • Batch size: You can easily double or triple the recipe to have enough granola for the week!
  • Storage: Use a glass jar for storage to keep your granola fresh and visible.
  • Temperature check: Ensure your oven is preheated to the correct temperature before baking to achieve the best texture.
  • Make it gluten-free: Use certified gluten-free oats to make this recipe suitable for those with gluten sensitivities.

Common Mistakes and Troubleshooting

Here are some common pitfalls to avoid when making your own granola:

  • Not stirring: Failing to stir your granola while baking can lead to uneven browning and clumping.
  • Baking too long: If you overbake, your granola may become too hard. Keep a close watch in the last few minutes!
  • Using quick oats: Quick oats can turn mushy, so stick with old-fashioned rolled oats for the best results.
  • Ignoring the cooling process: If you store the granola before it cools, it can become soft instead of crunchy.

Variations to Try

Here are some fun ways to switch up your cranberry nut granola:

  • Chocolate Cranberry Granola: Add 1/2 cup chocolate chips after baking, mixing them in while the granola is still warm.
  • Spiced Pumpkin Granola: Substitute pumpkin puree for oil and add 1 tsp pumpkin spice for a festive twist.
  • Maple Pecan Granola: Use pecans instead of mixed nuts and replace maple syrup with honey for a different flavor profile.
  • Fruit and Nut Medley: Incorporate dried fruits like raisins and apricots for a more diversified taste.

Storage and Make-Ahead Instructions

This granola is perfect for meal prep! Here’s how to store it:

  • Store in an airtight container at room temperature for up to 2 weeks.
  • For longer storage, freeze portions in resealable bags. Granola can be frozen for up to 3 months.
  • Make a batch on the weekend and enjoy it throughout the week for breakfast or snacks!

Frequently Asked Questions

Here are some common questions about making your own cranberry nut granola:

  • Can I use quick oats instead of rolled oats? While it’s best to use rolled oats for texture, quick oats can work if you adjust the baking time.
  • How can I make this recipe vegan? Use maple syrup and coconut oil, both of which are plant-based.
  • Can I add protein powder? Absolutely! Stir in a scoop of your favorite protein powder after mixing the wet and dry ingredients.
  • What’s the best way to serve granola? Enjoy it with yogurt, milk, or as a topping on smoothie bowls.
  • Can I omit the nuts? Yes, you can make a nut-free version by replacing them with seeds or additional coconut.
  • How do I make it gluten-free? Ensure you use certified gluten-free oats and double-check other ingredients for gluten content.
  • What if I don’t have maple syrup? Honey or agave syrup can be used as a substitute for sweetness.
  • How do I know when it’s done baking? The granola should be golden brown and fragrant when it’s ready to come out of the oven.

Nutritional Tips and Dietary Adaptations

This homemade granola is not only tasty but can be adjusted to meet various dietary needs:

  • For a lower sugar version: Reduce the amount of maple syrup or replace it with a sugar-free syrup.
  • To increase fiber: Add chia seeds or flaxseeds to the mix for an extra boost.
  • For a protein boost: Include additional nuts or seeds, or add protein powder as mentioned earlier.

Equipment Recommendations

To make your granola-making experience smooth, here’s what you’ll need:

  • Baking tray: A large, rimmed baking sheet works best for spreading your granola.
  • Parchment paper: Lining your tray with parchment prevents sticking and makes cleanup easier.
  • Mixing bowls: Use large bowls for mixing dry and wet ingredients.
  • Measuring cups and spoons: Accurate measurements ensure consistency in your granola.

Serving Suggestions

Now that you’ve made your delicious cranberry nut granola, here are some ideas for serving:

  • Top your morning yogurt with a generous sprinkle of granola for added crunch.
  • Mix it into smoothie bowls for a delightful texture.
  • Enjoy as a simple snack on its own or with a piece of fruit.
  • Pair with milk or a milk alternative for a wholesome breakfast.

Conclusion

There you have it! A complete guide to making your own cranberry nut granola that’s not only delicious but also packed with nutrition. Remember, cooking is about experimentation and enjoyment—don’t hesitate to make this recipe your own! With just a few simple steps, you’ll have a batch of granola that’s far superior to store-bought versions. So roll up your sleeves, and let’s make breakfast exciting again!

Cranberry Nut Granola

Prep Time 10 minutes
Cook Time 40 minutes
Total Time 50 minutes
Servings 8 servings
Calories 450
A crunchy, sweet, and nutty granola packed with cranberries and seeds, perfect for breakfast or snacking.

Ingredients

Dry ingredients

  • 225 g jumbo oats
  • 45 g mixed nuts (pecans, almonds, cashews, brazil or macadamia nuts)
  • 45 g coconut

Wet ingredients

  • 3 tbsp vegetable oil
  • 80 ml maple syrup
  • 1 tbsp fresh lemon juice
  • 1 orange zest of 1 orange
  • 0.5 tsp cinnamon
  • 100 g dried cranberries
  • 2 tbsp pumpkin seeds

Instructions 

  • Preheat oven to 140°C (280°F).
  • Mix oats, nuts, and coconut in a bowl.
  • Heat oil, syrup, lemon juice, orange zest, and cinnamon until warm.
  • Combine wet and dry ingredients, stir evenly.
  • Spread on a tray, bake 40 mins, stirring every 10 mins until golden. Cool, then add cranberries and pumpkin seeds.

Notes

Store in an airtight container for up to 2 weeks.
Calories: 450kcal
Cost: $12
Course: Breakfast
Keyword: Granola

Elevate Your Meals with Simple Healthy Slaw

If you’re looking for a vibrant, nutritious addition to your meals, this Simple Healthy Slaw recipe is just what you need! Packed with fresh veggies, seeds, and a zesty dressing, this slaw is a quick and easy way to enhance any dish. In this guide, you’ll discover everything you need to know about making the perfect slaw that is not only delicious but also healthy.

Why You’ll Love This Recipe

This slaw is more than just a side dish; it’s a versatile, flavor-packed addition to any meal. Here are five reasons you’ll love making it:

  • Quick and Easy: This slaw can be prepared in just 15 minutes, making it a perfect choice for busy weeknights.
  • Nutritious Ingredients: With fresh cabbage, carrots, and seeds, this slaw is loaded with vitamins and minerals.
  • Customizable: You can easily modify the ingredients to suit your taste or dietary preferences.
  • Make-Ahead Friendly: This slaw can be made in advance and stored, allowing the flavors to meld beautifully.
  • Great for Meal Prep: It’s a fantastic addition to meal prep, providing a healthy side that pairs well with a variety of main dishes.

Ingredients Breakdown

Here’s what you’ll need to make this delicious slaw:

  • 2 cups finely sliced purple cabbage: This adds a pop of color and crunch.
  • 2 cups finely sliced green cabbage: Provides a different texture and flavor.
  • 2 cups shredded carrots: For sweetness and vibrant color.
  • ÂĽ cup chopped fresh parsley: Adds freshness and a hint of herbal flavor.
  • Up to Âľ cup mixed seeds: I recommend using pepitas, sunflower seeds, and sesame seeds for added crunch and nutrition.
  • ÂĽ cup olive oil: For a smooth dressing that helps combine all flavors.
  • 2 to 3 tablespoons lemon juice: Adjust to taste for the right level of acidity.
  • 1 clove garlic: Offers a zesty punch to the dressing.
  • ½ teaspoon ground cumin: Adds a warm, earthy flavor that elevates the slaw.
  • ½ teaspoon salt: Enhances all the flavors.

Substitutions and Variations

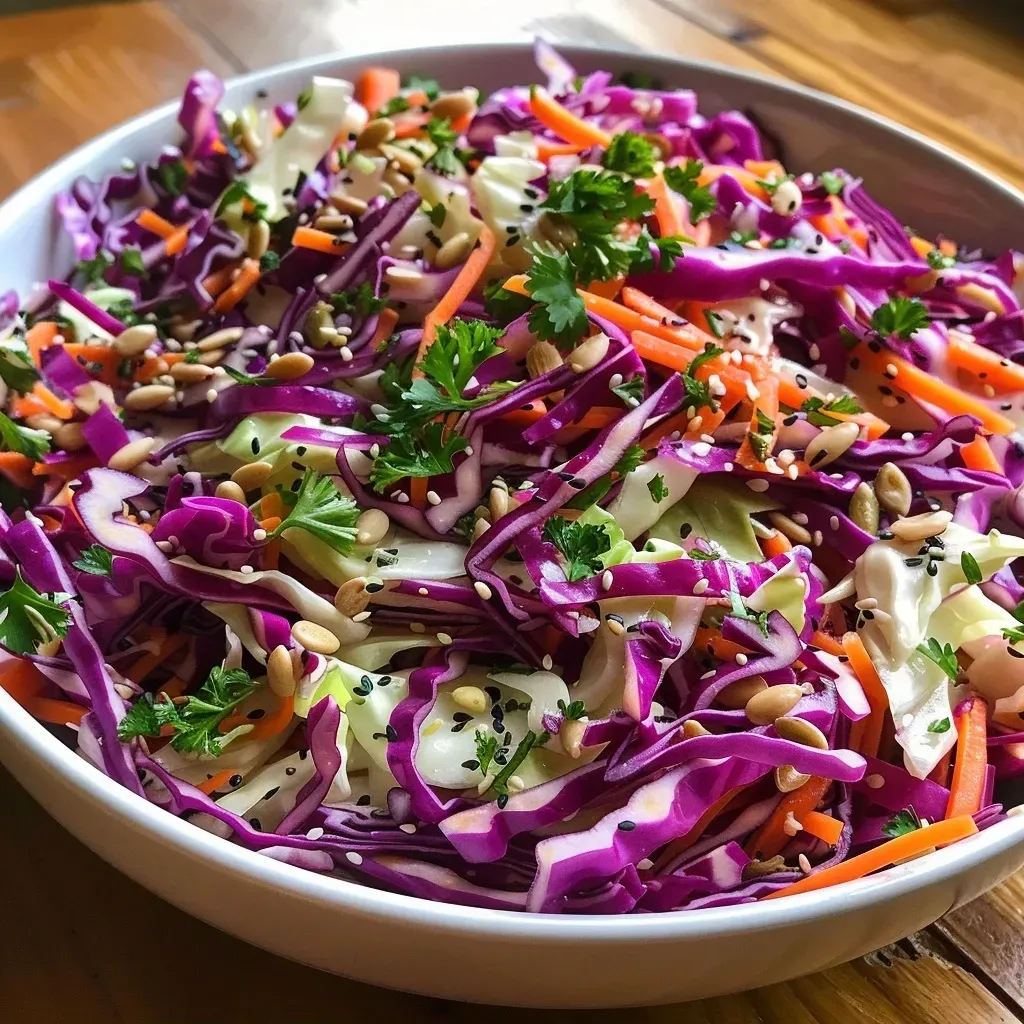
Side view of a fresh vegetable slaw with vibrant purple and green colors and a sprinkling of seeds.

You can easily customize this recipe to fit your taste preferences. Here are some great substitutions:

  • Cabbage types: Use Napa or Savoy cabbage for a different flavor and texture.
  • Carrots: Swap with shredded beets for a colorful twist.
  • Herbs: Replace parsley with cilantro or mint for a fresh flavor.
  • Seeds: Use nuts like slivered almonds or walnuts for an extra crunch.

How to Make the Dressing

The dressing is key to making this slaw shine. Here’s how to whip it up:

  • In a small bowl, combine the olive oil and lemon juice.
  • Add the pressed garlic, cumin, and salt. Whisk until thoroughly blended.
  • Taste and adjust the seasoning by adding more lemon juice if needed.

Pro Tips for Perfect Slaw

Here are some expert insights to ensure your slaw turns out perfectly:

  • Fresh ingredients: Always use the freshest vegetables for the best flavor and crunch.
  • Chill before serving: Letting the slaw sit in the fridge for at least 30 minutes can enhance the flavors.
  • Toast your seeds: Toasting seeds before adding them brings out their flavor and adds a delightful crunch.
  • Slice thinly: Ensure that the cabbage and carrots are sliced thinly for the best texture.
  • Balance flavors: Adjust the seasonings in the dressing to find the perfect balance for your taste.
  • Mix it up: Don’t be afraid to experiment with different veggies and dressings!
  • Storage tips: Store any leftovers in an airtight container in the fridge for up to 5 days.
  • Pair wisely: This slaw pairs well with grilled meats, tacos, or as a topping for sandwiches.

Common Mistakes and Troubleshooting

Even the best cooks make mistakes! Here are some common issues and how to avoid them:

  • Too soggy: If your slaw becomes soggy, try reducing the amount of dressing or serve it immediately after mixing.
  • Too bland: If the slaw lacks flavor, add more salt, lemon juice, or spices to enhance the taste.
  • Uneven texture: Ensure all ingredients are chopped to uniform sizes for even flavor distribution.

Storage and Make-Ahead Instructions

This slaw is perfect for meal prep! Here’s how to store it:

  • Make the slaw and dressing separately. Combine them just before serving to keep the veggies crisp.
  • Store the slaw in an airtight container in the fridge for up to 5 days.
  • If you want to make it ahead of time, prepare the slaw and dressing a day in advance.

Frequently Asked Questions (FAQ)

Here are some common questions about this Simple Healthy Slaw:

  • Can I use a different dressing? Absolutely! Feel free to experiment with different dressings like tahini or yogurt-based options.
  • Is this slaw vegan? Yes, this recipe is entirely plant-based!
  • Can I add protein to this slaw? Yes, shredded chicken or chickpeas can be great additions for a more filling meal.
  • How should I serve this slaw? It pairs beautifully with grilled meats, tacos, or as a topping on sandwiches.
  • Can I freeze the slaw? It’s best enjoyed fresh, but if you must freeze it, do so without the dressing.
  • How do I make this slaw spicier? Add chopped jalapeños or a dash of cayenne pepper to the dressing for a kick.
  • What’s the best way to chop cabbage? Use a sharp knife or a mandoline for even slices.
  • Can I make this slaw gluten-free? Yes, all ingredients are gluten-free, just double-check your seed brands.

Nutritional Tips and Dietary Adaptations

This slaw is not only tasty but also nutritious. Here’s how you can adapt it:

  • For a low-calorie option: Use less oil in the dressing and add more lemon juice for flavor.
  • Gluten-free: This recipe is gluten-free as written.
  • Low-carb: Replace carrots with zucchini noodles for a lower-carb version.
  • Keto-friendly: Use a sugar substitute in the dressing if needed.

Equipment Recommendations

To make this slaw, you’ll need some basic kitchen tools:

  • Sharp knife: For slicing the cabbage and carrots.
  • Cutting board: A sturdy surface for chopping.
  • Mixing bowl: To combine all the slaw ingredients.
  • Small skillet: For toasting the seeds.
  • Whisk: To mix the dressing thoroughly.

Serving Suggestions

This slaw is incredibly versatile! Here are a few serving ideas:

  • As a side dish: Serve alongside grilled chicken or fish for a refreshing complement.
  • In tacos: Use it as a crunchy topping for fish or veggie tacos.
  • On sandwiches: Add it to your favorite sandwich for extra crunch and flavor.
  • In salads: Toss it with mixed greens for a hearty salad.

Your Culinary Adventure Awaits!

Now that you have all the insights and tips, it’s time to get cooking! Whether you’re a novice or an experienced cook, this Simple Healthy Slaw is a fantastic way to bring fresh flavors to your table. Remember, cooking is all about experimenting and having fun, so feel free to make this recipe your own. Enjoy the process and happy cooking!

Simple Healthy Slaw

Prep Time 15 minutes
Cook Time 10 minutes
Total Time 25 minutes
Servings 4 servings
Calories 180
A vibrant and nutritious slaw combining colorful vegetables and seeds, dressed with a zesty lemon garlic dressing.

Ingredients

Vegetables

  • 2 cups finely sliced purple cabbage (one small cabbage)
  • 2 cups finely sliced green cabbage (one small cabbage)
  • 2 cups shredded carrots (store-bought or grated)
  • ÂĽ cup chopped fresh parsley
  • Âľ cup mixed seeds (pepitas, sunflower, sesame, poppy seeds)
  • ÂĽ cup olive oil
  • 2-3 tablespoons lemon juice (to taste)
  • 1 clove garlic (pressed or minced)
  • ½ teaspoon ground cumin
  • ½ teaspoon salt

Instructions 

  • Combine cabbage, carrots, and parsley in a bowl.
  • Toast seeds in a skillet until fragrant, then add to the bowl.
  • Mix olive oil, lemon juice, garlic, cumin, and salt to make the dressing.
  • Drizzle dressing over the slaw and toss to coat. Adjust lemon juice if needed.
  • Serve immediately or refrigerate to marinate.

Notes

This slaw is best enjoyed fresh but can be refrigerated for a few hours to enhance flavors.
Calories: 180kcal
Cost: $10
Course: Salad
Cuisine: Healthy
Keyword: Vegetables

Welcome to Your New Favorite Holiday Treat!

As the festive season approaches, there’s nothing quite like the warm, comforting flavors of gingerbread to get you into the holiday spirit. This Gingerbread Protein Shake is a delightful blend of seasonal spices and nutritious ingredients, perfect for a post-workout boost or a cozy afternoon snack. Packed with protein and flavor, this shake is not just a treat—it’s a way to enjoy the holidays while keeping your nutrition on track.

In this article, we’ll explore why you’ll love this recipe, break down the ingredients, offer expert tips, and provide variations to keep your taste buds excited. So, roll up your sleeves and get ready to whip up a festive drink that you can feel good about!

Why You’ll Love This Recipe

  • Festive Flavor: The combination of ginger, cinnamon, and nutmeg creates a warm, delightful taste reminiscent of gingerbread cookies.
  • High Protein Content: With a scoop of protein powder and other nutrient-rich ingredients, this shake supports muscle recovery and keeps you feeling full.
  • Easy to Make: Just throw everything in a blender for a quick, satisfying drink that takes minutes to prepare.
  • Dairy-Free Options: You can easily swap out dairy ingredients for plant-based alternatives, making this shake accessible for everyone.
  • Versatile Recipe: Customize this shake with your favorite add-ins to suit your taste or dietary preferences.

Ingredient Breakdown

Understanding the ingredients is key to making the best gingerbread protein smoothie. Here’s a detailed look at what you’ll need:

  • 1 cup frozen coffee ice cubes (or regular ice): Adds a refreshing chill and a subtle coffee flavor.
  • 1/2 frozen banana (optional): Provides natural sweetness and creaminess.
  • 1/2 cup milk (or water or dairy-free alternative): Choose almond milk, oat milk, or whatever you prefer for the base.
  • 1 scoop vanilla protein powder: This adds a protein boost; whey or plant-based options work well.
  • 1 tsp almond butter: For healthy fats and a nutty flavor that complements the spices.
  • 1 tsp molasses: This key ingredient enhances the gingerbread flavor and adds a touch of sweetness.
  • 1 tsp vanilla extract: Brings all the flavors together with its aromatic essence.
  • 1/2 tsp ground ginger: Essential for that classic gingerbread taste.
  • 1/2 tsp ground cinnamon: Adds warmth and spice.
  • Pinch of nutmeg and cloves: For depth and complexity in flavor.

Substitutions and Variations

Side view of a delicious gingerbread protein shake with ice cubes and smooth texture, garnished with whipped cream.

If you’re missing an ingredient or want to mix things up, here are some fantastic substitutions and variations:

  • Protein Powder: Use your favorite flavor—chocolate or unflavored can also work if vanilla isn’t available.
  • Nut Butters: Swap almond butter for peanut or cashew butter for a different flavor profile.
  • Dairy-Free Milk: Try coconut milk for a creamier texture or any nut milk you prefer.
  • Sweeteners: If you prefer your shake sweeter, consider adding honey or maple syrup instead of molasses.
  • Extra Spice: Get creative! Add a dash of cardamom or allspice for a unique twist.

Pro Tips for the Perfect Shake

Here are some tips to ensure your gingerbread protein shake turns out perfectly every time:

  • Blend Thoroughly: Make sure to blend for at least 30-60 seconds until smooth for the best texture.
  • Adjust Consistency: If the shake is too thick, add extra milk or water for your desired consistency.
  • Chill Your Ingredients: Using frozen ingredients will make your shake cold and refreshing without diluting the flavor.
  • Taste Before Serving: Always taste your shake before pouring it out; adjust sweetness or spice as needed.
  • Optional Toppings: Top with whipped cream and a gingerbread cookie for an extra festive touch!
  • Meal Prep: Pre-portion your dry ingredients for a quick grab-and-blend option on busy mornings.
  • Experiment with Toppings: Try adding a sprinkle of cinnamon or a few chocolate chips on top for added flavor.
  • Use a High-Powered Blender: This ensures that all ingredients blend seamlessly without chunks.
  • Store Leftovers: If you have any shake left, store it in the fridge for up to 24 hours, but give it a good shake before drinking.

Common Mistakes and Troubleshooting

Even the best recipes can go awry! Here are some common mistakes and how to avoid them:

  • Too Thick: If your shake is too thick, add more liquid gradually until you reach your desired consistency.
  • Not Blending Enough: If you notice chunks, blend longer; a smooth shake is key!
  • Too Sweet: If it’s overly sweet, balance it with a pinch of salt or a splash of unsweetened milk.
  • Flavor Imbalance: If the spices are too strong, add more milk or ice to dilute.

Make-Ahead and Storage Instructions

This shake is best enjoyed fresh, but if you want to prep ahead:

  • Pre-Make Ingredients: Combine dry ingredients in advance and store in an airtight container.
  • Pre-Blend and Store: You can blend the shake and store it in the fridge for up to 24 hours; just give it a good shake before consuming.
  • Frozen Portions: Freeze portions in ice cube trays for a quick grab-and-blend option later!

Nutritional Tips and Dietary Adaptations

This gingerbread protein shake can fit into various dietary needs:

  • High Protein: With protein powder, this shake is perfect for post-workout recovery.
  • Dairy-Free: Substitute dairy milk with plant-based alternatives to suit lactose intolerance.
  • Low Sugar Options: Choose unsweetened protein powder and reduce or eliminate added sweeteners.

Equipment Recommendations

To make this shake, you will need:

  • High-Powered Blender: Essential for achieving a smooth consistency.
  • Measuring Cups and Spoons: For accurate ingredient measurements.
  • Glass or Mason Jar: For serving and storing your shake.

Serving Suggestions

Here are some ways to enjoy your gingerbread protein shake:

  • Post-Workout Drink: Ideal for replenishing energy and nutrients after exercise.
  • Cozy Afternoon Snack: Sip while lounging or reading a book for a comforting treat.
  • Holiday Brunch Addition: Serve alongside pancakes or waffles for a festive breakfast spread.

Frequently Asked Questions

Got questions? Here are some common queries about the gingerbread protein shake:

  • Can I use fresh ginger instead of ground? Yes, but use a smaller amount to avoid overpowering the shake.
  • Is this shake vegan-friendly? Yes, just ensure you use plant-based protein powder and milk alternatives.
  • How can I make it lower in calories? Opt for water instead of milk and reduce or skip the nut butter.
  • Can I add greens to this shake? Absolutely! Spinach or kale can be added for extra nutrients without compromising flavor.
  • What can I use instead of molasses? Maple syrup or agave nectar can serve as alternatives, although the flavor will change slightly.
  • How long does this shake stay fresh? Best consumed immediately, but can be stored in the fridge for up to 24 hours.
  • Can I use flavored protein powder? Yes, just keep in mind that it may alter the overall flavor of the shake.
  • Is this shake kid-friendly? Definitely! It’s a nutritious treat that kids will love, especially with toppings.

Final Thoughts

The Gingerbread Protein Shake is not only a delicious way to indulge in the flavors of the season but also a nourishing option that fits into a healthy lifestyle. I hope you enjoy trying out this recipe and making it your own. Happy blending, and may your holidays be filled with joy and deliciousness!

Gingerbread Protein Shake

Prep Time 5 minutes
Total Time 5 minutes
Servings 1 serving
Calories 250
A delicious and festive protein shake with warm gingerbread spices, perfect for a quick treat or post-workout boost.

Ingredients

Base ingredients

  • 1 cup frozen coffee ice cubes (or regular ice)
  • 0.5 cup frozen banana (optional)
  • 0.5 cup milk (or water or dairy-free alternative)
  • 1 scoop vanilla protein powder (I use whey)
  • 1 tsp almond butter
  • 1 tsp molasses
  • 1 tsp vanilla extract
  • 0.5 tsp ground ginger
  • 0.5 tsp ground cinnamon
  • Pinch nutmeg and cloves

Optional toppings

  • to taste whipped cream & gingerbread cookie

Instructions 

  • Add all ingredients to a high-powered blender and blend for 30-60 seconds until smooth.
  • Pour into a glass and top with whipped cream and a gingerbread cookie if desired. Serve immediately!

Notes

You can adjust the sweetness by adding more molasses or sweetener of choice.
Calories: 250kcal
Cost: $10
Course: Beverage
Cuisine: Festive
Keyword: gingerbread, Protein Shake

Experience the Cozy Flavors of Autumn with a Spiced Mocktail

As the leaves turn golden and the air becomes crisp, there’s nothing quite like embracing the season with a delicious, warming drink. This Autumn Spiced Mocktail is a delightful blend of cranberry juice, orange juice, and aromatic spices that create a drink perfect for cozy gatherings or quiet evenings at home. With a few simple steps and fresh ingredients, you can whip up a refreshing beverage that encapsulates the essence of fall.

In this article, we’ll dive deep into the details of this delightful mocktail, exploring everything from its key ingredients to expert tips for making it your own. Whether you’re hosting a family dinner or just want to treat yourself, this mocktail will become a seasonal favorite!

Why You’ll Love This Recipe

This Autumn Spiced Mocktail is not just another drink; it’s an experience that brings warmth and joy to any occasion. Here are a few reasons to fall in love with this recipe:

  • Flavorful Fusion: The combination of cranberry and orange juices creates a sweet yet tart base, enhanced by the deep flavors of warming spices like cinnamon and cloves.
  • Easy to Make: With straightforward instructions, this mocktail is quick to prepare, making it a perfect choice for busy hosts or casual gatherings.
  • Non-Alcoholic Delight: This mocktail is a fantastic option for those who prefer to avoid alcohol but still want to enjoy a festive drink.
  • Customizable: Adjust the sweetness and spice levels to suit your taste, and feel free to experiment with different fruits and garnishes.
  • Perfect for All Occasions: Whether it’s a holiday party or a cozy movie night, this drink fits seamlessly into any setting.

Detailed Ingredient Breakdown

For the best results, it’s essential to understand the role of each ingredient. Here’s what you’ll need:

  • 8 oz Cranberry Juice: A key ingredient, cranberry juice provides a tart and refreshing flavor. Opt for 100% juice without added sugars for a healthier option.
  • 2 oz Orange Juice: This adds a sweet and citrusy note that balances the tartness of cranberry juice. Freshly squeezed juice is always preferred!
  • 1/2 Granny Smith Apple: Cored and sliced, these apples contribute a crisp texture and a hint of additional sweetness.
  • 1 Whole Clove: Cloves add a warm, aromatic flavor that’s quintessential for fall beverages.
  • 1 Cinnamon Stick: This not only infuses the drink with a warming spice but also serves as a lovely garnish.
  • 1 Fresh Ginger: Cut into penny-sized pieces, ginger adds a zesty kick, enhancing the overall flavor profile.
  • Optional Garnishes: Orange slices and rosemary sprigs can elevate your drink’s presentation and aroma.

How to Make Your Autumn Spiced Mocktail

Side view of a refreshing mocktail featuring cranberry and orange juice, with apple slices and spices.

Follow these simple steps to create your own cozy mocktail:

  1. Place the ginger, cinnamon stick, and cloves into an empty tea bag and pull the drawstring tight. If you don’t have a tea bag, tie the spices in a piece of cheesecloth.
  2. Pour the cranberry juice into a saucepan. Add the tea bag of spices, orange juice, and apple slices to the pan.
  3. Simmer the mixture over low heat for one hour, allowing the flavors to meld together.
  4. After simmering, remove the tea bag or cheesecloth of spices from the pan.
  5. Chill the mocktail in the refrigerator and serve over ice, garnished with an orange slice and a sprig of rosemary.
  6. For a warm option, serve immediately while warm, garnished with a cinnamon stick for an extra touch of warmth.

Pro Tips for the Perfect Mocktail

Here are some expert insights to ensure your mocktail turns out perfectly every time:

  • Quality Ingredients: Use fresh, high-quality juices and fruits for the best flavor. Avoid processed juices with added sugars.
  • Adjust Sweetness: If you prefer a sweeter drink, consider adding a touch of honey or maple syrup to taste.
  • Infuse Longer: For a deeper flavor, let the spices steep longer than an hour—just be sure to taste as you go!
  • Chill Before Serving: If serving chilled, allow the mocktail to cool completely before pouring over ice for optimal taste.
  • Garnish Creatively: Experiment with different garnishes like star anise or pomegranate seeds for a festive touch.
  • Serve in Style: Use clear glassware to showcase the beautiful colors of the mocktail.
  • Make It a Punch: Scale up the recipe for larger gatherings by multiplying the ingredients and serving in a punch bowl.
  • Pair with Snacks: Complement your mocktail with autumn-inspired snacks like spiced nuts or cheese platters.

Common Mistakes and Troubleshooting

Even the best recipes can have hiccups. Here are some common issues and how to avoid them:

  • Too Tart: If your mocktail is too tart, balance it out with a bit of sweetener or more orange juice.
  • Weak Flavor: Ensure your spices are fresh; old spices can lose their potency. Consider increasing steeping time for more robust flavors.
  • Not Chilled Enough: If the mocktail isn’t cold enough, add ice immediately before serving or chill it in the fridge longer.

Variations to Spice Up Your Mocktail

Feel free to customize your drink! Here are some variations to try:

  • Spiced Cranberry Punch: Add club soda or ginger ale for a sparkling twist.
  • Minty Fresh: Incorporate fresh mint leaves for a refreshing aroma and taste.
  • Apple Cider Variation: Substitute part of the cranberry juice with apple cider for an even more autumnal flavor.
  • Herbal Infusion: Try adding fresh thyme or basil for a unique herbal note.

Storage and Make-Ahead Instructions

This mocktail can be prepared in advance:

  • Refrigerate: Store any leftover mocktail in an airtight container in the refrigerator for up to 3 days.
  • Make Ahead: You can prepare the spiced infusion a day before and store it in the fridge. Just add the apple slices and ice when ready to serve.

Frequently Asked Questions

Here are some common questions about this delicious mocktail:

  • Can I make this mocktail ahead of time? Yes, you can prepare the spiced mixture in advance and store it in the fridge.
  • Is this mocktail suitable for kids? Absolutely! This drink is a great non-alcoholic option for all ages.
  • Can I use frozen fruit? Yes, frozen cranberries or apples can work well, especially if you’re serving it chilled.
  • What can I use instead of ginger? Try using ground ginger as a substitute, but start with a smaller amount as it’s more concentrated.
  • How do I adjust the spice level? Feel free to add more or fewer spices according to your taste preference.
  • Can I use other juices? Yes, feel free to mix and match with other fruit juices like pomegranate or grape.
  • What’s the best way to serve this drink? Serve it over ice for a refreshing drink or warm for cozy evenings.
  • How long does this mocktail last? It can last in the fridge for up to 3 days, but it’s best enjoyed fresh.

Nutritional Tips and Dietary Adaptations

This mocktail is naturally low in calories and can be adapted to fit various dietary needs:

  • Low Sugar: Use unsweetened cranberry juice to keep the sugar content low.
  • Vegan-Friendly: All ingredients are plant-based, making it suitable for vegan diets.
  • Gluten-Free: This recipe is naturally gluten-free, perfect for those with dietary restrictions.

Equipment Recommendations

To make your mocktail-making experience smoother, consider having the following tools on hand:

  • Tea Bag or Cheesecloth: For infusing your spices without the mess.
  • Medium Saucepan: To simmer your mocktail ingredients together.
  • Measuring Cups: To accurately measure your juices and other ingredients.
  • Serving Glasses: Choose clear glassware to showcase your beautifully colored mocktail.

Serving Suggestions

This Autumn Spiced Mocktail pairs wonderfully with a variety of foods and settings:

  • Family Dinners: Serve alongside roast chicken or a hearty vegetable dish for a comforting meal.
  • Holiday Gatherings: This mocktail is perfect for Thanksgiving or Christmas celebrations, offering a festive touch.
  • Casual Gatherings: Pair it with snacks like cheese platters or spiced nuts for a relaxed vibe.

Conclusion

As we embrace the beauty of autumn, this cozy Autumn Spiced Mocktail offers a delightful way to celebrate the season. With its rich flavors, easy preparation, and endless customization options, you can make this drink your own. So gather your ingredients, invite some friends over, and enjoy a taste of fall that warms the heart and soul!

Autumn Spiced Mocktail

Prep Time 10 minutes
Cook Time 1 hour
Total Time 1 hour 10 minutes
Servings 4 cups
Calories 120
A warm and cozy mocktail perfect for fall, combining tart cranberry juice with aromatic spices and fresh apple slices.

Ingredients

Beverages

  • 8 oz Cranberry juice
  • 2 oz Orange juice

Fruits

  • 1/2 Granny Smith apple (cored and sliced)

Spices

  • 1 Whole cloves
  • 1 Cinnamon stick Cinnamon stick
  • 1 Fresh ginger (cut to the size of a penny and 1/4 inch thick) Fresh ginger

Garnishes

  • Orange slices, rosemary sprigs, cinnamon stick for garnish (optional) Garnishes (Optional: orange slices, rosemary sprigs, cinnamon stick)

Instructions 

  • Place ginger, cinnamon, and cloves in a tea bag or cheesecloth.
  • Simmer cranberry juice, orange juice, apple slices, and spices for 1 hour.
  • Remove the spice bag and chill the mixture.
  • Serve over ice, garnished with orange slices and rosemary, or warm with a cinnamon stick.

Notes

This mocktail is perfect for cozy fall gatherings and can be served warm or cold.
Calories: 120kcal
Cost: $15
Course: Beverage
Cuisine: American
Keyword: Fall, mocktail, spiced