Author

Steven

Browsing

Start your day on a delicious note with these Gingerbread Protein Donuts. Combining the warm spices of gingerbread with the nutritional benefits of protein powder, these donuts are not just tasty; they’re also a great way to fuel your morning. Whether you’re looking for a quick breakfast or a healthy snack, this recipe is perfect for you!

In this comprehensive guide, we’ll walk through everything you need to know about making the fluffiest gingerbread donuts that are packed with flavor and protein. We’ll break down the ingredients, share expert tips, and provide variations to suit your taste. Let’s get cooking!

Why You’ll Love This Recipe

  • Protein-packed: Each donut is loaded with protein, making it a nutritious option for breakfast or a post-workout snack.
  • Cozy spices: The combination of ginger, cinnamon, and molasses creates a warm and inviting flavor that’s perfect for fall and winter.
  • Easy to make: With simple steps and easily accessible ingredients, these donuts come together quickly, even on busy mornings.
  • Healthy alternative: Unlike traditional fried donuts, these baked gingerbread donuts are lower in calories and sugar, allowing you to indulge guilt-free.
  • Customizable: You can easily modify the recipe to suit your dietary preferences, whether you need it vegan, gluten-free, or dairy-free.

Ingredient Breakdown

Let’s take a closer look at the ingredients and their roles in this recipe.

  • Whole Wheat Pastry Flour: This flour adds fiber and nutrients. You can substitute it with regular all-purpose flour if you prefer.
  • Vanilla Protein Powder: Adds sweetness and a protein boost. Feel free to use your favorite brand!
  • Unflavored Protein Powder: This helps maintain the donut’s structure. You can use any unflavored protein powder you have on hand.
  • Spices (Cinnamon, Ginger, Allspice, Cloves): These spices infuse the donuts with that classic gingerbread flavor.
  • Baking Powder & Baking Soda: Essential for leavening, ensuring your donuts are fluffy and light.
  • Unsweetened Applesauce: A great substitute for oil, adding moisture without extra fat.
  • Almond Milk: Use unsweetened almond milk for a dairy-free option, or substitute with any milk of your choice.
  • Molasses: This adds depth of flavor and a hint of sweetness typical of gingerbread.
  • Egg: Provides structure and moisture; can be replaced with a flax egg for a vegan version.
  • Gingerbread Flavored Almond Butter: This is a delightful addition that enhances the gingerbread flavor and adds healthy fats.

How to Make Gingerbread Protein Donuts

  1. Preheat: Preheat your oven to 350°F (175°C) and spray a 12-hole donut pan with cooking spray.
  2. Mix dry ingredients: In a large bowl, whisk together the flour, vanilla protein powder, unflavored protein powder, cinnamon, ginger, allspice, cloves, baking powder, and baking soda.
  3. Combine wet ingredients: In another bowl, whisk together the applesauce, almond milk, molasses, melted butter, and egg.
  4. Mix together: Add the wet mixture to the dry ingredients and stir until just combined. Avoid over-mixing!
  5. Fill the pan: Divide the batter evenly among the donut pan cavities, filling them about ⅔ to ¾ full.
  6. Bake: Bake for 12 minutes or until a toothpick inserted into the center comes out clean.
  7. Cool: Allow the donuts to cool in the pan for 5 minutes, then carefully remove them and transfer to a cooling rack.

Pro Tips for Perfect Donuts
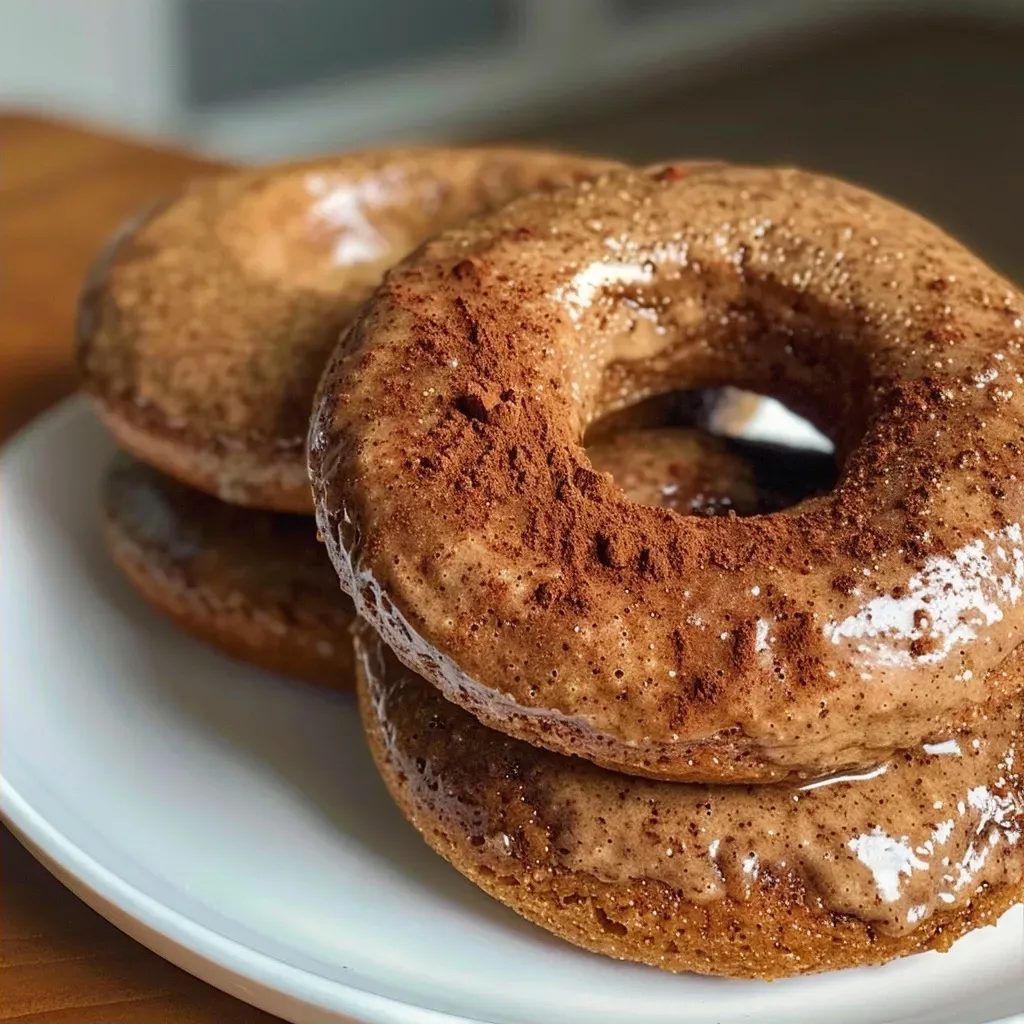
Juicy gingerbread protein donuts displayed on a rustic wooden surface.
  • Don’t over-mix: Stir just until combined to keep the donuts light and fluffy.
  • Check for doneness: Use a toothpick to check if they’re done baking; if it comes out clean, they’re ready!
  • Cool properly: Let them cool completely before glazing to prevent the glaze from melting.
  • Experiment with flavors: Add chocolate chips or nuts to the batter for an extra flavor boost.
  • Glaze with care: Apply the glaze while the donuts are still slightly warm for better adherence.
  • Store wisely: Keep them in an airtight container to maintain freshness.
  • Adjust sweetness: Feel free to add more or less sweetener based on your preference.
  • Use a donut pan: For best results, use a non-stick donut pan to ensure easy removal.

Common Mistakes and Troubleshooting

Even the best cooks can make mistakes! Here are some common issues and how to avoid them:

  • Dense donuts: This can happen if you over-mix the batter or add too much flour. Be gentle!
  • Sticking to the pan: Make sure to grease your donut pan well before baking.
  • Dry donuts: If you bake them for too long, they can dry out. Keep an eye on the baking time!
  • Flavorless donuts: Ensure your spices are fresh for maximum flavor.

Variations to Try

Make these gingerbread donuts your own with these fun variations:

  • Vegan version: Substitute the egg with a flax egg (1 tablespoon ground flaxseed mixed with 2.5 tablespoons water).
  • Gluten-free: Use a 1:1 gluten-free flour blend in place of the whole wheat flour.
  • Chocolate drizzle: Melt dark chocolate and drizzle over the cooled donuts for an indulgent touch.
  • Spiced glaze: Mix powdered sugar with a bit of almond milk and a pinch of cinnamon for a spiced glaze.

Storage and Make-Ahead Instructions

These donuts are best enjoyed fresh but can be stored for later! Here’s how to keep them:

  • Room temperature: Store in an airtight container for up to 2 days.
  • Refrigerate: For longer storage, keep them in the fridge for up to a week.
  • Freeze: Freeze for up to 3 months. Thaw at room temperature or microwave for a few seconds before enjoying.

Frequently Asked Questions

  • Can I make these donuts without protein powder? Yes, you can substitute it with more flour, but they won’t be as protein-rich.
  • What can I use instead of molasses? You can replace molasses with honey or maple syrup for a different flavor.
  • Are these donuts gluten-free? If you use gluten-free flour, they can be gluten-free!
  • How do I make the glaze? Mix powdered sugar with almond milk until you reach your desired consistency.
  • Can I add frosting? Absolutely! Cream cheese frosting pairs well with gingerbread flavors.
  • How do I make them spicier? Increase the amount of ginger or add a pinch of cayenne pepper for a kick.
  • What’s the best way to reheat them? Microwave for a few seconds to regain softness.
  • Can I use a different type of milk? Yes, any milk will work, including oat or soy milk.

Nutrition Tips and Dietary Adaptations

These donuts are not only delicious but also offer nutritional benefits:

  • High in protein: Great for muscle recovery post-workout.
  • Rich in fiber: Thanks to whole wheat flour, aiding in digestion.
  • Low in sugar: You can further reduce sugar by adjusting the glaze sweetener.
  • Healthy fats: Almond butter adds healthy fats that are good for heart health.

Equipment Recommendations

For the best results, make sure you have the following:

  • Donut Pan: A good non-stick donut pan is essential for perfect donut shapes.
  • Mixing Bowls: Use various sizes for mixing dry and wet ingredients.
  • Whisk: A sturdy whisk will help you mix the batter well.
  • Cooling Rack: Essential for cooling your donuts evenly.

Serving Suggestions

Enjoy your gingerbread protein donuts plain, or add some fun toppings! Here are a few ideas:

  • Dust with powdered sugar: A simple dusting adds a touch of sweetness.
  • Serve with coffee: Pair them with your favorite morning brew for a cozy breakfast.
  • Top with yogurt: Greek yogurt adds creaminess and a protein boost.
  • Side of fruit: Fresh fruit makes a refreshing addition to balance the sweetness.

In conclusion, these Wholesome Gingerbread Protein Donuts are a delightful way to start your day with a burst of flavor and nutrition. With easy-to-follow steps and the flexibility to customize, you’re sure to make them time and time again. Happy baking!
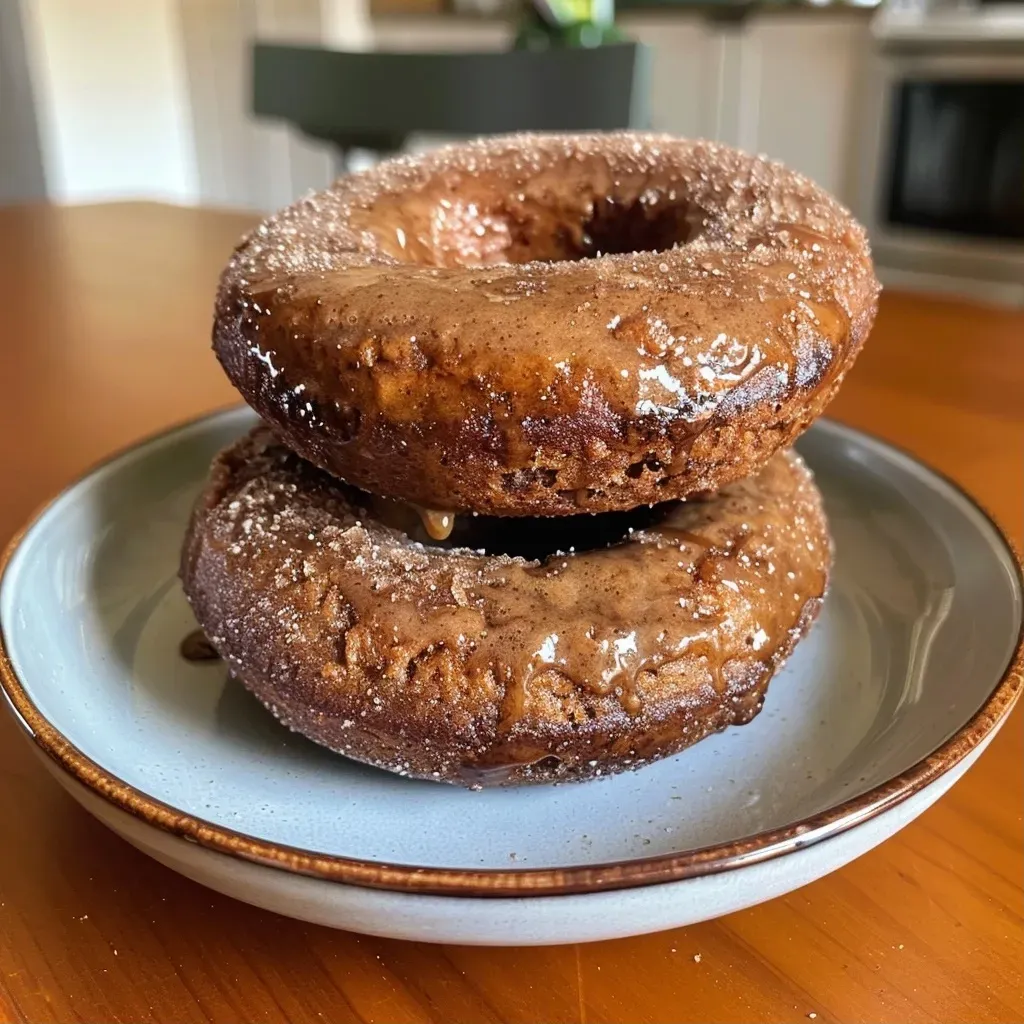
The Best, Softest Gingerbread Protein Donuts

Prep Time 10 minutes
Cook Time 12 minutes
Total Time 22 minutes
Servings 12 donuts
Calories 180
Enjoy these soft, flavorful gingerbread protein donuts perfect for a healthy treat during the holidays or any time you crave a cozy baked good.

Ingredients

Dry Ingredients

  • 0.75 cup Whole Wheat Pastry Flour (or regular) (90g)
  • 0.5 cup Vanilla Protein Powder (Whey-casein) (45g)
  • 0.33 cup Unflavored Protein Powder (Whey-casein) (30g)
  • 1 tsp Ground Cinnamon
  • 0.75 tsp Ground Ginger
  • 0.125 tsp Allspice
  • 0.125 tsp Ground Cloves
  • 1 tsp Baking Powder
  • 0.75 tsp Baking Soda

Wet Ingredients

  • 0.75 cup Unsweetened Applesauce (180g)
  • 0.5 cup Unsweetened Almond Milk (120ml)
  • 2 Tbsp Molasses (40ml)
  • 1 Tbsp Melted Butter (14g)
  • 3 Tbsp Gingerbread Flavored Almond Butter (42g)
  • 2 Tbsp Vanilla Protein Powder (Whey-casein) (12g)
  • 4.5 Tbsp Almond Milk (67ml)

Instructions 

  • Preheat oven to 350°F and spray donut pan.
  • Mix dry ingredients in a bowl.
  • Whisk wet ingredients in another bowl.
  • Combine wet and dry, then fill donut pan.
  • Bake for 12 minutes, cool, then serve.

Notes

Use a donut pan for best shape and texture.
Calories: 180kcal
Cost: $15
Course: Dessert
Cuisine: American
Keyword: Donuts, gingerbread, Protein

Indulge in a Sweet Delight: Toasted Marshmallow Milkshakes

There’s something magical about the combination of creamy ice cream and the rich, smoky flavor of toasted marshmallows. If you’re looking for a fun, easy dessert that brings a little nostalgia, you’ve come to the right place! This recipe for toasted marshmallow milkshakes is not just quick to make, but it also elevates a traditional milkshake into a delightful treat that will remind you of summer campfires and cozy evenings. In this guide, we’ll explore everything you need to know to whip up the perfect toasted marshmallow milkshake!

Why You’ll Love This Recipe

There are countless reasons to fall in love with these toasted marshmallow milkshakes! Here are just a few:

  • Quick and Easy: With just four ingredients and minimal prep time, this recipe is perfect for busy days or spontaneous cravings.
  • Ultimate Comfort Food: The creamy texture combined with the smoky sweetness of toasted marshmallows creates a comforting dessert that feels like a warm hug.
  • Customizable: Whether you want to add a scoop of your favorite ice cream flavor or mix in some chocolate syrup, the options are endless.
  • Perfect for All Ages: Kids and adults alike will love this treat, making it a fantastic choice for family gatherings or parties.
  • Impressive Presentation: Garnishing with toasted marshmallows makes for an eye-catching treat that’s sure to impress your guests.

Ingredients Breakdown

Let’s dive into the essential ingredients for this delicious milkshake:

  • 10 Regular Sized Marshmallows: These will be toasted for flavor and texture. You can use larger marshmallows if you prefer a more pronounced marshmallow taste.
  • 4 Cups Vanilla Ice Cream: The base of your milkshake. Feel free to experiment with flavors like chocolate or mint for a unique twist.
  • ¾ Cup Milk: This will help achieve the perfect shake consistency. Use whole milk for creaminess or almond milk for a lighter option.
  • Pinch of Salt: A little salt enhances the sweetness and balances the flavors beautifully.

Step-by-Step Instructions

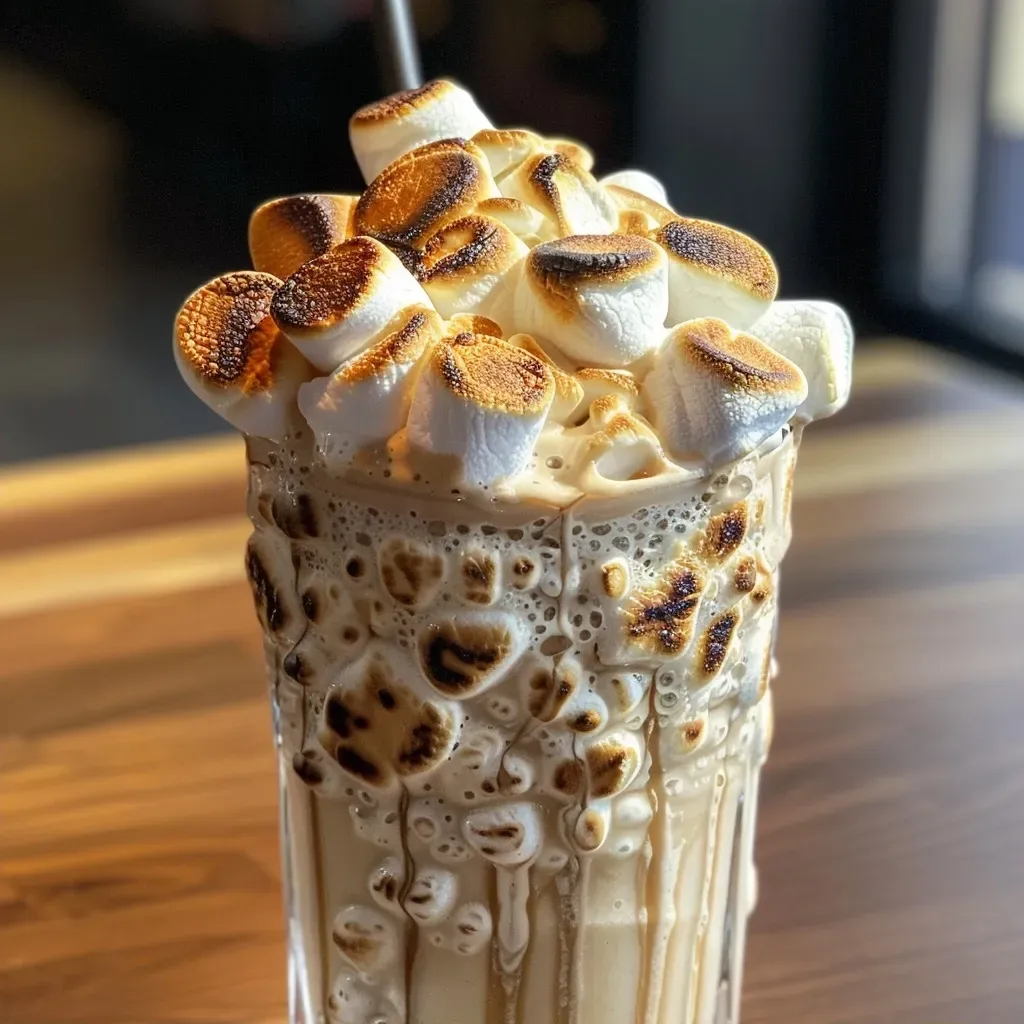
Side view of a creamy milkshake with toasted marshmallows and a straw, set against a neutral background.

Now that you have your ingredients ready, let’s get started with the preparation!

  1. Line a sheet pan with tin foil—avoid parchment paper, as it can catch fire. Lightly spray the foil with cooking spray to prevent sticking.
  2. Place 10 marshmallows on the foil. Using a blow torch, toast 8 of them on all sides until they are deeply charred—this will enhance their smoky flavor. The remaining 2 marshmallows will be used for garnish, so toast those just until lightly golden.
  3. If you don’t have a blow torch, you can toast the marshmallows under your oven’s broiler. Just be sure to keep an eye on them to avoid burning, and remove them once they are nicely charred. Alternatively, skewer them and toast them individually over a gas stovetop flame or open fire.
  4. Scoop your ice cream into a large mixing vessel with enough room to blend all the ingredients. Add the milk, the 8 charred marshmallows, and a pinch of salt.
  5. Using an immersion blender, blend the mixture until it’s completely smooth. If you prefer, a regular blender works just as well.
  6. Pour the milkshake into two tall glasses and garnish with the remaining two toasted marshmallows. Add a straw, take a sip, and enjoy your creation!

Pro Tips for the Perfect Milkshake

To ensure your toasted marshmallow milkshake turns out just right, consider these expert tips:

  • Use quality ingredients: High-quality ice cream and fresh marshmallows can elevate the flavor of your milkshake.
  • Mix it up: Don’t hesitate to add flavors like chocolate syrup, peanut butter, or even a splash of coffee for a different twist!
  • Chill your glasses: For an extra frosty experience, chill your serving glasses in the freezer for about 15 minutes before pouring in the milkshake.
  • Adjust the thickness: If your milkshake is too thick, add a bit more milk. If it’s too runny, add more ice cream until you reach your desired consistency.
  • Experiment with toppings: Try adding whipped cream, a drizzle of chocolate or caramel sauce, or even crushed graham crackers to give it a s’mores vibe!
  • Stay safe with flames: If using a blow torch, always follow safety guidelines and keep a fire extinguisher nearby, just in case!
  • Don’t rush the toasting: Take your time to achieve the perfect char on your marshmallows for that smoky flavor.
  • Make it a family affair: Involve the kids in toasting marshmallows and blending—they’ll love being part of the process!

Common Mistakes and Troubleshooting

Even the best cooks make mistakes! Here are some common issues and how to avoid them:

  • Marshmallows burning: If you find your marshmallows are burning, lower the flame or move them further away from the heat source to toast them more gently.
  • Shakes not blending well: If your milkshake is chunky, try blending it for a bit longer or adding a splash more milk to help everything combine smoothly.
  • Too sweet or too salty: Taste as you go! Adjust the amount of marshmallows or salt to get the perfect balance for your palate.
  • Too thick or too thin: Adjust the ice cream and milk ratios to find that sweet spot for your preferred consistency.

Delicious Variations to Try

Looking to switch things up? Here are some fun variations to inspire your next toast:

  • Chocolate Lover’s Delight: Substitute half of the vanilla ice cream with chocolate ice cream and swirl in chocolate syrup for an extra indulgent treat.
  • Nutty S’mores Shake: Add a tablespoon of peanut butter to your shake and top with crushed graham crackers for that classic s’mores flavor.
  • Minty Fresh: Incorporate a few drops of peppermint extract into the shake for a refreshing mint chocolate twist.
  • Fruity Marshmallow: Blend in some fresh strawberries or bananas for a fruity spin on your milkshake!

Storage and Make-Ahead Instructions

This milkshake is best enjoyed fresh, but you can make some components ahead of time:

  • Prepare marshmallows: Toast your marshmallows in advance and store them in an airtight container until you’re ready to blend.
  • Ice cream scoops: Pre-scoop your ice cream into individual portions and freeze them for quick access when you’re ready to make the shake.
  • Leftovers: If you have leftover milkshake, store it in the freezer for up to an hour. Just give it a quick blend again before serving!

FAQs About Toasted Marshmallow Milkshakes

Here are some frequently asked questions to help you with your milkshake experience:

  • Can I use different flavors of ice cream? Absolutely! Feel free to experiment with different flavors like chocolate, coffee, or even mint.
  • What if I don’t have a blow torch? You can toast marshmallows under the broiler, on a gas stove, or over an open flame with skewers.
  • How do I make this dairy-free? Substitute the ice cream with dairy-free alternatives and use non-dairy milk for a delicious vegan version.
  • Can I add alcohol to my milkshake? Yes! A splash of your favorite liqueur like Bailey’s or Kahlua can make a fun adult version.
  • How long do toasted marshmallows last? Toasted marshmallows can be stored in an airtight container for up to 2 days, but they are best enjoyed fresh.
  • Is this recipe kid-friendly? Definitely! Kids will love helping with the toasting and blending process.
  • What can I use as a garnish? Apart from toasted marshmallows, you can use whipped cream, chocolate shavings, or crushed graham crackers.
  • Can I make this milkshake ahead of time? It’s best enjoyed fresh, but you can prepare the ingredients ahead and blend just before serving.

Nutritional Tips and Dietary Adaptations

For those conscious about nutrition, here’s how you can adapt this recipe:

  • Low-Fat Option: Use low-fat ice cream and skim milk to reduce calories while still enjoying a creamy milkshake.
  • Sugar-Free Version: Look for sugar-free marshmallows and ice cream to enjoy this treat without the added sugar.
  • Gluten-Free: All the ingredients listed are generally gluten-free, but always check labels to ensure your specific products are safe.

Essential Equipment for Success

Here are some tools that will make your milkshake-making experience smoother:

  • Blender or Immersion Blender: Essential for achieving that smooth, creamy consistency.
  • Baking Sheet: Use this for toasting your marshmallows safely.
  • Blow Torch or Broiler: Critical for toasting your marshmallows beautifully.
  • Measuring Cups and Spoons: Precise measurements will help ensure the best flavor balance.

Serving Suggestions

To enhance your milkshake experience, consider these serving ideas:

  • Serve with Cookies: Pair your milkshake with chocolate chip cookies or graham crackers for a delightful treat.
  • Add a Fun Straw: Use colorful or themed straws for a festive touch.
  • Host a Milkshake Bar: Set up different toppings and mix-ins for guests to customize their shakes.

In Conclusion

Making a toasted marshmallow milkshake is not just a recipe; it’s an experience filled with warmth, creativity, and a bit of nostalgia. Whether you’re enjoying it on a hot summer day or a cozy winter evening, this delightful treat is bound to brighten your mood. So gather your ingredients, invite a friend or family member to join you, and enjoy the process of creating something truly delicious. Happy blending!

Easy Toasted Marshmallow Milkshakes

Prep Time 10 minutes
Cook Time 10 minutes
Total Time 20 minutes
Servings 2 servings
Calories 600
A deliciously smoky milkshake combining toasted marshmallows and creamy vanilla ice cream for a delightful treat.

Ingredients

Marshmallows

  • 4 cups vanilla ice cream
  • 0.75 cup milk
  • 10 regular-sized marshmallows marshmallows (10 marshmallows, toasted)
  • pinch salt

Instructions 

  • Line a foil-lined sheet and toast 8 marshmallows until charred; toast 2 lightly for garnish.
  • Combine ice cream, milk, 8 toasted marshmallows, and salt in a blender.
  • Blend until smooth, then pour into glasses.
  • Garnish with remaining toasted marshmallows and serve with a straw.

Notes

Use a blow torch or oven broiler to toast marshmallows safely.
Calories: 600kcal
Cost: $15
Course: Dessert
Keyword: marshmallow, milkshake

Transform Your Dinner with Creepy Green Slime Spinach Mac and Cheese

Are you ready to bring a touch of whimsy to your dinner table? Say hello to Creepy Green Slime Spinach Mac and Cheese! This delightful dish combines the comfort of classic mac and cheese with the vibrant green goodness of fresh spinach, creating a meal that’s not only fun but also nutritious. Perfect for family dinners or kids’ parties, this recipe is quick, easy, and sure to become a favorite for adventurous eaters of all ages. Let’s dive into why you’ll love this recipe and how to make it shine in your kitchen!

Why You’ll Love This Recipe

This Creepy Green Slime Spinach Mac and Cheese is more than just a fun dish; it’s packed with benefits that make it a must-try!

  • Quick Preparation: Ready in under 30 minutes, this dish is perfect for busy weeknights when you need a delicious meal in a hurry.
  • Simple Ingredients: Utilizing pantry staples like elbow macaroni and cheddar cheese, you won’t need to make a special trip to the store.
  • Healthy Twist: The addition of fresh spinach sneaks in essential nutrients, making this comfort food a bit healthier.
  • Kid-Friendly Fun: The vibrant green color and playful name make it an exciting choice for kids who might be picky about vegetables.
  • Versatile Dish: Serve it as a main course or a side dish at parties—this recipe fits any occasion!

Ingredients Breakdown

To whip up your Creepy Green Slime Spinach Mac and Cheese, gather the following ingredients:

  • 8 oz elbow macaroni: The classic choice for mac and cheese, providing the perfect bite.
  • 2 cups fresh spinach: Packed with vitamins, it adds a vibrant green color and nutrition.
  • 2 cups shredded cheddar cheese: The star of the dish, offering a creamy, cheesy flavor.
  • 2 tablespoons butter: Used to create a rich base for the cheese sauce.
  • 2 tablespoons all-purpose flour: Helps thicken the cheese sauce for that perfect creamy texture.
  • 2 cups milk: Adds creaminess and helps the cheese melt smoothly.
  • 1/2 teaspoon garlic powder: For a flavor boost that complements the cheese.
  • 1/2 teaspoon onion powder: Adds depth to the cheese sauce.
  • Salt and pepper to taste: Essential seasoning to enhance all flavors.
  • Green food coloring (optional): For that extra creepy effect, making the dish even more fun!

If you need substitutions, consider using gluten-free pasta for a gluten-free version or a dairy-free cheese alternative to accommodate dietary restrictions.

Step-by-Step Instructions

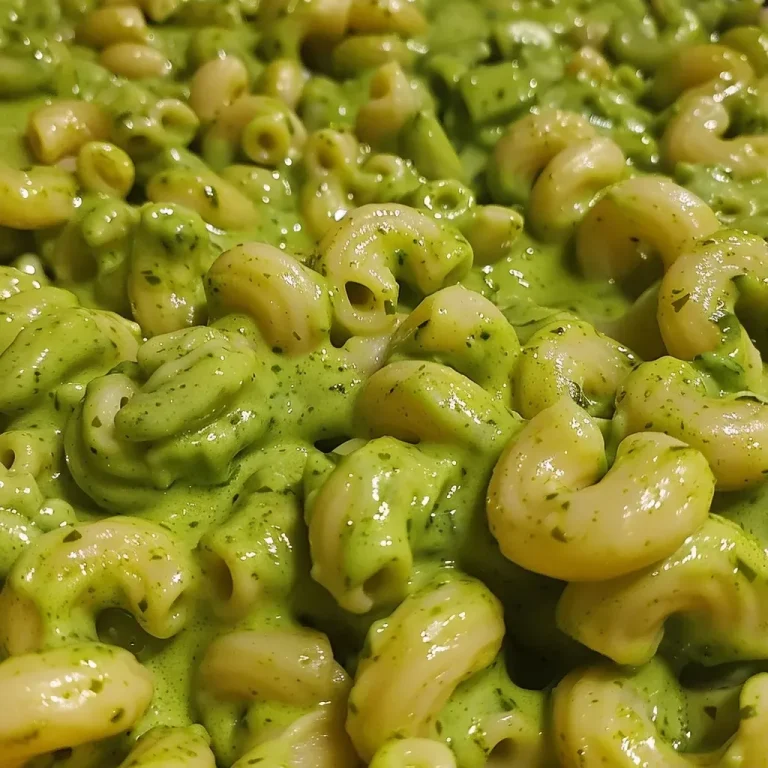
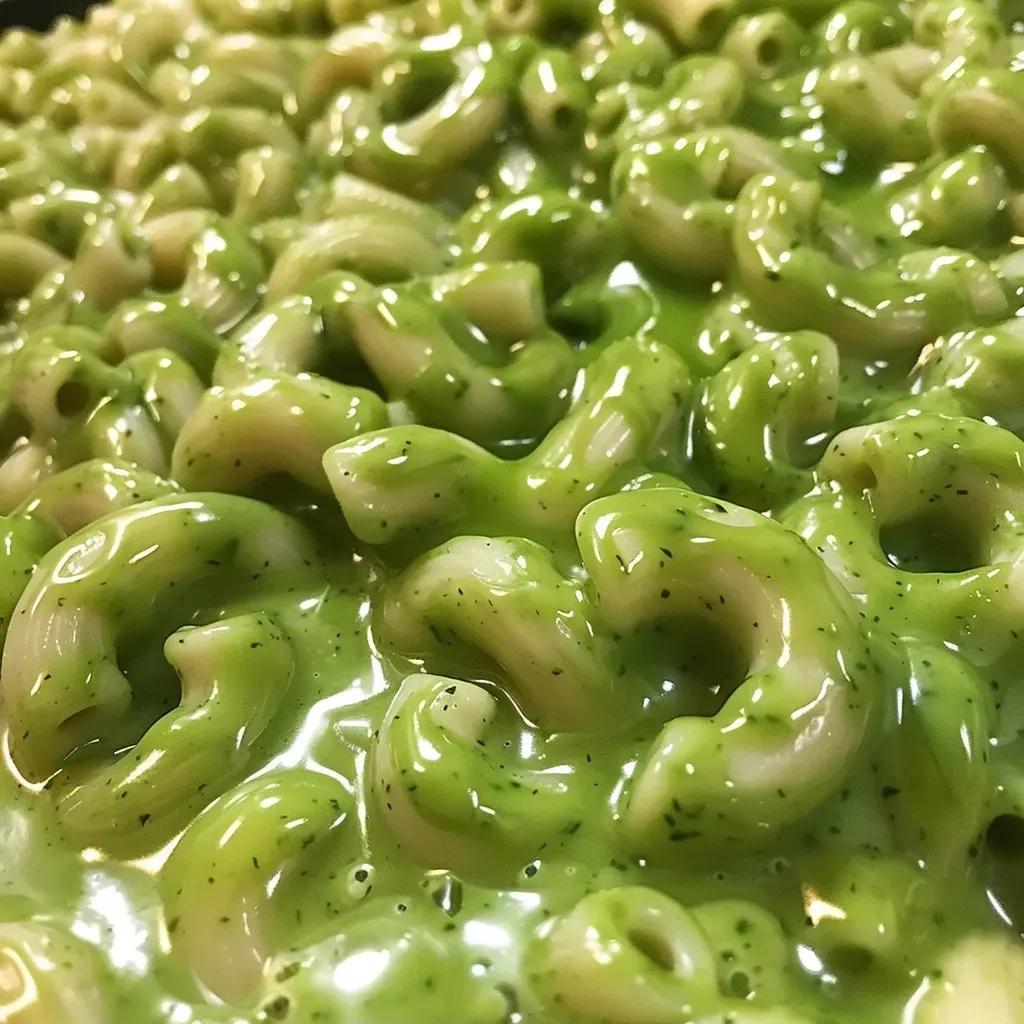
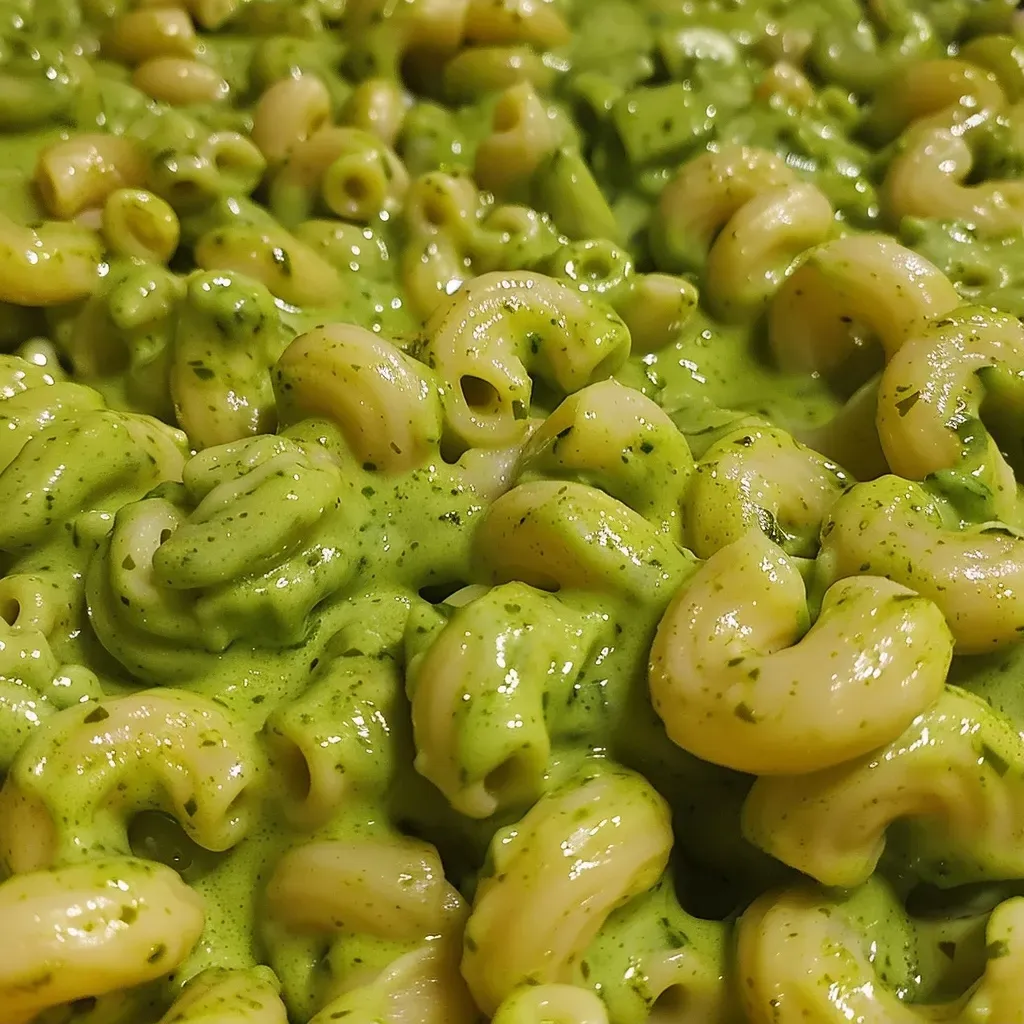
Juicy, vibrant green mac and cheese with spinach served in a white dish.

Follow these simple steps to prepare your Creepy Green Slime Spinach Mac and Cheese:

  1. Cook the macaroni: Bring a large pot of salted water to a boil. Cook the elbow macaroni until al dente, then drain and set aside.
  2. Make the cheese sauce: In a large saucepan over medium heat, melt the butter. Stir in the flour and cook until slightly golden.
  3. Add the milk: Gradually whisk in the milk, stirring constantly until the mixture thickens.
  4. Season the sauce: Stir in garlic powder, onion powder, salt, and pepper. Adjust seasoning to your taste.
  5. Melt the cheese: Add the shredded cheddar cheese and stir until completely melted and smooth.
  6. Add the spinach: Incorporate the fresh spinach into the cheese sauce, cooking until wilted.
  7. Create the slime effect: If desired, add a few drops of green food coloring and stir until reaching your preferred shade.
  8. Combine with macaroni: Mix the cooked macaroni into the cheese sauce until well-coated.
  9. Serve and enjoy: Scoop onto plates and enjoy your delightful dinner!

Expert Tips for Success

Here are some pro tips to ensure your Creepy Green Slime Spinach Mac and Cheese turns out perfectly:

  • Don’t overcook the pasta: Aim for al dente to prevent mushy macaroni.
  • Fresh spinach is best: Use fresh spinach for a vibrant color and flavor; frozen spinach can be watery.
  • Adjust the cheese: Feel free to mix in other cheeses like mozzarella or gouda for added flavor.
  • Enhance the flavor: Add a pinch of cayenne pepper or smoked paprika for a kick.
  • Experiment with textures: Top with breadcrumbs and broil for a crispy finish.
  • Make it ahead: Prepare the sauce ahead of time and store it in the fridge for up to 2 days.
  • Reheat gently: When reheating, add a splash of milk to help revive the creaminess.
  • Make it a meal: Add cooked chicken or bacon for extra protein.

Common Mistakes and Troubleshooting

Here are some common mistakes to avoid when making this recipe:

  • Overcooking the cheese sauce: Keep the heat on medium to avoid burning the cheese.
  • Not whisking enough: Whisk constantly when adding milk to prevent lumps.
  • Skipping seasoning: Don’t forget salt and pepper; they bring out the flavors.
  • Using low-quality cheese: Opt for good-quality cheese to ensure a creamy texture.

Delicious Variations

Feel free to mix things up with these creative variations:

  • Green Goddess Mac and Cheese: Add fresh herbs like basil or parsley for added flavor.
  • Meat Lovers Mac: Stir in cooked bacon, ham, or chicken for a hearty meal.
  • Spicy Slime: Incorporate diced jalapeños or a splash of hot sauce for heat.
  • Veggie Loaded: Mix in other vegetables, such as broccoli or peas, for extra nutrition.

Storage and Make-Ahead Instructions

This dish is best enjoyed fresh, but you can store leftovers in the fridge for up to three days. Here’s how to do it right:

  • Cool before storing: Allow the mac and cheese to cool completely before transferring it to an airtight container.
  • Reheat gently: When ready to eat, reheat in the microwave or on the stovetop, adding a bit of milk to restore creaminess.

Frequently Asked Questions

Here are some common questions about Creepy Green Slime Spinach Mac and Cheese:

  • Can I make this dish gluten-free? Yes, simply substitute the elbow macaroni with a gluten-free pasta.
  • What can I use instead of cheddar cheese? Feel free to use any melting cheese like mozzarella or Monterey Jack.
  • Is it safe to use food coloring? Yes, food coloring is safe in moderation; opt for natural dyes if preferred.
  • Can I freeze leftovers? Yes, you can freeze the dish; just be aware that the texture may change after thawing.
  • How do I make it creamier? Add a bit more milk or cream to the cheese sauce for a richer texture.
  • Can I use frozen spinach? Yes, but be sure to thaw and drain it well to avoid excess water.
  • What is the best way to reheat leftovers? Reheat on the stovetop over low heat, adding a splash of milk for creaminess.
  • How can I add more flavor? Try adding herbs or spices like thyme, nutmeg, or smoked paprika for a flavor boost.

Nutrition Tips and Dietary Adaptations

This Creepy Green Slime Spinach Mac and Cheese can be adapted for various dietary needs:

  • Vegetarian Option: This recipe is already vegetarian-friendly; just ensure your cheese is rennet-free.
  • Lower-Calorie Version: Use reduced-fat cheese and skim milk to cut down on calories.
  • Vegan Adaptation: Substitute cheese with a plant-based cheese alternative and use almond or soy milk.

Equipment Recommendations

Here are some essential tools to make your cooking experience smoother:

  • Large Pot: For boiling the macaroni.
  • Large Saucepan: Ideal for preparing the cheese sauce.
  • Whisk: Essential for mixing ingredients smoothly.
  • Measuring Cups and Spoons: For accurate ingredient measurements.

Serving Suggestions

Pair your Creepy Green Slime Spinach Mac and Cheese with these tasty accompaniments:

  • Garlic Bread: A crunchy side that complements the cheesy goodness.
  • Garden Salad: Fresh greens balance the richness of the mac and cheese.
  • Fruit Salad: A refreshing contrast to the savory dish.

Now that you have everything you need, it’s time to get cooking! This Creepy Green Slime Spinach Mac and Cheese is sure to be a hit at your dinner table, sparking joy and laughter while nourishing the family. Enjoy the process, and don’t forget to share your creations with friends and family!

Creepy Green Slime Spinach Mac and Cheese Dinner

Prep Time 10 minutes
Cook Time 20 minutes
Total Time 30 minutes
Servings 4 servings
Calories 600
A fun and spooky twist on classic mac and cheese, featuring vibrant green slime and nutritious spinach for a creepy dinner experience.

Ingredients

Pasta

  • 8 oz elbow macaroni

Vegetables

  • 2 cups fresh spinach

Cheese

  • 2 cups shredded cheddar cheese

Dairy & Fats

  • 2 tablespoons butter
  • 2 tablespoons all-purpose flour
  • 2 cups milk

Seasonings

  • 1/2 teaspoon garlic powder
  • 1/2 teaspoon onion powder
  • to taste Salt and pepper (to taste)

Food Coloring

  • few drops green food coloring (optional)

Instructions 

  • Cook the macaroni in salted boiling water until al dente, then drain.
  • Melt butter in a saucepan, stir in flour, and cook until golden.
  • Gradually whisk in milk, cook until thickened, then add seasonings.
  • Stir in shredded cheese until smooth, add spinach and cook until wilted.
  • Add green food coloring, mix, then combine with cooked macaroni and serve.

Notes

Adjust green food coloring for desired slime effect.
Calories: 600kcal
Cost: $15
Course: Main Course
Cuisine: American
Keyword: Green Food Coloring, Mac and Cheese, Spinach

Transform Your Dinners with Garlic Pumpkin Flatbread

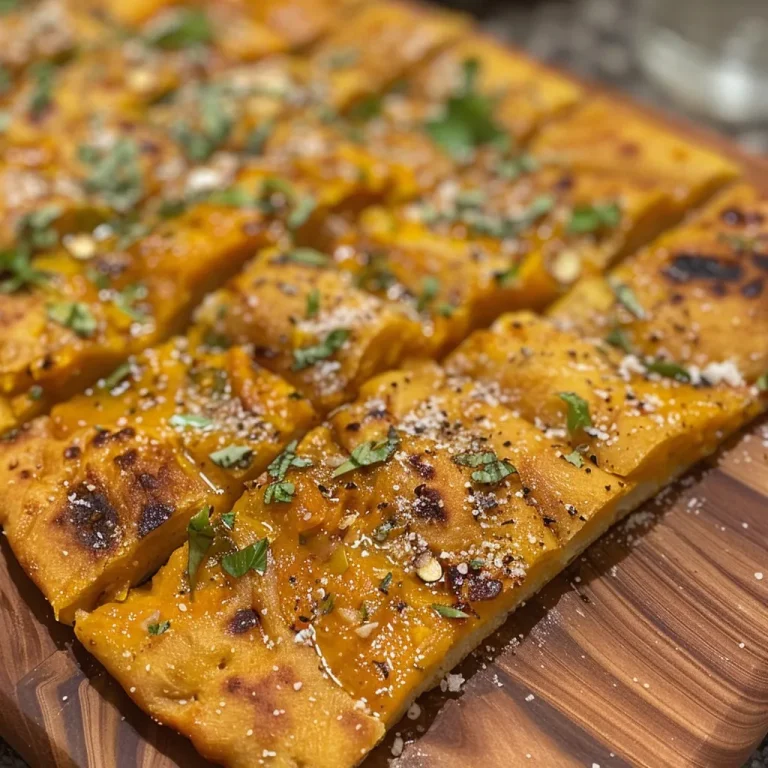
Welcome to a delightful culinary adventure! This Garlic Pumpkin Flatbread is not just another recipe; it’s a transformative experience that brings the warmth of autumn into your kitchen. With its rich flavors and pillowy texture, this flatbread is perfect for weeknight meals, serving as a side to soups or a base for your favorite toppings. Let’s dive into the details and make cooking a joyful experience!

Why You’ll Love This Recipe

  • Quick and Easy: With just a few steps and minimal prep time, you can whip up fresh flatbreads in under an hour.
  • Versatile Dish: Enjoy it as a side, wrap it around your favorite fillings, or serve it with dips; the possibilities are endless!
  • Flavorful Ingredients: Made with aromatic garlic and creamy pumpkin puree, this flatbread bursts with flavor.
  • Healthy Twist: Packed with nutrients, pumpkin adds fiber and vitamins, making this flatbread a healthier choice.
  • Perfect for Sharing: Ideal for gatherings and family dinners, this flatbread is sure to impress your guests!

Ingredient Breakdown

Here’s what you’ll need to create this delicious pumpkin flatbread:

  • 3 cups self-raising flour: This gives the flatbread its light and fluffy texture.
  • 1 ½ cups pumpkin puree: Adds moisture and a subtle sweetness—use canned or homemade!
  • ¾ tsp salt: Enhances the flavors of the other ingredients.
  • ¾ tsp garlic powder: For a robust garlic flavor throughout the dough.
  • 1 tbsp oil: Helps keep the flatbread moist.
  • 2 – 4 tbsp water: Add as needed to achieve a pliable dough.
  • 4 tbsp salted butter (vegan or dairy-free): To brush on the flatbreads for added richness.
  • 3 cloves garlic (minced): For that irresistible garlic butter topping.

Pro Tips for Perfect Flatbreads

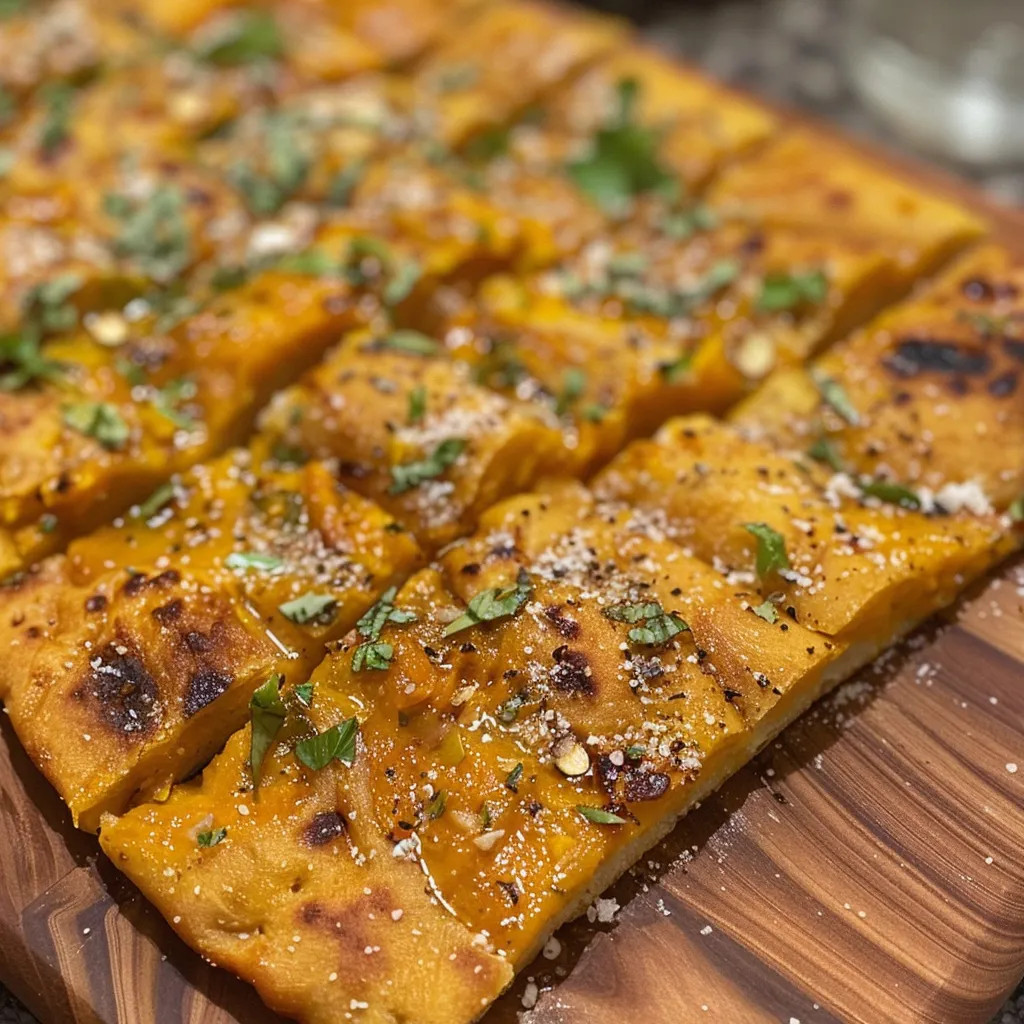
Juicy Garlic Pumpkin Flatbread displayed with a textured surface, highlighting garlic bits and a warm color.

Here are some expert insights to elevate your flatbread-making game:

  • Use Fresh Ingredients: Fresh pumpkin puree enhances flavor. If using canned, ensure it’s pure pumpkin, not pie filling.
  • Monitor Dough Consistency: The dough should be soft but not sticky. Adjust with flour or water as needed.
  • High Heat Cooking: A hot pan ensures that the flatbread puffs up beautifully; don’t rush this step!
  • Flavor Variations: Experiment with spices like cumin or paprika for a unique twist.
  • Keep Covered: Once cooked, keep the flatbreads covered with a towel to retain warmth and moisture.
  • Serve Warm: Enjoy immediately for the best texture and flavor; reheating can make them tough.
  • Use a Rolling Pin: Roll evenly for consistent cooking and a perfect shape.
  • Brush Generously: Don’t skimp on the garlic butter—this step adds a decadent layer of flavor!

Common Mistakes & Troubleshooting

Even the best cooks can face challenges. Here’s how to avoid common pitfalls:

  • Too Sticky Dough: Add a little more flour as you knead until you achieve a workable consistency.
  • Flatbreads Not Puffing: Ensure your pan is hot enough before placing the dough; a well-heated surface promotes puffing.
  • Overcooked Flatbreads: Watch closely; they cook quickly! Remove them when golden brown with some bubbles.
  • Flavor Lacking: Adjust garlic powder or seasoning to taste; fresh garlic also adds a punch!

Delicious Variations to Try

Want to mix things up? Here are some creative twists on this pumpkin flatbread recipe:

  • Cheese-Stuffed Flatbread: Add shredded cheese before rolling for a gooey center.
  • Herb-Infused Dough: Incorporate fresh herbs like rosemary or thyme into the dough for an aromatic experience.
  • Spicy Kick: Mix in red pepper flakes or jalapeños for a zesty flavor.
  • Sweet Version: Drizzle with honey or maple syrup for a dessert-style flatbread!

Storage and Make-Ahead Instructions

Planning ahead? Here’s how to store and prepare your flatbread:

  • Refrigeration: Store cooked flatbreads in an airtight container in the fridge for up to 3 days.
  • Freezing: Freeze flatbreads separated by parchment paper for up to 3 months. Thaw in the fridge overnight.
  • Make-Ahead: Prepare the dough in advance, wrap it tightly, and refrigerate for up to 24 hours before rolling out.

Frequently Asked Questions

Here are some common questions about making Garlic Pumpkin Flatbread:

  • Can I use all-purpose flour instead of self-raising?
    Yes, but add 1 ½ teaspoons of baking powder to mimic the leavening effect.
  • What can I substitute for pumpkin puree?
    Mashed sweet potatoes or butternut squash work well as alternatives.
  • Can I make this flatbread gluten-free?
    Absolutely! Use a gluten-free flour blend and adjust the liquid as needed.
  • How do I make pumpkin puree at home?
    Steam or roast pumpkin chunks until soft, then blend until smooth.
  • What’s the best way to serve flatbread?
    Pair with dips, soups, or use it as a wrap for sandwiches.
  • Can I reheat leftover flatbread?
    Yes, but for best results, reheat in a dry pan or oven instead of the microwave.
  • How do I keep flatbreads warm?
    Wrap them in a clean kitchen towel or place them in a covered dish.
  • What’s the nutritional value of this flatbread?
    This recipe is rich in fiber and vitamins, making it a wholesome addition to your diet.

Nutrition Tips and Dietary Adaptations

Want to make this recipe even healthier or accommodate dietary needs? Here are some tips:

  • Reduce Sodium: Use unsalted butter and adjust salt to lower sodium intake.
  • Higher Fiber: Substitute part of the flour with whole wheat or spelt flour for added fiber.
  • Vegan Option: Use plant-based butter and ensure the flour is vegan-friendly.
  • Protein Boost: Add Greek yogurt to the dough for extra protein and creaminess.

Essential Equipment Recommendations

Here’s what you’ll need to make this flatbread:

  • Mixing Bowl: A large bowl for mixing the ingredients.
  • Rolling Pin: For rolling out the dough evenly.
  • Frying Pan: A non-stick skillet works wonders for cooking the flatbreads.
  • Spatula: To flip the flatbreads with ease.
  • Storage Containers: To keep your flatbreads fresh for later enjoyment.

Serving Suggestions

Now that you’ve made your Garlic Pumpkin Flatbread, here are some delicious ways to serve it:

  • With Dips: Pair with hummus, tzatziki, or a creamy avocado dip.
  • As a Wrap: Fill with roasted vegetables, grilled chicken, or your favorite salad ingredients.
  • Complement Soup: Serve alongside a warm bowl of butternut squash or tomato soup.
  • Garnished: Top with fresh herbs or a sprinkle of feta cheese for an added burst of flavor.

With these tips and tricks, you’re all set to create an unforgettable Garlic Pumpkin Flatbread that will elevate your meals and impress your family and friends. Cooking is about enjoying the process, so take your time and have fun in the kitchen. Happy cooking!

Garlic Pumpkin Flatbread recipe

Prep Time 15 minutes
Cook Time 10 minutes
Total Time 25 minutes
Servings 12 pieces
Calories 150
Enjoy these flavorful, soft flatbreads infused with garlic and pumpkin, perfect for a cozy snack or side dish.

Ingredients

Dough

  • 3 cups self raising flour (plus extra for dusting)
  • 1.5 cups pumpkin puree
  • 0.75 tsp salt
  • 0.75 tsp garlic powder
  • 1 tbsp oil
  • 2-4 tbsp water (optional, add as needed)
  • 4 tbsp salted butter (vegan or dairy free options available)
  • 3 cloves garlic (minced)

Instructions 

  • Melt butter, add minced garlic, and simmer for 2 minutes. Set aside.
  • Mix flour, pumpkin puree, garlic powder, and salt. Knead, adding water as needed, then incorporate oil into the dough.
  • Divide dough into 12 balls, roll into 6-7 inch discs on floured surface.
  • Heat pan, cook flatbreads until bubbles form, flip and cook 40-50 seconds. Press to ensure even cooking.
  • Brush warm flatbreads with garlic butter and sprinkle with coriander (optional).
  • Transfer to tissue-lined dish to keep warm until serving.

Notes

For extra flavor, add fresh herbs or a drizzle of honey before serving.
Calories: 150kcal
Cost: $10
Course: Appetizer, Snack
Cuisine: Fusion
Keyword: flatbread, Garlic, pumpkin

Discover the Cozy Comfort of Butternut Squash Bread

As the days get shorter and the evenings cooler, there’s something undeniably comforting about a slice of homemade bread straight from the oven. This Butternut Squash Bread recipe is a delightful way to enjoy the season’s flavors, combining the natural sweetness of butternut squash with warm spices that will fill your home with inviting aromas. Whether it’s for breakfast, a snack, or a sweet treat, this bread is perfect for any occasion. Let’s dive into this easy recipe that promises to become a family favorite!

Why You’ll Love This Recipe

This butternut squash bread is not just another quick bread; it’s a wholesome, moist loaf that packs a punch of flavor. Here are several reasons to love it:

  • Deliciously Moist: The butternut squash puree ensures a moist texture that stays fresh longer.
  • Easy to Make: With simple steps and minimal ingredients, even novice bakers can whip this up!
  • Healthier Choice: Packed with nutrients from the squash, this bread is a great way to sneak in some veggies.
  • Versatile Base: You can customize this bread with nuts, dried fruits, or spices to suit your taste.
  • Perfect for Gifting: Wrap it up for a thoughtful gift that friends and family will appreciate.

Essential Ingredients for Butternut Squash Bread

To make this scrumptious butternut squash bread, gather the following ingredients:

  • 1 cup butternut squash puree: Provides moisture and natural sweetness. You can use homemade or canned puree.
  • 1 ½ cups all-purpose flour: This is the backbone of your bread, giving it structure.
  • ½ cup brown sugar: Adds depth of flavor and moisture.
  • ½ cup granulated sugar: For that sweet touch.
  • 2 eggs: Binds the ingredients together and gives richness.
  • ½ cup vegetable oil: Keeps the bread moist; you can swap it for melted coconut oil.
  • 1 tsp vanilla extract: Enhances the overall flavor profile.
  • 1 tsp cinnamon: Adds warmth and comfort.
  • ½ tsp nutmeg: A little goes a long way in adding spice.
  • ½ tsp baking soda: Helps the bread rise.
  • ½ tsp baking powder: Works with baking soda for a perfect lift.
  • ¼ tsp salt: Balances the sweetness.

Step-by-Step Guide to Making Butternut Squash Bread

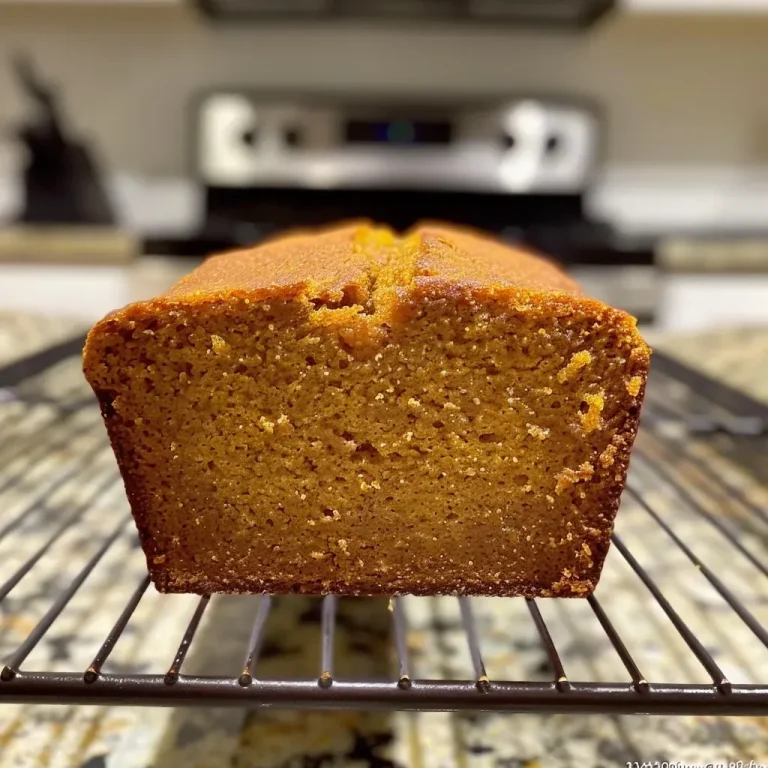
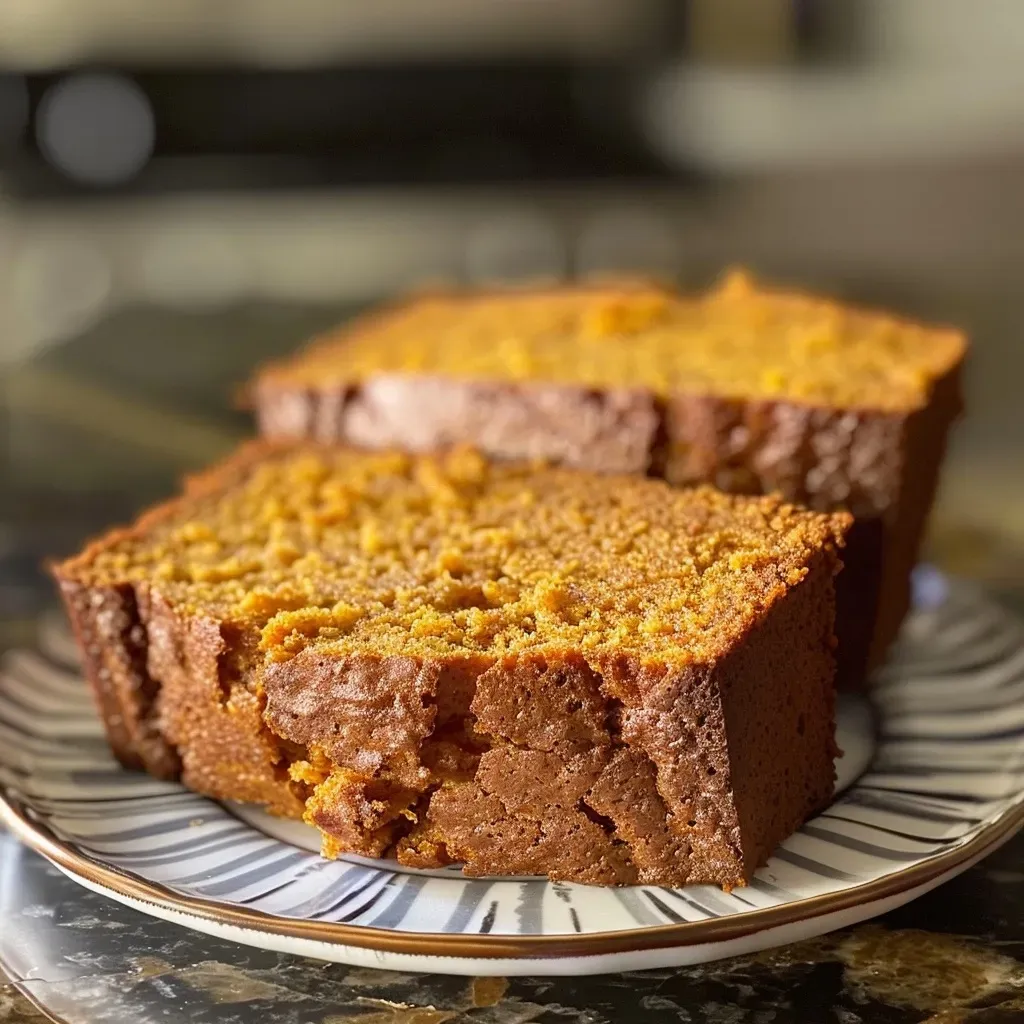
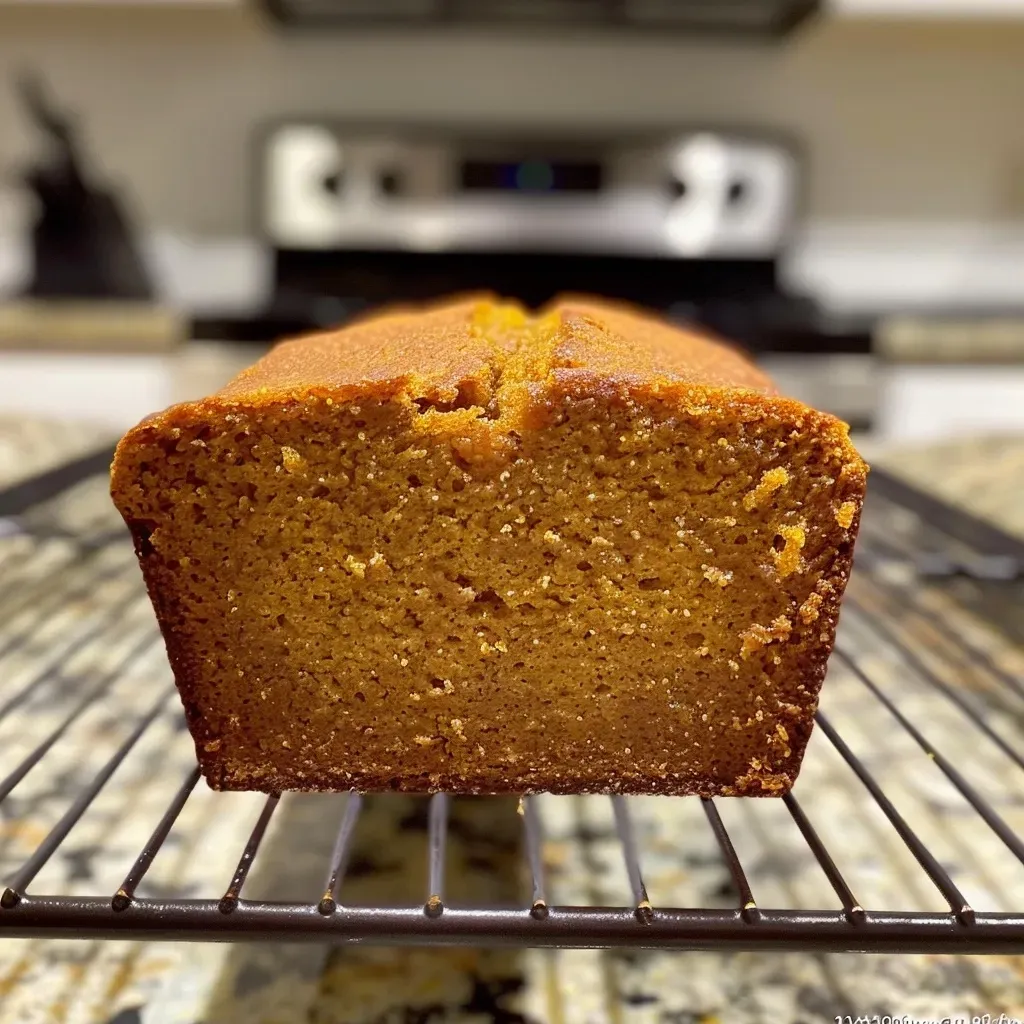
Close-up of Butternut Squash Bread with a soft interior, highlighting the spices and ingredients.

Now that you have your ingredients ready, let’s go through the steps to make this delicious bread:

  1. Preheat your oven to 350°F (175°C) and grease a loaf pan.
  2. Mix the wet ingredients: In a large bowl, combine the butternut squash puree, eggs, vegetable oil, and vanilla extract.
  3. Combine the dry ingredients: In another bowl, whisk together the flour, both sugars, cinnamon, nutmeg, baking soda, baking powder, and salt.
  4. Combine both mixtures: Gently fold the dry ingredients into the wet ingredients until just mixed—don’t overmix!
  5. Pour batter into the loaf pan: Spread it evenly and smooth the top.
  6. Bake for 50-60 minutes, or until a toothpick inserted into the center comes out clean.
  7. Cool before slicing: Allow it to cool in the pan for a few minutes before transferring to a wire rack.

Pro Tips for Perfect Butternut Squash Bread

To ensure your butternut squash bread turns out perfectly every time, consider the following expert tips:

  • Use fresh squash: If you have fresh butternut squash, roast it and puree it for a richer flavor.
  • Don’t overmix: Mix just until the ingredients are combined to avoid a dense loaf.
  • Check for doneness: Ovens can vary; start checking for doneness at 50 minutes.
  • Let it cool: Cooling helps to set the bread and makes slicing easier.
  • Store properly: Keep it in an airtight container at room temperature for up to 3 days, or freeze for longer storage.
  • Experiment with spices: Feel free to add ginger or allspice for a unique twist.
  • Incorporate nuts: Walnuts or pecans can add a delightful crunch.
  • Make it gluten-free: Substitute all-purpose flour with a gluten-free blend for a gluten-free version.

Common Mistakes to Avoid

Even the best bakers can face challenges. Here are some common mistakes and how to troubleshoot them:

  • Dry bread: This can happen if you overbake. Always start checking for doneness early.
  • Dense texture: Overmixing the batter can result in a tough loaf. Mix just until combined.
  • Too much sweetness: Adjust sugar levels to your taste, especially if using sweet toppings.

Delicious Variations to Try

While this butternut squash bread is fantastic on its own, here are some delicious variations to mix things up:

  • Chocolate Chip Butternut Squash Bread: Fold in chocolate chips for a sweet treat.
  • Coconut Butternut Squash Bread: Add shredded coconut for a tropical twist.
  • Spiced Pumpkin Seed Topping: Sprinkle pumpkin seeds on top before baking for added texture.
  • Maple Walnut Bread: Substitute brown sugar for maple syrup and add chopped walnuts.

Storage and Make-Ahead Instructions

This butternut squash bread is perfect for make-ahead! Here’s how to store and prepare for later:

  • Room Temperature: Store in an airtight container at room temperature for up to 3 days.
  • Freezing: Wrap tightly in plastic wrap and foil, then freeze for up to 3 months.
  • Thawing: To thaw, leave it at room temperature or microwave in short intervals.

Frequently Asked Questions

Here are some common questions about making butternut squash bread:

  • Can I use fresh butternut squash instead of puree? Yes, just roast and puree fresh squash until smooth.
  • What if my bread is too sweet? Adjust the sugar levels next time or use less sweet toppings.
  • How do I know when the bread is done? A toothpick inserted into the center should come out clean.
  • Can I use whole wheat flour? Yes, but it may change the texture slightly.
  • How can I make this recipe vegan? Substitute eggs with flax eggs and use a plant-based oil.
  • What spices work well with butternut squash bread? Consider adding ginger, allspice, or cardamom for different flavor profiles.
  • How long does it last in the fridge? It’s best enjoyed fresh, but can last up to a week in the fridge.
  • Can I double the recipe? Absolutely! Just use a larger loaf pan or make in two separate pans.

Nutrition Tips and Dietary Adaptations

If you’re looking to make this butternut squash bread a bit healthier, consider these substitutions:

  • Reduce sugars: Use half the sugar and sweeten with applesauce or ripe bananas.
  • Whole grain options: Substitute with whole wheat flour for added fiber.
  • Low-fat version: Use unsweetened applesauce instead of oil.

Essential Equipment for Baking

To achieve the best results, here’s what you’ll need:

  • Loaf pan: A standard 9×5 inch loaf pan works perfectly.
  • Mixing bowls: Have at least two on hand for wet and dry ingredients.
  • Whisk and spatula: Essential tools for mixing and folding ingredients.
  • Measuring cups and spoons: For precise measurements.

Serving Suggestions

This butternut squash bread is delightful on its own, but you can elevate the experience with these serving ideas:

  • Spread a little butter: A pat of butter adds richness.
  • Top with cream cheese: Cream cheese frosting makes for a decadent treat.
  • Pair with tea or coffee: Enjoy a slice with your favorite warm beverage.

Conclusion

With its warm flavors and comforting texture, this butternut squash bread is sure to become a staple in your kitchen. Not only is it simple to make, but the variations and storage options make it a versatile recipe for any time of year. I hope you enjoy baking and sharing this lovely bread with your loved ones. Happy baking!

Butternut Squash Bread

Prep Time 15 minutes
Cook Time 55 minutes
Total Time 1 hour 10 minutes
Servings 8 slices
Calories 250
A moist and flavorful bread made with roasted butternut squash, perfect for fall or anytime you crave a sweet, spiced treat.

Ingredients

Main

  • 1 cup butternut squash puree
  • 1 ½ cups all-purpose flour
  • ½ cup brown sugar
  • ½ cup granulated sugar
  • 2 eggs eggs
  • ½ cup vegetable oil
  • 1 tsp vanilla extract
  • 1 tsp cinnamon
  • ½ tsp nutmeg
  • ½ tsp baking soda
  • ½ tsp baking powder
  • ¼ tsp salt

Instructions 

  • Preheat oven to 350°F (175°C). Grease a loaf pan.
  • Mix squash, eggs, oil, and vanilla in a bowl.
  • Whisk flour, sugars, spices, baking soda, baking powder, and salt.
  • Combine wet and dry ingredients until just mixed.
  • Pour into pan and bake 50-60 minutes. Cool before slicing.

Notes

Store in an airtight container for up to 3 days.
Calories: 250kcal
Cost: $12
Course: Dessert
Cuisine: American
Keyword: butternut squash

Start Your Day Right with Apple Butter Granola

When it comes to breakfast, a good granola can transform your morning routine from mundane to marvelous. This Apple Butter Granola recipe is not only delicious but also incredibly easy to whip up. Packed with wholesome rolled oats, sweet apple butter, and crunchy almonds, it’s a nourishing treat that’s perfect for busy mornings or a leisurely weekend brunch. If you’re looking to kickstart your day with a wholesome breakfast, you’re in the right place!

Why You’ll Love This Recipe

  • Quick and Simple: With straightforward steps, this granola can be made in under an hour, making it perfect for those hectic mornings.
  • Nutrient-Rich Ingredients: Each serving is packed with fiber from oats and healthy fats from almonds, providing lasting energy.
  • Customizable: You can easily tweak the ingredients to suit your taste—add your favorite nuts or dried fruits!
  • Great for Meal Prep: Make a big batch at the start of the week, and you’ll have breakfast ready to go!
  • Perfect for Any Meal: Enjoy it as a topping for yogurt, a quick snack, or even as a delicious dessert!

Ingredient Breakdown

Let’s delve into the ingredients that make this granola so special. Each component plays a crucial role in flavor and texture, ensuring that each bite is both satisfying and nourishing.

  • Rolled Oats: The base of our granola, providing fiber and a hearty texture. You can substitute with gluten-free oats if needed.
  • Apple Butter: Adds natural sweetness and moisture. If you don’t have apple butter, you can use homemade applesauce in a pinch.
  • Honey: A natural sweetener that also helps bind the granola together. Maple syrup is a great vegan substitute.
  • Spices: A blend of cinnamon, nutmeg, and apple pie spice elevates the flavor profile—these spices are perfect for fall!
  • Almonds: For crunch and healthy fats. Feel free to swap for walnuts or pecans if you prefer.

How to Make Apple Butter Granola

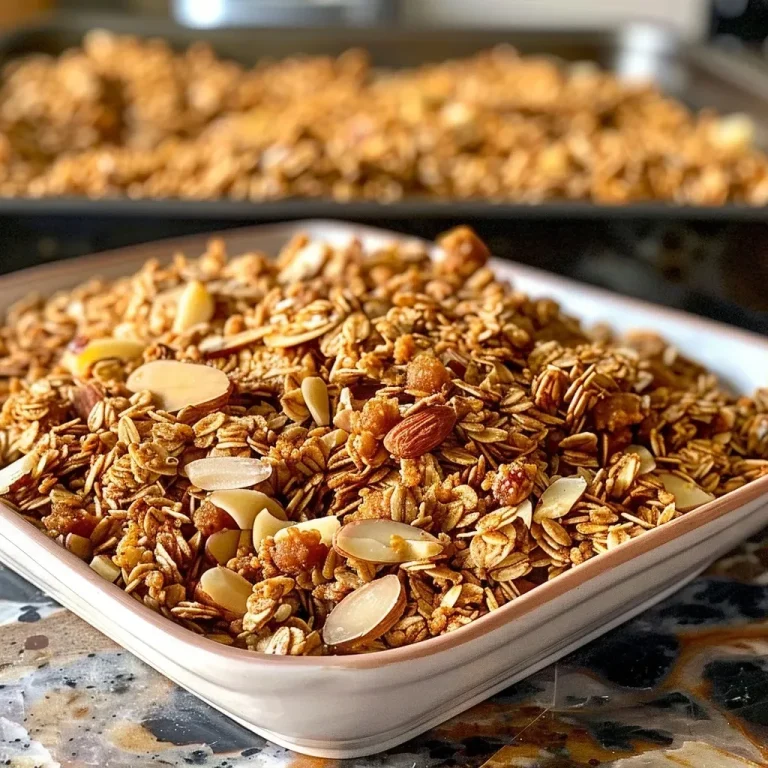
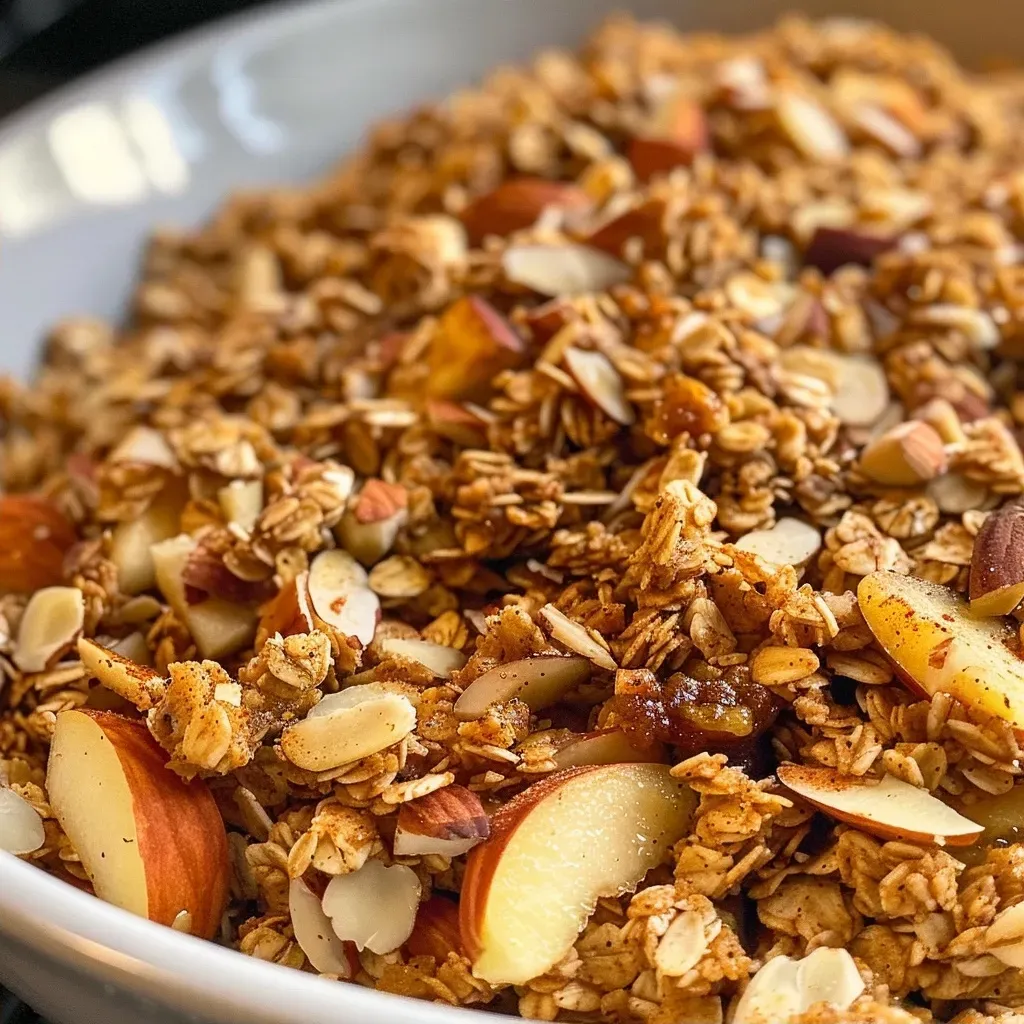
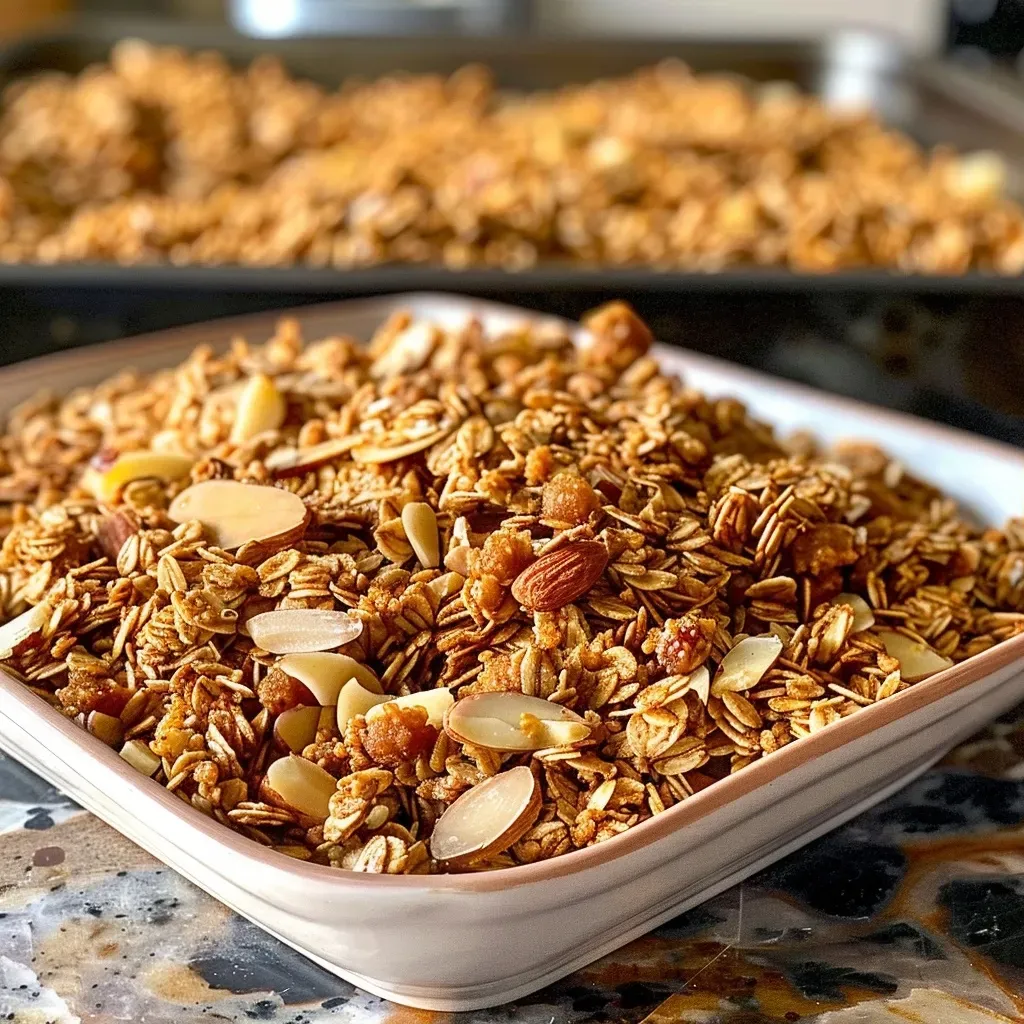
Side view of a textured mix of granola, apple butter, and slivered almonds in a bowl.

Ready to get started? Follow these simple steps to create your very own apple butter granola:

  1. Preheat your oven to 325°F (165°C) and line a large baking sheet with parchment paper.
  2. In a large bowl, combine 5 cups of rolled oats, 1 tsp apple pie spice, 1 tsp cinnamon, 1/4 tsp nutmeg, and 3/4 tsp salt. Mix well to ensure the spices are evenly distributed.
  3. In a separate medium bowl, whisk together 3/4 cup brown sugar, 1/2 cup apple butter, 1/4 cup applesauce, 1/4 cup honey, and 1 tsp vanilla extract. Mix until smooth.
  4. Pour the wet ingredients into the oat mixture and stir until all the oats are evenly coated. The mixture should be moist.
  5. Spread the granola mixture evenly onto the prepared baking sheet.
  6. Bake for 20 minutes, remove from the oven, stir, and bake for an additional 15-20 minutes or until golden brown and crisp.
  7. Once baked, remove from the oven and stir in 3/4 cup freeze-dried apples (chopped) and 3/4 cup slivered almonds. Let cool completely before storing in an airtight container.

Pro Tips for Perfect Granola

  • Monitor Baking: Keep an eye on the granola while baking; it can go from golden to burnt quickly.
  • Stirring: Stirring halfway through baking ensures even cooking and prevents burning.
  • Cooling: Allow the granola to cool completely before storing; this helps it achieve that crunchy texture.
  • Storage: Store your granola in an airtight container to maintain freshness for up to two weeks.
  • Mix-ins: Feel free to add other ingredients like chia seeds or pumpkin seeds for added nutrition.
  • Sweetness: Adjust the sweetness by adding more or less honey according to your taste.
  • Homemade Apple Butter: If you want to make your apple butter, simply cook down apples with sugar and spices until thickened.
  • Texture Preference: For clumpier granola, avoid stirring too much while baking.

Common Mistakes and Troubleshooting

Even the best recipes can sometimes go awry. Here are some common mistakes to avoid while making your apple butter granola:

  • Too Much Liquid: If your granola is soggy, it may have too much liquid. Ensure your measurements are accurate.
  • Not Baking Long Enough: If it’s not crispy enough, bake it a bit longer. Just be sure to stir to prevent burning.
  • Overmixing: Overmixing the wet and dry ingredients can lead to uneven clumps. Mix just until combined.

Delicious Variations

Get creative with your granola! Here are some variations you can try:

  • Dried Fruits: Add dried cranberries or raisins for a sweet twist.
  • Nut-Free Version: Leave out the almonds and add pumpkin seeds instead for crunch.
  • Chocolate Lover’s: Stir in cocoa nibs or dark chocolate chips after baking for a sweet treat.
  • Spiced Version: Add extra spices like ginger or cardamom for a warm flavor.

Storage and Make-Ahead Instructions

This granola can be easily stored and made ahead of time. Here’s how:

  • Storage: Keep in an airtight container at room temperature for up to two weeks.
  • Make-Ahead: Prepare a large batch and enjoy it throughout the week—just remember to allow it to cool completely before sealing.

Frequently Asked Questions

  • Can I use quick oats instead of rolled oats? Quick oats will yield a different texture and may become mushy. Rolled oats are recommended for the best results.
  • Can I make this granola vegan? Yes! Simply substitute honey with maple syrup or agave nectar.
  • How do I store leftover granola? Store in an airtight container to keep it fresh and crunchy.
  • Can I freeze granola? Yes, granola can be frozen for up to three months. Just ensure it’s in a well-sealed container.
  • What’s the best way to serve granola? Enjoy it with yogurt, milk, or as a topping on smoothie bowls.
  • Can I add protein powder? Absolutely! Mix in your favorite protein powder when combining the wet and dry ingredients.
  • How do I make it clumpier? To achieve clumps, press the granola down onto the baking sheet before baking.
  • Can I add fresh fruit? Fresh fruit should be added after baking, as it can make the granola soggy.

Nourishing Nutrition Tips

This granola is not only delicious but also offers nutritional benefits:

  • High Fiber: The oats and dried fruits contribute to a high fiber content, aiding digestion and promoting satiety.
  • Healthy Fats: Almonds provide healthy fats essential for heart health.
  • Natural Sweetness: Using apple butter and honey keeps added sugars lower than many store-bought options.

Essential Equipment Recommendations

To make this granola, you’ll need a few basic kitchen tools:

  • Baking Sheet: A large, rimmed baking sheet is essential for even baking.
  • Parchment Paper: Useful for easy cleanup and preventing sticking.
  • Mixing Bowls: A large bowl for mixing dry ingredients and a medium bowl for wet ingredients.
  • Whisk: A whisk helps combine wet ingredients smoothly.

Serving Suggestions

Wondering how to serve your granola? Here are some tasty ideas:

  • With Yogurt: Layer it with your favorite yogurt and fresh fruits for a parfait.
  • On Oatmeal: Sprinkle on top of oatmeal for added crunch and flavor.
  • As a Snack: Enjoy it as a quick, nutritious snack on its own.

With its delightful flavors and endless versatility, this Apple Butter Granola is sure to become a staple in your kitchen. Enjoy the process, and remember that the joy of cooking comes from experimentation and creativity. Happy cooking!

APPLE BUTTER GRANOLA

Prep Time 10 minutes
Cook Time 40 minutes
Total Time 50 minutes
Servings 8 servings
Calories 350
A delicious homemade granola infused with apple butter and spices, perfect for a healthy breakfast or snack.

Ingredients

Dried Fruits and Nuts

  • 5 cups rolled oats
  • 1 tsp apple pie spice
  • 1 tsp cinnamon
  • 1/4 tsp nutmeg
  • 3/4 tsp salt
  • 3/4 cup brown sugar
  • 1/2 cup apple butter
  • 1/4 cup applesauce
  • 1/4 cup honey
  • 1 tsp vanilla extract
  • 3/4 cup freeze-dried apples, chopped
  • 3/4 cup slivered almonds

Instructions 

  • Preheat oven to 325°F (160°C). Line a baking sheet with parchment.
  • Mix oats, spices, and salt. In a bowl, whisk together sugar, apple butter, applesauce, honey, and vanilla. Combine wet and dry ingredients, then spread on the baking sheet.
  • Bake for 20 minutes, stir, then bake another 15-20 minutes until golden. Stir in dried apples and almonds, then cool and store.

Notes

Store in an airtight container for freshness.
Calories: 350kcal
Cost: $15
Course: Breakfast
Cuisine: American
Keyword: apple, Granola

Unveiling the Cozy Delight of an Apple Cider Mocktail

As the leaves turn and the air gets crisp, there’s nothing quite like a refreshing apple cider mocktail to embrace the essence of autumn. This delightful beverage captures the warmth of the season with its cozy flavors and invigorating spices, all while being a guilt-free indulgence. In this definitive guide, we’ll delve into everything you need to know about crafting the perfect apple cider mocktail, ensuring you can whip up this festive drink any time you like!

Why You’ll Love This Recipe

This vegan apple cider mocktail isn’t just a beverage; it’s a celebration of flavors and a canvas for creativity. Here are some reasons why you’ll adore this recipe:

  • Simple Ingredients: With just three core components—apple cider, cinnamon, and ginger—you can create a drink that’s both delicious and easy to make.
  • Festive Appeal: Perfect for gatherings, this mocktail adds a touch of warmth and cheer to any autumn event, making it a crowd-pleaser.
  • Health Benefits: Packed with the nutritional goodness of apple cider and ginger, it’s a refreshing choice that supports your wellness journey.
  • Creative Customization: This recipe is versatile; feel free to tweak the spices or add your favorite fruit juices to make it your own!
  • Alcohol-Free Enjoyment: Enjoy the flavors of a traditional cocktail without the alcohol, making it suitable for everyone!

Ingredients You’ll Need

To craft your apple cider mocktail, gather the following ingredients:

  • Apple Cider: Look for fresh, unfiltered apple cider for the best flavor. If unavailable, bottled cider works in a pinch.
  • Cinnamon: Ground cinnamon or cinnamon sticks can enhance the warmth and spice of your drink.
  • Ginger: Fresh ginger adds a zesty kick. You can also use ginger ale if you prefer a fizzy version.

Feel free to make substitutions as needed:

  • Apple Juice: If apple cider is unavailable, high-quality apple juice can be a great alternative.
  • Maple Syrup: For added sweetness, a splash of maple syrup complements the spices beautifully.
  • Fresh Fruits: Pomegranate seeds or sliced oranges can make delightful garnishes.

Step-by-Step Instructions

Side shot of a vibrant Apple Cider Mocktail garnished with cinnamon.

Now that you have your ingredients, let’s dive into the steps to make this cozy drink:

  1. Prep Your Ingredients: Gather all your ingredients and equipment. If using fresh ginger, peel and slice it into thin pieces.
  2. Mix the Base: In a pitcher, combine the apple cider, cinnamon, and ginger. Stir well to infuse the flavors. If you desire a sweeter mocktail, add a bit of maple syrup.
  3. Chill: Let the mixture sit in the fridge for at least 30 minutes to allow the flavors to meld. This step creates a richer taste.
  4. Serve: Fill a glass with ice, pour in the chilled apple cider mixture, and garnish with a cinnamon stick and fresh fruit slices for a touch of flair!

Pro Tips for the Perfect Mocktail

To elevate your apple cider mocktail experience, consider these pro tips:

  • Infuse More Flavor: Add a splash of fresh orange juice for a citrusy twist that brightens the drink.
  • Garnish Creatively: Use star anise or fresh rosemary sprigs as unique garnishes to impress your guests.
  • Adjust Sweetness: Taste your mocktail before serving; adjust the sweetness with more maple syrup or honey as needed.
  • Make It Sparkly: For a fizzy version, top your mocktail with ginger ale or sparkling water before serving.
  • Batch It Up: For parties, double or triple the recipe and serve it in a large pitcher for easy self-service.
  • Seasonal Spices: Experiment with nutmeg or allspice for a different flavor profile that embodies the season.
  • Serve Chilled: Keep the mocktail chilled before serving to ensure a refreshing sip every time.
  • Mix and Match: Don’t hesitate to try different fruit juices or herbs to discover your favorite combination!

Common Mistakes and Troubleshooting

Even the best of us can encounter hiccups in the kitchen. Here are some common mistakes and how to troubleshoot them:

  • Overwhelming Spices: If your mocktail tastes too spicy, dilute it with more apple cider or add a splash of juice.
  • Too Sweet: If the drink is overly sweet, balance it with a bit of lemon juice to cut through the sweetness.
  • Flat Flavor: If your mocktail lacks depth, let it sit longer to infuse the flavors, or add a splash of vinegar for a tangy kick.

Variations to Try

Make your apple cider mocktail exciting by trying these variations:

  • Spiced Cranberry Mocktail: Substitute a portion of apple cider with cranberry juice for a tart kick.
  • Apple Ginger Fizz: Add club soda or sparkling water for a bubbly experience.
  • Maple Apple Delight: Incorporate a splash of maple syrup for a rich, sweet flavor.
  • Herbal Infusion: Muddle some fresh mint leaves into your drink for an aromatic twist.

Storage and Make-Ahead Instructions

This mocktail is perfect for making ahead of time. Here’s how to store it:

  • Refrigerate: Store any leftover mocktail in an airtight container in the fridge for up to 3 days.
  • Make Ahead: Prepare the base (without ice) up to 2 days in advance. Add ice and garnishes just before serving.

Frequently Asked Questions

Here are some common questions about the apple cider mocktail:

  • Can I use store-bought apple cider? Yes, store-bought apple cider works well, but fresh-pressed gives the best flavor.
  • Is this mocktail vegan? Absolutely! This recipe uses all plant-based ingredients.
  • Can I make this non-alcoholic cocktail for a crowd? Yes, simply scale up the recipe and serve in a large pitcher.
  • How do I make it sweeter? You can add more maple syrup or honey to increase sweetness.
  • What is the best way to serve this mocktail? Serve chilled over ice with garnishes for a festive look!
  • How long does homemade apple cider last? Homemade apple cider can be stored in the fridge for up to a week.
  • Can I freeze apple cider? Yes, you can freeze it in ice cube trays for later use in cocktails or smoothies.
  • What fruits pair well with apple cider? Oranges, pomegranates, and cranberries are excellent companions to apple cider.

Nutritional Tips and Dietary Adaptations

This mocktail is not only delicious but also offers nutritional benefits:

  • Rich in Antioxidants: Apple cider is packed with antioxidants, promoting heart health and overall wellness.
  • Ginger Benefits: Ginger is known for its anti-inflammatory properties, aiding digestion and boosting immunity.
  • Low in Calories: This mocktail is a guilt-free indulgence, making it a healthier alternative to sugary cocktails.

Equipment Recommendations

To make the preparation smoother, consider having the following equipment on hand:

  • Pitcher: For mixing and serving your mocktail.
  • Measuring Cups: To ensure accurate measurements of your ingredients.
  • Mixing Spoon: A long spoon for stirring the mixture well.
  • Glassware: Choose festive glasses to enhance the presentation of your mocktail.

Serving Suggestions

Pair your apple cider mocktail with delicious snacks or meals for a complete experience:

  • Cheese Board: Serve with a selection of cheeses, crackers, and fruits for a delightful pairing.
  • Fall Desserts: Enjoy alongside pumpkin pie or apple crisp for a seasonal treat.
  • Savory Bites: Complement it with savory appetizers like stuffed mushrooms or mini quiches.

With these tips and tricks, you’re ready to impress your friends and family with an unforgettable apple cider mocktail! Remember, cooking should be fun and creative, so don’t hesitate to experiment and make this recipe your own. Cheers to a cozy season filled with delightful flavors!

Apple Cider Mocktail

Prep Time 5 minutes
Cook Time 10 minutes
Total Time 15 minutes
Servings 4 cups
Calories 120
A refreshing and cozy non-alcoholic beverage perfect for any occasion, combining the warmth of cinnamon and ginger with crisp apple cider.

Ingredients

Beverages

  • 4 cups apple cider
  • 1 teaspoon cinnamon (ground)
  • 1 inch ginger (fresh, sliced)

Instructions 

  • Pour apple cider into a pot and heat over medium heat.
  • Add cinnamon and sliced ginger to the cider and simmer for 10 minutes.
  • Remove from heat and strain to remove ginger slices.
  • Serve warm in glasses, garnished with a cinnamon stick if desired.

Notes

This mocktail is perfect for cozy evenings or festive gatherings.
Calories: 120kcal
Cost: $8
Course: Beverage
Cuisine: American
Keyword: Apple Cider

Experience the Joy of No Bake Pumpkin Spice Energy Bites

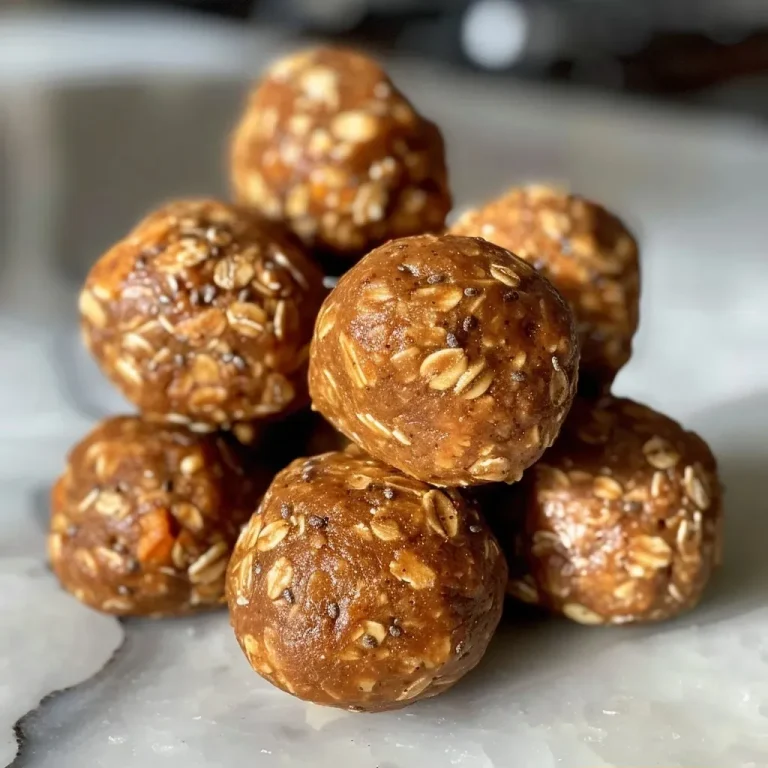
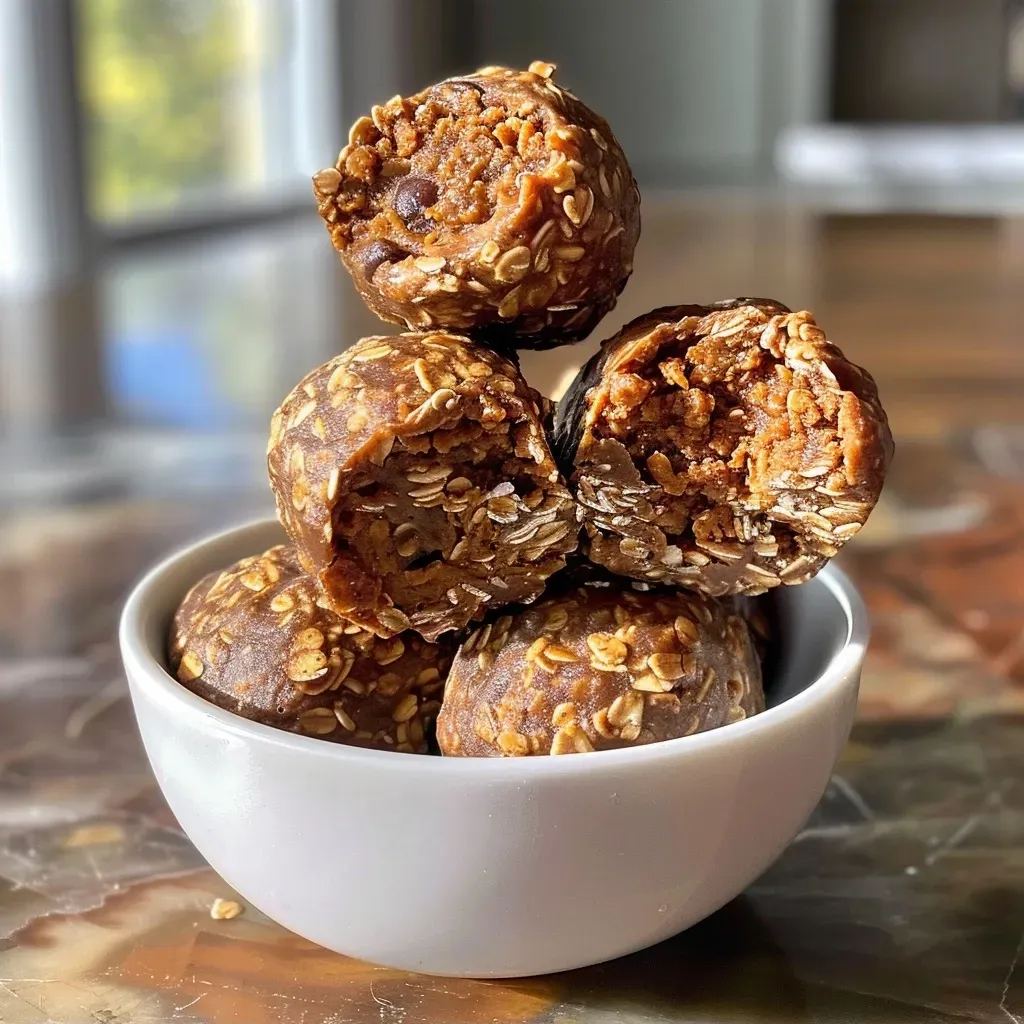
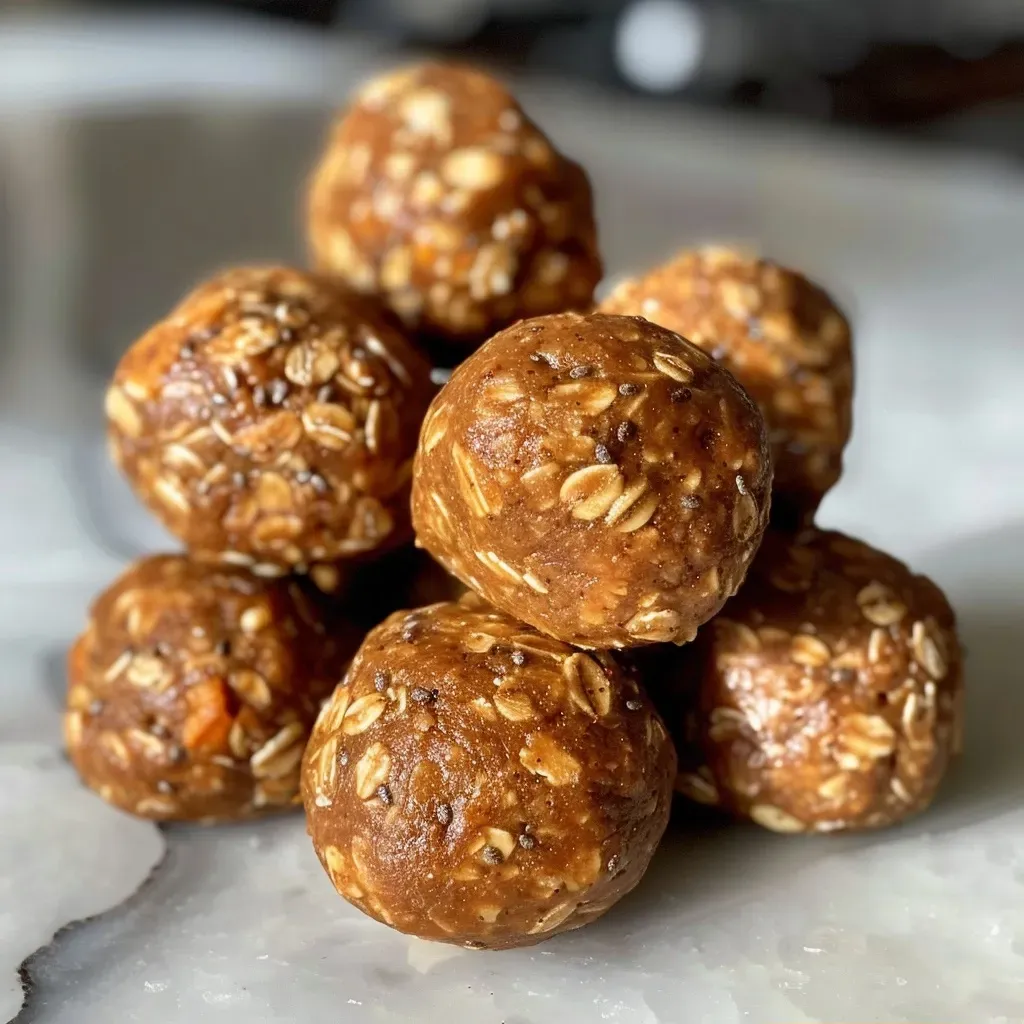
Embrace the flavors of fall with our delightful No Bake Pumpkin Spice Energy Bites! These little treats are not only incredibly easy to make but also packed with wholesome ingredients that provide a quick energy boost when you need it most. Whether you’re looking to satisfy a sweet craving or need a healthy snack for your afternoon slump, these energy bites are a perfect choice. With real pumpkin, creamy peanut butter, and a hint of maple syrup, they are sure to become a favorite in your kitchen. Let’s dive into this simple recipe that brings warmth and joy to your everyday snacking!

Why You’ll Love This Recipe

  • Quick and Easy: Ready in just 30 minutes with minimal prep time, making them perfect for busy days.
  • Nutritious Ingredients: Made with real pumpkin, peanut butter, and gluten-free oats, these bites provide protein and fiber to keep you full.
  • Customizable: Feel free to mix in your favorite ingredients like nuts or chocolate for a personal touch.
  • Perfect for Meal Prep: These bites store well in the fridge or freezer, making them ideal for on-the-go snacking.
  • Kid-Friendly: A fun and healthy treat that kids will love, making snack time exciting!

Gather Your Ingredients

Here’s what you’ll need to make these delicious No Bake Pumpkin Spice Energy Bites:

  • 1 cup peanut butter – creamy or crunchy based on your preference.
  • 1/2 cup pumpkin puree – ensures a rich pumpkin flavor.
  • 1 teaspoon vanilla extract – adds a warm, sweet aroma.
  • 1/2 cup maple syrup – a natural sweetener to balance the flavors.
  • 1 1/2 cups gluten-free rolled oats – the base of your energy bites (add more if too sticky).
  • 1/4 cup chia seeds – for added texture and omega-3 fatty acids.
  • 1 tablespoon pumpkin pie spice – for that quintessential fall flavor.
  • 1/2 cup dark chocolate chips – optional, but who can resist chocolate?

Step-by-Step Instructions

Side view of delicious No Bake Pumpkin Spice Energy Bites with chocolate chips.

Making these energy bites is as easy as 1-2-3! Follow these simple steps:

  1. Add the peanut butter, pumpkin purée, maple syrup, and vanilla extract to a mixing bowl. Stir with a wooden spoon until everything is well combined.
  2. Next, add the gluten-free rolled oats, chia seeds, chocolate chips, and pumpkin pie spice. Mix until you have a smooth dough.
  3. Place the mixture in the freezer for about 15-20 minutes to chill and firm up a bit.
  4. Once firm, use a cookie dough scoop to portion out the dough, then roll each portion into balls using your hands.
  5. Store the energy bites in an air-tight container in the fridge or freezer.

Pro Tips for Perfect Energy Bites

  • Chill the Dough: Refrigerating the dough makes it easier to handle and shape into perfect bites.
  • Adjust Consistency: If your dough is too sticky, simply add a few more tablespoons of oats until it reaches your desired consistency.
  • Mix-In Ideas: Get creative! Try adding nuts, seeds, or dried fruit for varied flavors and textures.
  • Use Quality Ingredients: Opt for organic nut butter and pure maple syrup for the best flavor.
  • Don’t Skip the Chia: These tiny seeds not only add nutrition but also help bind the bites together.
  • Storage is Key: Keep them in an airtight container to maintain freshness and flavor.
  • Perfect for Sharing: These bites make great gifts! Package them in a cute container for friends or family.
  • Experiment with Spices: Feel free to add a pinch of cinnamon or nutmeg for extra warmth.

Common Mistakes and Troubleshooting

Here are some common pitfalls and how to avoid them:

  • Too Sticky: If your mixture is too sticky to roll, add more oats until you achieve the right consistency.
  • Too Dry: If the mixture feels dry, a splash of warm water or another tablespoon of maple syrup can help.
  • Not Chilling: Skipping the chilling step can make it harder to roll the bites into shape.
  • Overmixing: Be careful not to over-mix; you want to combine the ingredients without breaking down the oats.

Variations to Try

Get creative! Here are some variations to consider:

  • Pumpkin Chocolate Chip: Add extra chocolate chips for a sweeter treat.
  • Nutty Delight: Incorporate chopped walnuts or almonds for a crunchy texture.
  • Spiced Energy Bites: Swap pumpkin pie spice with apple pie spice for a different flavor profile.
  • Protein Boost: Mix in your favorite protein powder for an added nutritional kick.

Storage and Make-Ahead Instructions

These energy bites are perfect for meal prep:

  • Store in an airtight container in the refrigerator for up to one week.
  • For longer storage, place them in the freezer where they can last for up to three months.
  • When ready to eat, simply remove from the freezer and allow to thaw at room temperature for a few minutes.

Frequently Asked Questions

  • Can I use another nut butter? Absolutely! Almond butter or cashew butter works wonderfully as well.
  • Are these energy bites gluten-free? Yes! As long as you use certified gluten-free oats, they are gluten-free.
  • Can I make these vegan? Yes! Use maple syrup and a plant-based nut butter for a vegan-friendly option.
  • How can I make them less sweet? Reduce the amount of maple syrup to suit your taste.
  • What’s the nutritional value of these bites? Each bite is rich in protein, fiber, and healthy fats, making them a nutritious snack.
  • Can I add protein powder? Yes! Feel free to incorporate your favorite protein powder into the mix.
  • How do I know when they are done? Once rolled, they should hold their shape and be firm to the touch.
  • Can I make these without pumpkin? Yes! Substitute pumpkin with mashed banana or applesauce for a different flavor.

Nutrition Tips and Dietary Adaptations

These energy bites are not just tasty but can be adapted to fit various dietary needs:

  • Low-Sugar Option: Reduce the maple syrup or substitute with a sugar-free sweetener.
  • Nut-Free Version: Use sunflower seed butter instead of peanut butter for a nut-free alternative.
  • Protein-Packed: Add a scoop of your favorite protein powder to enhance the nutritional profile.
  • Vegan-Friendly: Ensure all ingredients are plant-based to cater to vegan diets.

Equipment Recommendations

To make your cooking experience smoother, here are some kitchen tools I recommend:

  • Mixing Bowl: A large mixing bowl to combine all your ingredients.
  • Wooden Spoon: Perfect for mixing without damaging your bowls.
  • Cookie Dough Scoop: Helps in portioning out the dough evenly.
  • Airtight Container: Essential for storing your energy bites fresh.

Serving Suggestions

Here are some fun ways to enjoy your No Bake Pumpkin Spice Energy Bites:

  • Serve them as a quick breakfast alongside a cup of yogurt and fresh fruit.
  • Pair them with a warm cup of tea or coffee for a cozy afternoon snack.
  • Pack them in lunchboxes for a healthy treat during school or work.
  • Use them as a topping for smoothie bowls to add texture and flavor.

Wrap Up Your Cooking Adventure

With these No Bake Pumpkin Spice Energy Bites, you’re not just making a snack; you’re creating a delightful treat that brings the essence of fall to your kitchen. Whether you enjoy them on your own or share them with loved ones, these bites are sure to spread joy and warmth. So roll up your sleeves, gather your ingredients, and let’s get cooking! Remember, cooking is all about having fun and experimenting, so don’t be afraid to make this recipe your own. Happy snacking!

No Bake Pumpkin Spice Energy Bites

Prep Time 10 minutes
Total Time 10 minutes
Servings 12 pieces
Calories 180
These delicious no-bake energy bites combine pumpkin, peanut butter, and warm spices for a perfect fall snack.

Ingredients

Wet ingredients

  • 1 cup peanut butter
  • 1/2 cup pumpkin puree
  • 1 teaspoon vanilla extract
  • 1/2 cup maple syrup

Dry ingredients

  • 1 1/2 cups gluten free rolled oats (add more if too sticky)
  • 1/4 cup chia seeds
  • 1 tbsp pumpkin pie spice
  • 1/2 cup dark chocolate chips

Instructions 

  • Mix peanut butter, pumpkin, maple syrup, and vanilla until combined.
  • Add oats, chia seeds, chocolate chips, and spices; stir into a dough.
  • Chill in freezer for 15-20 minutes.
  • Roll into balls and store in fridge or freezer.

Notes

Store in an airtight container for best freshness.
Calories: 180kcal
Cost: $10
Course: Snack
Cuisine: American
Keyword: pumpkin

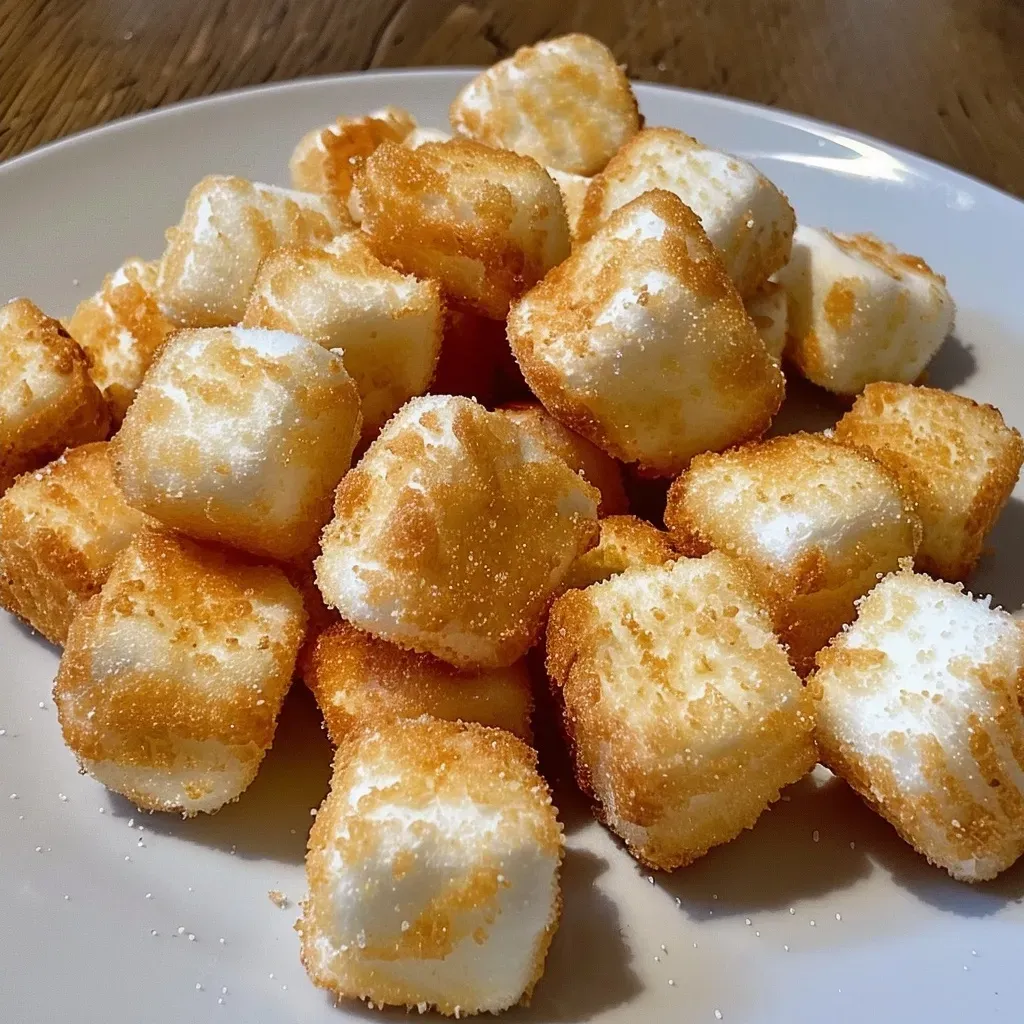
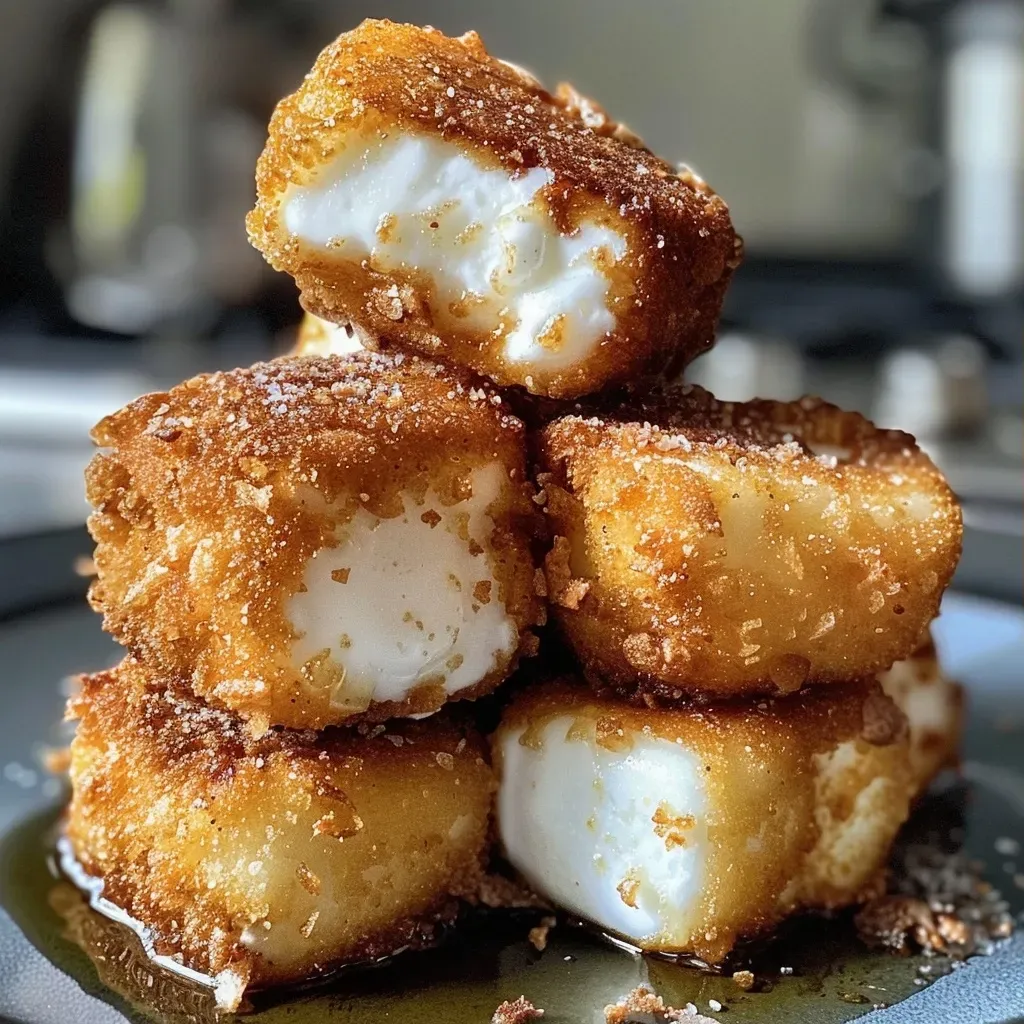
Welcome to the delightful world of fried marshmallows! This recipe is not just about a treat; it’s about experiencing the joy that comes with a crispy, golden exterior and a gooey, sweet inside. Perfect for parties, family gatherings, or just a cozy night in, these fried marshmallows are a fun way to satisfy your sweet tooth. Let’s dive into why you’ll love this recipe!

Why You’ll Love This Recipe

  • Quick and Easy: This recipe comes together in under 30 minutes, making it perfect for a last-minute snack.
  • Kid-Friendly Fun: Involve the kids in the kitchen! They’ll love dipping marshmallows in batter and watching them fry.
  • Customizable: Add your favorite toppings or substitutions to make this recipe uniquely yours.
  • Perfect for Any Occasion: Whether it’s a birthday party, BBQ, or movie night, these treats are sure to impress.
  • Decadent Texture: Experience the delightful contrast between the crunchy outside and the soft, melted marshmallow inside.

Ingredients Breakdown

This recipe calls for simple ingredients that you might already have in your pantry. Here’s what you’ll need:

  • 100 g Allzweckmehl: Regular all-purpose flour works well, but you can substitute with gluten-free flour for a gluten-free option.
  • 120 ml Milk: Use whole milk for creaminess or almond milk for a vegan alternative.
  • 1 Large Egg: If you’re looking for a vegan option, substitute with a flaxseed egg (1 tbsp ground flaxseed + 2.5 tbsp water).
  • 1 tsp Vanilla Extract: This adds a lovely flavor; you can also use almond extract for a different twist.
  • 1 tsp Baking Powder: Ensure it’s fresh for the best rise!
  • 200 g Marshmallows: Standard marshmallows work great, but consider mini marshmallows for bite-sized treats.
  • 500 ml Neutral Oil: Use vegetable or canola oil for frying.

Step-by-Step Instructions

Follow these simple steps to create your delicious fried marshmallows:

  1. In a mixing bowl, combine the flour, baking powder, and a pinch of salt.
  2. In another bowl, whisk together the milk, egg, and vanilla extract until smooth.
  3. Pour the wet ingredients into the dry ingredients, mixing until just combined; it’s okay if there are a few lumps.
  4. Heat the oil in a deep pan over medium heat. You can test if it’s ready by dropping a small amount of batter in—if it sizzles, you’re good to go!
  5. Dip each marshmallow into the batter, ensuring it’s fully coated.
  6. Carefully place the battered marshmallows into the hot oil. Fry for about 1-2 minutes on each side until golden brown.
  7. Once fried, remove the marshmallows and let them drain on a paper towel.
  8. Serve warm, perhaps with a dusting of powdered sugar or your favorite dipping sauce!

Pro Tips for Perfect Fried Marshmallows

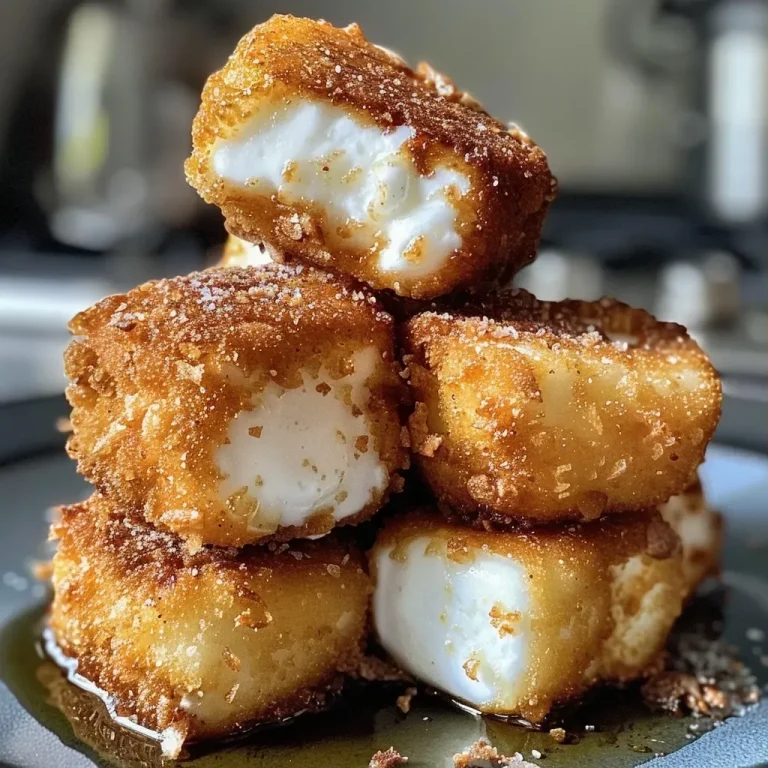
Side view of deliciously fried marshmallows with a shiny exterior.
  • Don’t Overcrowd the Pan: Fry in batches to ensure even cooking and prevent temperature drop.
  • Check Oil Temperature: Use a cooking thermometer; the ideal frying temperature is around 350°F (175°C).
  • Experiment with Flavors: Try adding cinnamon or cocoa powder to the batter for a unique twist!
  • Maintain Freshness: Serve immediately for the best texture; they taste best when warm.
  • Get Creative: Top with chocolate sauce, caramel drizzle, or sprinkles for added fun.
  • Store Properly: If you have leftovers, store them in an airtight container at room temperature for up to 2 days.
  • Use Mini Marshmallows: For a fun bite-sized option, use mini marshmallows instead.
  • Mind the Frying Time: Keep a close eye on them while frying to avoid burning.

Common Mistakes and Troubleshooting

Even the best of us have kitchen mishaps. Here’s what to watch out for:

  • Too Much Batter: If your marshmallows are too thickly coated, they may not cook through. Aim for a light coating.
  • Oil Not Hot Enough: If they absorb too much oil, your oil may not be hot enough. Always test before frying.
  • Overcooking: Keep an eye on the color. You want them golden brown, not burnt!
  • Too Much Flour: If your batter is too thick, add a splash more milk to loosen it up.

Variations to Try

Mix things up with these creative variations:

  • Chocolate Coated: Dip the fried marshmallows in melted chocolate for an extra indulgent treat.
  • Stuffed Marshmallows: Try stuffing marshmallows with chocolate chips or peanut butter before battering.
  • Seasoned Coatings: Add crushed nuts or crushed graham crackers to the batter for extra texture.
  • Flavored Marshmallows: Experiment with flavored marshmallows like strawberry or mint for a unique twist.

Storage and Make-Ahead Instructions

If you want to prepare ahead of time:

  • Prepare the batter and store it in the fridge for up to a day.
  • Fried marshmallows are best enjoyed fresh, but you can store leftovers in an airtight container at room temperature for up to 2 days.
  • To reheat, place in a preheated oven at 350°F (175°C) for a few minutes to regain their crispiness.

Frequently Asked Questions

  • Can I use different types of marshmallows? Yes! Feel free to experiment with flavored or mini marshmallows.
  • What can I serve with fried marshmallows? They pair well with chocolate sauce, fruit dips, or even ice cream!
  • Is this recipe gluten-free? You can easily make it gluten-free by using gluten-free flour.
  • How do I know when the oil is hot enough? You can drop a small amount of batter into the oil; if it bubbles and rises, it’s ready.
  • Can I freeze fried marshmallows? It’s best to enjoy them fresh, but you can freeze them before frying. Thaw and fry when ready.
  • What’s the best oil for frying? Neutral oils like vegetable or canola oil work best for frying.
  • How long do fried marshmallows last? They are best enjoyed immediately, but store leftovers for up to 2 days.
  • Can I make these vegan? Absolutely! Use a flaxseed egg and almond milk for a vegan-friendly version.

Nutritional Tips and Dietary Adaptations

Thinking about dietary needs? Here are some tips:

  • Low Sugar: You can reduce the amount of sugar in your batter or use a sugar substitute.
  • Vegan-Friendly: Substitute the egg with a flaxseed egg and use plant-based milk.
  • Gluten-Free: Use gluten-free flour for those with gluten sensitivity.
  • Portion Control: Enjoy these treats in moderation to keep your sweet tooth in check!

Equipment Recommendations

For best results, here are some essential tools:

  • Deep Fryer or Heavy Pot: A deep fryer makes frying easy, but a heavy pot works just fine.
  • Thermometer: A cooking thermometer helps maintain the correct oil temperature.
  • Slotted Spoon: Perfect for removing the fried marshmallows from the oil.
  • Mixing Bowls: Have a couple on hand for mixing your batter and ingredients.

Serving Suggestions

Finally, here’s how to serve your fried marshmallows:

  • Pair them with a scoop of ice cream for an indulgent dessert.
  • Serve with a variety of dipping sauces like chocolate, caramel, or fruit compote.
  • Dust with powdered sugar for a simple yet elegant touch.
  • Add fresh berries or fruit slices for a refreshing contrast.

Conclusion

With this straightforward guide, you’re well on your way to creating the perfect fried marshmallows. Remember, cooking is all about enjoying the process and bringing a smile to those around you. So gather your ingredients, invite some friends, and let the magic of fried marshmallows brighten your day. Happy cooking!

Frittierte Marshmallows für den perfekten Snack

Prep Time 10 minutes
Cook Time 10 minutes
Total Time 20 minutes
Servings 4 portions
Calories 250
Genießen Sie knusprige, goldene Marshmallows, die perfekt als Snack oder Party-Leckerbissen sind.

Ingredients

Baking & Dry Goods

  • 100 g Allzweckmehl (glutenfreies Mehl optional)
  • 120 ml Milch (Mandelmilch für vegan)
  • 1 stück Ei (Leinsamen-Ei für vegan)
  • 1 TL Vanilleextrakt (Mandel-Extrakt möglich)
  • 1 TL Backpulver (frisch verwenden)
  • 200 g Marshmallows (Mini-Marshmallows optional)
  • 500 ml Neutrales Öl (Pflanzen- oder Rapsöl)

Instructions 

  • Mehl, Backpulver und Vanilleextrakt in einer Schüssel vermengen.
  • Milch und Ei hinzufügen und zu einem glatten Teig verrühren.
  • Marshmallows in den Teig tauchen und gut bedecken.
  • Öl in einem Topf auf 180°C erhitzen.
  • Marshmallows portionsweise im heißen Öl goldbraun frittieren.
  • Auf Küchenpapier abtropfen lassen und warm servieren.

Notes

Verwenden Sie frisches Öl für beste Ergebnisse und achten Sie auf die richtige Temperatur beim Frittieren.
Calories: 250kcal
Cost: $12
Course: Snack
Cuisine: International
Keyword: Marshmallows

Welcome to the delightful world of rice crispy squares! Not only are they a fun, nostalgic treat, but they can also be made healthier with simple ingredient swaps. In this comprehensive guide, I’ll walk you through how to whip up a batch of Healthy Rice Crispy Squares that are packed with flavor and nutrition, perfect for any occasion. Let’s dive into the joy of cooking—because great food doesn’t need to be complicated!

Why You’ll Love This Recipe

  • Quick and Easy: With minimal prep time, you can have these squares ready in under 30 minutes.
  • Nutritious Ingredients: Made with wholesome components like brown rice cereal and almond butter, they provide energy without the sugar crash.
  • Customizable: Feel free to modify the ingredients to suit your dietary needs—these squares can easily be made vegan or gluten-free!
  • Perfect for Snacks: Whether you need a pick-me-up during the day or a quick treat after dinner, these squares have you covered.
  • Fun to Make with Family: Involve the kids in the kitchen! This recipe is simple enough for everyone to join in on the fun.

Ingredients Breakdown

Let’s take a closer look at the ingredients you’ll need for these delicious squares:

  • 4 cups brown rice crisps cereal: Choose a brand you love—Nature’s Path works great, but any brand will do!
  • 1/4 cup natural almond butter: This provides healthy fats and a creamy texture. You can substitute with peanut butter or any nut/seed butter of your choice.
  • 1/3 cup raw honey: A natural sweetener that adds moisture and binds the ingredients together. For a vegan alternative, use maple syrup.
  • 1/4 cup vegan butter: Earth Balance is a fantastic choice. If you’re not dairy-free, feel free to use organic butter.
  • 3 tablespoons cocoa powder: This adds a rich chocolate flavor. Opt for unsweetened cocoa for the best results.
  • 1/4 cup shredded, unsweetened coconut: Adds texture and a hint of sweetness without added sugars.

How to Make Healthy Rice Crispy Squares

Now that we’ve gathered our ingredients, it’s time to make these delightful squares!

  1. In a pan over low heat, melt the vegan butter, almond butter, and honey. Stir until well combined and smooth.
  2. In a large bowl, combine the brown rice crisps cereal, shredded coconut, and cocoa powder.
  3. Pour the melted mixture over the dry ingredients and stir until everything is evenly coated.
  4. Press the mixture firmly into an 8×8 inch pan lined with parchment paper. The smaller the pan, the thicker your squares will be!
  5. Cover with another piece of parchment paper and press down very firmly to compact the mixture.
  6. Place in the freezer for 1 hour, then transfer to the fridge and let sit overnight.
  7. In the morning, cut into squares and enjoy! Store any leftovers in the fridge for up to a week.

Pro Tips for Perfect Rice Crispy Squares

Side view of chewy rice crispy squares with ingredients visible.
  • Use Fresh Ingredients: Ensure your rice cereal and nut butter are fresh for the best flavor and texture.
  • Press Firmly: The key to the right texture is pressing the mixture down firmly in the pan to help it hold together.
  • Experiment with Flavors: Add a pinch of sea salt or a splash of vanilla extract for an extra flavor boost!
  • Adjust Sweetness: If you prefer sweeter squares, feel free to increase the amount of honey or add a bit of powdered sugar.
  • Make It Crunchier: For a crunchier texture, try adding some chopped nuts or seeds to the mixture.
  • Storage Matters: Keep them in an airtight container to maintain freshness and prevent them from getting soggy.
  • Cut Carefully: Use a sharp knife to cut into squares for clean edges.
  • Consider Coconut Oil: For a different flavor, substitute the vegan butter with coconut oil.

Common Mistakes and Troubleshooting

Here are some common pitfalls to avoid:

  • Not Pressing Down Enough: If your squares fall apart, it may be because they weren’t pressed firmly into the pan.
  • Overheating Ingredients: Melt the butters and honey over low heat; too high and they can burn.
  • Using the Wrong Pan Size: If you use a larger pan, your squares will be thinner and may not hold together well.
  • Not Letting Them Set: Be patient! Allowing them to chill overnight ensures they firm up properly.

Variations to Try

Feel free to get creative! Here are some tasty variations:

  • Cocoa Nibs: Add some cocoa nibs for an extra chocolatey crunch.
  • Dried Fruits: Mix in dried cranberries or raisins for a touch of sweetness.
  • Nutty Delight: Stir in chopped almonds or walnuts for added texture and flavor.
  • Minty Fresh: Add a few drops of peppermint extract to the melted mixture for a minty twist.

Storage and Make-Ahead Instructions

These squares can be made ahead of time and stored for later enjoyment. Here’s how:

  • Refrigerator: Store in an airtight container in the fridge for up to one week.
  • Freezer: For longer storage, you can freeze them. Just make sure to wrap them well to prevent freezer burn, and they’ll last for up to 3 months.
  • Thawing: When ready to eat, simply let them thaw at room temperature for a couple of hours before digging in.

Frequently Asked Questions

Here are some common questions about making rice crispy squares:

  • Can I use other cereals? Yes! Feel free to substitute with other cereals like rice puffs or even gluten-free options.
  • Can I make them vegan? Absolutely! Just use vegan butter and choose a plant-based sweetener.
  • How do I make them less sweet? You can decrease the amount of honey or replace it with a less sweet alternative like agave syrup.
  • Can I add protein powder? Yes! You can mix in a scoop of your favorite protein powder for an extra boost.
  • What if my mixture is too dry? If it seems crumbly, add a little more melted nut butter or honey to bind it together.
  • How can I make these gluten-free? Ensure you choose certified gluten-free brown rice cereal.
  • Can I use sugar instead of honey? Yes, but you may need to adjust the amount of butter to keep the mixture from getting too dry.
  • Are these suitable for kids? Definitely! They make a great snack for children, just keep an eye on portion sizes.

Nutrition Tips and Dietary Adaptations

To adapt this recipe for specific dietary needs:

  • Gluten-Free: Use gluten-free rice cereal and check other ingredients to ensure they meet gluten-free standards.
  • Dairy-Free: Opt for vegan butter and ensure your nut butter is dairy-free.
  • Sugar-Free: Use sugar substitutes like stevia or monk fruit sweetener if you’re watching your sugar intake.

Equipment Recommendations

Here’s what you’ll need to make these squares:

  • Non-Stick Pan: A good-quality non-stick pan makes melting easier and cleanup a breeze.
  • Spatula: Use a sturdy spatula for mixing and pressing the mixture into the pan.
  • Measuring Cups: Accurate measurements ensure the best results.

Serving Suggestions

Enjoy your healthy rice crispy squares in various ways:

  • Snack Time: Perfect as a quick on-the-go snack.
  • Lunchbox Treat: A great addition to kids’ lunchboxes.
  • Post-Workout Boost: Ideal for a post-exercise energy boost.

In conclusion, these Healthy Rice Crispy Squares are not just a treat, but a delightful way to bring joy and nutrition into your kitchen. With simple ingredients, easy steps, and endless customization options, you’ll find yourself making these again and again. Remember, cooking is all about confidence and creativity—enjoy the process, and happy cooking!

Healthy Rice Crispy Squares

Prep Time 10 minutes
Cook Time 1 hour
Total Time 1 hour 10 minutes
Servings 16 squares
Calories 180
A delicious and wholesome treat made with brown rice cereal, natural almond butter, and raw honey, perfect for a quick snack or dessert.

Ingredients

Main ingredients

  • 4 cups brown rice crisps cereal (Nature's Path or any brand)
  • 0.25 cup natural almond butter
  • 0.33 cup raw honey
  • 0.25 cup Earth Balance vegan butter or regular butter
  • 3 tablespoons raw or regular cocoa powder
  • 0.25 cup shredded, unsweetened coconut

Instructions 

  • In a pan over low heat, melt the vegan butter, almond butter, and honey, stirring until combined.
  • Mix rice cereal, coconut, and cocoa powder in a large bowl.
  • Pour the melted mixture over the cereal and stir well.
  • Press the mixture into an 8x8 pan lined with parchment paper, pressing firmly.
  • Freeze for 1 hour, then refrigerate overnight.
  • Cut into squares and enjoy!

Notes

Press the mixture very firmly into the pan for best results.
Calories: 180kcal
Cost: $15
Course: Dessert
Keyword: Healthy, rice, snack