Author

Steven

Browsing

Creating a Spook-tacular Mummy Charcuterie Board for Halloween

Halloween is just around the corner, and what better way to celebrate than with a fun and festive Mummy Charcuterie Board? Packed with assorted cheeses, turkey slices, fresh fruits, and spooky olive eyes, this easy-to-assemble spread is sure to delight guests of all ages. Whether you’re hosting a Halloween party or just want to add a special touch to your family’s snack time, this Mummy Charcuterie Board is perfect for creating a memorable experience around the table.

In this guide, we’ll walk you through everything you need to know to create the ultimate Mummy Charcuterie Board that looks impressive yet is simple to make. From ingredient breakdowns to expert tips, you’ll have all the tools to craft a delicious and visually striking board.

Why You’ll Love This Mummy Charcuterie Board

This Mummy Charcuterie Board is not just a treat for the eyes, but also for the taste buds. Here are five reasons why you’ll love this recipe:

  • Visually Appealing: The spooky mummy design adds a playful twist to your Halloween festivities, making it a great conversation starter.
  • Easy to Assemble: With simple steps and no cooking required, you can put together this board quickly, even on a busy day.
  • Customizable Ingredients: Feel free to swap out ingredients based on your preferences or dietary restrictions, making it versatile for everyone.
  • Healthy Options: Incorporating fresh fruits and nuts not only enhances flavor but also provides nutritious elements to your snack spread.
  • Fun for All Ages: Kids and adults alike will enjoy the festive presentation, encouraging everyone to dig in and enjoy!

Mummy Charcuterie Board Ingredients & Substitutions

To create a Mummy Charcuterie Board, gather the following ingredients. You can easily mix and match based on what you have at home!

  • Assorted cheeses: Cheddar, mozzarella, and gouda work well. You can also use vegan cheese for a dairy-free option.
  • Turkey or chicken slices: For a vegetarian option, consider using hummus or roasted vegetables as an alternative.
  • Crackers or breadsticks: Choose your favorite crackers or use whole grain options for a healthier choice.
  • Fresh fruits: Grapes, berries, and apple slices add color and sweetness. Feel free to use seasonal fruits!
  • Hummus or cream cheese: Either of these can be used as a spread, or try a flavored cream cheese for a twist.
  • Olives for the eyes: Use green or black olives to create a spooky face; you can also use grapes or cherry tomatoes.
  • Fresh herbs for garnish: Basil or parsley can add a lovely touch and fresh flavor to your board.

Step-By-Step Instructions to Make Your Mummy Charcuterie Board
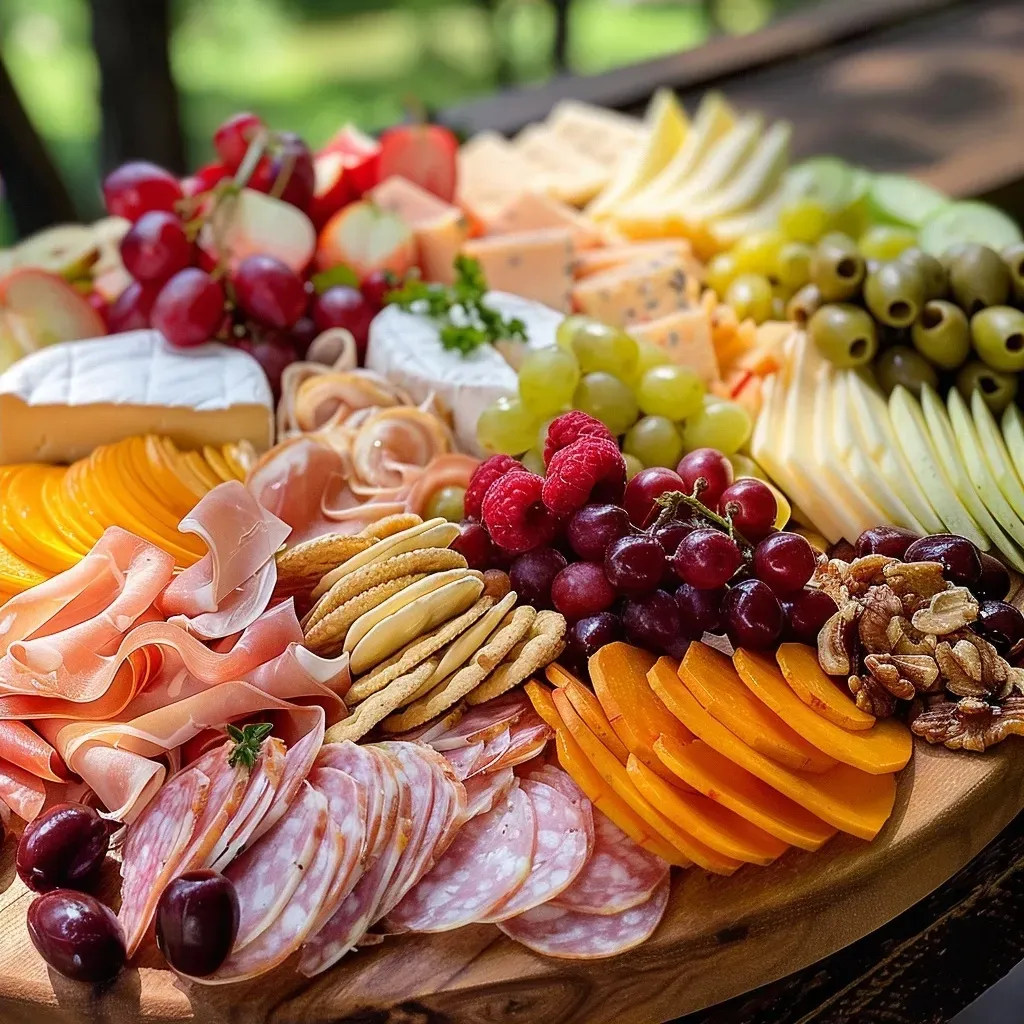
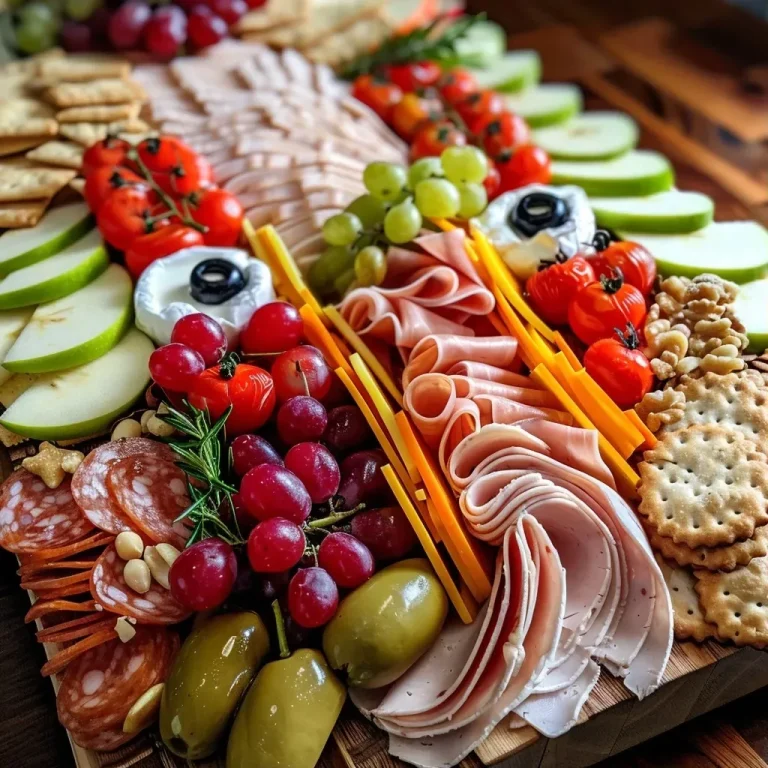
Side view of a Mummy Charcuterie Board with assorted cheeses, turkey, fresh fruits, and decorative elements like olives.

Now that you have your ingredients ready, let’s dive into the step-by-step process to create your Mummy Charcuterie Board.

  • Choose Your Board: Start with a large board, tray, or platter that gives you enough room to shape the mummy design. A rectangular board works well, but any flat surface can look great.
  • Arrange the Main Ingredients: Place the cheese and turkey slices in the center of the board to form a mummy body shape. Layer the cheese, turkey slices, and crackers in a loose oval or rectangle.
  • Create the Wrapped Mummy Lines: Use strips of sliced cheese, thin turkey slices, or breadsticks to create the mummy’s “wrapping” effect. Overlap them a bit to keep the look playful.
  • Add the Mummy’s Face: Leave a small open space near the top for the mummy’s face. Position two olive slices or small dots of cream cheese to form the eyes.
  • Surround with Colorful Fruits: Add grapes, berries, apple slices, nuts, and crackers around the mummy shape. Keep the colors balanced for a full yet tidy appearance.
  • Finish with Fresh Herbs: Add a few fresh herb sprigs around the edges for an elegant touch. Serve immediately or chill briefly until you’re ready to present.

Pro Tips for a Success

To ensure your Mummy Charcuterie Board is a hit, consider these expert insights:

  • Keep it Fresh: Use fresh fruits and vegetables to maintain vibrant colors and flavors. Avoid overly ripe items that might spoil quickly.
  • Mix Textures: Include a variety of textures with crunchy crackers, creamy cheeses, and juicy fruits to keep every bite interesting.
  • Plan Ahead: Prepare ingredients in advance. You can slice fruits and cheeses a few hours before serving to save time.
  • Make it Interactive: Encourage guests to customize their plates. Provide an assortment of toppings and spreads so they can create their own mummy snacks.
  • Think About Portion Sizes: Avoid overcrowding the board. Leave some space between items for a cleaner, more appealing look.
  • Use Seasonal Ingredients: Embrace the season by incorporating fall flavors like pumpkin seeds or caramelized nuts into your board.
  • Keep it Fun: Play with the arrangement and consider adding Halloween-themed decorations for added flair.
  • Stay Relaxed: Remember, cooking is about enjoyment. Don’t stress over perfection; focus on the fun of creating!

Common Mistakes and Troubleshooting

Even the best of us can make mistakes while assembling a charcuterie board. Here are some common pitfalls and how to avoid them:

  • Overcrowding: If your board looks too full, it can overwhelm guests. Aim for a balance between variety and space.
  • Not Balancing Flavors: Ensure you have a mix of sweet, salty, and savory items to cater to different tastes.
  • Using Ingredients That Don’t Pair: Test combinations ahead of time to ensure that flavors complement each other.
  • Forgetting to Garnish: Herbs not only add flavor but also enhance the presentation. Don’t skip this step!
  • Neglecting Food Safety: Keep perishable items chilled until serving to avoid spoilage, especially if you’re hosting outdoors.

Variations of the Mummy Charcuterie Board

Want to switch things up? Try these fun variations of the Mummy Charcuterie Board:

  • Vegetarian Version: Substitute turkey slices with roasted vegetables and add more hummus for dipping.
  • Sweet Treat Board: Use chocolate-covered fruits, cookies, and candies to create a dessert-themed mummy board.
  • International Flair: Incorporate cheeses and meats from different cultures, like Italian prosciutto or Spanish manchego.
  • Gluten-Free Board: Use gluten-free crackers or veggie sticks for an inclusive option everyone can enjoy.

Storage and Make-Ahead Instructions

To enjoy your Mummy Charcuterie Board stress-free, consider these storage and prep tips:

  • Make Ahead: You can prepare most of the ingredients a day in advance. Store sliced fruits in airtight containers to keep them fresh.
  • Assemble Just Before Serving: For the best presentation and taste, assemble the board right before you plan to serve it.
  • Storage Tips: Leftovers can be stored in the refrigerator for up to two days. Keep items like crackers separate to maintain their crunch.

Frequently Asked Questions (FAQ)

Here are some common questions about creating the perfect Mummy Charcuterie Board:

  • Can I use different types of cheeses? Absolutely! Experiment with your favorite cheeses to find the combinations you love.
  • How can I make it more kid-friendly? Include more fruits and sweet treats, and let kids help in assembling their own sections of the board.
  • What if I don’t have olives? You can use grapes, cherry tomatoes, or even mini marshmallows for the eyes.
  • Can I use leftovers from my fridge? Yes! Leftover meats, cheeses, and vegetables can add variety to your board.
  • How do I make it gluten-free? Simply choose gluten-free crackers or use vegetable sticks instead.
  • Is there a vegan option? Yes! Utilize plant-based cheeses, spreads, and a variety of fresh vegetables and fruits.
  • What is the best way to serve it? Place your board on a large table where everyone can gather around and help themselves.
  • How long will it last? The assembled board is best enjoyed fresh, but leftovers can be stored in the fridge for up to two days.

Nutrition Tips and Dietary Adaptations

Here are some nutrition tips to make your Mummy Charcuterie Board even healthier:

  • Incorporate Whole Grains: Opt for whole grain crackers or breadsticks to add fiber to your snack spread.
  • Add More Fruits and Veggies: Aim to fill half your board with fresh produce to increase vitamins and minerals.
  • Limit Processed Meats: If using meats, choose options that are lower in sodium and additives.
  • Choose Healthy Fats: Include nuts and seeds for healthy fats, which are great for heart health.

Equipment Recommendations

To create your Mummy Charcuterie Board, you’ll need a few essential tools:

  • Large Board or Platter: A wooden or ceramic board provides a sturdy surface for arranging your ingredients.
  • Sharp Knife: For slicing cheese and fruits neatly.
  • Small Bowls: Use for dips like hummus or cream cheese to keep the board organized.
  • Serving Utensils: Have spoons and tongs available for easier serving.

Serving Suggestions: What to Pair with Your Mummy Charcuterie Board

Enhance your Mummy Charcuterie Board with these pairing ideas:

  • Festive Drinks: Serve with apple cider, pumpkin spice lattes, or themed cocktails for a complete Halloween experience.
  • Dessert Options: Consider offering Halloween-themed cupcakes or cookies for an added sweet treat.
  • Complementary Dips: Add an array of dips like ranch, salsa, or a spicy cheese dip to elevate flavors.

Conclusion

Creating a Mummy Charcuterie Board is a delightful way to celebrate Halloween with friends and family. By following these step-by-step instructions, tips, and variations, you can craft a visually stunning and delicious spread that’s sure to impress. Remember, the key to a great charcuterie board is not just in the ingredients but in the fun of assembling and sharing it with others. So gather your ingredients, unleash your creativity, and enjoy the festive spirit this Halloween with your homemade Mummy Charcuterie Board!
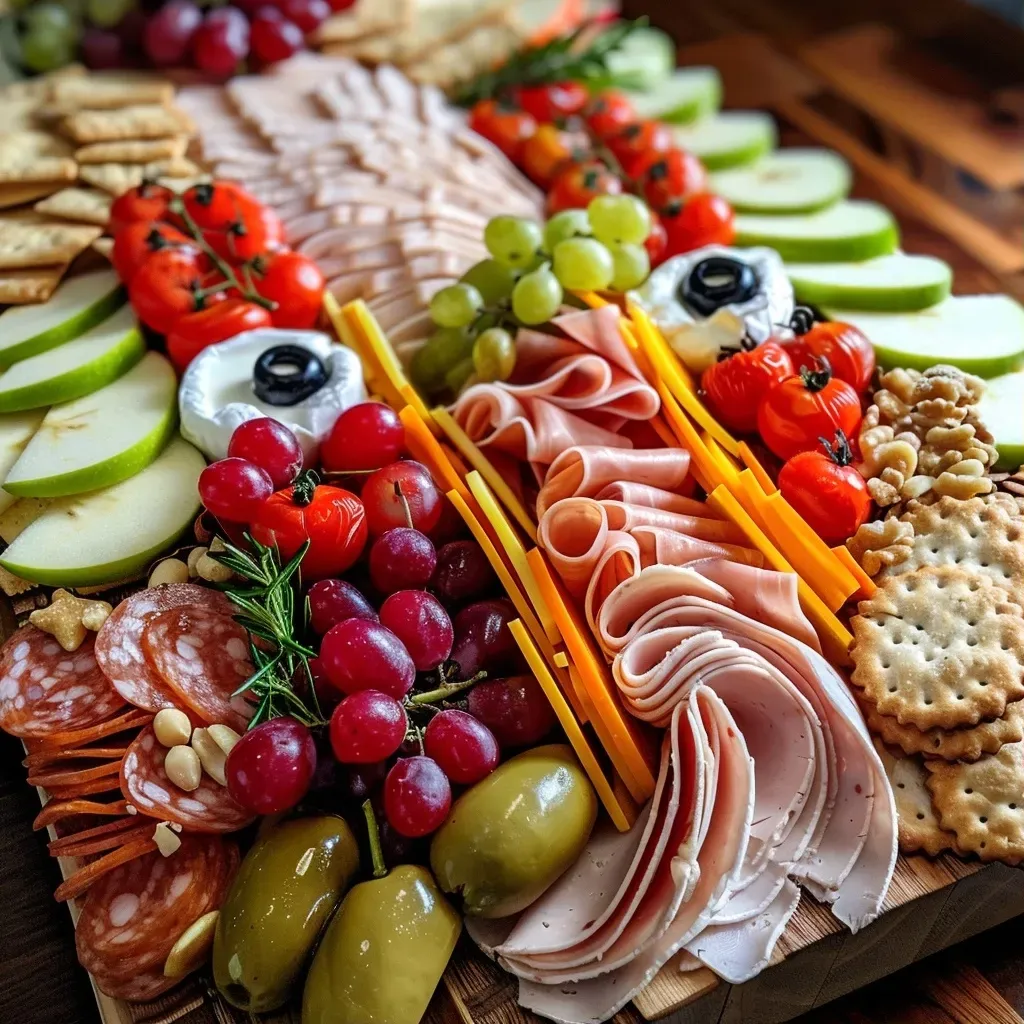
Mummy Charcuterie Board

Prep Time 20 minutes
Total Time 20 minutes
Servings 8 people
Calories 350
A fun and festive appetizer perfect for Halloween or themed parties, featuring a creatively arranged assortment of cheeses, meats, fruits, and snacks shaped like a mummy.

Ingredients

Main ingredients

  • 1 large platter Assorted cheeses, such as cheddar, mozzarella, and gouda
  • 200 grams Turkey slices or chicken slices
  • 100 grams Crackers or breadsticks
  • 150 grams Grapes, berries, and apple slices
  • 100 grams Hummus or cream cheese for spreading
  • 10 pieces Olives for the eyes
  • 8 pieces Cherry tomatoes or cucumber slices
  • 50 grams Roasted nuts or pretzels
  • 5 sprigs Fresh herbs for garnish

Instructions 

  • Arrange main ingredients in the center to form a mummy shape, layering cheese, meats, and crackers.
  • Create mummy wrapping with cheese strips, turkey slices, or breadsticks, overlapping slightly.
  • Place olives or cream cheese dots with olives for eyes near the top of the mummy.
  • Surround the mummy with grapes, berries, apple slices, nuts, and crackers for color and fullness.
  • Add fresh herbs around the edges for a finished look. Serve immediately or chill briefly.
Notes

Use a variety of cheeses and fruits for visual appeal and flavor. Keep the mummy playful and slightly messy for a fun presentation.
Calories: 350kcal
Cost: $15
Course: Appetizer
Cuisine: Party
Keyword: Charcuterie, Halloween, Mummy

Welcome to a culinary journey that celebrates the vibrant and comforting flavors of Balkan cuisine! Today, we’re diving into the delightful world of stuffed peppers, specifically the mouth-watering punjene paprike. This dish is not only a staple in many Balkan households but also a fantastic option for anyone looking to elevate their dinner game with minimal effort. Trust me, once you try these creamy, flavorful stuffed peppers, they will become a regular on your dinner table!

Why You’ll Love This Recipe

Here are just a few reasons you’ll adore this dish:

  • Quick Preparation: With simple steps and minimal cooking time, you can have a delicious meal ready in no time!
  • Creamy Filling: The combination of kaymak and fresh cheese creates a rich, creamy filling that perfectly complements the crunchy peppers.
  • Flexibility: This recipe allows for various ingredient swaps, making it easy to customize based on what you have in your kitchen.
  • Perfect for Entertaining: Serve these stuffed peppers as an appetizer or a main course at your next gathering to impress your guests.
  • Make-Ahead Option: These stuffed peppers taste even better the next day, making them ideal for meal prep!

Ingredient Breakdown

Here’s what you’ll need to create your delicious Balkan stuffed peppers:

  • Crunchy peppers: Choose bell peppers in vibrant colors for the best presentation and flavor.
  • Kaymak: This creamy dairy product adds richness. If unavailable, mascarpone is a great substitute.
  • Young fresh cheese: A softer cheese like ricotta or queso fresco works well. You can also use Farmer’s cheese if it’s easier to find.
  • Seasoning: Don’t forget to add salt and pepper to taste—seasoning is key to enhancing flavors!

Steps to Make Balkan Stuffed Peppers

Ready to get cooking? Follow these simple steps:

  1. Prepare the peppers by cutting off the tops and removing the seeds.
  2. In a bowl, mix kaymak and fresh cheese until creamy.
  3. Stuff the peppers generously with the cheese mixture.
  4. Arrange the stuffed peppers on a plate and serve cold as an appetizer.

Pro Tips for Perfect Stuffed Peppers

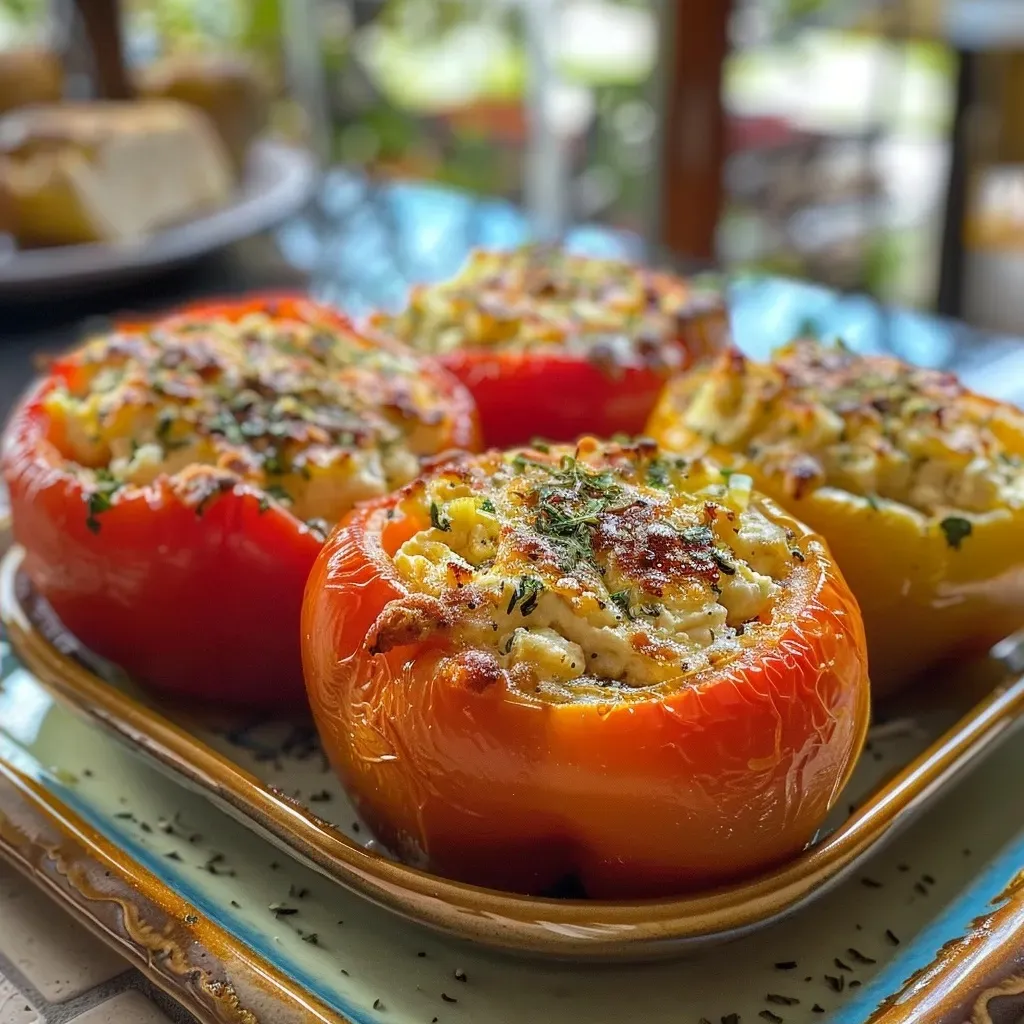
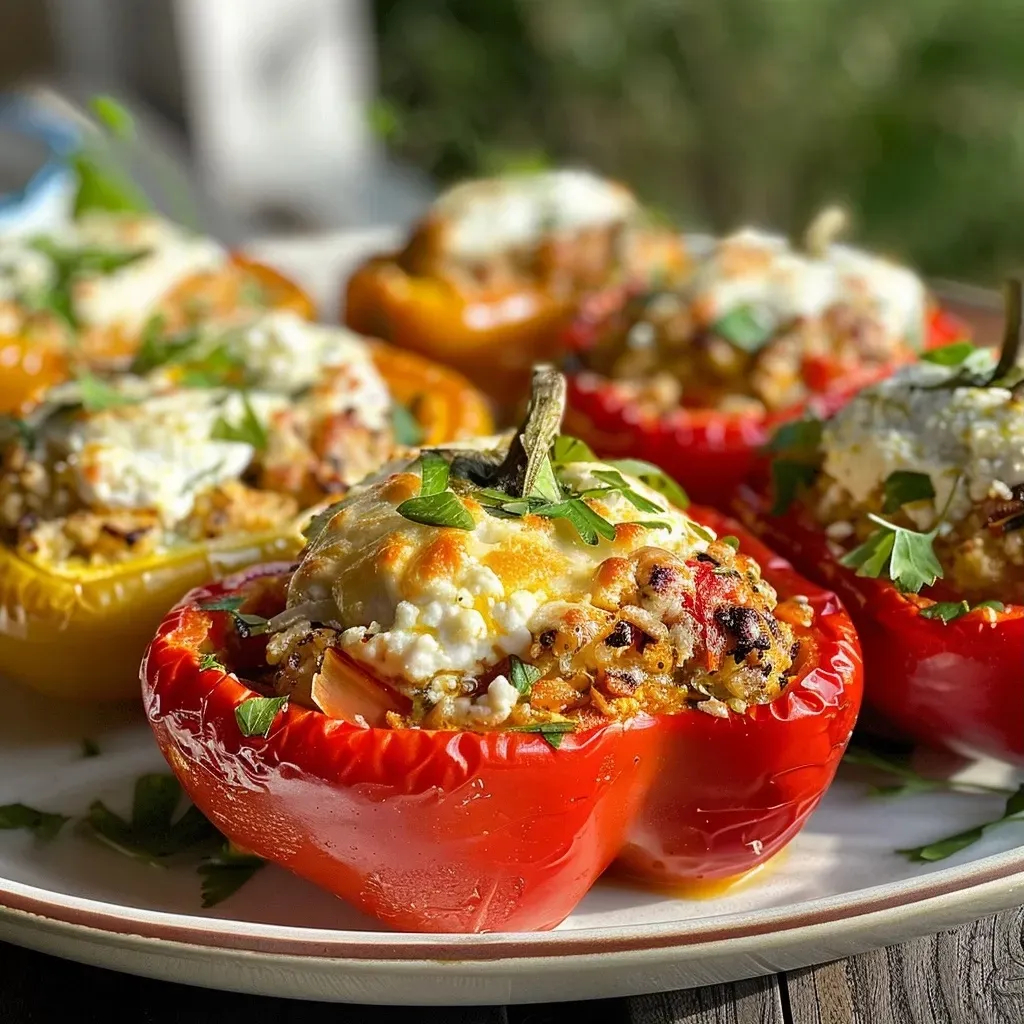
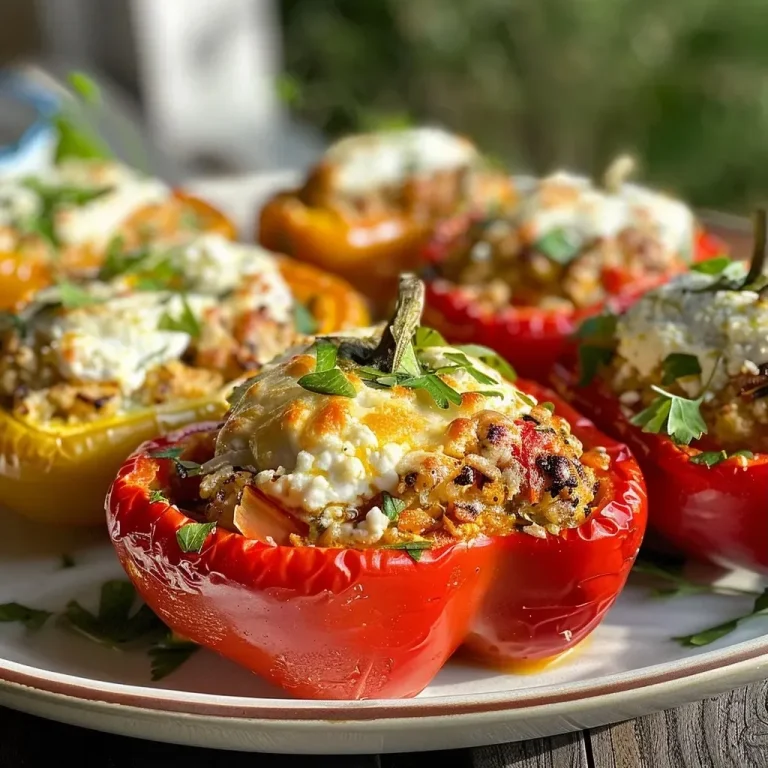
A vibrant image of stuffed peppers showcasing their colorful crunch and creamy filling.

Here are some expert tips to ensure your stuffed peppers turn out perfectly:

  • Choose the Right Peppers: Opt for firm, fresh bell peppers to ensure they hold up well during serving.
  • Layering Flavors: Consider adding herbs like dill or parsley to the cheese mixture for added depth.
  • Experiment with Cheese: Feel free to mix different cheeses for a unique flavor profile.
  • Don’t Overstuff: Leave a little room at the top of each pepper to prevent spills and ensure even filling.
  • Chill Before Serving: Allow the stuffed peppers to chill in the refrigerator for at least an hour to enhance the flavors.
  • Serving Suggestion: Drizzle a bit of olive oil over the finished dish for an added touch of richness.
  • Garnish: Fresh herbs or a sprinkle of paprika can elevate the presentation.
  • Pairing: Serve with a side of crusty bread or a fresh salad for a complete meal.

Common Mistakes and Troubleshooting

If you’re new to making stuffed peppers, here are some common pitfalls to avoid:

  • Underseasoning: Always taste your filling before stuffing to ensure it has enough flavor.
  • Choosing Overripe Peppers: Avoid peppers that are too soft or blemished. Freshness matters!
  • Skipping the Chilling Step: Allowing the flavors to meld in the fridge can make a big difference in taste.

Variations of Stuffed Peppers

Feel free to get creative! Here are some variations to try:

  • Spicy Twist: Add diced jalapeños or chili flakes to the cheese mixture for a kick.
  • Meat Lover’s Version: Incorporate cooked ground meat (beef or turkey) into the filling for a heartier option.
  • Veggie Delight: Add finely chopped spinach or zucchini to the filling for extra nutrition and flavor.
  • Italian Style: Mix in Italian herbs like basil and oregano, and serve with marinara sauce on the side.

Storage and Make-Ahead Instructions

You can prepare these stuffed peppers in advance:

  • Refrigerate: Store in an airtight container for up to 3 days.
  • Freeze: Freeze unstuffed peppers for up to 3 months, and fill them when you’re ready to cook.
  • Serve Chilled: These stuffed peppers are best served cold, making them perfect for meal prep!

Comprehensive FAQ

Here are answers to some common questions about making stuffed peppers:

  • Can I use other types of peppers? Yes! Feel free to experiment with poblano or banana peppers for different flavors.
  • What can I substitute for kaymak? Mascarpone is an excellent alternative if kaymak isn’t available.
  • How long do these peppers last in the fridge? They can last up to 3 days when stored properly.
  • Can I make these vegetarian? Absolutely! Use only cheese and vegetables for a delicious vegetarian option.
  • Should I cook the filling first? No, the filling is meant to be served cold, keeping the peppers crunchy.
  • Can I bake these peppers? Yes! Bake for 20-25 minutes at 350°F if you prefer a warm dish.
  • What side dishes pair well? A simple green salad or crusty bread complements the flavors beautifully.
  • How do I enhance the flavors? Adding fresh herbs or a dash of lemon juice can brighten the dish.

Nutrition Tips and Dietary Adaptations

For a healthier version, consider these tips:

  • Low-Fat Cheese: Use reduced-fat cheese options to keep the dish lighter.
  • Increased Veggies: Add more vegetables to the filling to boost fiber and nutrients.
  • Gluten-Free: This recipe is naturally gluten-free, making it suitable for those with dietary restrictions.

Equipment Recommendations

You don’t need much to create these stuffed peppers:

  • Mixing Bowl: For combining your filling ingredients.
  • Sharp Knife: Essential for cutting the tops off the peppers.
  • Airtight Containers: For storing leftovers or meal prep.

Serving Suggestions

When it comes to serving your delicious Balkan stuffed peppers, consider these ideas:

  • Garnish: Fresh herbs or a drizzle of olive oil can enhance the presentation.
  • Pair with Dips: Serve with tzatziki or a yogurt sauce for added creaminess.
  • Accompany with Bread: A loaf of crusty bread can round out the meal perfectly.

In conclusion, this Balkan stuffed peppers recipe is not just a dish; it’s a celebration of flavors, culture, and the joy of cooking. Whether you’re preparing a family dinner or hosting friends, these stuffed peppers are sure to impress. Remember, cooking is about experimenting and having fun—so don’t hesitate to make this recipe your own. Happy cooking, and enjoy your delicious creation!

Balkan Stuffed Peppers (Paprike Punjene Sirom)

Prep Time 15 minutes
Total Time 15 minutes
Servings 4 pieces
Calories 250
Enjoy these flavorful Balkan stuffed peppers filled with creamy cheeses, perfect as a cold appetizer or snack.

Ingredients

Vegetables

  • 4 pieces Crunchy peppers (Bell peppers or similar)
  • 100 g Kaymak (Turkish clotted cream)
  • 100 g Young fresh cheese (e.g., farmer's cheese)
  • 100 g Queso fresco (Fresh cheese option)
  • 50 g Ricotta (optional) (Optional for creaminess)

Instructions 

  • Stuff the peppers with kaymak and cheeses.
  • If kaymak is unavailable, use mascarpone as a substitute.
  • If fresh cheese is not available, use Farmer’s cheese or Queso fresco.
  • Serve the stuffed peppers cold as an appetizer.

Notes

Chill the peppers before serving for best flavor.
Calories: 250kcal
Cost: $12
Course: Appetizer
Cuisine: Balkan
Keyword: Stuffed Peppers

Are you ready to elevate your home cooking with a vibrant twist? These wholesome sweet potato tortillas are not just a delicious addition to your meals; they’re a delightful way to embrace healthy eating without sacrificing flavor. In this guide, we’ll show you how to create these gluten-free and vegan wraps that can be used for tacos, burritos, or even as a simple side to any dish. Let’s dive in!

Why You’ll Love This Recipe

  • Easy Preparation: With only a handful of ingredients, you can whip up these tortillas in no time, perfect for busy weeknights.
  • Nutritious Ingredients: Made with sweet potatoes, these tortillas are packed with vitamins and minerals, giving your meals a healthy boost.
  • Versatile Uses: Use them for wraps, tacos, or even as a base for your favorite dishes. Their unique flavor pairs well with a variety of fillings.
  • Kid-Friendly: The bright orange color and sweet taste of sweet potatoes can entice even the pickiest eaters to enjoy their meals.
  • Gluten-Free and Vegan: Perfect for those with dietary restrictions, ensuring everyone can enjoy a delicious homemade tortilla.

Ingredients Breakdown

For the perfect sweet potato tortillas, you’ll need:

  • 2 small sweet potatoes: Steamed or boiled, these provide a creamy texture and natural sweetness.
  • 2 tbsp vegan butter: Adds richness; you can also use oil for a lighter option.
  • 1-2 tbsp hot water: Helps in achieving the right dough consistency.
  • 3/4 tsp sea salt: Enhances the flavor of the tortillas.
  • 1/2 tsp onion powder: For a subtle aromatic flavor.
  • 1/2 tsp garlic powder: Adds depth and richness.
  • 3/4 cup gluten-free sourdough starter: Provides a unique flavor and texture; check notes for alternatives.
  • 2 tsp psyllium husk: Helps bind the ingredients and improves the texture.
  • 2-3 tbsp arrowroot flour: A great gluten-free option for thickening and binding.
  • 1/2 tsp baking powder: Optional, for lighter, puffier tortillas.

Expert Tips for Perfect Tortillas

Here are some tips to ensure your sweet potato tortillas turn out perfectly:

  • Cool the sweet potatoes: Make sure to cool the mashed sweet potatoes before mixing. Warm mash can make the dough too sticky.
  • Mix dry ingredients first: This ensures even distribution of flavors and prevents clumping.
  • Add moisture gradually: If your dough feels dry, add water a little at a time until you achieve a soft yet pliable consistency.
  • Use parchment paper: When rolling out the tortillas, place the dough between two sheets of parchment paper to prevent sticking.
  • Cook on medium heat: A hot pan will create a nice char without burning the tortillas.
  • Don’t overcrowd the pan: Cook tortillas one at a time to maintain the right temperature and texture.
  • Experiment with thickness: Depending on your preference, adjust the thickness of your tortillas—thicker for soft wraps, thinner for crispy versions.
  • Rest the dough: Let the dough sit for 10-15 minutes after mixing to relax the gluten-free flours, resulting in better texture.
  • Store properly: Keep any leftover tortillas in an airtight container to maintain freshness.

Common Mistakes and Troubleshooting

A side view of a soft, gluten-free sweet potato tortilla on a wooden surface.

Even the best cooks can make mistakes. Here’s how to troubleshoot:

  • Dough is too sticky: Add a little more arrowroot flour until the dough is manageable.
  • Tortillas are cracking: This usually means the dough is too dry; add a bit of water or mashed sweet potato.
  • Tortillas are too thick: Roll them out more thinly before cooking to achieve a better texture.
  • Flavor isn’t strong enough: Adjust seasonings to your taste, adding more salt, garlic, or onion powder as desired.

Variations to Try

Get creative with these delightful variations:

  • Herbed Sweet Potato Tortillas: Add chopped fresh herbs like cilantro or parsley for an additional flavor boost.
  • Spicy Sweet Potato Tortillas: Incorporate a pinch of cayenne pepper or chili powder for a kick.
  • Sweet Cinnamon Tortillas: Mix in a teaspoon of cinnamon and a touch of sugar for a dessert option.
  • Cheesy Sweet Potato Tortillas: Fold in nutritional yeast for a cheesy flavor without dairy.

Storage and Make-Ahead Instructions

These tortillas can be made ahead and stored for convenience:

  • Refrigerate
  • Freeze: Wrap tortillas in plastic wrap and place in a freezer bag for up to 2 months. Thaw in the fridge before use.
  • Reheat: Warm tortillas in a skillet or microwave before serving.

Frequently Asked Questions (FAQ)

  • Can I use regular flour instead of gluten-free flour? Yes, but the texture and flavor will differ.
  • What can I use instead of a sourdough starter? You can replace it with more arrowroot flour or a gluten-free all-purpose mix.
  • Are these tortillas suitable for meal prep? Absolutely! They are great for making ahead and storing.
  • Can I make these tortillas spicy? Yes! Just add spices like chili powder to the dough.
  • What fillings work well with these tortillas? Try them with grilled veggies, beans, or your favorite protein!
  • How do I ensure they don’t stick when cooking? Use a non-stick skillet or lightly grease the pan before cooking.
  • Can I make these without any sweet potato? While sweet potatoes provide flavor and texture, you could try using pumpkin puree as an alternative.
  • How do I know when the tortillas are done cooking? They should be lightly browned and firm to the touch.

Nutrition Tips and Dietary Adaptations

This recipe is not only delicious but also nutritious. Here are some adaptations:

  • Low-Carb Option: Substitute sweet potatoes with cauliflower puree for a lower-carb tortilla.
  • Higher Fiber: Add ground flaxseed to the dough for an extra fiber boost.
  • Protein Boost: Mix in protein powder to the dough for a protein-rich option.

Essential Equipment

For best results, consider these tools:

  • Mixing Bowls: For combining ingredients.
  • Rolling Pin: To roll out the dough evenly.
  • Non-Stick Skillet: For cooking the tortillas without sticking.
  • Parchment Paper: To prevent sticking when rolling out the dough.

Serving Suggestions

Enjoy your sweet potato tortillas with:

  • Fresh Salsa: A vibrant salsa can complement the sweetness of the tortillas.
  • Guacamole: Creamy and delicious, guacamole pairs perfectly with these wraps.
  • Grilled Chicken or Tofu: For a protein-packed meal, add your favorite protein.
  • Veggies and Hummus: A light and refreshing option for a quick meal.

Conclusion

There you have it! A comprehensive guide to making wholesome sweet potato tortillas that are not only easy to make but also delightful to eat. With these tips, tricks, and variations, you’re well on your way to making this recipe a staple in your kitchen. Enjoy the process, and happy cooking!

Sweet Potato Tortillas (Gluten-Free Vegan Wraps)

Prep Time 10 minutes
Cook Time 15 minutes
Total Time 25 minutes
Servings 4 pieces
Calories 150
These gluten-free vegan sweet potato tortillas are soft, flavorful, and perfect for wraps or tacos. Easy to make with simple ingredients, they are a healthy alternative to traditional tortillas.

Ingredients

Sweet Potatoes

  • 2 small sweet potatoes (steamed or boiled (no liquid / mashed))
  • 2 tbsp vegan butter (or use oil (ghee))
  • 1-2 tbsp hot water
  • 3/4 tsp sea salt (plus dash black pepper)
  • 1/2 tsp onion powder
  • 1/2 tsp garlic powder
  • 3/4 cup gluten free sourdough starter (see notes, if you don't have any)
  • 2 tsp psyllium husk
  • 2-3 tbsp arrowroot flour (or other starchy flour)
  • 1/2 tsp baking powder (optional, for puffier tortillas)

Instructions 

  • Mash steamed or boiled sweet potatoes until smooth.
  • Mix in vegan butter, hot water, salt, pepper, onion powder, and garlic powder until well combined.
  • Add sourdough starter, psyllium husk, arrowroot flour, and baking powder; knead into a dough.
  • Divide dough into 4 balls, roll out into thin circles.
  • Cook each tortilla on a hot skillet for 2-3 minutes per side until lightly browned.

Notes

Ensure sweet potatoes are well mashed for a smooth dough.
Calories: 150kcal
Cost: $15
Course: Main Course
Cuisine: vegan
Keyword: sweet potato

Spring is a time of renewal, and what better way to celebrate the season than with a vibrant Spring Root Vegetable Salad? This delightful dish combines the earthy flavors of golden beets, carrots, and radishes, all tossed in a tangy dressing that elevates the natural sweetness of the vegetables. Whether you’re preparing a light lunch, a side dish for dinner, or a potluck delight, this salad is not just visually appealing but also packed with nutrients and flavor. Let’s dive into the details of this refreshing recipe!

Why You’ll Love This Recipe

This Spring Root Vegetable Salad is a fantastic choice for various reasons:

  • Quick to Prepare: With simple ingredients and straightforward steps, you can whip this salad up in no time, making it perfect for busy weeknights.
  • Nutritious and Wholesome: Packed with vitamins and minerals, this salad offers a healthy dose of nutrients thanks to the vibrant root veggies.
  • Seasonal Appeal: Utilizing fresh, seasonal produce makes this dish not only delicious but also sustainable and eco-friendly.
  • Versatile Pairings: This salad pairs wonderfully with a variety of proteins, from grilled chicken to roasted chickpeas, making it a versatile addition to any meal.
  • Flavorful Dressing: The tangy pistachio vinaigrette adds a unique twist that enhances the flavors of the vegetables.

Ingredients Breakdown

Here’s what you’ll need to make your Spring Root Vegetable Salad:

  • 2 Tablespoons apple cider vinegar: Adds a tangy kick that brightens the flavors.
  • 2 1/2 Tablespoons Extra Virgin Olive Oil: A high-quality oil enhances the dressing’s richness.
  • 3 teaspoons Dijon mustard: Provides depth and a hint of spiciness.
  • 1 tsp honey: Balances the acidity with a touch of sweetness.
  • 1/2 teaspoon sea salt: Essential for bringing out the flavors.
  • 1/2 teaspoon pepper: A dash adds warmth; adjust to your taste.
  • 1 clove garlic, minced: Infuses the dressing with aromatic flavor.
  • 4 golden beets, peeled and shaved: The star of the salad, offering sweetness and vibrant color.
  • 4 medium carrots, peeled and shaved: Adds crunch and natural sweetness.
  • 1 small bunch (5-6) radishes, trimmed and clean, shaved: Provides a spicy kick and beautiful contrast.
  • 2 Tablespoons fresh leaf cilantro: A fresh herb that brightens the dish.

Ingredient Substitutions

If you can’t find certain ingredients or want to modify the recipe, here are some great substitutions:

  • Vinegar Options: Replace apple cider vinegar with red wine vinegar or lemon juice for a different tang.
  • Oil Swap: Use avocado oil or walnut oil for a unique flavor profile.
  • Mustard Choices: Whole grain mustard or honey mustard can be used for different textures and flavors.
  • Sweetener Alternatives: Maple syrup or agave nectar can replace honey for a vegan option.
  • Herb Variations: If you’re not a fan of cilantro, parsley or mint can offer a fresh taste.

Step-by-Step Instructions

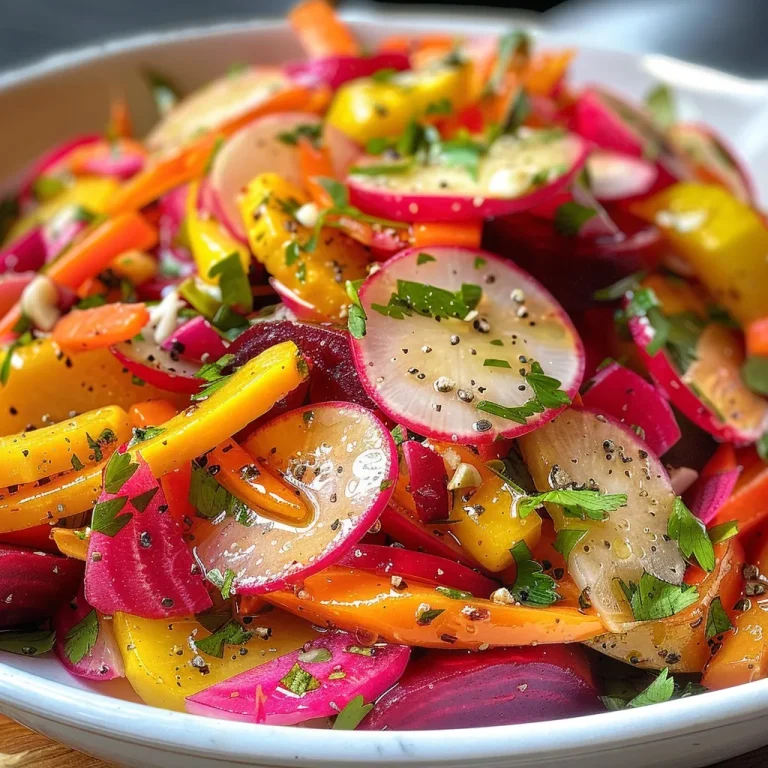
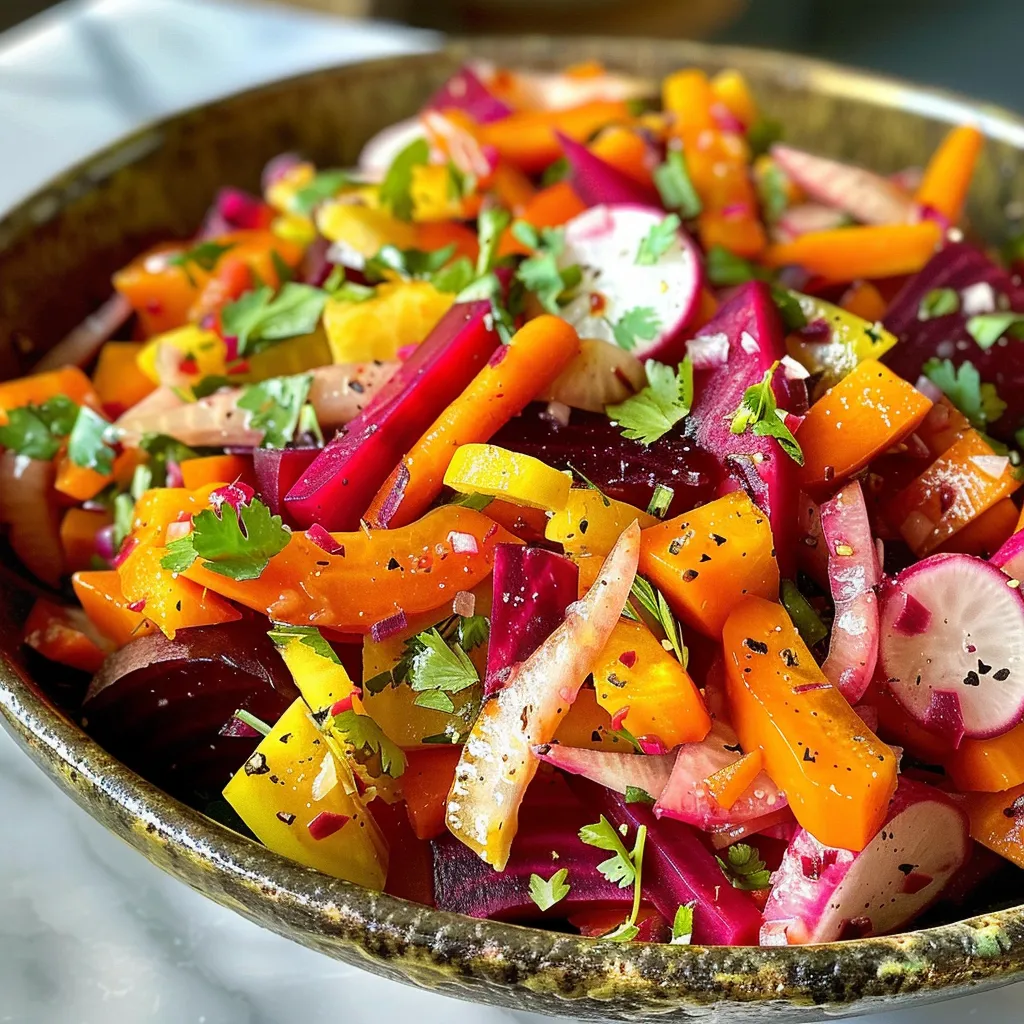
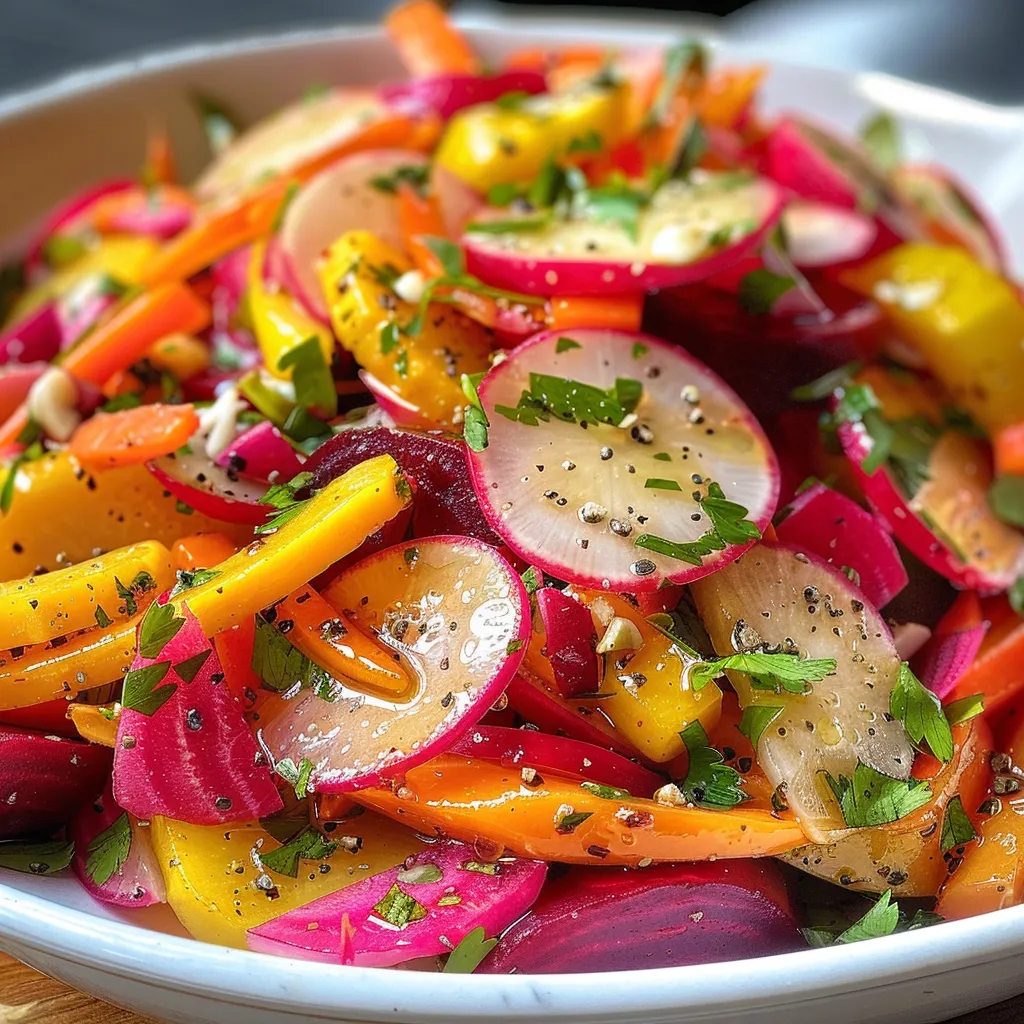
Side perspective of a colorful salad made with shaved golden beets, carrots, and radishes, dressed with apple cider vinaigrette.

Follow these simple steps to create your Spring Root Vegetable Salad:

  • For the Salad: Slice veggies using a mandolin or a slicing disc in a food processor. Arrange them artfully in a bowl.
  • Top with Dressing: Drizzle the prepared pistachio vinaigrette over the vegetables. Sprinkle with fresh cilantro.
  • Adjust Seasoning: Taste and add more salt and pepper as needed.
  • Rest Before Serving: Allow the salad to sit for a few minutes to let the flavors meld.

Pro Tips for the Best Results

To ensure your Spring Root Vegetable Salad is a hit, keep these tips in mind:

  • Uniform Slicing: Slice your vegetables evenly for consistent texture and cooking.
  • Fresh Ingredients: Use the freshest root vegetables you can find for optimal flavor.
  • Make Ahead: Prepare the salad a few hours in advance; it tastes even better as the flavors develop.
  • Layering Elements: When preparing for a gathering, layer the vegetables and dressing separately until serving time.
  • Pistachio Vinaigrette Prep: You can make the vinaigrette up to a week in advance and store it in the fridge.
  • Presentation Matters: Arrange your salad in a beautiful serving bowl to impress your guests.
  • Experiment with Textures: Add nuts or seeds for crunch, or toss in some grains for heartiness.
  • Use Seasonal Produce: Feel free to incorporate other seasonal vegetables like zucchini or asparagus.

Common Mistakes and Troubleshooting

Even the best cooks can make mistakes. Here’s how to avoid common pitfalls:

  • Overdressing: Too much dressing can make the salad soggy. Start with less and add more as needed.
  • Skipping Rest Time: Letting the salad sit for a bit allows flavors to meld; don’t skip this step!
  • Ignoring Texture: Ensure all vegetables are sliced uniformly to enhance the eating experience.
  • Rushing the Process: Take your time with each step for better results.

Variations to Explore

Feel free to get creative with your salad! Here are a few variations to try:

  • Root Veggie Medley: Add sweet potatoes or parsnips for a different flavor profile.
  • Nutty Addition: Toss in some toasted walnuts or pecans for an extra crunch.
  • Cheesy Twist: Crumble feta or goat cheese on top for a creamy contrast.
  • Fruit Fusion: Add slices of apple or pear for a sweet twist.

Storage and Make-Ahead Instructions

This salad can be made ahead of time. Here’s how to store it properly:

  • Refrigerate Leftovers: Store any leftover salad in an airtight container for up to 2 days.
  • Dressing Storage: Keep the vinaigrette separate in the fridge; it lasts up to a week.
  • Vegetable Prep: You can shave and prepare the vegetables a day in advance; just store them in water to keep them crisp.

Frequently Asked Questions

Here are some common questions about our Spring Root Vegetable Salad:

  • Can I make this salad ahead of time? Yes! Prepare it a few hours before serving for the best flavor.
  • What are the best root vegetables for this salad? Golden beets, carrots, and radishes are great, but feel free to experiment with others!
  • How do I keep the vegetables fresh? Store them in water in the fridge until you’re ready to prepare the salad.
  • Can I use different herbs? Absolutely! Parsley or mint can be a delightful substitute for cilantro.
  • Does this salad work for meal prep? Yes! Just keep the dressing separate until serving.
  • What’s the best way to serve this salad? Serve chilled or at room temperature for optimal flavor.
  • Are there any nutritional tips? Feel free to add protein like chickpeas or grilled chicken for a complete meal.
  • Can I add fruit to this salad? Yes, fruits like apples or pears can enhance the sweetness and add texture.

Nutrition Tips and Dietary Adaptations

This Spring Root Vegetable Salad is naturally vegan and gluten-free. Here are some ways to adapt it:

  • Paleo-Friendly: Stick to root vegetables and omit any grains or legumes.
  • Keto-Friendly: Focus on low-carb vegetables and skip the dressing sweetener.
  • Add Protein: Incorporate grilled chicken, tofu, or chickpeas for added protein.
  • Low Sodium Option: Reduce or omit the salt in the dressing to make it lower in sodium.

Equipment Recommendations

To make your salad preparation easier, here are some handy tools:

  • Mandolin Slicer: For perfectly thin slices of vegetables.
  • Mixing Bowl: A large bowl for tossing ingredients together.
  • Whisk: Essential for combining your dressing ingredients smoothly.
  • Food Processor: Helpful for quickly shaving vegetables.

Serving Suggestions

This salad shines as a side dish or a light meal. Here are some ideas on how to serve it:

  • With Grilled Proteins: Serve alongside grilled chicken, salmon, or tofu.
  • As a Light Lunch: Pair with a slice of whole grain bread or a wrap for a complete meal.
  • At Gatherings: Perfect for potlucks or barbecues, allowing guests to enjoy a fresh, healthy option.
  • On a Platter: Arrange the salad beautifully on a platter for a stunning center piece at your table.

In conclusion, this Spring Root Vegetable Salad is not just a feast for the eyes; it’s a celebration of flavors and health. With simple ingredients and a bit of creativity, you can create a dish that everyone will love. So, gather your root vegetables, channel your inner chef, and let’s make cooking enjoyable again!

Spring Root Vegetable Salad

Prep Time 15 minutes
Total Time 15 minutes
Servings 4 servings
Calories 150
A fresh and vibrant salad featuring shaved root vegetables, perfect for springtime gatherings.

Ingredients

Dressing

  • 2 Tablespoons apple cider vinegar
  • 2.5 Tablespoons Extra Virgin Olive Oil
  • 3 teaspoons Dijon mustard
  • 1 tsp honey
  • 0.5 teaspoon sea salt
  • 0.5 teaspoon pepper to taste (about 1/4 tsp)
  • 1 clove garlic, minced
  • 4 golden beets peeled and shaved
  • 4 medium carrots, peeled, shaved
  • 1 small bunch (5-6) radishes, trimmed and shaved
  • 2 Tablespoons fresh leaf cilantro

Instructions 

  • Slice vegetables with a mandolin or food processor.
  • Whisk dressing ingredients until well combined.
  • Pour dressing over vegetables, toss gently, then top with cilantro.
  • Season with additional salt and pepper if needed. Rest before serving.

Notes

Use a mandolin for even slices and quick prep.
Calories: 150kcal
Cost: $12
Course: Salad
Cuisine: American
Keyword: Vegetables

Warm, inviting, and oh so comforting, these gluten-free chai muffins are the perfect treat to kickstart your morning or enjoy as a delightful snack. Infused with the aromatic spices of chai, these muffins not only satisfy your taste buds but also fill your kitchen with a cozy aroma that feels like a warm hug. And the best part? They’re easy to make, even for the busiest of home cooks!

Why You’ll Love This Recipe

  • Quick and Easy: With simple ingredients and straightforward steps, you can whip these up in no time, making them ideal for busy mornings.
  • Flavorful Spice Blend: The combination of cinnamon, ginger, and nutmeg creates a warm chai flavor that is comforting and satisfying.
  • Gluten-Free Goodness: Made with gluten-free flours, these muffins are perfect for anyone with dietary restrictions without sacrificing taste.
  • Customizable: Add your favorite mix-ins like dried fruits, nuts, or chocolate chips to personalize each batch.
  • Healthier Choice: Using coconut sugar and flax meal not only enhances the flavor but also adds nutritional benefits.

Ingredient Breakdown

Let’s take a closer look at what goes into these delicious muffins:

  • 1 cup gluten-free flour mix: This is your base. Look for a blend that includes xanthan gum for better texture.
  • 1/2 cup tapioca flour: Adds chewiness and moisture, making the muffins light yet satisfying.
  • 1/2 cup flaxseed meal: A great source of omega-3 fatty acids and fiber. You can substitute with ground chia seeds if you prefer.
  • 1 teaspoon baking powder: Helps the muffins rise.
  • 1 teaspoon baking soda: Works in conjunction with acidic ingredients to create a light texture.
  • 1/2 teaspoon pink Himalayan salt: Enhances the flavor of the spices.
  • 2 teaspoons cinnamon: The star spice that gives chai its signature flavor.
  • 1/2 teaspoon ginger: Adds warmth and a slight zing.
  • 1/2 teaspoon nutmeg: Complements the other spices beautifully.
  • 2 eggs: For binding and moisture. You can substitute with a flax egg (2 Tbsp flax meal mixed with 6 Tbsp hot water).
  • 1 cup almond milk: Use any milk of choice, such as cashew or coconut milk.
  • 1 tablespoon melted coconut oil: Adds healthy fats and moisture. You may substitute with melted butter or a vegan alternative.
  • 1 teaspoon vanilla: Enhances the flavors.
  • 3/4 cup coconut sugar: A healthier sweetener that adds a subtle caramel flavor.

Step-by-Step Instructions

Ready to make these chai muffins? Let’s get started!

  1. Preheat your oven to 350°F (175°C). Line a muffin pan with liners and spray the insides with cooking spray to prevent sticking.
  2. In a large bowl, combine the gluten-free flour, tapioca flour, flax meal, baking powder, baking soda, salt, cinnamon, ginger, and nutmeg. Mix until well combined and create a well in the center.
  3. In a separate bowl, whisk together the eggs (or flax egg), almond milk, melted coconut oil, vanilla, and coconut sugar until smooth.
  4. Pour the wet mixture into the dry ingredients and mix gently. Be careful not to over-mix; a few lumps are okay!
  5. Scoop the batter evenly into the prepared muffin cups, filling each about 2/3 full.
  6. Bake for 18-20 minutes or until a toothpick inserted into the center comes out clean. Allow the muffins to cool in the pan for a few minutes before transferring them to a cooling rack.

Pro Tips for Perfect Muffins

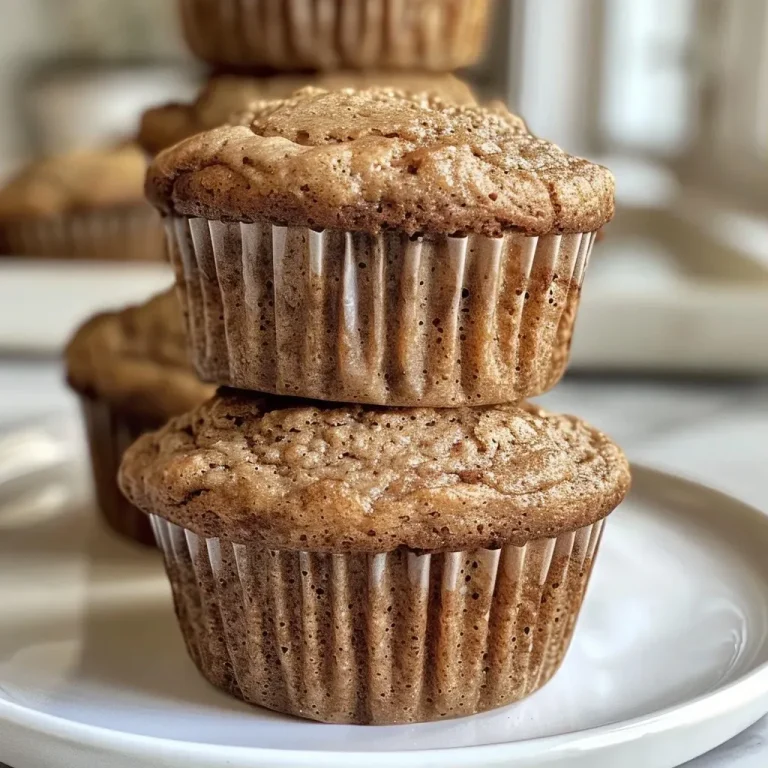
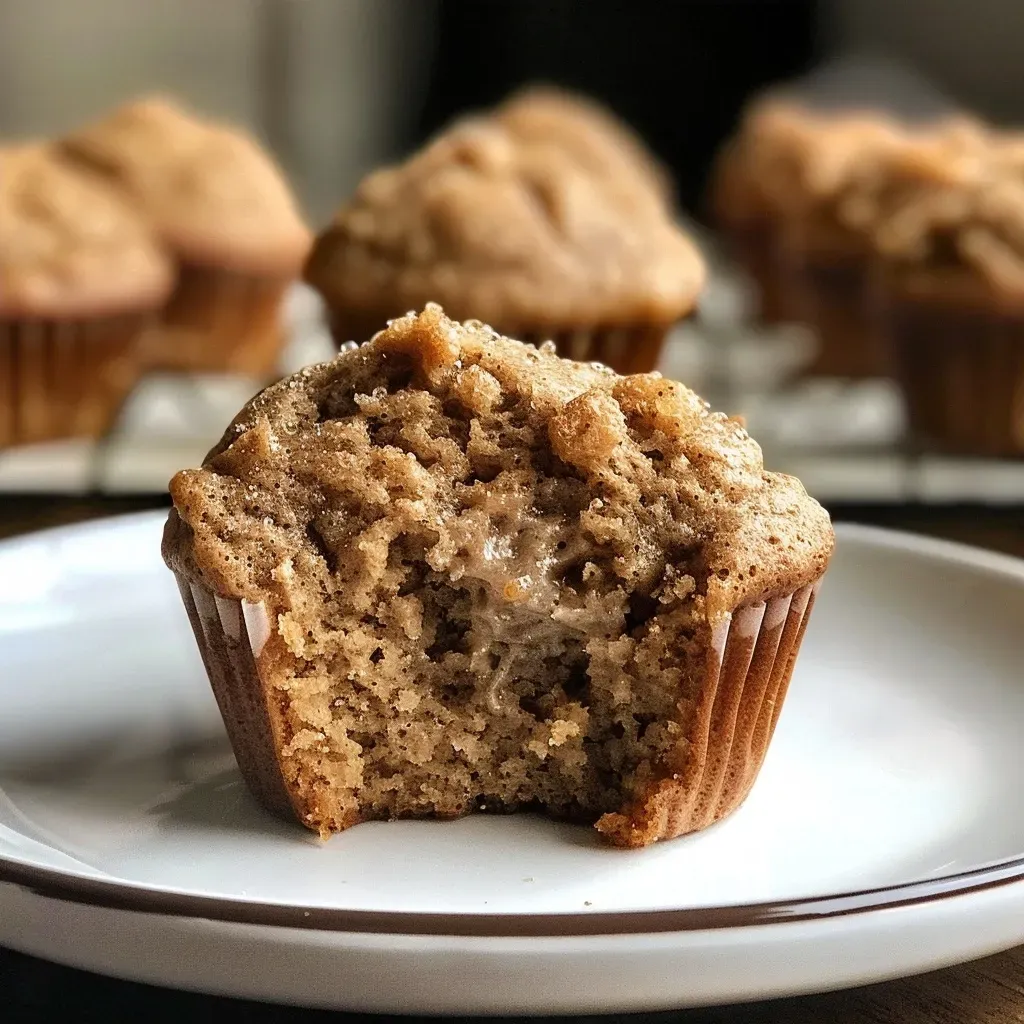
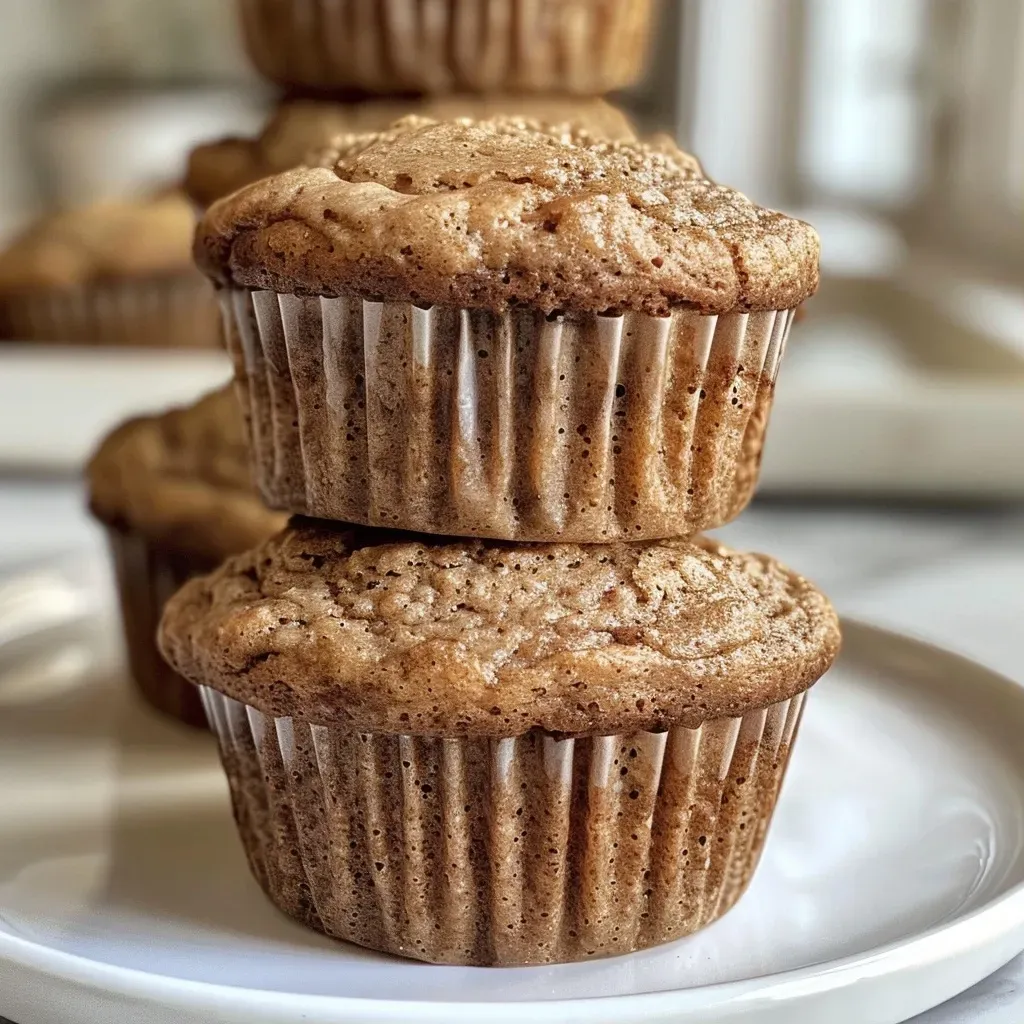
Delicious gluten-free chai muffins displayed from the side, highlighting their golden brown tops.
  • Don’t Over-Mix: Stir just until combined. Over-mixing can lead to dense muffins.
  • Check Your Flour: Make sure your gluten-free flour is fresh and hasn’t been sitting open for too long.
  • Experiment with Spices: Feel free to adjust the spice levels to your preference. Add more cinnamon or try cardamom for a unique twist!
  • Use Room Temperature Ingredients: This helps the batter come together more smoothly.
  • Cool Completely: Letting the muffins cool completely on a rack ensures they won’t become soggy.
  • Store Properly: Keep muffins in an airtight container to maintain their freshness.
  • Try Different Sweeteners: Coconut sugar can be swapped for maple syrup or honey, but adjust your liquid ingredients accordingly.
  • Mix-Ins Galore: Dried fruits like cranberries or chopped nuts can add texture and flavor.

Common Mistakes and Troubleshooting

Sometimes, things don’t go as planned. Here’s how to avoid common pitfalls:

  • Muffins are too dense: This could be due to over-mixing or using too much flour. Make sure to measure your flour correctly.
  • Muffins don’t rise: Ensure your baking powder and soda are fresh. Also, make sure you’re not substituting too many ingredients that could affect the chemical reactions.
  • Flavor is lacking: Taste the batter before baking and adjust spices or sweetness as needed!

Variations to Try

Feel free to mix things up with these variations:

  • Chai Chocolate Chip: Fold in mini chocolate chips for a sweet contrast to the spices.
  • Fruit-Filled: Add in chopped apples or pears for a juicy burst in every bite.
  • Nuts about Nuts: Walnuts or pecans can add crunch and flavor.
  • Vegan Version: Substitute eggs with a flax egg and use plant-based milk and oil.

Storage and Make-Ahead Instructions

These muffins are perfect for batch cooking:

  • Room Temperature: Store in an airtight container for up to 3 days.
  • Refrigerator: For longer freshness, keep them in the fridge for up to a week.
  • Freezer Friendly: Freeze muffins in a single layer, then transfer to a freezer bag for up to 3 months. Thaw at room temperature or microwave for a quick snack.

Frequently Asked Questions (FAQ)

  1. Can I make these muffins without eggs? Yes! Use a flax egg instead.
  2. What can I substitute for coconut sugar? Brown sugar or maple syrup can be good alternatives.
  3. Can I use regular flour? This recipe is designed for gluten-free flour, but you can use regular flour if gluten is not a concern.
  4. How can I tell when they’re done? Insert a toothpick in the center; if it comes out clean, they’re ready!
  5. Are these muffins suitable for freezing? Absolutely! They freeze well and make for an easy snack.
  6. What can I add for extra flavor? Try adding vanilla extract, lemon zest, or even a dash of almond extract.
  7. How long do they take to bake? Typically 18-20 minutes, but check with a toothpick.
  8. Can I make mini muffins? Yes! Adjust the baking time down to about 12-15 minutes.

Nutritional Tips and Dietary Adaptations

These muffins can fit into various dietary needs:

  • High Fiber: Flaxseed meal adds fiber, making these muffins a more filling option.
  • Lower Sugar: Reduce the coconut sugar if you prefer a less sweet muffin.
  • Nut-Free Option: Substitute almond milk with oat or rice milk.

Equipment Recommendations

To make these muffins, you’ll need:

  • Mixing Bowls: A set of various sizes for combining wet and dry ingredients.
  • Whisk: For blending ingredients smoothly.
  • Muffin Pan: A non-stick or silicone muffin pan works best for easy release.
  • Measuring Cups and Spoons: Accurate measurements ensure success in baking.

Serving Suggestions

These muffins are delicious on their own, but here are some ideas to elevate your experience:

  • Spread: A dab of almond butter or a smear of cream cheese complements the spices beautifully.
  • Pair with Tea: Enjoy them with a cup of chai or your favorite herbal tea for a cozy afternoon break.
  • Breakfast Boost: Serve them alongside yogurt and fresh fruit for a balanced breakfast.

Enjoy the process of baking these delightful gluten-free chai muffins! With each bite, you’ll experience the warmth of chai spices and the joy of homemade goodness. So, roll up your sleeves, gather your ingredients, and let’s make baking fun!

Gluten-Free Chai Muffins

Prep Time 10 minutes
Cook Time 20 minutes
Total Time 30 minutes
Servings 12 muffins
Calories 180
Enjoy these warm, aromatic gluten-free chai muffins perfect for a quick breakfast or snack.

Ingredients

Dry Ingredients

  • 1 cup gluten-free flour mix
  • 1/2 cup tapioca flour
  • 1/2 cup flaxseed meal
  • 1 teaspoon baking powder
  • 1 teaspoon baking soda
  • 1/2 teaspoon pink Himalayan salt
  • 2 teaspoons cinnamon
  • 1/2 teaspoon ginger
  • 1/2 teaspoon nutmeg

Wet Ingredients

  • 2 eggs (or flegg) (Mix 2 Tbsp flax meal with 6 Tbsp hot water for flegg)
  • 1 cup almond milk (or cashew milk)
  • 1 tablespoon coconut oil (melted)
  • 1 teaspoon vanilla
  • 3/4 cup coconut sugar

Instructions 

  • Preheat oven to 350°F. Line muffin tin and spray with cooking spray.
  • Mix dry ingredients in a bowl. In another bowl, whisk eggs, milk, melted coconut oil, vanilla, and coconut sugar.
  • Combine wet and dry mixtures gently, avoiding over-mixing.
  • Scoop batter into muffin cups and bake for 18-20 minutes. Cool before serving.

Notes

Use fresh spices for the best flavor. Store muffins in an airtight container.
Calories: 180kcal
Cost: $15
Course: Breakfast
Cuisine: Fusion
Keyword: chai, Gluten-Free, muffins

Crafting the Ultimate Halloween Chocolate Bark: A Festive Delight

Halloween is a time for ghoulish fun, spooky decorations, and, of course, delicious treats! One of the easiest yet most delightful recipes to whip up during this season is **Halloween Chocolate Bark**. This simple treat not only looks festive but also allows for endless creativity with toppings. In this guide, I’ll walk you through everything you need to know to create a chocolate bark that will impress your guests and keep them coming back for more. Let’s dive in!

Why You’ll Love This Halloween Chocolate Bark

This Halloween chocolate bark is a crowd-pleaser for several reasons:

  • Quick and Easy: With just a few ingredients and minimal prep time, this treat comes together in a snap.
  • Customizable: You can mix and match toppings like candy corn, Oreos, and candy eyes, making it suitable for all tastes.
  • Fun with Kids: This recipe is perfect for involving little ones in the kitchen, allowing them to help with decoration.
  • Perfect for Parties: Whether it’s for a Halloween gathering or a school event, this chocolate bark makes for a great snack that everyone will enjoy.
  • Great for Gifting: Packaged in treat bags, this bark makes a sweet gift for friends, family, or neighbors.

Ingredients You’ll Need to Make Halloween Chocolate Bark

Here’s what you’ll need to get started with your Halloween Chocolate Bark:

  • 2 cups dark chocolate chips (12 oz bag): This is the main body of your bark.
  • 1/3 cup white chocolate chips: For a beautiful contrast and decoration.
  • 1/4 cup candy corn: Adds a pop of color and a sweet crunch.
  • 3 Oreo cookies: Use these for a classic cookie flavor.
  • 10 mini Oreo cookies: Perfect for placing candy eyes on top.
  • Black icing: To add spooky designs and stick candy eyes.
  • Candy eyes: These will give your bark a fun, scary look!

Step-by-Step Instructions for Your Halloween Bark

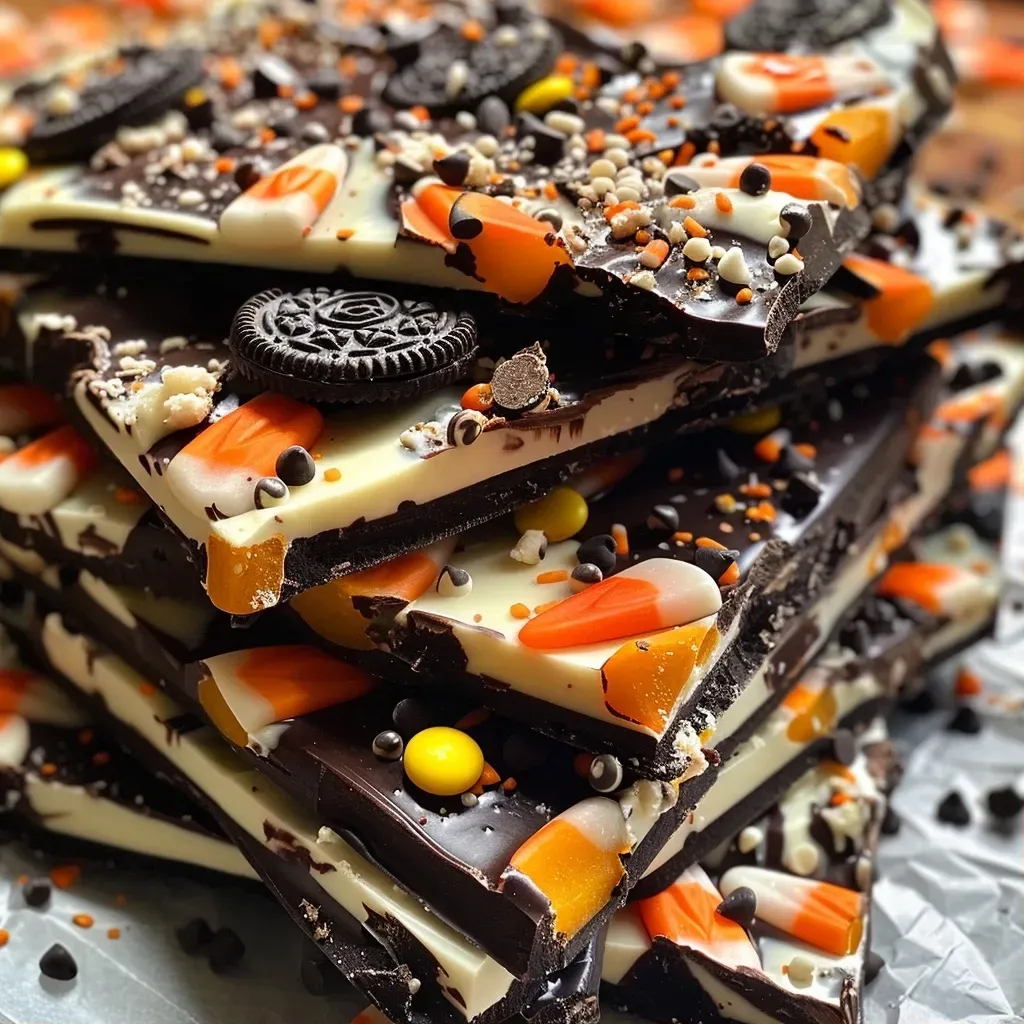
Side view of chocolate bark featuring dark and white chocolate, candies, and decorative icing.

Creating your Halloween Chocolate Bark is a straightforward process:

  • **Prepare the Baking Sheet**: Line a baking sheet with parchment paper or a silicone mat, ensuring some overhang for easy lifting later. Set aside.
  • **Melt the Dark Chocolate**: Add the dark chocolate chips to a microwave-safe bowl. Microwave for 1 minute, stir, microwave for another 30 seconds, and repeat until smooth.
  • **Spread the Chocolate**: Once melted, spread the dark chocolate evenly over the prepared baking sheet using a spatula.
  • **Melt the White Chocolate**: In a separate bowl, melt the white chocolate chips using the same microwave method until smooth.
  • **Create Swirls**: Drizzle the white chocolate diagonally across the dark chocolate. Use a toothpick to create swirls without fully mixing the two chocolates.
  • **Add Toppings**: Evenly distribute the candy corn over the chocolate. Split the Oreos in half, attaching candy eyes with black icing, and gently press them into the chocolate.
  • **Chill**: Place the baking sheet in the refrigerator for about 1 hour to allow the chocolate to harden.
  • **Break and Serve**: Once set, break the chocolate bark into pieces and serve immediately or store until ready to enjoy!

Pro Tips for Halloween Chocolate Bark Success

Here are some expert insights to ensure your chocolate bark turns out perfect:

  • Use Quality Chocolate: For the best flavor, opt for high-quality chocolate chips.
  • Microwave in Intervals: Always melt chocolate in short bursts to avoid burning.
  • Keep It Cool: Ensure your kitchen isn’t too warm, as chocolate can melt too quickly.
  • Experiment with Toppings: Feel free to swap out candy corn for other favorites like pretzels or nuts!
  • Don’t Overmix: When swirling the white chocolate, be gentle to maintain a beautiful marbled effect.
  • Store Properly: Keep your chocolate bark in an airtight container to maintain freshness.
  • Make It Seasonal: Change toppings according to the holiday – think red and green for Christmas!
  • Involve the Family: Let kids help with decorating; it makes for a fun family activity.

Common Mistakes and Troubleshooting

If things don’t go as planned, here’s how to fix common issues:

  • Chocolate Seizing: If your chocolate seizes and becomes grainy, you can add a teaspoon of vegetable oil to smooth it out.
  • Too Thick: If the chocolate layer is too thick, it can be hard to break. Try spreading it thinner next time.
  • Stuck to the Paper: If it sticks, gently warm the bottom of the baking sheet with a hairdryer or warm water to release the bark.

Variations to Try

Mix things up with these fun variations:

  • Spooky Spider Bark: Add gummy spiders and black sprinkles for a spooky effect.
  • Nutty Bark: Incorporate chopped nuts like peanuts or almonds for added crunch.
  • Fruit and Nut Bark: Use dried fruits like cranberries or cherries to add a chewy texture.
  • Mint Chocolate Bark: Swap the dark chocolate for mint chocolate chips for a refreshing twist.

Storage and Make-Ahead Instructions

This chocolate bark can be made ahead of time and stored:

  • Storage: Keep in an airtight container at room temperature for up to 1 week or in the fridge for up to 2 weeks.
  • Make Ahead: This treat is perfect for prepping a few days in advance of your Halloween festivities.

Frequently Asked Questions

Here are some common questions about Halloween Chocolate Bark:

  • Can I use milk chocolate instead of dark chocolate? Yes, feel free to use any chocolate you prefer!
  • How do I keep it from melting? Store it in a cool, dry place away from direct sunlight.
  • Can I use white chocolate as the base? Absolutely! Just keep in mind that white chocolate can be sweet.
  • What if I don’t have parchment paper? You can use a silicone baking mat instead.
  • Can I freeze the chocolate bark? It’s best enjoyed fresh, but you can freeze it if needed.
  • How do I add a drizzle for decoration? Use a piping bag or a ziplock with the corner cut off to create pretty designs.
  • Can I use different candies for toppings? Yes, the sky’s the limit! Get creative with your favorite candies.
  • Is this recipe gluten-free? If using gluten-free Oreos, yes, this bark can be gluten-free!

Nutritional Tips and Dietary Adaptations

Consider these tips for a healthier chocolate bark:

  • Dark Chocolate Benefits: Dark chocolate is rich in antioxidants and may offer health benefits when consumed in moderation.
  • Substituting Ingredients: Use sugar-free chocolate chips or natural sweeteners for a healthier option.
  • Dietary Needs: This recipe can be adapted for nut-free, vegan, or gluten-free diets based on the ingredients you choose.

Equipment Recommendations

Here’s what you’ll need to make this recipe:

  • Microwave-Safe Bowls: For melting the chocolate.
  • Spatula: To spread the melted chocolate evenly.
  • Baking Sheet: A standard baking sheet lined with parchment paper or a silicone mat.
  • Toothpick: For swirling the chocolates together.

Serving Suggestions

Here are some fun ways to serve your Halloween Chocolate Bark:

  • On a Platter: Arrange in playful shapes for a festive display.
  • In Treat Bags: Package in clear bags tied with a ribbon for gifts.
  • As Party Favors: Great for handing out at school parties or Halloween gatherings.

Creating your own Halloween Chocolate Bark is not only easy but also a fun way to celebrate the season. With this comprehensive guide, you’ll be able to craft a delicious treat that’s bound to impress. So gather your ingredients, invite some friends or family to join in, and let the Halloween spirit inspire your kitchen creations. Happy cooking!

Halloween Chocolate Bark

Prep Time 15 minutes
Cook Time 15 minutes
Total Time 30 minutes
Servings 8 pieces
Calories 250
A festive and easy-to-make chocolate treat perfect for Halloween celebrations, decorated with candy corn, Oreos, and spooky eyes.

Ingredients

Chocolate

  • 12 oz dark chocolate chips
  • 1/3 cup white chocolate chips

Add-ins

  • 1/4 cup candy corn
  • 3 pieces Oreo cookies (split in half)

Decorations

  • Black icing
  • Candy eyes

Instructions 

  • Line a baking sheet with parchment or silicone mat. Melt dark chocolate, then spread evenly.
  • Melt white chocolate separately, then drizzle diagonally over dark chocolate and create swirls with a toothpick.
  • Place candy corn evenly over the chocolate. Attach candy eyes to Oreo halves with black icing and press into the bark.
  • Refrigerate for 1 hour until set, then break into pieces and serve.

Notes

Use a spatula to spread the chocolate smoothly and work quickly when decorating.
Calories: 250kcal
Cost: $15
Course: Dessert
Cuisine: American
Keyword: bark, chocolate, Halloween

Welcome to your new favorite snack! This Blueberry Maple Walnut Trail Mix combines the wholesome goodness of oats, the natural sweetness of dried blueberries, and the satisfying crunch of walnuts, making it an ideal choice for anyone looking to boost their energy levels. Perfect for hikes, workouts, or simply as a delicious pick-me-up, this trail mix is not only easy to make but also packed with nutrients. Let’s dive into why you’ll absolutely love this recipe!

Why You’ll Love This Recipe

  • Simple Ingredients: This trail mix requires just a handful of ingredients that you probably already have in your pantry.
  • Health Benefits: Each ingredient brings its own set of nutrients, providing a healthy snack that keeps you energized throughout the day.
  • Customizable: Feel free to swap in your favorite nuts or dried fruits for a personalized touch.
  • Perfect for Meal Prep: Make a big batch and store it for quick snacks all week long.
  • Kid-Friendly: A great option for kids’ snacks or school lunches, this trail mix is tasty and nutritious!

Ingredients Breakdown

Here’s what you’ll need to whip up this delicious trail mix:

  • 1 cup dried blueberries: Packed with antioxidants, these little berries add sweetness and nutrients.
  • 1 cup rolled oats: A great source of fiber that keeps you full longer.
  • 1/2 cup walnuts: Rich in omega-3 fatty acids, walnuts provide healthy fats and crunch.
  • 3 tablespoons pure maple syrup: This natural sweetener complements the flavors beautifully.
  • 1 tablespoon vegetable oil: Helps with browning the oats, making them crispy.
  • 1/4 teaspoon salt: Enhances the flavors of the mix.

Need substitutions? Here are some ideas:

  • **Nut alternatives**: Use almonds or pecans instead of walnuts for different flavor profiles.
  • **Sweetener swap**: Honey or agave syrup can be used instead of maple syrup.
  • **Oat options**: Gluten-free oats are an excellent choice for those with gluten sensitivities.

How to Make Your Trail Mix

Follow these simple steps to create your own Blueberry Maple Walnut Trail Mix:

  1. Preheat your oven: Set it to 250 degrees Fahrenheit.
  2. Prepare the blueberries: Spread the dried blueberries on a baking sheet and bake for at least 2 hours. They will shrivel and become mostly dry; don’t worry, they will continue to dry during the cooling process.
  3. Mix the oats: In a separate bowl, combine the oats, walnuts, pure maple syrup, vegetable oil, and salt. Mix until everything is well coated.
  4. Bake the oat mixture: About an hour into the blueberry baking time, spread the oat mixture on the same baking sheet and continue to bake for another hour.
  5. Combine and enjoy: Once everything is done, mix the dried blueberries and oat mixture in a bowl, and your trail mix is ready to go!

Pro Tips for Success

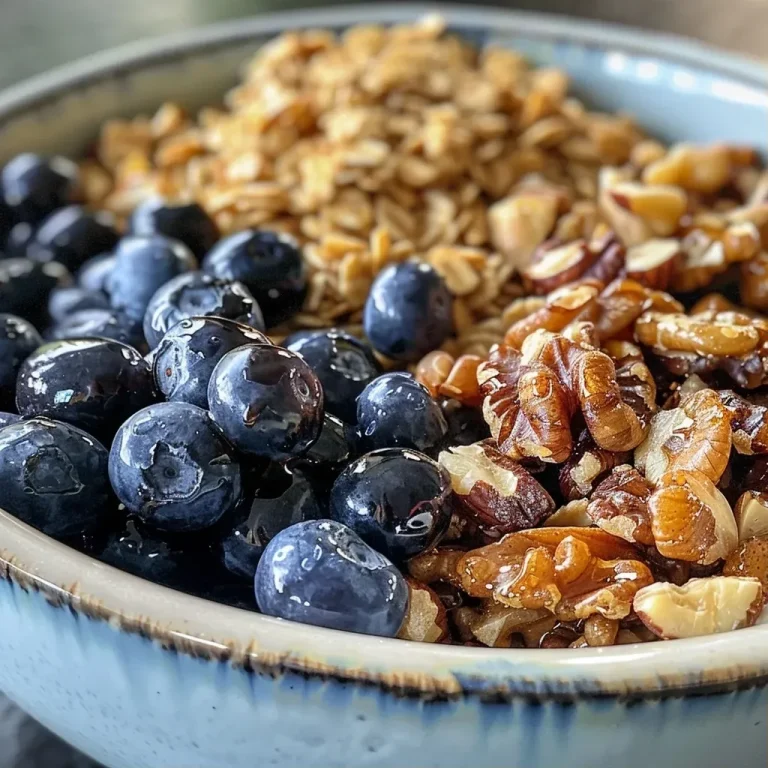
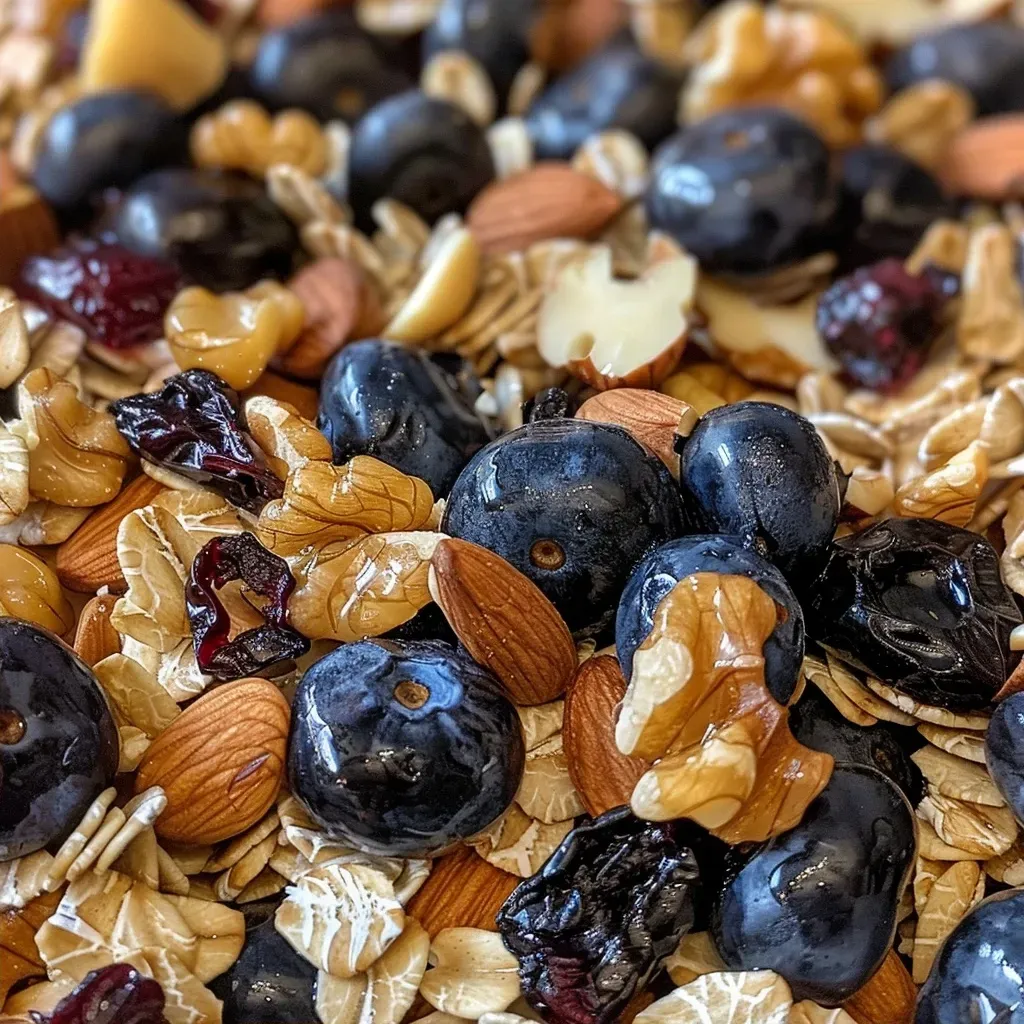
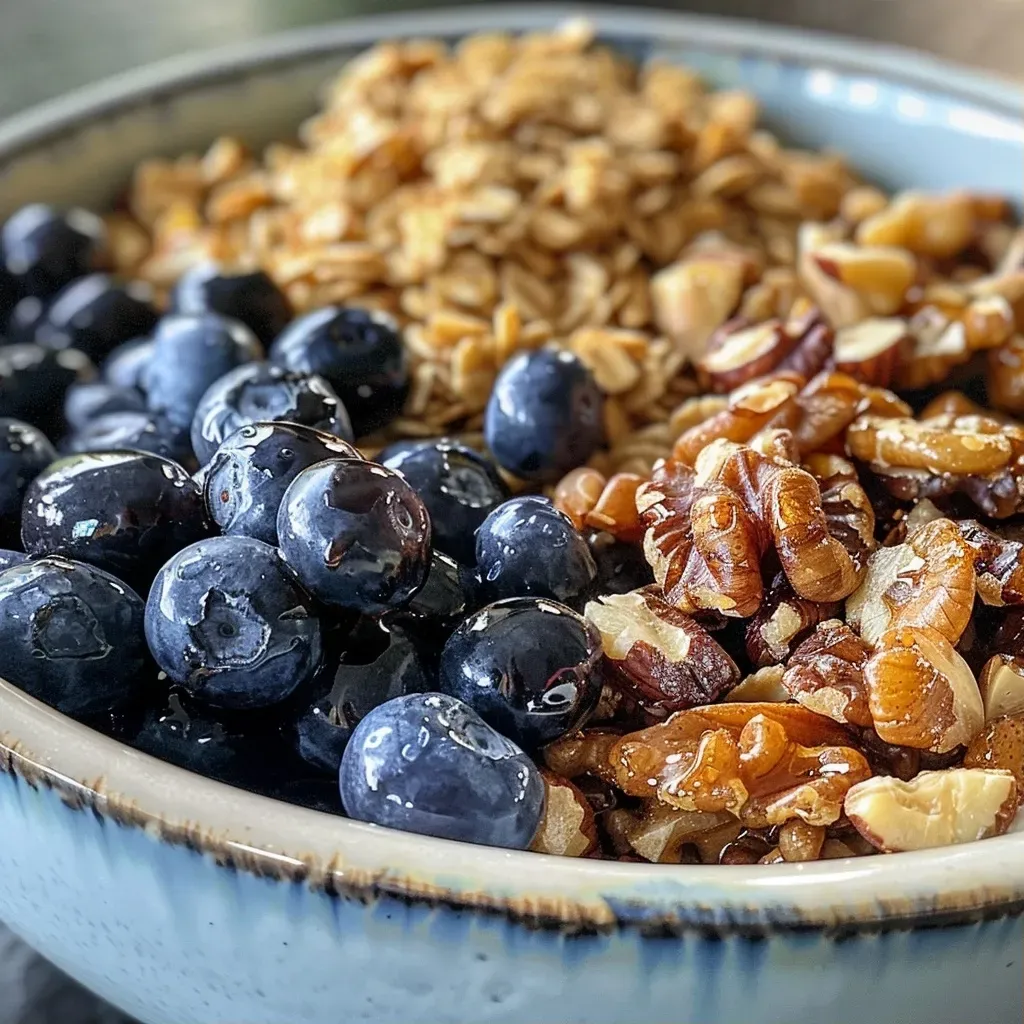
Side view of a colorful mix featuring blueberries, walnuts, and oats.
  • Monitor the oven: Keep an eye on your blueberries and oats to prevent burning; every oven is different.
  • Mix it up: Feel free to add coconut flakes or seeds for extra flavor and nutrition.
  • Cool completely: Let the trail mix cool before storing it to keep it crispy.
  • Store properly: Keep your trail mix in an airtight container to maintain freshness.
  • Experiment with flavors: Add spices like cinnamon or nutmeg for a unique twist.
  • Batch it up: Double the recipe to ensure you have enough for the week!
  • Make it a gift: Package it nicely to create a homemade gift for friends and family.
  • Check your pantry: Use whatever nuts and dried fruits you have on hand.

Common Mistakes and Troubleshooting

Even the best cooks can encounter hiccups. Here are some common issues and how to fix them:

  • Too sweet: If your trail mix ends up too sweet, add more oats or nuts to balance the flavor.
  • Burnt oats: Ensure you’re using a low enough temperature and keep an eye on the color.
  • Moisture in storage: Make sure the mix is completely cooled before sealing it in a container.

Variations to Try

Feeling adventurous? Here are some tasty variations to customize your trail mix:

  • Chocolate-Covered: Add dark chocolate chips for a decadent treat.
  • Tropical Twist: Incorporate dried mango or pineapple for a fruity flavor.
  • Nutty Boost: Add almonds, pecans, or pistachios for more texture and flavor.
  • Spicy Kick: Sprinkle in some cayenne pepper or chili powder for a spicy version.

Storage and Make-Ahead Instructions

This trail mix is perfect for meal prep. Here’s how to store it and plan ahead:

  • Storage duration: Keep it in an airtight container for up to two weeks at room temperature.
  • Freezing: You can freeze the mix for up to three months; just make sure to thaw before enjoying.
  • Make-ahead tips: Prepare a batch on the weekend so you have snacks ready for busy weekdays!

Frequently Asked Questions

Here are some common questions you might have about this Blueberry Maple Walnut Trail Mix:

  • Can I use fresh blueberries? Fresh blueberries will not work well; they need to be dried to achieve the right texture.
  • How can I make this trail mix gluten-free? Simply use certified gluten-free oats and ensure all other ingredients are gluten-free.
  • What’s the nutritional information? This trail mix is loaded with fiber, healthy fats, and antioxidants, making it a nutritious snack option.
  • Can I add protein powder? Yes, you can mix in a scoop of your favorite protein powder along with the dry ingredients.
  • Are there any nut-free options? Absolutely! Substitute seeds like pumpkin or sunflower seeds for nuts.
  • How do I make it vegan? This recipe is already vegan if you use agave syrup instead of honey.
  • Is it suitable for kids? Yes! It’s a healthy and tasty snack that kids will love.
  • How do I serve it? Enjoy it on its own, or mix it into yogurt or oatmeal for added texture and flavor.

Nutrition Tips and Dietary Adaptations

Here are some tips to make this trail mix even more nutritious:

  • Boost the fiber: Add chia seeds or flaxseeds for an extra fiber boost.
  • Reduce added sugars: Use less maple syrup or try unsweetened applesauce for sweetness.
  • Choose organic: Whenever possible, opt for organic ingredients to minimize pesticide exposure.

Equipment Recommendations

To make this trail mix, you’ll need:

  • Baking sheet: A standard-sized baking sheet works best for evenly spreading the ingredients.
  • Mixing bowl: A medium-sized bowl for combining the oats and other ingredients.
  • Airtight container: For storing your delicious trail mix and keeping it fresh.

Serving Suggestions

This trail mix is incredibly versatile! Here are some ways you can serve it:

  • On-the-go snack: Perfect for hiking, road trips, or busy workdays.
  • Breakfast topper: Sprinkle over yogurt or oatmeal for a nutritious breakfast.
  • Gift idea: Package it in a mason jar for a thoughtful homemade gift.

There you have it! A simple, delicious, and nutritious Blueberry Maple Walnut Trail Mix that’s sure to become a staple in your kitchen. With its easy preparation and endless variations, you’ll never get bored of this delightful snack. Remember, cooking should be fun and stress-free, so feel free to experiment and make this recipe your own. Happy snacking!

Blueberry Maple Walnut Trail Mix

Prep Time 10 minutes
Cook Time 2 hours 30 minutes
Total Time 2 hours 40 minutes
Servings 4 cups
Calories 350
A delicious and healthy homemade trail mix featuring dried blueberries, oats, and walnuts, sweetened with pure maple syrup.

Ingredients

Dried Blueberries

  • 1 cup blueberries (dried)

Oats

  • 1 cup oats

Walnuts

  • 1/2 cup walnuts

Sweeteners and Oils

  • 3 tablespoons pure maple syrup
  • 1 tablespoon vegetable oil
  • 1/4 teaspoon salt

Instructions 

  • Preheat oven to 250°F (120°C).
  • Bake blueberries on a baking sheet for 2 hours until shriveled and dry.
  • Mix oats, walnuts, maple syrup, oil, and salt in a bowl.
  • After 1 hour of blueberry baking, add oat mixture to the oven and bake for another hour.
  • Combine all ingredients in a bowl and mix well.

Notes

Store in an airtight container for up to a week.
Calories: 350kcal
Cost: $12
Course: Snack
Cuisine: American
Keyword: Blueberries, maple syrup, trail mix

Welcome to a delightful culinary adventure! Today, we’re diving into the comforting world of desserts with a twist—specifically, the Apple Chai Cobbler. This warm and inviting dish combines sweet, tender apples with aromatic chai spices, all nestled under a crispy topping that makes every bite a cozy experience. Perfect for sharing with loved ones or enjoying solo with a scoop of ice cream, this recipe is simple enough for any night of the week. Let’s explore why you’ll love this recipe and how you can make it at home!

Why You’ll Love This Recipe

There are so many reasons to fall in love with this apple chai cobbler. Here are just a few:

  • Quick and Easy: With simple ingredients and straightforward steps, you can whip this up in under an hour.
  • Flavor Explosion: The combination of sweet apples and chai spices creates a unique flavor profile that’s warm and inviting.
  • Versatile Dessert: Serve it warm with ice cream, or enjoy it cold for breakfast the next day—this cobbler is good anytime!
  • Perfect for Fall: This dish captures all the cozy flavors of fall, making it an ideal recipe for the season.
  • Great for Gatherings: Impress your friends and family with this delicious dessert that’s sure to be a hit at any gathering!

Ingredients Needed

Before we dive into the cooking process, let’s take a closer look at the ingredients you’ll need for your Apple Chai Cobbler. Feel free to make substitutions based on your pantry or dietary needs!

  • 5 cups diced McIntosh apples: Approximately 4 medium apples, peeled and cored. You can use any sweet variety you prefer!
  • 2 tablespoons granulated sugar: This adds a touch of sweetness to the filling.
  • 1/4 teaspoon ground cardamom: A warm spice that enhances the chai flavor.
  • 1/4 teaspoon ground allspice: Adds depth and warmth.
  • 1 teaspoon ground cinnamon: A must-have in any cozy dessert.
  • 1/2 teaspoon ground cloves: For an aromatic touch.
  • 1 teaspoon ground ginger: Brings a warming spice to the mix.
  • 1 tablespoon butter: Cut into small pieces to enrich the filling.
  • 1/2 cup light brown sugar: For a deeper sweetness and caramel flavor.
  • 1/2 cup oats: Adds a lovely texture to the topping.
  • 1/2 cup all-purpose flour: Essential for the topping’s structure.
  • 1/2 cup shredded coconut: Optional, but adds a delightful chewiness!
  • 3 tablespoons melted butter: To bring the topping together.

How Do You Make Apple Chai Cobbler?

Now that you have all your ingredients ready, let’s get started on making this delicious cobbler!

Step-by-Step Instructions

  • Preheat your oven: Set it to 375 degrees F (190 degrees C) to get it nice and hot for baking.
  • Prepare the filling: In a large bowl, combine all the filling ingredients—diced apples, granulated sugar, and spices. Mix well until the apples are evenly coated.
  • Transfer to a baking dish: Pour the apple mixture into an oven-safe dish, spreading it out evenly.
  • Make the topping: In another bowl, combine oats, all-purpose flour, light brown sugar, shredded coconut, and melted butter. Mix well until crumbly.
  • Assemble: Sprinkle the topping evenly over the apple mixture, ensuring everything is well covered.
  • Bake: Place the dish in the preheated oven and bake for 35-40 minutes. The apples should be soft, and the topping golden brown. A knife should come out clean when poked into the apples.
  • Cool and serve: Let it cool slightly before serving. Enjoy warm on its own or with a scoop of ice cream!

Pro Tips for a Perfect Apple Chai Cobbler

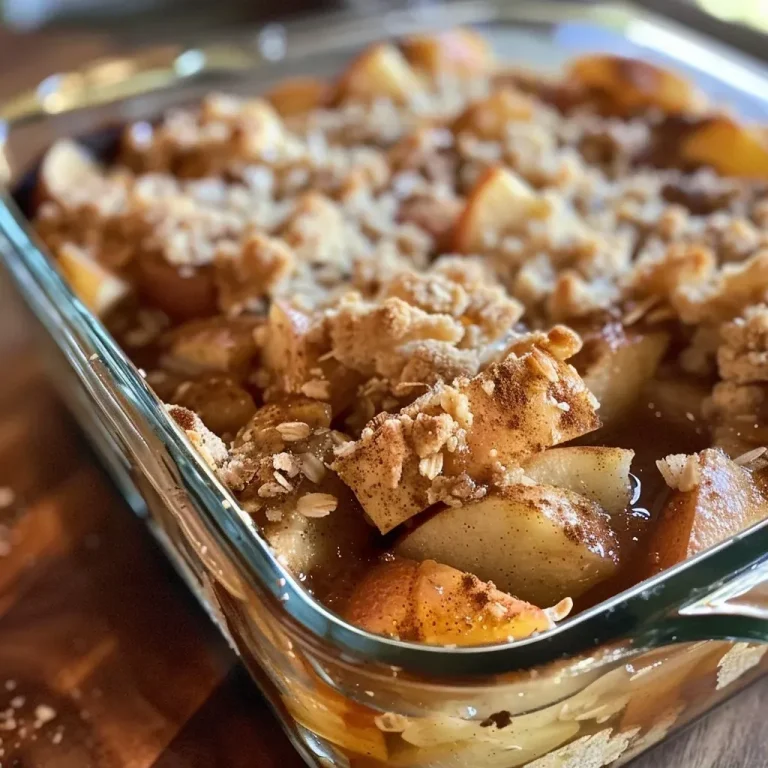
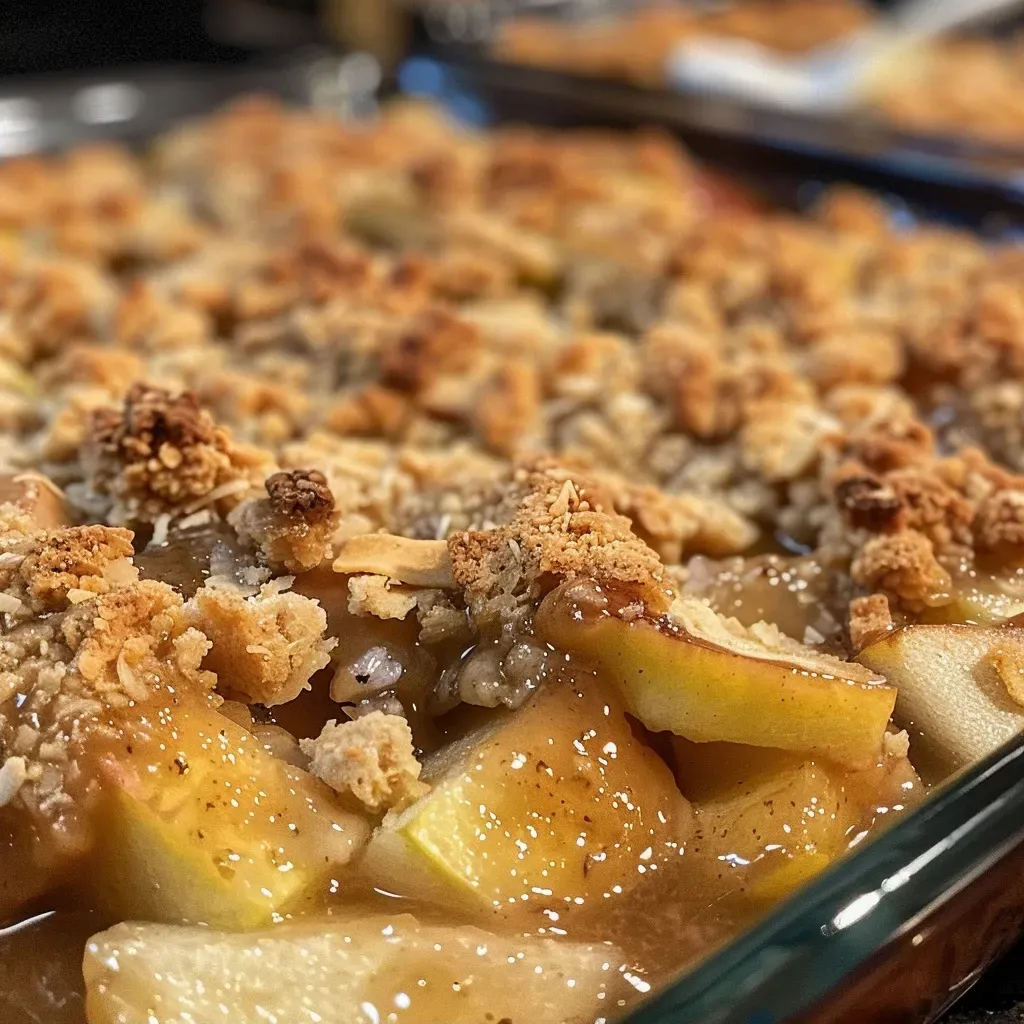
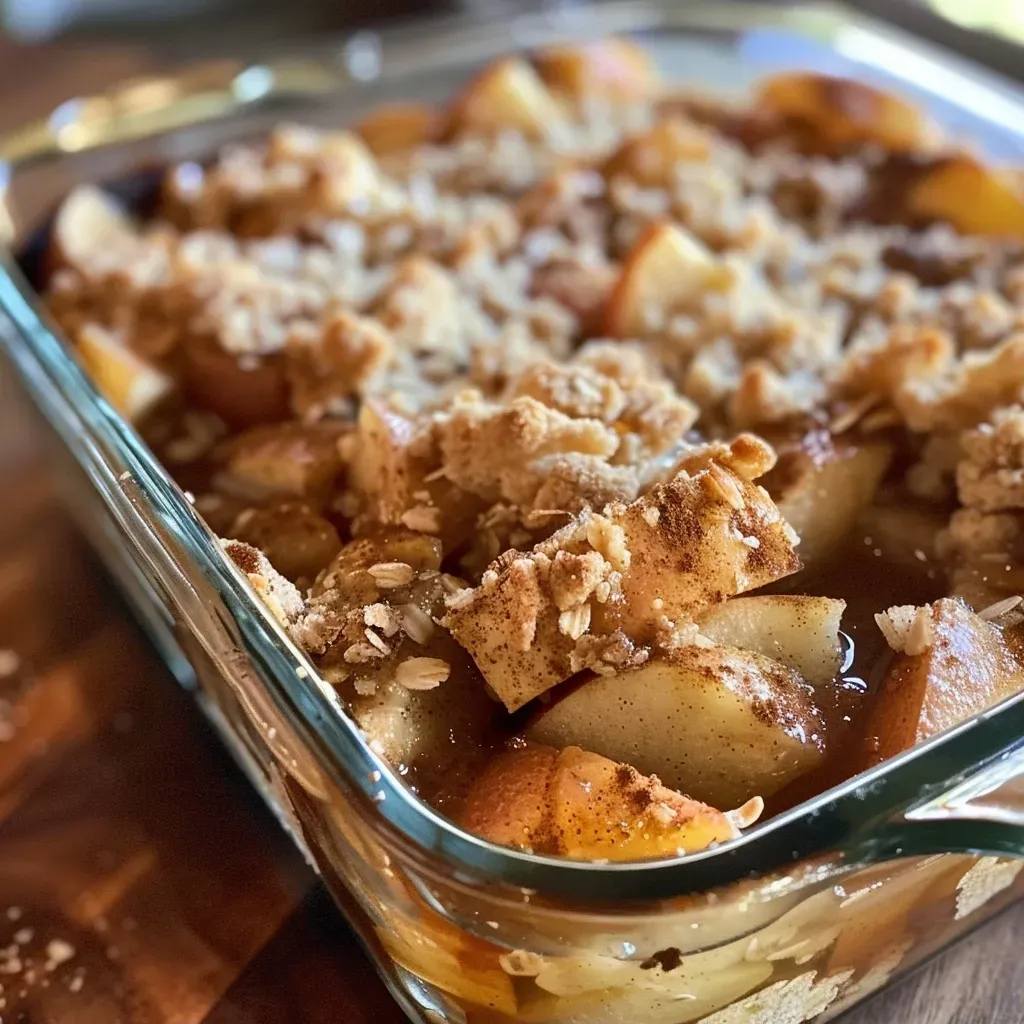
Side view of a fresh apple cobbler, showcasing its juicy filling and crisp topping, captured on an iPhone.

Ready to boost your cobbler game? Here are some expert insights:

  • Choose the right apples: McIntosh apples are great for baking, but you can also use Honeycrisp or Granny Smith for a tart flavor.
  • Spice it up: Feel free to adjust the spice levels based on your preference. Add more cinnamon or a pinch of nutmeg for extra warmth.
  • Let it cool: Allowing the cobbler to cool for about 10 minutes before serving helps the juices thicken for a better texture.
  • Serve it warm: This dessert is best enjoyed warm, so consider reheating leftovers in the oven.
  • Try different toppings: Swap out the shredded coconut for chopped nuts for added crunch.
  • Make it gluten-free: Substitute all-purpose flour with almond flour or a gluten-free flour blend.
  • Ice cream pairing: Vanilla or chai-flavored ice cream pairs beautifully with this cobbler.
  • Store leftovers properly: Keep any uneaten cobbler in an airtight container in the fridge.

Common Mistakes and Troubleshooting

Even the best home cooks can encounter issues. Here’s how to troubleshoot:

  • Too watery: If you find your cobbler filling is too runny, try adding an extra tablespoon of flour to help thicken it.
  • Burnt topping: If the topping is browning too quickly, cover it with foil for the last 15 minutes of baking.
  • Uneven baking: Make sure your oven is calibrated correctly to avoid issues with uneven baking.
  • Overmixed topping: Be gentle when combining the topping ingredients to keep it crumbly.

Variations to Try

Looking for a twist? Here are some fun variations:

  • Pear and Chai Cobbler: Substitute half the apples with pears for a different flavor profile.
  • Vegan Option: Use coconut oil instead of butter and flaxseed meal mixed with water as a binding agent.
  • Berry Chai Cobbler: Add a cup of your favorite berries for a delightful fruity addition.
  • Nutty Crumble: Incorporate chopped nuts like pecans or walnuts into the topping for extra crunch.

Storage and Make-Ahead Instructions

Want to prepare this ahead of time? Here’s how:

  • Make ahead: You can prepare the filling and topping separately and store them in the fridge for up to 24 hours before baking.
  • Storage: Store any leftover cobbler in an airtight container in the refrigerator for up to 3 days.
  • Reheating: Reheat in the oven at 350°F until warmed through, about 15-20 minutes.

Frequently Asked Questions

Here are some common questions about making the perfect Apple Chai Cobbler:

  • Can I use frozen apples? Yes, thaw and drain excess moisture before using them in the recipe.
  • What if I don’t have chai spices? You can make a simple blend using cinnamon, ginger, and nutmeg.
  • Can I double the recipe? Absolutely! Just make sure to use a larger baking dish and adjust cooking time as needed.
  • Is this recipe gluten-free? With the right substitutions, yes! Use gluten-free flour for the topping.
  • Can I freeze this cobbler? Yes, it freezes well! Just bake, let it cool, and store it in an airtight container.
  • What ice cream pairs best with it? Vanilla, chai, or even caramel ice cream complement the flavors beautifully!
  • How do I know when the cobbler is done? The topping should be golden brown, and the apples should be tender when pierced with a knife.
  • Can I add other fruits? Yes! Feel free to mix in berries or pears for a fruity twist.

Nutrition Tips and Dietary Adaptations

Want to make this dish healthier? Here are some tips:

  • Reduce sugar: You can cut down on sugar by using a sugar substitute or reducing the amount of granulated sugar in the filling.
  • Increase fiber: Use whole oats and whole grain flour for a fiber boost.
  • Boost nutrients: Add chia seeds to the filling for added nutrients and healthy fats.

Equipment Recommendations

To make your cooking experience smoother, here are some suggested tools:

  • Mixing bowls: Use various sizes for mixing the filling and topping.
  • Measuring cups and spoons: Essential for accuracy in baking.
  • Baking dish: An 8×8 inch dish works well for this recipe.
  • Sharp knife: For peeling and dicing apples quickly.

Serving Suggestions

Here’s how to serve your Apple Chai Cobbler like a pro:

  • With ice cream: A scoop of vanilla or chai ice cream on top makes for a delightful treat!
  • Drizzle of caramel: A drizzle of caramel sauce adds an indulgent touch.
  • Warm spices: Sprinkle a dash of cinnamon or nutmeg on top for an extra flavor boost.

Conclusion

There you have it—your ultimate guide to making a scrumptious Apple Chai Cobbler that’s sure to impress! With its cozy flavors and easy preparation, this dessert is perfect for any occasion, whether it’s a weeknight treat or a special gathering. Don’t be afraid to experiment with flavors and ingredients to make this recipe your own. Happy baking, and enjoy every delicious bite!

Apple Chai Cobbler {PF Changs Copycat}

Prep Time 15 minutes
Cook Time 40 minutes
Total Time 55 minutes
Servings 6 servings
Calories 350
A delicious apple cobbler infused with chai spices, perfect for a cozy dessert that mimics the flavors of PF Chang's.

Ingredients

Filling

  • 5 cups diced McIntosh apples (peeled, cored (approx. 4 medium))
  • 2 tablespoons granulated sugar
  • 0.25 teaspoon ground cardamom
  • 0.25 teaspoon ground allspice
  • 1 teaspoon ground cinnamon
  • 0.5 teaspoon ground cloves
  • 1 teaspoon ground ginger
  • 1 tablespoon butter (cut into small pieces)
  • 0.5 cup light brown sugar
  • 0.5 cup oats
  • 0.5 cup all purpose flour
  • 0.5 cup shredded coconut
  • 3 tablespoons melted butter

Instructions 

  • Preheat oven to 375°F (190°C).
  • Mix all filling ingredients; place in an oven-safe dish.
  • Combine topping ingredients; sprinkle over apples.
  • Bake for 35-40 minutes until apples are soft.

Notes

Serve warm with ice cream for extra indulgence.
Calories: 350kcal
Cost: $15
Course: Dessert
Cuisine: American
Keyword: apple, chai, cobbler

Welcome to your new favorite tea experience! This homemade Vanilla Oolong Chai is more than just a beverage; it’s a warm hug in a mug. Perfect for those chill evenings or a soothing start to your day, this recipe combines the rich flavors of oolong tea with aromatic spices and a hint of vanilla. Let’s embark on this cozy journey together and discover why this chai is a must-try!

Why You’ll Love This Recipe

This Vanilla Oolong Chai is not just another tea recipe; it offers a delightful blend of flavors and benefits that will elevate your tea-drinking experience. Here are five amazing reasons to love it:

  • Rich Flavor Profile: The fusion of oolong tea, spices, and vanilla creates a robust yet smooth taste that dances on your palate.
  • Health Benefits: Oolong tea is known for its antioxidant properties, while ginger and spices can aid digestion and boost your immune system.
  • Customizable Sweetness: Adjust the brown sugar to suit your taste; whether you prefer it sweet or mildly spiced, this chai accommodates.
  • Easy to Make: With just a few simple steps, you can whip up this cozy drink in no time, perfect for a quick treat after a long day.
  • Versatile Enjoyment: Enjoy it hot for a warm pick-me-up or serve it iced for a refreshing summer drink!

Essential Ingredients

Let’s dive into the ingredients that make this Vanilla Oolong Chai so special. Here’s what you need:

  • 3 tsp loose-leaf oolong tea (or 2 tea bags): A smooth base with complex flavor notes.
  • 1 cup water: The essential element for brewing.
  • 1 cup whole milk (or plant-based option): For creaminess, choose almond or oat milk for a dairy-free version.
  • 1/2 tsp vanilla extract: Enhances the chai with a sweet, aromatic essence.
  • 1 cinnamon stick: Adds warmth and spice.
  • 3-4 whole cloves: Provide a fragrant and spicy kick.
  • 1 star anise: Brings a unique flavor that complements the other spices.
  • 1-inch piece of fresh ginger, sliced: Adds a zesty freshness.
  • 1-2 tbsp brown sugar (adjust to taste): Sweetens your brew while adding depth.

How to Make Vanilla Oolong Chai

Ready to brew your chai? Follow these simple steps:

  1. In a small pot, bring 1 cup of water to a boil.
  2. Add the cinnamon stick, cloves, star anise, and sliced fresh ginger to the boiling water. Let it simmer for about 5 minutes to release the flavors.
  3. Stir in the oolong tea leaves (or tea bags) and steep for another 3-5 minutes, depending on how strong you like your tea.
  4. Pour in the milk and stir in the brown sugar. Let the mixture simmer on low heat for another 2-3 minutes.
  5. Remove the pot from the heat and stir in the vanilla extract, mixing well.
  6. Strain the chai into a mug to remove the spices and tea leaves. If serving iced, let the tea cool before pouring over ice. Enjoy!

Pro Tips for Perfect Chai

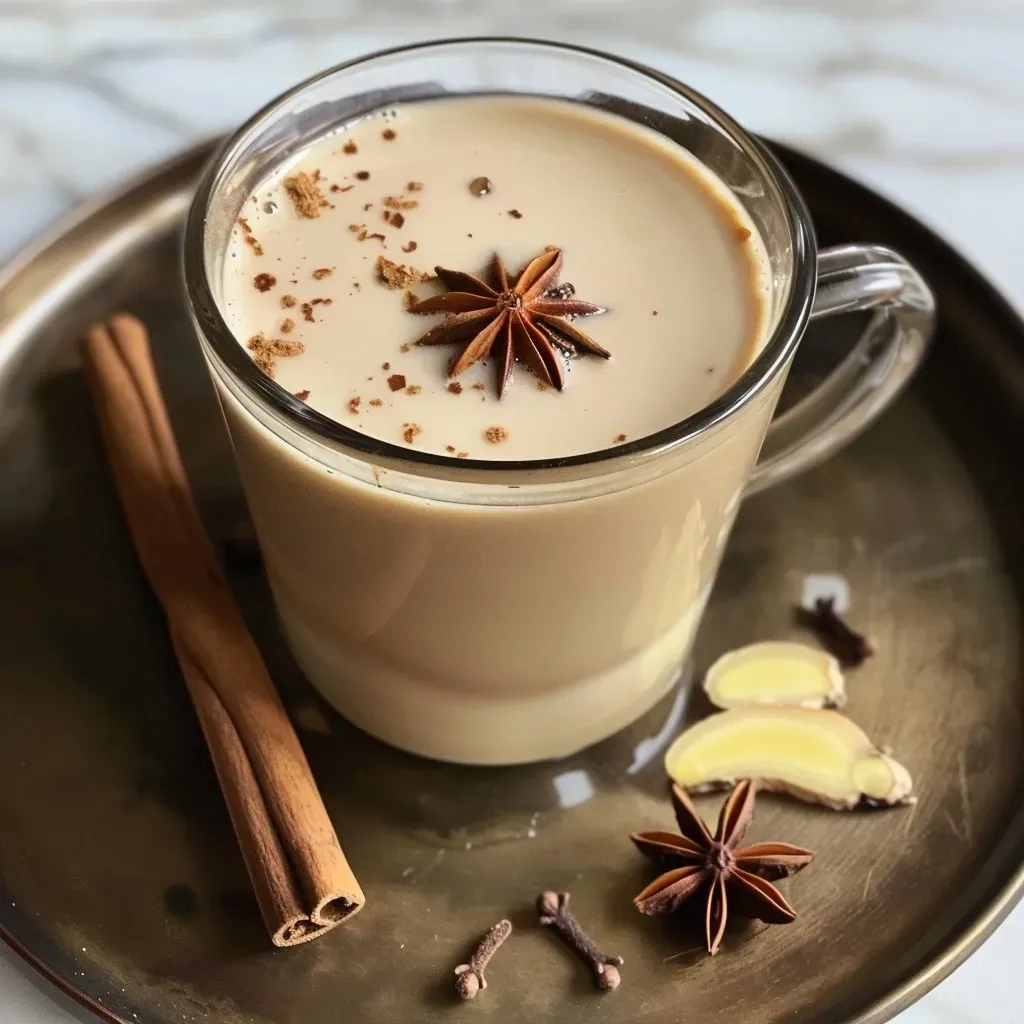
Side view of a steaming cup of Vanilla Oolong Chai surrounded by ingredients.

To ensure your Vanilla Oolong Chai turns out perfect every time, keep these expert tips in mind:

  • Quality Ingredients: Use high-quality loose-leaf oolong tea for the best flavor.
  • Control the Steeping Time: Steep the tea just right; too long can make it bitter.
  • Experiment with Milk: Try different types of milk for varied creaminess and flavor.
  • Spice It Up: Adjust the spice quantities based on your palate; add more ginger for a kick.
  • Sweetness Level: Start with less sugar; you can always add more if needed.
  • Chill for Iced Chai: If serving iced, let the chai cool to prevent dilution from melting ice.
  • Garnish Wisely: A sprinkle of cinnamon on top can enhance presentation and aroma.
  • Batch It: Make a larger batch for gatherings—just double the ingredients!

Common Mistakes and Troubleshooting

Even the best of us make mistakes in the kitchen! Here are some common pitfalls and how to avoid them:

  • Bitterness: Over-steeping the tea can lead to bitterness. Keep an eye on the time!
  • Weak Flavor: Not using enough spices or tea can result in a bland chai. Adjust accordingly.
  • Too Sweet: If you find your chai overly sweet, balance it out with more milk or a splash of lemon juice.
  • Curdled Milk: Adding cold milk to hot tea can cause curdling. Make sure your milk is warmed up.

Delicious Variations

Want to switch things up? Here are some enticing variations of Vanilla Oolong Chai:

  • Vanilla Rooibos Chai: Replace oolong with rooibos for a caffeine-free alternative.
  • Iced Vanilla Chai Latte: Brew the chai, cool it, then serve over ice with cold milk.
  • Spicy Masala Chai: Add black pepper and cardamom for a more traditional spice mix.
  • Coconut Chai: Substitute coconut milk for whole milk for a tropical twist.

Storage and Make-Ahead Instructions

Planning ahead? Here’s how to store your chai:

  • Make-Ahead: Brew your chai and refrigerate it for up to 3 days. Just reheat before serving.
  • Freezing: You can freeze brewed chai in ice cube trays for quick iced drinks later.
  • Storage: Keep loose tea and spices in a cool, dark place to maintain freshness.

Frequently Asked Questions

Got questions? Let’s answer some common ones:

  • Can I use tea bags instead of loose-leaf tea? Yes, just ensure they are high-quality oolong tea bags.
  • Is there a non-dairy alternative to milk? Absolutely! Almond, oat, and coconut milk are great substitutes.
  • Can I make this chai without sugar? Yes, feel free to omit sugar or use a natural sweetener like honey.
  • How can I make it less spicy? Reduce the amount of ginger and cloves according to your taste.
  • What is the best way to serve this chai? It can be enjoyed hot or iced, depending on your preference!
  • How long does brewed chai last in the refrigerator? Brewed chai can be kept for up to 3 days in the fridge.
  • Can I add other flavors? Yes, try adding nutmeg or cardamom for a unique twist!
  • Is this chai suitable for kids? Yes, just adjust the sweetness to their taste!

Nutritional Tips and Dietary Adaptations

This Vanilla Oolong Chai not only warms your soul but can also fit various dietary needs:

  • Low-Calorie Option: Use unsweetened almond milk and reduce sugar for a lighter version.
  • Gluten-Free: All ingredients are naturally gluten-free, making it safe for those with gluten sensitivities.
  • Vegan-Friendly: Substitute whole milk with any plant-based milk to make it vegan.

Essential Equipment Recommendations

Here’s what you’ll need to make this delightful chai:

  • Small Pot: Perfect for boiling water and simmering spices.
  • Strainer: To separate the spices and tea from your delicious brew.
  • Mug: Choose your favorite mug to enjoy your cozy chai!

Serving Suggestions

To make your chai experience even better, consider these serving suggestions:

  • Pair with Snacks: Serve with cookies, muffins, or scones for a delightful tea time.
  • Garnish: Top with a sprinkle of cinnamon or a dollop of whipped cream for extra indulgence.
  • Chai Party: Host a chai tasting with various spices and flavors for an inviting gathering.

Wrap-Up

With its rich flavors and comforting warmth, this homemade Vanilla Oolong Chai is sure to become a staple in your kitchen. Remember, cooking is all about confidence and creativity, so don’t hesitate to experiment with flavors and ingredients. Whether you enjoy it hot or iced, this chai is a great way to unwind and savor the moment. So go ahead, brew yourself a cup, and let the cozy vibes take over. Happy cooking!

Vanilla Oolong Chai

Prep Time 5 minutes
Cook Time 10 minutes
Total Time 15 minutes
Servings 2 cups
Calories 150
A warm and aromatic chai infused with vanilla and spices, perfect for cozy moments or a comforting treat.

Ingredients

Tea and Spices

  • 3 tsp loose-leaf oolong tea (or 2 tea bags)
  • 1 cup water
  • 1 cup whole milk (or plant-based option)
  • 1/2 tsp vanilla extract
  • 1 stick cinnamon (cinnamon stick)
  • 3-4 whole cloves
  • 1-inch piece fresh ginger (sliced)
  • 1-2 tbsp brown sugar (adjust to taste)

Instructions 

  • Bring 1 cup of water to a boil in a small pot.
  • Add cinnamon, cloves, star anise, and ginger; simmer for 5 minutes.
  • Add tea leaves and steep for 3-5 minutes.
  • Pour in milk, add brown sugar, and simmer for 2-3 minutes.
  • Remove from heat, stir in vanilla, strain, and serve.

Notes

Adjust sweetness and spice levels to taste. For iced chai, cool before serving over ice.
Calories: 150kcal
Cost: $10
Course: Beverage
Cuisine: Fusion
Keyword: spices, Tea, vanilla

Welcome to a delightful twist on a classic treat! Today, we’re diving into the world of Brown Butter Rice Krispie Squares with a hint of rosemary, perfect for any occasion. This easy-to-follow recipe combines the nutty flavor of brown butter with the aromatic notes of fresh rosemary, transforming traditional Rice Krispie squares into a gourmet experience. Whether you’re hosting a gathering or simply craving a sweet snack, these squares will elevate your snack game and impress your guests.

In this article, we’ll explore everything you need to know to make these delicious treats, from ingredients and step-by-step instructions to tips for success, variations, and storage advice. So, grab your apron and let’s get started!

Why You’ll Love This Recipe

Here are five compelling reasons to fall in love with these Brown Butter Rice Krispie Squares:

  • Unique Flavor Profile: The rich, nutty taste of brown butter paired with the herbaceous notes of rosemary makes for a sophisticated twist on a childhood favorite.
  • Quick and Easy: With just a handful of ingredients and minimal prep time, this recipe is perfect for both beginner and experienced cooks.
  • Customizable: Feel free to experiment with add-ins or toppings to suit your taste preferences.
  • Perfect for Any Occasion: Whether it’s a party, a picnic, or just a cozy night in, these squares are a hit.
  • Make Ahead Option: Prepare these treats in advance and store them for a quick snack or dessert later on.

Ingredients Breakdown

Let’s gather our ingredients to make these delicious Brown Butter Rice Krispie Squares:

  • 8 cups Rice Krispie Cereal: This is the base of our squares, providing that signature crunch.
  • 20 oz mini marshmallows (two bags): Essential for binding the squares together and giving them that gooey texture.
  • 1/2 cup butter, cut into tablespoons: Brown the butter for a rich flavor that enhances the overall taste.
  • 1/2 tsp vanilla: Adds a warm, sweet undertone to the treats.
  • 1 tsp coarse sea salt: Balances the sweetness of the marshmallows and enhances the flavors.
  • 1 tbsp rosemary, chopped fine: Fresh rosemary adds a fragrant and savory note to the classic recipe.

Ingredient Substitutions

If you’re looking to make adjustments, here are some substitutions you can consider:

  • Cereal: You can use any puffed rice cereal, or even try a gluten-free option if needed.
  • Butter: Coconut oil can serve as a dairy-free alternative.
  • Marshmallows: Look for vegan marshmallows for a plant-based option.
  • Rosemary: If you don’t have fresh rosemary, dried rosemary can also work, but use less as it’s more concentrated.

Step-by-Step Instructions

Now that we’ve got our ingredients ready, let’s make these delicious Rice Krispie squares!

  1. Prepare a baking pan (approx. 13″ x 9″) by lining it with parchment paper or greasing it with butter.
  2. Make brown butter: In a very large pot, melt the butter over medium-high heat. Stir occasionally until it melts, bubbles, and starts to turn a golden brown color. This process should take about 5-7 minutes—watch closely as it can go from perfectly browned to burnt quickly!
  3. Once the butter is golden and fragrant, remove it from heat. Stir in the vanilla and the mini marshmallows. Keep stirring until the marshmallows are fully melted. If needed, return the pot to low heat while stirring.
  4. In a separate bowl, mix together the Rice Krispie cereal, sea salt, and chopped rosemary. Pour the marshmallow mixture over the cereal and stir until everything is well coated.
  5. Gently press the mixture into the prepared baking pan. Use damp fingertips to prevent sticking, and be careful not to compact the mixture too much.
  6. Allow the squares to cool for about an hour before cutting them into 24 equal pieces.

Pro Tips for Perfect Rice Krispie Squares

Close-up of golden-brown Rice Krispie treats garnished with rosemary.

To ensure your Brown Butter Rice Krispie Squares turn out perfectly, keep these expert tips in mind:

  • Watch the Butter: Keep a close eye on the butter while it’s browning; it can easily burn if left unattended.
  • Don’t Overmix: Stir just until the ingredients are combined. Overmixing can lead to tough squares.
  • Use Fresh Rosemary: Fresh herbs provide the best flavor; dried rosemary can be used but adjust the quantity.
  • Storage: Store these squares in an airtight container at room temperature for up to one week.
  • Cutting Technique: Use a sharp knife to cut the squares for clean edges.
  • Chill for Easier Cutting: If the squares are too sticky to cut, refrigerate them for 15-20 minutes to firm them up.
  • Add Toppings: Consider drizzling melted chocolate or sprinkling crushed nuts on top for added flavor.
  • Experiment with Flavors: Feel free to add spices like cinnamon or nutmeg for a seasonal twist.

Common Mistakes and Troubleshooting

Even the best cooks can make mistakes! Here are some common pitfalls and how to avoid them:

  • Burnt Butter: If your butter turns too dark, start over—burnt butter has a bitter taste that can ruin the recipe.
  • Hard Squares: Pressing the mixture down too firmly can lead to hard squares. Gently press for a soft texture.
  • Sticking to the Pan: Ensure your pan is well-greased or lined to prevent sticking.
  • Uneven Mixing: Make sure everything is uniformly coated; use a spatula to fold the ingredients together gently.

Variations to Try

Looking to change things up? Here are four delicious variations of this recipe:

  • Chocolate Drizzle: Melt some chocolate chips and drizzle over the cooled squares for a decadent touch.
  • Nutty Crunch: Add 1 cup of chopped nuts (like almonds or pecans) for extra texture and nutrition.
  • Fruity Twist: Mix in dried cranberries or apricots for a sweet and tart flavor contrast.
  • Spiced Pumpkin: For a seasonal treat, add 1 tsp of pumpkin spice to the marshmallow mixture.

Storage and Make-Ahead Instructions

These Brown Butter Rice Krispie Squares can be made ahead and stored for later enjoyment:

  • Store in an airtight container at room temperature for up to one week.
  • If making ahead, consider wrapping individual squares in plastic wrap for easy grab-and-go snacks.
  • For longer storage, freeze squares in a freezer-safe container for up to three months. Thaw at room temperature before serving.

Frequently Asked Questions

Here are some common questions about making Brown Butter Rice Krispie Squares:

  • Can I use regular butter instead of brown butter? Yes, but brown butter adds a unique flavor that elevates the treat.
  • How do I make these squares gluten-free? Use gluten-free Rice Krispie cereal and check your marshmallows for gluten content.
  • What if I don’t have rosemary? You can omit it or substitute with another herb like thyme for a different flavor.
  • Are these treats suitable for kids? Absolutely! Kids love the marshmallowy goodness; just watch for any nut allergies if you add nuts.
  • Can I double the recipe? Yes, simply double all ingredients and use a larger pan.
  • How do I prevent sticking when pressing the mixture into the pan? Wet your fingers or use a spatula to press down the mixture gently.
  • Can I add color to these squares? Yes, you can fold in a few drops of food coloring with the marshmallows for a fun twist!
  • What’s the best way to cut the squares? Use a sharp knife and cut while the squares are slightly warm for cleaner edges.

Nutrition Tips and Dietary Adaptations

For those mindful of nutrition, here are some tips:

  • Lower Sugar Option: Use less marshmallows or look for sugar-free alternatives.
  • Adding Protein: Incorporate protein powder into the mixture for a protein boost.
  • Dairy-Free: Substitute butter with coconut oil and use dairy-free marshmallows.

Recommended Equipment

For this recipe, you’ll need the following equipment:

  • Large Pot: For melting the butter and mixing the ingredients.
  • Baking Pan: A 13″ x 9″ pan is ideal for this recipe.
  • Spatula: For stirring and pressing the mixture into the pan.
  • Parchment Paper: To line the pan for easy removal of the squares.

Serving Suggestions

Enhance your serving experience with these ideas:

  • Pair with Coffee: These squares are perfect alongside a morning cup of coffee or afternoon tea.
  • Serve at Parties: Cut into smaller squares for easy serving at gatherings or potlucks.
  • Garnish with Sea Salt: A sprinkle of sea salt on top enhances the flavors beautifully.

Conclusion

Congratulations! You’ve just mastered the art of making Brown Butter Rice Krispie Squares with Rosemary. These treats are not only delicious but also a fun way to experiment in the kitchen. Remember, cooking is all about confidence and creativity—don’t hesitate to make this recipe your own! Enjoy every bite and share your creations with friends and family. Happy cooking!

Brown Butter Rice Krispie Squares with Rosemary

Prep Time 15 minutes
Cook Time 20 minutes
Total Time 35 minutes
Servings 24 squares
Calories 150
A fragrant twist on classic Rice Krispie treats, infused with brown butter and fresh rosemary for a sophisticated flavor.

Ingredients

Cereal and Marshmallows

  • 8 cups Rice Krispie Cereal
  • 20 oz mini marshmallows (two bags)

Brown Butter and Flavoring

  • 1/2 cup butter (cut into tablespoons)
  • 1/2 tsp vanilla
  • 1 tsp coarse sea salt
  • 1 tbsp rosemary (chopped fine)

Instructions 

  • Line a 13" x 9" pan with parchment or grease it.
  • Melt butter in a large pot over medium-high heat until golden brown and fragrant, then remove from heat.
  • Stir in vanilla and marshmallows until melted; reheat gently if needed.
  • Mix in cereal, salt, and rosemary until well coated, then press gently into the pan.
  • Let cool for about an hour, then cut into 24 squares.

Notes

Gently press the mixture into the pan to avoid hard squares.
Calories: 150kcal
Cost: $15
Course: Dessert
Cuisine: American
Keyword: Marshmallows, Rice Krispies, Rosemary