
Creating a Spook-tacular Mummy Charcuterie Board for Halloween
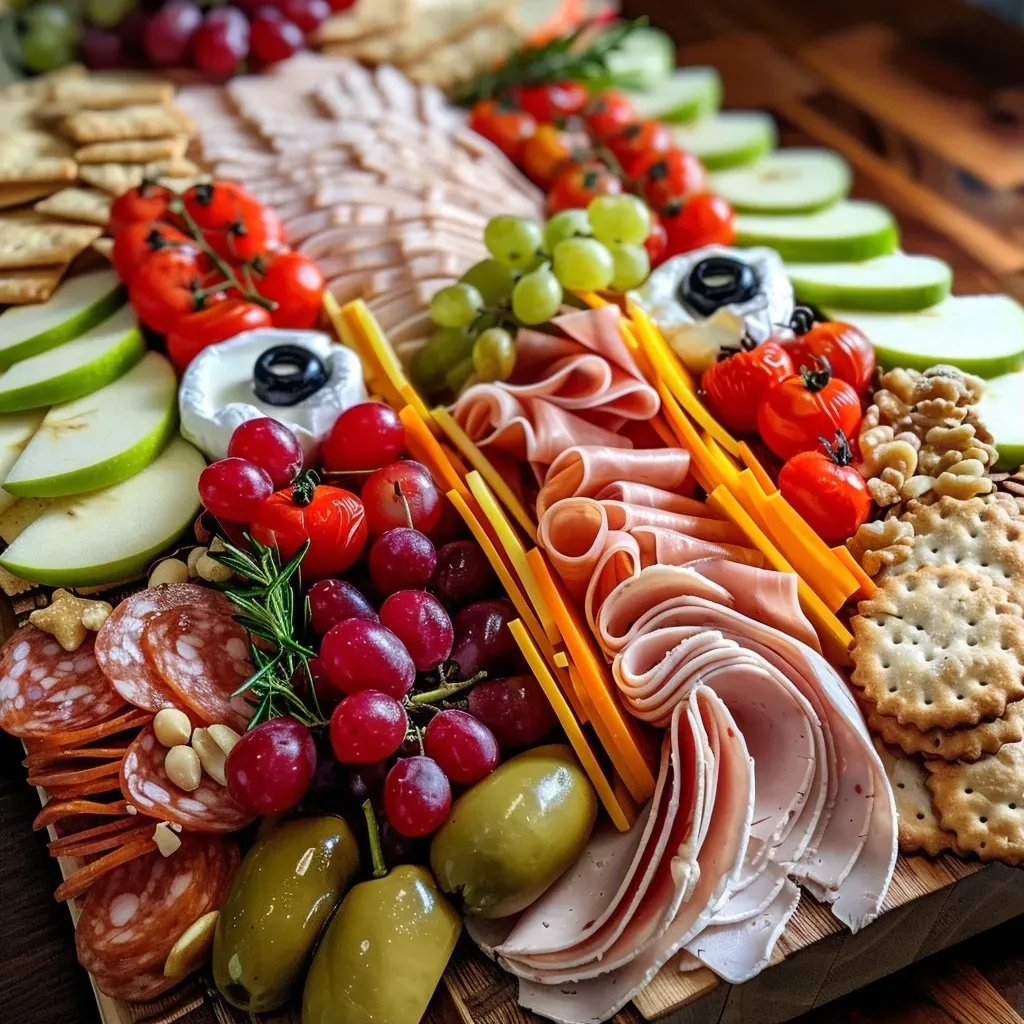
Halloween is just around the corner, and what better way to celebrate than with a fun and festive Mummy Charcuterie Board? Packed with assorted cheeses, turkey slices, fresh fruits, and spooky olive eyes, this easy-to-assemble spread is sure to delight guests of all ages. Whether you’re hosting a Halloween party or just want to add a special touch to your family’s snack time, this Mummy Charcuterie Board is perfect for creating a memorable experience around the table.
In this guide, we’ll walk you through everything you need to know to create the ultimate Mummy Charcuterie Board that looks impressive yet is simple to make. From ingredient breakdowns to expert tips, you’ll have all the tools to craft a delicious and visually striking board.
Why You’ll Love This Mummy Charcuterie Board
This Mummy Charcuterie Board is not just a treat for the eyes, but also for the taste buds. Here are five reasons why you’ll love this recipe:

★ Recommended Kitchen Tool
Meal Prep Container Set
Make this recipe even easier with a quality Meal Prep Container Set — a must-have kitchen staple!
- Visually Appealing: The spooky mummy design adds a playful twist to your Halloween festivities, making it a great conversation starter.
- Easy to Assemble: With simple steps and no cooking required, you can put together this board quickly, even on a busy day.
- Customizable Ingredients: Feel free to swap out ingredients based on your preferences or dietary restrictions, making it versatile for everyone.
- Healthy Options: Incorporating fresh fruits and nuts not only enhances flavor but also provides nutritious elements to your snack spread.
- Fun for All Ages: Kids and adults alike will enjoy the festive presentation, encouraging everyone to dig in and enjoy!
Mummy Charcuterie Board Ingredients & Substitutions
To create a Mummy Charcuterie Board, gather the following ingredients. You can easily mix and match based on what you have at home!
- Assorted cheeses: Cheddar, mozzarella, and gouda work well. You can also use vegan cheese for a dairy-free option.
- Turkey or chicken slices: For a vegetarian option, consider using hummus or roasted vegetables as an alternative.
- Crackers or breadsticks: Choose your favorite crackers or use whole grain options for a healthier choice.
- Fresh fruits: Grapes, berries, and apple slices add color and sweetness. Feel free to use seasonal fruits!
- Hummus or cream cheese: Either of these can be used as a spread, or try a flavored cream cheese for a twist.
- Olives for the eyes: Use green or black olives to create a spooky face; you can also use grapes or cherry tomatoes.
- Fresh herbs for garnish: Basil or parsley can add a lovely touch and fresh flavor to your board.
Step-By-Step Instructions to Make Your Mummy Charcuterie Board
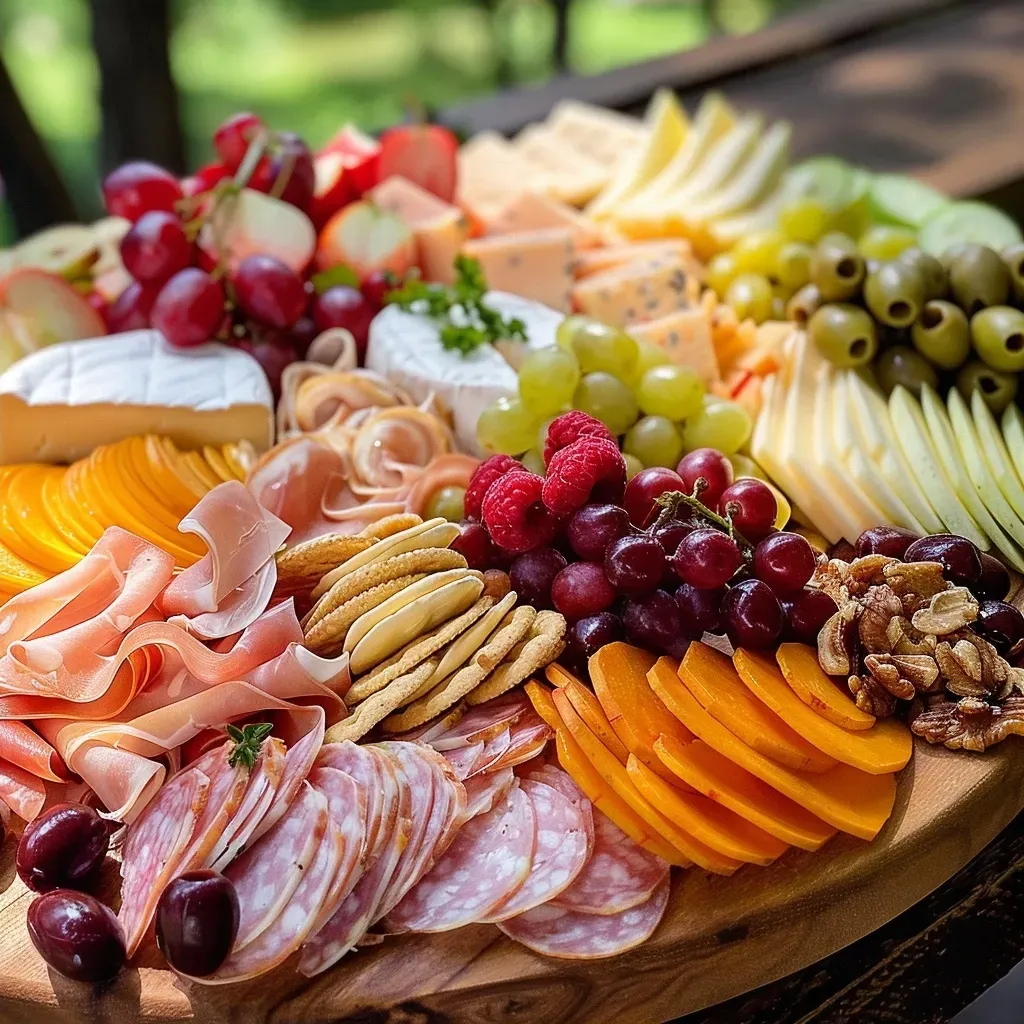
Now that you have your ingredients ready, let’s dive into the step-by-step process to create your Mummy Charcuterie Board.
- Choose Your Board: Start with a large board, tray, or platter that gives you enough room to shape the mummy design. A rectangular board works well, but any flat surface can look great.
- Arrange the Main Ingredients: Place the cheese and turkey slices in the center of the board to form a mummy body shape. Layer the cheese, turkey slices, and crackers in a loose oval or rectangle.
- Create the Wrapped Mummy Lines: Use strips of sliced cheese, thin turkey slices, or breadsticks to create the mummy’s “wrapping” effect. Overlap them a bit to keep the look playful.
- Add the Mummy’s Face: Leave a small open space near the top for the mummy’s face. Position two olive slices or small dots of cream cheese to form the eyes.
- Surround with Colorful Fruits: Add grapes, berries, apple slices, nuts, and crackers around the mummy shape. Keep the colors balanced for a full yet tidy appearance.
- Finish with Fresh Herbs: Add a few fresh herb sprigs around the edges for an elegant touch. Serve immediately or chill briefly until you’re ready to present.
Pro Tips for a Success
To ensure your Mummy Charcuterie Board is a hit, consider these expert insights:
- Keep it Fresh: Use fresh fruits and vegetables to maintain vibrant colors and flavors. Avoid overly ripe items that might spoil quickly.
- Mix Textures: Include a variety of textures with crunchy crackers, creamy cheeses, and juicy fruits to keep every bite interesting.
- Plan Ahead: Prepare ingredients in advance. You can slice fruits and cheeses a few hours before serving to save time.
- Make it Interactive: Encourage guests to customize their plates. Provide an assortment of toppings and spreads so they can create their own mummy snacks.
- Think About Portion Sizes: Avoid overcrowding the board. Leave some space between items for a cleaner, more appealing look.
- Use Seasonal Ingredients: Embrace the season by incorporating fall flavors like pumpkin seeds or caramelized nuts into your board.
- Keep it Fun: Play with the arrangement and consider adding Halloween-themed decorations for added flair.
- Stay Relaxed: Remember, cooking is about enjoyment. Don’t stress over perfection; focus on the fun of creating!
Common Mistakes and Troubleshooting
Even the best of us can make mistakes while assembling a charcuterie board. Here are some common pitfalls and how to avoid them:
- Overcrowding: If your board looks too full, it can overwhelm guests. Aim for a balance between variety and space.
- Not Balancing Flavors: Ensure you have a mix of sweet, salty, and savory items to cater to different tastes.
- Using Ingredients That Don’t Pair: Test combinations ahead of time to ensure that flavors complement each other.
- Forgetting to Garnish: Herbs not only add flavor but also enhance the presentation. Don’t skip this step!
- Neglecting Food Safety: Keep perishable items chilled until serving to avoid spoilage, especially if you’re hosting outdoors.
Variations of the Mummy Charcuterie Board
Want to switch things up? Try these fun variations of the Mummy Charcuterie Board:
- Vegetarian Version: Substitute turkey slices with roasted vegetables and add more hummus for dipping.
- Sweet Treat Board: Use chocolate-covered fruits, cookies, and candies to create a dessert-themed mummy board.
- International Flair: Incorporate cheeses and meats from different cultures, like Italian prosciutto or Spanish manchego.
- Gluten-Free Board: Use gluten-free crackers or veggie sticks for an inclusive option everyone can enjoy.
Storage and Make-Ahead Instructions
To enjoy your Mummy Charcuterie Board stress-free, consider these storage and prep tips:
- Make Ahead: You can prepare most of the ingredients a day in advance. Store sliced fruits in airtight containers to keep them fresh.
- Assemble Just Before Serving: For the best presentation and taste, assemble the board right before you plan to serve it.
- Storage Tips: Leftovers can be stored in the refrigerator for up to two days. Keep items like crackers separate to maintain their crunch.
Frequently Asked Questions (FAQ)
Here are some common questions about creating the perfect Mummy Charcuterie Board:
- Can I use different types of cheeses? Absolutely! Experiment with your favorite cheeses to find the combinations you love.
- How can I make it more kid-friendly? Include more fruits and sweet treats, and let kids help in assembling their own sections of the board.
- What if I don’t have olives? You can use grapes, cherry tomatoes, or even mini marshmallows for the eyes.
- Can I use leftovers from my fridge? Yes! Leftover meats, cheeses, and vegetables can add variety to your board.
- How do I make it gluten-free? Simply choose gluten-free crackers or use vegetable sticks instead.
- Is there a vegan option? Yes! Utilize plant-based cheeses, spreads, and a variety of fresh vegetables and fruits.
- What is the best way to serve it? Place your board on a large table where everyone can gather around and help themselves.
- How long will it last? The assembled board is best enjoyed fresh, but leftovers can be stored in the fridge for up to two days.
Nutrition Tips and Dietary Adaptations
Here are some nutrition tips to make your Mummy Charcuterie Board even healthier:
- Incorporate Whole Grains: Opt for whole grain crackers or breadsticks to add fiber to your snack spread.
- Add More Fruits and Veggies: Aim to fill half your board with fresh produce to increase vitamins and minerals.
- Limit Processed Meats: If using meats, choose options that are lower in sodium and additives.
- Choose Healthy Fats: Include nuts and seeds for healthy fats, which are great for heart health.
Equipment Recommendations
To create your Mummy Charcuterie Board, you’ll need a few essential tools:
- Large Board or Platter: A wooden or ceramic board provides a sturdy surface for arranging your ingredients.
- Sharp Knife: For slicing cheese and fruits neatly.
- Small Bowls: Use for dips like hummus or cream cheese to keep the board organized.
- Serving Utensils: Have spoons and tongs available for easier serving.
Serving Suggestions: What to Pair with Your Mummy Charcuterie Board
Enhance your Mummy Charcuterie Board with these pairing ideas:
- Festive Drinks: Serve with apple cider, pumpkin spice lattes, or themed cocktails for a complete Halloween experience.
- Dessert Options: Consider offering Halloween-themed cupcakes or cookies for an added sweet treat.
- Complementary Dips: Add an array of dips like ranch, salsa, or a spicy cheese dip to elevate flavors.
Conclusion
Creating a Mummy Charcuterie Board is a delightful way to celebrate Halloween with friends and family. By following these step-by-step instructions, tips, and variations, you can craft a visually stunning and delicious spread that’s sure to impress. Remember, the key to a great charcuterie board is not just in the ingredients but in the fun of assembling and sharing it with others. So gather your ingredients, unleash your creativity, and enjoy the festive spirit this Halloween with your homemade Mummy Charcuterie Board!
Mummy Charcuterie Board
Ingredients
Main ingredients
- 1 large platter Assorted cheeses, such as cheddar, mozzarella, and gouda
- 200 grams Turkey slices or chicken slices
- 100 grams Crackers or breadsticks
- 150 grams Grapes, berries, and apple slices
- 100 grams Hummus or cream cheese for spreading
- 10 pieces Olives for the eyes
- 8 pieces Cherry tomatoes or cucumber slices
- 50 grams Roasted nuts or pretzels
- 5 sprigs Fresh herbs for garnish
Instructions
- Arrange main ingredients in the center to form a mummy shape, layering cheese, meats, and crackers.
- Create mummy wrapping with cheese strips, turkey slices, or breadsticks, overlapping slightly.
- Place olives or cream cheese dots with olives for eyes near the top of the mummy.
- Surround the mummy with grapes, berries, apple slices, nuts, and crackers for color and fullness.
- Add fresh herbs around the edges for a finished look. Serve immediately or chill briefly.