Author

Steven

Browsing

Discover the Delight of Fig and Goat Cheese Quesadillas

Welcome to a culinary adventure that promises to elevate your snack game! In just minutes, you can whip up these Fig, Honey, Pistachio, and Goat Cheese Quesadillas that blend sweet and savory flavors into every bite. Perfect for a quick snack or a light meal, this recipe is not only delicious but also simple enough for any home cook to master. Let’s dive into the details!

Why You’ll Love This Recipe

These quesadillas are a fantastic way to combine various textures and flavors. Here are a few reasons why this recipe will quickly become a favorite:

  • Quick and Easy: With just a handful of ingredients, you can prepare these quesadillas in under 15 minutes, making them perfect for busy weeknights.
  • Flavor Explosion: The combination of figs, goat cheese, and honey creates a harmonious balance of sweet and savory that is sure to impress your taste buds.
  • Nutritious Ingredients: Packed with wholesome ingredients, these quesadillas are not only delicious but also offer various health benefits, from fiber-rich figs to protein-packed goat cheese.
  • Versatile Snack: Enjoy them as a light meal, an appetizer for entertaining guests, or even a unique addition to a brunch spread.
  • Customizable: This recipe serves as a fantastic base, allowing for endless variations that suit your personal taste or dietary preferences.

Ingredients Breakdown

Let’s explore the ingredients required for this delightful dish, along with some suggested substitutions to suit your pantry.

  • 2 brown rice tortillas: These provide a gluten-free option. You can substitute with corn tortillas or whole wheat tortillas for a different flavor and texture.
  • 1/3 cup soft goat cheese: Rich and creamy, goat cheese adds depth. If you’re not a fan, try feta or cream cheese for a similar texture.
  • Sliced fresh figs: Sweet and juicy, figs are the star of this recipe. Dried figs can work in a pinch; just rehydrate them in warm water for a bit.
  • Shelled pistachios: These add a delightful crunch. Almonds or walnuts can be substituted for a different nutty flavor.
  • 1 tablespoon raw honey: A drizzle of honey enhances the sweetness. Maple syrup or agave nectar can be used for a vegan alternative.

Step-by-Step Instructions

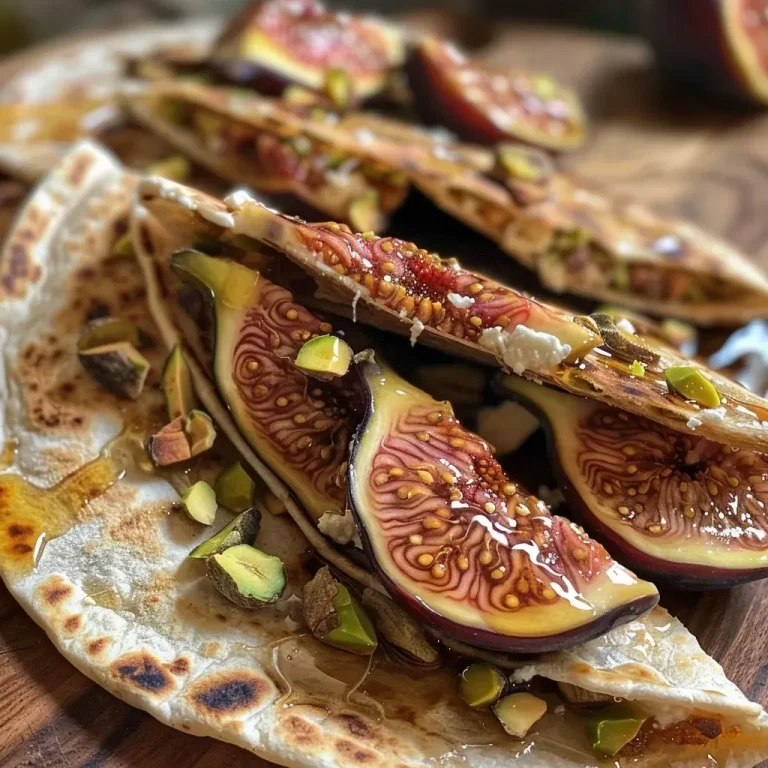
Sliced quesadillas filled with goat cheese, fresh figs, and sprinkled with pistachios.

Follow these simple steps to create your Fig and Goat Cheese Quesadillas:

  1. Spread the goat cheese evenly on one of the tortillas.
  2. Layer with sliced figs and sprinkle shelled pistachios on top.
  3. Spread a thin layer of raw honey on the other tortilla, then place it honey side down over the filled tortilla.
  4. Heat a buttered griddle or pan over medium heat. Cook both sides of the quesadilla for about 2-3 minutes, or until the tortillas are lightly browned and crispy.
  5. Remove from the heat, cut into wedges, and serve warm.

Pro Tips for Perfect Quesadillas

For an even better cooking experience, consider these expert tips:

  • Achieve the perfect crunch: Ensure your pan is hot enough before adding the quesadilla, which helps achieve that crispy texture.
  • Experiment with cheeses: Mix goat cheese with sharp cheddar or a hint of blue cheese for added flavor complexity.
  • Fresh herbs: Adding a sprinkle of fresh basil or mint can elevate the flavor profile of your quesadilla.
  • Use a weight: To ensure even cooking, press down on the quesadilla with a spatula or place a heavy pan on top while it cooks.
  • Make it spicy: Add a sprinkle of red pepper flakes or a drizzle of chili oil for a spicy kick!
  • Serve immediately: Quesadillas are best enjoyed fresh, so try to serve them right after cooking for maximum flavor.

Common Mistakes and Troubleshooting

Here are some common pitfalls to avoid when making quesadillas:

  • Overfilling: While it’s tempting to add more ingredients, too much filling can make the quesadilla difficult to flip and cause it to spill out.
  • Low heat: Cooking on low heat can lead to soggy tortillas. Always use medium heat to ensure crispy exteriors.
  • Skipping the butter: Butter or oil adds flavor and helps achieve that golden color. Don’t skip this step!
  • Not letting it rest: Allowing the quesadilla to sit for a minute after cooking helps the cheese set slightly, making it easier to cut.

Variations to Try

Feel free to mix things up! Here are some delicious variations of this quesadilla:

  • Apple and Cheddar: Swap figs for thinly sliced apples and use sharp cheddar for a sweet and savory twist.
  • Spinach and Feta: Add fresh spinach and replace goat cheese with feta for a Mediterranean flair.
  • Smoked Salmon: Layer in smoked salmon with cream cheese for a sophisticated brunch option.
  • Veggie Delight: Incorporate sautéed bell peppers and onions for a colorful, hearty version.

Storage and Make-Ahead Instructions

If you want to prepare ahead of time, here’s how to store your quesadillas:

  • Storage: Keep cooked quesadillas in an airtight container in the refrigerator for up to 2 days.
  • Freezing: You can freeze uncooked quesadillas. Layer parchment paper between each quesadilla to prevent sticking, and store in a freezer bag for up to 3 months.
  • Reheating: Reheat in a skillet over medium heat for a few minutes on each side until warmed through and crispy.

Frequently Asked Questions

Here are some common questions about making Fig and Goat Cheese Quesadillas:

  • Can I use a different type of cheese? Absolutely! Feel free to experiment with other cheeses like feta, cream cheese, or even a vegan cheese alternative.
  • Are these quesadillas gluten-free? Yes, if you use brown rice or corn tortillas, they can easily be made gluten-free.
  • Can I make these quesadillas vegan? Yes! Substitute goat cheese with a plant-based cheese and use maple syrup instead of honey.
  • What can I serve with them? These quesadillas pair wonderfully with a side salad, fresh fruit, or a light soup.
  • How do I know when they are done? They should be golden brown and crispy on both sides, with the cheese melted inside.
  • Can I add other fruits? Absolutely! Try using peaches, pears, or even berries for a unique flavor experience.
  • What’s the best way to cut them? Use a sharp knife or pizza cutter for clean cuts after they’ve cooled for a minute.
  • How can I make them spicier? Add jalapeños or a sprinkle of chili powder for a little heat!

Nutrition Tips and Dietary Adaptations

This recipe can easily be adjusted to fit various dietary needs:

  • Low-carb option: Use lettuce wraps instead of tortillas for a lighter version.
  • Higher protein: Consider adding grilled chicken or turkey for extra protein.
  • Vegan-friendly: As mentioned, use plant-based cheese and syrup for a delicious vegan option.

Essential Equipment for Success

To make your cooking experience seamless, here are some recommended tools:

  • Non-stick skillet: Essential for easy cooking and flipping of the quesadillas.
  • Spatula: A sturdy spatula will help you flip the quesadillas without breaking them.
  • Sharp knife or pizza cutter: For cutting the quesadillas into perfect wedges.

Serving Suggestions

Enhance your quesadilla experience with these serving ideas:

  • Garnish with herbs: Fresh herbs like cilantro or parsley can add a pop of color and flavor.
  • Pair with dips: Serve with a side of yogurt, salsa, or guacamole for added richness.
  • Use colorful plates: Presenting your quesadillas on vibrant plates can make them even more appetizing.

Conclusion

These Fig, Honey, Pistachio, and Goat Cheese Quesadillas are more than just a snack—they’re a celebration of flavors and textures that anyone can enjoy. With their ease of preparation and versatility, you’ll find yourself reaching for this recipe time and time again. So gather your ingredients, summon your culinary creativity, and get ready to impress yourself and your loved ones with this delightful dish!
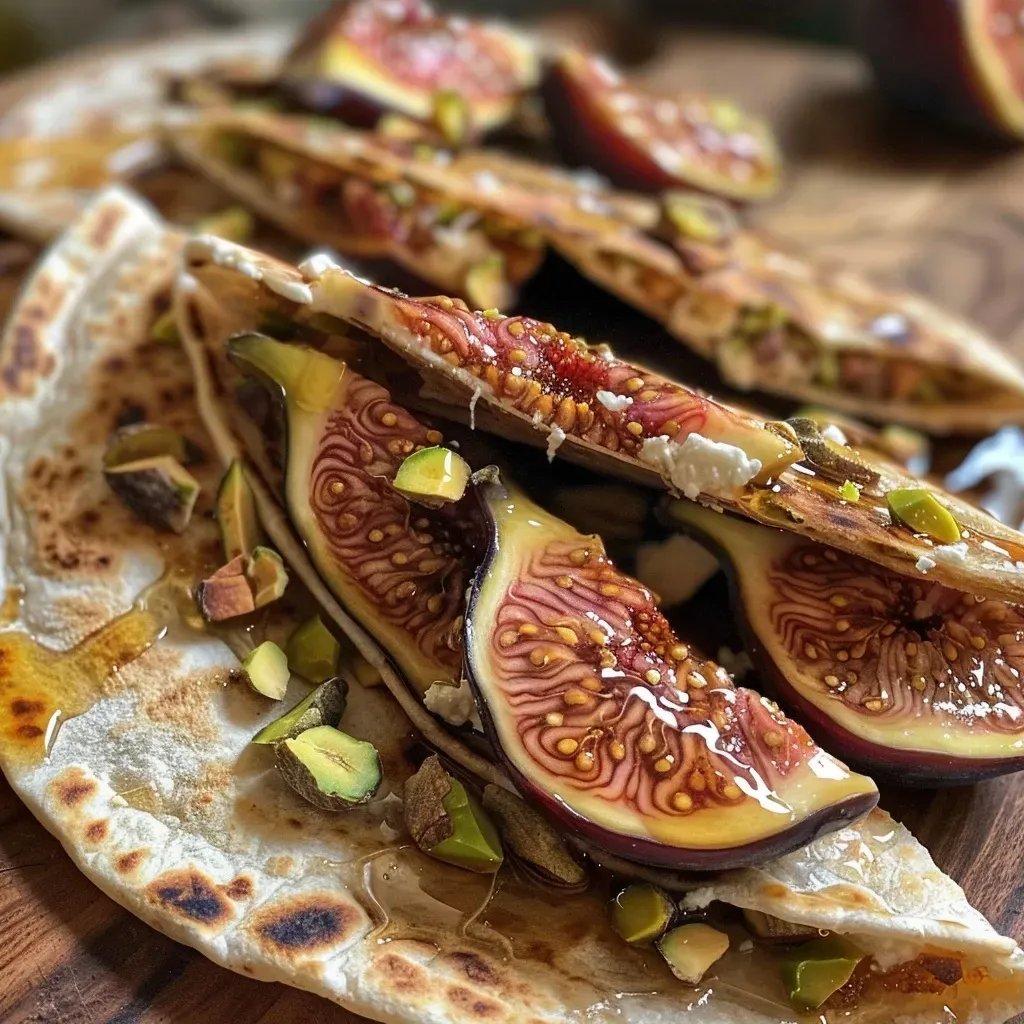
Fig, Honey, Pistachio, and Goat Cheese Quesadillas

Prep Time 10 minutes
Cook Time 6 minutes
Total Time 16 minutes
Servings 2 servings
Calories 350
Delight in these sweet and savory quesadillas combining fresh figs, creamy goat cheese, crunchy pistachios, and honey for a quick, flavorful snack or light meal.

Ingredients

Tortillas

  • 2 pieces brown rice tortillas
  • 1/3 cup soft goat cheese
  • sliced fresh figs (amount as needed)
  • shelled pistachios (amount as needed)
  • 1 tablespoon raw honey

Instructions 

  • Spread goat cheese on one tortilla and layer with sliced figs and pistachios.
  • Spread honey on the second tortilla and place it honey side down on top of the first.
  • Heat on a buttered griddle over medium heat for 2-3 minutes per side until crispy.
  • Cut into wedges and serve.

Notes

Use fresh figs for the best flavor and texture.
Calories: 350kcal
Cost: $15
Course: Appetizer, Snack
Cuisine: Fusion
Keyword: Fig, Goat Cheese, honey, Pistachio

Transform Your Mornings with Easy Pretzel and Nutella Granola

If you’re looking for a delightful way to kickstart your day or a quick snack to satisfy your cravings, you’ve come to the right place! This Pretzel and Nutella Granola recipe combines the irresistible sweetness of Nutella with the crunch of pretzels and oats, making it the perfect choice for breakfast or a mid-day treat. In this article, we’ll explore everything you need to know to make this delicious granola, from ingredients to variations, and tips for making it your own.

Why You’ll Love This Recipe

  • Quick and Easy: This recipe takes just 25 minutes from start to finish, allowing you to whip up a delicious snack without spending hours in the kitchen.
  • Customizable: Feel free to add your favorite nuts, seeds, or dried fruits for a personal touch that fits your taste.
  • Healthy Indulgence: With oats as the base and a moderate amount of Nutella, this granola offers a sweet treat that can still fit into a balanced diet.
  • Perfect for Meal Prep: Make a big batch and store it for quick breakfasts or snacks throughout the week.
  • Kid-Friendly: The combination of sweet chocolate and crunchy pretzels makes this granola a hit with kids and adults alike!

Ingredient Breakdown

Let’s dive into the ingredients you’ll need to make this scrumptious granola:

  • 4 Tbsp Nutella: This chocolate-hazelnut spread adds sweetness and flavor. You can substitute it with any chocolate spread or even a homemade nut butter if you prefer.
  • 4 Tbsp honey: This natural sweetener binds the granola and adds flavor. Maple syrup or agave nectar can be used as alternatives.
  • 3/4 cup pretzels (crushed): The star of this recipe adds a salty crunch. Use regular or gluten-free pretzels depending on your dietary needs.
  • 2 cups rolled oats: A nutritious base packed with fiber. Steel-cut oats can be used for a heartier texture but will require a longer baking time.

How to Make Pretzel and Nutella Granola

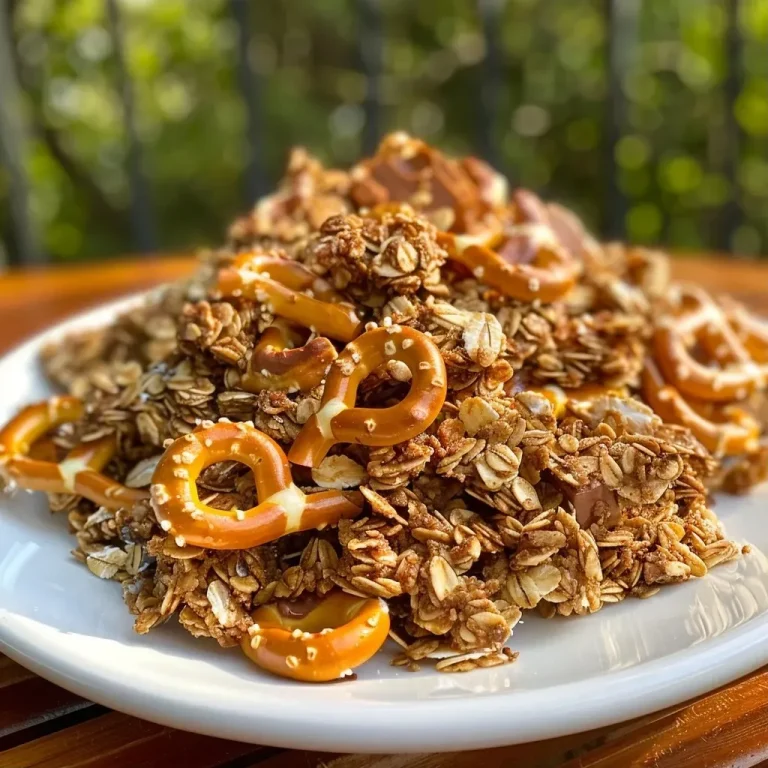
Side view of Pretzel and Nutella Granola, revealing pretzel pieces and glistening Nutella.

Ready to bring this delicious granola to life? Follow these simple steps:

  1. Preheat your oven: Set it to 320ËšF (160ËšC). Line a baking sheet with parchment paper or a silicone baking mat for easy cleanup.
  2. Prepare the Nutella mixture: In a small microwave-safe bowl, combine the Nutella and honey. Microwave for 20-30 seconds until warm, then stir until smooth.
  3. Mix dry ingredients: In a medium bowl, combine the rolled oats and crushed pretzels, ensuring they are evenly distributed.
  4. Combine: Pour the melted Nutella mixture over the dry ingredients. Stir until the oats and pretzels are well-coated.
  5. Bake: Spread the mixture evenly on the prepared baking sheet. Bake for about 17 minutes, stirring halfway through to ensure even toasting. Keep an eye on it to avoid burning.
  6. Cool and Store: Allow the granola to cool completely on the baking sheet. Once cooled, transfer it to an airtight container for storage.

Pro Tips for Perfect Granola

  • Watch the baking time: Ovens can vary, so keep an eye on your granola to ensure it doesn’t burn. Look for a golden-brown color.
  • Stir to prevent clumping: Stirring halfway through baking helps to achieve a more even texture and prevents clumping.
  • Try adding spices: A pinch of cinnamon or nutmeg can enhance the flavor profile of your granola.
  • Experiment with nuts: Chopped nuts like almonds or walnuts can add extra crunch and nutritional value.
  • Use fresh ingredients: Make sure your oats and nuts are fresh for the best flavor and texture.
  • Let it cool completely: This is crucial for achieving a crunchy texture; it will harden as it cools.
  • Store correctly: Keeping it in an airtight container will help maintain freshness and crunchiness.
  • Make it a breakfast bowl: Pair your granola with yogurt and fresh fruits for a nutritious breakfast.

Common Mistakes and Troubleshooting

Here are a few common pitfalls to avoid when making your granola:

  • Overbaking: Keep a close watch, as granola can quickly go from golden to burnt.
  • Not mixing enough: Ensure all ingredients are well-combined; otherwise, some clusters may not hold together.
  • Skipping the cooling process: If you store it while it’s still warm, the granola will become soggy.
  • Using stale ingredients: Always check the freshness of your oats and other components before starting.

Variations to Try

Feel free to get creative! Here are some delicious variations:

  • Chocolate Chip Pretzel Granola: Add mini chocolate chips after baking for extra sweetness.
  • Nutty Granola: Incorporate a mix of your favorite nuts for added crunch and healthy fats.
  • Dried Fruit Delight: Mix in dried cranberries, raisins, or chopped apricots after baking for a chewy texture.
  • Spicy Kick: Add a dash of cayenne pepper or chili powder for a sweet and spicy flavor.

Storage and Make-Ahead Instructions

This granola is perfect for meal prep! Here’s how to store it:

  • Store in an airtight container: Keep your granola stored in a cool, dry place to maintain freshness.
  • Lasts up to 2 weeks: Enjoy it for up to two weeks, if it lasts that long!
  • Make-ahead: Feel free to prepare a big batch on the weekend for quick breakfasts or snacks during the week.

Frequently Asked Questions

  • Can I use a different nut butter? Yes! Any nut butter can be used in place of Nutella for a different flavor.
  • Is this recipe gluten-free? If you use gluten-free pretzels and oats, this granola can be gluten-free.
  • Can I freeze granola? Absolutely! You can freeze granola for up to 3 months in an airtight container.
  • How do I make it less sweet? Reduce the amount of honey or Nutella, or substitute with a less sweet alternative.
  • What’s the best way to serve granola? Enjoy it with milk, yogurt, or as a topping for smoothie bowls.
  • Can I add protein powder? Yes! Stir in a scoop of protein powder to boost the nutritional content.
  • Can I make it without baking? Yes! You can make no-bake granola bars using the same ingredients.
  • What’s the nutritional value of this granola? It varies based on ingredients, but generally, granola is high in fiber and healthy fats.

Nutrition Tips and Dietary Adaptations

This granola can easily fit into various dietary preferences:

  • Vegan: Substitute honey with maple syrup or agave nectar.
  • Nut-Free: Replace Nutella with sunflower seed butter and use nut-free granola options.
  • High-Protein: Add seeds like chia or hemp hearts for an extra protein boost.

Essential Equipment for Success

Here’s what you’ll need to make this recipe:

  • Baking sheet: A standard baking sheet lined with parchment paper or a silicone mat for easy baking.
  • Mixing bowls: A few different sizes for mixing your ingredients.
  • Measuring cups and spoons: To ensure accurate measurements for consistency.
  • Microwave-safe bowl: For melting the Nutella and honey mixture.

Serving Suggestions

Here are a few delightful ways to enjoy your Pretzel and Nutella Granola:

  • As a breakfast cereal: Serve with your choice of milk or a dairy-free alternative.
  • Yogurt parfait: Layer with yogurt and fresh fruits for a nutritious snack or breakfast.
  • On top of smoothie bowls: Add a crunchy topping to your favorite smoothie bowl.
  • As a snack: Grab a handful for a sweet and salty treat on the go!

In conclusion, making your own Pretzel and Nutella Granola is not only easy but also incredibly rewarding. With this comprehensive guide, you have all the tools you need to create a delicious, customizable snack that the whole family will love. So why wait? Gather your ingredients, unleash your creativity, and enjoy the satisfying crunch of homemade granola in the comforts of your own kitchen!

Pretzel and Nutella Granola

Prep Time 5 minutes
Cook Time 17 minutes
Total Time 22 minutes
Servings 4 cups
Calories 250
A delicious homemade granola combining crunchy pretzels and rich Nutella for a sweet and salty treat.

Ingredients

Nutella and honey mixture

  • 4 Tbsp Nutella
  • 4 Tbsp honey
  • 3/4 cup pretzels, crushed
  • 2 cups rolled oats

Instructions 

  • Preheat oven to 320°F (160°C). Line a baking sheet with parchment.
  • Microwave Nutella and honey for 20-30 seconds, then mix until smooth.
  • Mix oats and crushed pretzels, then stir in the Nutella mixture until coated.
  • Spread mixture on baking sheet and bake for 17 minutes. Cool before storing.

Notes

Store in an airtight container for freshness.
Calories: 250kcal
Cost: $8
Course: Breakfast, Snack
Cuisine: American
Keyword: Granola, Nutella, pretzels

An Elegant Delight: Discovering Figs with Ricotta, Pistachios, and Honey

Welcome to a culinary journey that celebrates the luscious sweetness of fresh figs paired with creamy ricotta cheese, crunchy pistachios, and a drizzle of honey. This delightful appetizer is not just a feast for the eyes; it’s a symphony of flavors that can elevate any gathering, whether it’s a casual get-together or an elegant dinner party. In this article, we’ll explore everything you need to know to make this dish a standout on your table.

You’ll be surprised at how simple ingredients can create a masterpiece! Ready to dive in? Let’s go!

Why You’ll Love This Recipe

  • Quick and Easy Preparation: With just a few simple steps, you can whip up this delightful dish in under 15 minutes, making it perfect for last-minute entertaining.
  • Perfect Balance of Flavors: The combination of sweet figs, creamy ricotta, crunchy pistachios, and honey creates a harmonious flavor profile that will impress your guests.
  • Versatile Serving Options: Serve it as an appetizer, dessert, or even a breakfast treat! This dish is incredibly versatile, fitting into various occasions.
  • Nutritious and Wholesome: Packed with vitamins, minerals, and healthy fats, this recipe is not only delicious but also nutritious, making it a guilt-free indulgence.
  • Customizable: You can easily switch up ingredients to cater to dietary preferences or to experiment with new flavors, ensuring that no two servings are ever the same!

Key Ingredients & Substitutions

Let’s break down the essential elements of this dish. Each ingredient plays a crucial role in the overall taste and texture:

  • Fresh Figs: The star of our dish! Look for ripe figs that yield slightly when pressed. If fresh figs aren’t available, you can use dried figs, but soak them in warm water to soften.
  • Ricotta Cheese: This creamy cheese gives the dish its rich texture. If you prefer a different texture, you can substitute it with mascarpone or cottage cheese.
  • Pistachios: These nuts add a delightful crunch. If you’re allergic to nuts or want a different flavor, try sunflower seeds or chopped hazelnuts.
  • Honey: The natural sweetness of honey ties everything together. For a vegan option, you can use maple syrup or agave nectar.
  • Optional Garnish: A pinch of sea salt or a sprinkle of lemon zest can enhance the flavors and add a refreshing twist.

Step-by-Step Instructions

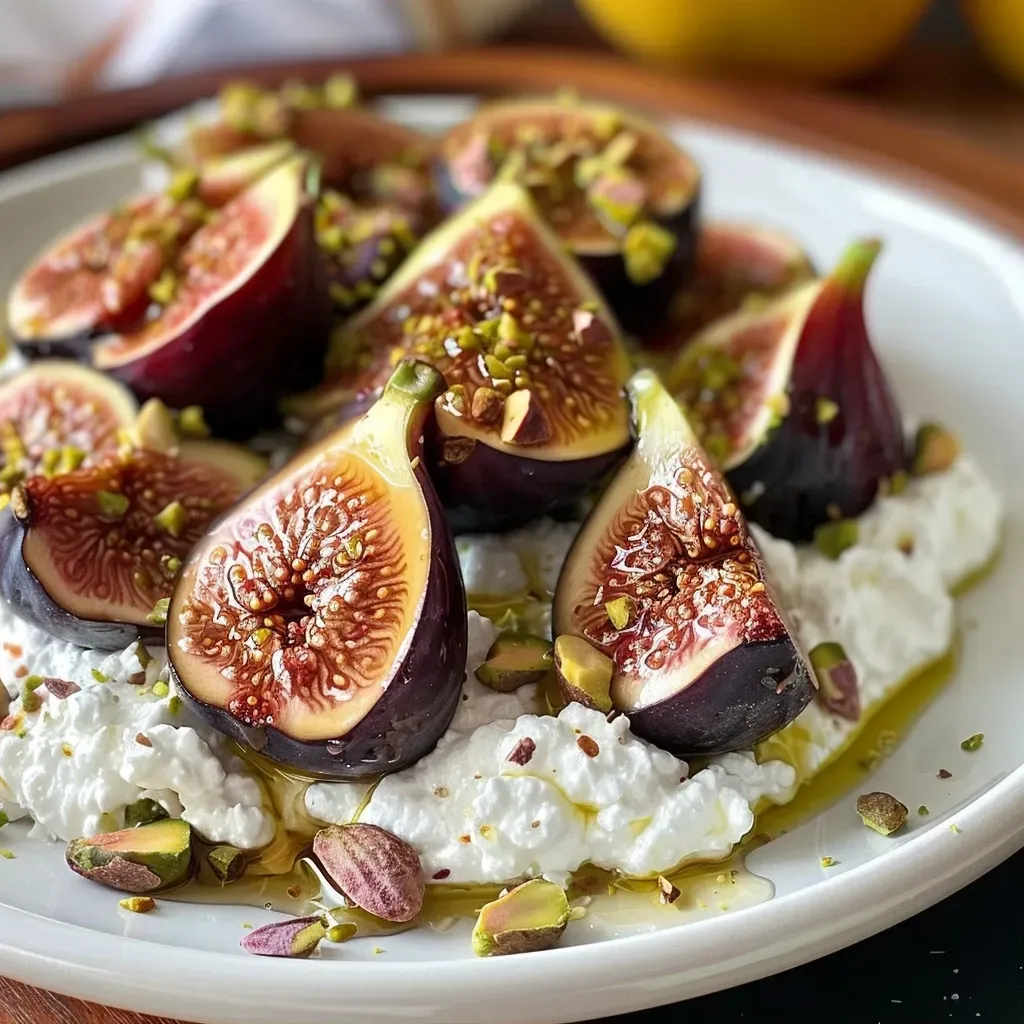
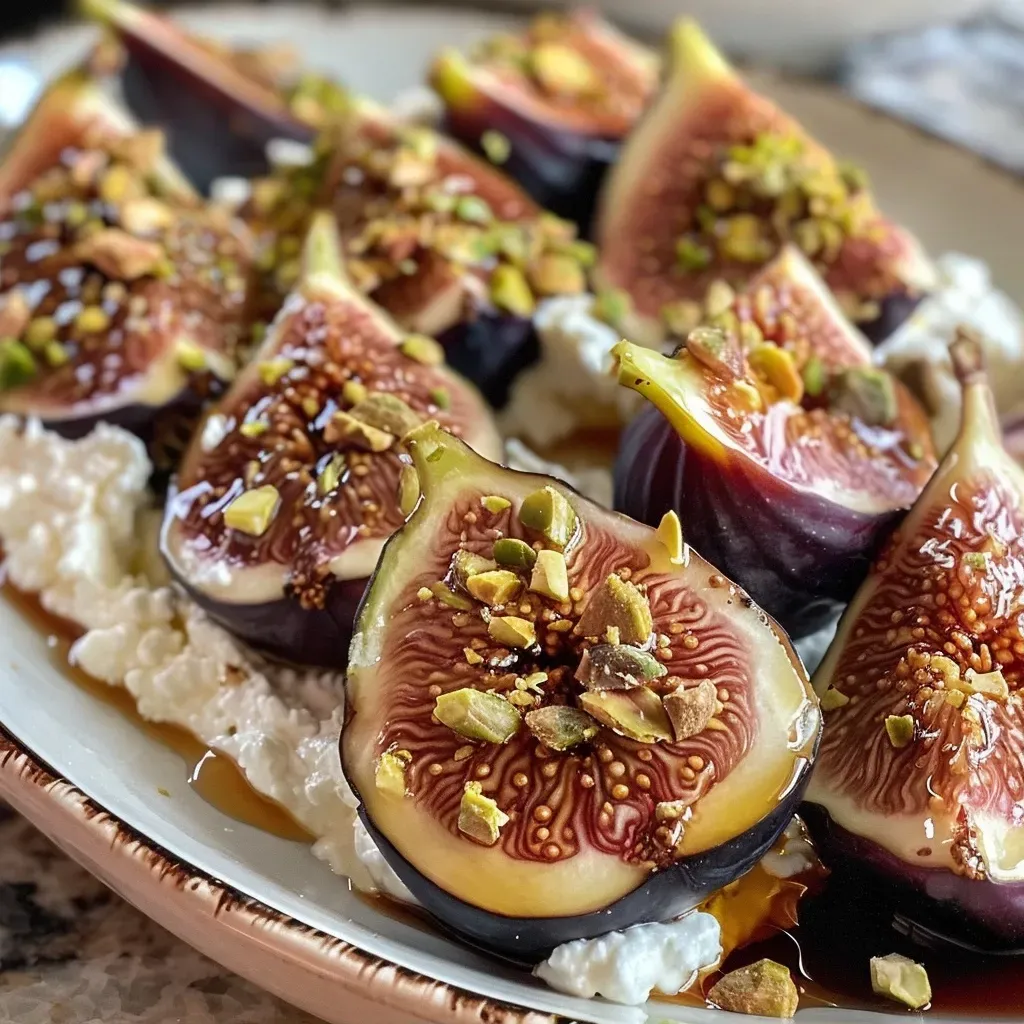
Fresh figs filled with creamy ricotta, garnished with chopped pistachios and honey drizzle.

Time to get cooking! Follow these simple steps to create your Easy Figs with Ricotta, Pistachios, and Honey:

  • Wash and Prepare the Figs: Start by gently washing the figs under cool running water to remove any dirt. After washing, pat them dry with a paper towel. Then, cut each fig in half lengthwise, exposing their sweet insides.
  • Arrange the Figs: Place your fig halves, cut side up, on a serving plate. This presentation will make them look lovely and inviting!
  • Add the Ricotta: Spoon a generous amount of ricotta cheese onto each fig half. Don’t be shy; the creaminess of the ricotta is what makes this dish so irresistible!
  • Sprinkle on the Pistachios: Evenly sprinkle the chopped pistachios over the ricotta-topped figs. They’ll add a nice crunch and nutty flavor that pairs perfectly with the creaminess of the ricotta.
  • Drizzle with Honey: Finish it off with a generous drizzle of honey. The sweetness of the honey combined with the figs is simply divine!
  • Optional Garnish: Elevate the dish even more with a tiny pinch of sea salt or a little sprinkle of lemon zest for a pop of brightness.
  • Serve and Enjoy: Your easy figs with ricotta, pistachios, and honey are ready! Serve them immediately and savor the creamy, crunchy, sweet, and fresh flavors. Enjoy every bite!

Pro Tips for Perfection

  • Choosing Figs: Look for figs that are slightly soft to the touch but not mushy. This indicates they are ripe and ready to eat.
  • Room Temperature Ingredients: Allow your ricotta to sit at room temperature for about 30 minutes before serving. This enhances its creaminess and makes it easier to spread.
  • Make Ahead: You can prepare the figs and ricotta in advance, but wait to add the honey until just before serving to keep the figs fresh.
  • Presentation Matters: Arrange the figs artistically on a platter, and consider using a drizzle of balsamic reduction for an elegant touch.
  • Experiment with Flavors: Don’t hesitate to add herbs like mint or basil for a refreshing twist.
  • Texture Variation: Toast your pistachios lightly in a dry skillet to enhance their flavor and crunch.
  • Infuse Your Honey: For a unique twist, infuse your honey with herbs like rosemary or thyme for added depth.
  • Serving Size: Plan for about two fig halves per person as an appetizer.

Common Mistakes and Troubleshooting

Even the best cooks make mistakes! Here are some common pitfalls and how to avoid them:

  • Overripe Figs: If your figs are too mushy, they may not hold their shape. Always check for firmness to ensure optimal texture.
  • Too Much Ricotta: While it’s tempting to pile on the ricotta, too much can overwhelm the figs. A spoonful per fig half is perfect.
  • Forgetting the Honey: Don’t skip the honey! It’s the final touch that ties all the flavors together.
  • Pistachio Substitutions: If you’re using a substitute for pistachios, ensure the flavor complements the figs instead of overpowering them.

Variations to Try

Want to mix things up? Here are some fun variations to consider:

  • Go Savory: Add crumbled blue cheese instead of ricotta for a bold flavor contrast.
  • Different Nuts: Swap out pistachios for walnuts or almonds for a different nutty flavor.
  • Chocolate Drizzle: For a dessert version, drizzle melted dark chocolate over the figs instead of honey.
  • Spiced Honey: Infuse your honey with cinnamon or chili flakes for a spicy kick!

Storage and Make-Ahead Instructions

While this dish is best enjoyed fresh, here are some storage tips:

  • Refrigeration: Store any leftovers in an airtight container in the fridge for up to two days. However, the figs may lose some of their texture.
  • Make-Ahead: Prepare the fig halves and ricotta mixture a few hours in advance. Assemble just before serving for the best flavor and presentation.

Nutrition Tips and Dietary Adaptations

This dish is naturally gluten-free and can be made vegetarian. Here are some additional tips:

  • Healthy Fats: The pistachios provide healthy fats and fiber, making this a nutritious snack or appetizer.
  • Dairy-Free Option: Substitute the ricotta with a dairy-free cheese alternative to make it vegan.
  • Low-Sugar Version: Use a sugar-free syrup instead of honey for a lower-sugar option.

Equipment Recommendations

To make this recipe, you’ll need:

  • Sharp Knife: For effortlessly slicing the figs.
  • Serving Platter: To beautifully present your figs.
  • Measuring Cups: For accurately measuring your ingredients.

Serving Suggestions

This dish shines on its own, but here are a few ideas to make it a part of a larger spread:

  • Pair with Wine: A glass of sweet white wine or a light rosé complements the flavors beautifully.
  • Accompany with Cheese: Serve alongside a selection of cheeses for an elegant cheese board.
  • Use as a Salad Topping: Add these figs to a mixed greens salad for a burst of flavor.

FAQ: Easy Figs with Ricotta, Pistachios, and Honey

  • What type of figs should I use? Fresh figs are best, but dried figs can be used in a pinch.
  • Can I prepare this dish ahead of time? Yes, you can prepare the figs and ricotta mixture ahead of time, but wait to add honey until serving.
  • What can I substitute for ricotta? Mascarpone or cottage cheese are great alternatives.
  • How should I store leftovers? Store leftovers in an airtight container in the fridge for up to two days.
  • Can this be made vegan? Absolutely! Use a dairy-free cheese substitute and maple syrup instead of honey.
  • What nuts can I use instead of pistachios? Walnuts or almonds work well as substitutes.
  • Is this recipe gluten-free? Yes, this recipe is naturally gluten-free!
  • Can I add other ingredients? Feel free to experiment with flavors by adding herbs or different fruits!

Final Thoughts

Creating a stunning appetizer doesn’t have to be complicated. With fresh figs, creamy ricotta, crunchy pistachios, and a drizzle of honey, you can impress your friends and family without breaking a sweat. Remember, cooking is about experimentation and fun, so don’t hesitate to make this recipe your own. Enjoy the process, and happy cooking!

Easy Figs with Ricotta, Pistachios, and Honey

Prep Time 10 minutes
Total Time 10 minutes
Servings 4 servings
Calories 150
A simple and elegant appetizer featuring fresh figs topped with creamy ricotta, crunchy pistachios, and a drizzle of honey.

Ingredients

Fruits

  • 8 pieces fresh ripe figs

Dairy

  • 1 cup ricotta cheese

Nuts

  • 1/3 cup shelled pistachios, roughly chopped
  • 2 tablespoons honey

Optional Garnish

  • a pinch sea salt or lemon zest (for garnish)

Instructions 

  • Wash, dry, and halve the figs lengthwise.
  • Arrange fig halves on a plate, cut side up.
  • Spoon ricotta onto each fig half.
  • Sprinkle chopped pistachios over the ricotta-topped figs.
  • Drizzle honey over all the figs and add optional garnish if desired.
  • Serve immediately and enjoy!

Notes

For extra flavor, add a tiny pinch of sea salt or lemon zest on top.
Calories: 150kcal
Cost: $15
Course: Appetizer
Cuisine: Mediterranean
Keyword: Figs

Transform Your Leftover Butternut Squash Seeds into a Delicious Snack!

Have you ever wondered what to do with the seeds from your butternut squash? Look no further! Roasting butternut squash seeds is not only easy and fun, but it also turns what would typically be kitchen scraps into a crunchy, nutritious delight. This guide will walk you through every step, ensuring that you feel confident and excited about making this healthy snack.

Why You’ll Love This Recipe

  • Simple Steps: This recipe breaks down the process into easy-to-follow steps, making it approachable for cooks of all skill levels.
  • Health Benefits: Butternut squash seeds are packed with nutrients, including magnesium, zinc, and healthy fats, making them a fantastic addition to your diet.
  • Versatile Flavor Profiles: You can customize the seasoning to create your perfect flavor, whether you prefer spicy, savory, or sweet.
  • Environmentally Friendly: Using the seeds reduces waste and makes the most of your butternut squash, aligning with sustainable cooking practices.
  • Perfect for Snacking: These crunchy seeds make an excellent snack on their own or as a topping for salads, soups, and more!

Ingredient Breakdown

Here’s what you’ll need to create your roasted butternut squash seeds:

  • 1/4 cup butternut squash seeds: From one medium butternut squash.
  • 1/2 teaspoon olive oil: This helps the seasonings stick and gives the seeds a delicious flavor.
  • 1/8 teaspoon salt: Adjust to taste; this enhances the overall flavor of the seeds.
  • 1/4 teaspoon coarsely ground black pepper: Adds a mild kick; feel free to adjust according to your preference.
  • 1 pinch cayenne pepper: For those who like it spicy—add more if you dare!

Pro Tips for Perfect Roasted Seeds

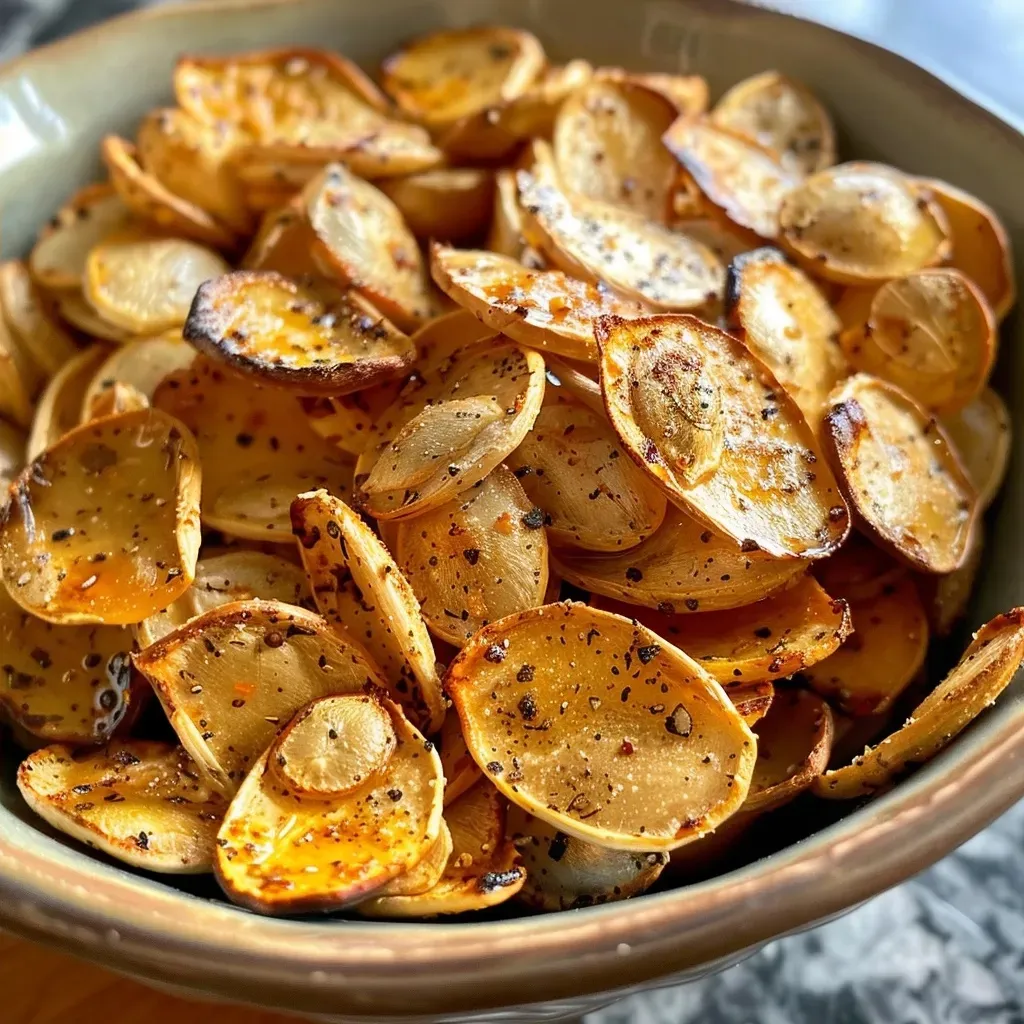
Juicy roasted butternut squash seeds displayed in a wooden bowl, side view.
  • Clean Thoroughly: Rinse the seeds well to remove any stringy bits from the squash. Pat them dry for the best crunch.
  • Season to Taste: The amount of seasoning can vary based on how many seeds you have. Adjust oil and spices accordingly!
  • Monitor Closely: Keep an eye on the seeds while they roast; they can go from perfectly golden to burnt quickly. Stir halfway through for even cooking.
  • Experiment with Flavors: Try adding garlic powder, smoked paprika, or even cinnamon for a sweet twist!
  • Storage: Store your roasted seeds in an airtight container at room temperature for up to a week, or refrigerate for longer freshness.
  • Make Ahead: Roast a large batch and enjoy them throughout the week as a quick snack or topping.
  • Air Fryer Option: If you have an air fryer, you can achieve perfectly roasted seeds in about 10 minutes at 300°F.
  • Don’t Waste Anything: Use the flesh of the butternut squash in soups, stews, or purees to complement your snack!

Common Mistakes and Troubleshooting

Cooking is all about learning from mistakes, so here are some common pitfalls and how to avoid them:

  • Overcooking: Seeds can burn quickly; check them frequently towards the end of the roasting time.
  • Insufficient Seasoning: If your seeds taste bland, don’t be afraid to add more spices or salt after roasting!
  • Not Drying Properly: If seeds are still wet when you roast them, they won’t get crunchy. Be sure to dry them thoroughly.
  • Skipping the Toss: Make sure to toss the seeds well with the oil and seasonings to ensure an even distribution of flavor.

Flavor Variations to Try

Get creative with your roasted seeds! Here are some flavor variations to keep things exciting:

  • Sweet Cinnamon: Add 1 teaspoon of brown sugar and a sprinkle of cinnamon for a sweet treat.
  • Garlic and Herb: Toss with garlic powder and Italian seasoning for an aromatic twist.
  • Spicy Sriracha: Mix in a teaspoon of Sriracha before roasting for a fiery kick.
  • Smoky BBQ: Use smoked paprika and a touch of brown sugar for a sweet and smoky flavor.

Storage and Make-Ahead Instructions

To keep your roasted butternut squash seeds fresh, follow these guidelines:

  • Storage: Store in an airtight container at room temperature for up to one week. For longer shelf life, refrigerate.
  • Make Ahead: You can roast a large batch ahead of time. Just be sure to let them cool completely before storing.

Frequently Asked Questions

  • Can I eat the seeds raw? Yes, but roasting enhances the flavor and texture!
  • What if my seeds burn? If they burn, it’s best to discard them and try again, keeping a closer eye on the roasting time next time.
  • Can I season them differently? Absolutely! Feel free to experiment with your favorite spices.
  • How do I know when they’re done? When they’re golden brown and smell nutty, they’re done!
  • Can I use seeds from other squash? Yes! The method works for pumpkin seeds and other squash varieties as well.
  • Are roasted seeds gluten-free? Yes, they are naturally gluten-free!
  • Can I re-roast them if they aren’t crunchy? Yes, just pop them back in the oven for a few minutes.
  • What are some serving suggestions? Use them as a salad topping, in granola, or simply enjoy them as a snack!

Nutritional Tips and Dietary Adaptations

Roasted butternut squash seeds are not only delicious but also nutritious. Here are some tips to enhance their health benefits:

  • Rich in Nutrients: They’re a good source of protein, healthy fats, and essential minerals.
  • Low Carb Option: Perfect for those following a low-carb or keto diet.
  • Vegan-Friendly: Naturally plant-based, making them great for all diets!

Essential Equipment for Roasting Seeds

To make this process smoother, here’s what you’ll need:

  • Baking Sheet: A rimmed baking sheet is best for even roasting.
  • Parchment Paper: Optional, but it can help with cleanup and prevent sticking.
  • Mixing Bowl: For tossing the seeds with oil and seasonings.
  • Measuring Spoons: Accurate measurements ensure the right flavor balance.

Serving Suggestions

Here are a few delicious ways to enjoy your roasted butternut squash seeds:

  • Snack Time: Enjoy them straight from the container for a quick, healthy snack.
  • Salad Topping: Sprinkle them over salads for added crunch and nutrition.
  • Granola Mix: Incorporate them into your homemade granola for extra texture.
  • Soups and Stews: Use as a garnish on soups for added flavor and visual appeal.

With just a few simple steps, you can unlock the flavor of your butternut squash seeds and transform them into a delightful snack. Remember, cooking is all about experimenting and having fun, so don’t hesitate to try different flavors and techniques. Happy roasting!

Roasted Butternut Squash Seeds

Prep Time 10 minutes
Cook Time 15 minutes
Total Time 25 minutes
Servings 4 servings
Calories 150
Enjoy crunchy, flavorful roasted butternut squash seeds as a healthy snack or topping.

Ingredients

Seeds

  • 1/4 cup butternut squash seeds (from 1 butternut squash)
  • 1/2 teaspoon olive oil
  • 1/8 teaspoon salt (or to taste)
  • 1/4 teaspoon coarsely ground black pepper (or to taste)
  • 1 pinch cayenne pepper (add more if you like it spicy)

Instructions 

  • Preheat oven to 325°F (160°C).
  • Remove fibers from seeds, rinse, and dry thoroughly.
  • Toss seeds with oil and seasonings, spread in a single layer on a baking sheet.
  • Bake for 14-17 minutes, stirring halfway, until golden. Cool before storing.

Notes

Keep an eye on the seeds to prevent over-browning and adjust seasonings to taste.
Calories: 150kcal
Cost: $2
Course: Snack
Cuisine: American
Keyword: butternut squash seeds

Transform Your Mornings with a Salted Date & Pistachio Yogurt Parfait

Are you ready to elevate your breakfast game? Look no further than this Salted Date & Pistachio Yogurt Parfait. This delightful dish brings together creamy Greek yogurt, sweet caramelized dates, and crunchy pistachios, creating a perfect blend of flavors and textures. Not only is it high in protein and gluten-free, but this recipe is also a feast for the eyes and a quick solution for busy mornings or a satisfying snack any time of day.

In this guide, we’ll explore why this parfait is a must-try, provide a detailed ingredient breakdown, share pro tips and common mistakes to avoid, and suggest some delicious variations. Let’s dive in and make this recipe a staple in your kitchen!

Why You’ll Love This Recipe

  • Quick and Easy: This parfait comes together in just 15 minutes, making it a perfect choice for a busy morning or a last-minute dessert.
  • Nutrient-Packed: With Greek yogurt as the base, you’re getting a healthy dose of protein, calcium, and probiotics.
  • Customizable: This recipe allows you to mix and match ingredients, so you can tailor it to your taste preferences or dietary needs.
  • Visually Stunning: The colorful layers of yogurt, dates, and pistachios make for a gorgeous presentation that’s perfect for brunch or entertaining.
  • Guilt-Free Indulgence: Enjoy a sweet treat without the guilt; this parfait is both satisfying and nutritious.

Ingredient Breakdown: What You’ll Need

Here’s what you’ll need to whip up your Salted Date & Pistachio Yogurt Parfait:

  • 1/4 cup roasted and salted pistachios: For a crunchy texture. If you prefer, you can toast raw pistachios and add a pinch of salt.
  • 1 tsp olive oil: Helps caramelize the dates. You can substitute with avocado oil if preferred.
  • 4 pitted Medjool dates: Sweet and chewy, these dates add natural sweetness. Feel free to use other dried fruits if you’re out of dates.
  • 2 tbsp water: Needed for caramelizing the dates; you can adjust as necessary.
  • Flaky sea salt: Such as Maldon, to enhance flavor.
  • 2 tsp vanilla bean paste: Adds a lovely depth of flavor. If you don’t have this, vanilla extract works just fine.
  • 2 cups Greek yogurt: Choose from non-fat, low-fat, or full-fat based on your preference.
  • Honey: Optional, for additional sweetness.

How to Make Your Parfait

Side profile of a yogurt parfait featuring visible layers of pistachios and dates.

Follow these simple steps to create your delightful parfait:

  1. Prepare Pistachios: If not already roasted and salted, toast raw pistachios in a dry skillet over medium heat for 2–3 minutes until fragrant. Let cool slightly, then chop.
  2. Caramelize Dates: In a small skillet, heat olive oil over medium heat. Add chopped dates and a generous pinch of flaky sea salt. Sauté for 2–3 minutes until sticky and glossy. Add water as needed to soften and create a caramel-like texture. Remove from heat and let cool slightly.
  3. Whip Yogurt: In a mixing bowl, whisk together Greek yogurt and vanilla bean paste until smooth, fluffy, and airy.
  4. Assemble Parfaits: Divide half the yogurt between two cups or jars. Sprinkle with half the chopped pistachios. Add the remaining yogurt, then top with the remaining pistachios, salted caramelized dates, a pinch of sea salt, and a drizzle of honey, if desired.
  5. Serve & Enjoy: Best served fresh, but can be stored covered in the refrigerator for up to 2 days.

Expert Tips for the Perfect Parfait

  • Use Fresh Ingredients: Make sure your yogurt and fruits are fresh for the best flavor and texture.
  • Experiment with Flavors: Don’t hesitate to add spices like cinnamon or nutmeg to your yogurt for an extra flavor kick.
  • Layer Creatively: For a beautiful presentation, alternate layers of yogurt, dates, and pistachios.
  • Make it Vegan: Substitute Greek yogurt with plant-based yogurt and use maple syrup instead of honey.
  • Chill Your Ingredients: Using cold yogurt will help keep the parfait refreshing and delicious.
  • Adjust Sweetness: Taste your yogurt before layering and add honey if you prefer a sweeter parfait.
  • Make Ahead: Prepare the yogurt and caramelized dates in advance to save time in the morning.
  • Mind Your Portions: Keep an eye on serving sizes, especially if you’re watching your calorie intake.

Avoiding Common Mistakes

Here are some common pitfalls to watch out for:

  • Overcooking Dates: Be mindful not to overcook the dates; you want them sticky but not burnt.
  • Skipping the Salt: A pinch of flaky sea salt enhances the flavors, so don’t skip it!
  • Layering Incorrectly: Layering improperly can lead to a mess. Follow the order of layering for the best results.
  • Using Low-Quality Yogurt: The quality of the yogurt impacts the flavor significantly. Go for high-quality Greek yogurt.

Delicious Variations to Try

Feeling creative? Here are some fun variations to customize your parfait:

  • Berry Bliss: Incorporate fresh berries like strawberries, blueberries, or raspberries for added color and flavor.
  • Chocolate Delight: Stir in cocoa powder to the yogurt and add chocolate chips for a sweet twist.
  • Tropical Treat: Swap dates for diced mango and top with shredded coconut.
  • Nutty Banana: Add sliced bananas and a drizzle of peanut butter for a hearty version.

Storage and Make-Ahead Instructions

This parfait is best enjoyed fresh, but if you want to prepare ahead:

  • Store the yogurt and caramelized dates separately in airtight containers in the fridge for up to 2 days.
  • Assemble the parfait just before serving to maintain the texture of the ingredients.
  • Layering the parfait a few hours in advance can also work, but it’s best to keep the crunchy elements separate until serving.

Frequently Asked Questions

Here are some common questions about this recipe:

  • Can I use non-Greek yogurt? Yes, but Greek yogurt offers a creamier texture and higher protein content.
  • How can I make this dairy-free? Use plant-based yogurt alternatives and ensure any other ingredients are dairy-free.
  • Can I add protein powder? Absolutely! Stir in a scoop of your favorite protein powder for an extra boost.
  • What can I use instead of pistachios? Almonds, walnuts, or granola can be delicious alternatives.
  • Is this recipe gluten-free? Yes, all the ingredients are naturally gluten-free.
  • How long does this parfait last? It can be stored in the fridge for up to 2 days, but it’s best enjoyed fresh.
  • Can I prepare this for meal prep? Yes, prepare the yogurt and toppings separately for quick assembly during the week.
  • What’s the best way to serve this? Serve chilled in a glass for a beautiful presentation.

Nutritional Tips and Dietary Adaptations

This parfait can be adapted to various dietary needs:

  • High-Protein: Use full-fat Greek yogurt or add a scoop of protein powder.
  • Low-Sugar: Skip the honey and rely on the natural sweetness of the dates.
  • Vegan Option: Substitute Greek yogurt with a plant-based alternative and use maple syrup.
  • Nut-Free: Omit the nuts and replace them with seeds such as chia or sunflower seeds for crunch.

Essential Equipment Recommendations

To make your parfait-making experience smooth and enjoyable, consider having the following on hand:

  • Mixing Bowls: A couple of different sized mixing bowls are great for combining your ingredients.
  • Skillet: A non-stick skillet is essential for caramelizing the dates perfectly.
  • Measuring Cups and Spoons: Accurate measurements will ensure your parfait turns out just right.
  • Whisk: A whisk will help you achieve that smooth, creamy yogurt.
  • Parfait Glasses or Jars: Clear glasses or jars are ideal for showcasing those beautiful layers.

Serving Suggestions

For a delightful presentation and experience, consider these serving suggestions:

  • Serve with a side of fresh fruit for an extra burst of flavor.
  • Pair with a light breakfast option, like a smoothie or whole grain toast.
  • Enjoy as a post-workout snack to replenish energy and protein.

Now that you have all the tools and knowledge, it’s time to get cooking! Dive into this Salted Date & Pistachio Yogurt Parfait and enjoy a delicious, nutritious treat that’s sure to brighten your day. Remember, cooking is all about having fun and experimenting, so don’t hesitate to make this recipe your own. Happy cooking!

Salted Date & Pistachio Yogurt Parfait (High Protein, Gluten-Free)

Prep Time 10 minutes
Cook Time 5 minutes
Total Time 15 minutes
Servings 2 servings
Calories 350
A delicious high-protein parfait combining creamy Greek yogurt, caramelized dates, and crunchy salted pistachios for a satisfying treat.

Ingredients

Nuts and Seeds

  • 1/4 cup roasted and salted pistachios (chopped or toast raw pistachios and add a pinch of salt)
  • 1 tsp olive oil (or avocado oil)
  • 4 pitted Medjool dates dates (chopped)
  • 2 tbsp water (as needed for caramelizing dates)
  • to taste flaky sea salt sea salt (such as Maldon)
  • 2 tsp vanilla bean paste (vanilla bean powder or pure vanilla extract)
  • 2 cups Greek yogurt (non-fat, low-fat, or full-fat)
  • to taste honey honey (optional, for drizzling)

Instructions 

  • Toast raw pistachios in a dry skillet over medium heat for 2–3 minutes, then let cool and chop.
  • Heat olive oil in a small skillet, add chopped dates and a pinch of sea salt. Sauté for 2–3 minutes, add water to soften and create a caramel texture. Let cool slightly.
  • Whisk Greek yogurt with vanilla bean paste until smooth and fluffy.
  • Divide half the yogurt into two cups, sprinkle with half the pistachios, then add remaining yogurt, salted caramelized dates, a pinch of sea salt, and honey if desired.
  • Serve immediately or refrigerate covered for up to 2 days.

Notes

For extra crunch, add more pistachios or top with fresh fruit.
Calories: 350kcal
Cost: $12
Course: Breakfast, Dessert
Cuisine: Mediterranean
Keyword: Dates, Pistachios, Yogurt

Get Ready for a Spooktacular Treat!

As Halloween approaches, it’s time to whip up some festive fun in the kitchen! This recipe for Boo-nilla Ghost Milkshakes combines the creamy goodness of vanilla bean ice cream with a hauntingly delicious twist. Perfect for kids and adults alike, these milkshakes are not just delightful; they’re also a fantastic way to celebrate the season with friends and family. In this comprehensive guide, we’ll walk you through every step of the process, ensuring that your Boo-nilla Ghost Milkshakes are a hit at any Halloween gathering.

Why You’ll Love This Boo-nilla Ghost Milkshake Recipe

This Boo-nilla Ghost Milkshake is more than just a tasty treat; it’s an experience! Here are some reasons you’ll adore making and sharing these delightful milkshakes:

  • Fun Presentation: The ghostly whipped cream topping looks amazing and adds a playful touch to your Halloween festivities.
  • Easy to Make: With just a few ingredients, you can create a decadent dessert that impresses without the stress.
  • Customizable Flavors: You can easily tweak the ingredients to match your preferences or dietary needs.
  • Perfect for All Ages: Kids love the fun, spooky theme, while adults will appreciate the rich flavors.
  • Great for Celebrations: Whether it’s a Halloween party or a cozy night in, these milkshakes set the mood perfectly.

Ingredients You’ll Need

Before diving into the recipe, let’s gather our ingredients. Here’s what you’ll need:

  • 4 cups vanilla bean ice cream: A quality ice cream will ensure a creamy, rich flavor. Consider using organic or artisanal brands for an extra touch.
  • 1 1/2-1 3/4 cup whole milk: The milk helps create the right consistency for the milkshake. Adjust the amount based on how thick you like your shakes.
  • 2 tsp vanilla extract: This enhances the vanilla flavor and adds depth to the milkshake.
  • 1 cup heavy whipping cream: Essential for that fluffy ghost topping!
  • 3 tbsp powdered sugar: This sweetens the whipped cream and helps stabilize it.
  • 1/2 tsp vanilla extract: A pinch more to flavor the whipped cream.

Step-by-Step Instructions

Side view of a creamy Boo-nilla Ghost Milkshake topped with whipped cream and a straw.

Ready to make your Boo-nilla Ghost Milkshakes? Let’s blend up some spooky goodness!

  1. In a blender, combine the vanilla bean ice cream, whole milk, and vanilla extract. Blend until smooth.
  2. In a medium mixing bowl, use a hand mixer (or stand mixer) to beat the heavy cream, powdered sugar, and vanilla extract until stiff peaks form.
  3. Divide the milkshake mixture among glasses. Cut the corner of a large Ziploc bag and pipe a swirl of whipped cream on top to resemble a ghost.
  4. Serve immediately and delight your guests!

Pro Tips for the Perfect Boo-nilla Ghost Milkshake

To elevate your milkshake game, consider these expert insights:

  • Ice Cream Temperature: Let your ice cream sit at room temperature for about 5-10 minutes before blending. This will make it easier to mix and yield a creamier texture.
  • Milk Consistency: Adjust the milk quantity to achieve your desired thickness. Less milk creates a more indulgent, thicker shake.
  • Whipping Cream Tips: Ensure your mixing bowl and beaters are cold; this helps the cream whip up faster and holds its shape.
  • Add Some Fun: Top your milkshake with sprinkles, gummy worms, or crushed Oreos for added Halloween flair!
  • Experiment with Flavors: Feel free to add a splash of coffee or chocolate syrup for a delightful twist.
  • Use Quality Ingredients: High-quality ice cream and vanilla extract make a noticeable difference in flavor.
  • Make It Ahead: Prepare the whipped cream in advance and store it in the fridge; just re-whip it before serving.
  • Presentation is Key: Use fun glasses or mason jars to serve your milkshakes for an eye-catching display.

Common Mistakes and Troubleshooting

Even the best of us can run into issues while cooking. Here are some common pitfalls to avoid when making your Boo-nilla Ghost Milkshakes:

  • Over-Blending: Blend just until smooth. Over-blending can make the shake too thin.
  • Too Watery: If your shake is too watery, reduce the amount of milk next time or add more ice cream.
  • Whipped Cream Not Stiffening: If your whipped cream isn’t thickening, try adding a bit more powdered sugar or ensure your cream is very cold before whipping.
  • Flavor Balance: If it’s too sweet, balance it out with a pinch of salt or by adding a small amount of espresso.

Delicious Variations to Try

Feeling adventurous? Here are some creative variations to switch up your Boo-nilla Ghost Milkshakes:

  • Chocolate Boo-nilla Shake: Add 1/4 cup of chocolate syrup to the blender for a chocolate twist.
  • Minty Ghost Shake: Incorporate 1 tsp of peppermint extract for a refreshing mint flavor.
  • Spooky Pumpkin Shake: Mix in 1/2 cup of pumpkin puree and a dash of pumpkin spice for a fall-inspired treat.
  • Fruit-Filled Ghost Shake: Blend in a banana or some strawberries for a fruity twist that brightens the flavor.

Storage and Make-Ahead Instructions

Wondering how to store your Boo-nilla Ghost Milkshakes? Here’s what you need to know:

  • Refrigeration: While milkshakes are best served fresh, you can store any leftover milkshake mixture in the fridge for up to 24 hours. Just re-blend before serving.
  • Freezing: If you have extra whipped cream, you can freeze it in a Ziploc bag for later use. Just thaw in the fridge before using.

Frequently Asked Questions

Here are some common questions regarding Boo-nilla Ghost Milkshakes:

  • Can I use a milk alternative instead of whole milk?
    Yes! Almond milk, coconut milk, or oat milk can be used for a dairy-free option.
  • How can I make this recipe vegan?
    Use vegan ice cream and plant-based milk, and whip together coconut cream with powdered sugar.
  • Can I make these milkshakes in advance?
    Yes, but for best results, prepare the milkshake mixture and whipped cream separately and combine just before serving.
  • What can I use instead of vanilla extract?
    You can substitute with almond extract or a different flavored extract of your choice.
  • How do I achieve a thicker milkshake?
    Add less milk or more ice cream, and blend less to maintain the texture.
  • Are there any allergy considerations?
    Be mindful of common allergens in ice cream or milk substitutes. Always check labels!
  • Can I add alcohol for adults?
    Yes, a splash of vanilla vodka can add a fun twist for adult parties!
  • What snacks pair well with these milkshakes?
    Consider serving with Halloween-themed cookies, popcorn, or spooky cupcakes.

Nutritional Insights and Dietary Adaptations

While these Boo-nilla Ghost Milkshakes are a treat, being mindful of nutrition can make them even better:

  • Caloric Content: Each shake is rich and may be high in calories; consider sharing or serving smaller portions.
  • Dairy-Free Options: Easily switch to dairy-free ice cream and milk for a lactose-free treat.
  • Lower Sugar Variations: Opt for sugar-free ice cream and reduce the powdered sugar for a healthier version.
  • Protein Boost: Add a scoop of protein powder to the shake for an extra nutritional punch.

Essential Equipment for Making Milkshakes

To make your Boo-nilla Ghost Milkshakes, you’ll need a few key pieces of equipment:

  • High-Powered Blender: Essential for achieving a smooth, creamy consistency.
  • Mixing Bowl and Hand Mixer: For whipping the heavy cream to perfection.
  • Ziploc Bag or Piping Bag: Useful for creating the ghostly whipped cream topping.
  • Serving Glasses: Choose fun, festive glasses to showcase your spooky creations!

Delicious Serving Suggestions

When serving your Boo-nilla Ghost Milkshakes, consider these fun ideas:

  • Garnish with Sprinkles: Top with Halloween-themed sprinkles for added color and fun.
  • Serve with Cute Straws: Use black and orange striped straws to enhance the Halloween vibe.
  • Pair with Treats: Offer some Halloween cookies or candy on the side for a complete dessert experience.

So, there you have it! A comprehensive guide to creating your very own Boo-nilla Ghost Milkshakes. With easy steps, fun variations, and plenty of tips, you can confidently make this spooky treat for any Halloween celebration. Remember, cooking should be fun and stress-free, so enjoy the process as you whip up this delightful milkshake! Happy Halloween!

Boo-nilla Ghost Milkshakes Recipe

Prep Time 10 minutes
Cook Time 5 minutes
Total Time 15 minutes
Servings 4 cups
Calories 650
Enjoy a spooky and delicious vanilla milkshake topped with whipped cream, perfect for Halloween treats or fun gatherings.

Ingredients

Dairy

  • 4 cups vanilla bean ice cream
  • 1.75 cups whole milk
  • 2 tsp vanilla extract

Whipped Cream

  • 1 cup heavy whipping cream
  • 3 tbsp powdered sugar
  • 0.5 tsp vanilla extract

Instructions 

  • Blend the ice cream, milk, and vanilla extract until smooth.
  • Beat the heavy cream, powdered sugar, and vanilla until stiff peaks form.
  • Divide the milkshake into glasses and pipe whipped cream on top.

Notes

Use a piping bag for a neat whipped cream swirl.
Calories: 650kcal
Cost: $15
Course: Dessert
Cuisine: American
Keyword: milkshake, vanilla

Unleash Your Inner Chef with Monster Mac and Cheese

Are you ready to elevate your dining experience with a dish that’s not just delicious but also a whole lot of fun? Welcome to the world of Monster Mac and Cheese, a spooktacular twist on a traditional favorite that will delight both kids and adults alike! This recipe is perfect for Halloween or any time you want to add a little magic to your meal. With just a few simple ingredients, you can create a vibrant, whimsical dish that’s sure to be the highlight of your dinner table. Let’s dive into the details!

Why You’ll Love This Recipe

  • Quick and Easy: This recipe takes less than 30 minutes from start to finish, making it perfect for busy weeknights.
  • Kid-Friendly Fun: The playful presentation with candy eyes and green pasta will excite children and encourage them to eat their veggies!
  • Customizable: You can easily modify this recipe to suit your family’s preferences, whether that means adding proteins or using different types of pasta.
  • Budget-Friendly: Using boxed mac and cheese keeps costs low while delivering great flavor.
  • Perfect for Celebrations: This dish is not only great for Halloween but also for parties, family gatherings, or any festive occasion.

Ingredient Breakdown

Let’s take a closer look at the ingredients you’ll need for this spooky creation and some recommended substitutions:

  • 1 box Kraft mac and cheese: The classic choice for a creamy, cheesy base. You can use any boxed mac you love, but Kraft offers that nostalgic flavor that many enjoy.
  • 4 tablespoons butter: This adds richness to the sauce. If you’re looking for a lighter option, you can use olive oil or a dairy-free substitute.
  • Green food coloring: This is the secret ingredient that brings the “monster” theme to life! Feel free to adjust the amount to achieve your desired hue.
  • Candy eyeballs: These fun toppings can be found in most stores around Halloween. You can substitute with chocolate chips or other fun candies if needed.

How to Make Monster Mac and Cheese

Side view of a creamy Mac and Cheese dish with green coloring and decorative googly eyes.

Follow these simple steps to create your Monster Mac and Cheese:

  1. Bring a large pot of water to a boil.
  2. Add the pasta and cook for 13 minutes or until tender.
  3. Drain the water and return the pasta to the pot.
  4. Add the cheese packet and butter, stirring until the butter melts and the cheese combines with the pasta.
  5. Stir in a few drops of green food coloring until the pasta reaches your desired color.
  6. Spoon into bowls and top with candy eyeballs for a fun finish!

Pro Tips for Success

  • Don’t Overcook the Pasta: Make sure to follow the cooking time to keep the pasta from becoming mushy.
  • Mix Thoroughly: Ensure the cheese and butter are fully combined for a creamy texture.
  • Experiment with Colors: You can mix in different colors of food coloring for various themed meals.
  • Use a Large Pot: This gives enough room for the pasta to cook evenly.
  • Keep it Warm: If you’re serving to guests, keep the mac and cheese warm on low heat until ready to serve.
  • Make it Your Own: Add cooked bacon, cooked chicken, or veggies for added flavor and nutrition.
  • Save Leftovers: Store any leftovers in an airtight container in the fridge for up to 3 days.
  • Make It Ahead: Prepare the mac and cheese a few hours in advance and reheat before serving.

Common Mistakes to Avoid

Here are some troubleshooting tips to ensure your Monster Mac and Cheese turns out perfectly:

  • Too Runny: If your mac and cheese is too liquidy, add a bit more cheese or let it cook a little longer on low heat.
  • Not Enough Flavor: Don’t forget to season! A sprinkle of salt and pepper can elevate the dish.
  • Food Coloring Overload: Start with a small amount of food coloring; you can always add more if needed.
  • Skipping the Butter: Butter adds richness; if omitted, the dish may taste bland.

Variations on Monster Mac

Feeling adventurous? Here are some fun variations to try:

  • Veggie Monster: Add boiled broccoli or spinach into the mac and cheese for extra nutrients.
  • Protein-Packed: Stir in cooked ground beef or shredded chicken for a heartier meal.
  • Seafood Twist: Mix in shrimp or crab meat for a luxurious version of this dish.
  • Spicy Kick: Add a pinch of cayenne pepper or some jalapeños for a spicy twist.

Storage and Make-Ahead Instructions

Want to prepare this dish ahead of time? Here’s how you can store it:

  • Refrigeration: Store in an airtight container for up to 3 days in the refrigerator.
  • Freezing: You can freeze the mac and cheese for up to a month. Just thaw in the fridge before reheating.
  • Reheating: Reheat in a skillet on low heat, adding a splash of milk for creaminess.

Frequently Asked Questions

Here are some common questions about making Monster Mac and Cheese:

  • Can I use a different type of pasta? Yes, any pasta shape will work, but keep an eye on cooking times.
  • Is this recipe suitable for vegetarians? Yes, it’s vegetarian; just ensure your cheese is vegetarian-friendly.
  • Can I make this gluten-free? Absolutely! Just use gluten-free pasta and cheese.
  • How can I make it dairy-free? Use dairy-free cheese and a plant-based butter substitute.
  • What’s the best way to serve it? Serve it warm in bowls, topped with candy eyeballs for a fun presentation.
  • Can I prepare it in advance? Yes, you can make it ahead and reheat it when ready to serve.
  • What drinks pair well with Monster Mac? A light soda or fruit juice complements the dish nicely.
  • How can I make it spicier? Add hot sauce or crushed red pepper flakes to the cheese mixture.

Nutrition Tips and Dietary Adaptations

While Monster Mac and Cheese is a treat, you can make it healthier:

  • Increase Veggies: Add in more vegetables to boost the nutrient content.
  • Choose Whole Grain Pasta: Opt for whole grain or legume-based pasta for more fiber.
  • Control Portions: Serve smaller portions alongside a salad for a balanced meal.

Equipment Recommendations

Here are some kitchen tools that can help you perfect your Monster Mac:

  • Large Pot: For boiling pasta.
  • Colander: For draining cooked pasta efficiently.
  • Wooden Spoon: For mixing ingredients thoroughly.
  • Measuring Cups: To ensure accurate ingredient amounts.

Serving Suggestions

When it comes to serving, here are some ideas to make your meal even more special:

  • Add a Side Salad: A fresh salad can balance the richness of the mac and cheese.
  • Serve with Garlic Bread: This classic pairing is sure to please.
  • Garnish with Fresh Herbs: Chopped parsley or chives can add a pop of color and flavor.

In conclusion, Monster Mac and Cheese is more than just a meal; it’s an experience. With its playful presentation and simple recipe, it’s a wonderful way to bring family and friends together for a delightful dining adventure. So roll up your sleeves, gather your ingredients, and get ready to create something truly special in your kitchen. Happy cooking!

Monster Mac and Cheese

Prep Time 5 minutes
Cook Time 15 minutes
Total Time 20 minutes
Servings 4 servings
Calories 400
A fun and spooky twist on classic mac and cheese, perfect for kids' parties or Halloween celebrations.

Ingredients

Pasta

  • 1 box Kraft Mac and Cheese
  • 4 tablespoons butter
  • a few drops green food coloring
  • handful candy eyeballs

Instructions 

  • Bring a large pot of water to a boil and cook pasta for 13 minutes.
  • Drain water, return pasta to pot, add cheese packet and butter.
  • Stir until cheese and butter are melted and combined.
  • Add green food coloring and stir until pasta is uniformly green.
  • Spoon into bowls and top with candy eyeballs.

Notes

Use a toothpick to add the candy eyeballs for easy placement.
Calories: 400kcal
Cost: $8
Course: Main Course
Cuisine: American
Keyword: Halloween, Kids, Mac and Cheese

As the mornings get cooler, there’s nothing quite as comforting as a warm drink to start your day. The Apple Butter Latte is a delightful blend of creamy almond milk, rich espresso, and the sweet warmth of apple butter, making it the perfect companion for chilly mornings. Not only does it taste divine, but it also brings the cozy vibes of fall right into your kitchen. In this guide, you’ll learn everything you need to make this delicious latte, plus tips, variations, and more!

Why You’ll Love This Recipe

This Apple Butter Latte is not just any drink; it’s a warm hug in a mug! Here’s why you’ll adore it:

  • Comforting Flavors: The combination of apple butter and cinnamon creates a nostalgic flavor profile that transports you to cozy autumn days.
  • Simple to Make: With just a few ingredients and easy steps, you can whip this up in minutes!
  • Customizable Ingredients: Feel free to use your favorite milk and adjust sweetness to your liking!
  • Perfect for Meal Prep: Make a batch ahead for busy mornings. This latte stays delicious even when reheated.
  • Vegan Option Available: With a few simple swaps, this recipe can easily be made dairy-free!

Essential Ingredients for Your Apple Butter Latte

To create the perfect Apple Butter Latte, you’ll need the following ingredients:

  • 1 cup unsweetened almond milk: This makes the drink creamy without overpowering the flavors. Feel free to swap with oat or soy milk for different textures.
  • 1 TBSP Eden Foods Organic Apple Butter Spread: The star ingredient, bringing rich, spiced apple flavor and natural sweetness.
  • 1 shot espresso or 1/4 cup strong coffee: Provides a robust base to balance the sweetness of the apple butter.
  • 1 –2 tsp coconut sugar: Adjust this to taste for added sweetness. Maple syrup also works beautifully!
  • Pinch of cinnamon: Adds warmth and depth; it’s a must for that cozy feel.
  • Vegan whipped cream: Optional, but it adds a fun touch and extra creaminess on top.
  • Cinnamon: For garnishing, it makes your latte look as good as it tastes!

How to Make Your Apple Butter Latte

Making this latte is as easy as pie! Follow these simple steps:

  1. Add the almond milk to a saucepan over medium heat.
  2. Once the milk is warm and steaming, add in the apple butter, coffee, coconut sugar, and cinnamon. Whisk until smooth and free of lumps.
  3. Taste your latte and adjust the sweetness with more coconut sugar if desired.
  4. Pour your Apple Butter Latte into mugs, top with vegan whipped cream and a sprinkle of cinnamon, and enjoy immediately!

Pro Tips for the Best Apple Butter Latte

Side view of a delicious Apple Butter Latte served in a clear glass cup, showcasing its rich texture.

To elevate your latte experience, check out these expert tips:

  • Use Fresh Ingredients: Fresh, high-quality apple butter makes a noticeable difference in flavor, so opt for Eden Foods if you can.
  • Perfect Temperature: Heat your milk to just before boiling to prevent scalding, which could alter the taste.
  • Froth It Up: If you have a milk frother, use it to create a creamy, frothy top that feels luxurious.
  • Experiment with Spices: Try adding nutmeg or cardamom for an extra layer of flavor.
  • Make It Iced: For a refreshing twist, chill the ingredients and serve over ice during warmer months.
  • Mix in Vanilla: A splash of vanilla extract can enhance the sweetness and aroma.
  • Add a Touch of Salt: A tiny pinch of sea salt can bring out the sweetness, balancing the flavors beautifully.
  • Perfect Pairings: Serve alongside a slice of apple pie or oat muffins for an indulgent breakfast.

Common Mistakes and Troubleshooting

Even the best of us can encounter hiccups in the kitchen. Here are some common mistakes and how to avoid them:

  • Curdled Milk: Avoid overheating your milk, which can cause it to curdle. Stick to medium heat and watch it closely.
  • Too Sweet: If your latte turns out too sweet, balance it with an additional shot of espresso or a pinch of salt.
  • Inconsistent Texture: Ensure thorough whisking when adding ingredients to avoid lumps. A blender can help achieve a smoother consistency.
  • Flavor Imbalance: If the apple flavor isn’t strong enough, add more apple butter gradually until it meets your preference.

Variations on Your Apple Butter Latte

Feeling adventurous? Here are some delicious variations to try:

  • Chai Apple Butter Latte: Replace espresso with brewed chai tea for a spiced twist.
  • Maple Apple Butter Latte: Add a tablespoon of maple syrup for a deeper, caramel-like sweetness.
  • Nutty Apple Butter Latte: Stir in a tablespoon of almond or hazelnut butter for a nutty flavor boost.
  • Iced Apple Butter Latte: Blend the ingredients with ice for a refreshing summer treat.

Storage and Make-Ahead Instructions

Want to prep ahead? Here’s how:

  • Making Ahead: Prepare the apple butter latte base (milk, apple butter, coffee, and spices) and store it in the fridge for up to 2 days. Reheat before serving.
  • Storage: Store any leftover latte in an airtight container in the fridge for up to 3 days. Reheat gently on the stove or in the microwave.
  • Freezing: While not ideal, you can freeze the latte mix for up to a month. Thaw and stir well before reheating.

Frequently Asked Questions

Here are some common questions about making the Apple Butter Latte:

  • Can I use other types of milk? Absolutely! Almond, oat, soy, or even coconut milk can be used based on your preference.
  • Is this recipe vegan? Yes, it can easily be made vegan by using plant-based milk and skipping dairy toppings.
  • What can I substitute for apple butter? You can use homemade apple puree or even pumpkin puree in a pinch!
  • Can I make it sugar-free? Yes! Use a sugar substitute like stevia or monk fruit to sweeten.
  • How can I adjust the caffeine level? Use decaf coffee or replace it with a caffeine-free herbal tea.
  • What’s the best way to froth milk? A handheld frother, blender, or even shaking in a jar can froth your milk effectively.
  • Can I add protein powder? Yes, adding a scoop of vanilla protein powder can make it a more filling drink.
  • How can I make this iced? Simply prepare the latte mix and serve it over ice instead!

Nutritional Tips and Dietary Adaptations

For a healthier twist:

  • Low-Calorie Options: Use unsweetened almond milk and skip the whipped cream to cut calories.
  • High-Protein Variants: Adding protein powder or using higher-protein milk alternatives can increase the nutritional value.
  • Fiber Boost: Using higher-fiber milk or adding chia seeds can enhance the fiber content of your drink.

Equipment Recommendations

To make your Apple Butter Latte, you’ll need:

  • Medium saucepan: For heating your milk and mixing ingredients.
  • Whisk or milk frother: To create a smooth and creamy texture.
  • Measuring cups and spoons: For accurate ingredient measurements.
  • Mugs: For serving your delicious latte!

Serving Suggestions

Enjoy your Apple Butter Latte with:

  • Fresh Pastries: Pair with cinnamon rolls or apple muffins for a delightful breakfast treat.
  • Warm Cookies: Chocolate chip or oatmeal cookies make for a comforting snack alongside your latte.
  • Fruit Salad: A light, refreshing fruit salad balances the richness of the latte.
  • Cheese Platter: A selection of cheeses can enhance the flavor experience.

With this comprehensive guide, you’re now equipped to create the ultimate Apple Butter Latte that will warm your mornings and brighten your days. Embrace the cozy vibes and enjoy every sip of this delightful drink, knowing you made it yourself—easy, delicious, and oh-so-satisfying!

Apple Butter Latte

Prep Time 5 minutes
Cook Time 5 minutes
Total Time 10 minutes
Servings 1 cup
Calories 150
A cozy and flavorful latte combining the sweetness of apple butter with rich espresso and warming spices. Perfect for a comforting treat any time of day.

Ingredients

Liquid

  • 1 cup unsweetened almond milk
  • 1 TBSP Eden Foods Organic Apple Butter Spread
  • 1 shot espresso or 1/4 cup strong coffee
  • 1-2 tsp coconut sugar
  • pinch cinnamon
  • Vegan whipped cream
  • cinnamon for garnish

Instructions 

  • Add almond milk to a saucepan and warm over medium heat.
  • Whisk in apple butter, coffee, coconut sugar, and cinnamon until smooth.
  • Taste and adjust sweetness with more coconut sugar if desired.
  • Pour into a mug and top with vegan whipped cream and cinnamon. Serve immediately.

Notes

This latte is best enjoyed fresh for maximum flavor and warmth.
Calories: 150kcal
Cost: $8
Course: Beverage
Cuisine: American
Keyword: apple, latte, Vegan

Discover the Delight of Roasted Acorn Squash

Are you ready to elevate your dinner game with a dish that is both delicious and simple? This roasted acorn squash recipe is not just another vegetable side; it’s a flavorful experience that brings warmth and comfort to your table. Perfectly roasted, infused with herbs, garlic, and parmesan, this recipe highlights the natural sweetness of the squash, making it an irresistible choice for any meal. Plus, it’s ready in under 30 minutes!

Why You’ll Love This Recipe

This roasted acorn squash recipe is packed with benefits that make it a must-try:

  • Quick and Easy: With just a few simple ingredients and minimal prep time, you can have a stunning side dish ready in no time.
  • Flavorful and Versatile: The combination of parmesan cheese, herbs, and garlic enhances the natural sweetness of the squash, making it perfect for any occasion.
  • Nutritious: Acorn squash is rich in vitamins A and C, fiber, and antioxidants, making this dish a healthy addition to your meals.
  • Customizable: Enjoy it as is or add your favorite toppings to make it your own. The possibilities are endless!
  • Great for Meal Prep: This roasted acorn squash stores well, so you can prepare it in advance and reheat for a quick side during busy weeks.

Ingredients & Substitutions

To make this delicious roasted acorn squash, you will need:

  • 1 medium acorn squash: Choose one that feels heavy for its size and has a deep green color.
  • ½ cup parmesan cheese: Freshly shredded for the best flavor. Substitute with nutritional yeast for a vegan option.
  • 2 tablespoons olive oil: Extra virgin olive oil works best, but you can use melted butter or avocado oil as alternatives.
  • 2 teaspoons herbes de Provence: A delightful mix of herbs. You can swap it for Italian seasoning or your favorite dried herbs.
  • 1 teaspoon coarse salt: Adjust to taste. Sea salt or kosher salt are great options.
  • 1 teaspoon garlic powder: Fresh minced garlic can be used for a bolder flavor.

How to Make Roasted Acorn Squash

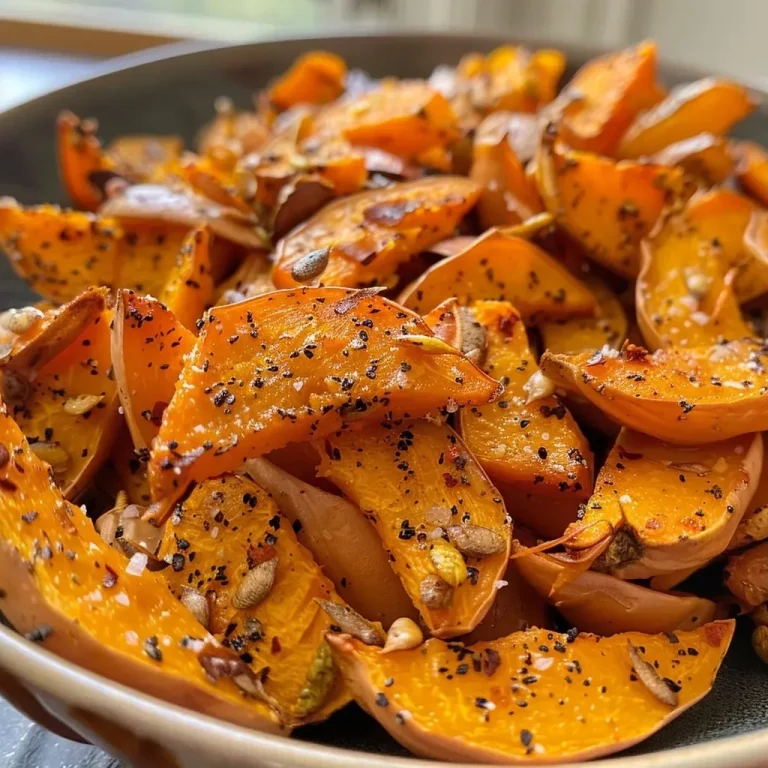
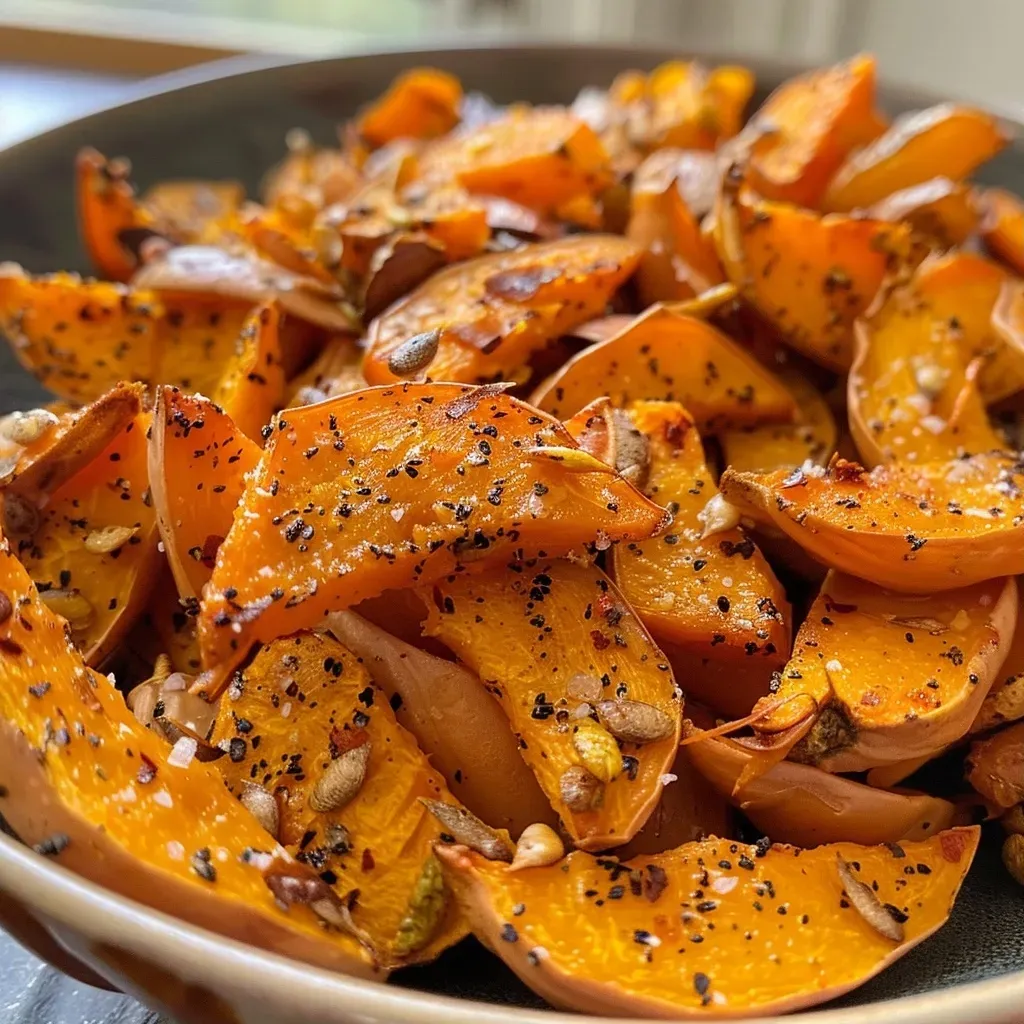
Side angle of a halved acorn squash, golden brown and glistening with olive oil.

Follow these simple steps for a perfect roasted acorn squash:

  1. Preheat your oven: Set it to 425°F (220°C) and line a baking sheet with parchment paper.
  2. Prepare the squash: Cut the squash in half lengthwise, scoop out the seeds, and slice into ½-inch pieces. Discard the stem portions.
  3. Toss with flavor: In a large mixing bowl, combine the squash slices with parmesan, olive oil, herbes de Provence, salt, and garlic powder. Toss until fully coated.
  4. Arrange on the baking sheet: Lay the slices on the prepared baking sheet, making sure they are in a single layer. Sprinkle any remaining seasoning and cheese from the bowl over the tops.
  5. Roast: Bake for about 20 minutes or until the bottoms are golden brown and tender. Serve warm and enjoy!

Expert Tips for Perfect Roasted Acorn Squash

Here are some pro tips to ensure you get the best flavor and texture:

  • Uniform slices: Try to cut the squash into even pieces for consistent cooking.
  • Don’t overcrowd: Give the squash space on the baking sheet to ensure it roasts rather than steams.
  • Experiment with spices: Feel free to add a pinch of cayenne pepper for heat or a drizzle of honey for extra sweetness.
  • Check for doneness: Use a fork to poke the squash; it should be tender and easily pierced.
  • Serve immediately: This dish is best enjoyed fresh out of the oven when it’s at its crispiest and most flavorful.

Common Mistakes and Troubleshooting

If you encounter any issues while making your roasted acorn squash, here are some common mistakes and how to avoid them:

  • Squash is mushy: Ensure you’re not cutting the pieces too small and that you’re using a high enough oven temperature.
  • Flavor is bland: Double-check your seasoning; fresh herbs or a squeeze of lemon juice can elevate the flavor.
  • Stuck to the pan: Make sure to use parchment paper and enough oil to prevent sticking.

Variations to Try

If you want to mix things up, here are some fun variations of this roasted acorn squash recipe:

  • Maple Glazed: Drizzle with maple syrup before roasting for a sweet and savory treat.
  • Stuffed Acorn Squash: Fill the roasted halves with quinoa, cranberries, and nuts for a hearty meal.
  • Spicy Roasted Acorn Squash: Toss with chili powder or smoked paprika for a kick.
  • Herb-Infused: Swap out herbes de Provence for fresh herbs like rosemary or thyme for a fragrant twist.

Storage and Make-Ahead Instructions

This roasted acorn squash is perfect for meal prep! Here’s how to store it:

  • Refrigerator: Store leftovers in an airtight container for up to 4 days.
  • Freezing: You can freeze roasted pieces in a single layer on a baking sheet, then transfer them to a freezer-safe bag once frozen. They’ll keep for 2-3 months.
  • Reheating: Reheat in the oven at 350°F (175°C) until warmed through for the best texture.

Comprehensive FAQs

Here are some frequently asked questions about roasted acorn squash:

  • Can I eat the skin of acorn squash? Yes, the skin is edible and becomes tender when roasted.
  • What dishes pair well with roasted acorn squash? It complements proteins like chicken or pork beautifully and works well in salads.
  • How do I know when acorn squash is ripe? Look for a hard shell and a deep green color; it should feel heavy for its size.
  • Can I use other types of squash? Absolutely! Butternut or delicata squash can be great alternatives.
  • Is acorn squash healthy? Yes, it’s low in calories and high in vitamins and fiber.
  • Can I roast acorn squash seeds? Yes, clean them and roast with a bit of oil and salt!
  • What’s the best way to cut acorn squash? Use a sharp knife and a stable cutting board for safety.
  • How can I make this recipe vegan? Substitute parmesan with nutritional yeast and replace olive oil with a vegan alternative.

Nutritional Tips and Dietary Adaptations

This roasted acorn squash recipe is adaptable for various dietary needs:

  • Gluten-Free: Naturally gluten-free, making it a safe option for those with gluten sensitivities.
  • Low-Carb: Keep it low-carb by adjusting the cheese quantity or skipping it altogether.
  • Vegan: Easily made vegan by using plant-based cheese alternatives.

Essential Equipment for Roasted Acorn Squash

Here’s what you’ll need to prepare this dish:

  • Sharp Knife: For cutting the squash safely.
  • Cutting Board: A stable surface is essential for safety.
  • Baking Sheet: A large one lined with parchment paper for easy cleanup.
  • Mixing Bowl: For tossing the squash with spices and oil.

Serving Suggestions

Make your meal complete by serving roasted acorn squash alongside:

  • Grilled Chicken: The savory flavors complement each other beautifully.
  • Quinoa Salad: Add some protein and greens for a balanced meal.
  • Roasted Brussels Sprouts: Another seasonal favorite that pairs well.

Final Thoughts

So there you have it—a hassle-free roasted acorn squash recipe that’s not only easy to make but also incredibly delicious and versatile. Whether you’re enjoying it as a side dish at dinner or using it as a base for a hearty salad, this recipe is sure to impress. Remember, cooking is all about confidence and creativity, so don’t hesitate to experiment with flavors and ingredients. Happy cooking!

Roasted Acorn Squash

Prep Time 10 minutes
Cook Time 20 minutes
Total Time 30 minutes
Servings 4 servings
Calories 180
A delicious roasted acorn squash recipe topped with parmesan cheese and seasoned with herbes de provence for a flavorful side dish.

Ingredients

Main

  • 1 medium acorn squash (halved and sliced)
  • 0.5 cup parmesan cheese (freshly shredded)
  • 2 tablespoons olive oil
  • 2 teaspoons herbes de provence
  • 1 teaspoon coarse salt
  • 1 teaspoon garlic powder

Instructions 

  • Preheat oven to 425°F (220°C). Line a baking sheet with parchment paper.
  • Cut squash in half, scoop out seeds, and slice into ½-inch pieces.
  • Mix squash with parmesan, olive oil, herbes de provence, salt, and garlic powder.
  • Arrange on baking sheet and sprinkle remaining seasoning and cheese.
  • Roast for 20 minutes until golden brown. Serve warm.

Notes

For extra flavor, sprinkle with fresh herbs before serving.
Calories: 180kcal
Cost: $12
Course: Side Dish
Cuisine: American
Keyword: Acorn Squash

Discover the Joy of Cooking with Halloween Chicken Parm Sliders

Welcome to a delightful culinary adventure where fun meets flavor! This Halloween, elevate your festivities with our Halloween Chicken Parm Sliders. These mini masterpieces are not only a hit at parties, but they also bring a sense of whimsy and excitement to your table. Imagine crispy chicken tenders layered with gooey mozzarella and a rich marinara sauce, all sandwiched between soft slider buns. Perfect for kids and adults alike, these sliders are sure to be a crowd-pleaser at any Halloween gathering. Let’s dive in and explore why you’ll love this recipe!

Why You’ll Love This Recipe

  • Kid-Friendly Fun: The playful presentation with “monster eyes” and “cheesy teeth” makes these sliders appealing to children, ensuring they’ll disappear quickly from the plate.
  • Quick and Easy Preparation: With frozen chicken tenders and simple assembly, this recipe saves you time without sacrificing taste, allowing you to enjoy your Halloween festivities.
  • Perfect for Entertaining: These sliders are great for Halloween parties, game days, or casual family dinners, making them versatile for any occasion.
  • Customizable Ingredients: Feel free to tweak the recipe to suit your taste—add more toppings, swap in different cheeses, or use homemade marinara for an extra flavor boost!
  • Deliciously Satisfying: With layers of chicken, cheese, and sauce, these sliders are hearty and satisfying, keeping your guests coming back for more.

Essential Ingredients for Halloween Chicken Parm Sliders

Let’s gather our ingredients to create these delicious sliders. Here’s what you’ll need:

  • 8 frozen chicken tenders: Choose your favorite brand for convenience. You can also use homemade chicken tenders if you prefer.
  • 8 slider buns: Soft, fluffy rolls work best for the perfect bite-sized experience.
  • 8 slices of mozzarella cheese: The gooey goodness of mozzarella is a must, but feel free to get creative with other cheeses!
  • 3/4 cup of marinara sauce: A classic tomato sauce adds essential flavor. You can make your own or use store-bought for convenience.
  • 16 green olives stuffed with pimento: These will create the fun monster eyes on your sliders!

Step-by-Step Instructions to Make Your Sliders

Juicy Chicken Parm Sliders arranged on a wooden board, showcasing cheese and a rich marinara sauce.

Now that we have our ingredients, let’s get started on making these Halloween Chicken Parm Sliders!

  1. Cook the Chicken Tenders: Remove the chicken tenders from the freezer and cook them according to package instructions until crispy and golden brown.
  2. Prepare the Cheese: While the chicken cooks, take your mozzarella slices and cut the edges into jagged shapes to resemble sharp monster teeth.
  3. Create the Monster Eyes: Skewer one olive onto a toothpick for each slider. You’ll need two olives per slider for a fun monster look!
  4. Warm the Marinara Sauce: In a small saucepan, warm the marinara sauce over medium heat until it’s simmering, enhancing its flavor.
  5. Assemble Your Sliders: Start with the bottom slider bun. Place about 1 tablespoon of marinara sauce on top.
  6. Add the Chicken: Place a hot chicken tender on top of the marinara sauce, adding more sauce as desired.
  7. Top with Cheese: Lay your mozzarella cheese slice on top, ensuring the “teeth” are facing forward.
  8. Finish and Serve: Place the top bun on the slider and skewer two olives into the top bun to create the monster look. Serve immediately to your little goblins!

Pro Tips for Perfect Sliders

  • Use Fresh Ingredients: Whenever possible, opt for fresh ingredients like homemade marinara or fresh-baked buns to enhance flavor.
  • Experiment with Cheeses: Try using provolone or sharp cheddar for a different flavor profile that complements the chicken.
  • Prep Ahead of Time: You can assemble the sliders a few hours in advance and keep them covered in the refrigerator until ready to bake.
  • Keep it Warm: If you have leftovers, keep them warm in the oven at a low temperature to maintain their crispy texture.
  • Serve with Dipping Sauces: Consider serving with extra marinara or a ranch dressing for dipping to add an extra layer of flavor.

Common Mistakes and Troubleshooting

Even the most seasoned cooks can run into a few hiccups. Here’s how to avoid common mistakes:

  • Overcooking the Chicken: Keep an eye on the chicken tenders to prevent drying them out. Follow package instructions closely for best results.
  • Too Much Sauce: While marinara is essential, adding too much can make the sliders soggy. Use just enough to enhance flavor without overpowering.
  • Cheese Not Melting: If your cheese doesn’t melt well, consider placing the assembled sliders under the broiler for a minute or two for that gooey texture.

Delicious Variations to Try

Don’t hesitate to get creative! Here are some fun variations to consider:

  • Spicy Sliders: Add sliced jalapeños or a drizzle of hot sauce for a kick!
  • BBQ Chicken Sliders: Swap marinara for BBQ sauce and add some coleslaw for a Southern twist.
  • Vegetarian Option: Use breaded eggplant or portobello mushrooms in place of chicken for a delicious vegetarian alternative.
  • Cheesy Garlic Bread Buns: Toast your slider buns with garlic butter and herbs for added flavor and texture.

Storage and Make-Ahead Instructions

Planning ahead is key for stress-free entertaining. Here’s how to store and prepare your sliders:

  • Make Ahead: Assemble sliders a few hours before your gathering and cover them in the fridge. Bake just before serving.
  • Storage: Leftover sliders can be stored in an airtight container in the fridge for up to 3 days. Reheat in the oven to retain crispiness.
  • Freezing: You can freeze cooked chicken tenders separately, but it’s best to assemble fresh sliders when you’re ready to serve.

Frequently Asked Questions

Here’s a handy FAQ to help you with any questions you might have:

  • Can I use fresh chicken instead of frozen tenders?
    Yes! Just ensure they’re cooked thoroughly.
  • What if I don’t have slider buns?
    Feel free to use regular burger buns or even mini bagels!
  • How can I make this healthier?
    Consider using baked chicken tenders and whole-grain buns for a healthier option.
  • Can I make the marinara from scratch?
    Absolutely! Homemade marinara sauce can elevate the flavors even more.
  • Are these sliders suitable for freezing?
    Yes, you can freeze the cooked chicken tenders separately but assemble fresh sliders when ready to serve.
  • What sides pair well with these sliders?
    Consider serving with a fresh salad, potato wedges, or veggie sticks.
  • How long does it take to make these sliders?
    Approximately 30 minutes from start to finish, making them a quick option!
  • Can I use other types of cheese?
    Definitely! Feel free to experiment with different cheeses like cheddar or gouda.

Nutrition Tips and Dietary Adaptations

Want to make these sliders fit your dietary needs? Here are some tips:

  • Gluten-Free: Substitute slider buns with gluten-free options.
  • Dairy-Free: Use dairy-free cheese alternatives and ensure the marinara is free from dairy products.
  • Low-Carb: Consider using lettuce wraps instead of buns for a low-carb version.

Essential Equipment for Success

To make your cooking experience smooth and enjoyable, here’s a list of equipment you might need:

  • Oven or Air Fryer: For cooking your chicken tenders perfectly.
  • Non-stick Skillet: Handy for warming the marinara sauce.
  • Toothpicks: To create those fun monster eyes!
  • Sharp Knife: For cutting the cheese into monster teeth.
  • Spatula: To help assemble your sliders with ease.

Serving Suggestions to Impress Your Guests

To take your Halloween party to the next level, consider these serving suggestions:

  • Garnish with Fresh Herbs: A sprinkle of parsley or basil can add a pop of color and freshness.
  • Creative Plating: Present sliders on a spooky-themed platter or arrange them in a fun, creative way.
  • Fun Side Dishes: Pair with themed snacks like “witches’ fingers” (veggie sticks) or “bat wings” (chicken wings).

There you have it—your ultimate guide to making the most delicious and fun Halloween Chicken Parm Sliders! Cooking should be an enjoyable experience, so embrace your creativity, involve your loved ones, and most importantly, have fun in the kitchen. Happy cooking and happy Halloween!

Halloween Chicken Parm Sliders

Prep Time 10 minutes
Cook Time 20 minutes
Total Time 30 minutes
Servings 8 pieces
Calories 650
Spooky and delicious, these Halloween Chicken Parm Sliders are perfect for a festive gathering. Easy to assemble and fun to eat!

Ingredients

Protein

  • 8 pieces frozen chicken tenders (Cook as directed)

Buns

  • 8 pieces slider buns

Cheese

  • 8 slices Mozzarella cheese (Cut into teeth shape)

Sauce

  • 0.75 cup Marinara sauce (Warm before assembling)

Olives

  • 16 pieces green olives stuffed with pimento (Skewered for eyes)

Instructions 

  • Cook chicken tenders as directed and prepare cheese slices with sharp teeth.
  • Warm marinara sauce over medium heat until simmering.
  • Assemble sliders: place marinara on bottom bun, add chicken, more sauce, cheese, then top bun.
  • Skewer olives to create monster eyes and place on top of sliders.
  • Serve immediately to your little goblins.

Notes

Use toothpicks to create sharp teeth on cheese slices for a spooky effect.
Calories: 650kcal
Cost: $15
Course: Appetizer
Cuisine: American
Keyword: Chicken, Halloween, Sliders