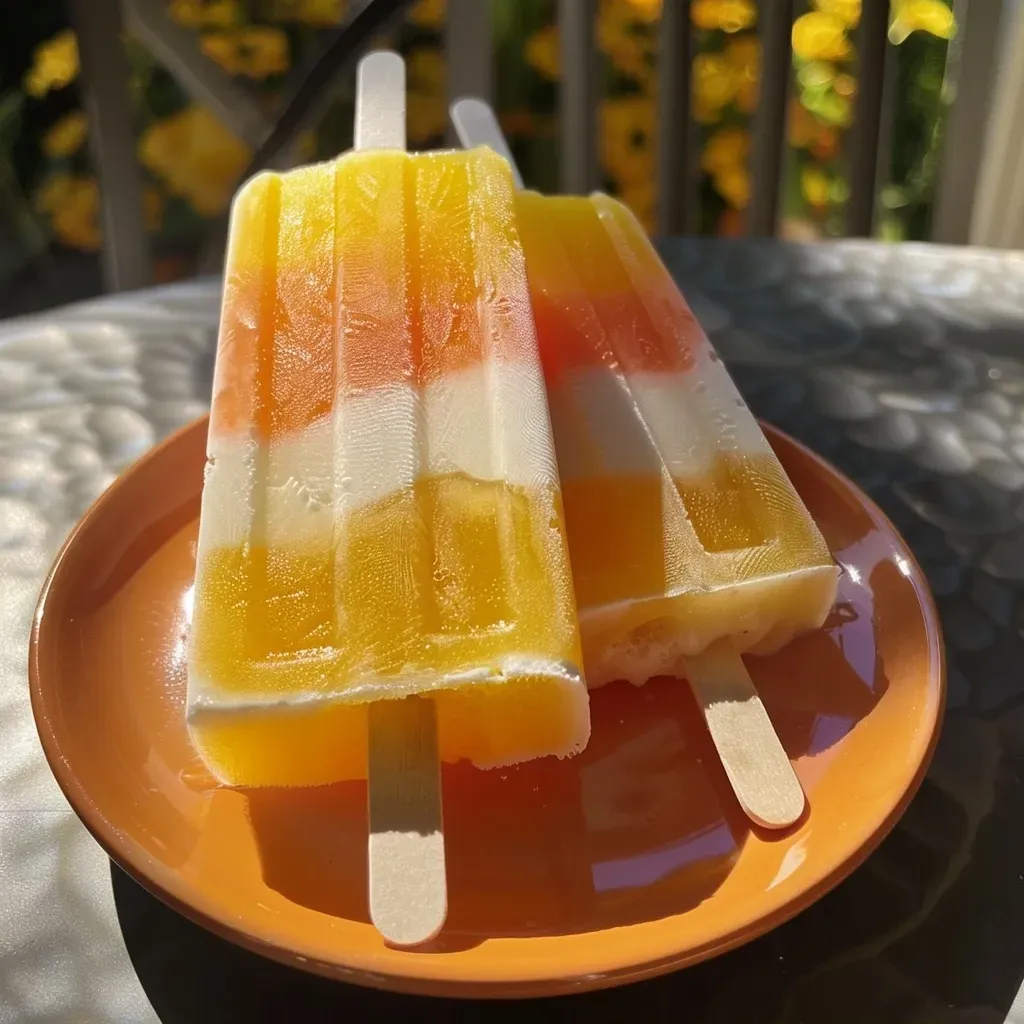
Beat the heat with our delightful Candy Corn Popsicles! Made with creamy coconut Greek yogurt and fruity juices, these popsicles are a refreshing treat perfect for any occasion. Simple to make and bursting with flavor, they’re sure to be a hit! Whether you’re looking to impress at a summer gathering or simply want to enjoy a cool snack at home, this recipe is your go-to.
Why You’ll Love This Recipe
- Fun & Festive: These popsicles are not only delicious but also visually appealing, making them a perfect treat for Halloween or any fun gathering.
- Healthy Ingredients: With Greek yogurt as a base, these popsicles are rich in protein and probiotics, offering a nutritious option for a sweet treat.
- Customizable Flavors: You can easily swap out juices or add your favorite fruits to create unique flavor combinations.
- Easy to Make: This recipe involves straightforward steps, making it accessible for cooks of all skill levels.
- Great for Kids: These popsicles are a fun way to get kids involved in the kitchen, allowing them to mix and layer their favorite flavors!
Ingredients: A Breakdown
Here’s what you’ll need to make these delightful candy corn popsicles:
- 1 cup Coconut Greek Yogurt: Creamy and rich, Greek yogurt adds protein and a delicious tang. You can substitute with regular yogurt if desired.
- 1/4 cup Whole Milk: This helps to thin out the yogurt. Almond or coconut milk can be used as dairy-free alternatives.
- 1 cup Orange, Peach, Mango Juice: A blend of these juices creates a vibrant orange hue. Feel free to use 100% juice without added sugars for a healthier option.
- 1 drop Red & Yellow Dye (As Needed for Orange Hue): This is optional if you want a brighter color, but not necessary for taste.
- 1 cup Pineapple Juice: Adds a tropical twist; you can substitute with any fruit juice you enjoy!
Step-by-Step Instructions
Follow these easy steps to create your Candy Corn Popsicles:

★ Recommended Kitchen Tool
Digital Kitchen Scale
Make this recipe even easier with a quality Digital Kitchen Scale — a must-have kitchen staple!
- Mix the Base: In a mixing bowl, combine the coconut Greek yogurt and whole milk. Stir until it reaches a smooth, soupy consistency—add more milk as needed.
- First Layer: Pour a small amount of the yogurt mixture into the bottom of your popsicle mold. Freeze for about 30 minutes until set.
- Second Layer: Mix the orange juice with a drop of red and yellow dye until it reaches your desired color. Pour this juice over the yogurt layer, filling it approximately 2/3 of the way. Freeze for 1 hour.
- Final Layer: Top off the molds with pineapple juice and insert popsicle sticks. Freeze for another 2 hours until completely solid.
- Serve: To remove, run warm water over the outside of the mold for a few seconds. Gently pull the popsicles out and enjoy!
Pro Tips for Perfect Popsicles
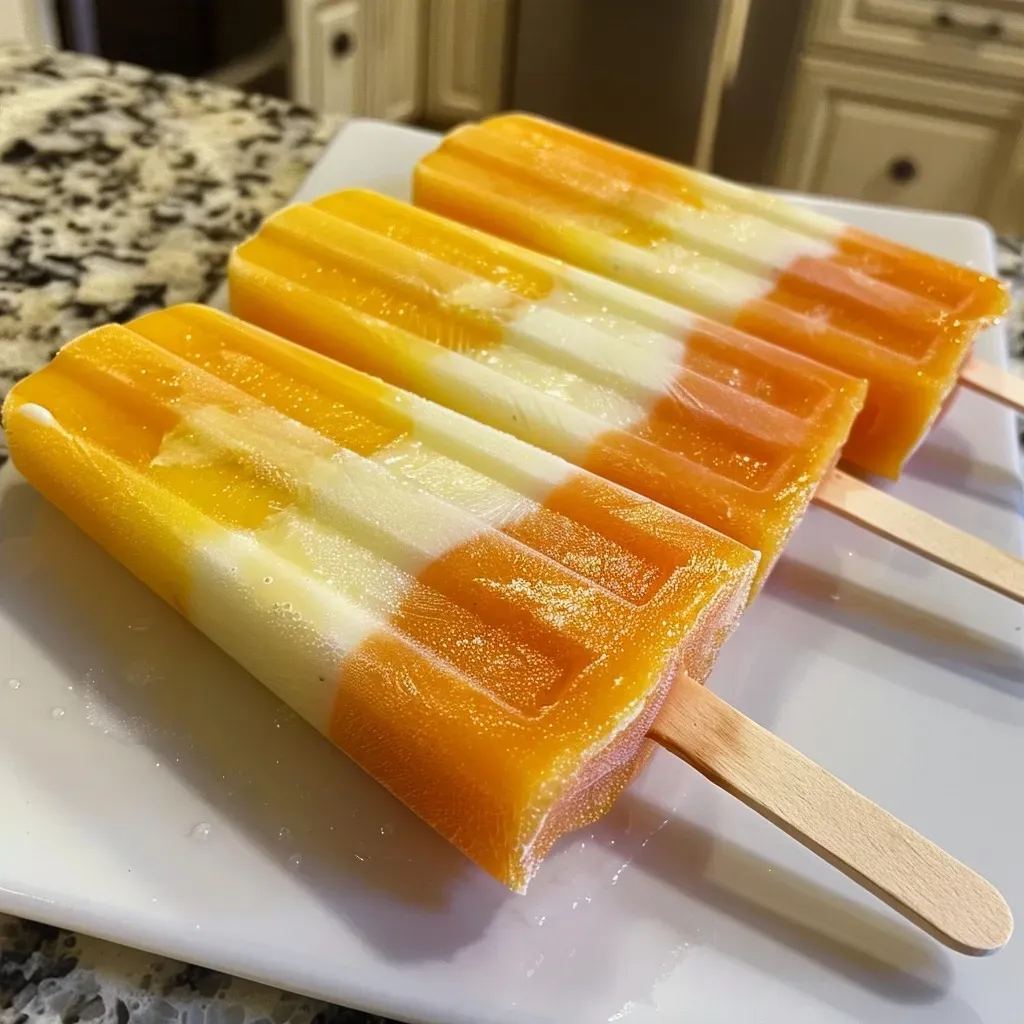
- Freeze Between Layers: Allow each layer to freeze adequately before adding the next to create distinct layers.
- Use Fresh Juice: Freshly squeezed juice enhances flavor and nutrition compared to bottled options.
- Experiment with Flavors: Don’t hesitate to mix different fruit juices or add pureed fruits for added texture and taste.
- Keep It Cool: Make sure your freezer is set to a low enough temperature to freeze the popsicles quickly without ice crystals forming.
- Storage Tips: Store popsicles in airtight bags or containers to prevent freezer burn and maintain flavor.
- Try Different Molds: Various popsicle molds can create fun shapes and sizes, making them more appealing for kids.
- Adjust Sweetness: Taste your juice before pouring; if it’s too sweet, balance it with unsweetened yogurt.
- Check for Doneness: If unsure, insert a toothpick into the popsicle; it should come out clean when they’re fully frozen.
Common Mistakes and Troubleshooting
Here are some common pitfalls and how to avoid them:
- Popsicles Won’t Come Out: If they’re stuck, run warm water over the outside of the mold for a few seconds to loosen.
- Layers Blending: Ensure each layer is frozen solid before adding the next; otherwise, they will blend together.
- Too Icy: If your popsicles are icy rather than creamy, try adding more yogurt or using less juice in your mixture.
- Flavor Too Mild: Adjust the juice ratio to balance the flavors better; sometimes a splash of lemon juice can brighten it up.
Variations to Try
Feel free to get creative! Here are some fun variations:
- Berry Bliss: Replace the orange juice with blended strawberries and blueberries for a berry version.
- Tropical Paradise: Use coconut milk instead of Greek yogurt and add layers of mango and passionfruit juice.
- Chocolate Delight: Mix in a tablespoon of cocoa powder into the yogurt for a chocolatey twist.
- Nutty Flavor: Add a spoonful of almond or cashew butter to the yogurt for a nutty and creamy texture.
Storage and Make-Ahead Instructions
These popsicles can be made ahead of time and stored in your freezer:
- Storage: Keep popsicles in an airtight container or freezer-safe bag for up to 2 months.
- Make Ahead: You can prepare these popsicles a week in advance for parties or family gatherings.
Nutrition Tips and Dietary Adaptations
If you have dietary preferences or restrictions, consider these adaptations:
- Dairy-Free: Use coconut yogurt and almond or oat milk to create a completely dairy-free option.
- Low Sugar: Opt for unsweetened yogurt and natural fruit juice without added sugars.
- High Protein: Add protein powder to the yogurt mixture to boost the protein content.
Equipment Recommendations
To make these popsicles, here’s what you’ll need:
- Popsicle Molds: Choose silicone molds for easy removal, or classic plastic molds that work just as well.
- Mixing Bowl: A medium-sized bowl for mixing the ingredients comfortably.
- Measuring Cups: Accurate measurements ensure the best results, so have these handy.
- Blender (optional): If you want to puree fruits or mix juices, a blender makes it easier.
Serving Suggestions
Here are some fun ways to serve your candy corn popsicles:
- Decorative Plates: Serve on colorful plates with a sprinkle of edible glitter for a festive touch.
- Fruit Garnish: Pair with fresh fruit slices or a drizzle of honey for added flavor.
- Party Treats: Place popsicles in a bucket of ice for a fun centerpiece at summer parties.
Frequently Asked Questions
Here are some common questions about making Candy Corn Popsicles:
- Can I use different fruits? Absolutely! Feel free to swap in your favorite fruits or juices.
- How long do they take to freeze? Generally, about 4 hours total, but check after each layer.
- Can I make these ahead of time? Yes, they can be made up to two weeks in advance and stored in the freezer.
- What if I don’t have popsicle sticks? You can use small spoons or even fruit skewers as an alternative.
- Can I add alcohol for adults? Yes! Adding a splash of rum or vodka to the juice layer can create a fun adult treat.
- What’s the best way to store leftovers? Keep them in an airtight container or bag in the freezer.
- Do these popsicles melt quickly? Like most popsicles, they will melt quickly, so enjoy them immediately!
- Can I use frozen fruit? Yes, frozen fruit can be pureed and added to the layers for added flavor.
So there you have it! A comprehensive guide to making the best Candy Corn Popsicles. With simple ingredients, easy steps, and endless variations, you’ll be a popsicle pro in no time. Grab your ingredients, gather your loved ones, and let’s make some sweet memories in the kitchen!
Candy Corn Popsicles
Ingredients
Dairy & Liquids
- 1 cup Coconut Greek Yogurt
- 1/4 cup Whole Milk
- 1 cup Orange, Peach, Mango Juice
- 1 drop Red & Yellow Dye (As Needed for Orange Hue)
- 1 cup Pineapple Juice
Instructions
- Mix yogurt with milk until smooth, adding 1 tablespoon of milk at a time until it drips from the spoon.
- Pour a small layer into the mold and freeze for 30 minutes.
- Add dye to orange juice until it is orange, then pour on top of yogurt layer, filling 2/3 of the mold. Freeze for 1 hour.
- Fill with pineapple juice, insert sticks, and freeze for 2 hours.
- Enjoy your colorful candy corn popsicles!