Author

Steven

Browsing

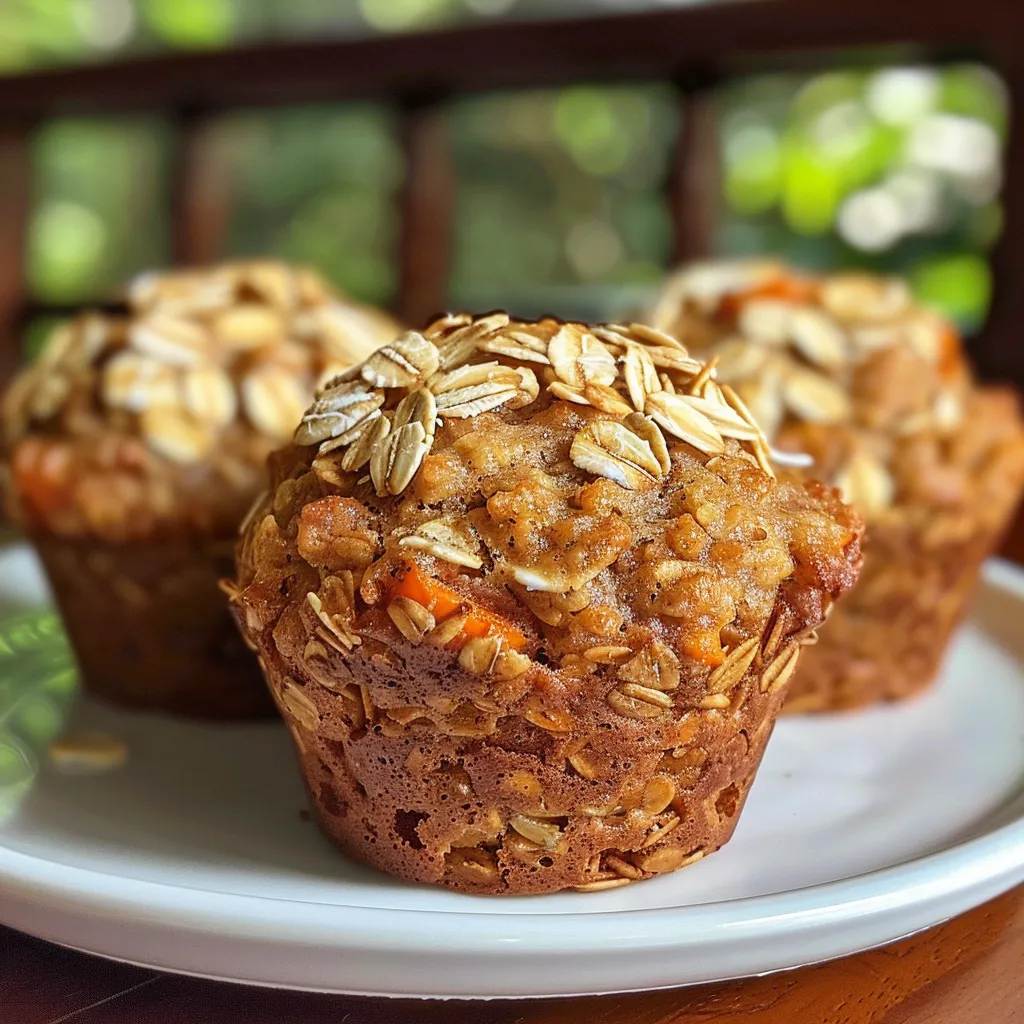
Your Ultimate Guide to One-Bowl Carrot Oatmeal Muffins

Welcome to your new favorite breakfast treat: One-Bowl Carrot Oatmeal Muffins. These delightful muffins are not only easy to make but also packed with flavor and nutrition. In this comprehensive guide, you’ll discover everything you need to know about crafting these delicious muffins, including tips, variations, and even troubleshooting advice. Let’s dive in and make mornings brighter with these simple yet satisfying muffins!

Why You’ll Love This Recipe

These muffins are perfect for busy mornings or as a healthy snack any time of day. Here are just a few reasons why you’ll adore this recipe:

  • Quick and Easy: With just one bowl required, these muffins come together in no time, making them ideal for hectic mornings.
  • Healthy Ingredients: Packed with rolled oats and carrots, these muffins are nutritious and can be made with whole ingredients you likely have on hand.
  • Customizable: Feel free to adapt the recipe to suit your taste preferences, with options for different add-ins and substitutions.
  • Kid-Friendly: The sweet flavor and fun texture make them a hit with children, while also providing essential nutrients.
  • Make-Ahead Friendly: These muffins store well, making them perfect for meal prep or a grab-and-go breakfast.

Ingredient Breakdown

Let’s take a closer look at the key ingredients that make these muffins so special, along with some helpful substitutions:

  • 1 cup rolled oats: Use whole rolled oats for the best texture and nutrition. Quick oats can work in a pinch but may lead to a softer muffin.
  • 1 cup grated carrots: Approximately 2 medium carrots. These add natural sweetness and moisture to the muffins.
  • 1/2 cup whole wheat flour: A nutritious alternative to all-purpose flour. You can substitute with all-purpose flour if preferred.
  • 1/2 cup all-purpose flour: This balances the density from the whole wheat flour.
  • 1/4 cup brown sugar: Coconut sugar can be used as a healthier alternative, providing a rich flavor.
  • 1 large egg: This helps bind the ingredients together, creating a fluffy texture.
  • 1/4 cup vegetable oil: Feel free to use melted coconut oil for a subtle coconut flavor.
  • 1/2 cup milk: Any type of milk works, including dairy or plant-based options.
  • 1 tsp vanilla extract: Adds a warm, sweet note to the muffins.
  • 1/2 tsp baking soda & 1/2 tsp baking powder: These leavening agents ensure your muffins rise beautifully.
  • 1 tsp ground cinnamon: A warm spice that enhances the overall flavor.
  • 1/2 tsp ground nutmeg: An optional ingredient that adds depth and warmth.
  • 1/4 tsp salt: Enhances all the flavors.

Step-by-Step Instructions

Side view of golden-brown carrot oatmeal muffins showcasing a fluffy texture.

Making these muffins is straightforward! Follow these easy steps:

  1. Preheat your oven to 350°F (175°C) and line a muffin tin with paper liners or grease it.
  2. In a large mixing bowl, combine the rolled oats, grated carrots, whole wheat flour, all-purpose flour, brown sugar, baking soda, baking powder, cinnamon, nutmeg, and salt. Stir until well combined.
  3. In a separate bowl, whisk together the egg, vegetable oil, milk, and vanilla extract.
  4. Pour the wet ingredients into the dry ingredients, mixing until just combined. Be careful not to overmix!
  5. Divide the batter evenly among the muffin cups, filling each about 2/3 full.
  6. Bake for 18-20 minutes or until a toothpick inserted into the center comes out clean.
  7. Let the muffins cool in the pan for 5 minutes before transferring them to a wire rack to cool completely.

Top Tips for Perfecting Your Muffins

Get the most out of your baking experience with these pro tips:

  • Don’t Overmix: Overmixing the batter can lead to dense muffins. Mix just until combined.
  • Use Fresh Ingredients: Ensure your baking powder and baking soda are fresh for the best rise.
  • Cool Before Storing: Allow muffins to cool completely before storing to prevent moisture buildup.
  • Experiment with Add-ins: Consider adding nuts, raisins, or chocolate chips for extra flavor and texture.
  • Check for Doneness: Use a toothpick to test doneness; it should come out clean or with a few moist crumbs.
  • Store Properly: Keep cooled muffins in an airtight container to maintain freshness.
  • Adjust Sweetness: Feel free to reduce the sugar if you prefer a less sweet muffin.
  • Make Larger Muffins: Use a larger muffin tin and adjust baking time accordingly for bigger treats.

Common Mistakes and Troubleshooting

A few common errors can lead to less-than-perfect muffins. Here’s how to avoid them:

  • Muffins Are Dense: This often results from overmixing the batter. Mix gently!
  • Muffins Don’t Rise: Ensure your baking powder and baking soda are fresh and not expired.
  • Too Dry: If your muffins are dry, you may have overbaked them. Keep an eye on them in the oven!
  • Too Sweet: Adjust the sugar to taste. You can always add less and taste the batter before baking.

Variations to Try

Want to mix it up? Here are some tasty variations:

  • Chocolate Chip Carrot Muffins: Add 1/2 cup of chocolate chips for a sweet twist.
  • Nuts and Seeds: Mix in 1/2 cup of chopped walnuts or sunflower seeds for added crunch.
  • Spiced Pumpkin Carrot Muffins: Substitute half of the grated carrots with canned pumpkin puree and add 1/2 tsp nutmeg.
  • Coconut Carrot Muffins: Add 1/2 cup of shredded coconut for a tropical flair.

Storage and Make-Ahead Instructions

These muffins can be made ahead of time and stored for later enjoyment:

  • Room Temperature: Store muffins in an airtight container at room temperature for up to 3 days.
  • Refrigeration: For longer storage, keep them in the fridge for up to a week.
  • Freezing: Freeze muffins in a zip-top bag for up to 3 months. Thaw overnight in the fridge or at room temperature.

Comprehensive FAQ

Here are some frequently asked questions about these muffins:

  • Can I make these muffins vegan? Yes! Substitute the egg with a flax egg (1 tbsp flaxseed meal + 2.5 tbsp water) and use plant-based milk and oil.
  • What can I use instead of milk? Any non-dairy milk works well, such as almond, soy, or oat milk.
  • How do I know when the muffins are done? Insert a toothpick into the center; it should come out clean or with a few moist crumbs.
  • Can I use quick oats instead of rolled oats? You can, but the texture may be slightly different, yielding a softer muffin.
  • Can I add fruits to the recipe? Absolutely! Consider adding blueberries or raisins for added sweetness.
  • How do I store leftover muffins? Keep them in an airtight container at room temperature or in the fridge.
  • What if I don’t have whole wheat flour? You can use all-purpose flour instead, but the muffins may be less nutritious.
  • Can I make mini muffins? Yes! Just reduce the baking time to about 12-15 minutes.

Nutritional Tips and Dietary Adaptations

These muffins can fit various dietary needs:

  • Gluten-Free: Use a gluten-free all-purpose flour blend in place of regular flour.
  • Lower Sugar: Reduce the sugar or use a sugar substitute if desired.
  • Protein Boost: Add a scoop of protein powder to the batter for an extra nutritional punch.

Equipment Recommendations

Here’s what you’ll need to get started:

  • Muffin Tin: A standard 12-cup muffin tin works best.
  • Mixing Bowls: A large bowl for mixing dry ingredients and a medium bowl for wet ingredients.
  • Whisk: For blending wet ingredients smoothly.
  • Measuring Cups and Spoons: Accurate measurements ensure consistent results.
  • Cooling Rack: Essential for cooling muffins evenly after baking.

Serving Suggestions

These muffins pair well with a variety of accompaniments:

  • Nut Butter: Spread almond or peanut butter for an added protein boost.
  • Yogurt: Serve with a dollop of yogurt for a creamy complement.
  • Fresh Fruit: Enjoy with a side of fresh fruit for a balanced meal.
  • Tea or Coffee: A warm beverage enhances the muffin experience.

Conclusion

Now you have everything you need to create delightful One-Bowl Carrot Oatmeal Muffins that are not only easy to make but also incredibly satisfying. With this guide, you can experiment, adapt, and enjoy these muffins your way. Happy baking, and remember—cooking is all about enjoying the process and having fun in the kitchen!

Easy One-Bowl Carrot Oatmeal Muffins

Prep Time 10 minutes
Cook Time 20 minutes
Total Time 30 minutes
Servings 12 muffins
Calories 150
These healthy and delicious carrot oatmeal muffins are quick to make in one bowl, perfect for a nutritious breakfast or snack.

Ingredients

Dry Ingredients

  • 1 cup rolled oats (Use whole rolled oats for best results.)
  • 1 cup grated carrots (Approximately 2 medium carrots.)
  • 0.5 cup whole wheat flour (Can substitute with more all-purpose flour.)
  • 0.5 cup all-purpose flour
  • 0.25 cup brown sugar (Coconut sugar can be used as a healthier alternative.)
  • 0.5 tsp baking soda
  • 0.5 tsp baking powder
  • 1 tsp ground cinnamon
  • 0.5 tsp ground nutmeg (Optional ingredient.)
  • 0.25 tsp salt
  • 1 large egg
  • 0.25 cup vegetable oil (Can substitute with melted coconut oil.)
  • 0.5 cup milk (Any type of milk can be used.)
  • 1 tsp vanilla extract

Instructions 

  • Preheat oven to 350°F (175°C). Line a muffin tin with paper liners.
  • In a large bowl, combine oats, grated carrots, flours, sugar, baking soda, baking powder, cinnamon, nutmeg, and salt.
  • Add egg, vegetable oil, milk, and vanilla extract to the dry ingredients. Mix until just combined.
  • Divide batter evenly among muffin cups and bake for 20 minutes or until a toothpick inserted comes out clean.
  • Allow muffins to cool slightly before serving.

Notes

For extra flavor, add a handful of chopped nuts or raisins to the batter.
Calories: 150kcal
Cost: $8
Course: Breakfast, Snack
Cuisine: American
Keyword: carrots, Healthy, muffins

Discover the Joy of Cooking: Effortless Chicken Pasta Bake

Welcome to your new favorite weeknight dinner! This Chicken Pasta Bake is not just a recipe; it’s a comforting hug in a casserole dish. Packed with flavor and made with simple ingredients, this dish is designed to bring joy to your kitchen without the stress. Whether you’re cooking for your family or hosting friends, this recipe is guaranteed to impress. Let’s dive into the details and see why you’ll love this effortless Chicken Pasta Bake!

Why You’ll Love This Recipe

This Chicken Pasta Bake isn’t just about taste; it’s about making cooking enjoyable and stress-free. Here are five compelling reasons why you’ll adore this dish:

  • Comforting flavors: The combination of tender chicken, creamy béchamel, and cheesy goodness will satisfy your cravings.
  • Simple ingredients: With items you likely already have in your pantry, this recipe is perfect for busy weeknights.
  • Meal prep friendly: You can assemble this dish ahead of time and bake it when you’re ready to eat, making dinner a breeze.
  • Versatile options: Feel free to add your favorite veggies or swap out the pasta for a gluten-free variety to fit your dietary needs.
  • Family-friendly: Kids and adults alike will love the cheesy, hearty nature of this baked dish, making it perfect for family gatherings.

Ingredient Breakdown

Here’s what you’ll need to create this delicious Chicken Pasta Bake. Each ingredient plays a crucial role in building layers of flavor.

  • Pasta: 13 oz of your favorite pasta (fusilli, penne, or even whole wheat for a healthier option).
  • Olive oil: 2 tablespoons for sautéing, bringing richness and flavor.
  • Chicken breasts: 3, cut into small cubes for tender bites.
  • Onion: 1, chopped for a sweet base flavor.
  • Garlic: 3 cloves, crushed to enhance the dish’s aroma.
  • Bell peppers: 2, diced for a pop of color and crunch.
  • Tomato paste: 1 tablespoon for depth and richness.
  • Tomato sauce: 14 oz of canned or homemade, providing the perfect tang.
  • Seasonings: Salt, black pepper, 1 teaspoon of oregano, and paprika for flavor enhancement.
  • Béchamel sauce ingredients: 6 tablespoons of butter, 3/4 cup of flour, and 3 cups of warm milk for creaminess.
  • Nutmeg: 1/4 teaspoon to elevate the béchamel sauce.
  • Cheese: 3 oz each of mozzarella and cheddar, grated for that gooey topping.

Pro Tips for Success

A detailed view of a Chicken Pasta Casserole with melted cheese, diced chicken, and vibrant bell peppers.

Here are some expert insights to ensure your Chicken Pasta Bake turns out perfectly every time:

  • Cook pasta al dente: Make sure to cook your pasta just under the package instructions; it will continue to cook in the oven.
  • Use leftover chicken: If you have rotisserie chicken, it’s a great shortcut—just shred and mix it in!
  • Season your layers: Don’t forget to season each layer of the dish to build depth of flavor.
  • Experiment with cheeses: Feel free to mix in your favorite cheeses like Gouda or Parmesan for added flavor.
  • Let it rest: After baking, allow the dish to sit for a few minutes before serving; it helps the flavors meld.
  • Cover with foil: If the top browns too quickly, cover with foil for the last 10 minutes of baking.
  • Fresh herbs: Garnish with fresh parsley or basil before serving for a burst of freshness.
  • Freeze for later: This dish freezes beautifully—just assemble and freeze before baking.

Common Mistakes and Troubleshooting

Even the best cooks can run into issues. Here are common pitfalls and how to avoid them:

  • Dry pasta bake: Ensure you don’t overcook the pasta before mixing; it should be slightly firm.
  • Sauce too thick: If your béchamel is too thick, whisk in a little more warm milk until you reach the desired consistency.
  • Uneven cooking: Stir the pasta and chicken mixture well before transferring it to the baking dish to ensure even distribution.
  • Too salty: Always taste as you go; you can adjust seasonings based on your preference.

Delicious Variations

This Chicken Pasta Bake is versatile, allowing for countless variations. Here are a few ideas to inspire your next creation:

  • Vegetable-packed: Add spinach, zucchini, or mushrooms to the chicken mixture for extra nutrients.
  • Spicy kick: Incorporate jalapeños or red pepper flakes for a spicy version.
  • Italian style: Stir in sun-dried tomatoes and Italian sausage for a hearty Italian twist.
  • Cheesy Alfredo: Swap the tomato sauce for Alfredo sauce for a rich, creamy variation.

Storage and Make-Ahead Instructions

This Chicken Pasta Bake is perfect for meal prep. Here’s how to store and prepare it:

  • Refrigerate: Store leftovers in an airtight container for up to 3 days.
  • Freeze: Assemble the dish without baking, wrap tightly, and freeze for up to 3 months.
  • To reheat: Bake from frozen at 375°F for 45-60 minutes, or until heated through.
  • Make ahead: Prepare the casserole in advance and refrigerate, then bake when ready to serve.

FAQ: Your Chicken Pasta Bake Questions Answered

  • Can I use whole wheat pasta? Yes! Whole wheat pasta is a nutritious alternative that will work well in this dish.
  • What can I substitute for chicken? Feel free to use turkey or even chickpeas for a vegetarian option.
  • How do I make it gluten-free? Use gluten-free pasta and ensure your flour for the béchamel is a gluten-free blend.
  • Can I add more cheese? Absolutely! Cheese lovers can never have enough—just make sure to balance it with the béchamel sauce.
  • Is this dish spicy? The recipe is not inherently spicy, but you can add heat with spices or jalapeños if desired.
  • Can I use frozen chicken? Yes! Just ensure you thaw it properly before cooking for even results.
  • What’s the best way to serve this? This dish is best served warm, straight from the oven, with a side salad or garlic bread.
  • How long should I bake it? Bake for 25-30 minutes or until golden-brown and bubbly on top.

Nutritional Tips and Dietary Adaptations

Cooking doesn’t have to mean compromising on your health goals. Here are some nutritional adaptations:

  • Lower fat: Use low-fat milk and reduced-fat cheese for a lighter version.
  • Increase veggies: This recipe is a great way to sneak in more vegetables—try adding broccoli or peas!
  • Protein boost: Add beans or legumes to increase the protein content without extra meat.
  • Portion control: Serve in smaller individual portions to help manage serving sizes.

Essential Equipment Recommendations

To make the best Chicken Pasta Bake, here’s a quick list of equipment you’ll need:

  • Large pot: For boiling pasta and preparing the chicken mixture.
  • Sauté pan: A large pan for cooking the chicken and vegetables.
  • Whisk: Essential for creating a smooth béchamel sauce.
  • Baking dish: A large casserole dish to hold all your delicious layers.

Serving Suggestions

Enhance your Chicken Pasta Bake experience with these serving ideas:

  • Fresh salad: Pair with a crisp green salad drizzled with vinaigrette.
  • Garlic bread: Serve alongside warm garlic bread for a comforting meal.
  • Wine pairing: A light white wine, like Sauvignon Blanc, complements the dish beautifully.
  • Herb garnish: Fresh basil or parsley will brighten the dish visually and flavor-wise.

Final Thoughts

Cooking should be a joy, not a chore. This Effortless Chicken Pasta Bake is here to simplify your weeknight meals while providing comfort and satisfaction. Remember, great food doesn’t require perfection—just some good ingredients, a dash of creativity, and the willingness to enjoy the process. Now, roll up your sleeves, grab your apron, and let’s make some magic in the kitchen!

Chicken Pasta Bake Recipe Chicken and Pasta Casserole

Prep Time 15 minutes
Cook Time 30 minutes
Total Time 45 minutes
Servings 4 servings
Calories 850
A hearty and cheesy baked chicken and pasta casserole that's perfect for family dinners.

Ingredients

Pasta

  • 13 oz Pasta of your choice
  • 2 tablespoons Olive oil
  • 3 pieces Chicken breasts (cut into small cubes)
  • 1 piece Onion (chopped)
  • 3 cloves Garlic (crushed)
  • 2 pieces Bell peppers (diced)
  • 1 tablespoon Tomato paste
  • 14 oz Tomato sauce or chopped tomatoes
  • to taste Salt
  • to taste Black pepper
  • 1 teaspoon Oregano
  • 1 teaspoon Paprika
  • 6 tablespoons Butter
  • 3/4 cup Flour
  • 3 cups Milk (warm)
  • to taste Salt
  • to taste Black pepper
  • 1/4 teaspoon Nutmeg
  • 3 oz Mozzarella (grated)
  • 3 oz Cheddar cheese (grated)

Instructions 

  • Preheat oven to 375°F (190°C). Prepare a baking dish and set aside.
  • Cook pasta in boiling salted water until al dente, then drain.
  • In a pan, sauté onion and garlic in olive oil, add chicken and cook until done, then add peppers, tomato paste, sauce, and seasonings. Simmer briefly.
  • Make béchamel sauce by melting butter, whisking in flour, then gradually adding warm milk and seasoning until thickened.
  • Combine pasta with béchamel and chicken mixture, transfer to baking dish, top with grated cheeses, and bake for 25-30 minutes until golden and bubbly.

Notes

For a richer flavor, add a sprinkle of herbs or extra cheese on top before baking.
Calories: 850kcal
Cost: $15
Course: Main Course
Cuisine: American
Keyword: baked, Chicken, Pasta

Unlock the Flavors of Italy with Chicken Pesto Flatbread Sandwiches

If you’re looking to elevate your weeknight dinners without a ton of fuss, you’ve landed in the right place! This Italian Chicken Pesto Flatbread Sandwich is not just quick and easy; it’s also bursting with flavor and perfect for busy weeknights. With tender chicken, fresh tomatoes, and creamy mozzarella, this dish is sure to impress your family or guests. Let’s dive into how you can make this delightful meal that brings the taste of Italy into your home.

Why You’ll Love This Recipe

This Chicken Pesto Flatbread Sandwich is a game-changer for your dinner rotation. Here are a few reasons why:

  • Quick and Easy: From prep to plate, you can have this dish ready in under 30 minutes, making it ideal for weeknight dinners.
  • Flavor Explosion: The combination of pesto, chicken, and mozzarella creates a mouthwatering flavor profile that is sure to delight.
  • Versatile: Customize your flatbread with your favorite ingredients or whatever you have on hand—think veggies, cheese, or different proteins!
  • Family-Friendly: Kids and adults alike will love this sandwich, making it a hit for family meals.
  • Healthy Option: Packed with lean protein and fresh ingredients, this sandwich is a nutritious choice for dinner.

Ingredient Breakdown

Let’s take a closer look at the ingredients you’ll need to whip up this delicious sandwich:

  • 1 packet Wish-Bone Italian Dressing and Seasoning Mix: This is the secret to infusing your chicken with vibrant flavor.
  • 1/4 cup oil: Use olive oil for a rich flavor that complements the other ingredients.
  • 1/4 cup water: Helps to create a marinade consistency.
  • 1/4 cup white balsamic vinegar: A subtle vinegar that adds tang; feel free to substitute with red wine vinegar if needed.
  • 1 1/2 pounds Tyson Chicken Breasts: Cut into thin strips for quick cooking and marinating.
  • 6 flatbreads: The base for your sandwich; you can use store-bought or homemade flatbreads.
  • 6 tablespoons pesto sauce: This can be store-bought or homemade, depending on your preference.
  • 6-12 slices mozzarella cheese: Adjust the amount based on your cheese love!
  • 12 slices tomato: Fresh tomatoes add a juicy crunch to your sandwich.

Step-by-Step Instructions

Side view of a delicious flatbread sandwich filled with chicken, pesto, and cheese.

Follow these easy steps to create your Italian Chicken Pesto Flatbread Sandwich:

  1. In a small bowl, whisk together the dressing mix, oil, water, and vinegar.
  2. Place the chicken strips in a large bowl and combine with 1/3 cup of the dressing marinade. Reserve the rest for later. Let the chicken marinate for at least 30 minutes.
  3. After marinating, heat a skillet over medium-high heat. Add the chicken strips, cooking until they are browned and cooked through. Discard any remaining marinade.
  4. Preheat your panini maker or indoor grill according to the manufacturer’s instructions.
  5. Brush one side of a flatbread with the reserved marinade and place it down on the panini maker or grill.
  6. Spread 1-1.5 tablespoons of pesto on half of the flatbread, then layer mozzarella cheese, cooked chicken, and tomato slices.
  7. If desired, add extra cheese on top of the tomatoes for a gooey finish.
  8. Fold the flatbread over the filling and cook until the cheese is melted and the flatbread is golden brown. Cut in half to serve.

Pro Tips for Success

Here are some expert insights to take your sandwich to the next level:

  • Use Rotisserie Chicken: For even quicker prep, use rotisserie chicken instead of raw chicken. Just shred it and mix with the marinade.
  • Fresh Ingredients Matter: Opt for fresh tomatoes and high-quality mozzarella for the best flavor.
  • Don’t Skip Marinating: Marinating the chicken adds depth of flavor; even 30 minutes makes a difference.
  • Experiment with Pesto: Try different pesto flavors like sun-dried tomato or arugula for a unique twist.
  • Watch Cooking Time: Keep an eye on your flatbread as it cooks to avoid burning. Each grill or maker varies.
  • Make it a Meal: Pair your sandwich with a side salad or soup for a complete dinner.
  • Customize for Dietary Needs: Gluten-free flatbreads are readily available if you need to cater to gluten sensitivities.
  • Serving Size: This recipe serves 6, but you can easily adjust the quantities based on your needs.

Common Mistakes and Troubleshooting

Here are some tips to avoid common pitfalls:

  • Overcrowding the Pan: If cooking chicken in batches, avoid overcrowding the pan to ensure even cooking.
  • Skipping the Rest: Letting the cooked chicken rest for a few minutes before assembling helps retain moisture.
  • Using Stale Flatbread: Fresh flatbreads will yield a better texture and taste.
  • Not Enough Sauce: Ensure you have enough pesto for flavor; adjust to your preference!

Delicious Variations

Feeling adventurous? Here are some creative twists you can try:

  • Veggie Delight: Add fresh spinach, roasted red peppers, or avocado for added nutrition and flavor.
  • Spicy Kick: Incorporate sliced jalapeños or a drizzle of hot sauce for a spicy version.
  • Caprese Style: Add fresh basil and balsamic glaze for a Caprese-inspired flatbread.
  • Cheesy Goodness: Mix in different cheeses like goat cheese or feta for a unique flavor.

Storage and Make-Ahead Instructions

This Chicken Pesto Flatbread Sandwich can be made ahead of time:

  • Refrigerate: Store leftover sandwiches in an airtight container in the fridge for up to 2 days.
  • Reheat: For the best texture, reheat in a skillet or panini maker.
  • Make Ahead: You can marinate the chicken a day in advance for deeper flavor.

Frequently Asked Questions

Here are some common questions about making Chicken Pesto Flatbread Sandwiches:

  • Can I use a different type of bread? Absolutely! Naan, pita, or even regular sandwich bread will work well.
  • Is this recipe gluten-free? Use gluten-free flatbreads to make this dish gluten-free.
  • Can I freeze this sandwich? While fresh is best, you can freeze cooked components separately and assemble fresh.
  • What’s the best way to serve this? Serve warm with a side salad or chips for a balanced meal.
  • Can I make this vegetarian? Yes! Substitute chicken with grilled vegetables or chickpeas.
  • How do I know when the chicken is cooked? Chicken is done when it reaches an internal temperature of 165°F (74°C).
  • Can I use homemade pesto? Yes! Homemade pesto adds an extra layer of flavor and freshness.
  • What is the nutritional information? This sandwich is rich in protein and can be adapted for lower carb or calorie options based on ingredients.

Nutritional Tips and Dietary Adaptations

This recipe can be easily adjusted to fit various dietary needs:

  • Low-Carb: Use lettuce wraps instead of bread for a lower-carb option.
  • Dairy-Free: Replace mozzarella with dairy-free cheese alternatives or simply omit cheese.
  • High-Protein: Add extra chicken or legumes to boost protein content.

Equipment Recommendations

Here’s what you’ll need to create your delicious sandwich:

  • Skillet or Panini Maker: Essential for cooking the chicken and grilling the sandwich.
  • Mixing Bowl: For marinating your chicken and mixing the dressing.
  • Whisk: To blend the marinade ingredients together smoothly.
  • Knife and Cutting Board: For slicing chicken and veggies.

Serving Suggestions

To round out your meal, consider serving your Chicken Pesto Flatbread Sandwich with:

  • Fresh Salad: A light mixed greens salad with a lemon vinaigrette pairs perfectly.
  • Chips: Crunchy kettle chips or sweet potato fries for a comforting crunch.
  • Soup: A warm bowl of tomato basil soup enhances the Italian theme!

So there you have it! A comprehensive guide to making the best Italian Chicken Pesto Flatbread Sandwich. With these simple steps and tips, you’ll be able to impress anyone at your dinner table while enjoying the process of cooking. Remember, the key is to have fun and feel confident in the kitchen. Happy cooking!

Italian Chicken Pesto Flatbread Sandwich

Prep Time 15 minutes
Cook Time 15 minutes
Total Time 30 minutes
Servings 6 sandwiches
Calories 450
A delicious and easy-to-make flatbread sandwich featuring marinated chicken, pesto, mozzarella, and fresh tomatoes, perfect for a quick lunch or dinner.

Ingredients

Dressing and Marinade

  • 0.33 cup Wish-Bone Italian Dressing and Seasoning Mix
  • 0.25 cup oil
  • 0.25 cup water
  • 0.25 cup white balsamic vinegar (can sub other vinegars)
  • 1.5 pounds Tyson Chicken Breasts (cut in thin strips)

Flatbreads

  • 6 pieces flatbreads

Pesto Sauce

  • 6 tablespoons pesto sauce (use less if desired or if pesto is thin)

Mozzarella Cheese

  • 6 slices mozzarella cheese (exact amount depends on your preference)

Tomatoes

  • 12 slices tomato slices

Instructions 

  • Whisk dressing mix, oil, water, and vinegar in a small bowl. Marinate chicken for 30 minutes.
  • Cook marinated chicken in a skillet until browned and cooked through. Discard remaining marinade.
  • Heat flatbreads on a grill or pan. Brush one side with reserved marinade, place coated side down.
  • Spread pesto on half of each flatbread, top with mozzarella, cooked chicken, and tomato slices. Add extra cheese if desired.
  • Fold flatbreads over fillings and cook until browned and cheese melts. Slice and serve.

Notes

For a crispier sandwich, cook on a panini press or indoor grill until golden.
Calories: 450kcal
Cost: $12
Course: Main Course
Cuisine: Italian
Keyword: Chicken, flatbread, Pesto

Are you ready to discover a delightful dish that brings vibrant flavors and simple ingredients together? This easy shrimp flatbread recipe is perfect for busy weeknights when you want something quick yet delicious. With the combination of succulent shrimp, garlic butter, and melted cheeses atop a crispy naan, you’ll find yourself indulging in a meal that feels gourmet but is incredibly easy to make. Let’s jump right into why you’ll love this recipe!

Why You’ll Love This Recipe

  • Quick and Easy: With a total prep and cook time of just about 30 minutes, this dish is perfect for a busy evening.
  • Flavor Explosion: The combination of garlic, herbs, and fresh shrimp creates a flavor profile that will impress your taste buds.
  • Customizable: You can easily swap ingredients based on what you have at home or your dietary preferences.
  • Great for Sharing: Perfect as an appetizer or a main dish, this flatbread is ideal for gatherings.
  • Healthy Option: With fresh ingredients and lean protein, this dish is a nutritious choice that doesn’t skimp on taste.

Ingredients Breakdown

To make this scrumptious shrimp flatbread, you’ll need the following ingredients:

  • 1 package of Naan flatbread: Offers a perfect base; you can also use pita or homemade flatbread.
  • Salt and pepper to taste: Essential for enhancing flavors.
  • 2 teaspoons of peppercorn seasoning: Adds a nice kick.
  • 2 teaspoons of red pepper seasoning: For a bit of heat.
  • 3 tablespoons of minced garlic: The star flavor that ties everything together.
  • 1/2 cup of shaved parmesan cheese: For a rich, nutty flavor.
  • 1/2 cup of shredded mozzarella: Melts beautifully to create that gooey texture.
  • 1 pound of large shrimp: Fresh or frozen, they provide the protein.
  • 1 bundle of basil: Fresh herbs elevate the dish.
  • 1 stick of garlic butter: Adds a rich, buttery flavor.
  • 3 tablespoons of diced red onion: For a crunchy texture and mild sweetness.
  • 2 tablespoons of lemon juice: Brightens up the flavors with acidity.

If you need to make substitutions, consider using herb cheese instead of garlic butter for a twist. You can also replace the shrimp with grilled chicken or sautéed vegetables for a vegetarian version!

Step-by-Step Directions

Ready to cook? Let’s get started with these simple steps:

  1. Preheat your oven to 375 degrees Fahrenheit.
  2. Add olive oil to a pan over medium heat.
  3. Sauté minced garlic for 2 to 4 minutes until fragrant.
  4. Add the shrimp to the pan and season with peppercorn seasoning, salt, pepper, red peppers, lemon juice, and garlic salt.
  5. Sauté the shrimp for 7 to 10 minutes, then set aside to cool.
  6. Spread garlic butter generously over the naan flatbread.
  7. Sprinkle a layer of shaved parmesan cheese over the flatbread.
  8. Add the cooked shrimp evenly across the flatbread.
  9. Top the shrimp with shredded mozzarella, diced red onion, and remaining shaved parmesan cheese.
  10. Bake in the preheated oven for 20-25 minutes or until the cheese is bubbly and golden.
  11. Garnish with red pepper flakes, serve, and enjoy!

Pro Tips for Perfect Shrimp Flatbread

Side view of a delicious shrimp flatbread garnished with basil.
  • Choose Fresh Shrimp: If possible, opt for fresh shrimp for the best flavor, but frozen shrimp work well too. Just ensure they’re thawed and drained.
  • Don’t Skip the Garlic: Fresh garlic makes a world of difference in flavor; don’t substitute with garlic powder if you can help it!
  • Experiment with Cheeses: Mixing different cheeses like feta or gouda can create unique flavor profiles.
  • Watch Your Baking Time: Keep an eye on the flatbread as baking times may vary depending on your oven.
  • Garnish with Fresh Herbs: Fresh basil or parsley adds a pop of color and flavor when serving.
  • Make Ahead: Prepare the shrimp mixture in advance and store it in the fridge until you’re ready to assemble and bake.
  • Use Air Fryer: For a crispier flatbread, you can also use an air fryer. Just adjust the cooking time to about 10-15 minutes.
  • Don’t Overload: Be careful not to overload the flatbread with toppings, as it may not bake evenly.

Common Mistakes & Troubleshooting

Even the best of us can make mistakes in the kitchen! Here are some common pitfalls and how to avoid them:

  • Overcooking the Shrimp: Shrimp cooks quickly; be sure not to overdo it or they’ll become rubbery.
  • Burnt Cheese: If your cheese is browning too quickly, cover the flatbread loosely with foil to prevent burning while baking.
  • Soggy Flatbread: Ensure your flatbread is crispy before adding toppings. You can bake it for a few minutes before adding ingredients.
  • Lack of Flavor: Taste your shrimp mixture before assembling to ensure it has enough seasoning.

Delicious Variations

Feel free to get creative with your shrimp flatbread! Here are some variations to try:

  • Spicy Shrimp Flatbread: Add diced jalapeños or a drizzle of sriracha for an extra kick.
  • Garlic Herb Shrimp Flatbread: Use garlic herb cheese instead of regular cheese for an aromatic twist.
  • Vegetable Lover’s Flatbread: Incorporate sautéed bell peppers, zucchini, and spinach along with the shrimp.
  • Sun-Dried Tomato Shrimp Flatbread: Add sliced sun-dried tomatoes for a tangy flavor boost.

Storage and Make-Ahead Instructions

If you have leftovers (which is rarely the case because it’s so good!), you can store your shrimp flatbread in an airtight container in the refrigerator for up to 3 days. Reheat in the oven at 350 degrees until warmed through. You can also prepare the shrimp mixture and toppings in advance, storing them separately in the fridge until you’re ready to bake.

Frequently Asked Questions

  • Can I use different types of flatbread? Absolutely! Pita, homemade dough, or even tortillas can be substituted.
  • Is this recipe gluten-free? You can make it gluten-free by using gluten-free flatbread.
  • Can I freeze this flatbread? While it’s best fresh, you can freeze the baked flatbread. Reheat in the oven when ready to eat.
  • What type of shrimp should I use? Large shrimp work best, but you can use any size. Just adjust cooking times accordingly.
  • What can I serve with shrimp flatbread? A side salad or garlic knots make great accompaniments.
  • How do I know when the shrimp is cooked? Shrimp turn pink and opaque when cooked. They should also curl into a C shape.
  • Can I make this dish vegetarian? Yes! Substitute shrimp with grilled vegetables such as zucchini or mushrooms.
  • How can I make this dish spicier? Add crushed red pepper, jalapeños, or a spicy sauce to your shrimp mixture.

Nutrition Tips and Dietary Adaptations

This shrimp flatbread recipe is not only delicious but also packed with nutrients. It’s a good source of protein from the shrimp, dairy from the cheeses, and vitamins from the fresh herbs and vegetables. To make it even healthier:

  • Swap cheeses: Use low-fat cheese options to reduce calories.
  • Add more veggies: Increase the amount of vegetables for fiber and nutrients.
  • Whole grain flatbreads: Opt for whole grain naan for added fiber.

Equipment Recommendations

To make your cooking experience smoother, here are some recommended tools:

  • Oven: A standard oven is essential for baking your flatbread to crispy perfection.
  • Pan: A non-stick skillet is great for sautéing your shrimp and garlic.
  • Spatula: For flipping shrimp and assembling your flatbread.
  • Measuring Cups and Spoons: Accurate measurements ensure the best flavor balance.

Serving Suggestions

Once your shrimp flatbread is baked and garnished, consider serving it with:

  • Fresh Salad: A light side salad with a vinaigrette complements the rich flavors.
  • Garlic Knots: These add an extra garlic kick to your meal.
  • Wine: A crisp white wine pairs beautifully with the flavors of shrimp.

Cooking should be a joyful experience, and this easy shrimp flatbread is here to brighten up your mealtime. Enjoy the process, and remember, it’s all about having fun in the kitchen. Happy cooking!

Shrimp Flatbread

Prep Time 10 minutes
Cook Time 25 minutes
Total Time 35 minutes
Servings 4 servings
Calories 650
A delicious shrimp flatbread topped with cheeses, herbs, and spices, baked to perfection for a flavorful appetizer or main dish.

Ingredients

Base

  • 1 package Naan flatbread
  • 1 stick garlic butter

Cheese

  • 1/2 cup shaved parmesan cheese
  • 1/2 cup shredded mozzarella

Seafood

  • 1 pound large shrimp

Vegetables & Herbs

  • 1 bundle basil
  • 3 tablespoons diced red onion

Seasonings & Condiments

  • 2 teaspoons peppercorn seasoning
  • 2 teaspoons red pepper seasoning
  • 3 tablespoons diced red onion
  • 2 tablespoons lemon juice

Instructions 

  • Preheat oven to 375°F (190°C). Spread garlic butter over naan. Add parmesan, mozzarella, cooked shrimp, red onion, and basil. Bake for 20-25 minutes. Garnish with red pepper flakes and serve.

Notes

For extra flavor, sprinkle with fresh herbs before serving.
Calories: 650kcal
Cost: $15
Course: Main Course
Cuisine: American
Keyword: shrimp

Transform Your Dinner Routine with a Flavorful Veggie Rice Bowl

Welcome to your new favorite meal! This Family Style Veggie Rice Bowl is not just a dish; it’s an experience that brings joy to your dinner table. With vibrant colors and a burst of flavors, this veggie-packed bowl is an easy way to make healthy eating fun and satisfying for everyone in the family. Let’s dive into why you’ll love this recipe and how to make it your own!

Why You’ll Love This Recipe

Cooking doesn’t have to be complicated! Here are five reasons why this veggie rice bowl will quickly become a staple in your home:

  • Quick and Easy: This recipe comes together in about 30 minutes, perfect for busy weeknights.
  • Customizable: Use whatever veggies you have on hand, making it an excellent way to reduce food waste.
  • Nutritious: Packed with vitamins and minerals, this bowl is a wholesome choice for the entire family.
  • Kid-Friendly: With colorful ingredients and delicious flavors, this dish is sure to please even the pickiest eaters.
  • Meal Prep Friendly: Make a big batch and enjoy leftovers for lunch or dinner throughout the week!

Ingredients Breakdown

Here’s what you’ll need to whip up this delicious veggie rice bowl:

  • White Rice: I recommend using jasmine or basmati for the best flavor and texture.
  • Butternut Squash: 2 cups, cubed. If you don’t have this, sweet potatoes work great too!
  • Yellow Onion: 1, sliced. Adds a sweet and savory depth to the dish.
  • Extra Virgin Olive Oil: 1 tablespoon for roasting and flavor.
  • Garlic: 6-8 cloves, minced. A must for aromatic goodness.
  • Frozen Mixed Vegetables: 1 bag (Asian blend or your choice). Convenient and nutritious!
  • Coconut Oil: 1 tablespoon for sautéing your veggies.
  • Avocado: 1-2, sliced. Adds creaminess to the bowl.
  • Soy Sauce: For seasoning. Choose a gluten-free option if needed.

Pro Tips for Perfecting Your Veggie Rice Bowl

Side view of a delicious rice bowl filled with bright, fresh veggies and garnished with sliced avocado.

Want to elevate your dish? Here are some expert insights:

  • Roast Your Veggies: Roasting brings out the natural sweetness of your vegetables. Don’t skimp on the olive oil and seasoning!
  • Fluff Your Rice: Once cooked, fluff your rice with a fork to keep it light and airy.
  • Layer Flavors: Start with a base of rice, then add veggies, followed by avocado and drizzle with soy sauce to maximize flavor.
  • Experiment with Sauces: Try different sauces like teriyaki, sriracha, or tahini for a unique twist.
  • Garnish: Add sesame seeds, fresh cilantro, or green onions for an extra pop of flavor.
  • Get Creative: Feel free to swap in any veggies you love; this dish is all about what you enjoy!
  • Use Leftovers: This recipe is fantastic for using up leftover veggies from your fridge!
  • Make it Vegan: This dish is already plant-based, but you can add tofu or tempeh for extra protein.

Avoid Common Mistakes

Here are some common pitfalls to avoid when making your veggie rice bowl:

  • Overcooking the Veggies: Keep an eye on your veggies while roasting to ensure they don’t become mushy.
  • Skipping Seasoning: Don’t forget to season each layer; it makes a big difference in overall flavor.
  • Using Cold Rice: Warm rice helps meld the flavors together better than cold rice.
  • Not Prepping Ahead: Meal prep can save you time; consider making extra rice and veggies to have on hand.

Delicious Variations to Try

This veggie rice bowl is versatile! Here are a few variations to keep things exciting:

  • Mexican Bowl: Swap soy sauce for taco seasoning, add black beans, corn, and top with salsa.
  • Italian Twist: Use Italian herbs, cherry tomatoes, and mozzarella cheese instead of avocado.
  • Asian Fusion: Incorporate sesame oil, edamame, and top with a sprinkle of sesame seeds.
  • Breakfast Bowl: Add a fried or poached egg on top for a hearty breakfast option.

Storage and Make-Ahead Instructions

This recipe is perfect for meal prep! Here’s how to store it:

  • Refrigerate: Store leftovers in an airtight container in the fridge for up to 4 days.
  • Freeze: You can freeze the rice and veggies for up to 3 months. Just reheat before serving.
  • Make-Ahead: Prepare the rice and chop your veggies ahead of time for quicker assembly during the week.

Frequently Asked Questions

Got questions? Here are some FAQs that might help:

  • Can I use brown rice instead of white? Yes! Just be sure to adjust the cooking time.
  • What other veggies can I use? Feel free to use any seasonal or frozen veggies you enjoy!
  • Can I make this dish gluten-free? Absolutely! Just choose gluten-free soy sauce or tamari.
  • How can I add more protein? Consider adding chickpeas, tofu, or even grilled chicken for extra protein.
  • Is this recipe kid-friendly? Definitely! The colorful veggies and tasty flavors appeal to kids.
  • What if I don’t like avocado? You can substitute with nuts or seeds for a nice crunch.
  • Can I make this vegan? Yes! This recipe is already plant-based and vegan-friendly.
  • How can I spice it up? Add chili flakes, sriracha, or your favorite hot sauce for a kick!

Nutrition Tips and Dietary Adaptations

This veggie rice bowl is not only delicious but also nutritious. Here are some tips to enhance its health benefits:

  • Increase Fiber: Add beans or lentils for extra fiber and protein.
  • Go Low-Carb: Substitute rice with cauliflower rice for a low-carb option.
  • Make it Whole Grain: Use quinoa or farro instead of white rice for added nutrients.
  • Balance Your Plate: Ensure your meal has a good mix of protein, carbs, and healthy fats.

Essential Equipment Recommendations

Having the right tools can make your cooking experience more enjoyable. Here’s what I recommend:

  • Rice Cooker: Perfect for making fluffy rice without any hassle.
  • Sharp Knife: A good knife makes prepping veggies quick and easy.
  • Baking Sheet: For roasting your veggies. Choose one with a non-stick or parchment lining.
  • Large Mixing Bowl: Essential for combining all your ingredients.

Serving Suggestions

To make your veggie rice bowl even more delightful, consider these serving ideas:

  • Top with Fresh Herbs: Cilantro or parsley adds a burst of freshness.
  • Include a Side Salad: A light salad pairs beautifully with this dish.
  • Pair with a Beverage: Enjoy with iced tea or a fresh smoothie for a complete meal.

So, are you ready to elevate your dinner routine with this vibrant veggie rice bowl? Cooking doesn’t have to be overwhelming; it’s all about enjoying the process and experimenting with flavors. Remember, you can make this dish your own by swapping in your favorite veggies and toppings. Now, let’s get cooking and bring some joy to your table!

Family Style Veggie Rice Bowl

Prep Time 10 minutes
Cook Time 25 minutes
Total Time 35 minutes
Servings 4 servings
Calories 550
A hearty and colorful rice bowl packed with roasted vegetables, fresh avocado, and flavorful seasonings, perfect for a wholesome meal.

Ingredients

Grains

  • 2 cups white rice (jasmine or basmati)

Vegetables

  • 2 cups butternut squash, cubed
  • 1 large yellow onion, largely sliced
  • 6-8 cloves garlic cloves
  • 1 bag frozen mixed Asian veggies or any frozen veggies

Fats & Oils

  • 1 tbsp extra virgin olive oil
  • 1 tbsp coconut oil

Produce

  • 1-2 avocado avocado, sliced

Condiments & Seasonings

  • salt and pepper to taste
  • soy sauce or sauce of choice

Instructions 

  • Preheat oven to 400°F (200°C). Line a baking sheet with parchment paper.
  • Place butternut squash, onion, and garlic on the baking sheet. Drizzle with olive oil, season with salt and pepper, and roast for 25 minutes.
  • Cook rice according to package instructions. Fluff with a fork and transfer to a large bowl.
  • Prepare frozen veggies as desired (steam, bake, roast, or sauté in coconut oil for 5-6 minutes). Add cooked veggies to the rice bowl.
  • Add sliced avocado, soy sauce, and seasonings. Mix well and serve.

Notes

Feel free to customize with your favorite seasonings or additional toppings.
Calories: 550kcal
Cost: $15
Course: Main Course
Cuisine: Fusion
Keyword: Healthy, rice, Vegetables

Elevate Your Culinary Skills with Grilled Mediterranean Flatbread Pizza

Are you ready to transform your weeknight dinners into something extraordinary? This Grilled Mediterranean Vegetable Flatbread Pizza, topped with a luscious roasted garlic tahini sauce, is the perfect dish to bring excitement back to your kitchen. Not only is it delicious, but it’s also quick and easy to prepare, making it a fantastic choice for busy weeknights. With its vibrant flavors and fresh ingredients, this flatbread pizza is sure to become a staple in your recipe repertoire. Let’s dive into why you’ll love this recipe and how you can make it your own.

Why You’ll Love This Recipe

  • Quick Preparation: This recipe comes together in under 30 minutes, making it perfect for a bustling weeknight dinner.
  • Versatile Toppings: Customize your flatbread pizza with a variety of grilled vegetables, olives, and fresh herbs to suit your taste.
  • Healthy Ingredients: Packed with fresh vegetables and a homemade tahini sauce, this dish is nutritious and satisfying.
  • Impressive Presentation: Serve this colorful flatbread to impress your guests at gatherings or family dinners.
  • Perfect for Leftovers: Enjoy the deliciousness again the next day, as it stores well and reheats beautifully.

Ingredient Breakdown

To create your Grilled Mediterranean Vegetable Flatbread Pizza, gather the following ingredients:

  • Active yeast: 2 1/4 teaspoons
  • Sugar: 1/2 teaspoon
  • Flour: 1 3/4 cups (use whole wheat for a healthier option)
  • Salt: 1 teaspoon
  • Fresh rosemary: 1 tablespoon, chopped (dried rosemary works too)
  • Water: 3/4 cup (warm for activating yeast)
  • Olive oil: 1 teaspoon, plus more for grilling
  • Assorted baby squash: 1 1/2 cups, sliced
  • Baby eggplant: 1, sliced
  • Shallot: 1 large, halved
  • Mixed pitted olives: 2 tablespoons, chopped
  • Cherry tomatoes: 2 tablespoons, halved
  • Fresh oregano leaves: 1 tablespoon
  • Roasted garlic: 2 cloves
  • Tahini: 1/4 cup
  • Lemon juice and zest: from 1 lemon
  • Pinch of salt: to taste
  • Water: up to 1/4 cup (for thinning tahini sauce)

Step-by-Step Instructions

Side view of a delicious flatbread pizza featuring grilled vegetables and tahini sauce, presented on a wooden board.

Follow these simple steps to whip up your delicious Grilled Mediterranean Flatbread Pizza:

  1. Prepare the Dough: In a food processor, combine the yeast, sugar, flour, salt, and rosemary. Pulse to mix. Gradually add warm water while pulsing until the dough begins to form. Knead on a floured surface until smooth and elastic.
  2. Let it Rise: Coat a clean bowl with 1 teaspoon of olive oil. Place the dough in the bowl, cover with a dish towel, and let it rise until doubled in size, about 1 hour.
  3. Shape the Flatbreads: Once risen, punch down the dough and knead lightly. Divide into two pieces and roll each into 8-inch ovals.
  4. Grill the Flatbreads: Preheat a grill pan over medium heat. Grill the flatbreads for about 1-2 minutes per side, or until they puff and show grill marks. Don’t flip until bubbles form on the surface.
  5. Grill the Vegetables: Halve the baby squash, eggplant, and shallot. Coat with olive oil, season with salt and pepper, and grill until tender, about 5-6 minutes.
  6. Make the Tahini Sauce: In a bowl, whisk together roasted garlic, tahini, lemon juice, lemon zest, and a pinch of salt. Thin with water until it reaches a pourable consistency.
  7. Assemble the Pizza: Spread half of the tahini sauce on each flatbread. Top with grilled vegetables, olives, cherry tomatoes, and fresh oregano. Drizzle with additional tahini sauce before serving.

Pro Tips for Perfect Flatbread Pizza

  • Use Fresh Ingredients: Fresh vegetables and herbs elevate the flavor. Opt for seasonal produce when possible.
  • Experiment with Toppings: Try adding feta cheese, arugula, or even grilled chicken for added flavor and texture.
  • Don’t Overcook the Flatbreads: Remove them from the grill as soon as they puff to prevent them from becoming too crispy.
  • Customize the Sauce: Adjust the tahini sauce by adding spices like cumin or smoked paprika for a unique twist.
  • Prep Ahead: Make the dough and grill the vegetables in advance to save time on busy nights.
  • Use Parchment Paper: If grilling directly on the grill, use parchment paper to prevent sticking.
  • Consider Vegan Options: This recipe can easily be made vegan by omitting any cheese or using a dairy-free cheese substitute.
  • Save the Leftovers: Store leftover flatbread pizza in an airtight container for up to 3 days.

Common Mistakes and Troubleshooting

Even the best cooks can make mistakes! Here are some common pitfalls and how to avoid them:

  • Yeast Not Activating: Ensure your water is warm (not hot) when adding yeast. If it doesn’t foam after a few minutes, your yeast might be dead.
  • Dough Too Sticky: If your dough is sticky, add a little more flour as you knead until it reaches a smooth consistency.
  • Flatbreads Not Puffing: Make sure your grill is hot enough before adding the flatbreads. If it’s too cool, they won’t puff up.

Delicious Variations

Feel free to get creative! Here are some variations you can try:

  • Italian Inspired: Top with grilled zucchini, sun-dried tomatoes, and a sprinkle of mozzarella cheese.
  • Spicy Kick: Add jalapeños or drizzle with sriracha for a spicy twist.
  • Breakfast Flatbread: Add scrambled eggs and fresh spinach for a hearty breakfast option.
  • Sweet Treat: Spread a layer of ricotta cheese and top with sliced figs and honey for a dessert flatbread.

Storage and Make-Ahead Instructions

To ensure your flatbread pizza stays fresh:

  • Refrigerate: Store leftovers in an airtight container in the fridge for up to 3 days.
  • Freeze: You can freeze the flatbreads before grilling. Just wrap them tightly in plastic wrap and then in aluminum foil.
  • Reheat: To reheat, place the flatbreads in the oven at 350°F (175°C) for about 10 minutes or until heated through.

Frequently Asked Questions

  • Can I use store-bought flatbread? Absolutely! Store-bought flatbread is a great time-saver and works perfectly for this recipe.
  • What other vegetables can I use? Feel free to use any seasonal vegetables you love—bell peppers, asparagus, or even artichokes work well!
  • Can I make this gluten-free? Yes! Substitute all-purpose flour with a gluten-free flour blend.
  • How do I make this pizza vegan? Simply eliminate any cheese and use a vegan tahini sauce.
  • Can I add protein to my flatbread pizza? Yes, grilled chicken or chickpeas are excellent protein additions!
  • How can I enhance the flavor? Consider marinating your vegetables in olive oil, lemon juice, and herbs before grilling.
  • What can I serve with this flatbread? A side salad or a light soup pairs wonderfully with this pizza.
  • Can I use other sauces? Try pesto or a spicy marinara for a different flavor profile!

Nutrition Tips and Dietary Adaptations

This Grilled Mediterranean Flatbread Pizza not only satisfies your taste buds but also offers a nutritious meal option. Here are some tips to enhance its health benefits:

  • Add More Veggies: Load up on a variety of colorful vegetables to increase fiber and nutrients.
  • Use Whole Grains: Opt for whole wheat flour to boost the fiber content of the crust.
  • Limit Added Sugars: The recipe uses minimal sugar, but be mindful of any toppings or sauces that may add extra sugars.

Equipment Recommendations

Here’s what you’ll need to make your flatbread pizza:

  • Food Processor: For quick dough preparation.
  • Grill Pan: A good-quality grill pan ensures perfect grill marks and flavor.
  • Measuring Cups and Spoons: Accurate measurements will make all the difference.
  • Baking Sheet: For resting grilled flatbreads or transferring them in and out of the oven.

Serving Suggestions

Elevate your dining experience by pairing your Grilled Mediterranean Flatbread Pizza with:

  • Crisp Green Salad: A refreshing salad with a tangy vinaigrette complements the richness of the flatbread.
  • Light Soup: A bowl of tomato basil soup or minestrone adds warmth and comfort.
  • Wine Pairing: A chilled white wine or a light-bodied red pairs beautifully with the flavors of the pizza.

Now that you’re armed with everything you need to create the ultimate Grilled Mediterranean Vegetable Flatbread Pizza, it’s time to get cooking! Remember, the joy of cooking comes from experimenting and making it your own. So gather your ingredients, invite a friend or family member to join you in the kitchen, and enjoy the process. Happy cooking!

Grilled Mediterranean Vegetable Flatbread Pizza with Roasted Garlic Tahini Sauce

Prep Time 20 minutes
Cook Time 15 minutes
Total Time 35 minutes
Servings 4 pieces
Calories 450
A flavorful and healthy flatbread pizza topped with grilled vegetables and a creamy tahini sauce, perfect for a Mediterranean-inspired meal.

Ingredients

Dough

  • 0.75 teaspoon active yeast
  • 0.125 teaspoon sugar
  • 1.75 cups flour
  • 1 teaspoon salt
  • 1 tablespoon fresh rosemary, chopped
  • ¾ cup water
  • 1 teaspoon olive oil

Vegetables

  • ½ cup assorted baby squash
  • 1 tablespoon olive oil
  • Salt and freshly ground pepper to taste

Toppings & Sauce

  • 2 tablespoons mixed pitted olives
  • 2 tablespoons cherry tomato
  • 1 tablespoon fresh oregano leaves
  • 2 cloves roasted garlic
  • ¼ cup tahini
  • Juice and zest of 1 lemon lemon juice and zest
  • Pinch salt
  • Water up to ¼ cup water for thinning sauce

Instructions 

  • Combine yeast, sugar, flour, salt, and rosemary in a food processor; add water and pulse until dough forms. Knead until smooth, then let rise until doubled (about 1 hour).
  • Divide dough, roll into 8-inch ovals, and grill each side until bubbles form and bread puffs (about 1-2 minutes per side).
  • Grill halved vegetables with olive oil, salt, and pepper until cooked (about 5-6 minutes).
  • Whisk roasted garlic, tahini, lemon juice, lemon zest, salt, and water until smooth and pourable.
  • Spread tahini sauce on flatbreads, top with grilled vegetables, olives, cherry tomatoes, oregano, and drizzle with more tahini sauce.

Notes

For best results, grill vegetables until tender and slightly charred for added flavor.
Calories: 450kcal
Cost: $15
Course: Main Course
Cuisine: Mediterranean
Keyword: Vegetables

Discover the Joy of Baking Moist Brownie Muffins

Welcome to a delightful journey where we transform simple ingredients into **moist brownie muffins** that will make every bite a chocolaty celebration! Perfect for any occasion—from casual family gatherings to fancy dinner parties—these muffins are not only easy to make but also bursting with rich chocolate flavor. Let’s dive into the world of baking and discover why this recipe will become a staple in your kitchen.

Why You’ll Love This Recipe

  • Decadent Chocolate Flavor: Each muffin is packed with intense chocolate goodness, satisfying even the most serious chocolate cravings.
  • Effortless Baking: With straightforward steps and minimal ingredients, this recipe is perfect for bakers of all skill levels.
  • Perfect for Any Occasion: Whether it’s brunch, dessert, or an afternoon snack, these muffins are versatile enough to suit any time of day.
  • Customizable Experience: You can easily adapt the recipe to include your favorite mix-ins, such as nuts or different chocolate types.
  • Make Ahead and Freeze: Prepare a batch ahead of time and freeze them for quick, delicious treats whenever the craving strikes.

Key Ingredients for Moist Brownie Muffins

Here’s what you’ll need to create these **indulgent brownie muffins**:

  • 1 cup all-purpose flour: The foundation of your muffins, providing structure.
  • 1/2 cup unsweetened cocoa powder: For that rich chocolate flavor we all love.
  • 1 cup granulated sugar: Balances the bitterness of cocoa, adding sweetness.
  • 1/2 cup brown sugar: Adds moisture and a hint of caramel flavor.
  • 1/2 cup melted butter: Ensures the muffins are rich and moist.
  • 2 large eggs: Binds the ingredients and adds richness.
  • 1 teaspoon vanilla extract: Enhances the overall flavor.
  • 1/2 teaspoon salt: Balances sweetness and enhances flavors.
  • 1/2 teaspoon baking powder: Helps the muffins rise.
  • 1 cup chocolate chips: For an extra chocolate kick in every bite!

Here are some substitutions you can make:

  • Flour: Gluten-free baking flour can be used for a gluten-free version.
  • Butter: Coconut oil or vegetable oil can be used for a dairy-free option.
  • Sugars: Use coconut sugar or a sugar substitute for a healthier alternative.
  • Eggs: Flax eggs (1 tablespoon ground flaxseed + 2.5 tablespoons water per egg) work well for vegan muffins.

Step-by-Step Instructions

Side view of a decadent brownie muffin, showcasing its texture.

Let’s get baking! Here’s how to make these **moist brownie muffins**:

  1. Preheat your oven to **350°F (175°C)** and line a muffin tin with paper liners.
  2. In a bowl, whisk together the **flour**, **cocoa powder**, **baking powder**, and **salt**.
  3. In another bowl, mix the **melted butter** with **granulated sugar** and **brown sugar** until well combined.
  4. Add the **eggs** one at a time, mixing well after each addition, then stir in the **vanilla extract**.
  5. Gradually mix the dry ingredients into the wet mixture until just combined.
  6. Fold in the **chocolate chips** gently until evenly distributed.
  7. Scoop the batter into the prepared muffin tin, filling each liner about **2/3 full**.
  8. Bake for **18-20 minutes**, or until a toothpick inserted in the center comes out clean.
  9. Let cool for a few minutes before transferring to a wire rack to cool completely.

Pro Tips for Perfect Brownie Muffins

  • Don’t Overmix: Mix until just combined to keep the muffins tender and moist.
  • Check Doneness Early: Start checking your muffins a few minutes before the suggested baking time.
  • Add More Chocolate: For a truly indulgent treat, sprinkle extra chocolate chips on top before baking.
  • Cool in the Tin: Allow the muffins to cool in the tin for about 5 minutes to maintain their shape.
  • Experiment with Spices: A pinch of cinnamon or espresso powder can enhance the chocolate flavor.
  • Use Quality Chocolate: Using high-quality chocolate will elevate the taste significantly.
  • Store Properly: Keep muffins in an airtight container at room temperature for up to 3 days or in the fridge for a week.
  • Freeze for Later: Wrap cooled muffins individually in plastic wrap and store in a freezer bag for up to 3 months.

Common Mistakes and Troubleshooting

Even the best bakers can run into issues! Here are some common mistakes and how to avoid them:

  • Dense Muffins: This often occurs from overmixing. Mix just until combined!
  • Dry Muffins: Make sure not to overbake your muffins. Check for doneness early.
  • Sticking to the Pan: Ensure you use paper liners or grease your muffin tin well.
  • Uneven Baking: Rotate your muffin tin halfway through baking for even results.

Delicious Variations

Mix things up with these fun variations:

  • Nutty Brownie Muffins: Add 1/2 cup of chopped walnuts or pecans for a delightful crunch.
  • Mint Chocolate Muffins: Incorporate **mint extract** and use mint chocolate chips for a refreshing twist.
  • Peanut Butter Swirl Muffins: Swirl in some **peanut butter** before baking for a nutty flavor contrast.
  • Spicy Brownie Muffins: Add a dash of cayenne pepper or chili powder for a surprising kick.

Storage and Make-Ahead Instructions

Want to enjoy these muffins later? Here’s how:

  • **Room Temperature**: Store in an airtight container for up to 3 days.
  • **Refrigerator**: They’ll last up to a week in the fridge.
  • **Freezer**: Wrap muffins individually and freeze. Thaw at room temperature or microwave for a few seconds to enjoy warm.

Frequently Asked Questions

  • Can I use whole wheat flour? Yes, but the texture may be denser. Consider using half whole wheat and half all-purpose flour.
  • How do I know when the muffins are done baking? A toothpick inserted into the center should come out clean or with a few moist crumbs.
  • Can I replace eggs in this recipe? Yes, you can use flax eggs or unsweetened applesauce as an alternative.
  • What can I serve with brownie muffins? They pair wonderfully with a scoop of ice cream or a drizzle of chocolate sauce.
  • How do I make these muffins gluten-free? Substitute all-purpose flour with a 1:1 gluten-free flour blend.
  • Can I make mini muffins? Absolutely! Reduce the baking time to about 10-12 minutes.
  • How do I store leftover muffins? Keep them in an airtight container at room temperature, or freeze for longer storage.
  • Can I add fruit to these muffins? Yes! Chopped cherries or raspberries can add a nice fruity twist.

Nutritional Tips and Dietary Adaptations

Want to make your muffins a bit healthier? Here are some tips:

  • Reduce Sugar: You can cut down the sugar by 25% without compromising taste.
  • Use Dark Chocolate: Opt for dark chocolate chips for added antioxidants.
  • Incorporate Fiber: Add some oats or chia seeds for added nutrition.
  • Control Portions: Use a mini muffin tin for smaller, healthier servings.

Equipment Recommendations

Here’s what you’ll need to ensure a smooth baking experience:

  • Muffin Tin: A standard muffin tin or a silicone muffin pan for easy release.
  • Mixing Bowls: At least two—one for dry ingredients and one for wet.
  • Whisk: Essential for mixing ingredients smoothly.
  • Measuring Cups and Spoons: Accuracy is key to perfect muffins!
  • Spatula: A silicone spatula helps in folding ingredients without over-mixing.

Serving Suggestions

These **moist brownie muffins** are delicious on their own, but here are some fun ways to serve them:

  • With Ice Cream: A scoop of vanilla or mint chocolate chip ice cream on top makes for an indulgent dessert.
  • Drizzled with Caramel Sauce: A touch of caramel elevates the chocolate flavor.
  • With Fresh Berries: Serve alongside fresh strawberries or raspberries for a refreshing contrast.
  • As a Breakfast Treat: Pair with coffee or tea for a delightful morning boost.

Conclusion

Now that you have all the tips and tricks for making these **moist brownie muffins**, it’s time to roll up your sleeves and get baking! With their rich chocolate flavor and soft, fudgy texture, these muffins are sure to become a favorite in your home. Remember, cooking is all about enjoying the process, so have fun and let your creativity shine. Happy baking!

Moist Brownie Muffins

Prep Time 10 minutes
Cook Time 20 minutes
Total Time 30 minutes
Servings 12 muffins
Calories 220
Delight in these rich and fudgy brownie muffins, perfect for a quick treat or dessert.

Ingredients

Dry Ingredients

  • 1 cup all-purpose flour
  • 0.5 cup unsweetened cocoa powder
  • 1 cup granulated sugar
  • 0.5 cup brown sugar

Wet Ingredients

  • 0.5 cup melted butter
  • 2 large eggs
  • 1 teaspoon vanilla extract
  • 0.5 teaspoon salt
  • 0.5 teaspoon baking powder
  • 1 cup chocolate chips

Instructions 

  • Preheat oven to 350°F (175°C) and line a muffin tin with paper liners.
  • Mix dry ingredients: flour, cocoa powder, baking powder, and salt.
  • Combine melted butter with sugars; add eggs and vanilla.
  • Gradually mix dry ingredients into wet; fold in chocolate chips.
  • Scoop batter into liners; bake 18-20 minutes. Cool before serving.

Notes

For extra fudginess, slightly underbake and let sit for a few minutes before removing from the oven.
Calories: 220kcal
Cost: $10
Course: Dessert
Cuisine: American
Keyword: brownie, chocolate, muffin

Unleash Your Inner Chef with Crispy Chicken Wraps

Welcome to your ultimate guide to creating the most crispy chicken wraps that will have your taste buds dancing! If you’ve ever craved the satisfaction of a delicious, homemade wrap de pollo crujiente, you’re in the right place. In this article, we’ll break down every aspect of making these flavorful wraps, ensuring you feel confident and excited to get cooking. With tender chicken, fresh veggies, and the sauce of your choice, this meal is not just quick to prepare but also a crowd-pleaser. Let’s dive into the world of crispy chicken wraps!

Why You’ll Love This Recipe

  • Quick Preparation: Perfect for busy weeknights, these wraps come together in under 30 minutes!
  • Customizable Ingredients: Tailor the wraps to your taste with various sauces and toppings.
  • Healthy Options: Use whole wheat tortillas and plenty of fresh veggies for a nutritious meal.
  • Kid-Friendly: These wraps are a hit with kids and adults alike, making mealtime stress-free.
  • Make Ahead: Prep the chicken in advance for a speedy assembly during the week.

Detailed Ingredient Breakdown

To make the most delicious crispy chicken wraps, you’ll need the following ingredients:

  • 2 pechugas de pollo: Boneless skinless chicken breasts work best for tender meat.
  • 1 cucharada de pimentón ahumado: This adds a smoky flavor that elevates your chicken.
  • 1 taza de pan rallado: Choose panko for extra crunch!
  • Tortillas de harina: Flour tortillas provide a soft, pliable base for your wrap.
  • Lechuga: Crisp lettuce adds freshness and crunch.
  • Tomate, en rodajas: Juicy tomato slices enhance flavor and juiciness.
  • Mayonesa o salsa de tu elección: Use your favorite sauce to tie all the flavors together.
  • Sal y pimienta al gusto: Essential for seasoning your chicken.
  • Aceite para freír: Choose a high smoke point oil like vegetable or canola oil.

Substitutions and Variations

Side view of a juicy chicken wrap showcasing its ingredients.

If you’re looking to switch things up, here are some fantastic substitutions and variations:

  • Chicken Alternatives: Try using turkey breast or tofu for a vegetarian option.
  • Whole Wheat Tortillas: For a healthier option, go for whole wheat or gluten-free tortillas.
  • Different Seasonings: Experiment with garlic powder, onion powder, or Italian herbs for varied flavors.
  • Veggie Add-Ins: Add sliced bell peppers, cucumbers, or avocado for extra nutrition.

How to Prepare Your Crispy Chicken Wrap

Let’s break down the steps to make your wraps:

  1. Sazona las pechugas de pollo con pimentón ahumado, sal y pimienta.
  2. Empana el pollo en pan rallado para una textura crujiente.
  3. Fríe el pollo en aceite caliente hasta que esté dorado y crujiente.
  4. Coloca el pollo en una tortilla, agrega lechuga, tomate y tu salsa favorita.
  5. Enrolla la tortilla y sirve, ¡y disfruta del delicioso sabor!

Pro Tips for Perfect Crispy Chicken Wraps

  • Even Thickness: Pound the chicken breasts to an even thickness for uniform cooking.
  • Chill Before Cooking: Refrigerate the breaded chicken for 30 minutes to help the coating adhere better.
  • Use a Thermometer: Ensure your chicken reaches an internal temperature of 165°F (75°C).
  • Fry in Batches: Avoid overcrowding the pan to keep the oil hot for optimal crispiness.
  • Let Rest: Allow the fried chicken to rest for a few minutes to maintain juiciness.

Common Mistakes and Troubleshooting

Here are a few common pitfalls and how to avoid them:

  • Chicken Not Crispy: Ensure your chicken is coated evenly and the oil is hot enough.
  • Wrap Falling Apart: Don’t overfill your wraps; a tight roll will keep everything together.
  • Dry Chicken: Avoid overcooking; use a meat thermometer to check doneness.

Storage and Make-Ahead Instructions

To keep your wraps fresh:

  • Storing Leftovers: Keep any leftover wraps in an airtight container in the fridge for up to 3 days.
  • Freezing Options: Wrap the chicken tightly in plastic wrap and freeze for up to a month. Reheat in the oven for the best texture.

Comprehensive FAQ

  • Can I bake the chicken instead of frying? Yes, for a healthier option, bake the chicken at 400°F (200°C) until crispy.
  • What sauces pair well with these wraps? Spicy mayo, ranch dressing, or honey mustard are great choices!
  • How do I ensure the chicken is cooked thoroughly? Use a meat thermometer to check for an internal temperature of 165°F (75°C).
  • What can I use instead of mayonnaise? Greek yogurt or avocado spread are excellent alternatives.
  • How do I prevent the tortillas from tearing? Warm the tortillas slightly before filling to make them more pliable.
  • Can I use other meats in the wraps? Absolutely! Try beef strips or shrimp for a different flavor.
  • How do I make the wraps spicier? Add sliced jalapeños or a dash of hot sauce to your filling.
  • What side dishes complement crispy chicken wraps? Serve with sweet potato fries or a fresh salad for a balanced meal.

Nutrition Tips and Dietary Adaptations

To make this recipe fit various dietary needs:

  • Low-Carb Version: Use lettuce wraps instead of tortillas for a keto-friendly option.
  • Dairy-Free: Opt for dairy-free mayo or sauces.
  • Gluten-Free: Substitute with gluten-free breadcrumbs and tortillas.

Essential Equipment Recommendations

  • Heavy-Bottomed Skillet: Ideal for frying to ensure even heat distribution.
  • Meat Thermometer: Essential for checking the doneness of your chicken.
  • Non-Stick Baking Sheet: Useful if you choose to bake your chicken.

Serving Suggestions

For the perfect presentation and enjoyment:

  • Add Fresh Herbs: Garnish with cilantro or parsley for a burst of freshness.
  • Pair with Dips: Serve with extra sauce or a side of guacamole for dipping.
  • Include a Side Salad: A simple green salad balances the meal beautifully.

Conclusion

And there you have it! Your ultimate guide to crafting crispy chicken wraps that are not only delicious but also easy to make. Remember, cooking is all about experimenting and having fun. With these simple steps and tips, you’ll be able to whip up a satisfying meal that your friends and family will love. So roll up your sleeves, get into the kitchen, and enjoy the process. Happy cooking!

Wrap de Pollo Crujiente

Prep Time 10 minutes
Cook Time 15 minutes
Total Time 25 minutes
Servings 4 porciones
Calories 450
Disfruta de un delicioso wrap de pollo crujiente, perfecto para una comida rápida y sabrosa.

Ingredients

Proteínas

  • 2 pieces pechugas de pollo
  • 1 cucharada pimentón ahumado
  • 1 taza pan rallado

Tortillas y vegetales

  • 4 unit tortillas de harina
  • 1 unidad lechuga
  • 1 rodaja tomate

Salsas y condimentos

  • Al gusto mayonesa o salsa de tu elección
  • Al gusto sal y pimienta
  • Para freír aceite

Instructions 

  • Sazona las pechugas con pimentón, sal y pimienta.
  • Empana el pollo en pan rallado.
  • Fríe el pollo en aceite caliente hasta dorar y crujiente.
  • Coloca el pollo en una tortilla, añade lechuga, tomate y salsa.
  • Enrolla la tortilla y sirve.

Notes

Para una opción más saludable, hornea el pollo en lugar de freírlo.
Calories: 450kcal
Cost: $12
Course: Almuerzo, Cena
Cuisine: Mexicana
Keyword: pollo

Experience the Ultimate Crispy Chicken Garlic Sandwich

Welcome to your next culinary adventure! If you’re looking for a deliciously satisfying meal that’s easy to make and packed with flavor, then you’re in the right place. The Ultimate Crispy Chicken Garlic Sandwich is not just a recipe; it’s a celebration of flavors that turns simple ingredients into something extraordinary. Whether you’re preparing a quick weeknight dinner or planning a satisfying lunch, this sandwich will impress everyone at your table. And the best part? It’s simple enough for any home cook, whether you’re a beginner or a seasoned pro.

Why You’ll Love This Recipe

This sandwich is not just about taste; it’s about creating a delightful experience. Here are some reasons why you’ll adore this recipe:

  • Quick and Easy: From prep to plate, this recipe takes under 30 minutes, making it perfect for busy nights.
  • Flavor-Packed: The combination of crispy chicken, garlic herb butter, and gooey cheese creates a flavor explosion.
  • Customizable: You can easily swap ingredients to suit your taste or dietary needs.
  • Leftover Friendly: Transform leftover rotisserie chicken into a gourmet sandwich that’s anything but boring.
  • Impressive Presentation: With its golden crust and melty cheese, this sandwich looks as good as it tastes.

Ingredient Breakdown

Let’s dive into what you need to make this delicious sandwich. Each ingredient plays an essential role in building flavor and texture.

  • Sourdough Bread: Thick-cut sourdough provides a sturdy base with a lovely crust. Feel free to substitute with whole grain or ciabatta if desired.
  • Shredded Chicken: Using rotisserie chicken makes this recipe even easier. You can also use grilled chicken breast or any leftover roasted chicken.
  • Cheese: A mix of mozzarella and provolone gives a creamy, melty texture. Consider using cheddar for a sharper flavor.
  • Garlic: Freshly minced garlic is essential for the herb butter. Garlic powder can be a substitute, but fresh is best!
  • Herbs: Fresh parsley adds brightness. You can also experiment with thyme or basil.
  • Butter: Unsalted butter is ideal for controlling the saltiness. You can use vegan butter for a plant-based version.
  • Mayonnaise: This is optional, but it adds creaminess. Try Greek yogurt for a lighter option.
  • Black Pepper: A pinch enhances the flavor; adjust according to your taste.

Pro Tips for Success

Side view of a juicy crispy chicken garlic sandwich with garlic butter and fresh parsley on toasted sourdough.

To ensure your sandwich turns out perfectly, here are some expert tips:

  • Use Room Temperature Ingredients: Let your butter and chicken sit out for about 10-15 minutes before starting. This helps the flavors meld better.
  • Don’t Rush the Heat: Cook your sandwich on medium-low heat to allow the cheese to melt thoroughly without burning the bread.
  • Cover the Pan: Covering the skillet initially helps trap heat and melt the cheese faster.
  • Press Down: Pressing the sandwich slightly with a spatula while cooking promotes an even crust.
  • Experiment with Spices: Add a pinch of paprika or Italian seasoning to the garlic butter for an extra flavor dimension.
  • Toast the Bread: Lightly toasting the unbuttered side of the bread before assembling can add an additional crunch.
  • Rest Before Cutting: Let the sandwich sit for a minute after cooking. This helps the cheese set, making it easier to cut.
  • Garnish Creatively: Add fresh herbs or a sprinkle of chili flakes for an appealing finish.

Common Mistakes and Troubleshooting

Every cook runs into hiccups now and then. Here’s how to tackle some common issues:

  • Burnt Bread: Lower the heat if the bread is browning too quickly. Patience is key!
  • Cold Cheese: If the cheese isn’t melting, try cooking the sandwich longer and ensuring it’s covered.
  • Soggy Sandwich: Layer shredded chicken and cheese carefully to maintain a balance. Avoid over-saturating the bread with butter.
  • Unbalanced Flavors: Taste your garlic butter before spreading. Adjust seasoning as necessary.

Variations to Try

This recipe is a fantastic base that you can customize to your liking. Here are some fun variations:

  • Spicy Chicken Garlic Sandwich: Add sliced jalapeños or a dash of hot sauce to the chicken mixture for a kick.
  • Caprese Style: Layer fresh mozzarella, tomatoes, and basil for a fresh, Italian twist.
  • Pesto Chicken Sandwich: Mix pesto into your shredded chicken for an herby flavor boost.
  • Buffalo Chicken Garlic Sandwich: Mix shredded chicken with buffalo sauce for a zesty alternative.

Storage and Make-Ahead Instructions

This sandwich is best enjoyed fresh, but you can prepare components ahead of time:

  • Chicken: Shredded chicken can be stored in the fridge for up to 3 days. Reheat before assembling.
  • Garlic Butter: You can make the garlic herb butter ahead and store it in the fridge for up to a week.
  • Assembled Sandwiches: While not recommended, you can assemble the sandwich, wrap it tightly, and store it in the fridge for a quick meal. Consume within a day.

Frequently Asked Questions

Here are some common questions about the Ultimate Crispy Chicken Garlic Sandwich:

  • Can I use frozen chicken? Yes! Just ensure it’s fully cooked and shredded before using.
  • What’s the best way to reheat leftovers? Reheat in a skillet over low heat to maintain crispiness.
  • Can I make this sandwich gluten-free? Absolutely! Use gluten-free bread and ensure all other ingredients are gluten-free.
  • What kind of cheese works best? Both mozzarella and provolone melt beautifully, but feel free to get creative!
  • How can I make this sandwich healthier? Opt for whole grain bread and use less butter or substitute with avocado.
  • Can I add vegetables? Yes! Sautéed peppers or spinach can add nutrients and flavor.
  • Is this recipe kid-friendly? Absolutely! Kids love the cheesy, crispy texture.
  • How do I prevent the sandwich from getting soggy? Layer ingredients thoughtfully and don’t overdo the mayonnaise or butter.

Nutritional Tips and Dietary Adaptations

For those mindful of their diet, here are some nutritional insights:

  • Low-Carb Option: Use lettuce wraps instead of bread.
  • High-Protein: Opt for extra chicken or add a slice of turkey.
  • Vegan Option: Substitute chicken with grilled tofu and use vegan cheese.
  • Dairy-Free: Use plant-based butter and cheese alternatives.

Equipment Recommendations

Here’s what you’ll need to whip up this scrumptious sandwich:

  • Skillet: A non-stick skillet is ideal for frying to achieve that crispy texture.
  • Spatula: A sturdy spatula helps in flipping the sandwich without losing its filling.
  • Mixing Bowls: Use different sizes for mixing your garlic butter and chicken.
  • Knife: A sharp knife is essential for slicing through the crispy sandwich.

Serving Suggestions

Here are some ways to serve this delightful sandwich:

  • With a Side Salad: A light green salad with vinaigrette pairs wonderfully.
  • Chips or Fries: Classic sides like kettle chips or sweet potato fries complement the sandwich perfectly.
  • Pickles: Adding pickles gives a tangy crunch that balances the richness of the sandwich.
  • Soup: Serve with a warm bowl of tomato soup for the ultimate comfort meal.

Now that you have everything you need to make the Ultimate Crispy Chicken Garlic Sandwich, it’s time to get cooking! Remember, the joy of cooking comes not just from the food itself but from the memories you create around the dinner table. Enjoy every bite, and don’t forget to share your creations with friends and family!

The Ultimate Crispy Chicken Garlic Sandwich

Prep Time 10 minutes
Cook Time 10 minutes
Total Time 20 minutes
Servings 2 servings
Calories 650
A deliciously crispy sandwich filled with tender shredded chicken, melted cheese, and flavorful garlic herb butter.

Ingredients

Bread

  • 4 slices sourdough bread, thick cut

Chicken

  • 1.5 cups shredded cooked rotisserie chicken

Cheese

  • 1.5 cups mozzarella and provolone shredded mix

Mayonnaise

  • 1 tbsp mayonnaise (optional)

Seasonings

  • Pinch black pepper

Butter

  • 3 tbsp unsalted butter, softened

Garlic

  • 2 cloves minced garlic

Herbs & Cheese

  • 1 tbsp chopped fresh parsley
  • 1 tbsp grated parmesan cheese

Instructions 

  • Mix softened butter, minced garlic, chopped parsley, and grated parmesan to make garlic herb butter.
  • Toss shredded chicken with mayonnaise and black pepper until coated.
  • Spread garlic butter on one side of each bread slice, then assemble sandwich with cheese, chicken mixture, and remaining cheese.
  • Top with second bread slice, buttered side up, and cook in a skillet over medium-low heat for 3-4 minutes per side until golden and cheese melts.

Notes

Cover the pan initially to help the cheese melt evenly.
Calories: 650kcal
Cost: $15
Course: Main Course
Cuisine: American
Keyword: Chicken, Garlic, Sandwich

Experience the Bliss of a Blueberry Banana Milkshake

Welcome to a delicious adventure that will elevate your snack game! This Blueberry Banana Milkshake is more than just a treat; it’s a creamy escape that combines the natural sweetness of ripe bananas and juicy blueberries, creating the perfect blend of flavors. Whether you’re looking for a refreshing afternoon pick-me-up or a delightful dessert, this milkshake is a fantastic choice. In this guide, we’ll dive deep into everything you need to know to whip up this tasty concoction, from ingredient breakdowns to expert tips and variations!

Why You’ll Love This Recipe

This banana milkshake is not only indulgent but also packed with benefits that make it a smart choice:

  • Nutrient-Packed: Loaded with vitamins and minerals from bananas and blueberries, this milkshake is a wholesome option.
  • Quick and Easy: Ready in just a few minutes, this recipe fits perfectly into your busy lifestyle.
  • Customizable: Easily adjust ingredients to cater to your taste preferences or dietary needs.
  • Perfect for All Ages: Kids and adults alike will enjoy the vibrant flavors and creamy texture.
  • Deliciously Versatile: Enjoy it as a snack, breakfast, or dessert—any time is a good time for this milkshake!

Ingredients: Your Guide to a Perfect Milkshake

Here’s what you’ll need for the classic Blueberry Banana Milkshake:

  • 1 banana: Choose a ripe banana for the best sweetness and creaminess.
  • 1/2 cup blueberries: Fresh or frozen, both options deliver fantastic flavor.
  • 1 cup vanilla ice cream: This adds that luscious, creamy texture that makes milkshakes irresistible.
  • 1/2 cup milk: Use your favorite type—dairy, almond, or oat milk all work well.
  • 1 tablespoon honey (optional): For those who like a little extra sweetness.

Step-by-Step Instructions

Side view of a creamy blueberry banana milkshake with a straw, showcasing its vibrant color.

Follow these simple steps to create your blueberry banana milkshake:

  1. Place the banana, blueberries, vanilla ice cream, milk, and honey (if using) in a blender.
  2. Blend until smooth and creamy, ensuring all ingredients are fully combined.
  3. Pour the milkshake into glasses.
  4. Serve immediately and enjoy the refreshing, fruity flavors!

Pro Tips for the Best Milkshake

Want to take your milkshake to the next level? Check out these expert insights:

  • Frozen Bananas: Using frozen bananas will enhance the creaminess and chill factor of your milkshake.
  • Quality Ice Cream: Opt for high-quality vanilla ice cream for richer flavor and creaminess.
  • Add a Dash of Cinnamon: A sprinkle of cinnamon can elevate the flavor profile beautifully.
  • Blend in Some Spinach: For a nutrient boost, add a handful of spinach; you won’t taste it!
  • Experiment with Flavors: Try adding a scoop of peanut butter for a nutty twist!
  • Chill Your Glasses: For extra frosty drinks, chill your glasses in the freezer before serving.
  • Use a High-Speed Blender: A high-speed blender will create a smoother, creamier milkshake.
  • Don’t Overblend: Blend just until smooth to avoid a watery texture.

Common Mistakes to Avoid

Even the best recipes can go awry. Here are some pitfalls to watch out for:

  • Using Unripe Bananas: This can lead to a less sweet and creamy milkshake.
  • Too Much Milk: Adding excess milk can make your milkshake too thin. Stick to the recommended measurements!
  • Not Blending Long Enough: Ensure you blend until all ingredients are combined for a uniform texture.
  • Skipping the Ice Cream: Ice cream is crucial for that rich, creamy milkshake experience—don’t skip it!

Delicious Variations to Try

Feel free to customize your milkshake with these creative twists:

  • Berry Blast Milkshake: Add strawberries or raspberries for an extra fruity flavor.
  • Peanut Butter Banana Milkshake: Blend in 2 tablespoons of peanut butter for a nutty delight.
  • Chocolate Blueberry Milkshake: Incorporate chocolate syrup or cocoa powder for a decadent treat.
  • Vegan Version: Use plant-based ice cream and almond or coconut milk for a vegan-friendly alternative.

Storage and Make-Ahead Tips

If you want to prepare ahead:

  • Make-Ahead: Blend your ingredients and store in the fridge for up to 24 hours, but it’s best enjoyed fresh.
  • Freezing: Freeze leftover milkshake in an airtight container for a quick treat later; just blend again to restore creaminess.

Frequently Asked Questions

Here are some common questions about the Blueberry Banana Milkshake:

  • Can I use frozen blueberries? Yes! Frozen blueberries work wonderfully and help chill the shake.
  • Is this milkshake healthy? It contains whole fruits and can be made with low-sugar options, making it a healthy treat.
  • How can I make it thicker? Use more ice cream or less milk to achieve a thicker consistency.
  • Can I add protein powder? Absolutely! A scoop of protein powder makes it a great post-workout snack.
  • What’s the best way to sweeten it? Honey, maple syrup, or agave nectar are excellent choices.
  • How long does it take to prepare? This milkshake takes just about 5 minutes to prepare.
  • Can I make it without ice cream? You can substitute with frozen yogurt or a banana-only base for a lighter option.
  • What’s the best milk to use? Any type works, but almond or oat milk are great dairy-free options.

Nutrition Tips and Dietary Adaptations

This milkshake is flexible for various dietary needs:

  • Gluten-Free: Naturally gluten-free, this recipe is safe for those with gluten sensitivities.
  • Dairy-Free: Use plant-based ice cream and milk for a dairy-free treat.
  • Low-Sugar Option: Substitute ice cream with unsweetened yogurt or skip the honey for a lower sugar content.

Essential Equipment for Making Milkshakes

Here’s what you’ll need in your kitchen:

  • High-Speed Blender: For a smooth and creamy texture, a powerful blender is key.
  • Measuring Cups: To ensure you get the right amount of each ingredient.
  • Serving Glasses: Choose fun or frosty glasses to elevate the presentation.

Serving Suggestions

To make the most of your milkshake experience:

  • Garnish: Top with whipped cream, fresh blueberries, or a sprinkle of granola.
  • Pairing: Serve alongside a slice of banana bread or a fruit salad for a complete treat.
  • Presentation: Use clear glasses to showcase the vibrant colors of the milkshake.

In conclusion, the Blueberry Banana Milkshake is a delightful and nutritious treat that can be enjoyed any time of day. With these tips, tricks, and variations, you’ll be well on your way to mastering this creamy classic. So gather your ingredients, blend away, and enjoy the sweet satisfaction of your homemade milkshake!

Blueberry Banana Milkshake

Prep Time 5 minutes
Total Time 5 minutes
Servings 2 glasses
Calories 350
A delicious and refreshing fruity milkshake perfect for a quick treat or breakfast.

Ingredients

Fruits

  • 1 piece banana, peeled
  • 0.5 cup blueberries, fresh or frozen
  • 1 cup vanilla ice cream
  • 0.5 cup milk
  • 1 tablespoon honey (optional)

Instructions 

  • Place banana, blueberries, ice cream, milk, and honey in a blender.
  • Blend until smooth and creamy.
  • Pour into glasses and serve immediately.

Notes

For a thicker shake, add more ice cream or frozen berries.
Calories: 350kcal
Cost: $5
Course: Beverage
Keyword: milkshake