Author

Steven

Browsing

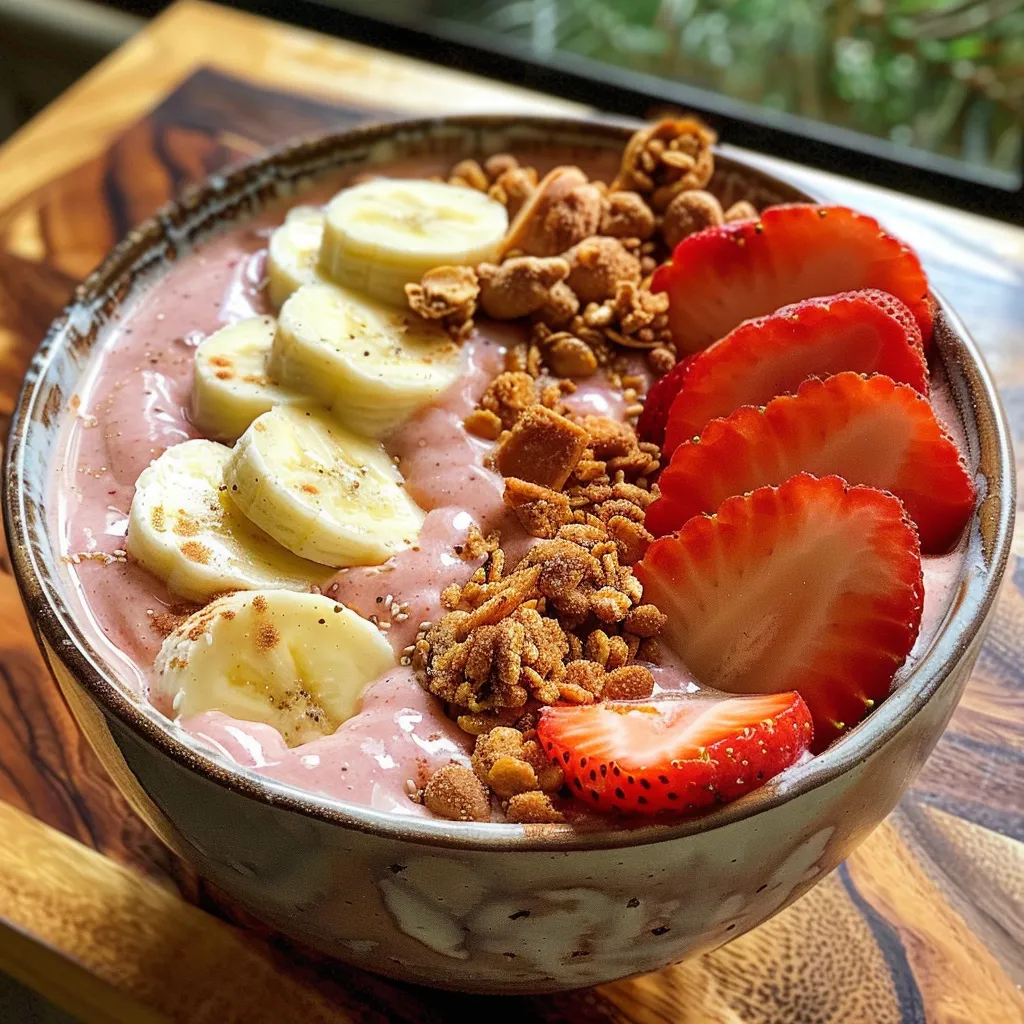
Discover the Ultimate Strawberry Banana Smoothie Bowl

If you’re looking for a quick, delicious, and nutritious breakfast or snack, you’ve landed in the right place! This Strawberry Banana Smoothie Bowl is not only easy to whip up, but it also packs a flavorful punch that will energize your day. Made with wholesome ingredients like frozen bananas and strawberries, this smoothie bowl is perfect for busy mornings or a refreshing afternoon treat. Let’s dive into why this recipe deserves a spot in your regular rotation!

Why You’ll Love This Recipe

Here are just a few reasons why this strawberry banana smoothie bowl will become your new favorite:

  • Quick Preparation: Ready in just 5 minutes, perfect for those hectic mornings.
  • Customizable: Adapt the recipe to your taste by adding your favorite toppings and add-ins.
  • Nutrient-Rich: Packed with vitamins and minerals from fruits, making it a healthy start to your day.
  • Deliciously Creamy: Achieve a thick, luxurious texture that feels indulgent without the guilt.
  • Dairy-Free Option: Easily made vegan with non-dairy milk, catering to various dietary needs.

Ingredients Breakdown

Let’s look at what you need to create this delightful bowl:

  • 2 frozen bananas: Peel and freeze ripe bananas for the best creaminess.
  • 1 1/2 cups frozen strawberries: Use high-quality frozen strawberries for natural sweetness.
  • 1 tsp vanilla extract: Adds depth and enhances the natural flavors of the fruits.
  • 1/2 cup non-dairy milk: Choose almond, coconut, or oat milk based on your preference.
  • Optional add-ins: Consider adding protein powder, almond butter, chia seeds, or flaxseeds for extra nutrition.

How to Make Your Strawberry Banana Smoothie Bowl

A colorful smoothie bowl featuring strawberries and bananas, with a creamy texture visible.

Follow these simple steps to create your smoothie bowl:

  • Add all ingredients: Place frozen bananas, frozen strawberries, vanilla extract, and non-dairy milk into your blender.
  • Blend until smooth: Start blending on low, gradually increasing speed. Use a tamper if necessary to ensure everything blends evenly.
  • Check consistency: If the mixture is too thick, add a little more milk. If too thin, add more frozen fruit.
  • Transfer to a bowl: Pour your thick smoothie into a bowl, creating a lovely canvas for your toppings.
  • Add toppings: Get creative! Top with fresh fruit, granola, nuts, seeds, or a drizzle of honey.

Pro Tips for the Perfect Smoothie Bowl

Here’s how to elevate your smoothie bowl game:

  • Use frozen fruit: For a thick, creamy texture, always use frozen bananas and strawberries.
  • Blend in stages: If your blender struggles, blend in smaller batches to ensure everything mixes well.
  • Experiment with textures: Try adding oats or nut butters for a different mouthfeel.
  • Chill your ingredients: Using chilled ingredients can help maintain that refreshing coolness.
  • Layer flavors: Don’t hesitate to mix in a tablespoon of cocoa powder for a chocolate twist!
  • Don’t skip the tamper: If your blender has one, it’s a game-changer for achieving that thick consistency.
  • Adjust sweetness: Taste your smoothie before serving; you can add a little honey or maple syrup if you prefer it sweeter.
  • Mind your toppings: Choose toppings that complement the flavor of your smoothie, like shredded coconut or sliced almonds.

Common Mistakes and Troubleshooting

Here are some common pitfalls and how to avoid them:

  • Too thin?: If your smoothie bowl is runny, add more frozen fruit or reduce the amount of liquid.
  • Over-blending: Be cautious! Blending too long can make your smoothie too thin; stop once it’s smooth.
  • Not enough flavor?: Always taste before serving. Adjust sweetness with honey or a pinch of salt to enhance flavors.
  • Stuck ingredients?: If ingredients get stuck, pause the blender, shake it gently, and blend again.

Delicious Variations to Try

Feeling adventurous? Here are some variations to switch up your smoothie bowl:

  • Berry Blast: Swap strawberries for blueberries or raspberries for a different fruity flavor.
  • Chocolate Delight: Add a tablespoon of cocoa powder or chocolate protein powder for a dessert-like treat.
  • Nutty Banana: Include almond butter or peanut butter for a protein boost and nutty flavor.
  • Tropical Twist: Use mango and pineapple instead of strawberries for a sunny, tropical vibe.

Storage and Make-Ahead Instructions

This smoothie bowl is best enjoyed fresh, but you can prepare components ahead of time:

  • Freeze ingredients: Pre-portion and freeze bananas and strawberries in zip-top bags for easy access.
  • Store leftovers: If you have leftovers, store them in an airtight container in the fridge for up to 24 hours. Note that the texture may change.

Frequently Asked Questions (FAQ)

Here are some common questions that might help you:

  • Can I use fresh fruit? While fresh fruit works, frozen fruit creates a thicker texture.
  • What if I don’t have a blender? A food processor can work in a pinch, though results may vary.
  • Can I make this smoothie bowl without bananas? Yes! Use avocado for creaminess or yogurt for a different base.
  • How can I make this smoothie bowl higher in protein? Add protein powder, Greek yogurt, or nut butter.
  • Is this smoothie bowl suitable for kids? Absolutely! It’s a great way to sneak in some fruits and nutrients.
  • Can I make it in advance? You can prepare the ingredients in advance but blend fresh for the best texture.
  • What toppings do you recommend? Fresh fruits, granola, nuts, seeds, or coconut flakes work wonderfully!
  • Is this recipe vegan? Yes! Simply use non-dairy milk and avoid any animal products in your toppings.

Nutrition Tips and Dietary Adaptations

This recipe is naturally low in calories and high in vitamins, but you can adapt it further:

  • Boost with greens: Add a handful of spinach or kale for extra nutrients without altering the flavor.
  • Low-carb option: Replace bananas with avocado or use unsweetened almond milk for a lower-carb version.
  • Gluten-free: This recipe is inherently gluten-free, making it suitable for those with gluten sensitivities.

Essential Equipment for a Smoothie Bowl

To make the perfect smoothie bowl, consider having:

  • High-speed blender: A powerful blender is key to achieving that creamy texture.
  • Tamper: If your blender has one, it helps push ingredients down for even blending.
  • Serving bowls: Choose wide, shallow bowls for an aesthetically pleasing presentation.

Serving Suggestions

Enjoy your strawberry banana smoothie bowl as:

  • Breakfast: A refreshing way to kickstart your day.
  • Post-workout snack: Perfect for replenishing energy after a workout.
  • Afternoon pick-me-up: An ideal treat to beat the afternoon slump.

With this guide, you’re all set to create the ultimate strawberry banana smoothie bowl! Remember, cooking is about experimentation and fun. So, go ahead, customize, and make it your own. Enjoy the process, and happy blending!

Strawberry Banana Smoothie Bowl

Prep Time 5 minutes
Total Time 5 minutes
Servings 2 bowls
Calories 250
A delicious and healthy smoothie bowl made with frozen bananas and strawberries, perfect for a quick breakfast or snack.

Ingredients

Fruits

  • 2 pieces frozen bananas (peeled before freezing)
  • 1.5 cups frozen strawberries
  • 1 tsp vanilla extract
  • 0.5 cup non-dairy milk

Optional add-ins

  • to taste protein powder, almond butter, chia seeds, etc (add as desired)

Instructions 

  • Add all ingredients to a blender.
  • Blend until smooth and creamy, using a tamper if needed.
  • Transfer to a bowl and add toppings of choice.
  • Enjoy!

Notes

You can customize toppings and add-ins for variety.
Calories: 250kcal
Cost: $10
Course: Breakfast
Keyword: Fruit, Healthy, Smoothie

Discover the Joy of Making a Classic Shawarma Chicken Sandwich

If you’re looking to elevate your sandwich game, you’ve landed in the right place! The Classic Shawarma Chicken Sandwich is a delightful twist on traditional flavors, bringing together juicy chicken thighs, a *creamy garlic sauce*, and fresh toppings—all wrapped in warm pita bread. This recipe not only satisfies your taste buds but also adds a touch of excitement to your weeknight dinners or lunch breaks. In this guide, we’ll walk you through every step of the process, ensuring you feel confident and inspired to make your own delicious shawarma chicken sandwich.

Why You’ll Love This Recipe

This recipe offers more than just flavor; it’s a complete experience. Here are five compelling reasons to get started:

  • Flavorful Marinade: The combination of spices, lemon juice, and garlic creates a *marinade* that infuses the chicken with rich, vibrant flavors.
  • Customizable Options: You can easily adjust the ingredients to suit your taste, whether you prefer more heat or extra creaminess in your sauce.
  • Quick and Easy: With simple steps and accessible ingredients, this recipe is perfect for busy weeknights or a quick lunch fix.
  • Healthy Ingredients: Packed with protein and fresh vegetables, this sandwich is not only delicious but also nutritious.
  • Fun to Assemble: Get creative with how you assemble your sandwich. With various toppings and sauces, each bite can be a new flavor adventure!

Ingredients You’ll Need

Let’s gather everything you need for this mouthwatering shawarma chicken sandwich. Here’s a detailed breakdown of the ingredients, along with some helpful substitutions:

  • 1.5 lbs boneless, skinless chicken thighs: Cut into 1-2 inch strips. *Note*: Chicken breasts can be used but may result in a drier texture.
  • 1/4 cup olive oil: A high-quality oil adds flavor and helps keep the chicken tender.
  • 3 cloves garlic, minced: Fresh garlic is key to the marinade and sauce.
  • 1 tbsp lemon juice, freshly squeezed: Adds brightness; bottled juice can be used in a pinch but won’t be as flavorful.
  • 1 tsp ground cumin: Provides a warm, earthy flavor.
  • 1 tsp ground coriander: Complements the cumin beautifully.
  • 1/2 tsp smoked paprika: For a hint of smokiness in your chicken.
  • 1/2 tsp turmeric powder: Adds color and a subtle flavor.
  • 1/4 tsp cayenne pepper (optional): For those who like a little heat!
  • 1/2 tsp salt: Enhances all the flavors.
  • 1/4 tsp black pepper: Freshly ground for the best flavor.
  • For the creamy garlic sauce:
  • 1/2 cup mayonnaise: Use a good quality mayo for the best taste.
  • 2 cloves garlic, minced very fine or grated: Ensures a smooth sauce.
  • 1 tbsp fresh lemon juice: Brightens the sauce.
  • 2 tbsp water: To achieve your desired sauce consistency.
  • Pinch of salt to taste: Adjust to your liking.
  • 4 large pita breads or flatbreads, warmed: The vessel for your delicious filling.
  • 1/2 cup shredded lettuce: Adds a nice crunch.
  • 1/2 cup diced tomatoes: Freshness and juiciness in every bite.
  • 1/4 cup thinly sliced red onion: A bit of sharpness to balance the rich flavors.
  • 1/4 cup chopped fresh parsley (optional): For a fresh finish.
  • 1/2 cup pickles (dill or Persian style), sliced: Adds a tangy crunch to the sandwich.

How to Make Your Shawarma Chicken Sandwich

Side angle of a delicious shawarma chicken sandwich filled with vibrant vegetables and sauce.

Now that we have all our ingredients ready, let’s dive into the preparation process. This is where the magic happens!

Step 1: Marinate the Chicken

In a large bowl, combine the chicken strips, olive oil, minced garlic, lemon juice, cumin, coriander, smoked paprika, turmeric, cayenne (if using), salt, and black pepper. Mix well to ensure all the chicken is evenly coated. Cover the bowl with plastic wrap and let it marinate in the refrigerator for at least 30 minutes, or up to 2 hours for maximum flavor.

Step 2: Cook the Chicken

Heat a grill pan or skillet over medium-high heat. Once hot, add the marinated chicken strips in a single layer, ensuring not to overcrowd the pan. Cook for about 5-7 minutes per side, or until the chicken is fully cooked and has a nice char. The internal temperature should reach 165°F (75°C). Remove from heat and let it rest for a few minutes before slicing.

Step 3: Make the Creamy Garlic Sauce

While the chicken is resting, prepare the creamy garlic sauce. In a small bowl, whisk together the mayonnaise, minced garlic, lemon juice, water, and a pinch of salt. Taste and adjust the seasoning as needed. If you prefer a thinner sauce, add a bit more water until you reach your desired consistency.

Step 4: Assemble the Sandwich

Warm the pita breads or flatbreads. Place a generous amount of sliced chicken in the center, drizzle with the creamy garlic sauce, and top with shredded lettuce, diced tomatoes, sliced red onion, parsley, and pickles. Fold the pita around the filling, and you’re ready to enjoy!

Pro Tips for Making the Perfect Shawarma Chicken Sandwich

  • Marination time matters: Allow the chicken to marinate longer for deeper flavors. Overnight is ideal if you have the time!
  • High heat for cooking: A hot pan helps achieve that coveted char and keeps the chicken juicy.
  • Use fresh ingredients: The quality of your ingredients, especially the garlic and herbs, makes a significant difference.
  • Adjust the sauce: Feel free to tweak the garlic sauce with additional spices or herbs to suit your taste.
  • Serve immediately: These sandwiches taste best when fresh, so assemble them right before serving.
  • Experiment with toppings: Try adding grilled vegetables or feta cheese for added flavor.
  • Make it spicier: Add chopped fresh chili or a dash of hot sauce to the chicken for an extra kick.
  • Try different breads: While pita is traditional, flatbreads, naan, or even baguettes can work beautifully!

Common Mistakes and Troubleshooting Tips

Even the best of us can run into hiccups while cooking. Here are some common mistakes and how to avoid them:

  • Dry Chicken: Overcooking is the main culprit. Use a meat thermometer to ensure you don’t go past 165°F (75°C).
  • Flavorless Sauce: If your sauce lacks flavor, try adding more garlic, lemon juice, or even a splash of vinegar.
  • Bread Too Tough: If your pita bread feels tough, warm it up in a pan or microwave just before serving.
  • Overloaded Sandwich: Be careful not to overfill the pita; too much filling can make it hard to eat!

Variations to Try

Get creative with your shawarma chicken sandwich! Here are a few delicious variations:

  • Spicy Shawarma: Add more cayenne pepper or a splash of sriracha to the marinade for heat.
  • Vegetarian Option: Substitute chicken with grilled eggplant or portobello mushrooms for a satisfying meat-free version.
  • Hawaiian Twist: Add grilled pineapple slices and teriyaki sauce for a sweet and savory combination.
  • Greek Style: Incorporate feta cheese and olives into your toppings for a Mediterranean flair.

How to Store and Make Ahead

If you’re planning to enjoy these sandwiches over a few days, here are some storage tips:

  • Refrigeration: Store leftover chicken in an airtight container in the fridge for up to 3 days.
  • Freezing: Cooked chicken can be frozen for up to 3 months. Thaw overnight in the fridge before reheating.
  • Make-Ahead Sauce: The creamy garlic sauce can be made in advance and stored in the fridge for up to a week.

FAQs About Shawarma Chicken Sandwiches

Got questions? Here are some common inquiries about this delicious dish:

  • Can I use chicken breasts instead of thighs? Yes, but thighs are juicier and more flavorful.
  • Is this recipe gluten-free? Use gluten-free pita or flatbreads to make it suitable for gluten-free diets.
  • Can I grill the chicken outside? Absolutely! Grilling adds an amazing flavor.
  • What should I serve with shawarma sandwiches? Consider pairing them with a fresh salad or crispy fries.
  • How can I boost the garlic flavor in the sauce? Add more minced garlic or roasted garlic for an intense flavor.
  • Can I make this sandwich in advance? Yes, prepare the chicken and sauce ahead of time, but assemble the sandwich just before serving.
  • What are some good toppings? Try pickled veggies, hot sauce, or avocado for extra flavor.
  • How do I know when the chicken is done? Use a meat thermometer; it should read 165°F (75°C).

Nutrition Tips and Dietary Adaptations

This shawarma chicken sandwich can fit into various dietary preferences. Here are some tips:

  • Low-Carb Option: Serve the chicken and toppings in a lettuce wrap instead of bread.
  • Dairy-Free Version: Replace regular mayonnaise with a dairy-free alternative or avocado for creaminess.
  • Low-Calorie Choice: Use less oil in the marinade and skip the sauce for a lighter meal.

Recommended Equipment

Here are some kitchen tools that will make your cooking experience easier:

  • Grill Pan or Skillet: A non-stick pan is ideal for achieving that perfect sear on the chicken.
  • Meat Thermometer: Helps ensure your chicken is cooked perfectly.
  • Mixing Bowls: Essential for marinating and mixing ingredients.
  • Whisk: For blending the creamy garlic sauce smoothly.

Serving Suggestions

To make your meal extra special, consider serving your shawarma chicken sandwich with:

  • Homemade French Fries: Crispy fries complement the sandwich perfectly.
  • Tabbouleh Salad: A refreshing salad to balance the rich flavors of the sandwich.
  • Hummus and Veggies: Serve as a starter or side for a complete Middle Eastern feast.

Now that you have all the tools and knowledge at your fingertips, it’s time to roll up your sleeves and get cooking! This Classic Shawarma Chicken Sandwich with its creamy garlic sauce is sure to become a new favorite in your home. Remember, cooking is all about having fun and experimenting. Enjoy the process, and most importantly, enjoy your delicious creation!

Classic Shawarma Chicken Sandwich with Creamy Garlic Sauce

Prep Time 20 minutes
Cook Time 30 minutes
Total Time 50 minutes
Servings 4 servings
Calories 650
Enjoy a flavorful shawarma chicken sandwich topped with a creamy garlic sauce, perfect for a quick and satisfying meal.

Ingredients

Chicken

  • 1.5 lbs boneless, skinless chicken thighs (cut into 2-inch strips)
  • 0.25 cup olive oil
  • 3 cloves garlic (minced)
  • 1 tbsp lemon juice (freshly squeezed)
  • 1 tsp ground cumin
  • 1 tsp ground coriander
  • 0.5 tsp smoked paprika
  • 0.5 tsp turmeric powder
  • 0.25 tsp cayenne pepper (optional, for heat)
  • 0.5 tsp salt
  • 0.25 tsp black pepper

Creamy Garlic Sauce

  • 0.5 cup mayonnaise (good quality)
  • 2 cloves garlic (minced very fine or grated)
  • 1 tbsp fresh lemon juice
  • 2 tbsp water
  • Pinch salt (to taste)

Sandwich Components

  • 4 large pita breads or flatbreads (warmed)
  • 0.5 cup shredded lettuce
  • 0.5 cup diced tomatoes
  • 0.25 cup thinly sliced red onion
  • 0.25 cup chopped fresh parsley (optional)
  • 0.5 cup pickles (dill or Persian style, sliced, for serving)

Instructions 

  • Marinate chicken with olive oil, garlic, lemon juice, cumin, coriander, paprika, turmeric, cayenne, salt, and pepper. Cook until browned.
  • Prepare creamy garlic sauce by mixing mayonnaise, minced garlic, lemon juice, water, and salt. Set aside.
  • Warm pita breads and assemble sandwiches with cooked chicken, lettuce, tomatoes, red onion, parsley, and pickles. Drizzle with garlic sauce.

Notes

For extra flavor, marinate the chicken longer and toast the pita for added texture.
Calories: 650kcal
Cost: $15
Course: Main Course
Cuisine: Middle Eastern
Keyword: Chicken, Sandwich, Shawarma

Discover the Joy of Cooking: Your Ultimate 30-Minute Chicken Spinach Salad

Welcome to your new favorite weeknight meal! This 30-Minute Chicken Spinach Salad is not just quick and easy; it’s a vibrant, flavorful dish that brings together fresh ingredients and delightful textures. Whether you’re a busy professional or a home cook looking to impress, this recipe will elevate your dinner game without adding stress. With juicy chicken, sweet fruits, and a tangy dressing, you’ll find yourself reaching for seconds!

Why You’ll Love This Recipe

This salad is packed with flavors and nutrients that will keep you energized and satisfied. Here are just a few reasons to love this dish:

  • Quick and Easy: Ready in just 30 minutes, this salad is perfect for busy weeknights when you want something fresh and satisfying without spending hours in the kitchen.
  • Nutritious and Delicious: With lean protein, fresh greens, and antioxidant-rich fruits, this salad offers a balanced meal that’s naturally gluten-free and full of vitamins.
  • Flavor Explosion: The combination of juicy blueberries, strawberries, and clementines with feta cheese creates a perfect balance of sweet and savory flavors.
  • Customizable: Feel free to add your favorite toppings or substitute ingredients to make it your own, ensuring it meets your taste preferences.
  • Meal Prep Friendly: This salad can be prepared ahead of time, making it an excellent option for meal prep enthusiasts.

Ingredient Breakdown

Let’s dive into the ingredients you’ll need to create this lovely salad:

  • 9 oz Chicken Breast: A lean protein source that can be grilled, baked, or pan-seared to perfection.
  • 4 cups Fresh Spinach: The base of our salad, providing essential vitamins and minerals.
  • 1/2 cup Blueberries: These little berries are packed with antioxidants and add a burst of sweetness.
  • 1/2 cup Strawberries: Sliced into rounds, they bring a juicy and vibrant flavor.
  • 2/3 cup Clementines: Peeled and segmented, they add a citrusy brightness to the mix.
  • 1/4 cup Feta Cheese: Creamy and tangy, it complements the sweetness of the fruit beautifully.
  • 1/4 cup Slivered Almonds: For a crunchy texture that enhances the overall experience.
  • 1/2 teaspoon Lemon Juice: Toss with the fruit to keep it fresh and enhance flavors.
  • Salt and Pepper: Essential seasonings to bring out all the flavors.
  • For the Dressing: 1/3 cup extra-virgin olive oil, 1.5 tablespoons balsamic vinegar, 1/2 teaspoon mustard, 2 teaspoons honey, 1/2 teaspoon poppy seeds, 1/4 teaspoon salt, and 1/8 teaspoon pepper.

**Substitutions:** If you’re missing an ingredient, don’t worry! Here are some easy swaps:

  • Chicken: Substitute with grilled tofu or chickpeas for a vegetarian version.
  • Spinach: Arugula or mixed greens can add a different flavor profile.
  • Berries: Use any seasonal fruits like raspberries or blackberries.
  • Feta Cheese: Goat cheese or even a dairy-free alternative works well.

Pro Tips for Success

Side angle of a fresh chicken spinach salad featuring sliced strawberries and blueberries.

Here are some expert insights to ensure your salad turns out perfect:

  • Cook Chicken Evenly: Ensure your chicken is cooked evenly by letting it rest before slicing. This keeps it juicy!
  • Use Fresh Ingredients: Fresh spinach and ripe fruits make a huge difference in flavor. Don’t skimp on quality!
  • Dress Right Before Serving: To prevent sogginess, dress the salad just before serving.
  • Tweak the Dressing: Adjust the sweetness or acidity of the dressing to match your taste preferences.
  • Toast Almonds: For extra flavor, lightly toast the almonds in a dry skillet before adding them to the salad.
  • Make It Ahead: Prepare components separately and combine them just before serving for the freshest results.
  • Store the Salad: If you have leftovers, store the salad and dressing separately in the fridge to keep everything fresh.
  • Experiment: Don’t hesitate to try different spices or herbs to enhance the flavor further!

Common Mistakes and Troubleshooting

Even seasoned cooks can make errors! Here’s how to avoid common pitfalls:

  • Overcooking Chicken: Use a meat thermometer to ensure the chicken reaches 165°F. Overcooked chicken can be dry.
  • Soggy Salad: Avoid sogginess by ensuring your spinach is thoroughly dried after washing.
  • Unbalanced Dressing: If your dressing is too acidic, add a bit more honey to balance it out.
  • Flavorless Salad: Don’t shy away from seasoning! A bit of salt and pepper can elevate the entire dish.

Variations to Try

Mix things up with these fun variations:

  • Grilled Chicken Spinach Salad: Try grilling your chicken for added flavor and a smoky touch.
  • Asian-Inspired Salad: Swap the dressing for a sesame ginger vinaigrette and add mandarin oranges and sesame seeds.
  • Southwestern Spinach Salad: Include black beans, corn, and a cilantro-lime dressing for a zesty twist.
  • Berry Nutty Salad: Add walnuts or pecans for a different nutty flavor alongside extra berries.

Storage and Make-Ahead Instructions

To keep your salad fresh, follow these storage tips:

  • In the Fridge: Store the salad in an airtight container without dressing. It will last for about 2 days.
  • Dressing Storage: Keep the dressing in a separate container; it can last up to a week in the fridge.
  • Make Ahead: Prepare the chicken and chop your veggies ahead of time for a quick assembly at mealtime.

Frequently Asked Questions

Here are some common questions about this recipe:

  • Can I use frozen spinach? Yes, but it’s best to thaw and drain it well before using to avoid excess moisture.
  • What can I use instead of balsamic vinegar? Apple cider vinegar or red wine vinegar can be great alternatives.
  • Is this salad gluten-free? Absolutely! All the ingredients are gluten-free as long as the dressing is checked for gluten.
  • How do I make this salad vegan? Substitute chicken with chickpeas or tofu and use a plant-based dressing.
  • Can I add other proteins? Definitely! Grilled shrimp or steak would be delicious additions.
  • What should I serve with this salad? It pairs wonderfully with crusty bread, soups, or even as a side to grilled meats.
  • Can I prepare this salad the night before? It’s best to assemble it the same day, but you can prep ingredients in advance.
  • How do I make the dressing creamier? Add a tablespoon of yogurt or mayonnaise for a creamy version of the dressing.

Nutritional Tips and Dietary Adaptations

To make this salad even more nutritious:

  • Increase Fiber: Add more fruits or swap in whole grain toppings.
  • Low-Calorie Option: Use less oil in the dressing or skip the feta cheese.
  • Add More Greens: Mix in kale or arugula for extra nutrients.

Essential Equipment Recommendations

For optimal results, consider having these handy:

  • Sharp Knife: A good knife is essential for slicing chicken and fruits accurately.
  • Cutting Board: Use a dedicated board for meats and another for vegetables to avoid cross-contamination.
  • Mixing Bowl: A large bowl is great for tossing the salad and ensuring even coating with dressing.
  • Meat Thermometer: Useful for checking chicken doneness without cutting into it.

Serving Suggestions

For a well-rounded meal, serve your salad with:

  • Garlic Breadsticks: These warm, garlicky delights provide a satisfying crunch and balance the freshness of the salad.
  • Chilled White Wine: A crisp Sauvignon Blanc complements the salad’s zesty dressing beautifully.
  • Fruit Platter: Enhance the meal with a vibrant platter of seasonal fruits.

In conclusion, this 30-Minute Chicken Spinach Salad is more than just a meal; it’s a celebration of fresh flavors and healthy ingredients. With the right tips and variations, you can make it fit any occasion or dietary need. So, roll up your sleeves, gather your ingredients, and enjoy the process of creating a dish that is not only delicious but also nourishing. Happy cooking!

30-Minute Chicken Spinach Salad

Prep Time 15 minutes
Cook Time 15 minutes
Total Time 30 minutes
Servings 4 servings
Calories 350
A quick and nutritious salad combining tender chicken, fresh fruits, and vibrant greens, perfect for a healthy meal in just 30 minutes.

Ingredients

Protein

  • 9 oz chicken breast

Vegetables & Greens

  • 4 cups spinach
  • 0.5 cup blueberries
  • 0.5 cup strawberries sliced into 1/4-inch rounds
  • 0.75 cup clementines peeled and separated into segments

Cheese & Nuts

  • 0.25 cup feta cheese
  • 0.25 cup slivered almonds

Dressing & Flavorings

  • 0.5 tsp lemon juice to toss with fruit
  • 0.33 cup extra-virgin olive oil
  • 1.5 tbsp balsamic vinegar
  • 0.5 tsp mustard
  • 2 tsp honey
  • 0.5 tsp poppy seeds
  • 0.125 tsp salt
  • 0.125 tsp pepper

Instructions 

  • Cook chicken until fully cooked, then slice.
  • In a large bowl, toss spinach, blueberries, strawberries, and clementine segments with lemon juice.
  • Prepare dressing by whisking olive oil, balsamic vinegar, mustard, honey, poppy seeds, salt, and pepper.
  • Drizzle dressing over the salad and toss gently.
  • Add sliced chicken, feta cheese, and slivered almonds on top.

Notes

Use fresh ingredients for best flavor and texture.
Calories: 350kcal
Cost: $12
Course: Salad
Cuisine: American
Keyword: Chicken, Fruit, Spinach

Unlock the Secrets to Irresistible No-Bake Oat Bars!

Welcome to the world of No-Bake Oat Bars, where simplicity meets deliciousness! If you’re looking for a quick, energy-packed snack that you can whip up in no time, you’ve come to the right place. These bars are not only easy to make but also customizable, healthy, and perfect for meal prep. Let’s dive into why this recipe will become your go-to for satisfying your sweet tooth without the hassle of baking.

Why You’ll Love This Recipe

  • Quick and Easy: This recipe requires just three ingredients and minimal prep time—perfect for busy days!
  • Healthy Snack Option: Packed with rolled oats and natural peanut butter, these bars offer wholesome energy that keeps you going.
  • Customizable: Feel free to add your favorite mix-ins or toppings to make it your own!
  • No Baking Required: Say goodbye to the oven! Simply mix, press, and chill to create these delightful bars.
  • Great for Meal Prep: Prepare a batch at the beginning of the week for easy grab-and-go snacks.

Ingredients Breakdown

Let’s take a closer look at the ingredients you’ll need to create these scrumptious No-Bake Oat Bars:

  • Rolled Oats (3 cups): The base of our bars, providing fiber and texture. You can substitute quick oats if needed, but rolled oats yield a better texture.
  • Natural Peanut Butter (1 cup): Adds creaminess and healthy fats. Almond butter or sunflower seed butter can be great alternatives for different flavor profiles or dietary needs.
  • Honey (1/2 cup): Acts as a natural sweetener and binder. You can swap it with maple syrup for a vegan option.
  • Salt (1/4 tsp, optional): Enhances flavor, but can be omitted if you prefer a sweeter taste.

Step-by-Step Instructions

Side view of delicious no-bake oat bars showcasing their chewy texture and oatmeal base.

Now that you have your ingredients ready, let’s walk through the process:

  1. In a large mixing bowl, combine the rolled oats and salt (if using). Mixing the salt with the oats first ensures even distribution.
  2. Add the peanut butter and honey to the oats. Make sure to mix thoroughly until the ingredients are well combined.
  3. Line an 8×8 or 9×9 baking tray with parchment paper. Clip the edges with binder clips to keep it in place.
  4. Pour the mixture into the baking tray and use a spatula to flatten it evenly. Press firmly to remove any air pockets.
  5. Refrigerate for 2-3 hours to let the bars set.
  6. Once firm, remove the bars from the tray and slice them into squares or rectangles. I typically cut this into 12 squares. Enjoy your homemade snack!

Pro Tips for Perfect No-Bake Oat Bars

  • Use Fresh Ingredients: Ensure your oats and nut butter are fresh for the best flavor and texture.
  • Mix Thoroughly: Make sure to blend the mixture well to avoid dry spots.
  • Chill Time is Key: Don’t skip the refrigeration step! It’s crucial for the bars to firm up.
  • Experiment with Flavor: Add chocolate chips, dried fruit, or nuts to elevate your bars!
  • Mind the Size: Cut the bars to your preferred size; smaller bars are great for kids!
  • Storage Matters: Keep them in an airtight container in the fridge to maintain freshness.
  • Make Ahead: These bars can be made a week in advance—perfect for busy schedules!
  • Try Different Nut Butters: Explore almond, cashew, or even tahini for unique flavors!

Common Mistakes and Troubleshooting

Even the best cooks encounter hiccups! Here are some common mistakes and how to avoid them:

  • Bars Falling Apart: Ensure you’re using enough peanut butter and honey to bind the ingredients. If they’re too crumbly, add a bit more of either.
  • Too Sweet or Not Sweet Enough: Adjust the quantity of honey to suit your taste. Remember, you can always add more, but you can’t take it out!
  • Texture Issues: If the mixture is too dry, incorporate a splash of milk or additional nut butter to achieve the right consistency.

Variations to Try

Feeling adventurous? Here are some fun variations to shake things up:

  • Chocolate Chip Oat Bars: Mix in 1/2 cup of dark chocolate chips to satisfy your sweet tooth.
  • Fruit and Nut Bars: Add 1/2 cup of chopped dried fruits (like cranberries or apricots) and your favorite nuts for extra crunch.
  • Chocolate Peanut Butter Bars: Mix in 2 tablespoons of cocoa powder for a chocolate twist.
  • Energy Boost Bars: Incorporate seeds like chia or flax for a nutritional boost!

Storage and Meal Prep Instructions

For optimal freshness:

  • Refrigerate: Store in an airtight container in the fridge for up to 1 week.
  • Freeze: For longer storage, wrap individual bars in plastic wrap and place them in a freezer bag. They can last for up to 3 months!

Nutritional Tips and Dietary Adaptations

These bars are not only delicious but also packed with nutrition:

  • High in Fiber: The oats provide a great source of dietary fiber, aiding digestion.
  • Protein-Packed: Peanut butter adds healthy protein, which helps keep you full.
  • Gluten-Free Option: Ensure you’re using certified gluten-free oats if you have a gluten intolerance.

Frequently Asked Questions

  • Can I make these bars vegan? Yes! Substitute honey with maple syrup and ensure your nut butter is vegan.
  • How do I prevent them from sticking? Use parchment paper in your baking tray and chill them thoroughly before slicing.
  • What can I use instead of peanut butter? Almond butter, sunflower seed butter, or any nut butter you prefer can be used.
  • Can I bake these bars? This recipe is designed for no-baking, but if you prefer a baked version, I recommend experimenting with full granola-style recipes.
  • How thick should the bars be? Aim for about 1 inch thick for optimal texture.
  • Can I add protein powder? Absolutely! Just be mindful of how much you add, as it may affect the binding consistency.
  • Do these bars need to be refrigerated? Yes, they should be kept in the fridge or freezer for best results.
  • How do I know when they’re ready to eat? They will feel firm to the touch after chilling for a few hours.

Essential Equipment Recommendations

To make your cooking experience seamless, here’s a list of must-have equipment:

  • Mixing Bowl: A large bowl for combining your ingredients.
  • Spatula: For mixing and flattening the mixture in your baking tray.
  • Baking Tray: An 8×8 or 9×9 square tray for shaping your bars.
  • Parchment Paper: Keeps your bars from sticking and makes cleanup easier.
  • Measuring Cups and Spoons: Precision is key when measuring ingredients.

Serving Suggestions

These bars are versatile and can be enjoyed in various ways:

  • As a Snack: Perfect for mid-day munching or post-workout fuel.
  • With Yogurt: Crumble them over yogurt for a delicious breakfast or dessert.
  • On-the-Go: Pack them for road trips, hikes, or busy mornings.

With this comprehensive guide to No-Bake Oat Bars, you’re now armed with all the knowledge and tips to create your version of this delightful treat. Remember, cooking is all about having fun and experimenting, so don’t hesitate to make this recipe your own. Happy cooking, friends!

No-Bake Oat Bars 3 Ingredients

Prep Time 10 minutes
Total Time 10 minutes
Servings 12 bars
Calories 250
Delicious and easy-to-make no-bake oat bars with just three simple ingredients. Perfect for a quick snack or healthy treat.

Ingredients

Dry ingredients

  • 3 cups rolled oats
  • 1 cup natural peanut butter
  • 0.5 cup honey
  • 0.25 tsp salt (optional) (optional)

Instructions 

  • Mix oats, salt (if using), and peanut butter in a large bowl.
  • Add honey and stir until well combined.
  • Line a baking tray with parchment paper and press the mixture firmly into it.
  • Refrigerate for 2-3 hours until set.
  • Remove from tray, cut into 12 bars, and enjoy.

Notes

Press the mixture down firmly to ensure bars hold together.
Calories: 250kcal
Cost: $10
Course: Snack
Keyword: Oats

Delight in the Morning: Unveiling the Magic of Peach Crisp Yogurt Bowls

Welcome to a delicious way to kick-start your day! If you’re looking for a breakfast that’s not only nourishing but also bursting with flavor, look no further than these Peach Crisp Yogurt Bowls. This recipe combines the sweetness of fresh peaches with the crunch of homemade granola and the creaminess of yogurt, creating a perfect harmony of textures and tastes. In this article, we’ll explore everything you need to know to make this delightful dish, ensuring it becomes a staple in your morning routine.

Why You’ll Love This Recipe

Here are a few reasons why these Peach Crisp Yogurt Bowls will quickly become your favorite breakfast:

  • Flavor Explosion: The combination of roasted peaches and crunchy granola creates a delightful contrast that’s hard to resist.
  • Customizable: You can easily swap ingredients based on what you have at home, making this a versatile recipe.
  • Quick and Easy: With just a few simple steps, you can whip up a wholesome breakfast in no time.
  • Healthy Start: Packed with oats, fruit, and yogurt, this breakfast is not only delicious but also nutritious.
  • Meal Prep Friendly: You can prepare the granola and roasted peaches in advance, making your mornings a breeze.

Ingredient Breakdown

Let’s dive into the ingredients you’ll need to create these Peach Crisp Yogurt Bowls. Each element plays a crucial role in delivering flavor and nutrition.

  • Oats (1 1/2 cups): The base of your granola, oats are a great source of fiber and will keep you feeling full.
  • Cinnamon (1 tsp): Adds warmth and sweetness without any sugar.
  • Nutmeg (1/4 tsp): A pinch elevates the flavor profile, giving it a cozy touch.
  • Salt (pinch): Balances the sweetness of the other ingredients.
  • Shredded Coconut (1/2 cup): Use sweetened or unsweetened; it adds a chewy texture and tropical flavor.
  • Chopped Pecans (1/3 cup): For added crunch and healthy fats.
  • Olive Oil (2 tbsp): Helps to bind the granola and adds richness.
  • Maple Syrup (1/3 cup): Natural sweetener that complements the oats and creates clumps in the granola.
  • Vanilla Extract (1/2 tsp): Enhances the overall flavor.
  • Almond Butter (2 tbsp): Adds creaminess and protein; can be substituted with peanut butter or sunflower seed butter for allergies.
  • Fresh Peaches (3 medium): The star of the dish! You can use frozen peaches in a pinch.
  • Sugar (3 tbsp): To enhance the sweetness of the peaches.
  • Vanilla Yogurt: The creamy layer in your bowl; feel free to use Greek yogurt for extra protein.

Step-by-Step Instructions

Close-up of a yogurt bowl topped with juicy peaches and crunchy pecans.

Now that you have all your ingredients ready, let’s get cooking!

1. Make the Granola

Preheat your oven to 325°F (163°C). In a large bowl, mix the oats, cinnamon, nutmeg, salt, shredded coconut, and chopped pecans. In a separate bowl, whisk together the olive oil, maple syrup, and vanilla extract. Pour the wet mixture over the dry ingredients and stir until everything is evenly coated.

Spread the granola mixture onto a baking sheet lined with parchment paper. Bake for about 20-25 minutes, stirring halfway through to ensure even browning. Remove from the oven and let it cool completely.

2. Prepare the Roasted Peaches

While the granola bakes, slice your peaches and toss them with the sugar. Let them sit for about 10 minutes to draw out their natural juices. After the granola is done baking, turn your oven up to 400°F (204°C). Line another baking sheet with parchment paper and spread the sliced peaches evenly. Roast for 12-14 minutes or until they are juicy and tender.

3. Assemble Your Bowls

In a bowl, add a generous scoop of yogurt, top it with warm roasted peaches, and sprinkle a hearty amount of homemade granola on top. Enjoy immediately for the best flavor and texture!

Expert Tips for Perfection

To ensure your Peach Crisp Yogurt Bowls turn out perfectly every time, keep these tips in mind:

  • Granola Texture: For a crunchier granola, bake it a little longer, but keep an eye on it to prevent burning.
  • Peach Ripeness: Use ripe peaches for the best flavor; they should be slightly soft to the touch.
  • Cooling the Granola: Let the granola cool completely before storing to maintain its crunchiness.
  • Flavor Variations: Experiment with spices like cardamom or add dried fruits for more texture.
  • Vegan Option: Substitute maple syrup for honey and use non-dairy yogurt to make this recipe vegan.
  • Storage Tips: Store the granola in an airtight container at room temperature for up to two weeks and the roasted peaches in the fridge for up to three days.
  • Serving Suggestions: Try adding chia seeds or flaxseeds for additional nutrition.
  • Make-Ahead Method: Prepare the granola and peaches ahead of time for a quick morning option.

Common Mistakes and Troubleshooting

Even seasoned cooks can run into issues. Here are some common mistakes to avoid:

  • Overbaking Granola: Keep a close watch on granola to avoid it becoming too hard. If it’s burnt, unfortunately, it can’t be salvaged.
  • Using Unripe Peaches: Avoid using peaches that are too firm as they won’t caramelize well in the oven.
  • Not Letting Granola Cool: If you pack warm granola into a container, it can become soggy.

Variations to Try

Feeling adventurous? Here are some fun variations to customize your Peach Crisp Yogurt Bowls:

  • Berry Bliss: Swap peaches for blueberries or strawberries for a different fruity flavor.
  • Nuts About It: Add different nuts like almonds or walnuts to the granola for a unique crunch.
  • Spiced Up: Incorporate pumpkin spice or chai spice into the granola for a seasonal twist.
  • Extra Creamy: Use a mix of Greek yogurt and cottage cheese for added protein and creaminess.

Storage and Make-Ahead Instructions

To keep your Peach Crisp Yogurt Bowls fresh:

  • Granola Storage: Keep in an airtight container at room temperature for up to two weeks.
  • Roasted Peaches Storage: Store in an airtight container in the fridge for up to three days.
  • Make-Ahead Option: Prepare the granola and roasted peaches in advance, and assemble your bowls when ready to serve.

FAQs About Peach Crisp Yogurt Bowls

If you have questions, you’re not alone! Here are some frequently asked questions about this recipe:

  • Can I use frozen peaches instead of fresh? Yes, frozen peaches will work, but they may release more juice than fresh ones.
  • How do I make this recipe gluten-free? Use certified gluten-free oats to make the granola.
  • Can I add protein powder to the yogurt? Absolutely! It’s a great way to boost the protein content.
  • What other fruits can I use? You can use any fruit you like, such as berries, bananas, or mangoes.
  • Can I make the granola without almond butter? Yes, you can substitute it with any nut butter or omit it entirely.
  • How long does the granola last? Homemade granola can last for up to two weeks when stored properly.
  • Is this recipe suitable for meal prep? Yes! You can prepare all components in advance and assemble when ready.
  • Can I use yogurt alternatives? Yes, feel free to use dairy-free yogurt to accommodate dietary restrictions.

Nutritional Tips and Dietary Adaptations

This recipe is packed with nutrients, but here are some tips to make it even healthier:

  • Protein Boost: Add a scoop of protein powder to your yogurt for an extra kick.
  • Dairy-Free Options: Use coconut or almond milk yogurt for a dairy-free alternative.
  • Lower Sugar: Reduce the sugar used for the peaches or swap maple syrup for a lower-calorie sweetener.

Equipment Recommendations

Here’s what you’ll need to make your Peach Crisp Yogurt Bowls:

  • Baking Sheets: Two for baking granola and roasting peaches.
  • Parchment Paper: To prevent sticking and for easy cleanup.
  • Mixing Bowls: A large bowl for mixing ingredients and a separate bowl for wet ingredients.
  • Measuring Cups and Spoons: For accurate measurements of your ingredients.
  • Spatula: To spread the granola evenly on the baking sheet.

Serving Suggestions

Enjoy your Peach Crisp Yogurt Bowls as a satisfying breakfast or snack. Here are a few serving ideas:

  • Layered Parfaits: Alternate layers of yogurt, peaches, and granola in a glass for an impressive presentation.
  • On-the-Go Option: Pack the ingredients separately and combine them when you’re ready to eat.
  • Pair with Smoothies: Serve alongside a refreshing smoothie for a complete meal.

In conclusion, these Peach Crisp Yogurt Bowls are not just a breakfast; they are an experience. They offer a delicious way to nourish your body and spark your creativity in the kitchen. Remember, cooking is about confidence and enjoyment—so don’t hesitate to experiment and make this recipe your own. Happy cooking!

Peach Crisp Yogurt Bowls

Prep Time 15 minutes
Cook Time 20 minutes
Total Time 35 minutes
Servings 4 bowls
Calories 350
A delightful combination of warm roasted peaches, crunchy granola, and creamy yogurt makes this a perfect breakfast or snack.

Ingredients

Oats and Nuts

  • 0.5 cup oats
  • 1 tsp cinnamon
  • 0.25 tsp nutmeg
  • pinch salt
  • 0.5 cup shredded coconut (sweetened or unsweetened)
  • 0.33 cup chopped pecans
  • 2 tbsp olive oil
  • 0.33 cup maple syrup
  • 0.5 tsp vanilla
  • 2 tbsp almond butter

Fruits

  • 3 medium peaches
  • 3 tbsp sugar

Yogurt

  • vanilla yogurt vanilla yogurt

Instructions 

  • Preheat oven to 325°F (160°C). Mix oats, cinnamon, nutmeg, salt, coconut, pecans, olive oil, maple syrup, vanilla, and almond butter. Spread on a baking sheet and bake for 20 minutes, stirring halfway.
  • While the granola bakes, slice peaches and toss with sugar. Let sit for 10 minutes.
  • Line a baking sheet with parchment, spread peaches, and roast at 400°F (200°C) for 12-14 minutes until tender.
  • Assemble bowls with yogurt, warm peaches, and granola. Serve immediately.

Notes

Store granola in an airtight container at room temperature for up to two weeks. Keep leftover peaches refrigerated for up to 3 days.
Calories: 350kcal
Cost: $10
Course: Breakfast
Cuisine: American
Keyword: Granola, Peach, Yogurt

How to Create Deliciously Simple Grilled Chicken Wraps

Welcome to your new favorite weeknight dinner! These grilled chicken wraps are not only quick and easy to prepare but also bursting with flavor. Perfect for busy evenings, this recipe will transform your routine meals into something exciting. Whether you’re cooking for yourself or a whole family, these wraps are sure to please everyone!

In this article, we’ll explore everything you need to know about making grilled chicken wraps, from the ingredients to expert tips, variations, and more. So let’s dive in!

Why You’ll Love This Recipe

  • Quick Preparation: With just a few simple steps, you can have a satisfying meal ready in under 30 minutes.
  • Customization: These wraps are versatile; you can easily adapt them to your taste by swapping out ingredients.
  • Healthy Option: Packed with protein and fresh veggies, they’re a nutritious choice for lunch or dinner.
  • Family-Friendly: Kids love the fun of wraps, making it a great way to encourage them to eat healthy.
  • Meal Prep Friendly: Prepare the chicken ahead of time, and you can throw these wraps together in a pinch!

Ingredient Breakdown

Getting the right ingredients is crucial for making mouthwatering grilled chicken wraps. Here’s what you’ll need:

  • Chicken Breasts: 2 boneless and skinless, sliced into cutlets (approximately 650g). For a leaner option, you can use turkey cutlets.
  • Spices: 1 teaspoon smoked paprika, ÂĽ teaspoon chili powder, ½ teaspoon garlic granules, ½ teaspoon salt, and â…› teaspoon ground black pepper. Feel free to experiment with different spices!
  • Olive Oil: 1 tablespoon for frying or grilling. You can also use avocado oil for a different flavor.
  • Tortillas: 4 flour tortilla wraps. Corn tortillas are a gluten-free alternative.
  • Fresh Veggies: 4 large iceberg lettuce leaves to add crunch and freshness.
  • Cheese: 1 cup shredded cheddar or mozzarella. You can try feta or pepper jack for a twist.
  • Dressing: ½ cup ranch dressing. Swap with Greek yogurt or a vinaigrette for a healthier option.

Step-by-Step Instructions

Side view of a juicy grilled chicken wrap on a plate, showcasing its ingredients.

Now that you have your ingredients ready, let’s walk through the steps:

  1. Season the Chicken: In a bowl, season the chicken cutlets with smoked paprika, chili powder, garlic granules, salt, and pepper.
  2. Prepare the Grill: Heat oil in a pan, grill pan, or preheat your outdoor grill.
  3. Cook the Chicken: Place the seasoned chicken cutlets on the grill or pan. Cook on both sides until the chicken is cooked through, reaching an internal temperature of at least 165°F (75°C).
  4. Rest the Chicken: Remove the chicken from the grill and let it rest on a plate for 5 minutes.
  5. Assemble the Wraps: On each tortilla, layer the lettuce leaves, followed by the chicken, shredded cheese, and a drizzle of ranch dressing.
  6. Grill the Wraps: Seal the tortilla, place the wrap on the grill or lightly oiled grill pan, and cook for 1-2 minutes on each side until golden brown.
  7. Serve: Remove from the grill, slice in half, and serve warm!

Pro Tips for the Perfect Wrap

  • Don’t Overcrowd the Grill: Ensure there’s enough space between pieces of chicken to allow for even cooking.
  • Let It Rest: Resting the chicken ensures juiciness. Cutting too soon can lead to dryness.
  • Experiment with Flavors: Try adding a squeeze of lime or lemon juice for a zesty kick.
  • Use Fresh Ingredients: Fresh veggies not only taste better but also add vibrant color to your wraps.
  • Watch the Cooking Time: Chicken cooks quickly, so keep an eye on it to prevent overcooking.
  • Warm the Tortillas: Lightly heating the tortillas before assembly makes them more pliable and easier to wrap.
  • Make It a Meal: Serve with a side of fresh fruit or a light salad for a complete dinner.
  • Store Leftovers Properly: Keep any leftover wraps in an airtight container in the fridge for up to 3 days.

Common Mistakes and Troubleshooting

Even the best cooks can run into hiccups. Here are some common mistakes and how to avoid them:

  • Dry Chicken: This often results from overcooking. Use a meat thermometer to check doneness.
  • Too Much Filling: Overstuffing can lead to messy wraps. Stick to a moderate amount for easier handling.
  • Unseasoned Chicken: Ensure you season the chicken well. It’s essential for flavor!
  • Cold Ingredients: If the ingredients are cold, they can make the wrap less enjoyable. Let elements like cheese come to room temperature before assembling.

Wrap Variations to Try

Feeling adventurous? Here are some delicious variations to keep things exciting:

  • Mexican Fiesta Wrap: Add black beans, corn, diced tomatoes, and avocado for a southwestern twist.
  • Buffalo Chicken Wrap: Toss your grilled chicken in buffalo sauce and add celery and blue cheese for a spicy kick.
  • Mediterranean Chicken Wrap: Include hummus, cucumbers, tomatoes, and feta cheese for a fresh flavor.
  • BBQ Chicken Wrap: Use barbecue sauce instead of ranch and add coleslaw for a tangy crunch.

Storage and Make-Ahead Instructions

Making these grilled chicken wraps ahead of time can save you time on busy evenings:

  • Cooked Chicken: Store leftover grilled chicken in an airtight container for up to 3 days.
  • Wrapped and Ready: Assemble wraps without dressing and store in the fridge for up to 24 hours. Add dressing just before serving.
  • Freezing: If you want to freeze your wraps, wrap them tightly in plastic wrap and store in a freezer-safe bag for up to 2 months. Thaw in the fridge before eating.

Frequently Asked Questions

Here are some common questions about grilled chicken wraps:

  • Can I use leftover chicken? Yes! Shredded or diced leftover chicken works great in this recipe.
  • What can I substitute for ranch dressing? Greek yogurt or a vinaigrette makes for healthy alternatives.
  • Are these wraps gluten-free? You can use gluten-free tortillas to make a gluten-free version.
  • How can I make this recipe dairy-free? Omit the cheese or substitute with a dairy-free alternative.
  • Can I grill vegetables with the chicken? Absolutely! Grilled peppers, onions, or zucchini can enhance the flavor.
  • What’s the best way to reheat the wraps? Use a skillet over medium heat to gently warm them without making them soggy.
  • Can I prepare the chicken ahead of time? Yes, you can grill the chicken a day in advance and store it in the fridge.
  • How do I make these wraps spicier? Add sliced jalapeños or a spicy sauce to your wraps for an extra kick!

Nutrition Tips and Dietary Adaptations

This recipe offers a nutritious balance of protein and veggies. Here are some tips to enhance its health benefits:

  • Lean Proteins: Opt for skinless chicken or turkey to reduce fat content.
  • Load Up on Veggies: Incorporating a variety of colorful vegetables increases vitamins and minerals.
  • Whole Grains: Choose whole wheat or sprouted tortillas for added fiber.
  • Controlled Portions: Keep an eye on portion sizes to maintain a balanced diet.

Essential Equipment for Success

Having the right tools can make your cooking experience smoother:

  • Grill Pan or Outdoor Grill: Ideal for achieving those beautiful grill marks.
  • Meat Thermometer: Ensures the chicken reaches a safe temperature.
  • Non-Stick Spray or Brush: Prevents sticking and helps achieve a nice sear on the wraps.
  • Sharp Knife: For slicing chicken and cutting the wraps easily.

Serving Suggestions

Pair your grilled chicken wraps with these delicious sides:

  • Fresh Salad: A simple side salad with mixed greens and vinaigrette complements the wraps perfectly.
  • Fruit Salad: A refreshing fruit salad balances the savory flavors of the wraps.
  • Chips and Salsa: Give a crunch to your meal with tortilla chips and homemade salsa.
  • Soup: A light soup, like tomato or vegetable, makes for a comforting side.

Conclusion

These grilled chicken wraps are not just a recipe; they’re a canvas for your culinary creativity. Packed with flavor and nutritious ingredients, they promise to be a hit in your household. With the tips, variations, and storage ideas provided, you now have everything you need to make these wraps a staple in your meal rotation. So grab your ingredients, fire up the grill, and enjoy the deliciousness of homemade wraps!

Grilled Chicken Wrap

Prep Time 10 minutes
Cook Time 15 minutes
Total Time 25 minutes
Servings 4 servings
Calories 550
A delicious and easy-to-make chicken wrap perfect for lunch or dinner, combining flavorful seasoned chicken with fresh vegetables and cheese.

Ingredients

Meat

  • 650 g chicken breasts boneless and skinless, sliced into cutlets
  • 1 teaspoon smoked paprika
  • 0.25 teaspoon chili powder
  • 0.5 teaspoon garlic granules
  • 0.5 teaspoon salt
  • 0.125 teaspoon ground black pepper
  • 1 tablespoon olive oil (if frying)
  • 4 pieces flour tortilla wraps
  • 4 leaves large iceberg lettuce leaves
  • 1 cup cheddar or mozzarella cheese shredded
  • 0.5 cup ranch dressing

Instructions 

  • Season chicken with paprika, chili powder, garlic, salt, and pepper.
  • Heat oil in a pan or grill, then cook chicken until internal temperature reaches 165°F (75°C).
  • Rest chicken for 5 minutes, then chop into strips.
  • Assemble wraps by layering lettuce, chicken, cheese, and ranch on each tortilla, then roll and grill for 1-2 minutes per side.

Notes

Ensure chicken is cooked thoroughly for safety.
Calories: 550kcal
Cost: $12
Course: Main Course
Cuisine: American
Keyword: Chicken, Wrap

If you’re looking for a comforting yet straightforward dish to whip up on a busy weeknight, this Creamy Chicken Spinach Pasta recipe is the perfect choice. Combining tender chicken, fresh spinach, and a rich, creamy sauce, it’s a delightful meal that’s bound to impress. With just one pot and minimal prep, you’ll be savoring this delicious dish in under 30 minutes. Let’s dive into the reasons why this recipe is a must-try!

Why You’ll Love This Recipe

  • Quick and Easy: Ready in just about 30 minutes, this dish is perfect for those busy nights.
  • One-Pot Wonder: Less cleanup means more time to relax after dinner.
  • Flavor-Packed: The combination of garlic, Italian seasoning, and creamy cheese creates a mouthwatering sauce that elevates the chicken and spinach.
  • Healthy Ingredients: With fresh spinach, lean chicken, and whole milk, it’s a nutritious option that doesn’t skimp on flavor.
  • Customizable: Easily adapt the recipe to your taste with different pasta shapes or add-ins like sun-dried tomatoes or mushrooms.

Ingredients You’ll Need

This recipe calls for some simple ingredients that you might already have in your kitchen. Below is a detailed breakdown of everything you’ll need to create this delicious dish, along with some helpful substitutions.

  • Pasta: 12 ounces of penne pasta (or use rigatoni, fusilli, or farfalle for a different texture).
  • Salt: 1 tablespoon for the pasta water, plus more for seasoning later.
  • Chicken: 1.5 pounds of boneless skinless chicken breasts, cut into 1-inch pieces. You can substitute with thighs for more flavor.
  • Olive Oil: 1 tablespoon of extra virgin olive oil for sautĂ©ing.
  • Seasoning: 0.5 teaspoon of salt, 0.25 teaspoon of black pepper, and 0.5 teaspoon of Italian seasoning.
  • Butter: 2 tablespoons, which adds richness to the sauce.
  • Garlic: 4 cloves, minced for that aromatic flavor.
  • Milk: 1.5 cups of whole milk for a creamy base. For a lighter version, you can use low-fat milk.
  • Cottage Cheese: 0.5 cup blended until smooth; it adds creaminess without too many calories.
  • Parmesan Cheese: 1 cup freshly grated (about 3 ounces) for a savory finish.
  • Fresh Spinach: 5 ounces (about 5 cups packed), which wilts beautifully in the sauce.
  • Optional: 0.25 teaspoon of red pepper flakes for a hint of heat.
  • Garnishes: Extra Parmesan and fresh parsley for serving.

Step-by-Step Instructions

Ready to get cooking? Follow these clear, detailed steps to bring your Creamy Chicken Spinach Pasta to life!

Step 1: Cook the Pasta

Start by bringing a large pot of water to a rolling boil. Add the tablespoon of salt and then the penne pasta. Cook until al dente, which should take about 8-10 minutes. Before draining, reserve about 1 cup of pasta water to adjust the sauce later if needed. Drain the pasta and set it aside.

Step 2: Prepare and Sear the Chicken

While the pasta cooks, cut your chicken into uniform 1-inch pieces. Pat them dry with paper towels and season with 0.5 teaspoon of salt, 0.25 teaspoon of black pepper, and 0.5 teaspoon of Italian seasoning. Heat the olive oil in a large 12-inch skillet over medium-high heat. Once hot, add the chicken in a single layer (don’t overcrowd the pan). Cook without moving for about 4 minutes until golden brown, then flip and cook for another 3-4 minutes until the internal temperature reaches 165°F. Transfer the chicken to a plate.

Step 3: Build the Sauce

Reduce the heat to medium and add the butter to the skillet. Once melted, add the minced garlic and sauté for 45-60 seconds until fragrant but not browned. Pour in the milk, stirring to scrape up any browned bits from the pan. Add the blended cottage cheese and 0.5 teaspoon of Italian seasoning. Whisk until smooth and bring to a gentle simmer, cooking for 2-3 minutes until slightly thickened.

Step 4: Combine Ingredients

Gradually stir in the Parmesan cheese until melted and the sauce is smooth. Taste and season with the remaining 0.5 teaspoon of salt, 0.5 teaspoon of black pepper, and red pepper flakes if using. Next, add the fresh spinach to the sauce, stirring continuously for 1-2 minutes until wilted and dark green.

Step 5: Bring It All Together

Return the cooked chicken to the skillet, then add the drained pasta. Toss everything together with tongs until the pasta and chicken are evenly coated in the creamy sauce. If the sauce seems too thick, add the reserved pasta water a couple of tablespoons at a time until you reach your desired consistency. Taste and adjust the seasoning as needed.

Step 6: Serve and Enjoy!

Serve hot, garnished with extra Parmesan, a sprinkle of black pepper, and fresh parsley for a pop of color.

Pro Tips for Perfect Creamy Chicken Spinach Pasta

Juicy chicken pieces and fresh spinach mixed with creamy pasta, captured side view.
  • Don’t Overcook the Pasta: Aim for al dente as it will continue cooking in the sauce.
  • Use Fresh Ingredients: Fresh spinach and quality chicken greatly enhance the flavor of the dish.
  • Adjust Creaminess: If you prefer a richer sauce, consider adding heavy cream instead of milk.
  • Blend the Cottage Cheese: This step ensures a smooth sauce without lumps.
  • Experiment with Flavors: Add sun-dried tomatoes or fresh herbs to customize your dish.
  • Keep it Simple: Use pre-cooked chicken or rotisserie chicken for an even quicker meal.
  • Store for Later: This dish holds up well in the fridge, making it perfect for meal prep.
  • Garnish Generously: Extra cheese and fresh herbs boost both flavor and presentation.

Common Mistakes and Troubleshooting

  • Overcooked Chicken: Ensure not to cook the chicken too long, as it can dry out. Use a meat thermometer to check for doneness.
  • Thick Sauce: If the sauce is too thick, gradually add reserved pasta water until it reaches your desired consistency.
  • Too Salty: If you over-salted the dish, balance it with a little extra milk or cream to dilute the saltiness.
  • Unbalanced Flavor: Taste as you go! Adjust seasoning with salt, pepper, and red pepper flakes to suit your palate.

Variations to Try

  • Mushroom & Spinach: Add sautĂ©ed mushrooms for an earthy flavor.
  • Sun-Dried Tomato Spinach Pasta: Incorporate sun-dried tomatoes for a tangy twist.
  • Italian Sausage: Swap chicken for Italian sausage for a heartier dish.
  • Vegetarian Option: Omit the chicken and add more vegetables like bell peppers and zucchini.

Storing and Make-Ahead Instructions

This Creamy Chicken Spinach Pasta can be made ahead of time. Here’s how to store it:

  • Refrigeration: Store leftovers in an airtight container in the refrigerator for up to 3 days.
  • Freezing: To freeze, let the pasta cool completely, then transfer to a freezer-safe container. It can last up to 2 months. Reheat in the microwave or on the stovetop, adding a splash of milk to loosen the sauce.

Frequently Asked Questions

  • Can I use whole wheat pasta? Absolutely! Whole wheat pasta is a great substitute and adds a nutty flavor.
  • What if I don’t have cottage cheese? You can use cream cheese or ricotta as an alternative for a creamy sauce.
  • Can I make this dish ahead of time? Yes, prepare the meal in advance and reheat when ready to serve.
  • How do I know when the chicken is cooked? Use a meat thermometer; chicken should reach an internal temperature of 165°F.
  • Can I add other vegetables? Definitely! Broccoli, bell peppers, or zucchini would work well in this recipe.
  • Is this dish gluten-free? Use gluten-free pasta to make it suitable for those with gluten sensitivities.
  • What can I serve with this pasta? A simple green salad or garlic bread pairs wonderfully with this dish.
  • Can I reheat leftovers? Yes, simply add a splash of water or milk while reheating to maintain creaminess.

Nutrition Tips and Dietary Adaptations

This Creamy Chicken Spinach Pasta can be tailored to meet various dietary needs:

  • Low-Carb: Use spiralized zucchini instead of pasta for a low-carb version.
  • High-Protein: Add chickpeas or lentils for an extra protein boost.
  • Dairy-Free: Substitute with non-dairy milk and a dairy-free cream alternative.

Essential Equipment Recommendations

To make your cooking experience smoother, here are some must-have kitchen tools:

  • Large Pot: For boiling the pasta.
  • 12-Inch Skillet: Ideal for sautĂ©ing the chicken and making the sauce.
  • Meat Thermometer: Ensures your chicken is perfectly cooked.
  • Blender: For blending the cottage cheese smoothly.

Serving Suggestions

Serve your Creamy Chicken Spinach Pasta hot, garnished with:

  • Extra Parmesan: A sprinkle of freshly grated cheese adds a delicious touch.
  • Fresh Parsley: Chopped parsley brightens the dish and adds color.
  • Cracked Black Pepper: For a bit of extra flavor and visual appeal.

In conclusion, this Creamy Chicken Spinach Pasta is not just a meal; it’s an experience filled with warmth, comfort, and flavor. Perfect for any weeknight, it’s a recipe you’ll come back to time and again. So, gather your ingredients and get ready to enjoy a dish that’s as rewarding to prepare as it is to eat!

Creamy Chicken Spinach Pasta

Prep Time 10 minutes
Cook Time 20 minutes
Total Time 30 minutes
Servings 4 servings
Calories 650
A rich and creamy pasta dish featuring tender chicken, fresh spinach, and Parmesan cheese, perfect for a satisfying meal.

Ingredients

Pasta

  • 12 ounces penne pasta or rigatoni, fusilli, farfalle
  • 1 tablespoon salt for pasta water

Chicken

  • 1.5 pounds boneless skinless chicken breast (cut into 1-inch pieces)
  • 1 tablespoon olive oil (extra virgin)
  • 0.5 teaspoon salt
  • 0.25 teaspoon black pepper
  • 0.5 teaspoon Italian seasoning

Sauce

  • 2 tablespoons butter
  • 4 cloves garlic (minced)
  • 1.5 cups whole milk
  • 0.5 cup low-fat cottage cheese (blended until smooth)
  • 1 cup Parmesan cheese (about 3 ounces, grated)
  • 0.5 teaspoon Italian seasoning
  • 0.5 teaspoon salt (to taste and adjust)
  • 0.5 teaspoon black pepper
  • 0.25 teaspoon red pepper flakes (optional)

Vegetables

  • 5 ounces fresh baby spinach (about 5 cups packed)

Garnish

  • extra Parmesan and parsley (for garnish)

Instructions 

  • Cook pasta in boiling salted water until al dente, then reserve 1 cup pasta water and drain.
  • Season chicken with salt, pepper, and Italian seasoning; cook in olive oil until golden and cooked through. Set aside.
  • SautĂ© garlic in butter, then add milk, cottage cheese, and Italian seasoning; simmer until slightly thickened. Stir in Parmesan and seasonings.
  • Add spinach to sauce until wilted, then return chicken and pasta; toss to coat, adding reserved pasta water to reach desired consistency. Garnish and serve.

Notes

Adjust seasoning to taste and serve hot with extra Parmesan and parsley.
Calories: 650kcal
Cost: $15
Course: Main Course
Cuisine: Italian
Keyword: Chicken, Pasta, Spinach

Discover the Joy of Cooking: Quick and Delicious Chicken Taco Salad for Busy Weeknights

If you’re looking for a meal that is not only **quick** but also **delicious**, you’ve landed in the right spot! This Chicken Taco Salad is the perfect solution for those hectic weeknights when time is tight but you still want to whip up something that your family will love. Packed with fresh ingredients and bursting with flavor, this salad is loaded with everything you adore about taco night – all in a healthy, easy-to-make dish!

Get ready to dive into this recipe that combines tender chicken, crisp veggies, and zesty ranch dressing. It’s a fan-favorite that brings excitement to your dinner table without the fuss. So, throw on your apron and let’s get cooking!

Why You’ll Love This Recipe

This Chicken Taco Salad isn’t just another salad; it’s a **flavor explosion** that comes together in a matter of minutes! Here are five reasons why this recipe is truly special:

  • Quick and Easy: Ready in under 30 minutes, making it perfect for busy weeknights.
  • Fresh Ingredients: Loaded with vibrant vegetables, making it a nutritious choice for the whole family.
  • Customizable: Easily swap out ingredients based on your preferences or what you have on hand.
  • Meal Prep Friendly: Great for preparing ahead of time for lunches or quick dinners.
  • Kid-Approved: Kids will love the fun taco flavors in a salad form!

Ingredients Breakdown

Let’s gather everything we need to make this amazing Chicken Taco Salad! Here’s what you’ll need, along with some handy substitution options:

  • 1.25 cups ranch dressing: For a lighter option, try Greek yogurt or a homemade vinaigrette.
  • 2 tbsp taco seasoning: You can use store-bought or make your own with chili powder, cumin, garlic powder, and paprika.
  • 2 cups chicken (shredded or chopped): Rotisserie chicken is a great shortcut, or you can use cooked ground turkey as a substitute.
  • 2 cups romaine lettuce (chopped): Feel free to use mixed greens or spinach for a different flavor.
  • 2 cups cherry tomatoes (halved): You can replace these with diced bell peppers for a crunchier texture.
  • 1 cup corn: Fresh, frozen, or canned corn all work well!
  • 1/4 cup red onion: Red onion adds a nice bite; use green onions for a milder flavor.
  • 4 green onions (sliced): Optional, but they add freshness to the dish.
  • 1.25 cups black beans: Canned black beans are convenient; just rinse them before adding.
  • 1/2 cup cheddar cheese (grated): Swap with Monterey Jack or omit for a dairy-free option.
  • 1/4 cup cilantro (chopped): Fresh parsley can be used if cilantro isn’t your favorite.
  • 1 whole lime: Fresh lime juice elevates the flavors; bottled lime juice works in a pinch.
  • 1 cup tortilla strips: Crunchy tortilla strips add texture; you can use crushed tortilla chips for a different take.

Step-by-Step Instructions

Side view of a Chicken Taco Salad filled with fresh vegetables and shredded chicken.

Now that we have our ingredients ready, let’s put it all together! Follow these simple steps:

  1. In a large bowl, whisk together the ranch dressing, taco seasoning, and salt until smooth.
  2. Prep all your vegetables by washing and chopping as needed.
  3. Combine the chicken, romaine, cherry tomatoes, corn, red onion, green onions, black beans, and cheddar cheese in the bowl.
  4. Drizzle the dressing over the salad and squeeze in the lime juice, mixing well to ensure everything is coated.
  5. Fold in the tortilla strips gently, garnish with cilantro, and serve immediately!

Pro Tips for Perfecting Your Chicken Taco Salad

Here are some expert insights to elevate your Chicken Taco Salad:

  • Prep Ahead: Chop your veggies and cook the chicken in advance to make assembly quicker.
  • Mix it Up: Experiment with different dressings like a cilantro lime vinaigrette for a zesty twist.
  • Flavor Boost: Marinate your chicken in lime juice and spices for extra flavor before cooking.
  • Go Crunchy: For added texture, try adding nuts or seeds like pumpkin seeds.
  • Fresh Herbs: Don’t skimp on the cilantro; it really brightens up the dish!
  • Serve Chilled: Chill your salad in the fridge for 15 minutes before serving for a refreshing taste.
  • Season Wisely: Adjust the spice level by choosing mild or spicy taco seasoning based on your taste.
  • Leftover Love: Use leftovers in wraps or as a topping for baked potatoes the next day!

Common Mistakes and Troubleshooting

Even the best cooks can make a few missteps. Here’s how to avoid common pitfalls:

  • Overdressing: Start with less dressing and add more as needed to avoid soggy salad.
  • Underseasoning: Taste as you go! Adjust seasoning based on your preferences.
  • Texture Issues: Ensure your veggies are fresh and crisp for the best bite.
  • Ingredient Substitutions: Be mindful that some swaps may alter the flavor profile significantly.

Variations to Try

Feeling adventurous? Here are some variations to switch things up:

  • Southwest Chicken Taco Salad: Add avocado, salsa, and jalapeños for a spicy kick.
  • Vegetarian Taco Salad: Substitute chicken with chickpeas or lentils for a protein-packed vegetarian option.
  • BBQ Chicken Taco Salad: Use BBQ sauce instead of ranch for a sweet and smoky flavor.
  • Asian-Inspired Taco Salad: Swap ranch for sesame dressing and add edamame and mandarin oranges.

Storage and Make-Ahead Instructions

This salad is fantastic for meal prep! Here’s how to store it:

  • Refrigeration: Store leftovers in an airtight container in the fridge for up to 3 days.
  • Make-Ahead: Prepare all ingredients and store separately. Mix just before serving for optimal freshness.
  • Freezing: Not recommended, as the texture of fresh veggies will suffer after thawing.

Frequently Asked Questions

Here are some common queries about Chicken Taco Salad:

  • Can I use frozen chicken? Yes, just ensure it’s fully cooked before adding it to the salad.
  • What dressing works best? Ranch is a classic choice, but feel free to use your favorite dressing!
  • Can I make this salad vegan? Absolutely! Use plant-based ranch and replace chicken with beans or tofu.
  • How can I make it spicier? Add diced jalapeños or a splash of hot sauce to the dressing.
  • What sides pair well with this salad? Tortilla chips or a warm corn bread make great complements.
  • Is this salad gluten-free? Yes, just ensure your tortilla strips are gluten-free.
  • How can I make it lower in calories? Use light ranch dressing and skip the cheese.
  • Can I add fruit? Definitely! Mango or pineapple would add a sweet twist.

Nutrition Tips and Dietary Adaptations

This Chicken Taco Salad is not only delicious but can also be tailored to fit various dietary needs:

  • Low-Carb: Skip the tortilla strips and use leafy greens as the base.
  • High-Protein: Add more chicken or incorporate beans and quinoa for an extra protein boost.
  • Dairy-Free: Replace cheese with avocado or nutritional yeast for a cheesy flavor without dairy.

Equipment Recommendations

Here’s what you’ll need to make this salad:

  • Mixing Bowl: A large bowl for mixing all the ingredients together.
  • Whisk: For mixing the dressing smoothly.
  • Knife and Cutting Board: To chop your fresh ingredients.
  • Measuring Cups and Spoons: For precise ingredient measurements.

Serving Suggestions

This Chicken Taco Salad is versatile and can be served in various ways:

  • As a Main Dish: Enjoy it as a hearty main course, especially on warm nights.
  • In a Wrap: Wrap the salad in a tortilla for a delightful lunch option.
  • On a Bed of Rice: Serve it over rice or quinoa for a filling meal.

So there you have it! This Chicken Taco Salad is not just a recipe; it’s a celebration of flavors that you and your family will love. Whether you make it as a quick weeknight dinner or a meal prep staple, you’re sure to impress with this delightful dish. Happy cooking, and remember—cooking is all about enjoying the process and making delicious memories!

Chicken Taco Salad

Prep Time 15 minutes
Cook Time 10 minutes
Total Time 25 minutes
Servings 4 servings
Calories 450
A fresh and flavorful salad combining shredded chicken, vegetables, and crunchy tortilla strips, perfect for a quick meal.

Ingredients

Dressing

  • 1.25 cups ranch
  • 2 tbsp taco seasoning
  • 0.25 teaspoon salt

Salad ingredients

  • 2 cups chicken shredded or chopped
  • 2 cups romaine chopped
  • 2 cups cherry tomatoes halved
  • 1 cup corn
  • 0.25 cup red onion
  • 4 green onions green onions
  • 1.25 cups black beans
  • 0.5 cup cheddar grated
  • 0.25 cup cilantro
  • 1 whole lime
  • 1 cup tortilla strips

Instructions 

  • Whisk ranch, taco seasoning, and salt until smooth.
  • Prepare vegetables and measure ingredients.
  • Combine salad ingredients in a large bowl and toss.
  • Add dressing and lime juice, then mix well.
  • Fold in tortilla strips, garnish, and serve immediately.

Notes

For extra flavor, chill the salad before serving.
Calories: 450kcal
Cost: $12
Course: Salad
Cuisine: Mexican
Keyword: Chicken

Are you craving a dish that’s quick, satisfying, and bursting with flavor? This Chicken Caesar Pasta Salad is the ultimate solution for busy weeknights! Combining tender chicken, fresh veggies, and creamy Caesar dressing, this recipe will become a staple in your dinner rotation. Plus, it’s easy to customize so you can make it your own. Let’s dive into this delicious journey!

Why You’ll Love This Recipe

Choosing this Chicken Caesar Pasta Salad means more than just a meal; it’s about enjoying the experience of cooking and eating! Here are some reasons why this recipe stands out:

  • Quick Preparation: Whip up this dish in just 30 minutes, making it perfect for those hectic evenings when time is not on your side.
  • Flavorful Ingredients: The combination of chicken, fresh veggies, and rich Caesar dressing creates a flavor explosion that is both satisfying and delightful.
  • Versatile Dish: Whether you’re serving it as a main course or a side dish, this pasta salad fits seamlessly into any meal.
  • Healthy and Balanced: Packed with protein from chicken and fiber from fresh vegetables, this salad is both nourishing and satisfying.
  • Make-Ahead Friendly: Perfect for meal prep! You can prepare it ahead of time and store it for a quick grab-and-go meal.

Ingredients You’ll Need

To create the best Chicken Caesar Pasta Salad, gather the following ingredients:

  • Rotini pasta (8 ounces): Its spiral shape holds onto the dressing perfectly, making every bite flavorful.
  • Cooked chicken breast (2 cups, diced or shredded): Adds lean protein and a satisfying meaty texture.
  • Romaine lettuce (1 cup, chopped): Brings crispness and freshness, essential for that classic Caesar crunch.
  • Cherry tomatoes (1/2 cup, halved): Adds a burst of sweetness and color.
  • Cucumber (1/2 cup, diced): Provides a refreshing crunch.
  • Red onion (1/4 cup, thinly sliced): For a mild yet zesty flavor.
  • Grated Parmesan cheese (1/2 cup): Enhances the creaminess and savory notes.
  • Caesar dressing (1/2 cup, store-bought or homemade): The key to tying all flavors together.
  • Salt and pepper to taste: Essential for seasoning.
  • Optional croutons for topping: For an extra crunch!

How to Make Chicken Caesar Pasta Salad

Ready to get started? Follow these simple steps for a delicious chicken caesar pasta salad:

  1. Fill a large pot with water and bring it to a rolling boil over high heat. Add a generous pinch of salt to enhance the pasta’s flavor.
  2. Add the rotini pasta to the boiling water. Stir occasionally to prevent sticking and cook according to package instructions (8-10 minutes) until al dente.
  3. Drain the pasta in a colander and rinse under cold water to stop the cooking process, ensuring it doesn’t become mushy. Let it sit to drain completely.
  4. If using raw chicken, grill, bake, or sauté it until the internal temperature reaches 165°F (75°C). Season with salt and pepper to taste.
  5. Let the cooked chicken rest for a few minutes to retain juices, then dice or shred it into bite-sized pieces.
  6. Chop the romaine lettuce into bite-sized pieces and wash thoroughly to maintain crispness.
  7. Slice cherry tomatoes in half to evenly distribute their sweetness.
  8. Peel, if desired, and slice cucumber lengthwise in half, remove seeds, and dice into small pieces.
  9. Thinly slice the red onion. Soak in cold water for 10 minutes to mellow the flavor if preferred.
  10. In a large mixing bowl, combine the cooled rotini pasta, prepared chicken, romaine lettuce, cherry tomatoes, cucumber, and red onion, ensuring even distribution.
  11. Sprinkle the grated Parmesan cheese evenly over the salad.
  12. Pour the Caesar dressing over the salad and toss gently until all ingredients are well coated.
  13. Adjust seasoning with salt and pepper as needed.
  14. Sprinkle croutons on top just before serving for added crunch.
  15. Cover the salad and chill in the refrigerator for about 30 minutes to allow flavors to meld.
  16. Toss gently once more before serving and enjoy your flavorful Chicken Caesar Pasta Salad!

Expert Tips for the Best Caesar Pasta Salad

Juicy Chicken Caesar Pasta Salad featuring colorful ingredients in a bowl.

Here are some expert tips to elevate your chicken caesar pasta experience:

  • Cook pasta al dente: This ensures the pasta holds up well in the salad, preventing it from becoming mushy.
  • Use cold ingredients: Chilling your salad helps the flavors meld beautifully.
  • Make your dressing: Homemade Caesar dressing can add a personal touch and freshness.
  • Add protein options: Consider adding chickpeas or bacon for extra texture and flavor.
  • Experiment with herbs: Fresh herbs like basil or parsley can brighten the dish significantly.
  • Grate your cheese: Freshly grated Parmesan melts better into the salad compared to pre-grated versions.
  • Keep ingredients separate: If serving later, keep croutons and dressing separate until ready to serve to maintain crunch.
  • Customize your add-ins: Feel free to add other veggies like bell peppers or even avocado for creaminess.

Common Mistakes and Troubleshooting

Even the best cooks can run into a few hiccups. Here’s how to avoid common mistakes:

  • Overcooking pasta: Always follow package time and taste to achieve an al dente texture.
  • Using too much dressing: Start with less and add more as needed to avoid a soggy salad.
  • Skipping the chilling step: This step enhances flavor; don’t skip it if you want the best taste.
  • Not seasoning enough: Taste as you go to ensure the right balance of flavors.

Variations to Try

Want to switch things up? Here are some delicious variations you can try:

  • Vegan Version: Substitute grilled tofu for chicken and use a vegan Caesar dressing.
  • Pasta Swap: Try using fusilli or penne pasta for a different bite and texture.
  • Grilled Veggies: Add grilled zucchini or bell peppers for a smoky twist.
  • Spicy Kick: Incorporate jalapeños or a spicy dressing for a heat boost.

Storage and Make-Ahead Instructions

This salad is perfect for meal prep! Here’s how to store it:

  • Refrigeration: Store leftovers in an airtight container in the fridge for up to 3 days.
  • Make-Ahead: Prepare the salad up to a day in advance, but keep the dressing and croutons separate until serving to maintain freshness.
  • Freezing: This dish does not freeze well due to the pasta and dressing; best enjoyed fresh!

Comprehensive FAQ

Got questions? We’ve got answers! Here are some FAQs regarding the Chicken Caesar Pasta Salad:

  • Can I use rotisserie chicken? Absolutely! Rotisserie chicken is a great time-saver and adds delicious flavor.
  • What dressing is best? While store-bought is convenient, homemade Caesar dressing can elevate the dish.
  • Can I make this salad gluten-free? Yes! Simply substitute the rotini pasta with a gluten-free pasta.
  • How can I make this salad spicier? Add red pepper flakes or spicy mustard to the dressing for a kick.
  • Is it okay to use other vegetables? Yes! Feel free to add your favorite veggies like bell peppers or artichokes.
  • How long can I keep leftovers? Leftovers can be stored in the fridge for up to 3 days.
  • Can I serve it warm? While it’s best served cold, you can enjoy it warm right after preparation.
  • How do I add more flavor? Consider marinating the chicken in a little Caesar dressing before cooking for extra flavor.

Nutrition Tips and Dietary Adaptations

This Chicken Caesar Pasta Salad can be adapted to fit various dietary needs:

  • Low-Carb Option: Substitute pasta with zucchini noodles for a lighter dish.
  • Dairy-Free: Use a dairy-free cheese alternative and dressing for a creamy flavor without the dairy.
  • High-Protein: Add chickpeas or lentils to boost protein content.

Equipment Recommendations

Ensure you have the right tools to make this salad a breeze:

  • Large Pot: For boiling the pasta.
  • Colander: To drain the pasta effectively.
  • Mixing Bowl: A large bowl for combining all the ingredients.
  • Sharp Knife: For chopping veggies and chicken easily.

Serving Suggestions

Here are some ideas to enhance your serving experience:

  • Pair with Bread: Serve with garlic bread or a baguette for a complete meal.
  • Garnish: Top with extra Parmesan or fresh herbs for an attractive presentation.
  • Wine Pairing: Enjoy with a chilled white wine like Sauvignon Blanc for a refreshing complement.

In conclusion, this Chicken Caesar Pasta Salad is more than just a recipe; it’s a gateway to delightful meals that bring joy and satisfaction to your table. Whether for a quick weeknight dinner or a gathering with friends, you can feel confident serving this delicious dish. So roll up your sleeves, grab your ingredients, and let’s make cooking a joyful experience!

Chicken Caesar Pasta Salad Recipe

Prep Time 15 minutes
Cook Time 10 minutes
Total Time 25 minutes
Servings 4 servings
Calories 450
A delicious and easy-to-make Chicken Caesar Pasta Salad perfect for a quick lunch or dinner, combining fresh vegetables, tender chicken, and creamy Caesar dressing.

Ingredients

Pasta

  • 8 ounces rotini pasta
  • 2 cups cooked chicken breast, diced or shredded
  • 1 cup romaine lettuce, chopped
  • 1/2 cup cherry tomatoes, halved
  • 1/2 cup cucumber, diced
  • 1/4 cup red onion, thinly sliced
  • 1/2 cup grated Parmesan cheese
  • 1/2 cup Caesar dressing (store-bought or homemade)
  • to taste Salt and pepper
  • Optional croutons for topping

Instructions 

  • Cook the rotini pasta in boiling salted water for 8-10 minutes until al dente, then drain and rinse with cold water.
  • If using raw chicken, cook until internal temperature reaches 165°F (75°C), then dice or shred and let rest.
  • In a large bowl, combine cooled pasta, chicken, lettuce, tomatoes, cucumber, and red onion.
  • Sprinkle Parmesan cheese over the mixture, pour Caesar dressing, and toss gently to coat evenly.
  • Season with salt and pepper as needed, top with croutons, and chill for 30 minutes before serving.

Notes

For a milder onion flavor, soak red onion slices in cold water for 10 minutes before draining.
Calories: 450kcal
Cost: $15
Course: Salad
Cuisine: American
Keyword: Chicken, Pasta

Welcome to Your New Favorite Cucumber Avocado Salad!

Are you ready to elevate your salad game? This refreshing cucumber avocado salad is not just a side dish; it’s a burst of freshness that brightens up any meal. Combining crisp cucumbers, creamy avocados, and juicy cherry tomatoes, this salad is perfect for any occasion, whether you’re hosting a summer barbecue or simply enjoying a light lunch. Let’s dive into the details that make this dish a must-try!

Why You’ll Love This Recipe

Here are five reasons to love this avocado cucumber salad:

  • Quick and Easy: This salad can be whipped up in under 15 minutes, making it an ideal choice for busy weeknights or last-minute gatherings.
  • Nutritious Ingredients: Packed with vitamins and healthy fats, this salad supports your wellness goals without sacrificing flavor.
  • Customizable: Feel free to tweak ingredients based on your preferences or what you have on hand—this salad is versatile!
  • Vibrant and Fresh: The colors and textures in this salad are visually appealing and create a delightful crunch.
  • Perfect for Meal Prep: Make a big batch at the beginning of the week to enjoy throughout; it keeps well in the fridge with proper storage.

Ingredients for Your Cucumber Avocado Salad

Here’s what you’ll need:

  • 2 cups cucumbers: Thinly sliced for optimal crunch. Choose fresh, firm cucumbers for the best flavor.
  • 1 large avocado: Diced. Make sure it’s ripe but firm to avoid mushiness in the salad.
  • 1 cup cherry tomatoes: Halved for sweetness and color.
  • 1/4 cup red onion: Thinly sliced. Soaking in cold water can mellow its flavor if desired.
  • 2 tbsp freshly squeezed lemon juice: For brightness and to help prevent browning of the avocado.
  • 2 tbsp extra virgin olive oil: Adds richness and depth of flavor.
  • Salt and pepper to taste: Essential for enhancing all the flavors.

Step-by-Step Instructions

A refreshing salad featuring sliced cucumbers, diced avocado, and halved cherry tomatoes.

Let’s make this delicious salad!

  • Wash the cucumbers and cherry tomatoes thoroughly.
  • Slice the cucumbers into thin rounds and halve the cherry tomatoes.
  • Cut the avocado in half, remove the pit, and scoop out the flesh gently. Dice into bite-sized pieces.
  • Thinly slice the red onion. If you prefer a milder flavor, soak it in cold water for a few minutes before adding it to the salad.
  • In a large mixing bowl, combine cucumbers, avocados, tomatoes, and onions.
  • Drizzle with lemon juice and olive oil, and season with salt and pepper.
  • Gently toss until all ingredients are evenly coated.
  • Serve immediately or chill for a brief period before serving.

Pro Tips for the Perfect Salad

Here are some expert insights to elevate your salad-making:

  • Choose the Right Avocado: Look for avocados that yield slightly to pressure but aren’t overly soft.
  • Maximize Freshness: Prepare the salad just before serving to maintain the best texture and flavor.
  • Experiment with Seasonings: Add herbs like dill or cilantro for an extra burst of flavor.
  • Consider Adding Protein: For a more filling dish, toss in some grilled chicken or chickpeas.
  • Make It Colorful: Incorporate other colorful vegetables like bell peppers or carrots for added nutrition.
  • Keep it Crisp: To avoid sogginess, store cucumbers and avocados separately until ready to mix.
  • Use a Good Olive Oil: A high-quality extra virgin olive oil will enhance the flavors of the salad.
  • Adjust to Taste: Don’t be afraid to tweak the lemon juice and seasoning to suit your palate.

Common Mistakes and Troubleshooting

Here are some pitfalls to avoid:

  • Overripe Avocados: Using overly ripe avocados can lead to a mushy salad. Make sure they’re just ripe enough.
  • Too Much Dressing: Avoid drowning the salad in dressing. Start with a little and add more if necessary.
  • Skipping the Chilling: If you have time, chilling the salad briefly allows the flavors to meld beautifully.

Variations to Try

Here are a few fun twists on the classic recipe:

  • Mexican Flair: Add black beans, corn, and a sprinkle of cumin for a southwestern version.
  • Mediterranean Style: Incorporate feta cheese, olives, and a splash of red wine vinegar.
  • Asian Influence: Toss in sesame oil, shredded carrots, and a hint of ginger for an Asian-inspired salad.
  • Fruit Fusion: Mix in diced mango or pineapple for a tropical twist.

Storage and Make-Ahead Instructions

To keep your salad fresh:

  • Refrigeration: Store in an airtight container. It’s best consumed within 1-2 days for optimal freshness.
  • Prepping Ahead: You can prepare the individual ingredients a day in advance and mix them just before serving.

Frequently Asked Questions

Here are some common questions about this salad:

  • Can I use other types of vinegar instead of lemon juice? Yes, lime juice or apple cider vinegar works well too!
  • What’s the best way to cut an avocado? Cut it in half lengthwise, twist to separate, remove the pit with a knife, and scoop out the flesh with a spoon.
  • How long does this salad last? It’s best enjoyed within 1-2 days, but the avocado may brown if stored too long.
  • Can I add different vegetables? Absolutely! Feel free to mix in your favorite veggies.
  • Is this recipe gluten-free? Yes, all the ingredients are naturally gluten-free.
  • How can I make it vegan? This recipe is already vegan-friendly as it contains no animal products.
  • Can I make this salad spicy? Yes! Add some diced jalapeños or a sprinkle of chili flakes for heat.
  • What do I serve with this salad? It pairs wonderfully with grilled meats, fish, or as a light stand-alone dish.

Nutritional Tips and Dietary Adaptations

This salad is not only delicious but also nutritious. Here’s how to make it even healthier:

  • Boost Fiber: Incorporate some quinoa or bulgur for added fiber and texture.
  • Low-Calorie Option: Reduce the amount of olive oil to cut calories without sacrificing flavor.
  • Heart-Healthy Fats: Avocado provides healthy fats, which can support heart health.

Essential Equipment for Salad-Making

Here’s what you’ll need:

  • Cutting Board: A sturdy surface for chopping your ingredients.
  • Sharp Knife: For clean cuts, especially with avocados and cucumbers.
  • Mixing Bowl: A large bowl to easily combine all your ingredients.
  • Measuring Spoons: For accurate measurement of dressings and seasonings.

Serving Suggestions

Bring this salad to life with these serving ideas:

  • Serve it alongside grilled chicken or fish for a complete meal.
  • Use as a filling for wraps or sandwiches.
  • Top with toasted nuts or seeds for an added crunch.

Conclusion

This cucumber avocado salad is more than just a dish; it’s a celebration of fresh ingredients and vibrant flavors. With its simplicity and versatility, it’s bound to become a staple in your kitchen. So gather your ingredients, invite friends over, and enjoy this delightful salad that’s as easy to make as it is enjoyable to eat. Happy cooking!

Refreshing Cucumber Avocado Salad

Prep Time 10 minutes
Total Time 10 minutes
Servings 4 servings
Calories 150
A light and refreshing salad combining crisp cucumbers, creamy avocados, and juicy cherry tomatoes, perfect for a quick healthy snack or side dish.

Ingredients

Vegetables

  • 2 cups cucumbers, thinly sliced
  • 1 large avocado, diced
  • 1 cup cherry tomatoes, halved
  • 0.25 cup red onion, thinly sliced (soaked in cold water if desired)
  • 2 tbsp freshly squeezed lemon juice
  • 2 tbsp extra virgin olive oil
  • to taste Salt and pepper

Instructions 

  • Wash and slice cucumbers, halve cherry tomatoes, and dice avocado.
  • Thinly slice red onion and soak if desired.
  • Combine all vegetables in a large bowl.
  • Drizzle with lemon juice and olive oil, then season with salt and pepper.
  • Gently toss to coat evenly and serve immediately or chill briefly.

Notes

For a milder onion flavor, soak sliced onions in cold water before adding.
Calories: 150kcal
Cost: $10
Course: Salad
Keyword: Avocado, Cucumber, Tomato