Author

Steven

Browsing

Welcome to Your New Favorite Breakfast!

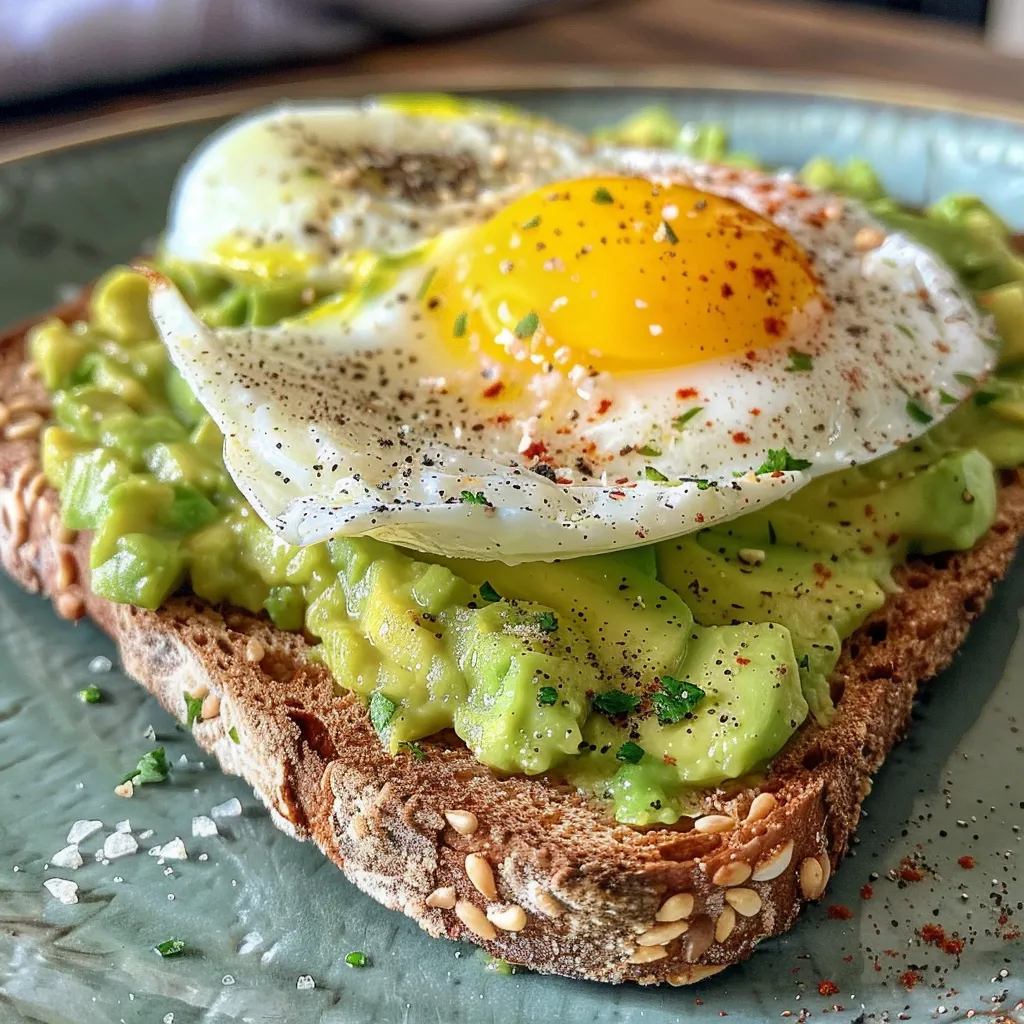
When it comes to quick, delicious meals, few can rival the simplicity and satisfaction of avocado toast with egg. This dish is not only a feast for the eyes but also a powerhouse of nutrition that fills you up and fuels your day. Whether you’re looking for a hearty breakfast, a light lunch, or a satisfying snack, you’ll find that this recipe is versatile enough to fit any occasion. In this guide, we’ll explore everything from the benefits of this delightful dish to pro tips that will elevate your cooking game. Let’s dive in!

Why You’ll Love This Recipe

This avocado toast with egg recipe isn’t just a meal; it’s a celebration of flavors and nutrients. Here are five reasons why you’ll love making it:

  • Quick and Easy: Ready in under 10 minutes, making it perfect for busy mornings.
  • Highly Customizable: Adapt it to your taste with a variety of toppings and spices.
  • Nutrient-Rich: Packed with healthy fats from avocados and protein from eggs, it’s a balanced meal.
  • Full of Flavor: The creamy avocado paired with a perfectly cooked egg creates an irresistible combination.
  • Visually Appealing: A colorful dish that’s as fun to look at as it is to eat!

Ingredient Breakdown

To make the best avocado toast with egg, you’ll need just a few simple ingredients. Here’s a detailed breakdown, including some substitutions:

  • 1 slice whole-grain bread: Whole-grain adds fiber and texture. Feel free to substitute with gluten-free bread or sourdough for a different flavor.
  • ½ ripe avocado: Choose avocados that yield slightly to pressure. If unavailable, try using guacamole for a quick fix.
  • 1 large egg: Eggs can be fried, scrambled, or poached depending on your preference. For a vegan option, consider using tofu or chickpea scramble.
  • ½ teaspoon lemon juice (optional): This adds a zesty freshness. Lime juice works too!
  • Salt and freshly ground black pepper, to taste: Essential for elevating flavors.
  • Pinch of red pepper flakes or hot sauce (optional): For those who enjoy a little heat!

How to Make Avocado Toast with Eggs

Thick slice of toasted bread with creamy avocado and a scrambled egg, presented in natural light.

Let’s break down the steps to create this delicious dish. It’s as simple as assembling a few ingredients!

Steps:

  • Mash the avocado: In a bowl, mash the ripe avocado with lemon juice, salt, and pepper to taste.
  • Cook the egg: Prepare your egg to your liking—fried, scrambled, or poached. For poaching, bring water to a gentle simmer and crack the egg into the water, cooking until whites are set but yolk is still runny.
  • Toast the bread: While the egg is cooking, toast your bread to your desired crispness.
  • Assemble: Spread the mashed avocado generously on the toast, top with the cooked egg, and sprinkle with red pepper flakes if desired.
  • Enjoy!: Serve immediately for the best flavor and texture.

Pro Tips for Perfect Avocado Toast

Ready to elevate your avocado toast game? Here are some expert tips:

  • Use riper avocados: Riper avocados mash easier and give a creamier texture.
  • Add toppings for flair: Experiment with toppings like cherry tomatoes, radishes, or microgreens for added freshness.
  • Don’t skip the seasoning: A sprinkle of salt and pepper is essential to bring the flavors together.
  • Toast just before serving: For the best texture, toast the bread right before assembling your dish to prevent sogginess.
  • Make it a meal: Add extras like smoked salmon, cheese, or sautéed spinach to make it more filling.
  • Use quality ingredients: Opt for organic eggs and fresh avocados for the best flavor and nutrition.
  • Try different breads: Experiment with different types of bread, such as rye, ciabatta, or even bagels, to discover your favorite.
  • Perfect your egg technique: If poaching, use a splash of vinegar in the water to help the egg white set quickly.
  • Stay creative: Don’t hesitate to mix in spices or different herbs to customize your avocado mash!
  • Serve immediately: For optimal taste, enjoy your avocado toast fresh off the grill!

Common Mistakes and Troubleshooting

Even the best cooks make mistakes! Here are some common pitfalls and how to avoid them:

  • Soggy toast: Avoid this by toasting just before serving and ensuring your avocado isn’t too watery.
  • Overcooked eggs: Keep an eye on cooking times, especially for poached eggs, to achieve that perfect runny yolk.
  • Unripe avocados: Choose avocados that yield to gentle pressure. If they’re too firm, they won’t mash well.
  • Not enough seasoning: Don’t forget to season your avocado and egg generously for the best flavor.
  • Skipping the lemon juice: This not only adds flavor but also prevents the avocado from browning quickly.

Variations on Avocado Toast with Egg

Feeling adventurous? Here are four delicious variations to try:

  • Mexican Style: Top with sliced jalapeños, fresh cilantro, and a drizzle of lime juice.
  • Mediterranean Twist: Add feta cheese, chopped olives, and sun-dried tomatoes for a vibrant flavor profile.
  • Breakfast Bowl: Serve your avocado toast on a bed of mixed greens, topped with a poached egg and a sprinkle of seeds.
  • Sweet and Savory: Drizzle honey on top of the avocado and sprinkle with walnuts for a unique flavor contrast.

Storage and Make-Ahead Instructions

If you’re planning to make this dish ahead of time, here’s how to do it:

  • Avocado storage: To keep cut avocado fresh, store it with the pit in and squeeze lemon juice on the exposed flesh.
  • Egg preparation: Cook eggs just before serving for the best texture. If you must prepare them in advance, store them in an airtight container in the fridge.
  • Toast storage: Toasted bread can be stored in an airtight container for a few hours, but for the best results, toast it right before assembly.

Frequently Asked Questions

Here are some common questions about making avocado toast with eggs:

  • Can I use frozen bread?: Yes, frozen bread works well. Just toast it directly from frozen.
  • What if my avocado is too hard?: If it’s too firm, wrap it in a paper bag at room temperature for a day or two to ripen.
  • Is this recipe vegan?: It can be made vegan by omitting the egg and replacing it with a plant-based alternative like tofu.
  • How can I make this dish more filling?: Add protein sources like beans, chicken, or cheese for a heartier meal.
  • Can I prepare this in advance?: While the toast is best fresh, you can prepare the avocado mash ahead of time. Just keep it covered in the fridge.
  • What toppings are best?: The sky’s the limit! Try everything from fresh herbs to smoked salmon.
  • How do I know when my egg is cooked?: For poached eggs, look for a set white and a runny yolk for the perfect consistency.
  • What’s the best way to mash avocado?: Use a fork for a rustic texture. For creamier results, a food processor works well!

Nutrition Tips and Dietary Adaptations

To make this meal even healthier, consider these alternatives:

  • Whole grain bread: Provides more fiber than white bread.
  • Plant-based eggs: For vegan diets, consider using products like Just Egg or chickpea flour scrambles.
  • Extra veggies: Add spinach, arugula, or bell peppers for added nutrients.
  • Healthy fats: Consider adding nuts or seeds for an extra boost of healthy fats.

Equipment Recommendations

Here’s what you’ll need to make this recipe:

  • Non-stick skillet: Perfect for cooking eggs without sticking.
  • Toaster or toaster oven: Essential for achieving the perfect toast.
  • Mixing bowl: For mashing the avocado.
  • Fork or potato masher: To mash the avocado to your desired consistency.

Serving Suggestions

Pair your avocado toast with any of these side options for a complete meal:

  • Fresh fruit: A side of berries or a banana adds natural sweetness.
  • Yogurt: A bowl of Greek yogurt provides extra protein.
  • Herbal tea or coffee: Enjoy your meal with a hot beverage of your choice.
  • Green salad: A light side salad can complement the toast beautifully.

Conclusion

There you have it! A complete guide to making the best avocado toast with egg. With its delightful flavors, nutritious ingredients, and endless customization options, this dish is bound to become a staple in your kitchen. Remember, cooking is all about enjoying the process and exploring what flavors you love. So grab your ingredients, get creative, and enjoy every bite of your delicious avocado toast!

🥑 Simple Avocado Toast with Egg – Easy, Healthy, and Delicious

Prep Time 5 minutes
Cook Time 5 minutes
Total Time 10 minutes
Servings 1 serving
Calories 350
A quick and nutritious breakfast featuring creamy avocado and a perfectly cooked egg on toasted whole-grain bread.

Ingredients

Bread

  • 1 slice whole-grain bread (toasted)

Avocado

  • 0.5 ripe avocado (halved and mashed)

Egg

  • 1 large egg (fried, scrambled, or poached)

Lemon juice

  • 0.5 teaspoon lemon juice (optional, for freshness)

Salt and pepper

  • to taste salt and freshly ground black pepper

Red pepper flakes or hot sauce

  • pinch red pepper flakes or hot sauce (optional, for spice)

Instructions 

  • Mash the ripe avocado for a creamy texture.
  • Toast the bread slices until golden.
  • Spread mashed avocado on the toasted bread.
  • Cook the egg to your preference and place it on top of the avocado.
  • Add lemon juice, salt, pepper, and optional hot sauce for flavor.

Notes

For extra crunch, top with seeds or microgreens. To make it more filling, add smoked salmon or cheese.
Calories: 350kcal
Cost: $5
Course: Breakfast
Cuisine: American
Keyword: Avocado, Egg, Toast

Kickstart Your Day with a Wholesome Spinach & Feta Omelette

If you’re looking for a quick, delicious, and nutritious way to start your mornings, look no further than this Fluffy Spinach & Feta Omelette. This recipe not only brings together vibrant flavors but also packs a protein punch that will keep you energized throughout the day. In just a matter of minutes, you can enjoy a meal that’s perfect for busy mornings or a light lunch. Let’s dive into the delightful world of omelettes and learn how to create a dish that’s simple yet satisfying!

Why You’ll Love This Recipe

This Spinach & Feta Omelette isn’t just easy to make; it also offers a range of benefits that elevate your breakfast game. Here’s why you’ll adore this dish:

  • Quick & Easy: Perfect for busy mornings, this omelette can be whipped up in under 15 minutes.
  • Nutritious Powerhouse: Packed with protein from eggs and vitamins from fresh spinach, it’s a healthy choice for any meal.
  • Flavorful Combination: The salty tang of feta cheese complements the earthy spinach, creating a delightful balance.
  • Customizable: Easily adapt this recipe to suit your taste by adding your favorite herbs or vegetables.
  • Minimal Cleanup: With simple ingredients and a quick cooking process, cleanup is a breeze!

Ingredients Breakdown

To make this delicious Spinach Feta Omelette, gather the following ingredients:

  • 3 large Eggs: The foundation for your omelette, providing essential protein and a rich texture.
  • 1 cup Fresh Spinach: A nutrient powerhouse that adds vibrant green and health benefits.
  • 2-3 tablespoons Feta Cheese: Tangy and creamy, this cheese elevates your dish with its unique flavor.
  • Salt & Pepper: To taste, these seasonings enhance the overall flavor of the omelette.
  • 1 tablespoon Butter or Oil: Essential for richness and preventing sticking, use a non-stick pan for best results.

Feel free to switch out ingredients based on your preferences. For example, if you’re looking for a dairy-free option, you can substitute nutritional yeast for feta or skip it altogether.

Step-by-Step Instructions

A beautifully plated spinach and feta omelette, showcasing its fluffy texture.

Making a spinach and feta omelette is straightforward. Follow these easy steps for perfect results:

  1. Prep the Ingredients: Wash the spinach thoroughly and pat it dry to remove excess water. Chop it roughly.
  2. Beat the Eggs: In a bowl, crack the eggs and whisk them until fully blended. Season with salt and pepper.
  3. Heat the Pan: In a non-stick skillet, heat butter or oil over medium-low heat. This ensures a gentle cooking process.
  4. Add Spinach: Once the pan is hot, add the spinach and sauté for 1-2 minutes until wilted.
  5. Pour in Eggs: Pour the beaten eggs over the spinach, tilting the pan to spread them evenly.
  6. Add Feta: Crumble the feta cheese over the top of the eggs. Allow it to cook for 2-3 minutes until the edges start to set.
  7. Fold & Serve: Carefully fold the omelette in half and cook for an additional minute. Slide it onto a plate and enjoy!

Pro Tips for Perfect Omelettes

To ensure your omelette turns out perfectly every time, keep these expert insights in mind:

  • Use Fresh Ingredients: Fresh spinach and quality feta will significantly enhance the flavor.
  • Control the Heat: Cooking on medium-low prevents the eggs from browning too quickly, ensuring a tender omelette.
  • Don’t Overcrowd: Avoid adding too many ingredients, which can make it difficult to fold the omelette.
  • Experiment with Herbs: Fresh herbs like chives, parsley, or dill can add an extra layer of flavor.
  • Serve Immediately: Omelettes are best enjoyed fresh off the stove for optimal texture.

Common Mistakes to Avoid

Every cook makes mistakes! Here are some frequent pitfalls and how to avoid them:

  • Overcooking: Keep an eye on your omelette; overcooking leads to a rubbery texture.
  • Too Much Liquid: Excess water from vegetables can make your omelette soggy. Always pat dry ingredients like spinach.
  • Skillet Choice: A quality non-stick skillet is crucial for easy flipping and cooking.
  • Filling Too Much: Stick to a light filling for the best folding and texture.

Variations to Try

Feel free to get creative! Here are some delicious variations of the Spinach Feta Omelette to try:

  • Italian Style: Add sun-dried tomatoes and basil for a Mediterranean twist.
  • Veggie Deluxe: Incorporate diced bell peppers, mushrooms, or onions for added nutrition.
  • Herbed Delight: Mix in fresh herbs like dill or parsley to enhance the flavor profile.
  • Avocado Addition: Top your finished omelette with sliced avocado for a creamy texture and healthy fats.

Storage and Make-Ahead Instructions

This omelette is best enjoyed fresh, but you can prepare some components ahead of time:

  • Prepped Ingredients: Chop spinach and crumbled feta in advance, storing them in the fridge for up to 3 days.
  • Cooked Omelette: If you have leftovers, store them in an airtight container in the fridge for up to 2 days. Reheat gently on the stovetop.

Frequently Asked Questions

Here are some common questions about making a Spinach Feta Omelette:

  • Can I use frozen spinach? Yes, but make sure to thaw and drain it well to avoid excess water.
  • What skillet is best for omelettes? A non-stick skillet is ideal for easy flipping and cooking.
  • Can I add meat to my omelette? Absolutely! Ham, bacon, or cooked chicken can add a nice flavor and protein boost.
  • What’s the best way to fold an omelette? Gently lift one side with a spatula and fold it over the filling to create a half-moon shape.
  • Can I make this omelette in advance? It’s best made fresh, but prepped ingredients can be stored ahead of time.
  • How do I prevent my omelette from sticking? Ensure your skillet is well-heated and use enough butter or oil before adding the eggs.
  • How many eggs should I use for a thicker omelette? For a thicker omelette, use 4 eggs instead of 3.
  • Is this recipe gluten-free? Yes, this omelette is naturally gluten-free!

Nutrition Tips and Dietary Adaptations

This Spinach & Feta Omelette is packed with nutrients. Here are some tips for dietary adaptations:

  • Low-Calorie Option: Use egg whites instead of whole eggs for a lighter version.
  • Vegan Alternative: Substitute eggs with chickpea flour mixed with water to create a vegan omelette.
  • Increase Fiber: Add diced tomatoes or mushrooms for extra fiber and nutrients.

Equipment Recommendations

Here’s what you’ll need to make the perfect omelette:

  • Non-Stick Skillet: Essential for easy cooking and flipping.
  • Spatula: A flexible spatula is ideal for folding your omelette.
  • Mixing Bowl: Use a medium bowl for whisking eggs thoroughly.

Serving Suggestions

Wondering how to serve your omelette? Here are some ideas:

  • With Toast: Pair your omelette with whole-grain toast for a complete meal.
  • Fresh Salad: Serve alongside a light salad for a nutritious breakfast or lunch.
  • Hot Sauce: Add a splash of your favorite hot sauce for a spicy kick!

Enjoy your culinary journey with this Omelette Recipe, and remember that cooking is about confidence and creativity. Don’t hesitate to experiment with flavors and ingredients that excite you. Happy cooking!

Fluffy Spinach & Feta Omelette for Your Busy Mornings

Prep Time 5 minutes
Cook Time 5 minutes
Total Time 10 minutes
Servings 1 serving
Calories 250
Start your day with a quick, nutritious, and delicious omelette packed with spinach and feta, perfect for busy mornings.

Ingredients

Eggs

  • 3 large Eggs (The foundation for your omelette, bringing in essential protein.)

Fresh Spinach

  • 1 cup Fresh Spinach (A nutrient powerhouse that adds vibrant green.)

Feta Cheese

  • 2-3 tablespoons Feta Cheese (Tangy and creamy, this cheese elevates your dish.)

Salt

  • to taste Salt (Key for enhancing flavors.)

Pepper

  • to taste Pepper (Key for enhancing flavors.)

Butter or Oil

  • 1 tablespoon Butter or Oil (Provides richness and prevents sticking.)

Instructions 

  • Beat the eggs in a bowl until well combined.
  • Chop the spinach and crumble the feta cheese.
  • Heat butter or oil in a non-stick skillet over medium heat.
  • Pour the beaten eggs into the skillet, then add spinach and feta on top.
  • Cook until eggs are set, then fold and serve hot.

Notes

For extra flavor, sprinkle with additional salt and pepper before serving.
Calories: 250kcal
Cost: $8
Course: Breakfast
Cuisine: International
Keyword: Omelette

Kickstart Your Day with a High Protein Breakfast Burrito

Are you ready to transform your mornings with a delicious and nutritious meal? These High Protein Breakfast Burritos are the perfect way to start your day, packed with savory flavors, fresh veggies, and creamy cheese. Not only are they incredibly satisfying, but they also offer a wealth of health benefits, making them a fantastic choice for anyone looking to fuel their body right! In this guide, we’ll explore why this recipe stands out, provide step-by-step instructions, and share tips on how to customize your burrito to fit your tastes.

Why You’ll Love This Recipe

  • Protein-Packed Goodness: Each burrito contains a whopping 35 grams of protein, perfect for keeping you full and energized throughout the morning.
  • Easy to Make: With simple ingredients and straightforward instructions, you can whip up these burritos in no time, even on busy mornings.
  • Meal Prep Friendly: These burritos freeze beautifully, making them an ideal option for meal prep. Just grab one from the freezer, and you’re ready to go!
  • Customizable: Feel free to get creative! Add your favorite veggies, swap out the protein, or try different cheeses to make this recipe your own.
  • Deliciously Satisfying: With the combination of creamy cheese, hearty sausage, and fresh peppers, every bite is a burst of flavor that will make your taste buds dance!

Ingredients and Substitutions

Here’s what you’ll need to create your own High Protein Breakfast Burritos, along with some helpful substitutions:

  • ½ lb ground breakfast sausage: You can substitute with turkey sausage or plant-based sausage for a lighter or vegetarian option.
  • 1 poblano pepper, seeded and diced: Bell peppers can be used instead for a milder flavor.
  • 12 large eggs, whisked: Egg whites or a plant-based egg substitute works as a lower-calorie alternative.
  • 1 tsp kosher salt: Adjust to taste.
  • ¼ tsp black pepper: Freshly ground black pepper enhances the flavor.
  • 2 oz cream cheese, cubed: Swap with Greek yogurt or dairy-free cream cheese for a lighter option.
  • 6 large burrito-sized tortillas: Siete grain-free or flour tortillas are great, but feel free to use whole wheat or corn tortillas.
  • 6-8 oz shredded cheddar cheese: Try pepper jack for a spicy kick, or a dairy-free cheese alternative for a vegan option.
  • 1 (15 oz) can black beans, drained and rinsed: Any canned beans work, such as pinto or kidney beans.
  • Optional toppings: Customize with green onions, cilantro, chipotle mayo, pico de gallo, or avocado for added flavor and nutrition!

Step-by-Step Instructions

A mouthwatering burrito filled with eggs, sausage, and cheese, showing textures and colors of the ingredients.

Let’s dive into creating your own burritos! Follow these easy steps to make a delicious batch:

  1. Preheat your oven to 425°F if you’re planning to bake and eat a burrito immediately rather than freezing the batch.
  2. Cook the sausage: Heat a large skillet over medium-high heat and add the ground sausage. Break it into small pieces with your spatula and cook for 5-7 minutes until completely browned with no pink remaining. Transfer to a paper towel-lined plate, leaving about 1 tablespoon of fat in the pan.
  3. Sauté the peppers: Reduce heat to medium and add the diced poblano peppers to the same skillet. Cook for 2-3 minutes, stirring occasionally, until they soften and become fragrant without turning mushy.
  4. Scramble the eggs: Lower heat to medium-low, pour in the whisked eggs, sprinkling with salt and pepper. Let them sit undisturbed for 1-2 minutes until the bottom just starts setting. Using a spatula, gently push the cooked edges toward the center, tilting the pan so uncooked egg flows to the edges. Add the cubed cream cheese and continue cooking another 1-2 minutes, stirring gently until the cheese melts into creamy streaks. Remove from heat when eggs are still slightly glossy.
  5. Warm the tortillas: Warm each tortilla for 20 seconds in the microwave or char briefly over a gas flame until soft and pliable.
  6. Assemble the burritos: Place a tortilla flat and layer 2-3 tablespoons of shredded cheese across the lower third. Add about ¼ cup black beans over the cheese, followed by a generous scoop of scrambled eggs and cooked sausage. Keep filling in the lower third, leaving 2 inches on each side.
  7. Wrap the burritos: Fold the bottom edge of the tortilla over the filling snugly, fold in both sides tightly, then roll forward firmly but gently until completely wrapped. Wrap each burrito in aluminum foil.
  8. Cook to serve or freeze: For immediate eating, bake foil-wrapped burritos for 8-10 minutes at 425°F until heated through with melted cheese. For meal prep, store foil-wrapped burritos in a freezer-safe bag. Bake directly from frozen for 20 minutes at 425°F for best texture, or unwrap and microwave for 2 minutes when you need a quick option.

Pro Tips for Perfect Burritos

  • Don’t overfill: It’s tempting to pack in more filling, but overfilling can lead to messy burritos. Stick to the recommended amounts!
  • Customize your spice level: If you like heat, consider adding diced jalapeños or a sprinkle of cayenne pepper to the egg mixture.
  • Use fresh ingredients: Fresh, high-quality ingredients enhance the overall flavor of your burritos, so choose the best options available.
  • Rest before freezing: Let cooked burritos cool completely before wrapping and freezing to prevent sogginess.
  • Reheat properly: For the best texture, bake from frozen instead of microwaving if possible.
  • Experiment with herbs: Fresh herbs like cilantro or parsley can elevate the freshness of your burritos.
  • Perfect storage: Store burritos in an airtight container if not wrapping in foil, which helps maintain moisture.
  • Make it a complete meal: Serve with a side salad or fruit for a balanced breakfast.

Common Mistakes and Troubleshooting

Even the best recipes can have hiccups! Here are some common mistakes and solutions:

  • Dry burritos: Ensure your eggs are cooked to a creamy consistency and avoid overcooking them.
  • Messy assembly: If your tortillas crack, warm them longer to make them pliable and easier to wrap.
  • Flavorless filling: Always taste and adjust seasoning as you go. A little extra salt or spices can make a big difference!
  • Frozen burritos not cooking through: Check your oven temperature with an oven thermometer to ensure accuracy, and rotate burritos halfway through cooking.

Variations to Try

Feel free to mix things up with these fun variations:

  • Veggie Delight: Swap the sausage for sautéed mushrooms, spinach, and zucchini for a delicious vegetarian option.
  • Southwestern Style: Add corn, black olives, and a touch of taco seasoning for a Southwestern flair.
  • Breakfast Burrito Bowl: Serve the filling over a bed of greens instead of in a tortilla for a low-carb option.
  • Cheesy Spinach: Incorporate fresh spinach and additional cheese into the egg mixture for an extra cheesy experience.

Storage and Make-Ahead Instructions

Planning ahead makes all the difference in a busy morning. Here’s how to store and prepare your burritos:

  • Refrigerate: Store leftover burritos in an airtight container in the fridge for up to 3 days.
  • Freeze: Wrap burritos in foil and place them in a freezer-safe bag to keep them fresh for up to 3 months.
  • Reheat

Frequently Asked Questions

Here are some common questions about making High Protein Breakfast Burritos:

  • Can I use egg substitutes? Yes, you can substitute the eggs with a plant-based egg product or egg whites for a lower-calorie option.
  • How do I make them spicier? Add diced jalapeños, hot sauce, or spicy sausage to the filling for an extra kick.
  • What’s the best way to thaw frozen burritos? The best way is to leave them in the fridge overnight or microwave them on low power.
  • Can I add more vegetables? Absolutely! Feel free to add any of your favorite vegetables to the filling.
  • Are these burritos gluten-free? Use gluten-free tortillas to make this recipe suitable for a gluten-free diet.
  • How long can I store leftovers? Leftover burritos can be stored in the refrigerator for up to 3 days or freeze for up to 3 months.
  • Can I make these burritos ahead of time? Yes! They are perfect for meal prep and can be made in advance and frozen.
  • What can I serve with these burritos? Serve with fresh salsa, avocado, or a light salad for a complete meal.

Nutrition Tips and Dietary Adaptations

To enhance the nutritional content of your burritos:

  • Add fiber: Incorporate more black beans or add quinoa for extra fiber and texture.
  • Boost antioxidants: Include fresh veggies like tomatoes and spinach for added vitamins.
  • Reduce calories: Use low-fat cheese and reduce the amount of cream cheese to cut calories without sacrificing flavor.

Equipment Recommendations

To make your cooking experience even smoother, here’s what I recommend:

  • Non-stick skillet: Ideal for cooking the sausage and eggs without sticking.
  • Spatula: A good spatula helps in scrambling eggs and flipping tortillas with ease.
  • Aluminum foil: Perfect for wrapping and freezing burritos.
  • Tortilla warmer: Keeps your tortillas warm and pliable while you assemble.

Serving Suggestions

Finally, let’s talk about how to serve these amazing burritos:

  • Top with fresh salsa: A scoop of fresh pico de gallo adds brightness and flavor.
  • Pair with guacamole: Creamy avocado complements the burrito nicely.
  • Serve with a side of fruit: Fresh fruit salad adds a refreshing contrast to the savory burrito.
  • Enjoy with a smoothie: A nutritious smoothie can complete your meal and add more vitamins.

Now that you’re equipped with everything you need to create mouthwatering High Protein Breakfast Burritos, I hope you feel inspired to get cooking! Remember, the key is to enjoy the process and make it your own. Happy cooking!

High Protein Breakfast Burrito

Prep Time 10 minutes
Cook Time 20 minutes
Total Time 30 minutes
Servings 6 burritos
Calories 650
A hearty and protein-packed breakfast burrito perfect for quick mornings or meal prep. Customize with your favorite toppings for added flavor.

Ingredients

Meat

  • 0.5 lb ground breakfast sausage
  • 1 pcs poblano pepper, seeded and diced
  • 12 large eggs, whisked
  • 1 tsp kosher salt
  • 0.25 tsp black pepper
  • 2 oz cream cheese, cubed
  • 6 large burrito-sized tortillas (Siete grain-free or flour tortillas)
  • 6-8 oz shredded cheddar cheese
  • 15 oz can black beans, drained and rinsed

Optional toppings

Instructions 

  • Preheat oven to 425°F (220°C) if baking immediately.
  • Cook sausage in a skillet over medium-high heat for 5-7 minutes until browned. Transfer to a plate, leaving about 1 tbsp fat.
  • Add diced poblano peppers to the same skillet; cook 2-3 minutes until softened.
  • Pour in whisked eggs, add salt and pepper; cook 1-2 minutes until just starting to set. Add cream cheese and stir until melted. Remove from heat.
  • Warm tortillas briefly. Layer cheese, black beans, eggs, and sausage on each. Fold and roll into burritos, then wrap in foil.
  • For immediate serving, bake wrapped burritos at 425°F for 8-10 minutes. For freezing, store in freezer-safe bags and bake from frozen for 20 minutes or microwave for 2 minutes.

Notes

For best texture, bake directly from frozen for meal prep.
Calories: 650kcal
Cost: $15
Course: Breakfast
Keyword: High-Protein

Why Oatmeal Waffles Are Your New Breakfast Staple

If you’re looking to elevate your breakfast game, oatmeal waffles are the answer! These delightful creations are not only fluffy and delicious but also offer a wholesome twist by incorporating oats, making them a nutritious choice for your morning meal. In this article, we’ll explore everything you need to know about making oatmeal waffles, from a comprehensive ingredient breakdown to troubleshooting tips and delicious variations.

What You’ll Love About This Recipe

  • Nutritious and filling: Packed with oats, these waffles provide fiber and essential nutrients to kick-start your day.
  • Easy preparation: With just a few simple steps, you can whip up a batch of these delightful waffles in no time.
  • Customizable: You can easily adapt the recipe to suit your taste preferences or dietary needs.
  • Perfect for meal prep: Make a large batch and freeze them for quick breakfasts throughout the week.
  • Kid-friendly: With a mild flavor and fun texture, kids will love these oatmeal waffles, making breakfast a breeze!

Ingredients for Oatmeal Waffles

To make these scrumptious oatmeal waffles, you’ll need the following ingredients:

  • 1 3/4 cup rolled oats: The star ingredient that gives these waffles their delightful texture and flavor.
  • 1 cup oat milk: A dairy-free alternative that keeps the waffles moist. Feel free to substitute with almond milk or regular milk!
  • 1 medium egg: Adds structure and helps bind the ingredients together.
  • 1/4 cup coconut oil (melted and cooled): Provides healthy fats and a subtle coconut flavor.
  • 1/4 cup maple syrup (or honey): Sweetens the batter naturally. Adjust to taste!
  • 1 teaspoon vanilla extract: Enhances the flavor profile of your waffles.
  • 1 teaspoon baking powder: Ensures your waffles are light and fluffy.
  • Pinch of salt: Balances the sweetness and enhances overall flavor.

Making Your Oatmeal Waffles

Ready to get cooking? Follow these simple steps to make your oatmeal waffles:

  1. Start with preparing and measuring all the ingredients. I like to use measuring cups to ensure accuracy.
  2. Take the blender and add all ingredients. Note: add wet ingredients first for easier blending.
  3. Mix everything at high speed until you get a smooth texture.
  4. Taste the batter and add additional sweetener if you think the mixture is not sweet enough.
  5. Let the batter rest for a few minutes. This allows the oats to absorb some liquid.
  6. Turn on the waffle maker and let it heat until it’s hot (the green light must be on).
  7. Coat waffle plates with cooking spray or melted coconut oil using a brush.
  8. Pour the batter onto the hot waffle plates, close the lid, and allow the waffles to cook. Depending on your waffle maker, it will take between 8-10 minutes per batch.
  9. Once baked, remove waffles from the waffle maker and place them on a cooling rack. Freshly baked waffles will be soft when you take them out but will harden as they cool on the rack.
  10. Repeat the process with the rest of the batter, making sure to grease the waffle plates before adding the batter to prevent sticking.
  11. Transfer cooled waffles to a plate.
  12. Add toppings (optional): I used banana, blueberries, and maple syrup. Be creative here and add toppings you like!
  13. Serve and enjoy!

Pro Tips for Perfect Oatmeal Waffles

  • Let the batter rest: Allowing the batter to sit for a few minutes is crucial for achieving the perfect texture.
  • Preheat the waffle maker: Make sure your waffle maker is fully heated before adding the batter for crispy waffles.
  • Experiment with toppings: Get creative with toppings like nuts, yogurt, or fruit compotes to enhance flavors.
  • Use a non-stick spray: Greasing the waffle plates ensures easy removal and perfect presentation.
  • Check for doneness: Every waffle maker is different, so keep an eye on your waffles for that golden-brown color.
  • Store properly: If you have leftovers, store them in an airtight container to maintain freshness.
  • Try gluten-free oats: For a gluten-free version, make sure to use certified gluten-free oats.
  • Adjust sweetness: Feel free to modify the amount of maple syrup or honey based on your preference.

Common Mistakes and Troubleshooting

Even the best cooks make mistakes! Here’s how to troubleshoot common issues with oatmeal waffles:

  • Waffles sticking to the waffle maker: Ensure you’re greasing the plates adequately and that the waffle maker is preheated.
  • Waffles not rising: Check that your baking powder is fresh; expired baking powder can lead to flat waffles.
  • Batter too thick: If the batter seems thick, add a splash more oat milk to achieve the desired consistency.
  • Waffles coming out soggy: Make sure to cook them long enough and allow them to rest on a cooling rack to crisp up.

Delicious Variations to Try

Want to switch things up? Here are some tasty variations of oatmeal waffles:

  • Cinnamon Oatmeal Waffles: Add 1 teaspoon of ground cinnamon to the batter for a warm, spicy flavor.
  • Chocolate Chip Oatmeal Waffles: Fold in 1/2 cup of dark chocolate chips for a sweet treat!
  • Banana Oatmeal Waffles: Mash one ripe banana into the batter for added sweetness and moisture.
  • Nutty Oatmeal Waffles: Stir in 1/4 cup of chopped nuts like walnuts or pecans for a crunchy texture.

Storage and Make-Ahead Instructions

You can easily make these oatmeal waffles ahead of time:

  • Refrigerate: Store in an airtight container in the refrigerator for up to 3 days.
  • Freeze: Place cooked waffles in a single layer on a baking sheet to freeze, then transfer to a freezer bag for up to 3 months.
  • Reheat: To reheat, pop them in the toaster or warm them in the oven until heated through.

Frequently Asked Questions

Here are some common questions about oatmeal waffles:

  • Can I use rolled oats instead of quick oats? Yes, rolled oats work well, but may yield a slightly different texture.
  • Can I make these waffles vegan? Absolutely! Substitute the egg with a flax egg or a chia seed egg.
  • What toppings do you recommend? Fresh fruit, yogurt, nut butter, or even a drizzle of chocolate sauce are all fantastic options.
  • How can I make these waffles gluten-free? Use certified gluten-free oats and ensure all other ingredients are gluten-free.
  • Can I add protein powder to the batter? Yes! Just be mindful of the consistency; you may need to add a bit more liquid.
  • How do I know when the waffles are done? Look for a golden-brown color and feel free to check your waffle maker’s indicator light.
  • Can I double the recipe? Certainly! Just remember to adjust your cooking time as needed.
  • What should I do if my batter is too runny? Add a bit more oats to thicken the batter to your desired consistency.

Nutrition Tips and Dietary Adaptations

To make your oatmeal waffles even healthier, consider these tips:

  • Add chia seeds or flaxseeds: Boost the fiber and omega-3 content by adding a tablespoon of chia seeds or ground flaxseeds.
  • Reduce sweeteners: You can cut the maple syrup or honey in half and still enjoy a delicious flavor.
  • Opt for whole grain flour: If you want to enhance nutrition, substitute half of the rolled oats with whole grain flour.
  • Try a savory twist: Add herbs and spices to create a savory version perfect for lunch or dinner.

Equipment Recommendations

To create the perfect oatmeal waffles, here’s what I recommend:

  • Waffle maker: A non-stick waffle maker is essential for easy waffle removal and cleanup.
  • High-speed blender: A blender helps achieve a smooth batter quickly and efficiently.
  • Measuring cups and spoons: Accurate measurements are key for successful baking.
  • Spatula: A flexible spatula makes pouring and spreading the batter easier.

Serving Suggestions

To serve your oatmeal waffles, consider these delightful ideas:

  • Fruit toppings: Top with fresh berries, sliced bananas, or warm apple compote for a fruity explosion.
  • Nut butters: Spread almond or peanut butter for added protein and richness.
  • Yogurt: A dollop of Greek yogurt adds creaminess and tang.
  • Maple syrup: Drizzle with pure maple syrup or a honey glaze for sweetness.

In conclusion, oatmeal waffles are a fantastic way to start your day filled with flavor and nutrition. With this comprehensive guide, you’re equipped to make them perfectly every time! So grab your ingredients, fire up that waffle maker, and enjoy a delicious breakfast that sets a positive tone for your day. Happy cooking!

Oatmeal Waffles

Prep Time 10 minutes
Cook Time 10 minutes
Total Time 20 minutes
Servings 4 pieces
Calories 250
Enjoy healthy and delicious oatmeal waffles, perfect for a nutritious breakfast or brunch.

Ingredients

Dry ingredients

  • 1 3/4 cups rolled oats
  • 1 cup oat milk
  • 1 medium egg
  • 1/4 cup coconut oil (melted and cooled)
  • 1/4 cup maple syrup (or honey)
  • 1 teaspoon vanilla extract
  • 1 teaspoon baking powder
  • Pinch salt

Instructions 

  • Combine all ingredients in a blender and blend until smooth.
  • Preheat waffle maker and lightly grease with cooking spray or coconut oil.
  • Pour batter onto hot waffle plates and cook for 8-10 minutes until golden.
  • Remove waffles and let cool slightly. Add toppings if desired and serve.

Notes

For extra flavor, add fresh fruits or nuts as toppings.
Calories: 250kcal
Cost: $12
Course: Breakfast
Cuisine: American
Keyword: Oats

Start Your Day Right with These Wholesome Oatmeal Waffles

Welcome to your new favorite breakfast! These Easy Oatmeal Waffles are not only delicious but also incredibly simple to make. Packed with wholesome ingredients, they provide the perfect fuel to kickstart your day. Whether you’re rushing out the door or enjoying a leisurely morning at home, this recipe is designed to fit into your busy lifestyle.

In just a few steps, you’ll be able to whip up a batch of waffles that are crispy on the outside and soft on the inside. Let’s dive into the delightful world of oatmeal waffles, where healthy meets delicious!

Why You’ll Love This Recipe

  • Quick and Easy: This recipe comes together in no time—perfect for busy mornings or last-minute brunches.
  • Nutritious Ingredients: Made with oats and wholesome ingredients, these waffles are a great source of fiber and protein.
  • Versatile Base: Customize the flavors with your favorite add-ins like fruits, nuts, or chocolate chips.
  • Freezer-Friendly: Make a big batch and freeze them for quick breakfasts throughout the week.
  • Kid-Friendly: Even the pickiest eaters will love these waffles, making breakfast a stress-free experience!

Ingredients You’ll Need to Make Oatmeal Waffles

Here’s what you’ll need to whip up these delicious oatmeal waffles:

  • 3 cups old fashioned oats
  • 3 teaspoons baking powder
  • 1/4 teaspoon salt
  • 1 to 2 tablespoons brown sugar or maple syrup
  • 4 large eggs
  • 1 and 1/2 cups milk (dairy or non-dairy)
  • 1/2 cup + 2 tablespoons liquid coconut oil (not hot)
  • 2 teaspoons vanilla extract

Ingredient Breakdown and Substitutions

Mouth-watering oatmeal waffles in a cozy, inviting setting.

Understanding your ingredients is key to mastering this recipe. Here’s a closer look:

  • Old Fashioned Oats: These provide the base for your waffles. You can substitute with quick oats, but the texture will vary.
  • Milk: Any milk works—dairy, almond, or oat milk are great options.
  • Coconut Oil: This adds a subtle flavor and moisture. You can substitute with melted butter or another oil if desired.
  • Sweeteners: Adjust the sweetness according to your preference. Try honey or agave syrup instead of brown sugar.
  • Eggs: For a vegan version, use flax eggs (1 tablespoon ground flaxseed mixed with 2.5 tablespoons water per egg).

How to Make Oatmeal Waffles

Now, let’s get cooking! Follow these simple steps:

  1. Add all ingredients into a blender. Blend until smooth (it usually takes about 3 minutes in my blender). Let the batter rest while you preheat the waffle iron; this helps it thicken slightly.
  2. Grease the waffle maker with non-stick cooking spray. Pour about 1/3 cup batter into each waffle plate and cook according to the manufacturer’s instructions until golden brown. Pro tip: Check the batter consistency before each batch. Oats absorb moisture, so the batter may thicken as it sits. Stir in a little water to maintain a pourable consistency.
  3. Remove waffles onto a plate and repeat with the remaining batter. Enjoy!

Pro Tips for Perfect Oatmeal Waffles

  • Resting the Batter: Allowing the batter to rest helps achieve a fluffier texture.
  • Greasing the Waffle Iron: Even if your waffle maker is non-stick, a little spray goes a long way in preventing sticking.
  • Don’t Overmix: Blend just until smooth; overmixing can lead to tougher waffles.
  • Check Your Waffle Iron: Adjust the heat settings according to your waffle maker for optimal results.
  • Add Flavor: Experiment with spices like cinnamon or nutmeg to elevate the flavor of your waffles.
  • Use Fresh Ingredients: Always use fresh baking powder for the best rise.
  • Monitor Cooking Time: Every waffle maker is different; keep an eye on the first batch to gauge timing.
  • Serve Immediately: Waffles are best served fresh, but you can keep them warm in a low oven while you cook the rest.

Common Mistakes and Troubleshooting

Even the best cooks encounter hiccups. Here are common issues and how to fix them:

  • Waffles Are Too Soggy: This may be due to excess moisture in the batter. Add a little more oats or reduce the milk next time.
  • Waffles Stick to the Iron: Be sure to grease the waffle maker well before pouring the batter.
  • Waffles Are Too Dense: If overmixed, the batter can become too dense. Blend just until smooth.
  • Uneven Cooking: Adjust the heat settings on your waffle maker as needed for even browning.

Variations to Try with Your Oatmeal Waffles

Feel free to get creative with your waffles! Here are some fun variations:

  • Chocolate Chip Oatmeal Waffles: Add 1/2 cup of mini chocolate chips to the batter for a sweet treat.
  • Banana Oatmeal Waffles: Mash 1 ripe banana into the batter for added sweetness and flavor.
  • Spiced Apple Oatmeal Waffles: Fold in diced apples and a teaspoon of cinnamon for a fall-inspired twist.
  • Berry Oatmeal Waffles: Mix in fresh or frozen berries for a burst of flavor.

Storage and Make-Ahead Instructions

Want to enjoy these waffles throughout the week? Here’s how to store and reheat them:

  • Refrigeration: Store cooled waffles in an airtight container in the refrigerator for up to 4 days.
  • Freezing: Place waffles in a single layer on a baking sheet, freeze until solid, then transfer to a freezer bag. They’ll last up to 3 months.
  • Reheating: Toast frozen waffles directly in the toaster or reheat in the oven at 350°F (175°C) for about 10 minutes.

Frequently Asked Questions

Here are some common queries to help you along the way:

  • Can I use quick oats instead of old fashioned oats? Yes, but the texture may be slightly different.
  • How do I make these waffles gluten-free? Use certified gluten-free oats and ensure your baking powder is gluten-free.
  • Can I use almond milk? Absolutely! Any milk works well in this recipe.
  • How many waffles does this recipe make? This recipe typically makes about 8-10 waffles, depending on your waffle maker.
  • Can I double the recipe? Yes, feel free to double the ingredients for a larger batch.
  • What can I serve with these waffles? They go great with maple syrup, fresh fruit, yogurt, or a dollop of nut butter.
  • How do I know when the waffles are done? Waffles are done when they’re golden brown and crisp. Check your waffle maker’s indicator light.
  • Can I make the batter ahead of time? It’s best to make the batter fresh, but you can prepare it the night before—just give it a good stir before using.

Nutrition Tips and Dietary Adaptations

These oatmeal waffles are not just tasty; they’re also healthy! Here are some nutritional insights:

  • High in Fiber: Oats are an excellent source of dietary fiber, which can help with digestion.
  • Protein Boost: Adding eggs provides a good amount of protein, perfect for keeping you full.
  • Low Sugar: With natural sweeteners like maple syrup or honey, you can control the sugar content.
  • Vegan Option: Use flax eggs and non-dairy milk to make this recipe vegan-friendly.

Equipment Recommendations

Here’s what you need to make these waffles:

  • High-Speed Blender: Essential for blending the oats smoothly.
  • Waffle Maker: A good quality non-stick waffle maker is key for perfect results.
  • Measuring Cups and Spoons: Accurate measurements ensure your waffles turn out just right.
  • Spatula: A silicone spatula is great for transferring waffles without damaging them.

Serving Suggestions

Once your waffles are ready, here are some delightful serving ideas:

  • Top with Fresh Fruits: Berries, banana slices, or even sautéed apples add natural sweetness.
  • Drizzle with Maple Syrup: A classic choice that never disappoints.
  • Spread Nut Butter: Almond or peanut butter adds creaminess and extra protein.
  • Add a Dollop of Yogurt: Greek yogurt gives a tangy flavor and boosts the protein content.

Enjoy your wholesome waffle mornings and remember, cooking is all about having fun and experimenting. With this easy-to-follow recipe, you’ll create delicious oatmeal waffles that everyone in your home will love. Don’t hesitate to make this recipe your own—add your favorite flavors and toppings for a breakfast experience that’s uniquely yours!

Easy Oatmeal Waffles

Prep Time 10 minutes
Cook Time 15 minutes
Total Time 25 minutes
Servings 4 servings
Calories 250
Delicious and wholesome oatmeal waffles that are quick to prepare and perfect for a hearty breakfast.

Ingredients

Dry ingredients

  • 3 cups old fashioned oats
  • 3 teaspoons baking powder
  • 1/4 teaspoon salt
  • 1 to 2 tablespoons brown sugar or maple syrup
  • 4 large eggs
  • 1 1/2 cups milk
  • 1/2 cup + 2 tablespoons liquid coconut oil liquid coconut oil (not hot)
  • 2 teaspoons vanilla extract

Instructions 

  • Add all ingredients into a blender and blend until smooth. Let batter rest while preheating the waffle iron.
  • Grease the waffle maker and pour about 1/3 cup batter into each section. Cook until golden brown.
  • Check batter consistency before each batch; stir in water if it thickens.
  • Remove cooked waffles and repeat with remaining batter.

Notes

Stir in water to adjust batter consistency before each batch.
Calories: 250kcal
Cost: $15
Course: Breakfast
Keyword: Oats

Elevate Your Dinner with Garlic Parmesan Roasted Cauliflower

Welcome to a culinary adventure that transforms a humble head of cauliflower into a star side dish! This Garlic Parmesan Roasted Cauliflower recipe is not just a feast for the eyes but also a delight for the taste buds. With just a handful of ingredients, you can create a dish that’s flavorful, satisfying, and oh-so-simple to make. Whether you’re serving it alongside grilled meats, tossing it into a salad, or enjoying it as a snack, this recipe is sure to become a staple in your kitchen.

Why You’ll Love This Recipe

  • Quick and Easy: This recipe requires minimal prep time and is perfect for busy weeknights. With just a few steps, you can have a delicious side dish on the table.
  • Flavor-Packed: Infused with the rich taste of garlic and the nutty goodness of Parmesan, this dish elevates the natural flavor of cauliflower to new heights.
  • Healthy and Nutritious: Cauliflower is a low-carb vegetable packed with vitamins C, K, and B6, making this dish a guilt-free addition to your meals.
  • Customizable: You can easily modify this recipe to suit your taste preferences or dietary needs, making it versatile for any occasion.
  • Family-Friendly: Even the pickiest eaters will enjoy this dish. Its crispy texture and savory flavor make it a fun way to introduce more vegetables into your family’s diet.

Ingredients You’ll Need

To make this delicious Garlic Parmesan Roasted Cauliflower, gather the following ingredients:

  • 1 head cauliflower (about 2 lbs)
  • 4 cloves garlic (minced)
  • 1/4 cup extra virgin olive oil
  • 1/2 cup Parmesan cheese (freshly grated)
  • Salt (to taste)
  • Pepper (to taste)
  • Fresh parsley (optional, for garnish)

How to Make Garlic Parmesan Roasted Cauliflower

Deliciously browned cauliflower with a sprinkle of Parmesan, showcasing its texture.

Follow these simple steps to create your Garlic Parmesan Roasted Cauliflower:

  1. Preheat your oven: Set it to 400°F (200°C).
  2. Prepare the cauliflower: Remove the leaves and stem from the cauliflower and cut it into uniform bite-sized florets.
  3. Make the garlic mixture: In a bowl, combine olive oil, minced garlic, salt, and pepper.
  4. Toss the florets: Coat the cauliflower florets with the garlic mixture until evenly coated.
  5. Arrange and sprinkle: Place the florets on a baking sheet lined with parchment paper. Sprinkle with half of the Parmesan cheese.
  6. Roast: Bake in the oven for 25 minutes until golden brown and tender. Add the remaining Parmesan cheese and roast for an additional 5 minutes until bubbly.
  7. Garnish: Before serving, sprinkle with fresh parsley for a pop of color and flavor.

Pro Tips for Perfect Garlic Parmesan Cauliflower

  • Uniform Florets: Ensure your cauliflower florets are cut to the same size for even cooking.
  • Fresh Ingredients: Use fresh garlic and quality Parmesan cheese for the best flavor impact.
  • Oven Thermometer: Check your oven’s temperature with a thermometer; uneven heat can affect roasting results.
  • Extra Crispiness: For added crunch, you can broil the cauliflower for the last 2-3 minutes.
  • Coating Variations: Feel free to add breadcrumbs for extra texture. Mix them with the Parmesan cheese before sprinkling.
  • Mix in Herbs: Experiment with different herbs like thyme or rosemary for an aromatic twist.
  • Batch Cooking: Roast a larger batch to enjoy as leftovers throughout the week in salads or wraps.
  • Serving Temperature: Serve immediately after roasting for the best texture; reheating may cause sogginess.

Common Mistakes and Troubleshooting

  • Soggy Cauliflower: Overcrowding the baking sheet can trap steam, making the cauliflower soggy. Use multiple sheets if necessary.
  • Burnt Garlic: If you notice the garlic browning too quickly, cover the dish with foil for part of the cooking time.
  • Undercooked Cauliflower: If your florets are large, they may need extra time. Check for tenderness with a fork.

Variations to Try

  • Spicy Garlic Parmesan Cauliflower: Add red pepper flakes to the olive oil mixture for a spicy kick.
  • Lemon Garlic Cauliflower: Squeeze fresh lemon juice over the cauliflower before serving for a zesty flavor.
  • Cheesy Herb Cauliflower: Add a mix of herbs like oregano and thyme along with the cheese for an herby twist.
  • Balsamic Glazed Cauliflower: Drizzle balsamic reduction over roasted cauliflower for a sweet tangy finish.

Storage and Make-Ahead Instructions

This Garlic Parmesan Roasted Cauliflower can be stored in an airtight container in the refrigerator for up to 3 days. To reheat, place it in the oven at 350°F (175°C) until warmed through for the best texture. You can also prepare the garlic oil mixture and cut the cauliflower ahead of time, storing them separately until you’re ready to roast.

Frequently Asked Questions

  • Can I use frozen cauliflower? Yes, but be aware that the texture may differ. Adjust the cooking time accordingly.
  • What can I serve with roasted cauliflower? This dish pairs well with grilled chicken, steak, or as part of a vegetarian platter.
  • Is this recipe keto-friendly? Absolutely! Cauliflower is a great low-carb vegetable, making this dish suitable for keto diets.
  • Can I make this vegan? Yes, substitute nutritional yeast for Parmesan cheese and use a plant-based oil.
  • How do I ensure my cauliflower is crispy? Make sure not to overcrowd the baking sheet and allow enough space for air circulation.
  • What’s the best way to cut cauliflower? Start by removing the leaves and stem, then cut the head into quarters and slice into florets.
  • How long does it take to roast cauliflower? Typically, 25-30 minutes at 400°F will yield tender and golden cauliflower.
  • Can I use other cheeses? Yes! Try using cheddar, mozzarella, or a mix for different flavor profiles.

Nutritional Tips and Dietary Adaptations

This recipe is not only delicious but also nutritious. Cauliflower is a low-calorie vegetable rich in fiber and vitamins. You can adapt this dish for various dietary needs:

  • Gluten-Free: This recipe is naturally gluten-free; just ensure the breadcrumbs (if used) are gluten-free.
  • Dairy-Free: Substitute dairy-free cheese or nutritional yeast to keep it dairy-free.
  • Low-FODMAP: Limit the garlic to reduce FODMAP content if necessary.

Equipment Recommendations

  • Baking Sheet: A sturdy, rimmed baking sheet will help prevent spills and ensure even roasting.
  • Parchment Paper: Using parchment paper prevents sticking and makes cleanup a breeze.
  • Mixing Bowl: A large mixing bowl is essential for tossing the cauliflower with the garlic mixture.

Serving Suggestions

Serve your Garlic Parmesan Roasted Cauliflower warm, garnished with fresh parsley. It works wonderfully as a side dish for any protein, or you can toss it into a salad for added texture and flavor. For a complete meal, consider pairing it with a light quinoa salad or a refreshing cucumber yogurt dip.

Now that you have all the details, it’s time to get cooking! This Garlic Parmesan Roasted Cauliflower is not just a recipe; it’s an experience that will make your weeknight dinners exciting and flavorful. Happy cooking!

Garlic Parmesan Roasted Cauliflower

Prep Time 10 minutes
Cook Time 30 minutes
Total Time 40 minutes
Servings 4 servings
Calories 180
A deliciously roasted cauliflower dish infused with garlic and topped with Parmesan cheese, perfect as a side or snack.

Ingredients

Cauliflower

  • 1 head cauliflower (about 2 lbs)
  • 4 cloves garlic (minced)
  • 0.25 cup extra virgin olive oil
  • 0.5 cup Parmesan cheese (freshly grated)
  • to taste salt
  • to taste pepper
  • optional fresh parsley (for garnish)

Instructions 

  • Preheat oven to 400°F (200°C).
  • Cut cauliflower into bite-sized florets and toss with olive oil, garlic, salt, and pepper.
  • Arrange on a baking sheet, sprinkle with half of the Parmesan, and roast for 25 minutes.
  • Add remaining Parmesan and roast for 5 more minutes until bubbly.
  • Garnish with parsley before serving.

Notes

For extra flavor, sprinkle with red pepper flakes or lemon zest.
Calories: 180kcal
Cost: $15
Course: Side Dish
Cuisine: American
Keyword: Cauliflower

Unlock the Secret to Deliciously Moist Blueberry Cottage Cheese Muffins!

Welcome to the wonderful world of baking! Today, we’re diving into a recipe for Blueberry Cottage Cheese Muffins. These muffins are not just any ordinary baked goods; they are packed with flavor, moisture, and a delightful twist thanks to the cottage cheese. Perfect for breakfast, a snack, or even dessert, this recipe is designed to boost your confidence in the kitchen! So, let’s get started!

Why You’ll Love This Recipe

Here are five compelling reasons why these muffins will become a staple in your kitchen:

  • Health Boost: With the addition of cottage cheese, these muffins are rich in protein, making them a nutritious choice for breakfast.
  • Moist and Flavorful: The cottage cheese keeps the muffins incredibly moist while adding a subtle tang that complements the sweetness of the blueberries.
  • Easy to Make: This recipe is straightforward, perfect for both novice and experienced bakers alike.
  • Versatile: Enjoy them fresh or customize with your favorite add-ins like nuts, spices, or different fruits!
  • Make Ahead: These muffins can be prepared in advance and stored for a quick grab-and-go breakfast option.

Ingredient Breakdown

Understanding the ingredients is key to creating the best Blueberry Cottage Cheese Muffins. Here’s what you’ll need and some suggestions for substitutions:

  • Coconut Oil: 1/4 cup, melted and cooled to room temperature. Substitute with unsalted butter or vegetable oil if preferred.
  • Coconut Sugar: 1/2 cup for natural sweetness. Brown sugar or honey can also be used.
  • Vanilla Paste: 1 tsp for added flavor. Vanilla extract is a suitable replacement.
  • Milk: 1/4 cup, any type works (dairy or non-dairy).
  • Eggs: 2 large, at room temperature. Use flax eggs for a vegan option.
  • Cottage Cheese: 1 cup, preferably a thick brand like Good Culture.
  • Flour: 1.75 cups, all-purpose or whole wheat. Gluten-free flour blends work too!
  • Baking Soda: 1 tsp to help the muffins rise.
  • Salt: 1/2 tsp to enhance flavor.
  • Cinnamon: 1/2 tsp for warmth, optional but recommended.
  • Nutmeg: 1/4 tsp for depth of flavor, optional.
  • Blueberries: 1 cup, fresh or frozen (toss with a bit of flour to prevent sinking).

Step-by-Step Instructions for Blueberry Cottage Cheese Muffins

A delicious batch of cottage cheese muffins with blueberries, highlighting their inviting texture.

Follow these simple steps to whip up your muffins:

  1. Preheat your oven to 375°F (190°C) and line a muffin tin with paper liners or grease them lightly.
  2. In a large mixing bowl, combine the coconut oil, coconut sugar, and vanilla paste. Mix until well combined.
  3. Add the milk and eggs, whisking until smooth.
  4. Fold in the cottage cheese until evenly incorporated.
  5. In a separate bowl, mix the flour, baking soda, salt, cinnamon, and nutmeg.
  6. Gradually add the dry ingredients to the wet mixture, stirring until just combined. Be careful not to overmix!
  7. Gently fold in the blueberries, ensuring they are evenly distributed.
  8. Divide the batter evenly among the prepared muffin cups.
  9. Bake for 20-25 minutes, or until a toothpick inserted into the center comes out clean.
  10. Let the muffins cool in the pan for a few minutes before transferring to a wire rack to cool completely.

Common Mistakes and Troubleshooting

A few tips to ensure your muffins turn out perfectly:

  • Overmixing: This can lead to dense muffins. Mix until just combined.
  • Incorrect Oven Temperature: Always preheat your oven and check with an oven thermometer if unsure.
  • Too Many Berries: While blueberries are delicious, too many can make the muffins soggy. Stick to 1 cup.
  • Using Cold Ingredients: Make sure your eggs and milk are at room temperature for better mixing.

Variations to Try

Feel free to customize this recipe to suit your taste preferences!

  • Chocolate Chip: Add 1/2 cup of dark chocolate chips for a decadent twist.
  • Banana: Replace half of the cottage cheese with mashed banana for a fruity flavor.
  • Nutty: Stir in 1/2 cup of chopped walnuts or pecans for added crunch.
  • Spiced: Add a touch of ginger or cardamom for a unique flavor profile.

Storage and Make-Ahead Instructions

These muffins store beautifully! Here’s how:

  • Room Temperature: Keep in an airtight container for up to 3 days.
  • Refrigerator: Store in an airtight container for up to a week.
  • Freezing: Freeze muffins for up to 3 months. Thaw in the fridge overnight before enjoying.

Comprehensive FAQ

Here are some common questions about making Blueberry Cottage Cheese Muffins:

  • Can I use frozen blueberries? Yes! Just toss them in flour before adding them to the batter.
  • How do I know when the muffins are done? A toothpick inserted in the center should come out clean.
  • Can I make these muffins gluten-free? Absolutely! Use a 1:1 gluten-free flour blend.
  • What can I substitute for cottage cheese? Greek yogurt or ricotta can be used for a similar texture.
  • How can I make these muffins vegan? Substitute eggs with flax eggs and use non-dairy milk and yogurt.
  • Can I add other fruits? Yes! Chopped strawberries or raspberries can be great alternatives.
  • How do I make the muffins sweeter? Increase the coconut sugar or add a drizzle of honey on top after baking.
  • What’s the best way to serve these muffins? Warm, with a pat of butter or a dollop of cream cheese for an indulgent treat!

Nutritional Tips and Dietary Adaptations

For those keeping an eye on nutrition, here are some tips:

  • Protein Boost: Cottage cheese is a great source of protein, making these muffins a filling option for breakfast.
  • Low Sugar: Adjust the sweetness by using less coconut sugar or opting for a sugar substitute.
  • Fiber Rich: Opt for whole wheat flour to increase dietary fiber.
  • Vegan Option: Easily adapt this recipe for vegan diets with simple substitutions.

Equipment Recommendations

To make this recipe easier, here’s some recommended equipment:

  • Muffin Tin: A non-stick muffin tin or silicone molds will yield the best results.
  • Mixing Bowls: A set of mixing bowls in various sizes is essential for combining ingredients.
  • Whisk: A good whisk helps incorporate ingredients smoothly.
  • Rubber Spatula: Perfect for folding in blueberries without breaking them.

Serving Suggestions

These muffins are delicious on their own, but here are a few ways to enhance your serving experience:

  • With Butter: Spread a little butter on warm muffins for added richness.
  • With Yogurt: Serve alongside a dollop of Greek yogurt for a protein-packed breakfast.
  • With Jam: Pair with your favorite jam or preserves to complement the flavors.
  • With Tea or Coffee: Enjoy with a warm beverage for a cozy treat.

In conclusion, these Blueberry Cottage Cheese Muffins are not just a recipe; they are a way to enjoy delicious, nutritious baking without the fuss. Remember, cooking is about experimenting and having fun in the kitchen. So, roll up your sleeves, and let’s bake some muffins that will make your taste buds sing!

Best Blueberry Cottage Cheese Muffins - theamazingfood

Prep Time 10 minutes
Cook Time 20 minutes
Total Time 30 minutes
Servings 12 muffins
Calories 210
These moist and fluffy blueberry cottage cheese muffins are perfect for a nutritious breakfast or snack, combining creamy cottage cheese with fresh blueberries for a delightful treat.

Ingredients

Dairy & Oils

  • 0.25 cup coconut oil (melted and cooled to room temperature)
  • 0.5 cup coconut sugar
  • 1 tsp vanilla paste (prefer Nielsen-Massey for richer flavor)
  • 0.25 cup milk
  • 2 eggs eggs (room temperature, about 70°F)
  • 1 cup cottage cheese (Good Culture brand provides the best thick texture)
  • 1.75 cups flour
  • 1 tsp baking soda
  • 0.5 tsp salt
  • 0.5 tsp cinnamon
  • 0.25 tsp ground nutmeg
  • 1 cup blueberries (fresh or frozen)

Instructions 

  • Preheat oven to 375°F (190°C) and line a muffin tin with paper liners.
  • Mix dry ingredients: flour, baking soda, salt, cinnamon, and nutmeg in a bowl.
  • In a separate bowl, whisk together coconut oil, coconut sugar, vanilla, milk, eggs, and cottage cheese until smooth.
  • Combine wet and dry ingredients, then gently fold in blueberries.
  • Divide batter evenly among muffin cups and bake for 20 minutes or until golden brown.

Notes

For extra flavor, sprinkle a little cinnamon on top before baking.
Calories: 210kcal
Cost: $12
Course: Breakfast, Snack
Cuisine: American
Keyword: Blueberry, Cottage Cheese

Start Your Day Right with a Vanilla Berry Protein Smoothie Bowl

Welcome to your ultimate guide to crafting the perfect Vanilla Berry Protein Smoothie Bowl! This deliciously thick and creamy bowl is not just a treat for your taste buds; it’s also a powerhouse of nutrients that sets the stage for a vibrant day ahead. Enjoy the delightful flavor of fresh berries combined with a protein boost that can kickstart your morning or serve as a fulfilling post-workout recovery. In this comprehensive guide, we’ll break down everything you need to know to make this smoothie bowl a staple in your kitchen.

Why You’ll Love This Recipe

This Vanilla Berry Protein Smoothie Bowl is not just about taste; it comes loaded with benefits that will make you want to whip it up every morning. Here are just a few reasons:

  • Quick and easy: Prepared in under 10 minutes, this smoothie bowl is perfect for busy mornings.
  • Customizable: Use your favorite fruits and toppings to make it your own!
  • Nutrient-dense: Packed with protein, fiber, and antioxidants for a balanced breakfast.
  • Great for meal prep: Make a batch for quick breakfasts throughout the week.
  • Kid-friendly: This smoothie bowl is a fun way to get kids excited about healthy eating.

Ingredients Breakdown

Let’s dive into the ingredients you’ll need for this creamy delight, along with some handy substitutions to cater to your dietary needs.

  • Frozen mixed berries (1 to 1.5 cups): Blueberries, strawberries, and raspberries all work well. If you prefer fresh, just add ice to maintain the texture.
  • Frozen banana (1 small, in chunks): This adds creaminess and sweetness. You can substitute with a ripe fresh banana or omit for a lower sugar option.
  • Vanilla protein powder (1 scoop): This can be whey or plant-based. Choose a flavor that complements the berries.
  • Greek yogurt (1/3 to 1/2 cup): For creaminess and protein. Use dairy-free yogurt for a vegan option.
  • Milk of choice (1/4 to 1/2 cup): Almond, oat, or soy milk can all work; adjust based on your preferred creaminess.
  • Chia seeds (1 tablespoon): These add fiber and omega-3 fatty acids. If unavailable, you can use flaxseeds.
  • Nut butter (1 tablespoon): Almond, peanut, or cashew butter enhance flavor and healthy fats. You can skip it or use sunflower seed butter for a nut-free option.
  • Vanilla extract (1/2 teaspoon): Elevates the flavor—don’t skip this!
  • Optional sweetener (1–2 teaspoons): Maple syrup, honey, or a few drops of stevia can be added based on your sweetness preference.
  • Toppings: Sliced banana, fresh berries, granola, coconut flakes, cacao nibs, and hemp seeds for added nutrition and crunch.

Step-by-Step Instructions

A delicious breakfast bowl featuring a blend of vanilla and berries, adorned with coconut flakes and chia seeds.

Now that you have your ingredients ready, let’s walk through the preparation process.

  1. Prep your base: Add frozen berries and frozen banana to your blender first. This helps the blades grab the fruit and create a thick texture.
  2. Add protein and creaminess: Scoop in the protein powder and Greek yogurt. This combo makes it creamy and keeps you full.
  3. Flavor and healthy fats: Add chia seeds, nut butter, and vanilla extract to boost thickness, fiber, and flavor.
  4. Pour in a little liquid: Start with 1/4 cup milk. You want just enough to get things moving. You can always add more.
  5. Blend low and slow: Pulse or blend on low, using a tamper if you have one. Scrape down the sides as needed. Add milk 1 tablespoon at a time until it turns into a thick, soft-serve-like blend.
  6. Taste and adjust: If it’s not sweet enough, add a touch of honey or maple syrup. If it’s too tart, a bit more banana or yogurt helps.
  7. Serve immediately: Spoon into a chilled bowl to keep it thick. Add toppings for crunch and extra nutrients.

Pro Tips for the Perfect Smoothie Bowl

Here are some expert insights to elevate your smoothie bowl game:

  • Use frozen fruits: They create a thicker, creamier texture compared to fresh fruits.
  • Chill your bowl: A cold bowl helps maintain the temperature of your smoothie, making it even more refreshing.
  • Layer wisely: Start with heavier toppings like granola at the bottom and lighter ones like coconut flakes on top for a beautiful presentation.
  • Experiment with flavors: Mix in spices like cinnamon or nutmeg to enhance the flavor profile.
  • Adjust thickness: Keep the liquid minimal until you achieve your desired consistency—thicker is better!
  • Don’t rush blending: Blend slowly to ensure everything is mixed well without turning it into a liquid.
  • Make it colorful: Use a variety of fruits to create an appealing visual that invites you to dig in.
  • Try different protein sources: Swap out protein powder for Greek yogurt or cottage cheese for a fun twist.

Common Mistakes and Troubleshooting

Even the best chefs run into hiccups! Here’s how to avoid common pitfalls:

  • Too thin: If your smoothie bowl is too runny, add more frozen fruit or yogurt to thicken it up.
  • Not sweet enough: Adjust sweetness with natural sweeteners—start small and taste as you go.
  • Uneven blending: If you notice chunks, pause to scrape down the sides and blend again.
  • Too thick: Add a splash more milk to get it moving, but be cautious not to overdo it.

Variations to Try

Feel free to switch things up with these creative variations:

  • Chocolate Berry Bowl: Add a scoop of cocoa powder or chocolate protein powder for a chocolatey twist.
  • Tropical Smoothie Bowl: Replace berries with mango and pineapple for a refreshing tropical flavor.
  • Green Smoothie Bowl: Add a handful of spinach or kale for a nutrient boost without compromising taste.
  • Nut-Free Version: Omit nut butter and replace it with sunflower seed butter or coconut yogurt for a nut-free option.

Storage and Make-Ahead Instructions

This smoothie bowl is best enjoyed fresh, but you can prepare components ahead of time:

  • Pre-packaged ingredients: Portion out your dry ingredients and freeze fruits together for a quick blend in the morning.
  • Storage duration: If you have leftovers, store them in an airtight container in the refrigerator for up to 24 hours. Note that texture may change.

Frequently Asked Questions

Here are some common questions to help you get the most out of your smoothie bowl experience:

  • Can I use fresh berries instead of frozen? Yes, but you’ll need to add ice for the desired thickness.
  • Is this smoothie bowl vegan-friendly? Absolutely! Use plant-based yogurt and protein powder.
  • How can I make this bowl lower in calories? Reduce the amount of nut butter and use unsweetened yogurt and milk.
  • Can I prepare this smoothie bowl the night before? Yes, but it’s best to blend fresh the next day for optimal texture.
  • What can I use instead of protein powder? Greek yogurt or cottage cheese can provide a protein boost without the powder.
  • Are there any nut-free options? Yes, use sunflower seed butter or omit nut butter entirely.
  • Can I add vegetables to my smoothie bowl? Yes! Spinach and kale can boost nutrition without affecting the flavor.
  • What toppings work best? Fresh fruits, seeds, nuts, and granola all work wonderfully—mix and match!

Nutrition Tips and Dietary Adaptations

This smoothie bowl is inherently nutritious, but here are a few tips to cater to specific dietary needs:

  • For a high-protein option: Increase the protein powder or add extra Greek yogurt.
  • Dairy-free: Ensure all ingredients, including yogurt and milk, are plant-based.
  • Gluten-free: This recipe is naturally gluten-free, just check your toppings.
  • Low-carb: Use fewer fruits and consider adding avocado for creaminess without the carbs.

Essential Equipment Recommendations

Having the right tools makes cooking a breeze. Here’s what you’ll need:

  • High-speed blender: A powerful blender ensures a smooth, creamy texture.
  • Measuring cups and spoons: For accurate ingredient measurements.
  • Spatula: To scrape down the sides of the blender for even blending.
  • Chilled serving bowls: Keeps your smoothie bowl thick and refreshing.

Serving Suggestions

For a delightful breakfast or snack, serve your Vanilla Berry Protein Smoothie Bowl with:

  • Crunchy toppings: Granola, nuts, or seeds for texture.
  • Fresh herbs: A sprinkle of mint or basil can add an unexpected burst of flavor.
  • Complementary flavors: Pair it with a side of whole-grain toast or a fruit salad.

Conclusion: Enjoy Your Culinary Adventure

With this definitive guide to the Vanilla Berry Protein Smoothie Bowl, you’re equipped to start your day with a delicious and nutritious meal. Embrace the creativity of customizing your bowl and enjoy the process of making healthy eating a joyful experience. Remember, cooking is about confidence, creativity, and enjoying every bite. Happy blending!

Vanilla Berry Protein Smoothie Bowl (Simple, Thick & Meal-Worthy) - A Creamy, Satisfying Breakfast

Prep Time 10 minutes
Total Time 10 minutes
Servings 2 bowl
Calories 350
This creamy smoothie bowl combines berries, banana, and protein for a satisfying breakfast that’s quick to prepare and customizable with your favorite toppings.

Ingredients

Fruits

  • 1 cup Frozen mixed berries
  • 1 small Frozen banana (in chunks)

Protein & Dairy

  • 1 scoop Vanilla protein powder (whey or plant-based)
  • 1/3 cup Greek yogurt (plain or vanilla)

Liquid & Seeds

  • 1/4 cup Milk of choice (almond, oat, dairy, etc.)
  • 1 tablespoon Chia seeds
  • 1 tablespoon Nut butter (almond, peanut, or cashew)
  • 1/2 teaspoon Vanilla extract

Optional Sweetener

  • 1-2 teaspoons Sweetener (maple syrup, honey, or stevia)

Toppings

  • Sliced banana, fresh berries, granola, coconut flakes, cacao nibs, hemp seeds (for topping)

Instructions 

  • Add frozen berries and banana to your blender for a thick base.
  • Add protein powder and Greek yogurt for creaminess and fullness.
  • Mix in chia seeds, nut butter, vanilla extract, and a splash of milk. Blend until smooth and thick.
  • Taste and adjust sweetness with honey or syrup if needed. Serve immediately topped with your favorite toppings.

Notes

Use frozen fruit for a thicker, colder smoothie bowl. Adjust liquid for desired consistency.
Calories: 350kcal
Cost: $10
Course: Breakfast
Keyword: Berry, Protein, Smoothie

Discover the Joy of Crispy Roasted Chickpeas

Are you ready to elevate your snacking game? Crispy roasted chickpeas are the perfect solution for anyone looking for a healthy, delicious snack that’s easy to make and packed with flavor. In this guide, I’ll walk you through everything you need to know about making these tasty morsels, from the ingredients to the best ways to enjoy them. Whether you’re vegan, gluten-free, or just someone who loves a good crunch, this recipe will have you covered!

Why You’ll Love This Recipe

This isn’t just a recipe; it’s a game-changer in your kitchen! Here’s why:

  • Quick and easy: With just a few simple steps, you can whip up a batch of these roasted chickpeas in under an hour, making them a convenient snack option.
  • Flavor-packed: Tossed with your favorite spices, these chickpeas can be tailored to your taste, from spicy to sweet.
  • Healthy snacking: Chickpeas are a great source of plant-based protein and fiber, making this snack not only satisfying but also nutritious.
  • Versatile: Enjoy them on their own, toss them into salads, or sprinkle over soups for added texture and flavor.
  • Kid-friendly: Even picky eaters will love the crunch and flavor of these chickpeas, making them a perfect snack for the whole family.

Ingredients You’ll Need

Let’s gather what you need to make these crispy roasted chickpeas:

  • 2 cans chickpeas: Make sure they are well-drained and rinsed. You can also use dried chickpeas that you soak and cook, but canned is quicker!
  • 2 tablespoons olive oil: This helps achieve that perfect crisp. You could also substitute with avocado oil for a different flavor.
  • 1 teaspoon smoked paprika powder: Adds a delightful smokiness. Feel free to explore other spices like cumin or curry powder.
  • 1 teaspoon garlic powder: For an extra layer of flavor. Fresh garlic can also work, but be cautious as it can burn.
  • 1/2 teaspoon salt: Essential for enhancing the flavors. You could also use sea salt or Himalayan salt for a gourmet touch.

Pro Tips for Perfectly Crispy Chickpeas

A detailed look at perfectly roasted chickpeas, glistening with olive oil.

Ready to become a roasted chickpea pro? Here are my top tips:

  • Dry thoroughly: Make sure to dry the chickpeas very well after rinsing. This is crucial for achieving a crunchy texture.
  • Don’t skip the oil: A bit of oil is essential for the roasting process, helping the chickpeas crisp up nicely.
  • Use parchment paper: Line your baking sheet with parchment paper for easy cleanup and to prevent sticking.
  • Watch the baking time: Keep an eye on your chickpeas towards the end of baking. They can go from perfect to overdone quickly!
  • Let them cool: Allow the chickpeas to cool on the baking sheet for a few minutes after baking; this helps them crisp up even more.
  • Experiment with spices: Don’t hesitate to get creative! Try using chili powder, cinnamon, or even a sprinkle of sugar for sweet variations.
  • Store properly: Keep your roasted chickpeas in an airtight container to maintain their crispiness.
  • Serve warm: For the best texture, enjoy them fresh out of the oven.

Common Mistakes to Avoid

Here are a few pitfalls to watch out for when making roasted chickpeas:

  • Not drying them enough: If the chickpeas are still wet, they won’t crisp up as desired.
  • Overcrowding the baking sheet: Give them enough space to roast evenly; otherwise, they may steam instead of roast.
  • Using too much spice before baking: Spices can burn during the initial roasting, so it’s best to add them afterward.
  • Not checking for doneness: Every oven is different. Check your chickpeas a few minutes before the suggested time to ensure they don’t burn.

Variations to Try

Feeling adventurous? Here are some delicious variations on the classic roasted chickpea recipe:

  • Spicy Sriracha: Toss your chickpeas with Sriracha sauce and a squeeze of lime before roasting for a fiery kick.
  • Sweet Cinnamon: Mix chickpeas with cinnamon and a touch of honey or maple syrup for a sweet treat.
  • Italian Herb: Use Italian seasoning, garlic powder, and a sprinkle of Parmesan cheese for an Italian twist.
  • BBQ Flavor: Coat your chickpeas with barbecue seasoning for a smoky, sweet flavor.

Storage and Make-Ahead Instructions

Want to make these chickpeas in advance? Here’s how to store them:

  • Room temperature: Store your roasted chickpeas in an airtight container at room temperature. They are best enjoyed within a few days for maximum crispiness.
  • Make-ahead: You can roast them a day or two in advance. Just be sure to keep them stored properly and re-crisp them in the oven for a few minutes if they lose their crunch.

FAQ About Roasted Chickpeas

Got questions? I’ve got answers! Here are some common inquiries about roasted chickpeas:

  • Can I use dried chickpeas? Yes! Just soak and cook them first according to package instructions.
  • What’s the best way to season them? You can use any spices you love! Just remember to add them after the first round of baking.
  • Can I make them without oil? Yes, but they won’t be as crispy. You can try air frying for a similar effect.
  • How do I store leftovers? Keep them in an airtight container at room temperature for up to 3 days.
  • Can I freeze roasted chickpeas? While you can freeze them, they may lose their crunch once thawed. It’s best to enjoy them fresh.
  • How long do they take to cook? The total baking time is about 35-40 minutes, depending on your oven.
  • What can I pair them with? They’re fantastic on their own or tossed into salads, grain bowls, or even soups!
  • Are they healthy? Absolutely! They’re packed with protein and fiber, making them a great snack option.

Nutritional Tips and Dietary Adaptations

Roasted chickpeas are not only delicious but also nutritious. Here are some tips to enhance their health benefits:

  • Boost fiber: Chickpeas are already high in fiber, which is great for digestion. Combine them with whole grains for a fiber-rich meal.
  • Protein power: Pair them with a source of protein like quinoa or tofu for a balanced meal.
  • Low sodium: Control the salt by making your own spice blends to keep sodium levels in check.
  • Gluten-free: Chickpeas are naturally gluten-free, making this snack perfect for those with gluten intolerance.

Essential Equipment

Here’s what you’ll need for the best results:

  • Baking sheet: A sturdy baking sheet ensures even cooking.
  • Parchment paper: This makes cleanup a breeze and prevents sticking.
  • Mixing bowl: A medium bowl for tossing the chickpeas with oil and spices.
  • Clean dishtowel or paper towels: For drying the chickpeas thoroughly after rinsing.

Serving Suggestions

How to enjoy your roasted chickpeas? Here are some delicious ideas:

  • As a snack: Enjoy them straight from the oven for a crunchy treat.
  • In salads: Toss them into salads for added texture and protein.
  • On grain bowls: Add them to bowls with rice or quinoa for a satisfying meal.
  • With dips: Pair them with hummus or guacamole for a fun twist on dipping.

Conclusion

Now that you know how to make crispy roasted chickpeas, it’s time to get into the kitchen and start experimenting! This simple recipe is not only satisfying but also offers endless variations to keep your snacking exciting. Remember, cooking is about confidence and creativity—don’t hesitate to tweak the recipe to make it your own. Enjoy your culinary adventure, and happy cooking!

Roasted Chickpeas

Prep Time 10 minutes
Cook Time 35 minutes
Total Time 45 minutes
Servings 4 servings
Calories 200
A crunchy and flavorful snack made from roasted chickpeas seasoned to perfection.

Ingredients

Canned Goods

  • 2 cans chickpeas (drained and dried)
  • 2 tablespoons olive oil
  • 1 teaspoon smoked paprika powder
  • 1 teaspoon garlic powder
  • 1/2 teaspoon salt

Instructions 

  • Preheat oven to 350°F (175°C). Line a baking sheet with parchment paper.
  • Drain and thoroughly dry the chickpeas with a towel.
  • Toss chickpeas with olive oil. Spread on baking sheet and bake for 25 minutes.
  • Remove from oven, add spices, and toss to coat evenly.
  • Return to oven and bake for another 10 minutes until crunchy.

Notes

Store in an airtight container for a crispy snack.
Calories: 200kcal
Cost: $5
Course: Snack
Keyword: Chickpeas

Start Your Day Right with a High Protein Strawberry Banana Smoothie Bowl

Are you looking for a delicious and nutritious way to kickstart your morning? Look no further than this High Protein Strawberry Banana Smoothie Bowl. Packed with vibrant flavors and essential nutrients, this smoothie bowl is not just a meal; it’s an experience that can energize your day. With a perfect blend of strawberries, bananas, Greek yogurt, and even a sneaky addition of riced cauliflower, you’ll be surprised at how deliciously thick and creamy this bowl can be. Let’s dive into why this recipe is a must-try!

Why You’ll Love This Recipe

  • Quick and Easy: This smoothie bowl can be whipped up in just 10 minutes. Perfect for busy mornings!
  • Customizable: Swap ingredients easily based on your preferences or what you have on hand.
  • Nutritious: Packed with protein from Greek yogurt and fiber from fruits, this bowl will keep you full and satisfied.
  • Kid-Friendly: A fun, colorful dish that kids will love to help make and eat!
  • Deliciously Versatile: Enjoy it as breakfast, a snack, or even a light dessert.

Ingredient Breakdown

Let’s take a closer look at the ingredients you’ll need to make this delightful smoothie bowl:

  • ¼ cup milk: Any type works! Almond, soy, or coconut milk can add unique flavors.
  • ¾ cup Greek yogurt: This adds creaminess and protein. Feel free to use plain or vanilla for a little sweetness.
  • 1 frozen banana: A frozen banana creates a thick, creamy texture and adds natural sweetness.
  • 1 cup frozen strawberries: These provide a burst of flavor and vibrant color!
  • 1 cup frozen riced cauliflower: An unexpected addition that boosts nutrients without altering the flavor.
  • Optional sweetener: A splash of honey or maple syrup can be added for extra sweetness.
  • Toppings: Get creative! Fresh strawberries, banana slices, granola, or hemp hearts work beautifully.

How to Make Your Smoothie Bowl

Here’s a simple step-by-step guide to creating your smoothie bowl:

  1. To a blender, add the milk, Greek yogurt, frozen banana, frozen strawberries, and riced cauliflower. Blend on low to get things moving, then increase to high.
  2. Blend until smooth, using a tamper or spatula to scrape down the sides as needed. If the mixture is too thick, add more milk gradually—just be careful not to make it runny!
  3. Pour the smoothie into a bowl and top with your favorite toppings. Enjoy immediately for the best experience!

Pro Tips for the Perfect Smoothie Bowl

  • Use frozen ingredients: Frozen fruits and vegetables create a thick and creamy texture.
  • Don’t over-blend: Blend just until smooth to maintain thickness.
  • Adjust consistency: If it’s too thick, add a little more milk; if too thin, add more frozen fruit.
  • Experiment with flavors: Try adding spinach or kale for an extra nutrient boost!
  • Presentation matters: Layer your toppings artfully for a beautiful bowl that’s Instagram-ready.
  • Make it a meal: Add protein powder for an extra kick if you’re looking for a more filling option.
  • Stay seasonal: Use seasonal fruits for the best flavor and freshness.
  • Prep ahead: You can pre-measure your smoothie base ingredients and freeze them for a quick blend in the morning.

Common Mistakes and Troubleshooting

Even the best recipes can hit a snag! Here are some common pitfalls and how to avoid them:

  • Too thin: If your smoothie bowl is too runny, add more frozen fruit or a handful of oats.
  • Too thick: Add a splash of milk at a time until you reach your desired consistency.
  • Not blending well: If your blender struggles, stop and scrape down the sides to help it blend evenly.
  • Flavor imbalance: If it’s too sweet, add a squeeze of lemon juice to balance the flavors.

Variations to Try

Mix things up with these fun variations:

  • Berry Blast: Swap strawberries for mixed berries (blueberries, raspberries, blackberries).
  • Green Machine: Add a handful of spinach or kale for a nutrient boost without altering the taste much.
  • Chocolate Delight: Add a tablespoon of cocoa powder or a scoop of chocolate protein powder.
  • Nutty Banana: Top with almond butter and sliced bananas for extra protein and healthy fats.

Storage and Make-Ahead Instructions

Want to prep ahead? Here’s how:

  • Make-Ahead: You can prep the smoothie base ingredients, blend, and freeze in an airtight container. Just thaw and blend on busy mornings!
  • Storage: Store leftover smoothie in the fridge for up to 24 hours. Stir or blend again before enjoying.

Frequently Asked Questions

Got questions? Here are some FAQs about this recipe:

  • Can I use fresh fruit instead of frozen? Absolutely! Just add a handful of ice to achieve the desired thickness.
  • Can I make this smoothie bowl vegan? Yes! Replace Greek yogurt with coconut yogurt and use plant-based milk.
  • What’s a good substitute for Greek yogurt? You can use any thick yogurt like Skyr or a dairy-free alternative.
  • How can I add more protein? Incorporate protein powder, chia seeds, or nut butter into your blend.
  • Can I add greens? Definitely! Spinach or kale is a great way to get extra nutrients without changing the flavor.
  • What toppings can I use? Get creative! Fresh fruits, nuts, seeds, or granola are all great options.
  • Is this smoothie bowl kid-friendly? Yes! Kids will love the fun toppings and the ability to customize their own bowls.
  • How do I make this smoothie bowl more filling? Add oats or nut butter for extra fiber and healthy fats.

Nutritional Tips and Dietary Adaptations

Want to make this recipe even healthier? Here are some tips:

  • Watch added sugars: Use fruits for sweetness rather than sweeteners.
  • Increase fiber: Add flax seeds or chia seeds to boost fiber content.
  • Low-carb option: Use unsweetened almond milk and omit the banana for a lower-carb version.

Essential Equipment for Smoothie Bowls

Having the right kitchen tools can make your smoothie bowl making experience smoother:

  • High-speed blender: A powerful blender is essential for achieving that creamy, smooth consistency.
  • Measuring cups and spoons: Ensure accurate measurements for perfect results.
  • Bowl: A nice, deep bowl allows for generous servings and beautiful presentations.

Serving Suggestions

Pair your High Protein Strawberry Banana Smoothie Bowl with:

  • Whole grain toast: Top with avocado or nut butter for a balanced meal.
  • Fresh juice: A glass of fresh orange juice adds a refreshing touch.
  • Yogurt parfait: Layer with granola and yogurt for a full breakfast spread!

In conclusion, this High Protein Strawberry Banana Smoothie Bowl is not just a recipe; it’s a pathway to a healthier, happier morning routine. Whether you’re whipping it up for yourself or sharing with family, it’s a delightful dish that brings joy and nourishment. Don’t forget to get creative with toppings and variations to make it your own. Happy cooking!

High Protein Strawberry Banana Smoothie Bowl

Prep Time 10 minutes
Total Time 10 minutes
Servings 2 servings
Calories 250
A delicious and nutritious smoothie bowl packed with protein, perfect for a quick breakfast or snack.

Ingredients

Dairy

  • 0.25 cup milk
  • 0.75 cup Greek yogurt (plain or vanilla)
  • 1 frozen banana (peeled) banana (frozen and peeled)
  • 1 cup frozen strawberries
  • 1 cup frozen riced cauliflower
  • optional splash honey or maple syrup (to sweeten if desired)

Toppings of choice

  • to taste fresh strawberries, banana, granola, hemp hearts

Instructions 

  • Add milk, yogurt, banana, strawberries, and cauliflower to a blender. Blend on low then high until smooth.
  • If needed, add more milk 1 tablespoon at a time to help blending. Do not over-blend to keep thickness.
  • Pour into a bowl, add toppings, and enjoy immediately.

Notes

Feel free to customize toppings for added flavor and texture.
Calories: 250kcal
Cost: $10
Course: Breakfast
Cuisine: American
Keyword: Fruit, Protein, Smoothie