Author

Steven

Browsing

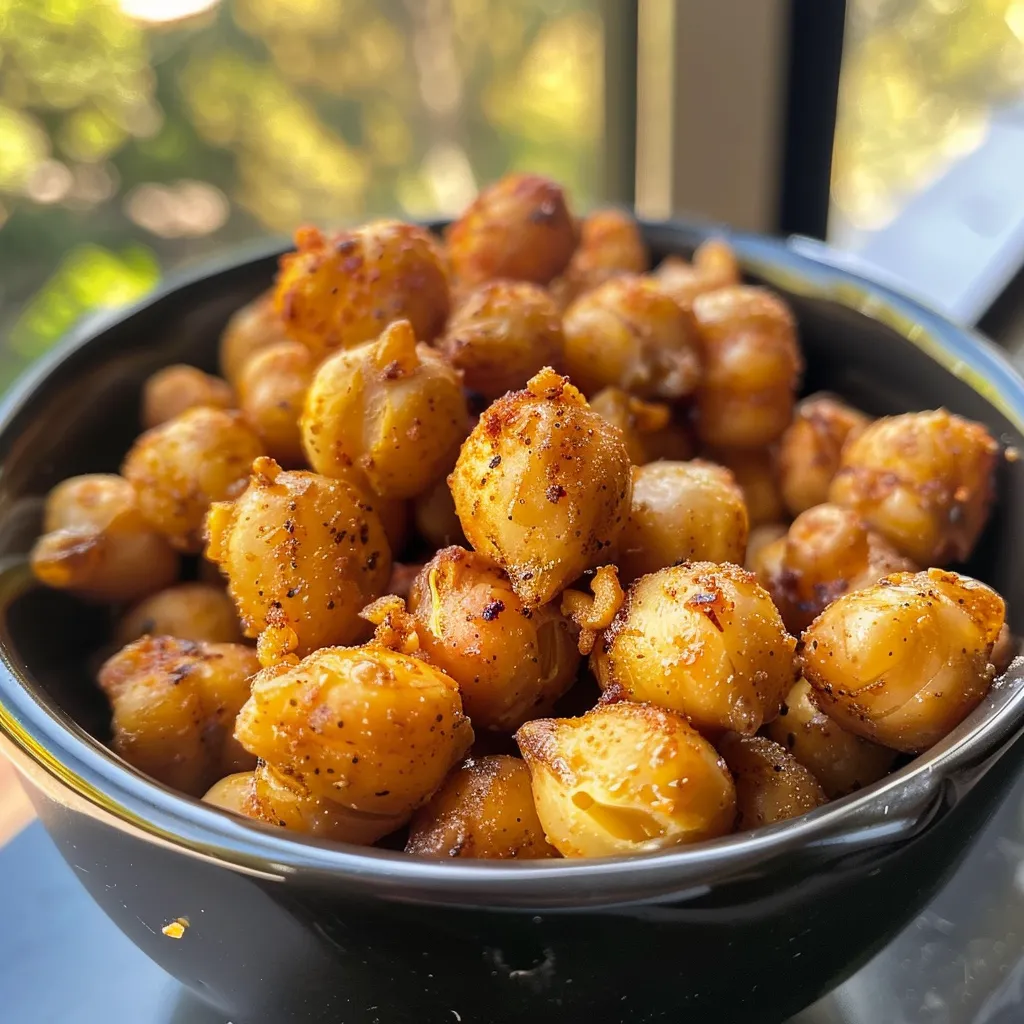
Discover the Joy of Crispy Roasted Chickpeas

Are you ready to elevate your snacking game? Crispy roasted chickpeas are the perfect solution for anyone looking for a healthy, delicious snack that’s easy to make and packed with flavor. In this guide, I’ll walk you through everything you need to know about making these tasty morsels, from the ingredients to the best ways to enjoy them. Whether you’re vegan, gluten-free, or just someone who loves a good crunch, this recipe will have you covered!

Why You’ll Love This Recipe

This isn’t just a recipe; it’s a game-changer in your kitchen! Here’s why:

  • Quick and easy: With just a few simple steps, you can whip up a batch of these roasted chickpeas in under an hour, making them a convenient snack option.
  • Flavor-packed: Tossed with your favorite spices, these chickpeas can be tailored to your taste, from spicy to sweet.
  • Healthy snacking: Chickpeas are a great source of plant-based protein and fiber, making this snack not only satisfying but also nutritious.
  • Versatile: Enjoy them on their own, toss them into salads, or sprinkle over soups for added texture and flavor.
  • Kid-friendly: Even picky eaters will love the crunch and flavor of these chickpeas, making them a perfect snack for the whole family.

Ingredients You’ll Need

Let’s gather what you need to make these crispy roasted chickpeas:

  • 2 cans chickpeas: Make sure they are well-drained and rinsed. You can also use dried chickpeas that you soak and cook, but canned is quicker!
  • 2 tablespoons olive oil: This helps achieve that perfect crisp. You could also substitute with avocado oil for a different flavor.
  • 1 teaspoon smoked paprika powder: Adds a delightful smokiness. Feel free to explore other spices like cumin or curry powder.
  • 1 teaspoon garlic powder: For an extra layer of flavor. Fresh garlic can also work, but be cautious as it can burn.
  • 1/2 teaspoon salt: Essential for enhancing the flavors. You could also use sea salt or Himalayan salt for a gourmet touch.

Pro Tips for Perfectly Crispy Chickpeas

A detailed look at perfectly roasted chickpeas, glistening with olive oil.

Ready to become a roasted chickpea pro? Here are my top tips:

  • Dry thoroughly: Make sure to dry the chickpeas very well after rinsing. This is crucial for achieving a crunchy texture.
  • Don’t skip the oil: A bit of oil is essential for the roasting process, helping the chickpeas crisp up nicely.
  • Use parchment paper: Line your baking sheet with parchment paper for easy cleanup and to prevent sticking.
  • Watch the baking time: Keep an eye on your chickpeas towards the end of baking. They can go from perfect to overdone quickly!
  • Let them cool: Allow the chickpeas to cool on the baking sheet for a few minutes after baking; this helps them crisp up even more.
  • Experiment with spices: Don’t hesitate to get creative! Try using chili powder, cinnamon, or even a sprinkle of sugar for sweet variations.
  • Store properly: Keep your roasted chickpeas in an airtight container to maintain their crispiness.
  • Serve warm: For the best texture, enjoy them fresh out of the oven.

Common Mistakes to Avoid

Here are a few pitfalls to watch out for when making roasted chickpeas:

  • Not drying them enough: If the chickpeas are still wet, they won’t crisp up as desired.
  • Overcrowding the baking sheet: Give them enough space to roast evenly; otherwise, they may steam instead of roast.
  • Using too much spice before baking: Spices can burn during the initial roasting, so it’s best to add them afterward.
  • Not checking for doneness: Every oven is different. Check your chickpeas a few minutes before the suggested time to ensure they don’t burn.

Variations to Try

Feeling adventurous? Here are some delicious variations on the classic roasted chickpea recipe:

  • Spicy Sriracha: Toss your chickpeas with Sriracha sauce and a squeeze of lime before roasting for a fiery kick.
  • Sweet Cinnamon: Mix chickpeas with cinnamon and a touch of honey or maple syrup for a sweet treat.
  • Italian Herb: Use Italian seasoning, garlic powder, and a sprinkle of Parmesan cheese for an Italian twist.
  • BBQ Flavor: Coat your chickpeas with barbecue seasoning for a smoky, sweet flavor.

Storage and Make-Ahead Instructions

Want to make these chickpeas in advance? Here’s how to store them:

  • Room temperature: Store your roasted chickpeas in an airtight container at room temperature. They are best enjoyed within a few days for maximum crispiness.
  • Make-ahead: You can roast them a day or two in advance. Just be sure to keep them stored properly and re-crisp them in the oven for a few minutes if they lose their crunch.

FAQ About Roasted Chickpeas

Got questions? I’ve got answers! Here are some common inquiries about roasted chickpeas:

  • Can I use dried chickpeas? Yes! Just soak and cook them first according to package instructions.
  • What’s the best way to season them? You can use any spices you love! Just remember to add them after the first round of baking.
  • Can I make them without oil? Yes, but they won’t be as crispy. You can try air frying for a similar effect.
  • How do I store leftovers? Keep them in an airtight container at room temperature for up to 3 days.
  • Can I freeze roasted chickpeas? While you can freeze them, they may lose their crunch once thawed. It’s best to enjoy them fresh.
  • How long do they take to cook? The total baking time is about 35-40 minutes, depending on your oven.
  • What can I pair them with? They’re fantastic on their own or tossed into salads, grain bowls, or even soups!
  • Are they healthy? Absolutely! They’re packed with protein and fiber, making them a great snack option.

Nutritional Tips and Dietary Adaptations

Roasted chickpeas are not only delicious but also nutritious. Here are some tips to enhance their health benefits:

  • Boost fiber: Chickpeas are already high in fiber, which is great for digestion. Combine them with whole grains for a fiber-rich meal.
  • Protein power: Pair them with a source of protein like quinoa or tofu for a balanced meal.
  • Low sodium: Control the salt by making your own spice blends to keep sodium levels in check.
  • Gluten-free: Chickpeas are naturally gluten-free, making this snack perfect for those with gluten intolerance.

Essential Equipment

Here’s what you’ll need for the best results:

  • Baking sheet: A sturdy baking sheet ensures even cooking.
  • Parchment paper: This makes cleanup a breeze and prevents sticking.
  • Mixing bowl: A medium bowl for tossing the chickpeas with oil and spices.
  • Clean dishtowel or paper towels: For drying the chickpeas thoroughly after rinsing.

Serving Suggestions

How to enjoy your roasted chickpeas? Here are some delicious ideas:

  • As a snack: Enjoy them straight from the oven for a crunchy treat.
  • In salads: Toss them into salads for added texture and protein.
  • On grain bowls: Add them to bowls with rice or quinoa for a satisfying meal.
  • With dips: Pair them with hummus or guacamole for a fun twist on dipping.

Conclusion

Now that you know how to make crispy roasted chickpeas, it’s time to get into the kitchen and start experimenting! This simple recipe is not only satisfying but also offers endless variations to keep your snacking exciting. Remember, cooking is about confidence and creativity—don’t hesitate to tweak the recipe to make it your own. Enjoy your culinary adventure, and happy cooking!

Roasted Chickpeas

Prep Time 10 minutes
Cook Time 35 minutes
Total Time 45 minutes
Servings 4 servings
Calories 200
A crunchy and flavorful snack made from roasted chickpeas seasoned to perfection.

Ingredients

Canned Goods

  • 2 cans chickpeas (drained and dried)
  • 2 tablespoons olive oil
  • 1 teaspoon smoked paprika powder
  • 1 teaspoon garlic powder
  • 1/2 teaspoon salt

Instructions 

  • Preheat oven to 350°F (175°C). Line a baking sheet with parchment paper.
  • Drain and thoroughly dry the chickpeas with a towel.
  • Toss chickpeas with olive oil. Spread on baking sheet and bake for 25 minutes.
  • Remove from oven, add spices, and toss to coat evenly.
  • Return to oven and bake for another 10 minutes until crunchy.

Notes

Store in an airtight container for a crispy snack.
Calories: 200kcal
Cost: $5
Course: Snack
Keyword: Chickpeas

Start Your Day Right with a High Protein Strawberry Banana Smoothie Bowl

Are you looking for a delicious and nutritious way to kickstart your morning? Look no further than this High Protein Strawberry Banana Smoothie Bowl. Packed with vibrant flavors and essential nutrients, this smoothie bowl is not just a meal; it’s an experience that can energize your day. With a perfect blend of strawberries, bananas, Greek yogurt, and even a sneaky addition of riced cauliflower, you’ll be surprised at how deliciously thick and creamy this bowl can be. Let’s dive into why this recipe is a must-try!

Why You’ll Love This Recipe

  • Quick and Easy: This smoothie bowl can be whipped up in just 10 minutes. Perfect for busy mornings!
  • Customizable: Swap ingredients easily based on your preferences or what you have on hand.
  • Nutritious: Packed with protein from Greek yogurt and fiber from fruits, this bowl will keep you full and satisfied.
  • Kid-Friendly: A fun, colorful dish that kids will love to help make and eat!
  • Deliciously Versatile: Enjoy it as breakfast, a snack, or even a light dessert.

Ingredient Breakdown

Let’s take a closer look at the ingredients you’ll need to make this delightful smoothie bowl:

  • ¼ cup milk: Any type works! Almond, soy, or coconut milk can add unique flavors.
  • ¾ cup Greek yogurt: This adds creaminess and protein. Feel free to use plain or vanilla for a little sweetness.
  • 1 frozen banana: A frozen banana creates a thick, creamy texture and adds natural sweetness.
  • 1 cup frozen strawberries: These provide a burst of flavor and vibrant color!
  • 1 cup frozen riced cauliflower: An unexpected addition that boosts nutrients without altering the flavor.
  • Optional sweetener: A splash of honey or maple syrup can be added for extra sweetness.
  • Toppings: Get creative! Fresh strawberries, banana slices, granola, or hemp hearts work beautifully.

How to Make Your Smoothie Bowl

Here’s a simple step-by-step guide to creating your smoothie bowl:

  1. To a blender, add the milk, Greek yogurt, frozen banana, frozen strawberries, and riced cauliflower. Blend on low to get things moving, then increase to high.
  2. Blend until smooth, using a tamper or spatula to scrape down the sides as needed. If the mixture is too thick, add more milk gradually—just be careful not to make it runny!
  3. Pour the smoothie into a bowl and top with your favorite toppings. Enjoy immediately for the best experience!

Pro Tips for the Perfect Smoothie Bowl

  • Use frozen ingredients: Frozen fruits and vegetables create a thick and creamy texture.
  • Don’t over-blend: Blend just until smooth to maintain thickness.
  • Adjust consistency: If it’s too thick, add a little more milk; if too thin, add more frozen fruit.
  • Experiment with flavors: Try adding spinach or kale for an extra nutrient boost!
  • Presentation matters: Layer your toppings artfully for a beautiful bowl that’s Instagram-ready.
  • Make it a meal: Add protein powder for an extra kick if you’re looking for a more filling option.
  • Stay seasonal: Use seasonal fruits for the best flavor and freshness.
  • Prep ahead: You can pre-measure your smoothie base ingredients and freeze them for a quick blend in the morning.

Common Mistakes and Troubleshooting

Even the best recipes can hit a snag! Here are some common pitfalls and how to avoid them:

  • Too thin: If your smoothie bowl is too runny, add more frozen fruit or a handful of oats.
  • Too thick: Add a splash of milk at a time until you reach your desired consistency.
  • Not blending well: If your blender struggles, stop and scrape down the sides to help it blend evenly.
  • Flavor imbalance: If it’s too sweet, add a squeeze of lemon juice to balance the flavors.

Variations to Try

Mix things up with these fun variations:

  • Berry Blast: Swap strawberries for mixed berries (blueberries, raspberries, blackberries).
  • Green Machine: Add a handful of spinach or kale for a nutrient boost without altering the taste much.
  • Chocolate Delight: Add a tablespoon of cocoa powder or a scoop of chocolate protein powder.
  • Nutty Banana: Top with almond butter and sliced bananas for extra protein and healthy fats.

Storage and Make-Ahead Instructions

Want to prep ahead? Here’s how:

  • Make-Ahead: You can prep the smoothie base ingredients, blend, and freeze in an airtight container. Just thaw and blend on busy mornings!
  • Storage: Store leftover smoothie in the fridge for up to 24 hours. Stir or blend again before enjoying.

Frequently Asked Questions

Got questions? Here are some FAQs about this recipe:

  • Can I use fresh fruit instead of frozen? Absolutely! Just add a handful of ice to achieve the desired thickness.
  • Can I make this smoothie bowl vegan? Yes! Replace Greek yogurt with coconut yogurt and use plant-based milk.
  • What’s a good substitute for Greek yogurt? You can use any thick yogurt like Skyr or a dairy-free alternative.
  • How can I add more protein? Incorporate protein powder, chia seeds, or nut butter into your blend.
  • Can I add greens? Definitely! Spinach or kale is a great way to get extra nutrients without changing the flavor.
  • What toppings can I use? Get creative! Fresh fruits, nuts, seeds, or granola are all great options.
  • Is this smoothie bowl kid-friendly? Yes! Kids will love the fun toppings and the ability to customize their own bowls.
  • How do I make this smoothie bowl more filling? Add oats or nut butter for extra fiber and healthy fats.

Nutritional Tips and Dietary Adaptations

Want to make this recipe even healthier? Here are some tips:

  • Watch added sugars: Use fruits for sweetness rather than sweeteners.
  • Increase fiber: Add flax seeds or chia seeds to boost fiber content.
  • Low-carb option: Use unsweetened almond milk and omit the banana for a lower-carb version.

Essential Equipment for Smoothie Bowls

Having the right kitchen tools can make your smoothie bowl making experience smoother:

  • High-speed blender: A powerful blender is essential for achieving that creamy, smooth consistency.
  • Measuring cups and spoons: Ensure accurate measurements for perfect results.
  • Bowl: A nice, deep bowl allows for generous servings and beautiful presentations.

Serving Suggestions

Pair your High Protein Strawberry Banana Smoothie Bowl with:

  • Whole grain toast: Top with avocado or nut butter for a balanced meal.
  • Fresh juice: A glass of fresh orange juice adds a refreshing touch.
  • Yogurt parfait: Layer with granola and yogurt for a full breakfast spread!

In conclusion, this High Protein Strawberry Banana Smoothie Bowl is not just a recipe; it’s a pathway to a healthier, happier morning routine. Whether you’re whipping it up for yourself or sharing with family, it’s a delightful dish that brings joy and nourishment. Don’t forget to get creative with toppings and variations to make it your own. Happy cooking!

High Protein Strawberry Banana Smoothie Bowl

Prep Time 10 minutes
Total Time 10 minutes
Servings 2 servings
Calories 250
A delicious and nutritious smoothie bowl packed with protein, perfect for a quick breakfast or snack.

Ingredients

Dairy

  • 0.25 cup milk
  • 0.75 cup Greek yogurt (plain or vanilla)
  • 1 frozen banana (peeled) banana (frozen and peeled)
  • 1 cup frozen strawberries
  • 1 cup frozen riced cauliflower
  • optional splash honey or maple syrup (to sweeten if desired)

Toppings of choice

  • to taste fresh strawberries, banana, granola, hemp hearts

Instructions 

  • Add milk, yogurt, banana, strawberries, and cauliflower to a blender. Blend on low then high until smooth.
  • If needed, add more milk 1 tablespoon at a time to help blending. Do not over-blend to keep thickness.
  • Pour into a bowl, add toppings, and enjoy immediately.

Notes

Feel free to customize toppings for added flavor and texture.
Calories: 250kcal
Cost: $10
Course: Breakfast
Cuisine: American
Keyword: Fruit, Protein, Smoothie

Discover the Joy of Roasted Parmesan Cauliflower Bites

Are you ready to elevate your snacking game? If you’re looking for an easy yet delicious option that brings flavor and satisfaction to your table, look no further! These Roasted Parmesan Cauliflower Bites are not only simple to make but also incredibly versatile, perfect for any occasion—from a quick weeknight dinner to a festive gathering. With just a handful of ingredients, you can whip up a dish that’s both healthy and indulgent. So let’s dive into how to make these scrumptious bites.

Why You’ll Love This Recipe

This delightful recipe is designed to captivate your taste buds and spark your culinary creativity. Here are five reasons why these parmesan cauliflower bites deserve a spot in your kitchen:

  • Flavor Explosion: The combination of roasted cauliflower and Parmesan cheese creates a savory, cheesy delight with every bite.
  • Easy to Prepare: With minimal prep time, this recipe is perfect for busy weeknights or last-minute gatherings.
  • Health-Conscious Choice: Cauliflower is a nutritious vegetable packed with vitamins, making this a guilt-free snack or side dish.
  • Versatile and Customizable: You can easily tweak the seasonings or add different toppings to suit your taste preferences.
  • Kid-Approved: Even picky eaters will love these tasty bites, making them a great option for family meals.

Ingredients You’ll Need

To make these irresistible roasted parmesan cauliflower bites, gather the following ingredients:

  • 1 medium head of cauliflower: Cut into bite-sized florets for even roasting.
  • 2 tablespoons extra virgin olive oil: This helps achieve that perfect golden-brown crispiness.
  • ½ cup freshly grated Parmesan cheese: Adds a rich, cheesy flavor that pairs beautifully with the cauliflower.
  • 1 teaspoon garlic powder: Infuses the bites with a savory aroma and taste.
  • 1 teaspoon paprika: Provides a hint of smokiness and color.
  • Salt to taste: Enhances all the flavors.

Feel free to experiment with substitutions! For example, you can use nutritional yeast for a dairy-free option or add a pinch of red pepper flakes for a spicy kick.

How to Make Roasted Parmesan Cauliflower Bites

Deliciously crispy cauliflower pieces garnished with parmesan and seasoning.

Follow these simple steps to create your roasted perfection:

  1. Preheat your oven: Set it to 425°F (220°C) to ensure your cauliflower gets crispy.
  2. Prepare your baking sheet: Line it with parchment paper or grease it lightly for easy cleanup.
  3. Toss the cauliflower: In a large bowl, coat the cauliflower florets with olive oil until they are evenly covered.
  4. Add seasonings: Sprinkle the garlic powder, paprika, and salt over the florets; mix thoroughly to ensure even seasoning.
  5. Coat with Parmesan: Add the freshly grated Parmesan cheese and toss until every floret is well-coated.
  6. Arrange on the baking sheet: Spread the cauliflower in a single layer to promote even roasting.
  7. Roast in the oven: Bake for 25-30 minutes or until the cauliflower is golden brown and crispy. Enjoy the heavenly aroma!

Pro Tips for Perfect Bites

To ensure your roasted parmesan cauliflower bites turn out perfectly every time, consider these expert tips:

  • Leave space between florets: This helps them roast evenly and become extra crispy.
  • Don’t skip the preheating: A hot oven is essential for achieving that perfect roasted texture.
  • Experiment with toppings: Try adding different herbs or spices like Italian seasoning or cumin for a unique twist.
  • Store leftovers properly: Keep any uneaten bites in an airtight container in the fridge for up to 3 days.
  • Reheat in the oven: For the best results, reheat leftover cauliflower bites in the oven rather than the microwave to maintain their crispiness.
  • Mix in other veggies: Feel free to add bell peppers or Brussels sprouts to the baking sheet for a colorful veggie medley.
  • Go for fresh cheese: Using freshly grated Parmesan will always yield better flavor than pre-grated cheese.
  • Check for doneness: The bites should be golden brown and tender when pierced with a fork.

Common Mistakes and Troubleshooting

Even the best of us make mistakes in the kitchen! Here are some common pitfalls to avoid when making roasted parmesan cauliflower bites:

  • Overcrowding the baking sheet: This leads to steaming rather than roasting, resulting in soggy bites.
  • Not using enough oil: Insufficient oil can cause the cauliflower to dry out instead of becoming crispy.
  • Skipping the salt: Don’t forget to season your cauliflower; it can make a huge difference in flavor.
  • Using old cauliflower: Fresh cauliflower is key! Look for firm florets without brown spots.

Delicious Variations

Want to switch things up? Here are a few tasty variations to try:

  • Buffalo Cauliflower Bites: Toss the cauliflower in buffalo sauce before roasting for a spicy kick.
  • Italian Herb Cauliflower: Mix in dried oregano and basil with the garlic powder for an Italian twist.
  • Cheesy Ranch Cauliflower: Add ranch seasoning to the mix for a zesty flavor.
  • Lemon Zest Cauliflower: Sprinkle some lemon zest before serving for a refreshing brightness.

Make Ahead and Storage

You can make these roasted parmesan cauliflower bites ahead of time!

  • Make Ahead: Prep the cauliflower and season it. Store in the fridge for up to 24 hours before roasting.
  • Storage: Keep leftovers in an airtight container for up to 3 days. Reheat in a 400°F oven for best results.

FAQs About Roasted Parmesan Cauliflower Bites

Got questions? Here are some frequently asked ones:

  • Can I use frozen cauliflower? Yes, but fresh cauliflower yields the best texture. If using frozen, thaw and pat dry before roasting.
  • What can I serve these bites with? They pair wonderfully with dips like ranch or buffalo sauce, or as a side to your favorite main dish.
  • Is this dish gluten-free? Absolutely! All the ingredients are naturally gluten-free.
  • Can I make this vegan? Substitute nutritional yeast for Parmesan and use a vegan butter alternative for added flavor.
  • How do I know when they’re done? The bites should be golden brown and crispy on the outside. A fork should easily pierce the cauliflower.
  • Can I add more cheese? Of course! Sprinkle more Parmesan cheese halfway through roasting for an extra cheesy finish.
  • What’s the best way to reheat leftovers? Reheat in the oven at 400°F until crispy again, about 10 minutes.
  • Can I add other spices? Absolutely! Feel free to customize with your favorite spices or herbs.

Nutritional Tips and Dietary Adaptations

This recipe is not only delicious but also offers some nutritional benefits:

  • Low in Carbs: Cauliflower is a fantastic low-carb alternative to traditional snacks.
  • Rich in Fiber: This vegetable is high in fiber, promoting digestive health.
  • Vitamins and Minerals: Cauliflower is packed with vitamins C, K, and B6, as well as folate.

For dietary adaptations, consider using almond flour instead of breadcrumbs for a gluten-free option!

Essential Equipment Recommendations

Here’s what you’ll need to successfully make these roasted parmesan cauliflower bites:

  • Baking Sheet: A sturdy baking sheet ensures even cooking.
  • Parchment Paper: This helps prevent sticking and makes cleanup a breeze.
  • Mixing Bowl: A large bowl for tossing the cauliflower and ingredients together.
  • Measuring Cups and Spoons: Precise measurements will help you get the best results.

Serving Suggestions

While these roasted parmesan cauliflower bites are delightful on their own, here are a few serving ideas:

  • As a Snack: Serve with your favorite dip, like ranch or hummus, for a satisfying snack.
  • As a Side Dish: Pair with grilled chicken or fish for a wholesome dinner.
  • On a Salad: Toss them into a fresh salad for added crunch and flavor.
  • At a Party: Serve on a platter with assorted dips for a crowd-pleasing appetizer.

With these Roasted Parmesan Cauliflower Bites, you’re not just making a dish; you’re creating an experience of joy and satisfaction. Whether you’re snacking solo or sharing with friends, these bites are sure to delight. Enjoy cooking and the delicious results!

Roasted Parmesan Cauliflower Bites

Prep Time 10 minutes
Cook Time 30 minutes
Total Time 40 minutes
Servings 4 servings
Calories 150
Enjoy these crispy, cheesy cauliflower bites that make a perfect snack or side dish.

Ingredients

Cauliflower

  • 1 medium head cauliflower
  • 2 tablespoons extra virgin olive oil
  • ½ cup freshly grated parmesan cheese
  • 1 teaspoon garlic powder
  • 1 teaspoon paprika
  • Salt to taste salt

Instructions 

  • Preheat oven to 425°F (220°C). Line a baking sheet.
  • Toss cauliflower in olive oil, then sprinkle with garlic powder, paprika, and salt.
  • Add parmesan cheese and toss to coat evenly.
  • Spread on baking sheet in a single layer.
  • Roast for 25-30 minutes until golden and crispy.

Notes

For extra crunch, broil for an additional 2 minutes.
Calories: 150kcal
Cost: $12
Course: Appetizer, Side Dish
Cuisine: American
Keyword: Bites, Cauliflower, Parmesan

Start Your Day Right with Apple Cinnamon Overnight Oats

Welcome to a deliciously simple recipe that brings the comforting flavors of apple cinnamon straight to your breakfast table! These overnight oats are not only easy to prepare but also packed with nutrients, making them a perfect choice for busy mornings. With just a few ingredients and minimal effort, you’ll have a wholesome breakfast that’s ready to go when you are. So grab a jar, and let’s dive into the delightful world of cinnamon overnight oats!

Why You’ll Love This Recipe

  • Quick and Easy Preparation: Spend just 10 minutes preparing your oats, and they’ll be ready to enjoy in the morning.
  • Healthy Breakfast Option: Packed with fiber and nutrients, these oats will keep you full and energized throughout your busy day.
  • Customizable: Tailor this recipe to your taste—swap out apples for other fruits, or use different sweeteners.
  • Perfect for Meal Prep: Prepare several jars at once to have a grab-and-go breakfast ready for the week.
  • Family-Friendly: Kids love the sweet and comforting flavors, making it a breakfast everyone can agree on!

Ingredients Breakdown

Here’s what you’ll need to create these delicious apple cinnamon overnight oats:

  • 1/2 cup rolled oats: Use old-fashioned oats for the best texture.
  • 1 cup milk: Any kind works—dairy, almond, coconut, or oat milk are all great choices.
  • 1/2 cup unsweetened applesauce: Adds moisture and sweetness without extra sugar.
  • 1 tablespoon chia seeds: These are packed with omega-3s and help thicken the oats.
  • 1 teaspoon maple syrup or honey (optional): Adjust sweetness to your liking.
  • 1/2 teaspoon ground cinnamon: The star spice that brings warmth and flavor.
  • 1/4 cup finely diced apple: Fresh apple adds crunch and flavor—feel free to peel or leave the skin on!
  • Pinch of salt: Enhances the sweetness and balances flavors.

Substitutions and Variations

A textured view of Apple Cinnamon Overnight Oats, highlighting the creamy mixture and diced apples.

If you want to mix things up a bit, here are some substitutions and variations to try:

  • Different Fruits: Swap apples for bananas, berries, or peaches for a fruity twist.
  • Nut Butters: Stir in a tablespoon of almond or peanut butter for added creaminess and protein.
  • Seeds and Nuts: Add chopped walnuts or sliced almonds for extra crunch and healthy fats.
  • Yogurt Addition: Mix in some Greek yogurt for additional creaminess and protein boost.

How to Make Apple Cinnamon Overnight Oats

Follow these simple steps to create your cinnamon overnight oats:

  • Combine Dry Ingredients: In a jar or bowl, mix rolled oats, chia seeds, ground cinnamon, and a pinch of salt.
  • Add Wet Ingredients: Pour in your milk and applesauce. If you’re adding maple syrup or honey, include it now.
  • Stir Thoroughly: Mix until everything is well combined. Ensure no clumps of oats or chia seeds stick to the bottom.
  • Fold in Diced Apple: Gently incorporate the apples into your mixture.
  • Cover and Chill: Seal your jar or bowl and place it in the refrigerator.
  • Soak Overnight: Allow the oats to soak for at least 6-8 hours, or preferably overnight.
  • Serve and Enjoy: In the morning, give the oats a quick stir and adjust the consistency with more milk if needed. Add your favorite toppings, like nuts or additional fruit!

Pro Tips for Perfect Overnight Oats

  • Use a Mason Jar: This keeps your oats fresh and ready to grab in the morning.
  • Layering Ingredients: Layer dry ingredients first, then wet, to avoid clumping.
  • Experiment with Flavors: Try adding vanilla extract or nutmeg for added depth.
  • Adjust Sweetness: Taste your mixture before chilling; you can always add more sweetener later.
  • Keep it Creamy: If your oats seem too thick in the morning, add a splash of milk and stir.
  • Mix and Match: Combine different fruits or toppings throughout the week to keep things interesting.
  • Stay Mindful of Portions: Stick to the recommended serving sizes to maintain a balanced diet.
  • Utilize Leftovers: If you have extra oats, use them in smoothies or baked goods!

Common Mistakes and Troubleshooting

Here are a few common slip-ups when making overnight oats and how to avoid them:

  • Too Thick: If your oats are too thick in the morning, simply stir in a little more milk until you reach your desired consistency.
  • Watery Oats: If your oats are too watery, next time reduce the amount of milk or increase the oats slightly.
  • Flavorless Oats: Make sure to season well with cinnamon and salt, and don’t forget to taste before refrigerating!
  • Using Quick Oats: Avoid quick oats for this recipe; they can become mushy and lose their texture.

Storage and Make-Ahead Instructions

These apple cinnamon overnight oats are great for meal prep! Here’s how to store them:

  • Refrigeration: Store your overnight oats in the refrigerator for up to 5 days.
  • Make-Ahead: Prepare multiple jars at once to save time during your busy mornings.
  • Freezer-Friendly: You can freeze the mixture for up to 3 months; just thaw overnight in the fridge before serving.

Frequently Asked Questions

Here are some common questions about apple cinnamon overnight oats:

  • How long do overnight oats last? They can be stored in the fridge for up to 5 days.
  • Can I eat overnight oats warm? Yes! If you prefer them warm, simply heat them up in the microwave for a minute or two.
  • What kind of oats should I use? Old-fashioned rolled oats are best; avoid instant oats as they can become mushy.
  • Can I make this vegan? Absolutely! Just use plant-based milk and a vegan sweetener.
  • How do I make my oats creamier? Try adding Greek yogurt or more chia seeds for a creamier texture.
  • Are overnight oats healthy? Yes! They’re high in fiber, protein, and whole grains, making them a nutritious breakfast option.
  • Can I add other toppings? Definitely! Try nuts, seeds, or any fresh fruit you enjoy.
  • What if I don’t have chia seeds? You can omit them, but they do help with texture and nutritional value.

Nutritional Tips and Dietary Adaptations

To optimize the health benefits of your apple cinnamon overnight oats, consider these tips:

  • Boost Fiber: Add a tablespoon of flaxseed or hemp seeds for extra fiber and nutrients.
  • Reduce Sugar: If you’re watching sugar intake, skip the sweeteners or use stevia.
  • Increase Protein: Add a scoop of protein powder or Greek yogurt for a more balanced breakfast.
  • Gluten-Free Option: Ensure you use certified gluten-free oats.

Equipment Recommendations

To make your cinnamon overnight oats successfully, you’ll need:

  • Jars or Bowls: Mason jars or airtight containers work best for storing overnight oats.
  • Spoons: A good mixing spoon for combining your ingredients thoroughly.
  • Measuring Cups and Spoons: For accurate measurements of your ingredients.
  • Refrigerator: To chill your oats overnight and enhance their flavor.

Serving Suggestions

Once your apple cinnamon overnight oats are ready, consider these serving ideas:

  • Top with Fresh Fruit: Add banana slices, berries, or additional diced apples for a fruity kick.
  • Nut Butter Drizzle: A spoonful of almond or peanut butter adds richness and flavor.
  • Sprinkle with Nuts: Chopped walnuts or pecans add crunch and healthy fats.
  • Yogurt Swirl: A dollop of yogurt on top makes for a creamy finish.

Enjoy these apple cinnamon overnight oats as a satisfying, nutritious breakfast that will keep you energized and ready to tackle your day. Remember, cooking is about enjoying the process, so feel free to experiment and make this recipe your own. Happy cooking!

Apple Cinnamon Overnight Oats

Prep Time 10 minutes
Total Time 10 minutes
Servings 2 servings
Calories 250
A quick and healthy breakfast that combines oats, apples, and cinnamon for a delicious start to your day.

Ingredients

Dry Ingredients

  • 1/2 cup rolled oats (old-fashioned oats)
  • 1 cup milk (dairy or non-dairy)
  • 1/2 cup unsweetened applesauce
  • 1 tablespoon chia seeds
  • 1 teaspoon maple syrup or honey (optional, for sweetness)
  • 1/2 teaspoon ground cinnamon
  • 1/4 cup finely diced apple (peeled or unpeeled)
  • Pinch salt

Instructions 

  • Mix oats, chia seeds, cinnamon, and salt in a jar or bowl.
  • Add milk, applesauce, and sweetener; stir well.
  • Fold in diced apple; cover and refrigerate overnight.
  • In the morning, stir and add more milk if needed. Serve and enjoy.

Notes

You can customize toppings like nuts or additional fruit for variety.
Calories: 250kcal
Cost: $10
Course: Breakfast
Cuisine: American
Keyword: Oats

Unlock the Secret to Irresistibly Crunchy Garlic Parmesan Cauliflower

Welcome to a culinary adventure where we transform humble cauliflower into a crispy garlic parmesan delight! This Crispy Garlic Parmesan Cauliflower is not just another side dish; it’s a flavor-packed experience that’s perfect for weeknight dinners or impressing guests at gatherings. With its golden crust and savory garlic undertones, you’ll find yourself craving this dish again and again. Let’s dive into why this recipe deserves a spot in your kitchen!

Why You’ll Love This Recipe

There are countless reasons to fall in love with this garlic parmesan cauliflower. Here are just a few:

  • Easy to Prepare: With just a handful of ingredients and simple steps, you can whip up this dish in no time.
  • Flavor Explosion: The combination of garlic and parmesan takes the natural flavor of the cauliflower to new heights.
  • Versatile Side Dish: Pair it with any main course, or enjoy it on its own as a snack or appetizer.
  • Healthy and Guilt-Free: Packed with nutrients, this dish is a great way to enjoy comfort food without the guilt.
  • Impressive Presentation: The golden, crispy florets make for a stunning addition to any dinner table.

Essential Ingredients for Crispy Garlic Parmesan Cauliflower

Before we get cooking, let’s break down the ingredients you’ll need:

  • Cauliflower: 1 medium head, cut into florets (about 8 cups). This is the star of our dish!
  • Extra-Virgin Olive Oil: 3 tablespoons. This adds flavor and helps achieve that crispiness.
  • Paprika: 1.5 teaspoons. A touch of smokiness that enhances the flavor.
  • Kosher Salt: 0.75 teaspoons. Essential for bringing out the flavors.
  • Cracked Black Pepper: 0.5 teaspoons. Adds a bit of heat and depth.
  • Garlic: 3 cloves, minced. Fresh garlic is a must for that aromatic flavor.
  • Grated Parmesan Cheese: 2 to 3 tablespoons. The secret to that golden, crispy coating.
  • Lemon Juice: 1/2 juice of lemon. Brightens the dish and adds freshness.
  • Fresh Parsley: 2 tablespoons, finely chopped. For garnish and a pop of color.

Step-by-Step Cooking Instructions

Delicious looking crispy cauliflower with a sprinkle of grated parmesan and chopped herbs.

Now that we have our ingredients ready, let’s get cooking with these simple steps:

  1. Preheat your oven to 450ºF and place a large rimmed baking sheet on the center rack.
  2. Prepare the Cauliflower: Cut the cauliflower into small florets and add them to a large bowl. Toss with olive oil, paprika, salt, and black pepper until evenly coated.
  3. Roast the Cauliflower: Empty the cauliflower onto the preheated baking sheet. Arrange the florets in a single layer, avoiding overcrowding. Roast for 20 to 25 minutes, tossing once midway through, until lightly charred and tender.
  4. Add Garlic and Cheese: Sprinkle Parmesan cheese and minced garlic over the cauliflower and place it back in the oven for an additional 5 minutes.
  5. Finish with Lemon and Parsley: Once roasted, spritz lemon juice over the top and garnish with fresh parsley. Toss gently and serve!

Pro Tips for Perfecting Your Cauliflower

Want to elevate your dish even further? Here are some expert insights:

  • Uniform Florets: Cut your cauliflower into similar-sized florets for even cooking.
  • Don’t Skimp on Oil: A good amount of olive oil helps achieve that coveted crispy texture.
  • Experiment with Cheese: For a twist, try using a mix of Parmesan and Pecorino Romano.
  • Spice It Up: Feel free to add a pinch of cayenne or chili powder for some heat.
  • Use Fresh Garlic: Freshly minced garlic gives the best flavor—avoid pre-minced varieties.
  • Check for Doneness: Every oven is different; keep an eye on your cauliflower to prevent burning.
  • Serve Immediately: This dish is best enjoyed fresh out of the oven for maximum crispiness.
  • Make Ahead: You can prep the cauliflower ahead of time, just add the cheese and garlic before roasting.

Common Mistakes and Troubleshooting

Even seasoned cooks can run into issues. Here’s how to troubleshoot:

  • Cauliflower Isn’t Crispy: Ensure you’re using enough oil and avoid overcrowding the baking sheet.
  • Burnt Cheese: If the cheese burns, try adding it halfway through the roasting process.
  • Undercooked Cauliflower: If it’s not tender, give it a few extra minutes in the oven.
  • Flavorless Dish: Make sure to season generously with salt and spices.

Variations to Explore

Get creative! Here are some variations you can try:

  • Buffalo Cauliflower: Toss in buffalo sauce before roasting for a spicy kick.
  • Herb-Infused: Add dried herbs like oregano or thyme for a fragrant twist.
  • Cheesy Garlic Bread Cauliflower: Mix in breadcrumbs for added crunch and extra cheese.
  • Asian-Inspired: Drizzle with soy sauce and sprinkle sesame seeds before serving.

Storage and Make-Ahead Instructions

Want to enjoy this dish later? Here’s how to store it:

  • Refrigerate: Store any leftovers in an airtight container in the fridge for up to 3 days.
  • Reheat: For best results, reheat in the oven at 350ºF to regain crispiness.
  • Make Ahead: You can prepare the cauliflower and seasonings a day in advance. Roast just before serving.

Frequently Asked Questions

Got questions? We’ve got answers!

  • Can I make this dish vegan? Yes! Simply omit the Parmesan or use a vegan cheese substitute.
  • What can I serve with garlic parmesan cauliflower? It pairs wonderfully with grilled meats, pasta, or as part of a vegetable platter.
  • Is cauliflower healthy? Absolutely! It’s low in calories and high in vitamins and fiber.
  • Can I use frozen cauliflower? Fresh cauliflower is best, but if you use frozen, reduce the roasting time.
  • How do I know when it’s cooked? The cauliflower should be tender and lightly charred.
  • What’s the best way to cut cauliflower? Use a sharp knife and cut the head into quarters before slicing off florets.
  • Can I add other vegetables? Yes, feel free to mix in other vegetables like broccoli or Brussels sprouts.
  • How do I make it spicier? Add red pepper flakes or a dash of hot sauce to the oil before tossing the cauliflower.

Nutrition Tips and Dietary Adaptations

This recipe is not only delicious but also versatile for various dietary needs:

  • Gluten-Free: Naturally gluten-free, making it perfect for those with gluten sensitivities.
  • Low-Carb: A great low-carb option for anyone following a keto or low-carb diet.
  • High-Protein Option: Add chickpeas or tofu for additional protein without sacrificing flavor.

Equipment Recommendations

To make your cooking experience smooth and enjoyable, here are some essential kitchen tools:

  • Rimmed Baking Sheet: A large, sturdy baking sheet is crucial for even roasting.
  • Mixing Bowl: For tossing the cauliflower and seasonings together.
  • Sharp Knife: A good knife will make cutting the cauliflower easier and safer.
  • Spatula: For flipping the cauliflower halfway through roasting.

Serving Suggestions

Here are some great ways to serve your crispy garlic parmesan cauliflower:

  • As a Side Dish: It pairs wonderfully with grilled chicken, steak, or fish.
  • Appetizer: Serve it with a dipping sauce like ranch or a spicy aioli.
  • Salad Topping: Add it on top of salads for added crunch and flavor.

In conclusion, this Crispy Garlic Parmesan Cauliflower recipe is a sure-fire way to impress anyone at your table with its delightful flavors and crispy texture. Remember, cooking is all about experimentation and finding joy in the process. So roll up your sleeves, have fun, and enjoy this delicious dish! Happy cooking!

Crispy Garlic Parmesan Cauliflower

Prep Time 10 minutes
Cook Time 25 minutes
Total Time 35 minutes
Servings 4 servings
Calories 180
A flavorful and crispy roasted cauliflower dish infused with garlic, Parmesan, and lemon, perfect as a side or snack.

Ingredients

Vegetables

  • 1 medium head cauliflower, cut into florets (about 8 cups)
  • 3 Tbsp. extra-virgin olive oil
  • 1.5 tsp. paprika
  • 0.75 tsp. kosher salt
  • 0.5 tsp. cracked black pepper
  • 3 cloves garlic, minced
  • 2 to 3 Tbsp. grated Parmesan cheese
  • 1/2 juice of lemon lemon juice
  • 2 Tbsp. finely chopped fresh parsley

Instructions 

  • Preheat oven to 450ºF (230ºC). Toss cauliflower florets with olive oil, paprika, salt, and pepper.
  • Arrange on a baking sheet and roast for 20-25 minutes until lightly charred and tender.
  • Sprinkle Parmesan and garlic over cauliflower and bake for 5 more minutes.
  • Spritz with lemon juice, garnish with parsley, toss, and serve.

Notes

For extra crispiness, broil for the last 2 minutes.
Calories: 180kcal
Cost: $12
Course: Side Dish
Cuisine: American
Keyword: Cauliflower

Your Ultimate Guide to a Refreshing 5-Minute Fruit Smoothie Bowl

Welcome to a delightful and energizing start to your day! If you’re looking for a quick and healthy breakfast option, look no further than this 5-Minute Fruit Smoothie Bowl. This recipe combines the creaminess of Greek yogurt with the vibrant flavors of fresh and frozen fruits, creating a nutritious breakfast that’s not only delicious but also visually appealing. In just five minutes, you can whip up this smoothie bowl and customize it with your favorite toppings, making it a versatile choice for any morning. Let’s dive in!

Why You’ll Love This Recipe

This recipe is not just a meal; it’s an experience! Here are five reasons why you’ll absolutely love making this smoothie bowl:

  • Quick to Prepare: In just 5 minutes, you can have a nutritious breakfast ready, perfect for busy mornings.
  • Customizable: You can easily swap out fruits and toppings to suit your taste preferences or dietary needs.
  • Nutrient-Rich: Packed with vitamins, minerals, and protein from Greek yogurt, this smoothie bowl is a healthy way to kickstart your day.
  • Kid-Friendly: The colorful presentation and fruity flavors make it a hit among kids, encouraging them to enjoy healthy foods.
  • Great for Meal Prep: You can prepare the base ahead of time and add toppings in the morning for a grab-and-go breakfast.

Ingredients Breakdown

Here’s what you’ll need to make this delicious smoothie bowl, along with some helpful substitutions:

  • 1 Banana: Use a ripe banana for sweetness. You can substitute with half an avocado for a creamier texture.
  • 1 Cup Frozen Strawberries: These add a refreshing flavor. Feel free to replace them with frozen raspberries or cherries.
  • 1/3 Cup Frozen Pineapple Chunks: Pineapple gives a tropical twist. Use mango chunks for an equally delightful flavor.
  • 1/2 Cup Vanilla Greek Yogurt: This provides creaminess and protein. Plant-based yogurt can be used for a vegan option.
  • Toppings: Get creative! Options include sliced strawberries, sliced bananas, fresh blueberries, granola, shredded coconut, slivered almonds, chopped walnuts, chia seeds, or sunflower seeds.

Simple Steps to Make Your Smoothie Bowl

A delicious smoothie bowl showcasing bananas, blueberries, and various toppings in a detailed close-up.

Follow these straightforward steps to create your smoothie bowl:

  • Prep: Chop the banana into 1-inch pieces and freeze for at least 1-2 hours (overnight is ideal).
  • Process: In a food processor, combine the frozen banana, strawberries, pineapple, and Greek yogurt. Blend for 2-4 minutes, making sure to scrape down the sides with a spatula for an even consistency.
  • Enjoy: Once the mixture is smooth and creamy, scoop it into bowls. Top with your favorite toppings and enjoy immediately!

Pro Tips for the Perfect Smoothie Bowl

To elevate your smoothie bowl game, consider these expert insights:

  • Texture Matters: For a thicker smoothie bowl, use less liquid (like yogurt or milk) and more frozen fruits.
  • Blend in Stages: Start with the harder ingredients and gradually add softer ones for a smoother blend.
  • Chill Your Bowl: For an extra refreshing experience, chill your serving bowls in the freezer before serving.
  • Add Protein: Boost the nutritional value by adding a scoop of protein powder or nut butter into the mix.
  • Sweetness Control: Taste your smoothie before adding sweeteners. You might find the fruits provide enough natural sweetness!
  • Layer Your Toppings: Create a visually appealing bowl by layering your toppings in sections—get creative!
  • Experiment with Greens: Add a handful of spinach or kale for added nutrients without altering the flavor significantly.
  • Freeze Leftovers: If you have extra smoothie mix, pour it into ice cube trays and freeze for future smoothies.

Common Mistakes & Troubleshooting

Even the best cooks make mistakes, but here’s how to avoid common pitfalls:

  • Too Runny: If your smoothie bowl is too thin, add more frozen fruit or reduce the liquid next time.
  • Not Blending Well: If your ingredients aren’t blending properly, stop and scrape down the sides of the bowl. Ensure your blender is powerful enough for frozen items.
  • Overly Sweet: If it turns out too sweet, balance it out with a splash of lemon juice or additional yogurt.
  • Not Enough Flavor: Add a pinch of salt or a splash of vanilla extract to enhance the overall taste.

Delicious Variations to Try

Switch things up and keep your breakfasts exciting with these variations:

  • Chocolate Peanut Butter: Blend in a tablespoon of cocoa powder and a scoop of peanut butter for a decadent treat.
  • Green Smoothie Bowl: Add a handful of spinach and some avocado for a nutritious green twist.
  • Tropical Paradise: Use mango instead of pineapple and add shredded coconut on top for a tropical vibe.
  • Berry Blast: Swap the strawberries for mixed berries (blueberries, blackberries, and raspberries) for a berry-packed bowl.

Storage & Make-Ahead Instructions

Want to prepare ahead of time? Here’s how:

  • Meal Prep: Prepare the smoothie base the night before and store it in an airtight container in the fridge. Add toppings fresh in the morning.
  • Freezing: You can freeze the smoothie base in portions. Just blend and pour into freezer-safe bags for up to 2 months.

Frequently Asked Questions

Here are some common questions about making smoothie bowls:

  • Can I use fresh fruit instead of frozen? Yes, but your smoothie may not be as thick. You can add ice to achieve the desired texture.
  • What if I don’t have a food processor? A high-speed blender works well too; just ensure to blend in small batches if needed.
  • How can I make it vegan? Substitute Greek yogurt with a dairy-free yogurt option and ensure your toppings are plant-based.
  • Can I add protein powder? Absolutely! A scoop of your favorite protein powder can boost the nutritional content.
  • Is this suitable for kids? Yes! The colorful presentation and fruity flavors make it a kid-friendly option.
  • How long can I store leftovers? Smoothie bowls are best enjoyed fresh, but you can store them in the fridge for up to 24 hours.
  • What toppings do you recommend? Get creative! Try granola, nuts, seeds, or fresh fruits based on your taste.
  • Can I meal prep smoothie bowls? Yes! Prepare the base in advance and add toppings when you’re ready to enjoy.

Nutritional Tips and Dietary Adaptations

This smoothie bowl is not only delicious but also packed with nutrients. Here are some tips for making it even healthier:

  • Boost Fiber: Add chia seeds or flaxseeds for an extra fiber boost.
  • Lower Sugar: Use unsweetened yogurt and watch the amount of sweet toppings you add.
  • Increase Protein: Incorporate Greek yogurt or protein powder to make it more filling and satisfying.

Equipment Recommendations

Here’s what you’ll need to make your smoothie bowl:

  • Food Processor or Blender: A high-quality appliance is key for a smooth consistency.
  • Measuring Cups and Spoons: Accurate measurements ensure the perfect balance of flavors.
  • Spatula: Use this to scrape down the sides of your food processor or blender.
  • Bowl and Spoon: For serving your delicious creation!

Serving Suggestions

To make your smoothie bowl a complete meal, consider pairing it with:

  • Whole Grain Toast: Top with avocado or nut butter for added healthy fats.
  • Hard-Boiled Eggs: A great source of protein to keep you full longer.
  • Oatmeal: Serve a small side of oatmeal for a heartier breakfast.

Conclusion

Now you have everything you need to create a delicious and nutritious 5-Minute Fruit Smoothie Bowl. With its vibrant flavors, health benefits, and endless customization possibilities, this recipe is sure to become a staple in your breakfast routine. Remember, cooking should be enjoyable, so feel free to experiment and make this recipe your own. Happy blending!

5-Minute Fruit Smoothie Bowl (with Greek Yogurt)

Prep Time 10 minutes
Total Time 10 minutes
Servings 2 bowls
Calories 250
A quick and delicious smoothie bowl packed with fresh fruits, Greek yogurt, and nutritious toppings, perfect for a healthy breakfast or snack.

Ingredients

Fruits

  • 1 piece banana (ripe, sliced)
  • 1 cup frozen strawberries
  • 1/3 cup frozen pineapple chunks

Dairy & Toppings

  • 1/2 cup vanilla Greek yogurt
  • sliced strawberries (for topping)
  • sliced bananas (for topping)
  • handful fresh blueberries (for topping)

Add-ins & Toppings

  • granola granola (for topping)
  • shredded coconut shredded coconut (for topping)
  • slivered almonds slivered almonds (for topping)
  • chopped walnuts chopped walnuts (for topping)
  • chia seeds chia seeds (for topping)
  • sunflower seeds sunflower seeds (for topping)

Instructions 

  • Chop banana into 1-inch pieces and freeze for 1-2 hours.
  • Add all ingredients to a food processor and blend for 2-4 minutes until smooth.
  • Scoop into bowls, add toppings, and serve immediately.

Notes

Use frozen fruits for a creamier texture and serve immediately for best taste.
Calories: 250kcal
Cost: $10
Course: Breakfast
Cuisine: American
Keyword: Fruit, Healthy, Smoothie

Why You’ll Love These Healthy Banana Oatmeal Cookies

Struggling to find a quick, nutritious snack that satisfies your sweet tooth? You’re in the right place! These healthy banana oatmeal cookies are not only delicious but also incredibly easy to make. With just a handful of ingredients, they offer a delightful balance of flavor and health. Let’s explore why you’ll want to whip up a batch today!

  • Quick & Easy: These cookies can be ready in less than 30 minutes, making them perfect for busy days or last-minute cravings.
  • Nutritious Ingredients: Made with ripe bananas and oats, these cookies are packed with fiber and essential nutrients.
  • No Added Sugar: The natural sweetness from the bananas means you don’t need to add any sugar—great for keeping your snacks healthy!
  • Customizable: Add your favorite mix-ins like dark chocolate chips, nuts, or dried fruit to personalize your cookies.
  • Vegan & Gluten-Free Options: Easily adaptable for various dietary needs, these cookies can fit into almost any lifestyle.

Ingredients You’ll Need

Let’s break down the ingredients that make these cookies so delicious. You can find most of these items in your pantry, and they’re simple to work with.

  • 3 ripe bananas: The spottier, the sweeter! Ripe bananas add natural sweetness and moisture.
  • 2 cups rolled oats: Use gluten-free oats if necessary; they provide a hearty base for the cookies.
  • 1/4 cup unsweetened almond or peanut butter: This ingredient adds healthy fats and a creamy texture.
  • 1 tsp vanilla extract: Enhances the flavor with a warm, sweet note.
  • 1 tsp cinnamon: Adds warmth and depth to the cookies.
  • 1/2 tsp baking powder: Helps the cookies rise and become fluffy.
  • 1/4 tsp salt: Balances the sweetness and enhances the overall flavor.
  • Optional add-ins: Consider 1/3 cup of dark chocolate chips, nuts, dried fruit, or coconut for extra flavor and texture.

Step-by-Step Instructions

Ready to get baking? Follow these simple steps to create your banana oatmeal cookies from scratch.

  • Prep: Preheat your oven to 350°F (175°C) and line a baking sheet with parchment paper. This keeps cookies from sticking and makes cleanup a breeze.
  • Mash: In a large bowl, mash the ripe bananas with a fork until smooth. This is a great way to get rid of any lumps!
  • Mix Wet: Stir in the nut butter and vanilla extract until everything is well combined.
  • Combine Dry: Add the rolled oats, cinnamon, baking powder, and salt. Mix until everything is incorporated.
  • Add-ins: Gently fold in any optional add-ins you like. This is where you can get creative!
  • Bake: Scoop tablespoon-sized mounds onto the prepared baking sheet. Flatten them slightly (they won’t spread much). Bake for 15-18 minutes until the edges are golden brown.
  • Cool: Let the cookies cool on the baking sheet for about 5 minutes, then transfer them to a wire rack to cool completely.

Pro Tips for Perfect Cookies

A tempting arrangement of healthy cookies featuring bananas and oats.

To ensure your cookies turn out perfectly every time, keep these tips in mind:

  • Use very ripe bananas: The darker the bananas, the sweeter your cookies will be. Look for ones with plenty of brown spots!
  • Don’t overmix: Once you add the dry ingredients, mix just until combined to keep your cookies tender.
  • Experiment with textures: Try using half rolled oats and half quick oats for a different texture.
  • Chill the dough: If the dough is too sticky, refrigerate it for 15-30 minutes to make it easier to scoop.
  • Store properly: Keep cookies in an airtight container to maintain freshness for up to a week.
  • Reheat for a fresh taste: Warm cookies in the microwave for a few seconds for that freshly baked feel.
  • Portion size: Use a cookie scoop for uniform sizes, ensuring even baking.
  • Make a double batch: These cookies freeze well, so consider making extra for later!

Common Mistakes and Troubleshooting

Even the best bakers can encounter issues. Here are some common mistakes to avoid:

  • Too dry or crumbly cookies: This could be due to over-mixing or not enough moist ingredients. Ensure your bananas are ripe and measure accurately!
  • Flat cookies: If your cookies spread too much, make sure your baking powder is fresh and remember to flatten them slightly before baking.
  • Burned edges: Keep an eye on your cookies, as oven temperatures can vary. Consider rotating the baking sheet halfway through baking.

Variations to Try

Feeling adventurous? Here are some tasty variations to elevate your cookies:

  • Chocolate Chip Banana Oatmeal Cookies: Add dark chocolate chips for a sweet treat that’s hard to resist.
  • Nutty Banana Oatmeal Cookies: Fold in chopped walnuts or pecans for added crunch.
  • Dried Fruit Cookies: Use raisins, cranberries, or apricots for a fruity twist.
  • Coconut Banana Cookies: Incorporate shredded coconut for a tropical flair.

Storage and Make-Ahead Instructions

Want to enjoy these cookies throughout the week? Here’s how to store and prepare ahead:

  • Room Temperature: Store cookies in an airtight container at room temperature for up to a week.
  • Refrigerator: For longer freshness, keep them in the fridge for up to two weeks.
  • Freezer: Freeze cookies in a single layer, then transfer them to a zip-top bag for up to 3 months. Thaw at room temperature or microwave briefly.
  • Make-ahead dough: Prepare the dough, scoop it onto a baking sheet, and freeze. Once solid, transfer to a bag and bake from frozen, adding an extra minute or two to the baking time.

Frequently Asked Questions

Got questions? Here are some FAQs about these delightful cookies:

  • Can I use quick oats instead of rolled oats? Yes, you can! Just keep in mind that the texture may be slightly different.
  • What can I substitute for nut butter? You can use sunflower seed butter or tahini for a nut-free option.
  • Can I add protein powder to the recipe? Absolutely! Just reduce the amount of oats slightly to maintain the right consistency.
  • How can I make these cookies vegan? The current recipe is already vegan, as it contains no eggs or dairy.
  • What’s the best way to mash bananas? Using a fork or a potato masher works best to achieve a smooth consistency.
  • Can I make these cookies smaller? Yes! Just adjust the baking time accordingly, checking for doneness regularly.
  • Why are my cookies too oily? If you’re using too much nut butter, it can cause excess oil. Measure accurately for the best results.
  • How do I know when the cookies are done? Look for golden edges and a firm center. They will continue to firm up as they cool.

Nutritional Tips and Dietary Adaptations

These cookies not only taste great but can also fit into various dietary preferences:

  • Gluten-Free: Use certified gluten-free oats to make these cookies safe for those with gluten intolerance.
  • Low-Calorie Options: Reduce the amount of nut butter or substitute with applesauce for a lighter version.
  • Add Protein: Mix in protein powder or pair with Greek yogurt for a protein boost.
  • Keep it Low Sugar: As the recipe is, it’s already low in sugar. Avoid adding any sweeteners for a truly healthy cookie.

Equipment Recommendations

For a seamless baking experience, here’s what you’ll need:

  • Mixing Bowls: A large bowl for mixing your ingredients ensures you have enough room.
  • Measuring Cups: Accurate measurements are key for baking success, so use proper measuring tools.
  • Baking Sheets: A good quality baking sheet ensures even baking.
  • Parchment Paper: This keeps your cookies from sticking and helps with easy cleanup.
  • Cookie Scoop: For uniform cookie sizes, a scoop makes it easier to portion out the dough.

Serving Suggestions

These cookies are versatile and can be enjoyed in various ways:

  • As a Snack: Perfect for a quick pick-me-up during the day.
  • With Breakfast: Serve alongside yogurt or a smoothie for a balanced meal.
  • On-the-Go: Pack them in lunchboxes for a healthy treat during school or work.
  • With Coffee or Tea: Enjoy them with your favorite beverage for a delightful afternoon break.

Now you’re ready to make your own deliciously simple healthy banana oatmeal cookies! Embrace your inner baker and enjoy the process. Remember, cooking is about creativity and having fun, so don’t stress about perfection. Happy baking!

Healthy Banana Oatmeal Cookies

Prep Time 10 minutes
Cook Time 15 minutes
Total Time 25 minutes
Servings 12 cookies
Calories 120
Enjoy these easy, healthy cookies made with ripe bananas and oats—perfect for a quick snack or breakfast.

Ingredients

Main

  • 3 pieces ripe bananas (spottier bananas are sweeter)
  • 2 cups rolled oats (use gluten-free if needed)
  • 0.25 cup unsweetened almond or peanut butter
  • 1 tsp vanilla extract
  • 1 tsp cinnamon
  • 0.5 tsp baking powder
  • 0.25 tsp salt
  • 0.33 cup dark chocolate chips, nuts, dried fruit, or coconut (optional add-ins)

Instructions 

  • Preheat oven to 350°F (175°C) and line a baking sheet with parchment paper.
  • Mash bananas in a large bowl until smooth, then stir in nut butter and vanilla.
  • Add oats, cinnamon, baking powder, and salt; mix until combined. Fold in optional add-ins.
  • Scoop tablespoon-sized mounds onto the sheet, flatten slightly, and bake for 15 minutes until edges are golden.
  • Let cool for 5 minutes, then transfer to a wire rack to cool completely.

Notes

These cookies are vegan and gluten-free; customize add-ins for variety.
Calories: 120kcal
Cost: $10
Course: Snack
Cuisine: Healthy
Keyword: Banana, oatmeal, Vegan

Unleash the Flavor: Your Guide to the Crispy Roasted Chickpea & Corn Mix

Welcome to the ultimate guide on creating a delightful crispy roasted chickpea and corn mix that will elevate your snacking experience! This recipe is not just about food; it’s about bringing joy to your kitchen and making every bite a celebration of flavor. Whether you’re looking for a quick snack or a crunchy topping for your salads, this mix is versatile and oh-so-delicious. Let’s dive into the details!

Why You’ll Love This Recipe

This crispy roasted chickpea and corn mix is more than just a snack; it’s a celebration of flavor and texture. Here are five compelling reasons to try it:

  • Quick and Easy: With just a few simple ingredients and minimal prep time, you can whip up this mix in under 30 minutes!
  • Healthful Snacking: Packed with protein from the chickpeas and fiber from corn, this mix is a guilt-free indulgence.
  • Versatile Use: Enjoy it on its own or as a crunchy topping for salads, soups, or grain bowls.
  • Customizable Flavor: With spices like smoked paprika and cumin, you can adjust the seasoning to your taste, making it uniquely yours.
  • Storage Friendly: This mix stays crispy for days when stored correctly, making it a perfect make-ahead snack.

Ingredients Breakdown

Before we jump into the cooking process, let’s explore the ingredients you’ll need for this crispy roasted chickpea and corn mix.

  • Canned Chickpeas: One 15-ounce can, drained and patted dry. This is the star of the show, providing protein and texture.
  • Frozen or Fresh Corn Kernels: 1 cup adds a natural sweetness and a tender crunch to the mix.
  • Olive Oil: 2 tablespoons help achieve that perfect, crispy texture without greasiness.
  • Smoked Paprika: 1 teaspoon for a smoky, rich flavor that complements the chickpeas beautifully.
  • Ground Cumin: 1 teaspoon adds warmth and earthiness.
  • Garlic Powder: 1 teaspoon for that aromatic kick.
  • Salt: 1/2 teaspoon enhances all the flavors.
  • Black Pepper: 1/4 teaspoon for a subtle heat.

Feel free to make substitutions based on your pantry. For instance, if you don’t have smoked paprika, regular paprika will work just fine. Vegan options are available as well, as all these ingredients are plant-based!

How to Make Crispy Roasted Chickpea & Corn Mix

Crispy chickpeas and corn kernels in a delightful arrangement, highlighting their crunch.

Now that we have our ingredients, let’s get cooking! Here’s a step-by-step guide to making this crispy roasted chickpea and corn mix:

  1. Preheat your oven: Set your oven to 400°F (200°C). This ensures a perfect roasting temperature.
  2. Prepare the chickpeas: Drain and rinse the canned chickpeas thoroughly. Pat them dry with a paper towel. The drier they are, the crispier they’ll become!
  3. Mix the ingredients: In a large bowl, combine the chickpeas, corn, olive oil, smoked paprika, cumin, garlic powder, salt, and black pepper. Toss until everything is well coated.
  4. Spread on a baking sheet: Line a baking sheet with parchment paper for easy cleanup. Evenly spread the chickpea and corn mixture in a single layer.
  5. Roast: Bake in the preheated oven for 20-25 minutes, or until the chickpeas are golden brown and crispy. Give them a stir halfway through to ensure even cooking.
  6. Cool and Enjoy: Once done, let the mix cool slightly before serving. This helps to enhance the crispiness!

Pro Tips for Perfectly Crispy Chickpeas

To achieve the best results, keep these expert tips in mind:

  • Dry is Best: Ensure your chickpeas are thoroughly dried before seasoning. This is the key to achieving that irresistible crunch.
  • Don’t Crowd the Pan: If you overcrowd the baking sheet, the chickpeas will steam instead of roast. Use two sheets if necessary!
  • Experiment with Spices: Feel free to switch up the spices! Try chili powder, curry powder, or even a dash of cayenne for heat.
  • Store Properly: Keep your mix in an airtight container at room temperature to maintain its crispiness for up to 5 days.
  • Make it a Meal: Use this mix as a salad topper or a crunchy element in grain bowls for a filling meal.

Common Mistakes and Troubleshooting

Even the best of us encounter issues in the kitchen! Here are some common mistakes and how to avoid them:

  • Chewy Chickpeas: If your chickpeas are chewy instead of crispy, they may not have been dried adequately, or they were overcrowded on the baking sheet.
  • Bland Flavor: Always taste and adjust the seasoning before roasting. Adding more salt or spices can make a significant difference!
  • Burnt Corn: If using fresh corn, keep an eye on it. It may roast faster than the chickpeas. Remove it earlier if needed.

Variations to Try

This crispy roasted chickpea and corn mix can be customized in many ways. Here are four variations to keep things exciting:

  • Tex-Mex Style: Add a teaspoon of taco seasoning for a zesty twist! Top with chopped cilantro after roasting.
  • Sweet and Spicy: Mix in a tablespoon of honey or maple syrup along with cayenne pepper for a sweet heat.
  • Italian Herb Mix: Use Italian seasoning and grated Parmesan cheese to create an herbaceous flavor profile.
  • Asian-Inspired: Toss with soy sauce, sesame oil, and a sprinkle of sesame seeds before roasting.

Storage and Make-Ahead Instructions

This mix is perfect for meal prep. Here’s how to store it:

  • Cool Completely: Allow the mix to cool completely before storage to prevent condensation, which can lead to sogginess.
  • Airtight Container: Store in an airtight container at room temperature for up to 5 days.
  • Freezing: For longer storage, you can freeze the mix in a freezer-safe bag for up to 3 months. Just re-crisp in the oven before serving!

FAQs About Crispy Roasted Chickpea & Corn Mix

Here are some frequently asked questions to help you get the most out of this recipe:

  • Can I use dried chickpeas instead of canned? Yes! Just soak and cook them until tender before proceeding with the recipe.
  • What can I substitute for corn? You can use peas or bell peppers for a different crunch.
  • How do I make this mix spicy? Add cayenne pepper or your favorite hot sauce to the mix before roasting.
  • Can I double the recipe? Absolutely! Just ensure you have enough space on your baking sheets to allow for even roasting.
  • What’s the best way to enjoy the mix? It’s perfect as a standalone snack or as a topping for soups and salads.
  • Can I make this mix ahead of time? Yes! It stores well and stays crispy for several days if stored properly.
  • What’s the nutritional information for this recipe? Each serving is low in calories and high in protein, making it a healthy snack choice.
  • What equipment do I need? You’ll need a baking sheet, parchment paper, and a mixing bowl to get started.

Nutritional Tips and Dietary Adaptations

This crispy roasted chickpea and corn mix is naturally vegan and gluten-free. Here are some tips to boost its nutritional value:

  • Add Nuts or Seeds: For extra crunch and healthy fats, toss in some pumpkin seeds or chopped nuts.
  • Include Greens: Mix in some kale or spinach just before serving to add more nutrients.
  • Boost Protein: Pair with a yogurt dip or serve alongside a protein-rich dish for a balanced meal.

Essential Equipment for Success

Having the right tools can make all the difference in your cooking experience. Here are some essentials to keep handy:

  • Baking Sheets: Use good-quality, heavy-duty baking sheets to ensure even roasting.
  • Parchment Paper: This makes for easy cleanup and prevents sticking.
  • Mixing Bowls: A large bowl for mixing ingredients helps keep things tidy.
  • Kitchen Towel: For drying off the chickpeas, a clean kitchen towel can be very helpful.

Serving Suggestions

This crispy roasted chickpea and corn mix is incredibly versatile! Here are some serving ideas:

  • Snack Time: Enjoy it straight from the bowl for a satisfying crunch between meals.
  • Salad Topper: Sprinkle over your favorite salads for added texture and flavor.
  • Soup Garnish: Use it as a crunchy topping for soups to enhance both flavor and presentation.
  • Grain Bowls: Mix it into grain bowls for a delightful crunch!

In conclusion, this crispy roasted chickpea and corn mix is not only delicious but also simple to make. With its delightful crunch, bold flavors, and versatility, it will quickly become a staple in your kitchen. So grab those ingredients, and let’s get roasting! Happy cooking!

Easy Crispy Roasted Chickpea & Corn Mix with a Bold Crunch

Prep Time 10 minutes
Cook Time 20 minutes
Total Time 30 minutes
Servings 4 servings
Calories 250
This flavorful snack combines roasted chickpeas and corn with bold spices for a satisfying crunch and a burst of flavor.

Ingredients

Canned Goods

  • 1 can Canned Chickpeas (drained and patted dry)
  • 1 cup Frozen or Fresh Corn Kernels

Spices & Oils

  • 2 tablespoons Olive Oil
  • 1 teaspoon Smoked Paprika
  • 1 teaspoon Ground Cumin
  • 1 teaspoon Garlic Powder
  • 1/2 teaspoon Salt
  • 1/4 teaspoon Black Pepper

Instructions 

  • Preheat oven to 400°F (200°C).
  • In a bowl, toss chickpeas and corn with olive oil and spices.
  • Spread mixture evenly on a baking sheet.
  • Roast for 20 minutes, stirring halfway through, until crispy.
  • Let cool slightly before serving.

Notes

Store leftovers in an airtight container for up to 3 days for maximum crunch.
Calories: 250kcal
Cost: $8
Course: Snack
Cuisine: American
Keyword: Chickpeas, Corn, Crunch

Transform Your Mornings with This Effortless Smoothie Bowl

Are you ready to elevate your breakfast game? This 5-Minute Smoothie Bowl is your answer! Packed with nutrients and bursting with flavor, it’s a refreshing way to kickstart your day. Perfect for busy mornings or a quick snack, this recipe combines creamy Greek yogurt, fresh fruits, and crunchy toppings for a delightful treat. Let’s delve into why you’ll love this recipe and how easy it is to make!

Why You’ll Love This Recipe

Here are five compelling reasons to whip up this smoothie bowl:

  • Quick and Easy: In just five minutes, you can create a delicious, nutritious breakfast or snack.
  • Customizable: Tailor it to your taste with your favorite fruits, toppings, and even protein powders.
  • Health Benefits: With Greek yogurt and fruits, you’re fueling your body with protein, vitamins, and antioxidants.
  • Visually Stunning: A smoothie bowl isn’t just tasty; it’s a feast for the eyes—perfect for sharing on social media!
  • Meal Prep Friendly: Make your smoothie base ahead of time for quick mornings.

Ingredients You’ll Need

Let’s gather our ingredients! Here’s what you’ll need for this refreshing smoothie bowl:

  • ¾ cup Greek yogurt: A creamy base that adds protein and tanginess.
  • ½ banana, sliced: Half blended for creaminess, and half for topping.
  • ½ cup sliced strawberries: Fresh and vibrant, these add natural sweetness.
  • 2–3 tbsp granola: Choose sugar-free for a healthier option—great for crunch!
  • 1 tbsp pumpkin seeds: These tiny powerhouses add nutrients and texture.
  • ½–1 tsp honey: Just a drizzle for natural sweetness (optional).

Instructions

Detailed shot of a smoothie bowl with granola, banana slices, and pumpkin seeds.

Ready to blend? Follow these simple steps:

  1. Add the Greek yogurt and half of the banana to your blender. Start on a low setting to combine evenly, then increase the speed until smooth. For a thicker consistency, add 2–3 ice cubes or a few frozen banana slices. Blend again until the texture is firm enough to hold your toppings without sinking.
  2. Use a spoon or silicone spatula to scoop the mixture into a bowl. A smaller bowl makes the smoothie look fuller and helps keep the toppings from spreading out too much. Smooth the top lightly for an even surface.
  3. Arrange the sliced strawberries and the remaining banana on top. Sprinkle the granola over one side or down the center to prevent sogginess. Add pumpkin seeds for extra texture and nutrients.
  4. Drizzle honey over the toppings. A light drizzle adds sweetness without overwhelming the flavor. If your honey is thick, warm it for a few seconds to help it spread easily.
  5. Remember, smoothie bowls melt quickly, especially in a warm kitchen! Serve immediately for the best experience—enjoy that thick base, fresh fruit, and crunchy toppings!

Pro Tips for the Perfect Smoothie Bowl

Want to elevate your smoothie bowl game? Here are some expert tips:

  • Use Frozen Fruit: For a thicker, creamier texture, opt for frozen fruit in your base.
  • Experiment with Yogurt: Try non-dairy alternatives like almond or coconut yogurt for a different flavor profile.
  • Boost with Protein: Add a scoop of your favorite protein powder for an extra nutritional punch.
  • Mix and Match Toppings: Don’t be afraid to get creative! Try chia seeds, nuts, or even a dollop of nut butter.
  • Balance Your Flavors: A pinch of salt can enhance sweetness—give it a try!
  • Mind the Consistency: Adjust the liquid ingredients (like milk or yogurt) to achieve your preferred thickness.
  • Go for Variety: Switch up fruits and toppings to keep things exciting each time you make it!
  • Presentation Matters: Take a moment to arrange your toppings beautifully—it makes a difference!

Common Mistakes and Troubleshooting

Even the best cooks make mistakes! Here’s how to avoid common pitfalls:

  • Too Runny: If your smoothie bowl is too thin, add more yogurt or ice, and blend again.
  • Too Thick: If it’s too thick, add a splash of milk or yogurt and blend until smooth.
  • Soggy Toppings: Add granola just before serving to keep it crunchy.
  • Flavor Imbalance: If it’s too sweet or too tart, adjust with a squeeze of lemon or a pinch of salt.
  • Not Enough Creaminess: Ensure you blend long enough for a smooth consistency!

Variations to Try

Feeling adventurous? Here are some delicious variations to experiment with:

  • Tropical Twist: Use coconut yogurt, pineapple, and mango for a refreshing tropical flavor.
  • Chocolate Delight: Add cocoa powder and a few chocolate chips for a dessert-like treat.
  • Nutty Banana: Incorporate almond butter or peanut butter for a rich, nutty flavor.
  • Berry Blast: Mix in a variety of berries—blueberries, raspberries, and blackberries—for a colorful, antioxidant-rich bowl.

Storage and Make-Ahead Instructions

If you’re looking to prep ahead, here’s how to store your smoothie bowl:

  • Make Ahead: Prepare the smoothie base and store it in an airtight container in the fridge for up to 24 hours.
  • Freezing: You can freeze the smoothie base in ice cube trays for up to 1 month—just blend with a little liquid before serving!
  • Leftovers: If you have leftover smoothie, store it in the fridge and consume within 24 hours for the best texture.

FAQs About Smoothie Bowls

Here are some common questions about smoothie bowls:

  • Can I use fresh fruit instead of frozen?
    Yes, but your smoothie may not be as thick. Consider adding ice for a frostier texture.
  • How do I make it dairy-free?
    Substitute Greek yogurt with coconut yogurt or any non-dairy yogurt alternative.
  • Can I add protein powder?
    Absolutely! Just mix in your favorite protein powder for an easy protein boost.
  • What can I use instead of honey?
    If you’re looking for alternatives, maple syrup or agave nectar work well.
  • How can I keep my toppings from getting soggy?
    Add toppings just before serving, and store any leftovers separately.
  • What if I don’t have a blender?
    You can use a food processor instead, or mash the ingredients by hand for a chunkier texture.
  • Can I make this smoothie bowl vegan?
    Yes! Just opt for plant-based yogurt and skip the honey.
  • How can I increase the fiber content?
    Add chia seeds, flaxseeds, or oats to your smoothie bowl for an extra fiber boost.

Nutrition Tips and Dietary Adaptations

Here are some ways to adapt this smoothie bowl to meet your dietary needs:

  • Low-Calorie: Use sugar-free granola and skip the honey for a lighter option.
  • High-Protein: Add a scoop of protein powder or Greek yogurt for a protein-packed breakfast.
  • Gluten-Free: Ensure your granola is gluten-free to keep this bowl suitable for all diets.
  • Vegan: Use non-dairy yogurt and a vegan sweetener to make it plant-based.

Equipment Recommendations

Here’s what you’ll need to make the perfect smoothie bowl:

  • High-Speed Blender: A powerful blender ensures a smooth consistency for your base.
  • Measuring Cups and Spoons: Accurate measurements help achieve the best flavor and texture.
  • Spatula: A silicone spatula is great for scooping out every bit of your smoothie.
  • Small Bowls: Choose smaller bowls for serving to enhance the presentation and keep toppings in place.

Serving Suggestions

Want to elevate your presentation? Here are some fun serving ideas:

  • Layering: Layer the smoothie base and toppings for a beautiful visual effect.
  • Garnishing: Add edible flowers or mint leaves for a pop of color and freshness.
  • Pairing: Serve alongside a slice of whole-grain toast or a handful of nuts for a balanced meal.
  • Sharing: Make it a fun social moment by serving large bowls for everyone to dig in together!

Now that you’ve got all the tools and tips, it’s time to get blending! Enjoy your delicious, nutritious smoothie bowl and share your creations with friends and family. Remember, cooking is all about having fun and experimenting. So, I’m so glad you chose to try this recipe—happy cooking!

5-Minute Smoothie Bowl

Prep Time 5 minutes
Total Time 5 minutes
Servings 1 bowl
Calories 250
A quick and nutritious breakfast option that combines creamy yogurt with fresh fruit and crunchy toppings for a satisfying start to your day.

Ingredients

Dairy

  • 0.75 cup Greek yogurt
  • 0.5 banana banana, sliced (half blended, half as topping)
  • 0.5 cup sliced strawberries
  • 2-3 tbsp granola (sugar-free optional)
  • 1 tbsp pumpkin seeds
  • 0.5-1 tsp honey

Instructions 

  • Add yogurt and half banana to blender. Blend until smooth. Add ice or frozen banana for thickness, then blend again.
  • Scoop mixture into a bowl and smooth the top.
  • Arrange strawberries and remaining banana on top. Sprinkle granola and pumpkin seeds over the bowl.
  • Drizzle honey over the toppings. Serve immediately.

Notes

Use frozen banana for a thicker, creamier texture.
Calories: 250kcal
Cost: $10
Course: Breakfast
Keyword: Healthy, Smoothie

Discover the Joy of Cooking with Oven-Roasted Parmesan Cauliflower

Welcome to the delightful world of cooking where simple ingredients turn into extraordinary meals! If you’re looking for an easy yet impressive side dish, you’re in the right place. This recipe for oven-roasted Parmesan cauliflower is not only packed with flavor but also incredibly simple to prepare. Perfectly crispy and golden, it’s an ideal accompaniment for any meal, whether it’s a casual weeknight dinner or a special occasion. Let’s dive into why you’ll love this recipe!

Why You’ll Love This Recipe

  • Irresistibly crispy texture: The high heat of the oven creates caramelized, golden edges while keeping the cauliflower tender in the center.
  • Flavor-packed: The combination of garlic powder, smoked paprika, and Parmesan cheese elevates the natural taste of cauliflower, making it a favorite among both veggie lovers and skeptics.
  • Quick and easy prep: With just 10 minutes of active preparation, you can pop this dish in the oven and let it do the work for you.
  • Healthy and nutritious: This roasted cauliflower is gluten-free, low-carb, and packed with vitamins, making it a wholesome addition to any meal.
  • Versatile serving options: Pair it with your favorite protein, toss it into salads, or serve it as a standalone snack with dips.

Ingredient Breakdown with Tips

Before we get started, let’s gather our ingredients and explore some helpful tips!

  • 1 head cauliflower: Choose a firm head with compact florets. Avoid any brown spots for the best flavor.
  • 3 tablespoons olive oil: Extra-virgin olive oil is preferred for its rich flavor, but any light olive oil will work.
  • 1 teaspoon garlic powder: This adds a wonderful depth of flavor; feel free to use fresh minced garlic for an extra kick.
  • 1 teaspoon smoked paprika: This spice gives a subtle smokiness; regular paprika can be used if you prefer.
  • 0.5 teaspoon salt and 0.5 teaspoon black pepper: Adjust these to taste, especially if serving with a salty protein.
  • 0.5 cup Parmesan cheese, grated: For best results, use freshly grated Parmesan. Pre-packaged can sometimes lack flavor.
  • 2 tablespoons fresh parsley, chopped (optional): Adds a fresh touch for garnish.
  • 1 lemon, cut into wedges (for serving): A squeeze of lemon brightens the dish beautifully.

Step-by-Step Instructions

Crispy cauliflower florets coated in Parmesan and spices, arranged on a plate.

Now that we have everything, let’s make this delicious oven-roasted Parmesan cauliflower!

  1. Preheat the oven to 425°F (220°C).
  2. In a large bowl, toss the cauliflower florets with olive oil, garlic powder, smoked paprika, salt, and black pepper until well-coated.
  3. Arrange the seasoned florets in a single layer on a large baking sheet. Make sure they’re spaced out for even roasting.
  4. Roast for 20 minutes undisturbed to allow for caramelization.
  5. After 20 minutes, sprinkle the Parmesan cheese evenly over the florets and return to the oven for an additional 5–7 minutes until the cheese is melted and golden.
  6. Garnish with fresh parsley, if using, and serve immediately with lemon wedges for a zesty finish.

Pro Tips for Perfect Oven-Roasted Cauliflower

Here are some expert insights to ensure your roasted cauliflower turns out perfectly every time:

  • Uniform size: Cut cauliflower into even sizes (about 1.5 inches) for consistent cooking.
  • Don’t overcrowd the pan: Leave space between florets to achieve crispy edges.
  • Preheat the baking sheet: For extra crispiness, place the baking sheet in the oven while it preheats.
  • Experiment with spices: Try adding chili flakes for heat or Italian herbs for a different flavor profile.
  • Use lemon zest: For an extra burst of flavor, add lemon zest before serving.
  • Flip halfway: For even browning, flip the florets after the first 10 minutes.
  • Use a silicone mat: A silicone baking mat prevents sticking and makes cleanup a breeze.
  • Check for doneness: Cook until edges are crispy and golden brown; fork-tender in the center is ideal.

Common Mistakes and Troubleshooting

Even the best cooks make mistakes! Here’s how to avoid common pitfalls:

  • Overcooked cauliflower: Keep an eye on the time; cauliflower should be tender but not mushy.
  • Cheese burns: If your cheese is browning too fast, cover the pan loosely with foil.
  • Not enough seasoning: Taste and adjust the spices before roasting for maximum flavor.

Variations & Substitutions

Feel free to get creative with your oven-roasted Parmesan cauliflower! Here are some delicious variations:

  • Buffalo Cauliflower: Toss the florets with buffalo sauce before roasting for a spicy kick.
  • Cheesy Garlic Cauliflower: Add more garlic and a blend of cheeses like cheddar for a richer flavor.
  • Herb-Infused: Mix in fresh herbs like rosemary or thyme to infuse the cauliflower with aromatic flavors.
  • Lemon Zest and Feta: Sprinkle feta cheese and lemon zest right before serving for a tangy twist.

Storage & Make-Ahead Instructions

If you want to prep ahead or store leftovers, here’s what you need to know:

  • Make Ahead: You can prepare the cauliflower florets and toss them with the seasonings a day in advance. Just store in an airtight container in the fridge.
  • Storage: Store leftovers in an airtight container in the fridge for up to 3 days. Reheat in the oven for best results.
  • Freezing: While best enjoyed fresh, you can freeze roasted cauliflower. Spread it on a baking sheet to freeze individually, then transfer to a freezer bag.

Comprehensive FAQ

Got questions? Here are some common inquiries about oven-roasted Parmesan cauliflower!

  • Can I use frozen cauliflower? Yes, but note that it may release more moisture, affecting crispiness.
  • What can I serve with roasted cauliflower? It pairs beautifully with grilled chicken, steak, or as part of a vegetarian platter.
  • How do I make it vegan? Omit the cheese or use a vegan cheese substitute for a delicious plant-based option.
  • Can I roast other vegetables with it? Absolutely! Just make sure they have similar cooking times.
  • How do I know when it’s done? Look for crispy edges and fork-tender centers—perfectly roasted!
  • Can I use other cheeses? Yes, feel free to experiment with Romano or Asiago for a different flavor.
  • What’s the best way to reheat leftovers? Reheat in the oven at 350°F (175°C) for about 10 minutes to regain crispiness.
  • Is this recipe gluten-free? Yes, this oven-roasted Parmesan cauliflower is naturally gluten-free and healthy!

Nutritional Tips & Dietary Adaptations

This recipe is not only delicious but also healthy! Here are some tips to enhance its nutritional value:

  • Boost fiber: Add chickpeas or beans to the dish for extra fiber and protein.
  • Low-carb option: This roasted cauliflower is a fantastic substitute for starchy sides like potatoes or rice.
  • Fresh herbs: Adding fresh herbs not only enhances flavor but also adds essential nutrients.
  • Use olive oil wisely: While healthy, be mindful of oil portions to keep the dish light.

Essential Equipment for Roasting

To make your cooking experience smooth and enjoyable, here are some recommended tools:

  • Large baking sheet: A sturdy baking sheet ensures even roasting.
  • Mixing bowl: A large bowl is essential for tossing the ingredients together.
  • Spatula or tongs: For flipping and serving the cauliflower without breaking it.
  • Silicone baking mat: This helps prevent sticking and makes cleanup easier.

Serving Suggestions

Now that your oven-roasted Parmesan cauliflower is ready, it’s time to serve it up! Here are some delicious ideas:

  • As a side dish: Serve alongside grilled chicken or fish for a wholesome meal.
  • In salads: Toss the roasted cauliflower into a mixed greens salad with a tangy vinaigrette.
  • With dips: Serve warm with hummus or tzatziki for a delightful appetizer.
  • In wraps: Use in veggie wraps with your favorite spreads for a tasty lunch option.

Conclusion

Cooking should be a joyful experience, and this crispy oven-roasted cauliflower recipe is a perfect example of how simple ingredients can create something truly special. By following these easy steps and tips, you’ll be able to impress your family and friends with a delicious side dish that’s both healthy and flavorful. Remember, cooking is not about perfection; it’s about creativity and enjoying the process. So gather your ingredients, roll up your sleeves, and let’s make some culinary magic happen!

Oven-roasted Parmesan Cauliflower, Irresistibly Crispy

Prep Time 10 minutes
Cook Time 25 minutes
Total Time 35 minutes
Servings 4 servings
Calories 180
This crispy roasted cauliflower is coated with savory Parmesan and spices, making it a perfect side or snack.

Ingredients

Cauliflower

  • 1 head cauliflower, cut into florets
  • 3 tablespoons olive oil
  • 1 teaspoon garlic powder
  • 1 teaspoon smoked paprika
  • 0.5 teaspoon salt
  • 0.5 teaspoon black pepper
  • 0.5 cup Parmesan cheese, grated
  • 2 tablespoons fresh parsley, chopped (optional)
  • 1 lemon lemon, cut into wedges (for serving)

Instructions 

  • Preheat oven to 425°F (220°C). Toss cauliflower with olive oil, garlic powder, paprika, salt, and pepper.
  • Arrange on a baking sheet and roast for 20 minutes.
  • Sprinkle Parmesan over cauliflower and bake for an additional 5–7 minutes.
  • Garnish with parsley and serve with lemon wedges.

Notes

For extra crispiness, broil for the last 2 minutes.
Calories: 180kcal
Cost: $15
Course: Side Dish
Cuisine: American
Keyword: Cauliflower