Author

Steven

Browsing

Welcome to Your New Favorite Banana Smoothie Recipe!

If you’re looking for a quick, nutritious, and utterly delicious way to kickstart your day, you’ve landed in the right place! This banana smoothie is not only easy to whip up but also packed with flavor and health benefits. In just a few minutes, you can blend together frozen bananas, creamy Greek yogurt, and a splash of milk into a refreshing drink that’s perfect for breakfast or a mid-afternoon snack. Let’s dive into the details of this effortless recipe!

Why You’ll Love This Recipe

  • Quick & Easy: Perfect for busy mornings; you can blend this smoothie in under 5 minutes!
  • Nutritious Boost: Packed with potassium from bananas and protein from Greek yogurt, this smoothie will keep you energized.
  • Customizable: Change up the flavors and ingredients to suit your taste; it’s versatile enough to adapt!
  • Kid-Friendly: A fun and tasty way to sneak in some healthy ingredients for picky eaters.
  • Deliciously Creamy: The combination of frozen bananas and yogurt creates the perfect smooth texture.

Banana Smoothie Ingredients

Let’s break down the ingredients you’ll need to make this banana smoothie, along with some handy substitutions!

  • 1 cup sliced banana: Frozen bananas (about 1 large banana) yield the best results, enhancing the creaminess.
  • ¼ cup Greek yogurt: Use either plain or vanilla for a hint of sweetness. For a dairy-free option, you can substitute with almond or coconut yogurt.
  • ¼ cup milk: Any kind works—dairy, almond, oat, or soy milk are all great choices.
  • ¼ teaspoon vanilla extract: Adds a lovely aromatic flavor. Feel free to increase this for a more pronounced taste.

How to Make a Banana Smoothie

Top-down view of a smoothie with a spoon resting beside it, showcasing its fresh ingredients.

Making your smoothie is as simple as following these steps:

  • Blend: Place all ingredients in a blender. Blend until smooth, adding more milk if needed to reach your desired consistency.
  • Serve: Pour into a glass and enjoy immediately for the best taste and texture!

Pro Tips for the Perfect Banana Smoothie

Here are some expert insights to elevate your smoothie game:

  • Use ripe bananas: The sweeter, brown-spotted bananas provide the best flavor.
  • Chill your ingredients: If you prefer a colder smoothie, chill your milk and yogurt beforehand.
  • Experiment with add-ins: A spoonful of peanut butter or a handful of spinach can add nutrition without compromising flavor.
  • Don’t over-blend: Blend just until smooth; over-blending can make your smoothie too runny.
  • Adjust sweetness: If your bananas aren’t super ripe, consider adding a touch of honey or maple syrup.
  • Use a high-powered blender: A strong blender will ensure a silky-smooth consistency, especially if you’re adding frozen fruits.
  • Try different milks: Different types of milk can change the flavor profile—experiment to find your favorite!
  • Make it thicker: If you like a thicker smoothie, add more frozen bananas or a scoop of oats.

Common Mistakes and Troubleshooting

Here are some common pitfalls and how to avoid them:

  • Too thin: If your smoothie is too watery, add more frozen bananas or Greek yogurt.
  • Too thick: Add a splash of milk to loosen it up.
  • Not sweet enough: Increase the ripeness of your bananas or add a natural sweetener.
  • Chunky texture: Make sure to blend long enough to break down all ingredients.

Recipe Variations

Want to mix things up? Here are some delicious variations to try:

  • Chocolate Banana Smoothie: Add 1 tablespoon of cocoa powder for a chocolatey twist.
  • Peanut Butter Banana Smoothie: Mix in 1 tablespoon of peanut butter for extra creaminess and protein.
  • Green Banana Smoothie: Add a handful of spinach or kale for an extra nutrient boost.
  • Berry Banana Smoothie: Toss in a handful of your favorite berries for a fruity explosion.

Storage and Make-Ahead Instructions

This banana smoothie is best enjoyed fresh. However, if you want to prepare it in advance, follow these tips:

  • Make-ahead: Prepare the ingredients and freeze them in a bag. Simply blend when you’re ready!
  • Storage: If you have leftovers, store in an airtight container in the fridge for up to 24 hours. It may separate, so give it a good shake before drinking.

Frequently Asked Questions

Here are some common questions about making banana smoothies:

  • Can I use fresh bananas instead of frozen? Yes! Fresh bananas can be used, but the smoothie will be less creamy. Consider adding ice for texture.
  • Can I make this smoothie vegan? Absolutely! Just use plant-based yogurt and milk.
  • How long will it last in the fridge? It’s best consumed right away, but can last in the fridge for up to 24 hours.
  • Can I add protein powder? Yes! This is a fantastic way to boost protein content.
  • What can I substitute for Greek yogurt? You can use regular yogurt, dairy-free yogurt, or even silken tofu for a protein boost.
  • Can I add other fruits? Definitely! Feel free to mix in berries, mango, or any other favorite fruits.
  • Is this smoothie good for weight loss? Yes! It’s low in calories and high in nutrients, making it a great choice for a healthy snack.
  • How can I make it more filling? Add a scoop of oats, chia seeds, or nut butter to increase fiber and healthy fats.

Nutrition Tips and Dietary Adaptations

This banana smoothie is not only delicious but can also be tailored to fit your dietary needs:

  • For Weight Loss: Opt for unsweetened almond milk and reduce the yogurt portion.
  • For High Protein: Use Greek yogurt or add a scoop of protein powder.
  • For Low-Carb: Skip the yogurt and use unsweetened nut milk.
  • For Dairy-Free: Choose plant-based yogurt and milk alternatives.

Equipment Recommendations

Making your banana smoothie is simple with the right tools. Here’s what you’ll need:

  • High-Speed Blender: A powerful blender ensures a smooth texture. Brands like Vitamix or Ninja work wonders.
  • Measuring Cups: Accurate measurements help achieve the perfect balance of ingredients.
  • Smoothie Cups: Invest in reusable cups or bottles for easy transport.

Serving Suggestions

Your banana smoothie is delicious on its own, but here are some serving ideas:

  • Top with granola: Adds a nice crunch and makes it feel more substantial.
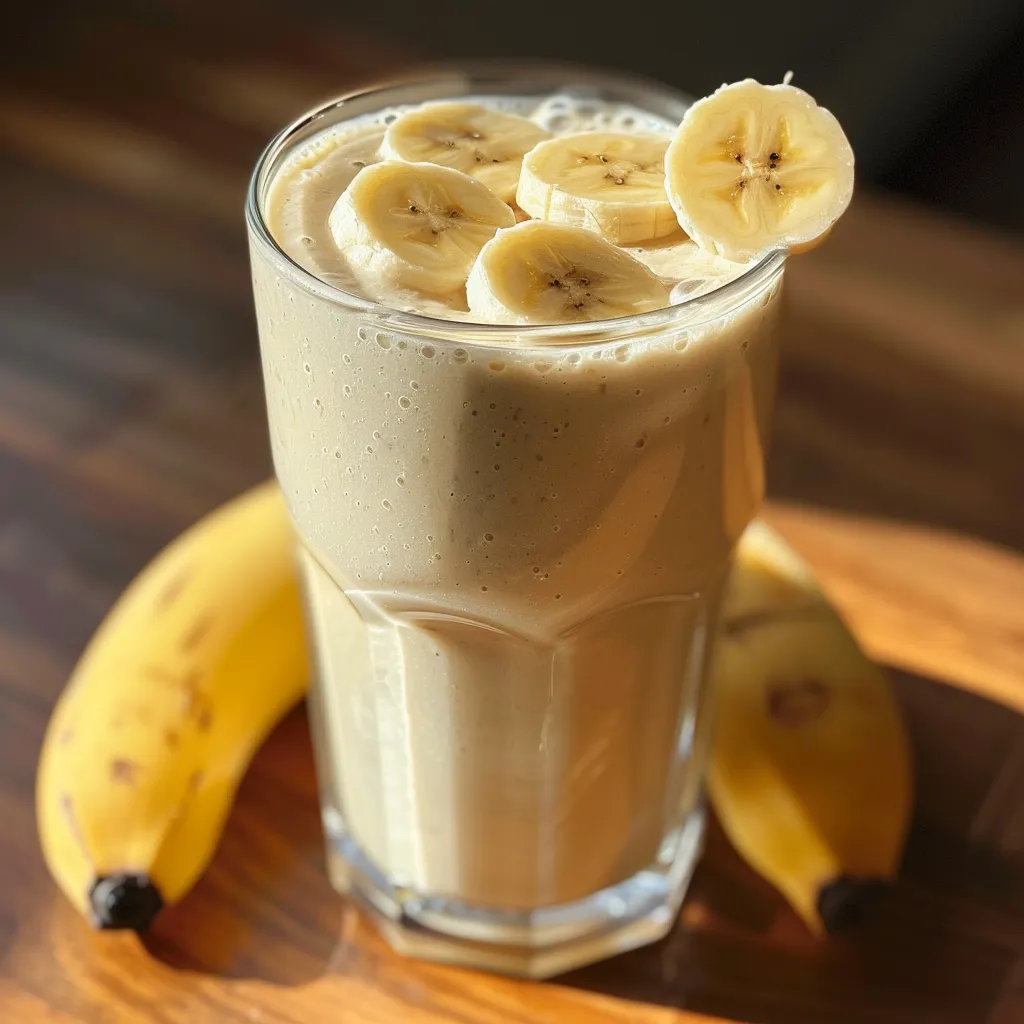
  • Garnish with banana slices: For a beautiful presentation, add a few slices on top.
  • Pair with a healthy snack: Enjoy with a handful of nuts or a piece of toast for a complete meal.

Conclusion

Now that you know how to make the best banana smoothie, you’re ready to blend up this delightful drink anytime you want! Whether you’re enjoying it for breakfast, as a post-workout snack, or simply a refreshing treat, this smoothie is sure to satisfy. Remember, cooking is about having fun and experimenting—don’t hesitate to make this recipe your own. Happy blending!

Best Banana Smoothie

Prep Time 5 minutes
Total Time 5 minutes
Servings 1 cup
Calories 250
A creamy and delicious banana smoothie perfect for a quick breakfast or snack. Packed with natural sweetness and protein, it's both satisfying and nutritious.

Ingredients

Fruits

  • 1 cup sliced banana (frozen is best, about 1 large banana) (Use frozen for creamier texture)
  • 0.25 cup Greek yogurt (plain or vanilla)
  • 0.25 cup milk (dairy, almond, oat milk, etc.)
  • 0.25 teaspoon vanilla extract

Instructions 

  • Place all ingredients in a blender.
  • Blend until smooth, adding more milk if needed.
  • Serve immediately.

Notes

For extra creaminess, add a handful of ice or a spoonful of honey.
Calories: 250kcal
Cost: $4
Course: Breakfast, Snack
Cuisine: American
Keyword: Banana

Unlock the Flavor: Your Guide to Crispy Chickpea Fries

Are you ready to discover a new favorite snack that’s both delicious and nutritious? These chickpea fries are not only easy to make but also packed with flavor and health benefits. With just a handful of ingredients, you can whip up a batch of crispy delights that will impress your taste buds and keep your hunger at bay. Let’s dive into this amazing recipe and transform your snacking game!

Why You’ll Love This Recipe

This chickpea fries recipe is sure to become your go-to for several reasons:

  • High in Protein: Made from chickpea flour and canned chickpeas, these fries are naturally rich in protein, making them a great snack option that helps keep you satisfied.
  • Versatile Flavor: You can customize the spices and seasonings to fit your taste. From cumin to red pepper flakes, the possibilities are endless!
  • Quick and Easy: With a prep time of just 10 minutes and baking time of about 25 minutes, you can have these crispy chickpea fries ready in no time.
  • Plant-Based Goodness: For those following a vegan or plant-based diet, these fries are a perfect choice, ensuring you enjoy a crunchy snack without any animal products.
  • Perfect for Dipping: Pair them with your favorite sauces or dips for a complete snacking experience!

Ingredients Breakdown

Here’s what you’ll need to make these crispy chickpea fries:

  • 2 cups canned chickpeas (drained and rinsed, approximately 400g)
  • 2 tablespoons cornstarch (16g) – to help achieve that perfect crunch
  • 1/4 cup water (60ml) – adjust if needed for consistency
  • 2 tablespoons olive oil (30ml) – for roasting and added flavor
  • 1 tablespoon apple cider vinegar (15ml) – to enhance flavor and texture
  • Salt (to taste)
  • Preferred spices: cumin, red pepper flakes, thyme, etc.
  • Topping: Sesame seeds for that extra crunch

Feel free to substitute the chickpeas with dry chickpeas that you cook yourself, or use different oils or spices based on what you have at hand!

Step-by-Step Directions

Appetizing close-up of chickpea fries, highlighting their crispy surface and seasonings.

Follow these simple steps to create your own crispy chickpea fries:

  1. Blend Ingredients: Combine all ingredients (except sesame seeds) in a blender and blend until smooth. You want a thick, homogenous mixture.
  2. Shape Fries: Shape the mixture into fry shapes on a baking tray lined with parchment paper. Don’t worry about them being perfect; rustic is charming!
  3. Add Sesame Seeds: Sprinkle sesame seeds on top of each fry for an added nutty flavor and texture.
  4. Bake: Bake in a preheated oven at 200°C (390°F) for 20-25 minutes, or until golden brown and crispy. Flip halfway through for even cooking.

Pro Tips for Perfect Chickpea Fries

Maximize your success with these expert insights:

  • Texture Matters: Ensure your chickpea mixture is smooth but not too watery; adjust water as needed.
  • Keep Them Thin: Shape fries to be about 1/2 inch thick for optimal crispness.
  • Preheat Your Oven: This is crucial for achieving that golden crunch.
  • Don’t Crowd the Pan: Give fries space on the baking sheet to ensure even cooking and crispiness.
  • Experiment with Spices: Different spices can completely alter the flavor profile—don’t hesitate to get creative!
  • For Extra Crispiness: Broil for the last 2-3 minutes, but watch closely to prevent burning.
  • Make It a Meal: Serve with a salad or as a side to your favorite plant-based burger.
  • Cool Before Serving: Allow fries to cool slightly for the best texture before serving.

Common Mistakes and Troubleshooting

Even the most seasoned cooks encounter hurdles! Here’s how to avoid common pitfalls:

  • Too Soft?: If your fries are too soft after baking, they may need more cornstarch or a longer bake time.
  • Sticking to the Pan?: Ensure your baking sheet is well-padded with parchment paper and lightly greased.
  • Flavorless?: Adjust seasoning! Taste the mixture before baking to ensure it’s flavorful enough.
  • Not Crispy Enough?: Try baking at a higher temperature or for a longer time, flipping halfway through.

Variations to Try

Mix things up with these exciting variations:

  • Spicy Chickpea Fries: Add cayenne pepper or chili powder for a kick.
  • Herbed Fries: Incorporate fresh herbs like rosemary or oregano for a fragrant twist.
  • Cheesy Flavor: Mix in nutritional yeast for a cheesy flavor without dairy.
  • Sweet Potato Chickpea Fries: Substitute half the chickpeas with cooked sweet potatoes for a naturally sweet version.

Storing and Make-Ahead Instructions

Want to prepare in advance? Here’s how:

  • Make Ahead: Shape the fries and chill them on the baking sheet for up to 1 hour before baking.
  • Storage: Store any leftovers in an airtight container in the fridge for up to 3 days.
  • Reheating: Reheat in the oven to restore crispiness, about 10-15 minutes at 200°C (390°F).

Frequently Asked Questions

Let’s tackle some common queries about chickpea fries:

  • Can I use dry chickpeas? Yes! Cook them until soft and blend them into the mixture.
  • How do I make this recipe gluten-free? This recipe is already gluten-free, but ensure your cornstarch is certified gluten-free.
  • Can I air fry these fries? Absolutely! Air fry at 200°C (390°F) for about 15-20 minutes, flipping halfway.
  • What dipping sauces pair well? Try tahini sauce, hummus, or a spicy aioli for a delicious pairing.
  • Can I freeze these fries? Yes! Freeze the uncooked shaped fries and bake straight from frozen.
  • Are chickpea fries healthy? Yes! They are high in protein and fiber, low in fat, and packed with nutrients.
  • What spices work best? Experiment with garlic powder, paprika, or even curry powder for unique flavors!
  • How do I know when they’re done? Look for a golden brown color and a crispy texture.

Nutrition Tips and Dietary Adaptations

Here are some health-conscious adjustments:

  • Lower Calorie Option: Reduce the olive oil or use a spray oil for baking.
  • Whole Foods: Use whole grain chickpea flour for added fiber.
  • Nut-Free Option: Omit sesame seeds if you have nut allergies.

Essential Equipment Recommendations

To make your cooking experience seamless, here’s what you’ll need:

  • Blender: For smooth mixing of ingredients.
  • Baking Sheet: Preferably lined with parchment paper for easy cleanup.
  • Measuring Cups and Spoons: For precise ingredient measurements.
  • Spatula: To shape the fries and flip them during baking.

Serving Suggestions

Want to elevate your snacking experience? Here are some serving ideas:

  • As an Appetizer: Serve with a selection of dips for a party or gathering.
  • On a Salad: Toss these fries on a fresh salad for added crunch.
  • With a Sandwich: Pair with your favorite sandwich for a satisfying meal.

In conclusion, these crispy chickpea fries are a delightful and healthy snack that everyone can enjoy. With their crunchy texture and customizable flavors, you can make them your own. So gather your ingredients and start cooking! Remember, cooking should be fun, and with these easy steps, you’ll be on your way to enjoying a delicious treat in no time!

Crispy Chickpea Fries

Prep Time 10 minutes
Cook Time 25 minutes
Total Time 35 minutes
Servings 4 pieces
Calories 250
Enjoy these crunchy, protein-packed chickpea fries topped with sesame seeds for a delicious snack or side dish.

Ingredients

Main

  • 2 cups canned chickpeas (drained and rinsed) (approximately 400g)
  • 2 tablespoons cornstarch (16g)
  • 1/4 cup water (60ml)
  • 2 tablespoons olive oil (30ml)
  • 1 tablespoon apple cider vinegar (15ml)
  • to taste N/A Salt (to taste)
  • Preferred N/A spices (such as cumin, red pepper flakes, thyme, etc.) (as desired)
  • 1 tablespoon Sesame seeds (for topping)

Instructions 

  • Blend all ingredients (except sesame seeds) until smooth.
  • Shape the mixture into fry shapes on a parchment-lined tray.
  • Sprinkle sesame seeds on top of each fry.
  • Bake at 200°C (390°F) for 20-25 minutes until golden and crispy.

Notes

For extra flavor, add your favorite spices to the mixture before shaping.
Calories: 250kcal
Cost: $12
Course: Appetizer, Snack
Cuisine: Vegetarian
Keyword: Chickpeas

Welcome to your go-to recipe for oatmeal waffles, where simplicity meets deliciousness! These waffles are not only quick to make but also packed with nutrients, making them a perfect choice for breakfast or a delightful snack. In under 30 minutes, you’ll have warm, fluffy waffles that are sure to please everyone at the table. Let’s dive into why this recipe is a must-try!

Why You’ll Love This Recipe

  • Quick and easy: With just a few ingredients and a blender, you can have these waffles ready in no time.
  • Nutritious: Made with rolled oats, these waffles are high in fiber and can help keep you feeling full longer.
  • Customizable: Feel free to add your favorite mix-ins like berries, nuts, or chocolate chips to elevate your waffles.
  • Freezer-friendly: Make a big batch and freeze them for busy mornings—simply pop them in the toaster for a quick meal!
  • Perfect for all diets: This recipe is naturally gluten-free (just ensure your oats are certified), dairy-free, and can be adapted for vegan diets.

Ingredient Breakdown

Let’s take a closer look at the ingredients that make these oat waffles not only delicious but also nutritious:

  • Rolled oats: The star of the recipe! They provide a hearty texture and are a great source of fiber.
  • Baking powder: This ingredient helps the waffles rise, giving them that fluffy texture we all love.
  • Sea salt: A pinch enhances the flavors and balances the sweetness.
  • Cinnamon: This aromatic spice adds warmth and depth to the waffles.
  • Water: Used to blend everything together; feel free to substitute with milk for a creamier texture.
  • Coconut oil: Adds moisture and a subtle coconut flavor—can be replaced with any neutral oil.
  • Egg: Binds the ingredients and adds richness. For a vegan option, use a flax egg or applesauce.
  • Maple syrup: A natural sweetener that pairs beautifully with the oats.
  • Vanilla extract: Enhances the overall flavor profile.

How to Make Wholesome Oat Waffles

Making these waffles is as easy as 1-2-3! Here’s a step-by-step guide:

  1. Place all of the ingredients in a blender and blend until smooth.
  2. Allow the batter to sit in the blender for 10 minutes while you preheat your waffle iron.
  3. Spoon 1/4-1/3 cup of batter onto the heated waffle iron and cook until lightly browned and crisp (about 2-5 minutes). Enjoy!

Pro Tips for Perfect Waffles

Side profile of freshly made oat waffles, adorned with a hint of cinnamon.

To ensure your waffles turn out perfectly every time, check out these expert insights:

  • Preheat your waffle iron: A properly heated waffle iron will give you a crisp exterior and fluffy interior.
  • Don’t overmix the batter: Blend just until combined to keep the waffles light and airy.
  • Let the batter rest: This allows the oats to absorb moisture for better texture.
  • Use a non-stick spray: Even if your waffle iron is non-stick, a light spray can help with easy release.
  • Experiment with toppings: Try fresh fruit, yogurt, or nut butter to enhance your waffles.
  • Check doneness: Waffles should be golden brown and crisp before removing from the iron.
  • Keep warm: If making multiple batches, keep finished waffles warm in a low oven (200°F) until serving.

Common Mistakes and Troubleshooting

We all make mistakes in the kitchen, but don’t worry! Here are some common issues and how to fix them:

  • Waffles sticking to the iron: Ensure your waffle iron is well-greased and preheated. If sticking persists, check your batter consistency.
  • Waffles too dense: This can happen if you overmix the batter. Blend just until smooth for a light result.
  • Uneven cooking: Make sure to evenly spread the batter and close the lid of the waffle iron completely.
  • Waffles not crisping up: Ensure your waffle iron is hot enough and consider adding a bit more oil to the batter.

Variations to Try

Want to mix things up? Here are some delicious variations on your oatmeal waffles:

  • Berry Bliss: Add a cup of fresh or frozen berries (like blueberries or strawberries) into the batter for a fruity twist.
  • Chocolate Chip: Stir in some dark chocolate chips for a decadent treat that both kids and adults will love.
  • Nutty Banana: Mash half a ripe banana into the batter and add chopped nuts for added texture and flavor.
  • Spiced Pumpkin: Incorporate 1/4 cup of pumpkin puree and a dash of nutmeg for a seasonal spin.

Storage and Make-Ahead Instructions

Planning ahead? Here’s how to store and reheat your waffles:

  • Refrigerator: Store cooked waffles in an airtight container for up to 3 days.
  • Freezer: Place cooled waffles in a single layer on a baking sheet to freeze, then transfer to a freezer bag for up to 3 months.
  • Reheating: For best results, reheat frozen waffles in a toaster or oven until heated through and crisp.

Frequently Asked Questions

Got questions? We’ve got answers! Here are some common inquiries about oatmeal waffles:

  • Can I use quick oats instead of rolled oats? Yes, but the texture will be slightly different—rolled oats give a heartier result.
  • Can I make these waffles vegan? Absolutely! Substitute the egg with a flax egg or 1/4 cup of applesauce.
  • What can I use instead of coconut oil? Any neutral oil works, such as canola or vegetable oil.
  • How do I know when the waffles are done? They should be golden brown and crisp; check your waffle iron’s indicator light if it has one.
  • Can I double this recipe? Yes, simply double the ingredients and adjust cooking time as needed.
  • What toppings go well with oatmeal waffles? Try yogurt, fresh fruit, maple syrup, or nut butter for delicious combinations!
  • How do I make a smaller batch? Halve the ingredients for a smaller serving size.
  • Are these waffles gluten-free? Yes, as long as you use certified gluten-free oats!

Nutritional Tips and Dietary Adaptations

These waffles can be tailored to fit various dietary needs:

  • Low-carb: Substitute rolled oats with almond flour or coconut flour for a lower-carb option.
  • High-protein: Add a scoop of protein powder to the batter for an extra protein boost.
  • Dairy-free: Use almond milk or oat milk instead of water for a creamier batter.

Equipment Recommendations

To get the best results from this recipe, here’s what you’ll need:

  • High-speed blender: For smooth batter consistency.
  • Waffle iron: A reliable non-stick waffle iron will yield the best results.
  • Mixing bowls: Handy for measuring and preparing ingredients.

Serving Suggestions

Serve your delicious oat waffles with a variety of toppings:

  • Fresh fruit: Sliced bananas, berries, or apples add a refreshing touch.
  • Yogurt: A dollop of Greek yogurt makes a protein-packed addition.
  • Nut butter: Spread almond or peanut butter for added richness and flavor.
  • Maple syrup: Drizzle with pure maple syrup for classic sweetness.

With these tips and variations, you’re well-equipped to create the perfect batch of oatmeal waffles that everyone will love. Remember, cooking is about exploring flavors and enjoying the process. So grab your ingredients and let’s make some delicious memories in the kitchen!

Thank you for joining me on this culinary adventure. I’m glad you’re here, and I hope you enjoy making these wholesome oat waffles as much as I do. Happy cooking!

Oat Waffles

Prep Time 10 minutes
Cook Time 5 minutes
Total Time 15 minutes
Servings 2 servings
Calories 180
Enjoy these healthy and delicious oat waffles, perfect for a quick breakfast or brunch.

Ingredients

Dry ingredients

  • 2/3 cup rolled oats
  • 1 tsp baking powder
  • 1/4 tsp sea salt
  • 1/8 tsp cinnamon

Wet ingredients

  • 3/8 cup water
  • 2 tbsp melted coconut oil
  • 1 egg egg
  • 1 tbsp maple syrup
  • 1/2 tsp vanilla

Instructions 

  • Blend all ingredients until smooth, then let sit for 10 minutes.
  • Preheat waffle iron.
  • Spoon batter onto waffle iron and cook until golden (2-5 minutes).
  • Serve and enjoy!

Notes

For extra flavor, add fresh fruit or nuts.
Calories: 180kcal
Cost: $8
Course: Breakfast
Cuisine: American
Keyword: Oats

Start Your Day Right with Apple Cinnamon Overnight Oats

Are you tired of the morning rush and looking for a delicious yet nutritious breakfast option? Look no further! Our Apple Cinnamon Overnight Oats recipe is designed for busy mornings, allowing you to prep the night before and wake up to a delightful meal that fuels your day. With just a few simple ingredients and minimal effort, these creamy oats are packed with flavor, and they’re perfect for anyone wanting to enjoy a wholesome breakfast without the stress.

Why You’ll Love This Recipe

This recipe isn’t just easy to make; it’s also versatile and packed with benefits. Here are five reasons why you’ll love our Apple Cinnamon Overnight Oats:

  • Quick and Easy: Prep takes just 10 minutes! Combine ingredients and let the fridge do the work overnight.
  • Nutritious Start: Rolled oats provide fiber and energy, while apples add natural sweetness and vitamins.
  • Customizable: Use your favorite milk or yogurt and experiment with different fruits or spices!
  • Dairy-Free Options: Easily make this recipe vegan by opting for almond milk and skipping the yogurt.
  • Meal Prep Friendly: Make multiple servings at once and store them in jars for grab-and-go breakfasts all week!

Ingredients You’ll Need

Gather these simple ingredients to create your Apple Cinnamon Overnight Oats:

  • 1 cup rolled oats: Choose old-fashioned oats for the best texture.
  • 1 cup almond milk: Or any milk of your choice for a creamy base.
  • 1 apple, diced: Gala or Honeycrisp apples work wonderfully for sweetness and crunch.
  • 1 tsp cinnamon: Adds that warm, cozy flavor we all love.
  • 1 tsp maple syrup (optional): For added sweetness if desired.
  • 1/4 cup yogurt (optional): Use Greek or dairy-free yogurt for creaminess.

How to Make Apple Cinnamon Overnight Oats

Freshly prepared apple cinnamon overnight oats with a hint of cinnamon sprinkled on top.

Follow these simple steps to prepare your oats:

  1. In a bowl or jar, combine the rolled oats, almond milk, diced apple, cinnamon, and maple syrup.
  2. Stir well until all ingredients are mixed evenly.
  3. If you prefer a creamier texture, fold in the yogurt at this stage.
  4. Cover the bowl or jar and refrigerate overnight so the flavors meld beautifully.
  5. In the morning, give it a good stir and enjoy it cold, or warm it up in the microwave for a comforting dish.

Pro Tips for Perfect Overnight Oats

To ensure your Apple Cinnamon Overnight Oats turn out perfectly every time, consider these expert insights:

  • Use airtight containers: This keeps your oats fresh and prevents any fridge odors from seeping in.
  • Let it sit longer: The longer the oats soak, the creamier they become! Aim for at least 6 hours.
  • Mix in extras: Consider adding chia seeds or flaxseed for added nutrition and texture.
  • Choose seasonal fruits: In the fall, add roasted pumpkin; in the summer, try fresh berries!
  • Adjust flavors: Feel free to tweak the cinnamon or maple syrup based on your personal taste.
  • Try different milks: Coconut milk or oat milk can add unique flavors to your oats.
  • Be mindful of portions: If you’re making multiple servings, keep the ingredient ratios consistent.
  • Garnish before serving: Add nuts, seeds, or additional fruits on top for a beautiful presentation.

Common Mistakes and Troubleshooting

Even simple recipes can have their hiccups. Here’s how to avoid some common pitfalls:

  • Too thick: If your oats are too thick in the morning, add a splash more milk to loosen them up.
  • Too mushy: Ensure you’re using the right type of oats—old-fashioned is best for texture.
  • Flavorless: Don’t skip the cinnamon or maple syrup! They are key to enhancing the overall flavor.
  • Not enough sweetness: You can always add a drizzle of honey or more maple syrup in the morning.

Delicious Variations to Try

Want to mix things up? Here are four delicious variations of the classic Apple Cinnamon Overnight Oats:

  • Pear and Ginger: Substitute the apple with diced pear and add a pinch of ground ginger for a spicy twist.
  • Chocolate Chunk: Add cocoa powder and dark chocolate chunks for a dessert-like version.
  • Nut Butter Delight: Stir in a tablespoon of almond or peanut butter for added protein and creaminess.
  • Berry Blast: Replace apple with mixed berries for a refreshing summer version!

Storage and Make-Ahead Instructions

Your Apple Cinnamon Overnight Oats can be stored easily, making them perfect for meal prep:

  • Fridge Storage: Keep in an airtight container for up to 5 days. Each jar can be taken out as needed.
  • Freeze: For longer storage, freeze portions in jars, but remember to leave space for expansion.
  • Thawing: When freezing, transfer to the fridge to thaw overnight before consuming.

Frequently Asked Questions

Here are some common questions about making Apple Cinnamon Overnight Oats:

  • How long do these oats last in the fridge? They can be stored for up to 5 days.
  • Can I use steel-cut oats? Yes, but they require longer soaking time and more liquid.
  • Do I need to peel the apples? It’s optional! Leaving the skin on adds extra fiber.
  • Can I make this recipe vegan? Absolutely! Just use almond milk and skip the yogurt.
  • What’s the best way to serve them? You can enjoy them cold straight from the fridge or warm them in the microwave.
  • Can I add protein powder? Yes, mix a scoop into your oats for an extra protein boost!
  • Are there gluten-free options? Yes, ensure to use certified gluten-free oats.
  • What other toppings can I add? Nuts, seeds, coconut flakes, or more fruits work great!

Nutrition Tips and Dietary Adaptations

To make your breakfast even more nutritious, consider these tips:

  • Add protein: Incorporate Greek yogurt or a protein powder to enhance your breakfast.
  • Incorporate healthy fats: Add nuts or seeds for extra crunch and nutritional benefits.
  • Go for whole foods: Always opt for whole, unprocessed ingredients when possible.

Kitchen Equipment Recommendations

To make this recipe, you’ll need some basic kitchen tools:

  • Measuring cups: For accurate ingredient measurements.
  • Bowl or jars: To mix and store your overnight oats.
  • Spoon or spatula: For stirring ingredients together.
  • Microwave or stovetop: For warming your oats if preferred.

Serving Suggestions

Here are a few fun ways to serve your Apple Cinnamon Overnight Oats:

  • Top with fresh fruits: Add additional slices of apple or banana on top before serving.
  • Drizzle with honey: A touch of honey can enhance the sweetness.
  • Sprinkle with nuts: Chopped walnuts or pecans add a delightful crunch.

Now that you’re armed with this delicious Apple Cinnamon Overnight Oats recipe and all the tips to make it your own, you’re ready to enjoy a nourishing breakfast that fits perfectly into your busy lifestyle. Remember, cooking should be fun and stress-free, so don’t hesitate to experiment and find what works best for you. Happy cooking!

Apple Cinnamon Overnight Oats

Prep Time 10 minutes
Total Time 10 minutes
Servings 2 servings
Calories 250
A quick and nutritious breakfast that combines the flavors of apple and cinnamon with creamy oats, perfect for busy mornings.

Ingredients

Base

  • 1 cup rolled oats
  • 1 cup almond milk
  • 1 apple diced apple
  • 1 tsp cinnamon
  • 1 tsp maple syrup (optional)
  • 1/4 cup yogurt (optional)

Instructions 

  • Combine oats, almond milk, apple, cinnamon, and maple syrup in a jar or bowl.
  • Stir well until evenly mixed.
  • If desired, fold in yogurt for creaminess.
  • Cover and refrigerate overnight.
  • In the morning, stir and enjoy cold or warm.

Notes

Prepare the night before for a quick breakfast.
Calories: 250kcal
Cost: $4
Course: Breakfast
Cuisine: American
Keyword: Oats

Unlock the Delight of Easy Spinach Cheese Squares

If you’re looking for a deliciously simple snack or light meal that packs a nutritional punch, look no further than these easy spinach cheese squares. In just a little over half an hour, you can create a dish that’s not only delightful to the palate but also incredibly satisfying. This recipe brings together fresh spinach and rich cheeses for a treat that’s perfect for kids, adults, and everyone in between. Let’s dive into why you’ll love this recipe and how to make it shine in your kitchen!

Why You’ll Love This Recipe

These easy spinach cheese squares are more than just a snack—they’re a versatile dish that can be enjoyed at any time of the day. Here are five reasons to whip up this recipe:

  • Nutritious and Delicious: Packed with vitamins and minerals from fresh spinach, this dish is a great way to incorporate greens into your diet without compromising on flavor.
  • Quick and Easy: With minimal prep and cook time, you can have these squares ready to serve in about 30 minutes, making them an ideal choice for busy weeknights.
  • Versatile Serving Options: Enjoy them warm as a snack, serve them cold at a picnic, or pair them with a salad for a light lunch.
  • Kid-Friendly: The cheesy goodness and flavorful spinach make these squares a hit with kids, ensuring they’ll be gobbled up in no time.
  • Customizable: Feel free to experiment with different cheeses or add-ins to suit your taste preferences!

Ingredients Breakdown

To create these spinach cheese squares, you’ll need just a few simple ingredients. Here’s what you’ll be using:

  • Fresh Spinach (2 cups, packed): Look for vibrant, green leaves. For convenience, you can also use frozen spinach—just make sure it’s well-drained.
  • Cream Cheese (8 oz): This adds a rich creaminess. If you prefer a lighter version, consider using low-fat cream cheese or Greek yogurt.
  • Shredded Cheese (1 cup, any blend): Cheddar, mozzarella, or a mix will work beautifully, offering that gooey, melty texture.
  • Eggs (2 large): These act as a binder, helping hold the squares together.
  • All-Purpose Flour (1/2 cup): A key ingredient that helps to create the right consistency. For a gluten-free option, almond flour or oat flour can be great alternatives.
  • Garlic Powder (1 teaspoon): Adds a lovely depth of flavor. You can also use minced fresh garlic for extra zest.
  • Salt and Black Pepper (to taste): Essential for enhancing the flavors of the dish.

Step-by-Step Instructions

A slice of spinach cheese square with a creamy interior, garnished with herbs.

Ready to get cooking? Let’s break down the steps to ensure your spinach cheese squares turn out perfectly every time.

  • Step 1: Preheat Your Oven: Set your oven to 350°F (175°C) to prepare for baking.
  • Step 2: Prepare the Spinach: Wash the fresh spinach thoroughly and sauté it in a pan over medium heat for about 2-3 minutes until wilted. This helps release excess moisture.
  • Step 3: Combine Ingredients: In a large mixing bowl, combine the sautéed spinach, cream cheese, shredded cheese, eggs, flour, garlic powder, salt, and pepper. Mix until all ingredients are well incorporated.
  • Step 4: Transfer to Baking Dish: Pour the mixture into a greased 9×9 inch baking dish and smooth the top with a spatula.
  • Step 5: Bake: Place in the oven and bake for 25-30 minutes or until the top is golden and a toothpick inserted in the center comes out clean.
  • Step 6: Cool and Cut: Allow to cool for about 10 minutes before cutting into squares. This allows them to set properly.

Pro Tips for Perfect Spinach Cheese Squares

Here are some expert insights to elevate your cooking experience:

  • Ensure Thorough Drainage: If using frozen spinach, make sure to squeeze out as much water as possible to avoid soggy squares.
  • Experiment with Cheese: Try different combinations of cheese for various flavor profiles. Feta or goat cheese can add a tangy twist!
  • Spice It Up: Add a pinch of red pepper flakes or chopped jalapeños for a kick.
  • Fresh Herbs: Incorporating fresh herbs like dill, parsley, or basil can enhance the flavor immensely.
  • Storage Tips: Store leftovers in an airtight container in the fridge for up to 3 days. Reheat in the oven for the best texture.
  • Make Ahead: You can prepare the mixture a day in advance and simply bake it when ready to serve!
  • Cutting Technique: Use a sharp knife to cut clean squares after they’ve cooled slightly to maintain shape.
  • Presentation Matters: Serve with a dollop of sour cream or a side of marinara sauce for an extra touch of flavor.

Common Mistakes to Avoid

Even simple recipes can have pitfalls. Here are some common mistakes and how to troubleshoot them:

  • Overmixing the Batter: This can lead to tough squares. Mix until just combined for a lighter texture.
  • Underbaking: Make sure to bake until golden brown. If you notice it’s browning too quickly, cover with foil.
  • Neglecting Seasoning: Don’t forget to season your mixture! Taste and adjust salt and pepper before baking.

Variations to Try

Feel free to customize your spinach cheese squares with these delicious variations:

  • Herbed Spinach Cheese Squares: Add fresh herbs like thyme or oregano for an aromatic twist.
  • Spicy Jalapeño Spinach Cheese Squares: Incorporate diced jalapeños for a spicy kick that complements the cheese.
  • Sun-Dried Tomato Spinach Cheese Squares: Mix in chopped sun-dried tomatoes for a burst of flavor and color.
  • Meat Lover’s Spinach Cheese Squares: Add cooked crumbled sausage or bacon for a hearty version.

Storage and Make-Ahead Instructions

These spinach cheese squares are perfect for meal prep! Here’s how to store and prepare them ahead of time:

  • Refrigerator: Store in an airtight container in the fridge for up to 3 days. Reheat in the oven or microwave.
  • Freezer: Freeze cut squares in a single layer on a baking sheet, then transfer to a freezer bag for up to 2 months. Reheat from frozen in the oven.
  • Prepare Ahead: You can prepare the mixture ahead of time and store it covered in the fridge for up to 24 hours before baking.

FAQs

Here are some frequently asked questions about this recipe:

  • Can I use frozen spinach? Yes, just ensure it’s well drained before mixing.
  • What can I substitute for cream cheese? Greek yogurt or low-fat cream cheese are great alternatives.
  • How do I know when they are done baking? They are done when golden on top and a toothpick inserted in the center comes out clean.
  • Can I add meat to this recipe? Absolutely! Cooked sausage or bacon can be great additions.
  • How do I store leftovers? Keep them in an airtight container in the fridge for up to 3 days.
  • Can I freeze these squares? Yes, freeze in a single layer before transferring to a freezer bag.
  • What is the best way to reheat them? Reheat in the oven for optimal texture, or microwave for convenience.
  • Are these squares gluten-free? You can make them gluten-free by using almond flour or a gluten-free flour blend.

Nutritional Tips and Dietary Adaptations

These spinach cheese squares are not only delicious but can also be tailored to fit various dietary needs:

  • Low-Carb Option: Swap flour for almond flour or omit it altogether for a low-carb version.
  • Dairy-Free Option: Use dairy-free cream cheese and cheese alternatives such as cashew cheese.
  • Vegan Option: Substitute eggs with flax eggs (1 tablespoon flaxseed meal + 2.5 tablespoons water) and use vegan cheese.

Essential Equipment

To make the process smoother, here’s what you’ll need:

  • Mixing Bowl: A large bowl for combining ingredients.
  • Baking Dish: A 9×9 inch pan is ideal for even baking.
  • Spatula: Useful for spreading the mixture evenly.
  • Oven Mitts: Safety first! Always use mitts when handling hot dishes.

Serving Suggestions

These easy spinach cheese squares can be enjoyed in various delightful ways:

  • As a Snack: Serve warm with a side of marinara or ranch dressing for dipping.
  • As a Meal: Pair with a fresh salad for a satisfying lunch or light dinner.
  • At Gatherings: Cut into smaller squares for appetizers at parties or potlucks.

Conclusion

These easy spinach cheese squares are a fantastic way to enjoy a nutritious snack or meal that’s quick to prepare and pleasing to the palate. With their cheesy goodness and vibrant spinach, they’re sure to become a staple in your kitchen. So gather your ingredients, follow the steps, and enjoy the delightful flavors you’ve created. Happy cooking, and remember, great meals don’t require perfection—just a willingness to try!

Easy Spinach Cheese Squares

Prep Time 10 minutes
Cook Time 30 minutes
Total Time 40 minutes
Servings 9 pieces
Calories 250
Delicious and cheesy spinach squares perfect for a quick snack or appetizer. Simple to make and full of flavor.

Ingredients

Main

  • 2 cups Fresh Spinach (packed)
  • 8 oz Cream Cheese
  • 1 cup Shredded Cheese (any blend)
  • 2 large Eggs
  • 1/2 cup All-Purpose Flour
  • 1 teaspoon Garlic Powder
  • to taste Salt and Black Pepper

Instructions 

  • Preheat oven to 350°F (175°C).
  • Sauté spinach until wilted, then mix with other ingredients.
  • Pour mixture into a greased 9x9 inch dish and smooth top.
  • Bake for 25-30 minutes until golden.
  • Cool for 10 minutes before cutting into squares.

Notes

Use any shredded cheese for variety and flavor.
Calories: 250kcal
Cost: $10
Course: Appetizer
Cuisine: American
Keyword: Spinach

Delightfully Healthy Blueberry Muffins: Your New Go-To Recipe

Welcome to your ultimate guide for making diabetic blueberry muffins that are not only delicious but also friendly for your blood sugar levels! If you’re seeking a scrumptious treat that combines wholesome ingredients with an easy-to-follow recipe, you’ve come to the right place. In this article, we’ll explore everything from the ingredients you’ll need to tips for making the perfect muffins. Let’s dive in!

Why You’ll Love This Recipe

These muffins are perfect for breakfast, a snack, or even a light dessert. Here’s why you’ll love making them:

  • Diabetic Friendly: Made with whole wheat flour and natural sweeteners, these muffins help manage your sugar levels.
  • Rich in Fiber: The use of whole grains and blueberries adds fiber, which is great for digestion and keeping you full.
  • Easy Preparation: With just a few simple steps, you can whip up a batch in no time.
  • Versatile: These muffins can be enjoyed fresh or frozen, making them a perfect make-ahead option.
  • Deliciously Nutritious: Packed with antioxidants from blueberries, they provide health benefits while satisfying your sweet tooth.

Ingredient Breakdown

Understanding the ingredients in your diabetic blueberry muffins is crucial for both taste and health. Here’s what you’ll need:

  • 1 ½ cups whole wheat flour: A healthier alternative to white flour, it adds fiber and nutrients.
  • 1 cup fresh blueberries: These antioxidants help manage blood sugar levels and bring natural sweetness.
  • ½ cup plain Greek yogurt: This adds moisture and protein, enhancing the texture of your muffins.
  • ¾ cup natural sweetener: Use stevia or erythritol for a low-calorie, diabetic-friendly option.
  • 2 large eggs: Eggs bind the ingredients and provide protein.
  • ½ teaspoon baking powder: This helps your muffins rise.
  • ½ teaspoon baking soda: A leavening agent that works with the yogurt for a fluffy texture.
  • Pinch of salt: Enhances the flavors of the other ingredients.

Ingredient Substitutions

Freshly baked blueberry muffins with a healthy twist, highlighting their whole wheat texture and colorful blueberries.

Don’t have everything on hand? Here are some easy swaps:

  • Flour: Use almond flour or oat flour for a gluten-free option.
  • Sweetener: Maple syrup or honey can be used but keep in mind they will add sugar.
  • Greek Yogurt: Unsweetened applesauce can be a great alternative for lower fat content.

How to Prepare Diabetic Blueberry Muffins

Follow these simple steps for baking your muffins:

  1. Preheat your oven: Set it to 350°F (175°C) and prepare a muffin tin with liners or grease it lightly.
  2. Mix dry ingredients: In a bowl, combine the whole wheat flour, baking powder, baking soda, and a pinch of salt.
  3. Whisk wet ingredients: In another bowl, mix the eggs, Greek yogurt, and natural sweetener until smooth.
  4. Combine mixtures: Gently fold the wet ingredients into the dry ingredients until just blended.
  5. Add blueberries: Carefully fold in the fresh blueberries to prevent them from breaking.
  6. Fill muffin cups: Fill each cup about two-thirds full with the batter.
  7. Bake: Place in the oven and bake for 20-25 minutes, or until golden brown and a toothpick comes out clean.

Pro Tips for Perfect Muffins

To ensure your muffins turn out perfectly every time, consider these expert insights:

  • Room temperature ingredients: Ensure your eggs and yogurt are at room temperature for better mixing.
  • Don’t overmix: Overmixing can make your muffins dense; mix until just combined.
  • Cool before serving: Allow muffins to cool in the tin for a few minutes before transferring to a wire rack.
  • Experiment with flavors: Add spices like cinnamon or nutmeg for a flavor boost.
  • To freeze: Place cooled muffins in an airtight container or freezer bag for up to 3 months.
  • Check doneness: Use a toothpick to test; it should come out clean when the muffins are fully cooked.

Common Mistakes and Troubleshooting

Even the best cooks face challenges. Here are common mistakes and how to fix them:

  • Dense muffins: This usually happens due to overmixing or too much flour. Make sure to measure accurately!
  • Too dry: If your muffins are dry, you might have overbaked them or not added enough moisture. Consider adding an extra tablespoon of yogurt next time.
  • Burned tops: If your muffins burn on top, try lowering the oven temperature by 25°F and checking for doneness sooner.

Variations You Can Try

Make this recipe your own by trying out these variations:

  • Nutty Addition: Fold in ½ cup of chopped walnuts or almonds for added crunch and healthy fats.
  • Chocolate Chip: Add a handful of sugar-free chocolate chips for a sweet twist.
  • Banana Blueberry: Mix in ½ mashed banana for extra moisture and natural sweetness.
  • Coconut Flavored: Incorporate ¼ cup of shredded unsweetened coconut for a tropical flair.

Storage and Make-Ahead Instructions

These muffins are perfect for meal prep! Here’s how to store and prepare them ahead:

  • Room Temperature: Store in an airtight container for 2-3 days.
  • Refrigerator: Keep them in the fridge for up to a week.
  • Freezing: Freeze muffins in a single layer, then transfer to an airtight container. They can last up to 3 months.
  • Reheating: Warm them in the microwave for 15-20 seconds or in the oven at 350°F for about 10 minutes.

Nutrition Tips and Dietary Adaptations

To maximize the health benefits of your muffins:

  • Watch your portions: Enjoy one muffin at a time to keep your sugar levels in check.
  • Prioritize whole ingredients: Opt for organic blueberries and natural sweeteners wherever possible.
  • Pair with protein: Enjoy your muffin with a side of scrambled eggs or Greek yogurt for a balanced meal.

Equipment Recommendations

For the best results, here’s the kitchen equipment you’ll need:

  • Muffin tin: A standard 12-cup muffin tin is perfect for this recipe.
  • Mixing bowls: Use at least two medium bowls for mixing dry and wet ingredients.
  • Whisk: A good whisk helps combine ingredients thoroughly.
  • Measuring cups and spoons: Accurate measurements are crucial for baking success.
  • Cooling rack: This allows muffins to cool evenly after baking.

Serving Suggestions

These muffins are as versatile as they are delicious! Here are some serving ideas:

  • Breakfast: Pair with a side of fruit and yogurt for a complete meal.
  • Snack: Enjoy them with a cup of tea or coffee for a delightful afternoon pick-me-up.
  • Brunch: Serve these muffins alongside scrambled eggs and fresh fruit for a balanced brunch spread.

Frequently Asked Questions

Let’s answer some common questions about these muffins:

  • Can I use frozen blueberries? Yes! Frozen blueberries work well; just fold them in while still frozen.
  • How do I know when my muffins are done? Insert a toothpick; if it comes out clean, they’re ready!
  • Can I make these muffins vegan? Yes! Substitute eggs with flax eggs and Greek yogurt with plant-based yogurt.
  • How many carbs are in these muffins? Each muffin typically contains 15-20 grams of carbs, depending on the sweetener used.
  • Can I add other fruits? Absolutely! Try adding chopped apples or peaches for a fruity twist.
  • What’s the best way to store leftovers? Keep them in an airtight container at room temperature or in the fridge for longer shelf life.
  • Can these muffins be made ahead of time? Yes! They freeze well for up to 3 months.
  • Are these muffins gluten-free? You can make them gluten-free by using almond or oat flour instead of whole wheat flour.

Conclusion

Now that you have the ultimate recipe for diabetic blueberry muffins, it’s time to get cooking! Remember, cooking is all about enjoying the process and experimenting with flavors. These muffins are perfect for anyone looking to enjoy a tasty treat without compromising their health. So gather your ingredients, preheat that oven, and let’s make some delicious memories in the kitchen!

Diabetic Blueberry Muffins

Prep Time 10 minutes
Cook Time 20 minutes
Total Time 30 minutes
Servings 12 muffins
Calories 150
Enjoy these healthy, low-sugar blueberry muffins perfect for a diabetic-friendly snack or breakfast.

Ingredients

Dry ingredients

  • 1 ½ cups whole wheat flour
  • ½ cup plain Greek yogurt
  • ¾ cup natural sweetener (stevia or erythritol)
  • 2 large eggs
  • ½ teaspoon baking powder
  • ½ teaspoon baking soda
  • Pinch salt

Blueberries

  • 1 cup fresh blueberries (or frozen)

Instructions 

  • Preheat oven to 350°F (175°C) and prepare muffin tin.
  • Mix dry ingredients: flour, baking powder, baking soda, and salt.
  • Whisk eggs, Greek yogurt, and sweetener until smooth.
  • Combine wet and dry mixtures gently, then fold in blueberries.
  • Fill muffin cups two-thirds full and bake for 20-25 minutes.

Notes

Use frozen blueberries if fresh are unavailable; do not thaw before adding.
Calories: 150kcal
Cost: $12
Course: Breakfast
Cuisine: American
Keyword: Blueberry, Diabetic, Healthy

Discover the Joy of Crunch: Your Ultimate Guide to Addictive Ranch Crispy Chickpeas

Welcome to your next favorite snack! These Addictive Ranch Crispy Chickpeas are not just delicious; they’re a satisfying crunch you can enjoy at any time of the day. With minimal ingredients and quick preparation, you’ll learn how to transform ordinary chickpeas into a protein-packed treat that’s perfect for snacking, salads, or entertaining. Let’s dive into why you’re going to love this recipe and how to make it your own!

Why You’ll Love This Recipe

Here are some fabulous reasons to get excited about making these ranch crispy chickpeas:

  • Protein-Packed Snack: Chickpeas are loaded with protein and fiber, making them a healthy and filling snack option.
  • Easy to Make: With just a few simple steps, you can whip up a batch in no time!
  • Customizable Flavors: Switch up the seasonings to create different flavor profiles, from spicy to savory.
  • Perfect for Meal Prep: Make a big batch and store them for a delicious, crunchy snack throughout the week.
  • Kid-Friendly: These ranch crispy chickpeas are a hit with kids, making them a great addition to lunchboxes or after-school snacks.

Ingredient Breakdown with Substitutions

Let’s look at the ingredients you’ll need to make these crispy chickpeas, along with some smart substitutions:

  • Chickpeas: Use 3 (15 oz) cans of organic low sodium garbanzo beans, or substitute with cooked dried chickpeas (about 4.5 cups).
  • Olive Oil: 1-2 tablespoons provide the necessary fat for crisping. You can swap this for avocado oil or any neutral oil of your choice.
  • Maple Syrup: This adds a touch of sweetness; honey or agave syrup can work as alternatives.
  • Spices: The blend includes garlic powder, onion powder, dill, parsley, salt, chili powder, cumin, paprika, and cayenne pepper. Feel free to mix and match based on your flavor preferences.

Step-by-Step Instructions

Side view of spiced chickpeas ready to be served as a savory snack.

Follow these simple steps to create your ranch crispy chickpeas:

  1. Preheat your oven to 400°F (200°C) and line a large baking sheet with parchment paper for easier cleanup.
  2. Drain and rinse the chickpeas thoroughly in a colander under cold running water. Remove any loose skins that come off during rinsing.
  3. Spread the chickpeas on a clean kitchen towel or paper towels and gently pat dry. The drier the chickpeas, the crispier they’ll get in the oven.
  4. Transfer the dried chickpeas to a large bowl and drizzle with olive oil. Toss until all chickpeas are evenly coated.
  5. Divide the chickpeas into three separate bowls if making different flavors. Add corresponding seasonings to each bowl and toss until evenly coated.
  6. Spread the seasoned chickpeas in a single layer on the prepared baking sheet, ensuring they’re not overcrowded. Use multiple baking sheets if necessary.
  7. Bake for 25-30 minutes, stirring halfway through cooking time, until the chickpeas are golden brown and crispy. They should make a slight rattling sound when you shake the pan.
  8. Remove from the oven and let cool completely on the baking sheet. The chickpeas will continue to crisp up as they cool. Store in an airtight container at room temperature for up to 3 days.

Common Mistakes and Troubleshooting

Here are some tips to ensure your chickpeas turn out perfectly crispy:

  • Not Drying Chickpeas Thoroughly: Make sure to dry the chickpeas well after rinsing; damp chickpeas won’t crisp up.
  • Overcrowding the Baking Sheet: Ensure there’s enough space between chickpeas on the baking sheet for proper airflow.
  • Skipping the Cool Down: Allowing the chickpeas to cool completely on the baking sheet helps them achieve maximum crispiness.

Pro Tips for Perfect Ranch Crispy Chickpeas

Here are some expert insights to elevate your chickpea game:

  • Experiment with Seasonings: Don’t hesitate to try different spices and herbs to find your favorite combination.
  • Double the Batch: You can easily double the recipe if you’re planning on sharing (or if you’re really hungry!).
  • Serve Warm or Room Temperature: While delicious at any temperature, serving them warm enhances the flavor.
  • Use a Convection Oven: If you have one, it circulates hot air better, resulting in crispier chickpeas.
  • Try Different Oils: Each oil has a unique flavor; experiment to see which you prefer in your chickpeas.

Creative Seasoning Variations

Don’t just stop at ranch! Here are several exciting variations to try:

  • Spicy Cajun: Replace ranch seasoning with Cajun spice mix for a fiery kick.
  • Sweet Cinnamon: Omit the savory spices and add cinnamon and a bit of sugar for a sweet treat.
  • Italian Herb Blend: Use Italian seasoning, garlic powder, and Parmesan cheese for a Mediterranean twist.
  • Smoky BBQ: Add smoked paprika and a dash of BBQ sauce for a smoky flavor profile.

Storage and Make-Ahead Instructions

Want to prepare these chickpeas in advance? Here’s how:

  • Store in Airtight Container: After cooling, store your chickpeas in an airtight container to maintain their crunch.
  • Keep at Room Temperature: They stay fresh for up to 3 days at room temperature.
  • Make Ahead: You can prepare the chickpeas a day in advance; just ensure they reach room temperature before serving.

Frequently Asked Questions

Here are answers to common questions regarding crispy chickpeas:

  • Why Aren’t My Roasted Chickpeas Crispy? Ensure they are thoroughly dried and not overcrowded on the baking sheet.
  • How Can I Make Them Less Salty? Reduce the amount of added salt in your seasoning mix.
  • Can I Use Frozen Chickpeas? It’s best to use canned or cooked dried chickpeas for optimal texture.
  • What Can I Pair Them With? They make a great salad topping, snack on their own, or can be added to soups for crunch.
  • How Do I Revive Soggy Chickpeas? Re-bake them in the oven for a few minutes to restore their crunch.
  • Can I Freeze Them? While not recommended, you can freeze them. Just note that they may lose their crunch once thawed.
  • What’s the Best Way to Serve Them? Serve them warm or at room temperature for the best flavor and texture.
  • Are They Gluten-Free? Yes, chickpeas are naturally gluten-free!

Nutritional Tips and Dietary Adaptations

This recipe can easily fit into various dietary plans:

  • Vegan-Friendly: This snack is vegan as it contains no animal products.
  • Gluten-Free: Chickpeas are gluten-free, making this a safe snack for those with gluten intolerances.
  • Low-Calorie Option: Use less oil for a lower-calorie snack without compromising on flavor.

Equipment Recommendations

Here’s what you’ll need to make these crispy chickpeas:

  • Baking Sheet: A large, rimmed baking sheet allows for even cooking.
  • Parchment Paper: Helps prevent sticking and makes cleanup a breeze.
  • Colander: Ideal for rinsing and draining chickpeas efficiently.
  • Bowl for Mixing: A large bowl lets you easily coat your chickpeas with oil and seasoning.

Serving Suggestions

Looking for ways to enjoy your ranch crispy chickpeas? Here are a few ideas:

  • As a Standalone Snack: Enjoy them straight from the container for a quick, satisfying crunch.
  • Add to Salads: Use them as a crunchy topping for salads, adding both flavor and nutrition.
  • As a Garnish: Sprinkle over soups or stews for added texture and flavor.
  • On Charcuterie Boards: They make an excellent addition to any charcuterie or snack board.

Conclusion: Your New Favorite Snack Awaits!

There you have it! A step-by-step guide to creating your very own Addictive Ranch Crispy Chickpeas. This simple, flavorful snack is not only easy to make but also packed with nutrition. Don’t be afraid to get creative with flavors and enjoy them however you like! Happy cooking, and get ready to munch on these delicious chickpeas with confidence!

Addictive Ranch Crispy Chickpeas: Homemade Savory Snack

Prep Time 10 minutes
Cook Time 30 minutes
Total Time 40 minutes
Servings 4 servings
Calories 220
Enjoy these crunchy, flavorful roasted chickpeas seasoned with a savory ranch-inspired blend, perfect for a healthy snack.

Ingredients

Canned Goods

  • 3 cans organic low sodium garbanzo beans
  • 1-2 tbsp olive oil
  • 1 tbsp maple syrup
  • ½ tsp cinnamon
  • 1 tsp garlic powder
  • 1 tsp onion powder
  • ½ tsp dried dill
  • ½ tsp dried parsley
  • ½ tsp salt
  • ½ tsp chili powder
  • ½ tsp ground cumin
  • ½ tsp paprika
  • ½ tsp cayenne pepper
  • ¼ tsp garlic powder
  • ¼ tsp salt

Instructions 

  • Preheat oven to 400°F (200°C) and line a baking sheet with parchment paper.
  • Drain, rinse, and dry chickpeas thoroughly.
  • Toss chickpeas with olive oil and maple syrup.
  • Divide into bowls and add seasonings, tossing to coat.
  • Spread on baking sheet and bake for 25-30 minutes, stirring halfway.
  • Cool completely and store in an airtight container.

Notes

Ensure chickpeas are thoroughly dried for maximum crispiness.
Calories: 220kcal
Cost: $10
Course: Snack
Cuisine: American
Keyword: Chickpeas

Elevate Your Breakfast with Avocado Toast and Egg

Welcome to your new favorite breakfast! If you’re looking for a nutritious, satisfying, and flavorful start to your day, look no further than avocado toast with egg. This dish is not only simple to make but also packed with healthy fats, protein, and vitamins that will keep you energized throughout the morning. In this comprehensive guide, we will explore everything from the perfect ingredients to cooking techniques and variations that will make your breakfast exciting. Let’s dive in!

Why You’ll Love This Recipe

This avocado toast with egg recipe isn’t just delicious; it’s also incredibly versatile and packed with benefits. Here are five reasons why you’ll adore it:

  • Nutrient-Rich Ingredients: Avocado is loaded with healthy fats, fiber, and essential nutrients, making it a fantastic choice for a balanced breakfast.
  • Quick and Easy: With just a few simple ingredients and steps, you can whip up this meal in under 15 minutes!
  • Customizable: You can easily modify the toppings and types of eggs to suit your taste or dietary preferences.
  • Perfect for Meal Prep: Make a batch of avocado spread and keep it in the fridge for quick breakfasts all week.
  • Dazzling Presentation: This dish is not only tasty but also visually pleasing, perfect for impressing friends or family.

Ingredient Breakdown

Let’s take a closer look at the ingredients you’ll need to create this delightful dish, along with some substitutions if you’re missing an item.

  • Bread of Choice: Use 1-2 slices of whole grain or sourdough bread for a hearty base. Gluten-free options are available if needed.
  • Ripe Avocado: Choose a ripe avocado for the best flavor and creaminess. Hass avocados are typically preferred.
  • Eggs: This recipe calls for 2 eggs, but you can adjust this based on your hunger levels or preferences. Try fried, scrambled, or poached eggs!
  • Salt and Pepper: Essential for seasoning. Feel free to experiment with herbs or spices.
  • Butter or Olive Oil: Use either for cooking your eggs. Olive oil is a great choice for a healthier option.
  • Optional: Splash of Vinegar: This is especially useful for poaching eggs, helping to keep the whites together.

How to Make Avocado Toast with Eggs

Now, let’s get into the nitty-gritty of how to prepare this delicious breakfast. Follow these steps for perfect results.

Cooking the Toast

1. Toast the bread in a toaster or on a skillet until golden and crisp. This step is crucial for creating a solid base that won’t become soggy.

Preparing the Avocado

2. Slice or mash the ripe avocado in a bowl. Spread it generously onto your toast. Season with a pinch of salt and freshly cracked pepper for that extra flavor.

Cooking the Eggs

3. If you’re frying: Heat butter or oil in a pan over low heat. Crack in the egg and cook until the whites are set and the yolk remains runny.

4. If you’re scrambling: Whisk the eggs in a bowl, pour them into the pan with butter or oil, and cook gently, folding until soft and fluffy.

5. For boiled eggs: Boil water and gently add the eggs. Cook to your desired doneness, then cool in an ice bath, peel, and slice.

6. To poach: Bring water with a splash of vinegar to a boil. Swirl the water, gently slide in the egg, and poach until the white is set and the yolk is soft.

Assembling Your Toast

7. Place the cooked egg on top of the avocado toast and serve immediately for the best taste and texture.

Pro Tips for Perfect Avocado Toast

To elevate your avocado toast game, consider these expert insights:

  • Choose the Right Avocado: Ensure it’s ripe but not overripe to avoid a mushy texture.
  • Season Well: Don’t skip the salt and pepper; they enhance the flavors tremendously.
  • Experiment with Toppings: Add sliced tomatoes, radishes, or microgreens for a burst of freshness and color.
  • Use Fresh Ingredients: Fresh herbs or spices can bring a whole new dimension of flavor.
  • Toast to Perfection: Aim for a golden brown color for the best crunch.
  • Don’t Rush the Eggs: Cooking them on low heat ensures they remain tender and flavorful.
  • Variate Your Breads: Try different types of bread like rye, ciabatta, or even bagels!
  • Make It a Meal: Pair your avocado toast with a side of fruit or yogurt for a complete breakfast.

Common Mistakes and Troubleshooting

Even the best of us can run into issues while preparing our meals. Here are some common mistakes and how to avoid them:

  • Soggy Toast: Make sure your toast is adequately toasted and let it cool for a minute before adding avocado.
  • Brown Avocado: To prevent browning, add a splash of lemon or lime juice to the avocado after mashing.
  • Overcooked Eggs: Keep the heat low and stay attentive to your eggs to achieve the perfect doneness.
  • Unripe Avocado: If your avocado isn’t ripe, place it in a brown paper bag for a day or two.
  • Too Much Salt: Start with a small pinch of salt and adjust to your taste.

Variations to Try

Feeling adventurous? Here are some exciting variations of avocado toast with egg:

  • Spicy Avocado Toast: Add a sprinkle of red pepper flakes or a few slices of jalapeño for a kick.
  • Caprese Style: Top with fresh mozzarella and basil for an Italian twist.
  • Breakfast Burrito Style: Add black beans and salsa for a southwestern flair.
  • Smoked Salmon Addition: Layer on some smoked salmon for an elegant and flavorful touch.

Storage and Make-Ahead Instructions

If you want to prepare ahead of time, here’s how:

  • Avocado Preparation: Mash the avocado and store it in an airtight container with a little lemon juice to prevent browning, and consume within 1-2 days.
  • Eggs: Cook eggs fresh if possible. If you need to prepare in advance, consider hard-boiling them.
  • Bread: Toast the bread fresh for the best texture. You can pre-slice your bread for convenience.

Comprehensive FAQ

Here are answers to some common questions about avocado toast with egg:

  • Can I make this recipe vegan? Yes! Substitute the eggs with tofu scramble or chickpea salad.
  • What type of bread is best? Whole grain or sourdough works best for flavor and texture.
  • Is this a healthy breakfast? Absolutely! It’s rich in healthy fats and protein.
  • How can I keep my avocado from browning? Adding lemon juice helps maintain its vibrant green color.
  • Can I make this ahead of time? You can prepare the avocado spread in advance, but for best results, toast and assemble just before serving.
  • What can I pair with avocado toast? Fresh fruit, yogurt, or a smoothie make excellent accompaniments.
  • Can I use different types of eggs? Yes! Feel free to use boiled, scrambled, poached, or fried eggs.
  • How long does avocado toast last? It’s best eaten fresh, but the avocado can be stored for 1-2 days in the fridge.

Nutritional Tips and Dietary Adaptations

This avocado toast is already a well-rounded meal, but here are some ways to adjust it for specific dietary needs:

  • Low-Carb Option: Use a low-carb bread or lettuce wrap instead of traditional bread.
  • High-Protein Option: Add additional eggs or consider topping with cottage cheese or Greek yogurt.
  • Gluten-Free Option: Opt for gluten-free bread or rice cakes as the base.
  • Vegan Option: Substitute eggs with plant-based options like tofu or chickpea salad.

Equipment Recommendations

To make the most of your avocado toast journey, consider having these kitchen tools on hand:

  • Toaster or Toaster Oven: For perfectly toasted bread.
  • Non-Stick Skillet: Ideal for cooking eggs without sticking.
  • Mixing Bowl: For mashing the avocado.
  • Spatula: For flipping eggs and serving.
  • Knife and Cutting Board: Essential for slicing avocados and bread.

Serving Suggestions

To make your avocado toast even more appealing, consider these serving ideas:

  • Garnish with Fresh Herbs: A sprinkle of cilantro or parsley can elevate the dish.
  • Serve with a Side Salad: A light salad on the side can add freshness.
  • Enjoy with a Smoothie: Pair your toast with a refreshing smoothie for a complete breakfast.

In conclusion, avocado toast with egg is not just a breakfast; it’s a canvas for your culinary creativity. With the right ingredients, techniques, and a dash of imagination, you can create a dish that not only satisfies but also nourishes. So grab your ingredients, channel your inner chef, and enjoy the delightful flavors and textures of this amazing breakfast! Happy cooking!

Avocado Toast With Egg

Prep Time 5 minutes
Cook Time 10 minutes
Total Time 15 minutes
Servings 1 serving
Calories 350
A quick and nutritious breakfast featuring creamy avocado on crispy toast topped with a perfectly cooked egg.

Ingredients

Bread

  • 1 slice bread of choice (whole grain or sourdough recommended)

Avocado

  • 1 ripe avocado ripe avocado

Eggs

  • 2 eggs eggs

Salt and pepper

  • to taste Salt and pepper

Butter or olive oil

  • for frying or scrambling eggs Butter or olive oil

Vinegar (optional)

  • splash optional Splash of vinegar (for poaching eggs)

Instructions 

  • Toast the bread until golden and crisp.
  • Spread mashed or sliced avocado on toast; season with salt and pepper.
  • Cook eggs: fry, scramble, or poach as preferred, until whites are set and yolk is soft.
  • Place cooked egg on avocado toast and serve immediately.

Notes

For extra flavor, add a squeeze of lemon or hot sauce.
Calories: 350kcal
Cost: $10
Course: Breakfast
Cuisine: American
Keyword: Avocado, Egg, Toast

Wholesome Oatmeal Waffles: Your New Favorite Breakfast

If you’re looking for a delicious, nutritious, and quick breakfast option, look no further than these oatmeal waffles. Perfectly fluffy and incredibly satisfying, they are made entirely with rolled oats, which means they’re not only healthier but also help keep you full longer. This recipe is ideal for busy mornings or leisurely weekend breakfasts alike. Plus, you’ll find that they come together in just minutes! Let’s dive into why you’ll love this recipe.

Why You’ll Love This Recipe

  • Nutritious Ingredients: Made with whole rolled oats instead of refined flour, these oatmeal waffles pack a fiber punch, keeping you energized throughout the day.
  • Quick and Easy: The batter can be whipped up in a blender in just a few minutes, making cleanup a breeze.
  • Customizable: You can easily adapt the recipe to your dietary needs, whether you’re vegan, gluten-free, or looking for low-sugar alternatives.
  • Perfect Texture: The waffles are crispy on the outside and fluffy on the inside, giving you that ideal waffle experience.
  • Freezable: Cooked waffles can be frozen and reheated for a quick breakfast solution any day of the week!

Ingredients Breakdown

Here’s what you’ll need to make these delicious oatmeal waffles:

  • 2 cups Old Fashioned rolled oats: Provides the base for the batter, offering great taste and health benefits.
  • 2 large eggs (or flax eggs): Acts as a binder. For a vegan option, use 2 tablespoons of ground flaxseed mixed with 6 tablespoons of water.
  • 3/4 cup milk of choice: Any milk works well here, including oat milk, almond milk, or cow’s milk.
  • 2 tablespoons neutral oil or melted butter: This adds richness and helps the waffles crisp up.
  • 2 tablespoons brown sugar: For a hint of sweetness; you can substitute with maple syrup or a sugar alternative.
  • 2 teaspoons vanilla extract: Adds flavor and depth to the batter.
  • 2 teaspoons baking powder: Ensures that the waffles rise and are light and fluffy.
  • 1/2 teaspoon kosher salt: Balances out the sweetness and enhances flavor.
  • 1/4 teaspoon cinnamon: A warm spice that complements the oats beautifully.

Pro Tips for Perfect Waffles

Mouth-watering oatmeal waffles garnished with fresh fruit and a sprinkle of cinnamon.
  • Let the batter rest: After blending, allow it to sit for 5 minutes. This helps the oats absorb moisture and thickens the batter.
  • Brush the waffle iron: Lightly coat your waffle maker with oil before adding the batter to prevent sticking.
  • Cook in batches: Depending on your waffle maker, you may be able to make several at once. Keep them warm in a low oven until served.
  • Adjust for thickness: If the batter seems too thick, add a splash more milk to get the consistency just right.
  • Experiment with spices: Don’t hesitate to add a pinch of nutmeg or a dash of vanilla extract for a flavor twist.
  • Use a scale: For the most accurate measurements, consider weighing your ingredients.
  • Fresh toppings: Top with fresh fruit, yogurt, or a drizzle of maple syrup for a delightful finish.
  • Make it a meal: Serve with bacon or sausage for a heartier breakfast option.

Common Mistakes and Troubleshooting

Even the best of us can run into hiccups when cooking. Here are some common pitfalls and how to avoid them:

  • Waffles sticking to the iron: Ensure your waffle iron is properly oiled and preheated before adding the batter.
  • Dense waffles: If your waffles are too heavy, you might need to add more baking powder or ensure your batter isn’t overmixed.
  • Gummy texture: Letting the batter rest helps prevent this; also, avoid overcooking.
  • Uneven cooking: Make sure to spread the batter evenly in the center of the waffle iron.
  • Not enough sweetness: Adjust the sweetener to your preference—taste the batter before cooking!

Variations to Try

Feel like mixing things up? Here are some delicious variations:

  • Chocolate Chip Oatmeal Waffles: Add 1/2 cup of mini chocolate chips to the batter for a sweet treat.
  • Banana Oatmeal Waffles: Mash one ripe banana into the batter for a natural sweetness and extra moisture.
  • Apple Cinnamon Waffles: Incorporate 1 cup of finely chopped apples and an extra 1/2 teaspoon of cinnamon for a fall-inspired flavor.
  • Nutty Oatmeal Waffles: Stir in 1/4 cup of chopped nuts or seeds for added crunch and nutrition.

Storage and Make-Ahead Instructions

Want to prepare for a busy week? Here’s how to store and enjoy these oatmeal waffles later:

  • Freezing: Place cooked waffles in a single layer on a baking sheet before freezing. Once frozen, transfer them to a plastic bag, removing excess air before sealing.
  • Reheating: For the best results, toast frozen waffles in a toaster or toaster oven until heated through and crispy.
  • Make-ahead: Prepare the batter the night before and store it in the fridge. Just give it a quick stir before cooking!

Frequently Asked Questions

  • Can I make these waffles vegan?: Absolutely! Just use flax eggs and any non-dairy milk of your choice.
  • What can I substitute for the rolled oats?: Quick oats can be used, but the texture will differ slightly.
  • How long do these waffles last in the fridge?: They can be stored in an airtight container for up to 3 days.
  • Can I use this batter for pancakes?: Yes! Simply pour the batter onto a hot skillet instead of a waffle iron.
  • Are these waffles gluten-free?: If you use certified gluten-free oats, they will be gluten-free.
  • What toppings do you recommend?: Maple syrup, fresh fruit, yogurt, and nut butter work wonderfully!
  • Can I double this recipe?: Yes, just scale the ingredients accordingly; it works brilliantly for larger gatherings.
  • What’s the best way to serve these waffles?: Serve them warm with a drizzle of maple syrup and your favorite toppings!

Nutritional Tips and Dietary Adaptations

When it comes to making healthy choices, these oatmeal waffles can easily fit into many dietary plans:

  • High Fiber: Packed with rolled oats, they provide essential fiber for digestive health.
  • Low Sugar: Adjust the sugar levels to suit your preference; using ripe bananas can sweeten naturally.
  • Protein Boost: Consider adding protein powder or Greek yogurt to the batter for extra protein.
  • Rich in Whole Grains: This recipe focuses on whole ingredients, making it a better choice for heart health.

Equipment Recommendations

To make the best oatmeal waffles, here’s what you’ll need:

  • High-Speed Blender: Perfect for creating a smooth batter quickly.
  • Waffle Iron: Any style will do, but a Belgian waffle maker gives you that classic fluffy texture.
  • Measuring Cups and Spoons: Accurate measuring is key to consistent results.
  • Spatula: For pouring batter and serving your waffles with ease.

Serving Suggestions

These oatmeal waffles are versatile and can be paired with various toppings:

  • Classic Maple Syrup: A timeless choice that never disappoints.
  • Fresh Berries: Strawberries, blueberries, or raspberries add freshness and color.
  • Nut Butter: Almond or peanut butter for a protein kick.
  • Yogurt: A dollop of Greek yogurt for added creaminess and protein.

Conclusion

These wholesome oatmeal waffles are not just easy to make but also a delightful way to start your day. Packed with nutrition, flavor, and versatility, they’re bound to become a family favorite. So grab your ingredients, fire up that waffle iron, and enjoy a cozy breakfast that’ll keep you energized and satisfied!

Oatmeal Waffles

Prep Time 10 minutes
Cook Time 10 minutes
Total Time 20 minutes
Servings 4 servings
Calories 250
Enjoy fluffy, wholesome oatmeal waffles that are quick to make and perfect for a delicious breakfast or brunch.

Ingredients

Dry ingredients

  • 2 cups Old Fashioned rolled oats
  • 2 large eggs (or flax eggs)
  • 3/4 cup milk of choice
  • 2 tablespoons neutral oil or melted butter
  • 2 tablespoons brown sugar
  • 2 teaspoons vanilla extract
  • 2 teaspoons baking powder
  • 1/2 teaspoon kosher salt
  • 1/4 teaspoon cinnamon

Instructions 

  • Blend all ingredients until smooth, then let sit for 5 minutes.
  • Preheat waffle iron and lightly brush with oil.
  • Pour batter into waffle iron and cook until golden brown.
  • Remove waffles and keep warm. Serve with maple syrup.
  • Freeze leftovers in a plastic bag; reheat in toaster as needed.

Notes

For extra flavor, add fresh berries or nuts on top.
Calories: 250kcal
Cost: $15
Course: Breakfast
Cuisine: American
Keyword: Oats