Author

Steven

Browsing

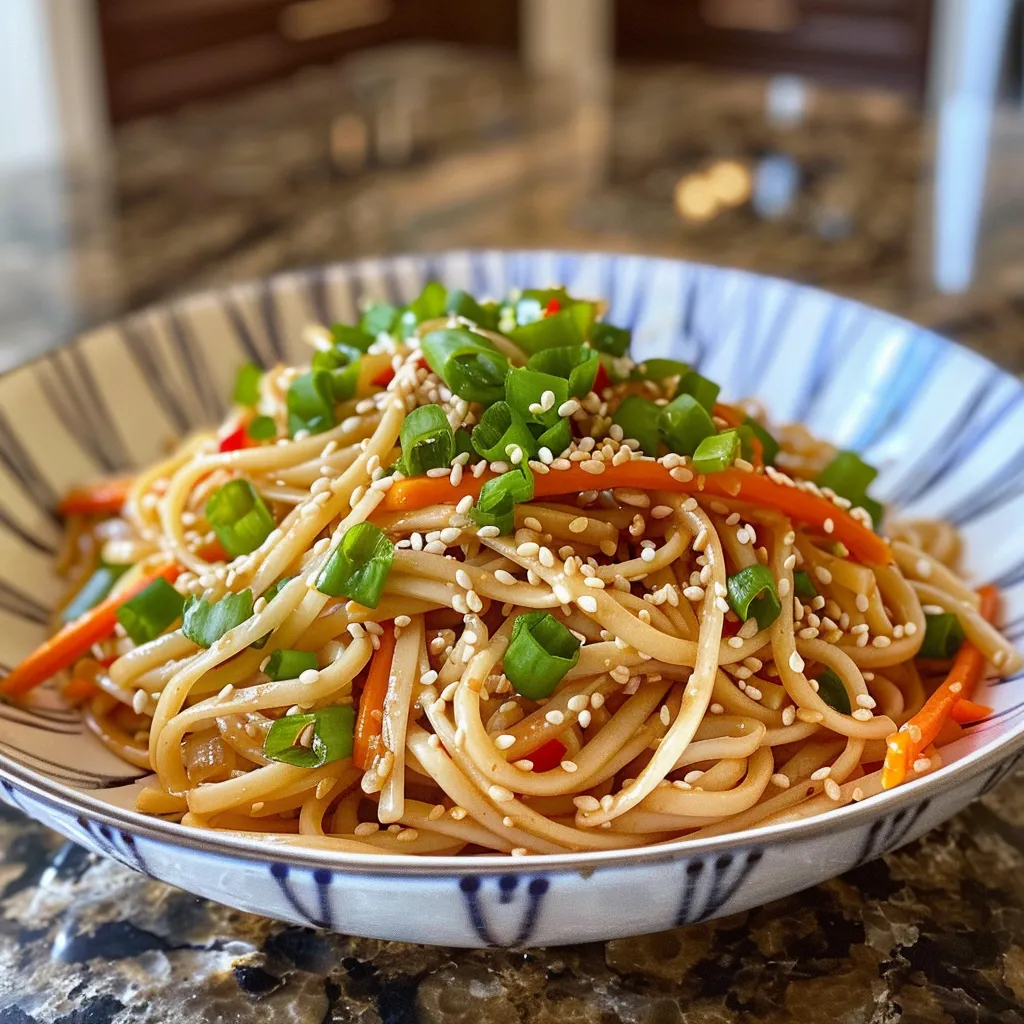
Beat the heat with our delightful Cold Sesame Noodle Salad! Packed with vibrant flavors and fresh ingredients, this dish is perfect for warm summer days. Quick to prepare and oh-so-satisfying, this easy-to-make noodle salad is not only refreshing but also a great option for meal prep. Let’s dive into why you’ll absolutely love this recipe!

Why You’ll Love This Recipe

  • Quick and Easy: With minimal prep time, this dish can be ready in under 30 minutes, making it perfect for busy weeknights.
  • Vibrant Flavors: The combination of sesame oil, soy sauce, and fresh veggies creates a mouthwatering flavor profile that bursts with freshness.
  • Healthy and Nutritious: Packed with whole wheat noodles and colorful vegetables, this salad is not only delicious but also wholesome.
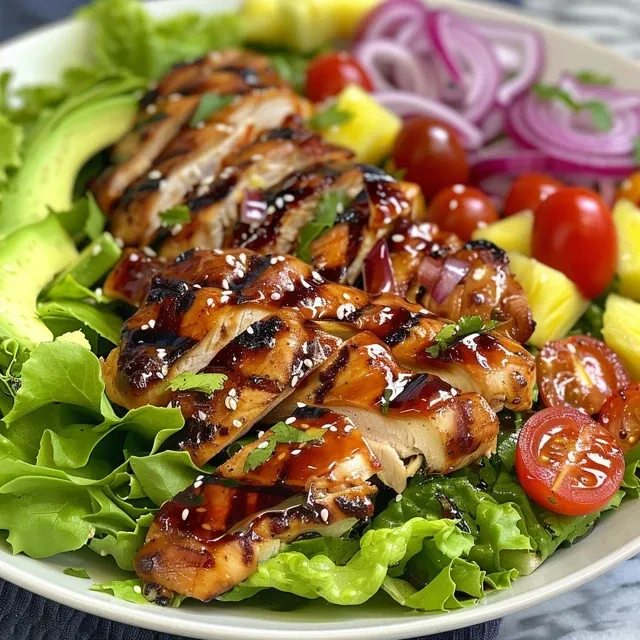
  • Versatile: Customize it to suit your tastes by adding protein like grilled chicken skewers or tofu for a complete meal.
  • Perfect for Meal Prep: This salad stores well in the fridge, making it an excellent choice for lunch or quick dinners throughout the week.

Ingredient Breakdown

Here’s what you’ll need for this easy cold sesame noodle salad:

  • 8 ounces Whole Wheat Linguine or Thin Spaghetti (can substitute with gluten-free noodles for dietary needs)
  • 1/4 cup Soy Sauce (Tamari can be used for gluten-free)
  • 2 tablespoons Sesame Oil (toasted sesame oil for an extra flavor boost)
  • 2 tablespoons Rice Vinegar (white vinegar is a good substitute)
  • 1 teaspoon Ground Ginger (fresh ginger elevates the flavor)
  • 2 cloves Garlic (minced; adjust quantity to taste)
  • 2 tablespoons Roasted Sesame Seeds (sunflower seeds can be used for a nut-free option)
  • 1 cup Carrot (grated; bell pepper slices can be added for extra crunch)
  • 1/2 cup Green Onions (diced; chives are a great substitute)

Steps to Make Cold Sesame Noodle Salad

  1. Cook the pasta according to package instructions. Drain and rinse with cold water.
  2. In a large bowl, whisk together the soy sauce, sesame oil, rice vinegar, ginger, and minced garlic.
  3. Add the cooked noodles to the bowl and toss to coat evenly with the dressing.
  4. Fold in the carrots, green onions, and sesame seeds.
  5. Chill in the refrigerator for at least 15 minutes before serving to allow flavors to meld.

Pro Tips for Success

A side view of a delicious Cold Sesame Noodle Salad featuring noodles and garnishments.
  • Prep Ahead: If you’re short on time, make the sesame vinaigrette ahead of time and store it in the fridge.
  • Texture Matters: Ensure the noodles are rinsed well to prevent them from sticking together.
  • Fresh Veggies: Use seasonal vegetables for the best flavor and nutrition.
  • Adjust the Heat: If you like spice, add a dash of chili oil or red pepper flakes to the dressing.
  • Perfect Pairing: This salad is a great side dish alongside grilled meats or seafood.
  • Storage Advice: Store leftover salad in an airtight container in the fridge for up to 3 days.
  • Nut-Free Option: Substitute roasted sesame seeds with sunflower seeds for a nut-free version.
  • Fresh Herbs: Add chopped cilantro or mint for an extra layer of flavor.

Common Mistakes and Troubleshooting

Here are some common pitfalls and how to avoid them:

  • Noodles Too Sticky: Make sure to rinse the noodles under cold water after cooking, which prevents them from clumping.
  • Overdressing: Start with less vinaigrette than you think you need; you can always add more later.
  • Flavorless Salad: Let the salad marinate in the fridge for at least 15 minutes to enhance the flavors.

Variations to Try

Feel free to mix things up with these variations:

  • Add Protein: Toss in some grilled chicken, shrimp, or tofu for a heartier meal.
  • Swap Noodles: Experiment with different types of noodles, such as rice noodles or soba noodles.
  • Veggie Boost: Incorporate other vegetables like bell peppers, cucumbers, or snap peas for added crunch.
  • Asian Twist: Add a splash of hoisin sauce or a sprinkle of crushed peanuts for extra flavor.

Storage and Make-Ahead Instructions

This salad is perfect for meal prep! Here’s how to store it:

  • Refrigerate in an airtight container for up to 3 days.
  • Make the dressing ahead of time and keep it separate until you’re ready to serve.
  • Store any leftover ingredients separately to maintain freshness.

Frequently Asked Questions

Here are some common questions about making cold sesame noodle salad:

  • Can I use other types of noodles? Yes, you can use any pasta you prefer, including rice noodles or gluten-free options.
  • How long can I store this salad? It can be stored in the fridge for up to 3 days.
  • Can I add meat to this salad? Absolutely! Grilled chicken, shrimp, or tofu are great additions.
  • What if I don’t have sesame oil? You can substitute it with olive oil, but the flavor will be different.
  • Is this salad suitable for meal prep? Yes, it’s perfect for making ahead and storing for lunches or quick dinners.
  • Can I make this salad vegan? Yes, simply omit any animal protein and ensure your noodles are vegan-friendly.
  • What can I serve with this salad? It pairs well with grilled meats or as a standalone dish.
  • How can I make this salad spicier? Add a dash of chili oil or red pepper flakes to the dressing before serving.

Nutrition Tips and Dietary Adaptations

This cold sesame noodle salad is not only delicious but also nutritious! Here are some tips to enhance its health benefits:

  • Whole Grains: Use whole wheat noodles for added fiber and nutrients.
  • Fresh Vegetables: Load up on colorful veggies to boost vitamins and minerals.
  • Protein Power: Include a source of protein such as chicken, tofu, or edamame to keep you satisfied.

Equipment Recommendations

To make your cooking experience easier, here are some handy tools:

  • Large Pot: For cooking your noodles.
  • Whisk: For mixing the dressing smoothly.
  • Cutting Board and Knife: For chopping vegetables efficiently.
  • Mixing Bowl: A large bowl for combining all ingredients.

Serving Suggestions

This salad is versatile and can be enjoyed in various ways:

  • As a light lunch on its own.
  • As a side dish alongside grilled chicken skewers.
  • In a picnic spread, paired with fresh fruit.
  • As a meal prep option, served over a bed of greens for added nutrition.

Now that you have all the tools and tips, it’s time to make this delightful Cold Sesame Noodle Salad! Enjoy the refreshing flavors and the satisfaction of a quick, healthy meal. Happy cooking!

Cold Sesame Noodle Salad Refreshing Flavor for Summer Days

Prep Time 10 minutes
Cook Time 10 minutes
Total Time 20 minutes
Servings 4 servings
Calories 350
A cool and flavorful noodle salad perfect for hot summer days, combining savory sesame and tangy vinegar with fresh vegetables.

Ingredients

Noodles

  • 8 ounces Whole Wheat Linguine or Thin Spaghetti (Can substitute with gluten-free noodles)
  • 0.25 cup Soy Sauce (Tamari can be used for gluten-free)
  • 2 tablespoons Sesame Oil (Toasted sesame oil for extra flavor)
  • 2 tablespoons Rice Vinegar (White vinegar is a good substitute)
  • 1 teaspoon Ground Ginger (Fresh ginger is even better)
  • 2 cloves Garlic (Minced, adjust quantity to taste)
  • 2 tablespoons Roasted Sesame Seeds (Sunflower seeds can be used for nut-free)
  • 1 cup Carrot (Grated)
  • 0.5 cup Green Onions (Diced, chives are a great substitute)

Instructions 

  • Cook the noodles according to package instructions, then drain and rinse with cold water.
  • In a bowl, whisk together soy sauce, sesame oil, rice vinegar, ground ginger, and minced garlic.
  • Combine cooked noodles, grated carrot, and green onions in a large bowl.
  • Pour the dressing over the noodle mixture and toss to combine.
  • Sprinkle with roasted sesame seeds and serve chilled.

Notes

For extra flavor, chill the salad for at least 30 minutes before serving.
Calories: 350kcal
Cost: $12
Course: Salad
Cuisine: Asian
Keyword: Noodles

Revitalize Your Day with a Raspberry Lemon Smoothie

Welcome to a delicious journey that will not only satisfy your taste buds but also support your health goals! This Raspberry Lemon Smoothie is a perfect blend of refreshing flavors and nutritious ingredients. Whether you’re looking for a quick breakfast, a post-workout snack, or a delightful afternoon treat, this smoothie is designed to boost your energy and keep you feeling great. Let’s dive into why this smoothie is a must-try!

Why You’ll Love This Recipe

This recipe isn’t just about taste; it’s about the numerous benefits it brings to your health and lifestyle:

  • Weight Loss Friendly: The combination of raspberries and lemon juice creates a weight loss smoothie that is low in calories but high in flavor, making it a guilt-free option.
  • Nutrient-Packed: With fresh fruits and Greek yogurt, this smoothie is rich in vitamins, antioxidants, and protein, ensuring you stay nourished throughout the day.
  • Quick and Easy: Ready in just a few minutes, this recipe is perfect for those busy mornings or when you need a quick snack without the hassle.
  • Refreshing Flavor: The blend of tart raspberries and zesty lemon offers a refreshing taste that invigorates your senses.
  • Customizable: Easy to adapt with various ingredients, allowing you to create your unique version of this smoothie.

Ingredients You’ll Need

Gathering the right ingredients is key to making a delicious smoothie. Here’s what you’ll need to whip up this Raspberry Lemon Weight Loss Smoothie:

  • 1½ cups fresh or frozen raspberries
  • 1 tablespoon fresh lemon juice
  • 1 teaspoon lemon zest
  • 1 cup water or unsweetened almond milk
  • ½ cup plain Greek yogurt or dairy-free yogurt
  • 1 teaspoon honey or maple syrup, optional
  • ½ teaspoon vanilla extract, optional

Ingredient Breakdown and Substitutions

Side view of a creamy raspberry lemon smoothie, showcasing its texture, with ingredients in the background.

Let’s explore each ingredient and some substitutions to cater to your taste and dietary needs:

  • Raspberries: Packed with antioxidants, they are also a great source of fiber. If you’re out of raspberries, consider using strawberries or blueberries for a similar effect.
  • Lemon Juice: Freshly squeezed lemon juice brightens up the flavor. If you don’t have lemons, lime juice can be a zesty alternative.
  • Greek Yogurt: This adds creaminess and protein. For a dairy-free option, use coconut yogurt or silken tofu.
  • Sweeteners: Honey or maple syrup can be adjusted based on your sweetness preference. For a low-calorie option, try stevia or agave syrup.

Pro Tips for the Perfect Smoothie

To ensure your smoothie is a hit every time, consider these expert tips:

  • Freeze Your Fruit: For a thicker, creamier texture, freeze your raspberries ahead of time.
  • Blend in Stages: Start by blending the liquid ingredients before adding the solid ones to ensure a smooth consistency.
  • Taste as You Go: Adjust the sweetness or tartness by tasting after blending. Add more honey or lemon juice based on your preference.
  • Use a High-Powered Blender: This ensures all ingredients are well blended and gives that silky smooth texture.
  • Don’t Over-Blend: Blend just until smooth to preserve the fresh flavor and nutritional benefits.
  • Experiment with Add-Ins: Consider adding spinach or kale for a green boost, or protein powder for an extra kick.
  • Check Consistency: If your smoothie is too thick, add a splash more liquid; if it’s too thin, add more fruit or yogurt.
  • Serve Immediately: For the best flavor and texture, enjoy your smoothie right after making it.

Common Mistakes and Troubleshooting

Even the best of us can make mistakes in the kitchen. Here are some common pitfalls and how to avoid them:

  • Too Thick: Add more liquid gradually to achieve your desired consistency.
  • Too Tart: Balance out excessive tartness by adding a touch more sweetener or a banana.
  • Not Blending Enough: Ensure all ingredients are fully integrated for a smooth result. If you hear chunks, blend a little longer.
  • Using Old Ingredients: Fresh ingredients yield the best flavor. Always check for freshness before use!

Variations to Try

Want to mix things up? Here are some delightful variations to this smoothie:

  • Green Raspberry Lemon Smoothie: Add a handful of spinach or kale for extra nutrients.
  • Berry Blast Smoothie: Combine raspberries with blueberries and strawberries for a mixed berry flavor.
  • Peachy Lemon Smoothie: Swap raspberries with fresh or frozen peaches for a sweeter twist.
  • Protein Power Smoothie: Add a scoop of your favorite protein powder to make it a post-workout drink.

Storage and Make-Ahead Instructions

Want to prepare ahead of time? Here’s how to store your smoothie for later:

  • Make-Ahead: Prepare all ingredients and freeze them in a zip-top bag. Just blend with liquid when you’re ready!
  • Storing Leftovers: If you have leftovers, store them in an airtight container in the fridge for up to 24 hours. Give it a good shake before enjoying.

Nutrition Tips and Dietary Adaptations

This smoothie is naturally low in calories and high in nutrients, making it suitable for various dietary needs:

  • Low-Carb Option: Replace the sweetener with a low-carb alternative to make it keto-friendly.
  • Vegan Adaptation: Use plant-based yogurt and a vegan sweetener to keep it completely plant-based.
  • Gluten-Free: All ingredients are naturally gluten-free, making it suitable for those with gluten sensitivities.

Serving Suggestions

Pair your smoothie with these options for a balanced snack or meal:

  • Granola Bars: A crunchy, nutritious addition that complements the smoothie.
  • Whole-Grain Toast: Top with avocado or nut butter for a satisfying breakfast.
  • Fruit Salad: A fresh fruit salad can enhance the smoothie experience with more flavor and nutrients.

Frequently Asked Questions

Got questions? Here are some common inquiries about the Raspberry Lemon Smoothie:

  • Can I use frozen raspberries? Yes! Frozen raspberries are perfect for smoothies and can enhance the texture.
  • How long can I store the smoothie? It’s best enjoyed fresh, but you can keep leftovers in the fridge for up to 24 hours.
  • Can I add greens to this smoothie? Absolutely! Spinach or kale blends well without altering the flavor much.
  • Is this smoothie suitable for kids? Yes! It’s a great way to sneak in some fruit and nutrients for kids.
  • How can I make this smoothie thicker? Add more yogurt or use frozen fruit to enhance thickness.
  • Can I substitute the Greek yogurt? Yes! You can use any yogurt type or even silken tofu for a dairy-free option.
  • What’s the nutritional value of this smoothie? This smoothie is low in calories, high in fiber, and a good source of protein, depending on your yogurt choice.
  • Is it possible to use other fruits? Definitely! Feel free to substitute any fruit you love or have on hand.

Conclusion

Your journey to a healthier lifestyle just got a little tastier with this Raspberry Lemon Smoothie. It’s not only quick and easy to prepare but also packed with nutrients and delightful flavors that will brighten your day. So grab your ingredients, fire up your blender, and enjoy this refreshing treat that supports your wellness goals. Remember, cooking is about having fun and being creative, so don’t hesitate to make this recipe your own. Happy blending!

Raspberry Lemon Weight Loss Smoothie

Prep Time 5 minutes
Total Time 5 minutes
Servings 1 cup
Calories 150
A refreshing and healthy smoothie perfect for weight loss, combining the tang of lemon with the sweetness of raspberries.

Ingredients

Fruits and liquids

  • 1.5 cups fresh or frozen raspberries
  • 1 tablespoon fresh lemon juice
  • 1 teaspoon lemon zest
  • 1 cup water or unsweetened almond milk
  • 0.5 cup plain Greek yogurt or dairy-free yogurt
  • 1 teaspoon honey or maple syrup (optional)
  • 0.5 teaspoon vanilla extract (optional)

Instructions 

  • Add liquid ingredients to the blender.
  • Add lemon juice, zest, raspberries, sweetener, and vanilla.
  • Blend until smooth.
  • Adjust texture and flavor as needed.
  • Serve immediately.

Notes

For a creamier texture, use Greek yogurt; for dairy-free, choose plant-based yogurt.
Calories: 150kcal
Cost: $8
Course: Breakfast, Snack
Cuisine: Healthy
Keyword: lemon, raspberry, Smoothie

Unleash the Flavor: A Grilled Vegetable Salad to Brighten Your Table

Welcome to the world of vibrant, grilled flavors! This Grilled Summer Vegetable Salad is not just a dish; it’s an experience that celebrates fresh produce and the joy of cooking outdoors. Perfect for warm evenings or as a colorful side at your next gathering, this salad is easy to prepare and absolutely delicious. Let’s dive into why you’ll love this recipe and how to make it shine!

Why You’ll Love This Recipe

Here are just a few reasons why this Grilled Vegetable Salad will become a staple in your kitchen:

  • Simple Preparation: With just a handful of ingredients and straightforward steps, you can whip this salad up in no time, making it a perfect option for busy weeknights.
  • Flavor Explosion: The grilling process enhances the natural sweetness of the vegetables, adding a smoky depth that elevates every bite.
  • Customizable: Feel free to mix and match your favorite vegetables, allowing for endless variations that suit your taste preferences.
  • Nutritious and Light: Packed with vitamins and minerals, this salad is a fantastic way to incorporate more vegetables into your diet while keeping meals light.
  • Perfect for Meal Prep: Make a big batch and enjoy it throughout the week or serve it at your next barbecue—this salad only gets better as the flavors meld!

Ingredients Breakdown

Here’s what you’ll need to make this delicious Grilled Summer Vegetable Salad:

  • 1 zucchini, sliced lengthwise
  • 1 yellow squash, sliced lengthwise
  • 1 red bell pepper, quartered
  • 1 yellow bell pepper, quartered
  • 1 red onion, cut into thick rounds
  • 1 cup cherry tomatoes
  • 2 ears of corn, husked
  • 2 tablespoons olive oil
  • Salt and black pepper to taste

**Substitutions**: If you’re missing any of these ingredients, don’t worry! Here are some easy swaps:

  • Onions: Use shallots or green onions for a milder flavor.
  • Corn: Frozen corn works well if fresh isn’t available.
  • Oil: Avocado oil or melted coconut oil can be used instead of olive oil.
  • Cheese: Crumbled goat cheese or Parmesan can replace feta for a different taste.

How to Make This Grilled Vegetable Salad

Side view of a colorful grilled vegetable salad with cherry tomatoes and onion, showcasing its fresh ingredients.

Ready to bring those fresh flavors to life? Follow these simple steps:

  1. Preheat your grill to medium-high heat and lightly oil the grates.
  2. Toss the zucchini, yellow squash, bell peppers, red onion, cherry tomatoes, and corn with olive oil, salt, and black pepper.
  3. Grill the vegetables until tender and slightly charred, about 3-5 minutes per side.
  4. Remove from the grill and let cool slightly. Cut the corn off the cobs and chop the grilled vegetables into bite-sized pieces.
  5. In a small bowl, whisk together olive oil, balsamic vinegar, Dijon mustard, garlic, salt, and pepper to make the dressing.
  6. Toss the grilled vegetables with the dressing in a large bowl. Garnish with crumbled feta cheese and fresh basil before serving.

Pro Tips for Perfect Grilling

To ensure your salad turns out amazing, keep these expert tips in mind:

  • Don’t overcrowd the grill: Give each vegetable space to cook evenly and develop that delicious char.
  • Use fresh, in-season vegetables: They’re more flavorful and nourishing, enhancing your salad’s taste.
  • Experiment with marinades: Marinating your veggies in the dressing for 30 minutes before grilling can add depth to the flavor.
  • Grill the corn in husk: It helps keep the kernels moist and adds a unique flavor.
  • Let the salad rest: Allowing it to sit for a few minutes after tossing helps the flavors meld beautifully.
  • Serve warm or cold: This salad is versatile; enjoy it right off the grill or chill for later!

Common Mistakes and Troubleshooting

Even the best cooks can run into issues. Here’s how to avoid common pitfalls:

  • Burnt vegetables: Keep the grill temperature steady and check for doneness regularly.
  • Tough veggies: Cut your vegetables into uniform sizes to ensure even cooking.
  • Watery dressing: If your dressing is too thin, you can add a touch more mustard or a pinch of sugar to enhance its consistency.

Delicious Variations

Feel free to switch it up! Here are some creative variations of this salad:

  • Add protein: Grilled chicken, shrimp, or chickpeas can turn this salad into a hearty meal.
  • Incorporate fruits: Try adding grilled peaches or avocados for a sweet twist.
  • Swap the dressing: A yogurt-based dressing or a tahini drizzle can provide a different flavor profile.
  • Herb it up: Add fresh herbs like cilantro, parsley, or dill for extra freshness and fragrance.

Storage and Make-Ahead Instructions

This salad is great for meal prep! Here’s how to store it:

  • Refrigerate leftovers: Store in an airtight container in the fridge for up to 3 days.
  • Make-ahead tips: Grill your veggies a day in advance and toss them with the dressing just before serving.
  • Freezing: While it’s best fresh, grilled veggies can be frozen for up to 3 months. Just thaw and add fresh ingredients when ready to serve.

Frequently Asked Questions

Here are some common questions about this Grilled Vegetable Salad:

  • Can I use frozen vegetables? Yes, but fresh veggies yield the best flavor and texture.
  • How long do I grill the vegetables? Grill until tender and charred, typically 3-5 minutes per side.
  • What can I serve with this salad? It pairs beautifully with grilled meats, sandwiches, or as a light meal on its own.
  • Can I add grains to this salad? Absolutely! Quinoa, farro, or couscous can enhance the salad’s heartiness.
  • Is this salad gluten-free? Yes, all ingredients are gluten-free, making it suitable for various diets.
  • Can I make this salad vegan? Yes, simply omit the cheese or substitute with a plant-based option!
  • What’s the best way to cut the vegetables? Aim for uniform thickness to ensure even grilling.
  • How do I enhance the dressing? Fresh herbs, garlic, or a squeeze of citrus can brighten up the flavor!

Nutritional Tips and Dietary Adaptations

This Grilled Summer Vegetable Salad is not only delicious but also packed with nutrients:

  • Low in calories: The salad is light, making it a great option for weight management.
  • Rich in fiber: The variety of vegetables helps boost your fiber intake, promoting digestive health.
  • Adaptable for diets: Easily modify for keto, paleo, or vegan diets by adjusting the dressing and cheese.

Equipment Recommendations

Here’s what you’ll need to make this salad a success:

  • Grill: A gas or charcoal grill works perfectly for achieving that smoky flavor.
  • Grilling basket: Helps keep smaller vegetables from falling through the grates.
  • Sharp knife: For easy and precise cutting of vegetables.
  • Mixing bowls: For tossing the salad and preparing the dressing.

Serving Suggestions

To make your meal complete, consider pairing this salad with:

  • Grilled meats: Chicken, steak, or fish complement the smoky flavors beautifully.
  • Crusty bread: A loaf of fresh bread is perfect for soaking up the delicious dressing.
  • Light white wine: A crisp Sauvignon Blanc or Pinot Grigio enhances the summer vibe.

Your Culinary Adventure Awaits!

Now that you have all the tools you need, it’s time to get cooking! This Grilled Vegetable Salad is not just a dish; it’s a celebration of flavors and colors that can bring joy to any meal. Enjoy experimenting with ingredients and making it your own. Happy grilling, and remember, the best meals come from a place of creativity and fun in the kitchen!

Grilled Summer Vegetable Salad

Prep Time 10 minutes
Cook Time 15 minutes
Total Time 25 minutes
Servings 4 servings
Calories 250
A vibrant and smoky salad perfect for summer, combining grilled vegetables with a tangy dressing and fresh herbs.

Ingredients

Vegetables

  • 1 piece zucchini (sliced lengthwise)
  • 1 piece yellow squash (sliced lengthwise)
  • 1 piece red bell pepper (quartered)
  • 1 piece yellow bell pepper (quartered)
  • 1 piece red onion (cut into thick rounds)
  • 1 cup cherry tomatoes
  • 2 ears corn (husked)
  • 2 tablespoons olive oil
  • to taste Salt and black pepper
  • 1 tablespoon balsamic vinegar
  • 1 teaspoon Dijon mustard Dijon mustard
  • 1 clove garlic garlic (minced)
  • to taste Feta cheese and fresh basil (for garnish)

Instructions 

  • Preheat grill to medium-high and oil grates. Toss vegetables with olive oil, salt, and pepper.
  • Grill vegetables until tender and slightly charred, about 3-5 minutes per side. Cool slightly.
  • Cut corn off cobs and chop grilled vegetables into bite-sized pieces.
  • Whisk together olive oil, balsamic vinegar, Dijon mustard, garlic, salt, and pepper to make dressing. Toss with vegetables.
  • Garnish with crumbled feta and basil before serving.

Notes

This salad is bursting with smoky flavors and fresh ingredients, making it a perfect addition to any summer meal!
Calories: 250kcal
Cost: $15
Course: Salad
Cuisine: American
Keyword: Vegetables

If you’re looking to elevate your dinner game while keeping it simple and delicious, you’ve landed in the right place! This BBQ Chicken Rice Bowl brings together tender chicken simmered in zesty BBQ sauce, fluffy rice, and a sprinkle of toppings that will make your taste buds dance. Perfect for busy weeknights, this dish is not only easy to whip up but also satisfies the whole family. Let’s dive into why this recipe is a must-try and how you can make it your own!

Why You’ll Love This Recipe

  • Unforgettable Flavor: The combination of BBQ sauce, honey, and spices creates a rich and tangy taste that transforms ordinary chicken into a flavor powerhouse.
  • Easy Preparation: With minimal prep work, you can toss everything into the slow cooker and let it do the magic while you focus on other tasks.
  • Customizable: Whether you prefer chicken thighs for juiciness or different toppings, this recipe adapts to your tastes and dietary needs.
  • Meal Prep Friendly: Prepare a big batch and enjoy delicious leftovers for lunch or dinner throughout the week.
  • Kid-Approved: The sweet and savory flavors are a hit with kids, making it a fantastic family meal that everyone will enjoy.

Ingredients You’ll Need

Gather the following ingredients to create your BBQ Chicken Rice Bowl:

  • 2 lbs chicken breasts or thighs: Choose thighs for extra tenderness and flavor.
  • 1 cup BBQ sauce: Your favorite brand or homemade will work perfectly.
  • ¼ cup honey: Adds a touch of sweetness that balances the BBQ sauce.
  • 1 tbsp apple cider vinegar: For a hint of acidity that brightens the flavors.
  • 1 tsp smoked paprika: Infuses a subtle smokiness that elevates the dish.
  • ½ tsp garlic powder: A classic flavor booster.
  • ½ tsp onion powder: Adds depth to the overall taste.
  • ¼ tsp chili flakes: For a little kick; adjust based on your spice preference.
  • Salt and pepper: To taste.
  • 3 cups cooked rice: White or brown rice works; feel free to use a rice cooker for ease.
  • 1 cup corn: Adds sweetness and texture; you can use frozen or fresh.
  • ½ cup shredded cheese: Cheddar or your favorite cheese for that melty goodness.
  • Crispy onions: For topping to add crunch and flavor.

Instructions

Follow these simple steps to create your BBQ Chicken Rice Bowl:

  1. In a mixing bowl, combine the BBQ sauce, honey, apple cider vinegar, smoked paprika, garlic powder, onion powder, chili flakes, salt, and pepper. This is your flavor base.
  2. Pour half of the sauce mixture into your slow cooker, ensuring the bottom is well coated.
  3. Add the chicken on top of the sauce, then pour the remaining sauce over the chicken.
  4. Cover and cook on low for 6 hours or high for 3-4 hours, until the chicken is tender and can be easily shredded.
  5. Once done, shred the chicken back into the sauce using two forks, stirring to mix well.
  6. To serve, spoon the shredded chicken and sauce over a bed of cooked rice, topping with corn, cheese, and a sprinkle of crispy onions.

Pro Tips for Making BBQ Chicken Rice Bowls

Juicy BBQ chicken served over a bed of rice, topped with cheese and crispy onions.
  • Use a meat thermometer: Ensure your chicken reaches an internal temperature of 165°F for perfect doneness.
  • Let it rest: Allow the shredded chicken to sit in the sauce for a few minutes before serving to soak up more flavor.
  • Experiment with BBQ sauces: Try different flavors, such as honey mustard or spicy BBQ, to switch things up.
  • Make it a meal: Add steamed veggies or salad on the side for a complete meal.
  • Spice it up: Adjust the chili flakes according to your family’s heat tolerance.
  • Rice Variations: Use quinoa or cauliflower rice for a healthier alternative.
  • Freezing options: Portion out leftovers in airtight containers for easy future meals.
  • Mix-in Options: Toss in black beans or diced bell peppers for extra flavor and nutrition.

Common Mistakes and Troubleshooting

Here are some common pitfalls and how to avoid them:

  • Overcooking the chicken: Cooking too long can dry it out. Always check for tenderness and internal temperature.
  • Not enough sauce: If you find the dish lacking moisture, consider adding a splash of chicken broth or extra BBQ sauce before serving.
  • Skipping the toppings: Toppings like cheese and crispy onions make a big difference in flavor and texture; don’t skip them!

Variations to Try

Feel free to adapt this recipe to suit your preferences:

  • Spicy BBQ Chicken Rice Bowl: Add diced jalapeños or a dash of hot sauce to the BBQ sauce for added heat.
  • Tropical BBQ Chicken: Mix in pineapple chunks or mango for a sweet twist.
  • Vegetarian Option: Swap chicken for chickpeas or tofu marinated in BBQ sauce for a plant-based version.
  • Asian-Inspired Bowl: Use teriyaki sauce instead of BBQ and top with sesame seeds and green onions.

Storage and Make-Ahead Instructions

This BBQ Chicken Rice Bowl is perfect for meal prep:

  • Refrigeration: Store any leftovers in an airtight container in the fridge for up to 4 days.
  • Freezing: Freeze the shredded chicken and sauce in freezer-safe bags for up to 3 months. Thaw in the fridge overnight before reheating.
  • Reheating: Heat on the stovetop or in the microwave until warmed through.

Frequently Asked Questions

  • Can I use bone-in chicken for this recipe? Yes, but adjust cooking time to ensure the chicken is fully cooked.
  • Can I make this recipe in advance for a party? Absolutely! Prepare the chicken ahead of time and reheat just before serving.
  • What can I serve with this BBQ Chicken Rice Bowl? A side of coleslaw or a simple green salad pairs wonderfully.
  • Can I use brown rice instead of white? Yes, brown rice is a healthy alternative that adds more fiber.
  • What BBQ sauce works best? Choose a sauce that you enjoy; sweet, smoky, or spicy all work great!
  • Can I make it gluten-free? Use gluten-free BBQ sauce and ensure your rice is also gluten-free.
  • How do I make this dish spicier? Add more chili flakes or use a spicy BBQ sauce for an extra kick.
  • Can I use a different protein? Absolutely! Pork or beef can also be delicious in this recipe.

Nutrition Tips and Dietary Adaptations

This BBQ Chicken Rice Bowl can fit various dietary needs:

  • Low-Carb: Serve the chicken over cauliflower rice instead of traditional rice.
  • Low-Sodium: Use low-sodium BBQ sauce and seasonings to control salt intake.
  • High-Protein: Pair with a side of Greek yogurt for added protein and a creamy texture.
  • Vegetarian: Replace chicken with marinated tofu and use a plant-based BBQ sauce.

Equipment Recommendations

To make this recipe, you’ll need:

  • Slow Cooker: Essential for tender, slow-cooked chicken.
  • Mixing Bowl: For combining your sauce ingredients.
  • Rice Cooker: Optional, but it makes cooking rice a breeze.
  • Shredding Forks: Handy for shredding chicken quickly and easily.

Serving Suggestions

Present your BBQ Chicken Rice Bowl beautifully:

  • Garnish: Add fresh herbs like cilantro or parsley for a pop of color.
  • Side Dishes: Serve with a side of roasted vegetables or corn on the cob.
  • Drink Pairing: A refreshing iced tea or lemonade complements the dish perfectly.

Now that you’ve got all the tools and tips to make a mouthwatering BBQ Chicken Rice Bowl, it’s time to get cooking! Remember, cooking is all about enjoying the process and experimenting with flavors. So roll up your sleeves, have fun, and enjoy the delicious results!

BBQ Chicken Rice Bowl That'll Blow Your Mind

Prep Time 10 minutes
Cook Time 6 hours
Total Time 6 hours 10 minutes
Servings 4 servings
Calories 650
A flavorful and easy-to-make rice bowl featuring tender BBQ chicken topped with cheese and crispy onions.

Ingredients

Protein

  • 2 lbs chicken breasts or thighs
  • 1 cup BBQ sauce
  • 0.25 cup honey
  • 1 tbsp apple cider vinegar
  • 1 tsp smoked paprika
  • 0.5 tsp garlic powder
  • 0.5 tsp onion powder
  • 0.25 tsp chili flakes
  • to taste Salt and pepper
  • 3 cups cooked rice
  • 1 cup corn
  • 0.5 cup shredded cheese

Toppings

  • Crispy onions crispy onions (for topping)

Instructions 

  • Mix BBQ sauce, honey, vinegar, and spices. Pour half into slow cooker.
  • Add chicken and top with remaining sauce. Cook on low for 6 hours or high for 3-4 hours until tender.
  • Shred chicken, stir back into sauce, and serve over rice with corn, cheese, and crispy onions.

Notes

Adjust seasoning to taste and enjoy!
Calories: 650kcal
Cost: $15
Course: Main Course
Keyword: BBQ, Chicken, rice

Discover the Joy of Frozen Yogurt Strawberry Bark

Welcome to your next favorite culinary adventure! If you’re searching for a refreshing, healthy treat that’s easy to make and even easier to enjoy, you’ve landed in the right place. This Frozen Yogurt Strawberry Bark is not only a delightful snack but also a versatile dessert that can be enjoyed year-round. With just a handful of ingredients, you can whip up this colorful, satisfying treat that will impress your family and friends. Let’s dive into the details!

Why You’ll Love This Recipe

There are countless reasons to fall in love with this Frozen Yogurt Bark. Here are just a few:

  • Healthy snacking: Made with fresh strawberries and creamy yogurt, this bark is a nutritious option that satisfies your sweet tooth without the guilt.
  • Simple ingredients: You only need 3-4 basic ingredients, most of which you probably have in your kitchen already.
  • Kid-friendly treat: This colorful bark is fun for kids to help make and eat, making it a perfect family activity.
  • Versatile options: Customize your bark with various toppings and flavors—there’s something for everyone!
  • Make-ahead convenience: Prepare a batch in advance and store it in the freezer for a quick snack at any time.

Ingredients Breakdown

To make this delightful treat, you’ll need the following:

  • 2 1/2 cups chopped fresh California strawberries: Sweet, ripe strawberries are the star of this recipe. If you can’t find fresh ones, frozen strawberries will work too; just let them thaw first.
  • 2 cups vanilla-flavored yogurt: Greek yogurt is an excellent choice for a creamy texture and added protein. Feel free to use flavored yogurt for a twist.
  • 1/2 cup coconut butter, melted: This adds a rich, tropical flavor. If you don’t have coconut butter, you can substitute with melted coconut oil.
  • Drizzle of honey (optional): Add a touch of sweetness if desired. Maple syrup or agave can be used as alternatives.

Pro Tips for Success

Side view of delicious frozen yogurt bark with strawberries and a glossy finish.

Here are some expert insights to ensure your Frozen Yogurt Strawberry Bark turns out perfect every time:

  • Use parchment paper: Line your baking sheet with parchment paper to make removing the bark a breeze.
  • Freeze until solid: Ensure you freeze the bark for at least 3-4 hours, or until it is completely firm.
  • Cut with a sharp knife: For clean cuts, use a sharp knife to slice the frozen bark into pieces.
  • Experiment with toppings: Try adding nuts, seeds, or other fruits for extra crunch and flavor.
  • Monitor the freezing time: The thickness of your yogurt layer can affect how long it takes to freeze. Check periodically.
  • Store properly: Keep the bark in an airtight container in the freezer to maintain freshness.
  • Layer for texture: For added appeal, layer different flavors of yogurt to create a colorful effect.
  • Use ripe fruit: Choose the ripest strawberries for the best flavor and sweetness.

Avoid These Common Mistakes

Even the simplest recipes can have pitfalls. Here are some common mistakes to avoid:

  • Not using parchment paper: This can lead to a sticky situation when trying to remove the bark from the baking sheet.
  • Overloading with toppings: Too many toppings can make the bark difficult to freeze evenly.
  • Freezing for too short a time: If the bark isn’t fully frozen, it will be too soft to cut into pieces.
  • Using low-quality yogurt: Opt for a creamy, high-quality yogurt for the best texture and flavor.

Variations to Try

Feel free to mix things up! Here are some exciting variations to inspire your creativity:

  • Chocolate Lover’s Bark: Substitute half of the yogurt with melted dark chocolate for a decadent treat.
  • Nutty Delight: Add chopped nuts or nut butter for a crunchy texture and additional protein.
  • Coconut Bliss: Mix in shredded coconut along with the strawberries for a tropical twist.
  • Berry Medley: Combine strawberries with other berries like blueberries and raspberries for a fruity explosion.

Storage & Make-Ahead Instructions

This bark can be prepared in advance and stored for later enjoyment:

  • Storage: Keep the bark in an airtight container in the freezer for up to 2 months.
  • Make-ahead: Prepare the bark a day or two in advance and have it ready for parties or family gatherings.

Frequently Asked Questions

Here are some common queries about making and enjoying Frozen Yogurt Strawberry Bark:

  • Can I use flavored yogurt? Yes, flavored yogurt can be used, but it may alter the sweetness of the bark.
  • How long does it take for yogurt to freeze? Typically, it takes about 3-4 hours for the bark to freeze solid.
  • Does yogurt stick to parchment paper? No, parchment paper helps prevent sticking, making it easy to lift the bark.
  • What can I use instead of honey? Maple syrup or agave syrup are excellent substitutes for honey.
  • How do I cut the bark? Use a sharp knife to slice the frozen bark into pieces.
  • Can I add other fruits? Absolutely! You can mix in any berries or fruits that you enjoy.
  • Is this recipe gluten-free? Yes, this bark is naturally gluten-free as it contains no grains.
  • Can I use non-dairy yogurt? Yes, almond milk yogurt or any other non-dairy yogurt works great!

Nutrition Tips and Dietary Adaptations

This Frozen Yogurt Strawberry Bark is not only delicious but also packed with nutrients:

  • Protein Power: Greek yogurt provides a good source of protein, essential for muscle repair and overall health.
  • Fiber Rich: Strawberries are high in fiber, supporting digestive health.
  • Low-Calorie Treat: This bark is a great alternative to high-calorie desserts, making it suitable for weight management.
  • Dairy-Free Option: Using non-dairy yogurt allows those with lactose intolerance to enjoy this treat without worry.

Equipment Recommendations

For this recipe, you’ll need:

  • Baking sheet: A standard-sized baking sheet will work perfectly.
  • Parchment paper: Essential for easy removal of the bark.
  • Sharp knife: For cutting the bark into pieces once it’s frozen.
  • Mixing bowl: A medium-sized bowl for combining your ingredients.

Serving Suggestions

Here are some ideas to elevate your Frozen Yogurt Strawberry Bark experience:

  • Garnish: Drizzle with extra honey or melted chocolate for added sweetness.
  • Pairing: Serve with a side of fresh fruit or a scoop of ice cream for a delightful dessert platter.
  • Breakfast Boost: Crumble some bark over granola or oatmeal for a refreshing breakfast option.

In conclusion, this Frozen Yogurt Strawberry Bark is not only a simple and fun recipe to make, but it also brings a burst of flavor and nutrition to your snack time. Enjoy the process of making it, and remember, great food doesn’t require perfection—just a willingness to try something new. Happy cooking!

Tasty Frozen Yogurt Strawberry Bark

Prep Time 10 minutes
Total Time 10 minutes
Servings 8 pieces
Calories 150
A delicious and easy frozen treat combining fresh strawberries and creamy yogurt for a refreshing snack or dessert.

Ingredients

Fruits

  • 2.5 cups chopped fresh California strawberries
  • 2 cups vanilla-flavored yogurt
  • 0.5 cup coconut butter, melted
  • drizzle optional honey (optional for sweetness)

Instructions 

  • Spread the chopped strawberries evenly on a baking sheet lined with parchment paper.
  • Mix the yogurt and melted coconut butter until smooth.
  • Pour the yogurt mixture over the strawberries and spread evenly.
  • If desired, drizzle honey on top.
  • Freeze for at least 4 hours until firm, then break into pieces and serve.

Notes

For a sweeter taste, add more honey or sweeten the yogurt beforehand.
Calories: 150kcal
Cost: $10
Course: Dessert
Keyword: strawberries

Revitalize Your Day with an Easy Iced Almond Milk Latte

Welcome to your next culinary adventure! If you’re looking for a refreshing drink that combines the robust flavor of espresso with the creamy goodness of almond milk, then look no further than this delightful iced almond milk latte. Perfect for hot summer days or whenever you need a quick pick-me-up, this recipe is simple, satisfying, and oh-so-delicious. In just a few easy steps, you’ll master the art of making a café-quality beverage right in your own kitchen. Let’s dive into why you’ll absolutely love this recipe!

Why You’ll Love This Recipe

  • Quick and easy: This recipe takes less than 10 minutes from start to finish, making it perfect for those busy mornings.
  • Customizable sweetness: Adjust the sweetness to your liking with options like brown sugar simple syrup or natural sweeteners.
  • Nutritious choice: Almond milk is lower in calories than regular milk and packed with vitamins, making this drink a health-conscious option.
  • Versatile base: Swap almond milk for any milk alternative you prefer, such as oat or soy milk, to cater to your taste.
  • Impress your friends: Serve this drink at your next gathering and wow your guests with your barista skills!

Ingredients Breakdown

To create the perfect iced almond milk latte, you’ll need the following ingredients:

  • 2 espresso shots: Use your favorite espresso beans to achieve a rich flavor. If you don’t have an espresso machine, brewed coffee works too!
  • 3/4 – 1 cup almond milk: Choose unsweetened almond milk for a healthier option or sweetened for a creamier taste.
  • 1 tbsp brown sugar simple syrup (optional): A quick homemade syrup can be made by dissolving equal parts brown sugar and water over low heat.
  • Ice cubes: Essential for chilling your drink. Consider coffee ice cubes for a stronger flavor!

How to Make an Iced Almond Milk Latte

A side view of a refreshing iced almond milk latte in a clear glass filled with ice.

Ready to bring your iced almond milk latte to life? Follow these simple steps:

  1. Make the espresso and add the sweetener, if using. Leave in the freezer for a few minutes to cool off.
  2. Take a tall glass or a jar and fill it with ice cubes.
  3. Pour the cooled espresso over the ice.
  4. Top it off with almond milk to your desired creaminess.

Expert Tips for the Perfect Iced Latte

  • Chill your espresso: Allow your espresso to cool slightly before combining it with ice to prevent dilution.
  • Use high-quality almond milk: For the best flavor, opt for barista-style almond milk that froths well.
  • Experiment with flavors: Add syrups like vanilla or caramel for a twist!
  • Froth the milk: If you want a beautiful foam, use a milk frother or shake the milk in a sealed jar before pouring.
  • Make it a cold brew: Substitute espresso with cold brew concentrate for a smoother taste.
  • Try flavored almond milk: Vanilla or chocolate almond milk can add an exciting depth to your latte.
  • Adjust the coffee strength: If you prefer a stronger latte, add an extra shot of espresso.
  • Serve immediately: Iced drinks are best enjoyed fresh to maintain their coolness.

Common Mistakes and Troubleshooting

  • Espresso too hot: Allow it to cool to prevent melting the ice too quickly.
  • Too much ice: If it melts too fast, your drink will become watery. Use less ice or coffee ice cubes.
  • Not enough sweetness: Adjust the syrup quantity based on your preference!

Variations of Iced Almond Milk Latte

Feeling adventurous? Here are some fun variations to try:

  • Iced Vanilla Almond Milk Latte: Add a splash of vanilla syrup for a sweet touch.
  • Cinnamon Almond Milk Latte: Sprinkle cinnamon on top for a warm, cozy flavor.
  • Mocha Almond Latte: Mix in a spoonful of cocoa powder or chocolate syrup for chocolate lovers.
  • Nutty Iced Latte: Blend in a few drops of hazelnut syrup for a nutty twist!

Storage and Make-Ahead Instructions

While this drink is best enjoyed fresh, you can prepare components ahead of time:

  • Make espresso in advance: Brew and chill espresso the night before. Store in the fridge and use within 24 hours.
  • Prepare simple syrup: Make a batch of brown sugar simple syrup and store it in the refrigerator for up to a month.
  • Use frozen coffee cubes: Brew a large batch of coffee, freeze it in ice cube trays, and use these instead of regular ice.

Frequently Asked Questions

  • Can I use regular milk instead of almond milk? Yes! Feel free to use any milk you prefer.
  • How can I make this drink vegan? This recipe is already vegan-friendly as it uses almond milk and no animal products.
  • Can I sweeten my latte without sugar? Absolutely! Try using natural sweeteners like stevia or agave syrup.
  • How long can I store leftover almond milk? Unopened almond milk can last for months, while opened should be consumed within 7-10 days.
  • What equipment do I need? An espresso machine, a frother, a tall glass, and ice trays!
  • Can I add spices? Yes! A pinch of nutmeg or cardamom can add a unique flavor to your latte.
  • Is this drink suitable for kids? Yes! You can adjust the sweetness and caffeine level as needed.
  • What are the health benefits of almond milk? Almond milk is low in calories, high in vitamin E, and can help lower cholesterol levels.

Nutrition Tips and Dietary Adaptations

This iced almond milk latte is not only delicious but can also be tailored to fit various dietary needs:

  • Low-calorie option: Use unsweetened almond milk and skip the syrup.
  • Protein boost: Add a scoop of protein powder for an energizing breakfast drink.
  • Nut-free version: Substitute almond milk with oat or coconut milk if nut allergies are a concern.

Equipment Recommendations

To make your iced almond milk latte, consider these tools:

  • Espresso machine: For the best flavor and quality.
  • Milk frother: To create that beautiful foam on top.
  • Tall glass or jar: Perfect for serving your iced beverage.
  • Ice cube trays: For making coffee ice cubes!

Serving Suggestions

Enjoy your iced almond milk latte as a refreshing afternoon treat, or pair it with:

  • Light pastries: Croissants or muffins make a delightful accompaniment.
  • Breakfast bowls: Serve alongside a healthy smoothie or overnight oats.
  • Snacks: Pair with fresh fruit or a handful of nuts for a balanced snack.

In conclusion, creating an iced almond milk latte at home is not only simple but also an enjoyable experience that brings café-style drinks right to your kitchen. With the right ingredients and a bit of creativity, you can craft a drink that’s uniquely yours. So gather your ingredients, follow these steps, and let your kitchen become your favorite coffee shop. Happy brewing!

Iced Almond Milk Latte

Prep Time 5 minutes
Cook Time 2 minutes
Total Time 7 minutes
Servings 1 cup
Calories 80
A refreshing iced latte combining rich espresso, sweetened almond milk, and ice for a cool treat.

Ingredients

Espresso

  • 2 shots espresso shots

Almond Milk

  • 3/4 cup almond milk

Sweetener

  • 1 tbsp brown sugar simple syrup (optional)

Ice Cubes

  • as needed ice cubes

Instructions 

  • Make the espresso and add the sweetener, if using.
  • Leave in the freezer for a couple of minutes to cool off.
  • Fill a tall glass or jar with ice cubes.
  • Pour the cooled, sweetened espresso into the glass with ice.
  • Pour almond milk over the espresso and serve.

Notes

Adjust sweetness to taste and enjoy immediately.
Calories: 80kcal
Cost: $4
Course: Beverage
Keyword: almond milk, coffee

Indulge in Decadence with Homemade Fudge Brownie Ice Cream Bliss

If you’re ready to elevate your dessert game, let’s dive into the world of **fudge brownie ice cream**! This creamy, chocolaty treat is a delightful blend of rich fudge brownies and velvety ice cream, perfect for impressing friends and family at any gathering. In this comprehensive guide, I’ll walk you through creating this indulgent dessert step-by-step, ensuring you feel confident and excited to whip it up in your kitchen.

Why You’ll Love This Recipe

Making your own fudge brownie ice cream is not just about satisfying a sweet tooth; it’s about creating a memorable experience. Here are five reasons why this recipe will steal your heart:

  • Ultimate flavor combination: The rich chocolate from both the ice cream and brownies creates a symphony of flavors that will leave you wanting more.
  • Customizable ingredients: You can tweak every aspect of this recipe—from the type of chocolate to the addition of toppings—to suit your taste.
  • Perfect for any occasion: Whether it’s a summer BBQ or a cozy winter night, this dessert fits right in.
  • Fun for the whole family: Involve your kids or friends in the process of making and enjoying this treat together!
  • Homemade goodness: There’s nothing quite like the satisfaction of creating something delicious from scratch.

Ingredients Breakdown

Let’s get into the nitty-gritty of what you’ll need to create this decadent fudge brownie ice cream. Here’s a detailed list of ingredients, along with some helpful substitutions:

  • 2 cups heavy cream: For a creamy base; you can substitute with half-and-half for a lighter version.
  • 3 tbsp cocoa powder: I recommend using **Hershey’s Special Dark** for a richer flavor.
  • 1 cup chocolate: Semi-sweet or dark chocolate works best; feel free to use dairy-free options for a vegan twist!
  • 1 cup whole milk: This adds creaminess; you can also use almond or oat milk as a substitute.
  • ¾ cup sugar: Adjust the sweetness to your preference; consider using coconut sugar for a healthier option.
  • 1 pinch salt: Balances the sweetness.
  • 5 egg yolks: Room temperature for better emulsification; these add richness but can be omitted for a lighter version.
  • ½ tsp vanilla extract: A must for enhancing flavor.
  • 1 batch fudge brownie: Use your favorite recipe or store-bought for convenience.
  • 1 cup mini chocolate chips: Optional, but they add delightful texture.

Instructions: Step-by-Step Guide

Side view of creamy fudge brownie ice cream in a bowl, highlighting its texture and chocolate pieces.

Now that you’ve got everything ready, let’s break down the steps to create your fudge brownie ice cream.

Step 1: Make the Brownies

Start by preparing your fudge brownies. Follow your favorite recipe, ensuring they are fudgy and delicious. Once baked, let them cool completely before cutting them into chunks. This will allow the brownies to hold their shape when folded into the ice cream.

Step 2: Prepare the Ice Cream Base

In a medium saucepan over medium heat, combine the heavy cream, whole milk, sugar, cocoa powder, and a pinch of salt. Stir until the sugar has dissolved and the mixture is warm. If using egg yolks, whisk them in a separate bowl and temper them by slowly adding a bit of the warm mixture into the yolks, stirring continuously. Then, combine the yolk mixture back into the saucepan. Heat until slightly thickened.

Step 3: Churn the Ice Cream

Pour the mixture into your **ice cream maker** and churn according to the manufacturer’s instructions until thick and creamy. If you don’t have an ice cream maker, pour the mixture into a shallow dish and freeze, stirring every 30 minutes until fully set.

Step 4: Fold in Brownies

Once your ice cream is churned, gently fold in the brownie chunks and mini chocolate chips, ensuring they are evenly distributed.

Step 5: Freeze and Enjoy!

Transfer the ice cream to an airtight container and freeze for at least 4 hours or until firm. Serve in bowls or cones, topped with extra brownie pieces or chocolate syrup.

Pro Tips for the Best Chocolate Fudge Brownie Ice Cream

Here are some expert insights to help you achieve the perfect ice cream:

  • Use quality ingredients: The better the ingredients, the better the flavor. Opt for high-quality chocolate and cocoa.
  • Chill your mixture: For a smoother texture, chill your ice cream base before churning.
  • Don’t overmix: When folding in brownies, be gentle to maintain their texture.
  • Experiment with flavors: Try adding different flavorings or mix-ins, such as peanut butter or nuts.
  • Store properly: Keep your ice cream in an airtight container to prevent freezer burn.
  • Let it soften: Before serving, let your ice cream sit at room temperature for a few minutes to soften.
  • Try different brownies: Experiment with blondies or different types of brownies for a unique twist.
  • Mind the temperature: Ensure your ice cream maker is fully frozen before use for the best results.

Common Mistakes and Troubleshooting

Even the best bakers can run into a few hiccups. Here are some common mistakes and how to avoid them:

  • Ice cream too hard: If your ice cream is rock solid, let it sit out for a few minutes before scooping.
  • Not enough chocolate flavor: Make sure to use high-quality chocolate and cocoa for a rich flavor.
  • Brownies sinking to the bottom: Freeze the brownie chunks for a bit before folding them in to help them stay suspended.
  • Ice cream not churning: Check that your ice cream maker is fully frozen and working properly.

Variations to Try

Feeling adventurous? Here are four delicious variations to inspire your next batch:

  • Peanut Butter Fudge Brownie Ice Cream: Swirl in creamy peanut butter for a nutty flavor explosion.
  • Mint Chocolate Chip Brownie Ice Cream: Add mint extract and green food coloring for a refreshing twist.
  • Salted Caramel Brownie Ice Cream: Incorporate salted caramel sauce for a sweet and salty delight.
  • Fruit-Infused Brownie Ice Cream: Fold in fresh raspberries or strawberries for a fruity contrast.

Storage and Make-Ahead Instructions

Your fudge brownie ice cream can be made ahead of time and stored in the freezer. To keep it fresh, follow these tips:

  • Use an airtight container: This prevents ice crystals from forming and keeps your ice cream creamy.
  • Label and date: Homemade ice cream can last up to 2 months in the freezer. Be sure to label your container.
  • Softening method: For the best texture, transfer it to the fridge for 20-30 minutes before serving.

Comprehensive FAQ

Here are some frequently asked questions to help you on your ice cream journey:

  • Can I make this ice cream without an ice cream maker? Yes, simply freeze the mixture in a shallow dish and stir every 30 minutes until firm.
  • How can I make this recipe vegan? Substitute heavy cream and milk with coconut or almond milk, use vegan chocolate, and omit egg yolks.
  • Can I use store-bought brownies? Absolutely! Just make sure they are fudgy and delicious.
  • What if my ice cream is too icy? This could be due to overchurning or not enough fat in your base. Ensure you use enough cream and churn correctly.
  • How do I serve this ice cream? It’s fantastic on its own or as a topping on cake, pie, or even pancakes!
  • Can I add other mix-ins? Definitely! Nuts, chocolate chips, or cookie pieces are excellent additions.
  • What’s the best way to scoop hard ice cream? Use a warm ice cream scoop or dip it in hot water for easy serving.
  • How can I enhance the flavor? Consider adding extracts like almond or coffee for a flavor boost.

Nutritional Tips and Dietary Adaptations

While this fudge brownie ice cream is a treat, here are some tips to make it a bit healthier:

  • Reduce sugar: Use natural sweeteners like honey or maple syrup.
  • Choose low-fat dairy: Opt for low-fat cream or milk to cut down on calories.
  • Add fruit: Incorporate pureed fruit to add sweetness and flavor without excess sugar.
  • Portion control: Serve smaller portions to enjoy this decadent treat without overindulging.

Equipment Recommendations

Here’s what you’ll need to create your fudge brownie ice cream:

  • Ice cream maker: Essential for achieving that creamy, smooth texture.
  • Mixing bowls: A set of different sizes for mixing ingredients and tempering eggs.
  • Measuring cups and spoons: Accurate measurements are key to a successful recipe.
  • Spatula: For folding in ingredients and transferring the mixture.
  • Airtight container: To store your homemade ice cream in the freezer.

Serving Suggestions

Make your fudge brownie ice cream even more delightful with these serving ideas:

  • Drizzle with chocolate syrup: A classic addition that enhances the chocolate flavor.
  • Top with whipped cream: Light and airy, it adds a perfect contrast.
  • Sprinkle with nuts: Chopped walnuts or pecans provide a crunchy texture.
  • Pair with fresh fruit: Raspberries or strawberries complement the rich chocolate beautifully.

By following this guide, you’ll not only master the art of making fudge brownie ice cream but also create a dessert that brings joy and excitement to any occasion. Remember, cooking is about creativity and confidence—so embrace it! Now grab your ingredients and start churning up some sweet memories in the kitchen. Happy cooking!

Fudge Brownie Ice Cream

Prep Time 20 minutes
Total Time 20 minutes
Servings 8 servings
Calories 350
Indulge in rich, chocolatey ice cream infused with chunks of fudgy brownies for a decadent treat.

Ingredients

Dairy

  • 2 cups heavy cream
  • 1 cup whole milk

Dry Ingredients

  • 3 tbsp cocoa powder (Hershey's special dark)
  • 1 cup chocolate (semi-sweet or dark)
  • 3/4 cup sugar
  • 1 pinch salt

Eggs

  • 5 egg yolks egg yolks (room temperature)
  • 1/2 tsp vanilla

Add-ins

  • 1 cup mini chocolate chips (if desired)
  • 1 batch Fudge Brownie Recipe

Instructions 

  • Prepare the brownie recipe and let it cool, then cut into small chunks.
  • In a mixing bowl, whisk together heavy cream, milk, cocoa powder, sugar, salt, egg yolks, and vanilla until smooth.
  • Pour the mixture into a freezer-safe container and churn in an ice cream maker according to manufacturer instructions.
  • During the last few minutes of churning, add mini chocolate chips and brownie chunks, then fold in gently.
  • Transfer to a container and freeze for at least 4 hours before serving.

Notes

For best results, use high-quality chocolate and ensure the brownie chunks are cooled before adding.
Calories: 350kcal
Cost: $15
Course: Dessert
Cuisine: American
Keyword: chocolate

Discover the Ultimate Caramel Pumpkin Spice Iced Coffee

As the leaves turn and the air becomes crisp, there’s nothing quite like the warmth and comfort of a deliciously crafted Caramel Pumpkin Spice Iced Coffee. This recipe blends the cozy flavors of autumn with the refreshing chill of iced coffee, making it a perfect treat for any time of day. Whether you’re unwinding after a busy workday or entertaining friends, this delightful drink is sure to impress.

This easy-to-follow recipe will not only satisfy your cravings but also fill your kitchen with the enticing aromas of pumpkin spice and caramel. With just a few simple ingredients and steps, you’ll be on your way to creating a café-quality beverage right at home. Let’s dive into the details!

Why You’ll Love This Recipe

Here are just a few reasons why this Caramel Pumpkin Spice Iced Coffee will quickly become your go-to recipe:

  • Quick and Easy: In less than 10 minutes, you can whip up this refreshing drink with minimal effort.
  • Customizable: Adjust the sweetness or spice level to suit your personal taste.
  • Budget-Friendly: Save money by making this delicious coffee shop drink at home.
  • Seasonal Delight: Perfectly captures the flavors of fall with pumpkin, caramel, and spices.
  • Impressive Presentation: Garnished with whipped cream and a drizzle of caramel, it looks as good as it tastes!

Ingredients Breakdown

Let’s take a closer look at what you’ll need to make this delightful drink, along with some easy substitutions:

  • Coffee: Use 1 cup of cold brew or strong brewed coffee (chilled). If you prefer instant coffee, dissolve it in cold water for a quick fix.
  • Milk: ½ cup of milk or any milk alternative such as almond, oat, or soy milk works wonderfully.
  • Pumpkin Puree: 2 tablespoons of canned pumpkin puree. You can substitute homemade pumpkin puree if you have it on hand.
  • Caramel Sauce: 1 tablespoon for mixing, plus extra for drizzling on top. Feel free to use sugar-free caramel sauce for a lighter option.
  • Maple Syrup: 1 tablespoon or any sweetener of your choice to enhance the flavor.
  • Spices: ½ teaspoon of pumpkin spice and a pinch of vanilla extract to elevate the taste.
  • Ice Cubes: Essential for that refreshing iced coffee experience.
  • Whipped Cream: Optional but highly recommended for a coffee-shop-style finish.

How to Make Caramel Pumpkin Spice Iced Coffee

A refreshing glass of Caramel Pumpkin Spice Iced Coffee with ice cubes and a swirl of caramel sauce on top.

Ready to make your own Caramel Pumpkin Spice Iced Coffee? Follow these simple steps:

  • Step 1: In a small bowl, whisk together the pumpkin puree, caramel sauce, maple syrup, pumpkin spice, and vanilla extract until smooth.
  • Step 2: Pour the cold brew coffee and milk into a tall glass. Stir in the pumpkin mixture until everything is fully combined.
  • Step 3: Fill the glass with ice cubes and drizzle extra caramel sauce on top to enhance the look and flavor.
  • Step 4: For a finishing touch, add whipped cream and an additional drizzle of caramel if desired.

Pro Tips for the Best Caramel Pumpkin Spice Iced Coffee

These expert insights will help you perfect your drink:

  • Chill Your Coffee: Make sure your coffee is well-chilled before mixing to keep your drink refreshing.
  • Spice Adjustment: If you love a stronger spice flavor, feel free to add a bit more pumpkin spice to suit your taste.
  • Blend for Smoothness: For a creamier texture, blend all the ingredients together instead of just stirring.
  • Make Ahead: Prepare the pumpkin mixture in advance and store it in the fridge for quick assembly later.
  • Experiment with Sweeteners: Try brown sugar or honey for a different sweetness profile.
  • Ice Alternatives: Freeze coffee in ice cube trays to avoid dilution as the ice melts.
  • Use Quality Ingredients: Choose high-quality coffee and fresh spices for the best flavor.
  • Presentation Matters: Use tall glasses and layer your ingredients for a beautiful visual effect.

Common Mistakes and Troubleshooting

Here are some common pitfalls to avoid when making your iced coffee:

  • Overly Sweet: If the drink turns out too sweet, balance it with more milk or a splash of cold brew.
  • Pumpkin Lumps: Ensure your pumpkin puree is smooth; whisk thoroughly to avoid lumps.
  • Watered-Down Coffee: Use less ice or coffee ice cubes to keep your drink strong and flavorful.

Variations to Try

Want to mix things up? Here are some fun variations:

  • Mocha Twist: Add a tablespoon of cocoa powder for a chocolatey pumpkin spice experience.
  • Nutty Flavor: Incorporate a tablespoon of hazelnut syrup for a nutty twist.
  • Spiced Chai: Replace the coffee with chai tea for a unique spiced beverage.
  • Vegan Delight: Use coconut cream instead of whipped cream for a dairy-free option.

Storage and Make-Ahead Instructions

If you want to prepare ahead:

  • Store the Pumpkin Mixture: Keep the pumpkin spice mix in an airtight container in the fridge for up to a week.
  • Chill the Coffee: Brew a batch of cold brew in advance and store it in the refrigerator for quick access.
  • Ice Cubes: Prepare coffee ice cubes to maintain your drink’s flavor without dilution.

Comprehensive FAQ

Here are some frequently asked questions to guide you:

  • Can I use hot coffee? Yes! You can use hot coffee, but let it cool before mixing for the best results.
  • Is pumpkin puree necessary? While it adds flavor, you can skip it if you prefer a simpler drink.
  • How can I make it sugar-free? Use sugar-free caramel sauce and a sugar substitute like stevia.
  • Can I use a different milk? Absolutely! Almond, oat, or coconut milk are great alternatives.
  • What if I don’t have pumpkin spice? You can create your own blend using cinnamon, nutmeg, and allspice.
  • How long does it take to prepare? It takes about 10 minutes from start to finish.
  • Can it be made in advance? Yes, prepare the pumpkin mixture and coffee ahead of time for a quick treat!
  • What’s the best way to serve it? Serve it chilled and enjoy it with a slice of pumpkin bread for the perfect fall snack!

Nutritional Tips and Dietary Adaptations

If you’re mindful of nutrition, consider these tips:

  • Low-Calorie Option: Use unsweetened almond milk and reduce the amount of caramel sauce.
  • High-Protein Boost: Add a scoop of protein powder to your coffee for a post-workout treat.
  • Watch Portion Sizes: While delicious, be cautious with the added sugars and creamy toppings.

Equipment Recommendations

Here’s what you’ll need to create this iced coffee:

  • Blender: For an ultra-smooth texture if you choose to blend.
  • Whisk: To combine the pumpkin mixture easily.
  • Tall Glasses: Perfect for showcasing your beautiful layers and garnishes.
  • Ice Cube Trays: For freezing coffee or regular ice cubes.

Serving Suggestions

Pair your Caramel Pumpkin Spice Iced Coffee with:

  • Fresh Baked Goods: Pumpkin muffins or scones make a cozy companion.
  • Light Breakfast: Enjoy it alongside yogurt and granola for a balanced meal.
  • Autumn Snacks: Apple slices with caramel dip or spiced nuts complement the flavors beautifully.

Now that you have all the tools and knowledge to create your very own Caramel Pumpkin Spice Iced Coffee, I encourage you to give it a try. Remember, cooking is all about experimentation and having fun! Enjoy the process, and soon you’ll be sipping on your favorite fall beverage, feeling confident and accomplished in the kitchen. Cheers!

Caramel Pumpkin Spice Iced Coffee

Prep Time 5 minutes
Total Time 5 minutes
Servings 2 cups
Calories 180
A deliciously spiced and sweet iced coffee perfect for fall, combining pumpkin, caramel, and warm spices.

Ingredients

Beverages

  • 1 cup cold brew coffee or strong brewed coffee, chilled
  • 0.5 cup milk or any milk alternative
  • 2 tbsp pumpkin purée
  • 1 tbsp caramel sauce, plus extra for drizzling
  • 1 tbsp maple syrup or sweetener of choice
  • 0.5 tsp pumpkin spice
  • 0.25 tsp vanilla extract
  • as needed quantity Ice cubes
  • optional Whipped cream (Optional topping)

Instructions 

  • Whisk together pumpkin purée, caramel sauce, maple syrup, pumpkin spice, and vanilla until smooth.
  • Pour coffee and milk into a glass, then stir in the pumpkin mixture.
  • Fill with ice cubes and drizzle with extra caramel sauce.
  • Top with whipped cream and additional caramel if desired.

Notes

Adjust sweetness and spice level to taste.
Calories: 180kcal
Cost: $15
Course: Beverage
Cuisine: American
Keyword: coffee, Fall, pumpkin

Discover the Joy of Grilling: Barbecue Tofu Veggie Skewers

Welcome to a world of flavor and fun! If you’re looking for a delicious and effortless way to enjoy barbecue season, look no further than these Barbecue Tofu Veggie Skewers. Packed with vibrant veggies and savory tofu, this recipe is not just easy to prepare; it’s a crowd-pleaser! In this guide, we’ll walk through everything you need to know to make these skewers a hit at your next gathering or weeknight dinner.

Why You’ll Love This Recipe

There are so many reasons to love these Barbecue Tofu Veggie Skewers! Here are just a few:

  • Quick and Simple: With just a few ingredients and minimal prep time, you can have these skewers ready for grilling in no time.
  • Flavor Burst: The combination of spices and barbecue sauce infuses the tofu and vegetables with incredible flavor that’s hard to resist.
  • Healthy and Nutritious: This recipe is packed with protein from the tofu and vitamins from the fresh veggies, making it a wholesome meal option.
  • Customizable: You can easily swap in your favorite vegetables or adjust the spices to suit your taste.
  • Perfect for Meal Prep: These skewers store well, making them a great choice for meal prep or leftovers.

Ingredients Breakdown

Let’s dive into the ingredients you’ll need to create these delightful skewers:

  • 1 (14-ounce) block extra-firm tofu: This type of tofu holds its shape well during grilling. You can also use firm tofu if necessary.
  • 3 tablespoons olive oil: This adds moisture and helps the spices adhere to the tofu and vegetables.
  • 2 teaspoons cumin: A warm spice that enhances the overall flavor profile.
  • 1 1/2 teaspoons hot smoked paprika: This adds a smoky, slightly spicy kick to your skewers.
  • 1/4 teaspoon onion powder: A subtle way to add depth to the flavor.
  • 1/4 teaspoon garlic powder: For that classic savory taste.
  • 1 teaspoon kosher salt: Essential for enhancing flavors.
  • 1/2 teaspoon black pepper: Adds a touch of heat.
  • 2 small zucchini: Sliced into 1/4-inch thick rounds for great texture.
  • 2 small yellow squash: Similar in size to zucchini for a colorful presentation.
  • 2 red peppers: Diced into 1-inch pieces for added sweetness.
  • 1 small red onion: Diced into 1-inch pieces, bringing both flavor and color.
  • 1/4 cup barbecue sauce: Use your favorite brand or homemade version for the best flavor.
  • Chopped fresh parsley for serving: Adds a pop of color and freshness to your dish.

Step-by-Step Instructions

Juicy barbecue tofu and assorted vegetables skewered together, showcasing vibrant colors.

Let’s get grilling! Follow these easy steps to prepare your skewers:

  1. Preheat the Grill: Begin by preheating your gas or charcoal grill to medium-high heat. If you’re using a stovetop grill pan, wait to heat it until your skewers are assembled.
  2. Prepare the Tofu: Pat the tofu dry with a towel. Wrap it in a dry towel and place a cast iron pan or cutting board on top to press out excess liquid for about 15 minutes. Cut the tofu into 1-inch cubes.
  3. Mix the Marinade: In a large bowl, whisk together 2 tablespoons of olive oil, cumin, paprika, onion powder, garlic powder, 1/2 teaspoon of salt, and 1/4 teaspoon of pepper.
  4. Coat the Tofu: Add the cubed tofu to the marinade and gently stir to ensure it is well-coated.
  5. Toss the Vegetables: In another bowl, toss the zucchini, yellow squash, red peppers, and red onion with 1 tablespoon of olive oil, 1/2 teaspoon of salt, and 1/4 teaspoon of pepper.
  6. Assemble the Skewers: Thread the tofu and vegetables onto skewers, alternating between them for a colorful presentation.
  7. Grill the Skewers: Place the skewers on the grill and cook for about 2 minutes per side, or until the tofu and veggies are charred with grill marks.
  8. Add the Sauce: In the last few minutes of grilling, brush the skewers with barbecue sauce for a caramelized finish.
  9. Serve: Sprinkle with chopped parsley before serving, and enjoy!

Pro Tips for Perfect Skewers

Here are some expert insights to ensure your skewers turn out perfectly:

  • Pressing the Tofu: Pressing the tofu is crucial for achieving the best texture. It helps remove excess moisture, allowing for better flavor absorption.
  • Marinate Longer: If you have time, let the tofu marinate for at least 30 minutes (or even overnight) for enhanced flavor.
  • Skewer Size: Use metal skewers for ease of grilling, or soak wooden skewers in water for 30 minutes to prevent burning.
  • Vegetable Sizes: Keep vegetable pieces uniform in size to ensure even cooking.
  • Watch the Grill: Stay close to the grill while cooking to avoid burning the skewers.
  • Experiment with Sauces: Feel free to try different barbecue sauces or marinades to create unique flavor profiles.
  • Vegetable Options: You can substitute bell peppers for mushrooms, cherry tomatoes, or even pineapple for a sweet twist.
  • Don’t Overcrowd: Leave some space between the pieces on the skewer to allow even cooking and charring.

Common Mistakes and Troubleshooting

Here are a few common pitfalls and how to avoid them:

  • Too Much Moisture: Avoid soggy skewers by pressing the tofu adequately and ensuring the vegetables aren’t overly wet.
  • Burnt Skewers: If using wooden skewers, remember to soak them beforehand to prevent burning.
  • Uneven Cooking: Make sure to cut vegetables and tofu into similar sizes to promote even cooking.
  • Flavorless Tofu: Marinate the tofu longer for a more robust flavor.

Variations to Try

Feel free to mix things up! Here are some delicious variations:

  • Spicy Skewers: Add sliced jalapeños or a dash of chili powder to the marinade for a kick.
  • Herb-Infused: Sprinkle fresh herbs like thyme or rosemary over the skewers before grilling.
  • Fruit and Veggie Mix: Add chunks of pineapple or mango for a sweet and savory combination.
  • Asian-Inspired: Use teriyaki sauce instead of barbecue sauce and add bok choy and mushrooms.

Storage and Make-Ahead Instructions

These skewers are perfect for meal prep! Here’s how to store them:

  • Refrigerate: Store leftover skewers in an airtight container in the fridge for up to 3 days.
  • Freezing: You can freeze the marinated tofu and vegetables before grilling. Thaw in the fridge overnight before grilling.
  • Make-Ahead: Assemble the skewers a few hours in advance and keep them covered in the refrigerator until ready to grill.

Frequently Asked Questions

Here are some common questions about making Barbecue Tofu Veggie Skewers:

  • Can I use different types of tofu? Yes, while extra-firm is best for grilling, firm tofu can also work.
  • Can I grill these skewers indoors? Absolutely! A stovetop grill pan works perfectly.
  • What can I serve with these skewers? Serve with rice, quinoa, or a fresh salad for a complete meal.
  • How do I know when the skewers are done? They should have grill marks and be slightly charred on the edges.
  • Can I use pre-marinated tofu? Yes, just adjust the amount of soy sauce in the marinade.
  • Are these skewers gluten-free? Use gluten-free soy sauce to make them gluten-free.
  • What vegetables work best? Bell peppers, zucchini, onions, and cherry tomatoes are excellent choices!
  • Can I make these skewers vegan? Yes, the recipe is entirely plant-based!

Nutritional Tips and Dietary Adaptations

These skewers are not only delicious but also nutritious. Here are some tips to enhance their health benefits:

  • High Protein: Tofu is a great source of plant-based protein, making it ideal for vegan diets.
  • Low Carb: Pair with a low-carb side like cauliflower rice for a healthy meal.
  • Fiber-Rich: The vegetables add fiber, which is essential for digestive health.
  • Dairy-Free: This recipe is naturally dairy-free, perfect for lactose-intolerant individuals.

Essential Equipment

Before you start grilling, make sure to gather these essential tools:

  • Grill or Grill Pan: For the best flavor and char.
  • Skewers: Metal skewers are reusable, while wooden ones need soaking.
  • Mixing Bowls: For marinating and tossing ingredients.
  • Basting Brush: For applying barbecue sauce towards the end of grilling.

Serving Suggestions

To elevate your meal, consider these serving ideas:

  • Side Dishes: Serve with a refreshing cucumber salad or a zesty coleslaw.
  • Grain Pairings: Quinoa or brown rice complements the skewers beautifully.
  • Dipping Sauces: Provide extra barbecue sauce or a tangy yogurt sauce for dipping.
  • Garnishes: Fresh herbs like cilantro or basil can add a burst of flavor.

With this comprehensive guide, you’re all set to create the most delicious Barbecue Tofu Veggie Skewers. Remember, cooking is about joy and exploration! Don’t hesitate to experiment with flavors and make this recipe your own. Happy grilling!

Barbecue Tofu Veggie Skewers

Prep Time 20 minutes
Cook Time 10 minutes
Total Time 30 minutes
Servings 4 servings
Calories 250
Enjoy these flavorful grilled tofu and vegetable skewers brushed with barbecue sauce, perfect for a quick and healthy meal.

Ingredients

Tofu

  • 14 ounce extra firm tofu (pressed and cubed)
  • 3 tablespoons olive oil
  • 2 teaspoon cumin
  • 1.5 teaspoon hot smoked paprika
  • 0.5 teaspoon onion powder
  • 0.5 teaspoon garlic powder
  • 0.5 teaspoon kosher salt
  • 0.25 teaspoon black pepper

Vegetables

  • 2 small zucchini (sliced into 1/4-inch rounds)
  • 2 small yellow squash (sliced into 1/4-inch rounds)
  • 2 red red peppers (diced 1 inch)
  • 1 small red onion (diced 1 inch)
  • 0.25 cup barbecue sauce

Chopped fresh parsley

Instructions 

  • Preheat grill to medium-high. Press and cube tofu.
  • Mix 2 tbsp olive oil with spices; coat tofu in mixture.
  • Toss vegetables with 1 tbsp olive oil, salt, and pepper.
  • Thread tofu and vegetables onto skewers.
  • Grill skewers 2 minutes per side, brushing with barbecue sauce in last minutes. Serve sprinkled with parsley.

Notes

Soak skewers if using wooden ones to prevent burning.
Calories: 250kcal
Cost: $15
Course: Main Course
Cuisine: American
Keyword: Grill, Tofu, Vegetables

Are you looking to elevate your dinner with a dish that’s not only delicious but also quick and easy to prepare? This Grilled Teriyaki Chicken Salad is your answer! Packed with vibrant fresh ingredients and a delightful homemade dressing, this salad is perfect for busy evenings and will surely become a favorite in your household. The combination of tender grilled chicken, juicy grilled pineapple, and crisp lettuce will leave you feeling satisfied and happy. Let’s dive into why you’ll love this recipe and how to make it shine!

Why You’ll Love This Recipe

  • Quick and Easy: With just a few steps and minimal preparation, you can whip up a flavorful meal in under 30 minutes.
  • Healthy Ingredients: This salad is loaded with fresh vegetables, lean chicken, and wholesome dressings, making it a nutritious choice for any dinner.
  • Flavor Explosion: The combination of teriyaki sauce, grilled pineapple, and fresh herbs creates a delightful burst of flavors with every bite.
  • Customizable: You can easily modify the ingredients to suit your taste or dietary preferences, from swapping chicken for tofu to adding your favorite veggies.
  • Perfect for Meal Prep: This salad holds up well, making it ideal for meal prepping for the week ahead.

Ingredients Breakdown

Here’s what you’ll need to create your own Grilled Teriyaki Chicken Salad:

  • ½ cup teriyaki sauce: Use your favorite store-bought or homemade recipe. This is the star ingredient that flavors your chicken.
  • 4 boneless, skinless chicken breasts: Pounded to even thickness ensures even cooking. You can substitute with tofu for a vegetarian option.
  • 8 cups chopped romaine or green leaf lettuce: Fresh greens add crunch and nutrients. Feel free to mix in other greens like spinach or kale.
  • ½ cup cherry tomatoes: Halved for a sweet, juicy addition.
  • ¼ red onion: Thinly sliced for a bit of zing.
  • 2 avocados: Sliced for creaminess and healthy fats.
  • 1 (15-ounce) can pineapple rings: The juice is divided for the marinade and dressing. Grilled pineapple adds a delicious tropical flavor.
  • Cilantro: Roughly chopped, it brings freshness to the dish.
  • ½ cup teriyaki sauce: For drizzling over the finished salad.
  • ⅓ cup rice vinegar or apple cider vinegar: This adds a tangy note to the dressing.
  • ⅓ cup olive oil: For a rich, smooth dressing base.
  • Pineapple juice: Reserved from the can for added sweetness and flavor in the dressing.

Instructions

Follow these simple steps to create your Grilled Teriyaki Chicken Salad:

  1. In a large resealable bag, combine the chicken, ½ cup teriyaki sauce, and half of the pineapple juice. Seal and chill for 15 minutes to marinate.
  2. While the chicken is marinating, prepare the dressing. In a small-medium bowl, whisk together the remaining teriyaki sauce, rice vinegar, olive oil, and the reserved pineapple juice. Cover and chill until needed.
  3. Preheat your grill to medium-high heat. Grease the grill grates to prevent sticking.
  4. Remove the chicken from the marinade (discard the marinade) and place it on the grill along with the pineapple rings. Grill the pineapple just until hot and tender with grill marks, about 2-3 minutes per side.
  5. Grill the chicken for 6-10 minutes on each side until cooked through, with no pink remaining in the center. Use a meat thermometer to ensure it reaches 165°F (75°C).
  6. Transfer the grilled chicken to a cutting board and let it rest for a few minutes before slicing it into strips or chopping into 1-inch pieces.
  7. Assemble your salads: Start with a base of chopped lettuce, then layer on the grilled chicken, cherry tomatoes, red onion, avocado slices, and grilled pineapple. Top with chopped cilantro.
  8. Before serving, drizzle the chilled dressing over the salads and toss gently to combine. Optionally, sprinkle with sesame seeds.

Pro Tips for Success

A delicious side perspective of Grilled Teriyaki Chicken Salad, showcasing tender chicken, fresh vegetables, and avocado slices.
  • Marinate for Flavor: The longer you can let the chicken marinate, the more flavorful it will be. Consider marinating for up to 2 hours.
  • Perfect Grill Marks: Ensure your grill is preheated before placing the chicken on it to achieve those beautiful grill marks and prevent sticking.
  • Resting Time: Allow the chicken to rest after grilling to keep it juicy; cutting it too soon can cause the juices to run out.
  • Customize Your Greens: Experiment with different greens like arugula, spinach, or even a mixed green salad for variety.
  • Store Extra Dressing: Any leftover dressing can be stored in the refrigerator for up to a week. It’s great on other salads too!
  • Don’t Overcrowd the Grill: Give your chicken and pineapple enough space on the grill to ensure even cooking.
  • Use a Meat Thermometer: To avoid overcooking, check the temperature of the chicken; 165°F (75°C) is the sweet spot for safe consumption.
  • Fresh Herbs: Incorporate other fresh herbs like mint or basil for an extra layer of flavor in your salad.
  • Sesame Seeds: Toasted sesame seeds add a delightful crunch and nutty flavor.
  • Experiment with Proteins: Try swapping the chicken for shrimp, tofu, or even salmon for a different twist on this salad.

Common Mistakes to Avoid

Here are some pitfalls to watch out for when making your Grilled Teriyaki Chicken Salad:

  • Skipping the Marinade: Don’t rush this step! Marinating infuses the chicken with flavor, making a significant difference in the final dish.
  • Not Preheating the Grill: Failing to preheat can lead to uneven cooking and sticking.
  • Overcooking the Chicken: Keep an eye on the grill to avoid dry chicken, which can happen if it’s left on too long.
  • Forgetting to Rest: Cutting into the chicken immediately after grilling can dry it out; always let it rest.
  • Using Too Much Dressing: Start with a little dressing and add more as needed to avoid sogginess.

Delicious Variations to Try

If you’re looking to mix things up, here are some tasty variations of this salad:

  • Spicy Teriyaki Chicken Salad: Add red pepper flakes or a drizzle of sriracha to the dressing for a kick of heat.
  • Mango Avocado Salad: Replace the grilled pineapple with fresh mango for a sweet, tropical twist.
  • Quinoa Chicken Salad: Toss in cooked quinoa for added protein and texture, making the salad even more filling.
  • Asian Coleslaw: Instead of romaine, use shredded cabbage and carrots for a crunchy, coleslaw-style salad.

Storage and Make-Ahead Instructions

Planning ahead? Here’s how to store and prepare this salad in advance:

  • Make-Ahead: You can marinate the chicken up to 24 hours in advance for deeper flavor.
  • Storage: Store any leftovers in an airtight container in the refrigerator for up to 3 days. Keep the dressing separate to maintain freshness.
  • Reheating: Reheat the grilled chicken in the microwave or on the stovetop until warmed through, ensuring it doesn’t dry out.
  • Fresh Ingredients: For best results, add fresh ingredients like avocado just before serving to prevent browning.

Frequently Asked Questions

Got questions? Here are some common queries about this recipe:

  • Can I use chicken thighs instead of breasts? Yes! Chicken thighs are delicious in this recipe and will add extra flavor.
  • What if I don’t have a grill? You can use a grill pan or bake the chicken in the oven at 375°F (190°C) until cooked through.
  • Can I make this salad vegan? Absolutely! Substitute the chicken with grilled tofu or tempeh, and use a vegan teriyaki sauce.
  • How can I make this gluten-free? Ensure that the teriyaki sauce is gluten-free and use tamari instead of regular soy sauce.
  • What can I serve with this salad? This salad pairs well with steamed rice, quinoa, or can be enjoyed alone for a light meal.
  • How do I make homemade teriyaki sauce? Combine soy sauce, brown sugar, garlic, ginger, and cornstarch in a saucepan, heat until thickened.
  • Can I use frozen chicken? Yes, but make sure it’s thoroughly thawed before marinating and grilling.
  • What if I don’t like cilantro? Feel free to replace cilantro with parsley or omit it entirely.

Nutritional Tips and Dietary Adaptations

This salad is not only delicious but also tailored to fit various dietary needs:

  • Low-Carb Option: Skip the pineapple and add more greens or nuts for a low-carb alternative.
  • Dairy-Free: This recipe is naturally dairy-free, making it suitable for those with lactose intolerance.
  • High-Protein: Add chickpeas or edamame for an extra protein boost.
  • Heart-Healthy: Use olive oil and plenty of vegetables to promote heart health.

Equipment Recommendations

To make this salad, you’ll need:

  • Grill: A gas or charcoal grill for perfect grilling results.
  • Grill Pan: If you’re indoors, a grill pan works wonders for achieving those beautiful grill marks.
  • Whisk: Essential for mixing the dressing smoothly.
  • Meat Thermometer: A must-have tool to ensure your chicken is cooked to perfection.
  • Cutting Board: For slicing your grilled chicken safely.

Serving Suggestions

This Grilled Teriyaki Chicken Salad is versatile and can be served in various ways:

  • As a Main Dish: Serve it as a hearty main course, perfect for dinner.
  • For Meal Prep: Pack it into containers for a quick, nutritious lunch throughout the week.
  • Side Dish: Serve smaller portions alongside grilled meats or fish for a refreshing side.
  • Picnic Friendly: Great for outdoor events; just keep the dressing separate until ready to eat.

Conclusion

In conclusion, the Grilled Teriyaki Chicken Salad is not just a meal; it’s an experience filled with flavors, colors, and healthy ingredients. Whether you’re a seasoned cook or just starting out, this recipe is designed to be approachable and enjoyable. Remember, cooking is all about confidence and creativity. So gather your ingredients, fire up the grill, and let this salad bring joy to your dinner table. Happy cooking!

Grilled Teriyaki Chicken Salad

Prep Time 20 minutes
Cook Time 20 minutes
Total Time 40 minutes
Servings 4 servings
Calories 450
A flavorful and healthy salad featuring grilled chicken and pineapple with a tangy teriyaki dressing.

Ingredients

Marinade

  • 0.5 cup teriyaki sauce (see note)
  • 4 pieces boneless skinless chicken breasts (pounded to even thickness)

Salad

  • 8 cups chopped romaine or green leaf lettuce
  • 0.5 cup cherry tomatoes (halved)
  • 0.25 red onion red onion (thinly sliced)
  • 2 pieces avocados (sliced)
  • 1 can (15 oz) pineapple rings with juice (juice divided)
  • 0.33 cup rice vinegar or apple cider vinegar
  • 0.33 cup olive oil
  • from can pineapple juice pineapple juice (from the pineapple rings)

Garnish & Dressing

  • a handful cilantro cilantro (roughly chopped)
  • 0.5 cup teriyaki sauce

Instructions 

  • Combine chicken, 0.5 cup teriyaki sauce, and half of the pineapple juice in a resealable bag. Seal and chill for 15 minutes.
  • Whisk together all dressing ingredients, cover, and chill until ready to serve.
  • Preheat grill, discard marinade, and grill chicken and pineapple rings until cooked and grill marks form. Slice chicken into strips.
  • Assemble salads with lettuce, then top with chicken, tomatoes, onions, avocados, pineapple slices, and cilantro. Serve with dressing.

Notes

Keep the dressing chilled until serving for best flavor.
Calories: 450kcal
Cost: $15
Course: Salad
Cuisine: Asian
Keyword: Chicken, Pineapple, Teriyaki