Author

Steven

Browsing

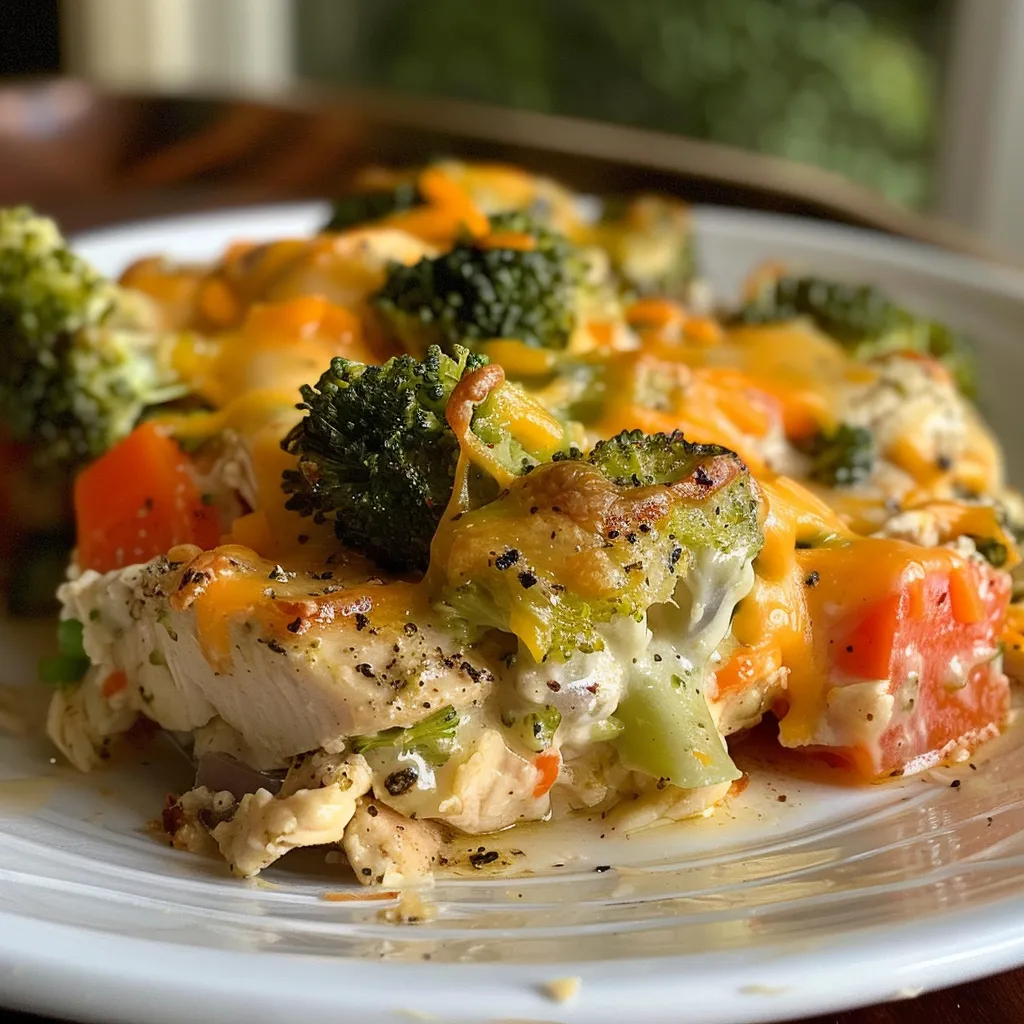
Welcome to a culinary adventure that celebrates the joy of cooking with a dish that’s both comforting and easy to prepare! If you’ve ever found yourself exhausted after a long day, dreaming of a warm, hearty meal without the fuss, then you’re in for a treat. This crockpot chicken and veggie casserole is here to transform your weeknight dinners into delicious, stress-free experiences. Packed with tender chicken, vibrant vegetables, and a creamy, cheesy sauce, this recipe will quickly become a staple in your home. Let’s dive in!

Why You’ll Love This Recipe

This casserole isn’t just any dish; it’s a celebration of flavors and convenience! Here are some reasons why it’s sure to be a hit:

  • Minimal Effort, Maximum Flavor: The crockpot does all the work for you. Just toss in the ingredients and let it simmer!
  • Healthy Comfort Food: With lean chicken and an abundance of vegetables, you’re serving up nourishment without compromising flavor.
  • Easy Cleanup: One-pot cooking means less mess to deal with after dinner, giving you more time to relax.
  • Perfect for Meal Prep: This recipe is versatile enough to be made in advance, making busy evenings a breeze.
  • Family-Friendly: With its creamy texture and cheesy goodness, even picky eaters will come back for seconds!

Key Ingredients for Your Casserole

Here’s what you’ll need to create this delightful dish:

  • 1.5 lbs boneless, skinless chicken breasts (about 3 medium breasts) – For a juicy base.
  • 4 cups mixed vegetables (e.g., broccoli florets, sliced carrots, diced bell peppers) – Feel free to use frozen or fresh!
  • 8 oz cream cheese (softened) – Adds that rich, creamy texture.
  • 1 cup low-sodium chicken broth – Enhances flavor without excess salt.
  • 2 cups shredded cheddar cheese (divided) – Because who doesn’t love cheese?
  • 1 tsp garlic powder – For aromatic depth.
  • 1 tsp onion powder – A savory touch.
  • 1 tsp Italian seasoning – Adds a hint of herby goodness.
  • 1/2 tsp salt (or to taste) – Seasoning is key!
  • 1/4 tsp black pepper (or to taste) – For a little kick.

How to Make Crockpot Chicken and Veggie Casserole

Let’s get cooking! Follow these simple steps to create your delicious casserole:

  1. Spray the inside of a 6-quart slow cooker with non-stick cooking spray.
  2. Place the chicken breasts in a single layer at the bottom.
  3. Top the chicken evenly with the mixed vegetables, spreading them out for even cooking.
  4. In a medium bowl, whisk together the chicken broth, softened cream cheese, garlic powder, onion powder, Italian seasoning, salt, and pepper until smooth.
  5. Pour the sauce mixture evenly over the chicken and vegetables.
  6. Cover and cook on low for 4-6 hours or on high for 2-3 hours, until the chicken is fully cooked and tender.
  7. Remove the chicken from the crockpot and shred it using two forks. Return the shredded chicken to the crockpot.
  8. Stir in 1 cup of the shredded cheddar cheese until melted and well combined.
  9. Sprinkle the remaining 1 cup of cheddar cheese over the top. Cover and cook for another 10-15 minutes, or until the cheese is completely melted and bubbly.
  10. Serve warm and enjoy your delicious creation!

Expert Tips for Success

Juicy chicken and colorful vegetables in a creamy casserole, viewed from the side.

To ensure your casserole turns out perfect every time, consider these expert insights:

  • Prep Ahead: For a stress-free dinner, assemble the ingredients the night before and refrigerate. Just pop it in the slow cooker in the morning!
  • Don’t Skip the Cheese: For the best flavor and texture, use block cheese and shred it yourself.
  • Experiment with Veggies: Feel free to mix in other vegetables like green beans, peas, or corn based on your family’s preferences.
  • Be Patient: Avoid lifting the lid while cooking. It releases heat and can extend cooking time.
  • Adjust the Seasoning: Taste before serving and adjust the salt and pepper to your liking.
  • Freezing Tips: This casserole freezes well. Store leftovers in an airtight container for up to 3 months!
  • Watch the Cooking Time: Cooking times may vary based on your specific slow cooker, so check for doneness early!
  • Make It Spicy: Add a dash of cayenne or red pepper flakes for an extra kick!

Common Mistakes and Troubleshooting

Here are some frequent pitfalls and how to avoid them:

  • Overcrowding the Crockpot: Make sure not to overfill your slow cooker, as this can affect cooking times.
  • Using Frozen Chicken: It’s recommended to thaw chicken beforehand for even cooking.
  • Too Much Liquid: If your casserole turns out too soupy, reduce the amount of broth next time or let it cook longer with the lid off to thicken.
  • Skipping the Toppings: Don’t forget the extra cheese on top! It’s a game-changer for texture and flavor.

Variations to Try

Want to mix things up? Here are a few delicious variations:

  • Mexican Twist: Add black beans, corn, and taco seasoning for a flavorful Mexican-inspired dish.
  • Italian Style: Mix in sun-dried tomatoes, spinach, and mozzarella cheese for an Italian flair.
  • Buffalo Chicken: Stir in buffalo sauce for a spicy kick, and serve with celery sticks on the side.
  • Vegetarian Version: Substitute chicken with chickpeas or tofu for a hearty vegetarian option.

Storage and Make-Ahead Instructions

Here’s how to keep your casserole fresh:

  • Refrigerate: Store leftovers in an airtight container in the refrigerator for up to 4 days.
  • Freeze: This casserole freezes well for up to 3 months. Thaw overnight in the fridge before reheating.
  • Reheat: Gently reheat in the microwave or on the stovetop, adding a splash of chicken broth or milk if needed to restore creaminess.

Frequently Asked Questions

Got questions? We’ve got answers!

  • Can I use frozen chicken for this recipe? It is generally recommended to thaw chicken before using it in a slow cooker to ensure even cooking.
  • What other vegetables can I add? This recipe is very versatile! Feel free to add vegetables like mushrooms, green beans, or cauliflower.
  • Can I make this casserole ahead of time? Absolutely! You can prepare everything the night before and cook it the next day.
  • How do I store and reheat leftovers? Store leftovers in an airtight container for up to 4 days. Reheat in the microwave or stovetop.
  • Is this recipe gluten-free? Yes, as written, this recipe is naturally gluten-free. Just ensure your broth and seasonings are certified gluten-free.
  • How can I make it creamier? For a creamier sauce, use a block of cream cheese and fully melt it into the casserole.
  • What if I don’t have a slow cooker? You can make this casserole in the oven at 350°F (175°C) for about 1 hour, covered.
  • Can I double this recipe? Yes! Just make sure you have a large enough crockpot to accommodate the extra ingredients.

Nutrition Tips and Dietary Adaptations

This casserole is not only delicious but also nutritious! Here are some tips to enhance its health benefits:

  • Lean Protein: Using skinless chicken breasts ensures a lower fat content while still providing essential protein.
  • Veggie Power: The mixed vegetables add fiber, vitamins, and minerals. Feel free to include a variety of colors!
  • Low-Sodium Options: Opt for low-sodium chicken broth to keep sodium levels in check.
  • Dairy-Free: Substitute cream cheese with a dairy-free alternative to make it suitable for lactose intolerance.

Equipment Recommendations

To make your cooking experience even easier, consider these essential tools:

  • 6-Quart Slow Cooker: Perfect for this recipe and many others!
  • Mixing Bowls: For combining your ingredients smoothly.
  • Measuring Cups and Spoons: Accurate measurements lead to great results.
  • Shredding Forks: Handy for easily shredding your cooked chicken.

Serving Suggestions

Pair your casserole with these delicious sides for a complete meal:

  • Crusty Bread: A slice of warm, crusty bread is perfect for soaking up the creamy sauce.
  • Green Salad: A light salad with vinaigrette adds a refreshing contrast.
  • Rice or Quinoa: Serve over rice or quinoa for an extra hearty meal.
  • Steamed Vegetables: A side of steamed veggies complements the casserole beautifully.

Now that you have all the tips, tricks, and insights, it’s time to gather your ingredients and start cooking! Remember, cooking should be a joyful experience, so don’t stress about perfection—just enjoy the process. I can’t wait for you to savor this crockpot chicken and veggie casserole with your loved ones. Happy cooking!

Crockpot Chicken and Veggie Casserole Easy Creamy!

Prep Time 10 minutes
Cook Time 4 hours
Total Time 4 hours 10 minutes
Servings 4 servings
Calories 550
A delicious and creamy crockpot casserole combining tender chicken with mixed vegetables and cheesy goodness, perfect for a comforting meal.

Ingredients

Protein

  • 1.5 lbs boneless, skinless chicken breasts (about 3 medium breasts)
  • 4 cups mixed vegetables (broccoli florets, sliced carrots, diced bell peppers)
  • 8 oz cream cheese (softened)
  • 1 cup chicken broth (low-sodium)
  • 2 cups shredded cheddar cheese (divided)
  • 1 tsp garlic powder
  • 1 tsp onion powder
  • 1 tsp Italian seasoning
  • 1/2 tsp salt (or to taste)
  • 1/4 tsp black pepper (or to taste)

Instructions 

  • Place chicken breasts in the crockpot and add mixed vegetables, cream cheese, chicken broth, garlic powder, onion powder, Italian seasoning, salt, and black pepper.
  • Cook on low for 6-8 hours or until chicken is cooked through and vegetables are tender.
  • Shred the cooked chicken and stir in 1 cup of shredded cheddar cheese until melted and creamy.
  • Sprinkle remaining cheddar cheese on top and serve hot.

Notes

For a thicker sauce, remove the lid during the last 30 minutes of cooking.
Calories: 550kcal
Cost: $15
Course: Main Course
Cuisine: American
Keyword: casserole, Chicken, Creamy

Why You’ll Love This Mushroom Couscous with Fresh Herbs

Welcome to your new favorite dish! This mushroom couscous recipe is not only quick and easy to prepare, but it also brings a delightful medley of flavors together in just 30 minutes. Whether you’re cooking for yourself or a crowd, this dish is bound to impress. Let’s dive into the reasons why you’ll fall in love with it!

  • Quick Preparation: With a total cook time of just 30 minutes, this dish is perfect for busy weeknights.
  • Flavor-Packed: The combination of sautéed mushrooms, aromatic garlic, and fresh herbs creates a rich flavor profile that’s both comforting and satisfying.
  • Versatile Serving Options: Whether as a main course or a side dish, this couscous pairs beautifully with proteins like chicken or fish, or even with a fresh salad.
  • Vegetarian and Vegan-Friendly: This dish is entirely plant-based, making it suitable for vegetarians and vegans alike.
  • Budget-Friendly: Utilizing simple pantry staples and fresh ingredients, this recipe is easy on your wallet without compromising on taste.

Ingredients You’ll Need

To make this delicious mushroom couscous, gather the following ingredients:

  • 3 tablespoons olive oil
  • 1 pound sliced mushrooms (any variety you prefer, such as cremini or shiitake)
  • 1 small onion, finely diced
  • 2 cloves garlic, minced
  • 1 cup Moroccan couscous
  • 1 1/2 cups vegetable stock
  • 1/4 cup chopped fresh dill
  • 1/2 teaspoon grated lemon zest
  • 1/4 teaspoon salt (adjust to taste)
  • 1/4 teaspoon pepper (adjust to taste)

Step-by-Step Instructions

Now that we have our ingredients ready, let’s walk through the process of making this delightful mushroom couscous!

Step 1: Sauté the Onions and Mushrooms

In a large skillet, heat the olive oil over medium heat. Add the diced onion and sauté until translucent, about 3-4 minutes. Follow this by adding the sliced mushrooms, stirring occasionally until they turn golden brown, approximately 5-7 minutes.

Step 2: Add Garlic and Cook the Couscous

Once the mushrooms are golden, add the minced garlic and cook for another minute until fragrant. Then, pour in the vegetable stock and bring to a boil. Once boiling, stir in the Moroccan couscous, cover, and remove from heat. Allow it to sit for 5 minutes.

Step 3: Fluff and Combine

After 5 minutes, fluff the couscous with a fork, then gently fold in the sautéed mushroom mixture, fresh dill, lemon zest, and season with salt and pepper to taste.

Step 4: Serve and Enjoy

Your mushroom couscous is now ready to be served! Enjoy it warm as a main dish or as a delightful side.

Pro Tips for Perfect Mushroom Couscous

Side view of a serving of Mushrooms Couscous with visible mushrooms and herbs.

Here are some expert insights to elevate your cooking:

  • Choosing Mushrooms: Experiment with a mixture of mushrooms such as shiitake, oyster, or portobello for a more complex flavor.
  • Herb Variations: Try adding fresh herbs like parsley or thyme for an extra layer of flavor.
  • Broth Boost: For added depth, substitute vegetable stock with mushroom broth or chicken stock.
  • Texture Matters: Ensure mushrooms are dry before sautéing to achieve a nice browning.
  • Leftover Storage: Store any leftovers in an airtight container in the fridge for up to 3 days.
  • Make it a Meal: Pair this couscous with grilled chicken, fish, or a hearty salad for a complete meal.
  • Spice it Up: Add a pinch of red pepper flakes for a bit of heat!
  • Meal Prep Friendly: You can prepare the mushroom mixture ahead of time and cook the couscous just before serving.

Common Mistakes to Avoid

Even the best cooks can make mistakes! Here are some common pitfalls and how to avoid them:

  • Overcrowding the Skillet: Avoid adding too many mushrooms at once, which can steam them instead of browning.
  • Skipping the Resting Time: Letting the couscous sit allows it to absorb all the flavors from the stock.
  • Using Stale Ingredients: Fresh herbs and quality stock make a significant difference in flavor. Always check the freshness of your ingredients.

Variations to Try

Feeling adventurous? Here are some tasty variations on this classic dish:

  • Nutty Couscous: Add toasted pine nuts or slivered almonds for a crunchy texture.
  • Cheesy Delight: Stir in grated Parmesan or feta cheese for a creamy finish.
  • Protein Boost: Incorporate cooked lentils or chickpeas for added protein.
  • Seasonal Veggies: Throw in seasonal vegetables like spinach or bell peppers for added nutrition and color.

Storage and Make-Ahead Instructions

This dish is perfect for meal prep!

  • Refrigeration: Store leftover mushroom couscous in an airtight container for up to 3 days.
  • Freezing: You can freeze the cooked couscous for up to 2 months. Thaw in the fridge overnight before reheating.
  • Reheating: Heat in a skillet with a splash of water or stock to refresh the flavors and texture.

FAQs About Mushroom Couscous

Got questions? We’ve got answers!

  • Can I use different types of couscous? Yes! While Moroccan couscous is preferred, you can use other types like Israeli couscous or quinoa.
  • Is this dish gluten-free? Substitute couscous with gluten-free options like quinoa or rice.
  • Can I make this dish ahead of time? Yes! You can prepare the mushroom mixture in advance and cook the couscous when ready to serve.
  • What proteins go well with this dish? Chicken, fish, or even grilled tofu make great companions!
  • Can I add more vegetables? Absolutely! Feel free to add any vegetables you love or have on hand.
  • How do I store leftovers? Keep leftovers in an airtight container in the fridge for up to 3 days.
  • Can I use dried herbs instead of fresh? Yes, but use them sparingly as dried herbs are more concentrated in flavor.
  • How can I make this dish spicier? Add red pepper flakes or diced jalapeños to the sauté for an extra kick!

Nutritional Tips and Dietary Adaptations

This mushroom couscous is not only delicious, but it can also be nutritious! Here are some tips:

  • Increase Fiber: Add beans or lentils for a fiber boost.
  • Reduce Sodium: Use low-sodium broth to control salt content.
  • Protein Options: Incorporate cooked chicken or chickpeas for added protein.

Essential Equipment for Cooking

Here’s what you’ll need to cook this dish:

  • Large Skillet: A good quality skillet is essential for even cooking of the mushrooms.
  • Measuring Cups and Spoons: Accurate measurements ensure the best results.
  • Spatula: A sturdy spatula for stirring and serving.
  • Fork: For fluffing the couscous.

Serving Suggestions

Here are some ideas to make your meal complete:

  • Grilled Chicken: Serve with grilled chicken for a wholesome meal.
  • Side Salad: Pair it with a light salad dressed with lemon vinaigrette.
  • Wine Pairing: A crisp white wine, like Sauvignon Blanc, complements the flavors perfectly.

In conclusion, this mushroom couscous with fresh herbs is not just a dish—it’s an experience! Whether you’re a novice cook or a seasoned chef, you’ll find joy in preparing and savoring this flavorful meal. So gather your ingredients, roll up your sleeves, and let’s get cooking. Remember, great food doesn’t require perfection, just a willingness to try! Happy cooking!

Mushrooms Couscous with Herbs

Prep Time 10 minutes
Cook Time 15 minutes
Total Time 25 minutes
Servings 4 servings
Calories 350
A flavorful and aromatic dish combining sautéed mushrooms and fresh herbs with fluffy couscous, perfect for a quick and satisfying meal.

Ingredients

Oil

  • 3 tablespoons olive oil

Mushrooms

  • 1 pound sliced mushrooms

Vegetable

  • 1 small onion, finely diced

Garlic

  • 2 cloves minced garlic

Couscous

  • 1 cup Moroccan couscous

Vegetable Stock

  • 1.5 cups vegetable stock

Herbs

  • 0.25 cup chopped fresh dill

Lemon Zest

  • 0.5 teaspoon grated lemon zest

Salt

  • 0.25 teaspoon salt, adjust to taste

Pepper

  • 0.25 teaspoon pepper, adjust to taste

Instructions 

  • Heat olive oil in a pan and sauté onions and garlic until fragrant.
  • Add sliced mushrooms and cook until tender.
  • Stir in couscous, vegetable stock, dill, lemon zest, salt, and pepper. Cover and simmer until couscous is cooked and liquid is absorbed.
  • Fluff with a fork and serve garnished with additional herbs if desired.

Notes

For extra flavor, add a squeeze of lemon juice before serving.
Calories: 350kcal
Cost: $12
Course: Main Course
Cuisine: Mediterranean
Keyword: Mushrooms

Quick and Flavorful Avocado Ranch Tuna Wraps: A Perfect Solution for Busy Days

If you’re looking for a delicious and hassle-free meal that comes together in minutes, you’re in for a treat! These Avocado Ranch Tuna Wraps are not only quick to prepare but also incredibly satisfying. They combine the creaminess of ripe avocado with the zesty flavor of ranch dressing, creating a delicious filling that’s perfect for lunch or a light dinner. Whether you’re short on time or just want to whip up something flavorful without a lot of fuss, this recipe has you covered.

In this article, we’ll dive deep into everything you need to know about making these delightful wraps, from ingredient breakdowns to expert tips. So roll up your sleeves, and let’s get cooking!

Why You’ll Love This Recipe

  • Quick Preparation: This recipe can be ready in just 15 minutes, making it perfect for busy weeknights or last-minute lunches.
  • Nutritious Ingredients: Packed with protein from the tuna and healthy fats from avocado, these wraps keep you full and energized.
  • Customizable Options: Easily adapt the ingredients based on your taste preferences or what you have on hand.
  • Kid-Friendly: The creamy texture and mild flavor make it a hit with children and picky eaters alike.
  • Perfect for Meal Prep: Make a batch ahead of time and store them for a quick grab-and-go meal throughout the week.

Ingredient Breakdown

Let’s take a closer look at the ingredients you’ll need for these delicious wraps:

  • 2 (5 oz) cans tuna in water: Drain and use for a protein-packed filling.
  • 1 ripe avocado: The star of the dish, providing creaminess and healthy fats.
  • 3 tablespoons ranch dressing: For that zesty flavor; choose your favorite brand or make your own!
  • 1 tablespoon fresh lemon juice: Adds brightness and prevents the avocado from browning.
  • 1/4 teaspoon black pepper: A simple seasoning to enhance the flavors.
  • 2 tablespoons finely chopped red onion: Adds a nice crunch and sharpness.
  • 2 tablespoons chopped fresh parsley (optional): For a fresh herbal note.
  • 4 large flour tortillas or whole wheat wraps: The perfect base for holding all that tasty filling.
  • 1 cup shredded lettuce: Adds crunch and freshness.
  • 1 medium tomato, thinly sliced: Juicy and vibrant, it complements the filling nicely.
  • 1/2 cup shredded cheddar cheese (optional): For added creaminess and flavor.

Instructions: How to Make Your Wraps

Side view of a vibrant avocado ranch tuna wrap showcasing its colorful fillings.

Follow these simple steps to create your delicious avocado ranch tuna wraps:

  • In a medium mixing bowl, use a fork or potato masher to mash the avocado with lemon juice until mostly smooth.
  • Add the drained tuna, ranch dressing, black pepper, red onion, and optional parsley to the bowl. Stir thoroughly until all ingredients are evenly incorporated.
  • Lay the flour tortillas flat. Evenly distribute shredded lettuce, tomato slices, and optional cheddar cheese across each wrap.
  • Spoon the tuna-avocado mixture evenly over the prepared fillings on each tortilla.
  • Fold in the sides of each tortilla, then roll tightly from bottom to top to fully enclose the filling.
  • Slice each wrap in half and serve immediately or wrap in parchment paper for portability.

Pro Tips for the Best Wraps

  • Choose the Right Avocado: Make sure your avocado is ripe but not overripe; it should yield slightly to gentle pressure.
  • Texture Matters: For a creamier filling, mash the avocado thoroughly. For a chunkier texture, leave some small pieces of avocado intact.
  • Experiment with Dressings: If you’re not a fan of ranch, try using Greek yogurt or a spicy aioli for a different flavor profile.
  • Chill Before Serving: Letting the wraps chill in the fridge for 30 minutes can enhance the flavors and make them even more refreshing.
  • Add Some Spice: Enhance the flavor by incorporating diced jalapeños or a drizzle of hot sauce into the filling.
  • Use Fresh Ingredients: Fresh herbs and high-quality tuna make a significant difference in taste.
  • Wrap Them Right: Make sure to roll tightly to prevent the filling from spilling out.
  • Store Properly: If you’re making these ahead of time, store them in an airtight container to keep them fresh.

Common Mistakes and Troubleshooting

Here are some common pitfalls to avoid when preparing your wraps:

  • Overripe Avocado: Avoid using an overripe avocado as it will lead to a mushy texture.
  • Too Much Dressing: Using too much ranch dressing can make the wraps soggy. Stick to the recommended amount.
  • Skipping the Lemon Juice: Don’t skip the lemon juice; it keeps the avocado vibrant and fresh.
  • Not Draining Tuna Properly: Make sure to drain the tuna well to avoid excess moisture.
  • Piling on Fillings: Be careful not to overload your wraps; it can make them difficult to roll.

Variations to Try

Feel free to switch things up with these tasty variations:

  • Spicy Tuna Wrap: Add chopped jalapeños and a dash of sriracha to the tuna mixture for a spicy kick.
  • Vegetarian Version: Replace tuna with chickpeas or white beans for a protein-packed vegetarian option.
  • Southwestern Flavor: Incorporate black beans, corn, and diced bell peppers for a Southwestern twist.
  • Italian Inspired: Add sliced olives, sun-dried tomatoes, and Italian herbs for a Mediterranean flair.

Storage and Make-Ahead Instructions

These wraps are perfect for meal prep! Here’s how to store and prepare them:

  • Refrigeration: Store any leftover wraps in an airtight container for up to 2 days. The avocado may brown slightly, but the flavor will remain intact.
  • Freezing: While it’s best to eat these fresh, you can freeze them. Wrap tightly in plastic wrap and store in a freezer bag. Thaw in the fridge before serving.
  • Make-Ahead: Prepare the filling and store it separately in the fridge. Assemble the wraps just before serving for optimal freshness.

Frequently Asked Questions

  • Can I use canned tuna in oil instead of water? Yes, just be aware that it will add more fat and flavor.
  • Is this recipe gluten-free? You can make it gluten-free by using gluten-free wraps.
  • How long do these wraps last in the fridge? They can be stored for up to 2 days in the fridge.
  • Can I make these wraps vegetarian? Absolutely! Substitute the tuna with chickpeas or other protein sources.
  • What can I add for extra crunch? Try adding diced bell peppers or cucumbers for extra texture.
  • How do I prevent the wraps from getting soggy? Use fresh ingredients and don’t overload the wraps with dressing.
  • Can I use Greek yogurt instead of ranch dressing? Yes, Greek yogurt is a great healthy alternative!
  • What are some good side dishes to serve with these wraps? Consider pairing them with a fresh salad or some veggie sticks and hummus.

Nutritional Tips and Dietary Adaptations

This recipe is packed with nutritional benefits, making it a great choice for a balanced meal:

  • High in Protein: Tuna is an excellent source of protein, making these wraps satisfying and nourishing.
  • Healthy Fats: The avocado provides heart-healthy fats that are good for your skin and overall health.
  • Low in Carbs: Using lettuce instead of bread can make this a low-carb option for those watching their carbohydrate intake.
  • Vegan Adaptation: For a vegan-friendly option, swap tuna for chickpeas and use a vegan ranch dressing.

Equipment Recommendations

To make these wraps, you’ll need:

  • Mixing bowl: For combining all the filling ingredients.
  • Fork or potato masher: For mashing the avocado.
  • Knife and cutting board: For slicing ingredients like tomatoes and onions.
  • Plastic wrap or parchment paper: For wrapping the finished wraps for storage or portability.

Serving Suggestions

These wraps are versatile and can be served in various ways:

  • With a Side Salad: Pair with a light green salad for a refreshing meal.
  • Chips and Salsa: Enjoy with your favorite chips and salsa for a complete lunch.
  • Fruit Salad: A side of fresh fruit can add brightness and sweetness to your meal.
  • Soup: Serve alongside a bowl of your favorite soup for a comforting combo.

So there you have it! A comprehensive guide to making your own Avocado Ranch Tuna Wraps. These wraps are not just easy to make; they’re delicious, nutritious, and perfect for any occasion. Now, go ahead and give this recipe a try. You’ll be amazed at how quick and satisfying home-cooked meals can be!

Avocado Ranch Tuna Wraps

Prep Time 10 minutes
Total Time 10 minutes
Servings 4 wraps
Calories 350
Enjoy these quick and delicious tuna wraps filled with creamy avocado and fresh vegetables, perfect for a healthy lunch or snack.

Ingredients

Canned Tuna

  • 10 oz tuna in water, drained
  • 1 pcs ripe avocado (peeled and pitted)
  • 3 tbsp ranch dressing
  • 1 tbsp fresh lemon juice
  • 0.25 tsp black pepper
  • 2 tbsp finely chopped red onion
  • 2 tbsp chopped fresh parsley (optional)
  • 4 large flour tortillas or whole wheat wraps
  • 1 cup shredded lettuce
  • 1 medium tomato (thinly sliced)
  • 0.5 cup shredded cheddar cheese (optional)

Instructions 

  • Mash avocado with lemon juice until smooth.
  • Add tuna, ranch dressing, black pepper, red onion, and parsley; stir to combine.
  • Lay tortillas flat; distribute lettuce, tomato, and cheese on each.
  • Spoon tuna mixture onto each wrap; fold sides and roll tightly.
  • Slice in half and serve immediately or wrap for portability.

Notes

For a spicier kick, add a dash of hot sauce or chopped jalapeños.
Calories: 350kcal
Cost: $10
Course: Lunch
Cuisine: American
Keyword: Avocado, Tuna, Wrap

Effortless Spicy Asian Chili Chicken Rice Paper Wraps

Welcome to a delightful culinary journey where simplicity meets flavor! These Spicy Asian Chili Chicken Rice Paper Wraps are not just another meal; they are a vibrant celebration of fresh ingredients and bold tastes, perfect for a quick weeknight dinner or an exciting gathering with friends. In just a few steps, you’ll learn how to create beautiful wraps that are not only delicious but also visually stunning. Let’s dive into this flavorful world!

Why You’ll Love This Recipe

There are countless reasons to fall in love with these wraps, but here are five key benefits that make them a must-try:

  • Quick and Easy: Whip up these wraps in under 30 minutes, making them perfect for busy weeknights.
  • Fresh and Flavorful: The combination of fresh vegetables and spicy chicken creates a vibrant flavor profile that’s sure to impress.
  • Customizable: Tailor the ingredients to your taste preferences, whether you prefer more spice or a vegetarian option.
  • Healthy Option: Packed with vegetables and lean protein, these wraps offer a nutritious meal that feels indulgent.
  • Fun to Assemble: Get the family involved in wrapping their own, turning dinner into a fun and interactive experience!

Ingredient Breakdown

Let’s take a closer look at what you’ll need for this recipe, along with some handy substitutions:

  • Chicken Breasts or Thighs: Boneless, skinless chicken is ideal for this dish. If you prefer a richer flavor, opt for thighs. For a vegetarian twist, try firm tofu or thinly sliced mushrooms.
  • Sweet Chili Sauce: This sauce adds a delightful sweetness and a hint of spice. You can use homemade or store-bought; just make sure it’s a quality brand.
  • Soy Sauce: A low-sodium variety is best for controlling saltiness. For gluten-free diets, tamari works wonderfully.
  • Fresh Ginger and Garlic: Essential for depth of flavor! If you’re out, ginger paste and powdered garlic can be used in a pinch.
  • Lime Juice: Freshly squeezed lime juice brightens up the dish. You could substitute with lemon juice if needed.
  • Rice Paper Wrappers: The star of the show! Look for 8.5-inch wrappers in the Asian aisle of your grocery store.
  • Vermicelli Noodles: These add a lovely texture. If unavailable, use thin glass noodles or skip them for more veggies.
  • Crisp Lettuce: Butter lettuce or romaine works best for wrapping. You can also use collard greens for a low-carb option.
  • Fresh Herbs: A mix of cilantro, mint, and Thai basil brings freshness. Feel free to use what you have!
  • Vegetables: Carrots and cucumbers add crunch; julienne them for easy wrapping.

Step-by-Step Instructions

Side view of colorful rice paper wraps containing chicken, herbs, and vibrant veggies.

Ready to make your wraps? Follow these simple steps:

  1. Prepare the Chili Chicken: In a bowl, combine thinly sliced chicken with 2 tablespoons sweet chili sauce, 1 tablespoon soy sauce, 1 teaspoon grated ginger, 1 clove minced garlic, 1 teaspoon lime juice, and a drizzle of sesame oil. Let it marinate for at least 15-30 minutes.
  2. Heat a Skillet: Over medium-high heat, add a little oil. Once hot, add the marinated chicken and cook until fully cooked through and slightly caramelized, about 5-7 minutes. Remove from heat and let it cool slightly.
  3. Cook Vermicelli Noodles: Bring a pot of water to a boil. Add the vermicelli noodles and cook according to package directions (usually just 2-3 minutes until tender). Drain and rinse with cold water to stop cooking and prevent sticking. Set aside.
  4. Prepare Fresh Produce: Wash and thoroughly dry all vegetables. Julienne the carrots and cucumbers into thin sticks. Tear the lettuce into manageable pieces. Pick the leaves off your mint, cilantro, and basil. Arrange all components on a large platter for easy access.
  5. Set Up Your Wrapping Station: Fill a shallow dish with warm water for dipping the rice paper wrappers. Have your chicken, noodles, vegetables, and herbs within easy reach.
  6. Soak the Rice Paper: Take one rice paper wrapper and dip it into the warm water for about 15-20 seconds. It should be pliable but not overly floppy or sticky.
  7. Assemble the Wrap: Carefully lay the softened wrapper flat on your damp surface. Arrange your fillings just below the center, starting with a piece of lettuce, then a small handful of vermicelli noodles, strips of carrot and cucumber, a portion of the chili chicken, and a sprinkle of fresh herbs.
  8. Wrap It Up: Fold the bottom edge of the wrapper up tightly over the fillings, then fold in the left and right sides towards the center. Continue to roll tightly from the bottom towards the top, creating a snug cylinder.
  9. Repeat: Continue soaking, filling, and rolling until you’ve used all your ingredients.
  10. Make the Dipping Sauce: In a small bowl, whisk together 3 tablespoons sweet chili sauce, 1 tablespoon lime juice, 1 tablespoon soy sauce, 1 teaspoon rice vinegar, 1/2 clove minced garlic, and a pinch of finely chopped chili if desired. Taste and adjust seasonings as needed.

Pro Tips for the Perfect Wraps

To ensure your wraps turn out perfectly every time, consider these expert tips:

  • Moisture Control: Make sure not to oversoak the rice paper; it should be pliable yet firm enough to hold its shape.
  • Even Filling: Distribute your fillings evenly for a balanced flavor in every bite.
  • Layer Wisely: Start with lettuce at the base to create a barrier that prevents moisture from soaking through the rice paper.
  • Keep it Cool: If making ahead, store wrapped rolls in the fridge with a damp paper towel to maintain moisture.
  • Experiment with Dipping Sauces: Try different sauces like peanut sauce or hoisin for a twist!
  • Presentation Matters: Cut the wraps in half diagonally before serving for a beautiful presentation.
  • Use Fresh Ingredients: Fresh herbs and crisp vegetables make all the difference in flavor and texture.
  • Practice Makes Perfect: Don’t worry if your first few wraps aren’t perfect; they’ll still taste amazing!

Common Mistakes and Troubleshooting

If you encounter issues while preparing your wraps, here’s how to troubleshoot:

  • Rice Paper Rips: If your rice paper tears, it may be too dry or soaked too long. Try again with more care.
  • Fillings Spill Out: Avoid overstuffing the wraps; less is more!
  • Chicken Not Cooked: Ensure the chicken is cooked thoroughly before assembling to prevent foodborne illness.

Variations to Try

Feel free to get creative with these variations:

  • Shrimp Version: Substitute chicken with shrimp for a seafood twist!
  • Vegetarian Delight: Use a mix of sautéed vegetables and tofu for a vegetarian option.
  • Spicy Kick: Add sliced jalapeños or a drizzle of hot sauce for an extra kick.
  • Fruit Fusion: Incorporate slices of mango or avocado for a sweet and creamy contrast.

Storage and Make-Ahead Instructions

To keep your wraps fresh:

  • Refrigeration: Store any leftover wraps in an airtight container in the fridge for up to 2 days.
  • Make-Ahead: You can prepare the filling a day in advance. Just assemble the wraps the day of serving for optimal freshness.

Frequently Asked Questions

Here are some common questions about these delicious wraps:

  • Can I use frozen rice paper wrappers? Yes! Just thaw them according to package instructions before using.
  • What’s the best way to reheat the chicken? You can quickly stir-fry it in a pan to reheat without drying it out.
  • Can I freeze these wraps? It’s best to eat them fresh, but you can freeze the fillings separately. Just thaw before using.
  • How do I make these gluten-free? Use gluten-free soy sauce (tamari) and ensure all ingredients are certified gluten-free.
  • What dipping sauces pair well with these wraps? Sweet chili sauce, hoisin, or a peanut sauce are all excellent choices!
  • How can I make these wraps spicier? Add extra chili flakes in the marinade or include spicy vegetables.
  • What vegetables work best? Crisp lettuce, carrots, cucumbers, and bell peppers are all great choices!
  • How long do these wraps last in the fridge? They are best enjoyed within 2 days for optimal freshness.

Nutritional Tips and Dietary Adaptations

Looking to make your wraps healthier? Here are some tips:

  • Lean Protein: Choose chicken breasts for a lower-fat option.
  • Increase Veggies: Load up on fresh vegetables to boost fiber and nutrients.
  • Low-Sodium Options: Use low-sodium soy sauce to control salt intake.

Recommended Equipment

To make these wraps, you’ll need:

  • Sharp Knife: For easy cutting of vegetables and chicken.
  • Cutting Board: A clean, stable surface for prep.
  • Shallow Dish: For soaking rice paper wrappers.
  • Skillet: A non-stick skillet works wonders for cooking the chicken.

Serving Suggestions

These wraps are best enjoyed fresh. Serve them with:

  • Extra Dipping Sauce: Offer a variety of dips for guests to enjoy!
  • Fresh Fruit: Pair with fruit like pineapple or watermelon for a refreshing contrast.
  • Side Salad: A light salad complements the wraps beautifully.

In conclusion, making Spicy Asian Chili Chicken Rice Paper Wraps at home is easier than you think! With fresh ingredients and simple steps, you’ll create a meal that’s not only satisfying but also a feast for the eyes. So grab your ingredients, gather your loved ones, and enjoy the delightful experience of assembling and savoring these wraps. Happy cooking!

Spicy Asian Chili Chicken Rice Paper Wraps Recipe

Prep Time 20 minutes
Cook Time 15 minutes
Total Time 35 minutes
Servings 4 servings
Calories 350
Delight in these fresh and flavorful rice paper wraps filled with spicy chili chicken, crisp vegetables, and fragrant herbs, perfect for a light yet satisfying meal.

Ingredients

Protein

  • 2 pieces Chicken Breasts or Thighs
  • 3 tablespoons Sweet Chili Sauce
  • 1 tablespoon Soy Sauce
  • 1 teaspoon Grated Ginger
  • 1 clove Minced Garlic
  • 1 tablespoon Lime Juice
  • 1 teaspoon Sesame Oil
  • Optional Chili Flakes (optional)

Wraps & Noodles

  • 8 pieces Rice Paper Wrappers
  • 100 grams Vermicelli Noodles
  • 1 head Crisp Lettuce
  • 1/2 cup Fresh Herbs (cilantro, mint, Thai basil)
  • 2 carrots Carrots
  • 1 cucumber Cucumbers

Dipping Sauces

  • 3 tablespoons Sweet Chili Sauce for dipping
  • 1 tablespoon Lime Juice for dipping
  • 1 tablespoon Soy Sauce for dipping
  • 1 teaspoon Rice Vinegar for dipping
  • 1 clove Minced Garlic for dipping
  • Chili Chili for dipping (optional)
  • Chopped Peanuts Chopped Peanuts for dipping

Instructions 

  • Combine thinly sliced chicken with 2 tablespoons sweet chili sauce, 1 tablespoon soy sauce, grated ginger, minced garlic, lime juice, and sesame oil. Marinate for 15-30 minutes.
  • Cook the chicken in a skillet over medium-high heat until fully cooked and slightly caramelized, about 5-7 minutes. Set aside to cool.
  • Cook vermicelli noodles in boiling water for 2-3 minutes until tender. Drain and rinse with cold water.
  • Prepare all produce: julienne carrots and cucumbers, tear lettuce, and pick herbs. Arrange ingredients on a platter.
  • Dip rice paper in warm water for 15-20 seconds until pliable. Lay flat and fill with lettuce, noodles, vegetables, chicken, and herbs. Fold and roll tightly.
  • Mix dipping sauce ingredients: sweet chili sauce, lime juice, soy sauce, rice vinegar, minced garlic, and chili if desired. Serve with wraps.

Notes

For extra flavor, add chopped peanuts or a squeeze of lime before serving.
Calories: 350kcal
Cost: $15
Course: Appetizer, Main
Cuisine: Asian
Keyword: Chicken, Chili, Rice Paper

Your Guide to Flavor-Packed Roasted Broccoli and Chickpea Bowls

Welcome to a culinary adventure that transforms simple, wholesome ingredients into a vibrant meal that’s both nourishing and delicious! In this article, we’ll explore the world of Roasted Broccoli and Chickpea Bowls, a dish that combines crispy roasted broccoli, hearty chickpeas, and a creamy tahini dressing. Perfect for busy weeknights or meal prep, this recipe is designed for both flavor lovers and those seeking quick, easy meals.

Not only does this recipe come together in no time, but it’s also packed with nutrients to fuel your day. Let’s dive into why you’ll love this dish and how to make it your own!

Why You’ll Love This Recipe

  • Quick and Easy: This dish can be ready in under 40 minutes, perfect for weeknight dinners.
  • Nutritious Ingredients: Packed with fiber, protein, and vitamins, it’s a wholesome meal option.
  • Customizable: You can easily swap out ingredients based on your preferences or seasonal availability.
  • Meal Prep Friendly: Great for making ahead and storing for busy days.
  • Delicious and Satisfying: The combination of flavors and textures creates a truly satisfying meal.

Ingredients Breakdown

To create your Roasted Broccoli and Chickpea Bowls, you’ll need the following ingredients:

  • 1 large head broccoli: Cut into florets for even roasting. Feel free to use frozen broccoli if fresh isn’t available; just be aware it may soften a bit more.
  • 1 (15-ounce) can chickpeas: Rinsed and drained. For extra crunch, pat them dry before roasting.
  • 2 tablespoons olive oil: This helps to crisp up the veggies and adds rich flavor.
  • ½ teaspoon garlic powder: For a hint of savory depth.
  • ¼ teaspoon onion powder: Adds a subtle sweetness.
  • Salt and black pepper: To taste, enhancing all the flavors.
  • 1 cup uncooked quinoa: A nutritious base; prepare according to package directions.
  • ¼ cup tahini: The star of your dressing, offering creaminess and a nutty flavor.
  • 2 tablespoons lemon juice: Brightens the dish and balances richness.
  • 1 tablespoon water: Adjust the dressing’s consistency as needed.
  • 1 clove garlic: Minced for that fresh flavor boost.

If you have dietary preferences, here are some substitutions:

  • Quinoa: Swap with brown rice, couscous, or even farro for a different texture.
  • Tahini: For a nut-free option, use sunflower seed butter or Greek yogurt.
  • Chickpeas: Replace with baked tofu or lentils for a protein-rich alternative.
  • Vegetables: Mix in seasonal vegetables like bell peppers, zucchini, or asparagus.

Step-by-Step Instructions

Juicy roasted broccoli and chickpeas in a vibrant bowl, seen from the side.

Let’s get cooking! Follow these simple steps to create your flavorful bowls:

  1. Preheat your oven: Set it to 400°F (200°C) to get the perfect roasting temperature.
  2. Prepare the vegetables: On a large baking sheet, combine the broccoli florets and drained chickpeas.
  3. Season: Drizzle the olive oil over the broccoli and chickpeas. Sprinkle with garlic powder, onion powder, salt, and pepper. Toss everything until evenly coated.
  4. Roast: Place in the oven and roast for 25-30 minutes, or until the broccoli is tender-crisp and slightly charred, and the chickpeas are crispy.
  5. Cook the quinoa: While the vegetables are roasting, cook the quinoa according to package instructions. Typically, combine 1 cup quinoa with 2 cups water or vegetable broth, bring to a boil, reduce heat, cover, and simmer for 15 minutes. Let it stand for 5 minutes, then fluff with a fork.
  6. Make the tahini dressing: In a small bowl, whisk together tahini, lemon juice, water, minced garlic, and a pinch of salt until smooth. Adjust water for your desired consistency.
  7. Assemble your bowls: Divide the cooked quinoa between serving bowls. Top with roasted broccoli and chickpeas, then drizzle with the tahini dressing.

Pro Tips for Perfect Bowls

  • Even roasting: Space out your broccoli and chickpeas on the baking sheet to ensure they roast evenly.
  • Texture matters: For crispier chickpeas, make sure they are well-drained and dry before roasting.
  • Flavor boost: Try adding a pinch of smoked paprika or chili powder for a kick of flavor.
  • Fresh herbs: Garnish with fresh parsley or cilantro for added freshness.
  • Adjusting seasoning: Taste and adjust salt and pepper before serving to ensure maximum flavor.
  • Cooking quinoa: Use vegetable broth instead of water to enhance the quinoa’s flavor.
  • Batch cooking: Make a larger batch of quinoa or roasted vegetables to use throughout the week.
  • Vegan option: This recipe is naturally vegan; enjoy it with confidence!

Common Mistakes and Troubleshooting

Even the best of us make mistakes in the kitchen! Here are some common pitfalls and how to avoid them:

  • Overcrowding the pan: If your chickpeas and broccoli are too close together, they can steam instead of roast. Give them room to breathe!
  • Under-seasoning: Don’t be shy with your seasonings; this is where flavor comes from. Adjust to your taste!
  • Overcooking quinoa: Keep an eye on your quinoa. Overcooked quinoa can become mushy; aim for fluffy grains.
  • Thick dressing: If your tahini dressing is too thick, add water gradually until you reach the desired consistency.

Variations to Try

Feel free to get creative with your bowls! Here are some tasty variations:

  • Asian-inspired: Add sesame oil, soy sauce, and top with sesame seeds and green onions.
  • Mexican twist: Mix in black beans, corn, and avocado, topped with a lime cilantro dressing.
  • Middle Eastern flair: Incorporate roasted eggplant, served with a sprinkle of sumac and fresh mint.
  • Grain-free: Serve over riced cauliflower or spiralized zucchini for a lighter option.

Storage and Make-Ahead Instructions

This recipe is perfect for meal prep! Here’s how to store and reheat:

  • Refrigerate: Store leftovers in an airtight container in the fridge for up to 4 days.
  • Reheat: Warm in the microwave or on the stovetop, adding a splash of water to keep it moist.
  • Make-ahead: Roast the vegetables and cook the quinoa ahead of time. Assemble bowls when ready to eat.

Frequently Asked Questions

Got questions? We’ve got answers!

  • Can I use frozen broccoli? Yes, but keep in mind it may have a softer texture.
  • Is this recipe gluten-free? Absolutely! It’s naturally gluten-free with quinoa as the base.
  • How can I make this recipe spicier? Add a pinch of cayenne pepper or red pepper flakes to the seasoning mix.
  • Can I use other legumes? Yes! Feel free to substitute chickpeas with lentils or black beans.
  • What else can I add? Consider adding roasted nuts, seeds, or a handful of leafy greens for extra nutrition.
  • How can I meal prep this? Store components separately and assemble them when ready to eat to maintain freshness.
  • Can I skip the tahini? Yes, you can replace it with yogurt or a simple vinaigrette if you prefer.
  • How do I store leftovers? Keep in an airtight container in the fridge for up to 4 days.

Nutrition Tips and Dietary Adaptations

For those monitoring nutrition:

  • Protein boost: Add grilled chicken or shrimp for additional protein.
  • Fiber-rich: The chickpeas and quinoa are excellent sources of fiber, aiding digestion.
  • Low-carb option: Substitute quinoa with riced cauliflower for a lower-carb meal.
  • Vegan-friendly: This recipe is plant-based, perfect for vegans and vegetarians alike.

Equipment Recommendations

Here’s what you’ll need:

  • Baking sheet: For roasting your vegetables.
  • Medium saucepan: To cook the quinoa.
  • Mixing bowl: For preparing your dressing.

Serving Suggestions

Serve your Roasted Broccoli and Chickpea Bowls with a side of fresh fruit, a light salad, or some crusty bread. Pair it with a refreshing drink like iced tea or lemonade to complement the meal. Enjoy your culinary creation!

Cooking is all about experimentation and enjoying the process. With this guide, you’re well-equipped to make a nourishing dish that not only satisfies your hunger but also brings joy to your kitchen. Happy cooking!

Roasted Broccoli and Chickpea Bowls

Prep Time 10 minutes
Cook Time 30 minutes
Total Time 40 minutes
Servings 2 servings
Calories 550
A nutritious and flavorful bowl combining roasted broccoli, chickpeas, and fluffy quinoa, topped with a creamy lemon tahini dressing.

Ingredients

Vegetables

  • 1 large broccoli (cut into florets)
  • 1 15-ounce can chickpeas (rinsed and drained)
  • 2 tablespoons olive oil
  • ½ teaspoon garlic powder
  • ¼ teaspoon onion powder
  • to taste salt and black pepper
  • 1 cup uncooked quinoa (prepared according to package directions)
  • ¼ cup tahini
  • 2 tablespoons lemon juice
  • 1 tablespoon water (add more if needed for desired consistency)
  • 1 clove garlic (minced)
  • to taste salt

Instructions 

  • Preheat oven to 400°F (200°C). Toss broccoli and chickpeas with olive oil, garlic powder, onion powder, salt, and pepper. Roast for 25-30 minutes.
  • Cook quinoa according to package instructions, then let it stand for 5 minutes and fluff with a fork.
  • Whisk tahini, lemon juice, water, minced garlic, and salt until smooth. Add more water for desired consistency.
  • Divide cooked quinoa into bowls, top with roasted broccoli and chickpeas, then drizzle with tahini dressing.

Notes

Feel free to add fresh herbs or a squeeze of extra lemon for extra flavor.
Calories: 550kcal
Cost: $15
Course: Main Course
Cuisine: Healthy
Keyword: Vegetarian

Colorful Vegetarian Wraps: A Delicious and Nutritious Meal

Welcome to the world of colorful vegetarian wraps! This wrap is not just a meal; it’s an experience filled with vibrant flavors and nutritious ingredients. Whether you’re a busy professional or a home chef looking to spice up dinner, these wraps are a quick and easy solution. Let’s dive into how you can create mouthwatering vegetarian wraps filled with turmeric rice, fresh veggies, and grilled cheese that are perfect for any night of the week!

By the end of this article, you’ll not only have a fantastic recipe but also tips, variations, and answers to your burning questions about wraps. Let’s get started!

Why You’ll Love This Recipe

  • Quick and Easy: This wrap is perfect for those busy weeknights when time is of the essence. With minimal prep and cooking time, you can enjoy a delicious meal in under 30 minutes.
  • Nutritious and Filling: Packed with fresh vegetables, protein-rich grilled cheese, and fiber-filled rice, this wrap is both satisfying and nutritious.
  • Customizable: Feel free to add your favorite ingredients or substitute based on what you have on hand. This wrap is versatile and can be tailored to your taste!
  • Great for Meal Prep: Make a batch ahead of time for lunches during the week. These wraps store well and can be enjoyed cold or reheated.
  • Family-Friendly: Kids love wraps! They’re fun to make and eat, making them a great choice for family dinners.

Detailed Ingredient Breakdown

Let’s take a closer look at the ingredients you’ll need to create these delicious wraps. Here’s what you’ll need:

  • 1 Packung Weizenwraps: Any type of wrap will work, including whole wheat or spinach wraps. If you’re gluten-free, opt for corn tortillas.
  • 400g Reis: Long-grain rice or jasmine rice works best. For a healthier option, use brown rice or quinoa.
  • 3 TL Butter: This adds flavor, but you can substitute with olive oil or a dairy-free alternative.
  • 150g Karotten: Shredded or julienned carrots add crunch and sweetness. You can also use bell peppers for a different flavor.
  • 150g Zucchini: Sliced zucchini adds moisture and nutrition. Feel free to replace it with other vegetables like bell peppers or cucumbers.
  • 1/2 Dose Mais: Canned corn provides sweetness and a pop of color. Fresh or frozen corn works too.
  • 2 Tomaten: Chopped fresh tomatoes add juiciness and flavor. Consider using sun-dried tomatoes for a more intense taste.
  • 1 TL Kurkuma: This gives the rice a beautiful golden color and earthy flavor. You can substitute with curry powder if preferred.
  • 1/2 TL Salz: Enhances the overall flavor. Adjust according to your taste.
  • Salat nach Wahl: Any leafy greens like spinach, arugula, or romaine work wonderfully.
  • 1 Packung Grillkäse: Grilled cheese adds richness. For a vegan option, try tofu or a plant-based cheese.
  • 200g Joghurt: This acts as a creamy dressing. Use plain yogurt, Greek yogurt, or a dairy-free version.
  • 10g Kräuter: Fresh herbs like mint, parsley, or basil elevate the flavors. Dried herbs can also be used in a pinch.

Step-by-Step Instructions

Side view of juicy vegetarian wraps showcasing vibrant ingredients and turmeric rice.

Follow these simple steps to create your colorful vegetarian wraps:

  1. Cook the rice according to the package instructions until fluffy and tender.
  2. In a pan, heat butter (or oil) over medium heat, then add the grilled cheese, cutting it into smaller pieces. Cook until golden and crispy.
  3. In the same pan, add the chopped carrots and zucchini. Sauté for about 3-4 minutes until softened.
  4. Mix in the cooked rice, turmeric, and salt. Stir well to combine, then fold in the corn.
  5. Prepare your fresh ingredients: wash and chop the tomatoes and greens.
  6. To make the yogurt sauce, blend yogurt with salt and chopped herbs until smooth.
  7. Lay out your wraps and fill each with the rice mixture, fresh tomatoes, and greens. Drizzle with yogurt sauce.
  8. Roll the wraps tightly, folding in the sides as you go. Cut in half and serve.

Pro Tips for the Perfect Wrap

  • Warm the Wraps: Heat your wraps for a few seconds in the microwave or on a skillet to make them more pliable and easier to roll.
  • Don’t Overfill: Keep your fillings moderate to prevent tearing. A good rule of thumb is to use about 1/2 to 2/3 cup of filling per wrap.
  • Use Fresh Ingredients: Fresh veggies not only taste better but also enhance the visual appeal of your wraps.
  • Experiment with Flavors: Feel free to add spices or sauces that you love. A drizzle of your favorite dressing can take this wrap to the next level!
  • Store Properly: If making ahead, wrap each individual wrap in foil or parchment paper to keep them fresh.
  • Try Different Textures: Incorporate crunchy elements like nuts or seeds for added texture.
  • Make it Saucy: Add a splash of your favorite sauce inside the wrap for extra flavor and moisture.
  • Chill Before Serving: If you prepare these wraps ahead of time, refrigerate them for about 30 minutes before serving for a refreshing meal.

Common Mistakes and Troubleshooting

Here are some common pitfalls to avoid when making your wraps:

  • Too Much Liquid: If the filling is too wet, it can make the wrap soggy. Ensure vegetables are well-drained and not overcooked.
  • Wraps Falling Apart: If your wraps are tearing, they may be too dry or overfilled. Experiment with different brands or types to find one that holds up well.
  • Flavorless Filling: Always season your filling well. Taste as you go and add herbs or spices to enhance the flavor.

Variations to Try

Feel free to mix things up with these creative wrap variations:

  • Mexican Inspired: Swap turmeric rice for cilantro lime rice and add black beans, corn, and avocado.
  • Asian Style: Use sesame oil instead of butter, and fill with sautéed bok choy, carrots, and tofu. Drizzle with soy sauce.
  • Mediterranean Twist: Incorporate roasted red peppers, feta cheese, and a drizzle of tzatziki sauce.
  • Breakfast Wrap: Fill with scrambled eggs, spinach, and cheese for a hearty morning meal.

Storage and Make-Ahead Instructions

To keep your wraps fresh:

  • Refrigerate: Store in an airtight container for up to 3 days.
  • Freezing: If you want to freeze wraps, wrap them tightly in plastic wrap and store in a freezer-safe bag for up to 3 months. Thaw in the refrigerator overnight before serving.
  • Assemble Just Before Serving: For the best texture, assemble your wraps shortly before eating if possible.

Frequently Asked Questions

Here are some common questions about making these vegetarian wraps:

  • Can I use other types of wraps? Absolutely! Whole wheat, gluten-free, or even large lettuce leaves work well.
  • Can I make these wraps vegan? Yes! Simply replace the grilled cheese with tofu or vegan cheese and use plant-based yogurt.
  • How do I prevent my wraps from getting soggy? Use less liquid in your fillings and ensure all ingredients are well-drained.
  • Can I add meat to these wraps? Certainly! Cooked chicken, turkey, or deli meats can be wonderful additions.
  • What is the best way to cut the wraps? Use a sharp knife and cut diagonally for the best presentation.
  • What can I serve with my wraps? Pair with a fresh salad, crispy chips, or a light soup.
  • How can I make these wraps spicier? Add jalapeños, sriracha, or chili flakes to the filling for an extra kick.
  • Can I make these wraps ahead of time? Yes, but it’s best to keep the filling separate until you’re ready to serve to maintain freshness.

Nutrition Tips and Dietary Adaptations

Your wraps can be as healthy as you want them to be!

  • Increase Fiber: Use whole grain wraps and add more beans or legumes for added fiber.
  • Reduce Calories: Use less cheese or opt for lower-fat dairy products.
  • Boost Protein: Add legumes like chickpeas or lentils to your filling for a protein punch.

Equipment Recommendations

Here’s what you’ll need to make your wraps:

  • Non-stick Skillet: For sautéing your vegetables and grilled cheese.
  • Sharp Knife: Essential for chopping your ingredients and cutting the wraps.
  • Cutting Board: A must-have for food prep.
  • Mixing Bowls: Useful for preparing your filling and sauces.

Serving Suggestions

These wraps are delicious on their own, but here are some great sides to complement your meal:

  • Fresh Salad: A light side salad with a vinaigrette pairs beautifully with the wraps.
  • Chips or Crisps: Add some crunch with a side of tortilla chips or veggie crisps.
  • Fruit Bowl: Fresh fruits like watermelon or berries can provide a refreshing contrast.

Final Thoughts

Making colorful vegetarian wraps with turmeric rice, fresh veggies, and grilled cheese is not just about feeding your body; it’s about enjoying the process of cooking and eating. You’re not just creating a meal; you’re crafting an experience filled with flavor and nutrition. So gather your ingredients and get ready to roll up something delicious—and remember, great food doesn’t require perfection, just a willingness to try new things. Happy cooking!

Vegetarische Wraps mit Kurkumareis, Gemüse und Grillkäse

Prep Time 15 minutes
Cook Time 20 minutes
Total Time 35 minutes
Servings 4 Portionen
Calories 550
Diese leckeren vegetarischen Wraps sind voller frischer Zutaten, aromatischem Kurkumareis und knusprigem Grillkäse – perfekt für ein schnelles und gesundes Essen.

Ingredients

Wraps

  • 400 g Reis
  • 3 TL Butter
  • 150 g Karotten
  • 150 g Zucchini
  • 1/2 Dose Mais
  • 2 Tomaten Tomaten
  • 1 TL Kurkuma
  • ½ TL Salz

Salat nach Wahl

  • 1 Packung Grillkäse
  • 200 g Joghurt
  • ½ TL Salz
  • 10 g Kräuter (z.B. Minze, Petersilie, Basilikum)

Instructions 

  • Reis nach Packungsanleitung kochen.
  • Grillkäse klein schneiden und in Butter knusprig braten.
  • Karotten und Zucchini klein schneiden, anbraten, Reis, Kurkuma, Salz und Mais hinzufügen.
  • Tomaten und Salat waschen und klein schneiden. Joghurt mit Salz und Kräutern pürieren.
  • Wraps füllen, aufrollen, nach Wunsch halbieren oder direkt servieren.

Notes

Für extra Geschmack kannst du die Wraps mit frischen Kräutern garnieren.
Calories: 550kcal
Cost: $12
Course: Hauptgericht
Cuisine: Deutsch
Keyword: Reis, Vegetarisch, Wraps

Transform Your Dinner Routine with This Flavorful Couscous and Shrimp Recipe

Are you ready to elevate your weeknight dinner game? This couscous with shrimp recipe will bring a burst of Mediterranean flavor to your table in no time! Combining tender shrimp, fresh ingredients, and aromatic spices, this dish is not only delicious but also incredibly easy to prepare. In this article, we’ll take you through all the steps, tips, and variations you need to make this meal a staple in your kitchen.

Cooking should be an enjoyable experience, and with this easy Mediterranean recipe, you’ll find that confidence and creativity can flourish in your kitchen. Let’s dive into what makes this dish so special!

Why You’ll Love This Recipe

  • Quick and Easy: This dish can be ready in just 20 minutes, making it a perfect weeknight meal.
  • Nutritious Ingredients: Packed with protein from shrimp and fiber from couscous, it’s a wholesome option for any dinner.
  • Versatile Flavor Profile: The combination of garlic, lemon zest, and spices creates a vibrant taste that complements a variety of sides.
  • Impressive Presentation: The colorful ingredients make for a visually stunning dish that’s perfect for entertaining guests.
  • Customizable: Easily swap ingredients to cater to your preferences or dietary needs.

Essential Ingredients for Couscous with Shrimp

Let’s gather everything you need to make this delightful dish. Here’s a detailed breakdown of the ingredients along with some substitutions you might consider:

  • Couscous: 1 cup of traditional couscous works perfectly, but feel free to use pearl couscous for a different texture.
  • Broth: 1 cup of chicken or vegetable broth adds depth of flavor; you can also use water if you’re in a pinch.
  • Olive Oil: 1 tablespoon for cooking; this adds richness and helps to sauté the garlic.
  • Shrimp: 1 lb of peeled and deveined shrimp is the star of the dish.
  • Garlic: 2 cloves, minced, for that aromatic touch.
  • Spices: 1/2 teaspoon smoked paprika and optional red pepper flakes (1/4 teaspoon) for a hint of heat.
  • Cherry Tomatoes: 1/2 cup, halved, adds sweetness and color.
  • Fresh Parsley: 1/4 cup, chopped, for a bright finish.
  • Lemon Juice and Zest: 1 tablespoon of juice and the zest of 1 lemon to brighten the dish.

Step-by-Step Instructions

Side view of a vibrant dish featuring couscous and succulent shrimp.

Now that we have our ingredients ready, let’s walk through the cooking process:

  1. In a medium saucepan, bring 1 cup of chicken or vegetable broth to a boil. Stir in 1 cup of couscous and 1/2 tablespoon of olive oil. Cover, remove from heat, and let it sit for 5 minutes.
  2. Fluff the couscous with a fork and set aside.
  3. In a large skillet, heat the remaining olive oil over medium heat. Add the minced garlic and cook for 30 seconds until fragrant.
  4. Add the shrimp, smoked paprika, red pepper flakes (if using), salt, and pepper. Sauté for about 3-5 minutes until the shrimp are pink and cooked through.
  5. Stir in the halved cherry tomatoes and cook for an additional 1-2 minutes until slightly softened.
  6. Combine the cooked couscous with the shrimp mixture. Stir in the lemon juice, lemon zest, and chopped parsley. Taste and adjust seasoning as needed.
  7. Serve warm with extra lemon wedges on the side.

Pro Tips for Perfect Couscous and Shrimp

Here are some expert insights to ensure your dish turns out perfectly every time:

  • Don’t Overcook Shrimp: Shrimp cooks quickly; watch for them to turn pink and opaque.
  • Fluff Your Couscous: After cooking, fluff with a fork to keep it light and prevent clumping.
  • Adjust Spices: Feel free to experiment with more spices like cumin or coriander for added warmth.
  • Fresh Herbs: Always use fresh parsley or basil for the best flavor, but dried herbs can work in a pinch.
  • Mind the Salt: Since broth can be salty, taste as you go and adjust seasoning accordingly.
  • Serve Immediately: This dish is best enjoyed right after cooking for optimal freshness.

Common Mistakes and Troubleshooting

Even the best cooks can run into a few hiccups. Here’s how to troubleshoot:

  • Dry Couscous: If your couscous turns out dry, it may need more liquid. Add a splash of broth or water and stir.
  • Overcooked Shrimp: If shrimp become rubbery, they’ve likely been overcooked. Keep an eye on them during cooking.
  • Not Enough Flavor: Boost flavor with more herbs, spices, or a splash of balsamic vinegar if needed.

Delicious Variations to Try

Want to mix things up? Here are some fun variations you can try:

  • Vegetarian Option: Substitute shrimp with chickpeas or grilled vegetables for a hearty vegetarian dish.
  • Seafood Medley: Add scallops or crab meat for a seafood feast.
  • Spicy Kick: Incorporate diced jalapeños or a splash of hot sauce for an extra heat boost.
  • Herbed Couscous: Mix in different herbs like dill or cilantro for a fresh twist.

Storage and Make-Ahead Instructions

This dish is not only quick to prepare, but it’s also easy to store and reheat:

  • Refrigerate: Store leftovers in an airtight container for up to 3 days.
  • Reheat: Warm in the microwave or on the stovetop with a splash of broth to keep it moist.
  • Make Ahead: Prepare the couscous and sauté the shrimp in advance; combine just before serving.

Frequently Asked Questions

Here are some common questions about making couscous with shrimp:

  • Can I use frozen shrimp? Yes, just thaw and rinse them before cooking.
  • What can I serve with this dish? Serve alongside a fresh salad, grilled vegetables, or crusty bread.
  • Can I make this dish gluten-free? Swap couscous with gluten-free grains like quinoa or brown rice.
  • How can I add more vegetables? Mix in sautéed zucchini, bell peppers, or spinach for added nutrition.
  • Is this dish good for meal prep? Absolutely! It stores well and is easy to reheat.
  • What’s the best way to season the shrimp? A simple mix of salt, pepper, and smoked paprika works wonders.
  • Can I make this dish spicy? Yes, add more red pepper flakes or diced jalapeños for heat.
  • How do I know when shrimp are done cooking? They should be pink and opaque with a firm texture.

Nutritional Benefits and Dietary Adaptations

This couscous with shrimp recipe offers a balance of protein and carbohydrates, making it a great option for a healthy meal:

  • Rich in Protein: Shrimp provide a high-quality protein source, aiding muscle repair and growth.
  • Low in Calories: This dish is relatively low in calories while being filling, great for weight management.
  • Customizable for Diets: Easily adapt for gluten-free, dairy-free, or low-carb diets by swapping ingredients.

Essential Equipment for Cooking

To ensure you have everything you need, here’s a quick list of the essential equipment:

  • Medium Saucepan: For cooking couscous and broth.
  • Large Skillet: Ideal for sautéing shrimp and mixing everything together.
  • Measuring Cups and Spoons: To ensure accurate ingredient amounts.
  • Fork: For fluffing couscous.

Serving Suggestions

Once your dish is ready, consider these serving ideas:

  • Garnish: Top with extra fresh parsley or a sprinkle of feta cheese for added flavor.
  • Pair with Wine: A chilled white wine like Sauvignon Blanc complements the Mediterranean flavors beautifully.
  • Accompanying Sides: Serve alongside a light salad or roasted vegetables for a complete meal.

In Conclusion

This couscous with shrimp recipe is a delightful way to bring the taste of the Mediterranean to your home. With its vibrant flavors and easy preparation, it’s sure to become a favorite in your weeknight dinner rotation. Remember, cooking is about enjoying the process and experimenting with flavors, so don’t hesitate to make this dish your own. Happy cooking!

Couscous with Shrimp

Prep Time 10 minutes
Cook Time 15 minutes
Total Time 25 minutes
Servings 4 servings
Calories 350
A quick and flavorful dish combining fluffy couscous with succulent shrimp, fresh tomatoes, and herbs.

Ingredients

Grains

  • 1 cup couscous
  • 1 cup chicken or vegetable broth

Oils

  • 1 tablespoon olive oil

Seafood

  • 1 lb shrimp, peeled and deveined

Vegetables & Herbs

  • 2 cloves garlic, minced
  • 1/2 teaspoon smoked paprika
  • 1/4 teaspoon red pepper flakes (optional)
  • to taste Salt and pepper
  • 1/2 cup cherry tomatoes, halved
  • 1/4 cup chopped fresh parsley
  • 1 tablespoon lemon juice
  • Zest of 1 lemon lemon zest

Instructions 

  • Bring broth to a boil, stir in couscous and 1/2 tablespoon olive oil. Cover and let sit for 5 minutes.
  • Fluff couscous with a fork and set aside. In a skillet, heat remaining olive oil, cook garlic for 30 seconds.
  • Add shrimp, paprika, red pepper flakes, salt, and pepper. Sauté 3-5 minutes until pink and cooked.
  • Stir in cherry tomatoes and cook for 1-2 minutes until slightly softened.
  • Combine couscous with shrimp mixture, stir in lemon juice, zest, and parsley. Adjust seasoning and serve warm.

Notes

For extra flavor, add a squeeze of lemon before serving.
Calories: 350kcal
Cost: $12
Course: Main Course
Cuisine: Mediterranean
Keyword: Seafood

Indulge in Comfort with Creamy Garlic Shrimp Over Mashed Potatoes

Welcome to a culinary adventure that combines the rich, savory flavors of creamy garlic shrimp with the comforting texture of fluffy mashed potatoes. This dish is not just a meal; it’s a celebration of home cooking that transforms ordinary evenings into delightful experiences. In this guide, we’ll explore everything you need to know to make this dish a standout on your dinner table.

Why You’ll Love This Recipe

This recipe for creamy garlic shrimp over mashed potatoes is a true crowd-pleaser for several reasons:

  • Quick Preparation: Ready in just 30 minutes, making it perfect for busy weeknights.
  • Rich, Flavorful Sauce: The creamy garlic sauce elevates the shrimp, making each bite a burst of flavor.
  • Comfort Food Classic: The combination of shrimp and mashed potatoes is a comforting classic that never fails to satisfy.
  • Versatile Pairing: Serve it with rice, pasta, or even sautéed vegetables for a delightful twist.
  • Easy to Customize: With a few simple swaps, you can adapt this dish to suit your taste or dietary needs.

Ingredients You’ll Need

Let’s break down the ingredients for this delicious dish, along with some helpful substitutions.

For the Shrimp:

  • 1 lb large shrimp: Peeled and deveined; feel free to use medium or jumbo shrimp based on your preference.
  • 2 tablespoons olive oil: For cooking the shrimp; can be swapped with butter for a richer flavor.
  • 1 teaspoon paprika: Adds a lovely warmth and color; cayenne can be used for heat.
  • 1 teaspoon garlic powder: Enhances the garlic flavor; fresh minced garlic can be used instead.
  • Salt and pepper: To taste; always season your shrimp well for flavor.

For the Creamy Garlic Sauce:

  • 2 tablespoons butter: Provides richness and helps in sautéing the garlic.
  • 4 cloves garlic, minced: Fresh garlic is key for that robust flavor.
  • 1 cup heavy cream: For a luxuriously creamy sauce; half-and-half can be a lighter alternative.
  • ½ cup grated Parmesan cheese: Adds depth and nuttiness; nutritional yeast is a great vegan substitute.
  • 1 teaspoon Dijon mustard (optional): For a hint of tang; omit if you prefer a milder sauce.

For the Mashed Potatoes:

  • 2 lbs potatoes: Peeled and cubed; Yukon Gold or Russet potatoes work best.
  • ½ cup warm milk: Ensures creamy mashed potatoes; you can use almond milk or any milk of choice.
  • ¼ cup butter: For richness; olive oil is a lighter option.
  • Salt: To taste; don’t forget to season your potatoes!

How to Make Creamy Garlic Shrimp Over Mashed Potatoes

Juicy, sautéed garlic shrimp on a bed of smooth mashed potatoes.

Let’s dive into the steps to make this comforting dish.

Step 1: Make the Mashed Potatoes

Boil the cubed potatoes in salted water for about 15 minutes until fork-tender. Drain, return them to the pot, and mash with butter and warm milk until smooth. Season with salt and keep warm.

Step 2: Cook the Shrimp

Toss the shrimp with olive oil, paprika, garlic powder, salt, and pepper. In a large skillet over medium-high heat, sear the shrimp for 2-3 minutes per side until they turn pink. Remove from the skillet and set aside.

Step 3: Make the Creamy Garlic Sauce

In the same skillet, melt butter over medium heat. Add minced garlic and sauté for 1 minute. Pour in heavy cream, stir in Parmesan and Dijon mustard if using, then season with salt and pepper. Simmer for 3-5 minutes until the sauce slightly thickens.

Step 4: Assemble the Dish

Plate the warm mashed potatoes, top with the sautéed shrimp, pour over the creamy garlic sauce, and garnish with fresh thyme. Serve warm and enjoy!

Expert Tips for Success

To ensure your meal is a hit, consider these helpful tips:

  • Don’t Overcook the Shrimp: They’re done as soon as they turn pink and opaque. This prevents a rubbery texture.
  • Dry Shrimp Before Searing: Pat shrimp dry to achieve a golden crust during cooking.
  • Use Fresh Garlic: Fresh garlic provides a punch that garlic powder simply can’t match.
  • Warm Ingredients Matter: Using warm milk for mashed potatoes keeps them creamy and fluffy.
  • Experiment with Seasoning: Don’t hesitate to adjust spices based on your preferences.
  • Make it a Meal: Pair with a side salad or steamed vegetables for a complete dinner.
  • Save Time: Prep ingredients in advance for an even quicker cooking experience.
  • Garnish Creatively: Fresh herbs not only add flavor but also make your dish visually appealing.

Common Mistakes and Troubleshooting

Here are some common pitfalls and how to avoid them:

  • Too Much Liquid in Mashed Potatoes: If they’re too runny, add a bit more butter or cream to thicken them up.
  • Overcooked Shrimp: Always keep an eye on shrimp as they cook quickly. Remove them as soon as they turn pink.
  • Garlic Sauce Not Thickening: If the sauce is too thin, simmer it for a few more minutes to reduce.
  • Flavorless Potatoes: Don’t forget to season your mashed potatoes well with salt and butter.

Variations to Try

Mix things up with these variations:

  • Spicy Garlic Shrimp: Add crushed red pepper flakes to the sauce for a kick.
  • Herbed Mashed Potatoes: Stir in fresh herbs like chives or parsley for extra flavor.
  • Lemon Garlic Shrimp: Squeeze fresh lemon juice into the sauce for a bright, zesty finish.
  • Veggie-Loaded Dish: Add sautéed spinach or mushrooms to the sauce for added nutrition.

Storage and Make-Ahead Instructions

If you’re planning for a busy week, here’s how to store and reheat:

  • Storing Leftovers: Keep the shrimp, sauce, and mashed potatoes in airtight containers in the fridge for up to 3 days.
  • Reheating: Gently reheat the shrimp and sauce in a skillet over low heat. Add a splash of cream if it thickens too much.
  • Make-Ahead Option: Prepare the mashed potatoes in advance and reheat them before serving.

Frequently Asked Questions

Here are some common questions about this recipe:

  • Can I use frozen shrimp? Yes, just ensure they are fully thawed and patted dry before cooking.
  • Is this dish gluten-free? Absolutely! All ingredients are gluten-free unless you add something that contains gluten.
  • What can I substitute for heavy cream? You can use half-and-half or a non-dairy alternative like coconut cream.
  • How can I make this dish lighter? Use less butter and cream, and opt for cauliflower mash instead of potatoes.
  • What’s the best way to store leftovers? Refrigerate in airtight containers for up to 3 days. Reheat gently.
  • Can I make this dish vegetarian? Substitute shrimp with sautéed mushrooms or a plant-based protein.
  • How do I know when shrimp are cooked? They should be pink and opaque, taking about 2-3 minutes per side.
  • Can I add more vegetables? Yes! Try adding spinach, bell peppers, or asparagus for added nutrition.

Nutrition Tips and Dietary Adaptations

For a healthier take on this dish, consider these adaptations:

  • Low-Carb Option: Serve the creamy garlic shrimp over steamed broccoli or zucchini noodles.
  • Dairy-Free Version: Substitute heavy cream with coconut milk and use dairy-free butter.
  • Increase Fiber: Use sweet potatoes instead of regular potatoes for a nutritious twist.
  • Boost Protein: Add cooked lentils or chickpeas to the dish for extra protein.

Equipment Recommendations

Here’s what you’ll need to make this recipe:

  • Large Skillet: For cooking the shrimp and the sauce.
  • Potato Masher: To achieve those creamy mashed potatoes.
  • Measuring Cups and Spoons: For accurate ingredient measurements.
  • Cutting Board and Knife: For chopping the garlic and preparing the shrimp.

Serving Suggestions

This dish is best enjoyed warm. Here are some serving ideas:

  • Fresh Salad: Pair with a simple green salad for a light meal.
  • Crusty Bread: Serve with warm, crusty bread to soak up the delicious sauce.
  • White Wine: Enjoy with a glass of crisp white wine to complement the flavors.
  • Herb Garnish: Top with fresh parsley or basil for an added pop of color.

Conclusion: Your New Weeknight Hero

With its creamy, garlicky goodness, this dish is sure to become a staple in your kitchen. Not only is it simple to make, but it also delivers impressive flavor and satisfaction. So gather your ingredients, roll up your sleeves, and enjoy the process of creating this comforting meal that brings joy to your table. Happy cooking!

Creamy Garlic Shrimp Over Mashed Potatoes

Prep Time 15 minutes
Cook Time 20 minutes
Total Time 35 minutes
Servings 4 servings
Calories 650
A delicious and creamy seafood dish served over smooth mashed potatoes, perfect for a comforting dinner.

Ingredients

Mashed Potatoes

  • 2 lbs potatoes, peeled and cubed
  • ½ cup warm milk
  • ¼ cup butter

Shrimp

  • 1 lb large shrimp, peeled and deveined
  • 2 tablespoons olive oil
  • 1 teaspoon paprika
  • 1 teaspoon garlic powder
  • Salt and pepper Salt and pepper, to taste
  • 2 tablespoons butter
  • 4 cloves garlic, minced
  • 1 cup heavy cream
  • ½ cup grated Parmesan cheese
  • 1 teaspoon Dijon mustard (optional)
  • Salt and pepper Salt and pepper, to taste
  • Fresh leaves fresh thyme leaves for garnish

Instructions 

  • Boil potatoes in salted water for 15 minutes, then drain and mash with butter and warm milk until smooth. Keep warm.
  • Toss shrimp with olive oil, paprika, garlic powder, salt, and pepper. Sear in a skillet for 2-3 minutes per side until pink. Remove and set aside.
  • Melt butter in the same skillet, sauté garlic for 1 minute, then add heavy cream, Parmesan, and Dijon if using. Season with salt and pepper, simmer until slightly thickened.
  • Plate mashed potatoes, top with shrimp, pour sauce over, and garnish with thyme. Serve warm.

Notes

For extra flavor, add a squeeze of lemon or chopped parsley before serving.
Calories: 650kcal
Cost: $15
Course: Main Course
Cuisine: American
Keyword: shrimp

If you’re looking for a dinner that’s quick, easy, and bursting with flavor, look no further than these Grilled Shrimp Bowls with Avocado and Corn. In under 30 minutes, you can whip up a dish that not only satisfies your hunger but also excites your taste buds. This recipe combines the succulent taste of grilled shrimp with the freshness of corn, creamy avocado, and vibrant salsa, making it perfect for busy weeknights or casual gatherings. Let’s dive in and discover how to make this delicious meal!

Why You’ll Love This Recipe

  • Quick preparation: This grilled shrimp bowl takes only about 30 minutes from start to finish, perfect for those busy evenings.
  • Healthy ingredients: Packed with protein from shrimp, healthy fats from avocado, and fiber from corn, this bowl is both nutritious and filling.
  • Customizable: Tailor this dish to your taste by swapping ingredients or adjusting spice levels—there’s no wrong way to build your bowl!
  • Flavor explosion: The combination of smoky grilled shrimp and tangy lime juice enhances every bite, ensuring an unforgettable meal.
  • Meal prep friendly: Prepare components in advance for a quick assembly during the week—perfect for meal preppers!

Ingredients Breakdown

Let’s gather everything you need for this amazing grilled shrimp bowl:

  • Shrimp: 2 lb large shrimp, peeled and deveined with tails on. You can use frozen shrimp; just be sure to thaw and pat dry.
  • Vegetable oil: 2 tbsp for grilling. This helps prevent the shrimp from sticking to the grill.
  • Salt: 1 1/4 tsp for seasoning the shrimp and enhancing flavors.
  • Smoked paprika: 1 tsp provides a rich, smoky flavor profile.
  • Barbecue sauce: 1 cup, preferably Sweet Baby Ray’s for its excellent glaze.
  • Skewers: 4, soaked in water for about 30 minutes if using wooden skewers.
  • Mayonnaise: 1/2 cup, creates a creamy base for your sauce.
  • Sriracha: 2 tbsp for a spicy kick in the creamy sauce.
  • Lime juice: 2 tbsp adds brightness and acidity.
  • Avocado: 2, diced into 1/2-inch cubes for creaminess.
  • Corn: 3 ears, grilled and cut off the cob for sweetness and crunch.
  • Cilantro: 1/4 cup, chopped for freshness.
  • Red onion: 1/4 cup, finely diced for a bite.
  • Olive oil: 2 1/2 tbsp for the corn salad—extra virgin is best.
  • Black pepper: 1/2 tsp to taste.
  • Queso fresco: 1/2 cup, crumbled for a salty finish.
  • Couscous: 4 cups, fluffed with a fork to prevent clumping.
  • Cherry tomatoes: 2 cups, halved or quartered for juicy sweetness.
  • Lime wedges: 1 lime, cut into wedges for serving—perfect for squeezing over the top!

Step-by-Step Preparation Guide

Step 1: Prepare the Shrimp

Start by marinating the shrimp. In a bowl, combine the shrimp, vegetable oil, salt, smoked paprika, and half of the barbecue sauce. Toss until the shrimp are evenly coated. Let them marinate for about 10 minutes while you prepare other components.

Step 2: Grill the Corn

While the shrimp is marinating, preheat your grill or grill pan to medium-high heat. Grill the corn for about 10-15 minutes, turning occasionally until charred and cooked through. Once grilled, allow it to cool slightly before cutting the kernels off the cob.

Step 3: Make the Creamy Sauce

In a small bowl, mix the mayonnaise, sriracha, lime juice, and a pinch of salt. Adjust to taste and set aside.

Step 4: Skewer and Grill the Shrimp

Preheat your grill to high heat. Thread the marinated shrimp onto skewers. Grill the shrimp for about 2-3 minutes on each side or until they are opaque and slightly charred. Brush with the remaining barbecue sauce during the last minute of grilling for extra flavor.

Step 5: Assemble Your Bowl

In a large bowl, combine the grilled corn, avocado, cilantro, and red onion. In a separate bowl, fluff the couscous with a fork. To serve, place a scoop of couscous in each bowl, top with the corn salad, and then add the grilled shrimp. Drizzle with the creamy sauce and sprinkle with queso fresco and cherry tomatoes. Serve with lime wedges on the side.

Pro Tips for Perfect Grilled Shrimp Bowls

Juicy grilled shrimp bowl from the side, showcasing avocados, corn, and a barbecue glaze.
  • Don’t overcook the shrimp: Grill the shrimp just until they are opaque and slightly firm to the touch to maintain their juicy texture.
  • Choose the right shrimp: Opt for large or jumbo shrimp for the best results. Smaller shrimp can overcook quickly and lose flavor.
  • Customize your sauce: Feel free to experiment with different sauces, like a cilantro-lime vinaigrette or a garlic herb sauce for a fresh twist.
  • Prep ahead: Marinate the shrimp and prepare the corn salad a day in advance for a quick assembly on the day of serving.
  • Use a grill pan indoors: If you don’t have an outdoor grill, a grill pan on your stovetop can achieve similar results.
  • Season well: Don’t skip seasoning the shrimp and corn; it elevates the overall flavor of the dish.
  • Vary the toppings: Add toppings like sliced jalapeños, radishes, or different cheeses to personalize your bowl.
  • Make it a grain bowl: Swap couscous for quinoa or rice for a hearty alternative.

Common Mistakes and Troubleshooting

  • Overcooking shrimp: Keep a close eye on shrimp as they grill. They cook quickly and can become rubbery if overdone.
  • Not soaking skewers: If using wooden skewers, always soak them in water for 30 minutes prior to grilling to prevent burning.
  • Not seasoning enough: Don’t skimp on seasoning the shrimp and corn; they need flavor to shine through.
  • Skipping the marinating step: Marinating enhances the flavor of the shrimp significantly, so don’t skip this step!
  • Using ripe avocados: Ensure your avocados are at the perfect ripeness—not too hard or overly soft—to keep them flavorful and intact.

Variations on This Grilled Shrimp Bowl

  • Spicy Shrimp Bowl: Add more sriracha to the creamy sauce or toss the shrimp in a spicy marinade before grilling.
  • Vegetarian Option: Substitute shrimp with grilled tofu or portobello mushrooms for a satisfying vegetarian bowl.
  • Mexican Street Corn Style: Add crumbled cotija cheese and chili powder to the corn salad for a zesty twist.
  • Herbed Couscous: Mix in fresh herbs like parsley or basil into the couscous for added flavor.

Storage and Make-Ahead Instructions

This grilled shrimp bowl is perfect for meal prep! You can prepare individual components in advance:

  • Grilled shrimp: Store in an airtight container in the fridge for up to 3 days. Reheat gently in a skillet.
  • Corn salad: Can be made a day ahead. Store in the fridge to maintain freshness.
  • Couscous: Cook it ahead of time and store in the fridge in a sealed container for up to 5 days.

Frequently Asked Questions

  • Can I use frozen shrimp? Yes! Just be sure to thaw and pat dry before marinating.
  • What can I substitute for couscous? Quinoa, brown rice, or even zucchini noodles work great!
  • How do I make this meal spicier? Increase the amount of sriracha in the sauce or add diced jalapeños to the corn salad.
  • Can I grill shrimp without skewers? Absolutely! Just place the shrimp directly on the grill or in a grill basket.
  • How long can I store leftovers? Leftovers can be kept in the fridge for up to 3 days. Reheat gently to avoid overcooking.
  • Can I prepare this bowl ahead of time? Yes! You can prep the shrimp, corn salad, and couscous in advance for quick assembly.
  • What other vegetables can I add? Feel free to add bell peppers, zucchini, or even shredded carrots for extra crunch.
  • Is this recipe gluten-free? Yes! Just ensure the barbecue sauce is gluten-free and use quinoa or rice instead of couscous.

Nutritional Tips and Dietary Adaptations

This grilled shrimp bowl is not only delicious but also nutritious! Here are some tips to keep it healthy:

  • Lean protein: Shrimp is a low-calorie source of protein packed with essential nutrients.
  • Healthy fats: The avocado adds heart-healthy fats, making this meal balanced and satisfying.
  • Fiber-rich: Corn and vegetables add fiber to your meal, promoting digestive health.
  • Customizable for diets: Easily adapt this recipe to fit paleo, keto, or Mediterranean diets by adjusting ingredients.

Equipment Recommendations

For the best grilling results, here’s what you’ll need:

  • Grill or Grill Pan: A reliable grill or grill pan is essential for that perfect charred flavor.
  • Skewers: Wooden or metal skewers for easy grilling of shrimp.
  • Mixing Bowls: Several bowls to mix and prepare ingredients.
  • Spatula or Tongs: For flipping the shrimp on the grill.
  • Measuring Cups and Spoons: For accurate ingredient measurements.

Serving Suggestions

This grilled shrimp bowl is delicious on its own, but here are some ideas to elevate your meal:

  • Serve with tortilla chips: Add a side of crunchy tortilla chips for a delightful crunch.
  • Top with fresh lime: Squeeze extra lime juice over the bowl for a zesty kick.
  • Pair with a refreshing drink: A cold margarita or iced tea complements the flavors beautifully.
  • Offer toppings: Set out additional toppings like sour cream, guacamole, or extra salsa for guests to customize their bowls.

Embrace cooking as an adventure! This Grilled Shrimp Bowl with Avocado and Corn is not just a meal—it’s an experience. With its vibrant colors, fresh flavors, and a satisfying crunch, you’ll feel like a culinary champion. So gather your ingredients, fire up the grill, and let’s make some magic happen in the kitchen!

Easy Grilled Shrimp Bowl with Avocado and Corn

Prep Time 20 minutes
Cook Time 15 minutes
Total Time 35 minutes
Servings 4 servings
Calories 650
A vibrant and flavorful bowl combining grilled shrimp, fresh avocado, sweet corn, and a zesty sauce for a quick and satisfying meal.

Ingredients

Protein

  • 2 lb shrimp peeled and deveined with tails left on

Vegetables & Fruits

  • 1.25 tsp salt
  • 1 tsp smoked paprika
  • 1 cup barbecue sauce (Sweet Baby Ray's recommended)
  • 2 skewers skewers
  • 0.5 cup mayonnaise (Hellmann's preferred)
  • 2 tbsp sriracha
  • 2 tbsp lime juice
  • 0.25 tsp salt

Fruits & Vegetables

  • 2 avocados diced into 0.5-inch cubes
  • 3 ears corn (grilled or boiled)
  • 0.25 cup cilantro (chopped)
  • 0.25 cup red onion (finely diced)
  • 2 tbsp lime juice
  • 2.5 tbsp olive oil (Goya Extra Virgin recommended)
  • to taste salt salt
  • 0.5 tsp black pepper
  • 0.25 cup queso fresco
  • 4 cups couscous (fluffed with a fork)
  • 2 cups cherry tomatoes (halved or quartered)
  • 0.25 cup fresh cilantro
  • 1 lime cut into wedges for serving

Instructions 

  • Marinate shrimp with salt, smoked paprika, and barbecue sauce. Thread onto skewers.
  • Grill shrimp until cooked through, about 3-4 minutes per side.
  • Cook corn ears until tender, then cut kernels off the cob.
  • Prepare sauce by mixing mayonnaise, sriracha, lime juice, salt, and cilantro.
  • Assemble bowls with couscous, grilled shrimp, corn, avocado, cherry tomatoes, queso fresco, and cilantro. Serve with lime wedges.

Notes

For extra flavor, marinate the shrimp longer and add a squeeze of lime before serving.
Calories: 650kcal
Cost: $15
Course: Main Course
Cuisine: American
Keyword: Seafood

Elevate Your Weeknight Dinners with Zesty Chickpea Wraps

If you’re on the lookout for a quick and delicious meal that bursts with flavor, you’ve come to the right place! These lemon garlic marinated chickpea wraps are not only easy to prepare but also incredibly satisfying. Packed with protein and fresh ingredients, this recipe is perfect for busy weeknights or casual gatherings. Let’s dive into the world of vibrant flavors and discover why these wraps should be on your dinner menu.

Why You’ll Love This Recipe

This recipe is a game-changer for anyone looking to enjoy a healthy yet flavorful meal. Here are just a few reasons why you’ll fall in love with these wraps:

  • Quick Preparation: With minimal cooking required, these wraps can be on your table in under 30 minutes.
  • Wholesome Ingredients: Made with protein-rich chickpeas and fresh veggies, these wraps are as nutritious as they are delicious.
  • Vibrant Flavors: The combination of lemon, garlic, and fresh herbs creates a zesty flavor explosion that’s sure to impress.
  • Customizable: Tailor the recipe to your taste by adding your favorite vegetables or herbs.
  • Perfect for Meal Prep: These wraps store well, making them an excellent option for lunchboxes or make-ahead dinners.

Ingredients You’ll Need

Gathering the right ingredients is essential for crafting the best marinated chickpea wraps. Here’s what you’ll need along with some substitution ideas:

  • Chickpeas: 2 (15 oz) cans of chickpeas, rinsed and drained. You can also use cooked dried chickpeas.
  • Cucumber: 1 cup diced. Substitute with bell peppers for added sweetness.
  • Cherry Tomatoes: 1 cup quartered. Grape tomatoes work just as well.
  • Red Onion: 1/4 cup finely diced. For a milder flavor, use green onions.
  • Fresh Parsley: 1/4 cup finely chopped. You can swap it for cilantro if preferred.
  • Fresh Mint or Basil: 2 tbsp, finely chopped. Both herbs add a refreshing touch.
  • Extra Virgin Olive Oil: 2 tbsp. Use avocado oil for a different flavor profile.
  • Dijon Mustard: 1 tsp. For a spicy kick, try whole grain mustard.
  • Lemon Juice and Zest: Juice and zest of 1 medium lemon. If you prefer a milder flavor, use lime instead.
  • Apple Cider Vinegar: 1 tbsp. You can use white vinegar if necessary.
  • Garlic: 2 cloves, crushed. Garlic powder can be used in a pinch.
  • Dried Oregano, Thyme, and Basil: 1/2 tsp each. Feel free to use Italian seasoning for convenience.
  • Maple Syrup or Agave: 2 tsp. Honey is a great alternative if you’re not vegan.
  • Salt: To taste.
  • Whole Grain Pitas or Wraps: For serving. Lettuce wraps are a low-carb option.
  • Hummus or Lemon Garlic White Bean Spread: Optional, for added creaminess.

How to Make Lemon Garlic Marinated Chickpea Wraps

Follow these simple steps to prepare your wraps:

  1. In a large mixing bowl, add the chickpeas, cucumbers, tomatoes, red onion, parsley, and mint. Sprinkle with a pinch of salt.
  2. In a separate jar, combine the olive oil, Dijon mustard, apple cider vinegar, garlic, oregano, thyme, basil, maple syrup, and a pinch of salt. Shake well to mix.
  3. Pour the dressing over the chickpea mixture and toss gently to combine. Cover and refrigerate for up to one hour, stirring occasionally.
  4. When ready to serve, place a wrap or pita on a flat plate and spread with your favorite spread. Top with the marinated chickpea salad and enjoy!

Pro Tips for Making the Best Wraps

To ensure your wraps are as delicious as possible, keep these expert tips in mind:

  • Marinate Longer: For maximum flavor, allow the chickpeas to marinate for at least one hour, or even overnight if you can.
  • Freshness is Key: Use the freshest ingredients possible for the best taste and texture.
  • Taste and Adjust: Always taste your dressing before adding it to ensure it meets your flavor preferences.
  • Layer Wisely: When assembling, layer ingredients to keep the wrap from getting soggy.
  • Experiment with Spices: Don’t hesitate to add spices or hot sauce for extra flavor.
  • Serve with Sides: Pair your wraps with a light salad or a side of fruit for a balanced meal.
  • Use Leftovers Creatively: Leftover chickpea salad can be enjoyed on its own or as a topping for grain bowls.
  • Keep Ingredients Separate: If meal prepping, store the dressing and salad separately to maintain freshness.

Common Mistakes and Troubleshooting

Here are some common pitfalls to avoid when making these wraps:

  • Over-Marinating: While marinating is essential, too long can make the chickpeas mushy.
  • Ignoring Salt: Insufficient seasoning can lead to bland flavors, so don’t skip the salt.
  • Skipping Fresh Herbs: Fresh herbs significantly enhance flavor; don’t omit them!
  • Assembling Too Early: If not eaten right away, assemble wraps just before serving to prevent sogginess.

Variations to Try

If you want to switch things up, here are some fun variations to consider:

  • Spicy Chickpea Wraps: Add diced jalapeños or a dash of cayenne pepper to the chickpea mixture for a spicy kick.
  • Greek-Inspired Wraps: Incorporate feta cheese, olives, and a drizzle of tzatziki sauce.
  • Asian Fusion Wraps: Swap the dressing for a sesame-ginger vinaigrette and add shredded carrots and cabbage.
  • Nutty Flavor: Add a handful of toasted nuts or seeds for extra crunch and nutrition.

Make Ahead and Storage

Planning ahead? Here’s how to store and prepare your wraps:

  • Store marinated chickpeas in an airtight container in the fridge for up to 3 days.
  • Prepare wraps without the spread and store components separately to maintain freshness.
  • Wraps can be assembled and stored in the fridge for up to 1 day, but it’s best to eat them fresh.

Frequently Asked Questions

Got questions? Here are some answers to common inquiries about these delicious wraps:

  • Can I use dried chickpeas instead of canned? Yes! Just soak and cook them beforehand for the best results.
  • How long can I keep leftovers? Leftover chickpea salad can be stored in the fridge for 3-4 days.
  • Can I freeze the chickpea mixture? It’s not recommended as it may change texture, but you can freeze cooked chickpeas.
  • What can I serve with these wraps? Pair with a green salad, roasted vegetables, or a light soup.
  • Are these wraps vegan? Yes! All ingredients in this recipe are plant-based.
  • Can I add cheese to the wraps? Absolutely! Feta or goat cheese would be delicious additions.
  • What if I don’t like garlic? You can reduce the amount or leave it out entirely for a milder flavor.
  • How can I make these gluten-free? Use gluten-free wraps or lettuce leaves as a substitute.

Nutritional Benefits and Dietary Adaptations

These chickpea wraps are not only delicious but also packed with health benefits:

  • High in Protein: Chickpeas are a fantastic source of plant-based protein, making these wraps satisfying and nourishing.
  • Rich in Fiber: With plenty of vegetables, these wraps provide dietary fiber essential for digestive health.
  • Low in Saturated Fat: Using olive oil and fresh ingredients keeps the fat content healthy.
  • Customizable for Diets: Easily adaptable for vegan, vegetarian, and gluten-free diets.

Equipment Recommendations

To make these chickpea wraps, you’ll need a few essential kitchen tools:

  • Mixing Bowls: Use various sizes for combining ingredients smoothly.
  • Jar with a Lid: Ideal for shaking the dressing ingredients together.
  • Cutting Board and Knife: Essential for chopping vegetables and herbs.
  • Measuring Cups and Spoons: Accurate measurements ensure the best flavor in your wraps.

Serving Suggestions

These wraps are versatile and can be served in various ways:

  • Plated with Sides: Serve alongside a light salad or a bowl of soup for a complete meal.
  • Picnic-Friendly: Pack them for picnics or lunches for an easy, portable meal.
  • Garnished with Extra Herbs: Top with additional herbs or a sprinkle of feta for added flair.

Wrap Up Your Culinary Adventure!

Now that you have all the details, it’s time to roll up your sleeves and get cooking! These lemon garlic marinated chickpea wraps are more than just a recipe; they are a way to make your weeknight dinners exciting and nutritious. Remember, cooking is about having fun and experimenting—don’t hesitate to put your twist on this delicious dish. Happy cooking!

Lemon Garlic Marinated Chickpea Wraps

Prep Time 15 minutes
Total Time 15 minutes
Servings 4 servings
Calories 350
Enjoy these flavorful chickpea wraps with fresh vegetables and a zesty lemon garlic dressing, perfect for a quick and healthy meal.

Ingredients

Canned Chickpeas

  • 30 oz cans of chickpeas (rinsed and drained)
  • 1 cup cucumber (diced)
  • 1 cup cherry tomatoes (quartered)
  • 0.25 cup red onion (finely diced)
  • 0.25 cup fresh parsley (finely chopped)
  • 2 tbsp fresh mint or basil (finely chopped)
  • 2 tbsp extra virgin olive oil
  • 1 tsp Dijon mustard
  • 1 medium lemon (juice and zest)
  • 1 tbsp apple cider vinegar
  • 2 cloves garlic (crushed)
  • 0.5 tsp dry oregano
  • 0.5 tsp dry thyme
  • 0.5 tsp dry basil
  • 2 tsp maple syrup or agave
  • to taste salt Salt

Whole Grain Pitas or Wraps

  • 4 pieces Whole Grain Pitas or Wraps

Hummus or Lemon Garlic White Bean Spread

Instructions 

  • Combine chickpeas, cucumber, tomatoes, red onion, parsley, and mint in a bowl, then season with a pinch of salt.
  • In a jar, whisk together olive oil, mustard, apple cider vinegar, garlic, oregano, thyme, basil, maple syrup, and a pinch of salt to make the dressing.
  • Pour the dressing over the chickpea mixture and toss to coat. Chill in the fridge for up to 1 hour, stirring occasionally.
  • Spread hummus or lemon garlic spread on pitas or wraps, then top with the chickpea salad. Roll up and serve.

Notes

For extra flavor, add a squeeze of fresh lemon before serving.
Calories: 350kcal
Cost: $10
Course: Dinner, Lunch
Cuisine: Mediterranean
Keyword: Chickpeas, Vegetarian