Author

Steven

Browsing

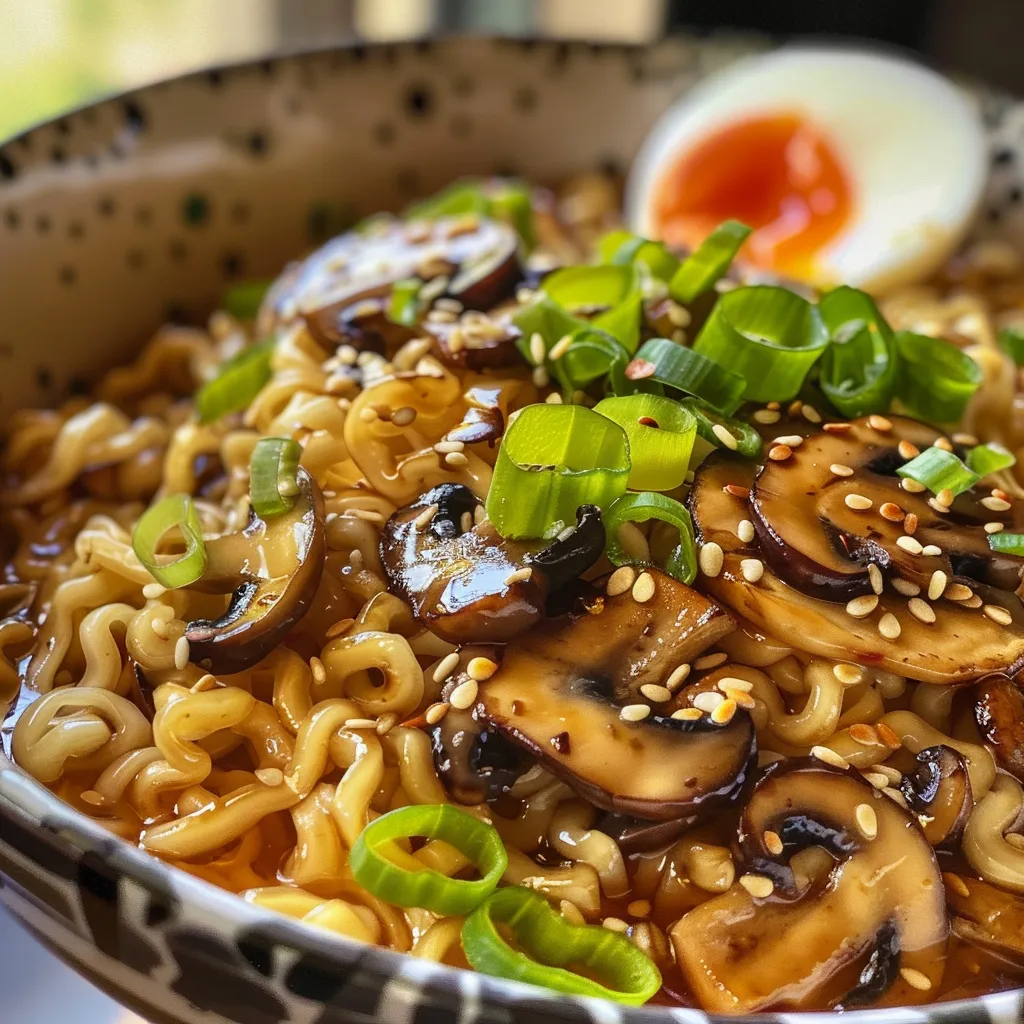
Transform Your Weeknight Dinners with Creamy Miso Mushroom Pasta

Welcome to a delightful culinary journey where simplicity meets flavor! In this article, we’ll explore how to create a rich and creamy miso mushroom pasta that’s perfect for busy weeknights. You’ll find a comprehensive guide that breaks down every step, ensuring you feel confident in the kitchen. Let’s dive into this delicious recipe that combines earthy mushrooms, savory miso, and a hint of brightness from lemon!

Why You’ll Love This Recipe

This creamy miso mushroom pasta is not just a meal; it’s an experience! Here are five reasons why you’ll adore this dish:

  • Quick and Easy: Ready in under 30 minutes, this recipe is perfect for those hectic weeknights when you want something delicious without spending hours in the kitchen.
  • Flavor-Packed: The combination of miso, earthy mushrooms, and fresh thyme creates a depth of flavor that will elevate your dinner game.
  • Customizable: Whether you’re a vegetarian or have specific dietary needs, this recipe offers various substitutions to suit your preferences.
  • Comforting and Satisfying: Rich creamy textures combined with al dente pasta make this dish a comforting choice that’s sure to please everyone at the table.
  • Perfect for Leftovers: This dish tastes even better the next day, making it a great option for meal prep or lunch the following day!

Ingredients Breakdown

Let’s gather our ingredients for this luscious dish. Here’s what you’ll need:

  • 2 tablespoons Olive oil: For sautéing the mushrooms and garlic.
  • 2 tablespoons Butter: Adds richness to the sauce.
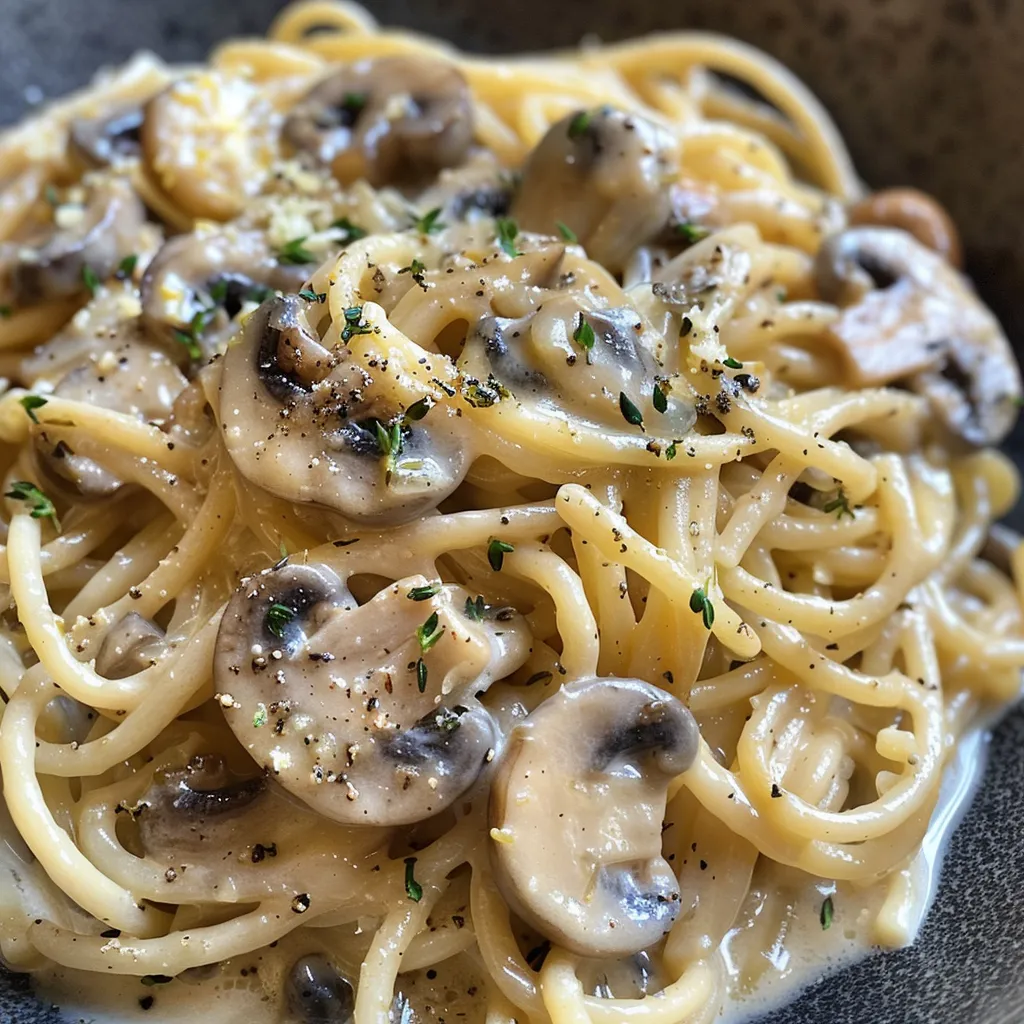
  • 270 grams Mushrooms (sliced, preferably shiitake or cremini): They provide a hearty texture and umami flavor.
  • 3-4 cloves Garlic (minced): For aromatic depth.
  • 2 tablespoons Fresh thyme leaves: Adds a fresh, herbal note.
  • 0.75 cup Single cream: Creates the creamy sauce. Substitute with plant-based cream for a vegan option.
  • 0.5-1 tablespoon White miso paste: The star ingredient that brings umami and depth.
  • 40 grams Parmesan (finely grated): A finishing touch for added flavor. Omit for a vegan version.
  • 0.25 teaspoon Black pepper: To enhance the flavors.
  • 2 tablespoons Fresh lemon juice: For a burst of brightness.
  • 1 tablespoon Lemon zest: Adds an aromatic citrus note.

How to Make Creamy Miso Mushroom Pasta

Side view of a bowl filled with creamy miso mushroom pasta, topped with grated Parmesan.

Now, let’s get cooking! Follow these simple steps to create your delicious pasta.

Step 1: Cook the Pasta

In a large pot of salted boiling water, cook your pasta according to package instructions until al dente. Reserve about 1 cup of the pasta water before draining.

Step 2: Sauté the Mushrooms

In a large skillet, heat the olive oil and butter over medium heat. Add the sliced mushrooms and sauté until they are golden brown and tender, about 5-7 minutes. Stir in the minced garlic and half of the thyme leaves, cooking for an additional minute until fragrant.

Step 3: Prepare the Sauce

Add the white miso paste to the skillet, stirring to coat the mushrooms. Then, pour in the single cream and mix until fully incorporated. If the sauce is too thick, add a little reserved pasta water to reach your desired consistency.

Step 4: Combine and Serve

Once the sauce is creamy and well-mixed, add the cooked pasta to the skillet. Toss everything together, ensuring every bite is coated in that luscious sauce. Finish with black pepper, lemon juice, lemon zest, and the remaining thyme leaves. Serve hot, topped with grated Parmesan if desired.

Pro Tips for Perfect Pasta

Here are some expert insights to elevate your pasta game:

  • Don’t Overcook the Pasta: Aim for al dente for the best texture. It will continue cooking in the sauce!
  • Choose Fresh Ingredients: Fresh thyme and quality mushrooms will significantly enhance the flavor.
  • Adjust the Creaminess: Feel free to add more cream or pasta water based on your preference for sauce consistency.
  • Experiment with Miso: Different types of miso (white, yellow, red) can impart different flavors; try them all!
  • Make it Vegan: Substitute the cream and Parmesan with plant-based alternatives for a delicious vegan version.
  • Save Some Pasta Water: This starchy water is a great way to adjust your sauce’s thickness without losing flavor.
  • Fresh Herbs Matter: Fresh thyme can be replaced with basil or parsley if you prefer!
  • Mind the Heat: Keep the heat on medium to avoid burning the garlic and miso.

Common Mistakes to Avoid

Here are a few pitfalls to watch out for:

  • Overcooking the Mushrooms: They should be golden brown but still firm. If they’re mushy, you’ve overdone it!
  • Skipping the Pasta Water: This is key for adjusting the sauce. Don’t forget to reserve some!
  • Not Tasting as You Go: Always taste your dish before serving to adjust seasoning, especially with miso, which can be salty.

Delicious Variations

Feel free to get creative! Here are some fun variations:

  • Spicy Miso Mushroom Pasta: Add a pinch of red pepper flakes for a kick.
  • Truffle Miso Mushroom Pasta: Drizzle with truffle oil just before serving for an indulgent twist.
  • Veggie-Packed Pasta: Toss in some spinach or kale for extra nutrition and color.
  • Cheesy Miso Mushroom Pasta: Use a mix of Parmesan and pecorino for a more complex flavor profile.

Storage and Make-Ahead Instructions

This pasta dish is perfect for meal prep! Here’s how to store it:

  • Refrigeration: Store leftover pasta in an airtight container in the fridge for up to 3 days.
  • Freezing: You can freeze the sauce separately for up to 2 months. Cook fresh pasta when ready to eat.
  • Reheating: Gently reheat on the stove with a splash of water or cream to bring back the creamy texture.

Frequently Asked Questions

Here are some common questions about making creamy miso mushroom pasta:

  • Can I use other types of mushrooms? Yes! Feel free to mix and match your favorites, such as portobello or button mushrooms.
  • Is this recipe gluten-free? You can use gluten-free pasta to make this dish gluten-free.
  • What can I serve with this pasta? It pairs wonderfully with a side salad or garlic bread.
  • How can I adjust the creaminess? Add more cream or pasta water for a thinner sauce, or reduce it for a thicker consistency.
  • Can I make this vegan? Absolutely! Substitute cream and cheese with plant-based options.
  • How long will leftovers last? Store in the refrigerator for up to 3 days.
  • Can I add protein to this dish? Yes! Grilled chicken or tofu works great for added protein.
  • Is miso paste healthy? Yes! Miso is rich in probiotics and has numerous health benefits.

Nutrition Tips and Dietary Adaptations

This pasta dish can be adapted to fit various dietary needs:

  • Low-Calorie Option: Use whole grain or chickpea pasta for added fiber and protein.
  • Heart-Healthy: Use olive oil instead of butter and reduce the amount of cream.
  • High-Protein: Add cooked lentils or chickpeas for a protein boost.

Essential Equipment

To make this dish, you will need:

  • Large Pot: For boiling your pasta.
  • Skillet: A large skillet works best for sautéing the mushrooms and mixing everything together.
  • Measuring Cups and Spoons: For precise ingredient measurements.
  • Cutting Board and Knife: For chopping your ingredients.

Serving Suggestions

To serve your creamy miso mushroom pasta:

  • Garnish with Fresh Herbs: Top with extra thyme or parsley for a fresh touch.
  • Serve with a Side Salad: A light, crunchy salad complements the creaminess of the pasta nicely.
  • Pair with Wine: A light white wine or sparkling water enhances the meal.

In conclusion, this creamy miso mushroom pasta is a must-try for anyone looking to elevate their weeknight dinners. With its rich flavors, easy preparation, and flexibility, it’s destined to become a household favorite. Grab your ingredients, and let’s cook something delicious together!

Best Creamy Miso Mushroom Pasta

Prep Time 10 minutes
Cook Time 15 minutes
Total Time 25 minutes
Servings 4 servings
Calories 450
A rich and creamy mushroom pasta infused with miso and lemon for a flavorful vegetarian dish.

Ingredients

Oil & Butter

  • 2 tablespoons Olive oil
  • 2 tablespoons Butter

Mushrooms

  • 270 grams Mushrooms sliced not too thin

Garlic & Herbs

  • 3-4 cloves Garlic minced
  • 2 tablespoons Fresh thyme leaves divided

Cream & Miso

  • 0.75 cup Single cream or light cream
  • 0.5-1 tablespoon White miso paste

Cheese & Seasonings

  • 40 grams Parmesan finely grated
  • 0.25 teaspoon Black pepper

Lemon & Zest

  • 2 tablespoons Fresh lemon juice
  • 1 tablespoon Lemon zest

Instructions 

  • Heat olive oil and butter in a large skillet over medium heat. Add sliced mushrooms and cook until browned.
  • Add minced garlic and thyme, cook for 1 minute until fragrant.
  • Mix in grated Parmesan, lemon juice, and zest. Season with black pepper.
  • Serve immediately over pasta or with crusty bread.

Notes

Use fresh thyme for best flavor and adjust miso to taste.
Calories: 450kcal
Cost: $12
Course: Main Course
Cuisine: Fusion
Keyword: Mushrooms

Discover the Joy of Cooking: A Vibrant Vietnamese Chicken Noodle Bowl That’s a Breeze to Prepare

Welcome to a culinary journey where the delightful flavors of Vietnam come alive in your kitchen! This Vietnamese Chicken Noodle Bowl, or Bun Ga Nuong, is not only a feast for the senses but also incredibly easy to make. With fresh ingredients and a simple marinade, you can whip up this tantalizing dish for your family or friends, impressing them with your cooking skills. Let’s dive deeper into this recipe and explore all its wonderful aspects!

Why You’ll Love This Recipe

This recipe is perfect for busy weeknights, bringing together vibrant flavors and essential nutrients. Here are five reasons to love this Vietnamese Chicken Noodle Bowl:

  • Quick Preparation: This dish can be ready in under an hour, making it perfect for weeknight meals.
  • Flavorful Marinade: The chicken is marinated in a delicious blend of fish sauce, garlic, and spices, infusing it with authentic Vietnamese flavors.
  • Fresh Ingredients: Packed with fresh greens, cucumbers, and herbs, this bowl is a colorful addition to your dinner table.
  • Customizable: You can easily swap out ingredients to cater to dietary needs, ensuring everyone can enjoy it!
  • Healthy and Satisfying: With lean protein and plenty of veggies, this bowl is both nourishing and filling.

Ingredient Breakdown

Here’s what you’ll need to create this delicious Vietnamese Chicken Noodle Bowl:

  • 1.5 lbs Boneless, Skinless Chicken Thighs: Cut into 1/2-inch thick slices for tender, juicy bites.
  • 2 tbsp Fish Sauce: A key ingredient that adds depth and umami flavor to the dish.
  • 1 tbsp Soy Sauce: Enhances the savory profile of the marinade.
  • 1 tbsp Brown Sugar: Balances the saltiness of the fish sauce.
  • 1 tbsp Minced Garlic: Adds aromatic fragrance and flavor.
  • 1 tbsp Minced Shallot: Provides a subtle sweetness and depth.
  • 1 tsp Freshly Ground Black Pepper: Adds a touch of heat.
  • 1 tsp Sesame Oil (optional): For a nutty aroma.
  • 1/4 cup Granulated Sugar: Sweetness for the Nuoc Cham sauce.
  • 1/2 cup Warm Water: Helps dissolve the sugar in the dipping sauce.
  • 1/4 cup Fresh Lime Juice: Freshly squeezed from 1-2 limes for brightness.
  • 1 tbsp Rice Vinegar: Adds tanginess to the Nuoc Cham.
  • 1-2 cloves Garlic (for Nuoc Cham): Minced for extra flavor.
  • 1-2 small Red Chilies: Optional for heat; can use bird’s eye chilies.
  • 8 oz Dried Rice Vermicelli Noodles: The base of the noodle bowl.
  • 4 cups Mixed Fresh Greens: Lettuce, spring mix, or chopped romaine for crunch.
  • 1 large Cucumber: Julienned for freshness.
  • 1 cup Bean Sprouts: Rinsed for a crunchy texture.
  • 1 cup Shredded Carrots: Adds color and sweetness.
  • 1/2 cup Fresh Mint Leaves: Chopped for a refreshing taste.
  • 1/2 cup Fresh Cilantro: Chopped for aromatic flavor.
  • 1/4 cup Chopped Roasted Peanuts: For a crunchy garnish.
  • 2 tbsp Fried Shallots: Optional, adds a delicious crunch.

If you need substitutions, consider the following: Use chicken breasts instead of thighs for a leaner option or tofu for a vegetarian version. You can also swap rice vermicelli for gluten-free noodles if needed.

How to Make Vietnamese Chicken Noodle Bowl

A side angle photo of a colorful bowl of Bun Ga Nuong featuring grilled chicken and fresh greens.

Now that we have all the ingredients ready, let’s go step-by-step through the cooking process:

  1. Marinate the Chicken: In a medium bowl, combine the sliced chicken thighs with fish sauce, soy sauce, brown sugar, minced garlic, minced shallot, black pepper, and sesame oil if using. Toss well to coat the chicken evenly. Let marinate at room temperature for at least 30 minutes, or refrigerate for up to 4 hours for deeper flavor.
  2. Prepare the Nuoc Cham Sauce: In a small bowl, dissolve the granulated sugar in warm water. Stir in fish sauce, fresh lime juice, and rice vinegar. Add minced garlic and sliced chilies if using. Stir well and taste, adjusting for your preferred balance of sweet, sour, salty, and spicy. Set aside.
  3. Cook the Rice Vermicelli: Bring a large pot of water to a rolling boil. Add dried rice vermicelli noodles and cook according to package instructions (typically 3-5 minutes) until tender but still al dente. Drain the noodles in a colander and rinse with cold water to stop cooking and prevent sticking. Drain well and set aside.
  4. Cook the Chicken: Choose your preferred cooking method:
    • Grilling: Preheat an outdoor grill or grill pan to medium-high heat. Grill marinated chicken slices for 3-4 minutes per side until cooked through with nice char marks.
    • Air Frying: Preheat the air fryer to 375°F (190°C). Arrange chicken in a single layer in the basket, cooking in batches if necessary. Air fry for 10-15 minutes, flipping halfway through until golden brown.
    • Pan-Frying: Heat 1-2 tablespoons of oil in a large skillet over medium-high heat. Add chicken in a single layer, cooking in batches if needed. Cook for 3-4 minutes per side until browned and cooked through.
  5. Assemble the Noodle Bowls: Divide the rinsed and drained rice vermicelli noodles among 4 large serving bowls. Arrange fresh mixed greens, julienned cucumber, shredded carrots, and bean sprouts around the noodles. Top each bowl with warm, cooked chicken slices. Garnish with fresh mint leaves, cilantro, chopped roasted peanuts, and fried shallots if using.
  6. Serve: Serve immediately with the Nuoc Cham dressing on the side, allowing each person to pour as much as desired over their bowl and toss all ingredients together before enjoying.

Pro Tips for Perfecting Your Noodle Bowl

To elevate your cooking game, consider these expert insights:

  • Prep Ahead: Marinate the chicken the night before for enhanced flavor.
  • Fresh Ingredients: Use the freshest herbs and vegetables for the best results.
  • Texture Balance: Aim for a mix of crunchy and soft elements to excite your palate.
  • Adjusting Spice: Modify the number of chilies in the Nuoc Cham to control heat levels.
  • Protein Variety: Experiment with shrimp or tofu for a different flavor profile.
  • Cooking Techniques: Try different cooking methods for the chicken to find your favorite.
  • Garnish Generously: Don’t hold back on the garnishes—they add flavor and visual appeal!
  • Make It a Meal Prep: Pack individual servings for easy lunches throughout the week.

Common Mistakes and Troubleshooting

Here are some common pitfalls to avoid:

  • Overcooking the Chicken: Keep an eye on the cooking time to prevent dry chicken.
  • Skipping the Marinade: Don’t rush this step; it’s crucial for flavor.
  • Not Rinsing Noodles: Rinsing stops the cooking process and prevents sticking.
  • Too Much Dressing: Start with a little Nuoc Cham; you can always add more!

Variations to Try

Switch things up with these fun variations:

  • Spicy Chicken: Add sriracha or chili garlic sauce to the marinade for a kick.
  • Vegetarian Delight: Substitute chicken with marinated tofu or tempeh for a plant-based option.
  • Coconut Curry Version: Incorporate coconut milk into the marinade for a creamy twist.
  • Noodle Salad: Serve the ingredients cold for a refreshing summer dish.

Storage and Make-Ahead Instructions

This dish is great for meal prep! Here’s how to store it:

  • Refrigeration: Keep leftovers in an airtight container for up to 3 days.
  • Freezing: Freeze marinated chicken for up to 2 months. Thaw in the fridge before cooking.
  • Make-Ahead Sauce: Prepare the Nuoc Cham sauce in advance and store it in the fridge for up to a week.

Comprehensive FAQs

Here are some frequently asked questions:

  • Can I prepare parts of the Vietnamese Noodle Bowl ahead of time? Yes! You can marinate the chicken and prepare the Nuoc Cham sauce in advance.
  • What kind of noodles are best for this recipe? Rice vermicelli noodles work best, but you can use any thin rice noodle.
  • How do I adjust the sweetness of the Nuoc Cham? Simply add more sugar for sweetness or more lime juice for acidity.
  • Can I use chicken breasts instead of thighs? Absolutely! Just be aware that breasts may cook faster.
  • Is this dish gluten-free? Yes, just ensure you’re using gluten-free sauces and noodles.
  • What if I don’t like fish sauce? You can substitute it with soy sauce or coconut aminos for a different flavor.
  • How can I make this dish spicier? Add more chilies to the marinade or use a spicy dipping sauce.
  • What should I serve with Vietnamese Chicken Noodle Bowls? Fresh spring rolls or a light salad are great accompaniments!

Nutrition Tips and Dietary Adaptations

This Vietnamese Chicken Noodle Bowl is not just delicious but also nutritious. Here are some tips to make it even healthier:

  • Protein Sources: Opt for lean chicken or plant-based proteins like tofu for a lighter meal.
  • Add More Veggies: Increase the amount of mixed greens or add other seasonal vegetables.
  • Use Whole Grains: Try whole grain rice noodles for added fiber.
  • Low-Sodium Options: Choose low-sodium soy sauce and fish sauce to reduce salt intake.

Equipment Recommendations

Here’s what you’ll need to prepare this recipe:

  • Grill or Grill Pan: For grilling the chicken, a grill pan works well indoors.
  • Air Fryer: A great option for a healthier cooking method without oil.
  • Large Pot: For boiling the rice vermicelli noodles.
  • Mixing Bowls: For marinating and preparing the Nuoc Cham sauce.

Serving Suggestions

For a perfect meal, consider serving your Vietnamese Chicken Noodle Bowl with:

  • Fresh Spring Rolls: Light and refreshing, they pair well with the noodle bowl.
  • Pickled Vegetables: Add a tangy crunch that complements the flavors.
  • Extra Herbs: Serve additional mint and cilantro on the side for garnish.
  • Chili Sauce: For those who enjoy a spicy kick, have some chili sauce ready!

In conclusion, this Vietnamese Chicken Noodle Bowl is a fantastic addition to your weekly meal rotation. With its vibrant flavors, fresh ingredients, and ease of preparation, you’ll find yourself making this dish time and time again. Happy cooking, and enjoy your culinary adventure!

Authentic Vietnamese Chicken Noodle Bowl Bun Ga Nuong

Prep Time 20 minutes
Cook Time 20 minutes
Total Time 40 minutes
Servings 4 servings
Calories 550
A flavorful and vibrant Vietnamese chicken noodle bowl featuring marinated grilled chicken, fresh herbs, and a tangy Nuoc Cham dipping sauce.

Ingredients

Chicken

  • 1.5 lbs Boneless, Skinless Chicken Thighs (cut into 1/2-inch slices)
  • 2 tbsp Fish Sauce
  • 1 tbsp Soy Sauce
  • 1 tbsp Brown Sugar (packed)
  • 1 tbsp Minced Garlic (about 2-3 cloves)
  • 1 tbsp Minced Shallot
  • 1 tsp Freshly Ground Black Pepper
  • 1 tsp Sesame Oil (optional)
  • 0.25 cup Granulated Sugar
  • 0.5 cup Warm Water
  • 0.25 cup Fish Sauce
  • 0.25 cup Fresh Lime Juice (from 1-2 limes)
  • 1 tbsp Rice Vinegar
  • 1-2 cloves Garlic (minced)
  • 1-2 small Red Chilies (thinly sliced, optional)
  • 8 oz Dried Rice Vermicelli Noodles (bun)
  • 4 cups Mixed Fresh Greens (lettuce, spring mix, chopped romaine)
  • 1 large Cucumber (julienned)
  • 1 cup Bean Sprouts (rinsed)
  • 1 cup Shredded Carrots
  • 0.5 cup Fresh Mint Leaves (chopped)
  • 0.5 cup Fresh Cilantro (chopped)
  • 0.25 cup Chopped Roasted Peanuts (for garnish)
  • 2 tbsp Fried Shallots (optional, for garnish)

Instructions 

  • Combine chicken slices with fish sauce, soy sauce, brown sugar, garlic, shallot, black pepper, and sesame oil. Marinate for 30 minutes.
  • Prepare Nuoc Cham: dissolve sugar in warm water, stir in fish sauce, lime juice, rice vinegar, garlic, and chilies. Set aside.
  • Cook rice vermicelli in boiling water for 3-5 minutes, drain, rinse with cold water, and set aside.
  • Grill, air fry, or pan-fry the marinated chicken until cooked through and slightly charred. Rest and slice if needed.
  • Assemble bowls: divide noodles, greens, cucumber, carrots, and bean sprouts. Top with chicken, herbs, peanuts, and fried shallots. Serve with Nuoc Cham on the side.

Notes

For extra flavor, marinate the chicken longer or add more herbs to taste.
Calories: 550kcal
Cost: $15
Course: Main Course
Cuisine: Vietnamese
Keyword: Chicken, herbs, Noodles

Welcome to Your New Favorite Buffalo Chickpea Pasta Salad

If you’re looking for a dish that’s not only delicious but also bursting with flavor and nutrition, you’ve come to the right place! Our Buffalo Chickpea Pasta Salad is a vibrant medley of fresh ingredients, creamy goodness, and that irresistible kick from buffalo sauce. This easy-to-follow recipe is perfect for any occasion—whether you’re hosting a summer BBQ, packing lunch for the week, or simply craving a satisfying meal at home. Let’s dive into the details and discover why this salad will quickly become a staple in your kitchen!

Why You’ll Love This Recipe

  • Quick and Easy: With simple steps and minimal prep time, you can whip up this dish in under 30 minutes!
  • Flavor Explosion: The combination of spicy buffalo sauce with creamy vegan mayo creates a rich taste that’s hard to resist.
  • Nutritious Ingredients: Packed with veggies and protein-rich chickpeas, this salad keeps you full and energized.
  • Versatile: Perfect as a main dish or a side, this salad pairs well with various meals and occasions.
  • Make Ahead Friendly: This salad tastes even better the next day, making it a great option for meal prep.

Ingredients Breakdown

To create this delicious Buffalo Chickpea Pasta Salad, you’ll need a few key ingredients. Here’s what you’ll need, along with some handy substitutions:

  • 1 pound short pasta (I used cavatappi): You can substitute with gluten-free pasta or whole grain pasta for a healthier option.
  • 1 bell pepper, diced: Any color will do, but red or yellow add a nice sweetness.
  • 10 ounces grape tomatoes, halved: Feel free to use cherry tomatoes or diced regular tomatoes.
  • 1 bunch cilantro, chopped: If you’re not a fan of cilantro, parsley makes a great substitute.
  • 1-2 large red onion, diced (or 1 small onion): Adjust to your taste; shallots can also be used for a milder flavor.
  • 2 small avocados, chopped: For creaminess, you could use diced cucumber instead.
  • 2 green onions, diced: Green onions add a fresh crunch; you can omit if desired!
  • 1 teaspoon avocado oil: Olive oil is a great alternative if you don’t have avocado oil.
  • 1 can (15-ounce) chickpeas, drained and rinsed: You can also use black beans for a different flavor.
  • Spices: Garlic powder, smoked paprika, and pepper enhance flavor—feel free to adjust these to your liking!
  • 1/4 cup buffalo sauce: Frank’s Red Hot is a classic choice, or use your favorite brand.
  • 2/3 cup vegan mayo: You can substitute with Greek yogurt for a tangy twist, if not vegan.
  • 1 can (4-ounce) green chiles: These add a nice kick; you can use fresh jalapeños for more heat.
  • 2 cloves garlic, peeled: Fresh garlic is best, but garlic powder can work in a pinch.
  • 1 tablespoon apple cider vinegar: Adjust to taste for acidity; lemon juice is another great option.

How To Make Buffalo Chickpea Pasta Salad

Side angle of a fresh pasta salad featuring chickpeas, bell peppers, and avocado.

Let’s get cooking! This salad is straightforward and fun to make. Follow these simple steps and you’ll have a delightful dish ready in no time!

Step 1: Cook the Pasta

Begin by bringing a large pot of salted water to a boil. Add the pasta and cook according to the package instructions. Once al dente, drain and rinse under cold water to stop the cooking process. Set aside.

Step 2: Prepare the Chickpeas

In a skillet, heat the avocado oil over medium heat. Add the chickpeas along with garlic powder, smoked paprika, and pepper. Cook for about 3 minutes, stirring occasionally, until the chickpeas become slightly crispy. Pour in the buffalo sauce and cook for an additional 2 minutes, stirring frequently. Remove from heat and set aside to cool.

Step 3: Make the Dressing

In a food processor or blender, combine the vegan mayo, green chiles, garlic, onion powder, dried parsley, dried chives, dried dill, and a pinch of pepper. Blend until smooth. Taste and adjust the seasoning as needed.

Step 4: Assemble the Salad

In a large mixing bowl, combine the cooked pasta, diced bell pepper, halved tomatoes, chopped cilantro, diced avocado, and the chickpeas. Pour the prepared ranch dressing over the salad and toss gently to combine.

Step 5: Chill and Serve

Top with sliced green onions for added crunch. For best results, let the salad chill in the refrigerator for at least 30 minutes before serving. This allows the flavors to meld beautifully!

Pro Tips for the Best Buffalo Chickpea Pasta Salad

  • Cooling is Key: Allow the chickpeas to cool before mixing them with the pasta to prevent them from warming up the salad.
  • Adjust the Spice Level: If you prefer a milder salad, reduce the amount of buffalo sauce or add more mayo to balance the heat.
  • Fresh Ingredients: Using fresh, high-quality ingredients will enhance the overall flavor of your salad.
  • Mix it Up: Don’t hesitate to customize with your favorite veggies or proteins—this recipe is very adaptable!
  • Chill Before Serving: Chilling the salad helps the flavors meld and makes it even tastier.
  • Make it Ahead: This salad can be made a day in advance, making it perfect for meal prep or potlucks.
  • Taste Before Serving: Always taste and adjust seasoning before serving; you may want to add a splash more vinegar or buffalo sauce.
  • Experiment with Dressings: Try different dressings like tahini or a vinaigrette for a unique twist!

Common Mistakes & Troubleshooting

Even simple recipes can have hiccups. Here are some common mistakes and how to avoid them:

  • Overcooking the Pasta: Ensure your pasta is al dente for the best texture; rinse with cold water to stop the cooking.
  • Too Much Dressing: If it feels over-dressed, add more pasta or veggies to balance it out.
  • Chickpeas Not Crispy: Make sure the skillet is hot enough and dry the chickpeas well before cooking.
  • Unbalanced Flavors: Taste as you go! Adjust the seasonings to get the right balance of flavors.

Variations to Try

Feel free to get creative! Here are some tasty variations you can try:

  • Buffalo Cauliflower: Substitute chickpeas with roasted cauliflower for a unique twist.
  • Greek Style: Add feta cheese and olives for a Mediterranean flair.
  • Spicy Avocado: Mash some avocado into the dressing for an extra creamy texture.
  • Quinoa Base: Swap the pasta for quinoa for a gluten-free and protein-packed option.

Storage and Make-Ahead Instructions

This Buffalo Chickpea Pasta Salad keeps well in the fridge for up to 3 days. Store it in an airtight container to maintain freshness. For make-ahead options, you can prepare the pasta, chickpeas, and dressing separately, then combine them just before serving to keep everything fresh!

Frequently Asked Questions (FAQs)

  • Can I make this gluten-free? Yes! Use gluten-free pasta or quinoa as a base.
  • How spicy is this salad? The spice level can be adjusted by altering the amount of buffalo sauce used.
  • Can I use canned chickpeas? Absolutely, canned chickpeas are perfect; just be sure to rinse them well!
  • Is this salad vegan? Yes, with the use of vegan mayo and no animal products in the recipe.
  • Can I freeze the salad? It’s best served fresh; freezing may alter the texture of the ingredients.
  • What can I serve with this salad? It pairs well with grilled veggies, burgers, or as a standalone lunch option.
  • Can I add cheese? Yes, crumbled feta or shredded cheese can enhance the flavor if you’re not strict about vegan options.
  • How do I prevent the avocado from browning? Squeeze fresh lemon juice on the avocado before mixing it into the salad.

Nutritional Tips and Dietary Adaptations

This salad is not only delicious but can also fit various dietary needs. Here are some tips:

  • For a lower-calorie option: Use a lighter mayo or Greek yogurt instead of vegan mayo.
  • Protein Boost: Incorporate additional beans or lentils to up the protein content.
  • Fiber Focused: Add more veggies like spinach or kale for extra fiber and nutrients.

Equipment Recommendations

To make your cooking experience seamless, here are some recommended tools:

  • Large Pot: For boiling pasta—make sure it’s large enough to prevent sticking.
  • Skillet: A good non-stick skillet helps with cooking chickpeas without sticking.
  • Food Processor or Blender: Essential for making the creamy dressing smoothly.
  • Mixing Bowls: Have a few sizes on hand for mixing and serving.

Serving Suggestions

Serve your Buffalo Chickpea Pasta Salad chilled, garnished with fresh herbs or extra green onions for a pop of color. It’s perfect alongside grilled vegetables, sandwiches, or as a part of a potluck spread. Enjoy!

With this comprehensive guide, you’re ready to tackle the kitchen and create a mouthwatering Buffalo Chickpea Pasta Salad that’s sure to impress. Remember, cooking is all about having fun and experimenting, so don’t hesitate to make this recipe your own. Happy cooking!

Buffalo Chickpea Pasta Salad

Prep Time 15 minutes
Cook Time 10 minutes
Total Time 25 minutes
Servings 4 servings
Calories 550
A flavorful and creamy pasta salad combining spicy buffalo chickpeas, fresh veggies, and a vegan ranch dressing, perfect for a quick and satisfying meal.

Ingredients

Pasta

  • 1 pound short pasta (cavatappi)
  • 1 diced bell pepper
  • 10 ounces grape tomatoes (halved)
  • 1 bunch cilantro (chopped)
  • 2 large red onion (diced)
  • 2 small avocados (chopped)
  • 2 green green onions (diced, for topping)
  • 1 teaspoon avocado oil
  • 1 15-ounce can chickpeas (drained and rinsed)
  • 0.5 teaspoon garlic powder
  • 0.5 teaspoon smoked paprika
  • 0.5 teaspoon pepper
  • 0.25 cup buffalo sauce (Frank's Red Hot)
  • 0.67 cups vegan mayo
  • 0.25 can green chiles
  • 2 cloves garlic (peeled)
  • 0.5 teaspoon onion powder
  • 0.5 teaspoon dried parsley
  • 0.5 teaspoon dried chives
  • 0.25 teaspoon dried dill
  • 0.25 teaspoon pepper
  • 1-2 tablespoons apple cider vinegar (to taste)

Instructions 

  • Cook pasta in boiling water until al dente, then drain and rinse with cold water.
  • Heat oil in a skillet, add chickpeas and seasonings, cook until crispy, then add buffalo sauce and cook briefly.
  • Blend ranch ingredients until smooth, taste and adjust seasonings.
  • Combine pasta, veggies, chickpeas, and ranch in a large bowl, toss to combine.
  • Top with green onions and serve.

Notes

For extra flavor, chill the salad before serving.
Calories: 550kcal
Cost: $15
Course: Salad
Cuisine: American
Keyword: Buffalo, Pasta, Vegan

Elevate Your Weeknight Dinners with a Chicken Tenders Couscous Wrap

If you’re searching for a quick and delicious meal that the whole family will love, look no further than this Chicken Tenders Couscous Wrap. Not only is it loaded with fresh herbs and vibrant flavors, but it also comes together in no time, making it perfect for busy weeknights. With just a few simple ingredients, you can whip up a dish that’s both satisfying and healthy. Let’s dive in!

Why You’ll Love This Recipe

This Chicken Tenders Couscous Wrap isn’t just another meal idea; it’s a celebration of flavor and convenience! Here are five reasons you’ll adore making this recipe:

  • Quick Preparation: This dish can be prepared in under 30 minutes, making it an ideal choice for those hectic weeknight dinners.
  • Nutritious Ingredients: Packed with lean protein from chicken and fiber from whole-wheat couscous, this wrap is a wholesome meal option.
  • Customizable: Whether you prefer different proteins or veggies, this wrap is easily adaptable to suit your taste!
  • Fresh Herbs: The combination of parsley and mint brings a burst of freshness that elevates the dish.
  • Kid-Friendly: Kids will love the fun of assembling their own wraps, making dinner a more engaging experience.

Ingredient Breakdown

Let’s explore the ingredients that make this wrap shine, along with some handy substitutions:

  • Whole Wheat Couscous: A healthier alternative to regular couscous, rich in fiber. If unavailable, quinoa or brown rice can work well.
  • Chicken Tenders: Lean and tender, these are ideal for quick cooking. You can substitute with grilled chicken or tofu for a vegetarian option.
  • Fresh Herbs (Parsley & Mint): Essential for flavor, but feel free to substitute with basil or cilantro if you prefer.
  • Lemon Juice: Adds a bright tang. If you don’t have fresh lemons, bottled lemon juice can suffice.
  • Olive Oil: Extra-virgin olive oil is recommended for its health benefits and flavor, but avocado oil is also a great substitute.

Step-by-Step Directions

Side photo of a colorful wrap filled with chicken tenders, couscous, and vegetables.

Here’s how to bring your Chicken Tenders Couscous Wrap to life:

  1. In a small saucepan, bring 0.5 cup water to a boil.
  2. Stir in 0.33 cup whole wheat couscous, cover, and remove from heat. Let stand for 5 minutes before fluffing with a fork.
  3. In a bowl, combine 1 cup chopped fresh parsley, 0.5 cup chopped fresh mint, 0.25 cup lemon juice, 3 tablespoons olive oil, 2 teaspoons minced garlic, and 0.25 teaspoon salt with 0.25 teaspoon freshly ground pepper.
  4. Toss the chicken tenders with 1 tablespoon of the parsley mixture and the remaining 0.25 teaspoon salt.
  5. Cook the chicken in a nonstick skillet over medium heat for about 3-5 minutes per side until fully cooked. Cut into bite-sized pieces once cool.
  6. Mix the remaining parsley mixture into the couscous along with chopped tomato and cucumber.
  7. To assemble, spread the couscous mixture on each wrap, divide the chicken, and roll like a burrito!

Pro Tips for Perfect Wraps

Enhance your cooking experience with these expert tips:

  • Use Fresh Ingredients: Fresh herbs and vegetables will significantly boost flavor and nutrition.
  • Don’t Overcook Chicken: Keep an eye on the chicken to ensure it remains juicy and tender.
  • Let Couscous Cool: Allowing the couscous to cool slightly before assembly prevents sogginess in the wraps.
  • Experiment with Sauces: Try adding tzatziki or hummus for extra creaminess and flavor.
  • Wrap Presentation: For a neat presentation, secure wraps with toothpicks before serving.
  • Use High-Quality Olive Oil: This enhances flavor and adds healthy fats to the dish.
  • Make It a Meal Prep: Prepare extra couscous and chicken for easy wrap assembly later in the week.
  • Check for Seasoning: Always taste and adjust seasoning before serving.

Common Mistakes and Troubleshooting

Here are some pitfalls to avoid while preparing your wraps:

  • Soggy Wraps: If your wraps are getting soggy, ensure your filling is cooled down and not overly wet before assembling.
  • Overcooked Chicken: Keep an eye on the cooking time to avoid dry chicken; a meat thermometer can help!
  • Too Much Filling: Overfilling can make wrapping difficult. Aim for manageable portions.
  • Neglecting Herbs: Fresh herbs are key; don’t skip them for maximum flavor.

Variations to Try

Feeling adventurous? Here are some delicious variations to consider:

  • Mediterranean Twist: Add feta cheese and olives for a classic Mediterranean flavor.
  • Spicy Kick: Incorporate jalapeños or a drizzle of sriracha for some heat.
  • Veggie Delight: Swap out chicken for grilled vegetables like zucchini and bell peppers.
  • Asian Fusion: Use teriyaki sauce instead of lemon juice and add shredded carrots and cabbage.

Storage and Make-Ahead Instructions

This wrap can be made ahead of time for easy lunches or dinners:

  • Refrigeration: Store assembled wraps in an airtight container for up to 2 days.
  • Freezing: It’s best to freeze the filling and assemble wraps fresh to maintain texture.
  • Make-Ahead: Prepare the couscous and chicken in advance, then just assemble when ready to eat.

FAQs About Chicken Tenders Couscous Wrap

Got questions? Here are some common inquiries about this recipe:

  • Can I use leftover chicken? Absolutely! Leftover grilled or roasted chicken works wonderfully.
  • How do I prevent soggy wraps? Ensure all components are cooled before assembly, and avoid over-saturating with sauces.
  • What can I substitute for couscous? Quinoa, brown rice, or bulgur can serve as excellent substitutes.
  • Are these wraps kid-friendly? Yes! Kids will enjoy filling and rolling their own wraps.
  • Can I make these wraps vegetarian? Certainly! Replace chicken with tofu or chickpeas for a plant-based option.
  • How long will leftovers keep? Leftovers can be stored in the fridge for up to 2 days.
  • What sauces pair well? Tzatziki, hummus, or a simple yogurt dressing complement these wraps beautifully.
  • Is this recipe healthy? Yes, it’s packed with nutritious ingredients and balanced flavors!

Nutrition Tips and Dietary Adaptations

This wrap is not only delicious but also supports a healthy lifestyle:

  • Protein Power: Chicken is a lean source of protein, great for muscle maintenance.
  • Fiber Boost: Whole wheat couscous enhances digestion and keeps you satisfied.
  • Heart Health: Extra-virgin olive oil provides healthy fats, important for cardiovascular health.
  • Vegetarian Adaptation: For a vegetarian version, replace chicken with beans or lentils.

Equipment Recommendations

Use these kitchen tools for a smooth cooking process:

  • Nonstick Skillet: Ideal for cooking chicken without sticking.
  • Small Saucepan: Perfect for boiling water and cooking couscous.
  • Mixing Bowls: Useful for combining ingredients and marinating chicken.
  • Knife and Cutting Board: Essential for chopping herbs and veggies.

Serving Suggestions

Serve your wraps with these delightful sides:

  • Fresh Salad: A side salad with mixed greens and a light vinaigrette pairs perfectly.
  • Chips or Veggies: Offer whole-grain chips or sliced veggies with hummus for a crunchy side.
  • Fruit Salad: A refreshing fruit salad adds a sweet touch to your meal.

This Chicken Tenders Couscous Wrap not only simplifies meal prep but also brings joy to your dining table. Whether you’re cooking for family or enjoying a solo meal, this recipe is here to inspire you. Enjoy the process, and happy cooking!

Chicken Tenders Couscous Wrap with Fresh Herbs

Prep Time 15 minutes
Cook Time 10 minutes
Total Time 25 minutes
Servings 4 wraps
Calories 450
A flavorful and fresh wrap combining tender chicken, fluffy couscous, and vibrant herbs, perfect for a quick lunch or dinner.

Ingredients

Water and Couscous

  • 0.5 cup water
  • 0.33333334326744 cup couscous, preferably whole-wheat

Fresh Herbs and Lemon Dressing

  • 1 cup chopped fresh parsley
  • 0.5 cup chopped fresh mint
  • 0.25 cup lemon juice
  • 3 tablespoons extra-virgin olive oil
  • 2 teaspoons minced garlic
  • 0.25 teaspoon salt, divided
  • 0.25 teaspoon freshly ground pepper

Chicken and Vegetables

  • 1 pound chicken tenders
  • 1 medium tomato, chopped
  • 1 cup chopped cucumber

Wraps

  • 4 10-inch spinach or sun-dried tomato wraps or tortillas

Instructions 

  • Bring water to a boil, stir in couscous, cover, and let stand for 5 minutes. Fluff with a fork.
  • Mix parsley, mint, lemon juice, oil, garlic, 1/8 teaspoon salt, and pepper in a small bowl.
  • Toss chicken tenders with 1 tablespoon of herb mixture and remaining salt. Cook in a skillet until done, then cut into bite-sized pieces.
  • Stir remaining herb mixture into couscous along with tomato and cucumber.
  • Spread 3/4 cup of couscous mixture on each wrap, add chicken, roll up, and serve.

Notes

Use fresh herbs for the best flavor and consider adding a squeeze of extra lemon before serving.
Calories: 450kcal
Cost: $12
Course: Main Course
Cuisine: Mediterranean
Keyword: Chicken, couscous, herbs

If you’re looking for a quick, delicious way to elevate your lunch or light dinner, then this creamy lemon herb tuna salad is just what you need! Packed with fresh herbs and zesty flavors, it’s a versatile dish that can be enjoyed on its own, in a sandwich, or with some crispy crackers. Let’s dive into why this recipe is not just easy to make but also a delightful addition to your meal rotation!

Why You’ll Love This Recipe

  • Quick and Easy: This recipe takes less than 30 minutes from start to finish, making it perfect for busy weekdays.
  • Flavorful and Fresh: The combination of lemon juice and fresh herbs gives this salad a refreshing zing that elevates the classic tuna salad.
  • Highly Customizable: You can easily modify the ingredients based on what you have at home, making it a flexible option for any pantry.
  • Nutritious and Satisfying: Packed with protein from the tuna and healthy fats from the mayonnaise, this salad keeps you full and energized.
  • Great for Meal Prep: This tuna salad stores well in the fridge, allowing you to prepare it ahead of time for easy lunches throughout the week.

Ingredients You’ll Need

Before jumping into the preparation steps, let’s gather everything you need. Here’s the complete list of ingredients for this herb tuna salad:

  • 2 cans (5 oz each) tuna: Drained (use albacore for a firmer texture or chunk light for a softer mix).
  • 1/2 cup mayonnaise: Light or regular based on your preference.
  • 2 tablespoons fresh lemon juice: For that citrusy zing.
  • 1 teaspoon lemon zest: Adds an extra layer of citrus flavor.
  • 1 tablespoon Dijon mustard: For a slight tanginess.
  • 1/2 cup finely chopped celery: Crunchy texture.
  • 1/4 cup finely chopped red onion: Adds sweetness and a bit of bite.
  • 2 tablespoons chopped fresh parsley: Enhances freshness.
  • 1 tablespoon chopped fresh dill: Classic herb that pairs perfectly with tuna.
  • 1/4 teaspoon salt: To taste.
  • 1/4 teaspoon black pepper: Freshly ground for best flavor.
  • Optional Additions: 1/4 cup chopped cucumbers, 2 tablespoons chopped almonds or walnuts, and 1 tablespoon chopped chives.

Step-by-Step Instructions

Now that we have all our ingredients, let’s get into the preparation steps for this creamy lemon herb tuna salad:

  1. Prepare the Tuna: Open and drain the tuna thoroughly to remove excess liquid. Place it in a medium mixing bowl.
  2. Flake the Tuna: Use a fork to gently flake the tuna into small pieces, keeping some texture for a satisfying bite.
  3. Chop the Vegetables and Herbs: Finely chop the celery and red onion, along with parsley and dill.
  4. Mix the Dressing: In a small bowl, combine mayonnaise, lemon juice, lemon zest, and Dijon mustard. Mix until smooth and creamy.
  5. Combine Everything: Add the chopped vegetables and herbs to the bowl with the tuna. Pour the dressing over the mixture and stir gently until everything is evenly coated.
  6. Optional Add-Ins: If desired, fold in chopped cucumbers, nuts, or chives for added crunch and flavor.
  7. Chill Before Serving: Cover the bowl and refrigerate for at least 15-30 minutes to allow flavors to meld together.
  8. Serve Chilled: Enjoy on its own, as a sandwich filling, or with crackers!

Pro Tips for the Perfect Tuna Salad

Side view of a vibrant tuna salad with lemon slices and fresh vegetables.
  • Drain Well: Ensure the tuna is thoroughly drained to avoid a watery salad.
  • Experiment with Herbs: Try adding fresh basil or cilantro for a different flavor profile.
  • Texture Matters: Finely chop ingredients to ensure a balanced distribution throughout the salad.
  • Adjust Seasoning: Taste and adjust salt and pepper according to your preference.
  • Let it Rest: Allowing the salad to chill enhances the flavors, making it even more delicious.
  • Use Quality Tuna: Opt for high-quality tuna for the best flavor and texture.
  • Try Greek Yogurt: Substitute half the mayonnaise with Greek yogurt for a lighter version.
  • Store Properly: Keep in an airtight container in the fridge to maintain freshness.
  • Use Fresh Ingredients: Fresh herbs and vegetables will provide the best flavor.
  • Customize Your Salad: Add your favorite ingredients like olives, capers, or even diced apples for sweetness!

Common Mistakes and Troubleshooting

  • Too Watery: If your salad is too watery, try draining the tuna again and adding more mayonnaise or Greek yogurt.
  • Overmixing: Gently fold the ingredients instead of stirring vigorously to maintain texture.
  • Flavor Lacking: If the salad tastes bland, add more lemon juice, salt, or fresh herbs to enhance the flavor.
  • Vegetables Not Chopped Fine Enough: Ensure your vegetables are finely chopped for better integration.

Variations to Try

This recipe is versatile, and here are some fun ways to switch things up:

  • Spicy Tuna Salad: Add a splash of hot sauce or diced jalapeños for a kick.
  • Avocado Tuna Salad: Substitute half the mayo with mashed avocado for a creamy texture.
  • Tuna Salad with Apples: Add diced apples for a sweet crunch.
  • Mediterranean Style: Incorporate olives, feta cheese, and sun-dried tomatoes for a Mediterranean twist.

Storage and Make-Ahead Instructions

This lemon herb tuna salad can be prepared ahead of time and stored in the refrigerator for up to 3 days. To keep the flavors fresh:

  • Store in an Airtight Container: This helps prevent it from absorbing odors from other foods.
  • Keep it Chilled: Always keep the salad refrigerated until ready to serve.
  • Avoid Freezing: Tuna salad does not freeze well due to the mayonnaise.

FAQ: Your Tuna Salad Questions Answered

  • How long does tuna salad last in the fridge? Typically, tuna salad can be stored for 3-5 days in the refrigerator.
  • Can I freeze tuna salad? It’s not recommended to freeze tuna salad as the texture of the mayonnaise can change.
  • What can I serve with tuna salad? Serve it on a bed of greens, in a sandwich, or with crackers and veggies.
  • Can I use other types of tuna? Yes, you can use chunk light, white tuna, or even flavored varieties for different taste profiles.
  • How do I make my tuna salad creamier? Add more mayonnaise or Greek yogurt to achieve the desired creaminess.
  • What if I don’t have fresh herbs? You can use dried herbs, but reduce the quantity as they are more concentrated.
  • What’s a good substitute for mayonnaise? Greek yogurt, sour cream, or a vegan mayo can be used as alternatives.
  • Can I make this salad vegan? Yes, use chickpeas or tofu instead of tuna and a vegan mayo alternative.

Nutritional Information and Dietary Adaptations

This tuna salad is not only delicious but also nutritious. Here’s a quick breakdown of its benefits:

  • High in Protein: Tuna is an excellent source of protein, ideal for muscle repair and growth.
  • Rich in Omega-3 Fatty Acids: Promotes heart health and reduces inflammation.
  • Low-Carb Option: Perfect for those following a low-carb or keto diet.
  • Customizable for Dietary Needs: Easily adjust ingredients to cater to gluten-free, dairy-free, or vegetarian diets.

Recommended Equipment

  • Mixing Bowl: A medium-sized bowl for combining ingredients.
  • Fork: For flaking the tuna and mixing the salad.
  • Knife: A sharp knife for chopping vegetables and herbs.
  • Cutting Board: Essential for safe and efficient chopping.
  • Airtight Container: For storing leftovers.

Serving Suggestions

This herb tuna salad is perfect for various serving options:

  • On a Bed of Greens: Serve over mixed greens for a refreshing salad.
  • In a Sandwich: Slather between slices of whole-grain bread or in a wrap.
  • With Crackers: Serve with your favorite crackers or pita chips for a crunchy snack.
  • Stuffed in Avocado: Halve an avocado and fill it with tuna salad for a healthy twist.

With this creamy lemon herb tuna salad, you have a recipe that’s not just easy to make but also packed with flavor and nutrition. Remember, cooking is about enjoying the process and making it your own. So gather your ingredients, follow these clear steps, and enjoy a delicious meal that makes you feel great. Happy cooking!

Creamy Lemon Herb Tuna Salad

Prep Time 10 minutes
Total Time 10 minutes
Servings 4 servings
Calories 250
A flavorful and creamy tuna salad infused with fresh lemon and herbs, perfect for a quick lunch or light dinner.

Ingredients

Canned Tuna

  • 10 oz tuna, drained
  • 0.5 cup mayonnaise
  • 2 tablespoons fresh lemon juice
  • 1 teaspoon lemon zest
  • 1 tablespoon Dijon mustard
  • 0.5 cup finely chopped celery
  • 0.25 cup finely chopped red onion
  • 2 tablespoons chopped fresh parsley
  • 1 tablespoon chopped fresh dill
  • 0.25 teaspoon salt
  • 0.25 teaspoon black pepper
  • 0.25 cup chopped cucumbers (optional) (optional)
  • 2 tablespoons chopped almonds or walnuts (optional) (optional)
  • 1 tablespoon chopped chives (optional) (optional)

Instructions 

  • Drain and flake the tuna in a bowl.
  • Chop celery, red onion, parsley, and dill; add to tuna.
  • Mix mayonnaise, lemon juice, lemon zest, mustard, salt, and pepper to make dressing.
  • Pour dressing over tuna mixture and stir gently.
  • Fold in cucumbers, nuts, and chives if using. Refrigerate for 15-30 minutes before serving.

Notes

For extra flavor, add a squeeze of fresh lemon before serving.
Calories: 250kcal
Cost: $10
Course: Salad
Keyword: herbs, lemon, Tuna

Why You Need This Quick and Delicious Asian Mushroom Ramen in Your Life

If you’re on the lookout for a delightful dish that combines comfort and convenience, look no further than this Asian Mushroom Ramen! In under 30 minutes, you can whip up a bowl of savory noodles that are not only packed with flavor but also brimming with nutrients. This recipe is perfect for those busy weeknights when you want something satisfying without the fuss. Let’s dive into why you’ll love this recipe!

Why You’ll Love This Recipe

This mushroom ramen dish isn’t just another noodle recipe; it’s a delightful experience waiting to happen. Here are five reasons that make this dish a must-try:

  • Quick Preparation: Ready in just 30 minutes, making it perfect for busy weeknights or cozy evenings.
  • Flavor Explosion: The combination of savory soy sauce, umami-rich mushrooms, and aromatic ginger creates a delectable broth that warms the soul.
  • Customizable: Easily adapt the recipe to include your favorite vegetables or proteins, ensuring it suits any dietary preference.
  • Health Benefits: Packed with nutrients from mushrooms and broth, this dish supports your immune system and provides essential vitamins.
  • Comfort Food: Nothing beats a warm bowl of ramen on a chilly evening, making it the ultimate comfort food.

Ingredients Breakdown

Let’s take a closer look at the ingredients you will need to create this delicious Asian mushroom ramen. Each component plays a crucial role in achieving that perfect flavor and texture.

  • Ramen Noodles: 200g of your favorite ramen noodles. You can use fresh, dried, or even instant noodles, depending on what you have on hand.
  • Sesame Oil: 1 tablespoon of sesame oil adds a nutty flavor that enhances the broth.
  • Mixed Mushrooms: 250g of a mix of shiitake, button, and oyster mushrooms for a rich umami flavor.
  • Garlic and Ginger: 2 cloves of minced garlic and 1 teaspoon of grated ginger elevate the dish with aromatic notes.
  • Soy Sauce: 2 tablespoons for that essential salty, umami kick.
  • Miso Paste: 1 tablespoon of miso paste adds depth and richness to the broth.
  • Vegetable Broth: 4 cups of vegetable broth (or chicken broth for a non-vegetarian version) serves as the base of your soup.
  • Rice Vinegar: 1 tablespoon for a tangy finish that brightens the flavors.
  • Toasted Sesame Seeds: 1 tablespoon for garnish, adding a delightful crunch.
  • Green Onions: 2 green onions, sliced, for a fresh finish.
  • Boiled Egg: Optional, but a soft-boiled egg adds creaminess and a boost of protein.
  • Chili Flakes: Optional, for those who enjoy a touch of heat.

Step-by-Step Cooking Instructions

A side perspective photo of ramen noodles topped with mixed mushrooms and a boiled egg.

Now that you have all your ingredients, let’s get cooking! Follow these simple steps to create your Asian Mushroom Ramen:

  1. Cook the ramen noodles according to the package instructions. Drain and set aside.
  2. In a large pan, heat the sesame oil over medium heat. Add the mushrooms and cook for about 5-7 minutes until they are soft and golden.
  3. Add the minced garlic and grated ginger to the pan and sauté for another 1-2 minutes until fragrant.
  4. Stir in the soy sauce, miso paste, vegetable broth, and rice vinegar. Bring the mixture to a boil, then reduce the heat and let it simmer for 5 minutes.
  5. Divide the cooked noodles into bowls. Pour the hot broth and mushrooms over the noodles.
  6. Garnish with toasted sesame seeds, sliced green onions, and sprinkle with chili flakes. If desired, add a boiled egg on top for an extra treat!

Pro Tips for Perfect Mushroom Ramen

To elevate your Asian mushroom ramen experience, consider these expert tips:

  • Choose Your Noodles Wisely: Opt for fresh ramen if possible; they offer the best texture. If using instant, discard the seasoning packet.
  • Experiment with Broth: For added flavor, use homemade broth or enhance store-bought broth with additional herbs and spices.
  • Don’t Overcook the Mushrooms: Sauté until just soft to maintain their texture and flavor.
  • Customize Your Toppings: Feel free to add bok choy, spinach, or other vegetables to boost nutrition.
  • Garnish for Flavor: Don’t skip the garnishes! They add texture and visual appeal.
  • Store Leftovers Properly: Keep the noodles separate from the broth to prevent them from becoming soggy.
  • Adjust Seasoning to Taste: Depending on your preference, you might want to add more soy sauce or miso for a richer flavor.
  • Make it Spicy: Add sriracha or chili oil for an extra kick!

Common Mistakes and Troubleshooting

Even simple recipes can pose challenges. Here are some common pitfalls and how to avoid them:

  • Overcooked Noodles: Follow package instructions closely and rinse noodles after cooking to stop the cooking process.
  • Flavorless Broth: Taste as you cook and adjust seasoning; a splash of soy sauce can enhance flavor significantly.
  • Soggy Mushrooms: Avoid overcrowding the pan while sautéing; give mushrooms enough space to brown properly.
  • Too Thick of a Broth: If your broth is too thick, add more vegetable broth or water to achieve your desired consistency.

Variations to Try

Feel free to play around with this mushroom ramen recipe. Here are some variations to keep things interesting:

  • Spicy Miso Ramen: Add more miso paste and a dash of chili oil for a spicy kick.
  • Vegetable Lover’s Ramen: Toss in your choice of seasonal veggies like bok choy, bell peppers, or snap peas.
  • Protein Boost: Add grilled chicken or tofu for a heartier meal.
  • Herbal Infusion: Incorporate fresh herbs like cilantro or basil for an aromatic touch.

Storage and Make-Ahead Instructions

This Asian mushroom ramen is best enjoyed fresh, but if you have leftovers, here’s how to store and reheat them:

  • Storing Leftovers: Keep the broth and noodles separate in airtight containers. They can be stored in the fridge for up to 3 days.
  • Reheating: When ready to eat, reheat the broth on the stove and add the noodles just before serving.
  • Make-Ahead Option: You can prepare the broth and sauté the mushrooms ahead of time; just combine with cooked noodles when ready to serve.

FAQ About Asian Mushroom Ramen

Got questions? Here are some frequently asked questions about this delightful dish:

  • Can I use instant ramen noodles? Yes, just discard the seasoning packet and follow the cooking instructions on the package.
  • What type of mushrooms work best? A mix of shiitake, button, and oyster mushrooms provides the best flavor, but feel free to use your favorites.
  • Can I make this dish vegetarian? Absolutely! Use vegetable broth and skip any meat toppings.
  • How can I make this ramen spicier? Add chili flakes, sriracha, or chili oil to the broth or as a topping.
  • Can I add other proteins? Yes! Grilled chicken, shrimp, or tofu can be great additions.
  • How long does the broth last in the fridge? The broth can be stored for up to 3 days in the refrigerator.
  • Can I freeze this ramen? It’s best to freeze the broth without the noodles. Cook noodles fresh when ready to eat.
  • What can I serve with this ramen? This ramen pairs well with dumplings, spring rolls, or a simple salad.

Nutritional Tips and Dietary Adaptations

This mushroom ramen is not only delicious but can also be tailored to meet various dietary needs:

  • Gluten-Free: Use gluten-free ramen noodles and tamari instead of soy sauce.
  • Low-Carb: Substitute traditional noodles with zucchini noodles or shirataki noodles.
  • Dairy-Free: This recipe is already dairy-free; just ensure any toppings are also dairy-free.
  • Low-Sodium Option: Use low-sodium soy sauce and homemade broth to control salt levels.

Essential Equipment for Making Ramen

To make your cooking process smooth, consider these essential tools:

  • Large Pot: For boiling the noodles and making the broth.
  • Non-Stick Pan: Ideal for sautéing mushrooms and aromatics without sticking.
  • Measuring Cups and Spoons: To ensure accurate ingredient measurements.
  • Sharp Knife: For chopping vegetables and mushrooms efficiently.

Serving Suggestions

To elevate your ramen experience, consider these tasty serving suggestions:

  • Garnish Generously: Always top your ramen with fresh herbs, sesame seeds, and a boiled egg.
  • Side Dishes: Serve with dumplings or spring rolls for a more substantial meal.
  • Pair with a Drink: A light sake or green tea complements the flavors beautifully.

Wrapping It Up

Cooking should be a joyful adventure, and this Quick and Delicious Asian Mushroom Ramen is a fantastic recipe to help you explore the delightful world of flavors. Remember, great food doesn’t require perfection—just a willingness to try! Grab your ingredients, follow the steps, and soon you’ll have a comforting bowl of ramen that warms your heart and nourishes your soul. Enjoy!

Asian Mushroom Ramen Noodles

Prep Time 10 minutes
Cook Time 15 minutes
Total Time 25 minutes
Servings 2 servings
Calories 450
A flavorful and comforting ramen dish packed with mushrooms and aromatic seasonings, perfect for a quick meal.

Ingredients

Noodles

  • 200 g ramen noodles
  • 1 tablespoon sesame oil
  • 250 g mixed mushrooms (shiitake, button, oyster)
  • 2 cloves garlic, minced
  • 1 teaspoon ginger, grated
  • 2 tablespoons soy sauce
  • 1 tablespoon miso paste
  • 4 cups vegetable broth
  • 1 tablespoon rice vinegar
  • 1 tablespoon toasted sesame seeds
  • 2 green onions sliced
  • 1 optional boiled egg optional
  • 0.5 teaspoon chili flakes (optional)

Instructions 

  • Cook the ramen noodles according to package instructions. Drain and set aside.
  • Heat sesame oil in a large pan over medium heat. Add mushrooms and cook for 5-7 minutes until soft.
  • Add garlic and ginger; cook for 1-2 minutes. Stir in soy sauce, miso, broth, and rice vinegar. Bring to a boil, then simmer for 5 minutes.
  • Divide noodles into bowls. Pour hot broth and mushrooms over noodles. Garnish with sesame seeds, green onions, chili flakes, and add boiled egg if desired.

Notes

Feel free to add extra vegetables or protein for a heartier meal.
Calories: 450kcal
Cost: $12
Course: Main Course
Cuisine: Asian
Keyword: Mushrooms, Noodles, ramen

Discover the Joy of Cooking with This One-Pot Wonder

If you’re looking for a delightful, hassle-free meal, look no further than this One-Pot Sweet Spiced Quinoa Lentil Salad. Packed with vibrant flavors and nourishing ingredients, this recipe is perfect for busy weeknights or meal prepping for the week ahead. The combination of quinoa and lentils not only brings a wonderful texture but also offers a healthful dose of protein and fiber. Let’s dive into why this dish deserves a spot in your recipe rotation!

Why You’ll Love This Recipe

  • Quick and Easy: This recipe requires just one pot, minimizing cleanup and making it perfect for busy cooks.
  • Flavor Explosion: The sweet and savory spices blend perfectly, creating an aromatic dish that tantalizes the taste buds.
  • Nutritious and Filling: With quinoa, lentils, and an array of fresh herbs, this salad is packed with protein, fiber, and essential vitamins.
  • Versatile Options: Customize the ingredients to your liking, making it a flexible meal suitable for various dietary preferences.
  • Meal Prep Friendly: Store leftovers in the fridge for up to five days, enjoying this salad cold or reheated, making it ideal for your meal prep needs.

Your Simple Ingredient Checklist

Here’s what you’ll need to get started:

  • 1 tablespoon extra virgin olive oil: Adds healthy fats and enhances flavor.
  • 1 red onion, diced: Provides a sweet base that complements the spices.
  • 1 teaspoon ground turmeric: Offers warmth and health benefits.
  • 1 teaspoon curry powder: Adds depth and a hint of spice.
  • 1/2 teaspoon salt: Enhances all the flavors.
  • 1/2 teaspoon ground black pepper: Adds a subtle kick.
  • 1 cup uncooked white quinoa: The star grain, rich in protein.
  • 1/2 cup French green lentils: Adds heartiness and texture.
  • 3 cups low-sodium vegetable broth: Infuses flavors into the dish.
  • 6 green onions, diced: Adds freshness and a mild onion flavor.
  • 1 cup fresh cilantro, chopped: Offers a burst of freshness.
  • 1 cup fresh parsley, chopped: Balances the flavors and adds greenery.
  • 1/2 cup sliced almonds: Provides crunch and healthy fats.
  • 1/2 cup dried mixed berries or cranberries: Adds sweetness and a chewy texture.
  • 1 juicy lime, juiced: Brightens the dish with acidity.
  • 1 tablespoon pure maple syrup: Enhances sweetness and balances spices.

How to Make Your One-Pot Salad

Close-up view of a hearty quinoa and lentil salad with fresh greens and almonds.

Now that you have your ingredients ready, let’s walk through the simple steps to create this delightful salad.

  1. Heat the Oil: In a large rimmed sauté pan, heat the olive oil over medium heat.
  2. Sauté the Aromatics: Add the red onion, turmeric, curry powder, salt, and pepper. Sauté for 2-3 minutes until the onions are soft and translucent.
  3. Add Grains: Stir in the quinoa, lentils, and vegetable broth. Mix well to combine.
  4. Bring to Boil: Increase the heat to high until the mixture begins to boil.
  5. Simmer: Once boiling, reduce the heat to low, cover the pan securely, and let it simmer for 17-20 minutes without lifting the lid. Check after 17 minutes; if all liquid isn’t absorbed, let it cook for the full 20 minutes.
  6. Finish Up: Once all liquid is absorbed, turn off the burner. Stir in the green onions, cilantro, parsley, almonds, dried berries, lime juice, and maple syrup. Adjust seasonings to taste.

Key Pro Tips for Success

To ensure your One-Pot Sweet Spiced Quinoa Lentil Salad turns out perfectly, keep these pro tips in mind:

  • Rinse Your Quinoa: Rinsing quinoa before cooking removes its natural coating, which can taste bitter.
  • Choose Quality Lentils: Use fresh lentils for better texture and flavor; older lentils can take longer to cook.
  • Don’t Skip the Herbs: Fresh herbs like cilantro and parsley elevate the dish with their bright flavors.
  • Adjust Spices: Feel free to tweak the amount of spices based on your taste preferences. Add more turmeric for color or curry for heat!
  • Storage Matters: Store leftovers in an airtight container in the fridge for up to five days.
  • Serve it Your Way: Enjoy this salad warm, at room temperature, or cold for a refreshing option.
  • Make it a Meal: Pair this salad with grilled chicken, roasted vegetables, or a side of hummus for a complete meal.
  • Experiment with Toppings: Consider adding feta cheese, avocado, or a dollop of yogurt for added creaminess.

Common Mistakes to Avoid

Here are a few pitfalls to watch out for when making this salad:

  • Overcooking the Grains: Keep an eye on the cooking time. Overcooked quinoa can become mushy.
  • Skipping the Seasoning: Seasoning is crucial for flavor; don’t skip the salt and spices!
  • Not Tasting: Always taste your dish before serving. Adjust seasoning as needed for the best flavor.
  • Using Too Much Liquid: Ensure you follow the liquid measurements closely for perfect texture.

Delicious Variations to Try

Feeling adventurous? Here are some tasty variations to customize your salad:

  • Spiced Up: Add a pinch of cayenne pepper for a spicy kick that will warm you up.
  • Protein Boost: Stir in cooked chickpeas or shredded chicken for added protein.
  • Nut-Free: Omit the almonds and add sunflower seeds or pumpkin seeds for crunch.
  • Green Goodness: Toss in diced bell peppers, zucchini, or spinach for extra veggies.

Storage and Make-Ahead Instructions

This salad is not only delicious but also convenient for meal prep. Here’s how to store and prepare it in advance:

  • Refrigeration: Store the salad in an airtight container in the fridge for up to five days. It’s great for lunch the next day!
  • Freezing: If you want to freeze it, portion it out into freezer-safe containers. It can be frozen for up to 3 months.
  • Thawing: Thaw overnight in the fridge before re-heating. Microwave or heat on the stove until warmed through.
  • Meal Prep: Prepare the base of the salad (quinoa and lentils) ahead of time, refrigerate, and add fresh herbs and toppings when ready to serve.

Frequently Asked Questions

Here are some common questions about this One-Pot Sweet Spiced Quinoa Lentil Salad:

  • Can I use different grains? Yes! You can substitute quinoa with bulgur or farro for a different texture.
  • What can I add for more flavor? Consider adding garlic, ginger, or a splash of soy sauce for an umami boost.
  • Is this salad vegan? Absolutely! All ingredients are plant-based.
  • Can I make this gluten-free? Yes, this recipe is naturally gluten-free as all ingredients are safe for gluten-sensitive diets.
  • How do I make it more filling? Add cooked beans or legumes for an extra protein punch!
  • What other veggies can I include? Feel free to add any seasonal vegetables you have on hand!
  • Can I serve it warm? Yes! This salad is delicious warm or chilled.
  • How do I reheat leftovers? Reheat in the microwave or on the stovetop with a splash of water to add moisture.

Nutritional Tips and Dietary Adaptations

This recipe is not only delicious but also packed with nutrients. Here are some dietary adaptations and tips:

  • High in Protein: Quinoa and lentils provide plant-based protein, making this a great option for vegetarians and vegans.
  • Rich in Fiber: The combination of quinoa and lentils supports digestive health.
  • Low in Fat: With minimal added fats, this salad is a heart-healthy choice.
  • Nut Allergies: Substitute nuts with seeds or simply omit them if allergies are a concern.

Equipment Recommendations

To make this recipe, you’ll need:

  • Large Rimmed Sauté Pan: A non-stick or ceramic pan works best for even cooking.
  • Measuring Cups and Spoons: Essential for accurate ingredient measurements.
  • Cutting Board and Knife: For chopping vegetables and herbs.
  • Storage Containers: Airtight containers for storing leftovers or meal prep portions.

Serving Suggestions

Pair your One-Pot Sweet Spiced Quinoa Lentil Salad with:

  • Grilled Chicken or Fish: Adds protein and complements the flavors beautifully.
  • Hummus: Serve with a side of hummus and pita for a satisfying meal.
  • Roasted Vegetables: Add a side of seasonal roasted veggies for extra nutrition.
  • Flatbread: Warm, fluffy flatbreads are perfect for scooping up the salad.

Conclusion

Cooking should be a joyful experience, and this One-Pot Sweet Spiced Quinoa Lentil Salad embodies just that! With its rich flavors, nourishing ingredients, and simplicity, it’s bound to become a staple in your home cooking. So grab your ingredients, follow these simple steps, and enjoy a hearty meal that’s as easy to make as it is delicious. Happy cooking!

One-Pot Sweet Spiced Quinoa Lentil Salad

Prep Time 10 minutes
Cook Time 20 minutes
Total Time 30 minutes
Servings 4 servings
Calories 350
A flavorful and nutritious one-pot salad combining quinoa, lentils, and fresh herbs, perfect for a quick, healthy meal.

Ingredients

Oil

  • 1 tablespoon extra virgin olive oil

Vegetables

  • 1 red onion red onion, diced
  • 1 teaspoon ground turmeric
  • 1 teaspoon curry powder
  • 0.5 teaspoon salt
  • 0.5 teaspoon ground black pepper

Grains and Legumes

  • 1 cup uncooked white quinoa
  • 0.5 cup French green lentils or black Beluga lentils
  • 3 cups low-sodium vegetable broth

Herbs and Nuts

  • 6 green onions green onions, ends removed and diced
  • 1 cup fresh cilantro, large stems removed and chopped
  • 1 cup fresh parsley, large stems removed and chopped
  • 0.5 cup sliced almonds
  • 0.5 cup dried mixed berries or dried cranberries
  • 1 juicy lime lime, juiced
  • 1 tablespoon pure maple syrup

Instructions 

  • Heat olive oil in a large pan over medium heat. Add onion, turmeric, curry, salt, and pepper; sauté 2-3 minutes until translucent.
  • Add quinoa, lentils, and vegetable broth; bring to a boil, then cover and simmer on low for 20 minutes until liquid is absorbed.
  • Once cooked, turn off heat and stir in green onions, cilantro, parsley, almonds, berries, lime juice, and maple syrup. Adjust seasonings as desired.

Notes

Store leftovers in an airtight container for up to five days. Reheat in microwave if desired.
Calories: 350kcal
Cost: $15
Course: Salad
Cuisine: Fusion
Keyword: Lentils, quinoa, Vegetables

Transform Your Dinner with Chili-Lime Shrimp Quinoa Bowls

If you’re looking to elevate your weeknight dinner routine, look no further than these delicious Chili-Lime Shrimp Quinoa Bowls. This recipe combines protein-packed shrimp with fluffy quinoa and zesty lime for a dish that’s not just quick to prepare but also bursting with flavor. In just 25 minutes, you can create a vibrant meal that’s as satisfying as it is healthy. Let’s dive into why you’ll love this recipe and how to make it shine in your kitchen.

Why You’ll Love This Recipe

  • Quick & Easy: Ready in just 25 minutes, perfect for busy weeknights.
  • Flavor-Packed: The combination of chili and lime infuses the shrimp with a refreshing zing.
  • High in Protein: With shrimp and quinoa, this meal is a powerhouse of protein.
  • Meal Prep Friendly: Easily prepare components in advance for a stress-free week.
  • Customizable: Add your favorite veggies or substitute proteins to suit your taste.

Ingredients Breakdown

Here’s what you’ll need to whip up your Chili-Lime Shrimp Quinoa Bowls, along with some handy substitutions:

  • Shrimp: Fresh or frozen works great. If you prefer a vegetarian option, try chickpeas or tofu instead.
  • Quinoa: A great base for this dish—use white, red, or tri-color quinoa for visual appeal.
  • Lime: Fresh lime juice brightens up the dish. You can substitute with lemon juice if needed.
  • Chili Powder: Adds warmth and depth. Experiment with chipotle for a smoky flavor.
  • Corn: Fresh, frozen, or canned corn is perfect; it adds a sweet crunch.
  • Black Beans: For added protein and fiber. You can swap for kidney beans or omit if desired.
  • Avocado: Creamy and nutritious; consider replacing with a dollop of Greek yogurt for a tangy twist.
  • Cilantro: Fresh herbs elevate the dish—basil or parsley can be a good alternative.

Step-By-Step Instructions

Juicy shrimp on a bed of quinoa with vibrant toppings in a side view presentation.

Ready to get cooking? Follow these simple steps to create your chili-lime shrimp quinoa bowls:

  1. Cook Quinoa: Rinse 1 cup of quinoa under cold water, then combine with 2 cups of water in a pot. Bring to a boil, cover, and reduce to a simmer for about 15 minutes.
  2. Season Shrimp: While the quinoa cooks, in a bowl, toss 1 pound of shrimp with juice from 1 lime and 2 teaspoons of chili powder. Let it marinate for a few minutes.
  3. Cook Shrimp Quickly: In a hot skillet, add a splash of oil and cook the shrimp for 3-4 minutes until they’re pink and opaque. Remove from heat promptly to avoid overcooking.
  4. Assemble Bowls: Fluff the quinoa with a fork and divide it among serving bowls. Top with cooked shrimp, corn, black beans, diced avocado, and a sprinkle of cilantro.
  5. Serve & Enjoy: Drizzle with extra lime juice for added zest and dig in!

Pro Tips for Success

To make your cooking experience even better, here are some expert insights:

  • Don’t Overcook Shrimp: Keep an eye on the shrimp; they cook quickly and will become rubbery if overdone.
  • Rinse Quinoa: Rinsing quinoa removes its natural coating, making it less bitter and fluffier when cooked.
  • Customize Spice Level: Adjust the amount of chili powder based on your heat preference. Add jalapeños for an extra kick!
  • Make Ahead: Prepare the quinoa and shrimp in advance for quick assembly during the week.
  • Garnish Creatively: Add toppings like feta cheese, diced tomatoes, or a dollop of salsa for variety.
  • Store Properly: Keep leftovers in an airtight container in the fridge for up to 3 days.
  • Try Different Proteins: Swap shrimp for salmon, chicken, or even roasted veggies for a different flavor profile.
  • Fresh Herbs Matter: Fresh cilantro or parsley can make a big difference in flavor—don’t skip them!

Common Mistakes and Troubleshooting

Here are some common pitfalls to avoid:

  • Overcooked Quinoa: Ensure you follow the water ratio to maintain fluffy quinoa. If it’s mushy, reduce cooking time next time.
  • Skipping the Rinse: Not rinsing the quinoa can lead to bitterness. Always rinse before cooking.
  • Old Shrimp: If your shrimp smell off, don’t use them. Fresh shrimp should have a mild ocean scent.

Variations to Try

Make your bowls even more exciting by trying these variations:

  • Mexican Fiesta: Add diced tomatoes, jalapeños, and a sprinkle of cheese for a fiesta twist.
  • Asian Fusion: Swap lime for soy sauce, add sesame oil, and toss in edamame instead of black beans.
  • Veggie Delight: Load up on sautéed bell peppers, zucchini, and mushrooms for a hearty vegetarian bowl.
  • Breakfast Bowl: Top your quinoa with a fried egg and avocado for a protein-packed breakfast option.

Storage and Make-Ahead Instructions

Plan ahead and enjoy your flavors longer:

  • Refrigerate: Store in airtight containers for up to 3 days. Reheat in the microwave or on the stove.
  • Freeze: For longer storage, freeze shrimp and quinoa separately. They can last up to 3 months.
  • Meal Prep: Prepare components like quinoa and shrimp in bulk. Assemble bowls fresh when ready to eat.

Frequently Asked Questions

Here are some common questions to help you out:

  • Can I use frozen shrimp? Yes, just ensure they are fully thawed before cooking.
  • What can I substitute for quinoa? You can use rice, couscous, or even cauliflower rice for a lower-carb option.
  • Is this recipe gluten-free? Absolutely! All ingredients are gluten-free, making it a great option for those with dietary restrictions.
  • Can I make this dish vegan? Yes! Replace shrimp with chickpeas or roasted tofu for a plant-based protein.
  • How spicy is this dish? The spice level can be adjusted by modifying the amount of chili powder used.
  • What should I serve with these bowls? They pair well with a light salad or tortilla chips for a crunchy side.
  • How do I know when shrimp are cooked? Shrimp are done when they turn pink and opaque; avoid cooking them longer than necessary.
  • Can I add more vegetables? Definitely! Feel free to add seasonal veggies or whatever you have on hand.

Nutritional Tips and Dietary Adaptations

This dish isn’t just tasty; it’s also packed with nutrition:

  • High Protein: Each bowl is loaded with protein from shrimp and quinoa, perfect for muscle repair.
  • Healthy Fats: Avocado adds monounsaturated fats, which are great for heart health.
  • Fiber-Rich: Black beans and quinoa provide fiber, aiding digestion and promoting satiety.

Recommended Equipment

Here’s what you’ll need to make your cooking experience seamless:

  • Medium Pot: For cooking quinoa.
  • Skillet: A non-stick skillet is ideal for quickly cooking shrimp.
  • Measuring Cups & Spoons: For accurate ingredient measurements.
  • Mixing Bowls: Helpful for marinating shrimp and combining ingredients.

Serving Suggestions

Once your bowls are assembled, consider these serving ideas:

  • Top with Fresh Lime: A squeeze of lime juice right before serving enhances the freshness.
  • Garnish with Cilantro: Fresh herbs add a pop of color and flavor.
  • Pair with a Light Drink: A refreshing iced tea or sparkling water complements the meal perfectly.

Conclusion

With these Chili-Lime Shrimp Quinoa Bowls, you’ve got a delightful and nutritious meal that’s quick to prepare and bursting with flavor. Whether you’re cooking for yourself or feeding a family, this recipe is sure to impress. Remember, cooking is all about confidence and creativity—so get in the kitchen and enjoy the process! Happy cooking!

Chili-Lime Shrimp Quinoa Bowls Healthy 25-Minute Dinner

Prep Time 10 minutes
Cook Time 15 minutes
Total Time 25 minutes
Servings 4 servings
Calories 450
Enjoy a quick and nutritious dinner with spicy shrimp, fluffy quinoa, and fresh toppings in just 25 minutes.

Ingredients

Protein

  • 1 pound lb Shrimp (peeled and deveined)

Grains

  • 1 cup cup Quinoa (rinsed)

Fruits & Vegetables

  • 1 unit Lime (juiced)
  • 1 teaspoon tsp Chili powder
  • 1 cup cup Corn (fresh or frozen)
  • 1 cup cup Black beans (cooked)
  • 1 unit Avocado (sliced)
  • 1/4 cup cup Cilantro (chopped)

Instructions 

  • Cook quinoa until fluffy, about 15 minutes.
  • Season shrimp with chili powder and lime juice.
  • Cook shrimp quickly in a skillet until pink, about 3-4 minutes per side.
  • Assemble bowls with quinoa, shrimp, corn, black beans, avocado, and cilantro. Serve.

Notes

For extra flavor, add a squeeze of lime or hot sauce.
Calories: 450kcal
Cost: $12
Course: Main Course
Cuisine: American
Keyword: shrimp

Why Teriyaki Beef Bowls are Your New Weeknight Favorite

Welcome to your new go-to recipe for busy nights! These Easy Teriyaki Beef Bowls are not just a meal; they are an experience filled with vibrant flavors, quick preparation, and endless customization. Perfect for those evenings when you want something delicious without spending hours in the kitchen, this recipe brings together tender beef, fresh vegetables, and a sweet-savory teriyaki sauce. Let’s dive into why you’ll love them and how to make the best version possible.

Why You’ll Love This Recipe

  • Quick Preparation: Ready in under 30 minutes, making it ideal for busy weeknights.
  • Flavor-Packed: A delightful combination of savory soy sauce and sweet brown sugar creates a mouthwatering teriyaki sauce.
  • Nutritious Ingredients: Loaded with fresh vegetables like bell peppers and broccoli, these bowls are as healthy as they are tasty.
  • Customizable: Use any vegetables you have on hand, from snap peas to carrots, to suit your family’s tastes.
  • Meal Prep Friendly: Make extra for easy lunches throughout the week, saving you time and effort.

Ingredients for Easy Teriyaki Beef Bowls

Before you start cooking, let’s gather the ingredients. Here’s what you’ll need:

  • 1 lb beef sirloin or flank steak: Thinly sliced against the grain for tenderness.
  • 2 cups fresh vegetables: Bell peppers, broccoli, and snap peas work wonderfully.
  • 1 cup jasmine or basmati rice: For a fluffy base to soak up the sauce.
  • 1/4 cup low-sodium soy sauce: The salty star of the show.
  • 2 tbsp brown sugar: For that perfect touch of sweetness.
  • 2 cloves garlic, minced: Fresh garlic adds depth to the sauce.
  • 1 tsp fresh ginger, grated: A little zing to elevate the flavors.
  • Cooking oil: For sautéing the beef and veggies.

How to Make Easy Teriyaki Beef Bowls

A vibrant Easy Teriyaki Beef Bowl featuring beef slices and colorful veggies in a bowl.

Time to bring it all together! Follow these simple steps to create your delicious teriyaki beef bowls:

  1. Prepare the rice according to package instructions.
  2. Thinly slice the beef against the grain into strips.
  3. In a bowl, whisk together the soy sauce, brown sugar, minced garlic, and grated ginger until well combined.
  4. Heat a large skillet over medium-high heat and add a splash of cooking oil.
  5. Add the sliced beef and cook for 3-4 minutes until browned.
  6. Stir in the fresh vegetables and sauté for another 2-3 minutes until they are tender yet crisp.
  7. Pour the teriyaki sauce over the beef and veggies, stirring well to coat. Let it simmer for an additional minute.
  8. Serve the teriyaki beef over the fluffy rice and enjoy!

Expert Tips for the Best Teriyaki Beef Bowls

  • Freeze for Ease: For perfectly thin slices, freeze the beef for about 30 minutes before slicing—it makes cutting a breeze!
  • Customize Your Veggies: Use whatever fresh vegetables you have. Carrots, zucchini, or even edamame work great!
  • Adjust the Sweetness: If you prefer a sweeter sauce, add more brown sugar to taste.
  • Marinade Magic: Let the beef marinate in soy sauce for 30 minutes before cooking for deeper flavor.
  • Use Low-Sodium Soy Sauce: This helps balance the dish without overwhelming saltiness.
  • Perfect Doneness: Aim for medium-rare to medium for the best texture—about 135°F to 145°F internal temperature.
  • Fresh Herbs: Top with green onions or sesame seeds for a fresh finish.
  • Make It Ahead: Prepare the sauce and slice the beef the night before to streamline cooking when you’re ready to eat.

Common Mistakes and Troubleshooting

Even the best cooks can have mishaps! Here’s how to avoid some common mistakes:

  • Overcooking the Beef: Keep an eye on the beef; it cooks quickly and can become tough if overdone.
  • Too Much Sauce: Start with less sauce. You can always add more if needed, but you can’t take it away!
  • Not Enough Veggies: Don’t skimp on vegetables—they add nutrition and texture. Aim for a colorful mix!
  • Burning Garlic: Add garlic later in the cooking process to prevent it from burning and becoming bitter.

Variations of Teriyaki Beef Bowls

Feeling adventurous? Here are some exciting variations you can try:

  • Spicy Teriyaki Beef: Add red pepper flakes or sriracha to the sauce for a spicy kick.
  • Teriyaki Chicken Bowls: Swap beef for chicken or tofu for a different protein option.
  • Quinoa Bowls: Substitute rice for quinoa for a healthier grain option that’s high in protein.
  • Vegetable-Only Bowl: Skip the beef entirely and amp up the veggies for a delicious vegetarian option.

Storage and Make-Ahead Instructions

Planning ahead? Here’s how to store and reheat your teriyaki beef bowls:

  • Storing Leftovers: Store in an airtight container in the fridge for up to 3 days.
  • Reheating: Gently reheat in the microwave or on the stovetop over low heat, adding a splash of water to keep the rice moist.
  • Make-Ahead Meals: Prep the beef and sauce in advance. Keep the vegetables fresh until you’re ready to cook.

Frequently Asked Questions

  • Can I use frozen beef? Yes, just ensure it’s fully thawed before slicing and cooking.
  • What can I substitute for soy sauce? Tamari or coconut aminos are great alternatives for a gluten-free option.
  • How can I make this dish gluten-free? Use gluten-free soy sauce or tamari instead of regular soy sauce.
  • Can I use a different type of rice? Absolutely! Brown rice, cauliflower rice, or even sushi rice will work well.
  • How long does it take to make? This recipe takes about 30 minutes from start to finish.
  • What other vegetables can I use? Zucchini, carrots, and bok choy are excellent additions.
  • Is this recipe good for meal prep? Yes! It keeps well in the fridge and reheats nicely.
  • Can I make it vegan? Yes, substitute the beef with tofu or tempeh and use a vegan-friendly soy sauce.

Nutritional Tips and Dietary Adaptations

For those watching their diet:

  • Protein Boost: Add edamame for extra protein and fiber.
  • Lower Carbs: Serve over spiralized veggies or cauliflower rice instead of traditional rice.
  • Lean Cuts: Choose lean cuts of beef to reduce fat content.

Equipment Recommendations

Here’s what you’ll need for this recipe:

  • Sharp Knife: For slicing the beef thinly and efficiently.
  • Large Skillet: A non-stick skillet is perfect for easy cooking and cleanup.
  • Whisk: Essential for mixing the teriyaki sauce ingredients thoroughly.
  • Measuring Cups and Spoons: Accurate measurements make for the best results.

Serving Suggestions

To elevate your meal, consider these serving ideas:

  • Garnish with Fresh Herbs: Chopped green onions or cilantro add a pop of color and freshness.
  • Side Dishes: Serve with a light salad or steamed dumplings for an Asian-inspired feast.
  • Pair with Drinks: A chilled sake or iced green tea complements the flavors beautifully.

Conclusion

These Easy Teriyaki Beef Bowls are not just a meal; they’re a canvas for your culinary creativity! With quick prep, delicious flavors, and the freedom to customize, they are sure to become a staple in your kitchen. So gather your ingredients, follow the steps, and enjoy a comforting bowl of homemade goodness. Happy cooking!

Easy Teriyaki Beef Bowls

Prep Time 10 minutes
Cook Time 15 minutes
Total Time 25 minutes
Servings 4 servings
Calories 550
Delicious and quick teriyaki beef bowls with fresh vegetables and fragrant rice, perfect for a satisfying meal.

Ingredients

Meat

  • 1 lb beef sirloin or flank steak, thinly sliced

Vegetables

  • 2 cups fresh vegetables (bell peppers, broccoli, snap peas)

Rice

  • 1 cup jasmine or basmati rice

Sauce

  • 0.25 cup low-sodium soy sauce
  • 2 tbsp brown sugar
  • 2 cloves garlic, minced
  • 1 tsp fresh ginger, grated

Cooking oil

  • as needed cooking oil for sautéing

Instructions 

  • Cook rice according to package instructions.
  • Slice beef against the grain into strips.
  • Whisk soy sauce, brown sugar, garlic, and ginger to make the sauce.
  • Heat oil in a skillet, cook beef for 3-4 minutes until browned.
  • Add vegetables, stir-fry for 2-3 minutes, then pour sauce over and simmer for 1 minute.

Notes

Use a mix of your favorite vegetables for variety.
Calories: 550kcal
Cost: $15
Course: Main Course
Cuisine: Asian
Keyword: Beef, Quick, Teriyaki

Are you looking for a delicious, quick meal that can be whipped up in no time? Look no further! These chicken and rice wraps are not only packed with flavor but also incredibly simple to prepare. Perfect for busy weeknights, they combine tender chicken, wild rice, and fresh ingredients into a satisfying dish that your whole family will love. In this guide, we’ll explore everything you need to know to make these wraps a staple in your kitchen.

Why You’ll Love This Recipe

This recipe is a game-changer for anyone looking to enjoy home-cooked meals without spending hours in the kitchen. Here are some reasons why you’ll adore these chicken and rice wraps:

  • Quick preparation: You can have these wraps ready in under 30 minutes, making them ideal for hectic evenings.
  • Make-ahead friendly: Prepare the chicken and rice mixture in advance, and simply assemble the wraps when you’re ready to eat.
  • Customizable ingredients: Swap out the wild rice for brown rice or quinoa, add your favorite veggies, or experiment with different sauces.
  • Kid-approved: The combination of chicken, cheese, and tortillas makes these wraps a hit with children, while still satisfying adults.
  • Easy cleanup: With just one pan for cooking and simple assembly, you’ll have less mess and more time to enjoy your meal.

Ingredient Breakdown

Let’s dive into the ingredients that make these wraps taste so delicious. Here’s what you’ll need:

  • 1.5 pounds chicken tenders: Boneless and skinless chicken is perfect for quick cooking and shredding.
  • 3 tablespoons olive oil: This will be used for marinating the chicken and sautéing, ensuring a rich flavor.
  • 3 cups wild rice: Use pre-cooked wild rice to save time. It adds texture and a nutty flavor.
  • 1 cup corn kernels: Fresh or frozen, corn adds sweetness and color to the dish.
  • 1.5 cups shredded cheddar cheese: A melty, cheesy filling that ties all the ingredients together.
  • 5 large flour tortillas: Use soft tortillas that can hold all the fillings without tearing.
  • 1 tablespoon olive oil (for cooking): A little extra oil for sautéing the chicken and achieving a golden color.
  • Juice from half a lemon: This brightens the flavors and adds a zesty kick.
  • 2 cloves garlic, minced: Fresh garlic enhances the overall flavor profile.
  • 1 tablespoon ground cumin: Adds warmth and an earthy note to the wraps.
  • 1 teaspoon salt: Essential for seasoning the chicken and rice.
  • 1/2 teaspoon ground black pepper: For a little heat and depth of flavor.
  • Juice from one and a half limes: Balances the richness with acidity.
  • 1 teaspoon sugar: To round out the flavors and enhance sweetness.
  • A small handful of fresh cilantro, chopped: Adds freshness and a burst of color.

Pro Tips for Perfect Wraps

To ensure your chicken and rice wraps turn out perfectly every time, follow these expert tips:

  • Marinate the chicken: Allow the chicken to marinate for at least 15 minutes to enhance flavor.
  • Don’t overcook the chicken: Cook the chicken until just done to keep it juicy; it will continue to cook while resting.
  • Use warm tortillas: Warm the tortillas slightly before assembling to prevent them from cracking.
  • Layer wisely: Start with rice, then chicken, followed by cheese and toppings to ensure even distribution.
  • Wrap tightly: Make sure to roll the wraps tightly to keep all the fillings inside.
  • Experiment with sauces: Try adding ranch, salsa, or a spicy aioli for extra flavor.
  • Cook in batches: If making for a crowd, cook the chicken in batches to avoid steaming.
  • Let them rest: After assembling, let the wraps rest for a few minutes before cutting; this helps them hold together.

Common Mistakes and Troubleshooting

Side view of a delicious wrap with chicken, rice, corn, and cheese on a wooden table.

Even the best cooks encounter hiccups. Here are some common mistakes to avoid:

  • Overcooked rice: Ensure your rice is cooked to the package instructions to maintain the right texture.
  • Under-seasoned chicken: Don’t be shy with salt and spices; they’re essential for flavorful chicken.
  • Too much filling: Avoid overloading the wraps, which can lead to tearing.
  • Cold tortillas: Cold tortillas can crack; always warm them before use.
  • Skipping the marination: Marinating is crucial for flavor; don’t skip this step!

Wrap Variations

Feel free to get creative with your wraps! Here are some variations to consider:

  • BBQ Chicken Wraps: Swap the cumin for BBQ sauce and add cooked bacon bits for a smoky flavor.
  • Spicy Chipotle Wraps: Mix in chipotle sauce with the chicken for a spicy kick.
  • Veggie-Packed Wraps: Add sautéed bell peppers, onions, and zucchini for a veggie boost.
  • Mediterranean Twist: Use feta cheese, olives, and tzatziki sauce for a Mediterranean flair.

Storage and Make-Ahead Instructions

These wraps are perfect for meal prep! Here’s how to store them:

  • Refrigeration: Store assembled wraps in an airtight container in the refrigerator for up to 3 days.
  • Freezing: Freeze unassembled wraps for up to 3 months. Thaw in the fridge before reheating.
  • Reheating: Warm in the microwave or a skillet until heated through; add a splash of water to keep them moist.

Frequently Asked Questions

Here are some common questions about chicken and rice wraps:

  • Can I use other proteins? Yes! Turkey, beef, or tofu can be great substitutes for chicken.
  • What if I don’t have wild rice? Brown rice or quinoa works wonderfully in this recipe.
  • Can I make these wraps vegetarian? Absolutely! Replace the chicken with beans, lentils, or extra veggies.
  • How do I make them gluten-free? Use gluten-free tortillas and ensure your other ingredients are gluten-free.
  • What can I serve with these wraps? Pair them with a side salad, guacamole, or a light soup for a complete meal.
  • How long do leftovers last? They will stay fresh for up to 3 days in the fridge.
  • Can I grill these wraps? Yes! Grilling adds an amazing smoky flavor and crispy texture.
  • What’s the best way to cut them? Use a sharp knife and cut diagonally for the best presentation.

Nutritional Tips and Dietary Adaptations

This recipe can accommodate various diets:

  • Protein boost: Add a scoop of black beans or chickpeas for extra protein and fiber.
  • Lower carb: Use lettuce wraps instead of tortillas for a low-carb option.
  • Dairy-free: Replace cheddar cheese with a dairy-free alternative or omit it entirely.

Essential Equipment

Here’s what you’ll need to make these wraps:

  • Large skillet: For cooking the chicken and sautéing.
  • Cutting board and knife: To chop and prepare your ingredients.
  • Measuring cups and spoons: For accurate measurements of ingredients.
  • Tongs: Useful for flipping the chicken and assembling the wraps.

Serving Suggestions

Here are some ideas for serving your chicken and rice wraps:

  • With dipping sauces: Serve with ranch, salsa, or a spicy mayo on the side.
  • Fresh sides: A crisp green salad or carrot sticks make great accompaniments.
  • Garnish: Top with avocado slices or extra cilantro for a fresh touch.

In conclusion, these quick and flavorful chicken and rice wraps are a terrific addition to any meal plan. They’re easy to prepare, customizable, and packed with flavor. Whether you’re cooking for yourself or a family, these wraps will surely impress. So, roll up your sleeves, gather your ingredients, and get ready to enjoy a delicious homemade meal!