Author

Steven

Browsing

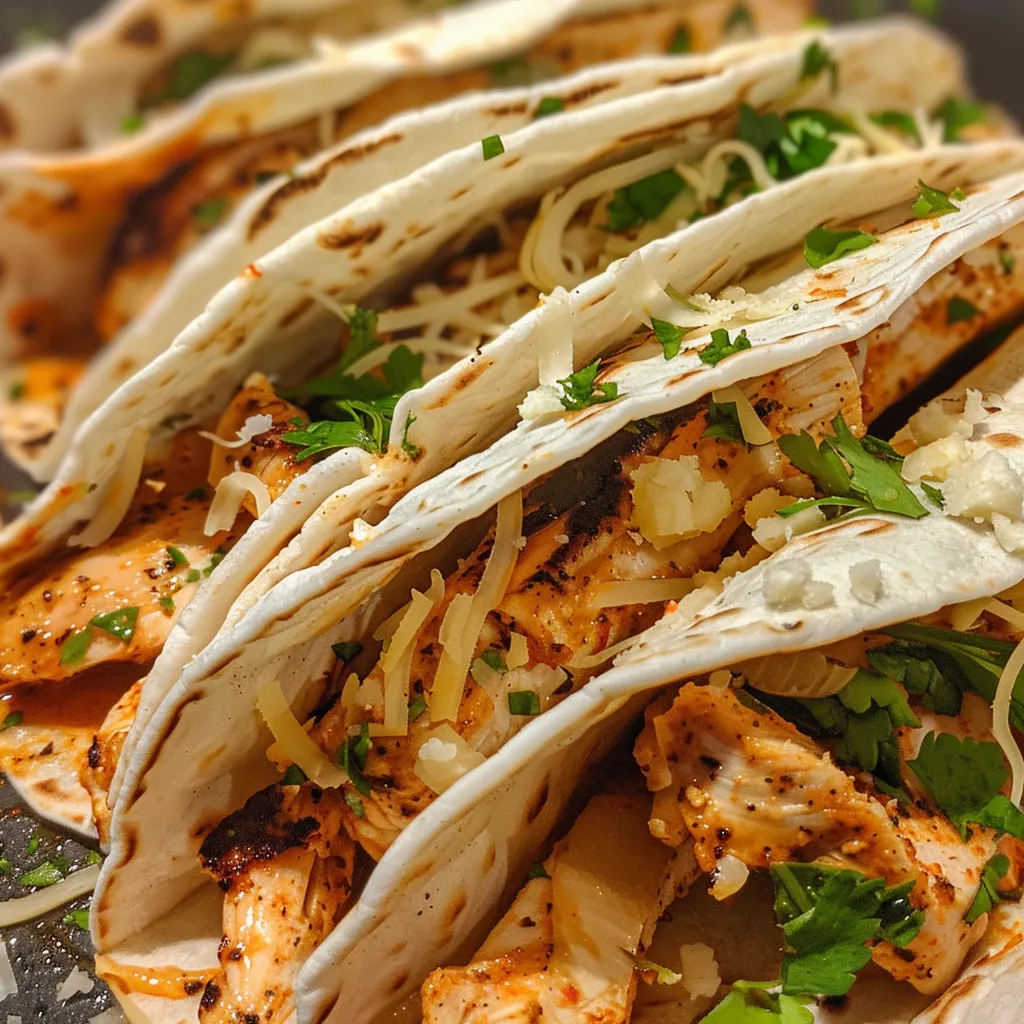
Deliciously Easy Garlic Butter Chicken Wraps: Your New Go-To Meal

If you’re looking for a quick, delicious meal that the whole family can enjoy, look no further than these Garlic Butter Chicken Wraps. Perfect for busy weeknights, this recipe combines juicy chicken, rich garlic butter, and gooey cheese, all wrapped up in a warm tortilla. With simple ingredients, this dish is not only packed with flavor but also incredibly easy to prepare. Let’s dive into how to make these irresistible wraps that are sure to become a staple in your household!

Why You’ll Love This Recipe

  • Quick and Easy: Ready in just 20-30 minutes, these wraps are perfect for busy nights when you need a satisfying meal in a hurry.
  • Family-Friendly: The combination of chicken, cheese, and garlic is a hit with kids and adults alike, making it a great choice for family dinners.
  • Versatile Ingredients: Using ingredients you likely already have in your pantry, you can customize these wraps to suit your family’s taste preferences.
  • Meal Prep Friendly: Make a double batch and store leftovers for easy lunches or dinners throughout the week.
  • Flavor-Packed: The rich flavor of garlic butter combined with cheesy goodness makes these wraps irresistibly delicious.

Ingredients for Your Garlic Butter Chicken Wraps

Here’s what you’ll need to whip up your own batch of Garlic Butter Chicken Wraps:

  • 2 large chicken breasts, cut into strips
  • 4 large flour tortillas or wraps
  • 4 tablespoons unsalted butter
  • 4 cloves garlic, minced
  • 1 teaspoon paprika
  • Salt and freshly ground black pepper, to taste
  • 1 cup shredded mozzarella cheese
  • ½ cup grated Parmesan cheese
  • Fresh parsley, chopped, for garnish
  • Optional: Sliced jalapeños or hot sauce for added heat

Step-by-Step Instructions to Make Garlic Butter Chicken Wraps

Side view of grilled chicken strips wrapped in a soft tortilla, garnished with parsley and spices.

Follow these simple steps to create your delicious wraps:

  • Prepare the Chicken: Season the chicken strips with salt, pepper, and paprika, ensuring they are well coated. Set aside.
  • Cook the Garlic Butter Chicken: In a large skillet over medium-high heat, melt 2 tablespoons of butter. Add minced garlic and cook until fragrant (about 30 seconds). Add the seasoned chicken strips and cook for 6-8 minutes, stirring occasionally, until cooked through and golden. Remove from heat.
  • Assemble the Wraps: Lay out the tortillas on a clean surface. Divide the cooked garlic butter chicken evenly among the tortillas. Sprinkle shredded mozzarella and Parmesan cheeses over the chicken. Add jalapeños or hot sauce if desired.
  • Wrap and Cook: Roll each tortilla tightly to secure the filling. Cook in a heated skillet or air fryer until cheese melts and wraps are golden (about 3-4 minutes per side). Alternatively, bake at 375°F (190°C) for 10-15 minutes.

Pro Tips for Perfect Garlic Butter Chicken Wraps

  • Use Fresh Ingredients: Freshly minced garlic will give you the best flavor. If possible, use fresh herbs to enhance the taste.
  • Chicken Alternatives: Feel free to use rotisserie chicken or any leftover cooked chicken to save time.
  • Customize Your Wraps: Add your favorite veggies like bell peppers or spinach for extra nutrients and flavor.
  • Cheese Varieties: Experiment with different cheeses such as cheddar or pepper jack for a unique twist.
  • Storage Tips: Store leftovers in an airtight container in the fridge for up to 3 days. Reheat in the microwave or skillet.
  • Make Ahead: Prepare the chicken and cheese mixture a day in advance, then assemble and cook when ready to eat.
  • Spice It Up: Add chili flakes or a dash of cayenne pepper to the chicken seasoning for a little heat.
  • Extra Gooeyness: For a cheesier wrap, increase the quantity of mozzarella and Parmesan.

Common Mistakes and Troubleshooting

Here are some common pitfalls and how to avoid them:

  • Overcooking Chicken: Ensure you don’t overcook the chicken; it should be golden brown and juicy. Use a meat thermometer to check if it’s cooked through (165°F/74°C).
  • Wraps Falling Apart: Make sure to roll the wraps tightly and cook them seam-side down first to help seal them.
  • Too Much Garlic: If you’re not a garlic fan, you can reduce the amount of garlic or substitute with garlic powder.
  • Burning the Wraps: Keep an eye on the skillet or air fryer to prevent burning. Cooking times may vary based on the appliance used.

Delicious Variations of Garlic Butter Chicken Wraps

Here are some fun ways to switch up your wraps:

  • Buffalo Chicken Wraps: Toss the cooked chicken strips in buffalo sauce before assembling the wraps for a spicy kick.
  • Veggie-Loaded Wraps: Add sautéed mushrooms, zucchini, or spinach to the chicken for a nutrient boost.
  • BBQ Chicken Wraps: Substitute garlic butter with BBQ sauce for a different flavor profile.
  • Mediterranean Wraps: Include feta cheese, olives, and roasted red peppers for a Mediterranean twist.

Storage and Make-Ahead Instructions

To keep your wraps fresh and delicious, follow these tips:

  • Refrigeration: Store any leftovers in an airtight container for up to 3 days. Reheat in a skillet or microwave.
  • Freezing: Wrap individual portions in foil and place them in a freezer-safe bag. They can be frozen for up to 2 months.
  • Thawing: Thaw frozen wraps in the refrigerator overnight before reheating.
  • Make-Ahead: Prepare the chicken filling and store it in the fridge, then assemble the wraps when ready to cook.

Frequently Asked Questions

  • Can I use other types of meat? Absolutely! Feel free to substitute chicken with turkey, beef, or even tofu for a vegetarian option.
  • How do I make these wraps healthier? Use whole wheat tortillas, reduce the amount of cheese, and add more veggies to increase fiber and nutrients.
  • Can I use a different type of cheese? Yes, you can use any cheese you like! Cheddar, gouda, or even vegan cheese work well.
  • What’s the best way to reheat leftovers? The best way to reheat is in a skillet over medium heat until warmed through, which keeps the wraps crispy.
  • Can I make these wraps spicy? Yes! Add hot sauce to the chicken or sprinkle in some chili flakes for added heat.
  • How do I prevent the tortillas from tearing? Warm the tortillas slightly before wrapping; this makes them more pliable and less likely to tear.
  • Can I bake these wraps instead of frying? Yes! Baking is a healthier option. Bake at 375°F (190°C) for about 10-15 minutes until golden and crispy.
  • Are these wraps kid-friendly? Definitely! The mild flavors and cheesy goodness are appealing to kids, making them a perfect family meal.

Nutrition Tips and Dietary Adaptations

If you’re looking to adapt this recipe to fit your dietary needs:

  • Gluten-Free: Use gluten-free tortillas to make this recipe suitable for those with gluten sensitivities.
  • Dairy-Free: Substitute cheese with dairy-free alternatives and use vegan butter for a dairy-free version.
  • Low-Carb: Use lettuce wraps instead of tortillas for a low-carb option that’s still flavorful.

Equipment Recommendations

To make these wraps, you’ll need:

  • Skillet or Frying Pan: For cooking the chicken and finishing the wraps.
  • Air Fryer: A great option for achieving a crispy texture without added oil.
  • Meat Thermometer: To ensure your chicken is cooked safely.
  • Sharp Knife and Cutting Board: For preparing your ingredients.

Serving Suggestions

Enjoy your Garlic Butter Chicken Wraps with these tasty accompaniments:

  • Fresh Salad: A light side salad with vinaigrette pairs beautifully with the wraps.
  • Chips and Salsa: Serve with tortilla chips and your favorite salsa for a fun crunch.
  • Fruit Salad: A refreshing fruit salad can balance out the savory flavors of the wraps.
  • Yogurt Sauce: A cool yogurt or tzatziki sauce can add a nice contrast to the warm wraps.

In conclusion, these Garlic Butter Chicken Wraps are a fantastic option for a flavorful, easy meal that can fit into any busy schedule. With so many ways to customize and enjoy them, you’ll never get bored. Remember, cooking should be fun and stress-free, so don’t hesitate to experiment with this recipe. Happy cooking!

Viral Garlic Butter Chicken Wraps

Prep Time 10 minutes
Cook Time 15 minutes
Total Time 25 minutes
Servings 4 wraps
Calories 550
Delicious and easy garlic butter chicken wraps perfect for a quick meal or snack. Packed with flavor and cheesy goodness, they are sure to become a favorite.

Ingredients

Chicken

  • 2 large chicken breasts (cut into strips)
  • 4 large flour tortillas or wraps
  • 4 tablespoons unsalted butter
  • 4 cloves garlic (minced)
  • 1 teaspoon paprika
  • to taste Salt and freshly ground black pepper
  • 1 cup shredded mozzarella cheese
  • ½ cup grated Parmesan cheese
  • for garnish Fresh parsley, chopped
  • optional sliced jalapeños or hot sauce (for added heat)

Instructions 

  • Season chicken strips with salt, pepper, and paprika. Set aside.
  • In a skillet, melt 2 tablespoons of butter, add garlic, and cook until fragrant. Add chicken and cook 6-8 minutes until golden. Remove from heat.
  • Divide chicken among tortillas, sprinkle with cheeses, and add jalapeños or hot sauce if desired.
  • Roll tortillas tightly and cook in a skillet or air fryer until cheese melts and wraps are golden, about 3-4 minutes per side, or bake at 375°F (190°C) for 10-15 minutes.

Notes

For extra flavor, garnish with chopped parsley before serving.
Calories: 550kcal
Cost: $12
Course: Main Course
Cuisine: American
Keyword: Chicken, Garlic, Wraps

Transform Your Dinner Routine with Garlic Soy Shrimp Rice Bowls

Welcome to a delicious culinary adventure! If you’re looking for an exciting and easy recipe to elevate your dinner, look no further. This Garlic Soy Shrimp Rice Bowl with a zesty lime drizzle is not only quick to prepare but also bursting with flavor. Perfectly marinated shrimp served over fluffy cooked jasmine rice creates a meal that is both satisfying and nutritious. In this article, we’ll explore every aspect of this recipe to ensure it becomes a staple in your kitchen.

Why You’ll Love This Recipe

This recipe isn’t just about taste; it’s about making your cooking experience enjoyable and stress-free. Here are five compelling reasons to give it a try:

  • Quick and Easy: Ready in under 30 minutes, making it perfect for busy weeknights.
  • Flavor Explosion: A delightful combination of soy sauce, honey, and garlic gives your shrimp an irresistible taste.
  • Customizable: Adapt the recipe to your preferences—add your favorite vegetables or adjust the spice level!
  • Healthy Option: Packed with protein and fresh ingredients, this dish supports a balanced diet.
  • Impressive Presentation: The vibrant colors and textures make it a feast for the eyes as well as the palate.

Ingredient Breakdown

To create the perfect Garlic Soy Shrimp Rice Bowl, you’ll need the following ingredients:

  • Shrimp: 1 pound of peeled and deveined shrimp. For convenience, you can also use frozen shrimp—just make sure to thaw them before cooking.
  • Soy Sauce: 3 tablespoons for marinating the shrimp; enhances flavor while keeping it moist.
  • Honey: 2 tablespoons add sweetness and balance the saltiness of the soy sauce.
  • Garlic: 3 cloves minced for that aromatic kick.
  • Sesame Oil: 1 tablespoon adds a nutty flavor; you can substitute with olive oil if necessary.
  • Fresh Ginger: 1 teaspoon grated ginger for a fresh zing in your dish.
  • Green Onions: Chopped for garnish; they add a nice crunch and color.
  • Sesame Seeds: Optional garnish that provides texture and visual appeal.
  • Cooked Jasmine Rice: 2 cups—fluffy rice is the perfect base for your shrimp.
  • Rice Vinegar: 1 tablespoon enhances the flavor of the rice.
  • Lime Juice: 2 tablespoons for that zesty drizzle.
  • Sriracha: 1 teaspoon for those who like a kick of heat; adjust to taste.

Pro Tips for Perfect Garlic Soy Shrimp Rice Bowls

A vibrant bowl featuring juicy shrimp glazed in garlic soy sauce over jasmine rice.

To ensure your dish turns out perfectly, consider these expert tips:

  • Marinade Time: For the best flavor, let the shrimp marinate for at least 15 minutes. This allows the flavors to penetrate the shrimp.
  • Cooking Temperature: Cook shrimp on medium-high heat to achieve a nice sear without overcooking.
  • Don’t Overcrowd the Pan: Cook shrimp in batches if necessary to ensure even cooking.
  • Use Fresh Ingredients: Fresh garlic and ginger will provide the best flavor; dried versions are not a suitable substitute.
  • Variations: Feel free to swap shrimp for chicken, tofu, or even salmon—just adjust the cooking time accordingly.
  • Vegetable Boost: Add vegetables like bell peppers, snap peas, or broccoli for extra nutrients and color.
  • Make-Ahead: Prepare the marinade and chop ingredients ahead of time for an even quicker dinner prep.
  • Serving Size: This recipe easily serves 4; increase ingredients proportionally for larger gatherings.

Common Mistakes and Troubleshooting

Even experienced cooks can run into issues! Here’s how to avoid some common pitfalls:

  • Shrimp Overcooking: Keep a close eye on the shrimp; they should turn pink and opaque. Remove from heat immediately.
  • Too Salty: If your dish turns out too salty, balance it with a bit of extra honey or serve with more rice.
  • Rice Clumping: Rinse rice before cooking to remove excess starch, ensuring fluffy grains.
  • Too Spicy: If the drizzle is too spicy, add more honey or lime juice to balance the heat.

Variations to Try

Want to mix it up a bit? Here are some delicious variations:

  • Honey Garlic Chicken: Substitute shrimp with diced chicken breast, following the same marinating and cooking process.
  • Tofu Delight: Use firm tofu instead of shrimp for a vegetarian option; press and cube the tofu before marinating.
  • Spicy Salmon Rice Bowl: Replace shrimp with salmon fillets and adjust cooking time accordingly.
  • Vegetable-Only Bowl: Skip the protein and load up on your favorite veggies, sautéing them in the marinade.

Storage and Make-Ahead Instructions

This dish can easily be prepared ahead of time and stored for later. Here’s how:

  • Refrigeration: Store leftovers in an airtight container in the fridge for up to 3 days.
  • Freezing: You can freeze the cooked shrimp and rice separately for up to 2 months. Thaw before reheating.
  • Make-Ahead: Prepare the marinade and chop ingredients the night before for a quick assembly on the day of cooking.

FAQ: Common Questions About Garlic Soy Shrimp Rice Bowls

  • Can I use frozen shrimp? Yes, just ensure they are fully thawed and patted dry before marinating.
  • Is there a substitute for soy sauce? You can use tamari or coconut aminos for a gluten-free option.
  • How spicy is the spicy lime drizzle? It’s adjustable—add more or less Sriracha to suit your taste.
  • Can I make this dish ahead of time? Absolutely! Prep the shrimp and rice in advance for quick cooking later.
  • What can I serve with this dish? This dish pairs well with a simple salad or steamed vegetables.
  • How do I store leftovers? Keep in an airtight container in the fridge for up to 3 days.
  • Can I use other types of rice? Yes, brown rice or even cauliflower rice can be great alternatives!
  • What if I don’t like shrimp? Substitute with any protein you prefer, such as chicken, beef, or tofu.

Nutrition Tips and Dietary Adaptations

This recipe can easily be adapted to fit various dietary needs:

  • Low-Carb Option: Use cauliflower rice instead of jasmine rice for a lower-carb meal.
  • Gluten-Free: Ensure your soy sauce is gluten-free or use tamari.
  • Vegan-Friendly: Swap shrimp for tofu and use maple syrup instead of honey.
  • Protein Boost: Add edamame or chickpeas for an extra protein punch if desired.

Essential Kitchen Equipment

To make your cooking experience seamless, here’s a list of recommended tools:

  • Non-stick Skillet: Ideal for cooking shrimp without sticking and easy cleanup.
  • Measuring Cups and Spoons: For accurate ingredient measurement.
  • Spatula: A sturdy spatula helps flip and serve your shrimp without breaking them.
  • Mixing Bowls: To marinate shrimp and mix your ingredients easily.

Serving Suggestions

To elevate your Garlic Soy Shrimp Rice Bowls even further, consider these serving ideas:

  • Garnish: Fresh cilantro or parsley can add a vibrant finishing touch.
  • Side Dishes: Pair with a light cucumber salad or steamed asparagus for a complete meal.
  • Extra Lime: Serve with lime wedges for those who enjoy an extra kick of citrus.
  • Chili Flakes: A sprinkle of chili flakes can enhance the dish’s flavor for spice lovers.

Conclusion

Cooking doesn’t need to be complicated, and this Garlic Soy Shrimp Rice Bowl with a zesty lime drizzle is a perfect example of how simple ingredients can come together to create a fantastic meal. With its rich flavors, quick prep time, and easy variations, this dish is sure to become a favorite in your home. So, gather your ingredients, follow the steps, and enjoy a delightful dinner that will impress your family and friends!

Garlic Soy Shrimp Rice Bowls with Spicy Lime Drizzle

Prep Time 10 minutes
Cook Time 15 minutes
Total Time 25 minutes
Servings 4 servings
Calories 450
Enjoy a flavorful bowl of tender shrimp over jasmine rice, topped with a spicy lime drizzle for a perfect quick meal.

Ingredients

Protein

  • 1 pound Shrimp peeled and deveined

Sauces and Oils

  • 3 tablespoons Soy Sauce
  • 2 tablespoons Honey
  • 1 tablespoon Sesame Oil
  • 1 teaspoon Fresh Ginger grated
  • 1 tablespoon Rice Vinegar
  • 1 tablespoon Lime Juice
  • 1 teaspoon Sriracha adjust to taste
  • 1 teaspoon Honey

Vegetables and Garnishes

  • 1 tablespoon Green Onions chopped for garnish
  • Sesame Seeds for garnish Sesame Seeds

Carbohydrate

  • 2 cups Cooked Jasmine Rice

Instructions 

  • Marinate shrimp with 1 tbsp soy sauce, honey, garlic, ginger, and sesame oil for 10 minutes.
  • Cook shrimp in a skillet over medium heat until pink and cooked through, about 5-7 minutes.
  • Meanwhile, prepare spicy lime drizzle by mixing lime juice, sriracha, rice vinegar, and honey.
  • Serve cooked shrimp over warm jasmine rice, drizzle with spicy lime sauce, and garnish with green onions and sesame seeds.

Notes

Adjust spice level by varying sriracha amount.
Calories: 450kcal
Cost: $15
Course: Main Course
Cuisine: Asian
Keyword: shrimp

Discover the Joy of Cooking with This Roasted Zucchini Salad

If you’re looking for a vibrant, nutritious dish that brings the flavors of summer to your table, look no further than this delightful roasted zucchini salad. This recipe combines fresh zucchini, yellow squash, and crispy chickpeas, all drizzled with a creamy yogurt tahini sauce. It’s not just a salad; it’s a celebration of seasonal produce, perfect for busy weeknights or weekend gatherings. You’ll find that cooking this roasted zucchini salad is straightforward and rewarding, ensuring you enjoy every bite.

Why You’ll Love This Recipe

This roasted zucchini salad is more than just a side dish; it’s a complete meal that is packed with flavor and nutrition. Here are five reasons why you’ll adore it:

  • Quick and Easy Preparation: With minimal prep time and straightforward steps, this recipe can be on your table in under an hour.
  • Flavor-Packed: The combination of roasted vegetables and a creamy sauce creates a delightful contrast of textures and tastes.
  • Nutrient-Rich Ingredients: Zucchini, chickpeas, and potatoes provide fiber, vitamins, and minerals, making this salad a wholesome choice.
  • Versatile and Customizable: You can easily modify this salad to suit your tastes or dietary needs, whether you’re vegetarian, vegan, or gluten-free.
  • Perfect for Meal Prep: This dish stores well, allowing you to enjoy leftovers throughout the week without losing flavor.

Ingredients Breakdown

Here’s what you’ll need to create this delectable roasted zucchini salad:

  • Zucchini and Yellow Squash: 2 zucchini and 2 yellow summer squash, sliced into half moons. These vegetables are the stars of the salad, offering a fresh crunch.
  • Baby Red Potatoes: 1 lb of baby red potatoes, diced. They add a hearty element to the salad.
  • Crispy Chickpeas: 1 can (15 oz) of chickpeas, rinsed and dried. Roasting them gives a satisfying crunch.
  • Olive Oil: Extra virgin olive oil for roasting and the sauce. It enhances flavor and provides healthy fats.
  • Seasonings: Garlic powder, oregano, thyme, salt, and black pepper to season the vegetables and chickpeas.
  • Yogurt Tahini Sauce: 1 cup of plain Greek yogurt, ¼ cup tahini, lemon juice, garlic, cumin, and salt for a creamy dressing.
  • Fresh Herbs: Chopped fresh basil for garnish, adding a burst of freshness.
  • Optional Add-Ins: Arugula or greens of choice for added texture, and feta cheese for a salty finish.

How to Make Roasted Zucchini Salad

Colorful roasted zucchini, yellow squash, and chickpeas in a vibrant salad.

Follow these simple steps to create your roasted zucchini salad:

  1. Preheat the Oven: Set your oven to 425°F (220°C). Line two rimmed baking sheets with parchment paper and lightly spray them with oil.
  2. Prep the Vegetables: Dice the potatoes, cut the zucchini and yellow squash into half moons, and rinse and drain the chickpeas, ensuring they are dry.
  3. Season the Potatoes: In a small bowl, mix half the seasoning blend with 1 Tbsp of olive oil. Toss the diced potatoes in this mixture, then spread them out on one of the baking sheets.
  4. Start Roasting: Roast the potatoes for 15 minutes to give them a head start.
  5. Add Chickpeas: Toss the chickpeas with the remaining olive oil and seasoning blend. After 15 minutes, add them to the baking sheet with the potatoes and roast for another 20-25 minutes until everything is golden brown.
  6. Roast Zucchini and Squash: On the second baking sheet, toss the zucchini and yellow squash with olive oil and seasonings. Roast for 12-15 minutes until tender.
  7. Make the Yogurt Tahini Sauce: In a blender or food processor, combine Greek yogurt, tahini, lemon juice, garlic, cumin, and salt. Blend until smooth, adjusting the consistency with water if needed.
  8. Assemble the Salad: In a large bowl, combine roasted veggies and chickpeas. Drizzle with yogurt tahini sauce, top with basil, and squeeze fresh lemon juice over everything.

Pro Tips for the Perfect Roasted Zucchini Salad

To ensure your roasted zucchini salad turns out perfectly, keep these expert tips in mind:

  • Don’t Overcrowd the Baking Sheets: Spread vegetables out in a single layer for even roasting.
  • Use Fresh Ingredients: Fresh vegetables will enhance the flavor and texture of your salad.
  • Experiment with Seasonings: Feel free to add spices like paprika or chili powder for extra flavor.
  • Check for Doneness: Depending on your oven, roasting times may vary. Keep an eye on the veggies to prevent burning.
  • Balance the Dressing: Adjust the yogurt tahini sauce to your preferred creaminess by adding more water if needed.
  • Make Ahead: You can roast the vegetables and store them in the fridge to save time during meal prep.
  • Pair with Protein: Add grilled chicken or chickpeas for a more filling meal.
  • Garnish for Presentation: Use fresh herbs and a sprinkle of feta to elevate the dish visually.

Common Mistakes and Troubleshooting

Even the best cooks make mistakes! Here are some common issues and how to fix them:

  • Vegetables Are Soggy: This often happens when they are overcrowded on the baking sheet. Ensure they have enough space to roast properly.
  • Chickpeas Aren’t Crispy: If they aren’t dried thoroughly before roasting, they won’t get crispy. Make sure to pat them dry.
  • Dressing Is Too Thick: Add a little water or extra lemon juice to thin the yogurt tahini sauce.
  • Lack of Flavor: Adjust seasonings to your taste. If it’s bland, a pinch of salt or a splash of lemon juice can help.

Variations to Try

This roasted zucchini salad is highly customizable! Here are some variations to inspire you:

  • Grilled Version: Swap roasting for grilling the zucchini and squash for a smoky flavor.
  • Spicy Chickpeas: Toss chickpeas with cayenne pepper or your favorite hot sauce for a kick.
  • Vegan Adaptation: Use a plant-based yogurt in place of Greek yogurt for a vegan-friendly option.
  • Add Nuts: Sprinkle toasted pine nuts or walnuts for additional crunch and healthy fats.

Storage and Make-Ahead Instructions

This roasted zucchini salad is perfect for meal prep! Here’s how to store it:

  • Refrigeration: Store leftovers in an airtight container in the fridge for up to 3 days. The flavors will meld beautifully over time.
  • Make-Ahead: Roast the vegetables and chickpeas ahead of time. Store them separately from the dressing until you’re ready to serve.
  • Freezing: While it’s best enjoyed fresh, you can freeze the roasted veggies for up to a month. Thaw and reheat before serving.

Comprehensive FAQ

Here are answers to some common questions about this roasted zucchini salad:

  • Can I use other vegetables?: Absolutely! Feel free to add bell peppers, carrots, or any seasonal vegetables you enjoy.
  • How can I make it gluten-free?: This recipe is naturally gluten-free, but always check your tahini and yogurt labels to be sure.
  • Can I prepare the tahini sauce in advance?: Yes, the yogurt tahini sauce can be made a day ahead and stored in the fridge.
  • What can I substitute for tahini?: Sunflower seed butter or almond butter can work as alternatives, though they will change the flavor slightly.
  • Can I make this salad vegan?: Yes! Substitute Greek yogurt with a dairy-free yogurt alternative.
  • What should I serve with this salad?: It pairs well with grilled meats, fish, or can be enjoyed on its own as a light meal.
  • How do I know when the veggies are done?: They should be tender and golden brown. A fork should easily pierce the potatoes and zucchini.
  • Can I double the recipe?: Yes! Just make sure to use larger baking sheets to avoid overcrowding.

Nutritional Tips and Dietary Adaptations

This salad is not only delicious but also nutritious! Here are some tips to make it even healthier:

  • Boost Fiber: Add more legumes like black beans or lentils for extra fiber and protein.
  • Use Whole Grains: Serve the salad over quinoa or brown rice for a complete meal.
  • Reduce Sodium: Use low-sodium chickpeas and limit added salt to make it heart-healthier.

Equipment Recommendations

Having the right tools can make your cooking experience smoother:

  • Sheet Pans: Invest in high-quality, sturdy sheet pans for even roasting.
  • Food Processor: A food processor makes preparing the tahini sauce quick and easy.
  • Sharp Knife: A good knife is essential for cutting vegetables evenly, ensuring they cook at the same rate.

Serving Suggestions

For a complete meal, consider these serving ideas:

  • Pair with Protein: Grilled chicken, steak, or tofu makes for a hearty addition.
  • Serve with Bread: A slice of crusty bread or pita can help scoop up the delicious salad.
  • Garnish: Finish with extra fresh herbs or a drizzle of balsamic reduction for a touch of elegance.

Embrace the joy of cooking with this roasted zucchini salad; it’s a dish that not only nourishes your body but also brings a sense of accomplishment in the kitchen. Cooking doesn’t have to be complicated—just follow these simple steps, and you’ll create a meal that shines with flavor and freshness. Happy cooking!

Roasted Zucchini Salad with Yogurt Tahini Sauce

Prep Time 15 minutes
Cook Time 40 minutes
Total Time 55 minutes
Servings 4 servings
Calories 350
A vibrant and healthy roasted vegetable salad topped with a creamy tahini yogurt sauce, perfect for a light lunch or dinner.

Ingredients

Vegetables

  • 2 pieces zucchini (cut into half moons)
  • 2 pieces yellow summer squash (cut into half moons)
  • 1 Tbsp extra virgin olive oil (for roasting)
  • ½ tsp garlic powder
  • 1 tsp dried oregano
  • ½ tsp dried thyme
  • ½ tsp kosher salt (more to taste)
  • ½ tsp black pepper
  • 1 15 oz can chickpeas (drained and rinsed)
  • 1 lb baby red potatoes (diced)
  • 2 Tbsp extra virgin olive oil (half for potatoes, half for chickpeas)
  • 1 tsp garlic powder
  • 2 tsp dried oregano
  • 1 tsp dried thyme
  • 1 tsp kosher salt
  • ½ tsp black pepper

Sauce

  • 1 cup plain Greek yogurt
  • ¼ cup tahini
  • 1 large lemon (juiced, about ¼ cup of lemon juice)
  • 2 Tbsp extra virgin olive oil
  • 1 clove garlic (minced)
  • ½ tsp ground cumin
  • ½ tsp salt
  • 2 Tbsp fresh basil (chopped)

Optional greens and cheese

  • arugula or greens of choice (optional)
  • feta cheese (optional)

Instructions 

  • Preheat oven to 425°F (220°C). Line baking sheets with parchment and spray with oil.
  • Dice potatoes, cut zucchini and squash into half moons. Toss potatoes with half the olive oil and seasonings, roast 15 minutes.
  • Add chickpeas to the sheet with potatoes, toss with remaining oil and seasonings, roast 20-25 minutes until golden.
  • Meanwhile, toss zucchini and squash with olive oil and seasonings, roast 12-15 minutes.
  • Blend yogurt, tahini, lemon juice, olive oil, garlic, cumin, and salt until smooth. Add water to desired consistency.
  • Assemble the salad by combining roasted veggies, chickpeas, greens, top with basil, feta, and lemon juice.

Notes

You can grill the zucchini and squash instead of roasting for a smoky flavor.
Calories: 350kcal
Cost: $15
Course: Salad
Cuisine: Mediterranean
Keyword: Zucchini

Unlock the Secrets to a Wholesome Chicken Pasta Bowl Ideal for Busy Nights

Welcome to the world of easy, comforting meals! If you’re looking to whip up a creamy chicken pasta bowl that is not only delicious but also loaded with nutrients, you’ve come to the right place. This recipe is designed for those busy weeknights where you want to serve something wholesome without spending hours in the kitchen. With tender chicken, vibrant roasted veggies, and a luxurious cream sauce, this dish is sure to become a family favorite. Let’s dive into this delightful culinary experience!

Why You’ll Love This Recipe

This creamy chicken pasta bowl is packed with benefits that make it a go-to meal for any weeknight. Here are five reasons why this recipe stands out:

  • Time-Saving: This is a one-pan meal, meaning less cleanup and more time to relax after dinner.
  • Flavor Explosion: The combination of roasted vegetables and a rich cream sauce elevates the dish to a gourmet level.
  • Customizable: Feel free to swap out the vegetables or pasta for your favorites, making it your own.
  • Nutrient-Rich: Packed with protein from the chicken and vitamins from the veggies, this dish is as healthy as it is delicious.
  • Kid-Friendly: The creamy sauce and tender pasta appeal to even the pickiest eaters, ensuring no leftovers!

Ingredient Breakdown: What You Need

Let’s take a closer look at the ingredients that make this dish shine, along with some helpful substitutions:

  • Chicken: 2 boneless, skinless chicken breasts, cubed. You can use thighs for a juicier option.
  • Pasta: 8 oz of penne or fusilli. Whole wheat pasta can be a great substitute for a healthier option.
  • Vegetables: 1 cup each of broccoli florets, sliced mushrooms, and diced potatoes. Feel free to add bell peppers, zucchini, or spinach.
  • Heavy Cream: 1/2 cup for that luscious sauce. For a lighter version, substitute with half-and-half or Greek yogurt.
  • Parmesan Cheese: 1/4 cup, grated. Nutritional yeast can be a great vegan alternative.
  • Garlic: 2 cloves, minced. Fresh garlic enhances the flavor, but garlic powder can work in a pinch.
  • Olive Oil: 2 tbsp for sautéing. You can also use butter or avocado oil.
  • Italian Herbs: 1 tsp dried herbs. Fresh herbs like basil or parsley add a fresh touch.
  • Seasoning: Salt and black pepper to taste.

Step-by-Step Instructions

Close-up of a delicious creamy pasta bowl with chicken and vegetables.

Ready to cook? Follow these simple steps to create your creamy chicken pasta bowl:

  1. Preheat the Oven: Set your oven to 400°F (200°C) for roasting the vegetables.
  2. Prepare the Chicken: In a large skillet, heat 1 tbsp of olive oil over medium heat. Add the cubed chicken, seasoning with salt and pepper. Cook until golden brown, about 7 minutes. Remove and set aside.
  3. Roast the Vegetables: On a baking sheet, toss the diced potatoes, broccoli, and mushrooms with olive oil, salt, and pepper. Roast for 20-25 minutes, until tender and slightly caramelized.
  4. Cook the Pasta: In a large pot, bring salted water to a boil and cook the pasta until al dente. Reserve 1/2 cup of pasta water, then drain the rest.
  5. Make the Sauce: In the same skillet used for the chicken, add garlic and sauté for 1 minute. Pour in the heavy cream, followed by the Parmesan cheese and dried herbs. Stir until the sauce thickens.
  6. Combine Everything: Add the cooked chicken and pasta to the sauce, tossing until well coated. If the sauce is too thick, add reserved pasta water until you reach the desired consistency.
  7. Serve and Enjoy: Plate your creamy chicken pasta bowl, garnishing with extra Parmesan and fresh herbs if desired.

Pro Tips for Perfecting Your Dish

To elevate your dish, consider these expert tips:

  • Don’t Overcook the Pasta: Aim for al dente; it will continue cooking in the sauce.
  • Reserve Pasta Water: The starchy water helps bind the sauce to the pasta.
  • Experiment with Flavors: Add a pinch of red pepper flakes for heat or a splash of lemon juice for brightness.
  • Use Fresh Ingredients: Fresh garlic and herbs make a noticeable difference in flavor.
  • Let It Rest: Allow the dish to sit for a few minutes before serving to enhance the flavors.
  • Make It Ahead: Prepare the chicken and sauce in advance, then simply reheat and add cooked pasta before serving.
  • Check for Seasoning: Always taste and adjust seasoning before serving.
  • Garnish Creatively: Fresh herbs or a drizzle of olive oil can elevate the presentation.

Common Mistakes and Troubleshooting

Even the best cooks make mistakes! Here’s how to troubleshoot common issues:

  • Too Thick Sauce: Add a splash of pasta water or broth to thin it out.
  • Overcooked Chicken: Use a meat thermometer to ensure chicken reaches 165°F without overcooking.
  • Flavor Lacking: Adjust with more seasoning or a splash of vinegar to brighten the dish.
  • Pasta Sticking Together: Ensure you stir the pasta during cooking and add olive oil after draining.
  • Too Salty: Balance with a bit of sugar or a squeeze of lemon juice.

Variations to Try

Here are some delicious variations to keep the recipe exciting:

  • Vegetarian Version: Replace chicken with chickpeas or tofu for a hearty, plant-based meal.
  • Seafood Twist: Substitute chicken for shrimp or scallops for a coastal flavor.
  • Spicy Chicken Pasta: Add diced jalapeños or crushed red pepper for a kick.
  • One-Pan Bake: Combine all ingredients in a baking dish and bake at 375°F for 30-35 minutes for an easy casserole-style meal.

Storage and Make-Ahead Instructions

This creamy chicken pasta bowl is great for meal prep!

  • Fridge: Store leftovers in an airtight container for up to 3 days.
  • Freezer: This dish can be frozen for up to 2 months; reheat on the stovetop with a splash of cream or broth.
  • Make-Ahead: Prepare the chicken, sauce, and vegetables a day in advance and combine just before serving.

Frequently Asked Questions

Here are some common queries about this recipe:

  • Can I use other types of pasta? Yes! Feel free to substitute with your favorite pasta type.
  • Is there a dairy-free option? Absolutely! Use coconut cream and nutritional yeast for a dairy-free version.
  • What can I add for extra protein? Consider adding beans, lentils, or more chicken for a protein boost.
  • How can I make this recipe gluten-free? Use gluten-free pasta and ensure your chicken broth is gluten-free as well.
  • Can I add more vegetables? Yes! Carrots, zucchini, or bell peppers would be fantastic additions.
  • How do I reheat leftovers? Reheat on the stovetop over low heat, adding a bit of cream or broth to loosen the sauce.
  • Can I make this without cream? Yes, substituting with a thick vegetable broth or a cashew cream can work.
  • How spicy is this dish? It can be made mild, but you can easily adjust the spice level to your liking!

Nutrition Tips and Dietary Adaptations

For those monitoring their nutrition, consider these tips:

  • Increase Fiber: Add more vegetables or use whole-grain pasta for added fiber.
  • Lower Fat: Use low-fat cream or yogurt to reduce the overall fat content.
  • Boost Nutrients: Incorporating a variety of colorful vegetables enhances both nutrition and presentation.

Essential Kitchen Equipment

To make your cooking process smoother, here are some must-have tools:

  • Large Skillet: A deep skillet is ideal for sautéing and simmering.
  • Large Pot: For boiling pasta effectively.
  • Baking Sheet: Perfect for roasting vegetables.
  • Measuring Cups and Spoons: Essential for accurate ingredient portions.
  • Colander: For draining pasta effortlessly.

Serving Suggestions

Presentation matters! Elevate your dish with these serving ideas:

  • Garnish: Fresh herbs like basil or parsley add color and freshness.
  • Pair with Bread: Serve with crusty bread or garlic bread for a complete meal.
  • Wine Pairing: A crisp white wine like Sauvignon Blanc complements the creaminess beautifully.

There you have it! With this comprehensive guide, you’re ready to create a creamy chicken pasta bowl that’s not only quick and easy but also bursting with flavor. Remember, cooking is all about enjoying the process and experimenting with flavors. So roll up your sleeves, gather your ingredients, and let’s make mealtime memorable!

Creamy Chicken Pasta Bowl with Roasted Veggies Potatoes

Prep Time 10 minutes
Cook Time 20 minutes
Total Time 30 minutes
Servings 4 servings
Calories 650
A hearty and creamy pasta dish featuring tender chicken, roasted potatoes, and fresh vegetables, perfect for a satisfying meal.

Ingredients

Protein

  • 2 pieces boneless, skinless chicken breasts (cubed)
  • 8 oz pasta such as penne or fusilli
  • 1 cup broccoli florets
  • 1 cup sliced mushrooms
  • 1 cup diced potatoes
  • 0.5 cup heavy cream
  • 0.25 cup grated Parmesan cheese
  • 2 cloves garlic (minced)
  • 2 tbsp olive oil
  • 1 tsp dried Italian herbs
  • to taste Salt and black pepper

Instructions 

  • Cook pasta according to package instructions; drain and set aside.
  • Toss potatoes with 1 tbsp olive oil, salt, and pepper; roast at 400°F (200°C) for 15 minutes.
  • In a skillet, heat remaining olive oil and cook chicken until browned; add garlic and cook for 1 minute.
  • Add broccoli, mushrooms, heavy cream, Parmesan, and Italian herbs; simmer until vegetables are tender and sauce thickens.
  • Combine cooked pasta, roasted potatoes, and sauce; toss to combine and serve hot.

Notes

For extra flavor, sprinkle additional Parmesan or fresh herbs before serving.
Calories: 650kcal
Cost: $15
Course: Main Course
Cuisine: American
Keyword: Chicken, Pasta, Vegetables

Welcome to the Flavorful World of BBQ Chickpea Pasta!

If you’re looking for a meal that is both satisfying and quick to prepare, you’ve come to the right place! This BBQ Chickpea Pasta is not only packed with flavor but also incredibly easy to make. With a delightful blend of wholesome ingredients, it’s perfect for busy weeknights or a leisurely family dinner. In this article, we will dive into everything you need to know about making this dish, from a comprehensive ingredient breakdown to expert tips and variations. Let’s get cooking!

Why You’ll Love This Recipe

Here are just a few reasons why this BBQ Chickpea Pasta will become a staple in your kitchen:

  • Quick and Easy: This dish can be ready in under 30 minutes, perfect for those hectic evenings.
  • Nutritious Ingredients: Packed with protein from chickpeas and vitamins from vegetables, this meal is as healthy as it is hearty.
  • Flavor Explosion: The BBQ sauce brings a sweet and tangy flavor that elevates the dish above traditional pasta recipes.
  • Versatile Base: The recipe can easily be adapted with different vegetables or pasta types to suit your taste preferences.
  • Plant-Based Goodness: This dish is entirely plant-based, making it a great option for vegans and those looking to reduce meat consumption.

Ingredient Breakdown

Let’s take a closer look at the ingredients you’ll need to make this BBQ Chickpea Pasta. Understanding each component will make you more confident in your cooking!

  • Chickpeas: One 15.5 oz. can, drained and rinsed. Chickpeas are a fantastic source of protein and fiber, making them a staple in plant-based diets.
  • Pasta: 9 oz. of gluten-free fusilli or your choice of pasta. Feel free to use whole grain or legume-based pasta for added nutrition!
  • Vegetable Broth: ½ cup adds depth to the sauce. You can also use water if you prefer.
  • BBQ Sauce: ¼ cup plus 1 tablespoon. Look for a sauce that is low in sugar and free from highly processed ingredients for the healthiest option.
  • Nutritional Yeast: 3 tablespoons. This ingredient adds a cheesy flavor and is an excellent source of B vitamins.
  • Spices: Garlic powder, onion powder, dried minced onion flakes, sea salt, black pepper, and optional red pepper flakes for a kick!
  • Fresh Parsley: A sprinkle for garnish adds freshness and color to the dish.

Step-by-Step Instructions

Side view of a bowl filled with BBQ Chickpea Pasta, showcasing its colorful ingredients.
  1. Cook the Pasta: Fill a large stockpot with water, add a couple of pinches of sea salt, and bring it to a boil. Add the pasta and cook it until al dente, about 7-9 minutes. Drain, rinse with cold water to halt cooking, and set aside.
  2. Sauté the Aromatics: In a large skillet over medium-high heat, add diced onions and sauté for 7-9 minutes until they are soft. Add minced garlic and cook for another 2-3 minutes until fragrant.
  3. Make the Sauce: Add the vegetable broth, diced tomatoes, BBQ sauce, nutritional yeast, garlic powder, onion powder, dried minced onions, sea salt, black pepper, and red pepper flakes to the skillet. Increase the heat to bring it to a simmer.
  4. Combine: Once the sauce is simmering, add the drained chickpeas and cooked pasta. Stir until everything is well combined. Simmer on low for about 2 minutes to allow the flavors to meld.
  5. Rest and Serve: Remove from heat and let the dish sit for 4 minutes. This allows the pasta to soak up the sauce. Serve hot, topped with nutritional yeast and fresh parsley.

Pro Tips for Success

Here are some expert insights to ensure your BBQ Chickpea Pasta turns out perfectly every time:

  • Don’t Overcook the Pasta: Aim for al dente as it will continue to cook when mixed with the sauce.
  • Experiment with BBQ Sauce: Different BBQ sauces can dramatically change the flavor profile. Try smoky, spicy, or sweet varieties!
  • Use Fresh Ingredients: Fresh herbs and quality ingredients make a noticeable difference in flavor.
  • Adjust Sweetness: If your BBQ sauce is too sweet, balance it with a dash of vinegar or lemon juice.
  • Make It Creamy: Stir in a splash of cashew cream or coconut milk for a creamy texture.
  • Try Different Proteins: Add tofu, tempeh, or even seitan for additional protein options.
  • Add More Veggies: Incorporate bell peppers, spinach, or zucchini for extra nutrition and color.
  • Store Leftovers: Keep any leftovers in an airtight container in the fridge for up to 3 days.

Common Mistakes and Troubleshooting

Cooking can be tricky, but don’t worry! Here are some common pitfalls to avoid:

  • Underseasoning: Taste your sauce before serving! Adjust seasoning as needed to enhance flavors.
  • Forgetting to Drain Chickpeas: Always rinse and drain canned chickpeas to remove excess sodium.
  • Skipping Resting Time: Letting the dish sit helps flavors meld, so don’t skip this step!
  • Using Overcooked Pasta: Always cook pasta to al dente; mushy pasta won’t hold up well in this dish.

Variations to Try

This BBQ Chickpea Pasta recipe is incredibly versatile! Here are a few variations to get you started:

  • BBQ Chickpea Salad: Serve the mixture cold over a bed of greens for a refreshing salad.
  • Spicy BBQ Chickpeas: Add extra red pepper flakes or a splash of hot sauce for a spicy kick.
  • Mac & Cheese Style: Stir in some vegan cheese for a creamy, cheesy version.
  • Italian Twist: Replace BBQ sauce with marinara for a different flavor profile altogether.

Storage and Make-Ahead Instructions

This dish is perfect for meal prepping! Here’s how to store it effectively:

  • Refrigerator: Store leftovers in an airtight container for up to 3 days.
  • Freezer: For longer storage, freeze in individual portions for up to 2 months. Thaw overnight in the fridge before reheating.
  • Reheating: Warm in a skillet over medium heat, adding a splash of vegetable broth if it seems dry.

Frequently Asked Questions

Got questions? Here are some common queries regarding BBQ Chickpea Pasta:

  • Can I use a different type of pasta? Absolutely! Feel free to use whole grain, gluten-free, or legume-based pasta.
  • Is this recipe gluten-free? Yes, if you use gluten-free pasta, the dish is entirely gluten-free.
  • Can I make this dish oil-free? Yes! The recipe does not require any oil; just sauté the onions in broth or water instead.
  • How can I add more protein? You can add tofu, tempeh, or even a scoop of protein powder if desired.
  • What can I substitute for nutritional yeast? You can use vegan parmesan cheese or omit it altogether, although nutritional yeast adds a unique flavor.
  • Can I use fresh tomatoes instead of canned? Yes, just chop and cook them down until they create a sauce consistency.
  • How spicy is this dish? The spice level can be adjusted based on your preference. Start with a little and increase as needed!
  • Can I prepare this dish ahead of time? Yes, you can prepare the sauce and cook the pasta ahead, then combine them when ready to serve.

Nutrition Tips and Dietary Adaptations

This BBQ Chickpea Pasta is not only delicious but also packed with nutritional benefits:

  • High in Protein: Chickpeas provide a significant amount of plant-based protein, making this dish filling and satisfying.
  • Rich in Fiber: The combination of pasta and chickpeas supports digestive health.
  • Low in Fat: This recipe is low in fat, especially if you keep it oil-free.
  • Vegan-Friendly: Perfect for those following a vegan lifestyle or anyone wanting to eat more plant-based meals.

Recommended Equipment

Here’s what you’ll need to successfully make this dish:

  • Large Stockpot: For boiling pasta.
  • Skillet: A non-stick or ceramic skillet works best for sautéing without sticking.
  • Cutting Board and Knife: For chopping vegetables and herbs.
  • Measuring Cups and Spoons: Accurate measurements ensure your dish turns out perfectly.

Serving Suggestions

This BBQ Chickpea Pasta is delicious on its own, but here are some serving ideas to elevate your meal:

  • With a Side Salad: Pair it with a fresh green salad drizzled with lemon vinaigrette.
  • Garlic Bread: Serve with warm garlic bread for a comforting touch.
  • With Roasted Vegetables: Add a side of roasted seasonal vegetables for extra color and nutrients.
  • Sprinkled with Nuts: Top with toasted pine nuts or walnuts for added crunch.

Final Thoughts

Cooking should always be enjoyable and stress-free, and this BBQ Chickpea Pasta embodies just that! With its easy preparation, rich flavors, and healthy ingredients, you’ll find yourself coming back to this recipe time and time again. Remember, great food doesn’t require perfection—just clear steps and good ingredients. So gather your supplies, unleash your inner chef, and savor the simple joys of cooking!

BBQ Chickpea Pasta

Prep Time 10 minutes
Cook Time 20 minutes
Total Time 30 minutes
Servings 4 servings
Calories 450
A flavorful vegan pasta dish combining smoky BBQ sauce, chickpeas, and pasta, topped with nutritional yeast and fresh parsley.

Ingredients

Pasta

  • 9 oz GF fusilli pasta or pasta of choice

Base Ingredients

  • 1 cup yellow onions, fine dice
  • 2 Tbsp minced garlic
  • ½ cup vegetable broth
  • ½ cup water or broth
  • 14 oz can petite diced tomatoes
  • ¼ cup BBQ sauce
  • 3 Tbsp nutritional yeast
  • 1 tsp garlic powder
  • 1 tsp onion powder
  • 2 Tbsp dried minced onion flakes
  • ½ tsp sea salt
  • Pinch black pepper
  • ¼ tsp red pepper flakes (optional)

Canned Chickpeas

  • 15.5 oz can chickpeas, drained and rinsed

Garnish

  • freshly chopped parsley

Instructions 

  • Cook pasta in boiling salted water until al dente, then drain and rinse with cold water. Set aside.
  • In a large skillet, sauté diced onions over medium-high heat for 7-9 minutes until softened, then add minced garlic and cook for a few more minutes.
  • Add all remaining base ingredients, bring to a boil, then reduce to a simmer. Mix in spice herb blend and cook for 4 minutes.
  • Stir in chickpeas and cooked pasta, simmer for 2 minutes, then remove from heat and let sit for 4 minutes to meld flavors.
  • Serve topped with nutritional yeast and chopped parsley.

Notes

For extra flavor, add a splash of lemon juice before serving.
Calories: 450kcal
Cost: $12
Course: Main Course
Cuisine: vegan
Keyword: BBQ, Chickpeas, Pasta

Transform Your Dinner Routine with This Vibrant Fiesta Shrimp Rice Bowl

Are you ready to elevate your weeknight dinners? This Fiesta Shrimp Rice Bowl is not just another meal; it’s a colorful celebration of flavors that comes together in just minutes! Whether you’re a busy professional, a parent juggling activities, or someone who simply loves good food, this recipe is designed to bring joy and satisfaction to your dinner table. Prepare yourself for a dish that’s quick, healthy, and utterly delicious!

Why You’ll Love This Fiesta Shrimp Rice Bowl

  • Quick and Easy: You can whip this up in just 30 minutes, making it perfect for busy weeknights.
  • Flavor-Packed: The combination of lime juice, spices, and fresh ingredients creates a vibrant fiesta in every bite.
  • Customizable: Feel free to swap shrimp for chicken, beef, or a plant-based protein to suit your preference.
  • Healthy Ingredients: Packed with wholesome ingredients, this bowl is a nutritious option for dinner.
  • Meal Prep Friendly: Prepare the components in advance for a quick assembly during the week.

Ingredients You’ll Need

Here’s what you need to create this scrumptious bowl:

  • 1 lb raw shrimp: Peeled and deveined; can substitute with chicken or tofu.
  • 2 cups uncooked white rice: Alternatively, use quinoa or brown rice for added nutrition.
  • 2 tablespoons olive oil: For marinating the shrimp and cooking.
  • 2 tablespoons lime juice: Adds a refreshing acidity.
  • 1 teaspoon smoked paprika: For a hint of smokiness.
  • 1 teaspoon cumin: Brings warmth to the dish.
  • 1/2 teaspoon chili powder: Adds a kick of heat.
  • 1/2 teaspoon garlic powder: Essential for flavor.
  • 1/2 teaspoon salt: Enhances all the flavors.
  • 1/4 teaspoon black pepper: For seasoning.
  • 1/8 teaspoon cayenne pepper: Optional, for those who love spice.
  • 2 tablespoons fresh chopped cilantro: For garnish and flavor.
  • 1/4 cup diced red onion: Adds crunch and sweetness.
  • 1/2 cup diced cherry tomatoes: Freshness and color.
  • 1 jalapeño: Sliced, optional for extra heat.
  • 1 large avocado: Sliced, for creaminess.
  • 1 15-ounce can fire-roasted corn: Adds sweetness and texture.

How to Make Your Fiesta Shrimp Rice Bowl

Side view of a Fiesta Shrimp Rice Bowl filled with shrimp, corn, cherry tomatoes, and sliced avocado.

Follow these simple steps to create your delicious bowl:

  1. Marinate the shrimp: In a medium bowl, combine olive oil, lime juice, smoked paprika, cumin, chili powder, garlic powder, salt, black pepper, cayenne pepper, and cilantro. Add the shrimp, ensuring they are well-coated. Let it marinate for at least 15 minutes.
  2. Cook the rice: While the shrimp is marinating, cook the rice or quinoa according to package instructions. Prepare your desired toppings, like chopping vegetables and slicing the avocado.
  3. Cook the shrimp: Heat a large skillet over medium-high heat. Add the marinated shrimp and cook for about 2-3 minutes on each side until they are pink and opaque.
  4. Assemble your bowls: Start with a base of cooked rice, layer on the shrimp, and top with your chosen toppings such as corn, diced tomatoes, red onion, jalapeño, and avocado.

Pro Tips for Perfecting Your Fiesta Shrimp Rice Bowl

  • Don’t Overcook the Shrimp: Shrimp cooks quickly, so keep an eye on them. They are perfect when they turn pink and opaque.
  • Customize Your Base: Experiment with different grains like farro or barley for a unique twist.
  • Prep Ingredients Ahead: Chop veggies and marinate shrimp the night before to save time.
  • Use Fresh Ingredients: Fresh herbs and ripe vegetables make a noticeable difference in flavor.
  • Adjust the Spice: Modify the amount of cayenne and chili powder to suit your heat preference.
  • Store in Airtight Containers: Keep leftovers fresh and avoid spills.
  • Add Crunch: Consider adding nuts or seeds for an extra texture contrast.
  • Pair with a Side Salad: A fresh green salad can complement the meal beautifully.

Common Mistakes and Troubleshooting

Even the best cooks can encounter hiccups. Here are some common mistakes and how to avoid them:

  • Overcooking Shrimp: Shrimp can become rubbery if overcooked. Cook just until pink and opaque.
  • Too Much Liquid: If your rice is mushy, make sure to use the correct water-to-rice ratio.
  • Not Enough Seasoning: Don’t skimp on the spices; they are key to flavor.
  • Skipping the Marinade: Marinating enhances flavor significantly—don’t skip this step!

Variations to Try

This recipe is incredibly versatile! Here are some fun variations to inspire your creativity:

  • Fiesta Chicken Bowl: Swap shrimp for diced chicken breast and follow the same marinating and cooking instructions.
  • Veggie-Only Bowl: Use grilled vegetables like zucchini, bell peppers, and mushrooms for a plant-based version.
  • Spicy Shrimp Bowl: Add more cayenne pepper or a drizzle of sriracha for an extra kick.
  • Quinoa Fiesta Bowl: Replace rice with quinoa for a gluten-free, protein-packed alternative.

Storage and Make-Ahead Instructions

This dish is perfect for meal prepping! Here’s how to store it:

  • Refrigeration: Store assembled bowls in airtight containers for up to 3 days.
  • Freezing: You can freeze the cooked shrimp separately for up to 2 months. Reheat thoroughly before serving.
  • Make-Ahead: Marinate the shrimp and chop your veggies a day in advance for quick assembly on busy nights.

Frequently Asked Questions

Have questions? Here are some common ones:

  • Can I use frozen shrimp? Yes! Just thaw them completely before marinating.
  • What if I don’t have lime juice? Use lemon juice as a substitute for a similar flavor.
  • Can I make it spicier? Absolutely! Increase the cayenne pepper or add fresh jalapeños for heat.
  • Is this recipe gluten-free? Yes, it’s naturally gluten-free, especially if you use quinoa or brown rice.
  • How can I make it vegetarian? Substitute shrimp with firm tofu or chickpeas for a hearty option.
  • Can I prepare this in advance? Definitely! Marinate the shrimp and prepare the toppings ahead of time.
  • What’s the best way to reheat leftovers? Reheat in a skillet over low heat to avoid overcooking the shrimp.
  • Is this suitable for kids? Yes! You can adjust the spice level to make it more kid-friendly.

Nutrition Tips and Dietary Adaptations

This Fiesta Shrimp Rice Bowl is not only delicious but also health-conscious. Here are some tips:

  • Balanced Meal: This bowl contains protein, healthy fats, and carbohydrates, making it satisfying.
  • Increase Fiber: Opt for brown rice or quinoa for added fiber and nutrients.
  • Fresh Veggies: Load up on fresh vegetables to boost vitamins and minerals.
  • Low-Calorie Option: Use less oil and focus on veggies for a lighter meal.

Essential Equipment

Here’s what you’ll need to create this meal:

  • Large skillet: For cooking the shrimp quickly and evenly.
  • Medium bowl: For marinating the shrimp.
  • Measuring spoons: To ensure proper seasoning.
  • Rice cooker or pot: For cooking rice or quinoa perfectly.

Serving Suggestions

Looking to enhance your meal? Try pairing with:

  • Fresh Salsa: A zesty salsa can brighten up the flavors.
  • Guacamole: Creamy guacamole complements the shrimp perfectly.
  • Chips: Serve with tortilla chips for a fun crunch.
  • Fresh Lime Wedges: A squeeze of lime adds freshness right before eating.

Conclusion

Cooking should be fun and stress-free, and this Fiesta Shrimp Rice Bowl embodies just that! With its vibrant flavors, quick prep time, and endless customization options, it’s set to become a staple in your kitchen. So gather your ingredients, put on your apron, and get ready to impress your family and friends with this delightful dish. Happy cooking!

Fiesta Shrimp Rice Bowl

Prep Time 15 minutes
Cook Time 10 minutes
Total Time 25 minutes
Servings 4 servings
Calories 450
A vibrant and flavorful rice bowl featuring marinated shrimp, fresh vegetables, and zesty toppings for a satisfying meal.

Ingredients

Protein

  • 1 lb raw shrimp peeled and deveined (or alternative protein)

Grains

  • 2 cups uncooked white rice or quinoa brown rice

Oils & Liquids

  • 2 tablespoons olive oil
  • 2 tablespoons lime juice

Spices & Herbs

  • 1 teaspoon smoked paprika
  • 1 teaspoon cumin
  • 0.5 teaspoon chili powder
  • 0.5 teaspoon garlic powder
  • 0.5 teaspoon salt
  • 0.25 teaspoon black pepper
  • 0.125 teaspoon cayenne pepper (more if you want it more spicy)

Vegetables & Toppings

  • 0.25 cup diced red onion
  • 0.5 cup diced cherry tomatoes
  • 1 sliced jalapeno (optional)
  • 1 large avocado sliced
  • 1 15-ounce can fire roasted corn drained

Instructions 

  • Marinate the shrimp with olive oil, lime juice, spices, and cilantro; refrigerate for 15 minutes.
  • Cook rice according to package instructions and prepare toppings.
  • Cook marinated shrimp in a skillet over medium-high heat for 2-3 minutes per side until fully cooked.
  • Assemble bowls with rice at the bottom, topped with shrimp and desired toppings.

Notes

Feel free to add more spice with extra cayenne or jalapenos for heat.
Calories: 450kcal
Cost: $15
Course: Main Course
Cuisine: Mexican
Keyword: bowl, rice, shrimp

Discover the Joy of Cooking with Avocado Chickpea Salad Wraps

Are you looking for a delicious, healthy, and quick meal that will elevate your lunch game? Look no further than these Avocado Chickpea Salad Wraps. Packed with vibrant flavors and nutritious ingredients, this recipe is perfect for anyone wanting to enjoy a filling meal without spending hours in the kitchen. In just a few simple steps, you can create a dish that’s both satisfying and refreshing, making it ideal for busy weekdays or laid-back weekends. Let’s dive into why this recipe will become a staple in your home!

Why You’ll Love This Recipe

  • Quick and Easy: These wraps come together in under 30 minutes, making them perfect for a quick lunch or dinner.
  • Health Benefits: With chickpeas and avocados, you’re getting a healthy dose of protein, fiber, and healthy fats.
  • Customizable: Feel free to add your favorite vegetables or spices to make this recipe your own.
  • Plant-Based Delight: This dish is entirely vegan, making it a great option for plant-based eaters.
  • Meal Prep Friendly: These wraps can be made ahead of time and stored for a busy week ahead!

Ingredients You’ll Need

Let’s break down the ingredients required for these Avocado Chickpea Salad Wraps, along with some potential substitutions you can make:

  • 1 can (15 oz) of chickpeas: Drained and rinsed for optimal texture and flavor.
  • 2 ripe avocados: Diced, providing creaminess and healthy fats.
  • 1 cup cherry tomatoes: Halved for sweetness and color.
  • 1/2 cup diced cucumber: Adds a refreshing crunch.
  • 1/4 cup diced red onion: For a mild onion flavor; you can substitute with green onions if desired.
  • 1/4 cup diced bell peppers: Any color works, bringing vibrant color and flavor.
  • 1/4 cup chopped fresh cilantro: Enhances the freshness; feel free to use parsley if you prefer.
  • Juice of 1 lemon: This brightens the flavors and adds acidity.
  • 2 tablespoons olive oil: For a rich, smooth dressing.
  • 1 teaspoon ground cumin: To elevate the flavor profile with a warm, earthy note.
  • Salt and pepper to taste: Essential for seasoning and enhancing all the flavors.
  • 4 whole wheat tortillas: The wraps that hold everything together. You can substitute with gluten-free tortillas if needed.

How to Make Avocado Chickpea Salad Wraps: Step-by-Step

Side view of a delicious wrap showcasing chickpeas, avocado, and vibrant veggies.

Now, let’s get cooking! Follow these simple steps to create your Avocado Chickpea Salad Wraps:

  1. In a large mixing bowl, combine the chickpeas, diced avocados, halved cherry tomatoes, diced cucumber, diced red onion, diced bell peppers, and chopped cilantro.
  2. In a separate small bowl, whisk together the lemon juice, olive oil, ground cumin, salt, and pepper to create the dressing.
  3. Pour the dressing over the chickpea and avocado mixture, and gently toss everything together until well coated.
  4. Warm the whole wheat tortillas for a few seconds in the microwave or on a dry skillet to make them pliable.
  5. Divide the avocado chickpea salad evenly among the tortillas, placing it slightly off-center.
  6. Roll up the tortillas, tucking in the sides as you go, to create wraps.
  7. Slice the wraps in half on a diagonal and serve immediately.

Pro Tips for Perfect Avocado Chickpea Salad Wraps

  • Choose Ripe Avocados: Make sure your avocados are perfectly ripe for the best flavor and texture.
  • Mix and Match Veggies: Don’t hesitate to use whatever veggies you have on hand; this recipe is versatile!
  • Adjust Seasoning: Taste your salad mixture before wrapping; adjust the salt and pepper as needed.
  • Keep It Fresh: If making ahead, store the salad and tortillas separately to prevent sogginess.
  • Spice It Up: Add a dash of cayenne pepper or chili flakes for a spicy kick!
  • Experiment with Dressings: Try different dressings like tahini or yogurt-based for a new flavor twist.
  • Use Fresh Herbs: Fresh herbs like dill or basil can elevate the taste of your salad wraps.
  • Wrap Smart: Wrap tightly to ensure nothing spills out while eating!

Common Mistakes to Avoid

  • Over-Mashing Avocados: Mash just enough; you want a chunky texture, not a puree.
  • Skipping the Dressing: Don’t skip the dressing; it brings all the flavors together.
  • Using Stale Tortillas: Always use fresh tortillas for the best wrap experience.
  • Forgetting to Season: Taste as you go; seasoning is crucial for flavor balance.

Variations to Try

Feel free to switch things up! Here are a few variations to inspire you:

  • Mexican Style: Add black beans, corn, and a sprinkle of taco seasoning for a southwestern twist.
  • Greek Twist: Incorporate feta cheese, kalamata olives, and a drizzle of balsamic dressing.
  • Asian Flair: Use sesame oil, soy sauce, and add shredded carrots and edamame for an Asian-inspired wrap.
  • Spicy Hummus: Spread a layer of spicy hummus on the tortilla before adding the filling for an extra flavor boost.

How to Store and Freeze Avocado Chickpea Salad Wraps

Storage is key to enjoying these wraps over time:

  • Refrigeration: Store the assembled wraps in an airtight container for up to 2 days. Keep the dressing separate if possible.
  • Freezing: While the filling can be frozen for up to a month, it’s best to assemble fresh wraps before serving.
  • Make-Ahead: Prepare the chickpea salad the night before and assemble the wraps when ready to serve.

Frequently Asked Questions (FAQ)

  • Can I use canned chickpeas? Yes, canned chickpeas are perfect for this recipe for convenience.
  • What can I use instead of tortillas? Lettuce leaves or rice paper wraps are great alternatives for a low-carb option.
  • How long will leftovers last? Leftovers can last in the fridge for up to 3 days, but the texture may change.
  • Can I use frozen avocados? Yes, frozen avocados can be used, but they may change texture when thawed.
  • Is this recipe gluten-free? Use gluten-free tortillas to make this recipe gluten-free.
  • How can I make it spicier? Add jalapeños or a hot sauce to the chickpea salad mixture for heat.
  • Can I add cheese? Yes, feta or goat cheese can be delicious additions.
  • Is this recipe suitable for meal prep? Absolutely! It’s perfect for meal prepping for the week.

Nutritional Tips and Dietary Adaptations

This dish is not only flavorful but also nutritious. Here are some tips to enhance its health benefits:

  • Boost Fiber: Add more veggies like spinach or kale for added fiber and nutrients.
  • Healthy Fats: The avocados provide healthy monounsaturated fats, essential for heart health.
  • Protein Power: Chickpeas are a fantastic source of plant-based protein, helping you feel fuller longer.

Equipment Recommendations

To make the cooking process smoother, here are a few tools you might find helpful:

  • Mixing bowls: A large bowl for mixing your salad and another for your dressing.
  • Whisk: A small whisk for combining your dressing ingredients effectively.
  • Knife and cutting board: For chopping your fresh ingredients with ease.

Serving Suggestions

These wraps are incredibly versatile and can be served in numerous ways:

  • With a Side Salad: Pair with a light side salad for a full meal.
  • Chips and Salsa: Serve with tortilla chips and your favorite salsa for a fun twist.
  • With a Dip: Accompany with hummus or tzatziki for added flavor.

With this comprehensive guide, you’re all set to whip up your own delicious Avocado Chickpea Salad Wraps. Cooking should be enjoyable and stress-free, and I hope this recipe helps you embrace your inner chef. Happy cooking, my friend!

Avocado Chickpea Salad Wraps

Prep Time 10 minutes
Total Time 10 minutes
Servings 4 wraps
Calories 350
Enjoy these fresh and healthy avocado chickpea salad wraps, perfect for a quick lunch or light dinner.

Ingredients

Canned Goods

  • 1 can 15 oz chickpeas (drained and rinsed)
  • 2 ripe avocados (diced)
  • 1 cup cherry tomatoes (halved)
  • 0.5 cup diced cucumber
  • 0.25 cup diced red onion
  • 0.25 cup diced bell peppers (any color)
  • 0.25 cup chopped fresh cilantro
  • 1 unit lemon (juice of 1 lemon)
  • 2 tablespoons olive oil
  • 1 teaspoon ground cumin
  • to taste Salt and pepper
  • 4 whole whole wheat tortillas

Instructions 

  • Combine chickpeas, avocados, cherry tomatoes, cucumber, red onion, bell peppers, and cilantro in a bowl.
  • Whisk lemon juice, olive oil, cumin, salt, and pepper to make the dressing.
  • Pour dressing over the mixture and toss gently.
  • Warm tortillas briefly, then divide the filling among them.
  • Roll up the wraps, slice in half, and serve immediately.

Notes

For extra flavor, add a dash of hot sauce or a sprinkle of cheese.
Calories: 350kcal
Cost: $10
Course: Lunch
Cuisine: Healthy
Keyword: Vegetarian

Transform Your Weeknight Dinners with Garlic Beef Pasta

Are you ready to whip up a dish that is not only delicious but also incredibly easy to make? This Garlic Beef Pasta combines tender ground beef, zesty garlic, and creamy goodness—all in one pot! Perfect for busy weeknights, this recipe will elevate your dinner game while keeping the stress at bay.

Whether you’re a seasoned chef or a novice in the kitchen, this recipe is designed to boost your confidence and bring excitement back to cooking. Ready to dive in? Let’s get started!

Why You’ll Love This Recipe

  • Quick and Convenient: This dish can be prepared in under 30 minutes, making it ideal for those hectic weeknights.
  • One-Pot Wonder: Enjoy minimal cleanup with this all-in-one recipe that saves you time and effort.
  • Flavor Explosion: The combination of garlic, beef, and creamy sauce creates a rich and comforting dish that your family will love.
  • Customizable: This recipe is versatile—feel free to add your favorite vegetables or adjust the spice level to suit your taste.
  • Impressive Yet Simple: Serve it up to guests or keep it for yourself; it’s a meal that looks great and tastes even better!

Ingredients You’ll Need

Gather these simple ingredients to create a mouthwatering Garlic Beef Pasta:

  • 12 ounces of your favorite pasta (penne, fettuccine, or spaghetti)
  • 1 pound ground beef
  • 1 tablespoon olive oil
  • 4 cloves garlic, minced
  • 1 small onion, finely chopped
  • 1 teaspoon Italian seasoning
  • ½ teaspoon red pepper flakes (optional for heat)
  • 1 can (14.5 ounces) diced tomatoes, drained
  • 1 cup beef broth
  • 1 cup heavy cream
  • 1 cup shredded mozzarella cheese
  • ½ cup grated Parmesan cheese
  • Salt and black pepper to taste
  • Fresh parsley for garnish

Don’t have everything on hand? Here are some helpful substitutions:

  • Pasta: Gluten-free pasta or whole wheat pasta can be used if preferred.
  • Ground Beef: Swap for ground turkey or chicken for a leaner option.
  • Heavy Cream: Use half-and-half or a dairy-free alternative for a lighter version.
  • Parmesan Cheese: Nutritional yeast can be an excellent substitute for a vegan option.

Step-by-Step Instructions

A tantalizing plate of Garlic Beef Pasta with visible garlic cloves and herbs, highlighting its delicious texture.

Step 1: Cook the Pasta

Bring a large pot of salted water to a boil. Cook the pasta according to the package instructions until al dente. Drain and set aside, reserving about ½ cup of pasta water.

Step 2: Brown the Beef

In a large skillet, heat the olive oil over medium heat. Add the ground beef and brown it, breaking it apart with a wooden spoon. Once fully cooked, drain any excess grease.

Step 3: Sauté the Aromatics

Add the chopped onion to the beef and cook for 2-3 minutes until softened. Stir in the minced garlic, Italian seasoning, and red pepper flakes if using. Sauté for another minute until fragrant.

Step 4: Build the Sauce

Pour in the diced tomatoes and beef broth, stirring to combine. Let the mixture simmer for about 5 minutes to meld the flavors together. Reduce the heat to low and stir in the heavy cream.

Step 5: Add the Cheese

Gradually mix in the shredded mozzarella and Parmesan cheese, stirring until melted and smooth. If the sauce is too thick, add a bit of the reserved pasta water until you reach your desired consistency.

Step 6: Combine Everything

Add the cooked pasta to the skillet and toss until evenly coated in the creamy garlic beef sauce. Taste and adjust seasoning with salt and black pepper as needed.

Step 7: Serve and Enjoy

Garnish with fresh parsley and extra Parmesan cheese before serving. Enjoy this rich, comforting dish while it’s hot!

Pro Tips for Perfect Garlic Beef Pasta

  • Don’t Overcook the Pasta: Aim for al dente; it will continue cooking in the sauce.
  • Use Fresh Garlic: Freshly minced garlic has a more robust flavor than pre-minced options.
  • Adjust the Heat: If you like it spicy, increase the red pepper flakes or add a splash of hot sauce.
  • Mind the Cream: Stir in the cream off the heat to prevent it from curdling.
  • Texture Matters: If the sauce is too thick, remember to add the reserved pasta water gradually.
  • Garnish Generously: Fresh herbs brighten up the dish and add a nice presentation touch.
  • Leftovers: This dish reheats well; just add a splash of water or broth when warming it up.
  • Experiment with Cheese: Mix in different cheeses like gouda or cheddar for a unique flavor twist.

Common Mistakes and Troubleshooting

Even the best cooks make mistakes! Here are some common pitfalls and how to avoid them:

  • Too Greasy: Drain the beef properly after browning to avoid excess grease in the sauce.
  • Watery Sauce: If your sauce turns out too thin, let it simmer longer to reduce and thicken.
  • Overcooked Pasta: Always follow cooking times on the package for the best texture.
  • Too Much Salt: Season gradually; you can always add more, but it’s tough to fix an oversalted dish.

Variations to Try

Feel free to customize this recipe to suit your taste. Here are a few fun variations:

  • Vegetarian Option: Replace the ground beef with lentils or mushrooms for a hearty vegetarian dish.
  • Spicy Kick: Add diced jalapeños or a dash of cayenne pepper for an extra kick.
  • Cheesy Delight: Incorporate cream cheese into the sauce for an ultra-creamy texture.
  • Veggie Boost: Toss in spinach, bell peppers, or zucchini for added nutrition and flavor.

Storage and Make-Ahead Instructions

This Garlic Beef Pasta can be prepared ahead of time and stored for later:

  • Refrigeration: Store in an airtight container in the fridge for up to 3 days.
  • Freezing: Freeze in portions for up to 2 months. Thaw in the fridge overnight before reheating.
  • Make-Ahead: Prepare the sauce in advance; just cook the pasta fresh when you’re ready to eat.

Frequently Asked Questions

  • Can I use a different type of pasta? Absolutely! Any pasta shape works well in this recipe.
  • What can I substitute for heavy cream? Half-and-half or a non-dairy milk can be used for a lighter version.
  • How do I make it gluten-free? Simply use gluten-free pasta and ensure your broth is gluten-free.
  • Can I add vegetables? Yes! Bell peppers, spinach, or mushrooms are excellent additions.
  • Is this recipe spicy? It can be! Adjust the red pepper flakes to your taste preference.
  • How long does it take to prepare? The total time is approximately 30 minutes from start to finish.
  • Can I double the recipe? Sure! Just ensure your skillet is large enough or use two pans.
  • How do I reheat leftovers? Reheat gently on the stove, adding a splash of broth to keep it creamy.

Nutrition Tips and Dietary Adaptations

This Garlic Beef Pasta can be adapted to fit various dietary needs:

  • Low-Carb: Use zucchini noodles or spaghetti squash instead of traditional pasta.
  • Dairy-Free: Substitute heavy cream with coconut milk and cheese with nutritional yeast.
  • Low-Calorie: Use lean ground turkey and reduce the amount of cheese.

Equipment Recommendations

Here’s a list of essential tools to help you create this dish:

  • Large Pot: For boiling the pasta.
  • Skillet: To cook the beef and sauce.
  • Wooden Spoon: Perfect for breaking up the beef while cooking.
  • Measuring Cups and Spoons: Ensure accurate ingredient measurements.

Serving Suggestions

This Garlic Beef Pasta pairs wonderfully with:

  • Garlic Bread: A perfect side to soak up the delicious sauce.
  • Side Salad: A fresh garden salad adds a nice contrast to the creamy pasta.
  • Wine: A glass of red wine complements the flavors beautifully.

With this comprehensive guide, you’re all set to make a mouthwatering Garlic Beef Pasta that will impress friends and family alike. Cooking doesn’t have to be stressful—just follow these simple steps, and you’ll have a delicious meal on the table in no time. Happy cooking!

Garlic Beef Pasta

Prep Time 10 minutes
Cook Time 20 minutes
Total Time 30 minutes
Servings 4 servings
Calories 650
A rich and creamy garlic beef pasta combines tender ground beef, flavorful sauce, and perfectly cooked pasta for a satisfying meal.

Ingredients

Pasta

  • 12 ounces pasta (penne, fettuccine, or your favorite)
  • 1 pound ground beef
  • 1 tablespoon olive oil
  • 4 cloves garlic, minced
  • 1 small onion, finely chopped
  • 1 teaspoon Italian seasoning
  • ½ teaspoon red pepper flakes (optional) (for a bit of heat)
  • 1 can 14.5 ounces diced tomatoes, drained
  • 1 cup beef broth
  • 1 cup heavy cream
  • 1 cup shredded mozzarella cheese
  • ½ cup grated Parmesan cheese

Salt and black pepper

  • to taste Salt and black pepper

Garnish

  • as needed Fresh parsley for garnish

Instructions 

  • Cook the pasta in salted boiling water until al dente, then drain and set aside.
  • In a skillet, heat olive oil and brown the ground beef. Drain excess grease.
  • Add chopped onion and cook until softened, then stir in garlic, Italian seasoning, and red pepper flakes. Sauté briefly.
  • Pour in diced tomatoes and beef broth, simmer for 5 minutes, then stir in heavy cream and melt cheeses. Adjust thickness with reserved pasta water.
  • Add cooked pasta to the sauce, toss to coat, season with salt and pepper, then garnish with parsley and Parmesan before serving.

Notes

For extra flavor, sprinkle additional Parmesan cheese on top before serving.
Calories: 650kcal
Cost: $15
Course: Main Course
Cuisine: Italian
Keyword: Beef, Garlic, Pasta

Brighten Your Plate with This Easy Lemon Dill Potato Salad

Welcome to my kitchen! Today, we’re diving into a delightful recipe that’s sure to become a staple at your table: the Lemon Dill Potato Salad. This dish is vibrant, refreshing, and packed with flavors that elevate any meal, whether it’s a casual weeknight dinner or a festive gathering. In under 30 minutes, you can whip up a bowl of creamy, tangy, and herbaceous goodness that everyone will love. Let’s get started!

Why You’ll Love This Recipe

This dill potato salad isn’t just delicious; it’s also incredibly versatile and easy to make. Here are five reasons to give it a try:

  • Quick and Easy: With simple ingredients and straightforward steps, this recipe can be prepared in under 30 minutes.
  • Fresh Ingredients: The use of fresh herbs like dill and parsley makes this salad vibrant and aromatic.
  • Perfectly Balanced Flavors: The zesty lemon juice combined with olive oil creates a dressing that’s light yet full of flavor.
  • Versatile Dish: This potato salad pairs perfectly with grilled meats, seafood, or can be enjoyed as a stand-alone vegetarian dish.
  • Make-Ahead Friendly: This salad can be made in advance, allowing the flavors to meld beautifully, making it ideal for meal prep.

Ingredients Breakdown

To create the perfect Lemon Dill Potato Salad, you’ll need the following ingredients:

  • 4 lbs small potatoes: I recommend using Yukon Golds for their creamy texture. You can substitute with red potatoes if preferred.
  • Fresh dill: A must-have for that authentic flavor—about one bunch, chopped.
  • Italian parsley: Adds a fresh note—use about half a bunch, chopped.
  • Green onions: Three to four, thinly sliced for a gentle bite.
  • Salt and pepper: Start with 1/2 tsp each, adjusting to taste.
  • Dressing: 3/4 cup freshly squeezed lemon juice, 1/4 cup virgin olive oil, 2-3 cloves fresh garlic (crushed), and 1-2 tsp Dijon mustard.

**Substitutions:** If you’re looking for alternatives, consider using red wine vinegar in place of lemon juice for a different twist, or Greek yogurt instead of olive oil for a creamier dressing.

How to Make Lemon Dill Potato Salad

Side view of a colorful potato salad featuring bright green dill, parsley, and sliced green onions.

Now, let’s walk through the steps to create this delightful salad:

  1. Rinse the potatoes and cut them in half. If they are larger, cut them into quarters. Place them in a large pot and cover with water, adding about 1 tsp of salt.
  2. Bring the water to a boil and cook the potatoes until they are fork-tender, approximately 10-15 minutes. Drain and let them cool slightly.
  3. While the potatoes are cooking, prepare the dressing. In a mason jar, combine the lemon juice, olive oil, Dijon mustard, crushed garlic, and a pinch of salt and pepper. Shake well to combine!
  4. Once the potatoes are cool enough to handle, transfer them to a large mixing bowl. Pour the dressing over the potatoes, and gently fold in the chopped herbs and green onions.
  5. Season with additional salt and pepper as needed. Serve topped with more fresh herbs and lemon wedges if desired. Enjoy!

Pro Tips for the Best Potato Salad

Here are some expert insights to enhance your potato salad experience:

  • Choose the right potatoes: Small, waxy potatoes like Yukon Golds or new potatoes hold their shape better and provide a creamy texture.
  • Don’t overcook: Keep a close eye on your potatoes; you want them tender but not mushy.
  • Flavor boost: For an extra layer of flavor, roast the garlic before adding it to the dressing.
  • Chill time: Allow the salad to chill in the fridge for at least 30 minutes before serving to let the flavors meld.
  • Herb variations: Experiment with other herbs like chives or tarragon for different flavor profiles.
  • Make it creamy: For a creamier salad, mix in a dollop of sour cream or Greek yogurt.
  • Add crunch: Toss in some diced celery or bell peppers for added crunch.
  • Spice it up: A pinch of red pepper flakes can add a nice kick to the dressing.

Common Mistakes and Troubleshooting

Here’s how to avoid common pitfalls:

  • Overcooking potatoes: Keep testing them for doneness; overcooked potatoes can lead to a mushy salad.
  • Too much dressing: Start with less dressing and add more as needed to prevent the salad from becoming soggy.
  • Missing seasoning: Always taste your salad before serving; adjust salt and pepper as needed.

Variations to Try

Get creative with these variations of lemon dill potato salad:

  • Greek Twist: Add feta cheese and olives for a Mediterranean flair.
  • Loaded Potato Salad: Mix in crispy bacon bits and shredded cheddar cheese.
  • Vegan Delight: Replace the mustard with avocado for a creamy vegan version.
  • Herb Medley: Combine dill with fresh basil and mint for a refreshing herb salad.

Storage and Make-Ahead Instructions

This potato salad is perfect for make-ahead meals. Here’s how to store it:

  • Refrigerate: Store any leftovers in an airtight container in the fridge for up to 3 days.
  • Make Ahead: You can prepare the salad a day in advance. Just add the fresh herbs right before serving to keep them vibrant.

Nutrition Tips and Dietary Adaptations

This lemon dill potato salad is naturally gluten-free and vegetarian. For healthier adaptations:

  • Low-Calorie Option: Use a light olive oil or reduce the amount of dressing.
  • Dairy-Free: Ensure all ingredients, including mustard, are dairy-free for a vegan version.

Equipment Recommendations

To make this recipe, you’ll need:

  • Large pot: For boiling the potatoes.
  • Mason jar: For mixing the dressing—easy to shake and store.
  • Cutting board and knife: To chop your herbs and vegetables.
  • Large mixing bowl: For combining all the ingredients.

Serving Suggestions

Pair your Lemon Dill Potato Salad with:

  • Grilled meats: Chicken, steak, or fish
  • Vegetarian dishes: Grilled vegetables or quinoa salads
  • As a side dish: Perfect for picnics or potlucks!

Frequently Asked Questions

Here are some common questions about making lemon dill potato salad:

  • Can I use other types of potatoes? Yes, red potatoes or fingerlings work well too.
  • Is this recipe gluten-free? Absolutely! All ingredients used are gluten-free.
  • How long does it last in the fridge? Store it in an airtight container for up to 3 days.
  • Can I make it vegan? Yes, use avocado instead of olive oil for a creamy dressing.
  • What if I don’t have fresh dill? You can use dried dill, but fresh is preferred for the best flavor.
  • Can I add other vegetables? Absolutely! Consider adding celery, bell peppers, or even pickles for extra crunch.
  • Should I serve it warm or cold? This salad is best served cold or at room temperature.
  • Can I freeze potato salad? It’s not recommended, as the texture may change upon thawing.

Now that you have all the tools, tips, and tricks to create the best Lemon Dill Potato Salad, I hope you feel excited to make it! Cooking should be a joyful process, so don’t stress—just enjoy the flavors and have fun experimenting. Happy cooking!

Lemon Dill Potato Salad

Prep Time 15 minutes
Cook Time 10 minutes
Total Time 25 minutes
Servings 6 servings
Calories 250
A fresh and tangy potato salad featuring herbs, lemon, and garlic, perfect for summer gatherings.

Ingredients

Potatoes

  • 4 lbs small potatoes (Yukon Gold) (about 2 - 2 lb bags)

Herbs

  • 1 bunch fresh dill, chopped
  • 0.5 bunch fresh Italian parsley, chopped
  • 0.25 cup green onions, sliced (white and green parts)

Dressing

  • 0.75 cup freshly squeezed lemon juice
  • 0.25 cup virgin olive oil
  • 2.5 cloves fresh garlic, crushed
  • 1.5 tsp dijon mustard
  • 0.25 tsp salt (or more to taste)
  • 0.25 tsp pepper (or more to taste)

Instructions 

  • Rinse potatoes, cut in half or quarters if large, then boil in salted water until fork-tender (~5 minutes). Drain and cool.
  • In a jar or bowl, combine lemon juice, olive oil, dijon mustard, garlic, salt, and pepper. Shake or whisk to mix.
  • Chop dill, parsley, and green onions. When potatoes are cool, toss with dressing and half the herbs. Adjust seasoning if needed.
  • Transfer to serving dish, top with remaining herbs, and serve with lemon wedges if desired.

Notes

Use fresh herbs for best flavor and adjust salt and pepper to taste.
Calories: 250kcal
Cost: $15
Course: Side Dish
Cuisine: American
Keyword: herbs, lemon, Potato

Delight in Cooking with One-Pan Garlic Veggie Rice

Welcome to your next culinary adventure! Today, we’re diving into the vibrant world of One-Pan Garlic Veggie Rice, a dish that brings together the ease of one-pan cooking with the delightful flavors of fresh vegetables and aromatic garlic. Perfect for busy weeknights or a relaxed weekend meal, this recipe is not only budget-friendly but also incredibly versatile. Let’s embark on this flavorful journey and transform your cooking experience into something truly enjoyable!

Why You’ll Love This Recipe

  • Simple Preparation: This recipe requires minimal prep work, making it ideal for even the busiest of days. You can have a delicious meal ready in under 30 minutes!
  • Budget-Friendly: With basic pantry staples and seasonal veggies, this dish is easy on the wallet while being full of flavor.
  • Customizable Ingredients: Feel free to swap in your favorite vegetables or use what you have on hand. This recipe is adaptable to suit your taste!
  • One-Pan Cooking: Save time on cleanup with this all-in-one dish. Everything cooks together, absorbing the wonderful flavors of garlic and broth.
  • Healthy & Satisfying: Packed with nutrients from the veggies and wholesome rice, this dish is both filling and nourishing, making it perfect for any meal.

Ingredient Breakdown

Here’s what you’ll need to create your One-Pan Garlic Veggie Rice, along with some handy substitutions:

  • 1 cup Long-grain white rice: Absorbs garlic and veggie flavors beautifully. You can also use brown rice or quinoa for a healthier alternative.
  • 2 tablespoons Olive oil: Enhances garlic aroma. Feel free to substitute with avocado oil or butter for different flavor profiles.
  • 3 cloves Garlic: The star ingredient that adds depth. Adjust to your taste; more garlic for a stronger flavor!
  • 2 medium Carrots: Add natural sweetness and crunch. Zucchini or bell peppers work well too.
  • 1 medium Bell pepper: Brings vibrant color. Any color works—red, yellow, or green!
  • 1 cup Frozen peas: Adds freshness and color. You can substitute with corn or green beans.
  • 1 medium Onion: Adds depth of flavor. Shallots can be used for a milder taste.
  • 2 cups Vegetable broth: For more flavor. Chicken broth is a great option if you’re not strictly vegetarian.
  • 1 teaspoon Salt: Essential seasoning to enhance all flavors. Adjust as necessary based on your broth’s saltiness.
  • 1 teaspoon Black pepper: Adds a touch of heat. You can add more or less depending on your preference.
  • 1/2 teaspoon Red chili flakes: Optional for heat. Omit if you prefer a milder dish.

How to Make One-Pan Garlic Veggie Rice

Side view of sizzling Garlic Veggie Rice, showcasing vibrant carrots and peas.

Let’s get cooking! Follow these simple steps to create your delicious one-pan meal:

  • Step 1: In a large skillet, heat the olive oil over medium heat. Add the chopped onion and sauté until translucent, about 3-4 minutes.
  • Step 2: Stir in the minced garlic and cook for an additional minute until fragrant.
  • Step 3: Add the chopped carrots and bell pepper, cooking for about 5 minutes until they start to soften.
  • Step 4: Stir in the rice, allowing it to toast slightly for about 2 minutes. This enhances the flavor!
  • Step 5: Pour in the vegetable broth, salt, black pepper, and red chili flakes. Bring to a boil, then reduce the heat to low.
  • Step 6: Cover and let simmer for about 15 minutes, or until the rice is cooked and has absorbed the liquid.
  • Step 7: Stir in the frozen peas and cook for an additional 2-3 minutes until heated through. Fluff the rice with a fork.
  • Step 8: Taste and adjust seasoning as needed. Serve hot and enjoy your meal!

Expert Tips for Perfect Garlic Veggie Rice

  • Don’t Rush the Sautéing: Allowing the onions and garlic to cook properly enhances their flavors and aromas.
  • Use Quality Broth: The flavor of your rice will depend largely on the quality of the broth used.
  • Fluff Before Serving: Fluff the rice with a fork before serving to ensure a light and airy texture.
  • Adjust for Your Taste: Feel free to add more spices or herbs like thyme or parsley for added flavor.
  • Make it a Meal: Serve with grilled chicken, tofu, or a side salad for a complete meal.
  • Cook with a Lid: This helps trap steam and ensures even cooking of the rice.
  • Let it Rest: After cooking, let the rice sit covered for a few minutes to finish steaming.
  • Chop Veggies Uniformly: This ensures they cook evenly and at the same rate.

Common Mistakes and Troubleshooting

Even the best cooks make mistakes! Here are some common pitfalls and how to avoid them:

  • Rice Too Sticky: This may happen if you don’t rinse the rice before cooking. Rinsing removes excess starch.
  • Undercooked Rice: If your rice is still hard after the time is up, add a bit more broth and cover again, cooking for a few more minutes.
  • Burnt Bottom: Ensure your heat isn’t too high, and consider stirring occasionally to prevent sticking.
  • Too Salty: If your broth is salty, reduce the added salt. You can also balance it out with a splash of lemon juice.

Variations to Try

Feel free to experiment with these delicious variations:

  • Spicy Mexican Twist: Add 1 can of black beans, corn, and taco seasoning for a Mexican-inspired flavor.
  • Asian-Inspired: Substitute soy sauce for salt and add sesame oil, chopped green onions, and some cooked chicken or tofu.
  • Herb Garden Delight: Mix in fresh herbs like basil, cilantro, or parsley just before serving for an aromatic finish.
  • Cheesy Version: Stir in some grated cheese such as cheddar or Parmesan just before serving for a creamy texture.

Storage and Make-Ahead Instructions

Want to prepare in advance? Here’s how to store your One-Pan Garlic Veggie Rice:

  • In the Fridge: Store leftovers in an airtight container for up to 3 days.
  • Freezing: This dish freezes well! Store in an airtight container for up to 2 months. Thaw in the fridge overnight before reheating.
  • Reheating: To reheat, add a splash of broth or water to loosen the rice, then microwave or heat on the stovetop until warmed through.

Comprehensive FAQ

  • Can I use brown rice instead? Yes, but cooking times will vary. Brown rice typically takes longer to cook.
  • What vegetables can I add? Any vegetables work! Consider broccoli, spinach, or mushrooms for variety.
  • Is this dish vegan? Absolutely! This recipe is entirely plant-based.
  • How do I make it gluten-free? Ensure your broth is gluten-free, and you’re all set!
  • Can I add protein? Yes! Cooked chicken, shrimp, or tofu can be added for extra protein.
  • What if I don’t have vegetable broth? Water can be used instead, but the flavor will be less rich.
  • How spicy is this dish? It’s mild, but you can adjust the red chili flakes to your heat preference.
  • Can I make this ahead of time? Yes! You can prepare it a day in advance and reheat when ready to serve.

Nutrition Tips and Dietary Adaptations

Looking to make this dish even healthier? Here are some tips:

  • Fiber Boost: Incorporate more vegetables or use brown rice for additional fiber.
  • Low-Sodium Option: Use low-sodium broth and minimal added salt to control sodium intake.
  • Protein Additions: Add beans or lentils for a protein-packed vegetarian meal.

Equipment Recommendations

To make this recipe, you will need:

  • Large Skillet: A nonstick or cast iron skillet works best for even cooking.
  • Wooden Spoon: For stirring ingredients without scratching your cookware.
  • Measuring Cups: To measure your ingredients accurately.

Serving Suggestions

Pair your One-Pan Garlic Veggie Rice with any of the following:

  • Grilled Chicken or Tofu: Adds a protein-packed element to your meal.
  • Fresh Salad: A light salad complements the richness of the rice.
  • Yogurt Sauce: A dollop of yogurt or tzatziki can add a refreshing touch.

In conclusion, this Easy Budget One-Pan Garlic Veggie Rice is not just a meal; it’s a delightful experience! By following these steps and tips, you’ll create a dish that not only nourishes but also brings joy to your kitchen. So roll up your sleeves, gather your ingredients, and let’s make something delicious together. Happy cooking!

Easy Budget One-Pan Garlic Veggie Rice You ll Love Making

Prep Time 10 minutes
Cook Time 15 minutes
Total Time 25 minutes
Servings 4 servings
Calories 350
This simple one-pan dish combines flavorful garlic, fresh vegetables, and rice for a quick, budget-friendly meal.

Ingredients

Rice

  • 1 cup Long-grain white rice (Absorbs garlic and veggie flavors beautifully.)
  • 2 tablespoons Olive oil (Enhances garlic aroma.)
  • 3 cloves Garlic (The star ingredient.)
  • 2 medium Carrots (Add natural sweetness.)
  • 1 medium Bell pepper (Brings vibrant color.)
  • 1 cup Frozen peas (Adds freshness.)
  • 1 medium Onion (Adds depth.)
  • 2 cups Vegetable broth (For more flavor.)
  • 1 teaspoon Salt (Essential seasoning.)
  • 1 teaspoon Black pepper (Essential seasoning.)
  • 0.5 teaspoon Red chili flakes (Optional for heat.)

Instructions 

  • Heat olive oil in a large pan over medium heat. Add chopped onion and minced garlic; sauté until fragrant.
  • Add diced carrots and bell pepper; cook for 3-4 minutes until slightly tender.
  • Stir in rice, vegetable broth, salt, pepper, and chili flakes; bring to a boil.
  • Reduce heat, cover, and simmer for 10-12 minutes until rice is cooked and liquid is absorbed.
  • Stir in frozen peas; cook for 2 minutes until heated through. Serve hot.

Notes

For extra flavor, add a squeeze of lemon or sprinkle fresh herbs before serving.
Calories: 350kcal
Cost: $10
Course: Main Course
Cuisine: Fusion
Keyword: Vegetables