Author

Steven

Browsing

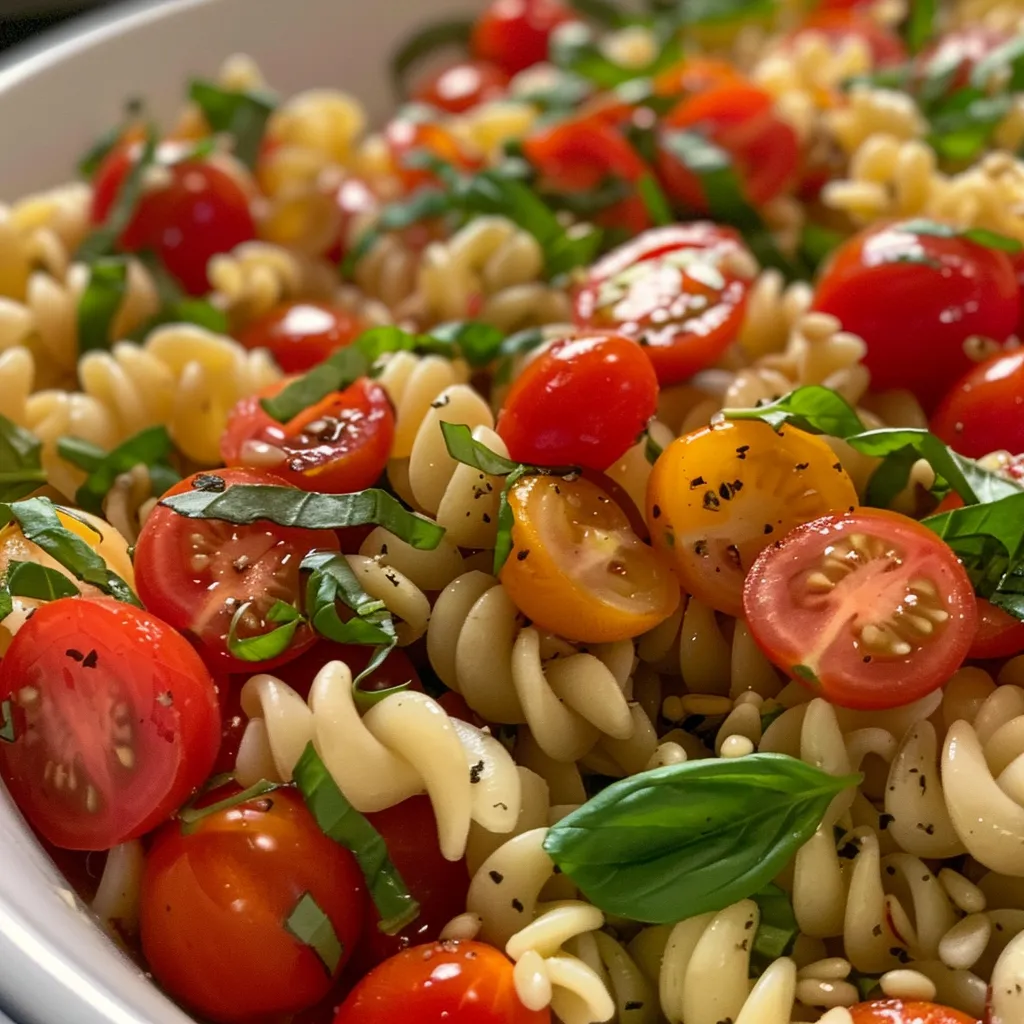
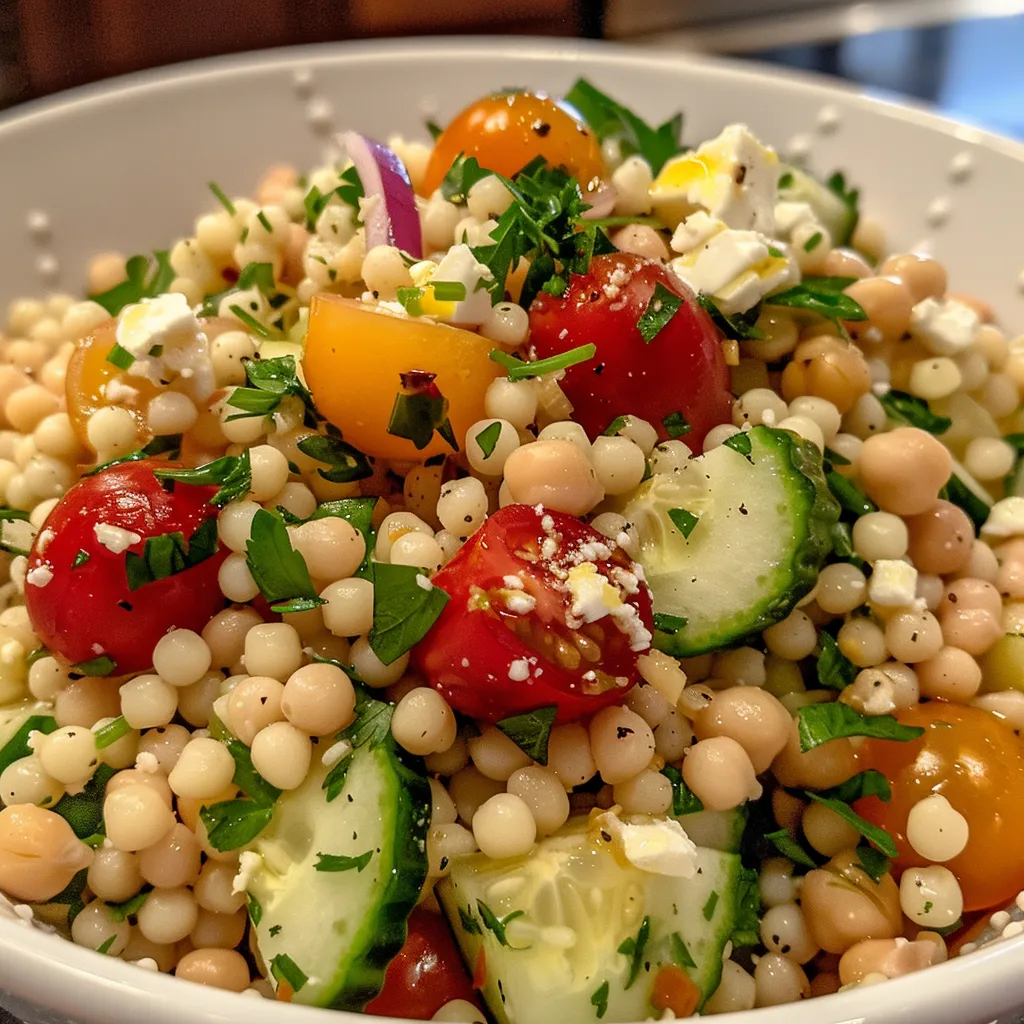
If you’re looking for a quick, vibrant dish that brings together the flavors of the Mediterranean, look no further! This Mediterranean Couscous Salad with Feta and Tomatoes is not only pleasing to the palate but also a breeze to prepare. In less than 30 minutes, you can have a show-stopping salad that’s perfect for weeknight dinners, meal prep, or a backyard barbecue. With the delightful combination of pearl couscous, fresh veggies, and a zesty dressing, this salad is a real treat!

Let’s dive into the details of making this amazing couscous salad, packed with all the flavors and textures you love.

Why You’ll Love This Recipe

  • Quick and Easy: This Mediterranean couscous salad can be whipped up in under 30 minutes, making it perfect for busy weeknights.
  • Health-Packed: Loaded with vegetables and chickpeas, this salad is nutritious and satisfying, offering a balanced meal in one bowl.
  • Make-Ahead Friendly: Prepare it in advance and let the flavors meld together in the fridge, saving you time when meal planning.
  • Versatile: This recipe is highly adaptable; you can mix and match veggies based on what you have on hand, allowing for creativity.
  • Perfect for Any Occasion: Whether it’s a light lunch, a side dish for dinner, or a potluck favorite, this salad fits every occasion.

Ingredients

To create this delicious Mediterranean Couscous Salad, gather the following ingredients:

  • 3 cups cooked pearl couscous
  • 3 Tbsp. olive oil (good quality is recommended)
  • Juice of 1 lemon
  • 1 Tbsp. Greek seasoning (store-bought or homemade)
  • ½ tsp. salt (to taste)
  • ¼ tsp. black pepper
  • 1 English cucumber or 3 cocktail cucumbers, diced
  • 1 pint cherry tomatoes, quartered
  • ½ cup feta cheese, crumbled
  • 1 (15-oz.) can chickpeas, rinsed and drained
  • ¼ red onion, finely diced
  • 3 Tbsp. fresh parsley, finely chopped

Ingredient Breakdown & Substitutions

  • Pearl Couscous: You can use regular couscous or quinoa as a gluten-free alternative.
  • Feta Cheese: If you’re not a fan of feta, goat cheese or even mozzarella can create a delicious twist.
  • Chickpeas: Substitute with black beans or lentils for a different protein source.
  • Vegetable Options: Feel free to add bell peppers, olives, or spinach to amp up the veggie content.

How to Make Mediterranean Couscous Salad

Making this refreshing salad is as simple as following these straightforward steps:

  1. Cook pearl couscous according to package instructions. Drain and allow to cool.
  2. In a large bowl, combine the cooled couscous with olive oil, lemon juice, Greek seasoning, salt, and black pepper. Toss to evenly coat the couscous.
  3. Add in the diced cucumber, quartered tomatoes, crumbled feta, chickpeas, diced onion, and chopped parsley. Mix gently until well combined.
  4. For best flavor, refrigerate for at least 30 minutes before serving. This allows the flavors to meld beautifully.
  5. Just before serving, sprinkle with additional chopped parsley for a fresh touch.

Pro Tips for Making the Best Couscous Salad

A colorful Mediterranean Couscous Salad with pearl couscous, fresh vegetables, and feta cheese, shot from the side.
  • Use High-Quality Olive Oil: The quality of oil impacts the overall flavor, so choose one you enjoy.
  • Cook Couscous Perfectly: Avoid overcooking pearl couscous to keep it al dente and prevent a mushy texture.
  • Let It Chill: Chilling the salad allows the flavors to intensify, making each bite more delicious.
  • Season Gradually: Taste as you go! Adjust salt and seasoning to your preference.
  • Fresh Herbs Matter: Use fresh parsley for a vibrant taste, as dried herbs won’t provide the same freshness.
  • Mix it Up: Try adding nuts like pine nuts or almonds for a crunchy texture.
  • Balance Your Flavors: Incorporate sweet (like roasted red peppers) to contrast the savory elements.
  • Meal Prep: This salad stores well, making it perfect for lunches throughout the week.

Common Mistakes and Troubleshooting

Even the best cooks make mistakes! Here are some common pitfalls and how to avoid them:

  • Overcooking Couscous: Keep an eye on cooking time, as overcooked couscous can become mushy.
  • Too Much Dressing: Avoid drowning the salad in dressing; it’s best to start with less and add more as needed.
  • Omitting Seasoning: Don’t forget to season your salad; it enhances the flavor significantly.
  • Not Letting It Rest: Skipping the chilling time can result in less flavorful bites.

Variations of Mediterranean Couscous Salad

Feel free to customize this recipe to suit your taste or dietary needs:

  • Greek-Inspired: Add kalamata olives and red bell peppers for a classic Greek flavor.
  • Vegan Version: Omit feta cheese and replace it with avocado for creaminess.
  • Spicy Kick: Incorporate diced jalapeños or a dash of cayenne for heat.
  • Seasonal Twist: Include roasted vegetables like zucchini or eggplant for a heartier salad.

Storage and Make-Ahead Instructions

This Mediterranean Couscous Salad holds up well in the fridge:

  • Make Ahead: Prepare the salad up to a day in advance. The flavors will deepen as it sits.
  • Storage: Store leftovers in an airtight container in the refrigerator for up to 3 days.
  • Freezing: Not recommended, as the texture of the couscous can change when frozen.

Comprehensive FAQ

  • What is pearl couscous? Pearl couscous, also known as Israeli couscous, is a larger, round variety of couscous that has a chewy texture.
  • Can I use regular couscous instead? Yes! Regular couscous can be used, but it will have a different texture.
  • Is this salad gluten-free? If you use gluten-free couscous or a grain like quinoa, it can be made gluten-free.
  • How long does the salad last in the fridge? It can last up to 3 days in the refrigerator, perfect for meal prep!
  • Can I add protein to this salad? Absolutely! Grilled chicken, shrimp, or tofu can all be great additions.
  • What dressing works best? The olive oil and lemon juice dressing is light and complements the salad well.
  • Is it necessary to refrigerate the salad? While not required, chilling improves the flavor significantly.
  • Can I serve it warm? Yes, though it’s best enjoyed chilled or at room temperature.

Nutrition Tips and Dietary Adaptations

This Mediterranean Couscous Salad is not only delicious but also nutritious:

  • Fiber-Rich: The chickpeas and vegetables add a good amount of fiber.
  • Low in Calories: Each serving is light yet filling, making it a great option for weight management.
  • Customizable for Diets: Easily adapted for vegetarian, vegan, or gluten-free diets.

Equipment Recommendations

To make your cooking experience smoother, consider having the following on hand:

  • Large Pot: For cooking pearl couscous easily.
  • Mixing Bowl: A large bowl is essential for combining all ingredients.
  • Measuring Cups and Spoons: Accurate measurements make a big difference in cooking.

Serving Suggestions

This salad pairs wonderfully with:

  • Grilled meats, such as chicken or lamb, for a complete meal.
  • Crusty bread or pita chips for a delightful crunch.
  • A side of tzatziki or hummus for dipping.

Now that you have everything you need to whip up this Mediterranean Couscous Salad, it’s time to gather your ingredients and get cooking! Remember, cooking is all about having fun and experimenting with flavors. Enjoy your culinary journey, and happy cooking!

Mediterranean Couscous Salad with Feta Tomatoes

Prep Time 10 minutes
Cook Time 15 minutes
Total Time 25 minutes
Servings 4 servings
Calories 350
A fresh and flavorful salad combining pearl couscous, vegetables, and feta cheese, perfect for a quick and healthy meal.

Ingredients

Cooked Pearl Couscous

  • 3 cups cooked pearl couscous

Olive Oil

  • 3 Tbsp olive oil (good quality)

Lemon Juice

  • 1 lemon lemon juice

Greek Seasoning

  • 1 Tbsp Greek seasoning (store-bought or homemade)

Salt

  • ½ tsp salt (to taste)

Black Pepper

  • ¼ tsp black pepper

English Cucumber or Cocktail Diced Cucumber

  • 1 cucumber English cucumber or diced cucumber

Cherry Tomatoes

  • 1 pint cherry tomatoes (quartered)

Feta Cheese

  • ½ cup feta cheese

Canned Chickpeas

  • 1 15-oz can chickpeas (rinsed and drained)

Red Onion

  • ¼ red onion red onion (finely diced)

Fresh Parsley

  • 3 Tbsp fresh parsley (finely chopped)

Instructions 

  • Cook pearl couscous on the stovetop, then let cool.
  • Combine cooked couscous, oil, lemon juice, Greek seasoning, salt, and pepper in a large bowl; toss to coat.
  • Mix in cucumber, tomatoes, feta, chickpeas, red onion, and parsley. Refrigerate for 30 minutes or overnight.
  • Add chopped parsley just before serving and enjoy!

Notes

For extra flavor, add a drizzle of olive oil before serving.
Calories: 350kcal
Cost: $12
Course: Salad
Cuisine: Mediterranean
Keyword: couscous, Feta, Tomatoes

Discover the Brightness of Lemon Parmesan Pasta Salad

Are you ready to elevate your pasta salad game? If you’re looking for a refreshing and zesty dish that combines simplicity with vibrant flavors, you’ve come to the right place! This Lemon Parmesan Pasta Salad is bursting with deliciousness and is perfect for any occasion, from summer picnics to elegant dinner parties. Packed with rotini pasta, tangy lemon juice, and rich Parmesan cheese, this dish is not just a salad; it’s a celebration of fresh ingredients and easy cooking. Let’s dive into why this recipe should be your next go-to!

Why You’ll Love This Recipe

This Lemon Parmesan Pasta Salad isn’t just another side dish; it’s a delightful experience! Here are some reasons why this recipe stands out:

  • Quick and Easy: Perfect for busy weeknights or last-minute gatherings, this dish comes together in under 30 minutes!
  • Flavor-Packed: The combination of zesty lemon and savory Parmesan creates a taste that’s both refreshing and satisfying.
  • Customizable: Make it your own! Add your favorite veggies or proteins to personalize this dish to your taste.
  • Perfect for Meal Prep: This pasta salad holds up well, making it a great option for leftovers or meal prep for the week.
  • Great for Any Occasion: Whether it’s a summer barbecue or a holiday feast, this salad fits right in!

Ingredients You’ll Need

Gathering your ingredients is the first step to making this delightful Lemon Parmesan Pasta Salad. Here’s what you’ll need:

  • 1 pound rotini pasta: This shape is ideal for holding onto the dressing and flavors.
  • 1 cup Italian dressing: A zesty base that enhances the overall flavor profile.
  • Juice of 2 lemons: Freshly squeezed juice adds a bright, citrusy punch.
  • 1 cup grated Parmesan cheese: Rich and nutty, this cheese is the star of the salad.
  • 1/4 cup chopped fresh parsley: Adds a splash of color and freshness.
  • 1 teaspoon garlic powder: A subtle kick that complements the other flavors.
  • 1 teaspoon kosher salt: Enhances all the flavors of the dish.
  • 1/2 teaspoon black pepper: For a touch of warmth and spice.
  • 1/2 teaspoon onion powder: A hint of sweetness and depth.

Directions to Make Lemon Parmesan Pasta Salad

Side view of a bowl filled with Lemon Parmesan Pasta Salad, showcasing pasta, cheese, and lemon zest.

Now that you have your ingredients ready, let’s get cooking! Follow these simple steps:

  1. Start by cooking the **rotini pasta** according to package instructions (about 10-11 minutes). Be sure to stir occasionally until al dente.
  2. Once cooked, drain the pasta and rinse it under cold water to cool it off. Make sure to drain it very well to avoid a soggy salad.
  3. In a large bowl, combine the **Italian dressing**, **lemon juice**, **grated Parmesan cheese**, **chopped parsley**, **garlic powder**, **kosher salt**, **black pepper**, and **onion powder**. Mix until well combined.
  4. Add the cooled pasta to the dressing mixture, stirring gently to coat all the pasta evenly.
  5. Serve immediately or chill in the refrigerator for a couple of hours for enhanced flavor.

Pro Tips for Perfecting Your Pasta Salad

To take your Lemon Parmesan Pasta Salad to the next level, keep these pro tips in mind:

  • Use Fresh Ingredients: Fresh lemon juice and quality Parmesan cheese make a noticeable difference in flavor.
  • Don’t Overcook the Pasta: Aim for al dente texture; it holds up better in salads.
  • Chill Before Serving: Allowing the salad to chill for a couple of hours helps the flavors meld beautifully.
  • Mix It Up: Feel free to add seasonal vegetables like cherry tomatoes, cucumbers, or bell peppers for extra crunch.
  • Adjust Seasonings: Taste and adjust salt and pepper before serving to suit your preferences.
  • Garnish Wisely: A sprinkle of extra Parmesan or fresh herbs on top adds a nice finishing touch.
  • Consider Protein: For a heartier meal, add grilled chicken, shrimp, or chickpeas.
  • Make It Gluten-Free: Substitute rotini with gluten-free pasta for a delicious gluten-free option.

Common Mistakes and Troubleshooting

Even the best cooks can have mishaps! Here’s how to avoid common mistakes:

  • Overdressing: Too much dressing can make the pasta salad soggy. Start with less and add more as needed.
  • Soggy Salad: Ensure pasta is fully drained and rinsed to prevent excess moisture.
  • Flavorless Salad: Taste as you go! Adjust the seasoning before serving to ensure a well-balanced flavor.

Variations to Try

Get creative with your Lemon Parmesan Pasta Salad! Here are some delicious variations:

  • Add Veggies: Try adding chopped bell peppers, cucumbers, or cherry tomatoes for extra crunch and color.
  • Protein Boost: Toss in grilled chicken, shrimp, or chickpeas for a satisfying meal.
  • Herb Infusion: Experiment with different herbs like basil, dill, or cilantro for a unique twist.
  • Cheese Swap: Substitute Parmesan with feta or goat cheese for a tangy flavor.

Storage and Make-Ahead Instructions

This pasta salad is great for meal prep! Here’s how to store it:

  • Refrigeration: Store in an airtight container in the fridge for up to 3-4 days. The flavors will continue to develop as it sits.
  • Freezing: While not recommended for this salad due to texture changes, you can freeze the dressing separately for later use.
  • Make-Ahead: Prepare the salad a day in advance for the best flavor. Just hold off on adding any greens until serving.

FAQs About Lemon Parmesan Pasta Salad

Here are some frequently asked questions to help you along the way:

  • Can I use other types of pasta in this recipe? Absolutely! Feel free to substitute with penne, fusilli, or even gluten-free pasta.
  • How long can I store leftovers? Leftovers can be stored in the refrigerator for up to 3-4 days.
  • Can this salad be served warm? While it’s best served cold, you can enjoy it slightly warm if preferred.
  • Is this recipe vegan-friendly? To make it vegan, substitute the cheese with nutritional yeast and use a vegan dressing.
  • Can I add nuts or seeds? Yes! Toasted pine nuts or sunflower seeds can add a delightful crunch.
  • How do I make it gluten-free? Simply replace the rotini with gluten-free pasta.
  • Can I add more spices? Feel free to add red pepper flakes or Italian seasoning for an extra kick!
  • What should I serve with this salad? Pair it with grilled meats, fish, or serve it as a light lunch on its own.

Nutritional Tips and Dietary Adaptations

This Lemon Parmesan Pasta Salad can be adapted to fit various dietary needs:

  • Low-Carb Option: Substitute pasta with spiralized zucchini or cauliflower rice for a low-carb alternative.
  • Healthy Fats: Drizzle with olive oil for added healthy fats.
  • Protein Power: Incorporate grilled chicken or tofu for an added protein boost.

Equipment Recommendations

To make this Lemon Parmesan Pasta Salad, you’ll need:

  • Large Pot: For boiling the pasta.
  • Colander: To drain the pasta efficiently.
  • Large Mixing Bowl: For combining all the ingredients.
  • Measuring Cups and Spoons: To ensure accurate ingredient measurements.

Serving Suggestions

Serve your Lemon Parmesan Pasta Salad as a side dish or main meal. Here are some ideas:

  • Pair with Grilled Chicken: A perfect complement for a protein-packed meal.
  • Serve with Garlic Bread: For a delightful Italian-inspired dinner.
  • Enjoy with a Fresh Green Salad: Create a colorful plate with mixed greens on the side.
  • Perfect for Picnics: This salad travels well, making it an ideal dish for outdoor gatherings.

In conclusion, this Lemon Parmesan Pasta Salad is not just a dish; it’s a joyful experience that brings friends and family together. With its bright flavors, quick preparation, and endless variations, you’ll find yourself making it again and again. So grab your ingredients, unleash your inner chef, and enjoy the delightful journey of creating this pasta salad. Happy cooking!

Lemon Parmesan Pasta Salad

Prep Time 10 minutes
Cook Time 11 minutes
Total Time 21 minutes
Servings 4 servings
Calories 350
A fresh and tangy pasta salad perfect for picnics and gatherings, combining zesty lemon, Parmesan, and herbs.

Ingredients

Pasta

  • 1 pound rotini pasta
  • 1 cup Italian dressing
  • 2 lemon lemons (juice) (Juice of 2 lemons)
  • 1 cup grated Parmesan cheese
  • 0.25 cup chopped fresh parsley
  • 1 teaspoon garlic powder
  • 1 teaspoon kosher salt
  • 0.5 teaspoon black pepper
  • 0.5 teaspoon onion powder

Instructions 

  • Cook the pasta according to package instructions (10-11 minutes). Drain and rinse under cold water.
  • In a large bowl, combine dressing, lemon juice, Parmesan, parsley, and seasonings.
  • Add the cooled pasta and toss to coat evenly.
  • Serve immediately or chill for a couple of hours for enhanced flavor.

Notes

For a creamier texture, add a splash of olive oil or more Parmesan before serving.
Calories: 350kcal
Cost: $12
Course: Salad
Cuisine: American
Keyword: Pasta

Transform Your Dining Experience with Grilled Chicken Caesar Salad

Welcome to the ultimate guide on making a Grilled Chicken Caesar Salad that’s not only healthy but also bursting with flavor! If you’re looking for a dish that combines juicy grilled chicken, crisp romaine lettuce, and a creamy dressing, you’ve landed in the right place. In just a few simple steps, you’ll learn how to master this classic recipe that’s perfect for any weeknight dinner or special occasion. Let’s dive into the flavorful world of this beloved salad!

Why You’ll Love This Recipe

This salad is more than just a meal; it’s an experience. Here are five reasons why you’ll adore this Grilled Chicken Caesar Salad:

  • Quick to Prepare: With only 30 minutes from start to finish, you can whip up this delicious dish even on the busiest of evenings.
  • Healthy and Nutritious: Packed with protein from the grilled chicken and vitamins from the fresh romaine, this salad is a balanced meal that won’t weigh you down.
  • Customizable: Whether you want to add extra toppings like avocado or swap out the dressing, this salad is versatile and can be tailored to your taste.
  • Perfect for Meal Prep: Make this salad ahead of time for a quick, healthy lunch option that’s easy to grab and go.
  • Impressive Presentation: The vibrant colors of the ingredients make for a beautiful dish that’s sure to impress your family or guests!

Ingredients You’ll Need for Grilled Chicken Caesar Salad

Here’s what you’ll need to create this delicious salad:

Main Ingredients List

  • 2 large boneless, skinless chicken breasts: The star of the salad, providing protein and flavor.
  • 2 tablespoons olive oil: For brushing the chicken and adding healthy fats.
  • Salt and pepper to taste: Essential for seasoning the chicken.
  • 6 cups romaine lettuce, chopped: Crisp greens that form the base of the salad.
  • 1/3 cup Parmesan cheese, shaved or grated: Adds a nutty, salty flavor.
  • 1 cup croutons: For that satisfying crunch.
  • 1/2 cup Caesar dressing: The creamy dressing that ties all the flavors together.

Optional Add-Ins and Substitutions

  • Grilled Shrimp: Swap chicken for shrimp for a seafood twist.
  • Avocado: Add creaminess and healthy fats.
  • Cherry Tomatoes: For a pop of sweetness and color.
  • Whole Wheat Croutons: For a healthier crunch option.

How to Make Grilled Chicken Caesar Salad

Side view of a vibrant Grilled Chicken Caesar Salad with grilled chicken, crisp lettuce, and a drizzle of Caesar dressing.

Follow these simple steps to create your salad:

Step 1: Prepare and Season the Chicken

Start by brushing the chicken breasts with olive oil and seasoning generously with salt and pepper. Let them rest for about 10 minutes to absorb the flavors.

Step 2: Grill the Chicken

Preheat your grill or grill pan over medium-high heat. Grill the chicken for 5-7 minutes on each side until it reaches an internal temperature of 165°F. Once done, remove it from the grill and let it rest for 5 minutes before slicing.

Step 3: Assemble the Salad

In a large bowl, combine the chopped romaine lettuce, croutons, and Parmesan cheese. Toss gently to mix.

Step 4: Add Dressing and Chicken

Drizzle the Caesar dressing over the salad and toss gently until everything is evenly coated. Top with the sliced grilled chicken and additional Parmesan if desired. Serve immediately with lemon wedges for an extra zing!

Pro Tips for the Best Salad

Here are some expert insights to elevate your salad-making game:

  • Marinate Your Chicken: For deeper flavor, consider marinating your chicken in a mixture of olive oil, lemon juice, garlic, and herbs for at least 30 minutes before grilling.
  • Use Fresh Ingredients: Always opt for fresh romaine and high-quality dressing for the best taste.
  • Grill Marks: To achieve those perfect grill marks, ensure your grill is hot enough before placing the chicken on it.
  • Resting Time: Letting the chicken rest after grilling allows the juices to redistribute, making each bite juicy.
  • Serve Chilled: If you prefer a cooler salad, chill your lettuce and dressing beforehand.
  • Customize Your Dressing: Feel free to add additional ingredients to your dressing, like minced garlic or anchovy paste, to enhance the flavor.
  • Experiment with Cheese: Try different types of cheese, such as feta or blue cheese, for a flavor twist.
  • Perfectly Crispy Croutons: For homemade croutons, toss bread cubes in olive oil, seasonings, and bake until golden and crunchy.

Common Mistakes and Troubleshooting

Even the best cooks can encounter issues. Here’s how to avoid common pitfalls:

  • Overcooking the Chicken: Keep a meat thermometer handy to ensure your chicken is perfectly cooked without drying out.
  • Too Much Dressing: Start with a small amount of dressing and add more as needed to avoid soggy lettuce.
  • Wilted Lettuce: Always wash and dry your lettuce thoroughly to keep it crisp.

Recipe Variations

Feel free to mix things up with these tasty variations:

  • Spicy Chicken Caesar Salad: Add cayenne pepper or a dash of hot sauce to your marinade for a kick.
  • Mediterranean Caesar: Include olives, sun-dried tomatoes, and feta cheese for a Mediterranean twist.
  • Vegan Caesar Salad: Substitute grilled tofu for chicken and use a vegan Caesar dressing.
  • Caesar Pasta Salad: Mix in cooked pasta for a heartier salad option that’s perfect for potlucks.

Storage and Make-Ahead Instructions

This salad is great for meal prep! Here’s how to store it:

  • Make Ahead: Grill the chicken and prepare the salad components separately. Store them in airtight containers in the fridge for up to 3 days.
  • Storage Tips: Keep the dressing separate until you’re ready to serve to prevent wilting.
  • Freezing: Avoid freezing the salad as the lettuce and dressing do not thaw well.

Frequently Asked Questions

Here are some common questions and answers about Grilled Chicken Caesar Salad:

  • Can I use frozen chicken? Yes, just ensure it’s fully thawed and patted dry before grilling.
  • What dressing is best for Caesar salad? A homemade Caesar dressing is best, but store-bought versions work well too.
  • How do I keep my lettuce crisp? Wash and dry your lettuce thoroughly and store it in the refrigerator in a sealed container.
  • Can I make this salad gluten-free? Absolutely! Use gluten-free croutons and check your dressing for gluten-containing ingredients.
  • How can I add more protein? Consider adding hard-boiled eggs or chickpeas for an extra protein boost.
  • What else can I serve with it? Pair it with a light soup or a crusty bread for a complete meal.
  • How long does the salad last in the fridge? It’s best enjoyed fresh, but can last 2-3 days if stored properly.
  • Can I make it vegetarian? Yes, substitute grilled veggies or tofu for the chicken!

Nutritional Tips and Dietary Adaptations

To make this salad even healthier:

  • Low-Fat Dressing: Use a low-fat or yogurt-based Caesar dressing to cut down on calories.
  • Lean Protein: Opt for lean cuts of chicken or turkey to reduce fat content.
  • More Greens: Boost the nutritional value by adding spinach or kale to the mix.

Essential Equipment Recommendations

To make your cooking experience smooth, here’s what you’ll need:

  • Grill or Grill Pan: For perfectly grilled chicken.
  • Meat Thermometer: To ensure your chicken is cooked to perfection.
  • Large Mixing Bowl: For tossing the salad ingredients together.
  • Sharp Knife: For slicing the chicken and chopping the lettuce.

Serving Suggestions

Elevate your meal by pairing your salad with:

  • Garlic Bread: A classic side that complements the flavors perfectly.
  • White Wine: A crisp white wine can enhance the dining experience.
  • Fruit Salad: A light fruit salad makes for a refreshing dessert.

Conclusion

Now that you’ve mastered how to create a delicious and healthy Grilled Chicken Caesar Salad, it’s time to enjoy the fruits of your labor. Remember, cooking is about exploration and creativity, so don’t hesitate to experiment with flavors and ingredients. With this guide in hand, you’re well on your way to impressing family and friends with your culinary skills. Happy cooking, and enjoy every bite!

Grilled Chicken Caesar Salad The Best Healthy and Easy Classic

Prep Time 15 minutes
Cook Time 15 minutes
Total Time 30 minutes
Servings 4 servings
Calories 550
A delicious and healthy grilled chicken Caesar salad that's quick to prepare and perfect for a satisfying meal.

Ingredients

Protein

  • 2 large boneless, skinless chicken breasts
  • 2 tablespoons olive oil
  • Salt and pepper to taste Salt and pepper

Vegetables

  • 6 cups romaine lettuce, chopped
  • 0.75 cup Parmesan cheese, shaved or grated
  • 1 cup croutons
  • 0.5 cup Caesar dressing

Instructions 

  • Brush chicken with olive oil, season with salt and pepper, and let rest for 10 minutes.
  • Preheat grill and cook chicken for 5-7 minutes per side until fully cooked. Rest for 5 minutes, then slice.
  • Combine chopped romaine, croutons, and Parmesan in a large bowl.
  • Add Caesar dressing and toss gently to coat.
  • Top salad with sliced chicken and extra Parmesan. Serve immediately with lemon wedges.

Notes

For extra flavor, add a squeeze of lemon or your favorite herbs.
Calories: 550kcal
Cost: $15
Course: Salad
Cuisine: American
Keyword: Caesar, Chicken, Healthy

Summer is here, and it’s time to embrace the vibrant flavors of the season! This easy Mango Avocado Salsa is not just a treat for your taste buds but also a feast for your eyes. With juicy mango, creamy avocado, and zesty lime, this salsa is perfect for picnics, barbecues, or simply as a refreshing snack. In this comprehensive guide, we will walk you through everything you need to know to make the best Mango Avocado Salsa ever.

Why You’ll Love This Recipe

Here are just a few reasons why this Mango Avocado Salsa will become a staple in your kitchen:

  • Quick & Easy: This recipe comes together in under 15 minutes, making it ideal for last-minute gatherings.
  • Fresh Ingredients: Using ripe mangoes and avocados ensures a burst of flavor that canned or jarred options just can’t compete with.
  • Versatile: Perfect as a dip for tortilla chips, a topping for grilled meats, or a refreshing side salad.
  • Healthy Snack: Packed with vitamins, fiber, and healthy fats, this salsa is not just delicious but good for you!
  • Customizable: Adjust the ingredients to suit your taste—add peppers for heat or swap out lime for lemon!

Fresh Mango Avocado Salsa Ingredients

Gather these fresh ingredients to make your salsa:

  • 1 large mango: Freshly peeled and cubed for the best texture.
  • 1 large avocado: Cubed to add a creamy richness.
  • 1/4 cup red onion: Finely diced for a touch of sharpness.
  • 1/4 cup cilantro: Freshly diced for that herbaceous flavor.
  • 2 tablespoons lime juice: Freshly squeezed to brighten the flavors.
  • Salt to taste: Enhances all the ingredients.

How to Make Fresh Mango Avocado Salsa

Now let’s get to the fun part—making the salsa! Follow these simple steps:

  1. In a mixing bowl, combine the cubed mango, avocado, red onion, and cilantro.
  2. Drizzle the freshly squeezed lime juice over the mixture and season with salt.
  3. Gently toss all the ingredients together to combine, being careful not to mash the avocado.
  4. Taste and adjust the seasoning, adding more lime juice or salt as desired.
  5. Serve immediately or refrigerate for up to 30 minutes to allow the flavors to meld.

Pro Tips for the Best Mango Avocado Salsa

Side view of a vibrant Mango Avocado Salsa, showcasing fresh ingredients like diced red onion and cilantro.

To elevate your salsa game, consider these expert insights:

  • Choose Ripe Fruits: For the best flavor, select mangoes and avocados that yield slightly to pressure when squeezed.
  • Fresh is Best: Use freshly squeezed lime juice for a superior flavor compared to bottled juice.
  • Customize Your Spice Level: If you like it spicy, add diced jalapeño or a pinch of cayenne pepper.
  • Chill Before Serving: Letting the salsa sit in the fridge for a short time enhances the flavors.
  • Use a Sharp Knife: A sharp knife will make cutting the fruits easier and safer.
  • Mix Gently: Be gentle when mixing to keep the avocado cubes intact for better presentation.
  • Consider Texture: For an extra crunch, add diced bell peppers or cucumbers.
  • Experiment with Herbs: Basil or mint can be delightful alternatives to cilantro.

Common Mistakes and Troubleshooting

Even the best can make mistakes! Here’s how to avoid common pitfalls:

  • Overripe Avocados: If your avocado is too soft, it may turn mushy in the salsa. Look for firm, slightly soft avocados.
  • Too Salty: If you accidentally added too much salt, balance it out with an extra squeeze of lime juice or more diced mango.
  • Flavor Imbalance: If the salsa tastes bland, consider adding more lime juice or salt to enhance the flavors.

Variations of Mango Avocado Salsa

Feel free to get creative! Here are some delicious variations:

  • Spicy Mango Salsa: Add one finely chopped jalapeño for a kick.
  • Mango Pineapple Salsa: Mix in diced pineapple for a tropical twist.
  • Black Bean Mango Salsa: Add canned black beans for extra protein and fiber.
  • Mango Avocado Cucumber Salsa: Include diced cucumber for a refreshing crunch.

Storage Tips for Mango Avocado Salsa

To keep your salsa fresh and delicious:

  • Refrigerate: Store in an airtight container in the fridge for up to 2 days.
  • Freezing: For longer storage, freeze portions in a freezer-safe container. It’s best to consume within 2 months, but expect some texture changes after thawing.

Make-Ahead Options

If you want to prepare ahead, here are some ideas:

  • Prep Ingredients: Chop the mango, avocado, and onion ahead of time. Keep them separate and mix just before serving.
  • Flavor Booster: Marinate the red onion in lime juice for an hour before adding to the mix to mellow its flavor.

Fresh Mango Avocado Salsa Recipe FAQs

Here are some common questions answered:

  • Can I use frozen mango? Yes, thawed frozen mango works well, though fresh is preferred.
  • How do I ripen an avocado quickly? Place it in a brown paper bag with an apple or banana for a day or two.
  • What’s the best way to cut a mango? Stand it upright and slice down along the pit on both sides, then cube the flesh.
  • Can I make this salsa without cilantro? Absolutely! You can omit it or substitute with your favorite herb.
  • How spicy is this salsa? It’s mild, but you can add jalapeños for heat if desired.
  • What should I serve with this salsa? Tortilla chips, grilled chicken, fish tacos, or as a topping for salads.
  • Can I add other fruits? Yes! Try adding diced strawberries or kiwi for a fruity twist.
  • How long does this salsa last? It’s best enjoyed fresh, but can last in the fridge for up to 2 days.

Nutritional Tips and Dietary Adaptations

This Mango Avocado Salsa is not only delicious but also packed with nutrients:

  • Healthy Fats: Avocados provide heart-healthy monounsaturated fats.
  • Vitamins and Fiber: Mangoes are rich in vitamin C and dietary fiber, making this salsa a healthy choice.
  • Gluten-Free: This recipe is naturally gluten-free and suitable for various diets.

Equipment Recommendations

To make your cooking experience easier, consider using:

  • Sharp Chef’s Knife: For precise cutting of fruits.
  • Cutting Board: A clean surface to chop your ingredients.
  • Mixing Bowl: A large bowl to combine all ingredients without spilling.
  • Airtight Containers: For storing leftovers and keeping them fresh.

Serving Suggestions

Here’s how to enjoy your salsa:

  • As a Dip: Serve with tortilla chips for a crowd-pleasing appetizer.
  • On Tacos: Use it as a topping for fish or chicken tacos for a burst of flavor.
  • With Grilled Meats: Pair with grilled chicken or shrimp for a refreshing side.
  • In Salads: Toss into a green salad for an added layer of flavor and texture.

In conclusion, this Mango Avocado Salsa is not only a delightful and flavorful treat but also a versatile addition to your culinary repertoire. Embrace the summer vibes, gather your ingredients, and enjoy this fresh, vibrant recipe with family and friends. Remember, cooking is about confidence and creativity—so don’t hesitate to experiment and make this recipe your own. Happy cooking!

Fresh Mango Avocado Salsa for Vibrant Summer Flavors

Prep Time 10 minutes
Total Time 10 minutes
Servings 4 servings
Calories 150
Enjoy this colorful and refreshing mango avocado salsa, perfect for summer gatherings or as a topping for grilled dishes.

Ingredients

Fruits

  • 1 large mango (freshly peeled and cubed)
  • 1 large avocado (cubed)
  • 0.25 cup red onion (finely diced)
  • 0.25 cup cilantro (finely diced)
  • 2 tablespoons lime juice (freshly squeezed)
  • to taste salt

Instructions 

  • Combine mango, avocado, red onion, and cilantro in a bowl.
  • Drizzle with lime juice and season with salt to taste.
  • Gently toss to combine all ingredients.
  • Serve immediately or chill before serving.

Notes

For extra flavor, add a pinch of chili flakes or cumin.
Calories: 150kcal
Cost: $8
Course: Appetizer
Cuisine: Fusion
Keyword: Avocado, Mango

Discover the Joy of BBQ Pineapple Chicken Kabobs

Looking for a mouthwatering dish that brings together juicy chicken, sweet pineapple, and vibrant veggies? You’re in the right place! These BBQ Pineapple Chicken Kabobs are not only simple to prepare but also a fantastic way to spice up your weeknight dinners or impress guests at your next family gathering. With a beautiful balance of flavors and textures, this recipe is your ticket to effortless cooking and happy hearts around the dinner table.

In this comprehensive guide, we’ll cover everything from ingredients and cooking tips to variations and storage advice, ensuring you feel confident every step of the way. Let’s dive into the delicious world of kabobs!

Why You’ll Love This Recipe

  • Quick and Easy: These kabobs are ready in no time, making them perfect for busy weeknights or spontaneous gatherings.
  • Flavor-Packed: The combination of sweet pineapple and savory BBQ sauce creates a delightful explosion of flavor that will leave everyone asking for seconds.
  • Customizable: Feel free to swap out ingredients based on your preferences—this recipe is versatile enough to cater to everyone!
  • Grill-Friendly: Whether you’re using a traditional grill or a grill pan, these kabobs are suited for both, allowing you to enjoy delicious grilled flavor anytime.
  • Family-Friendly: Kids love these kabobs! They’re fun to eat and can be paired with various sides to satisfy even the pickiest eaters.

Ingredient Breakdown

Here’s what you’ll need to make these delicious kabobs, along with some helpful substitutions:

  • 1 pound boneless, skinless chicken breasts: Cut into 1-inch cubes. You can also use chicken thighs for a juicier result.
  • 1 can (about 20 ounces) pineapple chunks: Ensure they are drained well. Fresh pineapple works wonderfully too!
  • ½ cup BBQ sauce: Choose your favorite brand, ensuring it’s halal-friendly if needed.
  • 1 cup bell peppers: Any colors you prefer—red, green, yellow, or orange add a splash of color!
  • 1 medium onion: Cut into wedges for added flavor.
  • Salt and pepper: To taste, enhancing the overall flavors.
  • Skewers: If using wooden skewers, soak them in water for 30 minutes to prevent burning.

Step-by-Step Instructions

Juicy chicken kabobs with pineapple, bell peppers, and onion on wooden skewers.

Follow these simple steps to create your BBQ Pineapple Chicken Kabobs:

  1. Preheat your grill to medium-high heat.
  2. In a large bowl, combine the chicken cubes, BBQ sauce, salt, and pepper. Toss to coat evenly.
  3. Thread the chicken, pineapple chunks, bell peppers, and onion onto the skewers, alternating as you go.
  4. Place the skewers on the grill and cook for about 10-15 minutes, turning occasionally, until the chicken is cooked through and has nice grill marks.
  5. Remove from the grill and let them rest for a few minutes before serving.

Pro Tips for Perfect Kabobs

  • Marinate for Extra Flavor: If you have time, marinate the chicken in BBQ sauce for at least 30 minutes (or up to 24 hours) for deeper flavor.
  • Don’t Overcrowd the Skewers: Leave some space between the ingredients to allow even cooking and nice caramelization.
  • Use Fresh Ingredients: Fresh pineapple and colorful vegetables not only taste better but also make your kabobs visually appealing.
  • Keep an Eye on Cooking Time: Chicken pieces can cook quickly on the grill; use a meat thermometer to ensure they reach 165°F.
  • Experiment with Seasoning: Try adding garlic powder, onion powder, or your favorite herbs for an extra flavor boost.
  • Use Two Skewers: For larger pieces of chicken or veggies, use two skewers to prevent them from spinning while grilling.
  • Let Kabobs Rest: Allow them to rest for a few minutes after grilling to retain juiciness.
  • Perfect for Meal Prep: These kabobs can be prepared in advance, making weeknight dinners a breeze.

Common Mistakes and Troubleshooting

Even the best cooks face hiccups in the kitchen. Here are some common mistakes to watch for and how to avoid them:

  • Dry Chicken: Avoid overcooking the chicken. Use a meat thermometer to check for doneness.
  • Burnt Veggies: If your veggies are burning while the chicken is undercooked, consider cutting them smaller or placing them on separate skewers.
  • Pineapple Sticking: If pineapple sticks to the grill, ensure it’s well-drained and consider using a little oil on the grill grates.

Variations to Try

Feel free to mix things up! Here are some tasty variations:

  • Teriyaki Twist: Substitute BBQ sauce with teriyaki sauce for an Asian-inspired flavor.
  • Veggie Delight: Skip the chicken and use only veggies for a vegetarian option. Zucchini, mushrooms, and cherry tomatoes work well!
  • Spicy Kick: Add jalapeño slices to the skewers for a spicy version that packs a punch.
  • Herbed Chicken: Use a blend of fresh herbs like rosemary, thyme, and parsley instead of BBQ sauce for a Mediterranean flair.

Storage and Make-Ahead Instructions

These kabobs are perfect for meal prep! Here’s how to store and prepare them in advance:

  • Refrigeration: Store leftovers in an airtight container in the fridge for up to 3 days.
  • Freezing: You can freeze uncooked skewers before grilling. Just thaw them in the fridge overnight before cooking.
  • Make-Ahead: Prep the skewers a day in advance, cover them with plastic wrap, and store them in the refrigerator until you’re ready to grill.

Frequently Asked Questions

Here are some common questions and answers to help you succeed with this recipe:

  • Can I use frozen chicken for kabobs? Yes, but make sure to thaw it completely before marinating and skewering.
  • What can I serve with BBQ pineapple chicken kabobs? These kabobs pair well with rice, quinoa, or a fresh salad.
  • Is it safe to eat grilled pineapple? Absolutely! Grilling enhances the sweetness and flavor of pineapple.
  • Can I cook these kabobs in the oven? Yes! Preheat the oven to 425°F and bake for about 20-25 minutes, turning halfway through.
  • What other sauces can I use? Feel free to explore different sauces like honey mustard, chimichurri, or garlic butter!
  • How do I know when the chicken is done? The internal temperature should reach 165°F for safe consumption.
  • Can I make these kabobs ahead of time? Yes! You can prep them a day in advance and grill them fresh when you’re ready.
  • Are these kabobs suitable for meal prep? Definitely! They are great for meal prep and can be enjoyed throughout the week.

Nutrition Tips and Dietary Adaptations

This recipe is not only delicious but can also be tailored to fit various dietary needs:

  • Low-Carb Option: Use zucchini noodles instead of rice for a low-carb meal.
  • Gluten-Free: Ensure the BBQ sauce is gluten-free to keep the recipe suitable for those with gluten sensitivities.
  • Protein-Packed: For extra protein, add some chickpeas or beans to the veggie version.

Essential Equipment for Grilling Kabobs

To get the best results from your kabob-making adventure, consider using the following equipment:

  • Skewers: Wooden or metal skewers work great. If using wooden, remember to soak them!
  • Grill: A gas or charcoal grill will give you that classic smoky flavor.
  • Grill Brush: Essential for cleaning your grill grates before cooking.
  • Meat Thermometer: This tool ensures your chicken is cooked to perfection.

Serving Suggestions

To round off your delightful meal, consider these serving ideas:

  • Fresh Salad: A crisp garden or Greek salad makes a refreshing side.
  • Rice or Quinoa: Serve the kabobs over a bed of rice or quinoa for a hearty meal.
  • Grilled Corn: Add some grilled corn on the cob for a summer vibe!
  • Yogurt Sauce: A cool yogurt or tzatziki sauce pairs beautifully with the flavors of the kabobs.

In conclusion, BBQ Pineapple Chicken Kabobs are a delightful and satisfying dish that brings joy to any table. With a few simple ingredients and steps, you can create a flavorful meal that will impress your family and friends. So gather your loved ones, fire up the grill, and savor the simplicity of this fantastic recipe!

BBQ Pineapple Chicken Kabobs

Prep Time 15 minutes
Cook Time 15 minutes
Total Time 30 minutes
Servings 4 servings
Calories 350
Enjoy these flavorful and halal-friendly BBQ pineapple chicken kabobs, perfect for grilling and sharing with friends and family.

Ingredients

Protein

  • 1 pound boneless, skinless chicken breasts (cut into 1-inch cubes)
  • 1 can about 20 ounces pineapple chunks (drained)

Sauce

  • 0.5 cup BBQ sauce (ensure it's halal-friendly)

Vegetables

  • 1 cup bell peppers (chopped, any colors)
  • 1 medium onion (cut into wedges)

Seasonings

  • to taste salt
  • to taste pepper

Other

  • 1 set skewers (soak wooden skewers in water for 30 minutes before using)

Instructions 

  • Soak wooden skewers in water for 30 minutes.
  • Thread chicken, pineapple, bell peppers, and onion onto skewers alternately.
  • Brush with BBQ sauce and season with salt and pepper.
  • Grill kabobs over medium heat for 12-15 minutes, turning occasionally.
  • Serve hot with extra BBQ sauce if desired.

Notes

Marinate the chicken in BBQ sauce for extra flavor if desired.
Calories: 350kcal
Cost: $15
Course: Main Course
Cuisine: American
Keyword: BBQ, Chicken, Pineapple

Kickstart Your Day with a Creamy Mango Smoothie Bowl

Are you ready to elevate your breakfast game? The Creamy Mango Smoothie Bowl is not just a feast for your taste buds; it’s a delightful way to nourish your body and soul. Bursting with tropical flavors, this bowl is perfect for anyone looking for a refreshing start to their day or a quick snack. In just a few minutes, you can whip up this vibrant dish that’s topped with chia seeds and coconut flakes. Let’s dive into why this mango smoothie bowl deserves a special place in your morning routine!

Why You’ll Love This Recipe

  • Quick and Easy: In under 10 minutes, you can create a delicious breakfast that requires minimal prep and cleanup.
  • Nutritious and Wholesome: Packed with vitamins and minerals from fresh mangoes and Greek yogurt, this smoothie bowl will keep you energized.
  • Customizable: Feel free to experiment with various toppings or ingredients based on your cravings or dietary needs.
  • Perfect for Meal Prep: Make a double batch and store it for busy mornings or healthy snacks throughout the week.
  • Kid-Friendly: This smoothie bowl is a fun and colorful way to encourage kids to eat healthy!

Ingredient Breakdown

Let’s look at what you need for this creamy mango smoothie bowl:

  • 2 large ripe mangoes: Peel and dice them for a naturally sweet base. If out of season, frozen mango works too!
  • 1 cup Greek yogurt: For creaminess and protein. Vegan? Use plant-based yogurt instead.
  • 1/2 cup almond milk: Adjust the quantity based on your desired consistency; any milk of choice works here.
  • 2 tablespoons honey or maple syrup: Sweeten according to your taste. Feel free to use agave syrup for a vegan option.
  • 2 tablespoons chia seeds: These tiny seeds are packed with nutrients and will add a delightful crunch.
  • 1/4 cup unsweetened coconut flakes: A tropical touch that brings texture and flavor to the bowl.
  • Fresh mint leaves: For garnish, adding a refreshing aroma and vibrant color.

Steps to Create Your Smoothie Bowl

Side angle of a vibrant mango smoothie bowl topped with coconut and chia seeds.

Ready to blend? Here’s how to make your creamy mango smoothie bowl:

  1. In a blender, combine the diced mangoes, Greek yogurt, almond milk, and honey or maple syrup. Blend until the mixture is smooth and creamy.
  2. If the mixture is too thick, add a little more almond milk to reach your desired consistency. Taste the smoothie mixture and adjust sweetness if needed by adding more honey or maple syrup.
  3. Divide the creamy mango smoothie into two serving bowls.
  4. Sprinkle one tablespoon of chia seeds over each smoothie bowl.
  5. Top each bowl with coconut flakes, distributing them evenly.
  6. Add fresh mint leaves on top for garnish if desired. For additional nutrients, consider topping the smoothie bowl with sliced fruits like bananas or strawberries.

Pro Tips for the Perfect Mango Smoothie Bowl

  • Use ripe mangoes: The sweetness and creaminess of ripe mangoes are essential for the best flavor.
  • Blend thoroughly: Ensure your mixture is completely smooth for a delightful texture.
  • Experiment with flavors: Add a splash of vanilla extract or a dash of cinnamon for an extra flavor boost.
  • Chill your ingredients: For a colder, thicker smoothie bowl, chill your mangoes and yogurt before blending.
  • Adjust sweetness: Always taste and adjust the sweetness to your preference; some mangoes can be sweeter than others.
  • Layer your toppings: Get creative with toppings like granola, nuts, or other fruits for a satisfying crunch.
  • Try different milks: Almond, coconut, or oat milk can all change the flavor profile of your smoothie bowl.
  • Make it a meal: Add a scoop of protein powder to boost the nutritional value if you’re having this as a post-workout snack.

Common Mistakes and Troubleshooting

Even simple recipes can have their hiccups! Here are some common mistakes to avoid when preparing your smoothie bowl:

  • Too Thick: If your smoothie is too thick, add more almond milk a tablespoon at a time until you reach your desired consistency.
  • Too Runny: If your smoothie is too runny, add more frozen mango or Greek yogurt to thicken it up.
  • Not Sweet Enough: Adjust sweetness by adding more honey or maple syrup, blending briefly to mix.
  • Flavor Overload: Stick to a few toppings to keep the flavor balanced rather than overwhelming your taste buds.

Delicious Variations

Feeling adventurous? Here are some fun variations you can try:

  • Berry Mango Smoothie Bowl: Add a cup of mixed berries to your blender for a fruity twist and extra antioxidants.
  • Coconut Mango Smoothie Bowl: Use coconut yogurt and top with toasted coconut flakes for a tropical experience.
  • Green Mango Smoothie Bowl: Blend in a handful of spinach or kale for added nutrients without sacrificing taste.
  • Nutty Mango Smoothie Bowl: Blend in a tablespoon of almond butter or peanut butter for a creamy, nutty flavor and added protein.

Storage and Make-Ahead Instructions

Want to prepare your smoothie bowl in advance? Here’s how:

  • For Meal Prep: You can prepare the smoothie base ahead of time. Just blend, pour into containers, and refrigerate for up to 2 days.
  • Freezing: Freeze your smoothie mixture in ice cube trays. Pop out a few cubes and blend with a little milk for a quick breakfast.
  • Storage: Store assembled smoothie bowls in the fridge for up to 24 hours, but toppings may lose their crunch.

Nutrition Tips and Dietary Adaptations

Here are some tips to keep your smoothie bowl nutritious:

  • Protein Boost: Add a scoop of protein powder or Greek yogurt for a filling breakfast.
  • Low Sugar: Use unsweetened yogurt and adjust honey or syrup to taste to keep sugar levels in check.
  • Gluten-Free: This recipe is naturally gluten-free, making it perfect for those with gluten sensitivities.
  • Vegan Option: Simply replace Greek yogurt with plant-based yogurt and use maple syrup for sweetness.

Equipment Recommendations

To make your smoothie bowl, you will need:

  • High-Speed Blender: A powerful blender will ensure your smoothie is perfectly creamy and smooth.
  • Measuring Cups and Spoons: Accurate measurements help achieve the best flavor and consistency.
  • Serving Bowls: Choose colorful bowls to make your smoothie bowl visually appealing.

Serving Suggestions

For an even more enjoyable experience, consider these serving suggestions:

  • Pair with Toast: Serve alongside whole-grain toast topped with avocado or nut butter for a balanced meal.
  • Fresh Juice: A glass of fresh orange or green juice complements the flavors beautifully.
  • Snack Pairing: Enjoy with a handful of nuts or a piece of fruit for a well-rounded snack option.

Frequently Asked Questions (FAQs)

  • Can I use frozen mango for this recipe? Yes, frozen mango works perfectly and can make your smoothie bowl thicker!
  • How can I make this smoothie bowl dairy-free? Substitute Greek yogurt with plant-based yogurt and use any non-dairy milk.
  • What if my smoothie is too runny? Add more mango or yogurt to thicken it up.
  • How long can I store the smoothie bowl? The base can be stored in the fridge for up to 2 days, while toppings are best added just before serving.
  • Can I add protein powder? Absolutely! It’s a great way to increase the protein content of your smoothie bowl.
  • Is this recipe kid-friendly? Yes, kids often love the sweetness and colorful presentation of smoothie bowls!
  • What are some good toppings? Besides chia seeds and coconut flakes, you can use fruits, nuts, granola, or even a drizzle of nut butter.
  • Can I make this smoothie bowl in advance? Yes, you can prepare the smoothie base ahead of time and store it in the refrigerator.

Now that you have all the tools and tips needed, get ready to transform your mornings with this delightful Creamy Mango Smoothie Bowl. It’s not just a recipe; it’s a joyful way to nourish your body and start your day on a positive note. Happy blending!

Creamy Mango Smoothie Bowl Topped With Chia Seeds And Coconut Flakes

Prep Time 10 minutes
Total Time 10 minutes
Servings 2 servings
Calories 350
A vibrant and nutritious smoothie bowl featuring ripe mangoes, creamy yogurt, and crunchy toppings, perfect for a refreshing breakfast or snack.

Ingredients

Fruits and Dairy

  • 2 large ripe mangoes (peeled and diced)
  • 1 cup Greek yogurt or plant-based yogurt (for dairy-free option)
  • 1/2 cup almond milk or any milk of choice
  • 2 tablespoons honey or maple syrup (adjust based on sweetness preference)
  • 2 tablespoons chia seeds
  • 1/4 cup coconut flakes (unsweetened)
  • as needed fresh mint leaves (for garnish, optional)

Instructions 

  • Combine mangoes, yogurt, almond milk, and honey in a blender. Blend until smooth and creamy.
  • If too thick, add more almond milk and blend briefly.
  • Divide the smoothie into two bowls. Sprinkle each with one tablespoon of chia seeds.
  • Top each bowl with coconut flakes and garnish with mint leaves if desired.
  • Optional: Add sliced fruits like bananas or strawberries for extra flavor.

Notes

For a creamier texture, freeze the mangoes before blending.
Calories: 350kcal
Cost: $10
Course: Breakfast
Cuisine: Fusion
Keyword: Healthy, Mango, Smoothie

Beat the Heat with Delicious Frozen Mango Popsicles

Summer is here, and what better way to cool off than with a refreshing treat? These Frozen Mango Popsicles are not only incredibly easy to make, but they’re also bursting with flavor and made with wholesome ingredients. Perfect for kids and adults alike, this recipe is a healthy alternative to store-bought popsicles packed with preservatives. In just a few simple steps, you’ll be enjoying a creamy, tropical delight that’s sure to satisfy your sweet tooth!

Why You’ll Love This Recipe

This mango popsicle recipe is a crowd-pleaser for several reasons:

  • Natural sweetness: Using ripe mangoes ensures that these popsicles are deliciously sweet without the need for excessive added sugars.
  • Simple ingredients: Made with just four core ingredients, these popsicles are a breeze to whip up and are free from any preservatives.
  • Dairy-free option: Substitute coconut milk for a dairy-free version that is still rich and creamy.
  • Customizable flavors: You can easily adjust the sweetness or add your favorite fruits for a unique twist.
  • Perfect for all ages: Healthy and fun, these popsicles are perfect for kids and adults alike, making them an ideal summer treat!

Ingredients Breakdown

Let’s gather our ingredients for these delightful mango popsicles:

  • 2 cups ripe mango: Use fresh or thawed frozen mango—ripe mangoes yield the best flavor.
  • 1/2 cup coconut milk or almond milk: Coconut milk gives a creamy texture, while almond milk is lighter.
  • 1-2 tbsp honey or maple syrup (optional): Adjust based on the sweetness of your mango; you can skip it if your mangoes are perfectly ripe.
  • 1 tbsp lime juice (optional): Adds a hint of brightness and balances the sweetness.

Step-by-Step Instructions

Side view of colorful mango popsicles with a smooth texture and frozen sheen.

Follow these simple steps to create your own frozen mango popsicles:

  1. Add the mango, coconut milk, sweetener (if using), and lime juice to a blender.
  2. Blend until the mixture is completely smooth and creamy.
  3. Pour the mixture into popsicle molds, leaving a little space at the top for expansion.
  4. Insert popsicle sticks into the molds and freeze for at least 4-6 hours, or until solid.
  5. To release the popsicles, run warm water over the outside of the molds for a few seconds and gently pull them out.
  6. Serve immediately or store in a sealed container in the freezer.

Pro Tips for Perfect Popsicles

To ensure your mango popsicles turn out perfectly every time, consider these expert insights:

  • Choose ripe mangoes: The sweeter the mango, the more flavorful your popsicles will be. Look for mangoes that yield slightly when gently pressed.
  • Blend well: For a creamy texture, blend the mixture until it’s completely smooth. No lumps allowed!
  • Experiment with flavors: Try adding other fruits like pineapple or berries to create a tropical blend.
  • Use quality molds: Invest in good popsicle molds for easy removal and uniform shapes.
  • Freezing time matters: Ensure your popsicles freeze for the full time indicated for the best results.
  • Run warm water over molds: This trick makes it easier to release your frozen treats without breaking them.
  • Consider layering flavors: Pour half the mixture in the molds, freeze for an hour, then add a different fruit blend on top for a fun twist.
  • Store properly: Keep popsicles in an airtight container to prevent freezer burn and preserve flavor.

Common Mistakes to Avoid

Even the best chefs make mistakes! Here are some common pitfalls and how to avoid them:

  • Not using ripe fruit: Under-ripe mangoes will yield bland popsicles. Always opt for ripe, sweet fruit.
  • Overfilling molds: Leave a little space at the top of the molds for the mixture to expand as it freezes.
  • Skipping the sweetness check: Taste the mixture before freezing; you can always add more honey or syrup if needed.
  • Not blending enough: Ensure your mixture is completely smooth for the best texture.
  • Freezing for too short a time: Make sure to freeze for the recommended time to achieve the right consistency.

Flavor Variations

Want to switch things up? Here are some delicious variations you can try:

  • Berry Bliss: Add a cup of mixed berries (strawberries, blueberries, raspberries) for a fruity twist.
  • Pineapple Coconut: Substitute half the mango with fresh pineapple for a tropical flavor explosion.
  • Mango-Lime Chia: Stir in a tablespoon of chia seeds for added texture and nutrition.
  • Minty Mango: Add fresh mint leaves before blending for a refreshing herbal flavor.

Storage and Make-Ahead Instructions

These mango popsicles are perfect for make-ahead snacks. Here’s how to store them:

  • Freezing: Store in popsicle molds until solid, then transfer to an airtight container.
  • Duration: They can last in the freezer for up to 3 months without losing flavor.
  • Reviving frozen popsicles: If they become hard, let them sit at room temperature for a few minutes before serving.

Frequently Asked Questions (FAQs)

Got questions? We’ve got answers! Here are some common queries about mango popsicles:

  • Can I use frozen mango? Yes, frozen mango works perfectly! Just thaw it before blending.
  • Are these popsicles vegan? Yes! Use coconut milk and skip honey for a fully vegan treat.
  • What if I don’t have popsicle molds? You can use small cups and sticks instead—just freeze them upright!
  • How do I get popsicles out of the mold? Run warm water over the outside of the molds for a few seconds to release them.
  • Can I add other fruits? Absolutely! Feel free to experiment with your favorite fruits.
  • How sweet should I make them? This depends on your taste; always taste the mixture before freezing.
  • Can I use yogurt? Yes! Substitute some coconut milk with yogurt for a tangy flavor.
  • What’s the best way to serve them? Serve them straight from the freezer, or let them sit for a minute for easier eating!

Nutritional Tips and Dietary Adaptations

These mango popsicles are not only a treat but also a nutritious snack:

  • Low in calories: Perfect for guilt-free snacking on hot days.
  • Rich in vitamins: Mangoes are packed with vitamins A and C, promoting good health.
  • Customizable for diets: Easily adapt the recipe for paleo, dairy-free, or gluten-free diets.
  • Protein boost: Consider adding protein powder or yogurt for a post-workout treat!

Equipment Recommendations

Having the right tools can make all the difference in your cooking experience. For these mango popsicles, here’s what you’ll need:

  • Popsicle molds: Silicone molds are great because they make it easy to remove the popsicles.
  • High-speed blender: A powerful blender ensures a smooth, creamy mixture.
  • Measuring cups: For accuracy in your ingredient measurements.
  • Spatula: Handy for scraping down the sides of the blender.

Serving Suggestions

Here are some fun ways to serve your mango popsicles:

  • Garnish with fresh fruit: Top with slices of mango or berries for a colorful presentation.
  • Serve with yogurt: A dollop of yogurt on the side makes for a refreshing complement.
  • Make a popsicle platter: Arrange different flavors on a platter for a fun dessert table.
  • Pair with a smoothie: Enjoy alongside a tropical smoothie for a complete treat!

Conclusion: Enjoy the Taste of Summer!

These Frozen Mango Popsicles are a delightful way to beat the heat and enjoy a taste of summer, no matter the season. With their bright flavors and creamy texture, they’re bound to become a favorite in your household. Remember, cooking should be fun and stress-free—so gather your ingredients, get blending, and enjoy the satisfaction of making your own delicious treats. Happy cooking!

Frozen Mango Popsicles

Prep Time 10 minutes
Total Time 10 minutes
Servings 4 popsicles
Calories 150
Enjoy a refreshing and healthy treat with these homemade frozen mango popsicles, perfect for hot days or a quick dessert.

Ingredients

Fruits

  • 2 cups ripe mango, chopped fresh or frozen and thawed
  • 1/2 cup coconut milk or almond milk
  • 1/2 tbsp honey or maple syrup (optional) (based on mango sweetness)
  • 1 tbsp lime juice (optional) (for brightness)

Instructions 

  • Add mango, coconut milk, sweetener, and lime juice to a blender and blend until smooth.
  • Pour the mixture into popsicle molds and insert sticks.
  • Freeze for at least 4-6 hours until solid.
  • Run warm water over molds and gently remove popsicles before serving.

Notes

Use ripe mango for best flavor and adjust sweetener to taste.
Calories: 150kcal
Cost: $10
Course: Dessert
Keyword: Mango

If you’re looking for a quick and delightful meal, look no further than this Quick Pasta Salad with Cherry Tomatoes and Basil. Perfect for busy weeknights or as a side dish at gatherings, this pasta salad is the epitome of fresh flavors and ease. Made with vibrant cherry tomatoes and fragrant basil, this salad is not only visually appealing but also incredibly satisfying. In just a few steps, you can create a dish that is sure to impress your family and friends!

Why You’ll Love This Recipe

This pasta salad isn’t just easy to make; it’s packed with benefits that will make you want to whip it up time and time again. Here are just a few reasons why this recipe stands out:

  • Speedy Preparation: This dish comes together in under 30 minutes, making it a perfect option for those busy nights when you want something delicious but don’t have much time.
  • Fresh Ingredients: With the use of juicy cherry tomatoes and fresh basil, this pasta salad is bursting with flavor and nutrition.
  • Versatile Dish: You can enjoy this salad as a main course, a side dish, or even as a light lunch. It’s incredibly adaptable to suit your meal needs.
  • Make-Ahead Friendly: This pasta salad can be made in advance, which means you can save time and effort when meal prepping or hosting.
  • Customizable: Add your favorite ingredients or swap out what you don’t have, making it a flexible recipe that fits your taste.

Ingredient Breakdown

Let’s dive into the key ingredients that make this pasta salad shine, along with some useful substitutions you can consider:

  • 2 cups Pasta: Use your favorite type; rotini, penne, or farfalle work wonderfully here. For a gluten-free option, choose gluten-free pasta.
  • 1 cup Cherry Tomatoes, halved: These add a sweet burst of flavor. If unavailable, you can use grape tomatoes or regular tomatoes diced.
  • 1/2 cup Fresh Basil, chopped: Fresh basil is essential for that aromatic touch. If you’re out, consider using fresh parsley or arugula as an alternative.
  • 1/4 cup Olive Oil: A high-quality olive oil enhances the flavor. Alternatively, avocado oil can be used for a different kind of richness.
  • 2 tablespoons Balsamic Vinegar: This adds a tangy depth. If you prefer, apple cider vinegar or red wine vinegar can be good substitutes.
  • Salt and Pepper, to taste: Essential for seasoning. Always taste before serving to ensure the flavors are balanced.
  • Optional: 1/4 cup Freshly Grated Parmesan Cheese: Adds creaminess; however, you can skip this for a vegan version or replace it with nutritional yeast.
  • Optional: 1/4 cup Pine Nuts, toasted: For a crunchy texture, but feel free to substitute with any nuts or seeds you like.

Pro Tips for Perfection

To ensure your pasta salad is the best it can be, consider these expert insights:

  • Cook Pasta Al Dente: Follow package instructions but aim for al dente pasta for the right texture that holds up in the salad.
  • Cool the Pasta: Rinse the cooked pasta under cold water to stop the cooking process and prevent it from becoming mushy.
  • Let It Marinate: Allow the salad to sit for at least 15 minutes before serving; this helps the flavors meld together beautifully.
  • Use Fresh Ingredients: Fresh herbs and vegetables will elevate the dish. Always choose the best quality ingredients.
  • Season Generously: Don’t shy away from seasoning. A well-seasoned salad is always more flavorful.
  • Consider Texture: Mix in crunchy elements like nuts or seeds for added texture contrast.
  • Experiment with Dressings: While the simple olive oil and balsamic vinegar dressing is delicious, feel free to switch it up with a creamy dressing, or a vinaigrette for a different flavor.
  • Toss Gently: When mixing your salad, toss gently to avoid breaking the pasta and damaging the delicate tomatoes.

Avoiding Common Mistakes

Close-up view of a vibrant pasta salad featuring halved cherry tomatoes and basil leaves.

Here are a few common pitfalls to be aware of:

  • Overcooking Pasta: This is a common mistake. Always check the pasta a minute or two before the package suggests. Al dente is key!
  • Skipping the Rinse: Rinsing the pasta helps cool it down and prevents it from sticking together.
  • Using Dull Ingredients: Stale or old ingredients can ruin your dish. Always use the freshest produce available.
  • Not Tasting: Always taste your salad before serving to adjust seasoning and ensure flavor balance.

Variations to Try

Feeling adventurous? Here are some variations to make this pasta salad uniquely yours:

  • Italian Pasta Salad: Add salami, mozzarella balls, and olives for a hearty Italian twist.
  • Greek Pasta Salad: Incorporate feta cheese, cucumbers, and kalamata olives for a Mediterranean flair.
  • Veggie-Packed Salad: Toss in bell peppers, red onions, and zucchini for extra crunch and nutrition.
  • Protein Boost: Add grilled chicken or chickpeas for a filling meal option.

Storage and Make-Ahead Instructions

This pasta salad is excellent for meal prep! Here’s how to store it:

  • Refrigeration: Store in an airtight container in the fridge for up to 3-5 days. The flavors will continue to develop as it sits.
  • Make-Ahead: You can prepare the salad a day in advance; just be sure to hold off on adding the tomatoes until right before serving to keep them fresh.

Frequently Asked Questions

Here are some common queries about this pasta salad:

  • Can I use other pasta shapes? Yes! Feel free to use any shape you prefer, just ensure it’s cooked al dente.
  • Is this salad gluten-free? You can make it gluten-free by using gluten-free pasta.
  • Can I add meat to this recipe? Absolutely! Grilled chicken or shrimp would be delicious additions.
  • How do I make it vegan? Simply omit the cheese and ensure no animal products are used in the dressing.
  • What’s the best way to serve this pasta salad? It’s best served chilled or at room temperature, making it ideal for picnics and potlucks.
  • Can I freeze the pasta salad? It’s not recommended to freeze pasta salad as the texture of the pasta and vegetables may become mushy.
  • How can I make this more flavorful? Consider adding more herbs, spices, or a splash of lemon juice for an extra zing.
  • What’s the nutritional content of this salad? It varies based on the ingredients used, but generally, it’s a healthy, balanced option rich in vitamins and fiber.

Nutrition Tips and Dietary Adaptations

This pasta salad can be tailored to fit various dietary needs:

  • Low-Carb Option: Swap traditional pasta for spiralized zucchini or cauliflower rice.
  • Vegan-Friendly: Omit cheese and use a plant-based dressing.
  • High-Protein Variation: Add chickpeas or grilled chicken to boost protein content.

Equipment Recommendations

To make your cooking experience smooth, consider having the following tools on hand:

  • Large Pot: For cooking the pasta.
  • Colander: To drain and rinse the pasta.
  • Large Mixing Bowl: For combining all the ingredients.
  • Whisk: To mix the dressing efficiently.
  • Sharp Knife: For chopping vegetables and herbs.

Serving Suggestions

Pair your pasta salad with these delectable options for a complete meal:

  • Grilled Chicken: Adds protein and pairs well with the salad’s flavors.
  • Garlic Bread: A classic side that complements any pasta dish.
  • Fresh Fruit Salad: A light and refreshing addition to balance the meal.
  • Simple Green Salad: Enhance your meal with a crisp salad on the side.

Conclusion

This Quick Pasta Salad with Cherry Tomatoes and Basil is not just a dish but a canvas for your culinary creativity. With its simple preparation, fresh ingredients, and countless variations, it truly embodies the joy of cooking without the stress. So gather your ingredients, follow the steps, and enjoy a delightful meal that’s sure to impress. Happy cooking!

Quick Pasta Salad with Cherry Tomatoes and Basil

Prep Time 10 minutes
Cook Time 10 minutes
Total Time 20 minutes
Servings 4 servings
Calories 350
A fresh and easy pasta salad perfect for a quick lunch or side dish, combining cherry tomatoes, basil, and a simple vinaigrette.

Ingredients

Pasta

  • 2 cups Pasta
  • 1 cup Cherry tomatoes, halved
  • 0.5 cup Fresh basil, chopped
  • 0.25 cup Olive oil
  • 2 tablespoons Balsamic vinegar
  • to taste Salt
  • to taste Pepper
  • 0.25 cup Freshly grated Parmesan cheese (optional) (optional)
  • 0.25 cup Pine nuts, toasted (optional) (optional)

Instructions 

  • Cook the pasta in salted boiling water until al dente, then rinse under cold water.
  • Halve the cherry tomatoes and place in a large bowl with chopped basil.
  • Whisk together olive oil, balsamic vinegar, salt, and pepper to make the dressing.
  • Add the cooled pasta to the bowl with tomatoes and basil, then pour the dressing over and toss.
  • Let sit for 15 minutes before serving.

Notes

You can add grated Parmesan or toasted pine nuts for extra flavor.
Calories: 350kcal
Cost: $10
Course: Salad
Cuisine: Italian
Keyword: Pasta

Discover the Ultimate Refreshing Strawberry Lemonade Recipe

Are you ready to cool off and refresh your taste buds? If you’re looking for a delightful drink that brings together the sweetness of strawberries and the zing of lemons, you’ve landed in the right place! This Strawberry Lemonade recipe is not just another beverage; it’s a vibrant celebration of flavors, perfect for any occasion. In this guide, we’ll explore everything you need to know about creating this refreshing drink, from the ingredients to expert tips, variations, and more.

Whether you’re hosting a summer gathering, enjoying a picnic, or just unwinding after a long day, this homemade strawberry lemonade will become your go-to drink. Let’s get started!

Why You’ll Love This Recipe

  • Endless Refreshment: This drink is the ultimate thirst-quencher, perfect for hot days.
  • Fresh Ingredients: Made with real strawberries and lemons, no artificial flavors here!
  • Customizable: Easily adjust sweetness and add fun variations to suit your taste.
  • Kid-Friendly: A non-alcoholic version that kids will love, with the option to make it boozy for adults.
  • Quick and Easy: Simple steps mean you can whip this up in no time!

Ingredient Breakdown

To make this Strawberry Lemonade, you’ll need a few staple ingredients. Here’s everything you need:

  • 4 cups pink lemonade: Chilled for the best flavor. You can use store-bought or homemade lemonade.
  • 1 cup fresh strawberries: Sliced, with the option to use extra for garnish.
  • 10 fresh mint leaves: For an aromatic touch.
  • 1 lemon: Thinly sliced, adding a lovely tartness.
  • Ice: Essential for serving this drink cold.
  • Optional extras: Additional strawberries and lemon rounds for garnish.

**Substitutions**: If you’re out of pink lemonade, you can use regular lemonade. For a less sweet version, you can dilute the lemonade with sparkling water or add more fresh lemon juice.

Step-by-Step Instructions

Side view of a pink lemonade drink featuring fresh strawberries and ice, captured on an iPhone.

Now that we have our ingredients ready, let’s dive into the simple steps to create this delicious drink:

  1. Gently muddle: In a large pitcher, gently muddle the strawberries and mint leaves together until they release their juices.
  2. Add lemonade: Pour in the chilled pink lemonade and add the lemon slices. Stir well to combine all the flavors.
  3. Fill glasses: Prepare serving glasses with ice and pour the lemonade mixture over the top.
  4. Garnish: Top each glass with additional strawberry slices, lemon wheels, and a sprig of mint.
  5. Serve immediately: Enjoy this refreshing drink right away or refrigerate for up to 2 hours before serving.

Pro Tips for the Best Strawberry Lemonade

  • Fresh Strawberries: Use ripe, sweet strawberries for the best flavor. If they’re a bit tart, add a touch more sugar.
  • Chill Everything: Make sure your lemonade is chilled—this helps keep the drink refreshing.
  • Experiment with Sweetness: Taste as you go! You can adjust sweetness by adding more lemonade or sugar to your liking.
  • Mint Infusion: For a stronger mint flavor, let the mint leaves steep in the lemonade for an hour before serving.
  • Alcohol Option: For an adult twist, add a splash of vodka or rum for a refreshing cocktail version.
  • Garnish Creatively: Get creative with garnishes! Try adding edible flowers or different fruits.
  • Freezing Strawberries: Freeze extra strawberries to use as ice cubes that won’t dilute your drink.
  • Spice It Up: Add a pinch of cayenne pepper for an unexpected kick!

Common Mistakes and Troubleshooting

Even the best cooks can run into trouble. Here are some common mistakes and how to fix them:

  • Too Sweet?: If your lemonade turns out too sweet, add extra lemon juice or a splash of vinegar to balance the flavors.
  • Too Tart?: If it’s too tart for your liking, try adding a bit more sugar or simple syrup.
  • Not Enough Flavor?: Make sure to muddle the strawberries and mint thoroughly to release their flavors.
  • Watery Lemonade?: Avoid this by using ice cubes made from lemonade or strawberries to keep it flavorful.

Delicious Variations of Strawberry Lemonade

Once you’ve mastered the basic recipe, try these exciting variations:

  • Spicy Strawberry Lemonade: Add a slice of jalapeño to the muddling process for a spicy kick.
  • Berry Medley Lemonade: Mix in other berries like blueberries or raspberries for a mixed berry lemonade.
  • Lavender Lemonade: Infuse the drink with lavender syrup for a floral twist.
  • Sparkling Strawberry Lemonade: Replace some of the lemonade with sparkling water for a fizzy version.

Storage and Make-Ahead Instructions

This strawberry lemonade is best enjoyed fresh, but you can prepare it ahead of time! Here are some tips:

  • Making Ahead: You can prepare the muddled strawberries and mint in advance and store them in the fridge for up to 24 hours.
  • Storing: Store leftover lemonade in an airtight container in the fridge for up to 3 days. However, it’s best enjoyed within the first day for optimal freshness.
  • Freezing: You can freeze the lemonade in ice cube trays for a refreshing treat later on!

Frequently Asked Questions

Here are some common questions about making strawberry lemonade:

  • Can I use frozen strawberries? Yes! Just thaw them before muddling to release their juices.
  • Is this drink gluten-free? Absolutely! All ingredients are naturally gluten-free.
  • Can I make this drink sugar-free? Yes! Use sugar substitutes like stevia or erythritol to sweeten.
  • How long can I keep it in the fridge? It’s best enjoyed fresh, but you can store it in the fridge for up to 3 days.
  • Can I make this drink a day ahead? Yes, prepare the ingredients ahead but mix just before serving to maintain freshness.
  • What can I use instead of pink lemonade? Regular lemonade works well too, or you can mix lemon juice with water and sugar.
  • How can I make this drink less acidic? Add more strawberries or a splash of lime juice to balance the acidity.
  • Can I use soda instead of lemonade? Certainly! Use lemon-lime soda for a fizzy version.

Nutrition Tips and Dietary Adaptations

Looking to make this drink healthier? Here are some tips:

  • Low-Calorie Option: Use a low-calorie lemonade or sweetener to reduce calories.
  • Rich in Vitamins: Strawberries are packed with vitamin C, making this drink a refreshing boost to your health.
  • Hydration: This drink is a great way to hydrate, especially on hot days.
  • Dietary Adaptations: Suitable for many diets, just adjust sweeteners and portion sizes accordingly.

Equipment Recommendations

Here’s some kitchen equipment that can assist you in making the perfect strawberry lemonade:

  • Pitcher: A large, sturdy pitcher for mixing and serving.
  • Measuring Cups: For accurately measuring ingredients.
  • Wooden Spoon: For muddling and stirring ingredients.
  • Ice Cube Tray: For freezing extra lemonade or strawberries.

Serving Suggestions

To elevate your strawberry lemonade experience, consider these serving suggestions:

  • Pair with Snacks: Serve with light snacks like chips or fresh fruit for a refreshing picnic.
  • Garnish Elegantly: Use colorful straws, fancy glasses, and garnishes to impress your guests.
  • Host a Lemonade Stand: Get the kids involved by setting up a fun lemonade stand with this recipe!

In conclusion, this Strawberry Lemonade recipe is not just a drink; it’s an experience full of flavor, fun, and refreshment. With easy-to-follow steps and endless variations, you can impress friends and family while enjoying the satisfaction of homemade goodness. So, gather your ingredients, and let’s make some memories over a glass of this delightful drink!

Strawberry Lemonade

Prep Time 10 minutes
Total Time 10 minutes
Servings 4 glasses
Calories 150
A refreshing and fruity beverage perfect for summer gatherings, combining fresh strawberries, lemon, and mint with chilled pink lemonade.

Ingredients

Beverages

  • 4 cups pink lemonade, chilled
  • 1 cup fresh strawberries, sliced
  • 10 leaves fresh mint leaves
  • 1 lemon lemon, thinly sliced
  • Ice Ice (for serving)
  • Optional extra strawberries and lemon rounds for garnish

Instructions 

  • Gently muddle strawberries and mint in a large pitcher.
  • Add pink lemonade and lemon slices; stir well.
  • Fill glasses with ice and pour the lemonade mixture over.
  • Garnish with extra strawberries, lemon wheels, and mint sprigs.
  • Serve immediately or refrigerate up to 2 hours.

Notes

For a sweeter taste, add a touch of honey or simple syrup.
Calories: 150kcal
Cost: $10
Course: Beverage
Keyword: lemonade, Mint, Strawberry

Quench Your Thirst with the Perfect Strawberry Lemonade

Welcome to your new favorite summer sip! This refreshing strawberry lemonade is not just a drink; it’s an experience that brings together sweet strawberries, zesty lemon juice, and a hint of mint for a delightful taste. With just a few simple steps, you can turn your kitchen into a refreshing beverage oasis. Perfect for gatherings, picnics, or simply enjoying on a sunny day, follow along as we break down everything you need to know about making this delicious drink!

Why You’ll Love This Recipe

This strawberry lemonade recipe is designed to be as enjoyable to make as it is to drink! Here are some reasons why you’ll love it:

  • Simple and Quick: With minimal prep time, you can whip this drink up in under 15 minutes, making it a great option for last-minute gatherings.
  • Refreshing Flavor Profile: The combination of fresh strawberries and lemon juice creates a perfectly balanced drink that’s both sweet and tangy.
  • Versatile Options: Whether you want it kid-friendly or boozy, this recipe easily adapts to your needs.
  • Perfect for Any Occasion: Whether it’s a summer barbecue or a cozy family dinner, this lemonade fits right in.
  • Healthier Alternative: You can control the sweetness and use fresh ingredients, making it a healthier option compared to store-bought lemonade.

Ingredients Breakdown

Let’s dive into the ingredients you’ll need to make this luscious drink. Each component plays a crucial role in creating that vibrant flavor.

  • 4 cups of pink lemonade: You can use store-bought lemonade or make your own. If you prefer a homemade version, mix fresh lemon juice with water and sweetener to taste.
  • 1 cup fresh strawberries, sliced: Choose ripe, sweet strawberries for the best flavor. You can also substitute with frozen strawberries if fresh isn’t available.
  • 10 fresh mint leaves: Mint adds a refreshing twist. Feel free to adjust the amount based on your preference.
  • 1 lemon, thinly sliced: Adds an extra zesty flavor and makes for a beautiful garnish.
  • Ice: Essential for serving your lemonade cold.
  • Optional: Extra strawberries and lemon rounds for garnish.

Step-by-Step Instructions

A refreshing serving of strawberry lemonade with visible strawberries, mint leaves, and lemon slices in a clear glass.

Now that we have our ingredients ready, let’s get into the fun part—making your strawberry lemonade!

  1. Gently muddle: In a large pitcher, gently muddle the sliced strawberries and mint leaves together until the strawberries release their juices. This helps to infuse the mint flavor into the drink.
  2. Add lemonade: Pour in the chilled pink lemonade and add the lemon slices. Stir well to combine all the flavors.
  3. Serve over ice: Fill your serving glasses with ice and pour the lemonade mixture over. Make sure to include some of those muddled strawberries for presentation!
  4. Garnish: Top with additional strawberry slices, lemon wheels, and a mint sprig for that extra touch.
  5. Enjoy: Serve immediately or refrigerate for up to 2 hours before serving to let those flavors meld.

Pro Tips for the Perfect Strawberry Lemonade

To ensure your drink turns out perfectly every time, check out these expert tips:

  • Use ripe strawberries: The riper the strawberries, the sweeter your lemonade will taste.
  • Experiment with sweetness: Adjust the sweetness by using more or less sugar in your lemonade mixture.
  • Fresh lemon juice is key: For the best flavor, always opt for freshly squeezed lemon juice instead of bottled.
  • Chill your ingredients: A cold pitcher and chilled lemonade ensure that your drink stays refreshing longer.
  • Garnish creatively: Adding colorful garnishes not only enhances the presentation but also adds extra flavor.
  • Try sparkling water: For a fizzy twist, mix in some sparkling water just before serving.
  • Infuse overnight: If you have time, letting the mixture sit in the fridge overnight can intensify the flavors.
  • Adjust mint amount: If you’re not a fan of mint, you can leave it out or use a smaller quantity to suit your taste.

Common Mistakes and Troubleshooting

Even the best of us can make mistakes when cooking! Here are some common issues and how to avoid them:

  • Too Sweet: If your lemonade ends up too sweet, add a bit more lemon juice to balance it out.
  • Too Tart: A spoonful of sugar or honey can help if it’s too sour for your taste.
  • Not Enough Flavor: Ensure you muddle the strawberries well to release their natural juices. If it still lacks flavor, consider adding a splash of lemon extract.
  • Too Watery: If you find the drink diluted, add less ice or chill the ingredients properly before mixing.

Variations to Try

Feeling adventurous? Here are some fun variations on the classic strawberry lemonade:

  • Strawberry Basil Lemonade: Swap mint for fresh basil for a unique flavor twist.
  • Boozy Strawberry Lemonade: Add a splash of vodka or rum for an adult version of this refreshing drink.
  • Frozen Strawberry Lemonade: Blend the ingredients with ice for a frozen treat perfect for hot days.
  • Berry Citrus Lemonade: Mix in other berries like blueberries or raspberries for a colorful and flavorful twist.

Storage and Make-Ahead Instructions

Planning ahead? You can make your lemonade in advance and store it correctly:

  • In the fridge: Store in an airtight container for up to 2 days. Give it a good stir before serving.
  • Freezing: You can freeze the lemonade mixture in ice cube trays. Use the cubes later to chill other drinks without diluting the flavor.
  • Freshness tip: Add mint just before serving to keep it fresh and vibrant.

Frequently Asked Questions

Here are some common questions about making strawberry lemonade:

  • Can I use frozen strawberries? Yes, frozen strawberries work well! Just let them thaw slightly before muddling.
  • How long can I store strawberry lemonade? It’s best enjoyed fresh but can be stored in the fridge for up to 2 days.
  • Can I make this drink less sweet? Absolutely! Adjust the sugar or use less sweet lemonade for a more tart flavor.
  • Is it possible to add other fruits? Yes! Feel free to mix in other fruits like peaches, raspberries, or even citrus fruits.
  • What can I use instead of sugar? Honey, agave syrup, or even stevia can be used as a natural sweetener.
  • How do I make this a sparkling drink? Add sparkling water just before serving for a bubbly texture.
  • Can I use bottled lemon juice? While you can, freshly squeezed lemon juice offers a much brighter flavor.
  • What’s the best way to serve this drink? Serve over ice with fresh garnishes for a beautiful presentation!

Nutrition Tips and Dietary Adaptations

Want to make your strawberry lemonade a bit healthier? Here are some tips:

  • Sweetener alternatives: Use natural sweeteners like honey or maple syrup instead of refined sugar.
  • Low-calorie options: Opt for low-calorie lemonade or reduce the amount of sweetener for a lighter drink.
  • Dairy-free: This recipe is naturally dairy-free, making it suitable for various dietary needs.

Essential Equipment Recommendations

To make your strawberry lemonade, you’ll need a few basic kitchen tools:

  • Large pitcher: For mixing and serving your drink.
  • Muddler or wooden spoon: To muddle the strawberries and mint.
  • Measuring cups: For accuracy in your ingredients.
  • Ice cube trays: If you plan on freezing any leftover lemonade.

Serving Suggestions

Enhance your lemonade experience with these serving ideas:

  • Pair with snacks: Serve alongside light snacks like fresh fruit, cheese platters, or light appetizers.
  • Garnish creatively: Consider using edible flowers or flavored ice cubes for a unique touch.
  • Serve in fun glasses: Use mason jars or colorful glasses to make the presentation pop.

Conclusion

This refreshing strawberry lemonade is more than just a drink—it’s a delightful experience that brings joy to any gathering! With easy-to-follow steps and endless variations, you can make this recipe your own. Whether you’re cooling off on a hot day or celebrating with friends, this lemonade is sure to impress. So grab your ingredients, and let’s make some memories, one sip at a time!

Strawberry Lemonade

Prep Time 10 minutes
Total Time 10 minutes
Servings 4 glasses
Calories 150
A refreshing and fruity beverage perfect for summer gatherings, combining fresh strawberries, lemon, and mint with chilled pink lemonade.

Ingredients

Beverages

  • 4 cups pink lemonade, chilled
  • 1 cup fresh strawberries, sliced
  • 10 leaves fresh mint leaves
  • 1 lemon lemon, thinly sliced
  • Ice Ice (for serving)
  • Optional extra strawberries and lemon rounds for garnish

Instructions 

  • Gently muddle strawberries and mint in a large pitcher.
  • Add pink lemonade and lemon slices; stir well.
  • Fill glasses with ice and pour the lemonade mixture over.
  • Garnish with extra strawberries, lemon wheels, and mint sprigs.
  • Serve immediately or refrigerate up to 2 hours.

Notes

For a sweeter taste, add a touch of honey or simple syrup.
Calories: 150kcal
Cost: $10
Course: Beverage
Keyword: lemonade, Mint, Strawberry