Author

Steven

Browsing

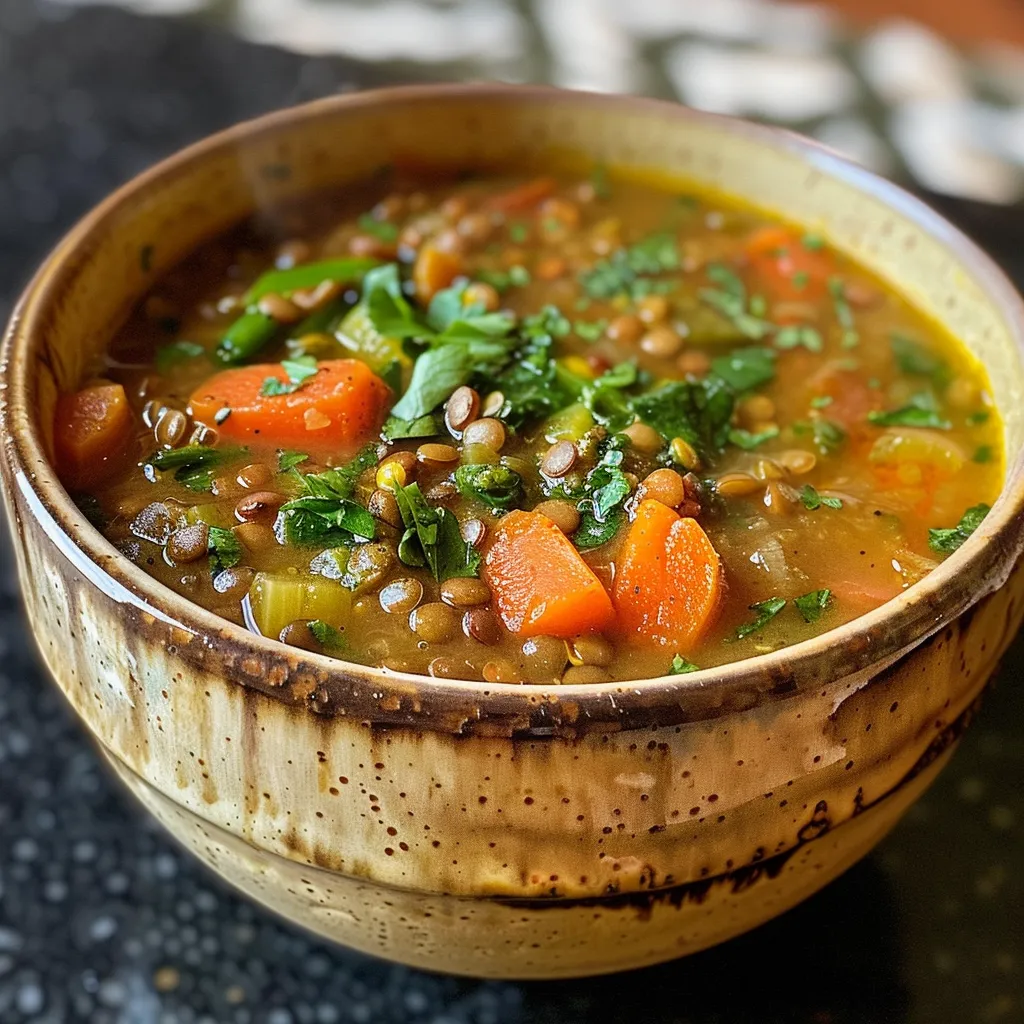
Warm Up with This Nourishing Detox Moroccan Lentil Soup

Are you looking for a cozy meal that nourishes both your body and soul? Look no further than this Detox Moroccan Lentil Soup. Packed with vibrant spices, wholesome ingredients, and a wealth of nutritional benefits, this soup is the perfect companion for chilly evenings or meal prep for a busy week ahead. In just under an hour, you can whip up a comforting bowl of goodness that’s not only delicious but also incredibly healthy. Let’s dive into why you’ll love this recipe and how to make it your own!

Why You’ll Love This Recipe

This Moroccan lentil soup isn’t just a meal; it’s an experience! Here are five compelling reasons to make this soup a staple in your kitchen:

  • Flavor Explosion: Enjoy a warming blend of Moroccan spices that tantalize your taste buds with each spoonful.
  • Super Nourishing: Lentils and a variety of veggies ensure that this soup is rich in protein, fiber, and essential vitamins, making it perfect for a natural detox.
  • Quick & Easy: With straightforward steps, this recipe comes together in about 30 minutes, making it ideal for busy weeknights.
  • Customizable: You can easily adjust the ingredients or spices to suit your preferences, making this soup versatile for any palate.
  • Perfect for Meal Prep: This soup stores beautifully in the fridge or freezer, allowing you to enjoy it whenever you like.

Ingredients You’ll Need

Gather the following ingredients to create your Detox Moroccan Lentil Soup. Feel free to get creative with substitutions based on what you have on hand!

  • 1 tablespoon avocado oil: For sautéing the vegetables.
  • 1 cup chopped onion: Adds a sweet and savory base.
  • 1 cup chopped celery: Provides a nice crunch and flavor depth.
  • 1 cup chopped carrot: For natural sweetness and color.
  • 1 cup chopped white fingerling potato: Creaminess and heartiness in every bite.
  • 2 garlic cloves, minced: Essential for aromatic flavor.
  • 1 teaspoon sea salt (+ more to taste): Enhances all the flavors.
  • 1 teaspoon black pepper (+ more to taste): Adds a subtle kick.
  • 2 teaspoons turmeric: Packed with anti-inflammatory properties.
  • 2 teaspoons ground cumin: Brings warmth and earthiness.
  • 2 teaspoons ground ginger: Adds a hint of sweetness and spice.
  • 2 teaspoons smoked paprika: Delivers a smoky flavor profile.
  • 1 teaspoon ground cinnamon: For a touch of warmth and sweetness.
  • 1 cup green (or brown) lentils: Provides protein and texture.
  • 1 cup red lentils: For a creamy consistency.
  • 4 cups vegetable broth: The base of your soup.
  • 2 cups water: Helps to adjust the consistency.
  • 1/4 cup tomato paste: Adds a rich, savory depth.
  • 1 cup almond milk (or coconut milk): For creaminess; choose based on your preference.
  • 1 tablespoon lemon juice: Brightens all the flavors.
  • 2 – 3 cups spinach: Adds vitamins and a pop of color.

How to Make Detox Moroccan Lentil Soup

Rich and hearty Detox Moroccan Lentil Soup displayed in a rustic setting.

Ready to get cooking? Follow these simple steps to create your delicious soup:

Step 1: Sauté the Vegetables

In a large stockpot or Dutch oven, heat the avocado oil over medium heat. Add the chopped onion, celery, carrot, potato, and minced garlic, sautéing for about 5 minutes until they soften slightly. Season with sea salt, black pepper, turmeric, cumin, ginger, smoked paprika, and cinnamon, cooking for an additional 2 minutes to allow the spices to bloom.

Step 2: Add Lentils and Liquids

Stir in the green and red lentils, allowing them to sauté for 1-2 minutes. Add the vegetable broth, water, and tomato paste; stir until the tomato paste is fully dissolved. Bring the mixture to a boil, then cover and reduce the heat to a simmer, cooking for 30 minutes.

Step 3: Finish with Creaminess and Greens

Once the lentils are tender, remove the pot from heat. Stir in the almond milk (or coconut milk), lemon juice, and spinach until the spinach wilts. Taste and adjust seasoning if necessary.

Step 4: Serve It Up

Serve your soup warm, topping with your choice of garnishes. I recommend a dollop of coconut yogurt, fresh parsley, pepper flakes, cracked pepper, and jalapeño slices for a bit of heat.

Pro Tips for Making Detox Moroccan Lentil Soup

To ensure your soup turns out perfectly every time, consider these expert tips:

  • Use fresh spices: Old spices can lose their potency, so opt for fresh ones for the best flavor.
  • Adjust consistency: If you prefer a thicker soup, reduce the amount of liquid; for a thinner soup, add more broth or water.
  • Let it sit: Allowing the soup to rest for a few hours or overnight enhances the flavors as they meld together.
  • Experiment with toppings: Get creative with garnishes like avocado, toasted nuts, or seeds for added texture.
  • Cook in batches: Making a double batch means you’ll have leftovers for quick meals throughout the week.
  • Freeze for later: Portion out leftovers in airtight containers for a quick meal option later on.
  • Add a kick: If you love spice, consider adding a pinch of cayenne pepper or a dash of hot sauce.
  • Incorporate other veggies: Feel free to add other vegetables like bell peppers or zucchini for more variety.

Common Mistakes and Troubleshooting

Even the best cooks can make mistakes! Here are some common pitfalls and how to avoid them:

  • Overcooking lentils: Keep an eye on your lentils; overcooked ones can turn mushy and lose texture.
  • Too salty: If your soup is too salty, add a peeled potato while cooking; it will absorb excess salt.
  • Not enough flavor: If the soup lacks depth, try adding more spices or a splash of vinegar for brightness.
  • Thickening issues: If the soup is too thin, let it simmer uncovered for a bit longer to reduce liquid.

Variations to Try

Want to mix things up? Here are some variations to consider:

  • Spicy Kick: Add diced jalapeños or a pinch of cayenne for a fiery version.
  • Creamy Spinach: Substitute half the almond milk with coconut cream for an extra creamy texture.
  • Herby Twist: Stir in fresh herbs like cilantro or parsley right before serving for a fresh taste.
  • Protein Boost: Add cooked chickpeas or shredded chicken for added protein.

Storage and Make-Ahead Instructions

This soup is perfect for meal prep and can be stored easily:

  • Refrigerator: Store in an airtight container for up to 5 days.
  • Freezer: Freeze in individual portions for up to 3 months. Thaw overnight in the fridge before reheating.

FAQs About Detox Moroccan Lentil Soup

Here are some frequently asked questions to help you get the most out of your cooking experience:

  • Can I use different lentils? Yes, you can substitute with any lentils you prefer, but cooking times may vary.
  • Is this soup vegan? Yes, this recipe is completely plant-based!
  • Can I make this soup spicy? Absolutely! Adjust the spices to your liking for more heat.
  • How do I thicken the soup? If you’d like a thicker consistency, let it simmer longer or add an extra potato.
  • What if I don’t have almond milk? Any non-dairy milk will work, or you can omit it entirely.
  • Can I add meat to this recipe? Yes, cooked chicken or turkey can be added for a meatier version.
  • What’s the best way to reheat leftovers? Reheat on the stovetop over low heat, adding a splash of broth or water to loosen.
  • Can I make this soup in a slow cooker? Yes, sauté the veggies first, then transfer everything to the slow cooker and cook on low for 6-8 hours.

Nutrition Tips and Dietary Adaptations

This Detox Moroccan Lentil Soup is not only delicious but also highly nutritious. Each serving is packed with protein, fiber, and essential vitamins. If you have specific dietary needs, consider these adaptations:

  • Gluten-Free: This recipe is naturally gluten-free; just ensure your broth is also gluten-free.
  • Low-Carb: Omit the potatoes and add more leafy greens for a low-carb version.
  • Keto-Friendly: Substitute lentils with cauliflower rice for a keto adaptation.

Equipment Recommendations

To make your cooking process smoother, here are some essential tools:

  • Large Stockpot or Dutch Oven: Ideal for even cooking and maximizing flavor.
  • Cutting Board and Knife: Essential for prepping all your veggies.
  • Measuring Cups and Spoons: For precise ingredient measurements.
  • Wooden Spoon: Perfect for stirring and mixing ingredients.

Serving Suggestions

Enjoy your soup as a meal on its own or pair it with these options for a complete dining experience:

  • Crusty Bread: Serve with a side of warm, crusty bread for dipping.
  • Fresh Salad: A light green salad with a citrus vinaigrette complements the soup wonderfully.
  • Rice or Quinoa: Serve over a bed of rice or quinoa for added heartiness.

Now that you’ve equipped yourself with everything you need to create this delightful Detox Moroccan Lentil Soup, get cooking! Remember, cooking should be fun and stress-free. Enjoy the journey and savor the delicious results. Bon appétit!

Detox Moroccan Lentil Soup

Prep Time 10 minutes
Cook Time 30 minutes
Total Time 40 minutes
Servings 4 servings
Calories 350
A hearty and flavorful Moroccan-inspired lentil soup packed with spices, vegetables, and plant-based goodness. Perfect for a nourishing detox meal.

Ingredients

Oil

  • 1 tablespoon avocado oil

Vegetables

  • 1 cup chopped onion
  • 1 cup chopped celery
  • 1 cup chopped carrot
  • 1 cup chopped white fingerling potato
  • 2 cloves garlic, minced

Spices

  • 1 teaspoon sea salt ((+ more to taste))
  • 1 teaspoon black pepper ((+ more to taste))
  • 2 teaspoons turmeric
  • 2 teaspoons ground cumin
  • 2 teaspoons ground ginger
  • 2 teaspoons smoked paprika
  • 1 teaspoon ground cinnamon

Lentils

  • 1 cup green (or brown) lentils
  • 1 cup red lentils

Liquids

  • 4 cups vegetable broth
  • 2 cups water
  • 1/4 cup tomato paste
  • 1 cup almond milk ((or coconut milk))
  • 1 tablespoon lemon juice
  • 2 - 3 cups spinach

Instructions 

  • Heat oil in a large pot. Sauté onions, celery, carrots, potatoes, and garlic for 5 minutes.
  • Add spices and cook for 2 minutes. Stir in lentils, broth, water, and tomato paste. Bring to boil, then simmer for 30 minutes.
  • Remove from heat, stir in almond milk, lemon juice, and spinach until wilted. Serve hot.

Notes

For extra flavor, garnish with coconut yogurt, parsley, pepper flakes, cracked pepper, and jalapeno slices.
Calories: 350kcal
Cost: $15
Course: Soup
Cuisine: Moroccan
Keyword: Lentils

Indulge in the Creamy Delight of High-Protein Strawberry Mousse

If you’re on the lookout for a quick, satisfying dessert that combines sweetness with nutrition, then this High-Protein Strawberry Mousse is just what you need! This delicious mousse is packed with flavor and protein, making it perfect for a post-workout treat or a guilt-free indulgence. With just three simple ingredients, you can whip up a delightful dessert that not only pleases your palate but also keeps you energized throughout the day. Let’s dive into the world of this high-protein strawberry sensation!

Why You’ll Love This Recipe

This mousse isn’t just another sweet treat; it offers a range of benefits that make it stand out:

  • Quick and Easy: With only three key ingredients, this mousse can be prepared in under 15 minutes.
  • High in Protein: Packed with cottage cheese, it provides a healthy dose of protein to fuel your body.
  • Versatile: Perfect as a snack, dessert, or even a breakfast option when paired with fruits or granola.
  • Customizable: Easily adapt the recipe to suit your taste by adding various flavors or toppings.
  • Guilt-Free Indulgence: Enjoy a creamy dessert without the added sugars and unhealthy fats found in many traditional mousse recipes.

Ingredients You’ll Need

To create this delicious high-protein strawberry mousse, gather the following ingredients:

  • 1 cup full-fat cottage cheese: This is the base of our mousse, providing a creamy texture and a hefty protein boost.
  • 1 cup (150g) fresh strawberries, halved: Sweet and vibrant, they add natural sweetness and a pop of color.
  • ¼ cup whipped topping (such as Cocowhip): This helps to lighten the mixture, creating that fluffy mousse texture.

Don’t worry if you don’t have these exact ingredients on hand; here are some substitutions:

  • Cottage Cheese: Greek yogurt can be used for a tangier flavor and similar texture.
  • Whipped Topping: Any non-dairy whipped cream or even homemade whipped cream will work.
  • Strawberries: Feel free to mix in other berries like raspberries or blueberries for a different flavor profile.

How to Make High-Protein Strawberry Mousse Recipe

Follow these simple steps to whip up your mousse:

  1. Add the full-fat cottage cheese and halved fresh strawberries to a blender. Blend until smooth and creamy, ensuring no lumps remain.
  2. Pour the whipped topping into the blended mixture.
  3. Gently fold the whipped topping into the blended cottage cheese and strawberries to keep the mousse light and airy.
  4. Divide the mousse into two containers and refrigerate for 2-4 hours or overnight to allow it to set properly.
  5. Enjoy the mousse straight from the fridge as a nutritious and satisfying dessert!

Pro Tips for the Best Mousse

To ensure your high-protein strawberry mousse turns out perfectly every time, consider these expert tips:

  • Use full-fat cottage cheese: It provides the best creamy texture and flavor.
  • Chill your ingredients: Using chilled ingredients helps the mousse set better.
  • Don’t over-blend: Blend just until smooth to maintain a light and airy texture.
  • Add a splash of vanilla: For an extra layer of flavor, consider adding a teaspoon of vanilla extract.
  • Experiment with sweeteners: If you prefer a sweeter mousse, a drizzle of honey or maple syrup can be added to taste.
  • Serve with fresh fruit: Garnish your mousse with additional berries for an appealing presentation.
  • Use a high-speed blender: A good blender will ensure a smooth consistency without lumps.
  • Make it ahead: This mousse keeps well, making it a great make-ahead dessert for gatherings.

Common Mistakes and Troubleshooting

Even the best cooks can face challenges. Here are some common mistakes and how to avoid them:

  • Too Lumpy: Make sure to blend thoroughly until completely smooth. If lumps persist, blend again.
  • Too Sweet: If the mousse turns out sweeter than desired, balance it with a pinch of salt or a bit of lemon juice.
  • Not Fluffy Enough: Ensure you gently fold the whipped topping in instead of stirring vigorously.
  • Separation: If your mousse separates, it may be due to over-blending or incorrect ratios. Always measure ingredients accurately.

Variations to Try

This high-protein strawberry mousse is versatile! Here are some fun variations:

  • Chocolate Strawberry Mousse: Add cocoa powder to the blender for a chocolate twist.
  • Berry Medley Mousse: Use a mix of strawberries, raspberries, and blueberries for a colorful dessert.
  • Coconut Strawberry Mousse: Mix in shredded coconut or coconut cream for a tropical flavor.
  • Mint Chocolate Chip Mousse: Add fresh mint leaves and chocolate chips for a refreshing dessert.

Storage and Make-Ahead Instructions

This mousse can be easily made in advance and stored in the fridge:

  • Refrigeration: Store in airtight containers in the fridge for up to 3 days.
  • Make-Ahead: Prepare up to 2 days in advance for the best flavor and texture.
  • Freezing: While not recommended for long-term storage, you can freeze leftovers for up to a week. Thaw in the fridge before serving.

Frequently Asked Questions (FAQ)

Here are some common questions about high-protein strawberry mousse:

  • Can I use low-fat cottage cheese? Yes, but it may affect the creaminess of the mousse.
  • Is this mousse vegan-friendly? To make it vegan, use plant-based whipped topping and a non-dairy yogurt.
  • Can I use frozen strawberries? Absolutely! Just thaw them and drain excess liquid before blending.
  • How can I make it sweeter? Add honey, maple syrup, or a sugar substitute to taste.
  • What’s the best way to serve this mousse? Serve chilled in dessert cups or bowls, topped with fresh berries.
  • How long does it take to set? Refrigerating for 2-4 hours is ideal for the best texture.
  • Can I double the recipe? Yes, simply double all ingredients and use a larger blender.
  • What are the nutritional benefits? High in protein, low in carbs, and provides essential vitamins from strawberries.

Nutrition Tips and Dietary Adaptations

This high-protein strawberry mousse is not just delicious but also nutritious. Here are some tips for those with dietary needs:

  • Gluten-Free: This recipe is naturally gluten-free, making it suitable for those with gluten sensitivities.
  • Low-Carb Option: Swap the whipped topping for a low-carb alternative to reduce sugars.
  • High-Protein Diet: Great for athletes or anyone looking to increase their protein intake.
  • Diabetic Friendly: Adjust the sweetness to manage sugar levels; opt for natural sweeteners.

Essential Equipment Recommendations

To make this mousse, here’s what you’ll need:

  • High-Speed Blender: For a smooth and creamy consistency.
  • Mixing Bowls: Use for combining ingredients before blending.
  • Measuring Cups and Spoons: Accurate measurements are key to a successful mousse.
  • Airtight Containers: For storing leftovers in the fridge.

Serving Suggestions

Serve this mousse in style to impress your guests:

  • Garnish with Fresh Berries: Add strawberries, blueberries, or mint leaves on top.
  • Drizzle with Chocolate: A light drizzle of chocolate sauce can elevate the dessert.
  • Use Elegant Dessert Cups: Presenting in clear cups showcases the beautiful layers.
  • Pair with Granola: For added crunch, serve with a sprinkle of granola on top.

In conclusion, this High-Protein Strawberry Mousse is not just a dessert; it’s a celebration of flavors, health, and creativity in the kitchen. With its ease of preparation and countless variations, it’s a recipe you’ll want to keep close at hand. So grab your ingredients, and let’s create something delicious and nutritious that everyone will love!

High-Protein Strawberry Mousse Recipe

Prep Time 10 minutes
Total Time 10 minutes
Servings 2 servings
Calories 180
A light and nutritious mousse combining cottage cheese and fresh strawberries, perfect for a healthy dessert.

Ingredients

Dairy

  • 1 cup full fat cottage cheese
  • 1 cup fresh strawberries (halved)
  • ¼ cup whipped topping (such as Cocowhip)

Instructions 

  • Add cottage cheese and strawberries to a blender and blend until smooth.
  • Pour in the whipped topping and gently fold to combine.
  • Divide into containers and refrigerate for 2-4 hours.
  • Serve chilled and enjoy.

Notes

This mousse is a high-protein, low-fat dessert perfect for a healthy treat.
Calories: 180kcal
Cost: $8
Course: Dessert
Keyword: strawberries

Kickstart Your Morning with a Berry Blast Protein Smoothie!

Are you looking for a delicious and nutritious way to energize your day? Look no further! This Berry Blast Protein Smoothie is not only packed with flavor but also loaded with essential nutrients to fuel your busy mornings. In just a few minutes, you can create a smoothie that is perfect for breakfast or a post-workout snack. Let’s dive into why this smoothie is a must-try!

Why You’ll Love This Recipe

This smoothie is a game-changer for anyone looking to incorporate more fruits and protein into their diet. Here are five specific benefits of this Berry Blast Protein Smoothie:

  • Packed with Nutrients: With mixed berries, Greek yogurt, and chia seeds, this smoothie provides a wealth of vitamins, minerals, and antioxidants.
  • High Protein Content: The addition of protein powder and Greek yogurt makes this smoothie a great option for muscle recovery after workouts.
  • Quick and Easy: This smoothie can be prepared in under five minutes, making it ideal for busy mornings.
  • Customizable Ingredients: You can easily swap ingredients based on your dietary needs or preferences, ensuring you get the perfect blend for your body.
  • Delicious Flavor: The combination of sweet berries and creamy almond butter creates a flavor that is both satisfying and refreshing.

Ingredients Breakdown

Here’s what you’ll need to whip up this incredible Berry Blast Protein Smoothie:

  • 1 cup mixed berries (fresh or frozen): Strawberries, blueberries, raspberries, or blackberries all work well.
  • 1 scoop vanilla protein powder: Opt for your favorite brand, or try plant-based options if preferred.
  • 1/2 cup unsweetened almond milk: This adds creaminess without the calories; feel free to use any milk of your choice.
  • 1/4 cup Greek yogurt: For a protein boost and creamy texture, Greek yogurt is a must.
  • 1 tablespoon chia seeds: These tiny seeds are packed with omega-3 fatty acids and fiber.
  • 1 tablespoon almond butter: Adds healthy fats and a nutty flavor; peanut butter works too!
  • 1/4 cup granola (for topping): A crunchy, healthy addition that makes the smoothie more satisfying.
  • Fresh raspberries and blueberries (for garnish): Use these to make your smoothie visually appealing.
  • A few sliced almonds (for garnish): For added crunch and nutrition.
  • Fresh mint leaves (for garnish): A refreshing touch that enhances the flavor.

Step-by-Step Instructions

Side view of a protein smoothie featuring mixed berries and almond garnishes.

Creating your Berry Blast Protein Smoothie is simple. Just follow these easy steps:

  • Combine mixed berries, protein powder, almond milk, Greek yogurt, chia seeds, and almond butter in a blender.
  • Blend on high speed until smooth and creamy.
  • Pour into glasses and top with granola, fresh raspberries, blueberries, sliced almonds, and mint leaves.
  • Serve immediately and enjoy the antioxidant-rich, low-sugar smoothie.

Pro Tips for the Perfect Smoothie

Want to elevate your smoothie game? Here are some expert insights:

  • Frozen Berries: If using fresh berries, consider adding ice for a thicker, chillier texture.
  • Protein Powder Alternatives: If you’re not keen on protein powder, try silken tofu or more Greek yogurt to boost protein content.
  • Sweetness Adjustment: Taste your smoothie before serving; if it’s not sweet enough, add a little honey or agave syrup.
  • Don’t Over-Blend: Blend just until combined to maintain some texture—smoothies should still have body!
  • Make-Ahead Options: Prep your ingredients in advance, and store them in individual bags in the freezer for quick morning smoothies.
  • Experiment with Greens: Add a handful of spinach or kale for an extra nutritional boost without compromising flavor.
  • Chill Your Glasses: Serve in chilled glasses for a refreshing experience.
  • Keep it Balanced: Ensure you have a good mix of carbs, protein, and healthy fats for a well-rounded smoothie.

Common Mistakes and Troubleshooting

Here are some common pitfalls to avoid when making your smoothie:

  • Too Much Liquid: If the smoothie turns out too runny, try adding more frozen fruit or Greek yogurt to thicken it up.
  • Unbalanced Flavors: If it’s too tart, add a touch of honey; if too sweet, a squeeze of lemon juice can help balance the flavors.
  • Not Blending Enough: Ensure you blend long enough to get a smooth consistency; chunks of fruit can ruin the experience.
  • Overloading Ingredients: Stick to the ingredient list; too many additions can alter the flavor and texture.

Variations to Try

Feel free to get creative! Here are some variations of the Berry Blast Protein Smoothie:

  • Green Berry Blast: Add a handful of spinach for extra nutrients without changing the flavor.
  • Chocolate Berry Delight: Incorporate a tablespoon of cocoa powder for a rich chocolate flavor.
  • Tropical Berry Twist: Substitute mixed berries with mango and pineapple for a tropical vibe.
  • Nutty Banana Berry Smoothie: Add a banana and replace almond butter with peanut butter for a different taste.

Storage and Make-Ahead Instructions

This smoothie is best enjoyed fresh, but you can store leftovers in the fridge for up to 24 hours. If you’re planning ahead, here’s how:

  • Pre-Make Smoothies: Blend your smoothie and store it in an airtight container in the refrigerator. Shake well before drinking.
  • Freezing Portions: Pour blended smoothies into ice cube trays and freeze. Blend again with a splash of almond milk for a quick treat later.

Frequently Asked Questions

Here are some common questions about the Berry Blast Protein Smoothie:

  • Can I use frozen berries? Absolutely! Frozen berries are great for smoothies and can help achieve a thicker consistency.
  • What type of protein powder should I use? Use any protein powder you like, whether whey, pea, or rice protein. Choose one that fits your dietary needs.
  • Can I make this smoothie vegan? Yes! Simply use plant-based protein powder and skip Greek yogurt or substitute it with a plant-based yogurt.
  • Is this smoothie good for weight loss? Yes, it’s low in calories yet high in protein and fiber, helping you feel full longer.
  • How can I add more fiber? You can add ground flaxseed or additional chia seeds for a fiber boost.
  • What can I use instead of almond milk? Any milk alternative works, including coconut milk, oat milk, or regular dairy milk.
  • Can I add greens to this smoothie? Yes! Spinach or kale can be added for extra nutrients without altering the taste significantly.
  • How long does the smoothie last in the fridge? It’s best consumed within 24 hours for optimal freshness and flavor.

Nutrition Tips and Dietary Adaptations

This Berry Blast Protein Smoothie is not only delicious but also highly adaptable for various dietary needs:

  • For Low-Carb Diets: Use fewer fruits and replace them with avocado for healthy fats.
  • For High-Fiber Needs: Add flaxseeds or oats to increase fiber content.
  • For Dairy-Free Options: Ensure all ingredients are dairy-free, including yogurt and protein powder.
  • For Low-Sugar Options: Opt for unsweetened almond milk and avoid added sweeteners.

Equipment Recommendations

To make your smoothie-making experience seamless, here are some essential tools:

  • High-Powered Blender: A good blender ensures a smooth consistency without chunks.
  • Measuring Cups: For accurate ingredient measurements.
  • Spatula: Handy for scraping down the sides of the blender to ensure all ingredients get blended.
  • Storage Containers: Use airtight containers for any make-ahead smoothies.

Serving Suggestions

Enhance your smoothie experience with these serving suggestions:

  • Pair with a Healthy Snack: Enjoy with a handful of nuts or a slice of whole-grain toast.
  • Garnish Creatively: Top with extra berries, nuts, or seeds for added texture and visual appeal.
  • Serve in a Fun Glass: Presentation matters—use colorful glasses to make your smoothie feel even more special.

Now that you’re equipped with everything you need, it’s time to blend! This Berry Blast Protein Smoothie is not only a feast for your taste buds but also a wholesome addition to your daily routine. So, grab your ingredients and let the blending begin!

Berry Blast Protein Smoothie

Prep Time 5 minutes
Total Time 5 minutes
Servings 2 cups
Calories 250
A delicious and nutritious smoothie packed with berries, protein, and healthy toppings to energize your day.

Ingredients

Mixed Berries

  • 1 cup mixed berries (fresh or frozen)

Protein Powder

  • 1 scoop vanilla protein powder

Liquid

  • 1/2 cup unsweetened almond milk

Dairy

  • 1/4 cup Greek yogurt

Seeds & Nuts

  • 1 tablespoon chia seeds
  • 1 tablespoon almond butter

Toppings

  • 1/4 cup granola (for topping)
  • Fresh raspberries and blueberries Fresh raspberries and blueberries (for garnish)
  • A few sliced almonds (for garnish)
  • Fresh mint leaves Fresh mint leaves (for garnish)

Instructions 

  • Combine berries, protein powder, almond milk, Greek yogurt, chia seeds, and almond butter in a blender.
  • Blend until smooth and creamy.
  • Pour into glasses and top with granola, berries, sliced almonds, and mint leaves.
  • Serve immediately and enjoy!

Notes

For extra flavor, add a splash of honey or a few ice cubes before blending.
Calories: 250kcal
Cost: $12
Course: Breakfast, Snack
Cuisine: American
Keyword: Berry, Protein, Smoothie

Deliciously Nutritious: The Ultimate Chicken and Sweet Potato Bowl Recipe

Welcome to your new go-to weeknight dinner! These Chicken and Sweet Potato Bowls are not only easy to prepare but also packed with flavor and nutrition. In under an hour, you can create a vibrant meal that balances tender chicken, roasted sweet potatoes, and a creamy spiced sauce that will make your taste buds dance. Let’s dive in!

Why You’ll Love This Recipe

This recipe isn’t just about satisfying hunger; it’s designed to nourish your body and soul. Here are five reasons why these bowls will become a staple in your home:

  • Quick and Easy: Perfect for busy weeknights, this dish can be prepped and cooked in under 40 minutes.
  • Customizable: Feel free to swap out ingredients or add your favorite toppings to make it your own.
  • Healthy Balance: With lean protein from chicken and nutritious sweet potatoes, these bowls offer a well-rounded meal.
  • Meal Prep Friendly: Cooked components can be stored separately for easy reheating throughout the week.
  • Delicious Flavor: The combination of spices and the creamy sauce elevates the dish, making it a delightful experience.

Gather Your Ingredients

Here’s what you’ll need to create these bowls:

  • 2 medium sweet potatoes (peeled and cubed)
  • 1 tablespoon olive oil
  • ½ teaspoon paprika
  • ¼ teaspoon garlic powder
  • Salt and black pepper (to taste)
  • 1 lb boneless, skinless chicken breast (cut into 1-inch cubes)
  • 1 tablespoon olive oil (for chicken)
  • ½ teaspoon garlic powder (for chicken)
  • ½ teaspoon onion powder
  • Salt and black pepper (to taste)
  • 2 cups cooked white or brown rice
  • ½ cup Greek yogurt (or mayonnaise)
  • 1 tablespoon lime juice
  • 1 teaspoon sriracha (or to taste)
  • ½ teaspoon cumin
  • ¼ teaspoon paprika (for sauce)
  • Pinch of cayenne pepper (optional)
  • 1 cup steamed or sautéed green vegetables (e.g., spinach, broccoli, chopped cucumber)
  • Fresh cilantro or parsley (for garnish)

Step-by-Step Instructions

Side view of a prepared bowl filled with chicken, sweet potatoes, and green veggies.

Ready to cook? Follow these easy steps to create your Chicken and Sweet Potato Bowls:

  1. Preheat your oven to 400°F (200°C).
  2. In a bowl, toss the cubed sweet potatoes with 1 tablespoon of olive oil, ½ teaspoon paprika, ¼ teaspoon garlic powder, and sprinkle with salt and pepper.
  3. Spread the sweet potatoes on a baking sheet and roast for 20-25 minutes, flipping halfway, until tender and caramelized.
  4. While the sweet potatoes are roasting, season the chicken cubes with ½ teaspoon garlic powder, ½ teaspoon onion powder, and salt and pepper.
  5. In a skillet, heat 1 tablespoon of olive oil over medium-high heat. Add the chicken and cook for 5-7 minutes until golden and cooked through.
  6. In a separate bowl, whisk together the Greek yogurt (or mayonnaise), lime juice, sriracha, cumin, and ¼ teaspoon paprika. Add salt to taste until you achieve a smooth, creamy consistency.
  7. If using, cook the rice and steam or sauté the green vegetables.
  8. To assemble, divide the rice among serving bowls. Top with roasted sweet potatoes, pan-seared chicken, and green vegetables.
  9. Generously drizzle with the creamy spiced sauce and garnish with chopped cilantro or parsley. Serve immediately!

Pro Tips for Perfection

Enhance your cooking experience with these expert insights:

  • Cut Uniformly: Ensure sweet potatoes are cut into even pieces for consistent roasting.
  • Prep Ahead: Chop your veggies and marinate the chicken the night before to save time.
  • Experiment with Spices: Feel free to add spices like cumin or curry powder to the chicken for added flavor.
  • Make it Vegan: Substitute chicken with roasted chickpeas or tofu and use a plant-based yogurt.
  • Double the Sauce: If you love the creamy spiced sauce, consider making extra for dipping.
  • Check for Doneness: Use a meat thermometer to ensure chicken reaches 165°F (74°C).
  • Let it Rest: Allow the chicken to rest for a few minutes after cooking before slicing to keep it juicy.
  • Garnish Generously: A sprinkle of fresh herbs adds a burst of flavor and color.

Common Mistakes to Avoid

Here are some pitfalls to steer clear of when making your bowls:

  • Overcrowding the Pan: Cooking too many sweet potatoes at once can lead to steaming rather than roasting.
  • Underseasoning: Don’t forget to taste and adjust seasoning at every stage for maximum flavor.
  • Skipping the Sauce: The creamy spiced sauce is key to tying all the flavors together—don’t skip it!
  • Not Preheating the Oven: Make sure your oven is fully preheated to get that perfect roast on your sweet potatoes.

Variations for Every Palate

Feel free to mix things up with these tasty variations:

  • Southwestern Twist: Add black beans, corn, and avocado for a southwestern flair.
  • Asian-Inspired: Use soy sauce and sesame oil with a sprinkle of sesame seeds.
  • Feta and Spinach: Top with crumbled feta and fresh spinach for a Mediterranean touch.
  • Spicy BBQ: Toss the chicken in your favorite BBQ sauce for a smoky flavor.

Storage and Make-Ahead Instructions

If you’re looking to prepare your meal in advance, here’s how to store and reheat:

  • Storage: Store each component separately in airtight containers in the fridge for up to 4 days.
  • Reheating: Reheat the chicken in a skillet over medium heat and warm the sweet potatoes in the oven or microwave.
  • Meal Prep: Prepare all ingredients and store them in portioned containers for quick assembly during the week.

Frequently Asked Questions

Here are some common questions about Chicken and Sweet Potato Bowls:

  • Can I use other vegetables? Yes! Feel free to use any veggies you have on hand.
  • How can I make this dish gluten-free? Ensure your sauces are gluten-free and use rice or quinoa as a base.
  • Can I freeze the components? Yes, the sweet potatoes and chicken freeze well. Just reheat thoroughly before serving.
  • What can I serve with this dish? Consider a fresh salad or a light soup to complement your meal.
  • Is this recipe suitable for meal prepping? Absolutely! It’s perfect for meal prep with its easy-to-store components.
  • How can I spice it up? Add more sriracha or fresh chili peppers to the sauce for extra heat.
  • What’s the best way to cook sweet potatoes? Roasting brings out their natural sweetness and enhances flavor.
  • Can this recipe be made vegetarian? Yes! Substitute chicken with chickpeas or tofu for a hearty vegetarian option.

Nutrition Tips and Dietary Adaptations

This recipe can be easily adapted to fit various dietary needs:

  • Low-Carb Option: Skip the rice and serve with a bed of leafy greens instead.
  • High-Protein Option: Add an extra serving of chicken or include a side of beans.
  • Dairy-Free: Use a dairy-free yogurt alternative for the sauce.
  • Whole30 Compliant: Ensure all ingredients fit Whole30 guidelines by avoiding processed items.

Essential Equipment You’ll Need

Make your cooking experience smooth with these essential tools:

  • Baking Sheet: A good-quality baking sheet ensures even roasting.
  • Skillet: Use a non-stick skillet for perfectly cooked chicken.
  • Mixing Bowls: Ideal for marinating chicken and mixing sauces.
  • Measuring Cups and Spoons: Accurate measurements help ensure the best flavor.

Serving Suggestions

Serve these bowls with:

  • A side salad: A light cucumber or mixed greens salad adds freshness.
  • Fresh herbs: Extra cilantro or parsley for garnish enhances flavor.
  • Warm tortillas: For a fun twist, serve with warm tortillas on the side.

Now that you have everything you need to make these delicious Chicken and Sweet Potato Bowls, it’s time to get cooking! Remember, the joy of cooking comes from experimenting and making the recipe your own. Enjoy your meal, and happy cooking!

Chicken and Sweet Potato Bowls

Prep Time 10 minutes
Cook Time 30 minutes
Total Time 40 minutes
Servings 4 servings
Calories 650
A flavorful and nutritious bowl combining roasted sweet potatoes, seasoned chicken, rice, and fresh vegetables, topped with a creamy spicy sauce.

Ingredients

Sweet Potatoes

  • 2 medium sweet potatoes (peeled and cubed)
  • 1 tbsp olive oil
  • 0.5 tsp paprika
  • 0.25 tsp garlic powder
  • Salt and black pepper to taste Salt and black pepper
  • 1 lb boneless, skinless chicken breast (cut into 1-inch cubes)
  • 1 tbsp olive oil
  • 0.5 tsp garlic powder
  • 0.5 tsp onion powder
  • Salt and black pepper to taste Salt and black pepper

Cooked Rice

  • 2 cups cooked white or brown rice

Sauce

  • 0.5 cup Greek yogurt (plain, or mayonnaise)
  • 1 tbsp lime juice
  • 1 tsp sriracha
  • 0.5 tsp cumin
  • 0.25 tsp paprika
  • Pinch optional cayenne pepper
  • Salt to taste Salt

Vegetables

  • 1 cup steamed or sautéed green vegetables (e.g., spinach, broccoli, chopped cucumber)

Garnish

  • Fresh cilantro or parsley chopped Fresh cilantro or parsley (for garnish)

Instructions 

  • Toss sweet potatoes with olive oil, paprika, garlic powder, salt, and pepper. Roast at 400°F (200°C) for 20-25 mins, flipping halfway.
  • Season chicken with garlic powder, onion powder, salt, and pepper. Cook in a skillet with olive oil for 5-7 mins until golden and cooked through.
  • Mix Greek yogurt, lime juice, sriracha, cumin, paprika, and salt to make the sauce.
  • Cook rice and prepare green vegetables. Assemble bowls with rice, roasted sweet potatoes, chicken, and vegetables. Drizzle with sauce and garnish.

Notes

Feel free to customize with your favorite vegetables or spice levels.
Calories: 650kcal
Cost: $15
Course: Main Course
Cuisine: Fusion
Keyword: Chicken, sweet potato

Indulge in the Sweet Comfort of Cinnamon Honey Baked Pears

There’s something magical about the aroma of baked pears wafting through your kitchen. This delightful dessert combines the natural sweetness of pears with the warm, inviting flavors of cinnamon and honey, creating a treat that’s not only easy to make but also perfect for any occasion. Whether you’re hosting a gathering or simply treating yourself to a cozy night in, these Cinnamon Honey Baked Pears will leave you feeling satisfied and content.

In this comprehensive guide, we’ll walk you through everything you need to know to make the perfect baked pears, from ingredient breakdowns and pro tips to variations for every palate. By the end, you’ll feel confident and excited to whip up this classic dessert. Let’s dive in!

Why You’ll Love This Recipe

  • Quick and Easy: With just a handful of ingredients and minimal prep time, you can have a delicious dessert ready in under an hour.
  • Healthy Treat: Made with fresh pears and minimal added sugar, this recipe offers a nutritious option that satisfies your sweet tooth.
  • Versatile Serving Options: Enjoy them as is or dress them up with ice cream, yogurt, or a sprinkle of nuts for an extra indulgent experience.
  • Impressive Presentation: These baked pears look stunning on a plate, making them a perfect dessert for entertaining guests.
  • Customizable Flavors: You can easily tweak the spices and toppings to suit your taste, making it a recipe that you can adapt for every season.

Ingredients Breakdown

Here’s what you’ll need for these delicious baked pears, along with some handy substitutions:

  • 4 firm pears: Bosc or Anjou are recommended for their sweetness and texture. If unavailable, any firm variety will work.
  • 4 tablespoons honey: Local honey is best for flavor. If you prefer a vegan option, try using maple syrup or agave nectar.
  • 1 teaspoon ground cinnamon: This adds warmth and depth. Feel free to experiment with other spices like nutmeg or ginger.
  • 1/4 cup water: This helps create steam in the baking dish, ensuring the pears cook evenly.
  • 1 tablespoon butter (optional): Adds richness; substitute with coconut oil for a dairy-free version.

Step-by-Step Instructions

Deliciously baked pears arranged neatly, showing a caramelized exterior and a luscious syrup.

Follow these simple steps to create your own Cinnamon Honey Baked Pears:

  • Preheat your oven: Set it to 375°F (190°C) to get it nice and hot for baking.
  • Wash and prepare the pears: Cut each pear in half lengthwise and scoop out the core and seeds using a spoon or melon baller.
  • Arrange the pears: Place the pear halves cut-side up in a small baking dish.
  • Mix the honey and cinnamon: In a small bowl, combine honey and cinnamon until well blended.
  • Spoon the mixture: Drizzle the honey-cinnamon blend evenly over the cut surface of each pear half.
  • Add water: Pour the water into the bottom of the baking dish to create moisture during baking.
  • Top with butter: If using, place a small piece of butter on top of each pear half.
  • Bake: Cook for 30 to 40 minutes, or until the pears are tender when pierced with a fork.
  • Serve warm: Once done, serve your baked pears warm, spooning any remaining syrup over the top.

Pro Tips for Perfect Baked Pears

  • Choose ripe but firm pears: This ensures they hold their shape during baking while still becoming tender.
  • Don’t overbake: Keep an eye on your pears; you want them soft but not mushy!
  • Experiment with spices: If you love flavor, try adding vanilla extract or a pinch of cardamom to the honey mixture.
  • Top with nuts: Adding chopped walnuts or pecans after baking enhances texture and flavor.
  • Use fresh herbs: A sprinkle of fresh mint or basil can elevate the dish with a refreshing twist.
  • Make it a meal: Serve alongside grilled chicken or pork for a sweet-savory combination.
  • Try different fruits: This recipe can be adapted using apples or peaches for a delightful variation.
  • Prepare ahead of time: You can prep the pears a few hours in advance and bake them just before serving.

Common Mistakes and Troubleshooting

Here are some frequent pitfalls to avoid when making your baked pears:

  • **Using overly ripe pears:** They may become mushy during baking. Choose pears that are firm to the touch.
  • **Not enough moisture:** If the baking dish looks dry, add a bit more water to prevent the pears from drying out.
  • **Skipping the butter:** While optional, butter adds richness. Don’t skip it unless you’re avoiding dairy.
  • **Overcooking:** Keep an eye on your pears; they should be tender but still hold their shape.

Flavor Variations

Want to switch things up? Here are some variations you can try:

  • Maple Glazed Pears: Substitute honey with maple syrup for a different flavor profile.
  • Nutty Cinnamon Pears: Add chopped walnuts or pecans for a crunchy texture.
  • Spiced Pears: Mix in a pinch of ginger or nutmeg for a spicier kick.
  • Citrus Zest: Add a sprinkle of orange or lemon zest to brighten the flavors.

Storage and Make-Ahead Instructions

If you want to prepare these baked pears in advance, here’s how to store them:

  • Refrigerate: Store any leftovers in an airtight container in the fridge for up to 3 days.
  • Reheat: Warm them in the oven at 350°F (175°C) for about 10 minutes, or in the microwave for 30-60 seconds.
  • Make ahead: You can prep the pears and sauce earlier in the day, then bake just before serving for the best texture.

Frequently Asked Questions

Here are some common inquiries about baked pears:

  • Can I use canned pears? Yes, but fresh pears will yield a better texture. If using canned, reduce baking time.
  • What if my pears are too soft? Use them for a compote or sauce instead of baking.
  • Can I freeze baked pears? Yes, freeze them in an airtight container for up to 3 months. Thaw before reheating.
  • Can I substitute sugar for honey? Yes, brown sugar or agave nectar can work as alternatives.
  • How do I know when they’re done? Pears should be tender but not falling apart when pierced with a fork.
  • What’s the best way to serve them? They’re delicious with ice cream, yogurt, or just on their own!
  • Can I use other fruits? Absolutely! Apples and peaches are great alternatives.
  • What’s the nutritional information? Each serving is approximately 150 calories, depending on the size of the pears and the amount of honey used.

Nutritional Tips and Dietary Adaptations

Here’s how to adapt this recipe to fit various dietary needs:

  • Vegan: Substitute honey with maple syrup or agave nectar.
  • Dairy-free: Skip the butter or replace it with coconut oil.
  • Low-sugar: Use a sugar substitute or reduce the amount of honey used.

Essential Equipment Recommendations

For this recipe, you will need:

  • Small baking dish: A ceramic or glass dish works best for even baking.
  • Cooking spoon: For mixing your honey and cinnamon together.
  • Measuring spoons: To ensure accurate quantities of ingredients.

Serving Suggestions

Here are some ways to serve your baked pears:

  • With cream: A dollop of whipped cream adds a luxurious touch.
  • On a salad: Serve warm pears on a bed of greens with feta and walnuts.
  • As a topping: Use them to top pancakes or waffles for a sweet breakfast treat.

Conclusion

Making Cinnamon Honey Baked Pears is a delightful way to satisfy your sweet cravings while enjoying the comforting flavors of fall. With simple ingredients and easy-to-follow steps, you can create a dish that’s sure to impress. So, gather your ingredients, preheat your oven, and let the journey of deliciousness begin. Remember, cooking is all about joy—don’t stress about perfection! Enjoy every bite and happy cooking!

Classic Cinnamon Honey Baked Pears

Prep Time 10 minutes
Cook Time 35 minutes
Total Time 45 minutes
Servings 4 servings
Calories 150
Enjoy tender baked pears drizzled with honey and cinnamon, a simple and delicious dessert or snack.

Ingredients

Pears

  • 4 pieces firm pears (Bosc or Anjou recommended)
  • 4 tablespoons honey
  • 1 teaspoon ground cinnamon
  • 0.25 cup water
  • 1 tablespoon butter (optional)

Instructions 

  • Preheat oven to 375°F (190°C).
  • Core and halve the pears, then place cut-side up in a baking dish.
  • Mix honey and cinnamon, then spoon over pears. Pour water into dish, add butter if using.
  • Bake for 30-40 minutes until tender.
  • Serve warm, spooning syrup over pears.

Notes

Use ripe pears for best flavor and adjust baking time for desired tenderness.
Calories: 150kcal
Cost: $10
Course: Dessert
Cuisine: American
Keyword: Cinnamon, honey, pear

Start your day on a refreshing note with these simple lemon muffins! Bursting with zesty flavor, this recipe combines easy-to-follow steps to create delightful muffins perfect for breakfast or a sweet snack. Whether you’re looking for a quick breakfast option or a sweet treat to share with friends, these lemon muffins will not disappoint. Let’s dive into why you’ll love this recipe and how to make the best lemon muffins right in your kitchen!

Why You’ll Love This Recipe

  • Quick and Easy: This recipe takes only about 30 minutes from start to finish, making it perfect for busy mornings.
  • Bright Flavor: The combination of lemon juice and zest creates a burst of citrus flavor that’s refreshing and uplifting.
  • Versatile Base: You can easily adapt the recipe by adding blueberries, poppy seeds, or even nuts to elevate the flavor.
  • Perfect Texture: These muffins are soft and moist, thanks to the buttermilk and melted butter, ensuring each bite is delightful.
  • Make-Ahead Friendly: These muffins can be stored for up to three days, and they freeze well, making them a great option for meal prep.

Ingredient Breakdown

Let’s look closely at the ingredients you’ll need to make these delicious lemon muffins, along with some substitutions to make them your own:

  • All-Purpose Flour: 2½ cups. You can substitute whole wheat flour for a healthier option, but it may slightly alter the texture.
  • Sugar: ½ cup granulated sugar. You can use coconut sugar or a sugar substitute if you’re looking to reduce calories.
  • Baking Powder: 1 teaspoon. Ensure it’s fresh for the best rise!
  • Baking Soda: ½ teaspoon. This helps balance the acidity from the lemon juice.
  • Salt: ¼ teaspoon. Enhances the overall flavor.
  • Buttermilk: 1 cup. You can make a substitute by adding 1 tablespoon of vinegar or lemon juice to regular milk.
  • Butter: ½ cup melted butter. Use unsalted butter for better flavor control.
  • Eggs: 2 large eggs. Vital for binding the ingredients together.
  • Lemon Zest: 1 heaping tablespoon. Fresh zest gives the muffins a vibrant flavor.
  • Fresh Lemon Juice: ¼ cup. The star ingredient that brings the lemony goodness!
  • Vanilla Extract: 1 teaspoon. Adds depth to the flavor.
  • Lemon Glaze (optional): 1 cup powdered sugar mixed with 2 tablespoons of fresh lemon juice for a sweet and tangy finish.

How to Make Easy Lemon Muffins

Follow these simple steps to create your own batch of delightful lemon muffins:

  1. Preheat: Preheat your oven to 350 degrees F. Lightly grease or line a muffin pan with paper cups and set aside.
  2. Mix Dry Ingredients: In a large bowl, combine the flour, sugar, baking powder, baking soda, and salt.
  3. Combine Wet Ingredients: In a medium bowl, whisk together the buttermilk, melted butter, eggs, lemon zest, lemon juice, and vanilla until well combined.
  4. Combine Mixtures: Pour the wet mixture into the dry ingredients and mix just until combined. Don’t overmix to ensure fluffy muffins!
  5. Fill Muffin Tin: Scoop the batter into the prepared muffin pan, filling each cup about 2/3 full.
  6. Bake: Bake for 15-20 minutes or until the tops spring back when lightly touched. A toothpick inserted should come out clean.
  7. Cool and Glaze: Allow the muffins to cool in the pan for 5 minutes, then transfer to a wire rack. If desired, drizzle with lemon glaze once cooled.

Pro Tips for Perfect Lemon Muffins

Textured lemon muffins with fresh lemon zest and a light dusting of sugar.
  • Room Temperature Ingredients: Let your eggs and buttermilk sit at room temperature for about 30 minutes before using. This helps the muffins rise better.
  • Don’t Overmix: When combining the wet and dry ingredients, mix just until combined. Overmixing can lead to dense muffins.
  • Use Fresh Lemons: Always opt for fresh lemons instead of bottled juice for the best flavor.
  • Check Doneness: Ovens can vary, so check the muffins a couple of minutes before the recommended baking time.
  • Experiment with Add-Ins: Try adding ½ cup of blueberries or poppy seeds to the batter for a twist on the classic flavor.
  • Cool Completely: Allow the muffins to cool completely before glazing to prevent the glaze from melting off.
  • Make Mini Muffins: This recipe can easily be adapted to make mini muffins. Just reduce the baking time to 10-12 minutes.
  • Freezing Tips: To freeze, store cooled muffins in an airtight container or freezer bag. They can last for up to 3 months.

Common Mistakes and Troubleshooting

Here are some common pitfalls to avoid when making lemon muffins:

  • Using Cold Ingredients: Cold ingredients can lead to uneven baking. Always use room temperature ingredients for the best results.
  • Not Measuring Correctly: Be precise with your measurements. Too much flour can make the muffins dry.
  • Opening the Oven Door: Avoid opening the oven door too early, as this can cause the muffins to collapse.
  • Skipping the Cooling Step: Letting muffins cool in the pan can create soggy bottoms; transfer them to a wire rack as soon as they’re out of the oven.

Variations to Try

Add a twist to your lemon muffins with these delicious variations:

  • Blueberry Lemon Muffins: Fold in 1 cup of fresh or frozen blueberries for a fruity burst.
  • Poppy Seed Lemon Muffins: Add 2 tablespoons of poppy seeds to the batter for a delightful crunch.
  • Chocolate Chip Lemon Muffins: Mix in ½ cup of semi-sweet chocolate chips for a sweet contrast to the tart lemon.
  • Gluten-Free Lemon Muffins: Substitute all-purpose flour with a gluten-free blend to cater to dietary restrictions.

Storage and Make-Ahead Instructions

These lemon muffins can easily fit into your meal prep routine:

  • Room Temperature: Store in an airtight container at room temperature for up to 3 days.
  • Refrigerate: You can refrigerate them for up to a week, but they may lose some moisture.
  • Freezing: Freeze in a single layer on a baking sheet, then transfer to a freezer bag for up to 3 months. Thaw at room temperature before serving.
  • Make-Ahead: Prepare the batter the night before and refrigerate. Bake fresh muffins in the morning!

Frequently Asked Questions

  • How long do lemon muffins last? These muffins can last up to 3 days at room temperature or up to a week in the refrigerator.
  • Can I freeze lemon muffins? Yes, freeze them in an airtight container for up to 3 months.
  • What can I substitute for buttermilk? You can use a mixture of milk and vinegar or yogurt as a substitute for buttermilk.
  • Can I add nuts to the recipe? Absolutely! Chopped walnuts or pecans would be a delicious addition.
  • How can I make these muffins healthier? Substitute half of the all-purpose flour with whole wheat flour and reduce the sugar to suit your taste.
  • What if my batter is too thick? If the batter seems too thick, add a splash of milk or buttermilk to loosen it up.
  • Can I make mini muffins? Yes, simply reduce the baking time to about 10-12 minutes.
  • Can I use bottled lemon juice instead of fresh? Fresh lemon juice is recommended for the best flavor, but bottled juice can work in a pinch.

Nutrition Tips and Dietary Adaptations

These lemon muffins can be adapted for various dietary needs:

  • Low-Calorie Option: Use a sugar substitute and reduce the amount of butter for a lighter version.
  • Vegan Option: Substitute eggs with flax eggs and use plant-based milk and butter alternatives.
  • Dairy-Free Option: Use almond or coconut milk and a dairy-free butter substitute.
  • High-Protein Option: Add a scoop of protein powder to the batter without altering the liquid ratio.

Equipment Recommendations

Here’s what you’ll need to make these delicious lemon muffins:

  • Muffin Pan: A standard 12-cup muffin pan is perfect for this recipe.
  • Mixing Bowls: Use a large bowl for dry ingredients and a medium bowl for wet ingredients.
  • Whisk: A whisk is essential for mixing the wet ingredients smoothly.
  • Measuring Cups and Spoons: Accurate measurements are crucial for the best results.
  • Wire Rack: A wire rack allows muffins to cool evenly without getting soggy.

Serving Suggestions

These lemon muffins are delicious on their own, but here are some serving ideas:

  • With a Cup of Tea: Pair your muffins with a warm cup of herbal tea for a cozy afternoon treat.
  • Brunch Spread: Serve them alongside fresh fruit and yogurt for a lovely brunch spread.
  • With a Sweet Topping: Try spreading a thin layer of cream cheese or lemon curd on top for an extra treat.
  • As a Dessert: Serve warm with a scoop of vanilla ice cream for a delightful dessert option.

Now that you have everything you need to make these delightful lemon muffins, gather your ingredients and get ready to enjoy a burst of flavor in every bite! Remember, cooking should be fun and stress-free, so don’t worry about perfection—just enjoy the process. Happy baking!

Lemon Muffins

Prep Time 10 minutes
Cook Time 20 minutes
Total Time 30 minutes
Servings 12 muffins
Calories 180
Bright and zesty lemon muffins perfect for breakfast or a snack, with a tender crumb and tangy glaze.

Ingredients

Dry ingredients

  • 2.5 cups all-purpose flour
  • 0.5 cup sugar
  • 1 teaspoon baking powder
  • 0.5 teaspoon baking soda
  • 0.25 teaspoon salt

Wet ingredients

  • 1 cup buttermilk
  • 0.5 cup butter (melted)
  • 2 large eggs
  • 1 heaping tablespoon lemon zest
  • 0.25 cup fresh lemon juice
  • 1 teaspoon vanilla

Frosting

  • 1 cup powdered sugar
  • 2 tablespoons fresh lemon juice

Instructions 

  • Preheat oven to 350°F (175°C). Line a muffin tin with paper cups.
  • Mix dry ingredients in a bowl. Combine wet ingredients in another bowl.
  • Pour wet into dry and mix just until combined. Fill muffin cups.
  • Bake for 15-20 minutes until tops spring back. Cool before frosting.

Notes

For extra lemon flavor, add more zest or lemon juice to the batter or frosting.
Calories: 180kcal
Cost: $12
Course: Breakfast
Cuisine: American
Keyword: lemon

Discover the Joy of Effortless Mediterranean Chicken Bake

Welcome to a culinary adventure that will transform your weeknight dinners into something extraordinary! The Effortless Mediterranean Chicken Bake is not just another recipe; it’s a delightful fusion of vibrant veggies, tender chicken, and aromatic spices that encapsulate the heart of Mediterranean cuisine. This dish is perfect for busy nights when you crave something healthy yet satisfying without spending hours in the kitchen. Let’s dive into what makes this recipe a must-try!

Why You’ll Love This Recipe

Here are five compelling reasons to embrace this Mediterranean Chicken Bake:

  • One-Pan Wonder: This dish requires minimal cleanup, allowing you to spend more quality time with loved ones and less time scrubbing pots and pans.
  • Healthy and Nutritious: Packed with fresh vegetables and lean protein, this bake is a wholesome meal that aligns with your wellness goals.
  • Flavor Explosion: The combination of herbs and spices creates a mouthwatering flavor profile that will tantalize your taste buds.
  • Customizable: Feel free to adapt the recipe with your favorite vegetables or proteins, making it versatile for any dietary preference.
  • Meal Prep Friendly: Perfect for making ahead and storing, so you have delicious, ready-to-eat meals throughout the week.

Ingredient Breakdown

Let’s explore the key ingredients in this Mediterranean Chicken Bake and some helpful substitutions:

  • Chicken breasts: 2 pieces, boneless and skinless, cut into bite-sized pieces. For a richer flavor, you can use thighs.
  • Zucchinis: 2 medium, sliced into half-moons. If zucchinis aren’t in season, yellow squash works beautifully.
  • Cherry tomatoes: 1 cup, halved. These add a burst of sweetness. You could substitute with grape tomatoes or even bell peppers.
  • Red onion: ½ piece, thinly sliced. For a milder flavor, opt for sweet onions or shallots.
  • Garlic: 2 cloves, minced. Fresh garlic is best, but ½ teaspoon of garlic powder can be used in a pinch.
  • Olive oil: 2 tablespoons; extra virgin is preferred for its flavor. You can swap with avocado oil for a different twist.
  • Herbs and Spices: Dried oregano (1 tsp), dried basil (½ tsp), smoked paprika (½ tsp), salt (½ tsp), black pepper (¼ tsp), and red pepper flakes (optional for heat).
  • Cheese: ½ cup mozzarella cheese (shredded) and ¼ cup Parmesan cheese (grated) for a delicious topping. Feel free to use dairy-free cheese for a vegan option.
  • Fresh parsley: 2 tablespoons, chopped, for garnish and added flavor.

Step-by-Step Instructions

Now that you have your ingredients ready, let’s get cooking!

  1. Preheat the oven to 400°F (200°C).
  2. Prepare the chicken: In a large bowl, combine the cut chicken, olive oil, garlic, oregano, basil, paprika, salt, pepper, and red pepper flakes. Toss until the chicken is well coated.
  3. Layer the veggies: In a baking dish, arrange the sliced zucchinis, cherry tomatoes, and red onion at the bottom.
  4. Add the chicken: Place the marinated chicken on top of the vegetables.
  5. Top it off: Sprinkle the mozzarella and Parmesan cheese evenly over the chicken and vegetables.
  6. Bake: Place the dish in the preheated oven and bake for 25-30 minutes, or until the chicken is cooked through and the cheese is bubbly and golden.
  7. Garnish: Remove the dish from the oven and sprinkle fresh parsley over the top before serving.

Cooking Tips for Success

Here are some expert tips to ensure your Mediterranean Chicken Bake turns out perfectly every time:

  • Check the chicken doneness: Use a meat thermometer to ensure the chicken reaches an internal temperature of 165°F (75°C).
  • Don’t overcrowd the pan: Ensure there’s enough space between the chicken and veggies for even cooking.
  • Experiment with spices: Feel free to add your favorite herbs like thyme or rosemary for a personal touch.
  • Watch the bake time: Oven temperatures can vary, so keep an eye on your bake to prevent overcooking.
  • Let it rest: After baking, let the dish sit for about 5 minutes before serving to allow the juices to redistribute.
  • Pair it right: This dish pairs beautifully with a side of couscous, quinoa, or a simple green salad.

Common Mistakes and Troubleshooting

Even the most experienced cooks make mistakes! Here’s how to avoid common pitfalls:

  • Overcooked chicken: If you notice dry chicken, you may have overbaked it. Remember, chicken should be juicy and tender.
  • Watery vegetables: Using frozen veggies can lead to excess moisture. Stick to fresh for the best results.
  • Burnt cheese: If your cheese is browning too quickly, cover the dish with foil midway through baking.

Delicious Variations

Want to switch things up? Here are some fun variations to try:

  • Greek Twist: Add kalamata olives and feta cheese for a classic Greek flair.
  • Italian Style: Swap out the zucchini for eggplant and use Italian seasoning instead of the dried herbs.
  • Spicy Kick: Add sliced jalapeños or a drizzle of hot sauce for an extra punch.
  • Vegetarian Option: Replace the chicken with chickpeas or lentils for a hearty vegetarian meal.

Storage and Make-Ahead Instructions

This Mediterranean Chicken Bake is perfect for meal prep! Here’s how to store it:

  • Refrigerator: Store leftovers in an airtight container for up to 3 days.
  • Freezer: For longer storage, freeze in a freezer-safe container for up to 2 months. Thaw in the refrigerator before reheating.
  • Reheating: Reheat in the oven at 350°F (175°C) until warmed through, or use a microwave for quick reheating.

Frequently Asked Questions

Here are some common questions about this Mediterranean Chicken Bake:

  • Can I use different proteins?: Absolutely! This recipe works well with fish, shrimp, or even tofu.
  • Is it gluten-free?: Yes, all the ingredients in this recipe are gluten-free!
  • How can I make it spicier?: Increase the amount of red pepper flakes or add diced fresh chili peppers.
  • Can I make this in advance?: Yes! Prepare the dish a day ahead, cover, and refrigerate until ready to bake.
  • What sides go well with this dish?: This chicken bake pairs nicely with a fresh salad, rice, or crusty bread.
  • How do I know when it’s done?: The chicken should be cooked through and reach an internal temperature of 165°F (75°C).
  • Can I adjust the serving size?: Yes! Simply scale the ingredients according to your needs.
  • What if I don’t have some ingredients?: Feel free to substitute with similar vegetables or proteins based on what you have available.

Nutritional Information and Dietary Adaptations

This Mediterranean Chicken Bake is not only delicious but also nutritious! Here’s a breakdown:

  • Healthy Fats: The olive oil provides heart-healthy fats while enhancing flavor.
  • Low Carb Option: This dish is naturally low in carbohydrates, making it perfect for low-carb diets.
  • High Protein: Packed with lean chicken, it supports muscle health and keeps you satiated.

Essential Equipment Recommendations

To prepare this Mediterranean Chicken Bake, you’ll need:

  • Baking Dish: A 9×13 inch or similar size works best for even cooking.
  • Mixing Bowls: For marinating the chicken and combining ingredients.
  • Measuring Cups and Spoons: Accurate measurements ensure the best flavor balance.
  • Cutting Board and Knife: For prepping your vegetables and chicken.

Serving Suggestions

To elevate your dining experience, consider serving this Mediterranean Chicken Bake with:

  • Quinoa Salad: A refreshing quinoa salad with lemon vinaigrette complements the bake beautifully.
  • Couscous: Fluffy couscous adds a lovely texture and absorbs the flavors from the bake.
  • Crusty Bread: Perfect for mopping up any sauce left on your plate!

Cooking should be an enjoyable experience, and this Effortless Mediterranean Chicken Bake embodies that spirit. With its vibrant flavors and easy preparation, you’ll find yourself returning to this dish time and again. So, roll up your sleeves, gather your ingredients, and let’s make mealtime a joyful occasion!

Remember, great food doesn’t require perfection—just clear steps, good ingredients, and a willingness to try. Happy cooking!

Best Mediterranean Chicken Bake

Prep Time 10 minutes
Cook Time 25 minutes
Total Time 35 minutes
Servings 4 servings
Calories 450
A flavorful and healthy Mediterranean-inspired chicken bake featuring fresh vegetables and herbs, perfect for a quick dinner.

Ingredients

Protein

  • 2 pieces boneless, skinless chicken breasts (cut into bite-sized pieces)

Vegetables

  • 2 medium zucchinis (sliced into half-moons)
  • 1 cup cherry tomatoes (halved)
  • ½ piece red onion (thinly sliced)

Aromatics & Oils

  • 2 cloves garlic (minced)
  • 2 tablespoons olive oil (extra virgin preferred)

Spices & Herbs

  • 1 teaspoon dried oregano
  • ½ teaspoon dried basil
  • ½ teaspoon smoked paprika
  • ½ teaspoon salt
  • ¼ teaspoon black pepper
  • ¼ teaspoon red pepper flakes (optional)

Cheese

  • ½ cup mozzarella cheese (shredded)
  • ¼ cup Parmesan cheese (grated)

Fresh herbs

  • 2 tablespoons fresh parsley (chopped)

Instructions 

  • Preheat oven to 400°F (200°C).
  • Toss chicken, zucchini, cherry tomatoes, onion, garlic, olive oil, and spices together.
  • Spread mixture in a baking dish and bake for 20-25 minutes.
  • Sprinkle cheeses and parsley on top, then bake for an additional 5 minutes until melted.
  • Serve hot and enjoy your Mediterranean Chicken Bake!

Notes

For extra flavor, marinate the chicken with herbs before baking.
Calories: 450kcal
Cost: $15
Course: Main Course
Cuisine: Mediterranean
Keyword: Chicken

Unleashing Flavor: The Ultimate Greek Chicken Wrap Recipe

If you’re searching for a quick, flavorful meal that can elevate your weeknight dinners, look no further than these delightful Greek Chicken Wraps. Packed with marinated chicken, fresh veggies, and a zesty tzatziki sauce, this recipe is not only simple to prepare but also versatile enough to satisfy the whole family. With just a handful of ingredients, you can create a dish that’s bursting with flavor and perfect for busy lifestyles.

Why You’ll Love This Recipe

These Greek Chicken Wraps are more than just a meal; they’re an experience! Here are some reasons why you’ll fall head over heels for this recipe:

  • Quick to prepare: With minimal prep and cooking time, these wraps can be ready in under an hour, making them ideal for busy weeknights.
  • Flavor-packed: The marinated chicken, combined with fresh vegetables and creamy tzatziki sauce, creates a delicious balance of flavors that will tantalize your taste buds.
  • Customizable: You can personalize these wraps with your favorite ingredients, making them suitable for everyone from picky eaters to culinary adventurers.
  • Healthy and nutritious: Loaded with protein, healthy fats, and fresh veggies, these wraps are a smart choice for anyone looking to maintain a balanced diet.
  • Perfect for meal prep: These wraps store well, making them a fantastic option for meal prepping lunches or quick dinners.

Ingredients You’ll Need

To whip up these Greek Chicken Wraps, gather the following ingredients:

  • For the Chicken:
  • ¼ cup olive oil
  • ¼ cup lemon juice
  • 3 cloves garlic, minced
  • ½ Tbsp dried oregano
  • ½ tsp salt
  • Black pepper, to taste
  • 6 boneless, skinless chicken thighs (about 1.8 lbs.)
  • For the Sauce:
  • ½ cup Greek yogurt
  • ½ tsp dried dill
  • 1 Tbsp lemon juice
  • ¼ tsp salt
  • For the Filling:
  • 1 pint grape tomatoes
  • 1 cucumber
  • ¼ red onion
  • 6 pieces flatbread or pita
  • 10 oz. hummus

Preparation and Cooking Tools

Close-up image of a Greek chicken wrap highlighting its vibrant colors and textures.

Having the right tools can make all the difference when preparing your Greek Chicken Wraps. Here are some essentials:

  • Mixing bowl: For marinating the chicken and mixing the tzatziki sauce.
  • Skillet or grill pan: Ideal for cooking the chicken to perfection.
  • Knife and cutting board: For chopping vegetables.
  • Meat thermometer: To ensure your chicken is cooked through.

How to Make Greek Chicken Wraps: Step by Step

Follow these simple steps to create your delicious Greek Chicken Wraps:

  • Step 1: In a bowl, combine olive oil, lemon juice, minced garlic, oregano, salt, and pepper. Add chicken thighs and marinate for at least 30 minutes to enhance the flavors.
  • Step 2: Heat a skillet over medium heat and cook the marinated chicken for about 6-7 minutes on each side until fully cooked. Let it rest for a few minutes before slicing.
  • Step 3: While the chicken is resting, prepare the tzatziki sauce by mixing Greek yogurt, dill, lemon juice, and salt in a small bowl.
  • Step 4: Dice the cucumber, halve the grape tomatoes, and thinly slice the red onion.
  • Step 5: Spread hummus on flatbread or pita, layer with sliced chicken, fresh veggies, and drizzle with tzatziki sauce. Roll tightly to form wraps.
  • Step 6: Serve immediately and enjoy your flavorful Greek Chicken Wraps!

Pro Tips for Perfect Greek Chicken Wraps

To ensure your wraps turn out mouth-wateringly delicious, consider these expert tips:

  • Marinate longer: If time allows, marinate the chicken for 1-2 hours to enhance the flavor even more.
  • Use fresh herbs: Fresh dill or parsley can elevate the tzatziki sauce and add a burst of freshness.
  • Cook on high heat: For a nice sear on the chicken, consider starting with a higher heat before reducing it to finish cooking.
  • Experiment with toppings: Try adding feta cheese, olives, or avocado for a different twist!
  • Warm your flatbread: Briefly warming your flatbread or pita can make them more pliable and easier to roll.
  • Use rotisserie chicken: For an even quicker option, use store-bought rotisserie chicken to save time.
  • Store the filling separately: If meal prepping, keep the filling separate from the wraps to maintain freshness.
  • Adjust seasoning: Taste as you go! Don’t be afraid to adjust the seasoning to suit your preferences.

Common Mistakes and Troubleshooting

Even the best cooks can make mistakes! Here’s how to avoid common pitfalls:

  • Overcooking chicken: Use a meat thermometer to check for an internal temperature of 165°F to avoid dryness.
  • Too much sauce: Start with a bit of tzatziki sauce and add more as needed to prevent soggy wraps.
  • Skipping the resting period: Allowing the chicken to rest after cooking helps retain its juices.

Recipe Variations

Feel free to mix things up with these tasty variations:

  • Vegetarian option: Substitute chicken with grilled eggplant or portobello mushrooms for a delicious vegetarian wrap.
  • Spicy twist: Add a dash of hot sauce or sliced jalapeños for a spicy kick!
  • Greek salad wrap: Use the same fillings but skip the chicken for a lighter salad wrap.
  • Whole grain option: Use whole grain or gluten-free tortillas to cater to dietary preferences.

Storage and Make-Ahead Instructions

These wraps can be made ahead of time and stored for later:

  • Refrigerate: Store wrapped Greek Chicken Wraps in an airtight container in the fridge for up to 3 days.
  • Freezing: For longer storage, freeze the chicken filling separately and thaw before assembling wraps.
  • Make-ahead sauce: Prepare the tzatziki sauce up to 3 days in advance and store it in the fridge.

Frequently Asked Questions

Here are some common questions about Greek Chicken Wraps:

  • Can I use chicken breasts instead of thighs? Yes, chicken breasts can be used, but they may require less marinating time.
  • What can I use instead of Greek yogurt? Sour cream or dairy-free yogurt can be good alternatives.
  • How can I make these wraps gluten-free? Use gluten-free tortillas or lettuce leaves instead of pita or flatbread.
  • Can I add other vegetables? Absolutely! Feel free to include bell peppers, spinach, or any veggies you love.
  • What’s the best way to store leftovers? Keep the filling and wraps separate to maintain freshness, and refrigerate in airtight containers.
  • How long do these wraps last in the fridge? They are best eaten within 3 days for optimal freshness.
  • Can I make these wraps spicy? Yes! Add some spicy ingredients like pepper jack cheese or hot sauce.
  • Is this recipe suitable for meal prep? Yes, it’s perfect for meal prep! Just store the components separately until ready to eat.

Nutrition Tips and Dietary Adaptations

This recipe can easily be adapted to fit various dietary needs:

  • Low-carb: Use lettuce wraps instead of tortillas or pita.
  • High-protein: Add more chicken or use a protein-rich flatbread.
  • Dairy-free: Substitute Greek yogurt with a dairy-free alternative.

Serving Suggestions

To complete your meal, consider serving these wraps with:

  • Side salads: A refreshing Greek salad pairs perfectly with these wraps.
  • Roasted vegetables: Add a medley of roasted veggies for extra flavor and nutrition.
  • Chips or fries: Serve with baked pita chips or sweet potato fries for a satisfying crunch.

Conclusion

Greek Chicken Wraps are a fantastic way to enjoy a healthy, flavorful meal without spending hours in the kitchen. With their customizable nature and vibrant ingredients, they make a perfect addition to your dinner rotation. So gather your ingredients, roll up those wraps, and enjoy a delicious feast that’s sure to impress your family and friends!

Greek Chicken Wraps

Prep Time 15 minutes
Cook Time 15 minutes
Total Time 30 minutes
Servings 4 servings
Calories 450
Enjoy flavorful Greek-inspired chicken wraps with fresh vegetables and creamy yogurt sauce, perfect for a quick and satisfying meal.

Ingredients

For the Chicken:

  • 0.25 cup olive oil
  • 0.25 cup lemon juice
  • 3 cloves garlic, minced
  • 0.5 Tbsp dried oregano
  • 0.5 tsp salt
  • to taste black pepper
  • 6 pieces boneless, skinless chicken thighs (about 1.8 lbs.)

For the Sauce:

  • 0.5 cup Greek yogurt
  • 0.5 tsp dried dill
  • 1 Tbsp lemon juice
  • 0.25 tsp salt

For the Filling:

  • 1 pint grape tomatoes
  • 6 pieces flatbread
  • 10 oz. hummus

Instructions 

  • Mix olive oil, lemon juice, garlic, oregano, salt, and pepper; marinate chicken for 30 minutes.
  • Cook chicken in a skillet until fully cooked, then rest and slice.
  • Combine Greek yogurt, dill, lemon juice, and salt to make the sauce.
  • Prepare vegetables: dice cucumber, halve tomatoes, thinly slice onion.
  • Spread hummus on flatbread, add chicken and vegetables, drizzle with sauce, then roll.
  • Serve immediately.

Notes

Marinate chicken at least 30 minutes for best flavor.
Calories: 450kcal
Cost: $15
Course: Main Course
Cuisine: Greek
Keyword: Chicken, Mediterranean, Wraps

Welcome to your new favorite weeknight dinner! This one-pan roasted chicken thighs recipe is not only simple but also a flavor explosion that the whole family will love. In under an hour, you can whip up a nutritious meal that features juicy chicken, vibrant vegetables, and hearty potatoes, all cooked together in one pan. With minimal cleanup and maximum taste, this dish is perfect for busy evenings when you want delicious food without the hassle. Let’s dive into why this recipe will become a staple in your kitchen!

Why You’ll Love This Recipe

  • Quick and Easy: With just one pan and straightforward steps, you can have dinner ready in about 50 minutes. Perfect for weeknights!
  • Flavorful and Juicy: The chicken thighs roast to perfection, ensuring the skin is crispy and the meat remains incredibly juicy.
  • Nutritious and Colorful: Packed with vegetables like broccoli and bell peppers, this meal is as healthy as it is delicious.
  • Customizable: You can easily swap in your favorite veggies or seasonings to suit your taste.
  • Minimal Cleanup: Since everything cooks in one pan, cleanup is a breeze—just toss the pan in the dishwasher!

Ingredient Breakdown with Substitutions

The right ingredients make all the difference! Here’s what you need for this recipe:

  • 8 bone-in, skin-on chicken thighs: For the best flavor and moistness. You can substitute with boneless thighs, but the cooking time will vary.
  • 500 g yellow potatoes, peeled and cubed: Yukon Gold potatoes work well here. Feel free to use sweet potatoes for a healthier twist.
  • 1 red bell pepper, chopped: Any color bell pepper works; just pick your favorite!
  • 200 g broccoli florets: Substitute with green beans or asparagus if you prefer.
  • 3 tbsp olive oil: Avocado oil is a great alternative with a higher smoke point.
  • 3 garlic cloves, minced: Fresh garlic adds a punch of flavor. You can use garlic powder in a pinch.
  • 1 tsp smoked paprika: This adds a lovely depth of flavor. Regular paprika can be used if unavailable.
  • 1 tsp dried oregano: A versatile herb; try thyme or rosemary for a different flavor profile.
  • Salt & black pepper to taste: Essential for balancing flavors.
  • 1 tbsp fresh parsley (optional, for garnish): Adds a fresh touch; you can skip it if you’re in a hurry.

Step-by-Step Instructions

Ready to get cooking? Follow these easy steps!

  1. Preheat your oven to 200 °C (400 °F).
  2. In a bowl, season the chicken thighs with 1 tbsp olive oil, smoked paprika, salt, pepper, and dried oregano. Rub the mixture well into the skin for maximum flavor.
  3. In another large bowl, toss the potatoes, broccoli, and bell pepper with the remaining olive oil, minced garlic, salt, and pepper.
  4. Spread the vegetables evenly in a large baking dish.
  5. Arrange the seasoned chicken thighs on top of the vegetables, skin side up.
  6. Roast in the oven for 45–50 minutes, or until the chicken is golden brown and reaches an internal temperature of 75 °C (165 °F).
  7. Garnish with fresh parsley before serving. Enjoy your meal warm!

Expert Tips for Perfect Chicken Thighs

  • Let the chicken rest: Allowing your chicken thighs to come to room temperature before seasoning helps them cook more evenly.
  • Pat the skin dry: A dry chicken skin will crisp up better in the oven, enhancing the overall texture.
  • Use a meat thermometer: This ensures your chicken is perfectly cooked without guessing.
  • Mix up the seasonings: Feel free to experiment with spices like cumin or chili powder for a different flavor profile.
  • Don’t overcrowd the pan: Ensure ample space between chicken and veggies for even roasting.
  • Adjust cooking time: If using boneless thighs or different vegetable types, monitor cooking times accordingly.
  • Marinate for flavor: For deeper flavor, marinate the chicken in the seasoning mix for a few hours or overnight.
  • Watch for burning: If the chicken skin browns too quickly, cover it loosely with foil to prevent burning.

Common Mistakes and Troubleshooting

Even the best of us can make mistakes in the kitchen. Here’s how to avoid common pitfalls:

  • Chicken not crispy: Ensure the skin is dry and avoid overcrowding the pan.
  • Undercooked chicken: Always check with a meat thermometer; chicken should reach 75 °C (165 °F).
  • Burnt vegetables: Cut them into uniform sizes to ensure even cooking and check them periodically.
  • Flavorless dish: Don’t skimp on seasoning! Adjust salt and spices as needed.

Delicious Variations

If you want to mix things up, consider these variations:

  • Spicy Kick: Add a pinch of cayenne pepper to the seasoning mix for heat.
  • Herb-Infused: Use fresh herbs like thyme, rosemary, or basil for a fragrant twist.
  • Asian-Inspired: Marinate the chicken in soy sauce, ginger, and sesame oil, and add bok choy or snap peas.
  • Comfort Food: Swap the veggies for carrots and parsnips for a more traditional roasted root vegetable dish.

Make-Ahead and Storage Instructions

This recipe is perfect for meal prep! You can prep the chicken and veggies a day in advance. Store them in an airtight container in the fridge. Roasted chicken thighs can be stored in the fridge for up to 3 days. You can also freeze leftovers for up to 3 months. To reheat, place the chicken and vegetables in the oven at 180 °C (350 °F) until warmed through.

Nutritional Tips and Dietary Adaptations

This dish can fit into various dietary preferences:

  • Low-carb: Substitute potatoes with cauliflower for a lower-carb option.
  • Gluten-free: This recipe is naturally gluten-free!
  • Paleo-friendly: Keep it simple with just chicken and veggies, omitting any additives.
  • Vegan: Replace chicken with tofu or tempeh and use vegetable broth for seasoning.

FAQ: Your Questions Answered

  • Can I use boneless chicken thighs? Yes, but reduce the cooking time by about 10-15 minutes.
  • What other vegetables work well? Carrots, zucchini, and Brussels sprouts are also great options!
  • Can I prepare this meal in advance? Absolutely! Prep the chicken and veggies ahead and cook when ready.
  • How do I store leftovers? Keep them in an airtight container in the fridge for up to 3 days.
  • What’s the best way to reheat? Reheat in the oven to maintain the chicken’s crispiness.
  • Is this recipe suitable for meal prep? Yes! It’s a great option for easy, reheatable meals throughout the week.
  • Can I bake this with a different spice mix? Yes! Feel free to experiment with different herbs and spices to suit your taste.
  • How do I know when the chicken is done? Use a meat thermometer; it should read 75 °C (165 °F) when fully cooked.

Equipment Recommendations

To make this recipe a breeze, here’s what you’ll need:

  • Large Baking Dish: A sturdy baking dish ensures even cooking.
  • Meat Thermometer: Essential for checking the doneness of your chicken.
  • Mixing Bowls: For seasoning and tossing veggies together.
  • Sharp Knife: For easy chopping of vegetables and chicken.

Serving Suggestions

This one-pan meal is a complete dish on its own, but you can enhance it even further:

  • Serve with a side salad: A fresh green salad pairs wonderfully with the hearty chicken and veggies.
  • Top with a sauce: A drizzle of balsamic glaze or a squeeze of lemon can elevate the flavors.
  • Pair with grains: Serve with quinoa or rice for a more filling meal.

Now you’re equipped with all the secrets to making the most delicious one-pan roasted chicken thighs with colorful veggies! Remember, cooking is about enjoying the process and experimenting. So put on your apron, have fun, and enjoy the wonderful flavors you create!

One-Pan Roasted Chicken Thighs with Veggies & Potatoes

Prep Time 10 minutes
Cook Time 50 minutes
Total Time 1 hour
Servings 4 servings
Calories 650
A flavorful and easy one-pan meal featuring crispy chicken thighs roasted with colorful vegetables and potatoes, perfect for a satisfying dinner.

Ingredients

Protein

  • 8 pieces bone-in, skin-on chicken thighs

Vegetables

  • 500 g yellow potatoes, peeled and cubed
  • 1 piece red bell pepper, chopped
  • 200 g broccoli florets

Seasonings & Oils

  • 3 tbsp olive oil
  • 3 cloves garlic, minced
  • 1 tsp smoked paprika
  • 1 tsp dried oregano
  • to taste Salt & black pepper
  • 1 tbsp fresh parsley (optional, for garnish)

Instructions 

  • Preheat oven to 200°C (400°F).
  • Season chicken thighs with 1 tbsp olive oil, paprika, salt, pepper, and oregano. Rub well.
  • Toss vegetables with remaining olive oil, garlic, salt, and pepper. Arrange in a baking dish.
  • Place chicken thighs on top of vegetables and roast for 45–50 minutes until golden and cooked through.
  • Garnish with parsley and serve warm.

Notes

Ensure chicken reaches an internal temperature of 75°C (165°F) for safety.
Calories: 650kcal
Cost: $15
Course: Main Course
Cuisine: International
Keyword: Chicken, roast, Vegetables

Discover the Joy of Ground Beef Bowls with Sweet Potatoes

Welcome to a world of comforting meals that embrace the essence of home cooking! If you’ve been searching for an easy yet satisfying dish, look no further than this *Ground Beef Bowl with Sweet Potatoes*. This delightful combination is not only delicious but also packed with nutrition, making it the perfect weeknight dinner. Whether you’re a busy professional, a parent juggling multiple schedules, or simply someone who loves good food, this recipe is designed for you. Let’s dive into the details!

Why You’ll Love This Recipe

  • Quick and Easy: Whip up this dish in under 45 minutes, perfect for those busy nights when time is short.
  • Nutritious Ingredients: Combining ground beef with sweet potatoes offers a balance of protein and fiber, keeping you satisfied and energized.
  • Customizable: Feel free to add your favorite veggies or spices to make it uniquely yours.
  • Meal Prep Friendly: This bowl holds up well in the fridge, making it ideal for prepping ahead for lunches or quick dinners.
  • Kid-Approved: The sweet flavor of the potatoes paired with savory beef makes it a hit with the whole family.

Ingredient Breakdown

Let’s get into the nitty-gritty of what you’ll need to create this mouthwatering dish. Here’s the ingredient list along with some handy substitutions:

  • 1 lb ground beef: You can use lean ground turkey or chicken if you prefer a lighter option.
  • 2 large sweet potatoes, diced: Regular potatoes or butternut squash work well as alternatives.
  • 1 tablespoon olive oil: Canola or avocado oil are great substitutes.
  • 1 onion, diced: Red or yellow onions add sweetness; shallots can also be used for a more delicate flavor.
  • 3 garlic cloves, minced: Garlic powder can be used in a pinch; about 1 teaspoon should suffice.
  • 1 teaspoon smoked paprika: Regular paprika or chili powder can replace this for a different flavor profile.
  • 1 teaspoon cumin: Coriander can be used as an alternative for a bright, citrusy note.
  • Salt and pepper: To taste, ensuring the dish is well-seasoned.
  • Fresh parsley for serving: Cilantro or green onions can add a fresh touch as well.

Step-by-Step Instructions

Side angle of a delicious beef bowl showcasing diced sweet potatoes and parsley.

Now that we have everything ready, let’s walk through the steps to create your delicious *Ground Beef Bowl with Sweet Potatoes*:

  1. Toss the diced sweet potatoes with olive oil, salt, and pepper, then roast them in the oven at 425°F (220°C) for about 25 minutes, or until golden and tender.
  2. While the sweet potatoes roast, heat a skillet over medium heat. Add the ground beef and cook it slowly, allowing it to brown and develop a rich flavor (about 8-10 minutes).
  3. Add the diced onion and minced garlic to the beef, letting them soften until fragrant, which should take another 3-4 minutes.
  4. Stir in the smoked paprika and cumin, mixing well to coat the beef evenly.
  5. Once the sweet potatoes are done, combine them with the seasoned beef mixture in the skillet.
  6. Serve warm, garnished with fresh parsley for a pop of color and freshness.

Pro Tips for the Perfect Beef Bowl

  • Use Quality Meat: Opt for grass-fed ground beef for better flavor and nutrition.
  • Don’t Overcrowd the Pan: When cooking the beef, give it enough space in the skillet to brown nicely.
  • Experiment with Spices: Feel free to add your favorite spices or hot sauce for an extra kick!
  • Roast Sweet Potatoes Evenly: Ensure the sweet potatoes are cut into uniform sizes for even cooking.
  • Fresh Herbs Make a Difference: Adding herbs at the end of cooking enhances flavor and presentation.
  • Make It Ahead: This dish can be made ahead of time for easy reheating throughout the week.
  • Balance the Flavors: Taste as you go and adjust salt, pepper, or spices according to your preference.
  • Consider Toppings: Top with cottage cheese, avocado, or hot honey for a gourmet touch.

Common Mistakes and Troubleshooting

Even the best chefs make mistakes! Here are some common pitfalls and how to avoid them:

  • Overcooked Sweet Potatoes: Check them frequently while roasting; you want them tender but not mushy.
  • Dry Beef: Avoid overcooking the ground beef. Cook until just browned to keep it juicy.
  • Too Much Spice: Start with less spice and add more as needed; it’s easier to adjust than to fix an overly spicy dish!
  • Skipping Fresh Herbs: Don’t skip the parsley; it adds brightness to the dish!

Variations to Try

Make this bowl your own with these exciting variations:

  • Add Veggies: Incorporate bell peppers, spinach, or kale for added nutrition and color.
  • Switch the Base: Try quinoa or brown rice instead of sweet potatoes for a different texture.
  • Top It Off: Drizzle with *hot honey* or your favorite sauce to elevate the flavors.
  • Go Global: Add soy sauce and sesame oil for an Asian twist, or taco seasoning for a Mexican-inspired version.

Storage and Make-Ahead Instructions

This beef bowl is perfect for meal prep! Here’s how to store it:

  • Refrigerate: Store leftovers in an airtight container in the fridge for up to 4 days.
  • Freeze: This dish freezes well! Portion it out into freezer-safe containers, and it can last for up to 3 months.
  • Reheating: Reheat in the microwave or on the stovetop, adding a splash of water if it appears dry.

Frequently Asked Questions

Still have questions? Here are some common inquiries about this recipe:

  • Can I use a different meat? Yes! Ground turkey or chicken are great alternatives.
  • How can I make this vegetarian? Substitute ground beef with lentils or plant-based meat alternatives.
  • Can I cook the sweet potatoes in the microwave? Absolutely! Cook them until tender, then proceed with the recipe.
  • What can I serve with this bowl? It pairs well with a side salad or steamed broccoli.
  • Is it gluten-free? Yes, all the ingredients are gluten-free, making this bowl a great option!
  • How can I add more flavor? Try marinating the beef before cooking or adding your favorite seasonings.
  • Can I make this spicy? Yes! Add chili powder or diced jalapeños for heat.
  • How do I know when the beef is fully cooked? Use a meat thermometer; it should reach an internal temperature of 160°F (71°C).

Nutrition Tips and Dietary Adaptations

This dish can easily fit into various dietary needs:

  • Low-Carb: Replace sweet potatoes with cauliflower for a lower-carb option.
  • Paleo: Ensure your beef is grass-fed and skip any non-Paleo toppings.
  • Keto: Use ground beef and low-carb veggies to keep it keto-friendly.
  • High-Protein: Add cottage cheese or Greek yogurt on top for an extra protein boost.

Equipment Recommendations

Here’s what you’ll need to make this delicious *Ground Beef Bowl*:

  • Skillet: A good-quality non-stick skillet will help prevent sticking and make cleanup easier.
  • Oven-safe Dish: For roasting sweet potatoes, a baking sheet or dish is essential.
  • Knife and Cutting Board: To chop your ingredients efficiently and safely.
  • Meat Thermometer: A handy tool to ensure your beef is cooked to perfection.

Serving Suggestions

For a complete meal, consider pairing your beef bowl with:

  • Green Salad: A fresh salad can balance the richness of the beef.
  • Bread: Serve with crusty bread to soak up any juices.
  • Fruit: A light fruit salad can provide a refreshing contrast.
  • Wine: A glass of red wine complements the flavors beautifully.

Enjoy your cooking adventure and remember that it’s all about the journey! With this *Ground Beef Bowl with Sweet Potatoes*, you’re not just making a meal; you’re crafting a comforting experience. Happy cooking!

Ground Beef Bowl with Sweet Potatoes

Prep Time 10 minutes
Cook Time 30 minutes
Total Time 40 minutes
Servings 4 servings
Calories 550
A hearty and flavorful dish combining seasoned ground beef with roasted sweet potatoes, perfect for a satisfying meal.

Ingredients

Meat and Vegetables

  • 1 lb ground beef
  • 2 large sweet potatoes (diced)
  • 1 tablespoon olive oil
  • 1 large onion (diced)
  • 3 cloves garlic (minced)
  • 1 teaspoon smoked paprika
  • 1 teaspoon cumin
  • to taste Salt and pepper
  • for serving Fresh parsley (chopped)

Instructions 

  • Toss diced sweet potatoes with olive oil, salt, and pepper, then roast until golden and tender.
  • Cook ground beef in a skillet until browned, then add diced onion and minced garlic, cooking until fragrant.
  • Stir in smoked paprika and cumin into the beef mixture.
  • Combine roasted sweet potatoes with the seasoned beef.
  • Serve warm, garnished with chopped fresh parsley.

Notes

Feel free to add a squeeze of lemon or a dash of hot sauce for extra flavor.
Calories: 550kcal
Cost: $15
Course: Main Course
Cuisine: American
Keyword: Ground Beef