Author

Steven

Browsing

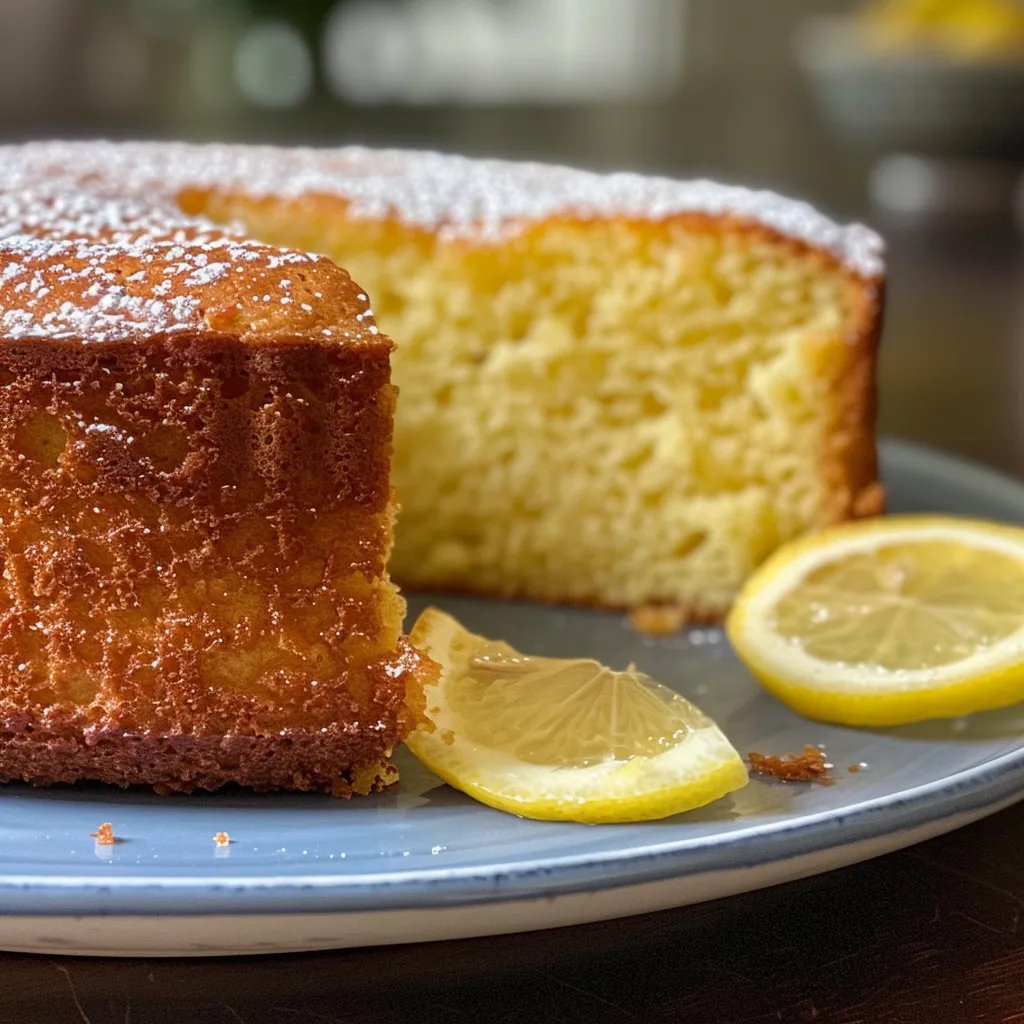
Discover the Delight of Lemon Olive Oil Cake

Welcome to the world of baking where simplicity meets flavor! If you’re looking for a cake that combines the vibrant zest of fresh lemons with the richness of extra virgin olive oil, you’ve come to the right place. This Lemon Olive Oil Cake is not only moist and delicious but also incredibly easy to make. Let’s dive into the details of this delightful recipe that will surely become a favorite in your home.

Why You’ll Love This Recipe

This cake isn’t just any dessert; it’s a celebration of flavors that you’ll want to share with friends and family. Here are a few reasons why this cake deserves a spot in your recipe collection:

  • Moist and Flavorful: The combination of olive oil and fresh lemon juice ensures that the cake stays moist while delivering a burst of flavor in every bite.
  • Easy to Make: With simple ingredients and straightforward steps, this recipe is perfect for both novice and experienced bakers.
  • Versatile: Enjoy it plain, topped with powdered sugar, or glazed for a more decadent treat.
  • Healthier Option: Using olive oil instead of butter adds healthy fats to your dessert, making it a slightly better choice.
  • Customizable: This recipe allows for numerous variations, letting you play with flavors and add-ins to suit your taste.

Ingredients for Lemon Olive Oil Cake

Let’s gather our ingredients! Here’s what you’ll need to create this delightful cake:

  • 2 cups All-Purpose Flour: Can be substituted with gluten-free flour for a gluten-free adaptation.
  • 1 cup Granulated Sugar: Reducing to ½ cup can work but may affect texture.
  • ½ cup Extra Virgin Olive Oil: Opt for high-quality oil to enhance flavors without overpowering them.
  • 2 Fresh Lemons: Use both zest and juice for maximum flavor.
  • 2 teaspoons Baking Powder: Ensure it’s fresh for effective rising.
  • ½ teaspoon Salt: Enhances flavor and balances sweetness.
  • 3 Eggs: Provides moisture and richness.
  • 1 cup Powdered Sugar: Optional for a sweet glaze or dusting before serving.

Step-by-Step Instructions for Lemon Olive Oil Cake

Ready to bake? Follow these easy steps to create your Lemon Olive Oil Cake:

  1. Prepare the Oven: Preheat your oven to 350°F (175°C) and grease a 9-inch round cake pan.
  2. Mix Wet Ingredients: In a large bowl, whisk together the eggs, granulated sugar, olive oil, lemon juice, and zest until well combined.
  3. Combine Dry Ingredients: In another bowl, whisk together the flour, baking powder, and salt.
  4. Combine Mixtures: Gradually add the dry ingredients to the wet ingredients, mixing until just combined. Avoid overmixing!
  5. Pour and Bake: Pour the batter into the prepared cake pan and smooth the top. Bake for 30-35 minutes or until a toothpick inserted in the center comes out clean.
  6. Cool and Serve: Allow the cake to cool in the pan for 10 minutes before transferring it to a wire rack to cool completely. Dust with powdered sugar before serving if desired.

Expert Tips for Perfecting Your Cake

To make sure your Lemon Olive Oil Cake turns out perfectly every time, consider these expert insights:

  • Room Temperature Ingredients: Ensure your eggs and olive oil are at room temperature for better mixing and texture.
  • Quality Olive Oil: Always use high-quality extra virgin olive oil for the best flavor.
  • Fresh Lemons: Freshly squeezed lemon juice and zest provide a vibrant flavor that bottled lemon juice cannot replicate.
  • Don’t Overmix: Mix until just combined to avoid a dense cake.
  • Check for Doneness: Different ovens may have variability, so always check your cake a few minutes before the suggested baking time.
  • Let It Cool: Allow the cake to cool properly to enhance its texture and flavor.
  • Flavor Enhancements: Consider adding poppy seeds or fresh herbs like rosemary for a unique twist.
  • Dusting with Sugar: If you choose to dust with powdered sugar, do it just before serving to prevent it from melting into the cake.

Lemon Olive Oil Cake Variations

Don’t hesitate to get creative! Here are some delicious variations to try:

  • Lavender Lemon Olive Oil Cake: Incorporate culinary lavender into the batter for a floral twist.
  • Berry Olive Oil Cake: Fold in fresh berries like blueberries or raspberries for added sweetness and color.
  • Citrus Medley Cake: Use a mix of citrus zest and juice (like orange and lime) for a bright flavor profile.
  • Chocolate Drizzle: Add a chocolate glaze on top for a decadent finish.

How to Store and Freeze Lemon Olive Oil Cake

To keep your cake fresh and delicious, follow these storage tips:

  • Storing: Keep the cake covered at room temperature for up to 3 days. If you want it to last longer, refrigerate it in an airtight container for up to a week.
  • Freezing: Wrap the cooled cake tightly in plastic wrap, then foil, and freeze for up to 3 months. Thaw in the refrigerator overnight before serving.

Lemon Olive Oil Cake FAQ

Here are some common questions about this delightful cake:

  • Can I use other oils? Yes, while olive oil gives a unique flavor, you can substitute with canola or vegetable oil.
  • How do I know when the cake is done? A toothpick should come out clean when inserted in the center.
  • Can I make this cake in advance? Absolutely! This cake tastes even better after a day in the fridge as the flavors meld.
  • What can I serve with this cake? Pair it with whipped cream, fresh berries, or a scoop of vanilla ice cream.
  • Is this cake gluten-free? Yes, simply substitute the all-purpose flour with a gluten-free flour blend.
  • What’s the best way to zest a lemon? Use a microplane or a zester to get fine zest without the bitter pith.
  • Can I add nuts? Yes, chopped almonds or walnuts can add a delightful crunch.
  • How should I store leftovers? Keep the cake covered at room temperature or refrigerate for longer freshness.

Nutritional Information and Dietary Adaptations

Here’s a basic overview of the nutritional information for one slice (1/12th of the cake):

  • Calories: Approximately 220
  • Fat: 10g (from olive oil)
  • Carbohydrates: 30g
  • Protein: 4g

This cake can easily be adapted for various dietary needs. By using gluten-free flour, you can make it suitable for those with gluten intolerance. Reducing the sugar can also cater to those seeking lower-sugar options.

Essential Equipment for Baking

Having the right tools can make your baking experience more enjoyable. Here’s what you’ll need:

  • Mixing Bowls: A set of varying sizes for mixing ingredients.
  • Measuring Cups and Spoons: For precise measurements of ingredients.
  • Whisk: Essential for mixing wet ingredients and ensuring a smooth batter.
  • Baking Pan: A 9-inch round cake pan works perfectly for this recipe.
  • Cooling Rack: Helps the cake cool evenly after baking.

Serving Suggestions for Lemon Olive Oil Cake

Now that your cake is baked and cooled, here are some serving ideas to elevate your dessert:

  • Dust with Powdered Sugar: A light dusting adds a touch of elegance.
  • Pair with Fresh Berries: Fresh strawberries or raspberries on the side enhance the flavor.
  • Serve with Whipped Cream: A dollop of lightly sweetened whipped cream complements the cake beautifully.
  • Ice Cream Scoop: Vanilla or lemon sorbet makes for a refreshing pairing.

Conclusion: Embrace the Joy of Baking

With this Lemon Olive Oil Cake, you have a deliciously moist dessert that’s simple to prepare and delightful to share. Remember, cooking and baking should be fun and stress-free! Enjoy experimenting with flavors and variations, and I hope this cake brings joy to your kitchen. Happy baking!

Delicious Lemon Olive Oil Cake: Moist and Effortlessly Simple

Prep Time 15 minutes
Cook Time 30 minutes
Total Time 45 minutes
Servings 8 pieces
Calories 250
This lemon olive oil cake is a moist, flavorful treat that combines fresh citrus with rich olive oil, perfect for a quick dessert or tea time.

Ingredients

Dry Ingredients

  • 2 cups All-Purpose Flour (Can be substituted with gluten-free flour for a gluten-free adaptation.)
  • 1 cup Granulated Sugar (Reducing to ½ cup can work but may affect texture.)
  • 2 teaspoons Baking Powder (Ensure it's not expired for effective rising.)
  • ½ teaspoon Salt (Enhances flavor.)

Wet Ingredients

  • ½ cup Extra Virgin Olive Oil (Use a high-quality oil to avoid overpowering tastes.)
  • 2 fresh lemons Lemons (Use both zest and juice.)
  • 3 eggs Eggs (Provides moisture and richness.)

Optional Glaze

  • 1 cup Powdered Sugar (Optional for a sweet glaze or dusting.)

Instructions 

  • Preheat oven to 350°F (175°C). Grease a cake pan.
  • In a bowl, whisk together flour, sugar, baking powder, and salt.
  • In another bowl, combine eggs, olive oil, lemon zest, and lemon juice.
  • Mix wet ingredients into dry ingredients until just combined. Pour into prepared pan.
  • Bake for 30 minutes or until a toothpick inserted in the center comes out clean. Let cool.

Notes

For a brighter flavor, add more lemon zest or juice to taste.
Calories: 250kcal
Cost: $15
Course: Dessert
Cuisine: Mediterranean
Keyword: cake, lemon, olive oil

Discover the Joy of Cooking with Zucchini Boats

Welcome to a delicious culinary adventure! If you’re looking for a quick and flavorful meal that’s perfect for busy weeknights, you’ve landed in the right place. Zucchini boats are not only easy to prepare, but they’re also a fantastic way to incorporate vegetables into your diet. This recipe for Ground Beef Zucchini Boats is packed with flavor, nutrition, and versatility. Let’s dive in!

Why You’ll Love This Recipe

  • Healthy & Low-Carb: These zucchini boats are a nutritious alternative to traditional pasta dishes, making them great for low-carb diets.
  • Quick & Easy: Ready in under 30 minutes, this meal is perfect for busy nights when you want something satisfying without the hassle.
  • Customizable: Switch up the protein, cheese, or seasoning to create your unique flavor profile, ensuring you never get bored.
  • Kid-Friendly: With their fun shape and delicious filling, these zucchini boats are sure to be a hit with the whole family.
  • Meal Prep Friendly: Make a large batch ahead of time and store them for easy lunches or dinners throughout the week.

Ingredients You’ll Need

Here’s what you’ll need to create these mouthwatering zucchini boats:

  • 4 medium zucchinis: Halved lengthwise and scooped out to create the “boats.” Choose firm zucchinis for the best texture.
  • 1 pound ground beef: Lean ground beef is ideal, but feel free to use turkey or a meat substitute for a healthier option.
  • 1 small onion: Diced for added flavor; this ingredient enhances the filling’s taste.
  • 2 cloves garlic: Minced for a rich, aromatic flavor that elevates the dish.
  • 1 cup tomato sauce: A flavorful base for the filling; you can use homemade or store-bought.
  • 1 cup shredded cheese: Mozzarella, cheddar, or parmesan work well to add creaminess and richness.
  • 1 tablespoon olive oil: For sautéing the beef and onions, this brings out their flavors.
  • 1 teaspoon Italian seasoning: A blend of herbs that adds depth to the filling.
  • 1/2 teaspoon paprika: This spice adds a subtle smokiness and warmth.
  • Salt & pepper to taste: Essential for enhancing all the flavors in the dish.

How to Make Ground Beef Zucchini Boats

Now that you have all your ingredients ready, let’s walk through the steps to create your delicious zucchini boats.

Step 1: Prepare the Zucchini

Preheat your oven to 375°F (190°C). Halve the zucchinis lengthwise and scoop out the flesh, leaving about 1/4 inch of the zucchini shell. This creates a sturdy “boat” that will hold all the delicious filling.

Step 2: Cook the Beef Filling

In a large skillet, heat the olive oil over medium heat. Add the diced onion and minced garlic, sautéing until they are translucent and fragrant. Next, add the ground beef, cooking until browned. Drain any excess fat, then stir in the tomato sauce, Italian seasoning, paprika, salt, and pepper. Allow the mixture to simmer for about 5 minutes.

Step 3: Assemble & Bake

Fill each zucchini half with the beef mixture, pressing down gently to pack it in. Top with shredded cheese. Place the filled zucchinis in a baking dish and cover with foil. Bake for 25-30 minutes, removing the foil in the last 10 minutes to let the cheese brown.

Step 4: Serve & Enjoy

Once baked, let the zucchini boats cool for a few minutes. Serve warm, garnished with fresh herbs if desired. Enjoy your flavorful creation!

Pro Tips for Perfect Zucchini Boats

  • Choose the right zucchini: Look for medium-sized zucchinis that are firm and free from blemishes for the best results.
  • Don’t overcook: Aim for a tender yet firm zucchini to avoid mushiness.
  • Experiment with fillings: Try adding cooked rice, beans, or different meats for varied flavors.
  • Season generously: Don’t be shy with spices; they can elevate the dish significantly.
  • Use leftover filling: If you have extra filling, serve it as a side dish or in a salad.
  • Broil for a crispy top: For an extra crispy cheese topping, broil for a minute or two after baking.
  • Make it vegetarian: Substitute ground beef with lentils or mushrooms for a hearty vegetarian option.
  • Pair with a fresh salad: A simple green salad complements the richness of the zucchini boats.

Common Mistakes & Troubleshooting

  • Overstuffing: Avoid overfilling the boats as they may not cook evenly.
  • Not seasoning: Ensure to taste and adjust the seasoning to enhance the overall flavor.
  • Skipping the baking step: Baking is crucial for melding flavors and ensuring the zucchini is tender.
  • Using watery fillings: If using vegetables, ensure they are cooked and drained properly to prevent excess moisture.

Variations to Try

Feeling adventurous? Here are some creative variations on the classic zucchini boats:

  • Taco Zucchini Boats: Use taco seasoning and add black beans, corn, and top with avocado and salsa.
  • Italian Style: Mix in Italian sausage, marinara sauce, and top with mozzarella cheese.
  • Cheesy Spinach & Feta: Sauté spinach and mix with feta cheese for a Mediterranean twist.
  • Breakfast Zucchini Boats: Fill with scrambled eggs, cheese, and diced tomatoes for a hearty breakfast option.

Storage and Make-Ahead Instructions

These zucchini boats can be made ahead of time, making them a great option for meal prep:

  • Refrigerator Storage: Store in an airtight container for up to 3 days.
  • Freezing: Freeze baked zucchini boats for up to 2 months. Thaw in the fridge overnight before reheating.
  • Reheating: Reheat in the oven at 350°F (175°C) until warmed through, about 15-20 minutes.

Frequently Asked Questions

  • Can I use other vegetables? Yes! Feel free to use bell peppers, eggplant, or even tomatoes as your base.
  • Are zucchini boats healthy? Absolutely! They are low in carbs and packed with nutrients.
  • How do I know when the zucchini is done? The zucchini should be tender but still hold its shape when done.
  • Can I make these vegetarian? Yes! Substitute the meat for beans, lentils, or a meat alternative.
  • What can I serve with zucchini boats? A fresh salad, rice, or quinoa make excellent side dishes.
  • Can I use frozen zucchini? It’s best to use fresh zucchini for this recipe, as frozen may become watery.
  • How do I prevent soggy zucchini? Ensure to pre-bake the zucchini for 10 minutes before adding the filling.
  • Can these be made ahead of time? Yes! Prepare and assemble, then bake when ready to serve.

Nutrition Tips and Dietary Adaptations

To make your zucchini boats even healthier:

  • Increase the Veggies: Add more vegetables to the filling for extra nutrition.
  • Go Lean: Use lean ground turkey or chicken instead of beef.
  • Cheese Options: Opt for low-fat cheese or nutritional yeast for a vegan option.

Equipment Recommendations

Here are some essential tools that will make your cooking experience smoother:

  • Sharp Knife: For easy slicing and scooping of the zucchinis.
  • Skillet: A large skillet to cook the beef and veggies efficiently.
  • Baking Dish: A sturdy dish that can hold the zucchini boats securely while baking.
  • Measuring Cups and Spoons: Accurate measurements ensure perfect seasoning and flavor.

Serving Suggestions

Serve your zucchini boats with:

  • Fresh Herbs: Garnish with parsley, basil, or cilantro for a burst of freshness.
  • Sour Cream or Greek Yogurt: A dollop on top adds creaminess and tang.
  • Hot Sauce: For those who love a spicy kick, drizzle some hot sauce on top before serving.

Cooking should be a joyful experience, and these Ground Beef Zucchini Boats are not only simple but also a reliable way to impress your family and friends. Remember, great meals don’t need to be complicated—just take it one step at a time, enjoy the process, and savor the results. Happy cooking!

Easy Ground Beef Zucchini Boats (Healthy and Delicious)

Prep Time 10 minutes
Cook Time 20 minutes
Total Time 30 minutes
Servings 4 servings
Calories 350
Enjoy these healthy and flavorful zucchini boats filled with seasoned ground beef and cheese, perfect for a quick and nutritious meal.

Ingredients

Vegetables

  • 4 medium zucchinis (Halved lengthwise and scooped out to create "boats")
  • 1 pound ground beef (Lean ground beef works best)
  • 1 small onion (Diced)
  • 2 cloves garlic (Minced)
  • 1 cup tomato sauce (Flavorful base for filling)
  • 1 cup shredded cheese (Mozzarella, cheddar, or parmesan)
  • 1 tablespoon olive oil (For sautéing)
  • 1 teaspoon Italian seasoning (Herb blend)
  • 0.5 teaspoon paprika (Adds smokiness)
  • to taste salt & pepper (Seasoning to preference)

Instructions 

  • Sauté diced onion and minced garlic in olive oil until fragrant.
  • Add ground beef and cook until browned; season with Italian seasoning, paprika, salt, and pepper.
  • Mix in tomato sauce and cook for a few minutes.
  • Stuff the zucchini boats with the beef mixture and top with shredded cheese.
  • Bake at 375°F (190°C) for 15-20 minutes until cheese is melted and bubbly.

Notes

For a lower sodium option, reduce added salt and use low-sodium tomato sauce.
Calories: 350kcal
Cost: $12
Course: Main Course
Cuisine: American
Keyword: Ground Beef, Zucchini

Kickstart Your Day with a Berry Blast

Welcome to your new morning essential: the Energizing Mixed Berry Protein Smoothie. This delightful berry smoothie is the perfect blend of nutrition and flavor, ensuring you start your day on the right foot. Packed with protein, vitamins, and antioxidants, it’s not just a breakfast option; it’s a quick post-workout boost that will keep you energized throughout the day. Let’s dive into why this smoothie is a must-try!

Why You’ll Love This Recipe

This recipe is a game-changer for anyone looking to enhance their morning routine. Here are five reasons to love it:

  • Quick and Easy: You can whip this smoothie up in under 5 minutes, making it perfect for busy mornings.
  • Nutrient-Rich: With ingredients like Greek yogurt and mixed berries, you’re fueling your body with essential nutrients.
  • Customizable: You can easily tweak ingredients based on your preferences or dietary needs.
  • High Protein: This smoothie is packed with protein, making it ideal for post-workout recovery.
  • Deliciously Satisfying: The blend of creamy yogurt and sweet berries creates a taste sensation that feels indulgent.

Ingredient Breakdown

Let’s look at what you’ll need to create this mouthwatering smoothie:

  • 3/4-1 cup milk of choice: Use almond, soy, or regular cow’s milk depending on your preference.
  • 3/4 cup Greek yogurt: Opt for 2% or whole milk yogurt for a creamier texture.
  • 1/2 cup frozen banana slices: These add natural sweetness and a thick, creamy consistency.
  • 1/2 cup frozen mixed berries: A mix of strawberries, blueberries, and raspberries packs antioxidant power.
  • 1 tablespoon hemp seeds: These boost your smoothie with omega-3 fatty acids and protein.
  • Optional toppings: Consider adding more berries, cacao nibs, chia seeds, or granola for added texture and flavor.

How to Make Your Berry Protein Smoothie

Creating this smoothie couldn’t be easier. Follow these simple steps:

  1. Combine all ingredients in a high-speed blender.
  2. Blend until completely smooth. If it seems thick, add a splash of milk to keep things moving.
  3. Serve in a glass topped with optional toppings like chia seeds, cacao nibs, or granola!

Pro Tips for the Perfect Smoothie

Here are some expert insights to elevate your smoothie game:

  • Layer your ingredients: Start with the liquid at the bottom for easier blending.
  • Add greens: Spinach or kale can boost the nutrient profile without altering the flavor much.
  • Use frozen fruit: They help create a thicker, colder smoothie.
  • Don’t skip the protein: Adding protein powder can enhance the smoothie’s filling power.
  • Adjust to your taste: If you prefer a sweeter smoothie, add a drizzle of honey or maple syrup.
  • Experiment with spices: A pinch of cinnamon or vanilla extract can enhance the flavor.
  • Make it a bowl: Pour your smoothie into a bowl and add toppings for a smoothie bowl experience.
  • Pre-prep ingredients: Freeze fruit in portions for a quick grab-and-go option.

Common Mistakes and Troubleshooting

Even the best recipes can go awry. Here’s how to troubleshoot common issues:

  • Too thick: Add more liquid gradually to reach your desired consistency.
  • Too thin: Add a bit more frozen fruit or Greek yogurt to thicken things up.
  • Not sweet enough: Consider adding honey, agave, or a ripe date for natural sweetness.
  • Too icy: Use less frozen fruit or let it sit for a minute before blending.

Variations to Try

Feeling adventurous? Here are some delicious variations of this smoothie:

  • Chocolate Berry Protein Smoothie: Add a tablespoon of cocoa powder for a chocolatey twist.
  • Vegan Version: Substitute Greek yogurt with coconut yogurt and use almond milk.
  • Peanut Butter Berry Smoothie: Add a tablespoon of natural peanut butter for a nutty flavor.
  • Green Berry Smoothie: Toss in a handful of spinach or kale for added nutrients.

Storage and Make-Ahead Instructions

Want to prepare your smoothie in advance? Here’s how:

  • In the fridge: Store in an airtight container for up to 24 hours. Shake or stir before drinking.
  • Frozen smoothie packs: Pre-portion your ingredients in freezer bags for a quick blend in the morning.

Frequently Asked Questions

Let’s tackle some common questions about this energizing smoothie:

  • Can I use fresh berries instead of frozen? Yes, but you may need to add ice for thickness.
  • Is this smoothie suitable for meal prep? Absolutely! Just store it properly and enjoy it within a day.
  • How can I make this smoothie dairy-free? Use a plant-based yogurt and milk alternative.
  • Can I add protein powder? Yes, for an extra protein boost, simply mix it in.
  • What’s the best time to drink this smoothie? It’s great for breakfast or as a post-workout snack.
  • How long can I store it? Best consumed fresh, but can be refrigerated for up to 24 hours.
  • Can I make it vegan? Yes, by substituting yogurt and milk with plant-based options.
  • What toppings do you recommend? Granola, nuts, or more berries for added texture and flavor!

Nutritional Insights

This smoothie is not just tasty but also packed with nutritional benefits:

  • Protein Power: The combination of Greek yogurt and hemp seeds provides a high protein content, essential for muscle repair.
  • Vitamins and Antioxidants: Mixed berries are rich in antioxidants that combat free radicals.
  • Healthy Fats: Hemp seeds contribute omega-3 fatty acids, promoting heart health.
  • Calcium Source: Dairy or fortified non-dairy milk adds a significant calcium boost.

Essential Equipment

To make this smoothie, you’ll need:

  • High-speed blender: Essential for achieving that perfect, creamy texture.
  • Measuring cups: For accurate ingredient measurements.
  • Spatula: Useful for scraping down the sides of the blender.

Serving Suggestions

Enjoy your smoothie as a standalone breakfast or pair it with:

  • Whole grain toast: For a more filling meal, top with avocado or nut butter.
  • Overnight oats: A perfect complement for a balanced breakfast.
  • Fruit salad: Fresh fruits can enhance the flavor and add variety.

With this Energizing Mixed Berry Protein Smoothie, you’re set to transform your mornings into a delightful and nutritious experience. So grab your ingredients and start blending! Remember, cooking is all about confidence, creativity, and enjoying the process. Happy blending!

Delicious Mixed Berry Protein Smoothie

Prep Time 5 minutes
Total Time 5 minutes
Servings 1 glass
Calories 250
A quick and nutritious smoothie packed with berries and protein to energize your day.

Ingredients

Liquid

  • 0.75 cup milk of choice
  • 0.5 cup Greek yogurt (2% or whole milk preferred)

Fruits

  • 0.5 cup frozen banana slices
  • 0.5 cup frozen mixed berries

Seeds & Toppings

  • 1 tablespoon hemp seeds
  • Optional more berries, cacao nibs, chia seeds, granola (for topping)

Instructions 

  • Combine all ingredients in a high-speed blender.
  • Blend until smooth, adding a splash of milk if needed.
  • Pour into a glass and add optional toppings.

Notes

Use frozen berries for a thicker, colder smoothie.
Calories: 250kcal
Cost: $12
Course: Breakfast, Snack
Keyword: Berries, Protein, Smoothie

Welcome to Flavorful Simplicity!

Cooking is a joyous journey, and I’m here to guide you through a delightful recipe that transforms busy weeknights into something special. Today, we’re diving into the world of Chicken and Sweet Potato Bowls. This dish is not just about feeding your belly; it’s about nourishing your creativity and your family. With tender chicken, creamy sweet potatoes, and an array of vibrant veggies, this bowl is a celebration of flavors that will make you feel accomplished in the kitchen.

Whether you’re a seasoned cook or just starting, this recipe is designed to boost your confidence and inspire your culinary adventures. Let’s get cooking!

Why You’ll Love This Recipe

  • Quick and Easy: With simple ingredients and straightforward steps, this dish comes together in under an hour, making it an ideal choice for hectic weeknights.
  • Healthy and Nutritious: Packed with protein, fiber, and vitamins, these bowls are as good for you as they are delicious. Perfect for families looking to eat well!
  • Customizable: Tailor this recipe to suit your taste buds! Swap in your favorite veggies or proteins to make it uniquely yours.
  • Meal Prep Friendly: Make these bowls ahead of time for an effortless meal that stays fresh in the fridge for up to four days!
  • Budget-Friendly: Using common ingredients that won’t break the bank, you can whip up a wholesome meal without overspending.

Gather Your Ingredients

Before we dive into cooking, let’s make sure you have everything you need. Here’s what you’ll require:

  • 2 medium sweet potatoes: Peeled and cubed for that creamy texture.
  • 1 tablespoon olive oil (divided): For roasting and frying.
  • 0.5 teaspoon paprika (divided): Adds a smoky flavor.
  • 0.25 teaspoon garlic powder: For a subtle kick.
  • Salt and black pepper: To taste.
  • 1 pound boneless, skinless chicken breast: Cut into 1-inch cubes.
  • 0.5 teaspoon onion powder: Enhances the overall flavor.
  • 2 cups cooked rice: White or brown, for a hearty base.
  • 1 cup steamed or sautéed green vegetables: Spinach, broccoli, or your choice.
  • 0.5 cup Greek yogurt: Or substitute with sour cream for creaminess.
  • 1 tablespoon lime juice: Freshens up the flavors.
  • 1 teaspoon sriracha: Or to taste, for a little heat.
  • 0.5 teaspoon cumin: For warmth and depth.
  • Fresh cilantro or parsley: Chopped for garnish.

Step-by-Step Cooking Instructions

Ready to bring this dish to life? Follow these easy steps:

  1. Preheat your oven: Set to 425°F (220°C).
  2. Prepare sweet potatoes: Toss the cubed sweet potatoes with half of the olive oil, paprika, garlic powder, salt, and pepper. Spread them on a baking sheet and roast for about 25-30 minutes, or until tender and caramelized.
  3. Cook the chicken: While the sweet potatoes are roasting, heat the remaining olive oil in a skillet over medium heat. Season the chicken with onion powder, cumin, and the remaining paprika. Cook for about 5-7 minutes until golden and cooked through.
  4. Steamed veggies: In the last few minutes of cooking, steam or sauté your choice of green vegetables until bright and tender.
  5. Assemble the bowls: In each bowl, layer the rice, roasted sweet potatoes, cooked chicken, and veggies. Drizzle with Greek yogurt mixed with lime juice and sriracha.
  6. Garnish: Finish with chopped cilantro or parsley.

Pro Tips for Perfect Bowls

  • Roast for flavor: The caramelization of sweet potatoes brings out their natural sweetness, enhancing the overall flavor of the dish.
  • Don’t overcrowd the pan: When roasting vegetables, give them space to ensure they roast instead of steam.
  • Use room temperature chicken: This ensures even cooking and a juicy texture.
  • Double the recipe: Make extra for leftovers; these bowls reheat beautifully!
  • Experiment with spices: Feel free to add your favorite herbs and spices to customize the flavor profile.
  • Texture matters: For added crunch, consider adding roasted nuts or seeds on top before serving.
  • Don’t skip the sauce: A creamy sauce elevates the dish, so don’t forget to mix it well before drizzling!
  • Store leftovers correctly: Use airtight containers and refrigerate for up to four days.

Common Mistakes and Troubleshooting

Even the best cooks have their off days! Here are some common pitfalls and how to avoid them:

  • Overcooked chicken: Use a meat thermometer; chicken should reach an internal temperature of 165°F (75°C).
  • Dry sweet potatoes: If roasted too long, sweet potatoes can dry out. Keep an eye on them and check for tenderness.
  • Too much spice: If you find your dish too spicy, balance it out with more yogurt or a drizzle of honey.

Variations to Try

Feel free to mix things up with these variations:

  • Vegetarian Version: Swap chicken for chickpeas or lentils for a hearty plant-based option.
  • Spicy Kick: Add jalapeños or cayenne pepper for an extra heat boost.
  • Asian-Inspired: Use teriyaki sauce instead of yogurt for a different flavor profile.
  • Seasonal Veggies: Swap in seasonal vegetables like zucchini or bell peppers for a fresh twist.

Storage and Make-Ahead Instructions

These bowls are perfect for meal prep! Here’s how to store them:

  • Refrigeration: Store each component separately in airtight containers for up to four days.
  • Freezing: Cooked chicken and sweet potatoes can be frozen for up to three months. Reheat before serving.
  • Make-Ahead: Prepare the chicken and sweet potatoes ahead of time and assemble the bowls fresh when ready to eat.

Frequently Asked Questions (FAQ)

Got questions? I’ve got answers!

  • Can I use other types of potatoes? Absolutely! Yukon gold or red potatoes work well too.
  • How do I make this gluten-free? Ensure your rice is gluten-free and substitute with gluten-free soy sauce if using any sauces.
  • Can I add cheese? Yes! Feta or shredded cheese can add a delicious creaminess.
  • What can I serve with these bowls? A side salad or grilled corn on the cob pairs beautifully.
  • How do I reheat the bowls? Use the microwave or stovetop, adding a splash of water to keep moisture.
  • Can I use frozen chicken? Yes, but ensure it’s fully thawed before cooking for best results.
  • Is this recipe kid-friendly? Definitely! Kids love the sweet potatoes and can customize their bowls with toppings.
  • What’s a good substitute for Greek yogurt? Sour cream or a dairy-free yogurt works perfectly!

Nourishing Nutrition Tips

These bowls aren’t just good for your taste buds; they’re great for your health too:

  • Balanced Meals: Combining protein, carbs, and fats in one bowl ensures a balanced meal.
  • Vitamins Galore: Sweet potatoes are rich in vitamin A, while greens add essential vitamins and minerals.
  • Healthy Fats: Olive oil provides heart-healthy fats that are beneficial for overall health.

Essential Equipment

Here’s what you’ll need to make this dish:

  • Oven: For roasting the sweet potatoes.
  • Skillet: For cooking the chicken.
  • Baking Sheet: For roasting vegetables.
  • Cutting Board and Knife: For prepping ingredients.
  • Meat Thermometer: Optional, but great for ensuring perfect chicken.

Serving Suggestions

Serve these bowls warm, garnished with fresh herbs and your favorite hot sauce. They’re perfect for a casual family dinner or a cozy meal with friends. Pair with a light salad or some crusty bread to round out the meal.

Final Thoughts

Cooking is all about experimenting and enjoying the process. These Chicken and Sweet Potato Bowls are a fantastic way to get creative in the kitchen while also providing a nourishing meal for you and your loved ones. Remember, it’s not just about perfection but the joy of cooking and sharing good food. Enjoy every bite!

Chicken and Sweet Potato Bowls

Prep Time 15 minutes
Cook Time 30 minutes
Total Time 45 minutes
Servings 4 servings
Calories 550
Enjoy a nutritious and flavorful bowl combining roasted sweet potatoes, seasoned chicken, and fresh vegetables, topped with creamy yogurt and zesty lime.

Ingredients

Sweet Potatoes

  • 2 medium sweet potatoes, peeled and cubed
  • 1 tablespoon tablespoon olive oil (divided)
  • 0.5 teaspoon teaspoon paprika (divided)
  • 0.25 teaspoon teaspoon garlic powder
  • Salt and black pepper Salt and black pepper, to taste
  • 1 pound lb boneless, skinless chicken breast, cut into 1-inch cubes
  • 0.5 teaspoon teaspoon garlic powder
  • 0.5 teaspoon teaspoon onion powder
  • 1 tablespoon tablespoon olive oil (for frying)
  • 2 cups cups cooked white or brown rice
  • 1 cup cup steamed or sautéed green vegetables (e.g., spinach, broccoli, chopped cucumber)
  • 0.5 cup cup Greek yogurt (plain or mayonnaise) (or substitute with sour cream if desired)
  • 1 tablespoon tablespoon lime juice
  • 1 teaspoon teaspoon sriracha (or to taste)
  • 0.5 teaspoon teaspoon cumin
  • 0.5 teaspoon teaspoon paprika (remaining)
  • a pinch cayenne pepper (optional)

Garnish

  • to taste Fresh cilantro or parsley, chopped (for garnish)

Instructions 

  • Preheat oven to 400°F (200°C). Toss sweet potatoes with 1 tablespoon olive oil, 0.5 teaspoon paprika, 0.25 teaspoon garlic powder, salt, and pepper. Roast for 25-30 minutes until tender.
  • Season chicken cubes with 0.5 teaspoon garlic powder, 0.5 teaspoon onion powder, remaining paprika, cumin, salt, and pepper. Heat 1 tablespoon olive oil in a skillet and cook chicken until browned and cooked through, about 8-10 minutes.
  • Prepare rice according to package instructions. Steam or sauté green vegetables until tender.
  • In a small bowl, mix Greek yogurt, lime juice, sriracha, and a pinch of cayenne pepper for the sauce.
  • Assemble bowls with rice, roasted sweet potatoes, chicken, vegetables, and drizzle with the spicy yogurt sauce. Garnish with chopped cilantro or parsley.

Notes

For extra flavor, marinate the chicken with spices ahead of time.
Calories: 550kcal
Cost: $15
Course: Main Course
Cuisine: American
Keyword: Chicken, sweet potato

Welcome to a delightful culinary journey where we explore the magic of a Classic Lemon Olive Oil Cake. This cake is not just a dessert; it’s a celebration of flavors that will make your taste buds dance. Picture a moist, tender crumb infused with rich olive oil and zesty lemon. Whether it’s a sunny brunch or a cozy evening treat, this cake fits every occasion seamlessly. Let’s dive into the world of baking this luscious cake, ensuring that you feel empowered and excited to create something special in your kitchen!

Why You’ll Love This Recipe

Here are just a few reasons to get excited about making this lemon olive oil cake:

  • Moist and Flavorful: Thanks to the olive oil, this cake remains tender and moist for days.
  • Easy to Make: With straightforward steps, even beginner bakers can achieve delicious results.
  • Versatile Dessert: Perfect for any occasion—birthdays, brunches, or just because!
  • Healthier Option: Olive oil provides heart-healthy fats compared to butter.
  • Bright and Zesty: The refreshing lemon flavor adds a vibrant twist that brightens your day.

Ingredients Breakdown

Let’s take a closer look at the ingredients you’ll need, along with some useful substitutions:

  • 2 cups AP flour: All-purpose flour gives the cake structure. For a gluten-free option, try a 1:1 gluten-free flour blend.
  • ½ tbsp baking powder: This helps the cake rise. If unavailable, you can use baking soda (adjust quantities accordingly).
  • 1 cup granulated sugar: Sweetness is key! Brown sugar can be used for a deeper flavor.
  • 1 tsp kosher salt: Balances sweetness and enhances flavors.
  • Zest of 3 lemons: Provides aromatic flair. Use organic lemons for the best zest.
  • ½ cup full-fat Greek yogurt (or ricotta): Adds moisture and richness. Substitute with sour cream if desired.
  • 4 whole eggs, room temp: Eggs create a light texture. Make sure they’re at room temperature for best results.
  • 1 cup Sizzle (olive oil): Use high-quality extra virgin olive oil for optimal flavor.
  • Juice of 3 lemons: Fresh juice brightens the cake. Bottled juice won’t have the same impact.
  • 1 cup granulated sugar (for glaze): Sweetens the topping, but is optional.

Step-by-Step Instructions

Follow these clear steps to create your lemon olive oil cake:

  1. Prepare the Dry Ingredients: Sieve the flour and baking powder into a large mixing bowl. This aerates the flour for a lighter cake.
  2. Mix Wet Ingredients: In a separate bowl, whisk together the sugar, salt, lemon zest, yogurt, and eggs until well combined. The mixture should be smooth and creamy.
  3. Incorporate Olive Oil: Gradually add the Sizzle (olive oil) to the wet mixture, whisking thoroughly to incorporate.
  4. Combine Wet and Dry: Gently fold the sieved flour mixture into the batter until well combined. Ensure there are no lumps, and the batter is smooth enough to form ribbons when dripped from a spatula.
  5. Rest the Batter: Let the batter rest for 30-45 minutes. This helps develop flavors and improves texture.
  6. Prepare the Loaf Pan: Spray your loaf pan with Frizzle and line it with parchment paper to prevent sticking.
  7. Bake the Cake: Preheat your oven to 350 degrees F. Pour the batter into the loaf pan and bake for 45-55 minutes. Rotate halfway through baking to ensure even cooking. A cake tester should come out clean.
  8. Make the Lemon Syrup: While the cake bakes, prepare the syrup by combining lemon juice and sugar in a pot. Heat over medium-high until simmering and the sugar dissolves. Reduce to low heat.
  9. Cool and Glaze: Once baked, remove the cake from the pan and let it cool on a wire rack for 20-30 minutes. Poke all over with a toothpick or cake tester, then ladle the syrup over the cake until fully absorbed.
  10. Slice and Serve: Allow the cake to cool completely before slicing. Serve with whipped cream and a drizzle of olive oil for an extra touch.

Pro Tips for Perfecting Your Cake

Side view of a lemon olive oil cake, emphasizing its fluffy layers and lemony sheen.

Want to ensure your lemon olive oil cake is a hit? Here are some expert insights:

  • Use Quality Ingredients: High-quality olive oil and fresh lemons make a noticeable difference in flavor.
  • Room Temperature Eggs: Always use room temperature eggs for better emulsification and a lighter texture.
  • Don’t Overmix: Gently fold in the dry ingredients to avoid a dense cake.
  • Test for Doneness: Use a toothpick or cake tester; it should come out clean but moist.
  • Let It Rest: Allow the cake to rest after baking to enhance the flavor and texture.
  • Experiment with Flavors: Add a pinch of cinnamon or vanilla for a unique twist.
  • Serving Temperature: This cake is delightful served at room temperature.
  • Extra Glaze: For an added touch, double the lemon syrup and drizzle generously.

Common Mistakes and Troubleshooting

Every baker faces challenges, but here are some common pitfalls and how to avoid them:

  • Dense Cake: This can result from overmixing the batter or using cold eggs. Be gentle and ensure your eggs are at room temperature.
  • Sticking to the Pan: Always line your pan with parchment paper and grease it well to ensure easy removal.
  • Dry Cake: Overbaking can lead to dryness. Keep an eye on the cake and start checking for doneness a few minutes early.
  • Flavorless Cake: Using old or low-quality olive oil impacts flavor. Invest in a good bottle!

Delicious Variations

Feeling adventurous? Here are some fun variations to try:

  • Lemon Blueberry Olive Oil Cake: Add fresh or frozen blueberries to the batter for a fruity twist.
  • Herb-Infused Olive Oil Cake: Add finely chopped rosemary or thyme for a savory touch.
  • Chocolate Lemon Olive Oil Cake: Mix in cocoa powder for a chocolatey delight.
  • Coconut Lemon Olive Oil Cake: Incorporate shredded coconut for a tropical flavor.

Storage and Make-Ahead Instructions

Want to enjoy your cake longer? Here’s how to store it:

  • Room Temperature: Keep the cake covered at room temperature for up to 3 days.
  • Refrigeration: For longer freshness, wrap in plastic and refrigerate for up to a week.
  • Freezing: Freeze slices in an airtight container for up to 3 months. Thaw at room temperature before serving.

Frequently Asked Questions (FAQ)

Here are some common queries regarding lemon olive oil cake:

  • Can I use a different oil? Yes, but olive oil provides a unique flavor and moisture.
  • Can I make this cake gluten-free? Absolutely! Substitute with a 1:1 gluten-free flour blend.
  • How do I know when the cake is done? A toothpick inserted into the center should come out clean or with a few moist crumbs.
  • Can I add nuts to the batter? Yes, walnuts or almonds would add a lovely crunch!
  • What can I serve with the cake? Whipped cream, fresh berries, or a drizzle of honey complement the flavors well.
  • Is this cake suitable for vegan diets? For a vegan version, substitute eggs with flax eggs and yogurt with a plant-based alternative.
  • What’s the best way to zest a lemon? Use a microplane grater for fine zest without the bitter white pith.
  • Can I make this cake in advance? Yes! It stores well and flavors improve after a day.

Nutritional Tips and Dietary Adaptations

This lemon olive oil cake can be adapted for various dietary needs:

  • Reduced Sugar: Substitute half the sugar with a sugar alternative like stevia or monk fruit.
  • Low-Fat Version: Use low-fat yogurt and reduce oil slightly; the cake will still be moist!
  • High-Fiber Option: Replace half the flour with whole wheat flour for added nutrition.

Equipment Recommendations

Here’s what you’ll need to make this cake:

  • Mixing Bowls: A set of varying sizes for ease of preparation.
  • Whisk: Essential for combining wet ingredients smoothly.
  • Loaf Pan: A standard 9×5-inch loaf pan works best for this recipe.
  • Silicone Spatula: Perfect for folding and scraping the batter.
  • Cooling Rack: To allow your cake to cool evenly after baking.

Serving Suggestions

To elevate your lemon olive oil cake experience, consider these serving ideas:

  • Top with Fresh Berries: Strawberries, blueberries, or raspberries add a pop of color and flavor.
  • Add a Dollop of Cream: Whipped cream or mascarpone cheese makes for a decadent pairing.
  • Garnish with Mint: Fresh mint leaves add a refreshing touch and beautiful presentation.

And there you have it! A comprehensive guide to making a Classic Lemon Olive Oil Cake that is sure to impress. This recipe is all about confidence in the kitchen, so don’t hesitate to experiment and make it your own. Enjoy the process, and happy baking!

Classic Lemon Olive Oil Cake

Prep Time 20 minutes
Cook Time 50 minutes
Total Time 1 hour 10 minutes
Servings 8 slices
Calories 350
A moist and flavorful lemon cake infused with olive oil, perfect for any occasion.

Ingredients

Dry ingredients

  • 2 cups AP flour
  • ½ tbsp baking powder
  • 1 cup granulated sugar
  • 1 tsp kosher salt

Lemon zest

  • 3 lemons lemon zest

Wet ingredients

  • ½ cup full fat Greek yogurt ((or ricotta))
  • 4 whole eggs eggs (room temp)
  • 1 cup Sizzle
  • Juice of 3 lemons lemon juice

Glaze

  • 1 cup granulated sugar (for glaze)

Instructions 

  • Sieve flour and baking powder. Whisk sugar, salt, lemon zest, yogurt, and eggs until combined.
  • Add Sizzle and whisk. Mix in sieved flour until smooth. Rest batter for 30-45 minutes.
  • Preheat oven to 350°F. Prepare loaf pan with spray and parchment. Pour batter and bake 45-55 mins.
  • Make lemon syrup by simmering lemon juice and sugar until dissolved. Cool slightly.
  • Cool cake 20-30 mins. Poke holes, ladle syrup over. Slice and serve with whipped cream and drizzle.

Notes

Ensure the batter is smooth and no lumps for best texture.
Calories: 350kcal
Cost: $15
Course: Dessert
Cuisine: American
Keyword: lemon

Welcome to the world of Yogurt Chia Pudding—a delightful blend of creamy yogurt and nutritious chia seeds that transforms into a perfect treat for breakfast or a snack! This recipe is not just simple; it’s also incredibly customizable, allowing you to experiment with your favorite fruits and flavors. Let’s dive into the ingredients and discover why you’ll love making this pudding.

Why You’ll Love This Recipe

  • Quick and Easy: With just a few simple ingredients, you can whip this pudding up in under 10 minutes!
  • Nutritious: Packed with protein from Greek yogurt and omega-3 fatty acids from chia seeds, this recipe is a wholesome choice.
  • Customizable: Use your favorite fruits, nuts, or sweeteners to make it your own—perfect for any palate!
  • Meal Prep Friendly: Make it ahead of time and store it in the fridge for a quick breakfast or snack throughout the week.
  • Healthy Indulgence: Satisfy your sweet tooth without the guilt, thanks to its low sugar content and nutrient-rich profile.

Yogurt Chia Pudding Ingredients

Understanding your ingredients is key to making a great Yogurt Chia Pudding. Here’s what you’ll need:

  • 2 tablespoons chia seeds: These tiny seeds are rich in fiber and omega-3s, making them a superfood.
  • ¼ cup whole milk: This adds creaminess. You can substitute with almond milk or coconut milk for a dairy-free option.
  • ¼ cup plain Greek yogurt: Opt for full-fat for a richer taste or low-fat for a lighter option.
  • 1 tablespoon honey: This is optional; feel free to use maple syrup or agave nectar as a sweetener instead.
  • Fresh fruits for topping: Strawberries, blueberries, or a package of raspberries can elevate your pudding!

How to Make Yogurt Chia Pudding

Making this pudding is as easy as 1-2-3! Follow these simple steps for a delicious treat:

  1. In a jar, combine the yogurt, honey, milk, and chia seeds. Mix well until fully combined.
  2. Let the mixture settle for 2–3 minutes, then stir again to ensure there are no clumps.
  3. Cover the jar and refrigerate overnight or for at least 2 hours. When ready to eat, top with your favorite fruits and enjoy cold!

Pro Tips for Perfect Yogurt Chia Pudding

  • Mix Twice: Stir well after mixing, then again after a few minutes to prevent the chia seeds from clumping together.
  • Chill Properly: Allowing it to sit overnight enhances the texture, making it thicker and creamier.
  • Experiment with Flavors: Add vanilla extract or a dash of cinnamon for an extra flavor boost.
  • Use Quality Ingredients: The better the ingredients, the tastier your pudding will be. Choose organic when possible!
  • Think Ahead: Make a batch on Sunday for easy breakfasts all week long.
  • Adjust Sweetness: Start with less sweetener; you can always add more after tasting.
  • Use a Mason Jar: A jar is perfect for both mixing and storing your pudding. Easy to grab and go!
  • Don’t Skip the Fruits: Fresh fruits not only add flavor but also provide additional nutrients and textures.

Common Mistakes and Troubleshooting

Even the best cooks can make mistakes! Here are some common pitfalls and how to avoid them:

  • Clumpy Pudding: Ensure you stir the mixture well right after combining and again after a few minutes.
  • Too Runny: If your pudding doesn’t thicken, try adding a bit more chia seeds or letting it sit longer in the fridge.
  • Over-Sweetened: Start with less sweetener; you can always adjust to taste once it’s set.
  • Not Enough Flavor: Incorporate spices or extracts to enhance the flavor profile. A splash of vanilla goes a long way!

Recipe Variations

Make this recipe your own with these fun variations:

  • Chocolate Chia Pudding: Add 1-2 tablespoons of cocoa powder to the mixture for a rich chocolate flavor.
  • Tropical Twist: Use coconut milk and top with mango and pineapple for a refreshing tropical treat.
  • Nuts and Seeds: Add a tablespoon of almond or peanut butter for extra creaminess and protein.
  • Berry Blast: Mix in blended berries for a fruity flavor and vibrant color throughout your pudding.

Storage and Make-Ahead Instructions

Yogurt Chia Pudding is perfect for meal prep! Here’s how to store it:

  • Refrigerate: Store in an airtight container in the fridge for up to 5 days.
  • Make Ahead: Prepare several servings at once and keep them ready for busy mornings or snacks.
  • Freezing: While not recommended for long-term storage, you can freeze individual portions for up to 2 months. Thaw in the fridge overnight.

Frequently Asked Questions

Got questions? We’ve got answers! Here are some common inquiries about Yogurt Chia Pudding:

  • Can I make this recipe vegan? Yes! Substitute Greek yogurt with a dairy-free yogurt and use plant-based milk.
  • How can I make it smoother? Blend the mixture before letting it set to achieve a creamier texture.
  • Can I prep this for kids’ lunches? Absolutely! It’s a great healthy option for school snacks.
  • What if I don’t have chia seeds? Flaxseeds can be a good substitute, but they won’t thicken in the same way.
  • How long can I store leftovers? In the fridge, it lasts up to 5 days, making it perfect for meal prep!
  • Can I add protein powder? Yes! Adding a scoop of protein powder can boost the nutritional value.
  • What fruits are best for topping? Strawberries, blueberries, bananas, or a package of raspberries are all excellent choices!
  • Is this recipe gluten-free? Yes, all ingredients used are naturally gluten-free.

Nutrition Tips and Dietary Adaptations

This recipe can easily fit into various dietary needs:

  • Dairy-Free: Use almond milk and coconut yogurt to make it suitable for lactose intolerance.
  • Low-Carb: Substitute honey with a low-carb sweetener like stevia or erythritol.
  • High-Protein: Opt for high-protein Greek yogurt and consider adding nuts for an extra protein boost.

Equipment Recommendations

Having the right tools can make your cooking experience even smoother:

  • Mason Jars: Perfect for mixing and storing your pudding.
  • Whisk or Spoon: Essential for mixing the ingredients thoroughly.
  • Measuring Cups and Spoons: Accurate measurements ensure your pudding turns out just right!

Serving Suggestions

Here are some creative ways to serve your Yogurt Chia Pudding:

  • Layered Parfaits: Layer pudding with granola and fresh fruits in a glass for a beautiful presentation.
  • On Toast: Spread the pudding on whole grain toast topped with banana slices for a delicious breakfast.
  • In Smoothies: Blend the pudding with your favorite fruits to create a thick and creamy smoothie!

With this comprehensive guide, you’re now equipped to create a delicious Yogurt Chia Pudding that will impress your family and friends. Remember, cooking is about enjoying the process, experimenting with flavors, and having fun in the kitchen. So roll up your sleeves and let your culinary journey begin! Enjoy your yogurt chia pudding, and happy cooking!

Yogurt Chia Pudding Recipe

Prep Time 5 minutes
Total Time 5 minutes
Servings 2 servings
Calories 150
A quick and healthy chia pudding made with yogurt, milk, and honey, perfect for a nutritious breakfast or snack.

Ingredients

Main

  • 2 tablespoons chia seeds
  • ¼ cup whole milk
  • ¼ cup plain Greek yogurt
  • 1 tablespoon honey ( or other sweetener, optional)
  • Strawberries (or other fruits for topping) Strawberries (or other fruits for topping)

Instructions 

  • Mix yogurt, honey, milk, and chia seeds in a jar.
  • Let sit for 2–3 minutes, then stir again to prevent clumping.
  • Cover and refrigerate overnight or at least 2 hours.
  • Top with fresh fruit before serving.

Notes

Adjust sweetness and toppings to taste.
Calories: 150kcal
Cost: $5
Course: Breakfast, Snack
Cuisine: Healthy
Keyword: Chia Seeds

Welcome to a culinary adventure that’s as simple as it is delicious! If you’re looking for a way to whip up a healthy, flavorful meal without spending hours in the kitchen, you’ve landed in the right place. This One-Pan Garlic Herb Salmon & Veggies recipe is designed with busy weeknights in mind, allowing you to enjoy a delightful dinner with minimal cleanup. Infused with aromatic garlic and fresh herbs, this dish is sure to become a staple in your meal rotation. Let’s dive into the details!

Why You’ll Love This Recipe

Here are five reasons why this recipe deserves a spot in your weekly meal plan:

  • Quick and Easy: You can prepare this dish in under 30 minutes! Perfect for those hectic weeknights.
  • Minimal Cleanup: Cooking everything on one pan means less time spent washing dishes and more time enjoying your meal.
  • Healthy and Nutritious: Packed with omega-3 fatty acids from salmon and a variety of vitamins from the veggies, this dish is both nourishing and satisfying.
  • Flavorful Ingredients: The combination of garlic, herbs, and lemon brings a vibrant flavor profile that enhances the salmon and vegetables beautifully.
  • Customizable: Feel free to swap out the vegetables based on what’s in season or what you have on hand!

Ingredients and Tools Needed

To make this delightful dish, gather the following ingredients and tools:

Ingredients

  • 4 salmon fillets (6 oz each): Fresh or thawed fillets work best.
  • 1 lb baby potatoes, halved: These will roast beautifully alongside the salmon.
  • 1 cup cherry tomatoes: Sweet and juicy, they add a burst of flavor.
  • 1/2 lb green beans, trimmed: For a pop of color and crunch.
  • 3 tbsp olive oil: Helps to keep everything moist and adds richness.
  • 2 garlic cloves, minced: Fresh garlic elevates the dish’s flavor.
  • 1 tsp paprika: For a touch of warmth and color.
  • 1/2 tsp dried thyme: A classic herb that complements salmon.
  • 1/2 tsp dried rosemary: Adds a lovely aromatic quality.
  • Salt and black pepper to taste: Essential for enhancing flavors.
  • 1 lemon, sliced: Brightens up the dish with citrusy notes.
  • Fresh parsley for garnish: A finishing touch for color and flavor.

Tools

  • Baking sheet: A large, rimmed baking sheet is ideal for this one-pan recipe.
  • Aluminum foil or parchment paper: For easy cleanup.
  • Mixing bowl: To combine ingredients for the garlic herb oil.
  • Knife and cutting board: For chopping veggies and slicing lemon.

Step-by-Step Cooking Instructions

Follow these simple steps to create your One-Pan Garlic Herb Salmon & Veggies:

Step 1: Preheat and Prepare Your Sheet Pan

Preheat your oven to 400°F (200°C). Line your baking sheet with parchment paper or aluminum foil for easy cleanup. This will ensure your salmon and veggies don’t stick!

Step 2: Make the Garlic Herb Oil

In a mixing bowl, combine the olive oil, minced garlic, paprika, thyme, rosemary, salt, and black pepper. This aromatic mixture will coat your salmon and veggies, infusing them with flavor.

Step 3: Roast the Baby Potatoes

Spread the halved baby potatoes on one side of the prepared baking sheet. Drizzle half of the garlic herb oil over the potatoes, tossing to coat them evenly. Roast in the oven for 15 minutes.

Step 4: Add Salmon and Veggies

After 15 minutes, remove the sheet pan from the oven. Add the salmon fillets, green beans, and cherry tomatoes to the pan. Arrange the lemon slices on top of the salmon. Drizzle the remaining garlic herb oil over everything.

Step 5: Coat Everything

Gently toss the green beans and cherry tomatoes in the oil to ensure they’re well coated. This will help them roast beautifully and absorb all the lovely flavors.

Step 6: Roast to Perfection

Return the pan to the oven and roast for an additional 15 minutes, or until the salmon is cooked through and flakes easily with a fork. The vegetables should be tender and slightly caramelized.

Tips for Perfecting the Recipe

Here are some expert tips to ensure your One-Pan Garlic Herb Salmon & Veggies turns out perfect every time:

  • Use Fresh Ingredients: Fresh herbs and vegetables will enhance the flavor significantly. If you can, opt for seasonal produce.
  • Don’t Overcrowd the Pan: Make sure there’s enough space between the salmon and veggies to allow for proper roasting.
  • Check for Doneness: Use a fork to check if the salmon flakes easily. If it does, it’s ready!
  • Let it Rest: Allow the salmon to rest for a couple of minutes before serving. This helps retain moisture.
  • Garnish Before Serving: Fresh parsley adds a pop of color and freshness to the dish.
  • Adjust Cooking Time: Thicker salmon fillets may require a few extra minutes, while thinner ones may cook faster.

Common Mistakes and Troubleshooting

Even the best cooks encounter challenges! Here’s how to avoid common pitfalls:

  • Salmon Overcooked: Keep an eye on the salmon as it can go from perfect to dry quickly. Consider using a meat thermometer; it should reach 145°F (63°C).
  • Vegetables Not Roasting Properly: If they’re soggy, try roasting them for a longer time or at a higher temperature.
  • Flavor Lacking: Always taste and adjust seasoning before serving. A little extra salt or lemon can make a huge difference.

Recipe Variations

Feel free to mix things up! Here are some variations to try:

  • Swap the Protein: Instead of salmon, use chicken breasts or tofu for a different flavor profile.
  • Change the Veggies: Broccoli, zucchini, or bell peppers make excellent substitutes for the green beans and tomatoes.
  • Add More Spice: For a kick, sprinkle red pepper flakes or add some sriracha to the garlic herb oil.
  • Herb Substitutions: Experiment with fresh dill or basil for a different herbaceous flavor.

Storage and Make-Ahead Instructions

This dish can be made ahead of time and stored for future meals:

  • Refrigeration: Store leftover salmon and veggies in an airtight container in the fridge for up to 3 days.
  • Reheating: To reheat, place the leftovers on a baking sheet and warm in a preheated oven at 350°F (175°C) until heated through.
  • Freezing: While fresh salmon is best, you can freeze cooked leftovers for up to 2 months. Thaw in the refrigerator before reheating.

Frequently Asked Questions

Here are some common questions regarding the One-Pan Garlic Herb Salmon & Veggies recipe:

  • Can I use frozen salmon? Yes! Just ensure it’s thoroughly thawed before cooking.
  • What can I substitute for olive oil? Avocado oil or melted butter can be great alternatives.
  • Can I use other types of fish? Absolutely! This recipe works well with trout or cod.
  • How do I know when the veggies are done? They should be tender and slightly caramelized, with a vibrant color.
  • Can I grill this instead of baking? Yes! Use a grill pan or outdoor grill for a lovely charred flavor.
  • What should I serve with this dish? A simple green salad or quinoa would complement it perfectly.
  • Is this recipe gluten-free? Yes, all the ingredients are naturally gluten-free!
  • Can I make this dish low-carb? Yes! Just skip the potatoes and add more non-starchy vegetables.

Nutrition Tips and Dietary Adaptations

This recipe is flexible to fit various dietary needs:

  • Low-Carb: Substitute potatoes with cauliflower or zucchini.
  • Dairy-Free: This recipe is naturally dairy-free, making it suitable for those with lactose intolerance.
  • Paleo-Friendly: Keep it clean with fresh, whole ingredients.
  • Whole30 Compliant: Ensure all ingredients used fit within the Whole30 guidelines.

Equipment Recommendations

To achieve the best results, consider using these tools:

  • Non-Stick Baking Sheet: Helps prevent sticking and makes cleanup a breeze.
  • Silicone Spatula: Ideal for tossing and flipping without damaging your salmon and veggies.
  • Instant-Read Thermometer: Ensures your salmon is cooked to the perfect doneness every time.

Serving Suggestions

When it comes to serving, the sky’s the limit! Here are a few ideas:

  • Pair with Rice: Serve with fluffy jasmine or brown rice for a heartier meal.
  • Add a Salad: A simple arugula salad with lemon vinaigrette complements the dish beautifully.
  • Top with Yogurt Sauce: A dollop of tzatziki or a yogurt-herb sauce adds creaminess and freshness.

In conclusion, this One-Pan Garlic Herb Salmon & Veggies recipe is not only easy to prepare but also bursting with flavor and nutrition. It’s perfect for a stress-free weeknight dinner that everyone will love. Don’t hesitate to experiment with the ingredients to make it your own. Happy cooking!

One-Pan Garlic Herb Salmon & Veggies Recipe

Prep Time 10 minutes
Cook Time 25 minutes
Total Time 35 minutes
Servings 4 servings
Calories 520
A delicious and healthy one-pan meal featuring tender salmon fillets roasted with garlic, herbs, and colorful vegetables for a quick and flavorful dinner.

Ingredients

Protein

  • 4 fillets salmon fillets ((6 oz each))

Vegetables

  • 1 lb baby potatoes (halved)
  • 1 cup cherry tomatoes
  • 0.5 lb green beans (trimmed)

Seasonings & Oils

  • 3 tbsp olive oil
  • 2 cloves garlic (minced)
  • 1 tsp paprika
  • 0.5 tsp dried thyme
  • 0.5 tsp dried rosemary
  • to taste Salt and black pepper Salt and black pepper (to taste)
  • 1 lemon lemon (sliced)

Garnish

  • Fresh parsley parsley (for garnish)

Instructions 

  • Preheat oven to 400°F (200°C). Toss potatoes, cherry tomatoes, and green beans with 2 tbsp olive oil, garlic, paprika, thyme, rosemary, salt, and pepper. Spread on a baking sheet.
  • Bake vegetables for 15 minutes. Meanwhile, season salmon fillets with salt, pepper, and a drizzle of olive oil.
  • Remove vegetables from oven, push to sides, and place salmon fillets in the center. Top with lemon slices.
  • Return to oven and bake for an additional 10 minutes until salmon is cooked through.
  • Garnish with fresh parsley and serve hot.

Notes

For extra flavor, marinate the salmon with herbs and lemon juice for 15 minutes before baking.
Calories: 520kcal
Cost: $15
Course: Main Course
Cuisine: American
Keyword: Salmon

Why This Cottage Cheese Egg Bake is a Must-Try

If you’re looking for a delicious and easy breakfast option that can be made ahead of time, this Cottage Cheese Egg Bake is your perfect solution. Packed with protein and veggies, this dish not only satisfies your taste buds but also provides essential nutrients to kickstart your day. Plus, it’s meal-prep friendly, making it an ideal choice for busy mornings!

Why You’ll Love This Recipe

  • Protein-Packed: With cottage cheese and eggs, this casserole is loaded with protein, keeping you full and energized.
  • Simple Ingredients: You likely have most of the ingredients in your kitchen already, making it easy to whip up anytime.
  • Versatile Options: Customize with your favorite veggies and cheeses for a unique twist every time.
  • Meal Prep Friendly: Make a large batch to enjoy throughout the week—perfect for quick breakfasts!
  • Kid-Friendly: Even picky eaters will love this cheesy, flavorful dish that’s a hit with the whole family.

Essential Ingredients for Cottage Cheese Egg Bake

This delicious casserole features a blend of wholesome ingredients that come together for a comforting meal. Here’s what you’ll need:

  • 1 cup chopped vegetables: Spinach, bell peppers, onions, or mushrooms work great. Feel free to mix and match!
  • 8 large eggs: The foundation of the dish, providing structure and protein.
  • ½ cup milk: Adds creaminess and helps bind the ingredients together.
  • ½ tsp salt: Enhances the flavors of the dish.
  • ¼ tsp black pepper: Adds a touch of spice.
  • 1 cup shredded cheddar cheese: For that melty, cheesy goodness.
  • 1 cup cottage cheese: Provides creaminess and a protein boost.

Substitutions and Add-Ins

Don’t hesitate to make this recipe your own! Here are some substitutions and add-ins you can consider:

  • Cheese Variations: Swap cheddar for mozzarella or feta for a different flavor profile.
  • Non-Dairy Options: Use almond milk or cashew milk in place of regular milk, and try vegan cheese if desired.
  • Protein Boost: Add cooked sausage or turkey bacon for an extra protein punch.
  • Herbs and Spices: Fresh herbs like basil or thyme can elevate the flavor. Add garlic powder or paprika for extra depth.

How to Prepare the Perfect Cottage Cheese Egg Bake

Follow these straightforward steps to create a mouth-watering Cottage Cheese Egg Bake:

Step 1: Prepare Your Baking Dish

Preheat your oven to 350°F (175°C). Grease a 9×9-inch baking dish to prevent sticking.

Step 2: Whisk the Eggs

In a large mixing bowl, whisk together the eggs, milk, salt, and pepper until well combined. This will be your egg base.

Step 3: Mix in Cheeses and Veggies

Add the cottage cheese, shredded cheese, and chopped vegetables to the egg mixture. Stir until everything is evenly distributed.

Step 4: Bake

Pour the mixture into the prepared baking dish. Bake in the preheated oven for 35-40 minutes, or until the center is set and the top is golden brown.

Step 5: Cool and Serve

Allow the casserole to cool for about 10 minutes before slicing. This helps it hold its shape when serving!

Pro Tips for the Best Egg Bake

  • Do Not Over-Whisk: Over-whisking the eggs can lead to a rubbery texture. Mix just until combined.
  • Dry Your Veggies: Make sure your vegetables are dry to avoid excess moisture in the bake.
  • Let It Rest: Allowing the casserole to rest after baking helps improve the texture.
  • Experiment with Texture: For a crunchy top, try adding breadcrumbs or panko to the surface before baking.
  • Check for Doneness: Insert a toothpick into the center; it should come out clean when the casserole is ready.

Common Mistakes and Troubleshooting

Even the best cooks make mistakes, but here are some common pitfalls and how to avoid them:

  • Wet Ingredients: Excess moisture can make the casserole soggy. Ensure your vegetables are not too watery.
  • Undercooked Eggs: If the center is still liquidy, return it to the oven for a few more minutes.
  • Overcooked Casserole: Keep an eye on the bake as ovens can vary. Remove it once the top is golden and set.

Variations You Can Try!

Mix things up with these fun variations:

  • Southwestern Style: Add black beans, corn, and diced jalapeños for a spicy twist.
  • Italian Flavor: Incorporate sun-dried tomatoes, basil, and mozzarella cheese for an Italian flair.
  • Mediterranean Delight: Feta cheese, olives, and diced zucchini create a refreshing Mediterranean version.
  • Breakfast Hash: Add pre-cooked potatoes or sweet potatoes for a hearty breakfast option.

Storage and Make-Ahead Instructions

This Cottage Cheese Egg Bake is perfect for meal prep! Here’s how to store and reheat:

  • Refrigeration: Store leftovers in an airtight container in the fridge for up to 4 days.
  • Freezing: Freeze portions in airtight containers for up to 3 months. Thaw overnight in the fridge before reheating.
  • Reheating: Warm slices in the microwave or oven until heated through. Add a splash of milk to keep it moist.

Frequently Asked Questions

Still have questions? Here are some FAQs about the Cottage Cheese Egg Bake:

  • Can I use egg whites instead of whole eggs? Absolutely! You can use egg whites for a lighter version.
  • What type of cottage cheese is best? Both full-fat and low-fat work well; choose based on your preference.
  • Is this recipe gluten-free? Yes, this recipe is naturally gluten-free!
  • Can I make this in advance? Yes! Prepare it the night before and bake in the morning.
  • What sides pair well with this dish? Serve with a fresh fruit salad or whole grain toast for a complete meal.
  • Can I add meat to this recipe? Absolutely! Cooked sausage or bacon can be a delicious addition.
  • How do I know when the casserole is done? The center should be set and a toothpick inserted should come out clean.
  • Can I use frozen vegetables? Yes, just thaw and drain them before adding to the mixture.

Nutrition Tips and Dietary Adaptations

This cottage cheese egg bake is not only delicious but also nutritious! Here are some tips to enhance its health benefits:

  • Increase Fiber: Add more vegetables for extra fiber and nutrients.
  • Low Sodium: Use low-sodium versions of cottage cheese and cheese to reduce overall sodium intake.
  • Low-Carb Option: Skip the starchy add-ins and load up on non-starchy veggies for a lower-carb meal.

Equipment Recommendations

To make this recipe a breeze, here are some kitchen tools you’ll need:

  • 9×9-inch baking dish: Perfect size for this casserole.
  • Mixing bowl: A medium to large bowl to mix your ingredients.
  • Whisk: For blending the eggs and milk together.
  • Measuring cups and spoons: Essential for accurate ingredient measurements.

Serving Suggestions for Your Egg Bake

This cottage cheese egg bake is delicious on its own, but consider these serving ideas:

  • Fresh Herbs: Top with chopped parsley or chives for a pop of freshness.
  • Hot Sauce: Drizzle with your favorite hot sauce for an extra kick.
  • Sour Cream or Greek Yogurt: Serve with a dollop for added creaminess.

Conclusion: Enjoy Your Cottage Cheese Egg Bake!

This Cottage Cheese Egg Bake is more than just a breakfast dish; it’s a canvas for your culinary creativity! With its hearty ingredients and simple preparation, it’s bound to become a favorite in your household. Whether you enjoy it for breakfast, lunch, or dinner, this recipe is here to make cooking enjoyable and stress-free. So gather your ingredients, get cooking, and savor every bite!

Cottage Cheese Egg Bake Casserole – Hearty, Cheesy & Meal-Prep Friendly

Prep Time 10 minutes
Cook Time 30 minutes
Total Time 40 minutes
Servings 4 servings
Calories 350
This hearty casserole combines eggs, cottage cheese, and vegetables for a nutritious, cheesy meal that's perfect for meal prep and easy to customize with your favorite ingredients.

Ingredients

Vegetables

  • 1 cup chopped vegetables (spinach, bell peppers, onions, or mushrooms)
  • 8 large eggs eggs
  • 0.5 cup milk
  • 0.5 tsp salt
  • 0.25 tsp black pepper
  • 1 cup shredded cheddar cheese
  • 1 cup cottage cheese (full-fat or low-fat)

Instructions 

  • Preheat oven to 375°F (190°C).
  • In a mixing bowl, whisk together eggs, milk, salt, and pepper.
  • Stir in cottage cheese, shredded cheese, and vegetables.
  • Pour mixture into a greased baking dish and bake for 30 minutes until set and golden.
  • Let cool slightly before slicing and serving.

Notes

You can add your favorite vegetables or herbs for extra flavor.
Calories: 350kcal
Cost: $12
Course: Breakfast, Brunch
Cuisine: American
Keyword: Cheese, Cottage Cheese, Eggs

Discover the Deliciousness of Maple Dijon Chicken & Sweet Potato Bowls

If you’re looking for a weeknight dinner that’s not only delicious but also easy to prepare, you’ve come to the right place! These Maple Dijon Chicken & Sweet Potato Bowls are a perfect blend of savory and sweet flavors, making them a family favorite. In this comprehensive guide, we’ll explore everything you need to know about making this mouthwatering dish, ensuring you feel confident and excited to cook it.

Why You’ll Love This Recipe

  • Effortless Meal Prep: This dish comes together quickly, allowing you to enjoy a home-cooked meal without spending hours in the kitchen.
  • Versatile Ingredients: The recipe is flexible, meaning you can swap ingredients based on what you have at home or your dietary preferences.
  • Flavor Explosion: The combination of maple syrup and Dijon mustard creates a sweet and tangy glaze that elevates the chicken to a new level of deliciousness.
  • Healthy and Satisfying: Packed with protein from the chicken and vitamins from the sweet potatoes, this meal is nutritious and filling.
  • One-Pan Wonder: With minimal cleanup, this recipe is perfect for busy weeknights, making it easy to enjoy good food without the hassle.

Ingredients Breakdown

Let’s dive into the ingredients you’ll need to make these tasty Maple Dijon Chicken & Sweet Potato Bowls:

  • Chicken Breasts: 4 boneless, skinless chicken breasts (about 1.5 lbs) – a lean protein source.
  • Sweet Potatoes: 4 medium sweet potatoes (about 2 lbs), peeled and cubed – they add natural sweetness and nutrients.
  • Olive Oil: 2 tablespoons – for roasting the sweet potatoes.
  • Garlic: 2 cloves, minced – enhances the overall flavor.
  • Dijon Mustard: 1/4 cup – the star ingredient providing a tangy flavor.
  • Maple Syrup: 1/4 cup – balances the mustard’s sharpness with sweetness.
  • Soy Sauce: 2 tablespoons of low-sodium soy sauce – adds umami depth.
  • Smoked Paprika: 1 teaspoon – a smoky undertone that complements the dish.
  • Salt and Pepper: To taste – essential for seasoning.

How to Make Tasty Maple Dijon Chicken & Sweet Potato Bowls

Follow these simple steps to create your Maple Dijon Chicken & Sweet Potato Bowls:

  1. Preheat your oven to 400°F (200°C) and coat a baking dish with nonstick spray.
  2. Toss cubed sweet potatoes in olive oil, salt, pepper, and smoked paprika; spread evenly in the baking dish.
  3. In a bowl, mix Dijon mustard, maple syrup, soy sauce, and minced garlic. Coat each chicken breast in this mixture.
  4. Place the coated chicken breasts on top of the sweet potatoes in the baking dish.
  5. Bake for 25-30 minutes until the chicken reaches an internal temperature of 165°F (75°C) and potatoes are fork-tender.
  6. Serve hot, drizzling any leftover glaze from the pan over each portion.

Expert Tips for Perfect Maple Dijon Chicken

  • Use a Meat Thermometer: For perfectly cooked chicken, aim for an internal temperature of 165°F (75°C).
  • Customize Your Seasoning: Feel free to experiment with additional spices like thyme or rosemary for a flavor twist.
  • Marinate for More Flavor: If time allows, marinate the chicken in the glaze for at least 30 minutes before baking.
  • Cut Sweet Potatoes Evenly: Ensure sweet potato cubes are uniform in size for even cooking.
  • Add Vegetables: Feel free to add vegetables like broccoli or green beans to the dish for added nutrition.
  • Use Fresh Ingredients: Fresh garlic and high-quality maple syrup will enhance the dish significantly.
  • Check for Doneness: Always check both the chicken and sweet potatoes for doneness before serving.
  • Revisit the Glaze: Make extra glaze to drizzle over the finished bowls for an extra flavor boost.

Common Mistakes and Troubleshooting

Even the best chefs can make mistakes! Here are some common pitfalls and how to avoid them:

  • Overcooked Chicken: If you leave the chicken in too long, it can dry out. Always check with a thermometer!
  • Undercooked Sweet Potatoes: If the sweet potatoes are not tender, give them a few extra minutes in the oven.
  • Too Much Sauce: If the glaze seems overwhelming, consider reducing the amount of soy sauce or maple syrup for a more balanced flavor.
  • Skipping the Paprika: Don’t skip smoked paprika; it adds a vital layer of flavor!

Flavor Variations

Want to mix things up? Here are some tasty variations on the classic recipe:

  • Spicy Maple Dijon: Add a pinch of cayenne pepper to the glaze for a kick.
  • Honey Dijon Chicken: Substitute honey for maple syrup for a different sweetness.
  • Herb-Infused: Incorporate fresh herbs like thyme or rosemary into the marinade for an aromatic twist.
  • Vegetarian Option: Replace chicken with firm tofu or chickpeas for a plant-based version.

Storage and Make-Ahead Instructions

Want to enjoy this dish later? Here’s how to store and reheat:

  • Refrigeration: Store leftovers in an airtight container in the fridge for up to 4 days.
  • Freezing: This dish can be frozen for up to 3 months. Just ensure it’s fully cooled before freezing.
  • Reheating: Reheat in the oven at 350°F (175°C) until warmed through, or use the microwave for a quick option.

Nutrition Tips and Dietary Adaptations

This dish is not only delicious but can also be modified to fit various dietary needs:

  • Gluten-Free: Use tamari instead of soy sauce for a gluten-free option.
  • Dairy-Free: This recipe is naturally dairy-free, making it suitable for lactose-intolerant individuals.
  • Low-Carb: Substitute sweet potatoes with cauliflower for a lower carb option.

Equipment Recommendations

Make sure you have the right tools for the job:

  • Roasting Pan: A good quality roasting pan will help in even cooking.
  • Meat Thermometer: Essential for ensuring your chicken is cooked perfectly.
  • Mixing Bowls: For combining your marinade and tossing sweet potatoes.

Serving Suggestions

Want to elevate your meal even more? Consider these serving options:

  • Fresh Salad: Serve with a side salad for a refreshing contrast.
  • Grain Base: Serve over quinoa or brown rice for added texture and nutrition.
  • Garnish: Fresh herbs or a sprinkle of sesame seeds can add a lovely finishing touch.

FAQs About Maple Dijon Chicken & Sweet Potato Bowls

  • What can I substitute for chicken? You can use tofu, chickpeas, or even turkey.
  • Can I use other vegetables? Absolutely! Broccoli, carrots, or bell peppers work well.
  • How long does it take to prepare? This dish takes about 10 minutes to prep and 30 minutes to cook.
  • Is this recipe suitable for meal prep? Yes! It stores well and is great for lunch the next day.
  • Can I grill instead of bake? Yes! You can grill the chicken for a smoky flavor.
  • What’s the best way to serve the leftovers? Reheat in the oven or microwave, and enjoy!
  • How do I know when the chicken is done? Use a meat thermometer; chicken should reach 165°F (75°C).
  • Can I make this dish ahead of time? Yes! You can prepare it in advance and store it in the fridge before baking.

Now that you have all the tools and knowledge to create these flavorful Maple Dijon Chicken & Sweet Potato Bowls, it’s time to get cooking! Remember, cooking is about enjoying the process and making it your own. So put on your apron, gather your ingredients, and let’s make a meal that will impress family and friends alike. Happy cooking!

Tasty Maple Dijon Chicken & Sweet Potato Bowls

Prep Time 10 minutes
Cook Time 30 minutes
Total Time 40 minutes
Servings 4 servings
Calories 450
A delicious and wholesome dish featuring tender chicken and sweet potatoes glazed with maple and Dijon for a flavorful meal.

Ingredients

Protein

  • 4 pieces boneless, skinless chicken breasts (about 1.5 lbs)

Vegetables

  • 4 medium sweet potatoes (about 2 lbs, peeled and cubed)

Oils & Condiments

  • 2 tablespoons olive oil
  • 2 cloves garlic, minced
  • 1/4 cup Dijon mustard
  • 1/4 cup pure maple syrup
  • 2 tablespoons low-sodium soy sauce
  • 1 teaspoon smoked paprika

Salt and pepper to taste

Instructions 

  • Preheat oven to 400°F (200°C). Coat a baking dish with nonstick spray.
  • Toss sweet potatoes in olive oil, salt, pepper, and paprika; spread in dish.
  • Mix Dijon, maple syrup, soy sauce, garlic, and paprika; coat chicken breasts.
  • Place chicken on top of sweet potatoes and bake 25-30 mins until cooked through.
  • Serve hot, drizzling with leftover glaze if desired.

Notes

Ensure chicken reaches an internal temperature of 165°F (75°C) before serving.
Calories: 450kcal
Cost: $15
Course: Main Course
Cuisine: American
Keyword: Chicken, maple syrup, sweet potato

Unlock the Magic of Chicken Stir-Fry: A Quick and Easy Recipe

Welcome to your new go-to weeknight meal! This Quick Chicken Stir-Fry is not only a feast for your taste buds but also a breeze to prepare. In under 30 minutes, you can whip up a vibrant dish filled with fresh ingredients, making it the perfect solution for busy nights. Whether you’re a seasoned chef or just starting out, this recipe is designed to be simple yet satisfying—let’s dive in!

Why You’ll Love This Recipe

Here are just a few reasons why this chicken stir-fry will quickly become a staple in your kitchen:

  • Quick Preparation: Ready in just 30 minutes, perfect for those hectic weeknights.
  • Flavorful Ingredients: A combination of savory soy sauce and sweet honey creates a mouthwatering sauce.
  • Customizable: Easily swap ingredients based on your preferences or what you have on hand.
  • Healthy Option: Packed with colorful veggies, this stir-fry is a nutritious choice for dinner.
  • One-Pan Wonder: Minimal cleanup with everything cooked in one skillet!

Ingredients for Your Chicken Stir-Fry

Gather these ingredients for a delicious stir-fry:

  • 1/4 cup Reduced-Sodium Soy Sauce: Use regular soy sauce if low-sodium is unavailable.
  • 2 tablespoons Honey: Maple syrup can be a vegan substitute for sweetness.
  • 1 tablespoon Toasted Sesame Oil: Vegetable oil works if sesame isn’t available.
  • 2 tablespoons Canola Oil: Grapeseed oil can be substituted.
  • 1 pound Boneless, Skinless Chicken Breast: Feel free to substitute with tofu, shrimp, or beef.
  • 2 cups Broccoli: Snow peas or green beans make great alternatives.
  • 1 cup Bell Pepper: Carrots or zucchini can be used instead.
  • 3 cloves Garlic: Fresh ginger can add a unique flavor boost.
  • 1/2 cup Raw Cashews: Consider sunflower seeds for a nut-free option.
  • 1 teaspoon Freshly Ground Black Pepper: Use white pepper for a milder flavor.

How to Make Your Chicken Stir-Fry

Appetizing close-up of stir-fried chicken with a glossy sauce.

Follow these straightforward steps to create your stir-fry:

  1. Begin by preparing your ingredients. Chop the chicken into bite-sized pieces and cut the veggies into uniform sizes for even cooking.
  2. In a small bowl, whisk together the reduced-sodium soy sauce, honey, and toasted sesame oil. Set aside.
  3. Heat canola oil in a large skillet over medium-high heat. Once hot, add the chicken and cook until browned and cooked through, about 5-7 minutes.
  4. Add the garlic and stir-fry for an additional minute until fragrant.
  5. Now, add the broccoli and bell pepper to the skillet. Stir-fry for another 3-4 minutes, allowing the veggies to become tender yet still crisp.
  6. Pour the sauce over the chicken and veggies, stirring to coat everything evenly. Cook for an additional 2 minutes until the sauce thickens slightly.
  7. Finally, sprinkle in the raw cashews and black pepper, giving it a quick stir before serving.

Pro Tips for a Perfect Chicken Stir-Fry

Make your stir-fry the best it can be with these expert insights:

  • Prep Ahead: Chop your veggies and chicken in advance to save time during cooking.
  • High Heat: Always cook on high heat for that classic stir-fry sear and to lock in flavors.
  • Don’t Overcrowd: Cook in batches if your skillet isn’t large enough to avoid steaming the ingredients.
  • Fresh Ingredients: Use the freshest produce you can find for maximum flavor and nutrition.
  • Experiment: Try adding different sauces or spices to customize your stir-fry to your taste.
  • Use a Wok: If available, a wok can enhance the cooking process thanks to its shape and heat distribution.
  • Adjust the Sauce: Feel free to tweak the soy sauce and honey ratio to suit your taste preference.
  • Garnish: Add fresh herbs or additional nuts for a pop of flavor and texture when serving.

Common Mistakes and Troubleshooting

Even the best of us can make mistakes in the kitchen. Here’s how to avoid common pitfalls:

  • Overcooking the Chicken: Keep an eye on your chicken to avoid a dry texture; it should be golden brown and cooked through.
  • Too Saucy: If you find your stir-fry too saucy, increase the heat for a minute to help it thicken or add more veggies to absorb excess liquid.
  • Vegetable Texture: Ensure that your veggies are cut evenly to promote even cooking.
  • Flavors Not Balancing: If it tastes too salty, add a splash of vinegar or citrus to balance it out.

Variations to Explore

Get creative with these variations to keep your stir-fry exciting:

  • Spicy Chicken Stir-Fry: Add red pepper flakes or sriracha to the sauce for a kick.
  • Vegan Delight: Replace chicken with tofu and ensure honey is substituted with maple syrup.
  • Beef Stir-Fry: Swap chicken for thinly sliced beef for a hearty alternative.
  • Mixed Veggie Stir-Fry: Use a variety of seasonal vegetables for a colorful and nutritious medley.

Storage and Make-Ahead Instructions

Want to prep ahead or store leftovers? Here’s how:

  • Make-Ahead: Chop vegetables and marinate the chicken up to a day in advance.
  • Storing Leftovers: Store in an airtight container in the fridge for up to 3 days.
  • Freezing: Freeze in portions for up to 3 months. Thaw in the refrigerator before reheating.
  • Reheating: Use a skillet over medium heat to reheat, adding a splash of water to maintain moisture.

Frequently Asked Questions

Here are answers to some common questions about chicken stir-fry:

  • Can I use frozen vegetables? Yes, frozen vegetables can be used; just add them to the skillet straight from the freezer.
  • What can I serve with chicken stir-fry? Serve over rice, quinoa, or noodles for a complete meal.
  • Is this recipe gluten-free? Use gluten-free soy sauce and ensure all other ingredients are gluten-free.
  • How can I make this dish spicier? Add sriracha or chili paste to the sauce for extra heat.
  • Can I use different proteins? Absolutely! Shrimp or beef are great alternatives to chicken.
  • What if I don’t have soy sauce? You can use coconut aminos or tamari as substitutes.
  • How long does it take to cook stir-fry? Typically, it takes about 15-20 minutes from start to finish.
  • Can I make this ahead of time? Yes, you can prepare the ingredients in advance and stir-fry just before serving.

Nutrition Tips and Dietary Adaptations

This chicken stir-fry is not only delicious but also nutritious. Here are some tips for tailoring it to your dietary needs:

  • Low Sodium: Use low-sodium soy sauce or coconut aminos to reduce salt intake.
  • Vegetarian/Vegan: Substitute chicken with tofu and honey with agave or maple syrup.
  • Gluten-Free: Ensure that soy sauce is gluten-free and check other ingredients.
  • Protein Boost: Add chickpeas or edamame for extra protein and fiber.

Essential Equipment for Your Stir-Fry

Having the right tools can make a significant difference in your cooking experience:

  • High-Quality Skillet or Wok: Essential for even cooking and excellent heat retention.
  • Sharp Knife: A good knife helps with precise, efficient chopping.
  • Cutting Board: Choose a sturdy cutting board to make prep work easier.
  • Measuring Cups and Spoons: Accurate measurements ensure flavor consistency.

Serving Suggestions for Your Chicken Stir-Fry

Make your meal even more enjoyable with these serving ideas:

  • Garnish: Top with sesame seeds or chopped green onions for added flavor and presentation.
  • Side Dishes: Pair with steamed rice, fried rice, or a fresh salad.
  • Drinks: Serve with a refreshing iced tea or a light beer to complement the flavors.

Your Culinary Adventure Awaits!

Now that you have all the tools and tips to create a stunning chicken stir-fry, it’s time to get cooking! Remember, the joy of cooking comes from experimenting and enjoying the process. Don’t stress about perfection; focus on the flavors and the delight of sharing your meal with loved ones. Happy cooking, and enjoy your delicious homemade chicken stir-fry!

Quick & Easy Chicken Stir-Fry: Your New Weeknight Hero

Prep Time 10 minutes
Cook Time 15 minutes
Total Time 25 minutes
Servings 4 servings
Calories 450
This flavorful chicken stir-fry is quick to prepare and perfect for busy weeknights, combining fresh vegetables with a savory sauce.

Ingredients

Sauces and Oils

  • 1/4 cup Reduced-Sodium Soy Sauce (Use regular soy sauce if low-sodium is unavailable.)
  • 2 tablespoons Honey (Maple syrup can be a vegan substitute.)
  • 1 tablespoon Toasted Sesame Oil (Vegetable oil works if sesame isn't available.)
  • 2 tablespoons Canola Oil (Grapeseed oil can be substituted.)

Main Protein

  • 1 pound Boneless, Skinless Chicken Breast (Substitute with tofu, shrimp, or beef if desired.)

Vegetables

  • 2 cups Broccoli (Substitutes include snow peas or green beans.)
  • 1 cup Bell Pepper (Carrots or zucchini can be alternatives.)
  • 3 cloves Garlic (Fresh ginger can add extra flavor.)
  • 1/2 cup Raw Cashews (Consider sunflower seeds for a nut-free option.)
  • 1 teaspoon Freshly Ground Black Pepper (White pepper can be used for a milder flavor.)

Instructions 

  • Slice chicken and vegetables into bite-sized pieces.
  • Mix soy sauce, honey, sesame oil, and canola oil to make the sauce.
  • Cook chicken in a skillet until browned, then add vegetables and stir-fry until tender.
  • Add the sauce to the skillet and toss to coat evenly.
  • Stir in cashews and season with black pepper before serving.

Notes

For extra flavor, add a splash of rice vinegar or a sprinkle of red pepper flakes.
Calories: 450kcal
Cost: $15
Course: Main Course
Cuisine: Asian
Keyword: Chicken