Author

Steven

Browsing

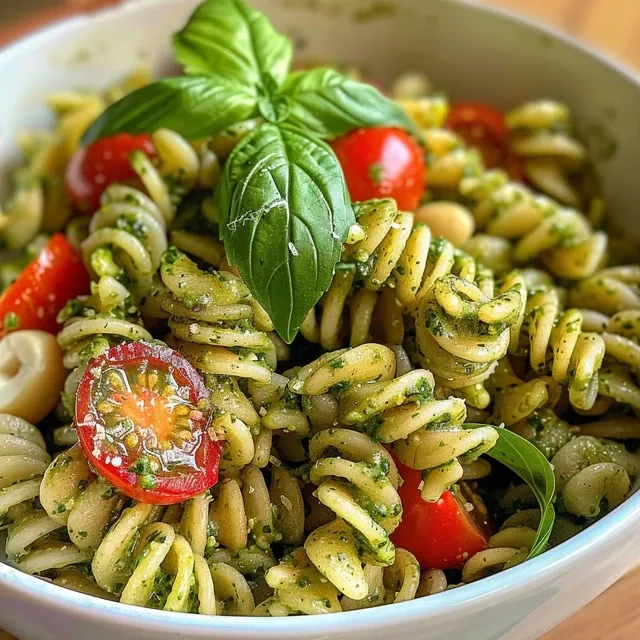
When you’re juggling a busy schedule, the last thing you want is to spend hours in the kitchen. That’s why this Gluten Free & Dairy Free Pesto Pasta recipe is a game changer! It’s quick, easy, and bursting with fresh flavors that will make weeknight dinners exciting again. In just under 30 minutes, you can whip up a dish that’s not only healthy but also incredibly satisfying. Let’s dive into why this recipe is perfect for you!

Why You’ll Love This Recipe

  • Speedy Preparation: Ready in under 30 minutes, perfect for busy evenings.
  • Flavorful and Fresh: Packed with vibrant basil, garlic, and nutritional yeast for a cheesy taste without dairy.
  • Customizable: Add your favorite veggies or protein to make it your own.
  • Healthy Ingredients: Gluten-free and dairy-free, suitable for various dietary needs.
  • Minimal Cleanup: One pot for pasta, one blender for pesto means less time cleaning!

Ingredients Breakdown

To make this delightful dish, you’ll need the following ingredients:

  • 2 cups fresh basil leaves: Packed for maximum flavor.
  • 1/3 cup raw cashews or pine nuts: For a creamy texture and nutty flavor.
  • 2 cloves garlic: Fresh garlic adds aromatic depth.
  • 1/4 cup nutritional yeast: A dairy-free alternative that gives a cheesy flavor.
  • 1 lemon, juiced: Fresh lemon juice brightens the dish.
  • 1/3 cup extra virgin olive oil: For richness and healthy fats.
  • Salt, to taste: Enhances the overall flavor.
  • 2 tbsp water (to thin, if needed): Adjusts the pesto consistency.
  • 12 oz gluten-free pasta: Brown rice or chickpea pasta works great.
  • 1 cup cherry tomatoes, halved: Adds juiciness and freshness.
  • 1 tbsp olive oil: For sautéing the tomatoes.
  • Fresh basil leaves, for garnish: For a pop of color and flavor.
  • Optional: sautéed zucchini or mushrooms: For extra veggies and texture.

Instructions to Make Your Pesto Pasta

Follow these simple steps to create your dish:

  1. Bring a large pot of salted water to a boil and cook the gluten-free pasta according to package directions. Reserve about 1/4 cup of pasta water before draining.
  2. While the pasta cooks, blend the basil, cashews, garlic, nutritional yeast, lemon juice, and salt in a food processor. With the motor running, drizzle in the olive oil until smooth. Add water to thin if needed.
  3. In a skillet, heat 1 tablespoon of olive oil over medium heat. Add the halved cherry tomatoes and cook for 4–5 minutes until they blister and soften.
  4. Toss the cooked pasta with the pesto and a splash of reserved pasta water to help coat it evenly. Add the sautéed tomatoes and garnish with fresh basil. Serve warm.

Pro Tips for Perfect Pesto Pasta

Deliciously plated gluten-free pasta mixed with pesto, nuts, and colorful cherry tomatoes.
  • Adjust the Texture: If your pesto is too thick, add more water or olive oil to reach your desired consistency.
  • Toast Your Nuts: Toasting cashews or pine nuts before blending can enhance their flavor.
  • Prep Ahead: Make your pesto in advance and store it in the fridge for up to a week.
  • Swap Ingredients: Feel free to use other nuts or herbs like parsley for a different twist!
  • Don’t Overcook the Pasta: Aim for al dente for the best texture.
  • Experiment with Add-Ins: Mix in sautéed vegetables or grilled chicken for added nutrition.
  • Use Quality Olive Oil: A good quality extra virgin olive oil enhances flavor significantly.
  • Save Some Pasta Water: The starchy water can help emulsify and thicken your sauce.

Common Mistakes and Troubleshooting

Even the best cooks make mistakes! Here are some common pitfalls and how to avoid them:

  • Pesto Too Thick: If it’s too thick, gradually add water or more olive oil until you achieve a smoother consistency.
  • Overcooked Pasta: Always check your pasta a minute or two before the package instructions suggest.
  • Too Much Garlic: If your pesto is too garlicky for your taste, balance it with more basil or olive oil.
  • Not Enough Flavor: A pinch of salt or an extra squeeze of lemon juice can brighten up the dish.

Flavorful Variations You Can Try

Get creative with your pesto pasta! Here are some variations to keep things exciting:

  • Sun-Dried Tomato Pesto: Blend in sun-dried tomatoes for a richer flavor.
  • Spinach & Basil Pesto: Combine spinach with basil for added nutrients and a unique taste.
  • Vegan Parmesan Substitute: Add cashew cheese or a sprinkle of hemp seeds for a cheesy flavor.
  • Roasted Veggie Pesto Pasta: Toss in roasted bell peppers or eggplant for added depth.

Storage and Make-Ahead Instructions

This dish is perfect for meal prep! Here’s how to store it:

  • Refrigerate: Store in an airtight container for up to 5 days.
  • Freeze: Pesto can be frozen for up to 3 months. Just thaw it in the fridge before use.
  • Reheat: Warm the pasta gently on the stovetop with a splash of water to avoid drying it out.

Comprehensive FAQ

Here are some frequently asked questions that might help you:

  • Can I use different nuts for the pesto? Yes! Almonds or walnuts are great alternatives.
  • Is this recipe gluten-free? Yes, use gluten-free pasta like brown rice or chickpea pasta.
  • Can I make this recipe nut-free? Yes, use sunflower seeds instead of nuts for a nut-free version.
  • How can I make this recipe lower in calories? Substitute half of the olive oil with vegetable broth.
  • Can I add protein to this dish? Absolutely! Grilled chicken, shrimp, or chickpeas work well.
  • What if I don’t have nutritional yeast? You can omit it, but it does add a unique cheesy flavor.
  • How do I know when the pasta is done? Taste a piece a minute or two before the package time says to check for doneness.
  • Can I use frozen basil? While fresh basil is best, frozen basil can work in a pinch!

Nutrition Tips and Dietary Adaptations

This dish is not only delicious but also nutritious! Here are some tips to enhance its health benefits:

  • Opt for Whole Grains: Choose brown rice or chickpea pasta for added fiber.
  • Add More Veggies: Include spinach, kale, or any seasonal veggies to boost nutrients.
  • Protein Boost: Incorporate beans or lentils for a plant-based protein punch.
  • Healthy Fats: The olive oil provides heart-healthy fats; just keep an eye on the quantity.

Equipment Recommendations

Here’s what you’ll need to make this recipe:

  • Large Pot: For boiling the pasta.
  • Food Processor: Essential for making the pesto.
  • Skillet: For sautéing tomatoes and any additional vegetables.

Serving Suggestions

Serve your Gluten Free & Dairy Free Pesto Pasta with:

  • Fresh Salad: A simple green salad pairs perfectly.
  • Garlic Bread: For a comforting side.
  • Grilled Veggies: Enhance your meal with seasonal grilled veggies.
  • Wine Pairing: A crisp white wine complements the flavors beautifully.

Cooking doesn’t have to be overwhelming. With this Quick and Flavorful Gluten Free & Dairy Free Pesto Pasta recipe, you’ll not only impress your taste buds but also make weeknight dinners a breeze. Enjoy the process, and remember, cooking is all about having fun and creating delicious memories!

Gluten Free & Dairy Free Pesto Pasta

Prep Time 10 minutes
Cook Time 15 minutes
Total Time 25 minutes
Servings 4 servings
Calories 520
A vibrant, dairy-free pesto pasta perfect for a quick, wholesome meal that caters to gluten-free and vegan diets.

Ingredients

Pesto

  • 2 cups fresh basil leaves, packed
  • 1/3 cup raw cashews or pine nuts
  • 2 cloves garlic
  • 1/4 cup nutritional yeast
  • 1 lemon lemon, juiced
  • 1/3 cup extra virgin olive oil
  • to taste Salt
  • 2 tbsp water (to thin, if needed)

Pasta

  • 12 oz gluten-free pasta (brown rice or chickpea pasta)
  • 1 cup cherry tomatoes, halved
  • 1 tbsp olive oil
  • for garnish Fresh basil leaves
  • optional sautéed zucchini or mushrooms

Instructions 

  • Cook gluten-free pasta in salted boiling water, reserving 1/4 cup of pasta water before draining.
  • Blend basil, cashews, garlic, nutritional yeast, lemon juice, and salt; drizzle in olive oil until smooth. Add water to thin if needed.
  • Heat olive oil in a skillet, cook cherry tomatoes for 4–5 minutes until blistered.
  • Toss cooked pasta with pesto and a splash of reserved pasta water; add sautéed tomatoes and garnish with basil. Serve warm.

Notes

Use fresh basil for the best flavor and adjust salt to taste.
Calories: 520kcal
Cost: $15
Course: Main Course
Cuisine: Fusion
Keyword: Gluten-Free, Pesto, Vegan

Welcome to Your New Favorite Recipe!

Are you ready to elevate your weeknight dinners with a dish that’s not only quick but also bursting with flavor? This One-Pan Garlic Butter Chicken and Veggies is your go-to solution for busy evenings, combining tender chicken breasts with vibrant vegetables, all coated in a luscious garlic butter sauce. In under 30 minutes, you’ll serve a meal that everyone will love, and the best part? It all cooks on one sheet pan for easy cleanup!

Why You’ll Love This Recipe

This dish isn’t just easy to make; it’s also packed with benefits that will make you reach for it again and again:

  • Quick & Easy: Ready in under 30 minutes, perfect for busy weeknights.
  • One-Pan Meal: Everything cooks together on a single sheet pan, minimizing cleanup time.
  • Flavorful Garlic Butter Sauce: The combination of garlic and butter creates a savory sauce that enhances the chicken and veggies.
  • Healthy Ingredients: Packed with lean protein and colorful vegetables, this dish is both nutritious and satisfying.
  • Customizable: Easily adjust the veggies based on what you have on hand or to suit your family’s preferences.

Ingredients Breakdown

Here’s what you’ll need to create this delicious sheet pan garlic butter chicken:

  • 4 boneless, skinless chicken breasts: Opt for thighs if you prefer juicier meat.
  • 1 lb baby potatoes, halved: These add heartiness; feel free to substitute with sweet potatoes for a healthier twist.
  • 2 cups mixed vegetables: Use your favorites, such as broccoli, bell peppers, or carrots.
  • 1/2 cup unsalted butter, melted: This forms the base of your garlic butter sauce.
  • 4 cloves garlic, minced: Freshly minced garlic elevates the flavor.
  • 1 teaspoon salt: Enhances overall flavor.
  • 1/2 teaspoon black pepper: For a bit of kick.
  • 1 teaspoon paprika: Adds color and a mild sweetness.
  • 1 teaspoon dried thyme: Complements the garlic and chicken beautifully.

Don’t have all the ingredients? Here are some smart substitutions:

  • Butter: Olive oil can be used for a healthier option.
  • Vegetables: Frozen mixed veggies work in a pinch.
  • Herbs: Use Italian seasoning if you don’t have thyme.

Step-by-Step Instructions

A delicious arrangement of garlic butter chicken, mixed veggies, and baby potatoes in a bowl.

Let’s get cooking with these simple steps to prepare your garlic butter chicken and veggies:

  1. Preheat your oven to 400°F (200°C).
  2. In a large bowl, combine the melted butter, minced garlic, salt, pepper, paprika, and thyme. Mix well.
  3. Add the chicken breasts to the bowl, ensuring they’re well-coated with the butter mixture.
  4. On a baking sheet, arrange the halved baby potatoes and mixed vegetables. Drizzle with half of the garlic butter sauce and toss to coat.
  5. Place the chicken breasts on the baking sheet among the veggies. Drizzle the remaining garlic butter sauce over the top.
  6. Bake for 20-25 minutes, or until the chicken reaches an internal temperature of 165°F (75°C) and the potatoes are fork-tender.
  7. Remove from the oven and let it rest for a few minutes before serving.

Pro Tips for Perfect Garlic Butter Chicken and Veggies

Here are some expert tips to make your cooking experience even better:

  • Even Cuts: Cut potatoes and veggies into similar sizes for even cooking.
  • Don’t Overcrowd: If your pan is too crowded, the chicken and veggies won’t roast properly; use two pans if necessary.
  • Use Fresh Ingredients: Fresh garlic and herbs significantly enhance the flavor of your dish.
  • Check for Doneness: Use a meat thermometer for perfectly cooked chicken every time.
  • Let it Rest: Allow the chicken to rest for a few minutes before slicing to retain its juices.
  • Garnish: Fresh parsley or a sprinkle of lemon juice brightens the dish before serving.
  • Experiment with Seasonings: Feel free to add your favorite spices for a personal touch.
  • Make it Ahead: Prepare the garlic butter mixture and marinate the chicken a few hours in advance for deeper flavor.

Common Mistakes and Troubleshooting

Even the best cooks can make mistakes! Here are some common pitfalls and how to avoid them:

  • Dry Chicken: Overcooking is the main culprit. Use a thermometer to ensure you don’t go over 165°F.
  • Undercooked Potatoes: If your potatoes aren’t tender, they likely need more time. Check them and give them extra minutes as needed.
  • Too Much Liquid: If the pan is too crowded, liquids can build up. Make sure there’s space between the chicken and veggies.

Delicious Variations

Get creative with these variations to switch things up:

  • Mediterranean Twist: Add olives, cherry tomatoes, and feta cheese.
  • Spicy Kick: Incorporate red pepper flakes or sriracha in the garlic butter sauce.
  • Citrus Zing: Squeeze fresh lemon juice over the dish before serving for a refreshing finish.
  • Herb-Infused: Swap dried thyme for rosemary or oregano for a different flavor profile.

Storage and Make-Ahead Instructions

This dish is fantastic for meal prep! Here’s how to store or prepare it ahead of time:

  • Refrigerate: Store leftover chicken and veggies in an airtight container for up to 3 days.
  • Freeze: Cool completely, then transfer to a freezer-safe container. It can be frozen for up to 2 months.
  • Reheating: Thaw in the fridge overnight before reheating. Warm in the oven at 350°F until heated through.

Frequently Asked Questions

Here are some common questions about making garlic butter chicken and veggies:

  • Can I use frozen chicken? Yes, just ensure it’s fully thawed before cooking.
  • What vegetables work best? Broccoli, bell peppers, and zucchini are great options.
  • How can I make this dish lower in calories? Use less butter or substitute with a healthier oil.
  • Can I cook this in an air fryer? Absolutely! Adjust the cooking time and temperature for your air fryer.
  • What sides pair well with this dish? Serve with a fresh salad or crusty bread to soak up the delicious sauce!
  • Is this recipe gluten-free? Yes, all ingredients used are gluten-free.
  • How can I enhance the garlic flavor? Increase the amount of garlic if you’re a fan of strong garlic flavors.
  • Can I double this recipe? Yes, just ensure your sheet pan has enough space; you might need two pans.

Nutritional Tips and Dietary Adaptations

This dish is not only delicious but also nutritious! Here are some tips to adapt it for various dietary needs:

  • Low-Carb: Substitute potatoes with cauliflower florets for a keto-friendly option.
  • Vegetarian: Swap chicken for chickpeas or plant-based protein and increase the veggie amount.
  • Dairy-Free: Use a dairy-free butter alternative to keep the garlic butter sauce creamy.

Equipment Recommendations

Here’s what you’ll need to make this dish:

  • Sheet Pan: A large, heavy-duty sheet pan works best for even cooking.
  • Mixing Bowl: For preparing the garlic butter sauce and mixing the ingredients.
  • Meat Thermometer: Essential for checking the chicken’s doneness without guesswork.
  • Spatula: For tossing the veggies and chicken to ensure even coating.

Serving Suggestions

Once your garlic butter chicken and veggies are ready, it’s time to serve! Here are some ideas:

  • Garnish: Fresh herbs, such as parsley or thyme, add a beautiful touch.
  • Accompaniments: Pair with rice, quinoa, or a light salad for a complete meal.
  • Presentation: Serve directly from the pan for a rustic feel, or plate individually for a more polished presentation.

Conclusion

Now that you have this incredible One-Pan Garlic Butter Chicken and Veggies recipe, you’re all set to impress your family or guests with minimal effort! Cooking doesn’t have to be stressful, and with simple ingredients and clear steps, you can create a meal that’s both satisfying and delicious. So grab your apron, gather your ingredients, and let’s make cooking fun again!

Garlic Butter Chicken and Veggies

Prep Time 10 minutes
Cook Time 30 minutes
Total Time 40 minutes
Servings 4 servings
Calories 550
A delicious one-pan meal featuring tender chicken breasts cooked with flavorful garlic butter and a medley of fresh vegetables and potatoes.

Ingredients

Protein

  • 4 pieces boneless, skinless chicken breasts
  • 1 lb baby potatoes, halved
  • 2 cups mixed vegetables (such as broccoli, bell peppers, and carrots)

Dairy

  • 1/2 cup unsalted butter, melted
  • 4 cloves garlic, minced

Spices & Seasonings

  • 1 teaspoon salt
  • 1/2 teaspoon black pepper
  • 1 teaspoon paprika
  • 1 teaspoon dried thyme

Instructions 

  • Preheat oven to 400°F (200°C).
  • Season chicken breasts with salt, pepper, paprika, and thyme.
  • In a skillet, melt butter and cook chicken until browned, then add garlic and cook for 1 minute.
  • Add potatoes and vegetables to the skillet, toss with garlic butter, and transfer to the oven.
  • Bake for 20-25 minutes until chicken is cooked through and vegetables are tender.

Notes

For extra flavor, sprinkle fresh herbs before serving.
Calories: 550kcal
Cost: $15
Course: Main Course
Cuisine: American
Keyword: Chicken, Garlic, Vegetables

Welcome to the world of effortless cooking! Today, we’re diving into a delightful recipe for Easy Bruschetta with fresh tomatoes and mozzarella. This classic Italian appetizer is not just a treat for your taste buds but also a visual feast. Whether you’re hosting a gathering or just enjoying a cozy night in, this bruschetta recipe is perfect for impressing your friends and family with minimal effort. Get ready to unlock the secrets to the best bruschetta you’ll ever make!

Why You’ll Love This Recipe

  • Quick and Simple: This recipe requires just a handful of fresh ingredients and can be whipped up in under 30 minutes.
  • Fresh and Flavorful: The combination of ripe tomatoes, fresh mozzarella, and aromatic basil creates a burst of flavor in every bite.
  • Perfect for Any Occasion: Whether it’s a last-minute snack, a party appetizer, or a side dish for an Italian dinner, this bruschetta fits the bill.
  • Customizable: Tailor this bruschetta to your taste with various toppings and flavor additions.
  • Ideal for Entertaining: Impress your guests with this elegant yet easy-to-make appetizer that pairs beautifully with wine.

Ingredients You’ll Need

Let’s gather our ingredients! Here’s what you’ll need for this easy bruschetta recipe:

  • 4 Roma tomatoes (diced) – These tomatoes are juicy and flavorful, making them perfect for bruschetta.
  • 1/2 cup fresh mozzarella (pearls or chopped) – Creamy mozzarella adds richness to the dish.
  • 1/4 cup fresh basil (chopped) – A must-have for that aromatic Italian flavor.
  • 2 tbsp extra virgin olive oil – Enhances the overall taste and adds a touch of richness.
  • Salt and black pepper (to taste) – Essential for seasoning.
  • Balsamic glaze (optional, for drizzling) – This adds a sweet and tangy finish.
  • 1 baguette (sliced into ½-inch pieces) – The base for your bruschetta; choose a good quality bread.
  • 2 tbsp olive oil (for brushing bread) – Helps achieve a golden, crisp texture.
  • 1 garlic clove (peeled) – For rubbing on the toasted bread to infuse flavor.

How to Make the Best Easy Bruschetta

Ready to create your masterpiece? Follow these simple steps:

  • Step 1: Preheat the Oven – Begin by preheating your oven to 400°F (200°C).
  • Step 2: Prepare the Bread – Slice the baguette into ½-inch thick pieces and arrange them on a baking sheet.
  • Step 3: Add Olive Oil – Brush each bread slice lightly with olive oil for added flavor and crispiness.
  • Step 4: Toast the Bread – Place the baking sheet in the oven and toast the bread for 6–8 minutes until golden brown and crisp.
  • Step 5: Infuse Garlic Flavor – Once toasted, rub the warm bread slices with the peeled garlic clove to impart a subtle garlic flavor.
  • Step 6: Make the Tomato Mixture – In a bowl, combine the diced tomatoes, 2 tablespoons of olive oil, salt, pepper, and chopped basil. Let this mixture sit for about 5 minutes to allow the flavors to meld.
  • Step 7: Assemble the Bruschetta – Top each toasted bread slice generously with the tomato mixture and add fresh mozzarella on top.
  • Step 8: Drizzle and Serve – If desired, drizzle with balsamic glaze for an added touch of flavor. Serve immediately for the best texture and taste.

Pro Tips for Perfect Bruschetta

  • Choose the Right Bread: Opt for a crusty baguette or ciabatta for the best texture.
  • Use Ripe Tomatoes: The flavor of your bruschetta largely depends on the quality of your tomatoes; make sure they’re ripe!
  • Chill the Tomato Mixture: Letting it sit for a few minutes helps enhance the flavors.
  • Experiment with Cheese: If you want something different, try burrata or goat cheese for a creamy twist.
  • Add Spice: For a kick, consider adding a pinch of red pepper flakes or diced jalapeños to the tomato mixture.
  • Make-Ahead Option: Prepare the tomato mixture ahead of time and assemble just before serving for the freshest taste.
  • Adjust for Dietary Needs: This bruschetta is easily adaptable for gluten-free diets; simply swap the bread.
  • Use Fresh Herbs: Besides basil, fresh parsley or chives can add a unique flavor profile.

Common Mistakes and Troubleshooting

Here are a few common issues and how to avoid them:

  • Too Soggy Bread: Ensure the bread is toasted well before adding toppings. Serve immediately to prevent sogginess.
  • Overseasoning: Start with a little salt and pepper; you can always add more after tasting.
  • Insufficient Flavor: Use high-quality olive oil and fresh ingredients for maximum flavor impact.
  • Too Much Garlic: If you’re unsure about garlic, start with rubbing just a little on the bread instead of using minced garlic in the topping.

Flavor Variations

Get creative! Here are a few variations you can try:

  • Caprese Bruschetta: Add sliced fresh mozzarella and a sprinkle of balsamic reduction.
  • Avocado Bruschetta: Mash ripe avocado into the tomato mix for a creamy twist.
  • Roasted Pepper Bruschetta: Incorporate diced roasted red peppers for a smoky flavor.
  • Pesto Bruschetta: Mix pesto into the tomato mixture for a vibrant herbal kick.

How Long Does Fresh Bruschetta Keep?

Bruschetta is best enjoyed fresh; however, if you have leftovers, store the tomato mixture separately from the toasted bread to maintain texture. The tomato mixture can be refrigerated for 1-2 days, while the bread is best eaten within a few hours to avoid becoming soggy.

Storage and Make-Ahead Instructions

To prepare in advance:

  • Store the tomato mixture in an airtight container in the fridge.
  • Toast the bread just before serving to keep it crisp.
  • Assemble the bruschetta right before serving for the best taste and texture.

Frequently Asked Questions

  • Can I make bruschetta with other types of bread? Yes, ciabatta or sourdough also work well!
  • What’s the best way to cut tomatoes for bruschetta? Dicing them finely ensures even distribution on the bread.
  • Can I use canned tomatoes? Fresh tomatoes are recommended for the best flavor, but you can use canned for a quick option.
  • How can I make this recipe vegan? Simply omit the mozzarella or substitute with a vegan cheese alternative.
  • What are some good sides to serve with bruschetta? Salads, antipasto platters, or cheese boards complement bruschetta beautifully.
  • Can I freeze bruschetta? It’s best not to freeze bruschetta as the texture will change upon thawing.
  • How can I make bruschetta spicy? Add diced jalapeños or a dash of hot sauce to the tomato mixture.
  • What’s the best way to serve bruschetta? Serve it on a platter with toothpicks for easy eating!

Nutrition Tips and Dietary Adaptations

This bruschetta is not only delicious but also offers some nutritional benefits:

  • Rich in Vitamins: Fresh tomatoes and basil are loaded with vitamins A and C.
  • Low Calorie: A great option for a light appetizer, keeping your meal balanced.
  • Gluten-Free Option: Substitute the baguette with gluten-free bread.
  • Dairy-Free Option: Use a nut-based cheese or omit cheese altogether.

Equipment Recommendations

For this recipe, you’ll need:

  • Cutting Board: For chopping your fresh ingredients.
  • Sharp Knife: A good knife makes slicing tomatoes and bread easy.
  • Baking Sheet: To toast your baguette slices evenly.
  • Mixing Bowl: For combining your tomato mixture.

Serving Suggestions

This bruschetta pairs wonderfully with:

  • Wine Nights: A crisp white wine like Sauvignon Blanc complements the flavors beautifully.
  • Charcuterie Boards: Add it to a selection of meats and cheeses for a delightful spread.
  • Salads: Serve alongside a fresh salad to create a balanced meal.
  • Soups: Perfect as a side to tomato basil soup for a comforting pairing.

In Conclusion

Your journey to creating the most delicious bruschetta begins with this simple recipe. The combination of fresh ingredients and easy steps makes it accessible for anyone, whether you’re a kitchen novice or a seasoned chef. Remember, cooking is all about enjoying the process and sharing delightful meals with loved ones. So, roll up your sleeves, gather your ingredients, and get ready to impress! Happy cooking!

Easy Bruschetta with Fresh Tomatoes and Mozzarella

Prep Time 10 minutes
Cook Time 8 minutes
Total Time 18 minutes
Servings 4 servings
Calories 250
A quick and delicious appetizer featuring fresh tomatoes, mozzarella, and basil on toasted baguette slices.

Ingredients

Main

  • 4 pieces Roma tomatoes (diced)
  • 1/2 cup fresh mozzarella (pearls or chopped)
  • 1/4 cup fresh basil (chopped)
  • 2 tbsp extra virgin olive oil
  • to taste salt and black pepper
  • optional balsamic glaze (for drizzling)
  • 1 piece baguette (sliced into ½-inch pieces)
  • 2 tbsp olive oil (for brushing bread)
  • 1 clove garlic (peeled)

Instructions 

  • Preheat oven to 400°F (200°C). Slice baguette and place on a baking sheet.
  • Brush bread slices with olive oil and toast for 6–8 minutes until golden.
  • Rub toasted bread with peeled garlic clove.
  • Mix diced tomatoes, olive oil, salt, pepper, and basil; let sit for 5 minutes.
  • Top bread slices with tomato mixture and mozzarella. Drizzle with balsamic glaze if desired.

Notes

Use fresh, ripe tomatoes for the best flavor.
Calories: 250kcal
Cost: $10
Course: Appetizer
Cuisine: Italian
Keyword: Mozzarella, Tomatoes

Unlock the Flavor: Your Ultimate Guide to Ground Turkey Enchilada Skillet

Welcome to your new favorite weeknight dinner! This Ground Turkey Enchilada Skillet is a one-pan wonder that brings all the delicious flavors of traditional enchiladas into a quick and easy meal. If you’re looking for a recipe that is not only packed with flavor but also easy to prepare, you’re in the right place. This dish is perfect for busy families, providing a hearty meal that can be on the table in under 40 minutes. Ready to dive into the world of savory goodness? Let’s get cooking!

Why You’ll Love This Recipe

This Ground Turkey Enchilada Skillet is designed with flavor and convenience in mind. Here are five specific benefits that make this dish a must-try:

  • Quick & Easy: This recipe comes together in one pan, minimizing cleanup and maximizing flavor. You’ll have dinner ready in around 30-40 minutes.
  • Healthy Ingredients: Using lean ground turkey keeps this dish lighter without sacrificing taste. Packed with veggies and beans, it’s a nutritious choice for the whole family.
  • Customizable: Feel free to get creative! You can easily substitute ingredients based on what you have on hand or your family’s preferences.
  • Kid-Friendly: With its cheesy topping and familiar flavors, this dish is a hit with children and adults alike, making it an excellent family meal.
  • Meal Prep Friendly: This skillet meal stores well and can be made ahead, perfect for those busy weeks.

Ingredient Breakdown

Let’s take a closer look at the ingredients that make this dish so delicious, along with some substitution ideas:

  • 1 lb ground turkey: I recommend using Butterball for a leaner result. You can also use ground chicken or beef if you prefer.
  • Spices (cumin, oregano, salt, pepper, chili powder): These spices create a warm, flavorful base. You can adjust the spices to your taste or add other favorites like smoked paprika.
  • Olive oil: Essential for sautéing—adds a little richness. Avocado oil is a great alternative.
  • Vegetables (onion, bell peppers, garlic): Fresh veggies add depth and sweetness. Feel free to swap in zucchini or spinach for variety.
  • Enchilada sauce: I use Old El Paso mild for consistency, but homemade enchilada sauce is fantastic if you have the time.
  • Salsa and green chiles: These ingredients add layers of flavor and a bit of heat. You can use any salsa you love!
  • Beans and corn: Black beans and corn add texture and nutrition. Kidney beans or pinto beans can be substituted based on preference.
  • Corn tortillas: Cut into strips, they add that authentic enchilada feel. You can also use flour tortillas.
  • Cheese: I use Tillamook Mexican Blend for melting. Feel free to use your favorite cheese or a dairy-free alternative.
  • Cilantro: Fresh cilantro adds a burst of flavor. If you’re not a fan, parsley or green onions can be used instead.

Pro Tips for a Perfect Skillet

Juicy ground turkey enchilada skillet filled with colorful veggies and topped with melted cheese, ready to serve.

Get ready to cook like a pro with these expert insights:

  • Brown the Turkey Well: Ensure your ground turkey is well-browned to develop rich flavors. Don’t rush this step!
  • Don’t Overcook the Veggies: Sauté until just tender to maintain a good texture and flavor in your dish.
  • Layer Your Flavors: Add spices at different stages to build complexity. Start with the turkey and then add them with the vegetables.
  • Use Quality Ingredients: Fresh and high-quality ingredients make a noticeable difference in flavor and texture.
  • Simmer for Depth: Allow the mixture to simmer for at least 10 minutes to let the flavors meld beautifully.
  • Top with Cheese: Add cheese towards the end and cover to allow it to melt perfectly.
  • Garnish Generously: Fresh cilantro and avocado on top enhance the dish’s presentation and flavor.
  • Store Properly: If you have leftovers, store them in airtight containers in the fridge for up to 3 days.

Avoid These Common Mistakes

Even simple recipes can have hiccups! Here’s how to avoid common pitfalls:

  • Too Much Liquid: If your skillet is too watery, let it simmer uncovered to reduce excess liquid.
  • Soggy Tortillas: To prevent soggy tortillas, add them just a few minutes before serving.
  • Underseasoning: Taste as you go. Adjust seasoning to your preference; it can make all the difference.
  • Skipping the Garnish: Don’t skip the cilantro or avocado—they add freshness and balance.

Variations to Try

Want to change it up? Here are some creative variations of the classic enchilada skillet:

  • Mexican Quinoa Enchilada Skillet: Swap rice for quinoa for a protein-packed twist.
  • Vegetarian Enchilada Skillet: Replace ground turkey with mushrooms or lentils for a hearty vegetarian option.
  • Spicy Enchilada Skillet: Add jalapeños or a dash of hot sauce for an extra kick!
  • Cheesy Enchilada Skillet: Double the cheese for a gooey, cheesy delight that everyone will love.

Storage and Make-Ahead Instructions

This dish is perfect for meal prep! Here’s how to store and reheat:

  • Refrigerate: Store leftovers in airtight containers for up to 3 days. The flavors actually deepen as they sit!
  • Freeze: You can freeze portions for up to 2 months. Thaw in the fridge overnight before reheating.
  • Reheat: Warm it up in a skillet over medium heat or in the microwave until heated through.

Frequently Asked Questions

Got questions? We’ve got answers! Take a look at these FAQs:

  • Can I use frozen ground turkey? Yes! Just be sure to thaw it completely before cooking.
  • What if I don’t have enchilada sauce? You can make a quick substitute using tomato sauce and spices!
  • Can I make this vegan? Absolutely! Substitute the turkey with lentils or mushrooms and use vegan cheese.
  • How do I know when the turkey is cooked? Ensure it reaches an internal temperature of 165°F (74°C).
  • What sides pair well with this dish? Serve with a simple salad, rice, or tortilla chips for a complete meal.
  • Can I add more vegetables? Yes! Feel free to toss in any veggies you have on hand.
  • What type of cheese is best? A good melting cheese like Monterey Jack or Mexican blend works well.
  • Can I make this dish in advance? Yes, you can prepare it ahead of time and store it in the fridge until ready to cook.

Nutrition Tips and Dietary Adaptations

Eating healthy doesn’t have to be boring! Here are some tips for balancing nutrition:

  • Lean Protein: Ground turkey is a great source of lean protein. Consider using ground chicken or even plant-based proteins for a healthier option.
  • Boost Fiber: Add extra beans or whole grain rice to increase fiber content.
  • Low-Sodium Options: Look for low-sodium canned goods to keep salt levels in check.
  • Fresh Veggies: Load up on vegetables for added nutrients and color in your dish.

Equipment Recommendations

To make cooking easier, here’s a list of essential tools you’ll need:

  • Skillet: A large, deep skillet is best for this recipe to accommodate all the ingredients.
  • Wooden Spoon: Perfect for stirring and breaking up the turkey as it cooks.
  • Measuring Cups and Spoons: For accurate ingredient measurements and consistency.
  • Cutting Board and Knife: Essential for prepping your vegetables and proteins.

Serving Suggestions

When it comes to serving, presentation is key! Here are some ideas:

  • Garnish Generously: Top with fresh cilantro, diced avocado, or a squeeze of lime for brightness.
  • Pair with Sides: Serve alongside tortilla chips, a fresh salad, or Mexican rice for a complete meal.
  • Family Style: Serve the skillet right on the table for a fun, communal dining experience.

Cooking should be a joyful experience, and this Ground Turkey Enchilada Skillet is here to help you embrace that. With its delicious flavors, ease of preparation, and the ability to customize, it’s sure to become a staple in your kitchen. Don’t forget to share your creations and let your family and friends join in on the fun! Happy cooking!

Best Ground Turkey Enchilada Skillet - theamazingfood

Prep Time 10 minutes
Cook Time 20 minutes
Total Time 30 minutes
Servings 4 servings
Calories 550
A flavorful and easy-to-make ground turkey enchilada skillet that combines fresh ingredients with rich enchilada sauce for a satisfying meal.

Ingredients

Meat

  • 1 lb ground turkey (I like Butterball for a leaner result)
  • 3/4 tsp cumin
  • 3/4 tsp oregano
  • 1/2 tsp salt
  • 1/4 tsp pepper
  • 1 tsp olive oil
  • 2 tsp olive oil
  • 1/2 onion diced onion (diced into 1/4-inch pieces)
  • 1.5 bell pepper bell pepper (stemmed, seeded, cut into 1/2-inch squares)
  • 3 garlic cloves garlic (freshly minced for best aroma)
  • 1/2 tsp cumin
  • 1/2 tsp oregano
  • 1/4 tsp salt
  • 1/2 tsp chili powder
  • 2.5 cups enchilada sauce (I use Old El Paso mild for consistent flavor)
  • 3/4 cup salsa
  • 4 oz green chiles
  • 14 oz black beans (rinsed and drained well)
  • 3/4 cup corn
  • 3/4 cup brown rice (cooked and cooled to prevent mushiness)
  • 4 corn tortillas cut into 1-inch wide strips
  • 1 cup cheese (I use Tillamook Mexican Blend for better melting)
  • 4 tbsp cilantro

Instructions 

  • Sauté diced onion, bell pepper, and garlic in olive oil until softened.
  • Add ground turkey, cumin, oregano, salt, pepper, and chili powder; cook until turkey is browned.
  • Stir in enchilada sauce, salsa, green chiles, black beans, corn, and cooked rice; simmer for 5 minutes.
  • Mix in tortilla strips and sprinkle cheese on top; cook until cheese melts.

Notes

For a spicier version, add jalapeños or hot sauce.
Calories: 550kcal
Cost: $15
Course: Main Course
Cuisine: Mexican
Keyword: Ground Turkey

Welcome to your new favorite dish! This Cottage Cheese & Egg Casserole is a delightful blend of flavors and nutrients, perfect for busy weeknights and satisfying for the entire family. With its creamy texture and protein-packed ingredients, this dish is not just a meal but a comforting experience that can brighten your day. Let’s dive into why you’ll love this recipe and how to make it effortlessly!

Why You’ll Love This Recipe

This casserole is more than just a tasty dish; it’s a versatile, nutritious option that can transform your mealtime. Here are five compelling reasons to embrace this recipe:

  • Quick Preparation: Ready in just 40 minutes, making it ideal for busy weekdays.
  • Nutritious Powerhouse: Packed with protein and essential nutrients from cottage cheese and eggs.
  • Customizable: Easily modify with your favorite vegetables or spices for a personal touch.
  • Meal Prep Friendly: Perfect for make-ahead meals; enjoy leftovers throughout the week.
  • Family-Friendly: A dish that appeals to both kids and adults alike, ensuring everyone cleans their plate!

Ingredient Breakdown

Let’s take a closer look at the ingredients that make this cottage cheese egg bake so special:

  • 4 large eggs: The base of your casserole, providing protein and structure.
  • 1 ½ cups cottage cheese: Adds creaminess and is a great source of protein.
  • ½ cup shredded cheddar cheese: Melts beautifully, adding flavor and richness.
  • ½ cup chopped green onions: Offers a fresh, mild onion flavor that brightens the dish.
  • 1 tablespoon olive oil: Helps prevent sticking and adds healthy fats.
  • 1 teaspoon garlic powder: Provides depth of flavor with minimal effort.
  • 1 teaspoon onion powder: Enhances the savory notes of the bake.
  • 1 teaspoon dried thyme: A fragrant herb that complements the cheese and eggs.
  • Salt and pepper to taste: Essential for bringing out the flavors.
  • Fresh parsley for garnish: Adds a pop of color and freshness to the finished dish.

Pro Tips for the Perfect Casserole

Here are some expert insights to elevate your casserole game:

  • Whisk Thoroughly: Ensure eggs are well-whisked for a fluffy texture.
  • Grease the Dish: Use olive oil generously to prevent sticking.
  • Customize Wisely: Incorporate vegetables like bell peppers or spinach for added nutrients.
  • Watch the Baking Time: Keep an eye on it in the oven; every oven is different. Look for a lightly golden top.
  • Let it Rest: Allow the casserole to cool for a few minutes before slicing for better structure.
  • Storage Matters: Store leftovers in an airtight container in the fridge for up to 4 days.
  • Reheat Gently: Use a microwave or oven at a low temperature to keep it moist.
  • Try Different Cheeses: Experiment with mozzarella or feta for unique flavors.

Common Mistakes and Troubleshooting

Even the best of us make mistakes in the kitchen! Here’s how to avoid some common pitfalls:

  • Too Watery: Make sure to drain any excess liquid from veggies before adding them.
  • Overbaking: Keep a close eye on the casserole; it can dry out if left too long.
  • Flat Texture: Ensure eggs are whisked until frothy to achieve a light bake.
  • Flavorless Dish: Don’t forget to season well; taste the mixture before baking!

Delicious Variations

Want to switch things up? Here are some fun variations to try:

  • Veggie Delight: Add spinach, bell peppers, or tomatoes for a nutrient boost.
  • Spicy Kick: Mix in jalapeños or red pepper flakes for some heat.
  • Herb Infusion: Use fresh herbs like basil or dill for a refreshing twist.
  • Meat Lover’s: Stir in cooked bacon or sausage for added protein and flavor.

Make-Ahead and Storage Instructions

This casserole is perfect for meal prep! Follow these tips:

  • Make-Ahead: Assemble the casserole the night before and refrigerate. Just pop it in the oven when you’re ready to bake!
  • Freezing: You can freeze leftovers for up to 2 months. Thaw in the fridge overnight before reheating.
  • Storage: Keep in an airtight container in the fridge for up to 4 days.

Comprehensive FAQ

Here are some common questions about the cottage cheese egg bake:

  • Can I use low-fat cottage cheese? Yes, low-fat options work just as well!
  • What can I substitute for cheddar cheese? Feel free to use mozzarella or any cheese of your choice!
  • How do I know when it’s done baking? The top should be golden, and a knife inserted should come out clean.
  • Can I make this vegetarian? Absolutely! Just skip any meat additions.
  • What’s the best way to reheat? Use a microwave or oven at low heat to avoid drying out.
  • How many servings does this make? This recipe serves about 4 hearty portions.
  • Can I add different spices? Yes! Feel free to experiment with your favorite spices.
  • Is this dish gluten-free? Yes, all ingredients used are gluten-free!

Nutritional Tips and Dietary Adaptations

Make this dish fit your dietary needs:

  • Low-Carb Version: Skip the cheese or use a low-carb alternative to reduce carbs.
  • Dairy-Free Option: Substitute cottage cheese with a dairy-free alternative like tofu or cashew cream.
  • High-Protein Boost: Add more eggs or include protein powder for an extra boost.

Equipment Recommendations

Here’s what you’ll need for this recipe:

  • Baking Dish: A 9×9-inch dish is perfect for this casserole.
  • Mixing Bowls: Use medium-sized bowls for mixing your ingredients.
  • Whisk: A good whisk is essential for beating those eggs!

Serving Suggestions

This casserole is delicious on its own, but here are a few ideas to elevate your meal:

  • Pair with a Salad: A fresh side salad adds crunch and balance.
  • Top with Salsa: A dollop of salsa brings in a zesty flavor.
  • Serve with Toast: Enjoy with whole-grain bread for a hearty breakfast.

In conclusion, this Cottage Cheese & Egg Casserole is not just a meal; it’s a celebration of flavors and nutrition. Whether you’re cooking for your family or meal prepping for the week, this dish offers the perfect balance of simplicity and comfort. Remember, cooking is about enjoying the process and having fun, so don’t hesitate to make this recipe your own. Happy cooking!

Savory Cottage Cheese & Egg Casserole

Prep Time 10 minutes
Cook Time 25 minutes
Total Time 35 minutes
Servings 4 servings
Calories 250
A delicious and protein-packed breakfast casserole combining eggs, cottage cheese, and flavorful herbs, perfect for a satisfying start to your day.

Ingredients

Eggs

  • 4 large eggs
  • 1 ½ cups cottage cheese
  • ½ cup shredded cheddar cheese
  • ½ cup chopped green onions
  • 1 tablespoon olive oil
  • 1 teaspoon garlic powder
  • 1 teaspoon onion powder
  • 1 teaspoon dried thyme
  • to taste Salt and pepper
  • for garnish Fresh parsley

Instructions 

  • Preheat oven to 350°F (175°C) and grease a 9×9-inch baking dish.
  • Whisk eggs, cottage cheese, cheddar, green onions, garlic powder, onion powder, thyme, salt, and pepper.
  • Pour mixture into the prepared dish.
  • Bake for 25-30 minutes until set and golden.
  • Let cool for 5 minutes, garnish with parsley, then slice and serve.

Notes

You can add extra herbs or vegetables for variation.
Calories: 250kcal
Cost: $15
Course: Breakfast
Cuisine: American
Keyword: Cottage Cheese, Eggs

Discover the Joy of Cooking: Effortless Lemon Herb Grilled Salmon

Welcome to your next culinary adventure! Today, we’re diving into a delightful recipe that not only satisfies your hunger but also brings a burst of flavor to your dinner table. Lemon Herb Grilled Salmon is a fantastic dish that showcases the beauty of fresh ingredients and simple techniques. With this recipe, you can create a restaurant-quality meal in under 30 minutes—perfect for busy weeknights or a special weekend gathering. Get ready to impress your family and friends with a dish that is as easy to make as it is delicious!

Why You’ll Love This Recipe

  • Quick and Easy: This recipe can be prepared in less than 30 minutes, making it ideal for any night of the week.
  • Flavor Packed: The combination of fresh herbs and zesty lemon creates a vibrant flavor profile that enhances the natural taste of the salmon.
  • Healthy & Nutritious: Salmon is rich in omega-3 fatty acids, making this dish a heart-healthy option for your family.
  • Versatile Pairings: This grilled salmon pairs beautifully with a variety of sides, from fresh salads to roasted vegetables.
  • Impressive Presentation: The bright colors and aromatic herbs make this dish visually appealing, perfect for entertaining guests.

Ingredients Breakdown

Let’s gather our ingredients for this flavorful lemon herb grilled salmon! Here’s what you need:

  • 4 salmon fillets: Skin-on, approximately 6 oz each. You can also use skinless fillets if preferred.
  • 2 tablespoons olive oil: This will help the marinade adhere to the salmon while adding healthy fats.
  • 2 tablespoons lemon juice: Freshly squeezed for the best flavor. Bottled lemon juice can be used in a pinch.
  • 1 teaspoon lemon zest: Adds a concentrated lemon flavor—don’t skip this step!
  • 2 cloves garlic: Minced for an aromatic kick.
  • 1 tablespoon fresh dill: Chopped, but feel free to substitute with dried herbs if you don’t have fresh.
  • 1 tablespoon fresh parsley: Chopped, for a burst of freshness.
  • 1 teaspoon fresh thyme leaves: Or use ½ teaspoon of dried thyme as an alternative.
  • Salt and black pepper: To taste for seasoning.
  • Lemon slices: For garnish—these can be grilled alongside the salmon for added flavor.

Step-by-Step Instructions

Deliciously cooked salmon fillet sprinkled with herbs and accompanied by lemon slices.

Now that we have everything ready, let’s walk through the steps to create this delicious dish. Don’t worry, I’ll guide you through every step!

  • Prepare the Marinade: In a medium bowl, whisk together the olive oil, lemon juice, lemon zest, minced garlic, chopped dill, parsley, thyme, salt, and pepper until well combined.
  • Marinate the Salmon: Pat the salmon fillets dry with paper towels. Place them in a shallow dish and pour the marinade over the fillets, ensuring they are fully coated. Let them marinate for 10-15 minutes while your grill heats up.
  • Preheat the Grill: Heat your grill or grill pan to medium-high heat. Lightly oil the grates to prevent sticking.
  • Grill the Salmon: Place the salmon fillets skin-side down on the grill. Cook for about 5–6 minutes, then flip carefully and cook for an additional 5–6 minutes, or until the fish flakes easily with a fork.
  • Serve & Enjoy: Remove from the grill and garnish with lemon slices and additional herbs if desired. Serve hot with your choice of sides!

Pro Tips for Perfect Grilled Salmon

To ensure your salmon turns out perfectly every time, here are some expert insights:

  • Choose Fresh Salmon: Always opt for the freshest salmon available. Look for vibrant color and a clean smell.
  • Don’t Skip the Marinade: Allowing the salmon to marinate enhances its flavor and tenderness.
  • Use a Grill Basket: If you’re worried about the salmon falling apart, a grill basket can help keep the fillets intact.
  • Monitor the Temperature: Salmon is perfectly cooked when it reaches an internal temperature of 145°F (63°C).
  • Let it Rest: Allow the salmon to rest for a few minutes before serving; this helps retain moisture.
  • Experiment with Herbs: Feel free to mix and match herbs based on your preference—oregano and basil work great too!
  • Grill Vegetables: Toss some veggies on the grill alongside the salmon for a complete meal.
  • Prep Ahead: You can marinate the salmon earlier in the day and grill it just before serving.

Common Mistakes & Troubleshooting

Even the best of us can make mistakes in the kitchen. Here are some common pitfalls and how to avoid them:

  • Overcooking: Keep an eye on your salmon; it cooks quickly, and overcooked salmon can become dry.
  • Skipping the Oil: Oil helps prevent sticking. Always grease your grill grates!
  • Too Much Salt: Season to taste. It’s easier to add more salt later than to fix an overly salty dish.
  • Not Preheating the Grill: Ensure your grill is hot enough before placing the salmon on it to achieve a nice sear.

Variations on Lemon Herb Grilled Salmon

Want to mix things up? Here are some variations you can try:

  • Honey Garlic Glaze: Add a tablespoon of honey to the marinade for a sweet and savory twist.
  • Spicy Cajun Salmon: Incorporate Cajun seasoning into the marinade for a spicy kick.
  • Asian-Inspired: Use soy sauce, ginger, and sesame oil in place of olive oil for an Asian flair.
  • Herb Crust: Top the salmon with a mixture of breadcrumbs and herbs before grilling for added texture.

Storage and Make-Ahead Instructions

If you have leftovers or want to prep ahead, here’s how to store your grilled salmon:

  • Refrigeration: Store any leftover salmon in an airtight container in the refrigerator for up to 2 days.
  • Freezing: Grilled salmon can be frozen for up to 3 months. Wrap tightly in plastic wrap and then in aluminum foil.
  • Reheating: Reheat gently in the oven or on a skillet over low heat to avoid drying it out.

Comprehensive FAQ

Got questions? I’ve got answers! Here are some frequently asked questions about grilling salmon:

  • Can I use frozen salmon? Yes, just make sure to thaw it completely before marinating.
  • What should I serve with grilled salmon? Grilled vegetables, quinoa, or a fresh salad are great accompaniments.
  • How can I tell when salmon is done? Salmon is done when it flakes easily with a fork and is opaque in the center.
  • Can I grill salmon with skin on? Yes, grilling with the skin on helps to keep the fish moist and flavorful.
  • What if I don’t have fresh herbs? Dried herbs can be used, but reduce the quantity to about 1/3 of fresh herbs.
  • Is grilled salmon healthy? Absolutely! Salmon is packed with omega-3 fatty acids and high-quality protein.
  • How do I prevent salmon from sticking to the grill? Make sure to oil the grill grates and preheat the grill properly.
  • Can I cook this salmon in the oven? Yes, you can bake it at 400°F (200°C) for about 12-15 minutes.

Nutrition Tips & Dietary Adaptations

This lemon herb grilled salmon is not only delicious but also nutritious. Here are some tips to make it even healthier:

  • Go Wild: Opt for wild-caught salmon whenever possible for better nutrition and flavor.
  • Paleo-Friendly: This recipe is naturally paleo-friendly; just serve with non-starchy vegetables.
  • Low-Carb: Pair with cauliflower rice or a green salad for a low-carb meal.

Equipment Recommendations

To make your grilling experience seamless, here’s some equipment you might need:

  • Grill or Grill Pan: A good quality grill or grill pan ensures even cooking and great grill marks.
  • Grill Basket: Ideal for smaller pieces of fish or vegetables to prevent falling through the grates.
  • Meat Thermometer: Ensures you cook your salmon to the perfect temperature without overdoing it.

Serving Suggestions

Now that your lemon herb grilled salmon is ready, here are some ideas for what to serve alongside:

  • Fresh Summer Salad: A crisp salad with mixed greens, cherry tomatoes, and a light vinaigrette complements the salmon beautifully.
  • Grilled Asparagus: The smoky flavors of grilled asparagus pair perfectly with the lemony salmon.
  • Quinoa or Rice: Serve with a side of fluffy quinoa or brown rice to soak up any leftover marinade.

Conclusion

Cooking doesn’t have to be stressful or complicated. With this Effortless Lemon Herb Grilled Salmon, you have a guaranteed crowd-pleaser that showcases fresh flavors and healthy ingredients. Remember, the joy of cooking lies in the experience, so embrace your creativity and enjoy every bite. Happy grilling!

Lemon Herb Grilled Salmon

Prep Time 10 minutes
Cook Time 12 minutes
Total Time 22 minutes
Servings 4 servings
Calories 350
Enjoy a flavorful and healthy grilled salmon infused with fresh lemon and herbs, perfect for a quick and elegant meal.

Ingredients

Salmon

  • 4 fillets salmon fillets (skin-on, 6 oz each)
  • 2 tablespoons olive oil
  • 2 tablespoons lemon juice (freshly squeezed)
  • 1 teaspoon lemon zest
  • 2 cloves garlic (minced)
  • 1 tablespoon fresh dill (chopped)
  • 1 tablespoon fresh parsley (chopped)
  • 1 teaspoon fresh thyme leaves (or ½ tsp dried)
  • to taste Salt and black pepper
  • Lemon slices for garnish

Instructions 

  • Whisk olive oil, lemon juice, lemon zest, garlic, dill, parsley, thyme, salt, and pepper to make the marinade.
  • Pat salmon dry, place in a dish, and pour marinade over. Let sit for 10–15 minutes.
  • Preheat grill to medium-high and oil grates.
  • Grill salmon skin-side down for 5–6 minutes, flip, and cook another 5–6 minutes until flaky.
  • Remove from grill, garnish with lemon slices and herbs, and serve hot.

Notes

For extra flavor, add a squeeze of fresh lemon before serving.
Calories: 350kcal
Cost: $15
Course: Main Course
Cuisine: American
Keyword: herbs, lemon, Salmon

Deliciously Simple: Your Guide to Wholesome Pasta with Spinach Sauce

If you’re seeking a quick, creamy, and satisfying meal, look no further! This Wholesome Pasta with Spinach Sauce brings together fresh ingredients and easy steps to create a dinner that will please everyone at the table. With just a handful of ingredients, you can whip up a dish that’s not only delicious but also packed with nutrients, making it perfect for busy weeknights. Let’s dive into the world of flavor!

Why You’ll Love This Recipe

This pasta dish is more than just a meal; it’s an experience! Here are five reasons you’ll adore this recipe:

  • Quick to Prepare: Ready in under 30 minutes, this dish is perfect for those hectic evenings.
  • Nutritious Ingredients: Packed with iron and vitamins, spinach adds a healthy twist to your meal.
  • Versatile Options: Easily customize with your favorite pasta shapes or add-ins for a personal touch.
  • Family-Friendly: Creamy and flavorful, even picky eaters won’t resist this dish!
  • Budget-Friendly: Utilizing simple, affordable ingredients means you can enjoy great taste without breaking the bank.

Ingredient Breakdown

Let’s take a closer look at the ingredients needed for this delightful pasta dish:

  • 8oz (225 grams) pasta: You can use penne, rigatoni, or spaghetti—whatever you have on hand!
  • 1 Tbsp olive oil: Extra virgin olive oil adds a rich flavor; feel free to drizzle a bit more on top for serving.
  • 2-3 garlic cloves: Finely sliced or minced for that aromatic base.
  • 9oz (250 grams) baby spinach: Fresh or pre-washed, it’s the star of the dish!
  • ¼ tsp fine salt: Enhances flavors; adjust to your taste.
  • 5oz (140 grams) cream cheese: For that creamy texture that binds everything together.
  • 1oz (30 grams) freshly grated parmesan cheese: A sprinkle on top adds a delicious finishing touch.
  • ¼ tsp ground nutmeg: Adds warmth and depth to the sauce; fresh nutmeg is even better!
  • Black pepper: Freshly cracked for seasoning to taste.

Pro Tips for Success

Here are some expert insights to ensure your pasta dish turns out perfectly every time:

  • Cook Pasta Al Dente: Follow package instructions closely, and reserve some cooking water for adjusting sauce consistency.
  • Avoid Burning Garlic: Cook it gently; burnt garlic can ruin the flavor.
  • Layer Spinach Gradually: Add spinach in batches for even wilting and to maintain vibrant color.
  • Adjust Creaminess: If the sauce is too thick, use the reserved pasta water to loosen it up.
  • Fresh Herbs: Consider adding basil or parsley for added freshness.
  • Experiment with Cheese: Try goat cheese or ricotta for different flavor profiles.
  • Make it Vegan: Substitute cream cheese and parmesan with plant-based alternatives.
  • Serve Immediately: Pasta is best enjoyed fresh, so serve right after mixing!

Common Mistakes to Avoid

Even the best cooks can make mistakes! Here are some common pitfalls and solutions:

  • Overcooking the Pasta: Always taste test a minute before the suggested cooking time.
  • Not Using Enough Salt: Proper seasoning is key—don’t be shy with the salt in your pasta water.
  • Skipping the Reserve Water: This starchy water is a lifesaver for achieving the right sauce consistency.
  • Not Mixing Quickly: Combine pasta and sauce immediately for best results; the heat helps meld the flavors.

Variations and Customizations

You can easily switch things up with these delicious variations:

  • Protein Boost: Add grilled chicken, shrimp, or chickpeas for a heartier meal.
  • Vegetable Medley: Toss in bell peppers, zucchini, or mushrooms for extra nutrition and flavor.
  • Spicy Kick: Add red pepper flakes or a splash of hot sauce to spice things up.
  • Herbed Delight: Include fresh herbs like thyme or dill for an aromatic twist.

Storage and Make-Ahead Instructions

This pasta dish is perfect for meal prep!

  • Refrigeration: Store leftovers in an airtight container for up to 3 days.
  • Freezing: Freeze portions in freezer-safe bags for up to 2 months. Thaw overnight in the fridge before reheating.
  • Reheating: Warm in a skillet over low heat, adding a splash of reserved pasta water to revive the sauce.

Frequently Asked Questions

Here are some common questions about making Pasta with Spinach Sauce:

  • Can I use frozen spinach? Yes! Just thaw and drain excess liquid before using.
  • What pasta works best? Any shape works; choose your favorite!
  • How can I make this dish gluten-free? Use gluten-free pasta for a safe alternative.
  • Can I use other cheeses? Absolutely! Try feta or gouda for different flavor profiles.
  • How spicy can I make it? Adjust the amount of red pepper flakes to your heat preference.
  • What can I serve it with? A fresh salad or garlic bread pairs perfectly!
  • Is this dish suitable for meal prep? Yes! It keeps well and tastes great reheated.
  • Can I add more vegetables? Definitely! Feel free to get creative with your favorites.

Nutrition Tips and Dietary Adaptations

This dish can easily fit into various dietary needs:

  • Low-Calorie Option: Use whole grain pasta and reduce cream cheese for fewer calories.
  • High-Protein Adaptation: Add beans or lentils to boost protein content.
  • Low-Carb Version: Swap pasta for spiralized zucchini or cauliflower rice.

Essential Equipment Recommendations

To make this recipe, you’ll need:

  • Large Pot: For cooking pasta.
  • Skillet: A large skillet to combine and heat the sauce.
  • Colander: For draining pasta efficiently.
  • Measuring Cups and Spoons: To ensure accuracy in your ingredients.

Serving Suggestions

Make your meal even more delightful with these serving ideas:

  • Freshly Grated Parmesan: Always a crowd-pleaser! Add a generous sprinkle before serving.
  • Drizzle of Olive Oil: A touch of high-quality olive oil enhances flavor.
  • Side Salad: A simple green salad complements the richness of the pasta.
  • Garlic Bread: Perfect for soaking up the creamy sauce!

Cooking should be fun and rewarding, and with this Pasta with Spinach Sauce, you’ll find that it’s also incredibly easy! Whether you’re rushing home from work or planning a cozy dinner, this dish is a fantastic choice. So roll up your sleeves, gather your ingredients, and enjoy the delicious journey of cooking!

Pasta with Spinach Sauce

Prep Time 10 minutes
Cook Time 15 minutes
Total Time 25 minutes
Servings 4 servings
Calories 520
A quick and delicious vegetarian pasta dish featuring a creamy spinach sauce, perfect for a wholesome meal.

Ingredients

Pasta

  • 8 oz pasta (penne, rigatoni, spaghetti...)
  • 1 Tbsp olive oil or extra virgin olive oil (plus more to serve)
  • 2-3 cloves garlic, finely sliced or minced
  • 9 oz baby spinach, washed
  • ¼ tsp fine salt (plus more to taste)
  • 5 oz cream cheese
  • 1 oz freshly grated parmesan cheese (plus more to serve)
  • ¼ tsp ground nutmeg (or ⅓ of freshly grated nutmeg, or to taste)
  • to taste black pepper

Instructions 

  • Cook pasta until al dente, reserving ½ cup of cooking water.
  • Heat olive oil in a skillet, add garlic, and cook until fragrant.
  • Add spinach and salt, cook until wilted.
  • Stir in cream cheese, some pasta water, parmesan, and nutmeg; cook briefly.
  • Add cooked pasta to the sauce, toss, and serve with extra cheese, pepper, and olive oil.

Notes

Use freshly grated parmesan for best flavor.
Calories: 520kcal
Cost: $12
Course: Main Course
Cuisine: Italian
Keyword: Pasta, Spinach

Transform Your Dinner with a Flavorful Chipotle Chicken Bowl

Welcome to your new favorite recipe that elevates your dinner game! This Chipotle Chicken Bowl with black beans, corn, and a creamy sauce is not just a meal; it’s a vibrant culinary experience perfect for any weeknight. Whether you’re a seasoned cook or just starting out, this recipe simplifies the process while delivering bold flavors. Let’s dive into how you can easily create this delightful bowl at home!

Why You’ll Love This Recipe

This recipe isn’t just about good food; it’s about making cooking enjoyable and stress-free. Here are some compelling reasons why you’ll love this Chipotle Chicken Bowl:

  • Quick and Easy: With just a few steps, you can whip up a delicious meal in under an hour.
  • Flavorful and Satisfying: The combination of spices and fresh ingredients creates a mouthwatering taste that everyone will love.
  • Customizable: Adjust the ingredients based on your preferences—add more veggies, switch up the protein, or spice it to your heart’s content!
  • Healthy Balance: Packed with protein, fiber, and healthy fats, this bowl is a nutritious choice for lunch or dinner.
  • Meal Prep Friendly: Perfect for meal prepping, you can make several servings in advance to save time during busy weekdays.

Ingredient Breakdown

Let’s look at the ingredients that make this Chipotle Chicken Bowl shine, along with some substitution options to suit your needs.

  • Chicken: Use 2 boneless skinless chicken breasts or thighs. If you’re looking for a vegetarian option, consider grilled tofu or tempeh.
  • Olive Oil: This adds richness and moisture. Feel free to substitute with avocado oil if preferred.
  • Lime Juice: Fresh is best, but bottled lime juice will work in a pinch.
  • Garlic: Fresh garlic cloves minced for robust flavor. Jarred garlic can be used as an alternative.
  • Spices: Chipotle chili powder, smoked paprika, cumin, salt, and black pepper create a smoky, flavorful profile. Experiment with taco seasoning if you have it on hand!
  • Black Beans: Canned works great; just remember to rinse them. For a twist, try pinto beans or chickpeas.
  • Corn: Grilled, roasted, or canned; use whatever is convenient. Frozen corn can be charred for added flavor.
  • Avocado: Adds creaminess and healthy fats. Substitute with guacamole if you prefer.
  • Cilantro: Fresh cilantro enhances flavor. If you’re not a fan, parsley makes a good substitute.
  • Sour Cream or Greek Yogurt: For the creamy sauce, use either based on your preference. Vegan yogurt is a great alternative.
  • Chipotle Peppers in Adobo: These add heat and depth. You can control the spice by adjusting the amount.
  • Honey: Balances the flavors in the sauce; agave syrup works as a vegan substitute.

Step-by-Step Instructions

Now, let’s get cooking! Follow these simple steps to create your Chipotle Chicken Bowl:

  1. In a medium mixing bowl, whisk together olive oil, lime juice, minced garlic, chipotle chili powder, smoked paprika, cumin, salt, and black pepper until well combined. Add the chicken and turn to coat completely. Cover and refrigerate for at least 30 minutes, or overnight for deeper flavor.
  2. Heat a grill or large skillet over medium-high heat. Remove chicken from marinade and cook for 6-7 minutes per side, depending on thickness, until internal temperature reaches 165°F and chicken has char marks. Let rest for 5 minutes before slicing into strips.
  3. While the chicken rests, warm the black beans in a small saucepan or microwave. Add a pinch of cumin and salt. For the corn, char frozen corn in a hot dry skillet for 3-4 minutes until golden spots appear.
  4. Make the creamy chipotle sauce by whisking together sour cream or Greek yogurt, lime juice, minced chipotle peppers, garlic powder, and honey in a small bowl. Taste and adjust heat level as desired.
  5. Build your bowls by layering warm black beans, charred corn, sliced avocado, and sliced chicken. Drizzle generously with creamy chipotle sauce and finish with fresh cilantro. Serve with lime wedges on the side.

Pro Tips for Perfecting Your Chipotle Chicken Bowl

Enhance your cooking experience with these expert insights:

  • Marination is Key: Marinating the chicken overnight allows the flavors to penetrate deeply, resulting in juicier, tastier meat.
  • Use Fresh Ingredients: Fresh herbs and vegetables elevate the dish’s flavor and nutrition.
  • Adjust Heat: If you prefer a milder dish, reduce the amount of chipotle peppers and chili powder.
  • Layer Flavors: Adding spices to your beans and corn while warming them intensifies the overall flavor profile.
  • Rest the Chicken: Allowing the chicken to rest after cooking helps retain its juices for a more succulent bite.
  • Customize Your Bowl: Feel free to add other veggies like bell peppers or roasted zucchini for a colorful and nutritious boost.
  • Use a Meat Thermometer: This ensures your chicken is perfectly cooked without being dry.
  • Make it a Feast: Pair with sides like tortilla chips, salsa, or a fresh salad for a complete meal.

Common Mistakes and Troubleshooting

Here are some common hiccups you might encounter and how to avoid them:

  • Dry Chicken: Ensure you don’t overcook the chicken. Use a meat thermometer to check doneness.
  • Overly Spicy: If the sauce ends up too hot, add a dollop of sour cream or yogurt to mellow the flavors.
  • Unbalanced Flavors: If your dish tastes flat, double-check the seasoning. A bit of salt or lime juice can enhance flavors.
  • Sticking Chicken: Make sure your grill or skillet is properly preheated and oiled to prevent sticking.

Variations to Try

Feel free to mix things up with these exciting variations:

  • Vegetarian Bowl: Substitute chicken with grilled vegetables or black bean patties for a meat-free option.
  • Spicy Chipotle Bowl: Add more chipotle peppers or a dash of hot sauce for extra heat.
  • Mexican Street Corn Style: Mix grilled corn with cotija cheese, lime, and chili powder for a twist.
  • Burrito Bowl: Add rice and tortilla strips to make it a burrito-style bowl.

Storage and Make-Ahead Instructions

Planning ahead is a breeze with this recipe!

  • Storing Leftovers: Keep any leftovers in an airtight container in the refrigerator for up to 3 days.
  • Make-Ahead: You can marinate the chicken a day in advance, and prep the beans and corn in advance to save time.
  • Freezing Tips: Cooked chicken can be frozen for up to 3 months. Just thaw in the refrigerator before reheating.
  • Reheating: Reheat in the microwave or on the stove with a splash of water to keep it moist.

FAQs About Chipotle Chicken Bowls

Here are some frequently asked questions to help you out:

  • Can I use other proteins? Absolutely! Feel free to use shrimp, beef, or even plant-based proteins.
  • How can I make this gluten-free? All the ingredients are naturally gluten-free, just ensure any sauces or seasonings are certified gluten-free.
  • What can I substitute for sour cream? Greek yogurt or a dairy-free yogurt can be great alternatives.
  • Can I use frozen chicken? Yes, but make sure it’s fully thawed before marinating for best results.
  • How spicy is this recipe? The heat can be adjusted by controlling the amount of chipotle peppers and chili powder you use.
  • What type of rice pairs well with this? Cilantro lime rice complements the flavors beautifully!
  • How can I make this dish vegan? Swap chicken for tofu or tempeh, and use plant-based yogurt and honey alternatives.
  • What are some good sides to serve with it? Try tortilla chips, guacamole, or a fresh salad for a complete meal.

Nutrition Tips and Dietary Adaptations

This Chipotle Chicken Bowl is not only delicious but also a wholesome meal option. Here’s how to make it even healthier:

  • Lean Protein: Choose chicken breast over thighs for a lower-fat option.
  • Whole Grains: Use brown rice or quinoa instead of white rice for added fiber and nutrients.
  • Fresh Veggies: Load up on additional vegetables to increase the nutrient density.
  • Low-Fat Options: Use low-fat sour cream or Greek yogurt to cut down on calories.

Essential Equipment for Cooking

Having the right kitchen tools is essential for success:

  • Grill or Skillet: A cast-iron skillet or grill pan works best for a good sear.
  • Mixing Bowls: You’ll need a medium bowl for marinating and a small bowl for the sauce.
  • Meat Thermometer: Ensure your chicken is cooked perfectly every time.
  • Measuring Cups and Spoons: Essential for precise ingredient measurements.

Serving Suggestions

To complete your Chipotle Chicken Bowl experience, consider these serving ideas:

  • Lime Wedges: Serve with lime wedges for an extra burst of flavor.
  • Tortilla Chips: A side of crunchy tortilla chips adds a delightful texture.
  • Fresh Salsa: Homemade or store-bought salsa pairs beautifully with the bowl.
  • Extra Cilantro: A sprinkle of fresh cilantro on top enhances the presentation and flavor.

Cooking should be a joyful experience, and this Chipotle Chicken Bowl is designed to help you enjoy every moment in the kitchen. With clear steps, delicious flavors, and plenty of options for customization, you can create a meal that not only satisfies but also excites. So gather your ingredients, roll up your sleeves, and let’s make dinner a highlight of your day!

Chipotle Chicken Bowl with Black Beans, Corn, and Creamy Sauce

Prep Time 15 minutes
Cook Time 20 minutes
Total Time 35 minutes
Servings 4 servings
Calories 550
A flavorful and hearty bowl combining smoky chipotle chicken, black beans, sweet corn, and a creamy sauce, perfect for a satisfying meal.

Ingredients

Protein

  • 2 pieces boneless skinless chicken breasts or thighs
  • 2 tablespoons olive oil
  • 2 tablespoons lime juice (fresh preferred)
  • 2 cloves garlic (minced)
  • 1 teaspoon chipotle chili powder
  • 1 teaspoon smoked paprika
  • 1 teaspoon cumin
  • 1 teaspoon salt
  • 0.5 teaspoon black pepper
  • 1 cup cooked black beans (canned works great, rinsed)
  • 1 cup corn (grilled, roasted, or canned)
  • 1 piece avocado (sliced)
  • 0.25 cup fresh cilantro (chopped)
  • 0.5 cup sour cream or Greek yogurt
  • 2 tablespoons lime juice (for sauce)
  • 1 tablespoon chipotle peppers in adobo (minced)
  • 1 teaspoon garlic powder
  • 1 teaspoon honey

Instructions 

  • Whisk together olive oil, lime juice, garlic, chipotle chili powder, smoked paprika, cumin, salt, and pepper. Marinate chicken for 30 minutes or overnight.
  • Grill or pan-cook chicken 6-7 minutes per side until cooked through. Rest and slice into strips.
  • Warm black beans and char corn in a skillet. Prepare creamy sauce by mixing sour cream, lime juice, minced chipotle, garlic powder, and honey.
  • Assemble bowls with beans, corn, sliced avocado, chicken, drizzle with sauce, and garnish with cilantro. Serve with lime wedges.

Notes

Adjust spice level by adding more or less chipotle peppers.
Calories: 550kcal
Cost: $15
Course: Main Course
Cuisine: Mexican
Keyword: bowl, Chicken, Chipotle

Discover the Joy of Cooking with Easy Turkey Vegetable Rice Skillet

Welcome to a culinary adventure that turns busy weeknights into delightful dining experiences! This Easy Turkey Vegetable Rice Skillet is not just a meal; it’s a celebration of vibrant flavors and wholesome ingredients. Perfect for those hectic evenings when you want something nutritious yet satisfying, this one-pan wonder will have your family asking for seconds.

In less than 30 minutes, you can create a dish that’s packed with protein, fiber, and colorful vegetables. Whether you’re a seasoned chef or just starting out, this recipe is designed to boost your confidence in the kitchen. Let’s dive into why you’ll love this dish!

Why You’ll Love This Recipe

  • Quick & Easy: Ready in under 30 minutes, making it an ideal choice for busy weeknights.
  • One-Pan Meal: Minimal cleanup with all ingredients cooked in one skillet, saving time and effort.
  • Flavorful & Healthy: Packed with lean protein and fresh vegetables, this dish is both satisfying and nutritious.
  • Versatile: Easily adaptable with different vegetables or spices to suit your taste.
  • Budget-Friendly: Affordable ingredients make this meal perfect for families or those on a budget.

Ingredient Breakdown

To create a delicious turkey vegetable rice skillet, you’ll need the following ingredients:

  • 1 pound Ground Turkey: Choose lean turkey for a healthy base that stays juicy.
  • 1 Onion: Finely chopped to add sweetness and depth.
  • 2 cloves Garlic: Minced, to infuse the dish with warming aromas.
  • 1 Bell Pepper: Diced, for a pop of color and sweetness.
  • 1 Carrot: Shredded or diced, adding crunch and nutrition.
  • 1 Zucchini: Chopped, contributing moisture and flavor.
  • 1 cup Long-grain White Rice: The perfect base that absorbs all the delicious flavors.
  • 2 cups Low-sodium Chicken Broth: For cooking the rice and enhancing flavor without excess sodium.
  • 2 tablespoons Tomato Paste: Adds richness and a slight tang.
  • 1 teaspoon Italian Seasoning: A blend of herbs that brings everything together.
  • 1 teaspoon Salt: To taste, enhancing all the flavors.
  • 1 teaspoon Black Pepper: Adds a mild heat and depth.
  • 1/4 cup Fresh Parsley: Chopped, for a fresh finish.
  • 1/4 cup Grated Parmesan Cheese (optional): For an added layer of flavor.

Ingredient Substitutions

Side view of a turkey vegetable rice skillet, showcasing its rich texture and colors.

Getting creative with your ingredients can lead to exciting variations of this skillet dish! Here are some easy substitutions:

  • Ground Turkey: Swap for ground chicken or beef for a different flavor profile.
  • Rice: Use brown rice or quinoa for a whole-grain alternative.
  • Vegetables: Feel free to add any seasonal vegetables like spinach, peas, or corn.
  • Broth: Vegetable broth works well for a vegetarian option.

How to Make Turkey Vegetable Rice Skillet

Ready to create this delicious dish? Follow these simple steps:

  1. Cook Turkey: In a large skillet, over medium heat, add a splash of olive oil. Add the ground turkey, breaking it apart with a spatula. Cook until browned, about 5-7 minutes.
  2. Add Vegetables: Stir in the chopped onion, garlic, bell pepper, carrot, and zucchini. Cook for another 5 minutes until the vegetables are slightly softened.
  3. Incorporate Rice: Add the long-grain rice to the skillet, stirring to combine with the turkey and vegetables.
  4. Mix in Broth: Pour in the chicken broth and tomato paste. Sprinkle in the Italian seasoning, salt, and pepper. Stir well to combine.
  5. Simmer: Bring the mixture to a gentle boil. Cover the skillet and reduce the heat to low. Let it simmer for about 15-20 minutes until the rice is tender and has absorbed the liquid.
  6. Add Fresh Herbs: Once cooked, remove from heat. Stir in fresh parsley and a sprinkle of grated Parmesan cheese if desired.
  7. Serve: Fluff the rice with a fork, serve warm, and enjoy!

Expert Tips for Perfecting Your Skillet

  • Don’t Rush the Browning: Allow the turkey to brown properly for a richer flavor.
  • Season Gradually: Adjust salt and pepper at the end to avoid over-seasoning.
  • Vegetable Variety: Mix and match vegetables based on seasonal availability.
  • Meal Prep: Prepare ingredients ahead of time for quicker cooking.
  • Cooking Rice: Use a tight-fitting lid to keep steam in for perfectly fluffy rice.
  • Leftovers: This dish reheats beautifully, making it perfect for meal prep.
  • Flavor Boost: Consider adding a splash of soy sauce or hot sauce for an extra kick.
  • Serve with Sides: Pair with a side salad or crusty bread for a complete meal.

Common Mistakes and Troubleshooting

Even the best cooks can face challenges. Here are some common mistakes to avoid:

  • Overcooking the Vegetables: Keep an eye on cooking times to prevent mushy veggies.
  • Not Enough Liquid: Ensure you have sufficient broth to cook the rice fully.
  • Skipping the Seasoning: Don’t skip or skimp on herbs and spices; they are key to flavor.

Variations to Try

Experimenting with variations can keep this dish fresh and exciting. Here are some ideas:

  • Mexican Fiesta: Add black beans, corn, and a sprinkle of taco seasoning for a Tex-Mex twist.
  • Italian Style: Incorporate spinach and sundried tomatoes, and finish with mozzarella cheese.
  • Asian Fusion: Swap the tomato paste for teriyaki sauce and add broccoli and snap peas.
  • Spicy Kick: Toss in jalapeños or cayenne pepper for some heat.

Storage and Make-Ahead Instructions

This skillet meal is perfect for meal prepping! Here’s how to store and reheat:

  • Refrigerate: Store leftovers in an airtight container for up to 3 days.
  • Freeze: This dish can be frozen for up to 2 months. Thaw overnight in the fridge before reheating.
  • Reheat: Warm in a skillet over low heat or in the microwave until heated through.

Frequently Asked Questions (FAQs)

  • Can I use brown rice instead of white? Yes, but brown rice will require more cooking time and liquid.
  • Is this dish gluten-free? Yes, if you use gluten-free broth and avoid adding soy sauce.
  • Can I prepare this dish in advance? Absolutely! Prep the ingredients ahead and store them in the fridge.
  • What can I serve with this skillet recipe? It pairs beautifully with a fresh salad or crusty bread.
  • Can I add more vegetables? Definitely! Feel free to load it up with your favorites.
  • How do I make it spicier? Add crushed red pepper flakes or hot sauce during cooking.
  • Can I use leftover turkey? Yes, just add it in during the last few minutes of cooking to heat through.
  • How do I know when the rice is done? The rice should be tender and the liquid fully absorbed.

Nutrition Tips and Dietary Adaptations

This meal is not only delicious but can also be tailored to meet various dietary needs:

  • Low-carb: Substitute rice with cauliflower rice for a low-carb option.
  • Vegetarian: Replace turkey with chickpeas or lentils and use vegetable broth.
  • High Protein: Add black beans or extra turkey for an additional protein boost.

Essential Equipment

To make this turkey vegetable rice skillet, you’ll need:

  • Large Skillet: A heavy-bottomed skillet is ideal for even cooking.
  • Cutting Board: For chopping vegetables safely.
  • Sharp Knife: A good knife makes preparation a breeze.
  • Spatula: For stirring and breaking up the turkey.

Serving Suggestions

This turkey vegetable rice skillet is versatile and can be served in various ways:

  • Garnish: Top with fresh herbs or additional cheese before serving.
  • Accompaniments: Serve with a side of avocado slices or a dollop of sour cream.
  • Presentation: Serve in bowls for a cozy family dinner vibe.

Conclusion

This Easy Turkey Vegetable Rice Skillet is more than just a meal; it’s a way to bring joy back into your kitchen. With its simplicity, flavor, and versatility, it’s bound to become a family favorite. So roll up your sleeves, gather your ingredients, and let’s create something wonderful together. Happy cooking!

Easy Turkey Vegetable Rice Skillet Recipe for Bold Homemade Flavor

Prep Time 10 minutes
Cook Time 20 minutes
Total Time 30 minutes
Servings 4 servings
Calories 450
This flavorful one-pan dish combines lean ground turkey, fresh vegetables, and rice for a quick and satisfying meal with bold homemade flavor.

Ingredients

Protein

  • 1 pound Ground Turkey (choose lean turkey for a healthy base)

Vegetables

  • 1 Onion Onion (finely chopped)
  • 2 cloves Garlic (minced)
  • 1 Bell Pepper Bell Pepper (diced)
  • 1 Carrot Carrot (shredded or diced)
  • 1 Zucchini Zucchini (chopped)

Grains

  • 1 cup Long-grain White Rice

Broth & Paste

  • 2 cups Low-sodium Chicken Broth
  • 2 tablespoons Tomato Paste

Seasonings

  • 1 teaspoon Italian Seasoning
  • 1 teaspoon Salt (to taste)
  • 1 teaspoon Black Pepper (to taste)

Garnish

  • 1/4 cup Fresh Parsley (chopped)
  • 1/4 cup Grated Parmesan Cheese (optional)

Instructions 

  • Sauté chopped onion and minced garlic until fragrant.
  • Add ground turkey and cook until browned.
  • Stir in diced bell pepper, shredded carrot, and chopped zucchini; cook for a few minutes.
  • Add rice, tomato paste, seasonings, and chicken broth; bring to a boil.
  • Reduce heat, cover, and simmer until rice is cooked and liquid is absorbed. Garnish with parsley and Parmesan if desired.

Notes

For extra flavor, add a squeeze of lemon or a dash of hot sauce.
Calories: 450kcal
Cost: $15
Course: Main Course
Cuisine: American
Keyword: Turkey

Discover Quick and Flavorful High Protein Street Corn Chicken Bowls

If you’re a busy food lover looking for a delicious, nutritious meal that comes together in no time, you’re in the right place! These High Protein Street Corn Chicken Bowls are the perfect solution for your weeknight dinners or meal prep needs. With tender chicken, zesty lime, and creamy Greek yogurt, you’ll savor every bite while feeling confident that you’re nourishing your body.

Why You’ll Love This Recipe

This bowl is not just another meal; it’s a delightful experience! Here are five reasons why this recipe stands out:

  • Quick Preparation: Ready in under 30 minutes, perfect for those busy evenings.
  • High Protein Content: Packed with protein to keep you satisfied and energized throughout the day.
  • Customizable: Tailor ingredients to your taste or dietary restrictions, making it suitable for everyone.
  • Flavorful Ingredients: The combination of smoked paprika and lime juice adds a vibrant twist that will excite your palate.
  • Meal Prep Friendly: Great for making ahead, allowing for easy grab-and-go lunches throughout the week.

Ingredient Breakdown

Let’s dive into the ingredients that make these High Protein Street Corn Chicken Bowls so fantastic, along with some handy substitutions.

  • Chicken Thighs: 1 pound – Tender and flavorful, but you can substitute with chicken breast or tofu for a lighter option.
  • Smoked Paprika: 1 tablespoon – Essential for infusing that BBQ aroma into the chicken. Don’t skip this spice!
  • Lime Juice: 2 tablespoons – Adds a zesty brightness that enhances the flavors of all ingredients.
  • Fire-Roasted Corn: 1 cup – You can use canned or frozen corn, which gives a great depth to the dish.
  • White Rice: 1 cup – Brown rice or quinoa can be used for extra nutrition, making it a wholesome choice.
  • Greek Yogurt: 0.5 cup – Substitute with sour cream for a different flavor profile.
  • Cotija Cheese: 0.25 cup – Feta or grated Parmesan work well if you can’t find Cotija.

Pro Tips for Perfect Results

Lively presentation of a High Protein Chicken Bowl showcasing ingredients like chicken, corn, and lime.

Follow these expert tips to ensure your High Protein Street Corn Chicken Bowls turn out perfectly every time:

  • Marinate Chicken: For at least 15 minutes to enhance flavor infusion.
  • Cook in Batches: If you’re making a larger quantity, cook the chicken in batches to avoid overcrowding the pan.
  • Use Fresh Ingredients: Fresh lime juice and high-quality spices make a significant difference in flavor.
  • Don’t Overcook: Chicken should reach an internal temperature of 165°F; use a meat thermometer for accuracy.
  • Layer Flavor: Add spices and lime juice at different stages of cooking for a deeper flavor.
  • Let It Rest: Allow the chicken to rest for a few minutes after cooking to retain its juices.
  • Garnish Generously: Consider topping with fresh avocado, cilantro, or jalapeños for added flavor and freshness.
  • Adjust Spice Levels: If you like it spicy, add a pinch of cayenne pepper to the chicken seasoning.

Common Mistakes and Troubleshooting

Even the best cooks make mistakes! Here are some common pitfalls and how to avoid them:

  • Dry Chicken: This often happens from overcooking. Keep an eye on the cooking time and use a meat thermometer.
  • Flavorless Rice: Cook rice in chicken broth instead of water for a flavor boost.
  • Too Much Liquid: If your mixture becomes soupy, let it cook a bit longer uncovered to allow excess moisture to evaporate.
  • Inconsistent Cooking: Make sure to slice chicken into even pieces for uniform cooking.

Delicious Variations

Want to mix things up? Here are four delicious variations of this recipe:

  • Vegetarian Option: Substitute chicken with chickpeas or black beans for a protein-packed vegetarian meal.
  • Spicy Street Corn: Add diced jalapeños to the corn for a kick of heat.
  • BBQ Twist: Brush the chicken with your favorite BBQ sauce during the last few minutes of cooking for a smoky flavor.
  • Mexican Street Corn Style: Mix mayo, lime juice, and cotija cheese into the corn for a creamy, tangy topping.

Storage and Make-Ahead Instructions

Planning ahead? Here’s how to store your High Protein Street Corn Chicken Bowls:

  • Refrigerate: Store in an airtight container in the fridge for up to 3-4 days.
  • Freeze: For longer storage, freeze individual portions in freezer-safe containers for up to 2 months.
  • Reheat: To reheat, simply microwave or warm on the stovetop until heated through.

Comprehensive FAQ

Here are some frequently asked questions to help you along the way:

  • Can I use frozen corn? Yes, frozen corn works perfectly in this recipe!
  • What can I substitute for Greek yogurt? Sour cream or a dairy-free yogurt can be used as alternatives.
  • Is this recipe gluten-free? Yes, just ensure the rice and any sauces are gluten-free.
  • How do I avoid soggy rice? Rinse your rice before cooking to remove excess starch.
  • Can I make this in advance? Yes! It’s a great meal prep option.
  • What sides go well with this dish? Consider a fresh salad or tortilla chips for a crunchy complement.
  • Is there a vegan version? Absolutely! Swap chicken for tofu or tempeh and use vegan yogurt.
  • How spicy is this dish? You control the spice! Adjust the seasoning to your liking.

Nutritional Insights and Dietary Adaptations

This High Protein Street Corn Chicken Bowl is not only delicious but also nutritious! Here’s a quick breakdown of its benefits:

  • High in Protein: Essential for muscle repair and growth.
  • Rich in Fiber: With corn and rice, this meal supports digestive health.
  • Customizable: Easily adapt to various dietary needs including gluten-free, vegetarian, and vegan.

Essential Equipment Recommendations

To whip up these bowls, make sure you have the following kitchen tools on hand:

  • Non-stick Skillet: For cooking the chicken evenly without sticking.
  • Medium Pot: To cook the rice to tender perfection.
  • Meat Thermometer: Ensures your chicken is cooked to the safe temperature.
  • Cutting Board: For prepping all your ingredients safely.

Serving Suggestions

Make your High Protein Street Corn Chicken Bowls truly shine with these serving ideas:

  • Top with Fresh Avocado: Creamy avocado adds a nice contrast to the dish.
  • Sprinkle with Fresh Herbs: Cilantro or parsley brighten up the flavors.
  • Serve with Lime Wedges: A little extra lime juice right before eating enhances all the flavors.
  • Pair with a Crunchy Salad: A side salad offers a refreshing crunch that complements the bowl.

In conclusion, these High Protein Street Corn Chicken Bowls are not just a meal; they’re an invitation to enjoy cooking without stress. With clear steps and delicious flavors, you can create a satisfying dish that fits perfectly into your busy lifestyle. So grab your ingredients and get ready to cook up a bowl of happiness!

High Protein Street Corn Chicken Bowls for Busy Food Lovers

Prep Time 10 minutes
Cook Time 15 minutes
Total Time 25 minutes
Servings 4 servings
Calories 650
Enjoy a quick and nutritious bowl packed with protein, smoky flavors, and fresh ingredients, perfect for busy days.

Ingredients

Protein

  • 1 pound chicken thighs (or chicken breast/tofu for a lighter option)
  • 1 tablespoon smoked paprika (essential for BBQ aroma)
  • 2 tablespoons lime juice (adds zesty brightness)
  • 1 cup fire-roasted corn (canned or frozen corn can be used)
  • 1 cup white rice (or brown rice/quinoa for extra nutrition)
  • 0.5 cup Greek yogurt (substitute with sour cream if desired)
  • 0.25 cup Cotija cheese (feta or grated Parmesan can be used)

Instructions 

  • Cook the rice according to package instructions.
  • Season chicken with smoked paprika and cook until fully done, then slice.
  • Mix lime juice with cooked corn and set aside.
  • Assemble bowls with rice, sliced chicken, corn mixture, Greek yogurt, and Cotija cheese.
  • Serve immediately and enjoy!

Notes

For extra flavor, add chopped cilantro or a squeeze of lime before serving.
Calories: 650kcal
Cost: $15
Course: Main Course
Cuisine: American
Keyword: Chicken, Healthy, Street Corn