Author

Steven

Browsing

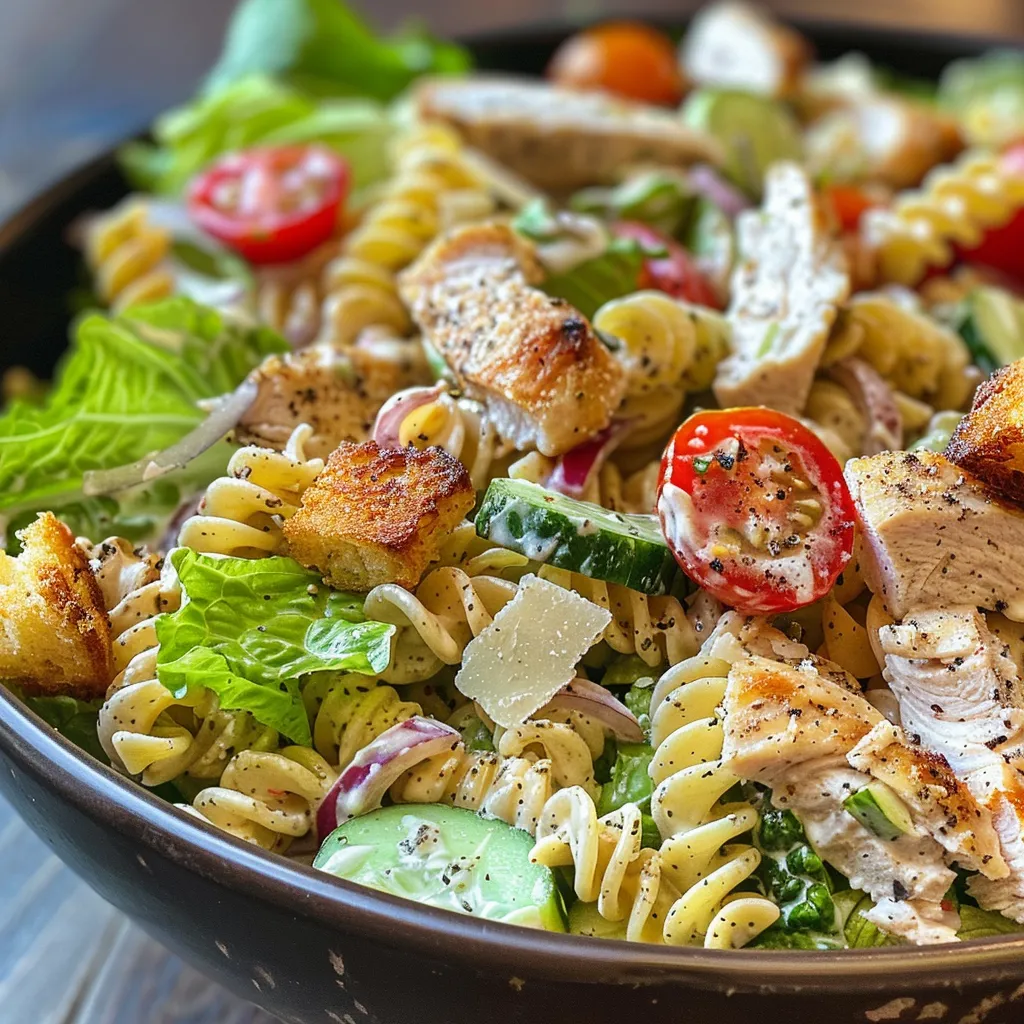
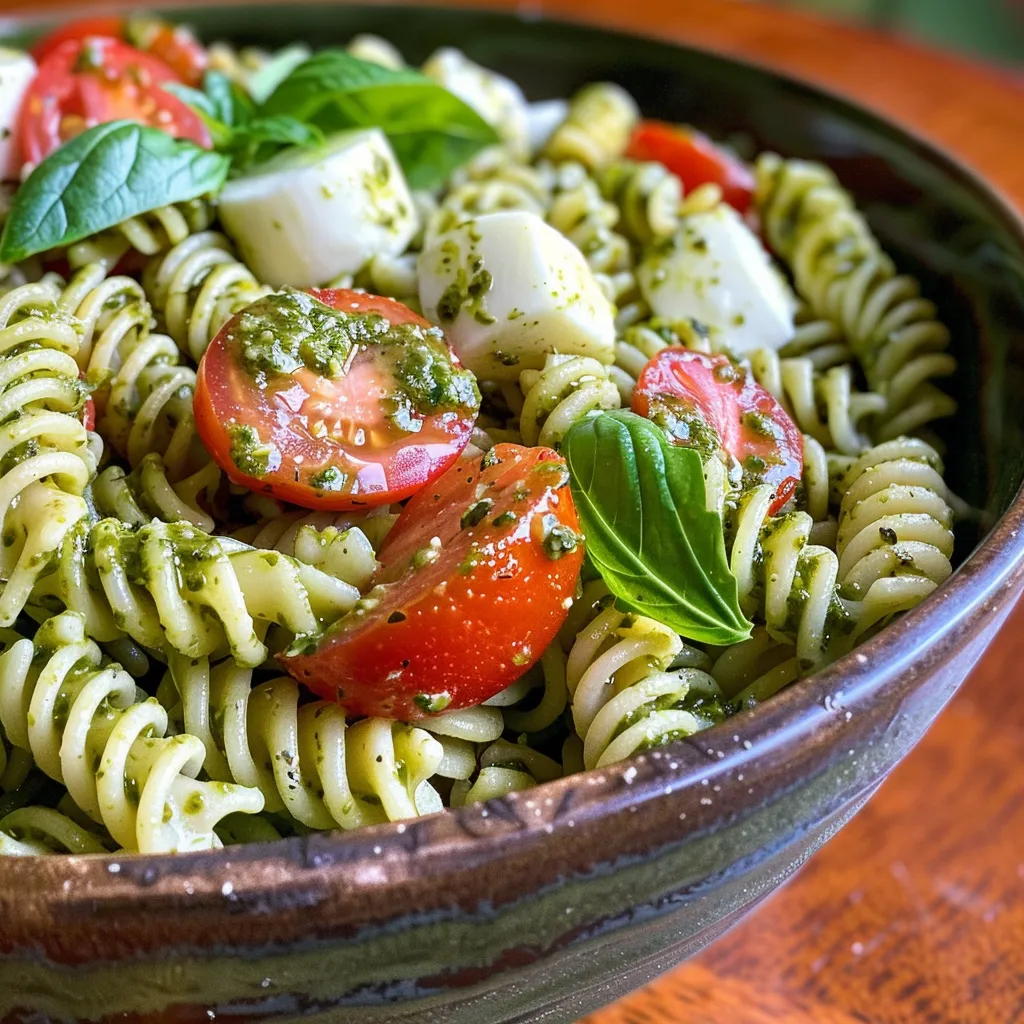
Deliciously Simple: Your Guide to Pasta Salad with Basil Pesto

If you’re looking for a dish that’s not only easy to make but also packed with flavor, then this Pasta Salad with Basil Pesto is your answer! Combining fresh ingredients like pasta, mozzarella, and vibrant cherry tomatoes, this salad is perfect for busy weeknights or weekend gatherings. Let’s dive into this delightful dish that brings the essence of summer to your table, making every bite a clear reminder of why cooking is such a joyful experience.

Why You’ll Love This Recipe

This Pasta Salad with Basil Pesto is more than just a meal; it’s a celebration of flavors and textures. Here’s why you’ll find it irresistible:

  • Quick Preparation: You can whip this up in under 30 minutes, making it perfect for those busy evenings.
  • Fresh Ingredients: Using vibrant ingredients not only enhances flavor but also adds nutritional value.
  • Versatile: This recipe is customizable—add your favorite proteins or veggies!
  • Make-Ahead Friendly: Prepare it in advance and let the flavors meld for a more delicious taste.
  • Perfect for Any Occasion: Whether it’s a potluck, picnic, or family dinner, this salad fits right in.

Ingredient Breakdown

Let’s take a closer look at the ingredients that make this pasta salad shine:

  • 8 ounces pasta (fusilli or rotini): Choose pasta shapes that hold the pesto well. Fusilli and rotini are perfect for their spiral shapes. You can also use gluten-free pasta if desired.
  • 1 cup fresh basil pesto: You can use either store-bought or homemade. Homemade pesto can enhance the flavor profile considerably.
  • 8 ounces fresh mozzarella, cubed: Creamy mozzarella adds a rich texture. For a twist, try feta or goat cheese instead.
  • 2 cups cherry tomatoes, halved: These sweet bites of flavor bring freshness. Add them just before serving for the best texture.
  • 1/4 cup olive oil: Adjust the amount based on your taste preferences; olive oil adds richness.
  • Salt and pepper to taste: Season according to your preference to elevate the dish.
  • Fresh basil leaves for garnish (optional): Not only does this enhance presentation, but it also adds a burst of fresh flavor.

How to Make Your Pasta Salad with Basil Pesto

Delicious pasta salad featuring fresh mozzarella, halved cherry tomatoes, and basil pesto.

Now, let’s get into the cooking process! Follow these simple steps for success:

  1. In a large pot, bring salted water to a boil. Add the pasta and cook according to package directions until al dente. Drain and set aside.
  2. In a large mixing bowl, combine the cooked pasta, basil pesto, and olive oil. Toss gently until the pasta is well coated.
  3. Add the cubed mozzarella and halved cherry tomatoes. Stir until evenly mixed.
  4. Season with salt and pepper. Taste and adjust the seasoning if necessary.
  5. Transfer to a serving bowl and garnish with fresh basil leaves.
  6. For best flavor, chill in the refrigerator for at least 30 minutes before serving.

Pro Tips for Success

To ensure your pasta salad is a hit, keep these expert tips in mind:

  • Cooking Time: Avoid overcooking the pasta; it should be firm to the bite (al dente) to maintain texture in the salad.
  • Chill Time: Allow the salad to chill for at least 30 minutes to let the flavors meld beautifully.
  • Ingredient Quality: Use the freshest ingredients you can find, especially for the pesto and tomatoes.
  • Seasoning: Taste as you go! Adjust the salt and pepper to enhance your flavor experience.
  • Leftover Pesto: If you have leftover pesto, it can be used in sandwiches, soups, or as a marinade.
  • Toss Gently: When mixing the ingredients, be gentle to avoid breaking the mozzarella.
  • Vibrant Add-Ins: Consider adding grilled chicken, roasted vegetables, or olives for extra flavor.
  • Fresh Herbs: Experiment with other herbs like parsley or arugula for different flavor profiles.

Common Mistakes to Avoid

Even the best cooks make mistakes! Here are some common pitfalls and how to avoid them:

  • Overcooked Pasta: Keep an eye on your pasta; it should be cooked al dente to maintain its structure.
  • Too Much Oil: While olive oil adds flavor, too much can make the salad greasy. Start with less and add more if needed.
  • Skipping the Chill: Don’t skip chilling—the flavors develop beautifully when allowed to sit.
  • Not Tasting: Always taste your dish before serving to ensure the seasoning is just right.

Flavor Variations

This pasta salad is incredibly versatile. Here are some variations to try:

  • Caprese Style: Add sliced fresh mozzarella, basil, and balsamic reduction for a classic Caprese twist.
  • Protein-Packed: Incorporate grilled chicken, shrimp, or chickpeas for a heartier dish.
  • Veggie Delight: Mix in roasted bell peppers, zucchini, or spinach for added nutrition and flavor.
  • Spicy Kick: Add red pepper flakes or jalapeños for a bit of heat.

Storage and Make-Ahead Instructions

Planning ahead can save you time and stress. Here’s how to store your pasta salad:

  • Refrigeration: Store in an airtight container in the refrigerator for up to 3 days. The flavors will continue to develop!
  • Freezing: Not recommended, as the texture of the pasta and fresh ingredients may not hold up.
  • Make-Ahead: Prepare the salad a day in advance. Just leave out the tomatoes until you are ready to serve for optimal freshness.

Frequently Asked Questions

Here are some common questions about making Pasta Salad with Basil Pesto:

  • Can I use a different type of pasta? Absolutely! Any short pasta shape will work well.
  • Is pesto sauce vegetarian-friendly? Most traditional pesto recipes contain cheese but can be made vegetarian by using nutritional yeast.
  • How can I make this dish vegan? Substitute the mozzarella with a plant-based cheese and use a vegan pesto recipe.
  • Can I add other vegetables? Yes! Feel free to mix in your favorite veggies for extra crunch and flavor.
  • What if I don’t have fresh basil? You can use store-bought pesto or even sun-dried tomato pesto for a different flavor.
  • How long can I store leftovers? Leftovers can be stored in the fridge for about 3 days in an airtight container.
  • Can I use dried herbs? Yes, but fresh herbs provide a burst of flavor that dried herbs cannot replicate.
  • What dishes pair well with this salad? It pairs wonderfully with grilled meats, seafood, or as a light lunch on its own.

Nutritional Tips and Dietary Adaptations

Keeping health in mind is essential. Here are a few tips:

  • Whole Wheat Pasta: For a healthier option, consider using whole wheat or legume-based pasta.
  • Low-Fat Cheese: Opt for low-fat mozzarella or feta to reduce calories.
  • Vegetable Boost: Increase the veggie content by adding more tomatoes, bell peppers, or leafy greens.

Essential Kitchen Equipment

Having the right tools can make your cooking experience easier:

  • Large Pot: For boiling pasta, a large pot is essential to prevent sticking.
  • Mixing Bowl: A big mixing bowl helps to combine all your ingredients seamlessly.
  • Measuring Cups and Spoons: Accurate measurements ensure the best balance of flavors.

Serving Suggestions

When it comes to serving your pasta salad, consider these ideas:

  • Chilled: Serve it cold for a refreshing dish, especially on warm days.
  • Garnish: A sprinkle of pine nuts or fresh herbs can elevate the presentation.
  • Pairing: Serve alongside grilled meats, fish, or as a satisfying vegetarian main dish.

In Conclusion

Making a Pasta Salad with Basil Pesto is not just about the ingredients; it’s about creating a dish that brings joy and flavor to your table. With simple steps and fresh ingredients, you can enjoy a meal that delights your taste buds while being a breeze to prepare. So gather your ingredients, channel your inner chef, and let this enticing salad become a favorite in your home! Happy cooking!

Pasta Salad with Basil Pesto

Prep Time 10 minutes
Cook Time 10 minutes
Total Time 20 minutes
Servings 4 servings
Calories 450
A vibrant and flavorful pasta salad featuring fresh basil pesto, mozzarella, and cherry tomatoes, perfect for a quick and satisfying meal.

Ingredients

Pasta

  • 8 ounces pasta fusilli or rotini (Choose pasta that holds pesto well.)
  • 1 cup fresh basil pesto (Store-bought or homemade.)
  • 8 ounces fresh mozzarella (Cubed. Can substitute with feta or goat cheese.)
  • 2 cups cherry tomatoes (Halved. Consider adding just before serving for freshness.)
  • 0.25 cup olive oil (Adjust according to taste.)
  • to taste salt and pepper (Season as desired.)

Garnish

  • optional Fresh basil leaves (Enhances presentation.)

Instructions 

  • Cook the pasta according to package instructions, then drain and let cool.
  • In a large bowl, combine cooked pasta, basil pesto, and olive oil.
  • Add cubed mozzarella and halved cherry tomatoes, then toss gently.
  • Season with salt and pepper to taste.
  • Garnish with fresh basil leaves if desired and serve.

Notes

For a creamier texture, toss the salad while the pasta is still warm.
Calories: 450kcal
Cost: $15
Course: Salad
Cuisine: Italian
Keyword: Basil Pesto, Pasta

Welcome to your new weeknight hero—a Crockpot Chicken and Veggie Casserole that’s not only deliciously creamy but also incredibly easy to make! With minimal effort, you can create a comforting dish that combines tender chicken, vibrant vegetables, and a cheesy sauce, perfect for any busy evening. If you’re looking for a way to make weeknight dinners exciting without adding stress, this recipe is here to help!

In this comprehensive guide, we’ll explore why you’ll love this recipe, a detailed ingredient breakdown, expert tips, common mistakes, variations, and much more. Let’s dive into the world of easy, flavorful cooking!

Why You’ll Love This Recipe

  • Minimal prep time: Just layer your ingredients in the crockpot, set it, and forget it—ideal for busy days!
  • Healthy and hearty: Packed with lean protein from the chicken and essential nutrients from the vegetables, this dish is both wholesome and filling.
  • Completely customizable: Use whatever veggies you have on hand—this recipe is a fantastic base for your culinary creativity.
  • Family-friendly: This casserole is a hit with both kids and adults, making dinnertime enjoyable for everyone.
  • Perfect for meal prep: Make a big batch and enjoy leftovers throughout the week—this casserole reheats beautifully!

Detailed Ingredient Breakdown

Here’s what you’ll need to create this delicious Crockpot Chicken and Veggie Casserole:

  • 1.5 lbs boneless, skinless chicken breasts: About 3 medium breasts will do. Feel free to use thighs for extra flavor!
  • 4 cups mixed vegetables: Options include broccoli florets, sliced carrots, diced bell peppers, or any favorite vegetables you have on hand.
  • 8 oz cream cheese: Make sure it’s softened for easy blending into the sauce.
  • 1 cup low-sodium chicken broth: Helps to keep the casserole moist and flavorful.
  • 2 cups shredded cheddar cheese: Divide this into two portions—one for mixing in and one for topping.
  • Seasonings: 1 tsp garlic powder, 1 tsp onion powder, 1 tsp Italian seasoning, 1/2 tsp salt (or to taste), and 1/4 tsp black pepper (or to taste).

Pro Tips for Success

To ensure your casserole turns out perfectly every time, here are some expert insights:

  • Prep ahead: Assemble all ingredients the night before and refrigerate. Just pop it in the slow cooker in the morning!
  • Layer wisely: Place chicken at the bottom of the crockpot for even cooking, followed by veggies and sauce.
  • Adjust seasoning: Taste before serving and adjust salt and pepper as needed—it can make a world of difference!
  • Use fresh ingredients: Fresh vegetables provide better flavor and texture compared to frozen ones.
  • Avoid overcooking: Cooking on low for 6-8 hours or high for 3-4 hours is ideal. Overcooking can lead to dry chicken.
  • Thicken the sauce: If you prefer a thicker sauce, remove the lid for the last 30 minutes of cooking time.
  • Experiment with cheeses: Try different types of cheese for varied flavors—pepper jack adds a nice kick!
  • Serve it right: Pair with a side of crusty bread or a fresh salad to complete your meal.

Common Mistakes and Troubleshooting

Close-up view of creamy chicken casserole with broccoli, carrots, and bell peppers.

Even the best cooks face challenges. Here are some common mistakes and how to avoid them:

  • Using frozen chicken: It’s best to thaw chicken beforehand to ensure even cooking and food safety.
  • Overcrowding the crockpot: Stick to the ingredient amounts specified to prevent uneven cooking.
  • Not enough liquid: If your casserole appears too dry, add a splash more chicken broth or water.
  • Skipping seasoning: Always season your dish well—don’t skip the spices!

Variations to Try

Want to switch things up? Here are some delicious variations you can try:

  • Southwestern Twist: Add black beans, corn, and a sprinkle of taco seasoning for a zesty flair.
  • Italian Style: Incorporate diced tomatoes and Italian sausage for a heartier option.
  • Cheesy Broccoli: Increase the amount of broccoli and add a creamy cheese sauce for extra cheesy goodness.
  • Asian-Inspired: Swap in soy sauce for the chicken broth and add sesame oil for a unique flavor.

Storage and Make-Ahead Instructions

This casserole is perfect for meal prepping! Here’s how to store and prepare it:

  • Refrigerate leftovers: Store in an airtight container for up to 4 days.
  • Freezing: You can freeze the unbaked casserole for up to 3 months. Thaw in the fridge overnight before cooking.
  • Reheating: Warm individual portions in the microwave, or reheat in a pot on the stove with a splash of broth to restore creaminess.

Frequently Asked Questions

Here are some common questions about this casserole:

  • Can I use frozen chicken for this recipe? It’s recommended to thaw chicken before using it to ensure it cooks evenly.
  • What vegetables can I add? Feel free to include mushrooms, green beans, peas, corn, or cauliflower!
  • Can I make this ahead of time? Yes! Assemble it the night before and cook it the next day.
  • How do I store leftovers? In an airtight container in the refrigerator for up to 4 days.
  • Is this recipe gluten-free? Yes, just ensure your chicken broth and seasonings are certified gluten-free.
  • Can I use different cheeses? Absolutely! Experiment with mozzarella, gouda, or pepper jack for different flavors.
  • How long does it take to cook? Cook on low for 6-8 hours or high for 3-4 hours.
  • Can I add pasta to the casserole? Yes, but consider cooking it separately and adding it towards the end to avoid mushiness.

Nutritional Tips and Dietary Adaptations

This casserole is not only delicious but can be adapted for various dietary needs:

  • Low-carb option: Skip the pasta and focus on the chicken and veggies for a satisfying meal.
  • Dairy-free version: Substitute cream cheese for a dairy-free alternative and use nutritional yeast for a cheesy flavor.
  • Vegetarian adaptation: Replace chicken with chickpeas or tofu for a hearty vegetarian dish.

Equipment Recommendations

To make this casserole, you’ll need:

  • Crockpot: A 6-quart slow cooker works best for this recipe.
  • Cutting board and knife: For chopping your veggies and chicken.
  • Measuring cups and spoons: To ensure accurate ingredient amounts.
  • Mixing bowl: For combining the cream cheese and seasonings.

Serving Suggestions

To round out your meal, consider serving this casserole with:

  • Crusty bread: A loaf of fresh bread is perfect for soaking up the creamy sauce.
  • Green salad: A light salad with vinaigrette balances the richness of the casserole.
  • Steamed rice or quinoa: Serve alongside for a complete meal!

Enjoy your delicious dinner! With this comprehensive guide, you’re now equipped with all the knowledge to create a fantastic Crockpot Chicken and Veggie Casserole that will impress your family and friends. Remember, cooking is about confidence and creativity—so have fun and enjoy the process!

Crockpot Chicken and Veggie Casserole Easy Creamy!

Prep Time 10 minutes
Cook Time 4 hours
Total Time 4 hours 10 minutes
Servings 4 servings
Calories 550
A delicious and creamy crockpot casserole combining tender chicken with mixed vegetables and cheesy goodness, perfect for a comforting meal.

Ingredients

Protein

  • 1.5 lbs boneless, skinless chicken breasts (about 3 medium breasts)
  • 4 cups mixed vegetables (broccoli florets, sliced carrots, diced bell peppers)
  • 8 oz cream cheese (softened)
  • 1 cup chicken broth (low-sodium)
  • 2 cups shredded cheddar cheese (divided)
  • 1 tsp garlic powder
  • 1 tsp onion powder
  • 1 tsp Italian seasoning
  • 1/2 tsp salt (or to taste)
  • 1/4 tsp black pepper (or to taste)

Instructions 

  • Place chicken breasts in the crockpot and add garlic powder, onion powder, Italian seasoning, salt, and pepper.
  • Add mixed vegetables, cream cheese, chicken broth, and 1 cup of shredded cheddar cheese to the crockpot.
  • Cover and cook on low for 4 hours or until chicken is cooked through and vegetables are tender.
  • Shred the chicken and stir in the remaining cheddar cheese until melted and creamy.
  • Serve hot, garnished if desired.

Notes

For a thicker sauce, cook uncovered for the last 30 minutes.
Calories: 550kcal
Cost: $15
Course: Main Course
Cuisine: American
Keyword: casserole, Chicken, Creamy

Welcome to a delightful culinary adventure where simplicity meets flavor! This Creamy Avocado Chicken Rice Bowl is not just another dinner recipe; it’s an experience that combines nourishing ingredients with the comfort of home cooking. The creamy avocado sauce adds a luscious touch to perfectly seasoned chicken and fluffy rice, making it a family favorite that’s both satisfying and exciting. In this article, we’ll walk you through every step, ensuring you feel empowered and confident in your cooking journey.

Why You’ll Love This Recipe

This Creamy Avocado Chicken Rice Bowl is more than just a meal; it’s a celebration of fresh ingredients and bold flavors. Here are five reasons why you’ll adore this recipe:

  • Quick and Easy: Perfect for busy weeknights, this dish comes together in under 30 minutes, making it a go-to for a satisfying dinner.
  • Healthful Ingredients: Packed with protein from chicken and healthy fats from avocados, this bowl is not only delicious but nutritious too.
  • Customizable: With various toppings and add-ins, you can easily tailor this dish to your family’s preferences. Think cherry tomatoes, black beans, or a sprinkle of cheese!
  • Flavorful Sauce: The creamy avocado sauce is a game-changer. It’s rich yet light, enhancing the overall dish with its fresh zing.
  • Meal Prep Friendly: Make the chicken and sauce ahead of time for effortless meal prep. Store in the fridge and assemble when ready to eat.

Ingredients Breakdown

Let’s dive into the ingredients that make this dish shine. Here’s what you’ll need:

  • 1 cup of uncooked rice: Jasmine or basmati work wonderfully for their fragrant aroma and fluffy texture.
  • 2 boneless, skinless chicken breasts: Approximately 1 pound total. Feel free to substitute with chicken thighs for a juicier experience.
  • 2 ripe avocados: Choose creamier varieties for that luscious sauce.
  • 1 tablespoon of extra virgin olive oil: This adds richness and depth to the chicken.
  • 1 lime: Fresh lime juice brightens up the dish and adds a zesty kick.
  • Salt and pepper: Essential for seasoning to enhance all flavors.
  • 1 teaspoon of garlic powder: A simple way to add depth and savoriness.
  • 1 teaspoon of paprika: Gives the chicken a beautiful color and a mild smokiness.
  • Optional toppings: Fresh cilantro, cherry tomatoes, black beans, corn, shredded cheese, and hot sauce to elevate your dish!

How to Prepare Your Creamy Avocado Chicken Rice Bowl

Now, let’s get cooking! Follow these straightforward steps for a delicious result:

Step 1: Cook the Rice

  • Rinse 1 cup of rice under cold water until the water runs clear.
  • In a pot, combine the rinsed rice with 2 cups of water and a pinch of salt.
  • Bring to a boil over medium-high heat.
  • Once boiling, reduce the heat to low, cover the pot, and let it simmer for about 15-20 minutes, or until the water is absorbed.
  • Remove from heat and let it sit, covered, for another 5 minutes. Fluff with a fork before serving.

Step 2: Prepare the Chicken

  • Season the chicken breasts with salt, pepper, garlic powder, and paprika for a flavorful base.
  • In a skillet, heat 1 tablespoon of olive oil over medium heat.
  • Add the seasoned chicken breasts, cooking for about 6-7 minutes on each side, until golden brown and cooked through (internal temperature should reach 165°F).
  • Remove the chicken from the skillet and let it rest for a few minutes before slicing into bite-sized pieces.

Step 3: Make the Creamy Avocado Sauce

  • In a blender or food processor, combine the avocados, juice of 1 lime, a pinch of salt, and a splash of water.
  • Blend until smooth and creamy. Adjust salt and lime juice to taste if needed.

Pro Tips for Success

Side view of a delicious rice bowl featuring chicken, avocado slices, and garnishes.

Here are some expert tips to ensure your Creamy Avocado Chicken Rice Bowl turns out perfect:

  • Perfect Avocados: Choose ripe but firm avocados. They should yield slightly to gentle pressure but not be mushy.
  • Chicken Cooking: For juicier chicken, let it rest after cooking to allow the juices to redistribute.
  • Rice Cooking: Always rinse rice to remove excess starch for fluffier grains.
  • Customize Your Bowl: Don’t hesitate to add your favorite toppings for added flavor and texture.
  • Adjust Spice: Add chili flakes or hot sauce if you like a kick!
  • Meal Prep: Cook extra rice and chicken for easy lunches throughout the week.
  • Leftover Sauce: Store leftover avocado sauce in an airtight container, pressing plastic wrap directly onto the surface to minimize browning.
  • Double the Recipe: Perfect for feeding a crowd or for meal prep. Just adjust the quantities accordingly!

Common Mistakes and Troubleshooting

Even the best chefs can encounter a few bumps in the road. Here are some common issues and how to solve them:

  • Sauce Too Thin: If your avocado sauce is too thin, add more avocado or reduce the amount of water.
  • Chicken Not Tender: Ensure the chicken is cooked to the right temperature and let it rest before slicing.
  • Bland Flavor: Always taste and adjust seasonings. A little extra lime juice or salt can elevate your dish.
  • Avocado Browning: To prevent browning, store leftover sauce in an airtight container with plastic wrap pressed on top.
  • Too Spicy: If it’s too spicy, balance it with a dollop of sour cream or yogurt when serving.
  • Flavor Balance: Ensure you have a good mix of flavors—season the chicken well and taste the sauce before serving.

Variations to Try

Feeling adventurous? Here are some fun variations you can try with your Creamy Avocado Chicken Rice Bowl:

  • Curry Chicken Version: Add curry powder to the chicken seasoning for an exotic twist.
  • Mexican-Inspired: Top with pico de gallo, jalapeños, and a drizzle of ranch dressing.
  • Asian Flair: Replace the avocado sauce with a sesame ginger dressing and add edamame.
  • Vegetarian Option: Swap chicken for grilled tofu or chickpeas, and keep the avocado sauce for creaminess.

Storage and Make-Ahead Instructions

For those busy days when you need to prepare ahead of time:

  • Store cooked rice, chicken, and avocado sauce separately in airtight containers in the fridge to maintain freshness.
  • Rice can be refrigerated for up to 4 days, and cooked chicken for up to 3 days.
  • The avocado sauce should ideally be consumed within 1-2 days to prevent browning.

Frequently Asked Questions

Here are some common questions people have about the Creamy Avocado Chicken Rice Bowl:

  • Can I use brown rice instead? Yes! Just be sure to adjust the cooking time, as brown rice takes longer to cook.
  • Can I freeze this dish? It’s best to freeze the chicken and rice separately, while the avocado sauce should not be frozen.
  • What can I serve with this bowl? It pairs well with a simple side salad or steamed vegetables.
  • Can I add more vegetables? Absolutely! Feel free to add any seasonal veggies you enjoy.
  • Is this recipe gluten-free? Yes, as long as you check that your rice is certified gluten-free.
  • How do I make this dairy-free? This recipe is already dairy-free, thanks to the creamy avocado sauce!
  • What if I don’t like avocados? You can use tahini or a yogurt-based sauce as a substitute.
  • How can I make it spicier? Add diced jalapeños or a hot sauce of your choice to the chicken.

Nutritional Tips and Dietary Adaptations

This Creamy Avocado Chicken Rice Bowl is not only delicious but also adaptable to various dietary needs:

  • Low-Carb Option: Use cauliflower rice instead of regular rice for a lighter meal.
  • High-Protein Version: Add extra chicken or incorporate beans for added protein.
  • Vegan Adaptation: Replace chicken with grilled tempeh or chickpeas and skip the avocado sauce for a tahini dressing.

Essential Equipment

To make your cooking experience smooth and enjoyable, here are some handy tools:

  • Rice Cooker: Perfect for making fluffy rice effortlessly.
  • Skillet: A good non-stick skillet will help you cook the chicken evenly.
  • Blender or Food Processor: Essential for creating that smooth avocado sauce.
  • Measuring Cups and Spoons: For accurate ingredient measurements.

Serving Suggestions

Your Creamy Avocado Chicken Rice Bowl is versatile and can be served in many delightful ways. Here are some suggestions:

  • Serve in large, colorful bowls for a family-style meal.
  • Garnish with fresh cilantro, lime wedges, and a sprinkle of chili flakes for an extra kick.
  • Offer a side of tortilla chips for a crunchy contrast.

In conclusion, this Creamy Avocado Chicken Rice Bowl is a fantastic way to elevate your dinner game without breaking a sweat. It’s delicious, nutritious, and can be customized to your heart’s content. So grab your apron, gather your ingredients, and let’s create something special in the kitchen. Happy cooking!

Creamy Avocado Chicken Rice Bowl

Prep Time 10 minutes
Cook Time 30 minutes
Total Time 40 minutes
Servings 4 servings
Calories 650
A delicious and nutritious bowl combining tender chicken, creamy avocado sauce, and fluffy rice, perfect for a quick and satisfying meal.

Ingredients

Rice

  • 1 cup uncooked jasmine or basmati rice

Chicken

  • 2 pieces boneless, skinless chicken breasts (about 1 pound total)

Avocado

  • 2 pieces ripe avocados

Olive Oil

  • 1 tablespoon extra virgin olive oil

Lime

  • 1 piece lime (for juice)

Seasonings

  • to taste salt and pepper
  • 1 teaspoon garlic powder
  • 1 teaspoon paprika

Optional toppings

  • fresh cilantro, cherry tomatoes, black beans, corn, shredded cheese, hot sauce (for garnish and extras)

Instructions 

  • Rinse rice and cook with 2 cups water and a pinch of salt until water is absorbed, then let sit covered for 5 minutes.
  • Season chicken with salt, pepper, garlic powder, and paprika. Cook in a skillet with olive oil for 6-7 minutes per side until cooked through.
  • Let chicken rest, then slice into bite-sized pieces. Blend avocados with lime juice, salt, and water until smooth.
  • Assemble bowls starting with rice, add sliced chicken, drizzle with avocado sauce, and top with optional garnishes.

Notes

Feel free to customize with your favorite toppings for added flavor and nutrition.
Calories: 650kcal
Cost: $15
Course: Main Course
Keyword: Avocado, Chicken, rice

Why You’ll Love This Effortless Chicken Caesar Pasta Salad

Are you looking for a quick and delicious meal that the whole family will love? This Chicken Caesar Pasta Salad is your answer! Combining tender chicken, crisp romaine, and a creamy homemade dressing, this recipe is perfect for busy weeknights or meal prep. With only a few ingredients and simple steps, you’ll whip this up in no time. Here are just a few reasons why this salad is a must-try:

  • Quick to Prepare: This recipe is ready in about 30 minutes, making it perfect for those hectic evenings.
  • Versatile Ingredients: You can easily substitute components based on what you have at home, ensuring no waste.
  • Flavor-Packed: The combination of flavors from the chicken, dressing, and fresh veggies is irresistible.
  • Meal Prep Friendly: Make it ahead of time and store it in the fridge for a tasty lunch or dinner throughout the week.
  • Kid-Approved: This salad is a hit with kids, making it a great way to incorporate healthy ingredients into their meals.

Ingredient Breakdown

Let’s dive into the ingredients you’ll need for this delightful salad. Understanding each component can help you make substitutions or enhancements as needed.

  • Short Pasta: 8 oz of penne, rotini, or farfalle. These shapes hold the dressing well and add a satisfying bite.
  • Romaine Lettuce: 4 cups, chopped. Crisp and refreshing, it provides a great contrast to the creamy dressing.
  • Cherry Tomatoes: 1 cup, halved (optional). Their sweetness adds a nice pop of flavor.
  • Chicken: 1 lb of boneless skinless breasts or thighs. Cooked to perfection, they’re the heart of this dish.
  • Olive Oil: 2 tbsp for cooking the chicken, adding healthy fats and flavor.
  • Parmesan Cheese: ½ cup shaved, plus extra for serving. A classic Caesar ingredient that adds richness.
  • Croutons: 1 cup or toasted bread cubes. They provide a satisfying crunch.
  • Seasonings: Salt and black pepper to taste, balancing the flavors.
  • Caesar Dressing: This is where the magic happens! You’ll need ½ cup mayonnaise, ¼ cup plain Greek yogurt (or sour cream), 2 tbsp fresh lemon juice, 1 tsp Dijon mustard, 1 tsp Worcestershire sauce, 1 minced garlic clove, and ½ tsp anchovy paste (optional).

How to Make Chicken Caesar Pasta Salad

Now that we have our ingredients ready, let’s break down the steps to make this delicious salad.

  • Cook the Pasta: Bring a large pot of salted water to a boil. Add the short pasta and cook until al dente, following package directions. Drain and rinse briefly under cool water to stop cooking. Transfer to a large mixing bowl and set aside.
  • Prepare the Chicken: Season the chicken with salt, pepper, garlic powder, and paprika. Heat 2 tablespoons of olive oil in a skillet over medium-high heat. Cook the chicken for 4-6 minutes per side until golden brown and cooked through (internal temperature should reach 165°F). Let it rest for 5 minutes, then slice or cube.
  • Make the Dressing: In a small bowl, whisk together the mayonnaise, Greek yogurt, lemon juice, Dijon mustard, Worcestershire sauce, minced garlic, and anchovy paste if using. Adjust the flavor with salt and pepper. If you prefer a thinner dressing, add a tablespoon of water or olive oil.
  • Assemble the Salad: Toss the cooled pasta with most of the dressing until well coated. Then, add the chopped romaine, cherry tomatoes, and sliced chicken. Toss gently to combine.
  • Final Touches: Sprinkle with Parmesan cheese and add croutons just before serving to maintain their crunch. Adjust seasoning with salt and pepper, and serve immediately.

Pro Tips for Perfecting Your Salad

Side view of a Chicken Caesar Pasta Salad featuring pasta, chicken, lettuce, and tomatoes.

To elevate your Chicken Caesar Pasta Salad, here are some expert insights:

  • Cook Pasta Perfectly: Always cook pasta to al dente for the best texture in salads.
  • Chill Your Ingredients: For a refreshing salad, ensure your lettuce and other ingredients are chilled before mixing.
  • Make Ahead: Prepare the pasta and dressing ahead of time, but mix in the lettuce and croutons just before serving to keep everything fresh.
  • Experiment with Proteins: Swap the chicken for grilled shrimp or even chickpeas for a vegetarian option.
  • Add More Veggies: Consider adding bell peppers, cucumbers, or avocados for extra nutrients and flavor.
  • Use Quality Ingredients: The dressing shines when made with good quality mayonnaise and fresh lemon juice.
  • Store Properly: Keep leftovers in an airtight container in the fridge for up to 3 days, but add croutons just before serving.
  • Season to Taste: Always taste your dressing and salad before serving to ensure flavors are balanced.

Common Mistakes to Avoid

Even the best recipes can go wrong if you’re not careful. Here are some common pitfalls and how to avoid them:

  • Overcooking the Pasta: This makes it mushy. Keep an eye on the cooking time and taste as it approaches al dente.
  • Skipping the Rinse: Rinsing the pasta helps cool it down and prevents it from sticking together.
  • Not Letting Chicken Rest: Resting allows the juices to redistribute, keeping the chicken juicy.
  • Using Old Ingredients: Fresh ingredients make a huge difference in flavor. Use fresh romaine and ripe tomatoes.
  • Overdressing the Salad: Start with less dressing; you can always add more if needed.

Variations to Try

Feel free to customize your Chicken Caesar Pasta Salad with these tasty variations:

  • Spicy Chicken Caesar: Add red pepper flakes or a drizzle of sriracha for heat.
  • Greek Caesar Salad: Substitute feta cheese for Parmesan and add black olives.
  • BBQ Chicken Caesar: Toss in some BBQ sauce with the dressing for a smoky twist.
  • Vegan Caesar Salad: Use chickpeas instead of chicken and a vegan mayo for the dressing.

Storage and Make-Ahead Instructions

This Chicken Caesar Pasta Salad is a great option for meal prep!

  • Store in an airtight container in the fridge for up to 3 days.
  • Keep croutons separate until ready to serve to maintain their crunch.
  • This recipe can be made a day in advance; just add fresh ingredients before serving.

Frequently Asked Questions

Here are some common questions about making Chicken Caesar Pasta Salad:

  • Can I use leftover chicken? Absolutely! Leftover rotisserie chicken works great in this salad.
  • Is anchovy paste necessary? It adds depth to the dressing, but you can skip it if you prefer.
  • Can I use different pasta shapes? Yes, any short pasta works well, so feel free to experiment!
  • How do I make this gluten-free? Use gluten-free pasta and check your dressing ingredients.
  • What can I add for extra crunch? Try adding nuts like walnuts or almonds for a delightful texture.
  • How can I make this lighter? Use low-fat mayonnaise and Greek yogurt to reduce calories.
  • Can this recipe be frozen? It’s best fresh, but if you freeze it, the texture may change.
  • What’s a good side dish to serve with this salad? Garlic bread or a light soup pairs beautifully!

Nutritional Tips and Dietary Adaptations

This Chicken Caesar Pasta Salad can be adapted to fit various dietary needs:

  • Low-Carb Option: Substitute pasta with zucchini noodles for a lower-carb version.
  • Higher Protein: Add extra chicken or incorporate chickpeas for a protein boost.
  • Heart-Healthy: Use whole wheat pasta and a lighter dressing to increase fiber.
  • Vegetarian Version: Omit the chicken and add more veggies like bell peppers and cucumbers.

Essential Equipment

To make this recipe, you’ll need a few basic kitchen tools:

  • Large Pot: For boiling the pasta.
  • Skillet: To cook the chicken to perfection.
  • Mixing Bowl: A large bowl for combining all ingredients.
  • Whisk: For mixing the dressing smoothly.
  • Knife and Cutting Board: For chopping and slicing ingredients.

Serving Suggestions

Make your meal complete by serving this salad with:

  • Garlic Bread: Perfect for sopping up any leftover dressing.
  • Grilled Vegetables: Complement the flavors of the salad.
  • Fruit Salad: A light, refreshing side that adds sweetness.
  • Wine Pairing: A crisp white wine pairs nicely with the flavors of the Caesar dressing.

Now that you have this comprehensive guide, you’re all set to create a delicious Chicken Caesar Pasta Salad that your family will adore! Remember, cooking is about having fun and experimenting, so feel free to make this recipe your own. Enjoy your culinary adventure and happy cooking!

Chicken Caesar Pasta Salad

Prep Time 15 minutes
Cook Time 15 minutes
Total Time 30 minutes
Servings 4 servings
Calories 650
A delicious and easy-to-make pasta salad with grilled chicken, crisp romaine, and a creamy Caesar dressing, perfect for a quick lunch or dinner.

Ingredients

Pasta

  • 8 oz short pasta (penne, rotini, or farfalle)

Vegetables

  • 4 cups chopped romaine lettuce
  • 1 cup cherry tomatoes halved (optional)

Protein

  • 1 lb boneless skinless chicken breasts or thighs

Dressing

  • ½ cup mayonnaise
  • ¼ cup plain Greek yogurt or sour cream
  • 2 tbsp fresh lemon juice
  • 1 tsp Dijon mustard
  • 1 tsp Worcestershire sauce
  • 1 small garlic clove minced
  • ½ tsp anchovy paste (optional)

Additional

  • to taste Salt and black pepper

Toppings

  • ½ cup shaved Parmesan (plus extra for serving)
  • 1 cup croutons or toasted bread cubes

Instructions 

  • Cook pasta in salted boiling water until al dente, then drain and rinse under cool water. Transfer to a large bowl.
  • Season chicken with salt, pepper, garlic, and paprika. Cook in olive oil until golden and cooked through, then rest and slice.
  • Whisk together mayonnaise, Greek yogurt, lemon juice, mustard, Worcestershire, garlic, and anchovy paste if using. Season with salt and pepper.
  • Toss pasta with most of the dressing, then add romaine, cherry tomatoes, and chicken. Gently toss to combine.
  • Sprinkle with Parmesan and top with croutons just before serving. Serve immediately or refrigerate without croutons for up to 3 days.

Notes

For extra flavor, marinate the chicken briefly before cooking or add more Parmesan for richness.
Calories: 650kcal
Cost: $15
Course: Main Course
Cuisine: American
Keyword: Chicken, Pasta, Salad

Why Garlic Lemon Chicken Skewers Are Your New Go-To Dish

If you’re looking for a delicious, easy, and stress-free recipe to impress your friends and family, look no further! Garlic Lemon Chicken Skewers are not only packed with flavor but also incredibly versatile and perfect for summer grilling. This dish is all about juicy chicken marinated in a vibrant garlic and lemon mixture, skewered, and grilled to perfection. Let’s dive in and discover why this recipe will become a staple in your kitchen!

With just a handful of ingredients and straightforward steps, you’ll create a dish that brings everyone together around the grill. Get ready for a flavor explosion that’s sure to make your taste buds dance!

What Makes This Recipe Special?

Here are five reasons why you’ll love these Garlic Lemon Chicken Skewers:

  • Quick to Prepare: With only 15 minutes of prep time, these skewers are perfect for busy weeknights or spontaneous gatherings.
  • Flavorful Marinade: The combination of fresh garlic and lemon juice creates a marinade that tenderizes the chicken and infuses it with zesty flavor.
  • Adaptable Ingredients: Substitute chicken thighs for even richer flavor or use different proteins like shrimp or tofu for a vegetarian option.
  • Healthier Grilling: Grilling is a low-fat cooking method that allows excess fat to drip away, making this dish a healthier choice.
  • Fun for Everyone: Skewering the chicken can be a fun activity for kids and adults alike, making it a great way to bond over cooking.

Ingredients You’ll Need

Gather the following ingredients to make your Garlic Lemon Chicken Skewers:

  • 2 pounds Boneless Skinless Chicken Breasts: Thighs can be used for a richer flavor.
  • 2 tablespoons Extra Virgin Olive Oil: A neutral oil can be substituted if needed.
  • 1 teaspoon Kosher Salt: Essential for enhancing the chicken’s natural flavor.
  • 1 teaspoon Freshly Ground Black Pepper: Adds a touch of warmth and depth to the dish.
  • 4 tablespoons Unsalted Butter: Can be swapped with ghee or dairy-free butter for dietary needs.
  • 4 cloves Garlic: Finely minced for that aromatic kick.
  • 2 tablespoons Fresh Lemon Juice: Always use fresh for vibrant flavor.
  • 1 teaspoon Fresh Lemon Zest: Elevates the brightness of the dish.
  • 2 tablespoons Fresh Parsley: Chopped for garnish and added freshness.
  • 1 teaspoon Red Pepper Flakes: Optional for a touch of heat.
  • 6 pieces Wooden or Metal Skewers: Wooden skewers require soaking for 30 minutes to prevent burning.

Step-by-Step Instructions

Close-up of flavorful Garlic Lemon Chicken Skewers with vibrant colors and herbs.

Follow these simple steps to create your Garlic Lemon Chicken Skewers:

Step 1: Prepare the Marinade

In a medium bowl, whisk together the **olive oil**, **kosher salt**, **black pepper**, **garlic**, **lemon juice**, and **lemon zest**. This marinade will infuse your chicken with a delightful flavor.

Step 2: Marinate the Chicken

Cut the chicken breasts into 1-inch cubes and add them to the marinade. Stir well to ensure all pieces are coated. Cover and let marinate in the refrigerator for at least 30 minutes, or up to 2 hours for maximum flavor.

Step 3: Thread Chicken onto Skewers

Once marinated, thread the chicken pieces onto the skewers, leaving a little space between each piece to ensure even cooking.

Step 4: Preheat and Grill

Preheat your grill to medium-high heat. Lightly oil the grill grates to prevent sticking. Place the skewers on the grill and cook for about 10-12 minutes, turning occasionally, until the chicken is fully cooked and has nice grill marks.

Step 5: Rest and Serve

Remove the skewers from the grill and let them rest for a few minutes. This allows the juices to redistribute, ensuring juicy chicken. Garnish with fresh parsley before serving.

Expert Tips for Perfect Skewers

Want to take your Garlic Lemon Chicken Skewers to the next level? Check out these expert tips:

  • Soak Wooden Skewers: Soak wooden skewers in water for at least 30 minutes before grilling to prevent burning.
  • Even Cooking: Cut the chicken into uniform pieces to ensure they cook evenly on the grill.
  • Add Vegetables: Skewer bell peppers, onions, or cherry tomatoes alongside the chicken for a colorful and nutritious addition.
  • Marinate Longer: For deeper flavor, marinate the chicken overnight in the fridge.
  • Adjust Heat: If you prefer a little heat, add red pepper flakes or brush the skewers with a spicy sauce during grilling.
  • Use a Meat Thermometer: Ensure the internal temperature of the chicken reaches 165°F (75°C) for safe consumption.
  • Experiment with Herbs: Fresh thyme or rosemary can be added to the marinade for a unique flavor twist.
  • Grill in Batches: If you have a lot of skewers, grill them in batches to avoid overcrowding, ensuring even cooking.

Common Mistakes to Avoid

Here are a few common pitfalls to watch out for when making your skewers:

  • Not Soaking Wooden Skewers: Skipping this step can result in burnt skewers. Always soak them for at least 30 minutes.
  • Skipping the Marinade: Don’t rush this step! Marinating the chicken is crucial for flavor and tenderness.
  • Overcrowding the Grill: Placing too many skewers on the grill can lower the temperature, leading to uneven cooking. Grill in batches if needed.
  • Cutting Chicken Too Thick: Ensure your chicken pieces are not too thick; otherwise, they won’t cook through properly.

Delicious Variations to Try

Feeling adventurous? Here are some fun variations to customize your Garlic Lemon Chicken Skewers:

  • Herb-Infused Skewers: Add fresh herbs like basil or oregano to the marinade for a Mediterranean twist.
  • Spicy Cajun Skewers: Mix in Cajun seasoning with the marinade for a fiery flavor kick.
  • Asian-Style Skewers: Use soy sauce, ginger, and sesame oil in the marinade for an Asian-inspired version.
  • Vegetarian Skewers: Substitute chicken with firm tofu or vegetables like zucchini and mushrooms for a meat-free option.

How to Store and Make Ahead

If you want to prep these skewers ahead of time, here’s what you need to know:

  • Make Ahead: Marinate the chicken earlier in the day or overnight for best results, then grill when ready.
  • Storage: Leftover skewers can be stored in an airtight container in the fridge for up to 3 days.
  • Freezing: If you want to freeze, marinate the chicken and skew them, then place them in a freezer-safe bag for up to 2 months. Thaw in the fridge before grilling.

Frequently Asked Questions

Here are some common questions about Garlic Lemon Chicken Skewers:

  • Can I use chicken thighs instead of breasts? Yes! Chicken thighs offer a richer flavor and remain juicier on the grill.
  • What can I serve with these skewers? Pair them with a fresh salad, grilled vegetables, or rice for a complete meal.
  • Can I make these skewers in the oven? Absolutely! Use a broiler to mimic the grilling effect, cooking for about 10-12 minutes.
  • How do I know when the chicken is done? Use a meat thermometer to ensure the internal temperature reaches 165°F (75°C).
  • What if I don’t have skewers? You can grill the chicken directly on the grill grates or use a grill basket.
  • Can I replace the garlic with garlic powder? Yes, but fresh garlic provides a more vibrant flavor.
  • How spicy are these skewers? They are mild, but you can add red pepper flakes for extra heat.
  • What’s the best way to reheat leftovers? Reheat in the oven or on the grill to maintain the texture.

Nutritional Information and Dietary Adaptations

This recipe is not only delicious but also nutritious! Here are some tips for making it fit your dietary needs:

  • Low-Carb Option: Serve with a side of grilled vegetables instead of rice for a low-carb meal.
  • Dairy-Free: Use dairy-free butter or omit it entirely for a dairy-free version.
  • Gluten-Free: This recipe is naturally gluten-free; just ensure the ingredients you use are certified gluten-free.
  • Caloric Content: Each serving contains approximately 250-300 calories, depending on the sides.

Equipment Recommendations

For the best grilling experience, consider having the following tools on hand:

  • Grill: A gas or charcoal grill will work perfectly for skewering chicken.
  • Meat Thermometer: Ensures your chicken is cooked to perfection.
  • Grill Basket: Helpful for grilling smaller vegetables alongside your skewers.
  • Skewers: Choose between wooden or metal skewers, making sure to soak wooden ones beforehand.

Serving Suggestions

Here are some ideas for what to serve alongside your Garlic Lemon Chicken Skewers:

  • Fresh Green Salad: A light salad with vinaigrette complements the skewers nicely.
  • Grilled Corn on the Cob: Sweet corn adds a delightful crunch and contrast.
  • Rice or Quinoa: Serve with a side of rice or quinoa to soak up all the flavors.
  • Yogurt Sauce: A refreshing yogurt or tzatziki sauce pairs perfectly with the skewers.

Conclusion

Garlic Lemon Chicken Skewers are not just a recipe; they’re an experience filled with flavor, fun, and connection. Whether you’re hosting a barbecue or just looking for a quick weeknight dinner, these skewers are sure to please. With their vibrant taste and easy preparation, you can enjoy the thrill of grilling without the fuss. So gather your ingredients and get ready to create a dish that will have everyone coming back for seconds!

Garlic Lemon Chicken Skewers for Juicy Summer Grilling Fun

Prep Time 15 minutes
Cook Time 10 minutes
Total Time 25 minutes
Servings 4 servings
Calories 250
Enjoy tender, flavorful chicken skewers infused with garlic and lemon, perfect for summer grilling.

Ingredients

Protein

  • 2 pounds Boneless Skinless Chicken Breasts or Thighs (can be used for a richer flavor)

Oil

  • 2 tablespoons Extra Virgin Olive Oil (a neutral oil can be substituted)

Seasonings

  • 1 teaspoon Kosher Salt
  • 1 teaspoon Freshly Ground Black Pepper

Butter & Alternatives

  • 4 tablespoons Unsalted Butter (can be swapped with ghee or dairy-free butter)

Aromatics & Citrus

  • 4 cloves Garlic, finely minced
  • 2 tablespoons Fresh Lemon Juice (use fresh for vibrant flavor)
  • 1 teaspoon Fresh Lemon Zest

Herbs & Spices

  • 2 tablespoons Fresh Parsley, chopped
  • 1 teaspoon Red Pepper Flakes (optional)

Skewers

  • 6 pieces Wooden or Metal Skewers (wooden skewers require soaking for 30 minutes)

Instructions 

  • Cut chicken into bite-sized pieces and marinate with garlic, lemon juice, lemon zest, salt, pepper, and chopped parsley for 15 minutes.
  • Thread chicken pieces onto soaked skewers.
  • Preheat grill to medium-high heat. Grill skewers for 10 minutes, turning occasionally, until cooked through.
  • In a small saucepan, melt butter and brush over cooked skewers. Sprinkle with red pepper flakes if desired.
  • Garnish with additional parsley and serve hot.

Notes

Soak wooden skewers for at least 30 minutes before grilling to prevent burning.
Calories: 250kcal
Cost: $15
Course: Main Course
Cuisine: American
Keyword: Chicken, Grilling, Summer

Discover the Joy of BBQ Chicken Salad

Are you ready to elevate your mealtime with a delightful dish that’s all about flavor and ease? This BBQ Chicken Salad is here to impress! It’s the perfect blend of tender chicken, fresh veggies, and zesty BBQ sauce, making it a hit for any occasion. Whether it’s a busy weeknight dinner or a casual weekend gathering, you’ll love how simple and satisfying this meal is to prepare. In this comprehensive guide, you’ll find everything you need to create this masterpiece, ensuring that every bite is bursting with flavor.

Why You’ll Love This Recipe

Let’s dive into the reasons why this BBQ Chicken Salad will become a staple in your kitchen:

  • Quick and Easy: This recipe comes together in under 30 minutes, making it perfect for busy weeknights.
  • Flavor-Packed: The combination of BBQ sauce, ranch dressing, and fresh ingredients creates a symphony of flavors in every bite.
  • Customizable: With numerous substitution options and variations, you can tailor this salad to your taste preferences or dietary needs.
  • Healthy and Nutritious: Packed with protein from chicken and fiber from veggies, this salad is a nutritious choice that keeps you full.
  • Impressive Presentation: Vibrant colors and textures make this salad visually appealing, perfect for impressing guests!

Ingredients Breakdown

Here’s what you’ll need for this mouthwatering BBQ Chicken Salad, along with some handy substitutions:

  • Chicken Breasts: 2 chicken breasts, sliced into strips. For a vegetarian option, consider grilled tofu or chickpeas.
  • BBQ Sauce: 1 cup of your favorite BBQ sauce. You can use homemade BBQ sauce for a personalized touch.
  • Ranch Dressing: 2 cups ranch dressing. Substitute with Greek yogurt for a lighter version.
  • Fresh Veggies: 1 large head of romaine lettuce, chopped; 1 large red bell pepper, chopped; 1 large tomato, cut into bite-sized pieces; 1/2 large red onion, cut into bite-sized pieces; 1/2 cup shredded carrots; 1 cup sweet white corn kernels, cooked and cooled; 2 cups black beans, cooked and rinsed.
  • Cheddar Cheese: 1 cup shredded cheddar cheese. Swap with feta for a tangy twist.
  • Olive Oil: 3 tablespoons for cooking the chicken.
  • Brown Sugar: 1/2 cup to sweeten the BBQ sauce.
  • Minced Garlic: 1 tablespoon for extra flavor.
  • Paprika: 1 teaspoon for a smoky kick.

How to Make BBQ Chicken Salad

Side view of a hearty BBQ chicken salad with colorful toppings.

Creating this delicious BBQ Chicken Salad is easier than you think! Follow these simple steps:

  1. Slice chicken breasts into three-inch strips.
  2. Heat olive oil in a large skillet over medium heat. Cook chicken strips until golden-brown edges appear and chicken is cooked through (about 5-7 minutes).
  3. While the chicken cooks, prepare the BBQ sauce by whisking together ketchup, brown sugar, paprika, and minced garlic in a bowl until smooth.
  4. Reduce heat and pour the BBQ sauce over the cooked chicken. Continue cooking until the chicken is well coated and the sauce begins to caramelize slightly (about 2-3 minutes).
  5. Remove the glazed chicken from heat and refrigerate to cool while you prepare the salad components.
  6. Clean and chop romaine lettuce into bite-sized pieces and arrange in the bottom of a large serving bowl.
  7. Layer black beans, corn kernels, red onion, and tomato pieces over the lettuce base.
  8. Add shredded carrot and chopped red bell pepper for additional color and crunch.
  9. Drizzle ranch dressing over the vegetables.
  10. Sprinkle shredded cheddar cheese across the salad.
  11. Finally, arrange the cooled BBQ chicken on top of the salad and serve immediately.

Pro Tips for Perfect BBQ Chicken Salad

Unlock the full potential of your BBQ Chicken Salad with these expert insights:

  • Grill for Extra Flavor: For added smokiness, consider grilling the chicken instead of pan-frying.
  • Use Seasonal Veggies: Incorporate seasonal vegetables for the freshest taste and added nutrients.
  • Don’t Skip the Marinade: Marinate your chicken in BBQ sauce for 30 minutes before cooking for deeper flavor.
  • Chill Before Serving: Allow the assembled salad to chill in the fridge for 15-30 minutes before serving for a refreshing experience.
  • Serve with Tortilla Chips: For a fun twist, serve your salad with crunchy tortilla chips on the side.
  • Make it a Wrap: Wrap the salad in a tortilla for a delicious on-the-go option.
  • Experiment with Cheeses: Try different cheeses like goat or blue cheese to change the flavor profile.
  • Garnish with Fresh Herbs: Fresh cilantro or parsley can elevate the dish even further.

Common Mistakes and Troubleshooting

Even the best cooks make mistakes! Here are some common pitfalls and how to avoid them:

  • Overcooking the Chicken: Keep an eye on your chicken to ensure it remains juicy. Use a meat thermometer to check that it reaches 165°F.
  • Too Much Sauce: Be cautious with the amount of BBQ sauce; start with less and add more to your taste.
  • Wilted Lettuce: Use fresh, crisp romaine for the best texture. Avoid pre-cut lettuce that may have been sitting out too long.
  • Skipping the Cool Down: Allowing the chicken to cool before adding it to the salad prevents wilting the greens.

Variations to Try

Mix things up with these fun variations:

  • Southwestern Twist: Add black beans, corn, and avocado for a Southwest-inspired BBQ Chicken Salad.
  • Asian Flair: Use sesame dressing instead of ranch and add sliced almonds and mandarin oranges.
  • Spicy Kick: Incorporate jalapeños or a spicy BBQ sauce for extra heat.
  • Fruit Fusion: Add diced mango or pineapple for a sweet contrast to the savory BBQ flavors.

Storage and Make-Ahead Instructions

This BBQ Chicken Salad is perfect for meal prep! Here’s how to store it:

  • Refrigeration: Store any leftovers in an airtight container in the fridge for up to 3 days.
  • Separate Components: To maintain freshness, keep the chicken, salad, and dressing separate until ready to serve.
  • Make Ahead: Prepare the chicken and chop the veggies a day in advance. Assemble just before serving for maximum freshness.

Comprehensive FAQ

Got questions? We’ve got answers!

  • Can I use leftover chicken for this recipe? Absolutely! Leftover grilled or rotisserie chicken works perfectly.
  • What can I use instead of ranch dressing? Try Greek yogurt, vinaigrette, or a homemade creamy dressing of your choice.
  • How spicy is the BBQ sauce? The spice level of BBQ sauce varies by brand. Opt for mild if you prefer less heat.
  • Can I make this salad vegan? Yes! Substitute chicken with grilled tofu, and use vegan BBQ sauce and dressing.
  • How do I prevent the salad from getting soggy? Keep the dressing separate until you’re ready to serve for optimal crunch!
  • Can I freeze BBQ Chicken Salad? It’s best enjoyed fresh, but you can freeze the chicken separately for later use.
  • What are some good side dishes? Serve with cornbread, coleslaw, or a light fruit salad for a complete meal.
  • How can I customize the ingredients? Feel free to swap in your favorite veggies or proteins based on what you have on hand!

Nutritional Tips and Dietary Adaptations

This BBQ Chicken Salad is as versatile as it is delicious! Here are some nutritional adaptations:

  • Low-Carb Option: Skip the corn and beans for a lower-carb version.
  • High-Protein Boost: Increase the amount of chicken or add beans for extra protein.
  • Gluten-Free: Ensure your sauces and dressings are gluten-free for a safe option.
  • Low-Calorie Alternative: Use low-fat ranch dressing and reduce the cheese for a lighter meal.

Equipment Recommendations

Here’s what you’ll need to successfully whip up this BBQ Chicken Salad:

  • Skillet: A large skillet for cooking the chicken.
  • Whisk: For mixing the BBQ sauce ingredients.
  • Cutting Board and Knife: Essential for chopping vegetables.
  • Large Serving Bowl: Perfect for assembling your beautiful salad.

Serving Suggestions

Enhance your BBQ Chicken Salad experience with these serving ideas:

  • Serve Chilled: This salad is best enjoyed cold, making it a refreshing dish on warm days.
  • Garnish Generously: Fresh herbs or additional cheese can elevate the presentation and flavor.
  • Pair with Drinks: Serve alongside iced tea or lemonade for a complete summer meal vibe.

Final Thoughts

This BBQ Chicken Salad is not just a meal; it’s an experience that brings joy to your table. With its vibrant ingredients and bold flavors, it invites you to gather around and enjoy a hearty dish made with love. Remember, cooking is about creativity and having fun, so don’t hesitate to make this recipe your own. Now, it’s time to grab those ingredients and get cooking! Enjoy every bite!

BBQ Chicken Salad

Prep Time 15 minutes
Cook Time 20 minutes
Total Time 35 minutes
Servings 4 servings
Calories 650
A flavorful and colorful salad featuring tender BBQ chicken, fresh vegetables, and a creamy ranch dressing.

Ingredients

Meat

  • 2 pieces chicken breasts (boneless, skinless)

Vegetables

  • 1 large red bell pepper (chopped)
  • 1 large red onion (cut into bite-sized pieces)
  • 1 large tomato (semi-ripe, cut into bite-sized pieces)
  • 1 head romaine lettuce (cleaned and chopped)
  • 1/2 cup shredded cheddar cheese
  • 1/2 cup brown sugar
  • 1 cup ketchup
  • 1 tablespoon minced garlic
  • 2 cups ranch dressing
  • 1/2 cup carrot (shredded)
  • 2 cups black beans (cooked and rinsed)
  • 1 cup sweet white corn kernels (cooked and cooled)

Oils & seasonings

  • 3 tablespoons olive oil
  • 1 teaspoon paprika

Instructions 

  • Slice chicken breasts into three-inch strips and cook in heated olive oil until golden and cooked through.
  • Whisk ketchup, brown sugar, paprika, and minced garlic to make BBQ sauce, then pour over cooked chicken and cook until caramelized.
  • Refrigerate chicken to cool, then chop romaine lettuce and layer in a large bowl.
  • Add black beans, corn, red onion, tomato, shredded carrot, and red bell pepper over the lettuce.
  • Drizzle ranch dressing, sprinkle cheddar cheese, top with cooled BBQ chicken, and serve.

Notes

For extra flavor, let the chicken sit in the BBQ sauce for 10 minutes before serving.
Calories: 650kcal
Cost: $15
Course: Main Course, Salad
Cuisine: American
Keyword: BBQ, Chicken, Salad

Discover the Magic of Chickpea Salad

Welcome to your new favorite dish! This chickpea salad is not just a meal; it’s a vibrant celebration of flavors and textures that brings excitement to your weeknight dinners. If you’re looking to elevate your meals without the stress, you’ve come to the right place. Packed with protein, fresh veggies, and a zingy dressing, this salad is perfect for meal prep or a quick dinner. Let’s dive into why you’ll love this recipe and how to make it your own!

Why You’ll Love This Recipe

  • Quick and Easy: Whip this up in under 15 minutes, perfect for busy weeknights.
  • Healthy and Nutritious: Packed with protein and fiber from chickpeas, making it a filling option.
  • Customizable: Add your favorite veggies or proteins to make it your own.
  • Flavor Explosion: The combination of lime, garlic, and spices creates a deliciously vibrant dressing.
  • Great for Meal Prep: This salad keeps well in the fridge, getting even tastier as the flavors meld.

Ingredients Breakdown

Here’s what you’ll need to create this delicious chickpea salad:

  • 3 tbsp extra-virgin olive oil: A high-quality oil adds richness and flavor.
  • 4 cloves garlic, minced: Fresh garlic provides a punch of flavor.
  • 2 medium limes, juiced: Fresh lime juice adds brightness and acidity.
  • 1½ tsp cumin: This spice adds an earthy depth to the dressing.
  • ½ tsp kosher salt: Essential for enhancing all the flavors.
  • ¼ tsp cayenne pepper: Adds a gentle kick; adjust to your heat preference.
  • ½ medium red onion, finely diced: Provides crunch and a slight sweetness.
  • 1 ¾ cup chopped parsley (cilantro also works): Fresh herbs add zest and freshness.
  • 3 cans (15-oz. each) chickpeas, drained and rinsed: The star of the salad, providing protein and texture.

Step-by-Step Instructions

A side view of a colorful chickpea salad featuring chopped herbs and diced vegetables.

Creating this chickpea salad is a breeze! Follow these simple steps:

  1. In a large bowl, whisk together the olive oil, minced garlic, lime juice, cumin, salt, and cayenne pepper until well combined.
  2. Add the finely diced red onion, chopped parsley, and rinsed chickpeas to the bowl.
  3. Gently stir to combine all ingredients, ensuring the chickpeas are well coated with the dressing.
  4. Serve immediately or, for the best flavor, refrigerate for a few hours to let the flavors meld together.

Pro Tips for Perfect Chickpea Salad

  • Let it Marinate: For maximum flavor, let the salad sit in the fridge for at least an hour before serving.
  • Experiment with Herbs: Try using mint or dill instead of parsley for a different flavor profile.
  • Add Crunch: Toss in some chopped bell peppers or cucumbers for extra texture.
  • Protein Boost: Add grilled chicken or feta cheese for a heartier meal.
  • Adjust the Heat: If you love spice, add more cayenne or some chopped jalapeños.
  • Storage: Store in an airtight container in the fridge for up to 5 days.
  • Perfect Pairings: Serve with pita chips, on a bed of greens, or as a filling for wraps.
  • Chickpea Quality: Drain and rinse canned chickpeas to reduce sodium and improve flavor.

Common Mistakes to Avoid

Here are a few common pitfalls to steer clear of when making your chickpea salad:

  • Overdressing: Too much dressing can make the salad soggy. Start with less and add more if needed.
  • Skipping the Rinsing: Always rinse canned chickpeas to remove excess sodium and improve taste.
  • Neglecting Freshness: Use fresh herbs and quality ingredients for the best flavor.
  • Forgetting to Let it Rest: Giving time for the flavors to meld is key to a delicious salad.

Chickpea Salad Variations

Feel free to switch things up! Here are some delicious variations you can try:

  • Mediterranean Chickpea Salad: Add diced cucumbers, Kalamata olives, and feta cheese.
  • Spicy Southwest Chickpea Salad: Mix in corn, black beans, and a chipotle dressing.
  • Asian-Inspired Chickpea Salad: Include shredded carrots, green onions, and a sesame dressing.
  • Moroccan Chickpea Salad: Add roasted sweet potatoes and a sprinkle of cinnamon.

Storage and Make-Ahead Instructions

This chickpea salad is perfect for meal prep! Here’s how to store it:

  • Refrigeration: Store in an airtight container for up to 5 days. The flavors will continue to develop.
  • Freezing: Not recommended, as the texture of the chickpeas and vegetables may change.
  • Make-Ahead: Prepare the dressing and chop the veggies a day in advance. Combine just before serving.

Frequently Asked Questions

Here are some common questions about making chickpea salad:

  • Can I use dried chickpeas instead of canned? Yes! Just soak and cook them until tender before using.
  • How can I make this salad vegan? This recipe is already vegan as written, but ensure any add-ins are also plant-based.
  • What if I don’t have limes? Lemon juice can be used as a substitute.
  • Can I add nuts or seeds? Absolutely! Toasted almonds or pumpkin seeds would add great texture.
  • Is this salad gluten-free? Yes! It’s naturally gluten-free, making it a great option for various diets.
  • Can I use other beans? Yes, you can substitute chickpeas with black beans or cannellini beans.
  • How can I make it a complete meal? Add grilled chicken, tuna, or quinoa for added protein.
  • What should I serve with this salad? It pairs well with grilled meats, sandwiches, or as a standalone meal.

Nutritional Tips and Dietary Adaptations

This chickpea salad is not only delicious but also offers several health benefits:

  • High in Protein: Chickpeas are an excellent source of plant-based protein, great for muscle recovery.
  • Rich in Fiber: Helps with digestion and keeps you full longer.
  • Low Calorie: The salad is low in calories while being nutrient-dense.
  • Gluten-Free: Safe for those with gluten sensitivities.

Essential Equipment for Making Chickpea Salad

Here’s what you’ll need to prepare this delicious salad:

  • Mixing Bowl: A large bowl is best for combining all ingredients.
  • Whisk: For mixing the dressing thoroughly.
  • Chopping Board and Knife: For chopping veggies and herbs.
  • Measuring Cups and Spoons: To ensure accurate ingredient amounts.

Serving Suggestions

This chickpea salad is incredibly versatile! Here are some serving ideas:

  • As a Side Dish: Perfect alongside grilled meats or fish.
  • In a Wrap: Use it as a filling for pita or tortilla wraps.
  • On a Bed of Greens: Serve it over mixed greens for a hearty salad.
  • With Pita Chips: Enjoy it as a dip with crispy pita chips.

Wrap-Up: Your New Go-To Chickpea Salad

Now that you’ve learned how to make this vibrant chickpea salad, it’s time to get cooking! Remember, cooking should be a joyful experience, so don’t stress about perfection. With fresh ingredients and these easy steps, you’ll create a dish that’s not only delicious but also a hit at your dinner table. Enjoy the flavors, get creative with variations, and most importantly, have fun in the kitchen!

Chickpea Salad

Prep Time 10 minutes
Total Time 10 minutes
Servings 4 servings
Calories 250
A fresh and flavorful chickpea salad perfect for a quick lunch or side dish, packed with herbs and zesty lime.

Ingredients

Dressing

  • 3 tbsp extra-virgin olive oil
  • 4 cloves garlic minced
  • 2 medium limes juiced
  • 1.5 tsp cumin
  • 0.5 tsp kosher salt
  • 0.25 tsp cayenne pepper
  • 0.5 medium red onion finely diced
  • 0.75 cup chopped parsley or cilantro (also works)
  • 3 15-oz. cans chickpeas drained and rinsed

Instructions 

  • Whisk together olive oil, garlic, lime juice, cumin, salt, and cayenne in a large bowl.
  • Add diced onion, chopped parsley, and chickpeas; stir gently to combine.
  • Serve immediately or refrigerate for a few hours to meld flavors.

Notes

For best flavor, let the salad sit for a few hours before serving.
Calories: 250kcal
Cost: $8
Course: Salad
Cuisine: Mediterranean
Keyword: Chickpeas

Discover the Joy of Grilled Summer Vegetable Salad

Grilled vegetables are the essence of summer cooking, offering a vibrant and flavorful way to enjoy fresh produce. In this ultimate Grilled Summer Vegetable Salad recipe, you’ll find a delightful medley of seasonal vegetables, expertly charred to enhance their natural sweetness. With a zesty lemon vinaigrette and the creamy richness of blue cheese, this salad is perfect for any gathering or a simple weeknight dinner. Let’s dive into the delicious details of making this salad that’s not only easy to prepare but also bursting with flavor and color.

Why You’ll Love This Grilled Summer Vegetable Salad

This salad isn’t just a side dish; it’s a celebration of summer! Here are five reasons to love this recipe:

  • Colorful Presentation: The combination of grilled zucchini, bell peppers, and cherry tomatoes creates a visually stunning dish that brightens any table.
  • Packed with Flavor: The grilling process caramelizes the vegetables, enhancing their natural sweetness while adding a smoky depth.
  • Health Benefits: This salad is rich in vitamins and antioxidants, making it a nutritious addition to your meals.
  • Versatile Dish: Enjoy it warm or cold, as a main course, or as a side, making it perfect for picnics, barbecues, or family dinners.
  • Quick and Easy: With minimal prep and cooking time, this salad can be on your table in under 30 minutes!

Ingredients for Grilled Summer Vegetable Salad

Here’s what you’ll need to create this delicious salad. Feel free to get creative with substitutions based on your taste preferences or what you have on hand!

  • 1 zucchini: Sliced lengthwise for optimal grilling.
  • 1 yellow squash: Sliced lengthwise, offering a slightly sweeter taste.
  • 1 red bell pepper: Quartered to add vibrant color and crunch.
  • 1 yellow bell pepper: Quartered for a balance of sweetness.
  • 1 red onion: Cut into thick rounds; grilling mellows its sharpness.
  • 1 cup cherry tomatoes: These add bursts of sweetness; keep them whole.
  • 2 ears of corn: Husked to provide a delightful crunch and sweetness.
  • 2 tablespoons olive oil: For tossing and grilling, enhancing flavor.
  • Salt and black pepper: To taste, enhancing the natural flavors of the vegetables.

Step-by-Step Instructions

A colorful array of grilled summer vegetables on a plate, showcasing zucchini, yellow squash, and red onion.

Follow these simple steps to create your Grilled Summer Vegetable Salad:

  • Preheat your grill: Set to medium-high heat and lightly oil the grates to prevent sticking.
  • Toss the veggies: In a large bowl, combine the zucchini, yellow squash, bell peppers, red onion, cherry tomatoes, and corn. Drizzle with olive oil and season with salt and black pepper. Toss until evenly coated.
  • Grill the vegetables: Place the veggies on the grill. Grill for about 3-5 minutes per side or until tender and slightly charred.
  • Cool and chop: Remove from the grill, allow to cool slightly, then cut the corn off the cobs and chop the grilled vegetables into bite-sized pieces.
  • Make the dressing: In a small bowl, whisk together olive oil, balsamic vinegar, Dijon mustard, minced garlic, salt, and pepper.
  • Toss and serve: In a large bowl, combine the grilled vegetables with the dressing. Garnish with crumbled blue cheese and fresh basil before serving.

Pro Tips for the Perfect Grilled Summer Vegetable Salad

Here are some expert insights to elevate your salad-making game:

  • Choose seasonal veggies: Fresh, in-season vegetables not only taste better but are also more nutritious.
  • Don’t overcrowd the grill: Give your vegetables space on the grill to ensure even cooking and nice grill marks.
  • Experiment with marinades: Marinate your veggies in balsamic or herb-infused olive oil for added flavor before grilling.
  • Use a grill basket: If you’re grilling smaller items like cherry tomatoes, a grill basket can prevent them from falling through the grates.
  • Cool slightly before chopping: Allow the grilled vegetables to cool a bit before chopping to retain their juices.
  • Add nuts or seeds: For added crunch, sprinkle some toasted nuts or seeds over the salad before serving.
  • Make it a meal: Add protein like grilled chicken, shrimp, or chickpeas to turn this salad into a complete meal.
  • Refrigerate before serving: For a cool salad, refrigerate it for about 30 minutes before serving to let the flavors meld.

Common Mistakes and Troubleshooting

Here are some common pitfalls to avoid when making your Grilled Summer Vegetable Salad:

  • Overcooking vegetables: Keep an eye on your grilling time; overcooked veggies can become mushy.
  • Not seasoning enough: Don’t skimp on salt and pepper; they’re essential for enhancing flavors.
  • Skipping the cooling step: Chopping hot vegetables can lead to a soggy salad; allow them to cool slightly.
  • Using old vegetables: Ensure your produce is fresh; wilted or old veggies will affect the taste and texture.

Variations to Try

Feel free to customize your salad with these tasty variations:

  • Herb-infused oil: Use herb-infused olive oil for an extra flavor boost when grilling.
  • Cheese options: Swap blue cheese for feta, goat cheese, or even a vegan cheese alternative.
  • Grilled fruits: Add grilled peaches or pineapple for a sweet contrast to the savory vegetables.
  • Spicy kick: Toss in sliced jalapeños or drizzle with a spicy vinaigrette for some heat.

Storage and Make-Ahead Instructions

This salad is perfect for meal prep! Here’s how to store it:

  • Refrigeration: Store any leftovers in an airtight container in the refrigerator for up to 3 days.
  • Make-ahead: You can grill the vegetables a day in advance; just toss with the dressing before serving.
  • Freezing: While the salad itself does not freeze well, you can freeze the grilled vegetables for later use in soups or stir-fries.

Frequently Asked Questions

Here are some common questions about making a Grilled Summer Vegetable Salad:

  • Can I use frozen vegetables? While fresh is best, you can use frozen vegetables; just grill them directly from frozen.
  • What dressing pairs well with grilled vegetables? A lemon vinaigrette or balsamic dressing complements the smoky flavors beautifully.
  • How do I make this salad vegan? Omit the cheese or replace it with a vegan alternative, and ensure the dressing is vegan-friendly.
  • Can I grill the vegetables in advance? Yes, grilled vegetables can be made a day ahead; just store them in the refrigerator.
  • What can I serve with this salad? It pairs well with grilled meats, fish, or as a light main dish on its own.
  • How do I prevent the vegetables from sticking to the grill? Make sure the grill is properly preheated and oiled before adding the vegetables.
  • Is this salad gluten-free? Yes, all the ingredients are naturally gluten-free, making it a great option for gluten-sensitive diets.
  • Can I add grains to this salad? Absolutely! Quinoa, couscous, or farro can be added for more texture and nutrition.

Nutritional Tips and Dietary Adaptations

To make this salad fit various dietary needs:

  • Low-carb option: Skip the corn and focus on non-starchy veggies.
  • High-protein version: Add grilled chicken, shrimp, or chickpeas for a protein boost.
  • Dairy-free: Omit the cheese or use a dairy-free alternative to accommodate allergies.

Essential Equipment

Here’s what you’ll need to make this delicious salad:

  • Grill: A grill (gas, charcoal, or electric) is essential for that smoky flavor.
  • Grill basket: Useful for smaller veggies like cherry tomatoes to prevent them from falling through the grates.
  • Cutting board and chef’s knife: For slicing and chopping your vegetables with ease.
  • Mixing bowls: To toss your ingredients and prepare the dressing.

Serving Suggestions

To elevate your meal, consider pairing this salad with:

  • Grilled meats: Chicken, steak, or fish complement the salad perfectly.
  • Fresh bread: A crusty baguette or garlic bread makes for a lovely side.
  • Wine pairings: A crisp white wine, like Sauvignon Blanc, enhances the fresh flavors of the salad.

In conclusion, the Grilled Summer Vegetable Salad is not only a feast for the eyes but also a wholesome addition to your dining table. With its vibrant colors, rich flavors, and endless customization options, it’s a dish that invites creativity and enjoyment in the kitchen. So fire up that grill, gather some fresh ingredients, and let’s celebrate the flavors of summer!

Grilled Summer Vegetable Salad

Prep Time 10 minutes
Cook Time 15 minutes
Total Time 25 minutes
Servings 4 servings
Calories 250
A vibrant and smoky salad perfect for summer, featuring grilled vegetables tossed in a flavorful dressing.

Ingredients

Vegetables

  • 1 piece zucchini (sliced lengthwise)
  • 1 piece yellow squash (sliced lengthwise)
  • 1 piece red bell pepper (quartered)
  • 1 piece yellow bell pepper (quartered)
  • 1 piece red onion (cut into thick rounds)
  • 1 cup cherry tomatoes
  • 2 ears corn (husked)
  • 2 tablespoons olive oil
  • to taste Salt and black pepper
  • for dressing olive oil, balsamic vinegar, Dijon mustard, garlic, salt, pepper (whisked together)
  • optional Feta cheese and fresh basil (for garnish)

Instructions 

  • Preheat grill to medium-high and oil grates.
  • Toss vegetables with olive oil, salt, and pepper; grill until tender and charred, about 3-5 minutes per side.
  • Remove vegetables, cool slightly, then cut corn off cobs and chop vegetables into bite-sized pieces.
  • Whisk together dressing ingredients and toss with grilled vegetables.
  • Garnish with crumbled feta and basil before serving.

Notes

This salad is bursting with smoky flavors and fresh ingredients, making it a perfect addition to any summer meal!
Calories: 250kcal
Cost: $15
Course: Salad
Cuisine: American
Keyword: Vegetables

Elevate Your Meal Game with This Shrimp Avocado Salad

Welcome to your new favorite dish! This Bright and Fresh Shrimp Avocado Salad is not just quick to prepare; it’s bursting with flavors that will excite your taste buds. Whether you’re looking for a light lunch or a refreshing dinner option, this salad is perfect for any day of the week. Packed with nutritious ingredients and a zesty dressing, it’s the kind of meal that feels indulgent without the guilt. Let’s dive into how to make this delightful recipe your new go-to!

Why You’ll Love This Recipe

There are countless reasons to adore this Shrimp Avocado Salad, but here are just a few:

  • Quick and Easy: Ready in under 30 minutes, making it perfect for busy weekdays.
  • Flavorful Ingredients: The combination of shrimp, creamy avocado, and fresh veggies packs a flavorful punch in every bite.
  • Nutritious & Filling: This salad is rich in healthy fats, proteins, and vitamins, keeping you satisfied and energized.
  • Customizable: Easy to modify based on your dietary needs or ingredient availability.
  • Impressive Presentation: Vibrant colors and textures make it visually appealing for any gathering or meal.

Ingredients You’ll Need

Gathering the right ingredients is key to achieving that restaurant-quality shrimp avocado salad at home. Here’s what you’ll need:

  • 1 lb shrimp: Peeled and deveined, fresh or frozen.
  • 1 tablespoon olive oil: For sautéing the shrimp.
  • 1 teaspoon garlic powder: Adds depth and flavor.
  • Salt and pepper to taste: Essential for seasoning.
  • 2 medium avocados: Diced for that creamy texture.
  • 1 cup cherry tomatoes: Halved for a pop of color and sweetness.
  • 1 cucumber: Diced for crunch.
  • ½ red onion: Thinly sliced for a mild bite.
  • 2 cups mixed greens or arugula: A fresh base for your salad.
  • 2 tablespoons fresh cilantro: Chopped for a burst of freshness.
  • 1 lime: Juiced for a tangy dressing.
  • 1 tablespoon olive oil for dressing: Helps to bring all the flavors together.
  • 1 teaspoon honey or agave syrup (optional): For a touch of sweetness.

**Ingredient Substitutions:** If you’re missing any ingredients, here are some alternatives:

  • Shrimp: Substitute with cooked chicken or chickpeas for a vegetarian option.
  • Avocado: Swap with guacamole for extra creaminess.
  • Mixed Greens: Use spinach or kale for a different green.
  • Cilantro: Parsley or basil can be substituted for a different herb flavor.

Step-by-Step Instructions

Side view of a vibrant Shrimp Avocado Salad with fresh shrimp, avocado, and vegetables arranged in a bowl.

Now, let’s get cooking! Follow these simple steps to create your Shrimp Avocado Salad:

  1. Prepare the Shrimp: In a skillet, heat 1 tablespoon of olive oil over medium heat. Sprinkle the shrimp with garlic powder, salt, and pepper. Sauté for about 3-4 minutes until pink and cooked through.
  2. Mix the Salad: In a large bowl, combine the diced avocados, halved cherry tomatoes, diced cucumber, sliced red onion, and mixed greens.
  3. Add the Shrimp: Once cooked, add the sautéed shrimp to the salad mix.
  4. Prepare the Dressing: In a small bowl, whisk together lime juice, 1 tablespoon of olive oil, and honey or agave syrup, if using.
  5. Dress the Salad: Pour the dressing over the salad and gently toss to combine. Be careful not to mash the avocados!
  6. Garnish: Top with fresh cilantro and serve immediately.

Pro Tips for Perfection

To ensure your Shrimp Avocado Salad turns out beautifully, here are some expert tips:

  • Use Fresh Ingredients: The fresher your ingredients, the better the flavor! Try to use in-season produce.
  • Customize Your Dressing: Experiment with different vinegars or spices to create a dressing that suits your taste.
  • Don’t Overcook the Shrimp: Remove the shrimp from heat as soon as they turn pink to keep them tender.
  • Chill Before Serving: For an extra refreshing salad, chill it in the fridge for 10-15 minutes before serving.
  • Batch Preparation: Cook extra shrimp for quick salads throughout the week.
  • Serve Immediately: This salad is best enjoyed fresh, as avocados can brown quickly.
  • Use a Sharp Knife: A sharp knife helps in making clean cuts, especially for avocados and vegetables.
  • Mind the Lime: Adjust the lime juice to your taste—more for tang, less for subtlety.

Common Mistakes & Troubleshooting

Even the best cooks can run into trouble! Here are some common mistakes and how to avoid them:

  • Overcooked Shrimp: Always watch your shrimp closely; they cook quickly! Remove them from heat once they turn opaque.
  • Mushy Avocado: Select avocados that are just ripe for the best texture—too soft can lead to mushiness.
  • Too Much Dressing: Start with a little dressing and add more as needed to avoid drowning the salad.
  • Too Salty: If you accidentally over-salt, add more greens or a squeeze of lime to balance the flavors.

Variations to Try

Feeling adventurous? Here are some tasty variations of the shrimp avocado salad to mix things up:

  • Tropical Twist: Add diced mango and coconut flakes for a tropical vibe.
  • Spicy Kick: Toss in sliced jalapeños or a dash of hot sauce for heat.
  • Asian-inspired: Use sesame oil in the dressing and add sliced radishes and edamame.
  • Caesar Style: Incorporate croutons and a Caesar dressing for a heartier salad.

Storage & Make-Ahead Instructions

This salad is best enjoyed fresh, but here are some tips for storage:

  • Refrigeration: Store leftovers in an airtight container for up to 24 hours. Keep the dressing separate until serving.
  • Make-Ahead: You can prepare the shrimp in advance and chop the vegetables; just combine them the day you plan to serve.
  • Avocado Tips: To prevent browning, squeeze lime juice over the avocado and store cut pieces in an airtight container.

Comprehensive FAQ

Have questions? Here are some common queries about this shrimp avocado salad:

  • Can I use frozen shrimp? Yes, just make sure to thaw them properly before cooking.
  • Is this recipe gluten-free? Absolutely! All ingredients are gluten-free.
  • What can I substitute for shrimp? Chicken, tofu, or chickpeas work great as alternatives.
  • How do I ripen avocados quickly? Place them in a brown paper bag with an apple or banana for a day or two.
  • Can I add grains to this salad? Yes! Quinoa or brown rice can add texture and make it more filling.
  • How long does this salad last in the fridge? Best consumed within 24 hours for optimal freshness.
  • Can I make this salad vegan? Yes, simply omit the shrimp and add more beans or tofu.
  • What’s the best way to serve this salad? Serve it cold or at room temperature for the best taste.

Nutrition Tips & Dietary Adaptations

This shrimp avocado salad can easily fit into various dietary lifestyles:

  • Low-Carb: Focus on the vegetables and protein, skipping any grains.
  • Paleo: Use fresh, whole ingredients and avoid processed items.
  • Keto: This salad is naturally low in carbs, making it perfect for a keto diet.
  • Vegetarian: Substitute shrimp with chickpeas or a plant-based protein for a vegetarian option.

Equipment Recommendations

Having the right tools can make cooking easier. Here’s what I recommend:

  • Skillet: A non-stick skillet for sautéing shrimp.
  • Sharp Knife: For easy chopping of veggies and avocados.
  • Cutting Board: A good surface to prepare your ingredients.
  • Mixing Bowl: A large bowl for combining your salad ingredients.
  • Whisk: For mixing your dressing thoroughly.

Serving Suggestions

This salad isn’t just a meal on its own; it pairs beautifully with:

  • Crusty Bread: Serve with a side of warm, crusty bread for a complete meal.
  • Wine: A crisp white wine like Sauvignon Blanc complements the flavors well.
  • Dips: Pair with hummus or a yogurt dip for a light appetizer.

Now that you have the ultimate guide to creating a fabulous Shrimp Avocado Salad, it’s time to roll up your sleeves and get cooking! Remember, cooking is all about enjoying the process and having fun in the kitchen. I hope this recipe inspires you to whip up this delicious salad and share it with friends and family. Happy cooking!

Shrimp Avocado Salad

Prep Time 15 minutes
Cook Time 10 minutes
Total Time 25 minutes
Servings 4 servings
Calories 350
A fresh and vibrant salad combining succulent shrimp, creamy avocados, and crisp vegetables, perfect for a light lunch or dinner.

Ingredients

Protein

  • 1 lb shrimp, peeled and deveined
  • 1 tablespoon olive oil
  • 1 teaspoon garlic powder
  • to taste Salt and pepper
  • 2 medium avocados, diced
  • 1 cup cherry tomatoes, halved
  • 1 cucumber diced cucumber
  • ½ red onion thinly sliced red onion
  • 2 cups mixed greens or arugula
  • 2 tablespoons fresh cilantro, chopped
  • 1 lime juiced
  • 1 tablespoon olive oil for dressing
  • 1 teaspoon honey or agave syrup (optional)

Instructions 

  • Cook the shrimp with olive oil, garlic powder, salt, and pepper until pink and cooked through, about 3-4 minutes per side.
  • In a large bowl, combine diced avocados, cherry tomatoes, cucumber, red onion, and mixed greens.
  • Add cooked shrimp and chopped cilantro to the salad mixture.
  • In a small bowl, whisk together lime juice, olive oil, and honey (if using). Drizzle over the salad and toss gently.
  • Serve immediately garnished with extra cilantro if desired.

Notes

For extra flavor, marinate the shrimp in lime juice and spices before cooking.
Calories: 350kcal
Cost: $15
Course: Salad
Keyword: shrimp

Why You’ll Love This Bright and Flavorful Lentil Salad

Welcome to the world of vibrant, delicious cooking! This lentil salad is not just a meal; it’s a celebration of fresh ingredients and wholesome flavors. Packed with nutrients, it’s perfect for a light lunch or a hearty side dish at dinner. Let’s dive into why you’ll absolutely love this recipe:

  • Quick and Easy: With minimal prep time and straightforward steps, you can whip this salad up in no time, making it perfect for busy weekdays.
  • Nutrient-Dense: Lentils are a fantastic source of protein, fiber, and essential vitamins, ensuring you get a nourishing meal.
  • Versatile: This salad is not only delicious but also adaptable. You can easily tweak the ingredients to suit your taste or dietary needs.
  • Make-Ahead Friendly: It stores beautifully in the fridge, allowing flavors to meld together, making it ideal for meal prep.
  • Fresh and Flavorful: The combination of fresh vegetables and zesty lemon vinaigrette brings a burst of flavor that is sure to satisfy.

Ingredient Breakdown

Let’s take a closer look at the ingredients that make this salad shine. Here’s what you need:

  • Lentils: 1 cup of dried lentils (green or brown are ideal). They hold their shape well and provide a hearty base for the salad.
  • Water: 4 cups for cooking the lentils. This ensures they are perfectly tender.
  • Bay Leaf: Adds aromatic depth while cooking the lentils.
  • Cucumber: 1 large cucumber, finely diced, for a crunchy texture.
  • Red Onion: ½ finely diced red onion for a hint of sweetness and color.
  • Medjool Dates: 1 cup finely diced for a natural sweetness that balances the flavors.
  • Flat Leaf Parsley: A small bunch, chopped, adds freshness and a pop of color.
  • Lemon Vinaigrette: Use a homemade recipe or your favorite store-bought version. It’s the finishing touch that brings everything together.

Pro Tips for the Perfect Lentil Salad

To ensure your lentil salad turns out fantastic every time, here are some expert insights:

  • Cooking Lentils: Rinse lentils under cold water to remove any debris. Cook them with a bay leaf for added flavor.
  • Texture Matters: Aim for tender but firm lentils. They should hold their shape and not turn mushy.
  • Chill Before Mixing: Let cooked lentils cool in the fridge for a few minutes. This helps maintain the crispness of the vegetables.
  • Customize Your Veggies: Feel free to add other vegetables like diced bell peppers, cherry tomatoes, or even roasted veggies for a twist.
  • Herb Variations: Try adding fresh mint or basil for a different flavor profile.
  • Vinaigrette Variations: Experiment with different dressings; a balsamic vinaigrette can add a nice depth.
  • Storage Tips: Keep the salad in an airtight container in the fridge. It stays fresh for up to three days.
  • Serving Suggestions: Serve as a side dish with grilled chicken or fish, or enjoy it on its own for a light meal.

Common Mistakes and Troubleshooting

A vibrant lentil salad featuring varying ingredients like parsley, cucumber, and dates, captured from the side.

Even the best cooks make mistakes! Here’s how to avoid common pitfalls:

  • Overcooking Lentils: If they’re mushy, you’ve cooked them too long. Keep an eye on them as they simmer.
  • Too Much Dressing: Start with half the amount of vinaigrette and add more to taste. You can always add, but you can’t take away!
  • Skipping the Chill: Don’t skip chilling the cooked lentils. It keeps the salad fresh and maintains the texture of the additions.
  • Not Tasting: Always taste your salad before serving. Adjust seasoning with salt, pepper, or extra lemon juice if needed.

Delicious Variations of Lentil Salad

Feeling adventurous? Here are some variations to keep things exciting:

  • Mexican-Inspired Lentil Salad: Add black beans, corn, avocado, and a lime vinaigrette for a zesty twist.
  • Curried Lentil Salad: Mix in curry powder and diced apples for a unique flavor profile.
  • Greek Lentil Salad: Incorporate feta cheese, olives, and diced tomatoes, drizzled with olive oil.
  • Roasted Vegetable Lentil Salad: Toss in roasted bell peppers, zucchini, and eggplant for a warm salad.

Storage and Make-Ahead Instructions

This lentil salad is perfect for meal prep! Here’s how to store it:

  • Refrigerate: Store in an airtight container for up to three days.
  • Make Ahead: Prepare the lentils and chop the vegetables a day in advance. Mix with the dressing just before serving.
  • Freezing: While the salad is best fresh, you can freeze the cooked lentils separately and add them to your salad later.

Frequently Asked Questions

Let’s answer some common questions about this recipe:

  • Can I use canned lentils? Absolutely! Rinse and drain them, and add them to the salad.
  • What can I substitute for the dates? Honey or maple syrup can be used for a similar sweetness.
  • Is this salad gluten-free? Yes, lentils are naturally gluten-free, making this salad a great option.
  • Can I add meat to this salad? Definitely! Grilled chicken or shrimp would make excellent additions.
  • How long does it take to cook lentils? Typically, 16-20 minutes is sufficient for green or brown lentils.
  • Can I use different herbs? Yes! Dill or cilantro can work beautifully in this salad.
  • What’s the best way to serve this salad? Serve chilled as a refreshing side or warm for a comforting meal.
  • Can I make this salad vegan? Yes, this recipe is already vegan-friendly!

Nutritional Benefits of Lentils

Lentils are not only delicious but also incredibly nutritious. Here are some key benefits:

  • High in Protein: Lentils provide a great source of plant-based protein, making them perfect for vegetarians and vegans.
  • Rich in Fiber: They are packed with dietary fiber, which aids digestion and promotes satiety.
  • Low in Calories: This salad is a great option for those looking to maintain a healthy weight.
  • Vitamins and Minerals: Lentils are rich in iron, folate, and magnesium, essential for overall health.

Equipment Recommendations

To make this lentil salad a breeze, consider these tools:

  • Medium Saucepan: For cooking the lentils.
  • Cutting Board: Essential for chopping vegetables.
  • Sharp Knife: A good knife makes prep work quick and easy.
  • Mixing Bowl: For combining all the ingredients before serving.

Serving Suggestions

This salad is versatile and can be served in various ways:

  • As a Side Dish: Pair it with grilled meats or fish for a balanced meal.
  • On a Bed of Greens: Serve it over mixed greens for a hearty salad.
  • Wrap It Up: Use it as a filling for wraps or sandwiches for a delightful lunch.
  • Standalone Meal: Enjoy it on its own for a healthy lunch or dinner option.

Conclusion

With its bright flavors and wholesome ingredients, this bright and flavorful lentil salad is sure to become a favorite in your kitchen. Remember, cooking doesn’t have to be complicated. Embrace the joy of making this salad, and feel free to experiment with your own twists. Happy cooking!

Lentil Salad

Prep Time 10 minutes
Cook Time 20 minutes
Total Time 30 minutes
Servings 4 servings
Calories 350
A vibrant and nutritious lentil salad packed with fresh vegetables and sweet dates, perfect for a light meal or side dish.

Ingredients

Lentils

  • 1 cup lentils
  • 4 cups water
  • 1 bay leaf bay leaf
  • 1 large cucumber (finely diced)
  • ½ red onion red onion (finely diced)
  • 1 cup Medjool dates (finely diced)
  • 1 small bunch flat leaf parsley
  • 1 recipe Lemon Vinaigrette (use half in this recipe)

Instructions 

  • Cook the lentils with water and bay leaf until soft, about 16-20 minutes.
  • Drain and chill the lentils in the fridge for a few minutes.
  • Mix in diced cucumber, red onion, dates, and parsley.
  • Drizzle with lemon vinaigrette and toss to combine.

Notes

Chill the salad before serving for best flavor.
Calories: 350kcal
Cost: $10
Course: Salad
Cuisine: Mediterranean
Keyword: Lentils