Author

Steven

Browsing

Welcome to your new favorite beverage experience! If you’re looking to enjoy a creamy and vibrant drink that combines the rich flavors of coconut with the earthy tones of matcha, you’ve come to the right place. This iced coconut matcha latte is not only delicious but also packed with health benefits, making it a perfect choice for any time of the day. In this article, we’ll break down everything you need to know to make the best version of this delightful drink at home.

Why You’ll Love This Recipe

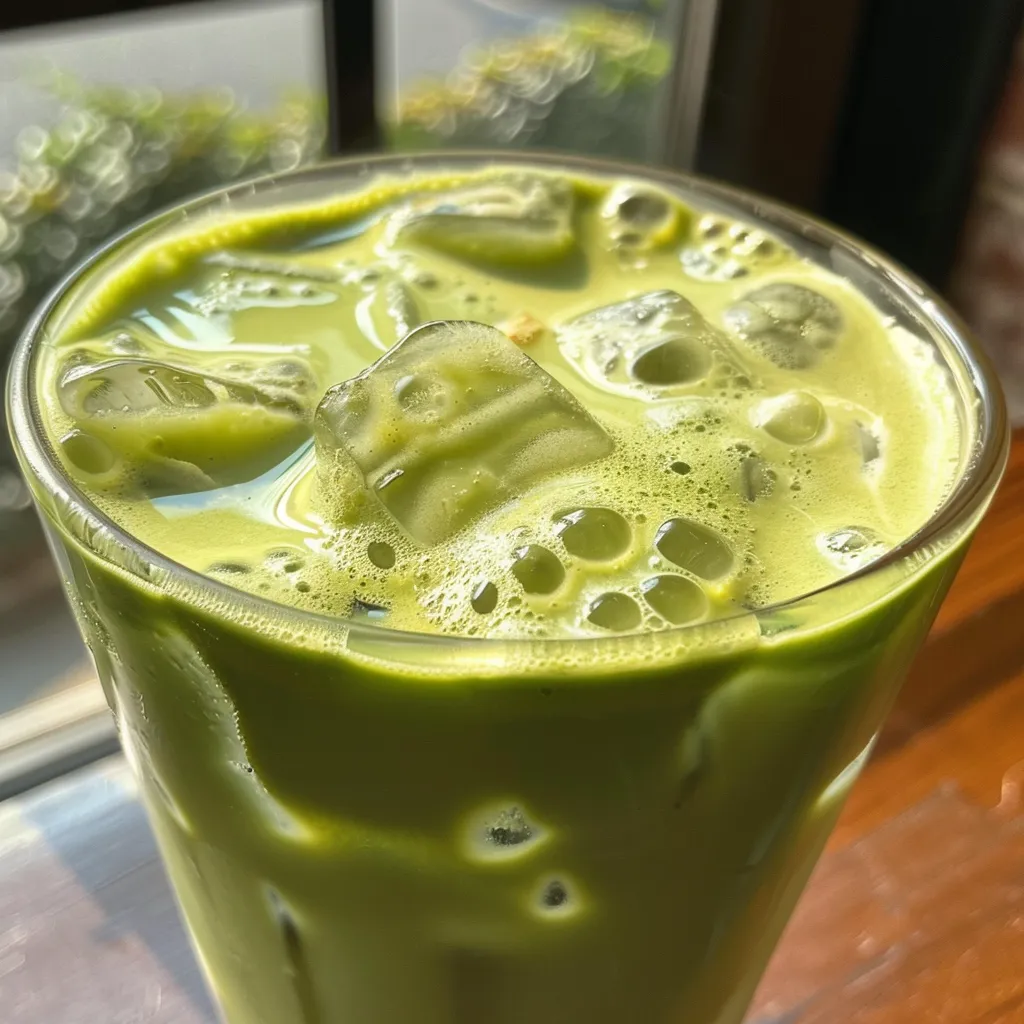
This iced coconut matcha latte isn’t just a pretty drink; it’s filled with amazing qualities that will keep you coming back for more! Here are a few reasons why you’ll love it:

  • Deliciously Creamy: The combination of coconut milk and matcha creates a rich, smooth texture that’s incredibly satisfying.
  • Health Benefits: Matcha is loaded with antioxidants, which can help boost your metabolism and improve your focus.
  • Customizable: You can easily adjust the sweetness and creaminess to match your personal taste.
  • Quick to Prepare: This drink can be whipped up in under 10 minutes, making it perfect for busy mornings.
  • Refreshing and Energizing: It’s a fantastic pick-me-up that’s both refreshing and energizing, especially on warm days!

Ingredients You’ll Need

Let’s gather our ingredients to create this flavorful iced coconut matcha latte. Below is a breakdown of what you’ll need:

  • 1 tsp ceremonial-grade matcha: For the best flavor and health benefits, choose high-quality matcha.
  • 1/2 tsp E3AFA powder: This adds an extra nutritional boost.
  • 1/4 cup hot water: Hot, but not boiling, to activate the matcha without bitterness.
  • 3/4 cup coconut milk: Full-fat canned coconut milk gives the creamiest texture, but feel free to use any plant milk you enjoy.
  • 1 tsp maple syrup or honey (optional): Sweeten to your liking!
  • Ice cubes: For that refreshing chill!

Step-by-Step Instructions

Ready to make your iced coconut matcha latte? Follow these simple steps to create your drink:

  1. In a small bowl, whisk together the E3AFA powder and matcha with the hot water until smooth and fully combined.
  2. Fill a tall glass with ice cubes.
  3. Pour in the coconut milk, creating a beautiful layer.
  4. Gently pour the matcha mixture over the milk to create a stunning swirl effect.
  5. Give it a stir before sipping and enjoy the brain-boosting, body-loving benefits!

Expert Tips for the Perfect Iced Coconut Matcha Latte

Close-up of a refreshing Iced Coconut Matcha Latte topped with frothy coconut milk.

To ensure your drink turns out perfectly every time, here are some expert tips to consider:

  • Quality matters: Invest in high-quality matcha for the best flavor and benefits.
  • Temperature check: Use hot, but not boiling, water to whisk the matcha for optimal flavor.
  • Mix it up: For a frothier texture, blend the coconut milk instead of pouring it directly.
  • Sweetener options: Experiment with different sweeteners like agave, stevia, or even flavored syrups.
  • Chill out: Refrigerate your coconut milk beforehand for an extra cool drink.
  • Matcha storage: Keep your matcha powder in an airtight container away from light and moisture to maintain freshness.
  • Consistency is key: Adjust the matcha and coconut milk ratios to find your perfect balance.
  • Layering technique: Pour the matcha slowly to create beautiful layers in your drink.

Common Mistakes and Troubleshooting

Even simple recipes can have their challenges. Here’s how to avoid common pitfalls:

  • Clumping: If your matcha clumps, make sure you’re whisking well, and consider using a fine mesh sieve before mixing.
  • Bitterness: If your latte tastes bitter, try using cooler water and ensure you’re using ceremonial-grade matcha.
  • Too thick: For a thinner latte, simply add more coconut milk or water until you reach your desired consistency.
  • Not sweet enough: Adjust the sweetness to your liking, and remember, you can always add more sweetener!

Variations to Try

Here are some fun variations to keep your iced coconut matcha adventures exciting:

  • Vanilla Coconut Matcha: Add a splash of vanilla extract for a sweet, aromatic twist.
  • Minty Iced Matcha: Blend in fresh mint leaves for a refreshing green drink.
  • Chocolate Coconut Matcha: Stir in a teaspoon of cocoa powder for a delicious chocolatey flavor.
  • Fruit-Infused Matcha: Add fresh fruit like strawberries or mango to the mix for a fruity twist.

Storage and Make-Ahead Instructions

If you want to enjoy your iced coconut matcha latte later, consider these tips:

  • Prep ahead: You can whisk the matcha mixture in advance and store it in an airtight container in the fridge for up to 2 days.
  • Keep it fresh: Store leftover coconut milk in the fridge and use it within a week for best flavor.
  • Ice cubes: Freeze leftover coconut milk in an ice tray for future drinks!

Frequently Asked Questions

Here are some common questions about making your iced coconut matcha latte:

  • Can I use almond milk instead of coconut milk? Absolutely! Almond milk will give your latte a different flavor but still be delicious.
  • Is matcha caffeinated? Yes, matcha contains caffeine, providing a gentler energy boost compared to coffee.
  • Can I make this drink hot? Yes! Just skip the ice and heat the coconut milk before combining it with the matcha.
  • How do I know if my matcha is fresh? Fresh matcha should have a bright green color and a vibrant aroma.
  • Can I add sweeteners other than honey? Yes! Feel free to use your favorite sweetener, such as agave or a sugar alternative.
  • Is this recipe vegan? Yes, if you use maple syrup instead of honey!
  • How can I make it lower in calories? Use light coconut milk or a lower-calorie sweetener.
  • Can I freeze this latte? Yes, you can freeze it, but it’s best enjoyed fresh for the best texture.

Nutritional Tips and Dietary Adaptations

This iced coconut matcha latte can be easily adapted to fit various dietary needs:

  • Low-carb: Use unsweetened almond milk and a low-calorie sweetener.
  • Dairy-free: The recipe is already dairy-free with coconut milk, but you can also use oat milk.
  • Gluten-free: All ingredients are naturally gluten-free, making this treat safe for those with gluten sensitivities.

Equipment Recommendations

To make your iced coconut matcha latte, you’ll need some essential kitchen tools:

  • Whisk: A small whisk or a matcha whisk for blending your matcha smoothly.
  • Glass: A tall glass to showcase the beautiful layers.
  • Measuring cups and spoons: To ensure you get the perfect amounts of each ingredient.
  • Blender (optional): If you prefer a frothier texture, a blender can help mix everything together well.

Serving Suggestions

Your iced coconut matcha latte is delightful on its own, but here are some serving suggestions:

  • Pair with breakfast: Enjoy it alongside a smoothie bowl or avocado toast for a nutritious start to your day.
  • Snack time: It goes perfectly with light snacks like fruit or nuts.
  • Afternoon treat: Serve it as a refreshing pick-me-up during those afternoon slumps.

In conclusion, making an iced coconut matcha latte at home is simple and rewarding. With this comprehensive guide, you now have the knowledge and confidence to create a drink that not only tastes amazing but also offers incredible health benefits. So grab your ingredients, and let’s get sipping on this refreshing treat!

Iced Coconut Matcha Latte

Prep Time 5 minutes
Cook Time 2 minutes
Total Time 7 minutes
Servings 1 cup
Calories 150
A refreshing and vibrant iced latte combining matcha and coconut milk, perfect for a brain-boosting treat.

Ingredients

powders

  • 2 tsp E3AFA powder
  • 1 tsp ceremonial-grade matcha
  • 0.25 cup hot water
  • 1 tsp maple syrup or honey (optional)
  • 0.75 cup coconut milk or any plant milk
  • ice cubes Ice cubes

Instructions 

  • Whisk E3AFA and matcha with hot water until smooth.
  • Fill a glass with ice and pour in the coconut milk.
  • Gently pour the green mixture on top to create a swirl.
  • Stir before sipping and enjoy.

Notes

Adjust sweetness to taste and enjoy this energizing drink.
Calories: 150kcal
Cost: $8
Course: Beverage
Cuisine: Fusion
Keyword: Coconut, iced, matcha

Are you ready to transform your breakfast experience? With the **Ninja Creami Smoothie Bowl**, you can create a delicious, creamy, and nutritious bowl that will make your mornings brighter and more energizing. This recipe is not only easy to follow but also packed with goodness, combining the rich flavors of mixed berries and banana with the smooth texture of Greek yogurt. Perfect for busy weekdays or leisurely weekends, this smoothie bowl offers a refreshing and satisfying start to your day.

Why You’ll Love This Recipe

This Ninja Creami Smoothie Bowl is more than just a meal; it’s a delightful way to kick off your day! Here are some reasons you’ll love making it:

  • Quick and Easy: Blend and freeze, then let the **Ninja Creami** do the work! You’ll have a delicious smoothie bowl ready in no time.
  • Nutritious Ingredients: Packed with **berries**, **banana**, and **Greek yogurt**, this bowl is loaded with vitamins, minerals, and protein, making it a perfect breakfast or snack.
  • Customizable Toppings: From granola to fresh fruit, you can personalize your bowl with your favorite toppings for a unique touch every time.
  • Healthy and Satisfying: The combination of protein and fiber will keep you full and energized throughout the morning.
  • Fun for Everyone: Kids and adults alike will love this colorful and creamy treat, making it an ideal family breakfast option.

Ingredients Breakdown

To create your perfect Ninja Creami Smoothie Bowl, you’ll need the following ingredients:

  • ¾ cup mixed berries (4 oz / 110 grams): Use a mix of your favorites like strawberries, blueberries, and raspberries.
  • ½ banana (2 oz / 60 grams): Adds natural sweetness and creaminess.
  • ½ cup milk (4 oz / 120 ml): Use any type of milk, including almond, oat, or cow’s milk for a creamier texture.
  • ½ cup Greek yogurt (4 oz / 120 grams): Opt for plain or flavored varieties, as this boosts protein content and creaminess.
  • 1 tablespoon honey or maple syrup (0.7 oz / 20 grams): Sweeten to taste; adjust based on your preference.
  • ½ teaspoon vanilla extract (optional): Enhances the flavor profile with a hint of warmth.
  • 1 scoop vanilla protein powder (about 1 oz / 30 grams): Perfect for a protein boost, especially for post-workout meals.

How to Make a Ninja Creami Smoothie Bowl

Follow these simple steps to create your delicious Ninja Creami Smoothie Bowl:

  1. In a blender, combine the **berries**, **banana**, **milk**, **Greek yogurt**, **honey**, and **vanilla extract**. Blend until completely smooth.
  2. Pour the mixture into a Ninja Creami pint container and freeze it flat for 8-12 hours.
  3. Once frozen, place the pint into the Ninja Creami and run the **Smoothie Bowl** setting. If the texture appears crumbly, add 1-2 tablespoons of milk and use the **Re-Spin** function until you achieve a smooth and creamy consistency.
  4. Scoop the smoothie bowl into a serving bowl and add your favorite toppings.
  5. Finish with a drizzle of honey if desired and serve immediately.

Pro Tips for the Best Smoothie Bowl

Side view of a vibrant smoothie bowl with mixed berries, banana slices, and granola.

To ensure your Ninja Creami Smoothie Bowl turns out perfectly every time, consider these expert tips:

  • Choose Ripe Bananas: The riper the banana, the sweeter and creamier your smoothie will be.
  • Freeze Ingredients for Extra Creaminess: Freeze your **berries** and banana beforehand for a thicker, creamier texture.
  • Adjust Thickness: If you prefer a thicker smoothie bowl, reduce the amount of milk. For a thinner consistency, add more milk gradually.
  • Experiment with Flavor: Try adding a handful of spinach or kale for a green smoothie bowl without compromising flavor!
  • Layer Your Toppings: Create a beautiful presentation by layering different toppings in sections.
  • Make it Ahead: Prepare your smoothie mixture the night before and freeze it for a quick breakfast option.
  • Use Fresh Ingredients: Fresh fruits and high-quality yogurt will elevate the flavor and nutrition of your bowl.
  • Don’t Skip the Re-Spin: If your bowl isn’t creamy enough, the **Re-Spin** function is your best friend—don’t hesitate to use it!

Common Mistakes and Troubleshooting

Even with the best intentions, mistakes can happen. Here are some common pitfalls and how to overcome them:

  • Too Thick: If your smoothie bowl is too thick, gradually add more milk and blend again until you reach your desired consistency.
  • Not Creamy Enough: If the texture is crumbly, make sure to use the **Re-Spin** function and add a splash of milk if necessary.
  • Flavor Imbalance: Adjust sweetness with honey or add a pinch of salt to enhance overall flavor if it tastes bland.
  • Overloading on Toppings: While toppings are great, be mindful not to overcrowd your bowl—less can be more!

Variations to Try

Feeling adventurous? Here are some fun variations to customize your Ninja Creami Smoothie Bowl:

  • Chocolate Banana Smoothie Bowl: Add cocoa powder or chocolate protein powder for a chocolatey twist.
  • Tropical Delight: Substitute mixed berries with mango and pineapple for a tropical flavor explosion.
  • Peanut Butter Bliss: Add a tablespoon of peanut butter for a rich, nutty flavor and extra protein.
  • Green Power Bowl: Incorporate a handful of spinach or kale for added nutrients without altering the taste.

Storage and Make-Ahead Instructions

Want to enjoy your smoothie bowls throughout the week? Here’s how to store and prepare them ahead of time:

  • Make Ahead: Prepare the smoothie mixture and freeze it in individual portions for easy access. Just blend and freeze the night before.
  • Storage: Store leftovers in an airtight container in the freezer for up to one week. Just remember to re-blend before serving!

Frequently Asked Questions

Got questions? Here are some answers to help you out:

  • Can I use frozen fruits? Yes! Frozen fruits are perfect for this recipe, especially if you want a thicker texture.
  • Is this recipe suitable for meal prep? Absolutely! You can prep multiple servings and freeze them for quick breakfasts.
  • Can I make it vegan? Yes! Use plant-based yogurt and milk alternatives to make it vegan-friendly.
  • What toppings do you recommend? Fresh fruits, granola, nuts, and seeds are excellent choices for toppings!
  • How long can I store the smoothie bowl? Store in the freezer for up to one week; just remember to blend again for the best texture.
  • Is there a protein-free version? Yes! Simply omit the protein powder and adjust sweetness to taste.
  • Can I add greens? Definitely! Spinach or kale can be added without affecting the flavor.
  • What if I don’t have a Ninja Creami? You can use a regular blender, but the texture may differ. Consider freezing your smoothie longer before blending.

Nutrition Tips and Dietary Adaptations

To maximize the health benefits of your Ninja Creami Smoothie Bowl, consider the following:

  • Opt for Low-Sugar Options: Choose unsweetened Greek yogurt and limit added sweeteners for a healthier bowl.
  • Boost Fiber Intake: Include chia seeds or flaxseeds in your bowl for added fiber and omega-3s.
  • Watch Portion Sizes: While nutritious, be mindful of portion sizes when adding toppings to keep calories in check.

Essential Equipment Recommendations

To create your Ninja Creami Smoothie Bowl, you’ll need:

  • Ninja Creami: This appliance is key to achieving that perfect creamy texture.
  • High-Speed Blender: A powerful blender is essential for blending your ingredients smoothly before freezing.
  • Pint Containers: Use Ninja Creami pint containers for freezing your smoothie mixture.

Serving Suggestions

When your Ninja Creami Smoothie Bowl is ready, here are some creative serving ideas:

  • Family Style: Serve in a large bowl and let everyone top their own smoothie bowl with their favorite toppings.
  • On-the-Go: Fill a portable container and take it with you for a quick breakfast on busy mornings.
  • Garnish Elegantly: Use edible flowers or mint leaves for a beautiful presentation for brunch gatherings.

With this guide, you’re set to create your own amazing Ninja Creami Smoothie Bowl that’s not just delicious but also nutritious. So grab your ingredients, fire up that Ninja Creami, and enjoy the journey of making breakfast fun and exciting!

Ninja Creami Smoothie Bowl

Prep Time 5 minutes
Cook Time 10 minutes
Total Time 15 minutes
Servings 2 servings
Calories 250
A delicious and healthy smoothie bowl made with mixed berries, banana, Greek yogurt, and protein, perfect for a quick breakfast or snack.

Ingredients

Mixed Berries

  • 0.75 cup mixed berries
  • 4 oz mixed berries

Banana

  • 0.5 banana banana
  • 2 oz banana

Milk

  • 0.5 cup milk
  • 4 oz milk

Greek Yogurt

  • 0.5 cup Greek yogurt
  • 4 oz Greek yogurt

Honey or Maple Syrup

  • 0.7 oz honey or maple syrup

Vanilla Extract (optional)

  • 0.5 teaspoon vanilla extract (optional)

Vanilla Protein Powder

  • 1 scoop vanilla protein powder (about 1 oz)

Toppings

  • Fresh berries, Sliced banana, Sliced almonds, Granola, Optional honey drizzle

Instructions 

  • Combine berries, banana, milk, yogurt, honey, and vanilla in a blender; blend until smooth.
  • Pour into a Ninja Creami container and freeze flat for 8-12 hours.
  • Run the Ninja Creami on the Smoothie Bowl or Lite Ice Cream setting; add milk and re-spin if crumbly.
  • Scoop into a bowl, add toppings, drizzle with honey if desired, and serve immediately.

Notes

For a creamier texture, re-spin with a splash of milk as needed.
Calories: 250kcal
Cost: $10
Course: Breakfast
Keyword: Fruit, Healthy, Smoothie

Unleash Flavor with Pesto Chicken Wraps

If you’re on the hunt for a quick, delicious meal that the whole family will love, look no further than these pesto chicken wraps. In just a few simple steps, you can create mouthwatering wraps that are perfect for busy weeknights, picnics, or a delightful lunch. With the vibrant flavors of fresh pesto, juicy chicken, and crisp veggies, these wraps deliver a satisfying crunch in every bite. Let’s dive into everything you need to know about making the best chicken pesto wraps in your kitchen!

Why You’ll Love This Recipe

  • Quick and Easy: Ready in under 30 minutes, making it a perfect solution for busy evenings.
  • Flavor Packed: The combination of pesto, juicy chicken, and creamy dressing creates a mouthwatering experience.
  • Customizable: Easily swap ingredients to suit your taste or dietary needs—add extra veggies or use different proteins.
  • Perfect for Leftovers: Great way to use up leftover chicken or veggies, reducing food waste.
  • Healthy Option: Packed with protein and fresh ingredients, these wraps are a healthy meal choice without sacrificing flavor.

Ingredients You’ll Need

To make these delightful pesto wraps, gather the following ingredients:

  • 2 cups cooked chicken: Chopped into bite-sized pieces. Rotisserie chicken works wonderfully for convenience.
  • ⅓ cup pesto: You can use store-bought for ease or homemade for a fresher taste.
  • 3 tablespoons grated Parmesan: Optional but adds a nice cheesy flavor.
  • 4 large tortillas: Flour tortillas provide a soft wrap, but feel free to use whole grain or gluten-free varieties.
  • 4 cups romaine lettuce: Shredded for a crunchy bite.
  • 1 cup cherry tomatoes: Sliced for a juicy burst of flavor.

For the creamy Caesar dressing:

  • ½ cup mayonnaise
  • 2 tablespoons olive oil
  • 3 tablespoons fresh lemon juice
  • ¼ cup grated Parmesan
  • 2 garlic cloves: Minced for extra flavor.
  • 1½ tablespoons capers: With brine for a tangy kick.
  • 2 teaspoons Dijon mustard
  • 2 teaspoons Worcestershire sauce
  • ¼ teaspoon salt
  • ¼ teaspoon freshly cracked black pepper

How to Make Pesto Chicken Wraps

Side view of a pesto chicken wrap filled with vibrant ingredients, including grilled chicken and fresh vegetables.
  1. Prep the Chicken: Chop the cooked chicken into small bite-size pieces and place in a large bowl.
  2. Add Pesto: Pour the pesto over the chicken and mix well until every piece is evenly coated.
  3. Make the Dressing: In a blender, combine mayonnaise, olive oil, lemon juice, Parmesan, garlic, capers, Dijon mustard, Worcestershire sauce, salt, and pepper. Blend until smooth and creamy.
  4. Mix the Salad: In a medium bowl, combine shredded romaine and sliced cherry tomatoes. Add half of the Caesar dressing and toss until evenly coated.
  5. Assemble the Wraps: Lay a tortilla flat, add a portion of the romaine salad mixture, top it with a generous scoop of pesto chicken, and sprinkle with extra Parmesan if desired.
  6. Fold the Wrap: Fold the sides of the tortilla inward, then roll it tightly like a burrito.
  7. Optional Toasting: For a warm wrap, heat a skillet over medium heat with a light spray of oil. Place the wrap seam-side down and toast for 2-3 minutes per side until lightly golden.
  8. Serve: Slice in half and serve immediately with extra dressing for dipping if desired.

Pro Tips for Perfect Pesto Chicken Wraps

  • Quality Pesto: A high-quality pesto makes a significant difference. If you’re making it at home, use fresh basil, good olive oil, and toasted pine nuts for the best flavor.
  • Chicken Variations: You can use grilled, roasted, or even shredded rotisserie chicken for a quick option.
  • Veggie Boost: Want to sneak in more veggies? Add sliced bell peppers, cucumbers, or even shredded carrots into the wrap.
  • Make It Ahead: Prep the chicken and salad mixture ahead of time to make assembly during the week a breeze.
  • Wrap It Right: To keep your wraps from getting soggy, layer the ingredients wisely—put the chicken on top of the greens.
  • Balancing Flavors: Adjust the seasoning of your dressing to your taste; a pinch more salt or a squeeze of lemon can elevate the flavors.
  • Experiment with Tortillas: Try using different types of wraps, such as spinach or sun-dried tomato, to add an extra flavor dimension.
  • Storage Savvy: Store leftovers in airtight containers in the fridge for up to 3 days.

Common Mistakes and Troubleshooting

Even the best cooks can hit a snag. Here are some common pitfalls and how to avoid them:

  • Dry Wraps: Ensure your chicken is moist. If it feels dry, consider adding a bit more pesto or dressing.
  • Overstuffing: It’s tempting to load up your wrap, but too many fillings can make it difficult to roll. Stick to a moderate amount.
  • Soggy Tortillas: If preparing wraps in advance, keep the dressing separate until ready to eat.
  • Flavor Imbalance: Always taste your dressing before adding it to the salad. Adjust the flavors as needed.

Variations on Pesto Chicken Wraps

Feel free to get creative with this recipe! Here are some tasty variations:

  • Caprese Style: Add fresh mozzarella and basil for a Caprese twist.
  • Spicy Kick: Incorporate sliced jalapeños or a dash of hot sauce for some heat.
  • Mediterranean Flare: Substitute olives and feta cheese for a Mediterranean vibe.
  • Low-Carb Option: Use lettuce leaves instead of tortillas for a refreshing, low-carb wrap.

How to Store and Meal-Prep Chicken Pesto Wraps

These wraps are perfect for meal prep! Here’s how to make them last:

  • Refrigeration: Store wraps in an airtight container in the fridge for up to 3 days.
  • Freezing: If you want to freeze, wrap each tightly in plastic wrap, then place in a freezer-safe bag. They can last up to a month.
  • Reheating: To reheat, thaw overnight in the fridge, then warm in a skillet or microwave.

Frequently Asked Questions

  • Can I make chicken pesto wraps ahead of time? Yes, you can prepare the chicken and salad mix a day in advance.
  • What can I use instead of mayonnaise? Greek yogurt or avocado can be great substitutes for a healthier dressing.
  • How do I make these wraps gluten-free? Simply use gluten-free tortillas or lettuce wraps.
  • Can I use other proteins? Absolutely! Turkey, ham, or even tofu work well in this recipe.
  • What toppings can I add? Try adding avocado, nuts, or different types of cheese for variety.
  • How do I prevent soggy wraps? Keep the dressing separate until you’re ready to eat, and avoid overloading the wrap with wet ingredients.
  • Can I include more vegetables? Yes! Feel free to add bell peppers, cucumbers, or spinach for added nutrition.
  • Is this recipe kid-friendly? Definitely! Kids love the fun of wraps and can customize their fillings.

Nutritional Tips and Dietary Adaptations

These pesto chicken wraps can easily fit into various dietary preferences:

  • Low-Carb: Use lettuce wraps instead of tortillas.
  • High-Protein: Add more chicken or include chickpeas for added protein.
  • Vegan: Substitute chicken with chickpeas or tempeh and use a vegan pesto and dressing.
  • Nut-Free: If you have a nut allergy, ensure your pesto is nut-free or make a sunflower seed pesto.

Essential Equipment Recommendations

Here’s what you need to make the perfect pesto chicken wraps:

  • Sharp Knife: For easy chopping of chicken and veggies.
  • Cutting Board: A clean surface for prep.
  • Blender or Food Processor: For making the dressing smooth and creamy.
  • Large Bowl: For mixing all the ingredients together.

Serving Suggestions

These wraps can stand alone, but they pair wonderfully with:

  • Side Salads: A light green salad or a Mediterranean bean salad.
  • Chips: Serve with sweet potato or tortilla chips for a crunch.
  • Dips: Extra Caesar dressing or a flavorful hummus can complement the meal.

Conclusion

Now that you have all the tips and tricks for making the ultimate pesto chicken wraps, it’s time to roll up your sleeves and get cooking! Remember, the beauty of this recipe lies in its flexibility and the joy of creating something delicious with your own hands. Whether you’re enjoying it as a quick lunch or a family dinner, these wraps are sure to impress. Happy cooking, my friends!

Pesto Chicken Wraps

Prep Time 15 minutes
Cook Time 10 minutes
Total Time 25 minutes
Servings 4 servings
Calories 650
Delicious and easy to make, these Pesto Chicken Wraps combine tender chicken, fresh vegetables, and flavorful pesto in a warm tortilla.

Ingredients

Chicken

  • 2 cups cooked chicken, chopped
  • cup pesto (add more if needed)
  • 3 tablespoons grated Parmesan (optional)
  • 4 large tortillas or wraps
  • 4 cups romaine lettuce, shredded
  • 1 cup cherry tomatoes, sliced
  • ½ cup mayonnaise
  • 2 tablespoons olive oil
  • 3 tablespoons fresh lemon juice
  • ¼ cup grated Parmesan
  • 2 cloves garlic
  • tablespoons capers with brine
  • 2 teaspoons Dijon mustard
  • 2 teaspoons Worcestershire sauce
  • ¼ teaspoon salt
  • ¼ teaspoon black pepper

Instructions 

  • Chop cooked chicken and mix with pesto until coated.
  • Blend mayonnaise, olive oil, lemon juice, Parmesan, garlic, capers, Dijon mustard, Worcestershire, salt, and pepper until smooth.
  • Toss shredded lettuce and cherry tomatoes with half of the dressing.
  • Lay a tortilla, add salad mixture, pesto chicken, and extra Parmesan if desired. Roll tightly.
  • Optional: heat in a skillet for 2-3 minutes per side until golden. Slice and serve with extra dressing.

Notes

For a warmer wrap, toast in a skillet before serving.
Calories: 650kcal
Cost: $15
Course: Main Course
Keyword: Chicken, Pesto, Wraps

Discover the Joy of Cooking with Mexican Chicken and Rice Salad

Welcome, fellow food enthusiasts! Today, we’re diving into a dish that’s vibrant, satisfying, and perfect for any occasion—the Mexican Chicken and Rice Salad. This recipe combines tender chicken, zesty spices, and fresh vegetables to create a meal that’s not just delicious but also a feast for the eyes. Whether you’re looking for a quick weeknight dinner or a delightful dish to impress guests, this salad has got you covered. Let’s get started!

Why You’ll Love This Recipe

This Mexican Chicken and Rice Salad is more than just a meal; it’s an experience! Here are some compelling reasons to fall in love with this dish:

  • Flavor Explosion: Each bite is bursting with fresh flavors, thanks to the combination of zesty lime, vibrant vegetables, and seasoned chicken.
  • Quick and Easy: With simple steps and minimal cooking, you can whip this salad up in no time, making it ideal for busy weeknights.
  • Versatile Ingredients: Feel free to customize with your favorite veggies or proteins—this salad is incredibly adaptable!
  • Healthy and Nutritious: Packed with lean protein, fiber, and vitamins, this dish is a guilt-free treat that satisfies your cravings.
  • Perfect for Meal Prep: This salad stores well, making it a great option for meal prep. Enjoy it throughout the week!

Ingredients for Mexican Chicken and Rice Salad

Gather the following ingredients to create this delightful dish:

  • 1 tablespoon olive oil
  • 1 pound boneless, skinless chicken breasts, cut into small pieces
  • 3 tablespoons taco seasoning
  • 1 cup frozen corn kernels
  • 1 ½ cups cooked rice (such as basmati)
  • 1 green bell pepper, chopped
  • 1 cup cherry tomatoes, chopped
  • 1 cup black beans, drained and rinsed
  • 6 green onions, chopped
  • 1 cup shredded queso duro cheese or cheddar cheese
  • ½ cup chopped cilantro
  • 2 tablespoons freshly squeezed lemon juice
  • 1 tablespoon freshly squeezed lime juice
  • 2 tablespoons olive oil
  • 1 avocado, diced (optional)
  • ¼ teaspoon salt, or to taste
  • ½ teaspoon black pepper, or to taste

Substitutions: If you don’t have queso duro, feel free to use cheddar or any cheese of your choice. Swap out black beans for kidney beans or chickpeas for a different texture!

How to Make Mexican Chicken and Rice Salad

Close-up view of a Mexican chicken salad featuring rice, black beans, and fresh toppings in a salad bowl.

Follow these simple steps to create your delicious salad:

Step 1: Cook the Chicken and Corn

Heat 1 tablespoon of olive oil in a skillet over medium-high heat. Season the chicken pieces with taco seasoning and cook until browned and cooked through, about 5-7 minutes. Remove the chicken from the skillet. Next, add the corn to the same skillet and cook until slightly charred, about 3-4 minutes.

Step 2: Assemble the Salad

In a large bowl, combine the cooked chicken, charred corn, rice, bell pepper, cherry tomatoes, black beans, green onions, cheese, and cilantro. Mix well to ensure all ingredients are evenly distributed.

Step 3: Prepare the Dressing

In a small bowl, whisk together the lemon juice, lime juice, olive oil, salt, and pepper. Pour the dressing over the salad and toss to coat everything evenly. Add diced avocado, if desired. Serve warm or cold.

Pro Tips for Making the Best Mexican Chicken and Rice Salad

Enhance your salad-making skills with these expert insights:

  • Use Fresh Ingredients: Fresh vegetables and herbs elevate the flavors—don’t skimp on quality!
  • Customize Seasoning: Adjust the taco seasoning to your taste. Add more for a spicier kick or less for a milder flavor.
  • Chill Before Serving: Allow the salad to chill for at least 30 minutes before serving. This helps the flavors meld beautifully.
  • Opt for Leftover Chicken: Using leftover rotisserie chicken can save time while adding delicious flavor.
  • Garnish with Lime Wedges: Serve with lime wedges for an extra zesty finish that guests will love.
  • Consider Texture: For added crunch, toss in some tortilla strips or nuts just before serving.
  • Make it Vegan: Substitute chicken with grilled tofu or chickpeas and use a vegan cheese alternative.
  • Experiment with Grains: Try quinoa or farro instead of rice for a different flavor and texture profile.

Common Mistakes and Troubleshooting

Even the best cooks can run into hiccups! Here are some common issues and how to avoid them:

  • Overcooked Chicken: Always monitor the cooking time. Chicken should be cooked until just done to avoid dryness.
  • Too Much Dressing: Start with a little dressing and add more as needed. You can always add, but you can’t take away!
  • Dry Salad: If your salad seems dry, a splash of lime juice or a drizzle of extra olive oil can help revive it.

Variations on the Mexican Chicken and Rice Salad

Mix things up with these fun variations:

  • Southwestern Style: Add diced jalapeños and corn salsa for a spicy twist.
  • Asian Fusion: Incorporate sesame oil, cucumbers, and edamame for an exciting fusion flavor.
  • Taco Bowl: Serve in taco shells or bowls for a fun presentation.
  • With Fruits: Toss in diced mango or pineapple for a sweet contrast to the savory elements.

Storage and Make-Ahead Instructions

This salad is perfect for meal prep! Here’s how to store it:

  • Refrigeration: Store in an airtight container for up to 3 days. The flavors will continue to develop!
  • Freezing: It’s best not to freeze the salad due to the texture of the vegetables and rice. However, you can freeze the chicken and corn mixture separately.
  • Make-Ahead: Prepare the salad up to a day in advance. Just add the avocado right before serving to keep it fresh.

FAQs about Mexican Chicken and Rice Salad

Got questions? We’ve got answers!

  • Can I make this salad ahead of time? Yes, it’s great for meal prep and can be made a day in advance.
  • What can I substitute for chicken? Tofu or chickpeas work well for a vegetarian option.
  • How spicy is this salad? The spice level can be adjusted based on the taco seasoning you use.
  • Can I use brown rice instead of white? Absolutely! Brown rice adds more fiber and a nuttier flavor.
  • How long does this salad last in the fridge? It can be stored for up to 3 days in an airtight container.
  • Can I add other vegetables? Yes! Feel free to incorporate your favorites like zucchini or carrots.
  • What’s the best way to serve this salad? It can be served cold or at room temperature, making it perfect for potlucks.
  • Is this salad gluten-free? Yes, all ingredients used are naturally gluten-free!

Nutrition Tips and Dietary Adaptations

This Mexican Chicken and Rice Salad not only tastes great but can also fit various dietary needs:

  • Low-Carb Option: Swap rice for cauliflower rice for a lower-carb choice.
  • High-Protein Boost: Add more chicken or include beans for additional protein.
  • Vegan-Friendly: Use plant-based cheese and substitute the chicken for tofu or beans.
  • Low-Sodium Variation: Use low-sodium taco seasoning and rinse canned beans to reduce sodium content.

Equipment Recommendations

To make this recipe easier, here are some kitchen tools that can help:

  • Skillet: A non-stick skillet is perfect for cooking the chicken and corn.
  • Large Mixing Bowl: A big bowl helps in tossing all your ingredients without mess.
  • Whisk: For mixing the dressing ingredients smoothly.
  • Cutting Board and Knife: Essential for chopping vegetables and proteins.

Serving Suggestions

Pair this salad with:

  • Crispy Tortilla Chips: For a crunchy side that complements the salad.
  • Guacamole: A creamy addition that enhances the flavors.
  • Grilled Corn on the Cob: Perfect for a summer meal that feels festive.
  • Fresh Limeade: A refreshing drink to balance the zesty flavors of the salad.

Cooking should be an enjoyable experience, and this Mexican Chicken and Rice Salad embodies that spirit! With its fresh ingredients and easy preparation, you’ll find yourself reaching for this recipe time and again. So grab your apron, turn on your favorite tunes, and let’s make this delightful dish together!

Mexican Chicken and Rice Salad Recipe

Prep Time 15 minutes
Cook Time 20 minutes
Total Time 35 minutes
Servings 4 servings
Calories 450
A vibrant and flavorful salad combining seasoned chicken, rice, fresh vegetables, and a zesty dressing, perfect for a quick lunch or dinner.

Ingredients

Protein

  • 1 tablespoon olive oil
  • 1 pound boneless, skinless chicken breasts (cut into small pieces)
  • 3 tablespoons taco seasoning

Vegetables

  • 1 cup frozen corn kernels
  • 1.5 cups cooked rice such as basmati
  • 1 green bell pepper, chopped
  • 1 cup cherry tomatoes, chopped
  • 1 cup black beans, drained and rinsed
  • 6 green onions chopped
  • 1 cup shredded queso duro cheese or cheddar cheese
  • 0.5 cup chopped cilantro
  • 2 tablespoons freshly squeezed lemon juice
  • 1 tablespoon freshly squeezed lime juice
  • 2 tablespoons olive oil
  • 1 avocado diced (optional)
  • 0.25 teaspoon salt, or to taste
  • 0.5 teaspoon black pepper, or to taste

Instructions 

  • Cook chicken with taco seasoning in a skillet until browned and cooked through. Remove and set aside.
  • Cook corn until slightly charred in the same skillet.
  • Combine chicken, corn, rice, bell pepper, tomatoes, black beans, green onions, cheese, and cilantro in a large bowl.
  • Whisk lemon juice, lime juice, olive oil, salt, and pepper to make the dressing.
  • Pour dressing over the salad, toss to coat, add diced avocado if desired, and serve.

Notes

For extra flavor, let the salad chill for 30 minutes before serving.
Calories: 450kcal
Cost: $15
Course: Salad
Cuisine: Mexican
Keyword: Chicken, rice, Vegetables

Elevate Your Dinner Routine with This Chicken Taco Salad

Are you tired of the same old weeknight meals? Let’s shake things up with a quick and flavor-packed chicken taco salad that’s bursting with colors, textures, and most importantly, taste! This dish is perfect for busy evenings when you want something satisfying yet simple to prepare. Packed with juicy chicken, fresh veggies, and a zesty ranch dressing, this salad is sure to become a family favorite. Plus, it’s versatile enough to accommodate whatever ingredients you have on hand!

Why You’ll Love This Chicken Taco Salad

This chicken taco salad isn’t just another recipe; it’s a celebration of flavors that brings joy to your table. Here are five reasons why this dish stands out:

  • Quick Preparation: With just 30 minutes of cooking time, you can serve a delicious meal that looks like you spent hours in the kitchen.
  • Customizable Ingredients: Use whatever veggies and proteins you have—this salad is incredibly forgiving! Swap grilled chicken for steak or add black beans for extra protein.
  • Healthy & Nutritious: Loaded with fresh greens and colorful veggies, this salad can be a wholesome meal on its own, keeping you full and satisfied.
  • Kid-Friendly: With its vibrant colors and crunchy tortilla chips, kids will love this salad, and you can easily get them involved in the preparation.
  • Perfect for Meal Prep: Make a big batch and store it for quick lunches throughout the week—just keep the dressing on the side until you’re ready to eat.

Ingredients Breakdown

Here’s everything you’ll need to whip up this delicious chicken taco salad, along with some handy substitutions!

  • Chicken: 2 medium boneless, skinless chicken breasts. You can also use grilled chicken, shredded rotisserie chicken, or even tofu for a vegetarian option.
  • Taco Seasoning: 2 tablespoons of your favorite brand or homemade taco seasoning. Spice it up with chili powder or cumin for added flavor.
  • Vegetable Oil & Butter: For cooking the chicken. You can substitute olive oil or avocado oil for a healthier option.
  • Frozen Corn: 1 small bag (or fresh corn if you prefer). Corn adds sweetness and crunch; you can also use black beans or chickpeas.
  • Romaine Lettuce: 2 heads of shredded green leaf lettuce. Feel free to mix in spinach or kale for added nutrients.
  • Tomatoes: 3 whole Roma tomatoes, diced. Cherry tomatoes work wonderfully too!
  • Pepper-Jack Cheese: 1/2 cup shredded. Substitute with cheddar or omit for a dairy-free option.
  • Green Onions: 3 whole, sliced. Red onions add a nice bite—use them if you prefer!
  • Cilantro: 1/3 cup, chopped. If you’re not a fan, parsley is a great alternative.
  • Tortilla Chips: Slightly crushed to add crunch. You can use baked chips or even make your own!

Step-by-Step Instructions

Juicy Chicken Taco Salad featuring lettuce, tomatoes, cheese, and tortilla chips.

Follow these easy steps to create your chicken taco salad:

  1. Make the Dressing: In a bowl, combine 3/4 cup of light ranch dressing and 1/4 cup of mild salsa. Mix well, cover, and refrigerate to allow the flavors to meld.
  2. Cook the Chicken: Season both sides of the chicken breasts with taco seasoning. Heat 2 tablespoons of vegetable oil and 2 tablespoons of butter in a large skillet over medium-high heat. Cook the chicken for about 5 minutes on each side until golden brown and cooked through. Remove and let cool before cutting into cubes.
  3. Prepare the Corn: Cook the frozen corn according to package directions; set aside.
  4. Assemble the Salad: On a large platter, layer the shredded lettuce, diced chicken, tomatoes, corn, shredded cheese, sliced green onions, and chopped cilantro. Top with crushed tortilla chips.
  5. Dress and Serve: Drizzle the dressing over the top and serve in individual bowls. Enjoy your delightful creation!

Pro Tips for the Perfect Chicken Taco Salad

Want to take your chicken taco salad to the next level? Consider these expert insights:

  • Marinate the Chicken: For an even deeper flavor, marinate the chicken in the taco seasoning and a splash of lime juice for at least 30 minutes before cooking.
  • Texture Variation: Mix in some crispy bacon or crunchy nuts for a delightful texture contrast.
  • Freshness Counts: Use fresh, in-season veggies for the best flavor and nutrition.
  • Layering: For a fun presentation, layer the ingredients in a glass bowl for a beautiful, colorful display.
  • Extra Spice: If you love heat, add jalapeños or a drizzle of hot sauce to the dressing for a kick.
  • Chill Your Salad: Let the assembled salad sit in the fridge for about 15 minutes before serving to allow the flavors to blend beautifully.
  • Keep It Crunchy: Add the tortilla chips just before serving to keep them crispy.
  • Customize the Dressing: Experiment with different dressings like cilantro lime vinaigrette or a creamy avocado dressing for a twist!

Common Mistakes and Troubleshooting

Even the best cooks can run into a few hiccups! Here are some mistakes to avoid while making your chicken taco salad:

  • Overcooking the Chicken: Cook until just done to keep it juicy—no one likes dry chicken!
  • Wilty Greens: Don’t dress the salad until you’re ready to serve to prevent sogginess.
  • Too Much Dressing: Start with a little and add more as needed. You can always add, but it’s hard to take away!
  • Ignoring Seasoning: Be generous with seasoning your chicken and veggies to enhance overall flavor.

Delicious Variations

Get creative with these variations of the classic chicken taco salad:

  • Southwest Chicken Taco Salad: Add black beans, diced avocado, and a chipotle ranch dressing.
  • Grilled Shrimp Taco Salad: Replace chicken with grilled shrimp for a seafood twist.
  • Vegetarian Taco Salad: Use chickpeas or lentils instead of chicken and add extra veggies like bell peppers.
  • Mexican Street Corn Taco Salad: Incorporate elote-style corn with cotija cheese and lime for a fresh take.

Storage and Make-Ahead Instructions

Want to prep ahead? This chicken taco salad is perfect for meal prep!

  • Make-Ahead: Prepare the chicken and dressing in advance, then store separately in the fridge. Assemble the salad just before serving for optimal freshness.
  • Storage: Keep leftovers in an airtight container in the fridge for up to 3 days. Just remember to store the tortilla chips separately to maintain their crunch.

Frequently Asked Questions

Here are some common questions about this chicken taco salad:

  • Can I use other proteins? Yes! Feel free to substitute with beef, pork, or plant-based proteins.
  • Is this salad gluten-free? Yes, as long as you use gluten-free tortilla chips and ranch dressing.
  • Can I make this salad vegan? Absolutely! Use tofu or tempeh instead of chicken and a vegan dressing.
  • How can I make this salad spicier? Add jalapeños or a spicy dressing to kick up the heat!
  • What’s the best way to chop the veggies? Dice everything uniformly for a beautiful presentation and even flavor distribution.
  • Can I freeze the chicken taco salad? It’s best not to freeze the assembled salad, but you can freeze cooked chicken for later use.
  • What can I serve with this salad? Serve with warm tortillas, Mexican rice, or a side of guacamole for a complete meal.
  • How do I know when the chicken is done? Use a meat thermometer—chicken should reach an internal temperature of 165°F (75°C).

Nutritional Tips and Dietary Adaptations

This chicken taco salad is not only delicious but can also fit various dietary needs. Here are some tips:

  • Low-Carb: Skip the tortilla chips and use a base of leafy greens.
  • High-Protein: Add more chicken or beans for a protein boost.
  • Low-Fat: Use a light ranch dressing or a yogurt-based dressing to reduce calories.
  • Nut-Free: Ensure no nuts are used in the dressing or toppings.

Essential Equipment for Your Chicken Taco Salad

Having the right tools can make cooking a breeze:

  • Skillet: A large non-stick skillet is great for cooking the chicken perfectly.
  • Mixing Bowls: Use various sizes for mixing your ingredients and dressing.
  • Chef’s Knife: A sharp knife will make chopping veggies quick and easy.
  • Meat Thermometer: Ensures your chicken is cooked to perfection without guesswork!

Serving Suggestions

Present your chicken taco salad beautifully with these serving ideas:

  • Individual Bowls: Serve in individual bowls for a personalized touch.
  • Family Style: Arrange on a large platter for everyone to dig in.
  • Garnish: Top with extra cilantro, lime wedges, or a sprinkle of cheese for added flair.

So there you have it! A comprehensive guide to creating a flavorful chicken taco salad that’s perfect for any night of the week. With this recipe, you’re not just making dinner; you’re creating an experience that brings loved ones together. Enjoy the journey of cooking, and remember, the best meals come from the heart! Happy cooking!

Chicken Taco Salad

Prep Time 10 minutes
Cook Time 20 minutes
Total Time 30 minutes
Servings 4 servings
Calories 450
A flavorful and easy-to-make chicken taco salad perfect for a quick lunch or dinner, combining fresh ingredients with a creamy ranch salsa dressing.

Ingredients

Dressing

  • 0.75 cups light ranch dressing
  • 0.25 cups mild salsa

Chicken

  • 2 pieces boneless, skinless chicken breasts
  • 2 tablespoons taco seasoning
  • 2 tablespoons vegetable oil
  • 2 tablespoons butter

Vegetables

  • 1 small bag frozen corn
  • 2 heads green leaf lettuce, shredded
  • 3 whole Roma tomatoes, diced
  • 0.5 cups shredded Pepper-Jack cheese
  • 3 whole green onions, sliced
  • 0.75 cups chopped cilantro

Toppings

  • as needed tortilla chips, slightly crushed

Instructions 

  • Combine ranch dressing and salsa in a bowl, stir, cover, and refrigerate.
  • Season chicken breasts, cook in oil and butter until golden and cooked through, then cool and cube.
  • Cook corn according to package instructions.
  • Assemble salad with lettuce, chicken, tomatoes, cheese, corn, green onions, cilantro, and crushed chips. Drizzle with dressing and serve.

Notes

For extra flavor, add a squeeze of lime or hot sauce.
Calories: 450kcal
Cost: $15
Course: Main Course
Cuisine: Mexican
Keyword: Chicken, Salad, Tacos

Welcome to a refreshing treat that not only satisfies your sweet tooth but also packs a nutritional punch! This Berry Nut Frozen Yogurt Bark is a delightful no-bake dessert that combines creamy yogurt, vibrant berries, and crunchy nuts for an irresistible snack. Perfect for hot summer days, after-school snacking, or a healthy dessert option, this recipe is a game-changer in your culinary repertoire. Let’s dive in!

Why You’ll Love This Recipe

There are so many reasons to fall in love with this frozen yogurt bark. Here are just a few:

  • Quick and Easy: With just a few simple steps, you can whip up this delicious treat in under 20 minutes.
  • Healthy Ingredients: Packed with protein-rich Greek yogurt and nutrient-dense berries, it’s a guilt-free indulgence.
  • Customizable: Tailor this recipe to your taste by swapping in your favorite fruits and nuts.
  • No Baking Required: This no-bake recipe makes it a hassle-free option for anyone.
  • Perfect for Meal Prep: Make a batch ahead of time and enjoy healthy snacks throughout the week!

Ingredients Breakdown

Here’s what you’ll need to make this delicious berry nut frozen yogurt bark:

  • 2 cups (480 ml) Greek yogurt: Choose plain for a tangy flavor or flavored yogurt for a sweeter option.
  • ¼ to ½ cup (60-120 ml) honey: Adjust the sweetness to your preference; maple syrup can be a great vegan alternative.
  • 1 tsp (5 ml) vanilla extract: Adds depth and warmth to the yogurt mixture.
  • 1 pinch salt: Enhances the flavors of the ingredients.
  • Fresh fruits: Strawberries, blueberries, or any seasonal berries of your choice.
  • Nuts of choice: Almonds, walnuts, or pecans work beautifully and add a nice crunch.

How to Make Berry Nut Frozen Yogurt Bark

Follow these simple steps for a delicious and refreshing treat:

Step 1: Blend the Base

In a medium bowl, whisk together the Greek yogurt, honey, vanilla extract, and a pinch of salt until smooth and uniform. This creamy base is the foundation of your frozen yogurt bark.

Step 2: Prepare the Surface

Completely line a rimmed baking sheet with parchment paper. This ensures easy removal and cleanup.

Step 3: Spread the Layer

Pour the yogurt mixture onto the prepared sheet, using a silicone spatula to create an even, thin layer approximately 1/4 inch thick.

Step 4: Decorate the Bark

Artfully scatter fresh strawberries, blueberries, and your choice of chopped nuts across the surface. Aim for an even distribution for visual appeal and balanced flavors.

Step 5: Freeze and Set

Place the baking sheet flat in the freezer. Allow the yogurt bark to solidify completely for about 3-4 hours or until firm enough to break into pieces.

Step 6: Segment and Store

Once frozen, remove from the freezer and gently fracture into bite-sized pieces using your hands or a knife. Transfer to an airtight freezer-safe container, placing parchment paper between layers to prevent sticking.

Step 7: Serve and Preserve

Enjoy your berry nut frozen yogurt bark within 7 days, keeping it stored in a sealed container in the freezer to maintain its freshness and texture.

Pro Tips for Perfect Frozen Yogurt Bark

Side angle of Berry Nut Frozen Yogurt Bark showcasing vibrant berries and chopped nuts.
  • Use Quality Ingredients: The better the yogurt and fruits, the tastier your bark will be.
  • Freeze Overnight: For best results, allow the yogurt bark to freeze overnight, ensuring it’s completely set.
  • Experiment with Flavors: Don’t hesitate to mix different flavored yogurts or add spices like cinnamon.
  • Keep it Colorful: Use a variety of berries for a stunning presentation and a delightful mix of flavors.
  • Be Mindful of Sweetness: Taste your yogurt mixture before freezing and adjust the sweetness as needed.
  • Try Different Nuts: Each nut adds a unique flavor; experiment to find your favorite combination.
  • Cut into Even Pieces: For uniform pieces, use a sharp knife to slice the bark straight out of the freezer.
  • Store in Single Layers: Keeping pieces separate in storage helps prevent them from sticking together.

Common Mistakes and Troubleshooting

Even the best cooks can run into hiccups. Here are some common mistakes and how to avoid them:

  • Too Soft: If your bark doesn’t freeze properly, it might be due to a thick layer. Spread it evenly!
  • Sticking to the Paper: Make sure to line your baking sheet well with parchment paper.
  • Overly Sweet: Adjust the amount of honey to suit your taste to avoid overpowering flavors.

Variations to Try

Make this recipe your own with these creative variations:

  • Chocolate Lovers: Add cocoa powder to the yogurt mixture and top with chocolate chips.
  • Tropical Delight: Substitute berries with diced mango and shredded coconut.
  • Nutty Banana: Replace nuts with granola and add banana slices for a different texture.
  • Spiced Pumpkin: Use pumpkin puree and pumpkin spice for a seasonal twist.

Storage and Make-Ahead Instructions

This frozen yogurt bark can be made ahead of time. Store it in an airtight container in the freezer, where it will keep well for up to 2 months. Just be sure to separate layers with parchment paper to avoid sticking. When ready to enjoy, simply take out a piece and let it sit for a few moments before indulging!

Frequently Asked Questions

Here are some common questions people have about making frozen yogurt bark:

  • Can I use non-dairy yogurt? Absolutely! Coconut or almond-based yogurts work well for a dairy-free option.
  • How can I make it lower in sugar? Use unsweetened yogurt and reduce the amount of honey or substitute with stevia.
  • What nuts work best? Almonds and walnuts are popular, but feel free to explore your favorites!
  • Can I add chocolate? Yes! Swirl in melted chocolate for a rich flavor.
  • How do I know when it’s frozen enough? It should be firm to the touch and easy to break into pieces.
  • Is this recipe gluten-free? Yes, it’s naturally gluten-free as long as you use gluten-free ingredients.
  • Can I use frozen fruit? Yes, just make sure to thaw them slightly before adding to the yogurt.
  • What’s the best way to serve it? Serve directly from the freezer for the best texture; it melts quickly!

Nutritional Tips and Dietary Adaptations

This berry nut frozen yogurt bark is not only delicious but also packed with nutrients. Here are some tips:

  • Protein Boost: Greek yogurt is high in protein, making it a great snack option for muscle recovery.
  • Fiber-Rich: Berries are loaded with fiber, keeping you full longer and aiding digestion.
  • Healthy Fats: Nuts provide essential fatty acids, which are beneficial for heart health.

Equipment Recommendations

To make your yogurt bark-making experience seamless, consider the following tools:

  • Baking Sheet: A rimmed baking sheet helps contain the yogurt and toppings.
  • Parchment Paper: Essential for easy removal and cleanup.
  • Silicone Spatula: Great for spreading yogurt evenly on the baking sheet.
  • Mixing Bowl: A medium-sized bowl for whisking together your ingredients.

Serving Suggestions

This frozen yogurt bark is versatile and can be served in many ways:

  • As a Snack: Perfect for an afternoon pick-me-up or a post-workout treat.
  • For Kids: A fun and healthy snack for kids that can be enjoyed after school.
  • At Parties: Cut into bite-sized pieces for easy sharing at gatherings.
  • On Top of Desserts: Crumble over ice cream or yogurt for an added crunch.

Now that you have all the tools to make your own Berry Nut Frozen Yogurt Bark, it’s time to get in the kitchen and start creating! Remember, cooking is about confidence and creativity, so don’t be afraid to experiment. Enjoy this delicious and healthy treat, and share it with friends and family!

Delectable Berry Nut Frozen Yogurt Bark Recipe

Prep Time 10 minutes
Total Time 10 minutes
Servings 8 pieces
Calories 150
A delicious and visually appealing frozen yogurt bark loaded with fresh berries and nuts, perfect for a healthy treat.

Ingredients

Base

  • 2 cups yogurt (plain or flavored)
  • 0.25 cup honey
  • 1 tsp vanilla extract
  • 1 pinch salt (kosher salt recommended)

Toppings

  • to taste strawberries, sliced
  • to taste blueberries
  • to taste nuts of choice, chopped (almonds or walnuts recommended)

Instructions 

  • Whisk yogurt, honey, vanilla, and salt until smooth to create the base.
  • Line a rimmed baking sheet with parchment paper.
  • Spread yogurt mixture evenly onto the prepared sheet to about ¼ inch thickness.
  • Scatter berries and nuts over the yogurt layer for decoration and flavor.
  • Freeze for 3-4 hours until firm, then break into pieces and store in an airtight container.

Notes

Store in the freezer and enjoy within 7 days for best freshness.
Calories: 150kcal
Cost: $15
Course: Dessert
Keyword: Berries, Nuts, Yogurt

Indulge in Deliciously Simple No Bake Almond Bars

Whip up these Deliciously Simple No Bake Almond Bars in no time! Packed with almond goodness, chocolate chips, and cranberries, they’re the perfect healthy snack for any time of day. This recipe combines the rich flavor of almond butter with the sweetness of maple syrup and the crunch of sliced almonds. With just a handful of ingredients, you can create a gluten-free, grain-free treat that delights both kids and adults. Let’s dive into the details and see why these bars are a must-try!

Why You’ll Love This Recipe

  • Healthy Snacking: With wholesome ingredients like almond flour and dried cranberries, these bars provide a nutritious energy boost.
  • Quick and Easy: No baking required! Simply mix, chill, and enjoy. Perfect for busy weeknights or last-minute snacks.
  • Customizable: Feel free to adjust the ingredients based on your preferences—add in dark chocolate chunks or swap cranberries for your favorite dried fruit.
  • Kid-Friendly: These bars are a hit with children, making them a great option for lunchboxes or after-school snacks.
  • Meal Prep Friendly: Make a batch ahead of time and store them in the fridge for a quick grab-and-go option throughout the week.

Ingredients You’ll Need

Gather these ingredients for your no-bake almond bars:

  • 1 1/2 cups almond flour: A great base for the bars, offering a nutty flavor and dense texture.
  • 3/4 cup almond butter: Choose a thick variety (like Barney’s) for the best results.
  • 6 tablespoons maple syrup: Natural sweetness that binds the ingredients together.
  • 3 tablespoons melted coconut oil: Adds richness and helps with binding.
  • 1/2 cup mini chocolate chips: Use vegan options if needed for a dairy-free treat.
  • 1/2 cup dried cranberries: Chopped for texture and fruity flavor.
  • 1/2 cup sliced almonds: Adds crunch and boosts the almond flavor.
  • 1/4 cup sweetened shredded coconut: Optional, but it adds a delightful chewiness.

Step-by-Step Instructions

Side view of No Bake Almond Bars showcasing layered ingredients and texture.
  1. In a large bowl, mix together the almond flour, almond butter, maple syrup, and melted coconut oil until well combined. Make sure to use a thick almond butter to help the bars set firm.
  2. Add in the remaining ingredients: mini chocolate chips, chopped dried cranberries, chopped sliced almonds, and shredded coconut. Stir until everything is evenly combined.
  3. Line a standard loaf pan with parchment paper. Firmly press the mixture into the pan, ensuring it’s packed tightly and of uniform thickness.
  4. If desired, spread a layer of melted chocolate on top for an extra touch of sweetness (this is a fun option for kids!).
  5. Chill in the refrigerator for a few hours or overnight to allow the mixture to firm up.
  6. Once set, remove the mixture from the pan using the parchment paper, and cut into bars or squares. Store in an airtight container in the fridge.

Expert Tips for Success

  • Perfect Consistency: Ensure your almond butter is thick to help the bars hold their shape.
  • Chill Time: The longer you chill, the firmer the bars will be. Overnight is ideal!
  • Storage: These bars can last up to a week in the fridge, making them a great make-ahead snack.
  • Ingredient Swaps: Swap out the cranberries for raisins, or use different nuts based on your taste preferences.
  • Texture Adjustments: For a crunchier bar, add more sliced almonds or even some chopped walnuts.
  • Vegan Options: Ensure all ingredients are plant-based, especially chocolate chips and almond butter.
  • Enhanced Flavor: Consider adding a pinch of salt or a dash of vanilla extract for an extra flavor boost.
  • Serving Size: Cut into smaller squares for a perfect snack size, especially for kids!

Common Mistakes and Troubleshooting

Even the best recipes can have hiccups. Here are some common issues and how to avoid them:

  • Bars Falling Apart: This can happen if the almond butter is too runny. Always use a thick variety to ensure binding.
  • Too Sweet: If your bars end up being too sweet, reduce the amount of maple syrup next time.
  • Not Firm Enough: If the bars don’t set well, try chilling them longer or adding more almond flour to the mixture.
  • Too Crumbly: If your mixture is too crumbly, add a bit more almond butter or coconut oil to help bind it together.

Delicious Variations to Try

Mix things up with these creative variations:

  • Chocolate Almond Bars: Incorporate cocoa powder into the mixture or drizzle melted dark chocolate on top.
  • Nut-Free Version: Substitute almond flour with sunflower seed flour for a nut-free option.
  • Berry Blast: Add dried blueberries or chopped strawberries instead of cranberries for a fruity twist.
  • Protein-Packed: Mix in a scoop of your favorite protein powder to enhance the nutritional profile.

Storage and Make-Ahead Instructions

These no bake almond bars are perfect for meal prep! Here’s how to store them:

  • Airtight Container: Store in an airtight container in the fridge for up to a week.
  • Freezing: You can freeze the bars for up to three months. Just wrap them individually in parchment paper before placing them in a freezer bag.
  • Thawing: Allow them to thaw in the fridge overnight before enjoying.

Frequently Asked Questions

  • Can I use peanut butter instead of almond butter? Yes! Peanut butter will work well, but the flavor will change slightly.
  • Are these bars gluten-free? Absolutely! As long as you use certified gluten-free almond flour.
  • Can I make these bars vegan? Yes, ensure all your ingredients, particularly chocolate chips, are vegan.
  • How long do these bars keep? They will last in the fridge for about a week and can be frozen for longer storage.
  • Can I add protein powder? Yes! Adding protein powder can enhance the nutritional content.
  • What can I use instead of maple syrup? Honey or agave syrup can be used as substitutes, but they will alter the flavor slightly.
  • Can I make these bars nut-free? Sure! Use seed butters and substitute almond flour with sunflower seed flour.
  • How do I know when the bars are set? They should feel firm to the touch. If they still feel soft, chill them longer.

Nutrition Tips and Dietary Adaptations

These bars are not only delicious but also packed with nutrients! Here are some tips to maximize their health benefits:

  • Add Seeds: Incorporate chia seeds or flaxseeds for added omega-3 fatty acids.
  • Reduce Sugars: Adjust the amount of maple syrup based on your sweetness preference.
  • Boost Fiber: Add in oats or additional nuts to increase the fiber content of your bars.
  • Check for Allergies: Always be mindful of any allergies, especially when preparing for kids.

Essential Equipment for Success

To make these no bake almond bars, you’ll need:

  • Mixing Bowl: A large bowl for combining all the ingredients.
  • Loaf Pan: For shaping the bars. A parchment-lined pan makes for easy removal.
  • Spatula: For mixing and packing the mixture into the pan.
  • Measuring Cups and Spoons: Accurate measurements ensure the best results.

Serving Suggestions

Enjoy your no bake almond bars in various ways:

  • Snack Time: Perfect for a quick energy boost any time of the day.
  • Breakfast On-the-Go: Pair a bar with a piece of fruit for a healthy breakfast.
  • Post-Workout Treat: Great for replenishing energy after a workout session.
  • Lunchbox Addition: Slice into smaller pieces for a kid-friendly lunchbox item.

Conclusion

These Deliciously Simple No Bake Almond Bars are a fantastic addition to your snack repertoire. With a mix of healthy ingredients and a simple preparation process, you’ll find yourself reaching for these bars again and again. Whether you’re looking for a quick snack or a nutritious treat, these bars deliver on all fronts. Remember, cooking should be fun and stress-free, and I’m here to help you every step of the way. So, gather your ingredients, and let’s create something delicious together!

No Bake Almond Bars

Prep Time 15 minutes
Total Time 15 minutes
Servings 12 bars
Calories 250
Delicious and healthy no-bake almond bars that are easy to make and perfect for a quick snack or treat.

Ingredients

Base

  • 2 cups almond flour
  • 3/4 cup almond butter (thick Barney's smooth variety)
  • 6 tablespoons maple syrup
  • 3 tablespoons melted coconut oil
  • 1/2 cup mini chocolate chips (or chopped regular chocolate chips, vegan if needed)
  • 1/2 cup dried cranberries (chopped)
  • 1/2 cup sliced almonds (chopped)
  • 1/4 cup sweetened shredded coconut

Instructions 

  • Mix almond flour, almond butter, maple syrup, and melted coconut oil until well combined.
  • Add chocolate chips, dried cranberries, sliced almonds, and shredded coconut; stir until evenly combined.
  • Line a loaf pan with parchment paper and press the mixture firmly into it.
  • Optional: spread melted chocolate on top. Chill for a few hours or overnight.
  • Remove from pan, cut into bars or squares, and store in the refrigerator.

Notes

Keep the bars refrigerated for the best texture and flavor.
Calories: 250kcal
Cost: $10
Course: Snack
Cuisine: American
Keyword: almond, Healthy, no bake

Refresh Your Summer with a Low-Carb Watermelon Juice

Summer is the perfect time to enjoy refreshing drinks that not only quench your thirst but also fit into your low-carb lifestyle. If you’re looking for a delicious way to beat the heat, look no further than this Low-Carb Watermelon, Lime, and Mint Summer Juice. This simple recipe is bursting with flavor, low in carbs, and incredibly easy to make, making it ideal for summer gatherings, picnics, or a quick refreshment on a hot day. Let’s dive into why this juice will quickly become your go-to summer drink!

Why You’ll Love This Recipe

This juice is not just another drink—it’s a delightful mix of flavors and health benefits. Here are just a few reasons why you’ll adore this refreshing beverage:

  • Low in carbs: Perfect for those following a ketogenic diet, this drink helps you stay within your carb limits while still enjoying a sweet treat.
  • Hydrating and refreshing: Watermelon is made up of about 92% water, making it an excellent choice for hydration during hot summer days.
  • Rich in vitamins: Watermelon is packed with vitamins A and C, both essential for maintaining good health and skin.
  • Simple ingredients: With just a few fresh ingredients, you can whip up this juice in no time—perfect for busy days.
  • Customizable flavor: Feel free to adjust the sweetness and tartness to your liking, ensuring a drink that suits your palate.

Ingredient Breakdown

Let’s take a closer look at what you’ll need to make this delightful juice:

  • 4 cups Watermelon: Use seedless, ripe watermelon for the best flavor. You can substitute with other low-carb fruits like cantaloupe or honeydew if desired.
  • 1/4 cup Fresh lime juice: Freshly squeezed lime juice adds a zesty kick. If you’re short on limes, bottled lime juice can work in a pinch.
  • 1/4 cup Fresh mint leaves: Fresh mint gives this juice a refreshing aroma. If fresh mint isn’t available, you can use a few drops of mint extract.
  • 2 tablespoons Erythritol or preferred low-carb sweetener: Adjust the sweetness based on your taste preference. Other sweeteners like stevia or monk fruit can also be used.
  • 2 cups Ice cubes: Ice makes your juice chilled and refreshing. You can also freeze some watermelon cubes ahead of time for a frosty treat.
  • Fresh lime slices and mint leaves for garnish: These not only enhance the appearance but also provide an extra burst of flavor.

Perfecting the Method

Side view of a refreshing low-carb watermelon juice with lime and mint, showcasing ice cubes and colorful garnishes.

Now that we have our ingredients ready, let’s go through the steps to create this refreshing juice:

  • Prepare Ingredients: Start by cubing your watermelon into bite-sized pieces, ensuring any seeds are removed. Squeeze fresh limes until you have 1/4 cup of juice. Rinse and pat dry the mint leaves.
  • Blend the Base: In a blender, combine the cubed watermelon, lime juice, mint leaves, and low-carb sweetener. Blend on high speed until the mixture is smooth.
  • Strain Optional: For a smoother juice, strain the mixture using a fine-mesh sieve or cheesecloth over a large bowl to remove any pulp or mint bits, pressing to extract as much liquid as possible.
  • Chill: Fill four glasses with ice cubes and pour the strained juice over the ice.
  • Garnish and Serve: Garnish each glass with a slice of lime and a sprig of mint. Stir well before serving to ensure the sweetener is well dissolved.
  • Enjoy: Sip and enjoy the refreshing flavors of summer with this keto-friendly juice!

Pro Tips for the Best Juice

Want to take your watermelon juice to the next level? Here are some expert insights:

  • Chill your ingredients: For an extra refreshing drink, refrigerate the watermelon cubes before blending.
  • Experiment with sweetness: Start with less sweetener and gradually add more to suit your taste.
  • Use frozen watermelon: If you have leftover watermelon, freeze it and use it in place of ice for a thicker, slushy consistency.
  • Infuse with flavors: Add a pinch of salt or a splash of coconut water for a unique twist.
  • Blend in other fruits: If you’re feeling adventurous, mix in other low-carb fruits like strawberries or raspberries for added flavor.
  • Make it a cocktail: Add a splash of vodka or rum for a festive adult drink.
  • Adjust tartness: If you prefer a tangier taste, increase the lime juice for a more vibrant flavor.
  • Serve immediately: This juice is best enjoyed fresh, so serve it right after preparing.

Common Mistakes and Troubleshooting

Even the best recipes can have hiccups! Here are some common issues and how to fix them:

  • Juice is too sweet: If your juice turns out too sweet, add a splash of lime juice to balance the flavors.
  • Too watery: If your juice is too thin, blend in a few more watermelon cubes to thicken it up.
  • Mint flavor is too strong: If the mint is overpowering, dilute the juice with a bit more watermelon or water.
  • Not enough flavor: If you find the taste lacking, try adding a bit more lime juice or sweetener.
  • Pulp is present: To avoid pulp, ensure you strain the juice thoroughly through a fine-mesh sieve.

Variations to Keep It Fresh

Want to change things up? Here are some delicious variations you might enjoy:

  • Sparkling Watermelon Fizz: Mix the juice with sparkling water for a bubbly drink.
  • Berry Melon Medley: Add a handful of strawberries or blueberries for a fruity twist.
  • Tropical Keto Twist: Mix in some unsweetened coconut milk for a tropical flavor.
  • Herbal Refresher: Experiment with basil instead of mint for a unique herbal flavor.

Storage and Make-Ahead Instructions

This juice is best enjoyed fresh, but you can prepare it ahead of time:

  • Refrigerate: Store any leftover juice in an airtight container in the fridge for up to 2 days. Stir well before serving.
  • Make-ahead option: Prepare the juice without ice and store it in the fridge. Add ice just before serving to keep it cold.

Frequently Asked Questions (FAQ)

Here are some common questions about this refreshing juice:

  • Can I make this juice ahead of time? Yes, you can prepare the juice in advance and store it in the refrigerator for up to 2 days.
  • Is watermelon keto-friendly? Yes, watermelon is low in carbs, making it suitable for a ketogenic diet in moderation.
  • Can I use bottled lime juice? While fresh lime juice is recommended for the best flavor, bottled lime juice can be used in a pinch.
  • How long does the juice last? The juice is best enjoyed fresh, but it can last in the fridge for about 2 days.
  • Can I freeze the juice? Yes, you can freeze the juice in ice cube trays and use it to chill drinks without diluting them.
  • What can I use instead of erythritol? You can use other low-carb sweeteners like stevia, monk fruit, or sucralose.
  • Can I add other fruits? Absolutely! Just be mindful of the carb content if you’re sticking to a low-carb diet.
  • What do I do if the juice is too thick? If the juice is too thick, add a little water or more lime juice to thin it out.

Nutrition Tips and Dietary Adaptations

This juice is not only delicious but also offers nutritional benefits:

  • Low Carb: With minimal carbs, this juice fits perfectly into a low-carb or ketogenic diet.
  • Vitamins and Minerals: Packed with vitamins A and C, it supports immune health and skin vitality.
  • Hydration: Provides hydration essential for summer days and physical activities.

Equipment Recommendations

To make this refreshing juice, you’ll need:

  • Blender: A high-speed blender works best for a smooth consistency.
  • Fine-mesh sieve or cheesecloth: Useful for straining the juice if you prefer a smoother drink.
  • Measuring cups and spoons: To measure your ingredients accurately.

Serving Suggestions

Here are some fun ways to serve your watermelon juice:

  • Chilled Glasses: Serve in chilled glasses for an extra refreshing experience.
  • Garnishes: Enhance presentation with lime slices, mint leaves, or even edible flowers.
  • Accompanying Snacks: Pair with low-carb snacks like cheese platters or veggie sticks for a perfect summer treat.

With its vibrant colors and refreshing taste, this Low-Carb Watermelon, Lime, and Mint Summer Juice is sure to become a summer favorite. Whether you’re hosting a party or simply enjoying a sunny day, this juice is a delightful way to stay cool and satisfied. So grab your ingredients and let’s make summer a little sweeter, one sip at a time!

Low-Carb Watermelon, Lime, and Mint Summer Juice

Prep Time 10 minutes
Total Time 10 minutes
Servings 4 glasses
Calories 50
Enjoy a refreshing, keto-friendly summer juice made with watermelon, lime, and mint for a perfect cool-down.

Ingredients

Watermelon

  • 4 cups Watermelon, seedless, cubed
  • 0.25 cup Fresh lime juice
  • 0.25 cup Fresh mint leaves
  • 2 tablespoons Erythritol or preferred low-carb sweetener, granulated
  • 2 cups Ice cubes

Garnish

  • 1 slice Fresh lime slices
  • Additional leaves Fresh mint leaves for garnish

Instructions 

  • Cube the watermelon and squeeze fresh lime juice.
  • Blend watermelon, lime juice, mint leaves, and sweetener until smooth.
  • Strain the mixture through a fine-mesh sieve to remove pulp and mint bits.
  • Fill glasses with ice and pour the strained juice over the ice.
  • Garnish with lime slices and mint leaves. Stir well before serving.

Notes

This juice is best enjoyed fresh and chilled for maximum refreshment.
Calories: 50kcal
Cost: $10
Course: Beverage
Cuisine: Summer
Keyword: Watermelon

Welcome to your new go-to recipe for a soothing and revitalizing drink that can become a cherished part of your nightly routine. This Detox Cucumber Ginger Bedtime Drink is not only refreshing but also packed with health benefits that will help you unwind after a long day. In this article, we’ll explore the ingredients, preparation steps, and why this detox drink is perfect for your evening routine.

Why You’ll Love This Recipe

This Detox Cucumber Ginger Bedtime Drink offers a delightful blend of flavors and functional benefits that’ll make you look forward to sipping it every night. Here are some reasons to fall in love with this recipe:

  • Promotes Relaxation: The soothing properties of cucumber and ginger help calm your mind and body, making it easier to wind down before bed.
  • Supports Digestion: Ginger is known to aid in digestion, helping your body process food more efficiently before you sleep.
  • Boosts Hydration: Infused with fresh ingredients, this drink keeps you hydrated, which is essential for overall health.
  • Detoxifies Your Body: The combination of lemon and ginger helps to flush out toxins, promoting a healthier internal environment.
  • Weight Management: Staying hydrated with this low-calorie drink can help curb late-night cravings and support weight loss.

Ingredients Needed

Let’s dive into the ingredient list for this detox drink. Each ingredient plays a specific role, both in flavor and health benefits:

  • 500ml (2 cups) warm water: Acts as the base for the drink, hydrating your body.
  • 2 tablespoons sodium bicarbonate (baking soda): Helps clean the cucumbers and balance pH.
  • 2-3 medium cucumbers (approximately 400g / 14 oz): Provides hydration and a refreshing flavor.
  • 2-3cm (1 inch) fresh ginger root, peeled: Adds a spicy kick and aids digestion.
  • Juice of 1 large lemon (approximately 60ml / 4 tablespoons): Infuses the drink with vitamin C and a zesty flavor.
  • 1 tablespoon fresh mint leaves or 1 teaspoon dried mint: Enhances flavor and has calming properties.
  • 500ml (2 cups) filtered water: Used for blending and mixing.
  • Ice cubes (optional): For serving chilled.
  • 1 teaspoon honey or stevia (optional): For natural sweetness, if desired.
  • Pinch of sea salt (optional): Helps maintain electrolyte balance.

Step-by-Step Instructions

Making this detox drink is straightforward. Follow these easy steps to create your refreshing beverage:

  1. Fill a large bowl with warm water and dissolve the 2 tablespoons of baking soda completely.
  2. Wash the cucumbers thoroughly under running water, then place them in the baking soda solution. Soak for 15 minutes.
  3. After soaking, rinse the cucumbers under cold running water to remove any residue.
  4. Cut the cleaned cucumbers into large chunks, leaving the skin on for extra nutrients.
  5. Peel the fresh ginger root using a spoon or vegetable peeler.
  6. Roll the lemon on a hard surface while applying pressure to release more juice, then cut and squeeze to extract all the juice.
  7. In a high-powered blender, combine the cucumber chunks, peeled ginger, fresh lemon juice, and mint leaves.
  8. Add 250ml (1 cup) of filtered water to the blender and blend on high speed for 60-90 seconds until smooth.
  9. Add the remaining 250ml (1 cup) of water and blend briefly to incorporate.
  10. Pour the blended mixture through a fine-mesh sieve or cheesecloth into a pitcher.
  11. For an ultra-smooth drink, strain the mixture a second time through an even finer sieve or coffee filter.
  12. Taste the strained drink and adjust flavors as needed, adding honey or stevia for sweetness if desired.
  13. Chill the drink in the refrigerator for at least 30 minutes before serving, or serve immediately over ice cubes.
  14. Stir well before serving, and garnish with fresh mint leaves or cucumber slices if desired.

Pro Tips for Perfection

Close-up view of a cucumber and ginger infused drink in a clear glass, showcasing its vibrant colors.

Here are some expert tips to ensure your detox drink is always a hit:

  • Choose ripe cucumbers: Look for firm cucumbers with smooth skin for the best flavor.
  • Fresh ginger: Always use fresh ginger for a more potent flavor and health benefits.
  • Adjust sweetness: Feel free to tweak the amount of honey or stevia to your taste.
  • Let it steep: For stronger flavors, let the drink infuse in the fridge for a few hours or overnight.
  • Experiment with herbs: Try adding basil or rosemary for a unique twist.
  • Keep it cold: Serve with ice for a refreshing experience.
  • Use a blender: A high-powered blender ensures everything is blended smoothly.
  • Strain properly: Take your time straining to avoid any gritty texture in your drink.
  • Storage tips: Store in an airtight container in the fridge for up to 2-3 days, but for best flavor, consume within 24 hours.
  • Remove solids: If you make a larger batch, remove solids after 24 hours to prevent bitterness.

Common Mistakes and Troubleshooting

Even the best of us can encounter hiccups in the kitchen. Here are some common mistakes and how to avoid them:

  • Too bitter? If your drink turns out bitter, it could be due to over-soaking the cucumbers. Stick to the recommended soaking time.
  • Weak flavor? Ensure you’re using fresh ingredients, especially ginger and lemon, for a robust taste.
  • Too sweet? If it’s overly sweet, dilute it with more water or add extra lemon juice to balance it out.
  • Clumpy texture? Make sure to blend thoroughly and strain well to avoid any lumps.

Variations to Try

Feel free to get creative! Here are some variations to keep things exciting:

  • Berry Blast: Add a handful of fresh berries like strawberries or blueberries for a fruity twist.
  • Spicy Kick: Incorporate a slice of jalapeño or a dash of cayenne pepper for heat.
  • Citrus Burst: Mix in slices of lime or orange for additional zest.
  • Herbal Infusion: Try adding fresh herbs like basil or cilantro for a unique flavor profile.

Storage and Make-Ahead Instructions

This detox drink is perfect for making ahead of time. Here’s how to store it:

  • Refrigerate: Store in an airtight container for up to 2-3 days. It’s best consumed fresh.
  • Pre-mix ingredients: You can prepare the cucumber, ginger, and lemon mixture a day in advance and blend it fresh when ready to serve.
  • Freeze portions: For longer storage, freeze small portions in ice cube trays and add to drinks as needed.

Frequently Asked Questions

Here are some common questions about this detox drink:

  • Can I use bottled lemon juice? While fresh is best, bottled juice can be used in a pinch.
  • Is this drink safe for everyone? Generally, yes, but consult with a doctor if you have specific allergies or health concerns.
  • How often can I drink this? Enjoy it nightly for best results, but it’s safe to consume daily.
  • Can I add other fruits? Absolutely! Feel free to experiment with other fruits that you enjoy.
  • What if I don’t have mint? You can skip it or substitute with other herbs like lemon balm.
  • How can I make it more filling? Add a tablespoon of chia seeds for added fiber and texture.
  • Does this drink have any calories? It is very low in calories, especially if you skip the honey or sweeteners.
  • Can I drink this on an empty stomach? Yes, it’s a great way to hydrate first thing in the morning!

Nutrition Tips and Dietary Adaptations

This detox drink is inherently healthy, but here are a few tips to enhance its nutritional value:

  • Low-calorie option: Keep it sugar-free by using stevia or simply enjoy the natural flavors.
  • Vegan-friendly: This recipe is naturally vegan, making it suitable for various dietary preferences.
  • Gluten-free: All ingredients are gluten-free, ideal for those with gluten sensitivities.

Equipment Recommendations

To make this drink, you’ll need:

  • High-powered blender: Essential for a smooth consistency.
  • Fine-mesh sieve or cheesecloth: For straining the mixture.
  • Large bowl: For soaking the cucumbers.
  • Pitcher: To store your delicious drink.

Serving Suggestions

Serve this refreshing drink chilled, garnished with:

  • Fresh mint leaves: Adds an aromatic touch.
  • Cucumber slices: Enhances the visual appeal and freshness.
  • Ice cubes: For a refreshing chill.

In conclusion, this Detox Cucumber Ginger Bedtime Drink is not only delicious but also a powerhouse of health benefits. With easy preparation and the flexibility to modify flavors, it’s the perfect addition to your evening routine. Remember, cooking is all about enjoying the process and trying new things, so don’t hesitate to make this recipe your own. Cheers to your health and happiness!

Detox Cucumber Ginger Bedtime Drink

Prep Time 15 minutes
Total Time 15 minutes
Servings 2 cups
Calories 50
A refreshing and detoxifying bedtime drink combining cucumber, ginger, lemon, and mint for a healthy unwind.

Ingredients

group

  • 500 ml warm water
  • 2 tablespoons sodium bicarbonate baking soda
  • 2-3 medium cucumbers (approximately 400g)
  • 1 inch fresh ginger root (about 2-3cm)
  • 60 ml juice of 1 large lemon
  • 4 tablespoons fresh lemon juice
  • 1 tablespoon fresh mint leaves (or 1 teaspoon dried mint)
  • 250 ml filtered water
  • ice cubes optional ice cubes
  • 1 teaspoon honey or stevia (for sweetness, optional)
  • pinch sea salt (for electrolyte balance, optional)

Instructions 

  • Dissolve baking soda in warm water in a large bowl.
  • Wash cucumbers, soak in baking soda solution for 15 minutes, then rinse thoroughly.
  • Cut cucumbers into chunks, peel ginger, and extract lemon juice.
  • Blend cucumber, ginger, lemon juice, and mint with 250ml filtered water until smooth, then add remaining water and blend briefly.
  • Strain the mixture into a pitcher, chill for 30 minutes or serve immediately over ice, garnished with mint or cucumber slices if desired.

Notes

Adjust sweetness and flavor as desired. For a colder drink, add ice cubes before serving.
Calories: 50kcal
Cost: $10
Course: Beverage
Cuisine: Healthy
Keyword: Cucumber, detox, ginger

Delightfully Irresistible Mini Fruit Tarts: A Culinary Adventure Awaits!

Welcome to your new favorite dessert recipe! These mini fruit tarts are not just a feast for the eyes but a celebration of flavors that will brighten up any dessert table. Featuring a buttery crust, a velvety pastry cream filling, and topped with vibrant fresh fruit, these tarts are as simple to make as they are delightful to eat. Let’s embark on this culinary journey where great taste meets easy preparation!

Why You’ll Love This Recipe

  • Quick to prepare: With straightforward steps, you’ll have these mini tarts ready in no time, making them perfect for last-minute gatherings.
  • Customizable toppings: Use your favorite seasonal fruit—berries, kiwi, or citrus—to create a tart that’s uniquely yours!
  • Impressive presentation: These tarts are stunningly beautiful, making them a show-stopper at any event.
  • Kid-friendly activity: Involve the little ones in assembling their own tarts, making cooking a fun family affair.
  • Deliciously satisfying: The balance of creamy pastry cream, buttery crust, and fresh fruit creates a taste explosion that everyone will love.

Ingredients for Irresistibly Easy Mini Fruit Tarts

Here’s what you’ll need to whip up these delightful tarts:

  • 1 cup All-purpose flour: This forms the base for a tender, buttery crust that beautifully cradles your pastry cream and toppings.
  • 1/2 cup Cold unsalted butter: Keep it chilled and cut into cubes for a flaky and crisp texture.
  • 2 tablespoons Granulated sugar: Adds just a hint of sweetness to balance the tartness of the fruit.
  • 1/4 teaspoon Salt: Enhances flavor and balances the sweetness naturally.
  • 5 tablespoons Ice water: Helps bring the dough together without melting the butter.
  • 2 cups Whole milk: Essential for a smooth and creamy custard filling.
  • 4 large Egg yolks: Provides richness and that silky texture everyone loves in pastry cream.
  • 1/2 cup Granulated sugar: Sweetens gently to complement, not overpower, the fruit topping.
  • 1/4 cup Cornstarch: Thickens the filling to hold beautifully inside your mini fruit tarts.
  • 1 teaspoon Vanilla extract: Infuses a warm, comforting flavor that ties all the ingredients together.
  • 1 cup Fresh strawberries: Bright red and juicy for a pop of color and flavor.
  • 1 cup Blueberries: Small bursts of sweet-tart goodness that contrast nicely with the creamy custard.
  • 2 medium Kiwi slices: Adds vibrant green and a refreshing tang, perfect for eye-catching presentation.
  • 1 cup Mandarin orange segments: Bring sunny citrus sweetness that enhances the overall freshness.
  • 1 tablespoon Apricot jam: Melted slightly, it creates a shiny, professional finish and helps the fruit stay fresh.

Step-by-Step Instructions

Side view of assorted mini fruit tarts showcasing vibrant fruits on a pastry base.

Let’s dive into the making of these delightful mini fruit tarts!

1. Prepare the Tart Dough

In a large bowl, combine the flour, sugar, and salt. Add the cold butter cubes and mix until the mixture resembles coarse crumbs. Gradually add the ice water, mixing until the dough just comes together. Wrap in plastic wrap and chill in the fridge for at least 30 minutes.

2. Bake the Tart Shells

Preheat your oven to 350°F (175°C). Roll out the chilled dough on a lightly floured surface and cut into circles to fit your tart pans. Press the dough into the pans and prick the bottoms with a fork. Bake for 15-20 minutes, or until golden brown. Allow to cool completely.

3. Make the Pastry Cream

In a saucepan, heat the whole milk over medium heat until it’s just about to boil. In a separate bowl, whisk together the egg yolks, granulated sugar, and cornstarch until smooth. Gradually whisk the hot milk into the egg mixture, then return to the saucepan. Cook over medium heat, stirring constantly until thickened. Remove from heat and stir in vanilla extract. Let cool completely.

4. Assemble the Tarts

Once the tart shells and pastry cream have cooled, fill each shell with the cream. Top with an assortment of fresh fruit, arranging them beautifully. Brush with warm apricot jam for a glossy finish.

Pro Tips for Perfect Mini Fruit Tarts

  • Chill your ingredients: Using cold butter and ice water ensures a flakier crust.
  • Don’t overmix: When making the tart dough, mix just until combined to avoid tough crusts.
  • Use seasonal fruits: Opt for fresh, ripe, and seasonal fruits for the best flavor.
  • Make ahead: Prepare the tart shells and pastry cream in advance for easy assembly later.
  • Experiment with flavors: Add citrus zest to the pastry cream for an extra flavor boost.
  • Check your oven temperature: Ensure it’s accurate to prevent overbaking the tart shells.
  • Keep tarts refrigerated: Store assembled tarts in an airtight container in the fridge to maintain freshness.
  • Use different fruits: Feel free to swap out the fruits based on availability and personal preference.

Common Mistakes and Troubleshooting

Here are some pitfalls to avoid and solutions to common issues:

  • Crust shrinking: Ensure your dough is well-chilled before baking and don’t stretch it when fitting into tart pans.
  • Pastry cream too runny: Cook it longer, stirring constantly until it thickens properly.
  • Fruit toppings sliding off: Brush the tarts with apricot jam to help secure the fruit.
  • Overbaked tart shells: Keep a close eye on your shells and remove them from the oven as soon as they’re golden.

Delicious Variations to Try

Mix things up with these fun variations:

  • Chocolate Ganache Base: Replace pastry cream with a rich chocolate ganache for a decadent twist.
  • Coconut Cream Filling: Substitute half the milk with coconut milk and add shredded coconut for a tropical flavor.
  • Nutty Crust: Incorporate ground nuts into your dough for added flavor and texture.
  • Berry Compote: Instead of fresh fruit, use a homemade berry compote for a burst of flavor.

Storage and Make-Ahead Instructions

These mini tarts are best enjoyed fresh, but here’s how to store them:

  • Assembled tarts: Store in an airtight container in the fridge for up to 2 days. Best enjoyed within 24 hours for optimal freshness.
  • Tart shells: Can be made ahead and stored in an airtight container at room temperature for up to 3 days.
  • Pastry cream: Prepare in advance and refrigerate in an airtight container for up to 3 days.

Frequently Asked Questions (FAQs)

  • Can I use store-bought tart shells? Absolutely! This saves time, and you can focus on the filling and toppings.
  • What fruits can I use? Berries, kiwi, citrus, and stone fruits all work beautifully.
  • How do I prevent the crust from getting soggy? Bake the crust until golden and consider a light layer of melted chocolate as a barrier.
  • Can I freeze these mini fruit tarts? It’s best to freeze the tart shells separately and assemble fresh before serving.
  • What can I substitute for egg yolks? Use a commercial egg replacer or a mixture of silken tofu and cornstarch.
  • How can I make these tarts gluten-free? Use a gluten-free all-purpose flour blend in place of regular flour.
  • Can I add flavors to the pastry cream? Yes! Consider adding citrus zest or extracts for additional flavor.
  • How do I make the tarts more colorful? Mix and match fruits for a stunning visual effect!

Nutritional Tips and Dietary Adaptations

For those looking to adapt this recipe to fit various dietary needs:

  • Gluten-free: Substitute with a gluten-free flour blend.
  • Dairy-free: Use coconut milk for the pastry cream and a vegan butter alternative.
  • Lower sugar: Reduce the sugar in the pastry cream or use a sugar alternative.

Essential Equipment Recommendations

To create these delightful mini tarts, you will need:

  • Mini tart pans: For perfect individual servings.
  • Mixing bowls: For combining ingredients efficiently.
  • Whisk: Essential for making the pastry cream.
  • Rolling pin: For rolling out the dough smoothly.
  • Cooling rack: To cool the tart shells evenly.

Serving Suggestions

These mini fruit tarts are perfect for any occasion. Serve them at:

  • Tea parties: Their small size makes them ideal for afternoon tea.
  • Birthday celebrations: Impress guests with these colorful treats.
  • Holiday gatherings: A sweet addition to your dessert spread.
  • Potluck dinners: Easy to transport and serve!

With these tips and insights, you’re now ready to create your own stunning mini fruit tarts. Remember, cooking is about experimenting and enjoying the process, so have fun with your creations! Happy baking!

Irresistibly Easy Mini Fruit Tarts to Brighten Your Dessert Table

Prep Time 30 minutes
Cook Time 15 minutes
Total Time 45 minutes
Servings 12 pieces
Calories 250
Delight in these simple yet stunning mini fruit tarts, featuring a buttery crust, creamy custard, and fresh fruit for a perfect dessert centerpiece.

Ingredients

Crust ingredients

  • 1 cup All-purpose flour (Use for a tender, buttery crust that holds up perfectly to juicy fruit.)
  • 0.5 cup Cold unsalted butter (Keep chilled and cut into cubes to create a flaky, crisp texture.)
  • 2 tablespoons Granulated sugar (Adds just a touch of sweetness to balance the tartness of the fruit.)
  • 0.25 teaspoon Salt (Enhances flavor and balances sweetness naturally.)
  • 5 tablespoons Ice water (Chill well to help bring the dough together without melting the butter.)

Custard filling ingredients

  • 2 cups Whole milk (Provides the smooth, creamy base that is essential for classic custard flavor.)
  • 4 large Egg yolks (Key for richness and that silky texture everyone loves in pastry cream.)
  • 0.5 cup Granulated sugar (Sweetens gently to complement, not overpower, the fruit topping.)
  • 0.25 cup Cornstarch (Thickens the filling to hold beautifully inside your Mini Fruit Tarts.)
  • 1 teaspoon Vanilla extract (Infuses warm, comforting flavor that ties all the ingredients together.)

Fruit toppings

  • 1 cup Fresh strawberries (Bright red and juicy for a pop of color and flavor.)
  • 1 cup Blueberries (Small bursts of sweet-tart goodness that contrast nicely with creamy custard.)
  • 2 medium Kiwi slices (Add vibrant green and a refreshing tang, perfect for eye-catching presentation.)
  • 1 cup Mandarin orange segments (Bring sunny citrus sweetness that enhances the overall freshness.)
  • 1 tablespoon Apricot jam (Melted slightly, it creates a shiny, professional finish and helps fruit stay fresh.)

Instructions 

  • Prepare the crust: Mix flour, sugar, salt, and cold butter until crumbly. Add ice water gradually to form dough. Chill for 15 minutes.
  • Roll out dough and cut into small tart shells. Bake at 350°F (175°C) for 12-15 minutes until golden. Cool completely.
  • Make the custard: Heat milk until just boiling. Whisk egg yolks, sugar, cornstarch, and vanilla. Slowly pour hot milk into yolk mixture, then cook until thickened. Chill.
  • Fill cooled tart shells with custard. Arrange fresh fruit on top. Brush with melted apricot jam for shine.

Notes

For best results, prepare the tart shells and custard ahead of time and assemble just before serving.
Calories: 250kcal
Cost: $15
Course: Dessert
Keyword: easy, Fruit, tart