Author

Steven

Browsing

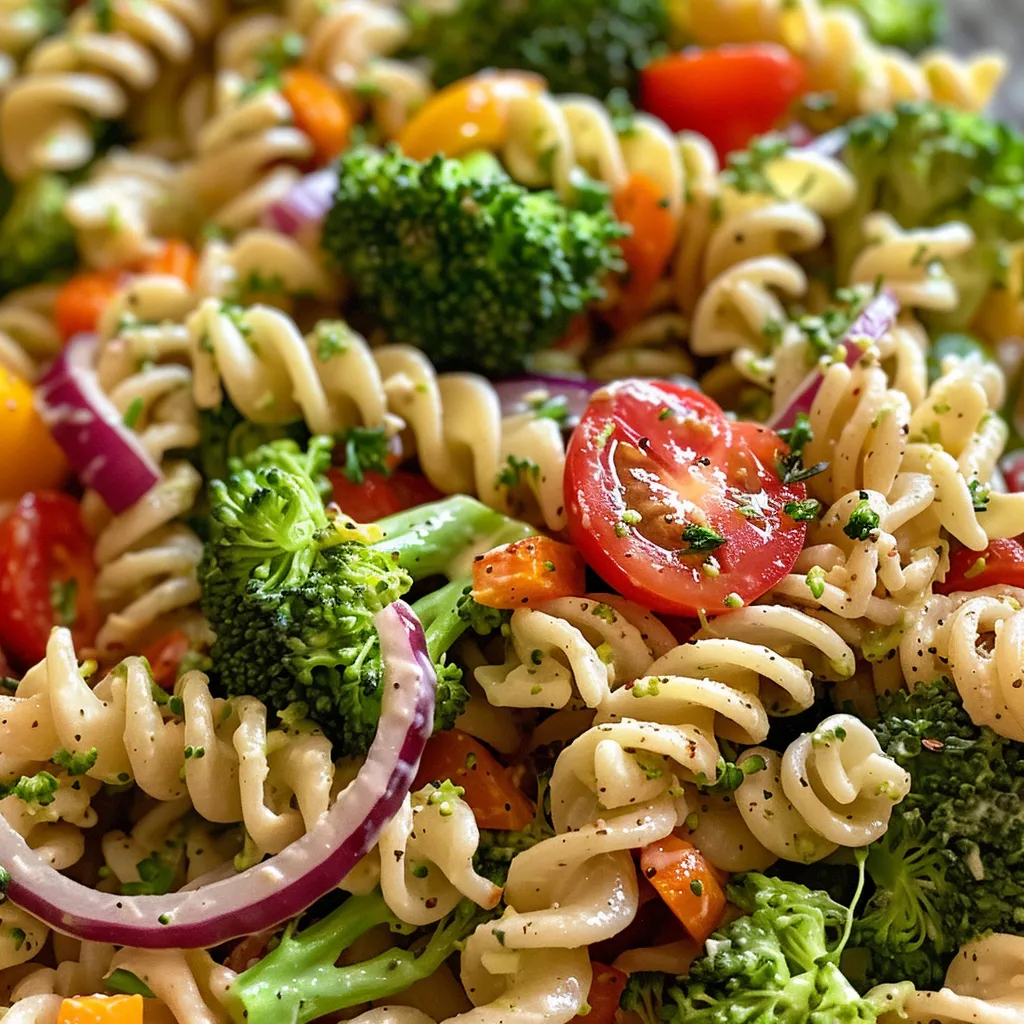
Welcome to a delightful journey where cooking meets joy! This Broccoli Pasta Salad is not just a dish; it’s a vibrant celebration of flavors and textures that promise to elevate any meal. Perfect for potlucks, barbecues, or simply a cozy dinner at home, this salad combines fresh ingredients and a zesty dressing to create a dish that is both simple and satisfying. Let’s dive into the world of broccoli pasta salads and discover why this one stands out!

Why You’ll Love This Recipe

This recipe isn’t just about tossing ingredients together; it’s about crafting a balanced and delightful experience. Here’s why you’re going to love this broccoli pasta salad:

  • Quick and Easy: Whip it up in under 30 minutes, making it a perfect option for busy weeknights or last-minute gatherings.
  • Fresh and Flavorful: The bright flavors of fresh vegetables and zesty dressing make each bite a burst of freshness.
  • Customizable: Easily adapt the ingredients to suit your taste or dietary needs, ensuring everyone at the table is happy.
  • Health Benefits: Packed with nutrients from broccoli and other veggies, this salad is as nutritious as it is delicious.
  • Make-Ahead Friendly: Prepare it a day in advance; it tastes even better after chilling in the fridge!

Ingredient Breakdown

Let’s get into the heart of this dish—the ingredients. Each element plays a vital role in achieving the perfect broccoli pasta salad.

  • 2 cups broccoli florets: Choose firm stalks with tight, dark green florets. This ensures you have crunchy, vibrant pieces in your salad.
  • 8 ounces pasta (rotini or penne): Rotini captures the dressing beautifully, while penne offers a meaty bite. Cook until al dente for the best texture.
  • 1 cup cherry tomatoes, halved: Opt for ripe, firm tomatoes for an added sweetness and color contrast.
  • 1/2 cup red onion, diced: Adds a sharp zing; soak in cold water for a milder flavor if desired.
  • 1/2 cup bell pepper, diced: Choose any color for a sweet crunch that complements the broccoli.
  • 1/2 cup shredded carrots: For sweetness and a beautiful pop of color.
  • 1 cup Italian dressing: Use a quality bottled dressing or make your own for a fresh twist.
  • Salt and pepper: Season gradually to enhance the flavors without overpowering them.

Step-by-Step Instructions

Now that we have our ingredients ready, let’s walk through the steps to create this delicious broccoli pasta salad.

  • Step 1: Cook the pasta according to package instructions until al dente. Drain and rinse under cold water to stop cooking.
  • Step 2: In a large bowl, combine the broccoli florets, cherry tomatoes, red onion, bell pepper, and carrots.
  • Step 3: Add the cooled pasta to the vegetable mixture.
  • Step 4: Pour in the Italian dressing and toss gently to coat all ingredients evenly.
  • Step 5: Season with salt and pepper to taste, adjusting as needed.
  • Step 6: Chill in the refrigerator for at least 30 minutes before serving to allow flavors to meld.

Pro Tips for Perfect Broccoli Pasta Salad

Close-up view of a serving of Broccoli Pasta Salad with vibrant vegetables and pasta.

Here are some expert insights to ensure your salad turns out just right:

  • Cool your ingredients: Make sure your pasta and broccoli are completely cool before mixing to prevent a watery salad.
  • Use quality dressing: The dressing significantly impacts the flavor; opt for a high-quality Italian dressing for the best results.
  • Add nuts or seeds: For extra crunch, consider adding toasted pine nuts or sunflower seeds.
  • Herbs are key: Fresh herbs like parsley or basil elevate the flavor profile; add them right before serving.
  • Experiment with cheeses: A sprinkle of feta or parmesan can add a creamy, salty depth to the salad.
  • Keep it colorful: Use a variety of bell peppers for a more vibrant presentation.
  • Adjust the dressing: If you prefer a creamier texture, mix in a dollop of sour cream or Greek yogurt.
  • Dress it right: If you’re making it ahead, consider keeping the dressing separate until just before serving for optimal freshness.

Common Mistakes and Troubleshooting

Even the best cooks can make mistakes! Here are some common pitfalls and how to avoid them:

  • Overcooked pasta: Ensure you cook the pasta only until al dente; this prevents a mushy texture in the salad.
  • Ignoring seasoning: Always taste and adjust your seasoning after mixing. A little salt can go a long way!
  • Skipping the chill: Allowing the salad to chill enhances the flavors; don’t skip this step!
  • Too much dressing: Start with less dressing, as you can always add more, but it’s hard to take it away if you add too much.

Variations to Try

Feel free to mix things up with these delicious variations:

  • Cheesy Delight: Add shredded mozzarella or cheddar for a creamy texture.
  • Protein Boost: Toss in cooked chicken, shrimp, or chickpeas for a complete meal.
  • Asian Twist: Replace Italian dressing with sesame dressing and add edamame and sliced almonds.
  • Mediterranean Style: Add olives, artichokes, and sun-dried tomatoes for a Mediterranean flair.

Storage and Make-Ahead Instructions

This salad is perfect for meal prep! Here’s how to store it:

  • Refrigeration: Store in an airtight container in the fridge for up to 3 days.
  • Make-Ahead: Prepare the salad a day in advance; the flavors will deepen as it sits.
  • Freezing: We don’t recommend freezing this salad, as the texture of the veggies may suffer.

Frequently Asked Questions

Got questions? Let’s answer some common ones!

  • Can I use frozen broccoli? Yes, but fresh broccoli gives the best crunch and flavor.
  • What can I substitute for pasta? Quinoa or chickpeas make great gluten-free alternatives.
  • Is this salad vegan-friendly? Yes, simply ensure your dressing is vegan, or make your own!
  • How can I make this salad spicier? Add diced jalapeños or a dash of red pepper flakes for a kick!
  • Can I add fruits? Absolutely! Apples or grapes can add a nice sweetness.
  • What dressing works best? A zesty Italian dressing is recommended, but feel free to explore others like ranch or balsamic.
  • Can I use whole wheat pasta? Yes, whole wheat pasta adds a nutty flavor and extra fiber.
  • How do I prevent browning in the salad? If using avocado or apples, sprinkle with lemon juice to slow down browning.

Nutrition Tips and Dietary Adaptations

This broccoli pasta salad can be adapted for various dietary needs:

  • Gluten-Free: Use gluten-free pasta or quinoa.
  • Low-Carb: Substitute pasta with spiralized zucchini or cauliflower.
  • Vegan: Ensure dressing is vegan; swap cheese for avocado or nutritional yeast.
  • Low-Fat: Use a light dressing or create your own with yogurt.

Equipment Recommendations

For the best results, here’s what you’ll need:

  • Large pot: For boiling pasta.
  • Colander: To drain pasta and rinse under cold water.
  • Large mixing bowl: For combining all ingredients.
  • Measuring cups and spoons: To ensure accurate ingredient amounts.

Serving Suggestions

This salad pairs beautifully with a variety of dishes:

  • Grilled meats: Perfect alongside grilled chicken or steak.
  • Wraps and sandwiches: A great side for any sandwich or wrap.
  • As a standalone meal: Enjoy it as a light lunch or dinner option on its own!

There you have it! A comprehensive guide to creating the best Broccoli Pasta Salad that’s not only delicious but also customizable to suit all tastes. Cooking doesn’t have to be stressful, and with this recipe, you can feel confident and excited to create something wonderful in your kitchen. Now, grab those ingredients and let’s get cooking!

Best Broccoli Pasta Salad

Prep Time 15 minutes
Cook Time 10 minutes
Total Time 25 minutes
Servings 4 servings
Calories 350
A vibrant and easy-to-make pasta salad packed with fresh vegetables and a flavorful Italian dressing.

Ingredients

Vegetables

  • 2 cups broccoli florets (Buy firm stalks with tight, dark green florets and no yellowing.)
  • 8 ounces pasta rotini or penne (Choose rotini for pockets that catch dressing or penne for meatier bites.)
  • 1 cup cherry tomatoes (Halved, choose firm, ripe tomatoes for the best texture.)
  • 0.5 cup red onion, diced
  • 0.5 cup bell pepper, diced
  • 0.5 cup shredded carrots
  • 1 cup Italian dressing (Use a quality bottled dressing or make your own.)
  • to taste salt and pepper (Season gradually after mixing.)

Instructions 

  • Cook the pasta according to package instructions, then drain and rinse with cold water.
  • Blanch broccoli florets in boiling water for 2 minutes, then cool in ice water.
  • In a large bowl, combine cooked pasta, broccoli, cherry tomatoes, red onion, bell pepper, and shredded carrots.
  • Pour Italian dressing over the mixture and toss to coat evenly.
  • Season with salt and pepper to taste, then serve chilled.

Notes

For extra flavor, add some grated Parmesan cheese before serving.
Calories: 350kcal
Cost: $12
Course: Salad
Cuisine: American
Keyword: broccoli

Welcome to your trusted cooking corner! Today, we’re diving into a delightful recipe that’s perfect for gatherings, picnics, or a quick snack: Caprese Skewers. With just a handful of fresh ingredients, you can create a dish that’s not only visually appealing but also bursting with flavor. Let’s explore how to make these tasty bites that embody the essence of a traditional Caprese salad—all on a stick!

Why You’ll Love This Recipe

These Caprese skewers are more than just a pretty appetizer; they come with numerous benefits that make them a must-try!

  • Easy to Assemble: With minimal prep time and no cooking required, these skewers are a breeze to put together, making them perfect for any occasion.
  • Fresh Ingredients: Utilizing fresh cherry tomatoes, mozzarella balls, and basil ensures vibrant flavors and a healthy snack option.
  • Versatile Serving Options: Whether it’s a summer barbecue or a cozy indoor gathering, Caprese skewers fit seamlessly into any menu.
  • Customizable Flavors: You can tweak the recipe to suit your taste, adding different herbs or drizzling with various sauces for a unique twist.
  • Eye-Catching Presentation: The colorful combination of red, white, and green makes these skewers a feast for the eyes, sure to impress your guests.

Ingredients You’ll Need

Gather these simple ingredients to create your Caprese skewers:

  • Extra Virgin Olive Oil: 2 tablespoons
  • Italian Seasoning: 1 teaspoon
  • Salt: to taste
  • Freshly Ground Pepper: to taste
  • Cherry Tomatoes: 24, ripe and juicy
  • Mini Mozzarella Cheese Balls: 24, or cheese balls of your choice
  • Fresh Basil Leaves: 24, for that aromatic touch
  • Balsamic Glaze: 2 tablespoons, for an additional flavor boost

Feel free to substitute ingredients based on availability or dietary preferences. For instance, if you can’t find mini mozzarella, regular mozzarella cut into bite-sized pieces works just as well!

How to Make Caprese Skewers

Ready to assemble? Follow these simple steps for perfect Caprese skewers:

  • Season the Oil: In a bowl, combine the extra virgin olive oil with Italian seasoning, salt, and freshly cracked pepper.
  • Marinate the Cheese: Add the mini mozzarella balls to the seasoned oil and gently toss to coat. For the best flavor, let them marinate for at least 30 minutes, or overnight in the fridge.
  • Assemble the Skewers: Thread a cherry tomato, a folded basil leaf, and a marinated mozzarella ball onto mini skewers. Repeat until all ingredients are used.
  • Drizzle and Serve: Arrange the skewers on a serving platter and drizzle with balsamic reduction and the seasoned olive oil for an extra flavor kick.

Expert Tips for Perfect Skewers

Side view of fresh Caprese skewers arranged on a plate with olive oil drizzle.

To elevate your Caprese skewers even further, consider these expert insights:

  • Choose Quality Ingredients: Fresh, high-quality ingredients make all the difference in flavor.
  • Experiment with Colors: Use a variety of heirloom tomatoes for a colorful presentation.
  • Adjust Seasonings: Feel free to add a pinch of red pepper flakes for a spicy kick!
  • Try Different Cheeses: Swap out mozzarella for burrata or feta for a unique flavor profile.
  • Make Ahead: Prep the skewers a few hours in advance. Just drizzle the balsamic glaze right before serving to keep them fresh.
  • Use Bamboo Skewers: They are sturdy and easy to handle. Soak them in water for 30 minutes before using to prevent burning.
  • Chill Before Serving: If you have time, refrigerate the assembled skewers for a refreshing bite.
  • Pair with Wine: These skewers pair beautifully with a light white wine or a refreshing sparkling water.

Common Mistakes and Troubleshooting

Even the best of us make mistakes! Here are some common pitfalls and how to avoid them:

  • Overcrowding the Skewers: Leave space between ingredients for easier eating and better flavor distribution.
  • Using Stale Ingredients: Always opt for fresh basil and ripe tomatoes to enhance flavor.
  • Not Marinating Long Enough: Allowing the mozzarella to marinate overnight really brings out the best flavors.
  • Skipping the Drizzle: The balsamic glaze is essential for balancing the flavors; don’t skip it!

Recipe Variations

If you want to switch things up, here are some delicious variations to try:

  • Caprese Salad Skewers: Add slices of avocado for creaminess and a different texture.
  • Prosciutto-Wrapped Skewers: Wrap prosciutto around the mozzarella balls for a savory twist.
  • Grilled Caprese Skewers: Grill the skewers for a smoky flavor—just be sure to soak wooden skewers beforehand.
  • Caprese Skewers with Pesto: Drizzle with pesto instead of balsamic glaze for a fresh herb flavor.

Storage and Make-Ahead Instructions

Want to prep these skewers in advance? Here’s how to do it right:

  • Storing Leftovers: Keep leftover skewers in an airtight container in the fridge for up to 2 days.
  • Make-Ahead: Assemble the skewers a few hours before serving; just wait to drizzle the balsamic glaze until serving time.
  • Freezing: Although not recommended, if you have leftover marinated mozzarella, you can freeze it in a sealed bag. Thaw in the fridge before use.

FAQs About Caprese Skewers

Here are some frequently asked questions to help you get the most out of your Caprese skewers:

  • Can I make the Caprese skewers ahead of time? Yes, you can assemble them a few hours in advance without compromising flavor.
  • What can I use instead of mozzarella? Burrata or feta cheese can be excellent substitutes.
  • How long do Caprese skewers last? Store leftovers in the fridge for up to 2 days.
  • Can I use store-bought balsamic glaze? Absolutely! It’s a convenient option if you’re short on time.
  • What type of tomatoes are best? Ripe cherry or grape tomatoes work best for sweetness and size.
  • Can I add other vegetables? Yes, feel free to add bell peppers or zucchini for extra color and flavor.
  • Do I need to marinate the mozzarella? While it enhances the flavor, you can skip this step if you’re short on time.
  • How do I serve these skewers? They’re great as a finger food appetizer or alongside a salad for a light meal.

Nutritional Tips and Dietary Adaptations

For those monitoring their diet, here are some tips:

  • Low-Carb Option: Replace cherry tomatoes with cucumber slices for a refreshing alternative.
  • Vegan Adaptation: Use vegan cheese or omit the cheese entirely and add marinated tofu instead.
  • Gluten-Free: This recipe is naturally gluten-free, making it suitable for those with gluten intolerance.
  • Healthier Drizzle: Use a low-sugar or homemade balsamic reduction to cut down on sugars.

Equipment Recommendations

To make your Caprese skewers effortlessly, here are a few handy tools:

  • Mini Skewers: Opt for 6-inch bamboo skewers for easy handling.
  • Mixing Bowl: A medium-sized bowl for marinating and tossing ingredients.
  • Measuring Spoons: For accurate seasoning measurements.
  • Sharp Knife: To slice any additional ingredients you may want to add.

Serving Suggestions

To enhance your Caprese skewers experience, consider these serving ideas:

  • Pair with a Fresh Salad: Serve alongside a light arugula salad with lemon vinaigrette.
  • Accompany with Dipping Sauces: Offer pesto, hummus, or a yogurt dip on the side.
  • Garnish with Fresh Herbs: Add extra basil or parsley as a garnish for an inviting look.
  • Set Up a Skewer Bar: Let guests assemble their own skewers with various ingredients for a fun twist.

Final Thoughts

Creating your own Caprese skewers is an enjoyable process that anyone can master, regardless of cooking experience. With fresh ingredients and a few easy steps, you can impress your guests and indulge in delicious flavors. So gather your ingredients, get creative with variations, and most importantly—have fun in the kitchen! Happy cooking!

Caprese Skewers Recipe

Prep Time 15 minutes
Total Time 15 minutes
Servings 24 pieces
Calories 150
A delightful and easy-to-make appetizer featuring fresh cherry tomatoes, mozzarella, basil, and a flavorful balsamic glaze.

Ingredients

Seasoning

  • 2 tablespoons Extra Virgin Olive Oil
  • 1 teaspoon Italian Seasoning
  • to taste Salt
  • to taste Freshly Ground Pepper

Main Ingredients

  • 24 pieces Cherry Tomatoes
  • 24 pieces Mini Mozzarella Cheese Balls
  • 24 leaves Fresh Basil Leaves
  • 2 tablespoons Balsamic Glaze

Instructions 

  • Season olive oil with Italian seasoning, salt, and pepper in a bowl.
  • Add mozzarella balls to the seasoned oil and toss to coat. Marinate for at least 30 minutes or overnight.
  • Thread a cherry tomato, basil leaf, and mozzarella onto mini skewers.
  • Arrange skewers on a platter and drizzle with balsamic glaze.
  • Optionally, drizzle seasoned olive oil over the tomatoes before serving.

Notes

For best flavor, let the mozzarella marinate overnight in the fridge.
Calories: 150kcal
Cost: $15
Course: Appetizer
Cuisine: Italian
Keyword: Basil, Mozzarella, Tomato

Discover the Joy of Homemade Berry Frozen Yogurt

Are you ready to beat the heat and indulge in a creamy, delicious treat that you can whip up in no time? This effortless homemade berry frozen yogurt is not just a dessert; it’s a celebration of flavors and a great way to enjoy fresh or frozen berries any time of the year. In this guide, we’ll walk you through every step of the process, ensuring you have the confidence to make this delightful treat at home. Let’s get started!

Why You’ll Love This Recipe

  • Quick and easy: You can create this creamy frozen yogurt in under 30 minutes, making it a perfect last-minute dessert.
  • Customizable: This recipe allows you to use your favorite berries, whether they’re fresh from the farmer’s market or frozen from your pantry.
  • No special equipment needed: While an ice cream maker is helpful, it’s not necessary! You can make this recipe without any fancy gadgets.
  • Healthier alternative: Packed with natural ingredients, this frozen yogurt is a lighter choice compared to store-bought ice creams that are laden with sugars and preservatives.
  • Kid-friendly and fun: Involve your kids in the process! They’ll love helping mash the berries and churning the yogurt.

Ingredients You’ll Need

Let’s take a look at the ingredients that will create this delightful frozen yogurt:

  • 3 cups whole plain yogurt: Cold from the fridge for creaminess.
  • ½ teaspoon vanilla extract: Adds a lovely aromatic flavor.
  • ½ cup heavy whipping cream: At least 30% fat for that rich, creamy texture.
  • 1 tablespoon corn syrup: Helps prevent ice crystals, giving you a smooth finish.
  • ¾ cup fine fruit sugar: For a balanced sweetness that complements the tartness of the berries.
  • 1 cup berries (fresh or frozen): Coarsely crushed; if using frozen, there’s no need to thaw.

Feel free to substitute with low-fat yogurt or alternative sweeteners like honey or maple syrup to suit your dietary preferences.

How to Make Your Berry Frozen Yogurt

Side view of delicious berry frozen yogurt topped with crushed fruit.

Now that we have our ingredients ready, let’s dive into the simple steps to make this delightful treat:

  1. In a large bowl, whisk together the yogurt, vanilla, cream, corn syrup, and fine sugar for about 2 minutes until well combined.
  2. Gently fold in the coarsely crushed berries to ensure they’re evenly distributed.
  3. Pour the mixture into your ice cream maker and churn until the texture is thick and creamy, resembling soft-serve ice cream.
  4. If you prefer a firmer consistency, transfer the mixture to a container with a lid and freeze for 3 to 6 hours or overnight.
  5. Before serving, let it sit out at room temperature for 10-15 minutes to soften slightly for easier scooping.

Expert Tips for Perfect Frozen Yogurt

  • Chill your ingredients: Ensure all your ingredients are cold before mixing for the best texture.
  • Don’t over-churn: Keep an eye on the consistency; over-churning can lead to a grainy texture.
  • Use quality berries: Fresh or high-quality frozen berries will enhance the flavor significantly.
  • Experiment with flavors: Try adding a dash of lemon juice or zest for a refreshing twist.
  • Consistent stirring: If you’re making it without an ice cream maker, stir every 30 minutes to prevent ice crystals from forming.
  • Sweetness adjustment: Taste the mixture before freezing and adjust the sweetness as necessary.
  • Storage: Store in an airtight container in the freezer to maintain freshness.
  • Serving suggestions: Top with fresh berries, granola, or a drizzle of chocolate for added flair.

Common Mistakes to Avoid

Even the best chefs can encounter hiccups. Here are some common mistakes to watch out for:

  • Using warm ingredients: Always start with cold ingredients to ensure a creamy end product.
  • Not mixing enough: Ensure the yogurt and cream are fully incorporated to avoid lumps.
  • Skipping the chilling step: Letting your mixture chill before churning is essential for the right consistency.

Delicious Variations to Try

Feeling adventurous? Here are some creative variations to elevate your frozen yogurt experience:

  • Chocolate Berry Frozen Yogurt: Mix in cocoa powder or melted chocolate for a rich twist.
  • Minty Berry Frozen Yogurt: Add fresh mint leaves for an invigorating flavor.
  • Peanut Butter Swirl: Fold in natural peanut butter for a nutty, creamy variation.
  • Coconut Berry Frozen Yogurt: Use coconut yogurt and add shredded coconut for a tropical vibe.

Storage and Make-Ahead Instructions

To keep your homemade berry frozen yogurt fresh:

  • Freezing: Store in an airtight container in the freezer. Properly stored, it can last up to 2 weeks.
  • Thawing: Always let it sit out at room temperature for 10-15 minutes before scooping to ease serving.
  • Batch Prep: Make a double batch and store one for later to always have a delightful treat ready.

Frequently Asked Questions

Here are some common questions and answers about making your berry frozen yogurt:

  • Can I use non-dairy yogurt? Yes! Non-dairy yogurt works great and can be just as creamy.
  • What types of berries can I use? Any berries work well—strawberries, blueberries, raspberries, or mixed berries.
  • Do I need an ice cream maker? No, but it helps! You can make it without one, just ensure to stir it every 30 minutes as it freezes.
  • How can I make it sweeter? Adjust the sugar or try adding a bit of honey or agave syrup.
  • Can I add other mix-ins? Absolutely! Chunks of chocolate, nuts, or cookie pieces can add fun textures.
  • Is it safe to eat after being frozen? Yes, as long as it’s stored properly, it is safe to eat.
  • What if it’s too hard to scoop? Let it sit at room temperature for a few minutes before scooping.
  • Can I make it without sugar? Yes, you can use natural sweeteners or fruits to sweeten your yogurt.

Nutritional Tips and Dietary Adaptations

To cater to different dietary needs:

  • Low-calorie option: Use low-fat yogurt and reduce the amount of sugar.
  • Vegan option: Replace yogurt and cream with coconut or almond-based alternatives.
  • Protein boost: Add protein powder to the yogurt mixture for an extra health kick.

Equipment Recommendations

For the best results, consider these tools:

  • Ice cream maker: A great investment if you plan to make frozen treats regularly.
  • Food processor: Perfect for blending ingredients if you don’t have an ice cream maker.
  • Mixing bowls: Have a set of various sizes for easy preparation and mixing.

Serving Suggestions

To enhance your dessert experience:

  • Top it off: Serve with fresh fruit, nuts, or a drizzle of honey or chocolate.
  • Pair with desserts: This frozen yogurt pairs beautifully with brownies or pie.
  • Make it a parfait: Layer it with granola and fruit for a delightful breakfast or snack.

Now that you’re equipped with all the tips, tricks, and insights, it’s time to roll up your sleeves and get cooking! This homemade berry frozen yogurt is not just a recipe; it’s a way to enjoy fresh flavors, create lasting memories, and indulge in a refreshing treat any time of the year. Let the fun begin!

Homemade Berry Frozen Yogurt

Prep Time 10 minutes
Cook Time 20 minutes
Total Time 30 minutes
Servings 4 cups
Calories 250
Enjoy a creamy, refreshing homemade berry frozen yogurt made with fresh or frozen berries and simple ingredients.

Ingredients

Dairy

  • 3 cups whole plain yogurt (cold from the fridge)
  • 0.5 teaspoon vanilla
  • 0.5 cup heavy whole whipping cream (at least 30% fat, cold from the fridge)
  • 1 tablespoon corn syrup
  • 0.75 cup fine fruit sugar

Berries

  • 1 cup berries (fresh or frozen, do not thaw if frozen, coarsely crushed)

Instructions 

  • Whisk together yogurt, vanilla, cream, corn syrup, and sugar for about 2 minutes.
  • Stir in the berries.
  • Pour the mixture into an ice cream machine and churn until thick like soft ice cream.
  • Serve immediately or transfer to a container and freeze until firm, about 3-6 hours.
  • Let sit 10-15 minutes before scooping and serving. Enjoy!

Notes

Read ice cream maker instructions before use.
Calories: 250kcal
Cost: $10
Course: Dessert
Cuisine: American
Keyword: Berries, frozen yogurt

Discover the Joy of Cherry Pie Greek Yogurt Parfaits

Welcome to the delightful world of Cherry Pie Greek Yogurt Parfaits! If you’re looking for a quick, delicious, and visually stunning treat, you’ve come to the right place. This recipe combines the creamy goodness of Greek yogurt with the sweet and tart flavors of cherry pie filling, topped with crunchy granola for that perfect textural contrast. Not only is this treat indulgent, but it’s also a healthy option that can be enjoyed at any time of the day. Whether for breakfast, a snack, or a dessert, these parfaits are sure to brighten your day!

Why You’ll Love This Recipe

Here are some specific benefits that make this Cherry Pie Greek Yogurt Parfait a must-try:

  • Quick and Easy: This recipe takes just minutes to prepare, making it perfect for busy mornings or last-minute gatherings.
  • Healthy Ingredients: With Greek yogurt as a base, you’re getting protein and probiotics, which are great for your gut health.
  • Customizable: Easily swap out the cherry pie filling for your favorite fruit or yogurt flavor, creating endless variations!
  • Guilt-Free Indulgence: Satisfy your sweet tooth without the guilt—this parfait is a lower-calorie alternative to traditional desserts.
  • Visually Stunning: Layers of vibrant cherry filling and creamy yogurt create a beautiful presentation, perfect for impressing guests.

Ingredients Breakdown

Let’s dive into the ingredients you’ll need for this delicious parfait:

  • Cherry Pie Filling: ½ cup. You can use store-bought or homemade for a fresher taste. If you prefer, swap it with other fruit fillings like blueberry or strawberry.
  • Vanilla Greek Yogurt: 1 cup. Greek yogurt adds a creamy texture and a protein boost. For a dairy-free option, use coconut or almond yogurt.
  • Crunchy Granola: 2 Tbsp. This adds a satisfying crunch. Choose your favorite granola or even make your own for a healthier option.

Pro Tips for Perfection

Side view of a dessert glass filled with vanilla Greek yogurt, cherry pie filling, and crunchy granola.

Follow these expert tips to ensure your parfaits turn out perfectly:

  • Layering Technique: For the best presentation, layer your ingredients carefully. Start with pie filling, then yogurt, followed by granola, and repeat.
  • Chill Before Serving: Let the parfaits chill in the refrigerator for at least 30 minutes. This allows flavors to meld and enhances the overall taste.
  • Granola Timing: Add the granola just before serving to keep it crunchy and avoid sogginess.
  • Experiment with Yogurt Flavors: While vanilla is classic, try using flavored yogurts like honey or even a cherry yogurt for an extra kick!
  • Presentation Matters: Use clear cups or jars to showcase the beautiful layers—this makes the parfaits visually appealing!
  • Sweetness Level: Taste your cherry pie filling before adding; if it’s too sweet, balance it with a plain yogurt.
  • Make Ahead: You can prepare the yogurt and pie filling a day in advance. Just layer them with granola right before serving.
  • Storage Tips: Store any leftovers in an airtight container in the refrigerator for up to two days.

Avoid Common Mistakes

Here are some common pitfalls to avoid when making your Cherry Pie Greek Yogurt Parfaits:

  • Overmixing Yogurt: Don’t overmix the yogurt; it should remain thick and creamy for the best texture.
  • Using Watery Fillings: If your cherry pie filling is too runny, it can make the parfait soggy. Consider thickening it or using a fruit preserve instead.
  • Skipping the Chill: Don’t skip the chilling step! This is crucial for flavor development.
  • Incorrect Layering: Layering too much of one ingredient can lead to an unbalanced taste. Aim for equal parts in each layer.

Delicious Variations

Feeling adventurous? Here are some delightful variations you can try:

  • Berry Bliss Parfait: Swap cherry pie filling with mixed berries for a refreshing twist.
  • Chocolate Cherry Delight: Add a layer of chocolate pudding between the yogurt and cherry filling for a decadent dessert.
  • Nutty Banana Parfait: Use banana slices and almond butter instead of cherry filling for a different flavor profile.
  • Coconut Paradise: Incorporate shredded coconut into the yogurt and top with tropical fruits for an island-inspired treat.

Storage and Make-Ahead Instructions

Planning ahead? Here’s how to store and prepare your parfaits:

  • Make Ahead: Prepare the yogurt and pie filling up to 24 hours in advance. Assemble just before serving to maintain texture.
  • Storage: Keep any assembled parfaits in the refrigerator and consume within two days for optimal freshness.

Frequently Asked Questions (FAQs)

Got questions? We’ve got answers!

  • Can I use other types of yogurt? Absolutely! Feel free to substitute with dairy-free yogurt or flavored varieties.
  • Is this recipe suitable for kids? Yes! This parfait is a fun and healthy snack that kids will love.
  • How long do leftovers last? Leftovers can be stored in the fridge for up to two days. Just remember to add granola before serving!
  • Can I freeze these parfaits? Freezing is not recommended as the texture of yogurt and granola may change.
  • What can I use instead of granola? Try crushed nuts, seeds, or even crumbled cookies for a different crunch.
  • Can I make this a vegan recipe? Yes! Use plant-based yogurt and ensure your granola is vegan-friendly.
  • What other toppings can I add? Consider adding fresh fruits, chocolate chips, or a drizzle of honey for added flavor.
  • How do I make my own cherry pie filling? Combine fresh or frozen cherries with sugar, cornstarch, and lemon juice, and cook until thickened.

Nutritional Tips and Dietary Adaptations

For those watching their diet, here are some tips to make this recipe work for you:

  • Low-Calorie Options: Use low-fat Greek yogurt and light granola to reduce calorie intake.
  • Protein Boost: Add a scoop of protein powder to the yogurt for an extra protein kick.
  • Healthy Fats: Incorporate nuts or seeds as toppings for healthy fats and additional nutrients.

Equipment Recommendations

To make your parfait-making process smooth, here’s what you’ll need:

  • Clear Glasses or Jars: Ideal for showcasing your layers.
  • Measuring Cups: For accurate ingredient measurements.
  • Spatula: Helps with layering and spreading the yogurt evenly.
  • Mixing Bowl: For mixing any additional ingredients or flavors into the yogurt.

Serving Suggestions

Wondering how to present your parfait? Here are some serving suggestions:

  • Brunch Party Favorite: Serve these parfaits at brunch gatherings for a colorful, show-stopping dish.
  • Make It a Snack Bar: Set up a parfait bar with various toppings and fillings for guests to customize their own.
  • Perfect Picnic Treat: Pack these parfaits in individual jars for a portable and mess-free dessert option.

Conclusion

Now that you have the complete guide to making Cherry Pie Greek Yogurt Parfaits, it’s time to roll up your sleeves and get started! This recipe is not just about enjoying a delicious dessert; it’s about creating joyful moments in the kitchen. Remember, cooking is a journey—embrace the process and have fun experimenting with flavors. Whether you’re whipping these up for yourself or sharing with loved ones, you’re sure to create smiles with each delightful bite. Happy cooking!

Cherry Pie Greek Yogurt Parfait

Prep Time 5 minutes
Total Time 5 minutes
Servings 1 serving
Calories 250
A delicious and easy-to-make parfait combining cherry pie filling, creamy Greek yogurt, and crunchy granola for a delightful treat.

Ingredients

Layered ingredients

  • 0.5 cup Cherry Pie Filling
  • 1 cup Vanilla Greek Yogurt
  • 2 Tbsp. Crunchy Granola

Instructions 

  • Layer ¼ cup cherry pie filling in a jar or dish.
  • Add ½ cup Greek yogurt on top.
  • Top with 1 tbsp. granola.
  • Serve and enjoy!

Notes

Use fresh or canned cherry pie filling for best flavor.
Calories: 250kcal
Cost: $5
Course: Dessert
Keyword: Cherry, Parfait, Yogurt

Discover the Joy of Making Iced Mocha Oat Latte at Home

If you’re searching for a refreshing drink that combines rich coffee flavor with creamy oat milk, look no further than the Iced Mocha Oat Latte. This delightful beverage is not only easy to make, but it also offers a perfect balance of sweetness and caffeine. In this comprehensive guide, we’ll walk you through every step of crafting this delicious drink, ensuring that even if you’re a busy woman on the go, you can enjoy a café-quality treat from the comfort of your home.

Why You’ll Love This Iced Mocha Oat Latte

  • Quick and Easy: This recipe requires just a few simple ingredients and can be made in under 10 minutes, making it perfect for busy mornings.
  • Customizable: Adjust the sweetness, substitute ingredients, or add flavorings to make it your own.
  • Nutritious Ingredients: Oat milk is a great dairy alternative that provides additional fiber and is often fortified with vitamins.
  • Perfect Pick-Me-Up: The combination of espresso and cocoa offers an energizing boost without the jitters associated with traditional coffee.
  • Refreshing and Satisfying: This drink is not just a beverage; it’s a treat that can satisfy your sweet tooth and keep you cool on warm days.

Ingredients You’ll Need

Before we dive into the preparation, let’s gather all the ingredients you’ll need. Here’s a detailed breakdown:

  • Oat Milk: The creamy base of your latte. You can use store-bought or homemade oat milk.
  • Espresso: Brewed coffee concentrate that gives your latte its rich flavor. If you don’t have an espresso machine, a strong coffee works too.
  • Cocoa Powder: Adds a chocolatey depth. Use unsweetened for more control over the sweetness.
  • Sugar or Sweetener: Customize your latte’s sweetness to your liking. Options include regular sugar, honey, or a sugar substitute.
  • Ice Cubes: Essential for serving your latte cold.
  • Whipped Cream (optional): For a luxurious finish.
  • Chocolate Shavings (optional): To elevate the presentation and flavor.

How to Make Iced Mocha Oat Latte

Close-up view of an Iced Mocha Oat Latte featuring layers of cocoa and oat milk, topped with cream.

Now that you have your ingredients ready, let’s get started with the preparation. Follow these simple steps:

Step 1 – Brew the Espresso

Brew a shot of espresso (or strong coffee) and let it cool slightly. This will prevent the ice from melting too quickly when you pour it over.

Step 2 – Make the Cocoa Mixture

In a small bowl, mix cocoa powder and sugar with a tablespoon of hot water to form a smooth paste. This ensures that the cocoa dissolves properly without clumping.

Step 3 – Combine Ingredients

Once your espresso has cooled, add it to the cocoa mixture and stir well to combine. This creates a rich chocolatey coffee base.

Step 4 – Assemble the Latte

Fill a glass with ice cubes, then pour oat milk over the ice, followed by the espresso-cocoa mixture. Stir gently to combine all ingredients.

Step 5 – Optional Toppings

If you’re feeling indulgent, top your latte with whipped cream and sprinkle chocolate shavings on top for that extra flair.

Pro Tips for Perfect Results

  • Chill Your Glass: For an extra frosty experience, chill your glass in the freezer for a few minutes before serving.
  • Use Fresh Ingredients: Freshly brewed espresso and quality cocoa powder will enhance the flavor of your latte.
  • Experiment with Sweetness: Start with less sugar and adjust to taste. Remember, you can always add more!
  • Try Different Oat Milk Brands: Different brands have varying flavors and creaminess, so find one you love.
  • Make a Coffee Concentrate: If you’re short on time, brew a strong coffee concentrate ahead of time for faster prep.
  • Adjust for Caffeine Sensitivity: If you prefer a lighter drink, use less espresso or substitute with decaf.
  • Add Flavorings: Consider adding vanilla or caramel syrup for a flavored twist.
  • Make it Vegan: Ensure your whipped cream is dairy-free if you’re following a vegan diet.

Common Mistakes and Troubleshooting

Even the best of us can make mistakes in the kitchen. Here are some common pitfalls and how to avoid them:

  • Too Sweet: If your latte turns out too sweet, add a splash of oat milk to dilute the sweetness.
  • Clumpy Cocoa: Ensure that you mix your cocoa powder with hot water thoroughly before combining it with espresso.
  • Watery Latte: If your drink becomes too watered down, use less ice or chill your espresso before mixing.
  • Weak Coffee Flavor: If you find your latte lacks coffee flavor, increase the espresso or decrease the oat milk.

Delicious Variations of Iced Mocha Oat Latte

Feel free to get creative with your Iced Mocha Oat Latte! Here are a few variations to try:

  • Mocha Mint: Add a few drops of peppermint extract for a refreshing twist.
  • Spicy Mocha: Incorporate a pinch of cinnamon or cayenne pepper for a kick.
  • Caramel Mocha: Drizzle caramel sauce over your whipped cream for a sweet finish.
  • Nutty Mocha: Blend in a tablespoon of almond butter or hazelnut spread for a nutty flavor.

Storage and Make-Ahead Instructions

Want to prepare ahead of time? Here’s how to store your ingredients:

  • Oat Milk: Store in the refrigerator for up to 5 days.
  • Espresso: Brew and refrigerate for up to 3 days. Just reheat before using.
  • Cocoa Mixture: Prepare your cocoa paste and store in an airtight container in the fridge for up to a week.
  • Assemble Fresh: It’s best to assemble your latte right before serving for optimal freshness.

FAQs About Iced Mocha Oat Latte

  • Can I use instant coffee instead of espresso? Yes, instant coffee can work in a pinch. Just mix it with hot water according to the package instructions.
  • Is iced mocha oat latte healthy? It can be a healthier option depending on your sweeteners and portion sizes. Oat milk provides nutrients and fiber.
  • Can I make it sugar-free? Absolutely! Use a sugar substitute or leave out the sweetener entirely.
  • What’s the best way to sweeten my latte? Natural sweeteners like honey, agave, or stevia are great options.
  • Can I use flavored oat milk? Yes! Flavored oat milk can add an extra layer of taste.
  • How can I make it dairy-free? Oat milk is naturally dairy-free, making this recipe suitable for those with lactose intolerance.
  • What’s the best ice to use? Regular ice cubes work fine, or you can freeze oat milk into ice cubes for extra creaminess.
  • How can I make a larger batch? Simply multiply the ingredients while maintaining the same ratios for a larger crowd.

Nutrition Tips and Dietary Adaptations

If you’re mindful of your nutrition, here are some tips:

  • Low-Calorie Options: Use unsweetened oat milk and a sugar substitute to reduce calories.
  • Protein Boost: Add a scoop of protein powder to your latte for an extra nutritional punch.
  • Fiber-Rich: Oat milk contains fiber, which supports digestive health.
  • Consider Allergies: Always check labels for allergens in packaged oat milk or syrups.

Essential Equipment Needed

To make your Iced Mocha Oat Latte, you’ll need:

  • Espresso Machine or Coffee Maker: For brewing your coffee.
  • Blender (optional): If you want to blend your ingredients for a frothy texture.
  • Measuring Spoons and Cups: For accurate ingredient measurements.
  • Glass: To serve your latte.

Serving Suggestions

This delightful drink pairs well with various snacks and meals:

  • Breakfast: Enjoy with a slice of banana bread or a muffin for a perfect morning combo.
  • Afternoon Snack: Pair it with a light salad or a granola bar for an energizing pick-me-up.
  • Dessert: Complement your latte with a piece of dark chocolate or a cookie for a sweet treat.

Conclusion

Making an Iced Mocha Oat Latte at home can be a delightful experience that transforms your coffee routine. With just a few simple steps, you can enjoy a refreshing drink that’s tailored to your tastes. Whether you’re indulging in a quiet moment or energizing your busy day, this latte is sure to become a favorite. Remember, cooking is about enjoying the process, so have fun and don’t hesitate to experiment with flavors. Cheers to your new favorite homemade beverage!

Iced Mocha Oat Latte

Prep Time 5 minutes
Cook Time 5 minutes
Total Time 10 minutes
Servings 1 cup
Calories 180
A refreshing and creamy iced latte with chocolate and oat milk, perfect for a quick treat.

Ingredients

Dairy & Non-Dairy Milk

  • 1 cup Oat milk
  • 1 shot Espresso (Brewed and cooled)
  • 1 tablespoon Cocoa powder
  • 1 teaspoon Sugar or sweetener
  • 1 cup Ice cubes
  • Optional Whipped cream (For topping)
  • Optional Chocolate shavings (For garnish)

Instructions 

  • Brew a shot of espresso and let it cool slightly.
  • Mix cocoa powder and sugar with hot water to form a smooth paste.
  • Add the cooled espresso to the cocoa mixture and stir well.
  • Fill a glass with ice cubes.
  • Pour oat milk and espresso mixture over the ice, then stir gently.
  • Optional: Top with whipped cream and chocolate shavings.

Notes

Adjust sweetness to taste and enjoy immediately.
Calories: 180kcal
Cost: $12
Course: Beverage
Cuisine: Fusion
Keyword: iced latte

Beat the Heat with These Delicious Mango Popsicles!

Welcome to your new favorite summer treat! These Mango Popsicles are not just refreshing but also incredibly simple to make. With just a few wholesome ingredients, you can create a delightful dessert that’s perfect for cooling off on a hot day. Whether you’re entertaining guests, enjoying a family treat, or just indulging yourself, this recipe is sure to impress. Let’s dive into why you’ll love these mango popsicles and how to whip them up effortlessly!

Why You’ll Love This Recipe

  • Quick and Easy: With only three ingredients, this recipe takes just a few minutes to prepare. No cooking is required, making it perfect even for the busiest days.
  • Healthy Ingredients: Made with fresh or frozen mango, creamy yogurt, and a touch of maple syrup, these popsicles are a guilt-free indulgence your whole family will enjoy.
  • Customizable Flavors: You can easily adjust the sweetness or add different fruits to create your own unique popsicle combinations.
  • Kid-Friendly: Children love the bright, tropical flavor, and you can feel good about serving them a healthy treat.
  • Perfect for Summer Parties: These popsicles are a hit at barbecues, birthday parties, or any gathering, adding a splash of color and flavor to your dessert table.

Ingredients Breakdown

To make these delicious mango popsicles, you’ll need the following ingredients:

  • 3 cups mango chunks: Use fresh mango for the best flavor, but if it’s not in season, frozen mango works beautifully—just be sure to thaw it first.
  • 1 ⅓ cup vanilla yogurt or skyr: This adds a creaminess that balances the sweetness of the mango. Greek yogurt is a great option for added protein.
  • 2 tbsp maple syrup or honey: Sweeten to your taste! You can adjust this based on how sweet your mango is.

How to Make Mango Popsicles

Side view of a mango popsicle showcasing its juicy, colorful layers.

Let’s get started with the steps to create your very own mango popsicles:

  1. Blend: In a high-speed blender, combine the mango chunks, yogurt, and maple syrup. Blend until smooth and creamy.
  2. Pour: Pour the mixture evenly into popsicle molds. Tap the molds on the kitchen counter to release any air pockets, then insert the popsicle sticks.
  3. Freeze: Place the molds in the freezer and let them freeze overnight or for at least 5 hours until solid.

Pro Tips for Perfect Popsicles

  • Use Ripe Mango: For the best flavor, use ripe, sweet mangoes. They will provide a delightful sweetness and rich taste.
  • Layer Flavors: Consider adding layers with other fruits like strawberries or blueberries for a stunning visual effect.
  • Experiment with Yogurt: Greek yogurt adds protein; however, any flavor of yogurt can be used to match your taste preferences.
  • Prevent Ice Crystals: To avoid icy popsicles, make sure the mixture is well blended and smooth before pouring it into molds.
  • Add Herbs: For a unique twist, try adding fresh mint or basil to the blender for an herby flavor.
  • Use Coconut Milk: Swap out yogurt for coconut milk for a dairy-free version that’s just as creamy and delicious.
  • Check Consistency: If the mixture seems too thick, add a splash of water or coconut milk to help it blend.
  • Run Under Warm Water: If your popsicles are hard to remove from the molds, run them under warm water for a few seconds to loosen them up.

Common Mistakes to Avoid

Here are some common pitfalls and how to troubleshoot:

  • Not Thawing Frozen Mango: If using frozen mango, always allow it to thaw slightly before blending to achieve a smooth texture.
  • Over-pouring: Avoid overfilling molds, as this can cause spills when inserting sticks.
  • Freezing Time: Don’t rush the freezing process! Ensure they freeze for at least 5 hours to achieve the right consistency.

Delicious Variations

Get creative! Here are a few variations to try:

  • Coconut Mango Popsicles: Replace yogurt with coconut milk for a tropical twist.
  • Mango Berry Swirl: Layer mango puree with a berry blend for a colorful treat.
  • Spicy Mango Popsicles: Add a pinch of cayenne pepper for a surprising kick that pairs well with the sweetness.
  • Green Smoothie Pops: Blend in a handful of spinach or kale for added nutrients without compromising the flavor.

Storage and Make-Ahead Instructions

Store your mango popsicles in the freezer for up to 2 months. To keep them fresh:

  • Wrap Individually: Consider wrapping each popsicle in plastic wrap or placing them in an airtight container to prevent freezer burn.
  • Label & Date: Always label your storage container with the date to keep track of freshness.

FAQs About Mango Popsicles

Got questions? We’ve got answers! Here are some frequently asked questions:

  • Can I use frozen mango for these mango popsicles? Absolutely! Just ensure to thaw it first for the best texture.
  • How long do these popsicles take to freeze? They generally need about 5 hours in the freezer, but overnight is best.
  • Are homemade mango popsicles healthy? Yes! They are made with natural ingredients and can be customized for dietary needs.
  • Can I add other fruits to the popsicles? Of course! Feel free to experiment with whatever fruits you love.
  • How do I prevent ice crystals from forming? Make sure to blend the mixture well and freeze completely.
  • What’s the best way to remove popsicles from the mold? Run warm water over the outside of the mold for a few seconds to loosen them.
  • Can I use flavored yogurt? Yes! Flavored yogurt can add an extra layer of taste to your popsicles.
  • How can I make these popsicles dairy-free? Simply use coconut milk instead of yogurt for a creamy dairy-free treat.

Nutritional Tips and Dietary Adaptations

These mango popsicles are not only delicious but also nutritious:

  • High in Vitamins: Mangoes are rich in vitamins A, C, and E, which are essential for a healthy immune system.
  • Protein Boost: By using yogurt or skyr, you’re adding a good amount of protein to your popsicles.
  • Low in Calories: This recipe is a low-calorie dessert option compared to many store-bought alternatives, making it a guilt-free treat!

Equipment Recommendations

To make your mango popsicles, you’ll need:

  • Popsicle Molds: Choose silicone molds for easy removal, or classic plastic molds if you prefer.
  • High-Speed Blender: A powerful blender will ensure a smooth and creamy texture.
  • Measuring Cups: Accurate measurements help create the perfect balance of flavors.

Serving Suggestions

Serve your mango popsicles on their own or get creative!

  • Garnish: Dip in melted dark chocolate and sprinkle with nuts for a gourmet treat.
  • Pair with Fresh Fruit: Serve alongside fresh berries or sliced fruit for a colorful plate.
  • Make a Mango Float: Serve popsicles in a glass of sparkling water or soda for a refreshing float.

Conclusion

Making these mango popsicles is not just about enjoying a delicious treat; it’s about creating memories and bringing joy to your family and friends. With a little creativity and a few healthy ingredients, you can transform simple mango into a delightful dessert that everyone will love. So grab your ingredients, and get ready to chill out with these easy and delicious mango popsicles!

Mango Popsicles

Prep Time 10 minutes
Total Time 10 minutes
Servings 9 popsicles
Calories 150
Enjoy a refreshing and healthy treat with these homemade mango popsicles, perfect for hot days or a quick snack.

Ingredients

Fruits

  • 3 cups mango chunks (fresh or frozen, thawed)
  • 1 ⅓ cups vanilla yogurt or skyr
  • 2 tbsp maple syrup or honey (to taste)

Instructions 

  • Add all ingredients to a high-speed blender and blend until smooth.
  • Pour the mixture evenly into popsicle molds and tap to release air bubbles.
  • Add popsicle sticks and freeze overnight or at least 5 hours.

Notes

You can adjust the sweetness by adding more or less honey or maple syrup.
Calories: 150kcal
Cost: $10
Course: Dessert
Keyword: Mango

Revitalize Your Mornings with a Refreshing Mango Peach Smoothie Bowl

Are you looking for a quick, nutritious breakfast that bursts with flavor and vibrancy? Look no further! This Mango Peach Smoothie Bowl not only tantalizes your taste buds but also fuels your day with essential nutrients. Made with frozen fruits and creamy coconut milk, this smoothie bowl is perfect for busy mornings or a delightful afternoon snack. Let’s dive into why you’ll love this recipe and how you can make it your own.

Why You’ll Love This Recipe

  • Quick and Easy: You can whip this bowl up in just a few minutes, making it an ideal choice for hectic mornings.
  • Nutrient-Packed: Loaded with vitamins and minerals, this smoothie bowl is a powerhouse of nutrition from fruits and coconut milk.
  • Customizable: Tailor it to your tastes by swapping in your favorite fruits and toppings.
  • Perfect for Meal Prep: This recipe can be prepared ahead of time, making breakfast effortless on busy days.
  • Deliciously Creamy: Achieve a soft serve ice cream consistency that is satisfying and indulgent without the guilt.

Ingredients for Your Mango Peach Smoothie Bowl

Here’s what you’ll need to create this delightful treat. Don’t worry if you don’t have everything on hand; I’ll provide some substitutions as well!

  • 1 Banana (quarter and freeze): This fruit adds natural sweetness and creaminess to your smoothie bowl.
  • 1 ½ cups Frozen Mango and Peaches: The star ingredients that create a tropical flavor explosion. You can use fresh fruit if you prefer, but frozen gives a thicker texture.
  • ¼ cup Coconut Milk: This provides a rich creaminess and subtle coconut flavor. If you’re not a fan, try almond milk or yogurt instead.
  • 1 tablespoon Maple Syrup: A natural sweetener that enhances the fruit’s flavor. Adjust to taste!
  • 1 teaspoon Vanilla Extract: This adds depth to your smoothie bowl. You can use vanilla bean paste for a more intense flavor.

How to Make This Mango Peach Smoothie Bowl

Side view of a delicious mango peach smoothie bowl with a creamy texture and colorful toppings.

Now that you have your ingredients, let’s get blending! Follow these simple steps:

  • Step 1: In a high-speed blender, add your frozen banana, frozen mango and peaches, coconut milk, maple syrup, and vanilla extract.
  • Step 2: Blend on high for about 3 minutes. Remember to stop occasionally to scrape down the sides of the blender.
  • Step 3: Blend until you achieve a soft serve ice cream consistency. This is key for that creamy texture!
  • Step 4: Pour the smoothie into a bowl and prepare to add your favorite toppings.

Best Toppings for Your Smoothie Bowl

Don’t forget the toppings! Here are some delicious ideas to enhance your smoothie bowl:

  • Sliced Fresh Fruit: Bananas, kiwis, strawberries, or more mango and peaches add a fresh crunch.
  • Nuts and Seeds: Almonds, walnuts, chia seeds, or pumpkin seeds provide healthy fats and protein.
  • Nut Butter: Drizzle almond or peanut butter on top for added creaminess and flavor.
  • Cacao Nibs: For a chocolatey crunch, sprinkle cacao nibs over your bowl.
  • Coconut Flakes: Toasted or plain, coconut flakes give a tropical twist.
  • Granola: Adds crunch and can be a great source of fiber.

Pro Tips for the Perfect Smoothie Bowl

Here are some expert insights to elevate your smoothie bowl game:

  • Use Frozen Fruits: For the best texture, always use frozen fruits. This ensures a thick and creamy blend.
  • Don’t Over Blend: Blend just until smooth; over-blending can make the mixture too thin.
  • Prep Ahead: Prepare your fruits the night before and store them in the freezer for a quick breakfast.
  • Experiment with Flavors: Try adding spinach or kale for a green boost without altering the taste much.
  • Mix and Match: Feel free to substitute with other fruits you love—berries, bananas, or even avocados work well.
  • Make It a Dessert: Top with whipped cream or yogurt for a delightful dessert version!
  • Check Consistency: If your smoothie is too thick, add a splash more coconut milk to thin it out.
  • Garnish Creatively: Arrange your toppings in a visually appealing way for an Instagram-worthy bowl.

Common Mistakes and Troubleshooting

Even the best cooks make mistakes! Here are some common pitfalls and how to avoid them:

  • Too Thin: If your smoothie is too thin, try adding more frozen fruit or ice cubes to thicken it up.
  • Too Thick: If it’s hard to blend, add a bit more liquid (coconut milk or water) to help it along.
  • Not Sweet Enough: If your smoothie is lacking sweetness, add a bit more maple syrup or a medjool date for natural sweetness.
  • Flavor Imbalance: Balance out tart flavors with a touch of honey or maple syrup.

Variations to Try

Feeling adventurous? Here are some fun variations to switch things up:

  • Berry Blast: Substitute mango and peaches with mixed berries for a colorful twist.
  • Tropical Paradise: Add pineapple and coconut extract for an extra tropical flavor.
  • Green Machine: Throw in a handful of spinach or kale for added nutrients without compromising the flavor.
  • Protein Power: Mix in a scoop of protein powder or Greek yogurt for a post-workout boost.

Storage and Make-Ahead Instructions

This smoothie bowl is not only delicious but also convenient!

  • Make Ahead: You can prep your ingredients the night before. Just blend in the morning!
  • Storage: If you have leftovers, store them in an airtight container in the fridge for up to 24 hours. Note that the texture may change slightly.
  • Freezing: You can freeze leftover smoothie bowls in individual containers for a quick breakfast option later.

Frequently Asked Questions (FAQ)

Got questions? I’ve got answers!

  • Can I use fresh fruit instead of frozen? Yes, but your smoothie bowl will be thinner. Frozen fruits give a thicker consistency.
  • Is this recipe vegan? Absolutely! All the ingredients are plant-based.
  • Can I make this smoothie bowl without bananas? Yes! You can substitute with avocado for creaminess or more frozen fruit.
  • How can I make this smoothie bowl lower in sugar? Use less maple syrup or opt for unsweetened coconut milk.
  • Can I add greens to this smoothie bowl? Definitely! Spinach or kale blends well without altering the flavor.
  • How do I store leftovers? Store in an airtight container in the fridge for up to 24 hours.
  • Can I use other types of milk? Yes! Almond milk, oat milk, or soy milk are great alternatives.
  • What’s the best way to serve this smoothie bowl? Serve immediately after blending to enjoy the perfect texture.

Nutrition Tips and Dietary Adaptations

This smoothie bowl can easily fit into various dietary preferences:

  • Gluten-Free: Naturally gluten-free; just ensure your toppings are also gluten-free.
  • Dairy-Free: Made with coconut milk, this recipe is dairy-free and suitable for lactose intolerant individuals.
  • Protein-Boost: Add protein powder or Greek yogurt to make it more filling.
  • Low-Calorie Option: Use less maple syrup and stick to lower-calorie toppings like fresh fruit and seeds.

Equipment Recommendations

For the best results, here’s what you’ll need:

  • High-Speed Blender: A powerful blender ensures a smooth, creamy consistency.
  • Measuring Cups and Spoons: Precision is key to achieving the perfect blend.
  • Spatula: Helps you scrape down the sides of the blender and get every last bit of goodness!
  • Serving Bowls: Choose vibrant bowls to showcase your beautiful smoothie creation.

Serving Suggestions

This smoothie bowl is not just for breakfast! Here are some fun serving ideas:

  • Brunch Delight: Serve it alongside whole-grain toast or avocado toast for a filling brunch.
  • Snack Time: Enjoy it as an afternoon snack to curb cravings.
  • Post-Workout Boost: A perfect recovery snack after a workout, packed with nutrients.
  • Party Pleaser: Serve in mini bowls at gatherings for a delightful treat everyone will love.

Conclusion

With this Mango Peach Smoothie Bowl, you’ll not only brighten your mornings but also add a splash of joy to your day. Its ease of preparation, nutritional benefits, and endless customization options make it a perfect go-to for everyone. So, gather your ingredients, blend away, and enjoy every delightful spoonful. Remember, great food doesn’t require perfection—just a willingness to try. Happy cooking!

Mango Peach Smoothie Bowl

Prep Time 5 minutes
Total Time 5 minutes
Servings 2 servings
Calories 250
A vibrant and refreshing smoothie bowl made with tropical mango and peach, perfect for a healthy breakfast or snack.

Ingredients

Fruits

  • 1 piece banana (quartered and frozen)
  • 1.5 cups mango peaches frozen

Liquid

  • 0.25 cup coconut milk
  • 1 tablespoon maple syrup
  • 1 teaspoon vanilla extract

Instructions 

  • Add all ingredients to a high-speed blender.
  • Blend on high for about 3 minutes, scraping down sides as needed.
  • Blend until smooth and creamy.
  • Pour into a bowl and top with your favorite toppings.

Notes

You can customize toppings with fresh fruit, nuts, seeds, or granola for added texture and flavor.
Calories: 250kcal
Cost: $8
Course: Breakfast
Cuisine: Fusion
Keyword: Fruit, Healthy, Smoothie

Welcome to a delightful culinary experience that brings a burst of flavor to your dinner table! This Chicken Mango Salad is not just a meal; it’s an explosion of colors and tastes that will leave you feeling satisfied and energized. Perfect for quick weeknight dinners or as a refreshing side dish for family gatherings, this salad is loaded with nutrients and flavor. In this guide, we’ll walk through everything you need to know to make this incredible dish and enjoy it to the fullest.

Why You’ll Love This Recipe

This Chicken Mango Salad isn’t just delicious; it’s packed with benefits that make it a fantastic choice for any meal. Here are just a few reasons to love it:

  • Nutrient-Rich Ingredients: Each bite is loaded with vitamins from fresh produce, providing essential nutrients for your body.
  • Quick and Easy: With simple steps and minimal prep time, you can have this salad ready in under 30 minutes!
  • Versatile Dish: Perfect as a main course or a side, it pairs beautifully with a variety of dishes.
  • Flavor Explosion: The combination of sweet mango, creamy avocado, and tender chicken creates a delightful contrast that’s sure to please your palate.
  • Meal Prep Friendly: Make it ahead of time for quick lunches or dinners throughout the week.

Ingredients You Will Need

Here’s the complete list of ingredients you’ll need to create this delicious salad, along with some handy substitutions:

  • 1 lb. chicken breasts: Feel free to substitute with grilled tofu or chickpeas for a vegetarian option.
  • 2 medium ripe mangoes: You can swap these with peaches or nectarines if they’re out of season.
  • 1 1/2 tsp. kosher salt: Adjust to taste; sea salt works well too.
  • 1/4 tsp. black pepper: Freshly ground pepper enhances flavor.
  • 1 1/2 tbsp. olive oil: Avocado oil or any light oil can be used.
  • 3-4 cups fresh arugula: Spinach or mixed greens are great alternatives.
  • 2/3 cup grape tomatoes: Cherry tomatoes work just as well.
  • 2 garden cucumbers: You can use Persian cucumbers for a sweeter taste.
  • 1 avocado: For extra creaminess, consider using a Haas avocado.
  • 1/2 small purple onion: Red, yellow, or green onion can be substituted based on your preference.
  • 1 tbsp. maple syrup: Honey or agave syrup can be used for sweetness.
  • 2 tbsp. apple cider vinegar: White wine vinegar is a suitable substitute.
  • 3 tbsp. olive oil: Use the same oil for consistency.
  • 1/2 tsp. kosher salt: Adjust based on your taste preference.
  • 1/4 tsp. ground dry mustard: Dijon mustard adds a nice tang if you prefer.
  • 1/4 tsp. onion powder: Garlic powder can be an excellent alternative.
  • 1 tsp. poppy seeds: Optional but adds a nice crunch.

Step-by-Step Instructions

Now that you have your ingredients ready, let’s dive into the cooking process:

  • Prepare the dressing: In a bowl, mix the olive oil, apple cider vinegar, maple syrup, mustard, onion powder, and poppy seeds. Whisk until well combined, then refrigerate until ready to use.
  • Cook the chicken: Season the chicken breasts with salt and pepper. Grill them outdoors until they reach an internal temperature of 165°F, or cook in a skillet over medium-high heat until golden brown, about 3 minutes per side.
  • Let it rest: After cooking, allow the chicken to rest for 10 minutes before cutting it into cubes.
  • Prep the veggies: Rinse and dry the arugula. Chop the onion, halve the tomatoes, and slice the cucumber. Peel and dice the mango and avocado.
  • Combine: In a large bowl, add the arugula, tomatoes, cucumbers, mango, avocado, and chicken cubes.
  • Dress the salad: Pour the poppy seed dressing over the salad and toss gently to coat all ingredients.
  • Serve: Enjoy your vibrant Chicken Mango Salad as a main dish or a refreshing side!

Pro Tips for a Perfect Salad

Delicious Chicken Mango Salad featuring colorful ingredients like arugula, tomatoes, and cucumbers.

Here are some expert insights to help you elevate your Chicken Mango Salad:

  • Use fresh ingredients: Fresh, ripe produce enhances the flavor and texture of your salad.
  • Timing is key: Dress your salad just before serving to keep the greens crisp.
  • Marinate the chicken: For an extra flavor boost, marinate the chicken in the dressing for an hour before cooking.
  • Mix it up: Experiment with different greens or add nuts for crunch.
  • Balance flavors: Adjust sweetness and acidity in the dressing to suit your taste.
  • Pair with wine: A chilled white wine complements this salad beautifully.
  • Keep it cool: Serve the salad chilled for a refreshing experience, especially on warm days.
  • Stay organized: Prep ingredients in advance to save time during busy weeknights.

Common Mistakes and Troubleshooting

Even with the best intentions, mistakes can happen. Here’s how to avoid common pitfalls:

  • Overcooking the chicken: Use a meat thermometer to ensure perfect doneness and juicy chicken.
  • Too much dressing: Start with a small amount; you can always add more if needed.
  • Watery salad: Avoid over-washing greens to prevent excess moisture.
  • Skipping seasoning: Don’t forget to season each component for maximum flavor.

Variations to Try

If you want to switch things up, consider these variations:

  • Spicy Chicken Mango Salad: Add sliced jalapeños or a pinch of cayenne to the dressing for heat.
  • Quinoa Chicken Mango Salad: Mix in cooked quinoa for added protein and texture.
  • Tropical Twist: Incorporate pineapple for a tropical flair.
  • Nutty Crunch: Toss in toasted almonds or walnuts for added crunch and nutrients.

Storage and Make-Ahead Instructions

Planning ahead? Here’s how to store and prepare your Chicken Mango Salad:

  • Make-ahead: Prepare the salad ingredients a day in advance, but dress just before serving to ensure freshness.
  • Storage: Keep leftover salad in an airtight container in the fridge for up to 2 days. Note that the greens may wilt over time.

Frequently Asked Questions

Here are some common questions about making Chicken Mango Salad:

  • Can I use frozen mango? Yes, thawed frozen mango can work, but fresh mango offers the best flavor.
  • What’s the best way to grill chicken? Preheat your grill to medium-high and oil the grates to prevent sticking.
  • Can I add other fruits? Absolutely! Strawberries or blueberries would be a delicious addition.
  • Is this salad suitable for meal prep? Yes, it can be prepped ahead but store the dressing separately to keep the greens fresh.
  • What can I serve with this salad? It pairs well with grilled fish or as a side to a hearty protein like steak.
  • Can I make this salad vegan? Yes, use chickpeas or tofu instead of chicken and maple syrup instead of honey.
  • How can I make it gluten-free? All the ingredients used in this recipe are naturally gluten-free!
  • How do I know when the chicken is done? Use a meat thermometer; it should read 165°F for safe consumption.

Nutritional Information and Dietary Adaptations

This salad is not only delicious but also healthy! Here’s a breakdown of its nutritional benefits:

  • Protein: Chicken provides essential amino acids for muscle repair and growth.
  • Healthy Fats: Avocado offers heart-healthy monounsaturated fats.
  • Vitamins and Minerals: Mango and veggies are rich in vitamins A, C, and K, supporting overall health.
  • Low-Calorie Option: This salad is light yet filling, making it ideal for weight management.

Equipment Recommendations

To make your cooking process smoother, consider using the following equipment:

  • Grill or Skillet: For perfectly cooked chicken.
  • Mixing Bowls: For prepping dressing and salad ingredients.
  • Meat Thermometer: To ensure chicken is cooked to perfection.
  • Sharp Knife: For easy chopping of fruits and vegetables.

Serving Suggestions

This Chicken Mango Salad is versatile and pairs wonderfully with various dishes:

  • Grilled shrimp: Adds a seafood twist that complements the salad’s fruity flavors.
  • Quinoa: Serve it over a bed of quinoa for a heartier meal.
  • Crusty bread: A side of artisanal bread makes for a delightful accompaniment.
  • Chilled white wine: A refreshing glass enhances the dining experience.

Conclusion

And there you have it—a vibrant, nutritious Chicken Mango Salad that’s as delightful to eat as it is to prepare! This recipe is designed to empower you in the kitchen, making cooking enjoyable and stress-free. With its flavorful ingredients and easy instructions, you’ll feel like a culinary expert in no time. So gather your friends and family, and get ready to enjoy a meal that’s sure to impress. Happy cooking!

Healthy Chicken Mango Salad

Prep Time 15 minutes
Cook Time 15 minutes
Total Time 30 minutes
Servings 4 servings
Calories 350
A vibrant and nutritious salad combining grilled chicken, fresh fruits, and crunchy vegetables, perfect for a light and healthy meal.

Ingredients

Protein

  • 1 lb chicken breasts
  • 2 tsp kosher salt (or to taste)
  • 0.25 tsp black pepper (or to taste)
  • 0.5 tbsp olive oil

Vegetables & Fruits

  • 3-4 cups fresh arugula
  • 0.75 cup grape tomatoes
  • 2 garden cucumbers cucumbers
  • 1 mango mango
  • 1 avocado avocado
  • 0.5 small purple onion

Dressing

  • 1 tbsp maple syrup
  • 2 tbsp apple cider vinegar
  • 3 tbsp olive oil
  • 0.5 tsp kosher salt (or to taste)
  • 0.25 tsp ground dry mustard
  • 0.25 tsp onion powder
  • 1 tsp poppy seeds

Instructions 

  • Mix dressing ingredients and refrigerate.
  • Season and grill or pan-fry chicken until cooked, then rest and cube.
  • Prepare veggies: rinse arugula, chop onion, halve tomatoes, slice cucumbers, peel and dice mango and avocado.
  • Combine all ingredients in a large bowl, pour dressing, and toss to coat.

Notes

Use fresh ingredients for best flavor and texture.
Calories: 350kcal
Cost: $15
Course: Salad
Cuisine: Healthy
Keyword: Chicken, Mango, Salad

Beat the Heat with Refreshing Yogurt Popsicles

As the temperature rises and summer days stretch long, nothing beats the refreshing delight of homemade yogurt popsicles. These easy-to-make frozen treats are not only a fun way to cool off, but they also provide a healthy alternative to store-bought ice creams. With just a few ingredients, you can transform simple yogurt into a delightful dessert that everyone in the family will love. Let’s dive into why you’ll adore this recipe and how to make yogurt popsicles that are both tasty and nutritious!

Why You’ll Love This Recipe

  • Simple Ingredients: With just a 6-pack of Stonyfield Organic Kids or YoBaby Yogurts and popsicle sticks, you can whip up these treats in no time.
  • Kid-Friendly Fun: Making yogurt popsicles is a delightful activity for kids. They can help with the mixing, layering, and even choose their favorite flavors!
  • Healthy Alternative: These popsicles are a great option for a refreshing snack, packed with probiotics and lower in sugar than traditional ice creams.
  • Customizable Flavors: You can easily customize your yogurt popsicles with fruits, honey, or even a splash of vanilla—limitless flavor combinations await!
  • Make Ahead and Store: These popsicles can be made in bulk, allowing you to have a stash of cool treats ready whenever the craving strikes.

Ingredients Breakdown

Here’s what you need to create your yogurt popsicles:

  • Stonyfield Organic Kids or YoBaby Yogurts: 6-pack of your choice. These yogurts are creamy, flavorful, and a fantastic base for popsicles.
  • Popsicle Sticks: Essential for holding your delicious creations together while they freeze. You can find these at any grocery store.

If you want to add more variety or adjust the sweetness, consider these substitutions:

  • Fruit Add-ins: Fresh berries, bananas, or mango chunks can be blended into the yogurt for added flavor.
  • Sweeteners: If you prefer sweeter popsicles, consider using honey or maple syrup. You can also use agave syrup for a vegan option.
  • Yogurt Alternatives: For a dairy-free version, swap out regular yogurt for coconut yogurt or almond yogurt.

How to Make Yogurt Popsicles: A Step-by-Step Guide

Juicy Easy Yogurt Popsicles in a variety of bright colors and flavors.

Now that you have your ingredients, let’s break down the steps to make your yogurt popsicles.

  1. Prepare the Yogurt: Using a paring knife, make a small slit in the middle of the foil wrapper for each cup of yogurt to allow for easy access.
  2. Insert Popsicle Sticks: Gently push a popsicle stick into the center of each yogurt cup.
  3. Freeze Overnight: Place the yogurt cups in the freezer. Allow them to freeze overnight to ensure they are solid.
  4. Enjoy! Once frozen, peel back the foil lid, remove the popsicle from the cup, and enjoy your homemade yogurt popsicles. If you encounter any difficulty removing them, run the container under warm water to loosen.

Pro Tips for Perfect Popsicles

  • Layering Flavors: For a fun twist, layer different flavors of yogurt in the molds. Start with one flavor, add a layer of fruit, and top with another yogurt flavor.
  • Use High-Fat Yogurt: Higher-fat Greek yogurt (3.5% or more) will yield creamier popsicles compared to non-fat varieties.
  • Experiment with Mix-ins: Consider adding a handful of shredded coconut or chocolate chips for extra texture and flavor.
  • Adjusting Sweetness: Taste the yogurt before freezing. If you find it too tart, mix in a bit of honey or maple syrup to balance the flavors.
  • Make-ahead Tips: Make a large batch of yogurt popsicles and store them in a freezer-safe bag to keep them fresh and ready for when the heat hits!
  • Using Molds: If you want to get fancy, consider using silicone molds instead of yogurt cups for easy removal.
  • Keep it Simple: Start with the basics before experimenting with more complicated recipes. This ensures you build confidence as you create delicious treats!
  • Serve with Toppings: Serve your popsicles with a drizzle of honey or a sprinkle of granola for a delightful crunch.

Common Mistakes and Troubleshooting

Even the best cooks encounter challenges. Here are some common mistakes to avoid when making yogurt popsicles:

  • Not Freezing Long Enough: Make sure to freeze your yogurt popsicles for at least 6-8 hours or overnight for best results.
  • Using Low-Quality Yogurt: Always opt for high-quality yogurt like Stonyfield for the best flavor and texture.
  • Skipping the Sweetener: If you find your popsicles too tart, don’t hesitate to mix in a natural sweetener.

Delicious Variations to Try

Why stick to one flavor when you can mix it up? Here are a few fun variations to try:

  • Berry Blast: Use mixed berries (strawberries, blueberries, raspberries) blended into the yogurt for a vibrant and fruity treat.
  • Peanut Butter Banana: Mix in creamy peanut butter and banana puree for a protein-packed popsicle.
  • Chocolate Delight: Add cocoa powder or melted chocolate to the yogurt and swirl in some chocolate chips for a decadent twist.
  • Coconut Lime: Incorporate coconut milk and a splash of fresh lime juice for a tropical vibe.

Storage and Make-Ahead Instructions

Your homemade yogurt popsicles can be stored in the freezer for up to 2 months. Here’s how to keep them fresh:

  • Wrap Individually: Wrap each popsicle in plastic wrap or store them in an airtight container to prevent freezer burn.
  • Label and Date: If you’re making multiple flavors, label them clearly, so you know exactly what you’re grabbing on a hot day.
  • Thaw Before Eating: If the popsicles are too frozen, let them sit at room temperature for a few minutes before attempting to remove them from their molds.

Frequently Asked Questions (FAQ)

  • How long do yogurt popsicles take to freeze? Typically, yogurt popsicles need to freeze for at least 6-8 hours or overnight for best results.
  • Can I use non-dairy yogurt? Yes! Coconut yogurt or almond yogurt can be great substitutes for a dairy-free version.
  • What fruits work best in yogurt popsicles? Berries, bananas, and mangoes are popular choices, but feel free to experiment with your favorites!
  • How do I remove popsicles from the molds? If stuck, run the molds under warm water for a few seconds to loosen them.
  • Can I add protein powder to the mixture? Absolutely! Adding protein powder is a great way to boost the nutritional value of your popsicles.
  • What if my popsicles are too icy? This can happen if the yogurt isn’t creamy enough. Try using a higher-fat yogurt for a smoother texture.
  • How can I make these popsicles more appealing for kids? Use colorful fruits and let them help in making their own combinations to keep things fun!
  • Can I use flavored yogurts? Yes! Flavored yogurts can add an extra layer of taste, just be mindful of the sugar content.

Nutritional Tips and Dietary Adaptations

These yogurt popsicles are not only delicious but can also fit various dietary needs:

  • Low-Sugar Option: Use plain yogurt and add your own natural sweeteners to control the sugar content.
  • Gluten-Free: All ingredients used are gluten-free, making them safe for those with gluten sensitivities.
  • Protein Boost: Mix in protein powder or Greek yogurt for an extra protein kick.
  • Vegan-Friendly: Substitute with plant-based yogurts and sweeteners for a vegan-friendly treat.

Equipment Recommendations

Here’s what you’ll need to get started:

  • Popsicle Molds: Silicone molds work best for easy removal.
  • Blender: A good blender will help you thoroughly mix in fruits or other ingredients.
  • Measuring Cups: Useful for precise ingredient measurements, especially if you’re trying new combinations.
  • Plastic Wrap: Great for storing popsicles and preventing freezer burn.

Serving Suggestions

Once your yogurt popsicles are ready, here are some fun ways to serve them:

  • With a Drizzle: Serve with a drizzle of honey, maple syrup, or chocolate sauce for added sweetness.
  • As a Snack: Perfect as a healthy snack during the day; they can also serve as a refreshing dessert.
  • Pair with Fresh Fruit: Serve alongside fresh fruit for a colorful, nutritious platter.

In conclusion, making yogurt popsicles is not only a great way to cool off during the hot days but also an opportunity to get creative in the kitchen. With this comprehensive guide, you now have the tools and knowledge to craft delicious, healthy treats that can become a staple in your summer routine. So gather your ingredients, grab some molds, and let the fun begin! Happy cooking!

Easy Yogurt Popsicles

Prep Time 10 minutes
Total Time 10 minutes
Servings 6 popsicles
Calories 100
Enjoy a healthy and refreshing treat with these simple homemade yogurt popsicles, perfect for hot days or a quick snack.

Ingredients

Yogurt

  • 6 cups Stonyfield Organic Kids or YoBaby Yogurts
  • 6 popsicle sticks popsicle sticks

Instructions 

  • Use a paring knife to make a small slit in the foil wrapper of each yogurt cup.
  • Insert a popsicle stick into each slit and place the cups in the freezer overnight.
  • Once frozen, peel back the foil lid, remove the yogurt from the cup, and enjoy.

Notes

If removing the popsicle is difficult, run the cup under warm water to loosen.
Calories: 100kcal
Cost: $5
Course: Dessert
Keyword: Yogurt

Why You’ll Crave These Zucchini Corn Fritters

If you’re searching for a delightful and simple dish that brings joy to your dinner table, look no further than these zucchini corn fritters. Perfect for a weeknight meal or a weekend snack, this recipe combines the fresh flavors of zucchini and sweet corn to create a dish that’s not only delicious but also versatile. Let’s dive into why you’ll love making these fritters!

  • Quick to Prepare: With a prep time of just 10 minutes and a cooking time of about 15 minutes, you can whip up these fritters in no time!
  • Customizable Ingredients: This recipe allows you to substitute ingredients based on your pantry. Want to go gluten-free? Use a gluten-free flour mix!
  • Healthy and Nutritious: Packed with vegetables and protein from eggs, these fritters are a great way to sneak in some nutrients, making them a perfect choice for the whole family.
  • Versatile Serving Options: Enjoy them as a main dish, side, or even as a snack, these fritters can fit any meal occasion.
  • Kid-Friendly: The crispy texture and sweet flavor make these fritters a hit with children, making it easier to include vegetables in their diet.

Ingredients You’ll Need

Gathering the right ingredients is key to making delicious zucchini corn fritters. Here’s what you’ll need:

  • 2 medium Zucchini: Grated and gently squeezed to remove excess moisture.
  • 1 cup Sweet Corn Kernels: Fresh or frozen, adding a delightful sweetness to the fritters.
  • ½ cup All-Purpose Flour: Acts as a binding agent; feel free to substitute with gluten-free flour if needed.
  • 2 Eggs: These act as a natural binder, giving your fritters structure.
  • 2 tablespoons Green Onions: Finely chopped for a mild onion flavor.
  • 1 teaspoon Garlic Powder: Adds savory depth; you can also use fresh minced garlic.
  • Salt and Pepper: To taste, enhancing the overall flavor.
  • 1 tablespoon Olive Oil: For frying, providing a nice crispy texture.
  • 1 teaspoon Butter (Optional): For extra richness in flavor.

Steps to Perfect Zucchini Corn Fritters

Now that you have your ingredients ready, let’s go through the steps to make these delightful fritters:

  1. Mix the Batter: In a large bowl, combine grated zucchini, sweet corn, flour, eggs, green onions, garlic powder, salt, and pepper. Stir until well combined.
  2. Heat the Oil: In a frying pan over medium heat, add olive oil and butter (if using). Allow it to heat up until shimmering.
  3. Fry the Fritters: Using a tablespoon, drop the batter into the hot oil, making sure to flatten them slightly. Fry for about 2-3 minutes on each side until golden brown and crispy.
  4. Drain Excess Oil: Once fried, place the fritters on a paper towel-lined plate to absorb any excess oil.
  5. Serve Warm: Enjoy them immediately, or let them cool and store for later!

Expert Tips for Making the Best Fritters

Side view of crispy zucchini corn fritters, showing their texture and vibrant colors.

To ensure your zucchini corn fritters turn out perfectly, consider these expert tips:

  • Remove Moisture: Squeeze out as much water as possible from the grated zucchini. Excess moisture can make the fritters soggy.
  • Test the Oil Temperature: Before frying all the fritters, do a small test. If the batter sizzles upon contact, the oil is ready.
  • Use Fresh Ingredients: Fresh zucchini and sweet corn will enhance the flavor significantly.
  • Adjust Seasoning: Don’t be afraid to taste the batter before frying. Adjust salt and pepper to your liking!
  • Batch Frying: Fry in batches to avoid overcrowding the pan, which can reduce the oil temperature and lead to sogginess.
  • Keep Warm: If making multiple batches, keep the cooked fritters warm in a low oven (around 200°F) until ready to serve.
  • Garnish Ideas: Top with sour cream, yogurt, or a sprinkle of fresh herbs for added flavor.
  • Experiment with Spices: Add spices like cumin or smoked paprika for a unique twist!

Common Mistakes and How to Avoid Them

Even the best cooks can make mistakes! Here are some common pitfalls and how to steer clear of them:

  • Too Much Flour: Adding too much flour can make the fritters dense. Stick to the recommended amount and adjust only if necessary.
  • Not Enough Binding: If your batter seems too loose, add another egg or a bit more flour to help bind the ingredients.
  • Inconsistent Cooking: Make sure your oil is at the right temperature. If it’s too hot, the outside will burn before the inside cooks.
  • Overcrowding the Pan: Frying too many fritters at once can decrease the oil temperature. Fry in smaller batches to maintain even cooking.

Delicious Variations to Try

These zucchini corn fritters are incredibly versatile! Here are some exciting variations to consider:

  • Cheesy Zucchini Corn Fritters: Add ½ cup of shredded cheese (like cheddar or feta) for a cheesy twist.
  • Spicy Corn Fritters: Incorporate diced jalapeños or a pinch of cayenne pepper for a spicy kick.
  • Herb-Infused Fritters: Mix in fresh herbs like dill, parsley, or cilantro for an aromatic flavor.
  • Sweet Potato Fritters: Substitute half the zucchini with grated sweet potato for a sweeter, heartier fritter.

Storing and Make-Ahead Options

If you want to prep these fritters ahead of time, here’s how to store and reheat them:

Make-Ahead Instructions

You can prepare the batter a few hours in advance and store it in the fridge until you’re ready to cook. Just remember to give it a good stir before frying!

Storing Leftover Fritters

Store leftover fritters in an airtight container in the fridge for up to 3 days. To keep them crispy, place a paper towel at the bottom of the container.

Freezing Fritters

For longer storage, freeze the cooked fritters in a single layer on a baking sheet. Once frozen, transfer them to an airtight container or freezer bag. They can last up to 2 months. Reheat them in the oven at 350°F until warmed through and crispy.

Frequently Asked Questions

Here are some common questions about making zucchini corn fritters:

  • Can I bake these fritters instead of frying them?
    You can bake them! Preheat your oven to 400°F, place the fritters on a lined baking sheet, and bake for about 25-30 minutes, flipping halfway through.
  • What’s the best oil for frying?
    Olive oil is great, but you can also use vegetable oil or canola oil for frying due to their high smoke point.
  • Can I add other vegetables?
    Absolutely! Grated carrots, bell peppers, or corn can be great additions for extra flavor and nutrition.
  • How can I make these fritters vegan?
    Substitute the eggs with flax eggs (1 tablespoon ground flaxseed mixed with 2.5 tablespoons water per egg) and use a vegan-friendly flour.
  • Are these fritters gluten-free?
    Yes, simply substitute all-purpose flour with a gluten-free flour mix.
  • How do I know when the fritters are done?
    When they are golden brown and crispy on the outside, they are ready. You can always cut one open to check if it’s cooked through.
  • Can I reheat the fritters?
    Yes! Reheat them in the oven or an air fryer for best results to maintain their crispiness.
  • What can I serve with zucchini corn fritters?
    They pair wonderfully with a side salad, yogurt dip, or even a spicy salsa for dipping.

Nutritional Information and Dietary Adaptations

These zucchini corn fritters not only taste great but can also fit various dietary needs:

  • Low-Calorie Option: Use less oil for frying or consider baking for a lighter version.
  • High-Protein Version: Add cottage cheese or Greek yogurt to the batter for added protein.
  • Vegetarian-Friendly: This recipe is naturally vegetarian, making it suitable for those following a meatless diet.

Essential Kitchen Equipment

To make the most of your cooking experience, here are some recommended tools:

  • Nonstick Frying Pan: Essential for frying without sticking and achieving that crispy texture.
  • Grater: A box grater works best for grating zucchini.
  • Mixing Bowls: Use medium-sized bowls for mixing the batter.
  • Measuring Cups and Spoons: For accurate ingredient measurements.
  • Spatula: A sturdy spatula will help flip the fritters with ease.

Final Thoughts

Cooking can be a joyful experience, and these zucchini corn fritters are a perfect example of how simple ingredients can come together to create something truly special. Whether you’re cooking for yourself or sharing with friends and family, this recipe is sure to impress. So gather your ingredients, put on your apron, and enjoy the process! Happy cooking!

Irresistible Zucchini Corn Fritters Recipe You ll Crave Tonight

Prep Time 10 minutes
Cook Time 15 minutes
Total Time 25 minutes
Servings 4 servings
Calories 150
These crispy zucchini corn fritters are quick to make and bursting with flavor, perfect for a satisfying snack or meal.

Ingredients

Vegetables

  • 2 medium Zucchini (Grated and gently squeezed to remove excess moisture)
  • 1 cup Sweet Corn Kernels (Fresh or frozen)
  • ½ cup All-Purpose Flour (Can substitute with gluten-free flour if needed)
  • 2 eggs Eggs (Acts as a natural binder)
  • 2 tablespoons Green Onions (Finely chopped)
  • 1 teaspoon Garlic Powder
  • to taste Salt Salt
  • to taste Pepper Pepper
  • 1 tablespoon Olive Oil (For frying)
  • 1 teaspoon Butter (Optional, for extra richness)

Instructions 

  • Combine grated zucchini, corn, flour, eggs, green onions, garlic powder, salt, and pepper in a bowl.
  • Heat olive oil in a skillet over medium heat.
  • Drop spoonfuls of batter into the skillet and flatten slightly.
  • Cook for 3-4 minutes per side until golden brown and crispy.
  • Remove fritters and drain on paper towels. Optional: add a small amount of butter for extra richness.

Notes

Serve warm with your favorite dipping sauce for best flavor.
Calories: 150kcal
Cost: $12
Course: Appetizer, Snack
Cuisine: American
Keyword: Corn, Fritters, Zucchini