Author

Steven

Browsing

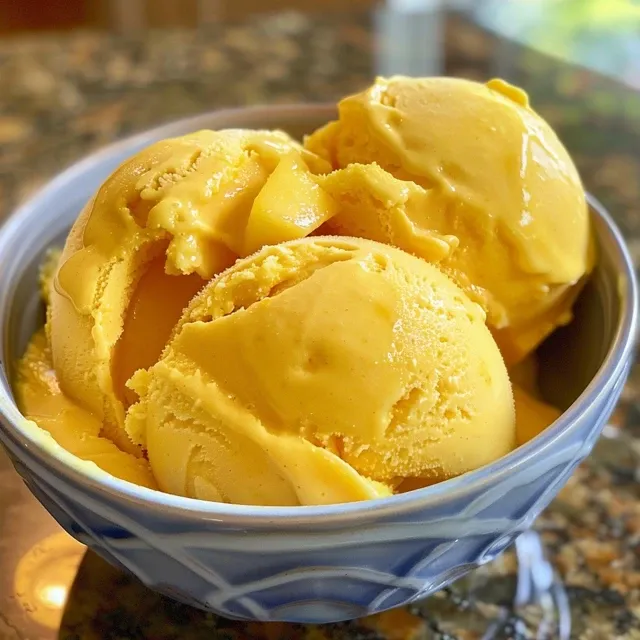
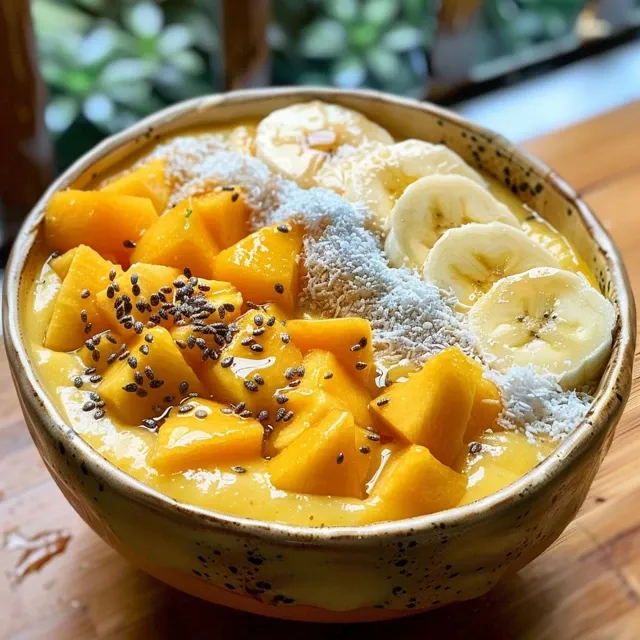
Start Your Day Right with a Mango Banana Smoothie Bowl

Welcome to a vibrant morning ritual that will kick-start your day with energy and joy! This Mango Banana Smoothie Bowl is not just a breakfast; it’s a tropical escape in a bowl. Packed with the goodness of frozen fruits and topped with crunchy granola, this smoothie bowl is perfect for busy mornings or a leisurely weekend brunch. With just a few simple ingredients, you can whip up a deliciously creamy smoothie that will leave you feeling refreshed and satisfied. Let’s dive into this delightful recipe and explore why it’s a must-have in your morning routine!

Why You’ll Love This Recipe

  • Quick and Easy: This smoothie bowl takes less than 10 minutes to prepare, making it the perfect solution for busy mornings.
  • Nutritious Ingredients: Packed with vitamins and minerals, the combination of mango and banana provides a healthy start to your day.
  • Customizable: You can easily adapt the ingredients and toppings to suit your taste or dietary needs, ensuring that every bowl is unique.
  • Kid-Friendly: This smoothie bowl is not only nutritious but also fun! Kids will love helping to create their own custom bowls.
  • Instagram-Worthy: With its vibrant colors and beautiful toppings, this bowl is perfect for sharing on social media!

Ingredients for Your Mango Banana Smoothie Bowl

To create this delicious smoothie bowl, gather the following ingredients:

  • 1 cup frozen mango chunks: Provides a tropical sweetness and creamy texture.
  • 1 cup frozen banana slices: Adds natural sweetness and enhances the creamy consistency.
  • 1/2 cup coconut milk: Gives the smoothie a rich, tropical flavor. You can substitute with almond milk or oat milk for a different taste.
  • 1 tablespoon honey (optional): For those who prefer a little extra sweetness.
  • 1/4 cup granola: Adds a delightful crunch and texture.
  • 1 tablespoon chia seeds: A superfood that boosts the nutritional value of your bowl.
  • 1/4 cup fresh berries: Blueberries, strawberries, or raspberries make excellent toppings.
  • 2 tablespoons shredded coconut: Adds a tropical flair and extra texture.

Step-by-Step Instructions for the Perfect Smoothie Bowl

Close-up view of a smoothie bowl featuring mango, banana, and granola toppings.

Now that you have all your ingredients ready, let’s get blending!

  • Gather Ingredients: Before you start, ensure all your ingredients are ready to use.
  • Prepare the Blender: Start by adding the coconut milk to the blender. This helps with blending and ensures a smooth texture.
  • Add Frozen Fruits: Next, add the frozen mango chunks and banana slices into the blender.
  • Blend: Secure the lid and start blending at a low speed, gradually increasing to high until the mixture is smooth and creamy. Scrape down the sides as necessary.
  • Check Consistency: Stop the blender and check the consistency. If it’s too thick, add a bit more coconut milk.
  • Chill Your Bowls: For an extra refreshing experience, place your serving bowls in the freezer for a few minutes.
  • Pour the Smoothie Base: Pour the smoothie mixture evenly into the chilled bowls, using a spatula to scrape out every delicious bit.
  • Add Toppings: Sprinkle granola on one side of each bowl, chia seeds next to the granola, and then layer fresh berries on another side. Finish with a sprinkle of shredded coconut over the top.

Pro Tips for the Best Smoothie Bowl

  • Use High-Quality Ingredients: Fresh or high-quality frozen fruits will greatly improve the flavor of your smoothie bowl.
  • Adjust Sweetness: Taste your smoothie base before serving. If you find it needs more sweetness, add a little honey or maple syrup.
  • Frozen Fruits: Ensure your fruits are adequately frozen to achieve that thick, creamy texture.
  • Experiment with Toppings: Get creative with toppings—nuts, seeds, or even a drizzle of nut butter can elevate your bowl.
  • Make Ahead: You can prepare the smoothie base a day in advance and store it in the freezer for a quick breakfast option.
  • Use a High-Speed Blender: A powerful blender will give you a smoother consistency, so blend until fully incorporated.
  • Customization is Key: Feel free to swap out fruits or add extras like spinach for a nutrient boost without sacrificing flavor.
  • Check Consistency: If your smoothie is too thick, add a splash more coconut milk until you reach your desired consistency.

Common Mistakes and Troubleshooting

Even the best cooks make mistakes! Here are some common pitfalls and how to fix them:

  • Too Thick Smoothie: If your smoothie is too thick, simply add more coconut milk a little at a time until you achieve the desired consistency.
  • Too Watery: If it’s too thin, add more frozen fruits to thicken it up.
  • Not Sweet Enough: Adjust sweetness with honey or maple syrup, or use ripe bananas for natural sweetness.
  • Not Smooth Enough: Blend longer or ensure your blender is powerful enough to handle frozen fruits.

Delicious Variations to Try

Here are some exciting variations to keep your smoothie bowl fresh and fun!

  • Berry Blast: Substitute mango with frozen berries for a berry smoothie bowl.
  • Green Smoothie Bowl: Add a handful of spinach or kale to the mix for a nutrient-packed green smoothie.
  • Peanut Butter Delight: Swirl in some peanut butter before blending for a protein boost and rich flavor.
  • Tropical Twist: Add a splash of pineapple juice or chunks of frozen pineapple for an extra tropical flavor.

Storage and Make-Ahead Instructions

If you want to prepare ahead of time, follow these tips:

  • Freezing the Smoothie Base: Blend the smoothie base and pour it into an airtight container. Store it in the freezer for up to 2 months. Thaw in the fridge overnight before serving.
  • Toppings: Prepare your toppings ahead of time and store them in separate containers in the fridge. This way, you can quickly assemble your bowl in the morning.

Nutrition Tips and Dietary Adaptations

This Mango Banana Smoothie Bowl is naturally nutritious, but here are a few tips for different dietary needs:

  • Dairy-Free: The recipe is naturally dairy-free using coconut milk, but feel free to use almond or oat milk.
  • Gluten-Free: Ensure your granola is gluten-free if you have dietary restrictions.
  • Vegan: Skip the honey for a fully vegan option and use maple syrup instead.
  • Protein Boost: Add a scoop of protein powder or Greek yogurt for extra protein.

Equipment Recommendations

To make your smoothie bowl preparation seamless, here are some essential tools:

  • High-Speed Blender: A good-quality blender is key for achieving a smooth consistency.
  • Measuring Cups and Spoons: Accurate measurements will ensure the best flavor balance.
  • Spatula: A spatula helps you scoop out every bit of the creamy smoothie mixture.
  • Chilled Bowls: Using chilled bowls keeps your smoothie cold and refreshing.

Serving Suggestions

Make your smoothie bowl a feast for the eyes! Here are some serving ideas:

  • Layered Presentation: Layer different fruits and toppings artfully for a stunning presentation.
  • Garnish with Fresh Mint: A sprig of fresh mint adds a pop of color and a refreshing aroma.
  • Pair with a Side of Toast: Serve your smoothie bowl with whole-grain toast topped with avocado or nut butter for a complete meal.

Frequently Asked Questions (FAQs)

  • Can I use fresh fruits instead of frozen? Yes, but you may need to add ice to achieve the same creamy texture.
  • How long does it take to make? This recipe takes about 10 minutes from start to finish.
  • Can I store leftovers? It’s best enjoyed fresh, but you can store leftovers in an airtight container in the fridge for up to 24 hours.
  • What can I substitute for coconut milk? Almond milk, soy milk, or oat milk are great alternatives.
  • Is this recipe suitable for kids? Absolutely! Kids love the fun of decorating their smoothie bowls.
  • How can I make it more filling? Add a scoop of protein powder or a serving of Greek yogurt.
  • Can I add vegetables? Yes! Spinach or kale are great additions for extra nutrients.
  • What toppings do you recommend? Fresh fruits, nuts, seeds, and granola are all fantastic options!

Conclusion

Your mornings deserve a splash of color and flavor, and this Mango Banana Smoothie Bowl delivers just that! With its easy preparation, nutritious ingredients, and endless customization options, it’s the perfect way to start your day. So grab your blender, gather your ingredients, and let the tropical vibes take over. Remember, cooking is about having fun and feeling confident in your kitchen. Enjoy and happy blending!

Mango Banana Smoothie Bowl

Prep Time 10 minutes
Total Time 10 minutes
Servings 2 bowls
Calories 350
A vibrant and nutritious smoothie bowl featuring tropical mango, banana, and a variety of toppings for a delicious breakfast or snack.

Ingredients

Fruits

  • 1 cup frozen mango chunks
  • 1 cup frozen banana slices
  • 1/2 cup coconut milk (plus 1/4 cup for blending)
  • 1 tablespoon honey (optional)
  • 1/4 cup granola
  • 1 tablespoon chia seeds
  • 1/4 cup fresh berries
  • 2 tablespoons shredded coconut

Instructions 

  • Add coconut milk, mango, and banana to blender; blend until smooth.
  • Pour the smoothie into chilled bowls.
  • Top with granola, chia seeds, berries, and shredded coconut.

Notes

Feel free to add more toppings or adjust sweetness to taste.
Calories: 350kcal
Cost: $10
Course: Breakfast
Keyword: Healthy, Smoothie, Tropical

Discover the Joy of Homemade Mango Ice Cream

Welcome to a delightful journey of flavor with this Mango Ice Cream recipe! If you’ve ever craved a creamy, refreshing treat that embodies the essence of summer, you’re in the right place. This easy-to-make ice cream combines sweet mango puree and luscious cream, creating a dessert that’s perfect for any occasion. Whether it’s a hot day or a cozy evening, this mango ice cream will brighten your mood and satisfy your sweet tooth.

Why You’ll Love This Recipe

  • Quick and Easy: With just a few simple ingredients, you can whip up this mango ice cream in no time.
  • Naturally Sweet: Made with ripe mangoes, this treat is a healthier alternative to store-bought ice cream.
  • Customizable: Add your favorite mix-ins or toppings to make it uniquely yours.
  • Perfect for All Ages: Kids and adults alike will love this creamy dessert.
  • Impressive Presentation: Serve it in bowls or cones for a delightful treat that looks as good as it tastes.

Ingredients Breakdown

Here’s what you’ll need to create this delectable mango ice cream:

  • 2 cups of sweet, ripe mango puree: Fresh or frozen mango works, but fresh will yield the best flavor.
  • 1 cup of condensed milk: This adds creaminess and sweetness. You can also make homemade condensed milk if you prefer.
  • 1 cup of whipping cream: Look for cold heavy whipping cream to achieve the best texture.
  • ½ cup of diced mangoes: For added texture and bursts of flavor.
  • Optional additions: A few strands of saffron for a hint of luxury or a squeeze of lime juice to brighten the flavors.

Pro Tips for the Best Mango Ice Cream

Side view of vibrant mango ice cream topped with fresh mango chunks and saffron strands.
  • Choosing Mangoes: Select ripe, sweet mangoes for the best flavor. They should yield slightly to pressure.
  • Chill Your Ingredients: Ensure your cream and mixing bowl are cold for better whipping results.
  • Mix Gently: When combining the whipped cream with the mango mixture, fold gently to maintain the airy texture.
  • Prevent Ice Crystals: Cover the ice cream mixture with cling wrap directly on the surface before freezing.
  • Let It Soften: Allow the ice cream to sit at room temperature for a few minutes before scooping for easier serving.
  • Flavor Variations: Don’t hesitate to experiment! Consider adding coconut milk for a tropical twist.
  • Storage Tips: Keep the ice cream in an airtight container to prevent freezer burn.
  • Make Ahead: This ice cream can be made a day or two in advance for easy entertaining.

Common Mistakes and Troubleshooting

Here are some common pitfalls to avoid when making your mango ice cream:

  • Using Overripe Mangoes: Too ripe can lead to an overly mushy texture. Choose mangoes that are just ripe.
  • Not Whipping Enough: Ensure your whipping cream forms soft peaks. This is essential for a light texture.
  • Skipping the Freezing Step: Allow at least 6-8 hours to freeze to achieve the proper consistency.

Variations to Try

Looking to mix things up? Here are some fun variations:

  • Coconut Mango Ice Cream: Substitute half of the cream with coconut milk for a tropical flavor.
  • Spicy Mango Ice Cream: Add a pinch of chili powder for a surprising kick.
  • Mint Mango Ice Cream: Fold in finely chopped fresh mint for a refreshing twist.
  • Vegan Mango Ice Cream: Use coconut cream and a plant-based sweetener instead of condensed milk.

Storage and Make-Ahead Instructions

This mango ice cream can be stored in the freezer for up to 2 weeks. For best results:

  • Store in an airtight container to keep it fresh.
  • Layer a piece of parchment paper on top of the ice cream before sealing to further prevent ice crystals.

Comprehensive FAQ

Let’s address some common questions about this delicious recipe:

  • Can I use frozen mango? Yes! Just ensure it’s fully thawed before making the puree.
  • How can I make this dairy-free? Use coconut cream and a dairy-free sweetener in place of condensed milk.
  • Can I add other fruits? Absolutely! Berries, bananas, or peaches can be excellent additions.
  • How long does it take to freeze? Aim for at least 6-8 hours for best results.
  • What’s the best way to serve it? Serve in chilled bowls or cones, garnished with fresh mango or mint.
  • Can I use a different sweetener? Yes, try honey or maple syrup for a different flavor profile.
  • How do I know when it’s done? The ice cream should be firm but scoopable.
  • What’s the best way to scoop hard ice cream? Use a warm scoop or let it sit at room temperature for a few minutes before serving.

Nutrition Tips and Dietary Adaptations

For those watching their nutrition:

  • Lower Sugar Options: Opt for a low-sugar condensed milk or reduce the amount used in the recipe.
  • Portion Control: Serve in smaller bowls to enjoy the flavor without overindulgence.
  • Balanced Pairing: Enjoy with fresh fruit or nuts for added nutrients.

Equipment Recommendations

Here’s what you’ll need to get started:

  • Blender or Food Processor: For pureeing the mangoes into a smooth consistency.
  • Mixing Bowl: A large bowl for whipping the cream and combining ingredients.
  • Whisk or Electric Mixer: For whipping the cream efficiently.
  • Airtight Container: Essential for freezing your ice cream without freezer burn.

Serving Suggestions

To serve your mango ice cream, consider:

  • Toppings: Fresh mango slices, toasted coconut, or a drizzle of honey.
  • Pairing: Serve alongside a piece of cake or berry compote for a delightful dessert experience.
  • Presentation: Use clear dishes to showcase the vibrant color of the mango ice cream!

In Conclusion

Making your own mango ice cream is not only rewarding but also a fantastic way to enjoy the vibrant flavors of summer. With this easy-to-follow recipe, you can create a creamy dessert that is sure to impress family and friends. So gather your ingredients, get into the kitchen, and start crafting your delightful treat today. Remember, the best part of cooking is the joy it brings, and this mango ice cream is sure to add a smile to your day!

Mango Ice Cream

Prep Time 20 minutes
Cook Time 10 minutes
Total Time 30 minutes
Servings 4 servings
Calories 250
Enjoy a creamy, refreshing homemade mango ice cream made with ripe mangoes and simple ingredients.

Ingredients

Fruits

  • 2 cups sweet, ripe mango puree
  • 1 cup condensed milk
  • ½ cup diced mangoes

Dairy

  • 1 cup whipping cream

Optional Add-ins

  • a few strands saffron strands (Optional)
  • a squeeze lime lime juice (Optional)

Instructions 

  • Peel, chop, and blend mangoes into a smooth puree.
  • If making homemade condensed milk, heat milk with sugar until thickened, then cool.
  • Whip the cream until soft peaks form.
  • Gently fold whipped cream into mango puree and condensed milk, then add diced mangoes.
  • Pour into a container, cover, and freeze for 6-8 hours. Let sit at room temperature for 5-10 minutes before serving.

Notes

For a richer flavor, add a few saffron strands or a squeeze of lime juice before freezing.
Calories: 250kcal
Cost: $12
Course: Dessert
Cuisine: International
Keyword: Mango

Welcome to a delightful culinary adventure where we combine the beloved flavors of spinach artichoke dip with the satisfying texture of pasta! This spinach artichoke pasta salad is more than just a meal; it’s a celebration of flavor, nutrition, and ease. Whether you’re planning a cozy family dinner or a lively potluck, this dish is your go-to for impressing guests and satisfying taste buds. With creamy sour cream, zesty artichoke hearts, and fresh spinach, this salad is a nourishing option that’s both exciting and comforting.

Why You’ll Love This Recipe

Here are just a few reasons why this spinach artichoke dip pasta salad will quickly become a favorite:

  • Quick and Easy: This recipe comes together in under 30 minutes, making it perfect for busy weeknights.
  • Flavor-Packed: The combination of creamy dressing and fresh ingredients creates a taste that’s hard to resist.
  • Versatile: This dish can be served warm or cold, making it ideal for any season or occasion.
  • Make-Ahead Friendly: Prepare it in advance and let the flavors meld for an even tastier dish.
  • Nutrient-Rich: With spinach and artichokes, you’re adding vitamins and minerals to your meal without sacrificing taste.

Ingredients You’ll Need for Spinach Artichoke Dip Pasta Salad

Gather the following ingredients for your dip pasta salad:

  • 12 ounces medium pasta: Rotini or bow tie pasta work beautifully. Whole wheat pasta can be a healthier substitute.
  • 1 cup sour cream: Swap with Greek yogurt for a lighter texture if desired.
  • ¾ cup mayonnaise: Consider using light mayonnaise to cut calories without losing creaminess.
  • 1 package (1.4 oz) vegetable soup mix: Create your own blend of seasonings for a homemade touch.
  • 3 green onions: Sliced for added crunch and mild sharpness.
  • 1 can (14 oz) artichokes: Water-packed, drained, and quartered before adding to the mix.
  • 4 cups fresh spinach: Chopped lightly packed to add color and health benefits.

Step-by-Step Instructions for Your Spinach Artichoke Dip Pasta Salad

Now that you have all your ingredients, let’s bring them together in simple steps:

  1. Cook the pasta: In a large pot of salted boiling water, cook the pasta until al dente. Drain and rinse under cold water to stop the cooking process.
  2. Mix the dressing: In a large mixing bowl, combine the sour cream, mayonnaise, and vegetable soup mix until smooth.
  3. Add the veggies: Stir in the sliced green onions, drained artichokes, and fresh spinach, mixing gently to combine.
  4. Combine pasta and dressing: Fold the cooled pasta into the dressing mixture until well coated.
  5. Chill: Cover and refrigerate the salad for at least 1 hour to allow the flavors to meld. Serve chilled or at room temperature.

Expert Tips for Perfect Spinach Artichoke Dip Pasta Salad

Side angle of a colorful bowl filled with Spinach Artichoke Dip Pasta Salad.

Enhance your cooking experience with these handy tips:

  • Perfect texture: Ensure your pasta is cooked al dente to maintain a pleasant bite in the salad.
  • Flavor infusion: For the best taste, allow the salad to chill in the refrigerator for at least 1 hour before serving.
  • Ingredient swaps: Feel free to swap regular mayo for light mayo or Greek yogurt to create a creamy yet healthier dish.
  • Fresh herbs: Consider adding fresh herbs like basil or parsley for an aromatic touch.
  • Protein boost: Toss in shredded chicken or cooked shrimp for an added protein kick.
  • Nutty crunch: Add toasted pine nuts or walnuts for a delightful crunch and flavor contrast.
  • Experiment with flavors: Try adding sun-dried tomatoes or olives for a Mediterranean twist.
  • Serving size: This recipe serves about 6-8 people, perfect for sharing!

Common Mistakes and Troubleshooting

Even the best cooks can make mistakes! Here’s how to avoid common pitfalls:

  • Overcooking pasta: Keep an eye on the pasta while cooking to prevent mushiness. Al dente is the way to go!
  • Skipping the chill: Don’t skip the chilling step; it enhances the flavors and improves the overall experience.
  • Ignoring seasoning: Taste and adjust the seasoning before serving. A little extra salt or pepper can make a big difference.

Variations of Spinach Artichoke Dip Pasta Salad

Looking to change things up? Here are some delicious variations to try:

  • Italian twist: Add diced salami, mozzarella balls, and Italian herbs for a zesty Italian-style salad.
  • Southwestern flair: Mix in black beans, corn, and diced red pepper for a Southwestern-inspired version.
  • Greek version: Replace artichokes with Kalamata olives and feta cheese, and add cucumbers for a Greek twist.
  • Vegan alternative: Use vegan mayo, coconut yogurt, and plant-based pasta for a vegan version that’s just as creamy and delicious.

Storage and Make-Ahead Instructions

This salad is perfect for prepping in advance:

  • Make-ahead: Prepare the salad up to 24 hours in advance and store it in the refrigerator.
  • Storage: Keep leftovers in an airtight container in the fridge for up to 3 days.
  • Freezing: For best results, avoid freezing as the texture may change once thawed.

Frequently Asked Questions

Here are some common questions and answers about this delightful recipe:

  • Can I make this dish ahead of time? Absolutely! It tastes even better when made a day in advance.
  • Can I use frozen artichokes? Yes, just thaw and drain them before adding to the salad.
  • What type of pasta works best? Rotini or bow ties are great choices; they hold the dressing well.
  • How can I make this salad lighter? Opt for Greek yogurt instead of sour cream and use light mayonnaise.
  • What can I serve with this salad? It pairs well with grilled chicken, burgers, or as a standalone dish for a light lunch.
  • Is this salad gluten-free? You can use gluten-free pasta to make this salad suitable for gluten-free diets.
  • Can I add meat to this salad? Yes, shredded rotisserie chicken or diced ham can be great additions.
  • What if I don’t have green onions? Chopped red onion or shallots can be used for a similar flavor.

Nutrition Tips and Dietary Adaptations

Here are some quick nutrition tips to consider:

  • High fiber: Use whole grain pasta to increase fiber content.
  • Low-calorie dressing: Substitute mayo with low-fat or Greek yogurt for a lighter option.
  • Vegetarian protein: Add chickpeas or lentils to boost the protein content without meat.

Equipment Recommendations

Here’s what you’ll need to prepare this delicious salad:

  • Large pot: For boiling pasta.
  • Mixing bowl: A large bowl for combining ingredients.
  • Colander: To drain the pasta after cooking.

Serving Suggestions

Here are some ideas for serving your spinach artichoke dip pasta salad:

  • As a side dish: Perfect alongside grilled chicken or steak for a hearty meal.
  • Potluck favorite: Great for gatherings, served in a large bowl with a serving spoon.
  • Lunch box option: Pack it for a delicious lunch at work or school.

In conclusion, this spinach artichoke dip pasta salad is not just a recipe; it’s an invitation to enjoy cooking and sharing delicious meals with loved ones. With its creamy texture, vibrant flavors, and simple steps, it’s sure to become a staple in your kitchen. So grab your ingredients and let’s make something delightful together!

Spinach Artichoke Dip Pasta Salad A Creamy, Flavorful Twist

Prep Time 10 minutes
Cook Time 10 minutes
Total Time 20 minutes
Servings 6 servings
Calories 350
This vibrant pasta salad combines the creamy flavors of spinach and artichokes with a tangy dressing, perfect for a refreshing meal or side dish.

Ingredients

Pasta

  • 12 ounces medium pasta rotini or bow ties (Whole wheat pasta can be a healthier substitute.)
  • 1 cup sour cream (Swap with Greek yogurt for a lighter texture.)
  • ¾ cup mayonnaise (Consider using light mayonnaise to cut calories.)
  • 1.4 oz vegetable soup mix (Create your own blend of seasonings for a homemade touch.)
  • 3 green onions green onions (Adds fresh crunch and mild sharpness.)
  • 14 oz artichokes (Water-packed, drain and quarter before adding.)
  • 4 cups fresh spinach (Chopped lightly packed.)

Instructions 

  • Cook the pasta according to package instructions, then drain and let cool.
  • In a large bowl, combine sour cream, mayonnaise, and vegetable soup mix to make the dressing.
  • Add cooked pasta, chopped artichokes, sliced green onions, and chopped spinach to the bowl. Toss to combine.
  • Chill in the refrigerator for at least 30 minutes before serving.

Notes

For a lighter version, substitute Greek yogurt for sour cream and light mayonnaise.
Calories: 350kcal
Cost: $12
Course: Salad
Cuisine: American
Keyword: Artichoke, Pasta, Spinach

Elevate Your Weeknight Dinners with a Vibrant Chicken Rice Salad

Welcome to a culinary adventure that perfectly balances simplicity and flavor! This Chicken Rice Salad is not just another salad recipe; it’s a delightful fusion of fresh ingredients and savory goodness that will energize your weeknight meals. With juicy chicken, colorful veggies, and a zesty dressing, this salad is a true crowd-pleaser. Whether you’re cooking for family or a casual gathering with friends, this dish guarantees satisfaction! Let’s dive into the world of vibrant flavors and discover how to make this delicious meal.

Why You’ll Love This Chicken Rice Salad Recipe

This Chicken Rice Salad is more than just a meal; it’s an experience! Here are five reasons why you’ll love making and eating this dish:

  • Quick and Easy: With just a few simple steps, you can have a nutritious meal ready in no time—perfect for busy weeknights.
  • Nutritious and Filling: Packed with protein from the chicken and fiber from the vegetables, this salad is both satisfying and healthy.
  • Versatile and Customizable: Feel free to modify the ingredients based on what you have on hand or to suit your taste preferences.
  • Meal Prep Friendly: This salad can be made ahead of time and stored, making it an ideal option for meal prep enthusiasts.
  • Delicious Leftovers: Enjoy the flavors even more the next day as they meld together in the refrigerator!

Ingredients That Make Your Chicken Rice Salad Shine

To create the perfect Chicken Rice Salad, gather the following ingredients:

  • 2 cups cooked chicken, shredded: Use leftover rotisserie chicken or quickly poach some chicken breasts for a fresh option.
  • 1 cup cooked rice: White, brown, or even quinoa can be used—choose what you prefer!
  • 1 cup cherry tomatoes, halved: These add a burst of sweetness and color to your salad.
  • 1 cucumber, diced: A refreshing crunch that complements the other ingredients.
  • 1 bell pepper, diced: Add your favorite color for extra visual appeal.
  • 1/4 cup red onion, finely chopped: For a sharp flavor that balances the sweetness of the tomatoes.
  • 1/4 cup fresh parsley, chopped: This herb adds freshness and a pop of green.
  • 1/4 cup olive oil: A healthy fat that enhances the overall flavor.
  • 2 tablespoons lemon juice: Brightens the dish and ties all the flavors together.
  • Salt and pepper to taste: Essential for elevating the dish’s flavors.

How to Prepare Your Chicken Rice Salad

Side view of a bowl filled with colorful Chicken Rice Salad ingredients.

Let’s break down the steps to create your Chicken Rice Salad. Each step is simple and straightforward, ensuring you can follow along easily!

  • Step 1: In a large bowl, combine the shredded chicken and cooked rice.
  • Step 2: Add the cherry tomatoes, cucumber, bell pepper, red onion, and parsley, mixing gently.
  • Step 3: In a separate small bowl, whisk together the olive oil, lemon juice, salt, and pepper until well combined.
  • Step 4: Pour the dressing over the salad and toss gently to combine, ensuring the salad is evenly coated.
  • Step 5: Serve chilled or at room temperature, and enjoy your delicious creation!

Pro Tips for the Best Chicken Rice Salad

To ensure your Chicken Rice Salad is the best it can be, here are some expert tips:

  • Use Fresh Ingredients: For the best flavor, opt for fresh vegetables and herbs when preparing your salad.
  • Let It Chill: Allow the salad to sit for 30 minutes in the refrigerator after mixing to let the flavors meld.
  • Dress Just Before Serving: To keep your salad crisp, add the dressing right before serving.
  • Experiment with Herbs: Try adding basil or cilantro for a different flavor profile.
  • Go Whole Grain: Use brown rice or quinoa for added nutrients and a nuttier flavor.
  • Add Crunch: Toss in some nuts or seeds for an extra crunch!
  • Spice It Up: For a kick, add diced jalapeños or a dash of hot sauce to the dressing.
  • Make It a Wrap: Use the salad as a filling in a wrap for a delicious on-the-go meal.

Common Mistakes and Troubleshooting

Even the best cooks can make mistakes! Here are some common pitfalls to avoid:

  • Overcooking the Chicken: Ensure your chicken is cooked just right to keep it tender and juicy.
  • Too Much Dressing: Start with a smaller amount of dressing and add more as needed to avoid sogginess.
  • Chopping Vegetables Unevenly: Aim for uniform sizes to ensure even flavor and texture in every bite.

Delicious Variations of Chicken Rice Salad

Switch things up with these tasty variations:

  • Mediterranean Twist: Add feta cheese, kalamata olives, and a sprinkle of oregano for a Mediterranean flair.
  • Asian-Inspired: Substitute soy sauce for olive oil, and add sesame seeds and edamame.
  • Southwestern Style: Incorporate black beans, corn, and avocado with a lime vinaigrette.
  • Fruit-Infused: Toss in diced apples or pears for a sweet contrast to the savory elements.

Storage and Make-Ahead Instructions

Planning for the week? Here’s how to store and prep your Chicken Rice Salad:

  • Make Ahead: This salad can be prepared up to 3 days in advance. Store it in an airtight container in the refrigerator.
  • Storage: Keep the salad in the refrigerator for up to 3 days. However, the vegetables may soften over time.
  • Freezing: Not recommended, as the texture of the vegetables will not hold up after thawing.

Frequently Asked Questions

Here are some common questions regarding Chicken Rice Salad:

  • Can I use leftover rice? Absolutely! Leftover rice works perfectly for this recipe.
  • What type of chicken is best? Rotisserie chicken is great for convenience, but any cooked chicken works well.
  • Can I add other vegetables? Yes! Feel free to customize with whatever fresh vegetables you have on hand.
  • Is this salad gluten-free? Yes, as long as you use gluten-free rice and check your dressing ingredients.
  • Can I make this salad vegan? Yes, substitute chicken with tofu or chickpeas and use a plant-based dressing.
  • What can I serve with this salad? Pair it with crusty bread, a light soup, or enjoy it on its own!
  • How do I make the dressing creamy? Add a dollop of Greek yogurt or avocado for a creamy texture.
  • Can I use a different grain? Definitely! Quinoa, farro, or barley can be excellent substitutes.

Nutritional Tips and Dietary Adaptations

This Chicken Rice Salad is not only delicious but also versatile for various dietary needs:

  • Low-Calorie Option: Use skinless chicken breast and limit the amount of olive oil.
  • High-Protein Variation: Add chickpeas or nuts to increase protein content.
  • Low-Carb Alternative: Substitute cauliflower rice for regular rice for a low-carb version.

Essential Equipment for Success

To make your cooking experience seamless, here are some recommended kitchen tools:

  • Sharp Knife: For easy and precise vegetable chopping.
  • Cutting Board: A sturdy surface is essential for safe food prep.
  • Mixing Bowls: Use a large bowl for mixing and a smaller one for the dressing.
  • Whisk: Essential for combining the dressing ingredients smoothly.

Serving Suggestions for Your Chicken Rice Salad

Enhance your dining experience with these serving suggestions:

  • Chilled: Serve the salad cold for a refreshing treat.
  • Garnish: Top with additional herbs or a sprinkle of nuts for added flair.
  • On a Bed of Greens: Serve it over a bed of mixed greens or spinach for extra nutrition.

In conclusion, this Chicken Rice Salad is not just a meal; it’s a celebration of flavor and freshness. With its vibrant ingredients and delightful dressing, it’s bound to be a hit at your dining table. So gather your ingredients, roll up your sleeves, and let’s create something delicious together!

Chicken Rice Salad

Prep Time 15 minutes
Cook Time 15 minutes
Total Time 30 minutes
Servings 4 servings
Calories 350
A fresh and flavorful salad combining shredded chicken, rice, and vibrant vegetables, perfect for a light meal or side dish.

Ingredients

Main ingredients

  • 2 cups cooked chicken, shredded
  • 1 cup cooked rice
  • 1 cup cherry tomatoes, halved
  • 1 unit cucumber, diced
  • 1 unit bell pepper, diced
  • 0.25 cup red onion, finely chopped
  • 0.25 cup fresh parsley, chopped
  • 0.25 cup olive oil
  • 2 tablespoons lemon juice
  • to taste Salt and pepper

Instructions 

  • Combine chicken and rice in a large bowl.
  • Add cherry tomatoes, cucumber, bell pepper, red onion, and parsley.
  • Whisk together olive oil, lemon juice, salt, and pepper in a small bowl.
  • Pour dressing over salad and toss gently.
  • Serve chilled or at room temperature.

Notes

Use fresh ingredients for best flavor.
Calories: 350kcal
Cost: $12
Course: Salad
Cuisine: International
Keyword: Chicken, rice, Vegetables

Discover the Refreshing World of Flat Tummy Water

Are you ready to transform your hydration routine? Flat Tummy Water is not just a trendy beverage; it’s a delightful mix of flavors that can help you stay refreshed and invigorated throughout the day. This detox drink combines simple ingredients like cucumber, lemon, ginger, mint, and basil. Not only is it delicious, but it also offers several health benefits that contribute to weight loss and overall wellness. In this article, we’ll delve into everything you need to know about Flat Tummy Water, from its benefits to how to make it and variations you can try.

Why You’ll Love This Recipe

Flat Tummy Water is more than just a pretty drink; it’s packed with benefits that make it a must-try. Here are five specific reasons to love this refreshing beverage:

  • Hydration Hero: Staying hydrated is crucial for your body’s functions. Flat Tummy Water helps you meet your daily water intake with a flavorful twist.
  • Weight Loss Support: The ingredients in this drink, like cucumber and ginger, can help boost your metabolism and support weight loss efforts.
  • Digestive Aid: Ginger and mint are known for their digestive properties, making this drink a great choice for soothing your stomach.
  • Antioxidant Power: Citrus fruits like lemons are rich in vitamin C, which helps fight free radicals and supports your immune system.
  • Refreshing Flavor: With a blend of fresh ingredients, this drink is not only healthy but also incredibly refreshing, making it a perfect choice for hot days.

Ingredients Breakdown

Let’s look at the ingredients that make up this delightful Flat Tummy Water recipe:

Flat Tummy Water Recipe

Ingredients:

  • 1 liter drinking water
  • 10 to 12 slices of cucumber
  • 1 lemon, sliced
  • 1 teaspoon grated ginger
  • 5 mint leaves
  • 5 basil leaves

Ingredient Substitutions: If you’re missing any of these ingredients, here are some substitutions you can try:

  • Lemon: You can replace lemon with lime for a different citrus flavor.
  • Mint: Fresh parsley or even a hint of rosemary can add a unique twist.
  • Basil: If basil isn’t available, try using cilantro for an aromatic change.
  • Ginger: Ground ginger can be used in place of fresh ginger if needed, but use it sparingly.

How to Make Flat Tummy Water

Side view of refreshing Flat Tummy Water, showcasing cucumber and lemon slices alongside mint and basil leaves.

Making Flat Tummy Water is a breeze! Follow these simple steps:

  • Step 1: Prepare Your Ingredients: Wash and slice the cucumber, lemon, and ginger. Make sure to use fresh ingredients for the best flavor.
  • Step 2: Combine Everything in a Jug: Fill a large glass jug with the 1 liter of water. Add in the cucumber slices, lemon, grated ginger, mint leaves, and basil leaves.
  • Step 3: Infuse Overnight: For maximum flavor, let the mixture infuse in the fridge overnight. This allows the ingredients to meld beautifully.
  • Step 4: Sip Throughout the Day: Enjoy your Flat Tummy Water by sipping it throughout the day. You can refill with water as needed!

Pro Tips for the Best Flat Tummy Water

To ensure you get the most out of your Flat Tummy Water, check out these expert tips:

  • Use Cold Water: Starting with cold water helps to extract more flavors from the ingredients.
  • Experiment with Infusion Time: If you prefer a lighter flavor, infuse for just a few hours instead of overnight.
  • Keep Ingredients Fresh: Change the ingredients every few days to keep the flavors exciting and fresh.
  • Add Ice Before Serving: For an extra refreshing experience, add ice cubes just before serving.
  • Make It Sparkling: Use sparkling water instead of still for a fizzy twist on this drink.
  • Stay Consistent: For the best results in weight loss and detox, make this a regular part of your hydration routine.
  • Don’t Skip the Ginger: Ginger is key for digestive health, so don’t leave it out!
  • Be Mindful of Sugar: Avoid adding sweeteners; the natural flavors should be enough!

Common Mistakes and Troubleshooting

Here are some common pitfalls to avoid when making Flat Tummy Water:

  • Using Old Ingredients: Ensure all ingredients are fresh for the best taste and health benefits.
  • Over-Infusing: Letting it steep too long can make the water taste bitter. Stick to the recommended time.
  • Not Drinking Enough: Remember to sip throughout the day to reap the full benefits.
  • Neglecting to Mix: Give the jug a gentle shake to mix the flavors before serving.

Creative Variations of Flat Tummy Water

Want to switch things up? Here are four exciting variations to keep your Flat Tummy Water experience fresh:

  • Berry Infusion: Add a handful of fresh berries (strawberries, blueberries, or raspberries) for a fruity twist.
  • Citrus Medley: Combine lemon, lime, and orange slices for a vibrant citrus flavor.
  • Herbal Twist: Use fresh herbs like rosemary or thyme for an aromatic experience.
  • Spicy Kick: Add a few slices of jalapeño for a spicy infusion that boosts metabolism.

Storage and Make-Ahead Instructions

You can easily make this beverage ahead of time. Here’s how:

  • Refrigerate: Store your Flat Tummy Water in the fridge for up to 3 days. After that, it’s best to make a fresh batch.
  • Keep Ingredients Separate: If you prefer to prepare in bulk, store the water separately from the ingredients and mix them before drinking to maintain freshness.

Comprehensive FAQ

Got questions about Flat Tummy Water? Here are some commonly asked questions:

  • Can Flat Tummy Water help with weight loss? Yes, it can aid in weight loss as it boosts metabolism and helps manage appetite.
  • How often should I drink Flat Tummy Water? You can drink it daily to maintain hydration and enjoy its health benefits.
  • Is there a limit to how much I can drink? While it’s safe to drink regularly, listen to your body and adjust as needed.
  • Can I use bottled lemon juice instead of fresh? Fresh is always best, but bottled juice can work in a pinch.
  • Does Flat Tummy Water have calories? This drink is low in calories, making it a great option for hydration without added sugars.
  • How will I know when it’s time to make a new batch? If the flavor starts to fade or the ingredients look wilted, it’s time for a fresh batch.
  • Can I add sweeteners to Flat Tummy Water? It’s recommended to enjoy it without sweeteners to keep it healthy.
  • Is it safe for everyone? Generally, yes. However, if you have specific health concerns, consult your doctor.

Nutrition Tips and Dietary Adaptations

Flat Tummy Water is naturally healthy, but here are some tips to enhance its nutritional profile:

  • Low-Calorie Option: This drink is low-calorie, making it suitable for various diets.
  • Vegan-Friendly: All ingredients are plant-based, perfect for vegans and vegetarians.
  • Gluten-Free: This beverage contains no gluten, making it safe for those with gluten sensitivities.
  • Low Sugar: Naturally low in sugar, it’s a great alternative to sugary beverages.

Equipment Recommendations

To make your Flat Tummy Water preparation seamless, consider having these items on hand:

  • Glass Jug: A large glass jug is perfect for infusing and displaying your drink.
  • Sharp Knife: Use a sharp knife for slicing fruits and veggies quickly.
  • Measuring Spoon: Accurate measuring spoons ensure you add the right amount of ginger.
  • Stirring Spoon: A long spoon for mixing ingredients is helpful for even distribution.

Serving Suggestions

Flat Tummy Water can be served in various ways:

  • Garnish with Fresh Herbs: Add a sprig of mint or basil on top for an appealing presentation.
  • Pair with Light Snacks: Enjoy with healthy snacks like nuts or fruit for a balanced refreshment.
  • Serve in Mason Jars: For a rustic look, serve in mason jars, perfect for gatherings.

Conclusion: Refresh Your Day

Flat Tummy Water is your new go-to beverage for hydration and wellness. With its vibrant flavors and health benefits, it’s a fantastic way to stay refreshed throughout the day. Whether you’re enjoying it on a sunny afternoon or using it to support your weight loss journey, this drink is easy to make and delightful to sip. So, gather your ingredients, and let’s raise a glass to a healthier, more refreshing way to hydrate!

Flat Tummy Water

Prep Time 10 minutes
Total Time 10 minutes
Servings 1 glass
Calories 10
A refreshing detox water infused with cucumber, lemon, ginger, and herbs to boost digestion and aid weight management.

Ingredients

Liquid

  • 1 liter drinking water
  • 10 to 12 slices cucumber (sliced)
  • 1 slice lemon (sliced)
  • 1 teaspoon grated ginger
  • 5 leaves mint leaves
  • 5 leaves basil leaves

Instructions 

  • Fill a glass jug with water.
  • Add cucumber, lemon, ginger, mint, and basil to the water.
  • Mix well and refrigerate overnight.
  • Serve chilled and drink throughout the day.

Notes

Use fresh ingredients for best flavor and benefits.
Calories: 10kcal
Cost: $10
Course: Beverage
Keyword: detox, Healthy, water

Brighten Your Plate with the Ultimate Mango Salsa Recipe

If you’re looking to add a vibrant pop of flavor to your meals, you’ve come to the right place! This mango salsa is a delightful combination of fresh ingredients that can elevate any dish. Perfect as a topping for tacos, a refreshing dip for chips, or even a complement to grilled meats, this easy recipe is a must-try. With just a few simple steps, you will discover how to create a mango salsa that not only tastes amazing but also brings a burst of color to your plate.

Why You’ll Love This Recipe

Here are five reasons this mango salsa will quickly become a favorite in your kitchen:

  • Versatile Dish: Use it as a dip, topping, or side; the possibilities are endless!
  • Fresh Ingredients: Made with wholesome, vibrant ingredients that provide a nutritional boost.
  • Quick & Easy: Ready in under 15 minutes, perfect for a last-minute gathering or a weekday meal.
  • Customizable: Adjust the heat and sweetness to your liking with simple modifications.
  • Impressive Presentation: The bright colors make this salsa a showstopper at any gathering!

Mango Salsa Ingredients

Gather the following ingredients to create your own fresh mango salsa:

  • 2 cups peeled and diced mangoes: About 2 small ripe mangoes will do the trick. Look for mangoes that yield slightly to pressure for the best flavor.
  • 3/4 cup chopped red bell pepper: This adds a sweet crunch and beautiful color.
  • 1 medium avocado, diced: For a creamy texture that balances the sweetness of the mango.
  • 1/3 cup chopped red onions: Rinsed in a sieve to remove harsh bite, offering a milder flavor.
  • 1/4 cup chopped fresh cilantro: A herb that elevates the salsa with its fresh, bright notes.
  • 3 Tbsp fresh lime juice: For that zesty tang that brings everything together.
  • 1 jalapeño, seeded and diced: Optional, for a kick of heat.
  • Salt, to taste: Enhances the flavors of the salsa.

How to Make Mango Salsa

Side view of a colorful mango salsa featuring fresh ingredients like cilantro and jalapeno.

Follow these simple steps to create your delicious mango salsa:

  1. In a medium mixing bowl, combine the diced mangoes, red bell pepper, avocado, red onions, and cilantro.
  2. Drizzle the fresh lime juice over the mixture.
  3. Add the diced jalapeño if you’re feeling adventurous!
  4. Season with salt to taste and toss gently to combine all ingredients.
  5. Serve shortly after preparing, as the avocado may brown over time.

Pro Tips for the Best Mango Salsa

Here are some expert insights to ensure your mango salsa is top-notch:

  • Choose Ripe Mangoes: Look for mangoes that are slightly soft to the touch but not mushy, ensuring the best flavor and sweetness.
  • Fresh Ingredients Matter: Use fresh herbs and produce for the brightest flavors in your salsa.
  • Adjust the Heat: If you prefer a milder salsa, omit the jalapeño or use just a small amount.
  • Chill Before Serving: Letting the salsa rest in the fridge for at least 30 minutes allows the flavors to meld beautifully.
  • Experiment with Citrus: Try adding orange juice for a sweeter twist or lemon juice for a sharper bite.
  • Don’t Overmix: Gently toss the ingredients to maintain the integrity of the avocado and mango chunks.
  • Pair with Complementary Dishes: This salsa is great on tacos, grilled chicken, or even served with fish!
  • Store Properly: To keep your salsa fresh, store it in an airtight container. Consider adding a little extra lime juice to help prevent browning.

Common Mistakes and Troubleshooting

A few common pitfalls can occur when making mango salsa. Here’s how to avoid them:

  • Using Unripe Mangoes: Avoid mangoes that are hard or green. They won’t have the sweetness you desire.
  • Skipping the Lime Juice: This is crucial for flavor balance and preventing browning in the avocado.
  • Overly Dice Ingredients: Keep your mango and avocado chunks sizable for texture.
  • Not Allowing Time to Chill: Skipping the chilling step can result in a less flavorful salsa.

Delicious Variations of Mango Salsa

Feeling adventurous? Here are a few variations to try:

  • Mango Avocado Corn Salsa: Add 1 cup of fresh or grilled corn for a sweet crunch.
  • Pineapple Mango Salsa: Swap half the mango for diced pineapple for a tropical twist.
  • Spicy Mango Salsa: Increase the jalapeño or add diced serrano peppers for more heat.
  • Mango Salsa with Black Beans: Mix in 1 cup of drained black beans for a protein-packed option.

Storage and Make-Ahead Instructions

This salsa is best enjoyed fresh, but here’s how to store it:

  • Refrigerate: Store in an airtight container in the fridge for up to 2 days. The avocado may brown slightly, but the flavor will still be delicious.
  • Make Ahead: You can prepare the salsa without the avocado a day in advance. Add the avocado just before serving to keep it fresh.

Frequently Asked Questions

Here are some common questions and answers about mango salsa:

  • Can I use frozen mango? Yes, but thaw it completely and drain excess liquid before using.
  • What can I serve with mango salsa? It pairs wonderfully with grilled chicken, fish tacos, or simply tortilla chips!
  • How can I make this salsa less sweet? Add more lime juice and include diced tomatoes for balance.
  • Is mango salsa healthy? Absolutely! It’s packed with vitamins and fiber, making it a nutritious choice.
  • Can I add other fruits? Yes! Try adding diced kiwi or strawberries for a fruity twist.
  • What type of mango is best for salsa? Haden or Tommy Atkins mangoes are great choices for their sweetness and flavor.
  • How long will mango salsa last in the fridge? It’s best consumed within 2 days for the freshest taste.
  • Can I make mango salsa without cilantro? Yes! Omit it or substitute with parsley for a different flavor.

Nutrition Tips and Dietary Adaptations

This mango salsa is not only delicious but also nutritious. Here are some tips:

  • Low-Calorie Option: Enjoy it guilt-free as a topping or dip without added sugars.
  • Vegan-Friendly: This recipe is naturally vegan and gluten-free.
  • High in Fiber: The ingredients are rich in dietary fiber, promoting digestion.
  • Customizable for Diets: Adjust ingredients based on dietary needs; for example, omit the jalapeño for a milder salsa.

Equipment Recommendations

To make your salsa preparation smooth, consider the following tools:

  • Sharp Knife: A good knife is essential for easily dicing your mango and other ingredients.
  • Cutting Board: A sturdy board will help keep your workspace organized.
  • Mixing Bowl: Choose a medium-sized bowl to comfortably mix all the ingredients.
  • Measuring Cups and Spoons: Accurate measurements ensure the best flavor balance.

Serving Suggestions

Here are a few creative ways to enjoy your mango salsa:

  • Taco Topping: Add it on top of fish or chicken tacos for a delightful crunch.
  • Grilled Chicken: Serve alongside grilled chicken for a refreshing contrast.
  • As a Dip: Pair it with tortilla chips or pita for a delicious appetizer.
  • Mixed into Salads: Toss it into a green salad for an exciting flavor boost.

In conclusion, this ultimate mango salsa recipe is not just a dish; it’s a celebration of fresh flavors and creativity in the kitchen. With its vibrant colors and delicious taste, it’s sure to impress at any gathering or simply for your family dinner. So grab those ripe mangoes, and let’s get cooking! You’re just a few steps away from creating something truly special. Happy cooking!

Mango Salsa

Prep Time 10 minutes
Total Time 10 minutes
Servings 4 people
Calories 150
A fresh and vibrant mango salsa perfect for snacking or as a topping for grilled dishes.

Ingredients

Main

  • 2 cups peeled and diced mangoes
  • 0.5 cup chopped red bell pepper
  • 1 medium avocado, diced
  • 0.75 cup chopped red onions (rinsed in a sieve to remove harsh bite)
  • 0.25 cup chopped fresh cilantro
  • 3 Tbsp fresh lime juice
  • 1 jalapeno seeded and diced jalapeno
  • to taste Salt

Instructions 

  • In a medium mixing bowl, toss together all ingredients.
  • Season with salt to taste.
  • Serve shortly after preparing to prevent browning of the avocado.

Notes

Best enjoyed fresh for optimal flavor and color.
Calories: 150kcal
Cost: $8
Course: Appetizer
Cuisine: Mexican
Keyword: Mango

Welcome to your new favorite weeknight meal! This creamy avocado pasta with chicken is not just a dish; it’s an experience of flavor, texture, and comfort. Perfect for busy evenings, this recipe combines the rich creaminess of ripe avocados with the satisfying bite of linguine, all while keeping things simple and quick. Ready to dive into a delicious journey? Let’s get cooking!

Why You’ll Love This Recipe

  • Quick and Easy: This creamy avocado pasta can be prepared in under 30 minutes, making it ideal for those hectic weeknights when you need a delicious meal without the fuss.
  • Nutritious Ingredients: Packed with whole foods like avocados, fresh herbs, and lean chicken, this dish nourishes your body while tantalizing your taste buds.
  • Versatile and Customizable: Whether you want to go vegetarian, add more veggies, or switch up the protein, this recipe adapts to suit your dietary preferences.
  • Kid-Friendly: The creamy texture and mild flavors make this avocado pasta a hit with kids and adults alike, ensuring everyone leaves the table happy.
  • Minimal Cleanup: With just one pot for the pasta and a blender for the sauce, you’ll spend less time cleaning and more time enjoying your meal.

Ingredients You’ll Need

To make this scrumptious dish, gather the following ingredients:

  • 10 oz pasta: I always use Barilla linguine for that perfect al dente texture.
  • 2 cups cooked chicken breast: Diced into 1/2-inch pieces for even browning and easy mixing.
  • 1 large ripe avocado: Ensure it’s very ripe for a smooth, creamy sauce.
  • 1/2 cup fresh basil leaves: Provides aromatic freshness.
  • 1/4 cup fresh parsley leaves: Adds a pop of color and flavor.
  • 2 scallions: For a subtle onion flavor.
  • 3 garlic cloves: Freshly minced for the best flavor.
  • 3 tbsp lemon juice: To brighten up the sauce.
  • 1/4 cup grated parmesan cheese: I prefer Kraft for a salty kick.
  • 1/4 cup extra virgin olive oil: Enhances richness and flavor.
  • 1/2 tsp sea salt: To taste.
  • 1/4 tsp freshly ground black pepper: For a hint of spice.
  • 1/4 tsp smoked paprika: Adds a subtle smokiness.
  • Optional: Rocket leaves, sourdough bread, and cherry tomatoes halved for serving.

How to Make Creamy Avocado Pasta

Follow these simple steps to whip up your creamy avocado pasta:

Step 1: Prepare the Mise en Place and Cook the Pasta

Start by boiling a large pot of salted water. Once boiling, add your linguine and cook until al dente according to package instructions. Remember to reserve 1 1/4 cups of pasta water before draining!

Step 2: Build the Avocado Cream Sauce

In a blender or food processor, combine the ripe avocado, fresh basil, parsley, scallions, minced garlic, lemon juice, parmesan cheese, olive oil, sea salt, black pepper, and smoked paprika. Blend until smooth and creamy, adding in the reserved pasta water gradually to reach your desired sauce consistency.

Step 3: Combine Pasta, Chicken, and Sauce

In the same pot used for the pasta, combine the cooked linguine and diced chicken. Pour the avocado sauce over the top and toss gently to coat everything evenly.

Step 4: Plate and Garnish

Serve your creamy avocado pasta warm. Garnish with rocket leaves and halved cherry tomatoes for a burst of color and additional flavor.

Pro Tips for the Creamiest Sauce

Close-up of creamy avocado pasta featuring linguine, chicken pieces, and basil leaves.
  • Use very ripe avocados: The riper the avocado, the creamier your sauce will be.
  • Add pasta water gradually: This helps achieve the perfect creamy consistency without making it too thin.
  • Don’t skip the lemon juice: It not only adds brightness but also prevents the avocado from browning.
  • Blend thoroughly: Ensure the sauce is silky and smooth for the best texture.
  • Taste as you go: Adjust seasoning to fit your palate for a personalized touch!
  • Consider adding nutritional yeast: For a cheesy flavor without the dairy, sprinkle in some nutritional yeast.
  • Let it sit: Allowing the dish to sit for 5 minutes before serving helps flavors meld beautifully.
  • Experiment with herbs: Try adding mint or cilantro for a fresh twist!

Common Mistakes and Troubleshooting

  • Overcooking the pasta: Make sure to check your pasta a minute or two before the package time to ensure it’s al dente.
  • Not using enough salt: Salt enhances flavor, so don’t be shy with it, especially in the pasta water.
  • Using unripe avocado: An unripe avocado will result in a chunky sauce rather than a smooth one.
  • Forgetting to reserve pasta water: Always set aside some pasta water before draining; it’s essential for achieving the perfect sauce consistency.

Variations of Creamy Avocado Pasta

Feel free to get creative! Here are some variations you can try:

  • Vegetarian Delight: Skip the chicken and add sautéed mushrooms or roasted bell peppers instead.
  • Spicy Avocado Pasta: Incorporate a pinch of cayenne pepper or diced jalapeños to kick up the heat!
  • Seafood Twist: Substitute chicken with shrimp or crab for a delightful seafood version.
  • Garden Fresh: Toss in seasonal vegetables such as zucchini, asparagus, or spinach for added nutrition and color.

Storage and Make-Ahead Instructions

If you want to prepare this dish in advance, here’s how to store it:

  • Refrigeration: Store any leftovers in an airtight container in the fridge for up to 3 days.
  • Freezing: I recommend not freezing the avocado sauce due to its creamy texture. Instead, freeze the cooked pasta and chicken separately, then combine when ready to serve.
  • Reheating: Gently reheat in a pan over low heat, adding a splash of water or olive oil to revive the creaminess.

FAQ: Your Burning Questions Answered

  • Can I use other types of pasta for this recipe? Absolutely! Feel free to swap in your favorite pasta shape, such as penne or fusilli.
  • How do I keep the avocado sauce from turning brown? The lemon juice in the sauce helps prevent browning. Store it in an airtight container with plastic wrap pressed against the surface to minimize air exposure.
  • Can I make the avocado sauce ahead of time? Yes, you can prepare the sauce a few hours in advance. Just remember to store it properly to keep it fresh.
  • Is this recipe kid-friendly? Definitely! The creamy texture and mild flavors make it a favorite among children.
  • Can I use frozen avocado? Yes, frozen avocado can work, although it may alter the texture slightly. Thaw it before blending.
  • What can I serve this pasta with? Pair it with a light salad or crusty bread to soak up the delicious sauce!
  • Is this recipe gluten-free? You can make it gluten-free by using gluten-free pasta.
  • Can I add cheese on top? Yes! A sprinkle of feta or goat cheese adds a delightful tang.

Nutrition Tips and Dietary Adaptations

This creamy avocado pasta is not just delicious; it’s also packed with nutrients. Avocados are rich in healthy fats, fiber, and vitamins, while chicken provides lean protein. To adapt this recipe for various dietary needs:

  • Dairy-Free: Omit the parmesan cheese or substitute with nutritional yeast.
  • Vegan: Use chickpeas instead of chicken, and ensure no animal products are added.
  • Low-Carb: Swap out the pasta for spiralized zucchini or spaghetti squash for a lighter option.

Equipment Recommendations

To make this recipe as effortless as possible, here are some kitchen tools I recommend:

  • High-Speed Blender: For the smoothest avocado sauce, a high-speed blender is ideal.
  • Large Pot: A good-quality pot is essential for boiling pasta efficiently.
  • Wooden Spoon: Great for mixing the pasta and sauce without scratching your cookware.

Serving Suggestions

For a complete meal experience, consider pairing your creamy avocado pasta with:

  • Garlic Bread: A crunchy side that complements the creamy sauce beautifully.
  • Mixed Green Salad: A light salad dressed with lemon vinaigrette balances the richness of the pasta.
  • Grilled Vegetables: Roasted or grilled seasonal veggies add a delightful texture and flavor contrast.

Enjoy your cooking journey with this creamy avocado pasta! Remember, cooking is all about having fun and experimenting. Don’t stress about perfection; embrace the process and let your creativity shine through in the kitchen!

Now, gather your ingredients and get ready to impress your family with this deliciously simple meal that’s sure to become a staple at your dinner table. Happy cooking!

Simple Creamy Avocado Pasta with Chicken - constantrecipes

Prep Time 10 minutes
Cook Time 15 minutes
Total Time 25 minutes
Servings 4 servings
Calories 650
A quick and flavorful pasta dish combining creamy avocado, tender chicken, and fresh herbs for a satisfying meal.

Ingredients

pasta

  • 10 oz pasta (e.g., Barilla linguine)

cooked chicken breast

  • 2 cups cooked chicken breast, diced (diced into 1/2-inch pieces)

red pepper flakes

  • 1/2 tsp red pepper flakes

pasta water

  • 1 1/4 cups pasta water

ripe avocado

  • 1 large ripe avocado (must be very ripe for creaminess)

fresh basil leaves

  • 1/2 cup fresh basil leaves

fresh parsley leaves

  • 1/4 cup fresh parsley leaves

scallions

  • 2 scallions (sliced)

garlic cloves

  • 3 cloves garlic, freshly minced

lemon juice

  • 3 tbsp lemon juice

grated parmesan cheese

  • 1/4 cup grated parmesan cheese (Kraft shredded)

extra virgin olive oil

  • 1/4 cup extra virgin olive oil

sea salt

  • 1/2 tsp sea salt

freshly ground black pepper

  • 1/4 tsp black pepper (freshly ground)

smoked paprika

  • 1/4 tsp smoked paprika

rocket leaves

  • rocket leaves

sourdough bread

  • sourdough bread

cherry tomatoes

  • cherry tomatoes, halved (for a burst of sweetness)

Instructions 

  • Cook pasta until al dente, then reserve 1 1/4 cups of pasta water and drain.
  • In a blender, combine avocado, basil, parsley, garlic, lemon juice, olive oil, and seasonings; blend until smooth.
  • Mix the blended sauce with cooked pasta, adding reserved pasta water to reach desired creaminess.
  • Stir in cooked chicken, cherry tomatoes, and scallions; top with parmesan and rocket leaves.
  • Serve with sliced sourdough bread on the side.

Notes

Use very ripe avocado for best creaminess and flavor.
Calories: 650kcal
Cost: $15
Course: Main Course
Cuisine: American
Keyword: Avocado, Chicken, Pasta

Chill Out with These Refreshing Mango Popsicles

Beat the heat with these delightful Frozen Mango Popsicles! Made with ripe mango, creamy coconut milk, and a hint of lime, this easy recipe is perfect for a quick, refreshing snack. Perfect for summer days or any time you crave a fruity treat! These homemade popsicles are not just delicious but also a great way to introduce your kids to healthy snacks. With just a few simple ingredients, you can create a dessert that’s bursting with flavor and fun.

Why You’ll Love This Recipe

This easy mango popsicle recipe is a crowd-pleaser for both kids and adults. Here’s why you’ll love making these at home:

  • Simple Ingredients: Just four main ingredients are needed, making it easy to whip up anytime.
  • Customizable Sweetness: You can adjust the sweetness to your preference with honey or maple syrup.
  • Refreshing Treat: Perfect for cooling off on hot summer days, these popsicles are a delicious way to hydrate.
  • Healthy Snack: Made with natural ingredients, they’re free of preservatives and artificial flavors.
  • Dairy-Free Option: Suitable for those with dietary restrictions, as they can be made with coconut or almond milk.

Ingredients for Your Mango Popsicles

To create these mouthwatering mango popsicles, gather the following ingredients:

  • 2 cups ripe mango: Fresh or frozen and thawed, for the best flavor.
  • 1/2 cup coconut milk or almond milk: Choose coconut for a creamier texture.
  • 1-2 tbsp honey or maple syrup: Optional, depending on the sweetness of your mango.
  • 1 tbsp lime juice: Adds a zesty brightness to the popsicles.

Feel free to experiment with different types of milk or sweeteners based on your preference!

How to Make Mango Popsicles: Step-by-Step Instructions

Side profile shot of juicy mango popsicles with a refreshing look.

Follow these simple steps to make your own delicious mango popsicles:

  1. Add mango, coconut milk, sweetener (if using), and lime juice to a blender.
  2. Blend until completely smooth and creamy, ensuring no chunks remain.
  3. Pour the mixture into popsicle molds.
  4. Insert popsicle sticks and freeze for at least 4-6 hours, or until solid.
  5. To release the popsicles, run warm water over the outside of the molds for a few seconds and gently pull them out.
  6. Serve immediately or store in a sealed container in the freezer for later enjoyment.

Pro Tips for Perfect Popsicles

Here are some expert insights to help you achieve the best results with your mango popsicles:

  • Choose Ripe Mangoes: The sweetness of your popsicles relies heavily on the ripeness of the mangoes. Look for mangoes that are slightly soft to the touch.
  • Texture Matters: For a creamier popsicle, opt for full-fat coconut milk. Almond milk will yield a lighter texture.
  • Experiment with Flavors: Add a splash of vanilla extract or a sprinkle of cinnamon for a unique twist on the classic flavor.
  • Layering Fun: Create visually stunning popsicles by layering different flavors or colors. Simply pour one layer, freeze it for about an hour, then add another layer.
  • Use Quality Molds: Invest in good-quality popsicle molds for easy removal and uniform popsicles.
  • Don’t Overfill: Leave a little space at the top of the molds to allow for expansion when freezing.
  • Quick Release Trick: If you’re having trouble getting the popsicles out, run them under warm water for a few seconds.
  • Keep it Clean: Clean your blender immediately after use to avoid sticky residue.

Common Mistakes and Troubleshooting

To ensure your popsicles turn out perfectly every time, avoid these common pitfalls:

  • Using Unripe Mangoes: Unripe mangoes will result in bland popsicles. Always choose ripe fruit for maximum sweetness.
  • Not Blending Enough: Make sure to blend the mixture until it’s completely smooth. Chunks can lead to uneven texture.
  • Freezing Too Short: Ensure they freeze for a sufficient time to become solid; otherwise, they can be difficult to remove.
  • Overly Sweetened Mixture: Start with less sweetener; you can always add more after tasting the blended mixture.

Variations to Try

Get creative with these fun variations to customize your mango popsicles:

  • Mango Coconut Chia Pops: Add 2 tablespoons of chia seeds to the mixture for added texture and health benefits.
  • Mango Berry Swirl: Blend in some strawberries or blueberries for a fruity twist and vibrant color.
  • Spicy Mango Pops: Add a pinch of cayenne pepper or chili powder for a spicy kick that complements the sweetness.
  • Minty Fresh: Blend in a handful of fresh mint leaves for a refreshing herbal note.

Storage and Make-Ahead Instructions

These mango popsicles can be made ahead of time and stored for later enjoyment:

  • Freezing: Store in the freezer for up to 3 months. Just be sure to keep them in an airtight container to prevent freezer burn.
  • Make-Ahead: Prepare them a day or two in advance to have a refreshing snack ready when you need it.
  • Thawing: If your popsicles are particularly frozen, let them sit at room temperature for a couple of minutes before removing from the molds.

Frequently Asked Questions (FAQs)

Here are some common questions regarding mango popsicles:

  • Can I use canned mango puree? Yes, canned mango puree works well, but ensure it is unsweetened for best results.
  • What type of coconut milk works best? Full-fat coconut milk gives the creamiest texture and flavor.
  • Are these popsicles vegan? Yes, they are entirely plant-based when made with coconut or almond milk.
  • Can I make this recipe without a blender? You can mash the mango by hand, but it may not be as smooth.
  • How do I know if my mango is ripe? A ripe mango will yield slightly to pressure and have a sweet aroma.
  • What if I don’t have popsicle molds? You can use small cups or ice cube trays; just insert sticks once partially frozen.
  • Can I add yogurt to the mixture? Absolutely! Adding yogurt will create a creamier texture and add probiotics.
  • How long do these popsicles last in the freezer? They can last for about 3 months if stored properly in an airtight container.

Nutritional Information and Dietary Adaptations

These mango popsicles are not only a treat but also a nutritious snack. Here are some nutritional insights:

  • Low in Calories: Each popsicle is low in calories and made with wholesome ingredients.
  • Rich in Vitamins: Mangoes are packed with vitamins A and C, boosting your immune system.
  • Low Sugar Option: Adjust the sweetness to suit your dietary needs, making them a great low-sugar option.
  • Gluten-Free: Naturally gluten-free, they are safe for those with gluten sensitivities.

Equipment Recommendations

To make these mango popsicles, you will need:

  • Popsicle Molds: Silicone molds are great for easy release.
  • Blender: A high-speed blender will ensure a smooth consistency.
  • Measuring Cups: Accurate measurements will ensure perfect ratios for your popsicles.

Serving Suggestions

Serve your mango popsicles with a side of fresh fruit or a drizzle of honey for added flair. They also pair wonderfully with:

  • Fresh Mint: Garnish with mint leaves for a pop of color and flavor.
  • Chocolate Drizzle: Dip in melted chocolate for a decadent treat.
  • Coconut Flakes: Roll in unsweetened coconut flakes for a tropical crunch.

Now that you have the ultimate guide to making Frozen Mango Popsicles, it’s time to get creative in the kitchen! Enjoy the process and share these delightful treats with family and friends. Remember, cooking should be fun and stress-free—so dive in and enjoy your refreshing creations!

Frozen Mango Popsicles

Prep Time 10 minutes
Total Time 10 minutes
Servings 4 popsicles
Calories 150
Enjoy a refreshing and healthy treat with these homemade frozen mango popsicles, perfect for hot days or a quick dessert.

Ingredients

Fruits

  • 2 cups ripe mango, chopped (fresh or frozen and thawed)
  • 1/2 cup coconut milk or almond milk
  • 1/2 tbsp honey or maple syrup (optional, based on mango sweetness)
  • 1 tbsp lime juice (optional, for brightness)

Instructions 

  • Add mango, coconut milk, sweetener, and lime juice to a blender and blend until smooth.
  • Pour the mixture into popsicle molds and insert sticks.
  • Freeze for at least 4-6 hours until solid.
  • Run warm water over molds and gently remove popsicles before serving.

Notes

For a creamier texture, use full-fat coconut milk.
Calories: 150kcal
Cost: $10
Course: Dessert
Keyword: Mango

Discover the Delight of a Strawberry Banana Smoothie Bowl

Are you ready to elevate your breakfast game? A Strawberry Banana Smoothie Bowl is not just a treat for your taste buds; it’s a refreshing way to start your day with a burst of nutrients. This creamy delight combines the natural sweetness of frozen bananas and strawberries, creating a bowl that’s both satisfying and healthy. In this guide, we’ll walk you through everything you need to make the perfect smoothie bowl, ensuring your mornings are deliciously stress-free!

Why You’ll Love This Recipe

This Strawberry Banana Smoothie Bowl is more than just a pretty dish. Here are five reasons to fall in love with it:

  • Quick and Easy: With just a few ingredients and a blender, you can whip up this smoothie bowl in under 10 minutes!
  • Nutrient-Rich: Packed with vitamins, minerals, and antioxidants, this bowl supports your health goals while satisfying your sweet tooth.
  • Customizable: You can easily adapt this recipe to suit your tastes by adding various toppings and mix-ins.
  • Vegan and Dairy-Free: This recipe is naturally dairy-free; just choose your favorite non-dairy milk for a creamy texture.
  • Perfect for Any Time: Whether it’s breakfast, a snack, or a light dessert, this smoothie bowl fits the bill!

Ingredients for Your Strawberry Banana Smoothie Bowl

Here’s what you’ll need to get started:

  • 2 Frozen Bananas: Make sure they’re peeled before freezing for easy blending.
  • 1 1/2 Cups Frozen Strawberries: Using frozen fruit helps achieve that thick, creamy texture.
  • 1 Tsp Vanilla Extract: A splash of vanilla adds a lovely flavor depth.
  • 1/2 Cup Non-Dairy Milk: Almond milk works beautifully, but feel free to use oat or coconut milk as well.
  • Optional Add-Ins: Consider protein powder, almond butter, or chia seeds for an extra nutritional boost.

Step-by-Step Guide to Making Your Smoothie Bowl

Close-up of a creamy smoothie bowl featuring strawberries and bananas, garnished with nuts and chia seeds.

Let’s dive into the steps to create your delicious Strawberry Banana Smoothie Bowl:

  1. Add all your ingredients to a blender.
  2. Blend until smooth and creamy. For the best results, use a blender with a tamper to push ingredients down towards the blades, which helps achieve a thick consistency.
  3. Transfer your smoothie to a bowl.
  4. Add your choice of toppings and enjoy!

Pro Tips for the Best Results

Here are some expert insights to enhance your smoothie bowl-making experience:

  • Use Frozen Ingredients: Frozen bananas and strawberries yield a creamier texture, making your smoothie bowl more indulgent.
  • Chill Your Ingredients: For an extra thick and refreshing experience, chill your non-dairy milk and any other ingredients before blending.
  • Don’t Over-Blend: Stop blending as soon as the mixture is smooth to maintain a thick consistency that holds your toppings well.
  • Experiment with Toppings: Fruits, nuts, seeds, and granola can elevate your bowl both in flavor and texture.
  • Make it a Meal: Add protein powder or nut butter to transform your smoothie bowl into a filling meal.
  • Layer Flavors: Consider adding a hint of honey or maple syrup if you prefer a sweeter bowl.
  • Use a Tamper: If your blender allows, use a tamper to push ingredients down for a smoother blend.
  • Blend in Batches: If making multiple bowls, blend in small batches to ensure even consistency.

Common Mistakes and Troubleshooting

Here are some common pitfalls and how to avoid them:

  • Too Thin: If your smoothie is too runny, add more frozen fruit or ice to thicken it up.
  • Too Thick: If it’s too thick to blend, add a splash of non-dairy milk to loosen it up.
  • Uneven Blending: Ensure you’re blending on high speed and using a tamper for a smooth consistency.
  • Unpleasant Taste: Balance flavors by adjusting sweetness with honey or maple syrup, or by adding a pinch of salt.

Variations to Try

Feel free to mix it up! Here are some variations you can try:

  • Chocolate Banana Smoothie Bowl: Add cocoa powder or chocolate protein powder for a chocolatey twist.
  • Berry Blast Smoothie Bowl: Substitute the strawberries with a mix of your favorite berries for a different flavor profile.
  • Peanut Butter Banana Smoothie Bowl: Swirl in some peanut butter for a deliciously nutty taste.
  • Green Smoothie Bowl: Add a handful of spinach or kale for a nutrient boost without compromising flavor.

Storage and Make-Ahead Instructions

You can make your smoothie bowl ahead of time! Here’s how:

  • Refrigeration: Store any leftovers in an airtight container in the fridge for up to 24 hours. You may need to stir in some extra non-dairy milk before consuming.
  • Freezing: For longer storage, freeze your blended smoothie in ice cube trays. Thaw before serving or blend again for a refreshing treat.

Frequently Asked Questions (FAQs)

Here are some common questions about Strawberry Banana Smoothie Bowls:

  • Can I use fresh bananas instead of frozen? Yes, but using frozen bananas gives a creamier texture.
  • What can I use instead of non-dairy milk? You can substitute with regular milk, yogurt, or fruit juice if preferred.
  • What toppings do you recommend? Fresh fruits, nuts, seeds, granola, or coconut flakes are all excellent choices!
  • How can I make my smoothie bowl sweeter? Add honey, maple syrup, or a splash of orange juice for a natural sweetness boost.
  • Is it okay to make this smoothie bowl the night before? Absolutely! Just store it in the fridge and stir before serving.
  • Can I add protein powder? Yes, protein powder is a great addition for a filling breakfast or post-workout snack.
  • What if I don’t have a blender? A food processor can be used, but may require more liquid to achieve a smooth consistency.
  • Are there any other fruits I can use? Yes! You can experiment with mango, peaches, or even avocados for a creamy texture.

Nutritional Benefits and Dietary Adaptations

This Strawberry Banana Smoothie Bowl is a powerhouse of nutrition:

  • Rich in Vitamins: Bananas are high in potassium, while strawberries are loaded with vitamin C.
  • Low in Calories: This recipe is a healthy alternative to sugary breakfast options.
  • Fiber-Packed: The addition of chia seeds or nuts can increase the fiber content, keeping you fuller for longer.

Essential Equipment Recommendations

To make your smoothie bowl experience seamless, consider these tools:

  • High-Powered Blender: A good blender is essential for achieving that smooth, creamy consistency.
  • Spatula: Useful for scraping down the sides of your blender to ensure everything is well mixed.
  • Serving Bowls: Choose bowls that are wide and shallow for a beautiful presentation of your toppings.

Serving Suggestions

Now that you’ve made your Strawberry Banana Smoothie Bowl, here are some serving suggestions:

  • Top with Fresh Fruits: Sliced bananas, strawberries, or even blueberries add freshness and visual appeal.
  • Add Crunch: Sprinkle granola or nuts for an irresistible crunch that contrasts the creamy base.
  • Drizzle on Nut Butter: A swirl of almond or peanut butter not only adds flavor but also healthy fats.
  • Garnish with Seeds: Chia seeds or hemp seeds provide added nutrition and texture.

In conclusion, creating a Strawberry Banana Smoothie Bowl is not only a delightful culinary experience but also a step towards healthier eating. With its vibrant colors, luscious texture, and nutritional benefits, it’s a perfect addition to your breakfast rotation or any time you need a refreshing snack. So, roll up your sleeves, gather your ingredients, and enjoy the journey of making this delicious smoothie bowl!

Strawberry Banana Smoothie Bowl

Prep Time 5 minutes
Total Time 5 minutes
Servings 2 servings
Calories 250
A delicious and healthy smoothie bowl made with frozen bananas and strawberries, perfect for a quick breakfast or snack.

Ingredients

Fruits

  • 2 pieces frozen bananas (peeled before freezing)
  • 1.5 cups frozen strawberries

Add-ins

  • 1 tsp vanilla extract
  • 0.5 cup non-dairy milk

Optional add-ins

  • to taste protein powder, almond butter, chia seeds, etc (add as desired)

Instructions 

  • Add all ingredients to a blender.
  • Blend until smooth and creamy, using a tamper if needed.
  • Transfer to a bowl and add toppings of choice.
  • Enjoy!

Notes

You can customize toppings and add-ins for variety.
Calories: 250kcal
Cost: $10
Course: Breakfast
Keyword: Fruit, Healthy, Smoothie

Welcome to your new go-to treat: No Bake Chocolate Oatmeal Bars! If you’re looking for a delightful dessert that satisfies your sweet tooth without the need for an oven, you’ve come to the right place. In just a few simple steps, you can whip up these delicious bars that are perfect for any occasion. Whether it’s a quick snack for the kids, a potluck contribution, or an indulgent treat for yourself, these bars have got you covered. Let’s dive into what makes this recipe a must-try!

Why You’ll Love This Recipe

Here are just a few reasons you’ll adore these no bake chocolate oatmeal bars:

  • Quick and Easy Preparation: With minimal cooking time, you can have these bars ready in under 30 minutes.
  • No Oven Required: Perfect for hot days or when you simply don’t want to turn on the oven.
  • Customizable Ingredients: Easily swap out ingredients to suit your taste or dietary needs.
  • Rich Chocolate Flavor: Indulge in the deep, satisfying taste of chocolate combined with wholesome oats.
  • Perfect for Sharing: These bars are visually appealing and make great gifts or party treats!

Ingredients

To make these delicious chocolate oatmeal bars, you will need the following ingredients:

  • 1 cup butter: This adds richness and helps bind the bars.
  • 1/2 cup brown sugar (packed): For sweetness and a hint of caramel flavor.
  • 1 teaspoon vanilla extract: Enhances the overall flavor.
  • 3 cups rolled oats: The base of our bars, providing texture and heartiness.
  • 1 cup semisweet or dark chocolate chips: Choose your favorite for a rich chocolate experience.
  • 1/2 cup peanut butter: Adds creaminess and a nutty element.

Ingredient Breakdown and Substitutions

Understanding your ingredients is key to achieving the best results. Here’s a closer look at each component:

  • Butter: For a dairy-free option, use coconut oil or a plant-based butter substitute.
  • Brown Sugar: Can be replaced with coconut sugar for a healthier alternative.
  • Peanut Butter: Almond butter or sunflower seed butter works well for those with nut allergies.
  • Chocolate Chips: Use dairy-free chocolate chips if you’re looking for a vegan version.
  • Oats: Rolled oats are preferred for texture; steel-cut oats can be too chewy.

How to Make No Bake Chocolate Oatmeal Bars

Side view of layered No Bake Chocolate Oatmeal Bars showcasing their gooey texture and chocolate drizzle.

Follow these simple steps to create your no bake chocolate oatmeal bars:

  1. Line an 8-inch or 9-inch square baking dish with parchment paper and set aside.
  2. Melt the butter and brown sugar together in a large saucepan over medium heat until the butter is fully melted and the sugar dissolves.
  3. Stir in the vanilla extract and mix well.
  4. Add the rolled oats to the saucepan, cooking on low heat for 3 to 4 minutes until the mixture is well blended.
  5. Pour half of the oat mixture into the prepared baking dish, spreading it out evenly and pressing down firmly.
  6. In a separate microwave-safe bowl, melt the peanut butter and chocolate chips together, stirring until smooth.
  7. Pour the melted chocolate mixture over the oat crust in the pan, reserving about 1/4 cup for drizzling. Spread evenly.
  8. Top with the remaining oat mixture, pressing gently, and drizzle with the reserved chocolate mixture.
  9. Refrigerate for 2 to 3 hours or overnight. Before cutting into bars, bring to room temperature.

Expert Tips for Success

To ensure your bars turn out perfectly every time, keep these pro tips in mind:

  • Press Firmly: Make sure to press down the oat mixtures firmly to help the bars hold together.
  • Chill Thoroughly: Allow enough chilling time for the bars to set properly before cutting.
  • Customize Toppings: Get creative with toppings like crushed nuts or shredded coconut for added flavor and texture.
  • Use Quality Ingredients: High-quality chocolate and natural peanut butter can elevate the taste significantly.
  • Keep It Moist: If you find the mixture too dry, a splash of milk or a bit more melted butter can help.

Common Mistakes and Troubleshooting

If you encounter issues while making your no bake bars, here are common mistakes and how to troubleshoot them:

  • Bars Crumbling: Ensure you pressed the layers down firmly. If still too crumbly, add a bit more melted butter.
  • Chocolate Not Melting: Microwave in short intervals and stir frequently to avoid burning.
  • Too Sweet: If the bars turn out too sweet for your taste, consider reducing the sugar next time or balancing with some sea salt.
  • Sticking to the Pan: Always line your baking dish with parchment paper for easy removal.

Variations to Try

Mix it up with these fun variations to keep your no bake chocolate oatmeal bars exciting:

  • Nutty Delight: Add 1/2 cup of chopped nuts like almonds or walnuts for an extra crunch.
  • Fruity Twist: Incorporate 1/2 cup of dried fruits like cranberries or raisins for a burst of sweetness.
  • Mint Chocolate: Add a few drops of peppermint extract to the chocolate mixture for a refreshing flavor.
  • Spicy Kick: Mix in a dash of cayenne pepper or cinnamon for a subtle heat.

Storage and Make-Ahead Instructions

Your no bake chocolate oatmeal bars can be stored easily:

  • Refrigeration: Keep them in an airtight container in the refrigerator for up to one week.
  • Freezing: These bars freeze well! Cut them into squares, wrap individually, and store in the freezer for up to 3 months.
  • Defrosting: To enjoy, let them thaw in the refrigerator overnight before serving.

FAQ

Here are answers to some common questions about making no bake chocolate oatmeal bars:

  • Can I use quick oats?: Quick oats are not recommended as they may lead to a mushy texture.
  • What if I don’t like peanut butter?: Substitute with any nut or seed butter of your choice!
  • How do I know when they are set?: The bars should be firm to the touch and hold their shape when cut.
  • Can I make them vegan?: Yes, use plant-based butter and dairy-free chocolate chips.
  • Are these bars gluten-free?: They can be gluten-free if you use certified gluten-free oats.
  • How can I make them less sweet?: Reduce the sugar and chocolate chips to suit your preference.
  • Can I add protein powder?: Yes, feel free to mix in your favorite protein powder for an extra boost!
  • What’s the best way to cut them?: Use a sharp knife and wipe it clean between cuts for neat squares.

Nutrition Tips and Dietary Adaptations

Feel good about your treat by considering these nutritional aspects:

  • Healthy Fats: The healthy fats from peanut butter and butter provide energy and satisfaction.
  • Whole Grains: Rolled oats offer fiber, helping with digestion and keeping you full.
  • Protein Boost: Adding nuts or protein powder can enhance the protein content.
  • Lower Sugar Options: You can use less sugar or natural sweeteners like honey or agave syrup.

Equipment Recommendations

To make the process smoother, here are some handy tools you might need:

  • 8-inch or 9-inch Square Baking Dish: For setting your bars.
  • Parchment Paper: Essential for easy removal of the bars.
  • Large Saucepan: For melting and mixing your ingredients.
  • Microwave-Safe Bowl: For melting chocolate and peanut butter.
  • Sharp Knife: For cutting your bars into perfect squares.

Serving Suggestions

These bars are delectable on their own, but here are some serving ideas:

  • With Ice Cream: Serve a warm bar with a scoop of vanilla ice cream for a decadent dessert!
  • Garnished with Fruit: Top with fresh berries for a refreshing contrast.
  • Drizzle of Caramel: A drizzle of caramel sauce can elevate the flavor experience.
  • As a Snack: Perfect as a midday energy booster or after-school treat.

In conclusion, making these no bake chocolate oatmeal bars is not only a fun kitchen project, but it also results in a delicious treat that you and your loved ones will cherish. Remember that cooking is about experimenting and enjoying the process. So get in the kitchen, have fun, and create your own versions of these delightful bars. Happy cooking!

Best No Bake Chocolate Oatmeal Bars

Prep Time 15 minutes
Cook Time 10 minutes
Total Time 25 minutes
Servings 12 bars
Calories 350
Delicious and easy-to-make no-bake chocolate oatmeal bars perfect for a quick treat or snack.

Ingredients

Dough

  • 1 cup butter
  • 1 2 cup brown sugar packed
  • 1 teaspoon vanilla extract
  • 3 cups rolled oats
  • 1 cup semisweet or dark chocolate chips
  • 1 2 cup peanut butter

Instructions 

  • Line an 8-inch or 9-inch square baking dish with parchment paper.
  • Melt butter and brown sugar in a saucepan over medium heat until smooth; stir in vanilla and oats. Cook for 3-4 minutes.
  • Press half of the oat mixture into the prepared dish; set aside the remaining half.
  • Melt peanut butter and chocolate chips together until smooth; spread over the crust, reserving 1/4 cup for drizzling.
  • Top with remaining oat mixture, press gently, drizzle with remaining chocolate, and refrigerate for 2-3 hours before cutting.

Notes

Keep refrigerated for best results and cut into bars before serving.
Calories: 350kcal
Cost: $10
Course: Dessert
Cuisine: American
Keyword: chocolate, no bake, Oats