Author

Steven

Browsing

Discover the Joy of Thai Chicken Salad

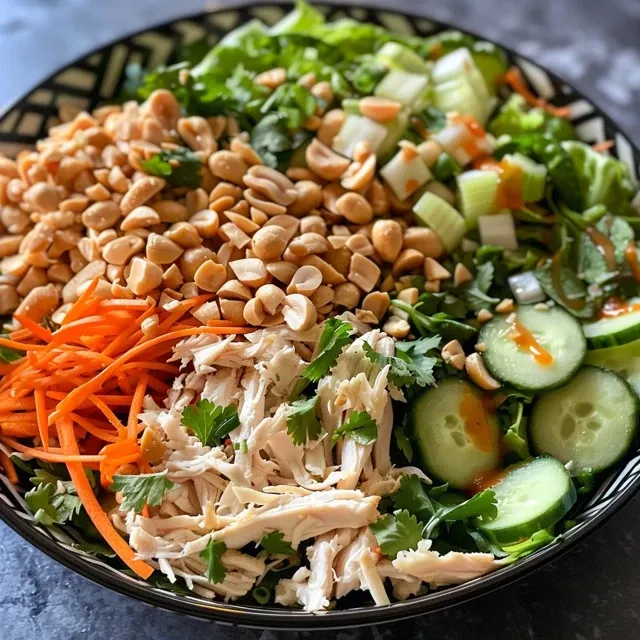
Welcome to your new favorite go-to recipe: Thai Chicken Salad! This vibrant dish combines tender rotisserie chicken, fresh vegetables, and a zesty dressing that will invigorate your taste buds. Perfect for quick meals or light lunches, this salad embodies all the flavors of Thai cuisine while being incredibly easy to prepare. Cooking should be fun and stress-free, and with this recipe, you’ll see just how enjoyable it can be!

Why You’ll Love This Recipe

Here are five reasons why this Thai Chicken Salad should be on your weekly menu:

  • Flavor Explosion: The combination of sweet chili sauce, fresh vegetables, and crunchy peanuts creates a delightful taste sensation that you’ll crave.
  • Quick and Easy: With rotisserie chicken and minimal prep, this salad can be ready in under 30 minutes, making it perfect for busy weeknights.
  • Healthy and Nutritious: Packed with vegetables, lean protein, and healthy fats, this dish is a wholesome choice for any meal.
  • Versatile Ingredients: Use whatever veggies you have on hand or customize the dressing to suit your taste.
  • Meal Prep Friendly: Prepare the salad in advance for quick grab-and-go lunches throughout the week.

Ingredient Breakdown

Let’s dive into the ingredients you’ll need for this delightful Thai Chicken Salad and some substitutions you can make if needed:

  • Shredded Rotisserie Chicken: You can use leftover grilled chicken or poached chicken breast. This saves time and adds flavor.
  • Napa Cabbage: A crunchy alternative is regular green cabbage, or you can opt for mixed salad greens for a lighter texture.
  • English Cucumbers: If you prefer, you can substitute with Persian cucumbers or even bell peppers for a different crunch.
  • Matchstick Carrots: Shredded carrots work equally well, adding color and sweetness.
  • Cilantro: Parsley can be used as a substitute if you’re not a fan of cilantro.
  • Scallions: Red onion or shallots can provide a similar flavor, but use them sparingly as they are more potent.
  • Roasted Peanuts: For a nut-free option, sunflower seeds or pumpkin seeds add a crunchy alternative.
  • Thai Sweet Chili Sauce: If unavailable, you can mix equal parts honey and sriracha for a sweet and spicy alternative.
  • Rice Vinegar: Apple cider vinegar can be used if you’re out of rice vinegar.
  • Fish Sauce: Soy sauce or tamari can replace fish sauce for a vegetarian option.

Step-by-Step Instructions

Side view of a vibrant Thai Chicken Salad featuring shredded chicken and nuts.

Now that you have your ingredients ready, let’s walk through the steps to make this delicious Thai Chicken Salad:

  1. Make the Dressing: In a bowl or mason jar, combine the Thai sweet chili sauce, rice vinegar, grated garlic, grated ginger, sesame oil, fish sauce, and honey. Mix or shake to combine. Adjust the consistency with water as needed.
  2. Prepare the Salad: In a large serving bowl, add the shredded chicken, Napa cabbage, cucumbers, carrots, cilantro, scallions, and peanuts.
  3. Dress and Toss: Pour the prepared dressing over the salad ingredients and toss until everything is evenly coated.
  4. Garnish and Serve: Top with additional peanuts for extra crunch and enjoy your refreshing salad!

Pro Tips for the Best Thai Chicken Salad

To ensure your salad is absolutely perfect, consider these expert tips:

  • Fresh Ingredients: Use the freshest vegetables available for maximum crunch and flavor.
  • Adjusting Spice: If you prefer a spicier salad, add chopped fresh chili peppers or a dash of sriracha to the dressing.
  • Let it Chill: Allow the salad to sit for about 15 minutes after dressing to let the flavors meld together.
  • Prep Ahead: Chop your vegetables and make the dressing in advance for easy assembly at mealtime.
  • Customizable: Feel free to add protein like shrimp or tofu for variation.
  • Season to Taste: Always taste the salad before serving and adjust the seasoning if needed.
  • Ingredient Ratios: If you enjoy a more dressed salad, feel free to double the dressing recipe.
  • Presentation: Serve in a large bowl or individual portions for a beautiful presentation.

Common Mistakes and Troubleshooting

Here are some common mistakes and how to avoid them:

  • Over-dressing: Too much dressing can make the salad soggy. Start with a little and add more as necessary.
  • Using Dull Vegetables: Avoid wilted or soggy vegetables; always choose crisp, fresh produce.
  • Skipping Seasoning: Don’t forget to season your salad with salt and pepper to enhance flavors.
  • Not Tasting: Always taste before serving to ensure it meets your flavor preferences.

Variations to Try

Want to switch things up? Here are some fun variations to explore:

  • Thai Chicken Salad with Mango: Add slices of fresh mango for a sweet and tropical twist.
  • Crunchy Thai Chicken Salad: Mix in crispy fried onions or chow mein noodles for added texture.
  • Spicy Thai Chicken Salad: Toss in jalapeños or use a spicy chili sauce to kick it up a notch.
  • Vegetarian Thai Salad: Replace the chicken with chickpeas or tofu for a hearty plant-based option.

Storage and Make-Ahead Instructions

This salad is great for meal prep! Here’s how to store it:

  • In the Fridge: Store any leftover salad in an airtight container in the fridge for up to 3 days. Keep the dressing separate until ready to serve to maintain crunchiness.
  • Make-Ahead: Prepare the chicken and chop the vegetables a day in advance. Mix everything just before serving.

FAQs about Thai Chicken Salad

Here are some frequently asked questions to help you make the most of your Thai Chicken Salad:

  • Can I use frozen chicken? Yes, just ensure it’s fully cooked and shredded before using it in the salad.
  • What if I don’t like cilantro? Feel free to substitute with parsley or omit it entirely.
  • How spicy is the salad? The spice level depends on the chili sauce used. Adjust to your preference by adding less or more.
  • Can I make this salad vegan? Absolutely! Just substitute the chicken with tofu and the fish sauce with soy sauce.
  • What is the best way to serve this salad? It can be served as a main dish or as a side salad with grilled meats.
  • How do I make it gluten-free? Use gluten-free soy sauce instead of fish sauce, and ensure all other ingredients are gluten-free.
  • Can I add fruits? Yes! Fruits like mandarin oranges or apples can enhance the sweetness and flavor.
  • How do I prevent the salad from wilting? Store the dressing separately and add it just before serving.

Nutritional Tips and Dietary Adaptations

This Thai Chicken Salad can easily fit various dietary preferences:

  • Low-Carb: Skip the carrots and use more leafy greens to lower the carb count.
  • High-Protein: Add boiled eggs or more chicken to increase protein content.
  • Dairy-Free: This recipe is naturally dairy-free, making it a great option for lactose-free diets.

Essential Equipment

Here’s what you’ll need to whip up this delicious salad:

  • Large Mixing Bowl: For combining all salad ingredients.
  • Mason Jar or Bowl: Ideal for mixing the dressing.
  • Knife and Cutting Board: For chopping your veggies.
  • Measuring Cups and Spoons: To measure ingredients accurately.

Serving Suggestions

This Thai Chicken Salad is versatile and pairs well with:

  • Grilled Chicken or Fish: A great addition for those wanting more protein.
  • Rice or Quinoa: Serve it over a bed of rice or quinoa for a more filling meal.
  • Wraps: Use the salad as a filling in lettuce wraps or tortillas for a fun twist.

Your Cooking Adventure Awaits!

Now that you have everything you need to make this delicious Thai Chicken Salad, it’s time to head to the kitchen! Remember, cooking is about exploration and joy, so don’t hesitate to adjust the flavors to your liking. Enjoy the process, and happy cooking!

Thai Chicken Salad

Prep Time 15 minutes
Total Time 15 minutes
Servings 4 servings
Calories 350
A vibrant and flavorful Thai Chicken Salad combining shredded chicken, fresh vegetables, and a spicy sweet chili dressing for a refreshing meal.

Ingredients

Protein

  • 3 cups shredded rotisserie chicken

Vegetables

  • 4 to 5 cups thinly sliced Napa cabbage
  • 2 cups thinly sliced English cucumbers
  • 1 cup shredded or matchstick carrots
  • 1 cup chopped cilantro packed
  • 2 scallions sliced scallions
  • 1 cup roasted peanuts plus more for garnish
  • cup Thai sweet chili sauce (Mae Ploy brand)
  • 3 to 4 tablespoons rice vinegar (adjust to taste)
  • 2 cloves fresh garlic, grated (use a zester)
  • 1 teaspoon fresh ginger, grated
  • ½ tablespoon sesame oil
  • 2 teaspoons fish sauce
  • 1 teaspoon honey (optional for more sweetness)

Water as needed

Instructions 

  • Combine all dressing ingredients in a bowl or jar, mix or shake, and adjust water for desired consistency.
  • In a large bowl, toss shredded chicken, vegetables, cilantro, scallions, and peanuts.
  • Add dressing and toss to coat evenly. Garnish with extra peanuts and serve.

Notes

Adjust dressing water for preferred consistency and sweetness.
Calories: 350kcal
Cost: $15
Course: Salad
Cuisine: Thai
Keyword: Chicken

Are you ready to transform your weeknight dinners into something vibrant and exciting? Welcome to the world of power bowls, where nutrition meets flavor in a delightful balance. This Balanced Chicken Veggie Power Bowl is not just a meal; it’s a celebration of colors and tastes that will invigorate your taste buds and nourish your body. In this guide, we’ll walk through every step to create this delicious and nutritious meal that’s perfect for busy nights or lazy weekends.

In just under 30 minutes, you’ll have a wholesome dinner ready to serve. This recipe is designed to be simple and adaptable, allowing you to make it your own. So, let’s dive in and discover why this power bowl is a must-try!

Why You’ll Love This Recipe

  • Quick and Easy: Prepare this meal in under 30 minutes, making it perfect for busy weeknights.
  • Nutritious Ingredients: Packed with lean protein, fresh veggies, and wholesome grains, this bowl supports your health.
  • Customizable: Feel free to swap in your favorite veggies or grains—this recipe embraces creativity!
  • Meal Prep Friendly: Perfect for batch cooking; make a few servings ahead and enjoy throughout the week.
  • Kid Approved: The colorful presentation and tasty flavors appeal to both kids and adults, making it a family favorite.

Detailed Ingredient Breakdown

Let’s take a closer look at the ingredients you’ll need to whip up your Balanced Chicken Veggie Power Bowl. Each component plays a vital role in achieving that delicious flavor profile!

  • Chicken Breast: 1 chicken breast, cut into strips. You can substitute with tofu or chickpeas for a vegetarian option.
  • Olive Oil: 1 tbsp olive oil. Feel free to swap with avocado oil for a different flavor.
  • Spices: 1 2 tsp smoked paprika and 1 4 tsp garlic powder. These spices are crucial for flavor; adjust to your taste.
  • Salt and Pepper: To taste. Always season to enhance the flavors of your ingredients.
  • Lemon Juice: Juice of 1 2 lemon. Fresh lemon juice brightens the dish.
  • Vegetables: 1 2 cup broccoli florets, 1 4 red bell pepper (sliced), 1 4 yellow bell pepper (sliced), and 1 medium carrot (sliced). You can use frozen vegetables if you’re short on time.
  • Rice: 1 2 cup jasmine or basmati rice. Brown rice or quinoa are great alternatives for a nuttier flavor.
  • Water: 1 cup water, for cooking the rice.
  • Pinch of Salt: For cooking the rice.

Step-by-Step Instructions

Now that we have our ingredients ready, let’s get cooking!

  1. Marinate the Chicken: Toss chicken strips in olive oil, smoked paprika, garlic powder, lemon juice, salt, and pepper. Let sit for 10 minutes to absorb the flavors.
  2. Sear the Chicken: Heat a skillet or grill pan over medium heat. Sear the marinated chicken until golden brown and cooked through, about 6-8 minutes.
  3. Steam the Veggies: While the chicken cooks, steam the broccoli and carrot slices until just tender (3-5 minutes). You can keep the bell peppers raw for crunch or lightly steam them for 1 minute.
  4. Cook the Rice: Rinse the rice under cold water. In a small pot, combine rice, water, and a pinch of salt. Bring to a boil, then cover and simmer on low heat for 12-15 minutes until the water is absorbed. Let sit for 5 minutes, then fluff with a fork.
  5. Assemble Your Bowl: On a plate or in a bowl, arrange the rice, chicken, and vegetables side by side. Serve warm and enjoy your colorful, nutritious meal!

Pro Tips for Perfecting Your Bowl

A close-up of a chicken and vegetable bowl showcasing fresh ingredients and textures.
  • Cook the Chicken Evenly: Ensure your skillet is hot before adding the chicken to get that golden sear.
  • Season Your Vegetables: A sprinkle of salt and pepper can elevate the taste of your veggies—don’t skip it!
  • Fluff Your Rice: Always let your rice sit before fluffing; this keeps it from becoming mushy.
  • Look for Color: A variety of vibrant vegetables not only make your bowl more appealing but also boost its nutritional value.
  • Experiment with Sauces: Try drizzling a sauce like sriracha, teriyaki, or tahini to add depth to your bowl.
  • Make it Ahead: Prep the chicken and veggies ahead of time and store in the fridge for quick assembly later.
  • Use Leftovers: This power bowl is perfect for utilizing leftover chicken or veggies from previous meals.
  • Mind the Cooking Time: Adjust the steaming time for the veggies depending on your preference for crunchiness.
  • Include Fresh Herbs: Fresh cilantro or parsley can add a burst of flavor and freshness to your bowl.
  • Keep it Balanced: Aim for a good mix of protein, carbs, and veggies in your bowl for a well-rounded meal.

Common Mistakes and Troubleshooting

Even the best cooks can face challenges in the kitchen. Here are some common mistakes and how to avoid them:

  • Overcooking the Chicken: Keep an eye on the chicken to prevent it from drying out. Aim for an internal temperature of 165°F.
  • Mushy Rice: Rinse your rice thoroughly to remove excess starch, which can lead to a gummy texture.
  • Veggies Overcooked: Steam vegetables just until tender; they should retain some crunch for the best texture.
  • Underseasoned Dish: Don’t be afraid to taste and adjust seasoning as you cook to ensure balanced flavor.

Delicious Variations

Make this power bowl your own with these fun variations:

  • Southwestern Style: Add black beans, corn, and avocado for a Tex-Mex twist.
  • Asian Inspired: Substitute chicken with teriyaki tofu, add snap peas, and serve with a drizzle of soy sauce.
  • Mediterranean Bowl: Use grilled chicken, add cherry tomatoes, cucumber, olives, and a dollop of tzatziki.
  • Breakfast Bowl: Top with a fried egg, and add roasted sweet potatoes and sautéed spinach for a hearty breakfast option.

Storage and Make-Ahead Instructions

This Balanced Chicken Veggie Power Bowl is great for meal prep! Here’s how to store it:

  • Refrigerate: Store in an airtight container in the fridge for up to 4 days. Keep components separate to maintain freshness.
  • Freezing: You can freeze the cooked chicken and rice for up to 3 months. Thaw in the fridge overnight before reheating.
  • Reheating: Gently reheat in the microwave or on the stove, adding a splash of water to prevent drying out.

Frequently Asked Questions (FAQs)

  • Can I make this recipe gluten-free? Yes! Use gluten-free soy sauce or tamari and ensure all ingredients are gluten-free.
  • What other proteins can I use? You can substitute chicken with shrimp, beef, or plant-based proteins like tempeh or tofu.
  • Can I use frozen vegetables? Absolutely! Just adjust the cooking time slightly as frozen veggies may require a bit longer to heat through.
  • How do I add more flavor? Experiment with different marinades, herbs, and spices to customize the flavor profile to your liking.
  • Is this recipe kid-friendly? Yes! The colorful presentation and delicious flavors make it appealing to children.
  • Can I double this recipe? Definitely! This recipe is easily scalable for meal prep or feeding a crowd.
  • What can I serve with this bowl? Consider pairing it with a side salad or some whole-grain bread for a complete meal.
  • How can I make it more filling? Add more grains like quinoa or farro, or top with nuts and seeds for added texture and protein.

Nutritional Tips and Dietary Adaptations

To enhance the nutritional value of your Balanced Chicken Veggie Power Bowl, consider these tips:

  • Load Up on Veggies: Aim for a variety of colors in your bowl to maximize vitamins and minerals.
  • Choose Whole Grains: Opt for brown rice or quinoa for added fiber and nutrients.
  • Watch Portion Sizes: Be mindful of portion sizes, especially with higher-calorie ingredients like oils and sauces.
  • Incorporate Healthy Fats: Add a handful of nuts or seeds for healthy fats and crunch.
  • Stay Hydrated: Pair your meal with a refreshing drink, like infused water or herbal tea, to aid digestion.

Essential Equipment Recommendations

Having the right tools can make cooking easier and more enjoyable. Here are some essentials:

  • Non-Stick Skillet: Ideal for searing chicken without sticking.
  • Steamer Basket: Perfect for steaming veggies while retaining their nutrients and color.
  • Rice Cooker: A handy tool for perfectly cooked rice every time.
  • Sharp Chef’s Knife: Essential for cutting chicken and vegetables efficiently.
  • Measuring Cups and Spoons: For precise ingredient measurements.

Serving Suggestions

Presenting your power bowl well can enhance the dining experience:

  • Layer It Up: Arrange the rice, chicken, and veggies in sections for a visually appealing presentation.
  • Garnish: Add fresh herbs like cilantro or parsley and a wedge of lemon for a fresh touch.
  • Sauce Drizzle: Finish with a drizzle of your favorite sauce or dressing to elevate the flavors.
  • Serve Warm: Enjoy the bowl warm for the best taste experience.

In conclusion, the Balanced Chicken Veggie Power Bowl is not just a meal; it’s a delightful culinary adventure that allows for creativity and personalization. Whether you’re cooking for yourself or your family, this recipe is sure to bring joy to your dinner table. So, roll up your sleeves, gather your ingredients, and let’s make cooking fun and stress-free. Happy cooking!

Balanced Chicken Veggie Power Bowl

Prep Time 10 minutes
Cook Time 20 minutes
Total Time 30 minutes
Servings 2 servings
Calories 450
A colorful and nutritious meal combining tender chicken, fresh vegetables, and fragrant rice for a balanced and satisfying dish.

Ingredients

Protein

  • 1 piece chicken breast (cut into strips)
  • 1 tbsp olive oil
  • 2 tsp smoked paprika
  • 4 tsp garlic powder
  • to taste Salt and pepper (to taste)
  • 0.5 lemon juice of 1/2 lemon

Vegetables

  • 0.5 cup broccoli florets
  • 0.25 cup red bell pepper, sliced
  • 0.25 cup yellow bell pepper, sliced
  • 1 medium carrot, sliced

Grains

  • 0.5 cup jasmine or basmati rice
  • 1 cup water
  • Pinch salt

Instructions 

  • Toss chicken strips in olive oil, paprika, garlic powder, lemon juice, salt, and pepper. Let sit for 10 minutes.
  • Cook chicken in a hot skillet or grill until golden and cooked through, about 6-8 minutes.
  • Steam broccoli and carrots until tender, 3-5 minutes. Keep bell peppers raw or lightly steam for 1 minute.
  • Rinse rice, then cook with water and salt in a small pot until water is absorbed, about 12-15 minutes. Fluff and set aside.
  • Assemble the bowl with rice, chicken, and vegetables. Serve warm.

Notes

Feel free to customize vegetables or add your favorite toppings for extra flavor.
Calories: 450kcal
Cost: $12
Course: Main Course
Cuisine: Healthy
Keyword: Chicken, rice, Vegetables

Welcome to your new favorite summer drink! If you’re looking to beat the heat while indulging in a creamy, sweet treat, this Easy Homemade Vanilla Iced Coffee is just what you need. Combining chilled coffee with luscious half and half and a homemade or store-bought vanilla syrup, this recipe will have you feeling refreshed and energized, without the stress of complicated steps. In less than 10 minutes, you can enjoy a delightful pick-me-up that rivals your local coffee shop’s offerings.

Why You’ll Love This Recipe

Let’s talk about the delightful benefits of making your own vanilla iced coffee:

  • Quick Preparation: This recipe takes just 5 minutes from start to finish, making it perfect for busy mornings or afternoon cravings.
  • Customizable Flavor: Adjust the sweetness and creaminess to your taste, allowing you to create a drink that’s uniquely yours. You can use any milk alternative like almond or oat milk!
  • Cost-Effective: Enjoying iced coffee at home saves you money compared to frequent visits to your favorite coffee shop.
  • Quality Control: You can choose high-quality coffee and ingredients, ensuring a delicious cup every time.
  • Creative Variations: This base recipe opens the door to endless variations, so you can keep it fresh and exciting!

Ingredients You’ll Need

Here’s what you’ll need to whip up this refreshing drink:

  • 8 ounces chilled coffee or cold brew: Choose your preferred brew strength for the best flavor.
  • 1 tablespoon vanilla-flavored simple syrup: Use store-bought or follow our simple recipe to make your own.
  • 1 cup ice cubes: Fresh, clean ice is essential for the perfect chill.
  • 2 tablespoons half and half or creamer of your choice: Feel free to substitute with any milk alternative that you love!

How to Make Homemade Vanilla Iced Coffee

Follow these straightforward steps to create your iced coffee masterpiece:

Step 1: Brew Your Coffee

Start by brewing your coffee. If you’re using cold brew, simply pour it into a glass. For brewed coffee, allow it to cool to room temperature, then chill it in the fridge until cold.

Step 2: Prepare the Vanilla Syrup

You can either use store-bought vanilla syrup or make your own by combining equal parts sugar and water with a splash of vanilla extract. Heat until the sugar dissolves, then let it cool.

Step 3: Assemble Your Iced Coffee

In a tall glass, add the ice cubes, then pour the chilled coffee over the ice. Add the vanilla syrup and stir to combine.

Step 4: Add Creaminess

Top your drink with half and half or your chosen creamer. Give it a gentle stir, and enjoy!

Pro Tips for Making the Perfect Iced Coffee

Side view of a refreshing homemade vanilla iced coffee with creamy texture.
  • Choose Quality Coffee: Use freshly brewed coffee or high-quality cold brew for the best flavor.
  • Experiment with Sweetness: Start with a small amount of syrup and adjust to your liking.
  • Make It Ahead: Brew coffee in advance and store it in the fridge for a quick grab-and-go drink.
  • Use Flavorful Creamers: Try flavored creamers like hazelnut or caramel for a twist.
  • Ice Matters: Use large ice cubes to prevent your coffee from diluting too quickly.
  • Garnish Creatively: Consider adding whipped cream, a sprinkle of cocoa, or a cinnamon stick for extra flair.
  • Chill Your Glass: Pre-chill your glass to keep your drink colder for longer.
  • Test Different Ratios: Find your perfect balance of coffee to syrup to cream!

Common Mistakes and Troubleshooting

Here are some common pitfalls to avoid while making your vanilla iced coffee:

  • Using Hot Coffee: Always ensure your coffee is chilled; using hot coffee will melt the ice too quickly.
  • Too Much Syrup: Start with less syrup; you can always add more if needed.
  • Weak Flavor: If your coffee tastes weak, try a darker roast or adjust the coffee-to-water ratio.
  • Not Mixing Well: Stir thoroughly to ensure the syrup is fully incorporated into the coffee.

Variations of Vanilla Iced Coffee

Want to switch things up? Here are some fun variations to try:

  • Mocha Iced Coffee: Add a tablespoon of chocolate syrup for a chocolatey twist.
  • Caramel Vanilla Iced Coffee: Drizzle caramel sauce on top for an indulgent treat.
  • Spiced Vanilla Iced Coffee: Add a pinch of cinnamon or nutmeg for a warm flavor profile.
  • Almond Joy Iced Coffee: Incorporate coconut milk and a dash of almond extract to recreate the candy bar flavor.

Storage and Make-Ahead Instructions

You can easily make your vanilla iced coffee ahead of time:

  • Store Coffee: Keep brewed coffee in the fridge for up to a week.
  • Make Syrup Ahead: Homemade vanilla syrup can be stored in an airtight container in the fridge for up to two weeks.
  • Assemble Fresh: For the best flavor, assemble your drink just before serving.

Frequently Asked Questions

Here are some common queries about iced coffee:

  • Can I use decaf coffee? Yes! Decaf works just as well for a delicious iced coffee.
  • How long can I store iced coffee? Brewed coffee can last up to a week in the fridge, but it’s best enjoyed fresh.
  • What can I substitute for half and half? You can use any milk or non-dairy alternatives like oat or almond milk.
  • Can I use flavored syrups? Absolutely! Feel free to experiment with different flavors for a unique twist.
  • Is this recipe suitable for kids? Yes! Just adjust the sweetness to your taste.
  • Can I make this iced coffee vegan? Yes! Use plant-based milk and a vegan vanilla syrup.
  • How do I make my iced coffee less watery? Use larger ice cubes or freeze coffee into ice cubes.
  • Can I add alcohol to this recipe? Yes, a splash of coffee liqueur can elevate your coffee experience!

Nutrition Tips and Dietary Adaptations

For those watching their nutrition, consider these tips:

  • Low-Calorie Options: Use a sugar substitute in your syrup for fewer calories.
  • Dairy-Free Choices: Opt for almond, coconut, or soy milk as a creamer alternative.
  • Watch the Add-Ins: Be mindful of additional syrups or toppings that can increase calories and sugar.

Essential Equipment for Iced Coffee

Gather these tools to make your iced coffee experience smooth:

  • Coffee Maker or Cold Brew Maker: Choose your preferred brewing method.
  • Measuring Cups and Spoons: Precision helps in achieving the perfect balance of flavors.
  • Glass or Tumbler: A tall glass is ideal for showcasing your beautiful layered drink.
  • Stirring Spoon: Use a long spoon to mix your ingredients well.

Serving Suggestions

Enhance your iced coffee experience with these serving ideas:

  • Pair with Pastries: Enjoy alongside muffins or scones for a delightful breakfast.
  • Garnish with Whipped Cream: Add a dollop of whipped cream on top for extra creaminess.
  • Serve with a Straw: A reusable straw adds a fun touch and is eco-friendly!

Now that you have the ultimate guide to making homemade vanilla iced coffee, you can impress your friends and family with your barista skills. Remember, the joy of cooking comes from experimenting and enjoying the process. So, gather your ingredients and start blending flavors! Happy brewing!

Easy Homemade Vanilla Iced Coffee

Prep Time 5 minutes
Total Time 5 minutes
Servings 1 cup
Calories 80
Enjoy a refreshing and creamy vanilla iced coffee made easily at home with just a few simple ingredients.

Ingredients

Beverages

  • 8 ounces chilled coffee or cold brew
  • 1 tablespoon vanilla-flavored simple syrup (store-bought or homemade)
  • 1 cup ice cubes
  • 2 tablespoons half and half or creamer (of your choice)

Instructions 

  • Fill a glass with ice cubes.
  • Pour the chilled coffee over the ice.
  • Add vanilla simple syrup and stir well.
  • Pour in the half and half or creamer and mix until combined.
  • Serve immediately and enjoy!

Notes

You can adjust the sweetness by adding more or less vanilla syrup.
Calories: 80kcal
Cost: $5
Course: Beverage
Keyword: iced coffee, refreshing, vanilla

Unlock the Refreshing Joy of Your New Favorite Peach Smoothie

Welcome to the delightful world of peach smoothies! If you’ve been searching for a delicious and easy way to enjoy the sweet, juicy goodness of peaches, you’re in the right place. This Refreshing Bliss Peach Smoothie Recipe combines ripe peaches, creamy Greek yogurt, and a splash of citrus to create a drink that is not only refreshing but also packed with nutrition. Whether you’re looking to kickstart your morning, recharge after a workout, or enjoy a midday treat, this smoothie is perfect for you!

In this comprehensive guide, we’ll break down everything you need to know about making the perfect peach smoothie. We will cover the ingredients, tips for the best flavor, variations to try, and even some common mistakes to avoid. Plus, we’ll provide answers to your frequently asked questions to ensure your smoothie experience is nothing short of amazing. Let’s dive in!

Why You’ll Love This Recipe

This peach smoothie is not just a quick blend of ingredients; it’s a culinary experience that brings joy and health into your daily routine. Here are five reasons why you will love this recipe:

  • Delicious Flavor: The combination of ripe peaches and Greek yogurt creates a creamy texture and a sweet, tangy flavor that’s irresistible.
  • Nutrition Boost: Packed with vitamins, calcium, and protein, this smoothie is a nutritious option that fuels your body.
  • Quick and Easy: With just a few simple steps, you can whip up this smoothie in under ten minutes—perfect for busy mornings!
  • Customizable: Feel free to add your favorite ingredients or substitutes to create a unique flavor profile.
  • Great for Any Occasion: This peach smoothie is ideal for breakfast, a post-workout snack, or a refreshing dessert.

Ingredients You’ll Need for Classic Peach Smoothie

Let’s take a closer look at the ingredients that make this smoothie so special:

  • 2 ripe peaches: Fresh, juicy peaches are the star of this smoothie. Choose ones that are slightly soft to the touch for optimal sweetness.
  • 1 cup plain Greek yogurt: This adds creaminess and a protein boost to your smoothie.
  • 1/2 cup orange juice: A splash of citrus brightens the flavors and balances the sweetness of the peaches.
  • 1 tablespoon honey (optional): If your peaches aren’t as sweet as you’d like, a drizzle of honey can enhance the flavor.
  • 1 cup ice cubes: These help achieve the perfect chilled consistency.

How to Make a Peach Smoothie?

A delicious peach smoothie captured from the side, showcasing its smooth texture and vibrant color.

Making this peach smoothie is a breeze! Follow these simple steps:

1. Prep Your Peaches

Start by peeling and pitting the peaches. Cut them into chunks to make blending easier.

2. Add Ingredients to Blender

Place the peach chunks, Greek yogurt, orange juice, and optional honey into your blender.

3. Add Ice

Next, toss in the ice cubes to achieve that frosty texture.

4. Blend Until Smooth

Blend on high until the mixture is completely smooth and creamy. This usually takes about 30 seconds.

5. Taste and Adjust

Give your smoothie a taste. If you’d like it sweeter, add more honey and blend again.

6. Serve and Enjoy

Pour the smoothie into a glass and enjoy immediately for the best flavor and texture.

Pro Tips for the Best Peach Smoothie

To elevate your smoothie-making skills, here are some expert tips:

  • Choose the Right Peaches: Always opt for ripe, sweet peaches. If they’re out of season, frozen peaches work well too.
  • Experiment with Yogurt: Try flavored Greek yogurt for a twist, or use dairy-free yogurt for a vegan option.
  • Chill Your Ingredients: For an extra cold smoothie, chill your yogurt and juice beforehand.
  • Balance Flavors: Don’t be afraid to adjust the honey based on your taste preferences.
  • Blend in Superfoods: Boost the nutrition by adding spinach or kale without compromising the flavor.
  • Use a High-Speed Blender: This ensures a creamy, smooth texture without any chunks.
  • Consider Texture: If you like a thicker smoothie, reduce the amount of orange juice.
  • Garnish Creatively: Top with a slice of peach or a sprinkle of granola for added texture.

Common Mistakes and Troubleshooting

Even the simplest recipes can come with a few hiccups. Here’s how to avoid common mistakes:

  • Too Sweet? If your smoothie is too sweet, add a splash of lemon juice to balance the flavors.
  • Too Thick? Thin your smoothie with a little extra orange juice or water, blending until you reach the desired consistency.
  • Not Creamy Enough? If your smoothie isn’t creamy, include more Greek yogurt or a banana to improve the texture.
  • Not Cold Enough? Ensure to use ice cubes and consider pre-chilling your ingredients.

Some Other Creative Peach Smoothie Variations to Try

Here are four delicious variations to keep your smoothie game exciting:

  • Tropical Twist: Add 1/2 cup of pineapple and coconut milk for a tropical flair.
  • Berry Peach Smoothie: Incorporate a handful of mixed berries for a fruity explosion.
  • Peach-Mango Delight: Swap out half of the peaches with ripe mango for a sweet twist.
  • Protein Boost: Add a scoop of protein powder or nut butter for an extra energy kick.

Storage and Make-Ahead Instructions

If you want to enjoy your smoothie later, here’s how to store it properly:

  • Refrigerate: Store leftover smoothie in an airtight container in the fridge for up to 24 hours. Shake well before consuming.
  • Freeze: Pour your smoothie into ice cube trays and freeze for a quick grab-and-go option. Blend frozen cubes with a splash of liquid when ready to enjoy.

Comprehensive FAQ

Let’s tackle some common questions about peach smoothies:

  • Can I use frozen peaches? Absolutely! Frozen peaches are great for smoothies and can give you a thicker texture.
  • Is this recipe vegan? To make it vegan, substitute Greek yogurt with a plant-based yogurt.
  • How can I make this smoothie dairy-free? Use almond milk or coconut milk in place of yogurt and regular milk.
  • Can I add spinach to my smoothie? Yes! Spinach blends well and adds nutrients without altering the taste.
  • How long does a peach smoothie last? It’s best enjoyed fresh, but can be stored for up to a day in the fridge.
  • Can I use other fruits? Yes! Experiment with your favorite fruits to create your unique blend.
  • What’s the best time to enjoy this smoothie? It’s perfect for breakfast, a snack, or even dessert!
  • How can I increase the protein content? Add protein powder, Greek yogurt, or nut butter for a protein boost.

Nutrition Tips and Dietary Adaptations

For those mindful of nutrition, here are some adaptations:

  • Low-Calorie Option: Use low-fat yogurt and skip the honey for a lighter smoothie.
  • Added Fiber: Incorporate flaxseeds or chia seeds for additional fiber and omega-3s.
  • Reduced Sugar: Use unsweetened yogurt and avoid adding honey if you prefer less sugar.

Equipment Recommendations

To achieve the best results, consider using the following equipment:

  • High-Speed Blender: A powerful blender will ensure smooth, creamy results.
  • Measuring Cups: Accurate measurements make a difference in flavor balance.
  • Cutting Board and Knife: For easy peach prep, keep your cutting tools sharp and ready.

Serving Suggestions

Serve your peach smoothie in a tall glass with a colorful straw. For an extra touch, garnish with fresh peach slices or a sprig of mint. Enjoy it on its own or pair it with a light breakfast, such as whole-grain toast or oatmeal, for a satisfying meal.

Conclusion

Your journey into the world of peach smoothies has just begun! With this Refreshing Bliss Peach Smoothie Recipe, you’ve got a delicious and nutritious drink at your fingertips. Remember, cooking and blending are all about confidence and creativity. Don’t hesitate to experiment with flavors and ingredients to make this smoothie truly yours. Cheers to a vibrant and healthy lifestyle!

Classic Peach Smoothie

Prep Time 10 minutes
Total Time 10 minutes
Servings 2 cups
Calories 200
A refreshing and creamy peach smoothie perfect for a quick breakfast or snack.

Ingredients

Fruits

  • 2 pieces ripe peaches, peeled and pitted
  • 1 cup plain Greek yogurt
  • 0.5 cup orange juice
  • 1 tablespoon honey (optional)
  • 1 cup ice cubes

Instructions 

  • Cut the peaches into chunks.
  • Add peaches, Greek yogurt, and orange juice into a blender.
  • If desired, add honey for sweetness.
  • Add ice cubes and blend until smooth.
  • Serve immediately.

Notes

For a creamier texture, use frozen peaches.
Calories: 200kcal
Cost: $8
Course: Breakfast, Snack
Cuisine: American
Keyword: Peach

Delight in Creamy Garlic Chicken Rice Bowls

Welcome to a culinary journey that promises to transform your weeknight dinners into something extraordinary! These creamy garlic chicken rice bowls are not just a meal; they are a cozy embrace on a plate, perfect for busy evenings when you want something quick yet indulgent. With tender chicken coated in a luscious garlic cream sauce, served over fluffy rice, this recipe is designed for those who crave flavor without the fuss. Let’s dive into the details of this incredible dish!

Why You’ll Love This Recipe

This recipe is a winner for so many reasons. Here are just a few highlights that make it stand out:

  • Quick and Easy: Perfect for busy weeknights, this dish takes less than 30 minutes to prepare from start to finish.
  • Flavor-Packed: The creamy garlic sauce elevates the chicken, packing each bite with incredible flavor that everyone will love.
  • Customizable: Easily adapt this recipe by swapping in your favorite vegetables or different types of rice.
  • Meal Prep Friendly: Make a big batch for the week, and enjoy reheatable leftovers that taste just as good the next day.
  • Family Favorite: It’s a dish that both kids and adults can agree on, making dinner time a breeze!

Ingredient Breakdown

To make these delightful chicken rice bowls, you’ll need the following ingredients:

  • 1 pound boneless, skinless chicken breasts: Cut into bite-sized pieces for easy cooking.
  • 2 tablespoons olive oil: For sautéing the chicken to golden perfection.
  • 4 cloves garlic, minced: The star ingredient that adds a rich flavor to the sauce.
  • 1 cup heavy cream: This creates the creamy texture of the sauce; you can substitute with half-and-half for a lighter option.
  • 1 cup chicken broth: Adds depth to the sauce; homemade or store-bought works well.
  • 1 teaspoon Italian seasoning: A blend of herbs that enhances the dish’s flavor.
  • Salt and pepper to taste: Essential for seasoning the chicken and sauce.
  • 2 cups cooked rice: White or brown rice works; you can also use quinoa or cauliflower rice for a low-carb version.
  • Fresh parsley, chopped: For garnish and a pop of color.
  • Grated Parmesan cheese: Optional, but highly recommended for an extra layer of flavor.

Pro Tips for Perfect Creamy Garlic Chicken Rice Bowls

Juicy chicken pieces in a creamy garlic sauce served over rice.

Here are some expert insights to ensure your dish turns out perfectly:

  • Cut Uniformly: Cut chicken into even pieces to ensure consistent cooking.
  • Don’t Rush the Garlic: Allow the garlic to sauté until fragrant but be careful not to burn it, as it can turn bitter.
  • Simmer the Sauce: Let the sauce simmer long enough to thicken, which enhances its richness.
  • Adjust Creaminess: If you prefer a lighter sauce, you can reduce the amount of heavy cream and increase the chicken broth.
  • Experiment with Herbs: Add fresh herbs like thyme or basil for a twist on flavor.
  • Serve Immediately: For the best texture, serve the bowls right after preparation.
  • Try Different Rice: Substitute with jasmine or basmati rice for varied flavor.
  • Add Veggies: Incorporate steamed broccoli or bell peppers for added nutrition.

Common Mistakes and Troubleshooting

Even simple recipes can have their pitfalls. Here’s how to avoid common mistakes:

  • Underseasoning: Always taste your sauce before serving; it may need extra salt or pepper.
  • Overcooking Chicken: Keep an eye on your chicken to prevent it from becoming dry; it should be golden brown and cooked through but still moist.
  • Too Thin Sauce: If your sauce is too thin, let it simmer longer to thicken.
  • Burnt Garlic: If your garlic burns, it’s best to start over with fresh garlic to maintain the dish’s flavor.

Recipe Variations

This recipe is versatile and can be adapted in many delicious ways. Here are a few ideas to try:

  • Vegetarian Option: Replace chicken with mushrooms or tofu for a plant-based version.
  • Spicy Version: Add red pepper flakes or sriracha to the garlic sauce for a kick.
  • Asian Twist: Incorporate soy sauce and ginger to create an Asian-inspired garlic sauce.
  • One-Pan Meal: Toss in your favorite vegetables like snap peas or carrots directly into the skillet with the chicken for a complete meal.

Storage and Make-Ahead Instructions

If you want to prepare this dish in advance, here’s how to store and reheat:

  • Make-Ahead: Cook the chicken and sauce in advance, then store separately from the rice. Reheat before serving.
  • Storage: Store leftovers in an airtight container in the refrigerator for up to 3 days.
  • Freezing: You can freeze the creamy chicken sauce for up to 2 months. Thaw in the fridge overnight before reheating.
  • Reheating: For best results, reheat on the stovetop over low heat, adding a splash of chicken broth to restore creaminess.

Comprehensive FAQ

Here are some frequently asked questions about this recipe:

  • Can I use frozen chicken? Yes, but make sure to thaw it completely before cooking.
  • What can I use instead of heavy cream? You can substitute with Greek yogurt, sour cream, or a non-dairy alternative.
  • Is this recipe gluten-free? Yes, as long as you use gluten-free chicken broth and ensure your rice is gluten-free.
  • How can I make this dish dairy-free? Use coconut milk or a dairy-free cream alternative instead of heavy cream.
  • Can I add more garlic? Absolutely! Feel free to increase the garlic for a stronger flavor.
  • What type of rice is best? Both white and brown rice work well; choose based on your preference.
  • How do I know when the chicken is cooked? The chicken should reach an internal temperature of 165°F (75°C).
  • Can I double the recipe? Yes, just adjust the cooking time slightly as needed.

Nutritional Tips and Dietary Adaptations

This dish can easily be adjusted to fit various dietary needs:

  • For lower calories: Use less cream and more broth, and serve with a side salad.
  • For higher protein: Add beans or legumes to increase the protein content.
  • To make it more filling: Serve with whole grain rice or quinoa for added fiber.

Essential Equipment Recommendations

To make your cooking experience smoother, here are some must-have kitchen tools:

  • Non-Stick Skillet: Ideal for cooking chicken evenly and preventing sticking.
  • Wooden Spoon: Perfect for stirring the sauce without scratching your skillet.
  • Meat Thermometer: Ensures your chicken is cooked to the perfect temperature.
  • Measuring Cups and Spoons: For accurately measuring your ingredients.

Serving Suggestions

When it comes to serving this dish, consider these options:

  • Garnish: Top with fresh parsley and grated Parmesan cheese for added flavor.
  • Side Dishes: Pair with a simple green salad or steamed vegetables for a balanced meal.
  • Complementary Flavors: Serve with a glass of white wine or lemon-infused water for a refreshing drink.

In Conclusion

Your journey in the kitchen should be about enjoyment and creativity, and these creamy garlic chicken rice bowls embody just that. With their rich flavors and comforting textures, they are sure to become a go-to recipe in your home. Remember, perfection comes with practice, so don’t hesitate to experiment and make this dish your own. Happy cooking!

Creamy Garlic Chicken Rice Bowls An Incredible Ultimate Recipe for 4

Prep Time 10 minutes
Cook Time 20 minutes
Total Time 30 minutes
Servings 4 servings
Calories 650
Enjoy a flavorful and creamy garlic chicken served over rice, perfect for a quick and satisfying meal.

Ingredients

Protein

  • 1 pound boneless, skinless chicken breasts
  • 2 tablespoons olive oil
  • 4 cloves garlic, minced
  • 1 cup heavy cream
  • 1 cup chicken broth
  • 1 teaspoon Italian seasoning
  • to taste Salt and pepper
  • 2 cups cooked rice white or brown
  • for garnish Fresh parsley, chopped
  • optional Grated Parmesan cheese (for serving)

Instructions 

  • Cut chicken into bite-sized pieces, season with salt and pepper.
  • Heat olive oil in a skillet over medium-high heat, cook chicken until golden and cooked through, about 5-7 minutes.
  • Add minced garlic and cook for 1-2 minutes until fragrant.
  • Pour in heavy cream and chicken broth, stir in Italian seasoning, and simmer for 5 minutes until sauce thickens.
  • Add cooked rice, stir to coat, adjust seasoning, then garnish with parsley and Parmesan if desired.

Notes

Use freshly chopped parsley for best flavor and add Parmesan cheese just before serving for extra richness.
Calories: 650kcal
Cost: $15
Course: Main Course
Cuisine: American
Keyword: Chicken, Creamy, Garlic

Discover the Joy of Making a Mediterranean Chickpea Salad

If you’re looking for a quick, vibrant, and nutritious dish that brightens up your meals, then this Mediterranean Chickpea Salad is just what you need! Packed with flavor, this salad comes together in minutes and is perfect for busy weeknights or as a refreshing side dish at gatherings. Whether you’re a seasoned cook or a kitchen novice, the simplicity of this recipe will inspire you to enjoy cooking again.

In this article, we’ll break down everything you need to know about creating the perfect Mediterranean Chickpea Salad, including ingredient breakdowns, useful tips, and variations to keep things exciting!

Why You’ll Love This Recipe

Here are just a few reasons to whip up this delicious salad:

  • Quick to Prepare: This salad can be made in just 15 minutes, making it ideal for busy days.
  • Nutritious Ingredients: With protein-packed chickpeas, fresh vegetables, and healthy fats from olive oil, this dish is both satisfying and nourishing.
  • Customizable: Easily swap ingredients based on your preferences or what you have on hand.
  • Great for Meal Prep: Make a big batch and enjoy it throughout the week; it tastes even better the next day!
  • Vibrant Flavor: The combination of fresh herbs, zesty lemon, and spices creates a delightful taste in every bite.

Detailed Ingredient Breakdown

Let’s dive into the ingredients that make this salad a standout:

  • Chickpeas: 2 cups cooked chickpeas (canned is fine!). Chickpeas are a great source of protein and fiber.
  • Red Onion: 1/4 cup diced; adds a sweet and sharp flavor. If you prefer a milder taste, soak the diced onions in cold water for 10 minutes.
  • Fresh Parsley: 2 tbsp finely diced; this herb adds a fresh, vibrant note. For a twist, try using fresh mint or cilantro.
  • Tomato: 1 diced and seeded; tomatoes bring juiciness. Any variety works, but vine-ripened or cherry tomatoes are particularly flavorful.
  • Persian Cucumbers: 2 diced; these mini cucumbers are crunchy and sweet. If unavailable, regular cucumbers will do, but peel them first.
  • Jalapeño: 1 tbsp finely diced; adds a spicy kick. Feel free to adjust the amount based on your heat preference.
  • Olive Oil: 1/3 cup; use high-quality extra virgin for the best flavor.
  • Lemon Juice: 1/8 cup (from 1 lemon); fresh lemon juice brightens the salad.
  • Garlic: 2 cloves mashed into a paste; garlic enhances the flavor profile.
  • Sea Salt: 1 tsp; to taste.
  • Cumin: 1 1/2 tsp; adds warmth and depth. Feel free to substitute with coriander for a different flavor.

Pro Tips for the Best Mediterranean Chickpea Salad

A side view of a colorful salad with chickpeas, red onions, tomatoes, and cucumbers in a bowl.

Here are some expert insights to elevate your salad-making game:

  • Prep Ahead: Chop your veggies in advance and store them in the fridge to save time when you’re ready to assemble.
  • Marination Time: Let the salad sit for at least 30 minutes before serving. This allows the flavors to meld beautifully.
  • Experiment with Textures: Add crunchy nuts or seeds, like sunflower or pumpkin seeds, for an extra layer of texture.
  • Adjust Seasonings: Taste and adjust the salt and lemon juice to fit your preferences—don’t be afraid to make it your own!
  • Storage Tips: Store leftovers in an airtight container in the fridge for up to three days. The flavors will continue to develop!
  • Vegan Option: This salad is naturally vegan, but you can add protein like chickpea flour dumplings if desired.
  • Freshness Matters: Use the freshest ingredients possible for the best taste. Farmer’s market finds are ideal!
  • Presentation Counts: Serve the salad in a colorful bowl or on a rustic platter to make it visually appealing.

Common Mistakes to Avoid

Here are some pitfalls to watch out for when making your Mediterranean Chickpea Salad:

  • Over-mixing: Gently toss the ingredients together to avoid mushing the chickpeas and veggies.
  • Skipping the Marination: Don’t skip letting the salad sit; this step is crucial for flavor enhancement.
  • Ignoring Fresh Ingredients: Dried herbs won’t provide the same flavor as fresh; always choose fresh when possible.
  • Using Low-Quality Olive Oil: The quality of olive oil directly impacts the salad’s overall taste, so choose the best you can find.

Variations to Keep Things Exciting

Feel free to experiment with your Mediterranean Chickpea Salad. Here are some delightful variations:

  • Mediterranean Quinoa Salad: Substitute chickpeas with cooked quinoa for a gluten-free option.
  • Greek Salad Twist: Add kalamata olives and crumbled feta cheese for a traditional Greek flavor.
  • Spicy Chickpea Salad: Mix in diced bell peppers and a dash of hot sauce for more heat.
  • Avocado Chickpea Salad: Fold in diced avocado for creaminess and added healthy fats.

Storage and Make-Ahead Instructions

This salad is perfect for meal prep! Here’s how to store it:

  • Refrigeration: Store in an airtight container in the fridge for up to three days. The flavors only get better!
  • Freezing: This salad isn’t ideal for freezing due to the fresh vegetables but you can freeze cooked chickpeas for future use.
  • Make Ahead: Prepare the dressing and chop veggies a day in advance. Mix everything just before serving.

Frequently Asked Questions (FAQs)

Here are some common queries about this Mediterranean Chickpea Salad:

  • Can I use dried chickpeas? Absolutely! Just soak and cook them according to package instructions before adding to the salad.
  • How do I make this salad gluten-free? This recipe is gluten-free as is, but always check your ingredient labels to be sure.
  • Can I add protein to this salad? Yes! Consider grilled chicken, tuna, or hard-boiled eggs for an extra protein boost.
  • What should I serve with this salad? It pairs wonderfully with grilled meats, pita bread, or as a standalone meal.
  • Can I make this salad vegan? This recipe is naturally vegan; just skip any cheese toppings!
  • How can I add more flavor? Experiment with different herbs and spices, like dill or smoked paprika, to enhance the flavor profile.
  • Is this salad kid-friendly? Yes! The flavors are mild and fresh, perfect for introducing kids to new ingredients.
  • How do I make it lower in fat? Reduce the amount of olive oil or substitute with a lighter dressing.

Nutritional Tips and Dietary Adaptations

This Mediterranean Chickpea Salad not only tastes great, but it also offers numerous health benefits:

  • Protein Power: Chickpeas are a fantastic source of plant-based protein, making this salad filling and satisfying.
  • Fiber Rich: The fiber content helps keep you full and supports digestive health.
  • Heart-Healthy Fats: Olive oil is known for its heart-healthy benefits, promoting good cholesterol levels.
  • Vitamins and Minerals: The fresh veggies in this salad provide essential vitamins like A and C, as well as minerals.

Essential Equipment Recommendations

To make your Mediterranean Chickpea Salad, you will need:

  • Large Mixing Bowl: For combining all your ingredients.
  • Knife and Cutting Board: To chop your vegetables efficiently.
  • Small Jar with Lid: Perfect for shaking up the dressing ingredients.
  • Measuring Cups and Spoons: For accurate ingredient measurements.

Serving Suggestions

When it comes to serving your Mediterranean Chickpea Salad, consider:

  • As a Side Dish: Pair it with grilled chicken or fish for a balanced meal.
  • On a Bed of Greens: Serve it over a bed of mixed greens for added color and nutrition.
  • With Pita Bread: Enjoy it with warm pita or flatbreads for a delicious Mediterranean experience.
  • As a Standalone Meal: This salad is hearty enough to be the main attraction on its own!

Conclusion

Making a Mediterranean Chickpea Salad is not just about throwing ingredients together—it’s about creating a dish that brings joy and flavor to your table. With its vibrant colors, refreshing taste, and numerous health benefits, this salad is sure to become a favorite in your home. Enjoy the process, and remember that cooking is all about confidence and creativity. So, roll up your sleeves, gather your ingredients, and let’s make this delicious salad together!

Mediterranean Chickpea Salad

Prep Time 10 minutes
Total Time 40 minutes
Servings 4 servings
Calories 250
A fresh and flavorful Mediterranean chickpea salad perfect for a quick lunch or side dish.

Ingredients

Cooked Chickpeas

  • 2 cups cooked chickpeas

Vegetables

  • 0.25 cup red onions, diced
  • 2 tbsp fresh parsley, finely diced
  • 1 tomato diced seeded tomato
  • 2 Persian cucumbers diced Persian cucumbers
  • 1 tbsp jalapeno, finely diced

Dressing

  • 0.33 cup olive oil
  • 0.75 cup fresh lemon juice (from 1 lemon)
  • 2 garlic cloves mashed into a paste
  • 1 tsp sea salt
  • 1.5 tsp cumin

Instructions 

  • Combine all salad ingredients in a large bowl.
  • Mix dressing ingredients in a jar, shake well.
  • Pour dressing over salad and toss to combine.
  • Let marinate for 30 minutes before serving.

Notes

For extra flavor, add a sprinkle of feta cheese or olives.
Calories: 250kcal
Cost: $12
Course: Salad
Cuisine: Mediterranean
Keyword: Chickpeas

If you’re looking for a refreshing dish that perfectly captures the essence of summer, Watermelon Mint Salad is just what you need. This delightful combination of juicy watermelon, aromatic mint, and a zesty dressing will not only tantalize your taste buds but also keep you feeling cool on those hot days. In this guide, we’ll explore everything you need to know to create the perfect watermelon mint salad, from ingredient breakdowns to tips for serving. Whether you’re hosting a summer barbecue or just want to enjoy a healthy snack, this recipe is your go-to solution!

Why You’ll Love This Recipe

This salad is more than just a pretty plate. Here are five reasons why this watermelon mint salad will become a staple in your summer menu:

  • Quick & Easy: With just a few simple ingredients and minimal prep time, you can whip this salad up in under 15 minutes.
  • Refreshing Flavors: The combination of sweet watermelon and fragrant mint creates a burst of flavor that is incredibly refreshing.
  • Healthy & Nutritious: Watermelon is low in calories but high in vitamins A and C, making this salad a guilt-free treat.
  • Versatile Dish: Perfect as a side dish, a light appetizer, or a summery dessert, this salad fits any occasion.
  • Make-Ahead Friendly: You can prepare it in advance, making it an ideal choice for gatherings and picnics.

Ingredients for Watermelon Mint Salad

To make this vibrant salad, gather the following ingredients:

  • 6 cups seedless watermelon: Choose ripe watermelon for the sweetest flavor; look for a cream-colored belly spot for ultimate ripeness.
  • 2 tablespoons fresh mint: Minced to release aroma; if you’re out of mint, consider using basil for a lovely twist.
  • 1 tablespoon lemon juice: Fresh is preferred for the best zing, but bottled juice works in a pinch.
  • 1 tablespoon olive oil: Use high-quality extra virgin olive oil for enhanced flavor.
  • 2 teaspoons sugar: You can substitute with honey or agave for a different sweetness profile.

How to Make Watermelon Mint Salad

Creating this salad is a breeze! Follow these simple steps:

  1. Prepare the Watermelon: Cut the watermelon into bite-sized cubes, removing any tough rind.
  2. Mix the Dressing: In a small bowl, whisk together the lemon juice, olive oil, and sugar until well combined.
  3. Combine Ingredients: In a large bowl, gently toss the watermelon cubes with the minced mint and dressing until evenly coated.
  4. Serve Fresh: Enjoy immediately for the best texture and flavor, or chill for a bit before serving.

Pro Tips for Perfecting Your Salad

A side view of a colorful watermelon salad garnished with mint, showing juicy chunks.

To ensure your watermelon mint salad stands out, consider these expert tips:

  • Choose the Right Watermelon: Select a watermelon that feels heavy for its size and has a uniform shape for the best flavor.
  • Fresh Mint Matters: Always use fresh mint for a vibrant taste; dried herbs won’t provide the same impact.
  • Adjust Sweetness: Taste your salad after dressing it; feel free to add more sugar or honey to suit your preference.
  • Chill Before Serving: A brief chill in the refrigerator enhances the flavors and makes this salad even more refreshing.
  • Experiment with Cheese: Crumbled feta cheese adds a creamy, salty element that complements the sweetness of the watermelon.
  • Pair with Other Fruits: Add in diced cucumbers or berries for an extra layer of flavor and texture.
  • Balance Flavors: If you love a hint of spice, add a pinch of cayenne pepper or crushed red pepper flakes to the dressing.
  • Keep It Fresh: To maintain freshness, store leftovers in an airtight container in the fridge and consume within a day.

Common Mistakes and Troubleshooting

Even the best of us can make mistakes in the kitchen! Here are some common pitfalls and how to avoid them:

  • Using Overripe Watermelon: Ensure your watermelon is ripe but not overly soft; a firm texture indicates freshness.
  • Too Much Mint: If you overdo it with the mint, the flavor can become overwhelming. Start with less and add more if desired.
  • Skipping the Dressing: Don’t skip the dressing! It ties all the flavors together and elevates the dish.
  • Not Letting It Chill: If you serve it immediately without chilling, the flavors won’t meld as beautifully.

Variations on Watermelon Mint Salad

Feel free to get creative! Here are four delicious variations to try:

  • Watermelon Feta Salad: Add crumbled feta cheese for a rich, creamy contrast to the sweet watermelon.
  • Spicy Watermelon Salad: Toss in some jalapeño slices for a spicy kick that contrasts with the sweet fruit.
  • Herbed Watermelon Salad: Mix in fresh basil or cilantro for a different herby flavor profile.
  • Citrus Watermelon Salad: Include segments of orange or grapefruit for a zesty twist.

How to Store and Make Ahead

Want to prepare this salad ahead of time? Here’s how:

  • Storage: Keep the salad in an airtight container in the fridge for up to 1 day. The mint may wilt over time, so it’s best enjoyed fresh.
  • Make Ahead: Prepare the watermelon and mint mix a day in advance, but add the dressing just before serving to maintain freshness.
  • Freezing: While not recommended for this salad, leftover watermelon can be frozen for smoothies or sorbets later.

Comprehensive FAQ

Got questions about your watermelon mint salad? Here are some common queries:

  • How do I choose a ripe watermelon? Look for a firm, symmetrical watermelon with a creamy yellow spot on the underside.
  • Can I use other melons? Absolutely! Cantaloupe or honeydew melon can be delicious alternatives.
  • Does this recipe work well for meal prep? Yes, just keep the dressing separate until serving to maintain freshness.
  • Can I make this salad vegan? Yes! The ingredients are naturally vegan-friendly.
  • What should I serve with this salad? It pairs perfectly with grilled meats, seafood, or as part of a summer buffet.
  • How long does this salad last? Best enjoyed fresh, but can be stored in the fridge for up to 1 day.
  • Can I add nuts or seeds? Absolutely! Adding toasted nuts like pistachios or almonds can provide a delightful crunch.
  • Is this salad gluten-free? Yes, all ingredients are gluten-free, making it a safe choice for gluten-sensitive individuals.

Nutrition Tips and Dietary Adaptations

This salad is not only delicious but also nutritious. Here are some health tips:

  • Low Calorie: Watermelon is mostly water, making this salad hydrating and low in calories.
  • Vitamins and Antioxidants: Watermelon is rich in vitamins A and C, boosting your immune system.
  • Dietary Fiber: Adding mint can aid digestion, making this salad not just tasty but beneficial!
  • For Low Sugar: Reduce or omit the sugar in the dressing to make the salad even healthier.

Equipment Recommendations

While making this salad doesn’t require fancy tools, having the right equipment can help:

  • Sharp Knife: A good knife will make cutting the watermelon easier and safer.
  • Cutting Board: A sturdy cutting board is essential for preparing your ingredients.
  • Mixing Bowls: Use large bowls to mix the salad and dressing without spilling.
  • Whisk: A whisk is ideal for blending the dressing ingredients smoothly.

Serving Suggestions

Ready to serve your watermelon mint salad? Here are some ideas:

  • As a Side Dish: Serve alongside grilled chicken or fish for a light, summery meal.
  • At Picnics: Pack it in a cooler for a refreshing side that travels well.
  • For Brunch: Pair with yogurt and granola for a bright start to your day.
  • On a Buffet: Offer it as part of a larger spread with other salads and appetizers.

Conclusion

Now that you’re equipped with everything you need to make the perfect watermelon mint salad, it’s time to get cooking! Remember, the essence of this dish lies in its simplicity, freshness, and the joy of sharing it with loved ones. Enjoy the vibrant flavors and refreshing crunch, and don’t hesitate to make it your own with various adaptations. Happy cooking!

Watermelon Mint Salad A Refreshing Summer Delight You ll Love

Prep Time 10 minutes
Total Time 10 minutes
Servings 4 people
Calories 150
Enjoy a cool and refreshing watermelon salad infused with fresh mint and a hint of lemon, perfect for summer days.

Ingredients

Watermelon

  • 6 cups seedless watermelon (Choose ripe watermelon for the sweetest flavor.)

Fresh mint

  • 2 tablespoons fresh mint (Minced to release aroma.)

Lemon juice

  • 1 tablespoon lemon juice (Fresh is preferred.)

Olive oil

  • 1 tablespoon olive oil (Use high-quality extra virgin.)

Sugar

  • 2 teaspoons sugar (Can substitute with honey or agave.)

Instructions 

  • Cut the watermelon into bite-sized cubes and place in a large bowl.
  • Minced the fresh mint and add to the watermelon.
  • Mix lemon juice, olive oil, and sugar in a small bowl, then pour over the watermelon and mint.
  • Toss gently to combine all ingredients evenly.
  • Serve immediately or chill for 30 minutes for extra refreshment.

Notes

This salad is best enjoyed fresh and chilled for maximum flavor.
Calories: 150kcal
Cost: $10
Course: Salad
Cuisine: Summer
Keyword: Watermelon

Elevate Your Mornings with a Berry Burst Smoothie Bowl

Welcome to your new favorite breakfast! This energizing Berry Burst Smoothie Bowl is not just a meal; it’s an experience that will kickstart your day with vibrant flavors and essential nutrients. Packed with frozen mixed berries, ripe banana, and creamy Greek yogurt, this smoothie bowl is the perfect blend of sweetness and tang. In just a few simple steps, you can create a refreshing dish that’s perfect for busy mornings or leisurely brunches with friends and family. Let’s dive in!

Why You’ll Love This Berry Burst Smoothie Bowl

This recipe isn’t just a pretty dish; it’s also a powerhouse of benefits. Here are a few reasons to love it:

  • Nutritious Start: A fantastic way to get your daily servings of fruit while enjoying a creamy texture and satisfying flavors.
  • Quick & Easy: Blend your ingredients in under 10 minutes, making it ideal for busy mornings.
  • Customizable: Adjust sweetness, thickness, and toppings to suit your taste buds and dietary preferences.
  • Instagram-Worthy: With its vibrant colors and beautiful presentation, this bowl is sure to impress on social media.
  • Healthy Energy Boost: Perfectly balanced with protein, fiber, and vitamins to keep you energized throughout the day.

Essential Ingredients for Your Smoothie Bowl

To create a delicious berry burst smoothie, you’ll need the following ingredients:

  • 1 cup frozen mixed berries (strawberries, blueberries, raspberries): These are the stars of your smoothie, providing antioxidants and natural sweetness.
  • 1 ripe banana: Adds creaminess and natural sweetness; a great source of potassium!
  • 1/2 cup plain Greek yogurt: For protein and a rich texture—choose dairy or dairy-free options as needed.
  • 1/2 cup unsweetened almond milk: Adjust according to your desired thickness; you can also use coconut water or regular milk.
  • 1/4 cup granola, nuts, or seeds (optional): Adds crunch and healthy fats; feel free to mix and match based on your preferences.

How to Make Your Berry Burst Smoothie Bowl

Side view of a colorful Berry Burst Smoothie Bowl filled with mixed berries and banana slices.

Let’s get blending! Here’s how to prepare your delicious smoothie bowl:

  1. In a clean blender, add the frozen mixed berries and the ripe banana.
  2. Pour in the Greek yogurt and almond milk. Adjust the almond milk based on how thick you like your smoothie.
  3. Blend until smooth, scraping down the sides of the blender as needed to ensure all ingredients are well mixed.
  4. Serve the smoothie in bowls, creating swirls for a beautiful presentation.
  5. Top generously with your choice of granola, nuts, or seeds for added texture and flavor!

Perfecting the Cooking Process

Although this recipe is straightforward, here are a few pro tips to ensure perfection:

  • Frozen Ingredients: Always use frozen mixed berries for a thicker, creamier texture that can hold up when served in a bowl.
  • Layering Technique: For a beautiful presentation, pour the smoothie base first, then add toppings strategically for visual appeal.
  • Adjusting Sweetness: If you prefer a sweeter smoothie, add a drizzle of honey or maple syrup before blending.
  • Consistency Check: If your smoothie is too thick, add a splash more almond milk until you reach your desired consistency.
  • Blend with Care: Start your blender on low speed to avoid splatters, gradually increasing to high for a smooth finish.

Add Your Touch

The best part about this berry burst smoothie bowl is how easily you can customize it! Here are some ideas:

  • Fruits: Experiment with different combinations of fresh fruit like mango, pineapple, or kiwi for a tropical twist.
  • Nut Butters: Swirl in almond or peanut butter for an extra dose of creaminess and flavor.
  • Superfoods: Add a teaspoon of chia seeds or flaxseeds for added nutrition without changing the flavor significantly.
  • Herbs: Add a pinch of fresh mint or basil for a refreshing twist that complements the berries.

Storage & Make-Ahead Instructions

If you want to prep ahead, follow these guidelines:

  • Make-Ahead: Prepare the smoothie base a day in advance and store it in an airtight container in the fridge. Blend with toppings just before serving.
  • Freezing: Freeze prepared smoothie bowls in individual containers for a quick grab-and-go breakfast option.
  • Storage Time: Consume your smoothie bowl within 24 hours for the best flavor and texture, especially if using fresh fruits.

Frequently Asked Questions (FAQs)

Here are some common questions about the Berry Burst Smoothie Bowl:

  • Can I use fresh fruit instead of frozen? Yes! However, using frozen berries will yield a thicker consistency.
  • What toppings work best? Granola, nuts, seeds, and fresh fruit are all excellent choices!
  • Is this recipe vegan? Absolutely! Simply replace the Greek yogurt with a dairy-free yogurt alternative.
  • How can I make it sweeter? Consider adding honey, maple syrup, or a medjool date before blending.
  • Can I use different kinds of milk? Yes! Any milk or milk alternative works, such as coconut milk, oat milk, or regular dairy milk.
  • How do I make it more filling? Add a scoop of protein powder or nut butter for extra protein and staying power.
  • Can I add greens? Definitely! Spinach or kale can be blended in for added nutrients without altering the flavor much.
  • Is this smoothie bowl good for weight loss? Yes! It’s packed with nutrients and can be a part of a balanced diet.

Nutritional Tips and Dietary Adaptations

Here are some tips for making this smoothie bowl fit your dietary needs:

  • Low-fat Option: Use low-fat Greek yogurt and unsweetened almond milk to reduce calories.
  • Protein Boost: Incorporate protein powder or cottage cheese for extra protein content.
  • Diabetic-Friendly: Opt for unsweetened yogurt and limit added sugars.
  • Gluten-Free: Ensure your granola or toppings are gluten-free to maintain this dietary requirement.

Equipment Recommendations

Here’s what you’ll need to make your smoothie bowl:

  • High-Speed Blender: Essential for achieving a silky-smooth texture in your smoothie.
  • Measuring Cups: To accurately measure your ingredients, ensuring the right balance of flavors.
  • Bowl: A beautiful bowl for serving your masterpiece and showcasing those vibrant colors.
  • Spatula: Handy for scraping down the sides of the blender to ensure everything is well mixed.

Serving Suggestions

How to enjoy your Berry Burst Smoothie Bowl:

  • Breakfast Delight: Serve it as a nutritious and energizing breakfast.
  • Post-Workout Refuel: Enjoy it after a workout for a balanced recovery meal.
  • Light Snack: Perfect for a mid-afternoon snack to keep your energy up.
  • Brunch Showstopper: Impress your friends by serving it at brunch gatherings.

Conclusion: Your New Go-To Recipe!

This Berry Burst Smoothie Bowl is more than just a recipe; it’s a canvas for your culinary creativity. With its bright flavors, nutritional benefits, and endless customization options, you’ll find yourself making this dish again and again. So grab your ingredients, fire up your blender, and get ready to enjoy a delicious start to your day!

Berry Burst Smoothie Bowl

Prep Time 5 minutes
Total Time 5 minutes
Servings 2 bowls
Calories 250
A vibrant and nutritious smoothie bowl packed with mixed berries and bananas, perfect for a quick breakfast or snack.

Ingredients

Fruits

  • 1 cup frozen mixed berries (strawberries, blueberries, raspberries)
  • 1 ripe banana banana

Dairy & Liquids

  • 1/2 cup plain Greek yogurt
  • 1/2 cup unsweetened almond milk

Toppings

  • 1/4 cup granola, nuts, or seeds (optional)

Instructions 

  • Add frozen berries and banana to a blender.
  • Pour in Greek yogurt and almond milk; blend until smooth.
  • Adjust milk for desired thickness, then blend again.
  • Pour into bowls and create swirls for presentation.
  • Top generously with granola, nuts, or seeds.

Notes

Feel free to customize toppings for added crunch and flavor.
Calories: 250kcal
Cost: $8
Course: Breakfast
Keyword: Berries, Healthy, Smoothie

Discover a Delightful Low Carb Tuna Salad

If you’re looking for a refreshing and satisfying dish that fits perfectly into your low-carb lifestyle, you’ve come to the right place! This Low Carb Keto Avocado Tuna Salad combines creamy avocados, protein-rich tuna, and zesty lime for a meal that not only pleases your taste buds but is also incredibly easy to prepare. Whether you’re packing lunch for work or looking for a quick dinner option, this salad is your go-to!

Why You’ll Love This Recipe

Here are five reasons why this avocado tuna salad will become a staple in your kitchen:

  • Flavor Fusion: The creamy avocado pairs beautifully with the savory tuna, creating a delightful mix of textures and flavors that will keep you coming back for more.
  • Healthy Fats: Packed with omega-3 fatty acids from tuna and healthy fats from avocado, this salad supports heart health while keeping you full and satisfied.
  • Quick & Easy: With just a few simple steps, you can whip up this salad in under 15 minutes, making it perfect for busy weeknights.
  • Customizable: Feel free to personalize this dish with your favorite add-ins or seasonings to make it truly your own.
  • Meal Prep Friendly: This salad stores well, making it a fantastic option for meal prepping for the week ahead.

Ingredient Breakdown

To make this delicious avocado tuna salad, you’ll need the following ingredients:

  • 4 cans of tuna (5 oz each, drained): Ideally, a mix of chunk light and solid white albacore. This brings a balance of flavor and texture.
  • 2 medium avocados: Ensure they are perfectly ripe for the best creaminess in the salad.
  • 2 tablespoons of lime juice: Fresh lime juice brightens the dish and enhances the flavors of the other ingredients.
  • 3 tablespoons of finely chopped celery: This adds a satisfying crunch.
  • ¼ cup (4 tablespoons) of freshly chopped cilantro: A burst of freshness that complements the tuna and avocado.
  • 3 tablespoons of minced red onion: It gives a gentle sharpness to the salad.
  • 1 tablespoon of minced jalapeños (optional): For those who enjoy a bit of heat; feel free to add more for an extra kick!
  • ½ teaspoon of sea salt: Adjust to taste to enhance the overall flavor.

**Substitutions**: You can use Greek yogurt instead of mayonnaise for a lighter option, or swap the cilantro for parsley if you prefer.

How to Make Avocado Tuna Salad

Side view of a colorful tuna salad featuring avocado, cilantro, and lime.

Now that you have your ingredients ready, let’s dive into the simple steps for preparing this salad:

  • Mash the Avocado: In a bowl, combine the avocados with lime juice and a pinch of sea salt. Mash until smooth and creamy.
  • Combine the Mix-ins: Stir in the drained tuna, chopped cilantro, red onion, celery, and jalapeños if using. Mix thoroughly, gently breaking apart any large pieces of tuna.
  • Refine the Flavor: Taste the mixture and adjust seasoning as needed. Add more salt or jalapeños if you like it spicier.
  • Plate and Enjoy: Serve immediately on its own or wrapped in fresh lettuce leaves for a light meal.

Pro Tips for Perfecting Your Salad

To ensure your avocado tuna salad turns out perfectly every time, keep these expert tips in mind:

  • Choose Ripe Avocados: Make sure your avocados are ripe but not overripe; they should yield slightly when pressed.
  • Drain Tuna Well: Ensure your tuna is well-drained to avoid a watery salad.
  • Fresh Ingredients Matter: Use fresh lime juice and fresh cilantro for maximum flavor impact.
  • Chill for Flavor: Allow the salad to chill in the refrigerator for 30 minutes before serving to let the flavors meld together.
  • Experiment with Seasonings: Try adding garlic powder, smoked paprika, or even curry powder for unique flavor twists.
  • Texture Variety: Consider adding diced cucumber or bell peppers for extra crunch.
  • Serve with Style: Serve in avocado halves or on a bed of mixed greens for an impressive presentation.
  • Portion Control: If meal prepping, store in individual airtight containers for easy grab-and-go lunches.

Common Mistakes and Troubleshooting

Even the best cooks can make mistakes! Here are some common pitfalls and how to avoid them:

  • Too Much Lime Juice: If your salad becomes too tangy, balance it by adding more avocado or tuna.
  • Over-Mixing: Be gentle when mixing the tuna to keep some chunks intact for better texture.
  • Using Unripe Avocados: This can result in a grainy texture; always test for ripeness before using.
  • Serving Immediately: While it can be tempting to dig in right away, letting it chill enhances the flavors.

Variations to Try

Feel free to get creative with your avocado tuna salad by trying out these delicious variations:

  • Mediterranean Twist: Add chopped olives, sun-dried tomatoes, and feta cheese for a Mediterranean-inspired flavor.
  • Spicy Southwest Style: Mix in diced tomatoes, corn, and a splash of hot sauce for a Southwestern kick.
  • Asian-Inspired: Use sesame oil instead of lime juice, and toss in chopped green onions and shredded carrots.
  • Herb Infusion: Experiment with different herbs like dill, basil, or mint to change up the flavor profile.

Storage and Make-Ahead Instructions

This avocado tuna salad is perfect for meal prep! Here’s how to store it:

  • In the Refrigerator: Store in an airtight container for up to 3 days. Note that the avocado will brown, so consume within the first couple of days for the best flavor.
  • Freezing: Freezing is not recommended due to the texture of the avocado once thawed. Instead, prepare the other ingredients and mix in the avocado fresh when ready to serve.
  • Make Ahead: You can prepare all the components ahead of time and assemble just before serving for the freshest taste.

Frequently Asked Questions

Here are some common questions about this avocado tuna salad:

  • Can I use canned chicken instead of tuna? Yes, this recipe works well with canned chicken for a different protein option.
  • What can I serve with this salad? It pairs beautifully with crisp lettuce wraps, whole-grain bread, or on a bed of greens.
  • Is this recipe gluten-free? Yes, all the ingredients are naturally gluten-free!
  • Can I add more vegetables? Absolutely! Feel free to add your favorite vegetables like bell peppers or cucumbers.
  • How spicy is this salad? The spiciness depends on the amount of jalapeños you add; adjust to your preference!
  • What’s the best way to mash avocados? Use a fork or a potato masher for a smooth consistency without over-mashing.
  • Can I make this salad vegan? Substitute tuna with chickpeas or another protein source for a delicious vegan option.
  • How can I enhance the flavor? A dash of garlic powder or a sprinkle of smoked paprika can elevate the taste.

Nutritional Insights

This avocado tuna salad is not only delicious but also packed with nutrition:

  • High in Protein: Tuna is a fantastic source of lean protein, essential for muscle repair and overall health.
  • Rich in Healthy Fats: Avocados provide monounsaturated fats, which are beneficial for heart health.
  • Low in Carbs: Perfect for those following a low-carb or ketogenic diet, this salad keeps your carb intake in check.
  • Vitamins and Minerals: Ingredients like cilantro and lime juice supply essential vitamins and antioxidants.

Essential Equipment

To make your avocado tuna salad, you’ll need:

  • Mixing Bowl: For combining all your ingredients.
  • Fork or Potato Masher: To mash the avocado smoothly.
  • Measuring Spoons: For accurate ingredient measurements.
  • Airtight Container: For storing leftovers or meal prep.

Serving Suggestions

Here are some fun ways to enjoy your avocado tuna salad:

  • On Lettuce Wraps: Use crisp lettuce leaves as a wrap for a refreshing, low-carb option.
  • With Whole Grain Crackers: Serve as a dip for a crunchy texture contrast.
  • In a Sandwich: Spread between whole-grain bread or a wrap for a hearty lunch.
  • As a Stuffed Avocado: Hollow out an avocado and fill it with the salad for a beautiful presentation.

Cooking is all about creativity and enjoying the process! With this Low Carb Keto Avocado Tuna Salad, you’ll not only have a delicious meal but also the confidence to make it your own. So grab your ingredients and get ready to whip up something delightful!

Low Carb Keto Avocado Tuna Salad Recipe

Prep Time 10 minutes
Total Time 10 minutes
Servings 4 servings
Calories 350
A quick and healthy low-carb tuna salad featuring creamy avocados and fresh herbs, perfect for a keto diet.

Ingredients

Canned Tuna

  • 4 cans tuna (5 oz each, drained, mix of chunk light and solid white albacore)
  • 2 medium avocados
  • 2 tablespoons lime juice
  • 3 tablespoons finely chopped celery
  • ¼ cup freshly chopped cilantro
  • 3 tablespoons minced red onion
  • 1 tablespoon minced jalapeños (optional, add 1-2 extra for more heat)
  • ½ teaspoon sea salt (adjust to taste)

Instructions 

  • Mash the avocado with lime juice and salt until smooth.
  • Mix in tuna, cilantro, red onion, celery, and jalapeños.
  • Adjust seasoning with extra salt or jalapeños if desired.
  • Serve immediately, on its own or in lettuce wraps.

Notes

For extra spice, add more jalapeños.
Calories: 350kcal
Cost: $15
Course: Salad
Cuisine: keto
Keyword: Avocado, Low-Carb, Tuna

Beat the Heat with Delightful Coconut Berry Popsicles

Summer is the perfect time to indulge in refreshing treats, and what better way to cool down than with homemade Coconut Berry Popsicles? This easy-to-follow recipe combines the sweetness of strawberries and raspberries with the creamy goodness of coconut milk, creating a delightful snack that everyone will love. In this guide, you’ll discover not just how to make these tasty pops but also why they should be a staple in your summer treat rotation!

Why You’ll Love This Recipe

These Coconut Berry Popsicles are not just delicious; they come with a plethora of benefits that make them a must-try:

  • Healthy ingredients: Packed with fresh fruits and coconut milk, these popsicles are a guilt-free treat.
  • Customizable flavors: You can easily adapt the recipe to include your favorite berries or other fruits.
  • No artificial additives: By making your own, you control all the ingredients—no preservatives here!
  • Quick preparation: With minimal prep time, you can whip up a batch in no time.
  • Family favorite: Kids and adults alike will enjoy these colorful, fruity pops!

Ingredients Breakdown

Let’s dive into the ingredients you’ll need to make these delightful popsicles:

  • 1 lb strawberries (roughly chopped): Fresh strawberries give a sweet base; feel free to use frozen if out of season.
  • 1 cup raspberries: These tangy berries add a burst of flavor and beautiful color.
  • 2 tbsp honey (or to taste): A natural sweetener that enhances the fruit flavors.
  • 2 tbsp coconut flakes: Adds a chewy texture and enhances the coconut flavor.
  • 1/2 cup coconut milk (full fat recommended): The creamy base that ties everything together.

How to Make Coconut Berry Popsicles

Side view of vibrant Coconut Berry Popsicles showcasing strawberries and raspberries.

Follow these simple steps to create your own batch of Coconut Berry Popsicles:

  • Combine all the ingredients except coconut milk in the bowl of your food processor.
  • Purée the fruits until smooth, gradually pouring in the coconut milk as you blend.
  • Fill your popsicle molds with the mixture, leaving a little space at the top to allow for expansion.
  • Freeze for about 2-3 hours, or until fully set.

Pro Tips for Perfect Popsicles

Here are some expert insights to ensure your popsicles turn out perfectly every time:

  • Blend thoroughly: Ensure the mixture is completely smooth for the best texture.
  • Try different molds: Use silicone molds for easy removal, or experiment with different shapes!
  • Sweetness test: Adjust the honey based on your personal taste and the ripeness of the fruit.
  • Freeze extras: Double the recipe and freeze extras for those hot days.
  • Layer flavors: For a fun twist, layer different fruit mixtures in the molds.
  • Use fresh ingredients: The quality of your fruit will directly affect the flavor of your popsicles.
  • Experiment with herbs: Adding mint or basil can create a refreshing twist.
  • Serve with style: Dip in melted chocolate or roll in crushed nuts before freezing for added flair!

Common Mistakes & Troubleshooting

Here are some common pitfalls to avoid when making your popsicles:

  • Too icy: If your popsicles are too icy, it might be due to not blending well enough. Ensure your mixture is completely smooth.
  • Not sweet enough: Adjust sweetness to your liking. Taste your mixture before freezing!
  • Sticking to the mold: If they are hard to remove, try running warm water over the mold for a few seconds.

Variations to Try

Feel free to get creative! Here are some fun variations on the Coconut Berry Popsicles:

  • Mixed Berry Blast: Use a mix of blueberries, blackberries, and strawberries for a berry medley.
  • Tropical Twist: Substitute half the berries with mango or pineapple for a tropical flavor.
  • Nutty Coconut: Add a handful of chopped almonds or cashews for a crunchy texture.
  • Chocolate-Dipped: Dip the frozen pops in melted dark chocolate and then roll in crushed nuts.

Storage & Make-Ahead Instructions

These popsicles are perfect for making ahead! Here’s how to store them:

  • Freezing: Store your popsicles in an airtight container in the freezer for up to 3 months.
  • Thawing: To enjoy, remove from the freezer and let sit for a few minutes before pulling them out of the molds.

Frequently Asked Questions

Got questions? Here are some answers to common inquiries about Coconut Berry Popsicles:

  • Can I use frozen berries? Yes, frozen berries work great! Just ensure they are thawed slightly before blending.
  • What if I don’t have coconut milk? You can substitute with any milk of your choice, though the flavor will differ slightly.
  • How long do they last in the freezer? These popsicles can last up to 3 months in the freezer when stored properly.
  • Can I add other sweeteners? Absolutely! Maple syrup or agave nectar are great alternatives.
  • Can I make them vegan? Yes, this recipe is already vegan-friendly with coconut milk and plant-based sweeteners!
  • What’s the best way to remove them from molds? Run warm water over the outside of the molds to help release the popsicles.
  • Can I add yogurt? Yes, adding a bit of yogurt can create a creamier texture and add protein.
  • What if I want to make a larger batch? Simply double or triple the recipe, adjusting the freezing time as needed.

Nutrition Tips & Dietary Adaptations

These popsicles are not only delicious but can also be made to fit various dietary needs:

  • Low sugar: Use stevia or erythritol as a sweetener for a low-sugar version.
  • Paleo-friendly: Stick with natural sweeteners like honey or maple syrup for a paleo twist.
  • Gluten-free: This recipe is naturally gluten-free, making it suitable for celiac diets.

Equipment Recommendations

To make the best Coconut Berry Popsicles, here’s what you’ll need:

  • Food processor: Essential for blending the fruits smoothly.
  • Popsicle molds: Silicone molds are recommended for easy removal.
  • Measuring cups: To ensure accurate ingredient portions.

Serving Suggestions

Ready to enjoy your popsicles? Here are some serving ideas:

  • As a dessert: Serve them after dinner for a sweet ending to your meal.
  • Snack time: Perfect for a refreshing snack on a hot afternoon.
  • At parties: Slice them in half and serve on a platter for guests to enjoy.

With this comprehensive guide, you’re all set to make the most delightful Coconut Berry Popsicles! Remember, the key to great cooking is confidence and creativity—so don’t hesitate to experiment with flavors and ingredients. Happy cooking!

Coconut Berry Popsicles

Prep Time 10 minutes
Total Time 10 minutes
Servings 4 popsicles
Calories 150
Enjoy a refreshing and healthy treat with these coconut berry popsicles, perfect for hot days or a quick dessert.

Ingredients

Fruits

  • 1 lb strawberries (roughly chopped)
  • 1 cup raspberries

Sweetener

  • 2 tbsp honey (or more to taste)

Toppings

  • 2 tbsp coconut flakes
  • 0.5 cup coconut milk (full fat)

Instructions 

  • Combine all fruits, honey, and coconut flakes in a food processor and purée.
  • Gradually pour in the coconut milk and process until smooth.
  • Pour the mixture into popsicle molds.
  • Insert sticks and freeze for 2-3 hours.

Notes

Use ripe berries for the best flavor and sweetness.
Calories: 150kcal
Cost: $10
Course: Dessert
Cuisine: Fusion
Keyword: Berries