Author

Steven

Browsing

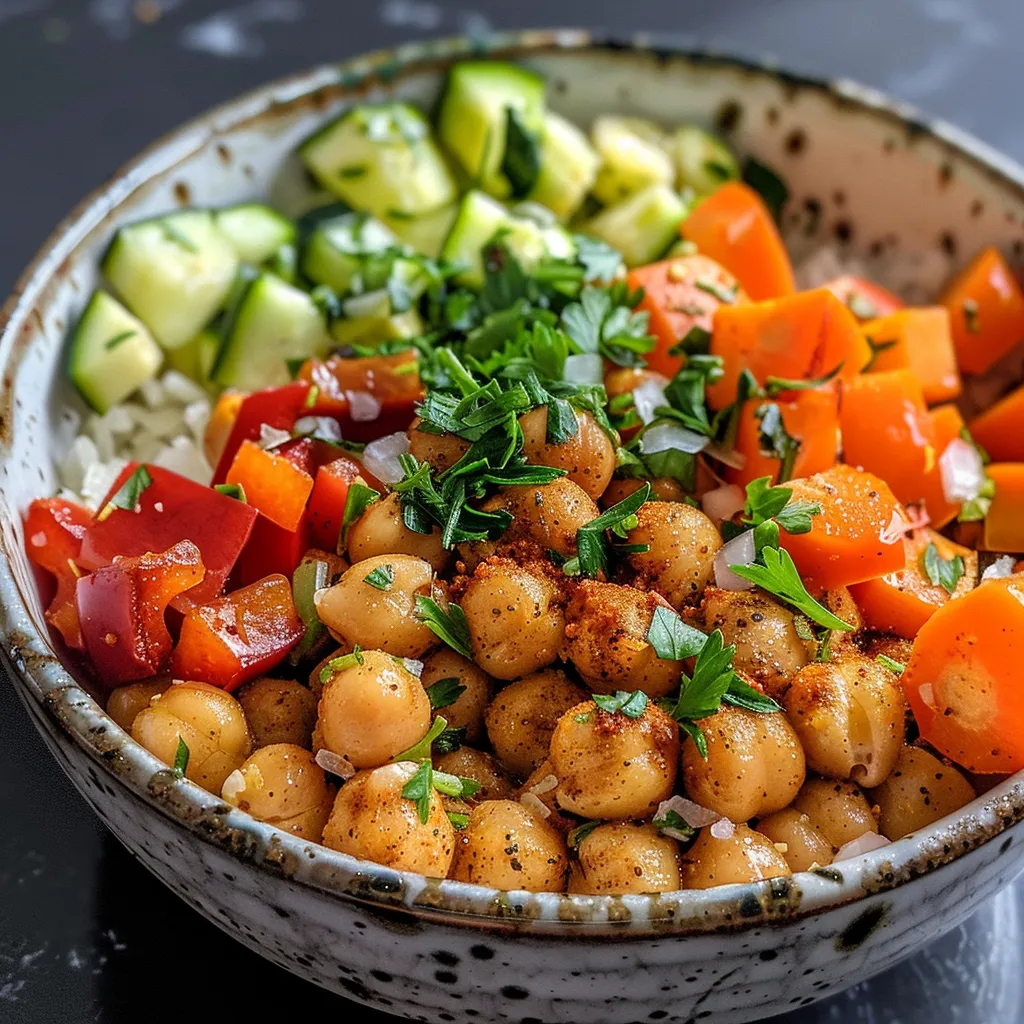
Your New Favorite Roasted Chickpea and Veggie Bowl!

Are you ready to discover a meal that is not only delicious but also incredibly easy to prepare? This Roasted Chickpea and Veggie Bowl is a delightful blend of flavors and textures, making it the perfect choice for a weeknight dinner or a meal prep option. Packed with nutrients and bursting with vibrant colors, this dish is not just a feast for your taste buds but also for your eyes. In this guide, we’ll walk you through everything you need to know to make this recipe a staple in your kitchen—it’s time to embrace the joy of cooking!

Why You’ll Love This Recipe

  • Quick to Prepare: This recipe comes together in less than 40 minutes, making it ideal for busy weeknights.
  • Plant-Based Goodness: Packed with protein from chickpeas and fiber from fresh veggies, this bowl is a wholesome meal option for everyone.
  • Customizable: Feel free to mix and match your favorite vegetables or try different dressings to suit your taste.
  • Great for Meal Prep: Make a larger batch and store it in the fridge for easy lunches or dinners throughout the week.
  • Budget-Friendly: Using pantry staples and seasonal vegetables, this dish is easy on the wallet without compromising on flavor.

Ingredient Breakdown and Substitutions

Here’s what you’ll need to create this delightful bowl, along with some easy substitutions to consider:

  • 1 can chickpeas, drained and rinsed: For a fresher option, you can cook your own chickpeas from dried.
  • 1 bell pepper, diced: Any color works! Red, yellow, or green all add different flavors and aesthetics.
  • 1 zucchini, diced: This versatile veggie adds a lovely texture; feel free to swap it for yellow squash.
  • 1 carrot, sliced: For a sweeter note, use a parsnip or sweet potato.
  • 2 tablespoons olive oil: Avocado oil can also be used for a different flavor profile.
  • 1 teaspoon garlic powder: Fresh minced garlic is a fantastic substitute for a more robust flavor.
  • 1 teaspoon paprika: Smoked paprika gives a lovely depth of flavor, so try that if you have it on hand!
  • Salt and pepper to taste: Always adjust according to your preference.
  • Fresh parsley for garnish: Basil or cilantro can also brighten up this dish beautifully.

Step-by-Step Instructions

A close-up view of a nutritious bowl filled with roasted chickpeas and assorted vegetables, showcasing vivid colors and textures.

Ready to dive into the cooking process? Follow these simple steps to create your new favorite bowl:

  1. Preheat your oven to 400°F (200°C).
  2. In a large mixing bowl, toss together the drained chickpeas, diced bell pepper, zucchini, and carrot.
  3. Drizzle the mixture with olive oil and sprinkle on garlic powder, paprika, salt, and pepper. Toss well to ensure everything is coated.
  4. Spread the mixture evenly on a lined or greased baking sheet.
  5. Bake for 25-30 minutes, stirring halfway through, until the veggies are tender and the chickpeas are slightly crispy.
  6. Garnish your creation with freshly chopped parsley and serve warm.

Pro Tips for the Perfect Bowl

Here are some expert insights to elevate your cooking:

  • Ensure Crispiness: Make sure chickpeas are well-drained and patted dry before seasoning for optimal crispiness.
  • Don’t Crowd the Pan: Spacing out your veggies allows for better roasting, ensuring they get that lovely caramelization.
  • Experiment with Spices: Add your favorite spices or herbs to customize the flavor profile. Consider cumin, turmeric, or Italian seasoning.
  • Try Different Dressings: A tahini dressing or a simple lemon vinaigrette can add a refreshing touch to your bowl.
  • Get Creative with Toppings: Consider adding avocado slices, nuts, or seeds to enhance texture and nutritional value.
  • Adjust Cooking Time: Depending on your oven and the size of your vegetable pieces, you may need to adjust cooking time slightly.
  • Use Seasonal Veggies: Incorporate whatever is fresh and in season for the best flavor and nutrition.
  • Store Properly: Keep leftovers in an airtight container for up to 3 days in the fridge.

Common Mistakes and Troubleshooting

Even the best cooks can run into issues. Here are some potential pitfalls and how to avoid them:

  • Chickpeas Not Crispy: If your chickpeas aren’t crispy, check if they were sufficiently dried before baking.
  • Vegetables Overcooked: Keep an eye on your baking time and stir occasionally to ensure even cooking.
  • Lack of Flavor: Always taste and season as you go, adjusting spices according to your palate.

Variations to Try

Switch things up with these fun variations:

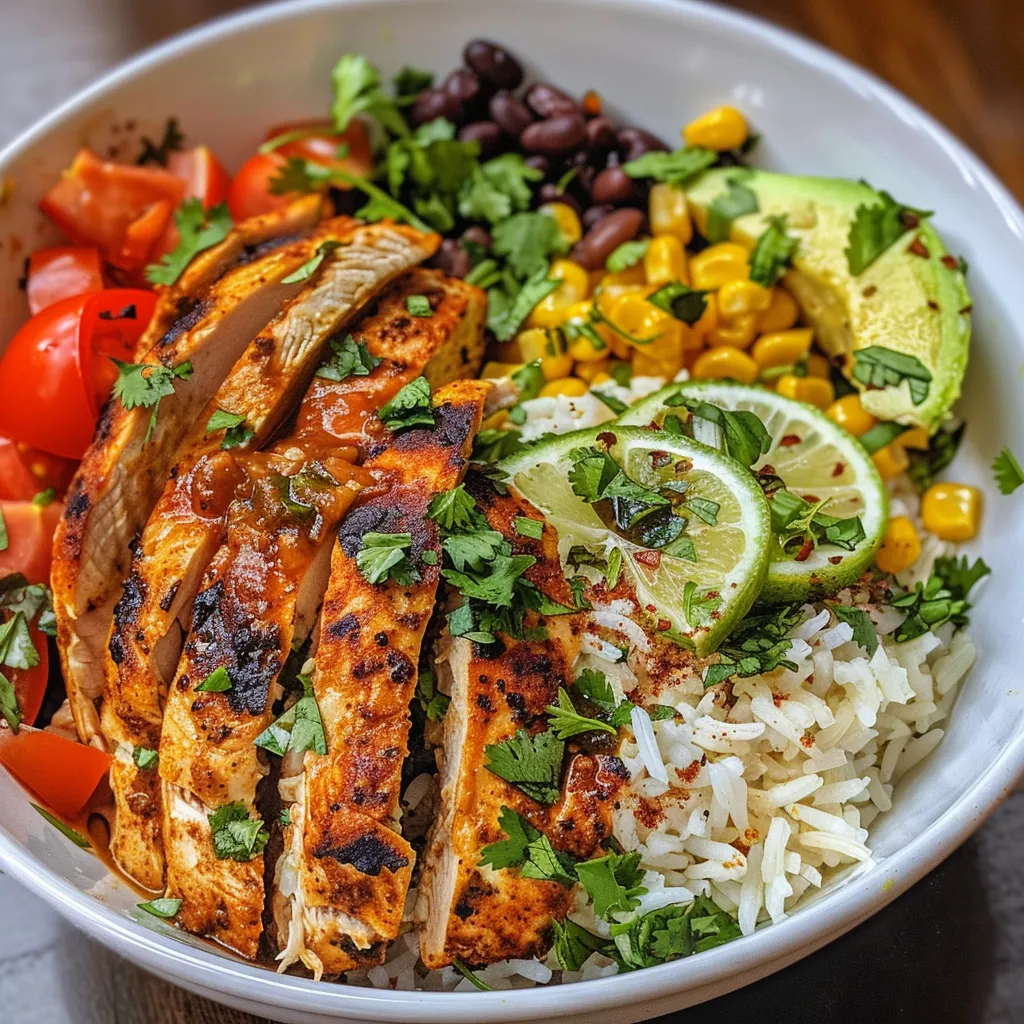
  • Mexican-Inspired: Add corn, black beans, and top it with avocado and lime crema.
  • Asian Flair: Incorporate bok choy and drizzle with a sesame ginger dressing.
  • Mediterranean Twist: Use eggplant, cherry tomatoes, and a tahini sauce for a flavor-packed bowl.
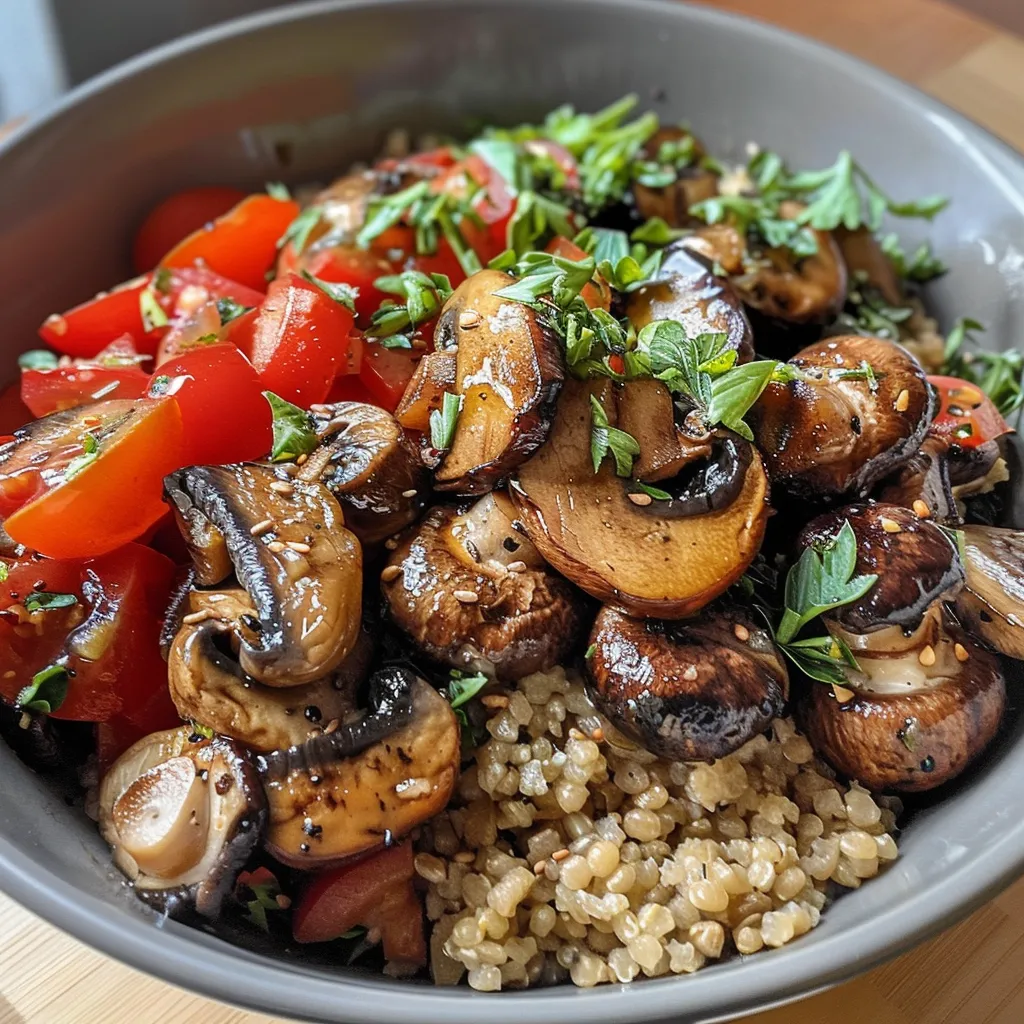
  • Hearty Grain Bowl: Serve the roasted veggies over quinoa or farro for added protein and fiber.

Storage and Make-Ahead Instructions

This roasted chickpea and veggie bowl is perfect for making ahead of time:

  • Refrigerate: Store in an airtight container for up to 3 days.
  • Reheat: Warm in the oven at 350°F (175°C) for about 10-15 minutes, or in the microwave until heated through.
  • Make Ahead: Prep the ingredients a day in advance and assemble right before baking for fresh results.

Comprehensive FAQ

Here are some common questions about this recipe:

  • Can I use frozen vegetables? Yes! Just ensure they are thawed and drained before use.
  • Is this dish gluten-free? Absolutely! All the ingredients are naturally gluten-free.
  • Can I add protein? Yes! Grilled chicken, tofu, or tempeh would be great additions.
  • Is it safe to eat leftovers? Yes, as long as they have been stored properly in the fridge.
  • What can I use instead of chickpeas? White beans or lentils can work, though cooking times may vary.
  • Can this be served cold? Yes! This bowl can be enjoyed cold or at room temperature, making it perfect for lunch.
  • How do I make it spicier? Add chili powder or fresh jalapeños for an extra kick!
  • What’s the best way to serve it? Serve it in a bowl with your favorite dressing drizzled on top!

Nutritional Tips and Dietary Adaptations

This dish is not only delicious but also packs a nutritional punch:

  • High in Protein: Chickpeas provide plant-based protein that helps keep you full.
  • Rich in Fiber: The variety of vegetables adds fiber, which is beneficial for digestion.
  • Vegan and Vegetarian-Friendly: This recipe caters to both lifestyles, making it inclusive.
  • Low in Calories: Enjoy a hearty meal without the guilt, perfect for weight management.

Equipment Recommendations

To make this recipe smoothly, consider having the following on hand:

  • Mixing Bowl: A large bowl for combining ingredients.
  • Baking Sheet: A good quality baking sheet ensures even cooking.
  • Spatula: For stirring and serving your delicious bowl.
  • Oven Mitts: Safety first! Protect your hands when handling hot trays.

Serving Suggestions

Here are some great ways to serve your Roasted Chickpea and Veggie Bowl:

  • Pair with a Green Salad: A fresh side salad complements the warm flavors of the bowl.
  • Top with Your Favorite Dressing: A drizzle of tahini dressing or yogurt sauce enhances the flavors.
  • Serve with Whole Grain Bread: A slice of whole grain bread makes it a complete meal.
  • Invite Friends Over: This bowl is perfect for sharing—set up a DIY bowl bar for a fun dinner party!

Conclusion

There you have it—your new favorite Roasted Chickpea and Veggie Bowl! This recipe is not just about cooking; it’s about embracing the joy of creating meals that nourish and satisfy. Remember, cooking is all about confidence, creativity, and a willingness to try new things. So gather your ingredients, invite a friend or two, and enjoy the process. Happy cooking!

The Ultimate Roasted Chickpea and Veggie Bowl

Prep Time 10 minutes
Cook Time 30 minutes
Total Time 40 minutes
Servings 4 servings
Calories 350
A flavorful and healthy roasted chickpea and veggie bowl perfect for a quick, nutritious meal.

Ingredients

Canned Goods

  • 1 can chickpeas (drained and rinsed)
  • 1 piece bell pepper (diced)
  • 1 piece zucchini (diced)
  • 1 piece carrot (sliced)
  • 2 tablespoons olive oil
  • 1 teaspoon garlic powder
  • 1 teaspoon paprika
  • to taste salt and pepper
  • for garnish fresh parsley (chopped)

Instructions 

  • Preheat oven to 400°F (200°C).
  • Toss chickpeas and diced vegetables with olive oil, garlic powder, paprika, salt, and pepper.
  • Spread mixture on a lined baking sheet in a single layer.
  • Bake for 25-30 minutes until veggies are tender and chickpeas are crispy.
  • Garnish with chopped parsley and serve warm.

Notes

Feel free to add your favorite herbs or spices for extra flavor.
Calories: 350kcal
Cost: $10
Course: Main Course
Cuisine: Healthy
Keyword: Chickpeas, Vegetables

Unleash the Flavor of Cilantro Lime Chicken Bowls

If you’re looking to brighten up your dinner table, look no further than these easy and delightful Cilantro Lime Chicken Bowls. This recipe captures the essence of summer with juicy chicken, zesty lime, and a vibrant medley of fresh ingredients that come together to create a satisfying meal perfect for any night of the week. Whether you’re meal prepping for busy days or looking for a fresh dinner idea, these bowls are sure to impress!

Why You’ll Love This Recipe

This cilantro lime chicken bowl recipe isn’t just delicious—it’s also incredibly versatile and easy to make. Here are five reasons you’ll fall in love:

  • Quick and Easy: With prep and cook time under 30 minutes, you can whip these up on a busy weeknight.
  • Flavor-Packed: The combination of lime, garlic, and cilantro creates a refreshing taste that transforms ordinary chicken.
  • Meal Prep Friendly: Make a batch ahead of time and enjoy them throughout the week for quick lunches or dinners.
  • Customizable: You can easily swap out ingredients to suit your preferences or dietary needs.
  • Healthy and Satisfying: Packed with protein, fiber, and fresh veggies, these bowls will keep you feeling full and energized.

Ingredients You’ll Need

Before we dive into the cooking, let’s gather our ingredients. Here’s what you’ll need for these flavorful bowls:

  • 1.5 pounds boneless skinless chicken breasts: Tender and juicy, perfect for marinating.
  • 3 tablespoons lime juice: Freshly squeezed for the best flavor.
  • 1 tablespoon lime zest: Adds an extra punch of citrusy goodness.
  • 3 tablespoons olive oil: For marinating and cooking the chicken.
  • 3 cloves garlic, minced: Essential for that aromatic flavor.
  • 1 teaspoon chili powder: Provides a hint of spice.
  • 1 teaspoon cumin: Adds warmth and depth.
  • Salt and black pepper to taste: Enhances all the flavors.
  • ¼ cup chopped fresh cilantro: The star herb that brings everything together.
  • 3 cups cooked rice (or brown rice): The base of your bowls.
  • 1 cup black beans, rinsed and drained: For protein and texture.
  • 1 cup corn kernels, cooked: Sweet and crunchy additions.
  • 1 cup chopped tomatoes: Freshness and color.
  • 1 avocado, sliced: Creamy richness.
  • Extra cilantro and lime wedges for garnish: For that finishing touch.

Step-by-Step Instructions

Juicy cilantro lime chicken served in a bowl with rice, beans, corn, and avocado slices.

Ready to cook? Let’s break it down into simple steps:

  • 1. Marinate the Chicken: In a bowl, combine chicken, lime juice, lime zest, olive oil, garlic, chili powder, cumin, salt, and pepper. Let it marinate for at least 15 minutes (or up to 2 hours for more flavor).
  • 2. Cook the Chicken: Heat a skillet over medium-high heat. Add the marinated chicken and cook for 6-7 minutes on each side until golden brown and cooked through (internal temperature should reach 165°F).
  • 3. Rest and Slice: Let the chicken rest for a few minutes before slicing it into strips.
  • 4. Prepare the Rice Base: While the chicken is cooking, prepare your rice according to package instructions.
  • 5. Warm Beans and Corn: In a small saucepan, heat black beans and corn until warmed through.
  • 6. Assemble the Bowls: In serving bowls, layer rice, black beans, corn, chopped tomatoes, and sliced avocado. Top with sliced chicken and sprinkle with fresh cilantro.
  • 7. Garnish: Serve with lime wedges for squeezing over and enjoy!

Pro Tips for Perfecting Your Bowls

Here are some expert tips to elevate your cilantro lime chicken bowls:

  • Marinate Longer: For deeper and more intense flavors, marinate the chicken for at least 2 hours or overnight.
  • Use Chicken Thighs: They stay extra juicy and flavorful, making them a great alternative to breasts.
  • Serve with Peach Salsa: Add a sweet and tangy peach salsa to complement the savory chicken.
  • Mix in Extra Veggies: Feel free to add bell peppers, zucchini, or any of your favorite veggies for more nutrition.
  • Experiment with Grains: Swap rice for quinoa, farro, or cauliflower rice for a different texture.
  • Top with Cheese: Crumbled feta or shredded cheese can add creaminess and flavor.
  • Make it Spicy: Add diced jalapeños or a hot sauce drizzle for some heat.
  • Store Properly: Keep leftovers in airtight containers in the fridge for up to 4 days.

Common Mistakes to Avoid

Here are some pitfalls to watch out for:

  • Skipping the Marinade: It’s essential for flavor; don’t rush this step!
  • Overcooking the Chicken: Use a meat thermometer to ensure the chicken is juicy and tender.
  • Not Letting the Chicken Rest: Resting allows the juices to redistribute, ensuring a moist chicken.

Variations to Try

These bowls are incredibly versatile! Here are some variations to consider:

  • Southwest Style: Add black olives, jalapeños, and top with avocado ranch dressing.
  • Thai-Inspired: Use coconut milk in place of olive oil with lime and add coconut flakes.
  • Mediterranean Twist: Replace cilantro with parsley and add olives and feta cheese.
  • Veggie Version: Substitute chicken with grilled tofu or tempeh for a plant-based option.

Storage and Make-Ahead Instructions

These bowls are great for meal prep! Here’s how to store:

  • Refrigerate: Store assembled bowls in airtight containers for up to 4 days.
  • Freeze: You can freeze the marinated chicken (uncooked) for up to 3 months. Just thaw before cooking.
  • Make Ahead: Prep all ingredients ahead of time and assemble just before serving for freshness.

Frequently Asked Questions

Here are some common questions about cilantro lime chicken bowls:

  • Can I use frozen chicken? Yes, just ensure it’s fully thawed before marinating and cooking.
  • What can I substitute for lime juice? Lemon juice works well as a substitute if needed.
  • How can I make this dish spicier? Add more chili powder or serve with a spicy salsa.
  • Is this recipe gluten-free? Yes, just ensure your rice and any additional sauces are gluten-free.
  • Can I add other proteins? Absolutely! Shrimp, beef, or turkey can be great alternatives.
  • How do I store leftovers? Keep in an airtight container in the fridge for up to 4 days.
  • Can I use brown rice? Yes, brown rice makes a nutritious and delicious base for these bowls.
  • What toppings do you recommend? Try fresh cilantro, lime wedges, sliced jalapeños, or a dollop of sour cream.

Nutritional Tips and Dietary Adaptations

This recipe is not only delicious but also nutritious! Here are some tips for dietary adaptations:

  • Low-Carb: Substitute rice with cauliflower rice or sautéed zucchini noodles.
  • High-Protein: Add extra beans or serve with a side of Greek yogurt.
  • Dairy-Free: Omit cheese or sour cream and stick to avocado for creaminess.

Recommended Equipment

Here are some tools that will help you make the best cilantro lime chicken bowls:

  • Skillet: A non-stick skillet is ideal for cooking the chicken.
  • Meat Thermometer: Ensures your chicken is cooked perfectly every time.
  • Mixing Bowls: Use for marinating and prepping ingredients.
  • Rice Cooker: Perfect for cooking rice with ease.

Serving Suggestions

To make your meal even more delightful, serve your cilantro lime chicken bowls with:

  • Fresh Salad: A side salad with mixed greens, cucumbers, and a light vinaigrette complements the meal.
  • Chips and Salsa: Serve with tortilla chips and fresh salsa for a crunchy side.
  • Sweet Treat: A light dessert like fruit salad or sorbet to finish off your meal.

Final Thoughts

Cooking should be enjoyable and stress-free! With this cilantro lime chicken bowls recipe, you’ll be able to create a colorful, tasty meal that’s sure to please everyone at your table. Remember, the key is in the marination and using fresh ingredients. So gather your loved ones, roll up your sleeves, and get ready to savor every bite. Happy cooking!

Cilantro Lime Chicken Bowls Recipe

Prep Time 15 minutes
Cook Time 20 minutes
Total Time 35 minutes
Servings 4 servings
Calories 550
Enjoy a vibrant and flavorful bowl featuring tender chicken, fresh cilantro, and zesty lime, perfect for a quick and healthy meal.

Ingredients

Protein

  • 1.5 pounds boneless skinless chicken breasts
  • 3 tablespoons lime juice
  • 1 tablespoon lime zest
  • 3 tablespoons olive oil
  • 3 cloves garlic minced
  • 1 teaspoon chili powder
  • 1 teaspoon cumin
  • to taste Salt
  • to taste Black pepper
  • ¼ cup chopped fresh cilantro
  • 3 cups cooked rice or brown rice
  • 1 cup black beans rinsed and drained
  • 1 cup corn kernels cooked
  • 1 cup chopped tomatoes
  • 1 avocado sliced

Garnish

  • Extra cilantro and lime wedges (for garnish)

Instructions 

  • Marinate chicken with lime juice, lime zest, garlic, chili powder, cumin, salt, and pepper for 10 minutes.
  • Cook chicken in olive oil over medium heat until fully cooked, about 8-10 minutes.
  • Assemble bowls with rice, black beans, corn, tomatoes, sliced chicken, and avocado. Garnish with cilantro and lime wedges.

Notes

Use fresh ingredients for best flavor and adjust seasoning to taste.
Calories: 550kcal
Cost: $15
Course: Main Course
Cuisine: Mexican
Keyword: Chicken

Welcome to a culinary adventure that brings together the rich, nutty flavors of freekeh and the earthy tones of mushrooms, all topped with a zesty chili lime tahini dressing. This Mixed Mushroom Freekeh Bowl is not just a recipe; it’s a journey into the world of healthy, satisfying, and easy weeknight dinners. In under 30 minutes, you can create a dish that’s as nutritious as it is delicious, making it perfect for busy evenings when you want to enjoy a home-cooked meal without the stress.

Freekeh, a grain celebrated for its high fiber content and nutty flavor, pairs beautifully with a variety of mushrooms, while the chili lime tahini dressing adds a delightful kick. Let’s dive into why you’ll love this recipe and how it can fit seamlessly into your weeknight routine!

Why You’ll Love This Recipe

  • Quick and Easy: This dish takes less than 30 minutes from start to finish, perfect for those busy weeknights.
  • Nutritious Ingredients: Freekeh is packed with fiber and protein, while mushrooms offer essential vitamins and minerals.
  • Versatile: Customize the bowl with your choice of vegetables and toppings to suit your taste.
  • Vegan and Gluten-Free: This recipe is suitable for a variety of dietary preferences, ensuring everyone can enjoy it.
  • Flavor-Packed: The combination of savory mushrooms and zesty tahini dressing makes every bite a delightful experience.

Ingredients Breakdown

To create this Mixed Mushroom Freekeh Bowl, you’ll need the following ingredients:

  • Freekeh: 1 cup uncooked (200 g) – A nutritious ancient grain that provides a chewy texture.
  • Water: 2 cups – To cook the freekeh until tender.
  • Salt: A pinch, for flavor.
  • Tahini: 1/2 cup – Adds creaminess and depth to the dressing.
  • Lime Juice: Juice of 1 lime – For a fresh, zesty kick.
  • Gochujang or Korean Chili Paste: 1/2 tablespoon – For a hint of heat.
  • Chili Crisp or Chili Oil: 1/2 tablespoon – Enhances the flavor profile.
  • Maple Syrup: 1 tablespoon – Balances the heat with sweetness.
  • Soy Sauce: 1/2 tablespoon, or to taste – For added umami flavor.
  • Water: 1/4 cup, room temperature – To adjust the tahini dressing’s consistency.
  • Scallions: 6, trimmed and sliced – For a fresh, oniony crunch.
  • Neutral Oil: 6 tablespoons (avocado oil recommended) – For sautéing the mushrooms.
  • Kosher Salt: 1/4 teaspoon – Adjust to taste.
  • Chinese Five Spice Powder: 1/2 teaspoon – Adds complexity to the mushrooms.
  • Mushrooms: 12.5 oz of your choice (e.g., baby Bella, oyster, shimeji) – A mix adds texture and flavor.
  • Vegan Butter: 1 tablespoon – For richness.
  • Shallot: 1 small, halved and thinly sliced – Enhances the dish with its mild sweetness.
  • White Miso Paste: 1 tablespoon – For an umami boost.
  • Vegetables: Cooked lentils, grated or fresh vegetables of your choice (lettuce, carrots, tomatoes, etc.) – For added nutrition and texture.
  • Nuts or Seeds: Your choice – For crunch and additional nutrition.
  • Crispy Fried Shallots: Optional, but they make all the difference!
  • Toasted Sesame Seeds: For garnish, adding a nutty flavor.

Cooking Instructions

Follow these simple steps to create your Mixed Mushroom Freekeh Bowl:

1. Cook the Freekeh

In a medium saucepan, bring 2 cups of water to a boil. Stir in 1 cup of freekeh and a pinch of salt. Lower the heat to a simmer, cover, and cook for about 20-25 minutes or until the freekeh is tender and the water is absorbed. Fluff with a fork and set aside.

2. Prepare the Tahini Dressing

In a bowl, whisk together 1/2 cup tahini, juice of 1 lime, 1/2 tablespoon gochujang, 1/2 tablespoon chili oil, 1 tablespoon maple syrup, and 1/4 cup room temperature water until smooth. Adjust the consistency and flavor with additional water or soy sauce if needed.

3. Sauté the Mushrooms

In a large skillet, heat 6 tablespoons of neutral oil over medium heat. Add the sliced shallots and sauté for 2-3 minutes until translucent. Add the mushrooms, 1/4 teaspoon kosher salt, and 1/2 teaspoon Chinese five spice powder. Cook for about 5-7 minutes, stirring occasionally, until the mushrooms are browned and tender.

4. Assemble the Bowl

In a large bowl, combine the cooked freekeh with the sautéed mushrooms. Drizzle with the chili lime tahini dressing and toss to combine. Top with sliced scallions, your choice of fresh vegetables, nuts or seeds, and crispy fried shallots if using.

Pro Tips for Success

Side view of a delicious Mixed Mushroom Freekeh Bowl featuring a variety of mushrooms and a creamy dressing.
  • Perfectly Cooked Freekeh: Ensure to follow the cooking times closely; it should be tender but still have a slight chew.
  • Flavor Variations: Experiment with different types of mushrooms for unique flavors.
  • Adjust Heat: Modify the amount of gochujang or chili oil to suit your spice preference.
  • Make Ahead: Cook the freekeh and sauté the mushrooms in advance to save time on busy nights.
  • Storage: Store leftovers in an airtight container in the fridge for up to 3 days.
  • Nut-Free Option: Omit nuts or seeds for a nut-free version.
  • Fresh Herbs: Add chopped fresh parsley or cilantro for an extra layer of flavor.
  • Meal Prep: Prepare individual bowls for easy grab-and-go meals throughout the week.

Common Mistakes and Troubleshooting

Here are some common pitfalls to avoid when making your freekeh bowl:

  • Overcooking Freekeh: Keep an eye on the cooking time; it should be tender but not mushy.
  • Dressing Too Thick: If your tahini dressing is too thick, gradually stir in more water to reach your desired consistency.
  • Mushroom Overcrowding: Avoid overcrowding the pan while sautéing the mushrooms; this can lead to steaming instead of browning.
  • Not Seasoning Enough: Taste and adjust seasoning throughout the cooking process for the best flavor.
  • Skipping Crispy Shallots: Don’t skip the crispy shallots—they add a wonderful crunch and flavor contrast.

Recipe Variations

Here are some delightful variations you can try with your Mixed Mushroom Freekeh Bowl:

  • Protein Boost: Add cooked chickpeas or lentils for an extra protein punch.
  • Spiced Freekeh: Stir in spices like cumin or smoked paprika while cooking the freekeh for added flavor.
  • Roasted Veggies: Incorporate roasted vegetables such as bell peppers or zucchini for even more texture and taste.
  • Cheesy Twist: Mix in nutritional yeast or your favorite vegan cheese for a cheesy flavor without dairy.

Storage and Make-Ahead Instructions

This recipe is perfect for meal prep! Here’s how to store it:

  • Refrigeration: Store the cooked freekeh, sautéed mushrooms, and dressing separately in airtight containers in the refrigerator. They will keep well for up to 3 days.
  • Reheating: Reheat the freekeh and mushrooms in the microwave or on the stove until warmed through. Add a splash of water to the mushrooms if they seem dry.
  • Make-Ahead: Prepare the freekeh and mushrooms a day ahead of time for easy assembly at dinner.

Frequently Asked Questions

  • Can I use a different grain instead of freekeh? Absolutely! Quinoa or farro are great alternatives.
  • Is this recipe gluten-free? Yes, it’s naturally gluten-free if you use gluten-free soy sauce.
  • How do I make the tahini dressing less bitter? Adding more maple syrup can help balance out the bitterness of tahini.
  • Can I add meat to this dish? Yes! Grilled chicken or tofu can be great additions for more protein.
  • What if I don’t have gochujang? You can substitute it with sriracha or any other chili paste you prefer.
  • How long does freekeh take to cook? It typically cooks in about 20-25 minutes.
  • Can I freeze leftovers? Yes, you can freeze the cooked freekeh and mushrooms in an airtight container for up to 3 months.
  • What vegetables should I add? Feel free to use any fresh vegetables you have on hand, like spinach, kale, or carrots.

Nutrition Tips and Dietary Adaptations

This Mixed Mushroom Freekeh Bowl is not only delicious but also nutritious. Here are some tips to maximize its health benefits:

  • High Fiber: Freekeh is a great source of dietary fiber, aiding digestion and promoting fullness.
  • Rich in Antioxidants: Mushrooms contain powerful antioxidants that help combat oxidative stress.
  • Vegan-Friendly: This recipe is entirely plant-based, making it suitable for vegans and vegetarians alike.
  • Low in Calories: With a focus on whole ingredients, this bowl is low in calories but high in nutrients.

Essential Equipment

To make your Mixed Mushroom Freekeh Bowl, you’ll need the following kitchen tools:

  • Medium Saucepan: For cooking the freekeh.
  • Large Skillet: For sautéing the mushrooms and shallots.
  • Mixing Bowl: To prepare the tahini dressing.
  • Measuring Cups and Spoons: For accurate ingredient measurements.
  • Whisk: To mix the tahini dressing smoothly.

Serving Suggestions

This Mixed Mushroom Freekeh Bowl can be enjoyed in several delightful ways:

  • As a Standalone Meal: It’s hearty enough to serve as a complete meal on its own.
  • With a Side Salad: Pair it with a light side salad for a refreshing contrast.
  • As a Lunch Box Option: Pack it for lunch at work or school; it holds up well and can be eaten cold or reheated.
  • With Grilled Protein: Serve alongside grilled chicken or tofu for a well-rounded dinner.

In conclusion, creating your Mixed Mushroom Freekeh Bowl is not just about enjoying a delicious meal; it’s about embracing simplicity, flavor, and nutrition. With this comprehensive guide, you’re equipped to make a dish that will become a staple in your weeknight dinner rotation. Remember, cooking is about having fun and experimenting, so feel free to make this recipe your own. Happy cooking!

Mixed Mushroom Freekeh Bowl with Chili Lime Tahini Dressing

Prep Time 15 minutes
Cook Time 30 minutes
Total Time 45 minutes
Servings 4 servings
Calories 450
A hearty and flavorful bowl combining nutty freekeh, savory mushrooms, and a zesty chili lime tahini dressing for a satisfying meal.

Ingredients

Dry grains and liquids

  • 1 cup freekeh, uncooked
  • 2 cups water
  • Pinch salt

Tahini and dressings

  • 0.5 cup tahini
  • 1 lime juice of 1 lime
  • 0.5 tbsp gochujang or Korean chili paste
  • 0.5 tbsp chili crisp or chili oil
  • 0.5 tbsp maple syrup or other sweetener (adjust to taste)
  • 0.5 tbsp soy sauce (to taste)
  • 0.25 cup room temperature water (adjust to desired consistency)

Vegetables and toppings

  • 6 scallions scallions, sliced (root ends trimmed)
  • 6 tbsp neutral oil (e.g., avocado oil)
  • 0.25 tsp kosher salt (or more to taste)
  • 0.5 tsp Chinese five spice powder
  • 12.5 oz mushrooms of choice (e.g., baby Bella, oyster, shimeji)
  • 1 tbsp vegan butter
  • 1 small shallot (halved and thinly sliced)
  • 1 tbsp white miso paste

Additional toppings

  • to taste salt and pepper
  • as needed cooked lentils
  • as desired grated or fresh vegetables (lettuce, carrots, tomatoes, etc.)
  • as desired nuts and seeds
  • as needed crispy fried shallots (makes all the difference)
  • 1 tbsp toasted sesame seeds

Instructions 

  • Cook the freekeh in water with a pinch of salt until tender, about 20 minutes. Drain and set aside.
  • Prepare the mushrooms by sautéing with vegan butter, shallots, salt, and five spice until browned and cooked through, about 10 minutes.
  • Whisk together tahini, lime juice, gochujang, chili oil, maple syrup, soy sauce, and water to make the chili lime tahini dressing.
  • Assemble bowls with cooked freekeh, sautéed mushrooms, fresh vegetables, lentils, and drizzle with dressing. Garnish with scallions, toasted sesame seeds, and crispy shallots.

Notes

For extra crunch, add toasted nuts or seeds and crispy shallots on top.
Calories: 450kcal
Cost: $15
Course: Main Course
Cuisine: Fusion
Keyword: Mushrooms

Transform Your Weeknight Dinners with This Flavor-Packed Pasta Bowl

Welcome to the world of simple yet flavorful cooking! This Pasta Bowl recipe is designed for those busy weeknights when you want to whip up something delicious without spending hours in the kitchen. Packed with vibrant vegetables, aromatic herbs, and a creamy sauce that ties everything together, this pasta bowl brings joy to the table in under an hour. Let’s dive into the details!

Why You’ll Love This Recipe

This pasta bowl is not just another meal; it’s a delightful experience that offers:

  • Quick Preparation: With only a 15-minute prep time, you can have dinner ready in no time!
  • Flavor Explosion: A perfect blend of roasted veggies, fresh basil, and a creamy balsamico sauce creates a memorable taste.
  • Versatile Ingredients: Swap out vegetables based on your preference or what’s in season—this recipe is adaptable!
  • Healthy & Satisfying: Packed with nutrients, this dish makes for a balanced meal that leaves you feeling great.
  • Family-Friendly: Even the pickiest eaters will enjoy this colorful and tasty pasta bowl.

Ingredient Breakdown

Here’s what you’ll need to create this scrumptious pasta bowl:

  • 1 Zucchini: Adds a mild flavor and lovely texture.
  • 1 Paprikaschote (Bell Pepper): Choose your favorite color for a pop of sweetness.
  • 1 Knoblauchzehe (Garlic Clove): Essential for flavor; feel free to add more if you love garlic!
  • 1 EL Rapsöl (Rapeseed Oil): For roasting the veggies.
  • Pfeffer und Salz: To taste; essential for enhancing flavors.
  • 150 g Kirschtomaten (Cherry Tomatoes): Juicy and sweet, they brighten the dish.
  • 1 Bd. Basilikum (Basil): Fresh basil adds an aromatic kick.
  • 25 g getrocknete Tomate (Sun-Dried Tomatoes): For a concentrated burst of flavor.
  • 2 EL Pinienkerne (Pine Nuts): Toasted for added crunch and a nutty flavor.
  • 200 g Penne: A hearty pasta shape that holds the sauce well.
  • 1 EL Olivenöl (Olive Oil): For the dressing and flavor.
  • 2 EL Balsamico-Creme: This sweet balsamic reduction ties the whole dish together.
  • 2 EL geriebener Parmesan oder vegetarische Alternative: For a cheesy finish, use your favorite cheese or a non-dairy option.

Pro Tips for Pasta Perfection

Enhance your cooking with these expert insights:

  • Roasting Time: Keep an eye on the veggies as they roast; they should be tender and slightly caramelized for optimal flavor.
  • Salt the Water: Make sure to salt your pasta water generously; it’s the key to flavorful pasta.
  • Save Pasta Water: Reserve some pasta water before draining; it can help adjust the sauce’s consistency later.
  • Fresh vs. Dried Herbs: If you only have dried basil, use about one-third of the amount compared to fresh.
  • Customize the Sauce: Adjust the balsamico cream based on your taste; add more for a sweeter sauce or less for a tart finish.
  • Storage Tips: Leftovers can be stored in the fridge for up to three days; just reheat gently to avoid overcooking the pasta.
  • Experiment with Proteins: Add grilled chicken, shrimp, or chickpeas for a protein boost.
  • Garnish Wisely: Finish with a sprinkle of extra cheese or fresh basil for a professional touch.

Avoid These Common Mistakes

To ensure your pasta bowl turns out perfectly, watch out for these pitfalls:

  • Overcooking the Pasta: Follow the package instructions closely; al dente is ideal!
  • Underseasoning: Don’t be shy with your spices! Taste and adjust as you cook.
  • Ignoring the Roasting Process: Roasted vegetables can transform the flavor; don’t rush this step!
  • Forgetting the Cheese: Cheese adds richness; ensure you don’t skip it!

Variations to Try

If you’re in the mood for something different, consider these tasty variations:

  • Italian Sausage Twist: Add sliced Italian sausage for a heartier dish.
  • Vegan Delight: Omit the cheese and use nutritional yeast for a cheesy flavor without dairy.
  • Spicy Kick: Add red pepper flakes for a bit of heat.
  • Seasonal Veggie Bowl: Use whatever veggies are in season for the freshest flavors.

Storage and Make-Ahead Instructions

This pasta bowl is perfect for meal prep! Here’s how to store it:

  • Refrigeration: Keep leftovers in an airtight container for up to three days.
  • Freezing: This dish can be frozen, but the texture may change slightly upon reheating.
  • Make Ahead: Prepare the roasted veggies and sauce a day in advance; cook the pasta fresh when you’re ready to serve.

FAQs About Your Pasta Bowl

Here are some common questions you might have:

  • Can I use gluten-free pasta?: Absolutely! Substitute with your favorite gluten-free pasta.
  • What if I don’t have balsamico cream?: You can use regular balsamic vinegar, but consider mixing it with a bit of honey or maple syrup for sweetness.
  • How do I make this dish spicier?: Add fresh chili peppers or red pepper flakes for extra heat!
  • What can I replace the pine nuts with?: Walnuts or sunflower seeds are great alternatives.
  • Can I add protein to this dish?: Yes! Grilled chicken, shrimp, or beans work well.
  • Is this recipe kid-friendly?: Definitely! The flavors are mild and appealing to children.
  • How do I reheat leftovers?: Gently warm them on the stove or microwave, adding a splash of water to prevent drying out.
  • Can I prepare this dish without an oven?: Yes! You can sauté the vegetables on the stovetop instead of roasting them.

Nutrition Tips and Dietary Adaptations

This pasta bowl can fit various dietary needs:

  • Low-Carb Option: Substitute pasta with spiralized zucchini or spaghetti squash.
  • Vegan Adaptation: Use plant-based cheese or nutritional yeast instead of Parmesan.
  • Nut-Free Version: Omit the pine nuts or swap with pumpkin seeds.

Essential Equipment for Success

Here’s what you’ll need to make this recipe:

  • Large Baking Sheet: For roasting vegetables evenly.
  • Pot for Pasta: A big pot to boil your pasta to perfection.
  • Blender or Food Processor: To create your creamy sauce effortlessly.

Serving Suggestions

Serve this delicious pasta bowl with a side salad or garlic bread for a complete meal. Pair it with a glass of white wine or sparkling water for a refreshing touch. You can also garnish with more fresh basil or a sprinkle of chili flakes to suit your taste.

Conclusion

Cooking doesn’t have to be stressful! With this Flavor-Packed Pasta Bowl recipe, you can create a satisfying and delicious meal that the whole family will love. Remember, cooking is about enjoying the process, so have fun with it! Let your creativity shine, and don’t hesitate to experiment with different veggies and seasonings. Happy cooking!

Pasta Bowl so würzig lecker

Prep Time 10 minutes
Cook Time 25 minutes
Total Time 35 minutes
Servings 2 portions
Calories 550
A flavorful and vibrant pasta bowl featuring roasted vegetables, fresh herbs, and a delicious tomato-basil sauce.

Ingredients

Vegetables

  • 1 piece Zucchini (halved and sliced)
  • 1 piece Paprikaschote (cut into pieces)
  • 1 clove Knoblauchzehe (chopped)
  • 1 EL Rapsöl
  • Pfeffer, Salz Seasonings (to taste)
  • 150 g Kirschtomaten (halved)
  • 1 Bd. Basilikum (leaves separated)
  • 25 g getrocknete Tomate (roughly chopped)
  • 2 EL Pinienkerne (toasted)
  • 200 g Penne (cooked)
  • 1 EL Olivenöl
  • 2 EL Balsamico-Creme
  • 2 EL geriebener Parmesan oder vegetarische Alternative

Instructions 

  • Preheat oven to 200°C. Toss zucchini, paprika, and garlic with oil, season, and roast for 25 minutes.
  • Meanwhile, halve cherry tomatoes, prepare basil, and toast pinienkerne. Blend half of basil with tomatoes, dried tomatoes, oil, and balsamic to make sauce.
  • Cook penne according to package. Drain, reserving some pasta water.
  • Combine pasta with sauce, top with roasted vegetables, cherry tomatoes, remaining basil, pinienkerne, and cheese. Serve immediately.

Notes

Use fresh basil for best flavor and toast pinienkerne for added aroma.
Calories: 550kcal
Cost: $12
Course: Main Course
Cuisine: German
Keyword: Pasta

Discover the Joy of Cooking Savory Mushroom Tacos

Welcome to a culinary adventure that transforms your ordinary taco night into something extraordinary! In this article, we’ll dive into the world of mushroom tacos—a delightful combination of flavors and textures that will tantalize your taste buds. These tacos are not just delicious; they’re also incredibly easy to prepare, making them perfect for busy weeknights or fun gatherings with friends. So, grab your apron, and let’s get cooking!

Why You’ll Love This Recipe

Here are five compelling reasons to make these savory mushroom tacos a staple in your kitchen:

  • Flavor Explosion: The combination of portobello mushrooms, sweet red pepper, and zesty lime creates a mouthwatering flavor profile that is both satisfying and refreshing.
  • Quick and Easy: With a total cooking time of just 25 minutes, these tacos can be whipped up in no time, perfect for those hectic evenings.
  • Versatile Ingredients: The ingredients are simple and can be easily substituted or enhanced based on your preferences or what you have on hand.
  • Healthy and Nutritious: Packed with vegetables and low in calories, these tacos are a guilt-free option that doesn’t compromise on taste.
  • Customizable: Whether you’re vegan, gluten-free, or just looking to switch things up, we’ll explore plenty of variations to suit your dietary needs.

Ingredients for Savory Mushroom Tacos

Gather the following ingredients to create your delicious mushroom tacos:

  • 4 large portobello mushrooms (about 3/4 pound): These mushrooms are juicy and serve as the perfect meat alternative.
  • 1 tablespoon olive oil: Adds a rich, earthy flavor.
  • 1 medium sweet red pepper, cut into strips: Provides sweetness and color.
  • 1 medium onion, halved and thinly sliced: Adds depth and sweetness.
  • 2 garlic cloves, minced: For aromatic flavor.
  • 1 1/2 teaspoons chili powder: Introduces a subtle heat.
  • 1/2 teaspoon salt: Enhances the overall flavor.
  • 1/2 teaspoon ground cumin: Adds warmth and earthiness.
  • 1/4 teaspoon crushed red pepper flakes: For an additional kick.
  • 1 teaspoon grated lime zest: Brightens up the filling.
  • 2 tablespoons lime juice: Adds acidity and freshness.
  • 8 corn tortillas (6 inches, warmed): The perfect vessel for your taco mixture.
  • 1 cup shredded pepper jack cheese: For a creamy, spicy topping.

Step-by-Step Instructions to Prepare Mushroom Tacos

An iPhone photo of delicious mushroom tacos filled with portobello mushrooms and peppers.

Follow these simple steps to whip up your mushroom tacos:

  • Prepare the mushrooms: Remove the stems from the portobello mushrooms and, if desired, scoop out the gills using a spoon. Slice the mushrooms into 1/2-inch pieces.
  • Saute the vegetables: In a large skillet, heat the olive oil over medium-high heat. Add the sliced mushrooms, red pepper, and onion. Saute until the mushrooms are tender, about 5-7 minutes.
  • Add seasoning: Stir in the minced garlic, chili powder, salt, cumin, crushed red pepper flakes, lime zest, and lime juice. Cook and stir for an additional minute until fragrant.
  • Assemble the tacos: Serve the mushroom taco mixture in warmed tortillas and top with shredded pepper jack cheese.

Pro Tips for Perfect Mushroom Tacos

For the best taco experience, consider these expert tips:

  • Choose firm mushrooms: Look for portobellos that are firm and free from blemishes for the best texture.
  • Don’t overcrowd the pan: If your skillet is too crowded, the mushrooms will steam instead of sauté, preventing that delicious caramelization.
  • Experiment with spices: Feel free to adjust the spices according to your taste preferences—add more chili powder for heat or include smoked paprika for a smoky flavor.
  • Use fresh lime: Freshly squeezed lime juice will enhance the flavor compared to bottled options.
  • Warm the tortillas: Warm tortillas on a skillet or in the oven for better flexibility and flavor.
  • Top wisely: Try adding fresh cilantro, avocado slices, or a dollop of sour cream for extra richness.
  • Make it a meal: Serve your tacos with a side of black beans or Mexican rice for a complete meal.
  • Save some for later: The mushroom filling can be stored in the fridge for up to 3 days, making it great for meal prep.

Common Mistakes and Troubleshooting

Even the best chefs encounter hiccups; here are some common mistakes and how to avoid them:

  • Overcooking the mushrooms: Keep an eye on your mushrooms to ensure they are tender but not mushy. They should maintain some bite.
  • Not seasoning adequately: Taste your mixture before serving and adjust the seasoning as necessary. Don’t be afraid to add a pinch more salt or spice!
  • Skipping the warm tortillas: Cold tortillas can make your tacos less enjoyable; always warm them for the best experience.

Variations to Try with Your Mushroom Tacos

Here are some fun variations to keep your taco nights exciting:

  • Taco Bowl: Skip the tortillas and serve the mushroom mixture over rice or quinoa for a healthy bowl option.
  • Vegan Option: Omit the cheese or substitute with a dairy-free cheese alternative.
  • Spicy Kick: Add diced jalapeños or a dash of hot sauce to the filling for extra heat.
  • Grilled Version: Grill the mushrooms instead of sautéing for a smoky flavor.

Storage and Make-Ahead Instructions

Planning ahead? Here’s how to store and reheat your tacos:

  • Refrigeration: Store any leftover mushroom filling in an airtight container in the fridge for up to 3 days.
  • Freezing: The taco mixture can be frozen for up to 2 months. Thaw in the fridge overnight before reheating.
  • Reheating: Reheat the filling in a skillet over medium heat or in the microwave until heated through.

Frequently Asked Questions (FAQs)

Here are some common questions about making mushroom tacos:

  • Can I use other types of mushrooms? Yes! Feel free to experiment with shiitake, cremini, or button mushrooms.
  • Can I make these tacos gluten-free? Absolutely! Use corn tortillas or gluten-free wraps as a substitute.
  • How spicy are these tacos? The spice level can be adjusted by varying the amount of chili powder and crushed red pepper flakes.
  • Can I prepare the filling ahead of time? Yes! It can be made a day in advance and stored in the fridge.
  • What toppings are best? Fresh cilantro, avocado, and lime wedges make excellent toppings!
  • Are these tacos kid-friendly? Yes, the flavors are mild and can be adjusted to suit younger palates.
  • How can I make these tacos more filling? Consider adding black beans or refried beans to the mixture or as a side.
  • Can I serve these tacos cold? While they are best served warm, the filling can be enjoyed cold as well.

Nutrition Tips and Dietary Adaptations

This dish is already quite healthy, but here are a few tips to enhance the nutrition:

  • Add more veggies: Consider adding zucchini, spinach, or corn to the filling for extra nutrients.
  • Swap cheese options: Use low-fat cheese or nutritional yeast for a dairy-free option.
  • Watch the tortillas: Opt for whole grain or high-fiber tortillas to increase the fiber content.

Essential Equipment for Making Mushroom Tacos

Here’s what you’ll need for this recipe:

  • Skillet: A non-stick or cast-iron skillet works best for sautéing your ingredients.
  • Knife and Cutting Board: For chopping and prepping your veggies.
  • Spatula: Essential for stirring and serving your taco mixture.
  • Measuring Cups and Spoons: To ensure precise ingredient quantities.

Serving Suggestions for Your Tacos

Pair your delightful mushroom tacos with these delicious sides:

  • Mexican Rice: A flavorful base that complements the tacos beautifully.
  • Black Beans: A protein-packed side that rounds out your meal.
  • Guacamole and Salsa: Fresh dips to enhance flavor.
  • Fresh Salad: A light and refreshing salad to balance the meal.

Conclusion

Cooking should be a joyful and creative experience, and these savory mushroom tacos are a testament to that philosophy. With their rich flavors, simple preparation, and numerous variations, they’re sure to become a beloved dish in your home. So go ahead, embrace your inner chef, and enjoy the process of making these delicious tacos—your taste buds will thank you!

Mushroom Tacos

Prep Time 10 minutes
Cook Time 10 minutes
Total Time 20 minutes
Servings 4 servings
Calories 250
Delicious vegetarian mushroom tacos packed with flavor and easy to prepare.

Ingredients

Main Ingredients

  • 4 large portobello mushrooms (about 3/4 pound)
  • 1 tablespoon olive oil
  • 1 medium sweet red pepper (cut into strips)
  • 1 medium onion (halved and thinly sliced)
  • 2 cloves garlic (minced)
  • 1.5 teaspoons chili powder
  • 0.5 teaspoon salt
  • 0.5 teaspoon ground cumin
  • 0.25 teaspoon crushed red pepper flakes
  • 1 teaspoon grated lime zest
  • 2 tablespoons lime juice
  • 8 pieces corn tortillas (6 inches, warmed)
  • 1 cup shredded pepper jack cheese

Instructions 

  • Remove stems from mushrooms, and if desired, gills using a spoon. Slice into 1/2-inch pieces.
  • Heat oil in a large skillet over medium-high heat. Saute mushrooms, red pepper, and onion until tender, about 5-7 minutes.
  • Add garlic, chili powder, salt, cumin, red pepper flakes, lime zest, and lime juice. Cook and stir for 1 minute.
  • Serve the mushroom mixture in warmed tortillas, topped with shredded cheese.

Notes

For extra flavor, add fresh cilantro or a squeeze of lime before serving.
Calories: 250kcal
Cost: $12
Course: Main Course
Cuisine: Mexican
Keyword: Mushrooms

Discover the Joy of Cooking with Roasted Broccoli Pesto Pasta

Are you ready to transform your weeknight meals with a dish that’s both simple and delicious? Roasted Broccoli Pesto Pasta is more than just a meal; it’s a culinary adventure that brings together fresh ingredients, vibrant flavors, and the comforting satisfaction of homemade cooking. Packed with nutrients and bursting with flavor, this recipe is designed for busy days when you want to enjoy something special without spending hours in the kitchen. Let’s dive into why this dish is a must-try!

Why You’ll Love This Recipe

  • Quick and Easy: With just a few simple steps, you can have a delightful dinner ready in under 30 minutes.
  • Healthy Ingredients: This pasta dish is loaded with roasted broccoli, olive oil, and nuts, making it not only delicious but also nutritious.
  • Flavor-Packed: The combination of roasted broccoli and zesty lemon creates a pesto that’s rich and satisfying.
  • Versatile: You can easily customize this recipe to suit your taste or dietary preferences, making it perfect for everyone.
  • Perfect for Meal Prep: This pasta can be made ahead and stored, ready to be enjoyed throughout the week.

Roasted Broccoli Pesto Pasta Ingredients

Let’s gather the ingredients you’ll need to create this flavorful dish:

  • Olive Oil: A key ingredient for roasting and making pesto; it adds richness.
  • Salt: Essential for enhancing flavors.
  • Pepper: Freshly ground for the best taste.
  • Broccoli Florets: The star of the dish, rich in vitamins and minerals.
  • Pine Nuts: For a delightful crunch and nuttiness; can substitute with walnuts or almonds.
  • Penne Pasta: A great shape that holds the pesto well; feel free to use any pasta you have on hand.
  • Lemon: Adds brightness and acidity to balance the flavors.
  • Parmesan: For a savory depth; you can use nutritional yeast for a vegan option.
  • Garlic: Fresh garlic provides aromatic depth; roasted garlic can add a sweeter flavor.

How to Make Roasted Broccoli Pesto Pasta

Side view of a bowl filled with Roasted Broccoli Pesto Pasta garnished with pine nuts.

Now, let’s walk through the steps to create this delightful dish:

  1. Preheat the oven to 425 degrees F.
  2. Toss the broccoli on a sheet pan with olive oil, salt, and pepper. Spread it into a single layer.
  3. Roast the broccoli until it’s lightly browned and crisp-tender, about 10-12 minutes.
  4. Prepare the pesto: In a food processor, combine 1 cup roasted broccoli, garlic, toasted pine nuts, Parmesan, and lemon juice. Blend until combined.
  5. With the motor running, slowly pour in the olive oil through the feeder tube until the pesto is smooth.
  6. Cook the penne according to package instructions until al dente. Remember to save 1/2 cup of the cooking water before draining.
  7. Combine the cooked penne with the pesto in a large bowl, folding in the remaining roasted broccoli. Add a splash of reserved pasta water as needed to coat the penne.

Make Ahead Options

This dish is perfect for meal prep! Here are some tips on how to prepare it in advance:

  • Cook the pasta: You can cook the penne a day ahead and store it in an airtight container in the fridge.
  • Prepare the pesto: Make the broccoli pesto a day or two in advance; store it in a jar with a layer of olive oil on top to keep it fresh.
  • Roast the broccoli: If you prefer, roast the broccoli ahead of time and reheat it when ready to serve.

What to Serve with Roasted Broccoli Pesto Pasta?

Pairing your pasta with the right sides can elevate your meal. Consider these options:

  • Garlic Bread: A classic accompaniment that complements the pesto beautifully.
  • Side Salad: A fresh salad with mixed greens, cherry tomatoes, and a light vinaigrette adds a refreshing crunch.
  • Grilled Chicken or Tofu: For added protein, serve with grilled chicken or grilled tofu for a vegetarian option.
  • Steamed Vegetables: Keep it simple with a side of steamed seasonal veggies.

Roasted Broccoli Pesto Pasta Variations

Feel free to get creative! Here are some variations to try:

  • Nut-Free Option: Omit the nuts and use sunflower seeds instead for a similar crunch.
  • Spicy Kick: Add red pepper flakes to the pesto for a spicy twist.
  • Cheesy Pesto: Mix in some ricotta cheese for a creamy texture in the pesto.
  • Veggie-Loaded: Add other roasted vegetables like bell peppers or zucchini for extra flavor and nutrients.

How to Store and Freeze Roasted Broccoli Pesto Pasta

Proper storage ensures your dish stays fresh and tasty:

  • Refrigeration: Store leftover pasta in an airtight container in the fridge for up to 3 days.
  • Freezing: To freeze, place in a freezer-safe container, separating layers with parchment paper. Enjoy within 2 months.
  • Reheating: Reheat in the microwave or on the stovetop, adding a splash of reserved pasta water to loosen the sauce.

Common Mistakes and Troubleshooting

Cooking can be tricky, so here are some common pitfalls and how to avoid them:

  • Overcooked Broccoli: Keep an eye on the broccoli; it should be crisp-tender, not mushy.
  • Pasta Too Sticky: Ensure you use enough water when cooking the pasta, and toss it with olive oil after draining.
  • Pesto Too Thick: If your pesto is too thick, add a little reserved pasta water to achieve your desired consistency.

Expert Tips for Roasted Broccoli Pesto Pasta

Here are some tips to elevate your dish:

  • Use Fresh Ingredients: Fresh garlic and high-quality olive oil make a significant difference in flavor.
  • Season Generously: Don’t be afraid of salt and pepper—they enhance the flavors of the ingredients.
  • Don’t Skip the Lemon: A splash of lemon juice brightens the dish and balances the richness of the pesto.
  • Adjust to Taste: Feel free to adjust the ratio of ingredients in the pesto to suit your taste preferences.
  • Experiment with Herbs: Adding fresh basil or arugula to the pesto can create interesting flavor profiles.

Frequently Asked Questions

Let’s address some common questions about this recipe:

  • Can I use frozen broccoli? Yes, frozen broccoli can be used; just make sure to thaw and drain it before roasting.
  • Is this recipe vegan-friendly? Yes, simply omit the cheese or use a vegan substitute.
  • What other pasta shapes work well? Fusilli or farfalle are great alternatives if you want to switch it up!
  • Can I make this gluten-free? Absolutely! Use gluten-free pasta for a delicious alternative.
  • How do I make the pesto nut-free? Replace nuts with pumpkin seeds for a nut-free version.
  • How long does leftover pesto last? Pesto can be stored in the fridge for up to a week, or frozen for later use.
  • What can I add to the pesto for extra flavor? Fresh herbs like basil or parsley can enhance the pesto’s flavor profile.
  • Is it necessary to roast the broccoli? Roasting enhances the flavor, but you can steam it if you prefer.

Nutritional Tips and Dietary Adaptations

This recipe is not only delicious but also healthy. Here’s how to make it even better for your dietary needs:

  • Low-Calorie: Use whole wheat pasta for added fiber without sacrificing flavor.
  • High-Protein: Add grilled chicken, chickpeas, or lentils for a protein boost.
  • Vegan: Substitute nutritional yeast for Parmesan cheese to keep it plant-based.

Equipment Recommendations

To make this recipe, you’ll need:

  • Food Processor: Essential for making the pesto quickly and efficiently.
  • Sheet Pan: For roasting the broccoli evenly.
  • Large Pot: To cook the pasta.
  • Measuring Cups and Spoons: For accurately measuring ingredients.

Conclusion: Enjoy Your Culinary Adventure!

Cooking should be an enjoyable experience. With this Roasted Broccoli Pesto Pasta recipe, you’ll find that preparing delicious meals can be both simple and rewarding. Remember, it’s not about perfection; it’s about the joy of creating something wonderful. So gather your ingredients, follow the steps, and let your creativity shine in the kitchen. Happy cooking!

Roasted Broccoli Pesto Pasta

Prep Time 10 minutes
Cook Time 15 minutes
Total Time 25 minutes
Servings 4 servings
Calories 520
A vibrant and flavorful pasta dish featuring roasted broccoli blended into a fresh pesto, perfect for a quick and healthy meal.

Ingredients

Vegetables and Nuts

  • 2 heads Broccoli Florets (about 4 cups)
  • 2 tablespoons Olive Oil
  • 1/2 cup Pine Nuts (toasted)
  • 1 cup Parmesan (grated)
  • 3 cloves Garlic (minced)
  • 1 lemon Lemon (juiced)
  • 2 tablespoons Olive Oil (for pesto)

Pasta

  • 8 ounces Penne Pasta (about 225 grams)

Seasonings

  • to taste Salt
  • to taste Pepper

Instructions 

  • Preheat oven to 425°F (220°C). Toss broccoli with 1 tbsp olive oil, salt, and pepper; roast for 10-12 minutes until crisp-tender.
  • Finely chop 1 cup roasted broccoli, garlic, pine nuts, Parmesan, and lemon juice; blend in a food processor. With motor running, add 2 tbsp olive oil until smooth.
  • Cook pasta in salted boiling water until al dente; reserve 1/2 cup cooking water, then drain.
  • Mix pesto with pasta, fold in remaining roasted broccoli, and add reserved water as needed to coat.

Notes

Use freshly grated Parmesan for best flavor.
Calories: 520kcal
Cost: $12
Course: Main Course
Cuisine: Italian
Keyword: broccoli, Pasta, Pesto

Welcome to the wonderful world of homemade wraps! If you’re looking for a meal that’s not only delicious but also nourishing and easy to prepare, these Spicy Lentil Rice Wraps are just what you need. Packed with flavor and wholesome ingredients, this recipe will take your taste buds on an exciting journey without breaking a sweat in the kitchen. Let’s dive into why you’ll love this recipe and how to make it a staple in your meal rotation!

Why You’ll Love This Recipe

There are countless reasons to fall in love with these Spicy Lentil Rice Wraps. Here are just a few:

  • Quick and Easy: With just a few simple steps, you can have a delicious meal ready in less than 30 minutes—perfect for busy weeknights!
  • Nutritious Ingredients: Lentils and rice are packed with protein and fiber, making these wraps a filling and healthy option.
  • Customizable: You can easily adjust the ingredients to suit your taste, whether you prefer more spice or a milder flavor.
  • Great for Meal Prep: These wraps can be made ahead of time and stored for quick lunches or dinners throughout the week.
  • Kid-Friendly: With a fun, hand-held format, these wraps are a hit with kids and adults alike!

Ingredient Breakdown

Let’s take a closer look at the ingredients you need to whip up these amazing wraps:

  • 1 cup lentils (cooked): Use green or brown lentils for the best texture.
  • 1 cup rice (cooked): Any rice will do, but brown rice adds extra nutrition.
  • 2 tbsp olive oil: For sautéing and flavor enhancement.
  • 2 tbsp hummus: A creamy base that adds flavor and moisture.
  • 1/2 tsp garlic powder: For that aromatic kick.
  • 1/2 tsp onion powder: A staple for depth of flavor.
  • 1/2 tsp dried parsley: For a touch of freshness.
  • 1/2 tsp smoked paprika: Adds a delightful smokiness.
  • 1/2 tsp pepper: Adjust to taste.
  • Salt to taste: Essential for balancing flavors.
  • 2 tbsp vegan mayo: Creaminess without the egg.
  • Chili garlic sauce to taste: Spice it up as you like!
  • 1/4 cup tahini: For a nutty flavor and creaminess.
  • Lemon juice to taste: Freshens up the dish; I used 2 small lemons.
  • Water as needed: To thin out the sauces.
  • 4 pieces lavash or wrap of choice: Use whole wheat for added fiber or gluten-free wraps if needed.
  • Shredded cabbage: Adds a nice crunch and freshness.

How to Make Spicy Lentil Rice Wraps

Ready to get cooking? Follow these straightforward steps to create your wraps:

  1. In a large bowl, combine all of the lentil rice ingredients (cooked lentils, rice, olive oil, hummus, and spices). Mix well and adjust seasonings to your preference.
  2. In another bowl, mix the ingredients for the spicy mayo (vegan mayo and chili garlic sauce) until smooth. Set aside.
  3. For the lemon tahini sauce, combine tahini, lemon juice, garlic powder, parsley, and water in a bowl. Stir until you reach a smooth consistency, adding more water if necessary.
  4. To assemble your wraps, spread a generous amount of spicy mayo down the center of each lavash. Top with the lentil rice mixture and shredded cabbage.
  5. Roll the wrap tightly, cut it in half, and serve with the lemon tahini sauce on the side. Enjoy!

Pro Tips for Perfect Wraps

Side view of a juicy Spicy Lentil & Rice Wrap, showcasing its vibrant filling.

Here are some expert insights to ensure your wraps turn out perfectly every time:

  • Texture Matters: If you want the filling to have a perfect texture, make sure your lentils and rice are not overcooked—al dente is best!
  • Experiment with Spices: Don’t hesitate to add your favorite spices—cumin or coriander can elevate the flavor profile.
  • Let It Chill: For an even fresher taste, chill the filling in the fridge for about 30 minutes before assembling.
  • Wrap it Up: Practice rolling tight wraps to prevent the filling from spilling out during eating.
  • Storage Solutions: If preparing in advance, store the filling separately to keep the wraps from getting soggy.
  • Mix It Up: Feel free to add extra vegetables like bell peppers or carrots for added crunch and nutrition.
  • Garnish Wisely: Top with fresh herbs like cilantro or green onions for an extra flavor boost.
  • Don’t Skip the Sauce: The lemon tahini sauce is a game-changer—make sure to serve it on the side!

Common Mistakes and Troubleshooting

Even the best cooks can face challenges. Here’s how to avoid some common pitfalls:

  • Overcooked Ingredients: If your lentils are mushy, they’ll spoil the wrap’s texture. Aim for perfectly cooked, firm lentils.
  • Soggy Wraps: To prevent sogginess, spread the mayo and sauces sparingly, or serve on the side.
  • Too Spicy: If you accidentally make it too spicy, balance it with more creamy tahini sauce.
  • Filling Spilling Out: If your wraps are bursting, try using smaller amounts of filling or rolling them tighter.

Variations to Try

Feeling adventurous? Here are some fun variations to switch things up:

  • Mexican-Inspired: Add black beans, corn, and avocado for a taco twist.
  • Greek Style: Incorporate olives, feta, and cucumber for a Mediterranean flair.
  • Asian Fusion: Use sesame oil, add shredded carrots, and serve with soy sauce instead of tahini.
  • Breakfast Wrap: Mix in scrambled eggs and spinach for a protein-packed breakfast option.

Storage and Make-Ahead Instructions

These wraps are perfect for meal prep! Here’s how to store them:

  • Refrigeration: Store assembled wraps in an airtight container in the refrigerator for up to 3 days.
  • Freezing: If you want to freeze them, wrap each one in plastic wrap before placing it in a freezer bag. They can last for up to 2 months.
  • Reheating: Reheat in the microwave for 30 seconds to 1 minute, or enjoy cold!

Frequently Asked Questions

Here are some common questions about these wraps:

  • Can I use canned lentils? Absolutely! Just rinse and drain them before using.
  • What if I’m not vegan? Feel free to substitute regular mayo for the vegan option.
  • Can I add more vegetables? Yes! Feel free to add any sautéed or raw vegetables you enjoy.
  • Is this recipe gluten-free? Use gluten-free wraps or lettuce leaves instead of lavash.
  • How can I make it spicier? Add more chili garlic sauce or fresh jalapeños!
  • Can I make this wrap ahead of time? Yes, just store the filling and wraps separately until ready to eat.
  • What should I serve with these wraps? They pair well with a side salad or some crispy sweet potato fries.
  • How do I know when my lentils are done? They should be tender but not mushy—taste as you cook!

Nutrition Tips and Dietary Adaptations

This recipe is not only delicious but also nutritious! Here’s how you can adapt it for various dietary needs:

  • For Low-Carb: Swap rice with cauliflower rice for a lighter option.
  • For High-Protein: Add cooked quinoa or chickpeas to increase protein content.
  • For Whole30: Use compliant wraps and avoid legumes; try shredded chicken instead.
  • For Nut-Free: Omit tahini and replace it with yogurt or more hummus.

Equipment Recommendations

To make your cooking experience seamless, here are some kitchen tools you might find helpful:

  • Mixing Bowls: A good set of mixing bowls is essential for combining your ingredients.
  • Measuring Cups and Spoons: Accurate measurements ensure the best flavor.
  • Sharp Knife: For chopping vegetables and cutting your wraps cleanly.
  • Cooking Pot: Use a large pot for cooking your lentils and rice.

Serving Suggestions

Enhance your wraps with these delightful serving ideas:

  • Side Salad: A fresh green salad with a light vinaigrette complements the wraps perfectly.
  • Chips and Dip: Serve with some crispy pita chips and extra hummus or guacamole.
  • Fruit Salad: A refreshing fruit salad can balance the spiciness of the wraps.

Conclusion

So there you have it! These Spicy Lentil Rice Wraps are not just easy to make; they’re versatile, delicious, and incredibly satisfying. I hope this recipe inspires you to get creative in the kitchen and enjoy the process of cooking without the stress. Remember, the best meals come from a place of joy and exploration. Happy cooking!

Spicy Lentil Rice Wraps

Prep Time 15 minutes
Cook Time 10 minutes
Total Time 25 minutes
Servings 4 pieces
Calories 450
Delicious and hearty wraps filled with seasoned lentils, rice, and fresh cabbage, topped with spicy mayo and lemon tahini sauce for a flavorful meal.

Ingredients

Lentil Rice Mixture

  • 1 cup cooked lentils
  • 1 cup cooked rice

Spicy Mayo

  • 2 tbsp vegan mayo
  • to taste chili garlic sauce

Lemon Tahini Sauce

  • 0.25 cup tahini
  • 2 small lemons lemon juice (about 2 tbsp)
  • 0.25 tsp garlic powder
  • 0.25 tsp dried parsley
  • 0.25 tsp pepper

Wraps

  • 4 pieces lavash or wrap of choice

Vegetables

  • shredded cabbage shredded cabbage

Instructions 

  • Combine lentils, rice, garlic powder, onion powder, parsley, paprika, pepper, and salt in a bowl. Mix well and set aside.
  • Mix vegan mayo with chili garlic sauce in a bowl. Set aside.
  • Whisk tahini with lemon juice, garlic powder, parsley, pepper, and water until smooth. Adjust seasonings as needed.
  • Spread spicy mayo on the center of each wrap, add lentil rice mixture and shredded cabbage, then roll up. Serve with lemon tahini sauce on the side.

Notes

Feel free to add more vegetables or adjust seasonings to taste.
Calories: 450kcal
Cost: $12
Course: Main Course
Cuisine: Fusion
Keyword: Vegan, Wraps

Discover the Joy of Cooking with This Oven Roasted Corn Salad

Welcome to a delightful culinary adventure! This Oven Roasted Corn Salad is not only vibrant but also brimming with flavors that will elevate any meal. Whether you’re looking for a side dish for a barbecue, a potluck, or just a fresh, healthy addition to your dinner plate, this salad is the perfect choice. In this comprehensive guide, I’ll walk you through everything you need to know to make this salad a staple in your kitchen.

Why You’ll Love This Recipe

This roasted corn salad has so much to offer! Here are just a few reasons to get excited:

  • Flavor Explosion: The roasting process enhances the natural sweetness of the corn, creating a depth of flavor that’s simply irresistible.
  • Fresh and Colorful: Packed with colorful ingredients like bell peppers and cherry tomatoes, this salad is as visually appealing as it is delicious.
  • Quick and Easy: With only a handful of ingredients and straightforward steps, you can whip up this dish in no time.
  • Highly Customizable: Feel free to mix and match ingredients based on what you have on hand or your dietary preferences.
  • Perfect for Meal Prep: This salad tastes even better after the flavors have melded together, making it ideal for preparing in advance.

Ingredients You’ll Need

Here’s what you need to create this vibrant salad:

  • 4 ears of corn: Fresh corn is ideal, but you can also use thawed frozen corn in a pinch.
  • 1 red bell pepper: Adds sweetness and color.
  • 1 green bell pepper: Provides a nice crunch.
  • 1 small red onion: For a sharp, tangy flavor.
  • 1 cup of cherry tomatoes: Juicy and sweet, they elevate the salad.
  • 1 tablespoon olive oil: Enhances roasting and adds richness.
  • 2 tablespoons lime juice: Freshens the dish and balances flavors.
  • Salt and pepper to taste: Essential for seasoning.
  • Fresh cilantro: Adds a burst of freshness.

Ingredient Substitutions

Don’t worry if you don’t have everything on hand! Here’s how you can tweak this recipe:

  • Corn: Use canned corn or frozen corn if fresh isn’t available.
  • Bell Peppers: Any color of bell pepper works; jalapeños can add a spicy kick.
  • Red Onion: Green onions or shallots can be used for a milder flavor.
  • Cilantro: If you’re not a fan, parsley or basil make for great alternatives.

Step-by-Step Instructions

Side view of a fresh corn salad with roasted corn, bell peppers, and cherry tomatoes.

Follow these simple steps to make your oven roasted corn salad:

  1. Preheat your oven to 400°F (200°C).
  2. Husk the corn and remove all silk strands. Place the corn on a baking sheet.
  3. Drizzle olive oil over the corn and season with salt and pepper.
  4. Roast the corn for 25-30 minutes, turning occasionally until golden.
  5. Let the corn cool slightly, then cut the kernels off the cob into a large bowl.
  6. Add diced red and green bell peppers, red onion, and halved cherry tomatoes to the bowl.
  7. Pour lime juice over the mixture and toss gently to combine.
  8. Add chopped cilantro and adjust seasoning as needed. Finish with garnishes.
  9. Serve fresh or allow flavors to meld for a few hours before serving.

Expert Tips for Oven Roasted Corn Salad

To ensure your salad turns out perfectly, keep these expert tips in mind:

  • Use Fresh Ingredients: The fresher your ingredients, the better the flavor.
  • Don’t Overcrowd the Baking Sheet: This helps the corn roast evenly and prevents steaming.
  • Adjust Lime Juice: Depending on your taste, you might want more or less lime juice—taste as you go!
  • Chill Before Serving: Letting the salad sit in the fridge for at least an hour allows the flavors to combine beautifully.
  • Experiment with Spices: Try adding cumin or smoked paprika for an extra layer of flavor.

Common Mistakes and Troubleshooting

Here are some common pitfalls to avoid while making this salad:

  • Skipping the Roasting Step: Roasting is key to developing flavor—don’t skip it!
  • Using Overripe Tomatoes: Make sure your cherry tomatoes are ripe but not mushy for the best texture.
  • Not Tasting Before Serving: Always taste and adjust seasoning before serving to ensure a balanced flavor.

Variations to Try

Want to switch things up? Here are some fun variations to try:

  • Mexican Corn Salad: Add crumbled feta cheese, chopped jalapeños, and a sprinkle of chili powder for a kick.
  • Grilled Corn Salad: Instead of roasting, grill the corn for a smoky flavor.
  • Quinoa Corn Salad: Incorporate cooked quinoa for added protein and texture.
  • Bean and Corn Salad: Mix in black beans or chickpeas for a heartier version.

Storage and Make-Ahead Instructions

This salad is excellent for meal prep! Here’s how to store it:

  • Refrigerator: Store in an airtight container in the fridge for up to 3 days.
  • Make-Ahead: Prepare the salad a day in advance for the flavors to meld.
  • Freezing: It’s best enjoyed fresh, but you can freeze individual portions for up to a month. Just thaw and mix in fresh ingredients after thawing.

Frequently Asked Questions

You’ve got questions; I’ve got answers! Here are some common queries about this oven roasted corn salad:

  • Can I use frozen corn for this recipe? Yes, thawed frozen corn works well if fresh corn isn’t available.
  • Is this salad vegan-friendly? Absolutely! All the ingredients are plant-based.
  • How long does this salad last in the fridge? It will stay fresh for about 3 days in an airtight container.
  • Can I add protein to this salad? Yes! Grilled chicken, shrimp, or beans are great additions.
  • What can I serve with this salad? It pairs well with grilled meats, tacos, or as part of a veggie platter.
  • Can I make this salad spicy? Definitely! Add diced jalapeños or a sprinkle of cayenne pepper.
  • Can I use other types of vinegar? Yes, apple cider vinegar or red wine vinegar can be great substitutes for lime juice.
  • What’s the best way to roast corn on the cob? The method I provided works well, but you can also wrap corn in foil and grill it for a different flavor.

Nutritional Tips and Dietary Adaptations

This salad is not only delicious but also packed with nutrients:

  • Low-Calorie: A light option, perfect for those watching their calorie intake.
  • High in Fiber: The combination of corn, peppers, and tomatoes provides a good source of dietary fiber.
  • Gluten-Free: Naturally gluten-free, making it suitable for those with gluten sensitivities.

Essential Equipment Recommendations

To ensure your cooking experience is smooth, here’s what you’ll need:

  • Baking Sheet: A sturdy baking sheet for roasting the corn.
  • Sharp Knife: For cutting corn off the cob and chopping vegetables.
  • Mixing Bowl: A large bowl for combining all the ingredients.
  • Measuring Cups and Spoons: To accurately measure your ingredients.

Serving Suggestions

This salad is incredibly versatile! Here are some serving ideas:

  • As a side dish for grilled meats like chicken or steak.
  • On top of tacos or burritos for added freshness.
  • As a light lunch paired with whole-grain bread or crackers.
  • As part of a picnic spread alongside hummus and pita.

Now you’re ready to create a mouthwatering Oven Roasted Corn Salad that will impress your family and friends! Remember, cooking is all about having fun and experimenting, so feel free to make this recipe your own. Happy cooking!

Delicious Oven Roasted Corn Salad A Flavorful Healthy Side

Prep Time 10 minutes
Cook Time 30 minutes
Total Time 40 minutes
Servings 4 servings
Calories 250
A vibrant and healthy side dish featuring roasted corn mixed with fresh vegetables and herbs, perfect for any meal.

Ingredients

Main

  • 4 ears corn (husks removed)
  • 1 red bell pepper red bell pepper (diced)
  • 1 green bell pepper green bell pepper (diced)
  • 1 small red onion red onion (diced)
  • 1 cup cherry tomatoes (halved)
  • 1 tablespoon olive oil
  • 2 tablespoons lime juice
  • to taste Salt and pepper
  • a handful fresh cilantro (chopped)

Instructions 

  • Preheat oven to 400°F (200°C). Husk the corn and roast on a baking sheet for 25-30 minutes, turning occasionally.
  • Let the corn cool, then cut kernels off the cob into a large bowl.
  • Add diced bell peppers, red onion, and halved cherry tomatoes to the bowl.
  • Pour lime juice and olive oil over the mixture, toss gently, then add chopped cilantro and season with salt and pepper.
  • Serve immediately or let flavors meld for a few hours before serving.

Notes

For extra flavor, add a squeeze of lime just before serving.
Calories: 250kcal
Cost: $15
Course: Side Dish
Cuisine: American
Keyword: Corn

If you’re looking for a quick, delicious, and satisfying dinner option that brings a burst of flavor to your table, then you’re in for a treat with these cilantro lime chicken wraps. This recipe combines tender marinated chicken with fresh vegetables and zesty lime, all wrapped up in a soft tortilla. Perfect for busy weeknights, these wraps are not just easy to prepare but also incredibly versatile, allowing you to customize them to your liking. Let’s dive into the details of this delightful meal that everyone will love!

Why You’ll Love This Recipe

This recipe for cilantro lime chicken wraps is packed with benefits that make it a must-try:

  • Quick and Easy: With minimal prep and cooking time, you can have dinner ready in under 30 minutes!
  • Flavor Explosion: The combination of lime juice, cilantro, and spices creates a fresh and vibrant flavor profile that’s hard to resist.
  • Healthy Ingredients: Lean chicken breast and fresh vegetables make these wraps a nutritious option for any meal.
  • Customizable: You can easily swap out ingredients based on your personal taste or what you have on hand.
  • Meal Prep Friendly: These wraps are perfect for meal prepping, allowing you to enjoy them throughout the week.

Ingredients

Here’s what you’ll need to whip up these tasty wraps:

  • 1 lb boneless, skinless chicken breasts: This lean protein is perfect for marinating and grilling.
  • 2 tbsp olive oil: Adds richness and helps the spices adhere to the chicken.
  • 2 tbsp lime juice: Freshly squeezed lime juice is best for a zingy flavor.
  • 1 tsp lime zest: Enhances the lime flavor without adding more liquid.
  • 2 cloves garlic, minced: A must for that aromatic base.
  • 1/2 tsp cumin: Adds warmth and depth to the flavor.
  • 1/2 tsp chili powder: For a mild kick; adjust to your taste!
  • Salt and pepper to taste: Essential for bringing out the flavors.
  • 1/4 cup fresh cilantro, chopped: The star herb that gives this dish its name!
  • 4 large flour tortillas or wraps: Use whole wheat for a healthier option.
  • 1 cup shredded lettuce: For crunch and freshness.
  • 1/2 cup diced tomatoes: Adds juiciness and color.
  • 1/4 cup red onion, thinly sliced: A touch of sharpness.
  • 1/2 avocado, sliced (optional): Creamy goodness to elevate your wrap.
  • 1/4 cup sour cream or Greek yogurt: For added creaminess; Greek yogurt is a lighter option.
  • 1 tbsp mayonnaise (optional): For extra richness.

Step-by-Step Instructions

Follow these simple steps to create your delicious wraps:

  • In a bowl, combine the olive oil, lime juice, lime zest, garlic, cumin, chili powder, salt, pepper, and chopped cilantro. This is your marinade!
  • Add the chicken breasts to the marinade, ensuring they are well coated. Cover and refrigerate for at least 30 minutes (or up to 2 hours for more flavor).
  • Preheat your grill or skillet over medium heat. Grill or pan-cook the marinated chicken for 6-7 minutes per side, or until fully cooked (internal temperature should reach 165°F). Let rest for a few minutes before slicing thinly.
  • Warm the tortillas slightly to make them more pliable.
  • Spread sour cream or Greek yogurt on each tortilla (and mayonnaise if using).
  • Layer with shredded lettuce, diced tomatoes, red onion, avocado slices, and sliced chicken.
  • Wrap tightly and slice in half before serving. Enjoy!

Pro Tips for Perfect Cilantro Lime Chicken Wraps

Juicy chicken wrapped in a tortilla with vibrant toppings of lettuce and tomatoes.

Here are some expert insights to elevate your wrap game:

  • Marinate Longer: For the best flavor, marinate the chicken for at least 2 hours or overnight.
  • Choose the Right Tortilla: Flour tortillas are soft and pliable, but whole wheat or corn tortillas also work well.
  • Adjust Spice Levels: Feel free to add cayenne pepper or hot sauce to the marinade for a spicier kick.
  • Mix Up the Greens: Try adding spinach or arugula for a different flavor.
  • Grill for Flavor: Grilling the chicken adds a smoky flavor that enhances the wraps.
  • Use Leftovers: This recipe is great for using leftover chicken; just skip the marinating step!
  • Fresh Herbs: Experiment with other herbs like parsley or mint for a unique twist.
  • Thinly Slice: Thin slices of chicken allow for better wrapping and easier eating.

Common Mistakes and Troubleshooting

Even the best cooks can run into issues. Here are some common pitfalls and how to avoid them:

  • Dry Chicken: Ensure you don’t overcook the chicken; use a meat thermometer for accuracy.
  • Too Much Marinade: While marinating is essential, too much can make the chicken soggy. Use just enough to coat.
  • Wraps Falling Apart: Ensure your tortillas are warm and pliable before filling them.
  • Lack of Flavor: Always taste your marinade before adding the chicken; it should be well-seasoned.

Variations to Try

Feeling adventurous? Here are some variations to customize your wraps:

  • BBQ Chicken Wraps: Swap out cilantro and lime for BBQ sauce for a sweet and smoky flavor.
  • Veggie-Only Wraps: Skip the chicken and load up on grilled vegetables, beans, and avocado for a delicious vegetarian option.
  • Spicy Shrimp Wraps: Use marinated shrimp instead of chicken for a seafood twist.
  • Fruit Additions: Add mango or pineapple for a sweet contrast to the savory chicken.

Storage and Make-Ahead Instructions

These wraps can be made ahead of time for easy meals throughout the week:

  • Assemble the wraps without adding the sauces and store them in an airtight container in the refrigerator for up to 3 days.
  • To freeze, wrap each individual wrap tightly in foil or plastic wrap and place in a freezer-safe bag. They can be stored for up to 3 months. Thaw in the refrigerator overnight before reheating.

Comprehensive FAQ

Here are answers to some common questions about these wraps:

  • Can I use chicken thighs instead of breasts? Absolutely! Chicken thighs will give you a juicier wrap.
  • How can I make these wraps gluten-free? Use corn tortillas or gluten-free wraps instead of flour tortillas.
  • Can I grill the chicken instead of pan-searing? Yes, grilling adds a wonderful smoky flavor!
  • What can I use instead of sour cream? Greek yogurt is a great, healthier substitute.
  • How do I keep the wraps fresh? Store assembled wraps without dressing in an airtight container in the fridge.
  • Can I add cheese? Yes! Shredded cheese like cheddar or Monterey Jack works well.
  • What’s the best way to reheat the wraps? Reheat in a skillet over low heat until warmed through.
  • Can I make these wraps vegan? Yes! Substitute chicken with grilled tofu or chickpeas and skip dairy products.

Nutrition Tips and Dietary Adaptations

This recipe can easily be modified to fit various dietary needs:

  • Low-Carb: Use lettuce wraps instead of tortillas for a low-carb option.
  • High-Protein: Add beans or quinoa to increase the protein content.
  • Vegan: Substitute chicken with plant-based protein sources like tofu or tempeh.
  • Low-Fat: Use Greek yogurt instead of sour cream and skip the mayonnaise.

Equipment Recommendations

Here are some kitchen tools that can make your cooking experience easier:

  • Grill Pan or Skillet: A good non-stick grill pan is perfect for achieving those grill marks indoors.
  • Meat Thermometer: To ensure your chicken is cooked perfectly every time.
  • Mixing Bowls: Having a couple of different sizes is useful for marinating and mixing ingredients.
  • Sharp Knife: For slicing the chicken and vegetables easily.
  • Cutting Board: A sturdy cutting board makes prep work simpler.

Serving Suggestions

To make your meal even more delightful, consider pairing these wraps with:

  • Chips and Salsa: A classic side that complements the flavors of the wraps.
  • Fresh Fruit Salad: A refreshing contrast to the savory wraps.
  • Guacamole: Creamy and delicious, it’s a perfect dip for your wraps!
  • Rice or Quinoa: For a hearty side, serve with cilantro lime rice or quinoa.

These cilantro lime chicken wraps are not just a meal; they’re an experience filled with flavor, creativity, and ease. Enjoy the process of making them, and remember—cooking doesn’t have to be perfect; it just needs to be enjoyable. Happy cooking!

Cilantro Lime Chicken Wraps

Prep Time 15 minutes
Cook Time 15 minutes
Total Time 30 minutes
Servings 4 servings
Calories 450
Enjoy these flavorful chicken wraps with fresh cilantro, lime, and vibrant toppings, perfect for a quick and delicious meal.

Ingredients

Protein

  • 1 lb boneless, skinless chicken breasts
  • 2 tbsp olive oil
  • 2 tbsp lime juice
  • 1 tsp lime zest
  • 2 cloves garlic, minced
  • 0.5 tsp cumin
  • 0.5 tsp chili powder
  • to taste Salt and pepper
  • 0.25 cup fresh cilantro, chopped

Wraps

  • 4 large flour tortillas or wraps

Fillings

  • 1 cup shredded lettuce
  • 0.5 cup diced tomatoes
  • 0.25 cup red onion, thinly sliced
  • 0.5 avocado sliced (optional)
  • 0.25 cup sour cream or Greek yogurt
  • 1 tbsp mayonnaise (optional)

Instructions 

  • Mix olive oil, lime juice, lime zest, garlic, cumin, chili powder, salt, pepper, and cilantro to create marinade.
  • Add chicken to marinade, refrigerate for 30 minutes, then grill or pan-cook for 6-7 minutes per side. Rest and slice thinly.
  • Warm tortillas, spread with sour cream or yogurt and mayonnaise if using.
  • Layer tortillas with lettuce, tomatoes, onion, avocado, and chicken. Wrap tightly and slice in half.

Notes

For extra flavor, marinate the chicken longer or add your favorite toppings.
Calories: 450kcal
Cost: $15
Course: Main Course
Cuisine: Mexican
Keyword: Chicken, Wraps

Welcome to a culinary journey that will transform your weeknight dinners! If you’re looking for a quick, high-protein meal that’s packed with flavor, then this Teriyaki Beef and Broccoli with Rice recipe is your go-to. With just a few simple ingredients, you can whip up a satisfying dish that will impress your family and friends. This recipe is perfect for busy weeknights when you need something delicious that doesn’t require hours in the kitchen.

Why You’ll Love This Recipe

  • Quick Preparation: Ready in under 30 minutes, perfect for those hectic weeknights.
  • High in Protein: Lean beef and broccoli provide a nutritious boost, making it a healthy choice.
  • Simple Ingredients: Made with pantry staples like teriyaki sauce and basmati rice, ensuring convenience.
  • Customizable: Easily adapt the recipe by adding your favorite vegetables or protein for a personal touch.
  • Family-Friendly: A delicious dish that kids and adults alike will enjoy, making it a hit at the dinner table.

Ingredient Breakdown

Let’s dive into the ingredients you’ll need for this flavorful dish, along with some helpful substitutions:

  • Frozen Broccoli (1 kg): A convenient choice; however, you can use fresh broccoli, cauliflower, or a mix of vegetables.
  • Lean Diced Beef (500 g): Flank steak is ideal, but you can substitute with sirloin or even chicken for a different flavor.
  • Teriyaki Sauce (250 g): Store-bought is easy, but homemade can elevate the flavor. Mix soy sauce, honey, and ginger for a quick version.
  • Beef Stock Cube (1): Essential for enhancing flavor; vegetable stock can be used for a lighter option.
  • Salt and Black Pepper (1 tsp each): Essential seasonings to taste; feel free to add garlic powder for extra depth.
  • Low-Calorie Cooking Spray: Keeps it light; olive oil or sesame oil can add extra flavor if preferred.
  • Sesame Seeds (optional): For garnish, adding a nice crunch and visual appeal.
  • Basmati Rice (125 g): A classic choice, but jasmine rice or brown rice can also work well.

How to Make Teriyaki Beef and Broccoli

Follow these simple steps to create your delicious Teriyaki Beef and Broccoli:

Step 1: Cook the Beef

Heat a large frying pan or wok over medium-high heat. Spray with low-calorie cooking spray, then add the diced beef. Season with salt and pepper, crumbling in the beef stock cube. Cook for 4-5 minutes until browned.

Step 2: Cook the Broccoli

While the beef is cooking, bring a pot of water to a boil. Add the frozen broccoli and cook until tender, about 3-4 minutes. Drain and set aside.

Step 3: Combine Beef and Broccoli

Once the beef is browned, add the cooked broccoli to the pan and stir well to combine.

Step 4: Add the Sauce

Pour the teriyaki sauce over the beef and broccoli, stirring to coat everything evenly. Let it simmer for another 2-3 minutes until heated through.

Step 5: Cook the Rice

While the beef and broccoli are finishing up, cook the basmati rice according to the packet instructions. This usually takes around 10-12 minutes.

Step 6: Serve and Enjoy

Divide the freshly cooked rice into serving bowls, top with the teriyaki beef and broccoli, and garnish with sesame seeds if desired. Enjoy your delicious meal!

Pro Tips for Perfect Teriyaki Beef and Broccoli

Side view of a bowl filled with Teriyaki Beef and Broccoli, featuring glossy beef and steamed broccoli over rice.
  • Slice Against the Grain: For tender beef, slice it against the grain while it’s slightly frozen.
  • Don’t Overcook the Broccoli: Add it towards the end to keep it bright and crunchy.
  • Use Fresh Ingredients: Fresh garlic and ginger can elevate the dish’s flavor profile.
  • Experiment with Sauces: Try different sauces like hoisin or oyster sauce for variation.
  • Make it Spicy: Add red pepper flakes for a kick of heat if you enjoy spicy food.
  • Double the Sauce: If you like a saucier dish, feel free to double the teriyaki sauce for extra flavor.
  • Meal Prep Friendly: This dish holds up well in the fridge, making it great for meal prep.
  • Serve with Extra Veggies: Consider adding bell peppers, snap peas, or carrots for added nutrition.

Common Mistakes and Troubleshooting

Here are some common pitfalls and how to avoid them:

  • Overcooking the Beef: Keep an eye on cooking time to ensure the beef remains tender.
  • Too Much Sauce: Start with a little sauce; you can always add more if needed.
  • Sticking to the Pan: Make sure to use enough cooking spray or oil to prevent sticking.
  • Undercooking the Broccoli: Ensure it’s tender but still vibrant in color for the best texture.

Variations to Try

Feel free to get creative with these variations:

  • Teriyaki Chicken: Swap the beef for diced chicken breast for a lighter option.
  • Vegetarian Version: Use tofu or tempeh in place of beef for a plant-based meal.
  • Beef and Broccoli Stir-Fry: Add a mix of colorful bell peppers and snap peas for extra nutrients.
  • Curry Teriyaki: Add curry powder to the sauce for a fusion twist on this classic dish.

Storage and Make-Ahead Instructions

This dish can be stored in the fridge for up to 3 days. To store:

  • Let the teriyaki beef and broccoli cool completely before transferring to an airtight container.
  • Reheat in the microwave or on the stovetop, adding a splash of water or extra sauce to keep it moist.

Frequently Asked Questions (FAQ)

  • Can I use fresh broccoli instead of frozen? Yes, fresh broccoli works beautifully in this recipe!
  • Is teriyaki sauce gluten-free? It depends on the brand. Look for gluten-free options if needed.
  • Can I make this dish ahead of time? Yes, it stores well and can be reheated without losing flavor.
  • What can I serve with teriyaki beef and broccoli? Serve with rice, quinoa, or noodles for a complete meal.
  • How can I make this dish spicier? Add sriracha or red pepper flakes to the sauce for a spicy kick.
  • Is this dish suitable for meal prep? Absolutely! It keeps well in the fridge, making it perfect for meal prep.
  • Can I use other meats? Yes, you can substitute with chicken, pork, or even shrimp!
  • What is the best type of rice to use? Basmati rice is great, but jasmine or brown rice works too.

Nutrition Tips and Dietary Adaptations

This Teriyaki Beef and Broccoli dish not only satisfies your taste buds but also provides a well-rounded meal. Here are some tips:

  • High Protein: The beef and broccoli combo delivers essential proteins and vitamins.
  • Low-Calorie Option: Opt for low-sodium teriyaki sauce and use minimal oil for a lighter dish.
  • Keto-Friendly: Substitute rice with cauliflower rice for a keto adaptation.
  • Vegan Alternative: Replace beef with tempeh or tofu and use a vegan teriyaki sauce.

Equipment Recommendations

To make this process even easier, here are some handy kitchen tools you might need:

  • Wok or Large Non-Stick Pan: Ideal for stir-frying and preventing sticking.
  • Cooking Spray: Helps to keep the beef from sticking to the pan.
  • Measuring Cups and Spoons: For accurate ingredient measurements.
  • Sharp Knife: Essential for slicing the beef against the grain efficiently.

Serving Suggestions

Elevate your dining experience with these serving tips:

  • Garnish: Top with sesame seeds, green onions, or cilantro for added flavor.
  • Pairing: Serve with a side of steamed dumplings or a fresh salad.
  • Rice Variations: Try serving with jasmine, brown, or even fried rice for a twist.
  • Family Style: Serve the dish in a large bowl for a shared dining experience.

As you embark on this cooking adventure, remember that the joy of cooking lies in experimentation. Whether you’re trying out new ingredients or adjusting flavors, embrace the process! This Teriyaki Beef and Broccoli with Rice will not only satisfy your hunger but also make your weeknight dinners something to look forward to. Happy cooking!

Teriyaki Beef and Broccoli with Rice

Prep Time 10 minutes
Cook Time 20 minutes
Total Time 30 minutes
Servings 4 servings
Calories 650
A quick and flavorful Asian-inspired dish combining tender beef, crisp broccoli, and savory teriyaki sauce served over rice.

Ingredients

Main ingredients

  • 1 kg Frozen Broccoli
  • 500 g Diced Beef (flank steak)
  • 250 g Teriyaki Sauce
  • 1 cube Beef Stock Cube
  • 1 tsp Salt
  • 1 tsp Black Pepper
  • Low Calorie Cooking Spray
  • 125 g Basmati Rice

Optional Garnish

  • to taste Sesame Seeds (optional)

Instructions 

  • Heat a large pan or wok over medium-high heat, spray with cooking spray, add beef, season with salt and pepper, crumble in stock cube, and cook for 4-5 minutes until browned.
  • Meanwhile, boil water and cook frozen broccoli until tender, then drain and set aside.
  • Add cooked broccoli to the beef in the pan and stir well.
  • Pour teriyaki sauce over the beef and broccoli, stir to coat, and simmer for 2-3 minutes.
  • While the beef and broccoli finish, cook basmati rice according to packet instructions.
  • Serve the beef and broccoli over rice, garnished with sesame seeds if desired.

Notes

For extra flavor, add a splash of sesame oil or chopped green onions.
Calories: 650kcal
Cost: $15
Course: Main Course
Cuisine: Asian
Keyword: Beef, broccoli, Teriyaki