Author

Steven

Browsing

Welcome to Your New Favorite Comfort Food

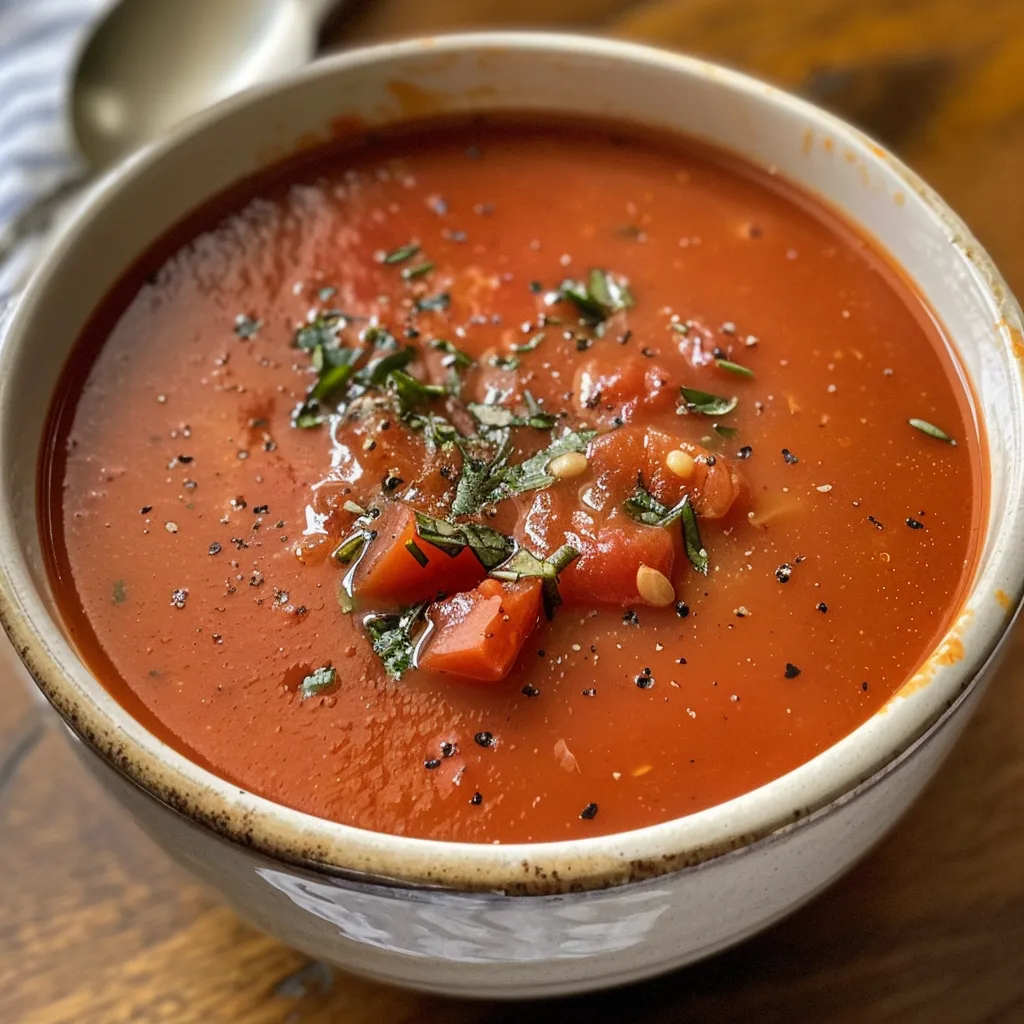
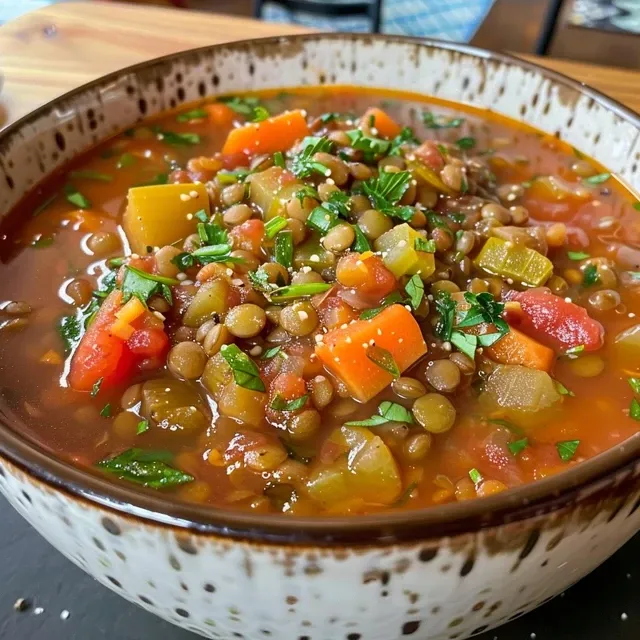
There’s nothing quite like a warm bowl of tomato lentil soup to soothe the soul. This nourishing tomato lentil soup combines the heartiness of lentils with the vibrant flavors of tomatoes, making it an ideal dish for any time of the year. Whether you’re looking for a cozy meal after a long day or a nutritious option to share with family, this recipe is sure to become a staple in your kitchen. Let’s dive into the details and discover why this soup is not only easy to make but also packed with flavor and nutrients!

Why You’ll Love This Recipe

  • Quick and Easy: This recipe can be prepared in under an hour, making it perfect for busy weeknights.
  • Nutritious and Filling: Packed with plant-based protein from lentils and a variety of vegetables, this soup is both satisfying and healthy.
  • Customizable: With many ingredient substitutions and variations, you can tailor this soup to your taste and dietary needs.
  • Meal Prep Friendly: Make a big batch and store it for quick meals throughout the week.
  • Delicious Leftovers: The flavors only get better after a day in the fridge, making it a great option for meal planning.

Ingredient Breakdown

Let’s take a closer look at the ingredients that make this tomato lentil soup so delicious:

  • Green or Brown Lentils: 1 heaping cup, rinsed and picked over. These lentils become tender and offer protein and fiber.
  • Water or Vegetable Broth: 4 cups for cooking the lentils. Using broth adds extra flavor.
  • Bay Leaves: 2 leaves to infuse the soup with aromatic undertones.
  • Olive Oil: 1 tablespoon, or use water/broth for an oil-free option.
  • Onion, Carrot, and Celery: 1 medium onion, 1 large carrot, and 3 celery stalks, all finely diced to build a flavorful base.
  • Sea Salt: 1 tablespoon measured separately for seasoning in layers.
  • Garlic: 4 cloves, minced, to add depth to the flavor.
  • Yukon Gold Potato: 1 large potato, finely diced for creaminess and texture.
  • Dried Thyme: 1 teaspoon for herbal notes.
  • Red Pepper Flakes: ¼ teaspoon for a hint of heat.
  • Crushed Tomatoes: 1 (28-ounce) can for the soup base.
  • Tamari or Soy Sauce: 1 tablespoon for umami flavor.
  • Maple Syrup: 1 teaspoon to balance acidity.
  • Tahini: 1 tablespoon for creaminess.
  • Balsamic Vinegar: 1-2 light splashes to enhance flavor.
  • Fresh Spinach: 1-2 handfuls added for nutrition and color.
  • Frozen Corn: 1 cup for sweetness and texture.
  • Fresh Herbs: Chopped parsley, thyme, or basil for garnish.

How to Make Your Tomato Lentil Soup

Close-up of delicious homemade tomato lentil soup featuring a blend of vegetables and spices.

Now that you have all your ingredients ready, let’s break down the cooking process into simple steps:

  • Step 1 – Cook the Lentils: In a small saucepan, combine the rinsed lentils, 4 cups of water, and bay leaves. Bring to a boil, then reduce to a simmer. Cover partially and cook for about 25 minutes until tender. Save any remaining liquid and discard bay leaves.
  • Step 2 – Build the Flavor Base: In a large Dutch oven or heavy-bottomed pot, heat olive oil or water over medium heat. Add the diced onion, carrot, and celery with a pinch of salt. Cook for 7-10 minutes until softened and lightly golden. Add minced garlic and cook for another 30-60 seconds until fragrant.
  • Step 3 – Combine Ingredients: Pour in 6 cups of water or vegetable broth, add vegan bouillon cubes, diced Yukon Gold potato, dried thyme, red pepper flakes, and a few more pinches of salt. Bring to a boil, then reduce to a simmer. Cook for 15 minutes until the potatoes are almost tender.
  • Step 4 – Final Touches: Stir in crushed tomatoes, cooked lentils (with any liquid), tamari, and maple syrup. Simmer for an additional 5 minutes until all is nicely melded.
  • Step 5 – Adjust Seasoning: Turn off the heat. Stir in tahini, black pepper, and balsamic vinegar to taste. Adjust salt as needed. For a creamier texture, blend a portion of the soup with an immersion blender.
  • Step 6 – Add Greens: Stir in fresh spinach and frozen corn after turning off the heat. Let sit for 10 minutes to develop flavors.
  • Step 7 – Serve: Ladle soup into bowls. Enjoy with warm crusty bread or homemade croutons. Top with olive oil, flaky salt, chopped fresh herbs, or vegan parmesan cheese if desired.

Pro Tips for Perfection

  • Texture Matters: For a creamier dish, blend part of the soup, but leave some chunky for texture.
  • Layer Your Seasoning: Season in layers as you cook for deeper flavor integration.
  • Fresh Herbs: Add fresh herbs at the end to maintain their vibrant flavor and color.
  • Storing Leftovers: Keep in airtight containers in the fridge for up to 5 days or freeze for up to 3 months.
  • Experiment with Spices: Feel free to add spices like cumin or paprika for added complexity.
  • Kid-Friendly: If serving children, reduce the red pepper flakes or leave them out entirely.
  • Add Protein: For more protein, consider adding chickpeas or tofu.
  • Check Consistency: If the soup is too thick, simply add a bit more water or broth to reach your desired consistency.

Common Mistakes and Troubleshooting

Even the best recipes can have hiccups. Here are some common mistakes to watch out for:

  • Undercooked Lentils: Make sure to cook lentils until tender; they should not be crunchy.
  • Overseasoning: Always taste as you go. It’s easier to add salt than to take it out!
  • Burnt Garlic: Be cautious not to let garlic brown too much when sautéing, as it can turn bitter.
  • Too Thick or Thin: Adjust the consistency by adding water or broth as needed.
  • Skipping the Resting Time: Let the soup sit after cooking; it allows flavors to meld beautifully.

Variations to Try

Get creative with your tomato lentil soup! Here are some variations you can try:

  • Spicy Version: Add more red pepper flakes or a diced jalapeño for a kick.
  • Creamy Version: Blend more of the soup or add coconut milk for a rich, creamy texture.
  • Herbed Variation: Stir in fresh herbs like dill or cilantro for a fresh twist.
  • Protein-Packed: Mix in some cooked quinoa or chickpeas for an extra boost of protein.

Storage and Make-Ahead Instructions

This tomato lentil soup is perfect for meal prep! Here’s how to store it:

  • Refrigerate: Keep in airtight containers for up to 5 days.
  • Freeze: Portion into freezer-safe bags and freeze for up to 3 months.
  • Reheat: Gently reheat on the stovetop, adding a splash of water or broth to loosen if necessary.

FAQs

Here are some frequently asked questions about tomato lentil soup:

  • Can I use red lentils? Yes, but they will cook faster and result in a creamier soup.
  • Is this soup gluten-free? Yes, as long as you use gluten-free tamari or broth.
  • Can I add meat to this recipe? Absolutely! Shredded chicken or sausage can be added for extra flavor.
  • How do I make this soup spicier? Increase the amount of red pepper flakes or add hot sauce.
  • What can I serve with this soup? Crusty bread, grilled cheese sandwiches, or a fresh salad work well.
  • Can I omit the potato? Yes, you can leave it out or substitute it with another vegetable like sweet potato.
  • Can I use canned lentils? Yes, but reduce cooking time as they are already cooked.
  • How can I make this soup creamier? Blend a portion of the soup or add cream or coconut milk before serving.

Nutritional Information and Dietary Adaptations

This tomato lentil soup is not only comforting but also packed with nutrients:

  • High in Fiber: Lentils provide plenty of dietary fiber, promoting digestive health.
  • Rich in Protein: A great source of plant-based protein, making it filling and satisfying.
  • Low in Calories: A healthy option that won’t weigh you down.
  • Vegan-Friendly: This recipe is completely plant-based, perfect for vegans and vegetarians.

Equipment Recommendations

To make your cooking experience even smoother, here’s a list of recommended equipment:

  • Large Dutch Oven or Soup Pot: Ideal for even cooking and flavor development.
  • Small Saucepan: For cooking lentils separately.
  • Wooden Spoon: Great for stirring without scratching your pots.
  • Immersion Blender: For easily blending part of the soup for a creamier texture.

Serving Suggestions

Make your meal complete with these serving suggestions:

  • Crusty Bread: Serve with fresh-baked bread for dipping.
  • Croutons: Add homemade or store-bought croutons for a crunchy texture.
  • Fresh Herbs: Garnish with chopped parsley or basil for a pop of freshness.
  • Olive Oil Drizzle: A splash of high-quality olive oil enhances the flavors.

Conclusion

Now that you have everything you need to create this nourishing tomato lentil soup, I hope you feel inspired to dive into the kitchen! Remember, cooking should be a joyful experience, so don’t stress over perfection. Enjoy the process, make it your own, and savor the wonderful flavors that come together in this comforting bowl of goodness. Happy cooking, my friend!

Tomato Lentil Soup Recipe

Prep Time 10 minutes
Cook Time 40 minutes
Total Time 50 minutes
Servings 4 servings
Calories 350
A hearty and nutritious vegan tomato lentil soup packed with vegetables and flavor, perfect for a comforting meal.

Ingredients

Lentils

  • 1 cup green or brown lentils, rinsed and picked over
  • 4 cups water for cooking lentils
  • 2 bay leaves bay leaves
  • 1 tablespoon extra virgin olive oil or water/broth for oil-free option
  • 1 medium yellow onion, finely diced
  • 1 large carrot, finely diced
  • 3 stalks celery, finely diced
  • 1 tablespoon sea salt, measured separately to season in layers
  • 4 cloves garlic, minced
  • 6 cups water or low sodium vegetable broth (if broth used, omit bouillon cubes)
  • 2 vegan bouillon cubes vegan bouillon cubes
  • 1 large Yukon Gold potato, finely diced
  • 1 teaspoon dried thyme
  • ¼ teaspoon red pepper flakes
  • 1 can (28-ounce) crushed tomatoes
  • 1 tablespoon tamari
  • 1 teaspoon maple syrup
  • 1 tablespoon tahini
  • to taste Black pepper
  • 1-2 light splashes balsamic vinegar
  • 1-2 handfuls fresh baby spinach, whole or chopped
  • 1 cup frozen corn (white or yellow)
  • as needed fresh herbs like chopped parsley, thyme, or basil (add once heat is off)

Instructions 

  • Cook lentils in a small saucepan with water and bay leaves until tender, then set aside.
  • In a large pot, sauté diced vegetables with oil and salt until softened, then add garlic and cook briefly.
  • Add broth, vegan bouillon, potatoes, thyme, red pepper flakes, and salt; simmer until potatoes are nearly tender.
  • Stir in crushed tomatoes, cooked lentils, tamari, and maple syrup; simmer for 5 minutes.
  • Turn off heat, stir in tahini, pepper, vinegar, and optional herbs; add spinach and corn, then let rest for 10 minutes before serving.

Notes

For a creamier texture, blend a small portion of the soup before serving.
Calories: 350kcal
Cost: $15
Course: Main Course
Cuisine: vegan
Keyword: Lentils

Discover the Joy of Baking a Light & Fluffy Yogurt Cake

Welcome to your new favorite baking adventure! This light and fluffy yogurt cake is not just a dessert; it’s a delightful experience that brings joy to your kitchen and your taste buds. Perfect for any occasion, whether it’s a family gathering or a simple afternoon treat, this cake is a testament to how easy it can be to create something delicious with just a few simple ingredients. Let’s dive into the world of yogurt cake and explore why this recipe is a must-try!

Why You’ll Love This Recipe

This yogurt cake is more than just another dessert. Here are five compelling reasons to fall in love with this recipe:

  • Easy to Make: With straightforward steps, even beginner bakers will find success with this light yogurt cake.
  • Deliciously Light: Made with yogurt, this cake has a moist texture that melts in your mouth, making it irresistible.
  • Customizable Flavors: You can easily adapt this recipe by adding your favorite flavors, like citrus zest or vanilla extract.
  • Perfect for Any Occasion: Whether it’s a birthday, a holiday, or just a Tuesday, this cake fits right in.
  • Healthy Twist: Using yogurt not only enhances the flavor but also adds moisture, making it a healthier dessert option.

Ingredients You’ll Need

Gather these simple ingredients to whip up your light and fluffy yogurt cake:

  • 1 ½ cups all-purpose flour: This is the foundation of your cake, providing structure and stability.
  • 2 tsp baking powder: Essential for that light and airy texture, helping the cake rise beautifully.
  • ½ tsp salt: Enhances the sweetness and balances the flavors in the cake.
  • 3 large eggs: Adds richness and helps bind the ingredients.
  • 1 cup yogurt: The star ingredient that brings moisture and a delightful tang to your cake.
  • 1 cup granulated sugar: Sweetens the cake perfectly without overpowering the other flavors.
  • ½ cup vegetable oil: Keeps the cake moist and contributes to its tender crumb.
  • 1 tsp vanilla extract: A must-have for that comforting flavor.
  • Zest of 1 lemon (optional): Adds a refreshing brightness to the cake.

How to Make Your Light & Fluffy Yogurt Cake

An iPhone photo capturing the side profile of a yogurt cake, focusing on its airy structure and inviting appearance.

Now that you have your ingredients ready, let’s get baking! Follow these simple steps:

  1. Preheat and Prepare: Preheat your oven to 350°F (175°C) and grease an 8-inch round cake pan. For easy removal, you can also line it with parchment paper.
  2. Mix Dry Ingredients: In a medium bowl, whisk together the all-purpose flour, baking powder, and salt. Set this aside for later.
  3. Combine Wet Ingredients: In a large bowl, whisk the eggs, yogurt, granulated sugar, vegetable oil, and vanilla extract until smooth. If you’re using lemon zest, add it now for a refreshing hint of flavor!
  4. Combine Mixtures: Gradually add the dry ingredients to the wet mixture, stirring gently until just combined. Be careful not to overmix; it’s okay if there are a few lumps.
  5. Pour the Batter: Pour the batter into the prepared cake pan, smoothing the top with a spatula.
  6. Bake the Cake: Bake for 30-35 minutes, or until the top is golden brown and a toothpick inserted in the center comes out clean.
  7. Cool and Serve: Allow the cake to cool in the pan for 10 minutes, then transfer it to a wire rack to cool completely. You can also serve it slightly warm for an extra indulgent experience!

Pro Tips for Perfecting Your Yogurt Cake

To ensure your yogurt cake turns out perfectly every time, keep these professional insights in mind:

  • Use Room Temperature Ingredients: Let your eggs and yogurt sit out for about 30 minutes before mixing. This helps create a smoother batter and a fluffier cake.
  • Don’t Overmix: Stir until just combined to keep your cake light and airy. Overmixing can lead to a dense texture.
  • Check for Doneness: Ovens vary, so start checking your cake a few minutes before the suggested baking time to avoid overbaking.
  • Flavor Enhancements: Feel free to experiment with different flavorings, such as almond extract or a splash of orange juice, for a unique twist.
  • Layering Options: Consider making this cake in layers and filling it with whipped cream and fresh berries for an impressive dessert.
  • Serve with Style: Dust the finished cake with powdered sugar and top with whipped cream and seasonal fruits for a beautiful presentation.
  • Cooling Properly: Ensure the cake is completely cooled before frosting or slicing to maintain its structure.
  • Storing Leftovers: Keep any leftover cake in an airtight container at room temperature for up to 3 days for the best flavor and texture.

Common Mistakes and Troubleshooting

Even the best bakers encounter challenges. Here are some common pitfalls and how to avoid them:

  • Dense Cake: This often happens due to overmixing or using cold ingredients. Ensure everything is room temperature and mix just until combined.
  • Dry Cake: Overbaking can lead to dryness. Keep an eye on the cake as it bakes and test for doneness early.
  • Sticking to the Pan: Always grease your pan well or use parchment paper to prevent sticking.
  • Flavorless Cake: If your cake ends up bland, consider adding more vanilla, lemon zest, or using flavored yogurt.

Variations to Try

Feel free to get creative! Here are some delicious variations of the light yogurt cake:

  • Chocolate Yogurt Cake: Replace ¼ cup of flour with cocoa powder for a rich chocolate flavor.
  • Fruit-Infused Cake: Fold in fresh berries or diced peaches into the batter before baking for a fruity twist.
  • Nutty Delight: Add chopped nuts like walnuts or almonds for a crunchy texture.
  • Gluten-Free Option: Substitute all-purpose flour with a gluten-free flour blend to make this cake gluten-free.

Storage and Make-Ahead Instructions

This yogurt cake is perfect for making ahead of time. Here’s how to store it:

  • At Room Temperature: Store in an airtight container for up to 3 days.
  • In the Refrigerator: For longer freshness, keep it in the fridge for up to a week; just be sure it’s covered.
  • Freezing: You can freeze the cake for up to 3 months. Wrap it tightly in plastic wrap and aluminum foil before freezing.

Frequently Asked Questions

Here are some common questions and answers to help you on your baking journey:

  • Can I use flavored yogurt instead of plain yogurt? Yes, flavored yogurt can add extra taste! Just be mindful of the added sugar.
  • Can I substitute vegetable oil with another type of oil? Absolutely! You can use melted coconut oil or canola oil.
  • How can I make this cake gluten-free? Use a gluten-free all-purpose flour blend in place of regular flour.
  • Can I make this cake without the whipped topping? Yes, it’s delicious on its own or with just a dusting of powdered sugar.
  • How do I know when the cake is done baking? A toothpick inserted in the center should come out clean or with just a few crumbs attached.
  • Can I add chocolate chips to the batter? Yes! Fold in chocolate chips for a delightful surprise in every bite.
  • What can I serve with this cake? It’s wonderful with a side of whipped cream, fresh berries, or a scoop of ice cream.
  • Is this cake suitable for kids? Definitely! It’s a light and fluffy treat that kids will love.

Nutritional Tips and Dietary Adaptations

This cake can be adapted to fit various dietary needs:

  • Lower Sugar Option: Reduce the amount of sugar by 1/4 cup without compromising the cake’s texture.
  • Vegan Alternative: Replace eggs with flaxseed meal (1 tablespoon flaxseed meal + 3 tablespoons water = 1 egg) and use plant-based yogurt.
  • Dairy-Free Version: Substitute regular yogurt with coconut or almond yogurt for a dairy-free alternative.

Equipment Recommendations

Here’s the essential equipment you’ll need to make this delightful yogurt cake:

  • Mixing Bowls: Use both large and medium bowls for mixing ingredients.
  • Whisk: A good whisk is essential for combining wet ingredients smoothly.
  • Measuring Cups and Spoons: Accurate measurements lead to perfect results.
  • 8-Inch Cake Pan: A round cake pan is perfect for this recipe; ensure it’s well-greased.
  • Cooling Rack: This allows your cake to cool evenly and prevents sogginess.

Serving Suggestions

Elevate your yogurt cake with these serving ideas:

  • Dust with Powdered Sugar: A light dusting adds a touch of elegance.
  • Top with Fresh Berries: Strawberries, blueberries, or raspberries complement the cake beautifully.
  • Whipped Cream: Serve with a dollop of whipped cream for extra indulgence.
  • Citrus Glaze: Drizzle a simple lemon glaze over the top for an extra flavor boost.

Conclusion

Creating a light and fluffy yogurt cake is not only satisfying but also a wonderful way to share joy with family and friends. This recipe is your gateway to baking success, offering flexibility, flavor, and fun in every slice. So gather your ingredients, unleash your inner baker, and savor the delightful moments that come with mastering this simple yet scrumptious cake. Happy baking!

Light & Fluffy Yogurt Cake

Prep Time 10 minutes
Cook Time 35 minutes
Total Time 45 minutes
Servings 8 slices
Calories 250
This yogurt cake is a light, fluffy treat perfect for any occasion. Easy to make and delightfully moist, it’s a healthier dessert option.

Ingredients

Dry ingredients

  • 1 ½ cups all-purpose flour
  • 2 tsp baking powder
  • ½ tsp salt

Wet ingredients

  • 3 large eggs
  • 1 cup yogurt
  • 1 cup granulated sugar
  • ½ cup vegetable oil
  • 1 tsp vanilla extract
  • Zest of 1 lemon (optional) lemon zest (optional)

Instructions 

  • Preheat oven to 350°F (175°C) and prepare a cake pan.
  • Mix dry ingredients in a bowl; whisk wet ingredients in another.
  • Combine wet and dry mixtures gently; pour into pan.
  • Bake for 30-35 minutes until golden and a toothpick comes out clean.
  • Cool in pan 10 minutes, then transfer to wire rack; serve as desired.

Notes

You can add lemon zest for extra flavor or top with fresh berries for presentation.
Calories: 250kcal
Cost: $15
Course: Dessert
Cuisine: International
Keyword: Yogurt

Transform Your Weeknight Dinners with a Flavorful Sweet Chili Chicken Bowl

If you’re looking to elevate your weeknight dinners, this Sweet Chili Chicken Bowl is the perfect solution. Not only is it quick and easy to prepare, but it also combines tender chicken thighs, vibrant vegetables, and a creamy coconut lime drizzle that will make your taste buds dance. This recipe is designed to be approachable, making it ideal for both novice cooks and seasoned chefs. Let’s dive into why this recipe deserves a spot in your regular meal rotation!

Why You’ll Love This Recipe

  • Quick and Easy: You can whip up this delicious bowl in under 30 minutes, making it perfect for busy weeknights when you don’t want to compromise on flavor.
  • Flavor Explosion: The combination of the sweet chili sauce and the creamy coconut lime drizzle creates a delightful balance of sweet, spicy, and tangy flavors.
  • Healthy and Nutritious: Packed with protein from the chicken and loaded with colorful veggies, this bowl is a nutritious choice that doesn’t skimp on taste.
  • Customizable: Feel free to mix and match the veggies or even switch the protein to cater to your family’s preferences.
  • Meal Prep Friendly: This dish stores well in the fridge and reheats beautifully, making it ideal for meal prep.

Ingredients Breakdown

To create your Sweet Chili Chicken Bowl, you’ll need the following ingredients:

  • 1 lb (450g) boneless, skinless chicken thighs: These cuts are juicy and absorb flavors well. You can substitute with chicken breasts if preferred, but thighs offer more flavor.
  • ½ cup (120ml) sweet chili sauce: This is the star of the dish, providing sweetness and a hint of spice. Opt for a low-sugar version if you’re watching your sugar intake.
  • ⅓ cup (80ml) full-fat canned coconut milk: For a creamy texture in the drizzle. Light coconut milk can be used, but it won’t be as rich.
  • 1 large lime (zest and juice): This adds freshness and acidity to balance the dish. If you don’t have lime, lemon can substitute in a pinch.
  • 2 cloves garlic, minced: Fresh garlic adds aromatic depth. You can also use garlic powder if fresh isn’t available.
  • 1½ cups cooked jasmine or basmati rice: This serves as the base of the bowl. Quinoa or cauliflower rice can be great alternatives.
  • 2 cups (300g) mixed veggies: Bell peppers, snap peas, and shredded carrots are great choices, but feel free to use whatever you have on hand.
  • ½ cup (15g) fresh cilantro, chopped: Adds a fresh herbal note. If you’re not a fan of cilantro, parsley is a suitable substitute.
  • Salt and freshly cracked pepper, to taste: Essential for seasoning. Don’t forget to taste and adjust as needed.
  • 2 tbsp (30ml) olive oil: For sautéing the chicken and vegetables, which helps develop flavor.

How to Make It: Step-by-Step

Detailed shot of Sweet Chili Chicken with a creamy coconut lime sauce and fresh ingredients.

Now that you have your ingredients ready, let’s walk through the steps to make your Sweet Chili Chicken Bowl.

  1. Cook the rice: Rinse ¾ cup (150g) dry jasmine rice under cold water until clear. Combine with 1½ cups (360ml) water in a saucepan. Bring to a boil, cover, reduce heat to low, and simmer for 15 minutes. Remove from heat and let rest, covered, for 5 minutes. Fluff with a fork.
  2. Prep the chicken: Pat chicken thighs dry and season both sides with salt and pepper.
  3. Sauté the chicken: Heat 1 tbsp (15ml) olive oil in a skillet over medium-high heat. Cook chicken thighs about 5 minutes per side until golden and cooked through (165°F/74°C). Remove and let rest, then slice into strips.
  4. Cook the veggies: In the same skillet, heat the remaining 1 tbsp (15ml) olive oil. Add mixed veggies and minced garlic. Sauté for about 5 minutes until tender-crisp. Season with salt and pepper.
  5. Make the coconut lime drizzle: In a bowl, whisk together ⅓ cup (80ml) full-fat coconut milk, juice and zest of 1 lime, and a pinch of salt until smooth and creamy.
  6. Assemble the bowl: Spoon rice into bowls, top with veggies and sliced chicken. Drizzle with coconut lime sauce and sprinkle with chopped cilantro.
  7. Final touches: Toss gently if desired to coat all ingredients or leave drizzled for presentation. Serve immediately.

Pro Tips for Perfecting Your Sweet Chili Chicken Bowl

  • Let the chicken rest: After cooking, allowing the chicken to rest for a few minutes helps retain its juices, making it more tender.
  • Adjust the spice: If you like more heat, consider adding red pepper flakes or sriracha to the sweet chili sauce while cooking.
  • Prep ahead: You can marinate the chicken in the sweet chili sauce a few hours before cooking for deeper flavor.
  • Use fresh ingredients: Fresh herbs and vegetables enhance the flavor significantly. Don’t skimp on quality!
  • Experiment with grains: Try using quinoa or brown rice for a different texture and added nutrients.
  • Keep it colorful: Aim for a variety of colors in your veggies for a more visually appealing dish.
  • Store leftovers properly: Keep any leftover chicken and rice in the fridge in airtight containers for up to 3 days.
  • Garnish creatively: Consider adding nuts or seeds for an extra crunch and flavor boost.

Common Mistakes and Troubleshooting

Cooking can sometimes lead to unexpected outcomes. Here are common mistakes to avoid and solutions to keep your dish on track:

  • Overcooking the chicken: This can make the chicken dry. Use a meat thermometer to ensure it reaches 165°F (74°C) without overcooking.
  • Skipping the resting time: Cutting into the chicken immediately after cooking can cause juices to run out. Always let it rest!
  • Too much sauce: If you find your bowl too saucy, consider serving the extra sauce on the side to control how much you use.
  • Undercooking the veggies: For crunchy veggies, sauté just until tender-crisp. Overcooking can lead to mushiness.

Variations to Try

Feel free to get creative with your Sweet Chili Chicken Bowl. Here are some tasty variations to try:

  • Protein swaps: Substitute chicken with shrimp, tofu, or beef for a different twist on flavor and texture.
  • Spice it up: Add diced jalapeños or a splash of hot sauce to the coconut lime drizzle for an extra kick.
  • Different sauces: Experiment with teriyaki or peanut sauce for a unique flavor profile.
  • Seasonal veggies: Use whatever is in season or available, such as zucchini or asparagus, for freshness and variety.

Storage and Make-Ahead Instructions

This bowl is not only delicious but also practical for meal prep!

  • Refrigeration: Store leftovers in an airtight container in the fridge for up to 3 days. Reheat gently in the microwave or on the stovetop.
  • Freezing: While the rice can be frozen, it’s best to store the chicken and veggies separately to maintain texture. Consume frozen meals within 1-2 months.

Frequently Asked Questions

Here are some common queries regarding the Sweet Chili Chicken Bowl:

  • Can I use chicken breasts instead of thighs? Yes! Chicken breasts can be used, but they may require less cooking time to avoid drying out.
  • What is the best way to reheat leftovers? Microwave in short intervals, stirring in between, or reheat on the stovetop with a splash of water to prevent drying.
  • Can I use frozen vegetables? Absolutely! Just add them to the skillet a little earlier to ensure they are cooked through.
  • Is this dish gluten-free? Yes, as long as the sweet chili sauce you use is gluten-free, this dish is safe for gluten-sensitive diets.
  • How can I make it dairy-free? This recipe is already dairy-free; just ensure your sweet chili sauce doesn’t contain any dairy ingredients.
  • Can I prepare the sauce ahead of time? Yes! You can prepare the coconut lime drizzle a day in advance and store it in the fridge.
  • What can I serve it with? This bowl pairs well with a side salad or steamed dumplings for a complete meal.
  • Can I add more veggies? Certainly! Feel free to add as many veggies as you like to boost nutrition.

Nutritional Tips and Dietary Adaptations

This Sweet Chili Chicken Bowl is versatile enough to accommodate various dietary preferences:

  • Low-carb option: Substitute rice with cauliflower rice for a low-carb version.
  • Vegan adaptation: Replace chicken with tofu and use a plant-based sweet chili sauce for a vegan-friendly meal.
  • Low-calorie version: Reduce the amount of sweet chili sauce or use a homemade version with less sugar.

Essential Equipment Recommendations

Here’s what you’ll need to make your cooking process smoother:

  • Non-stick skillet: This is essential for cooking the chicken and veggies without sticking.
  • Meat thermometer: To ensure your chicken is cooked to perfection.
  • Rice cooker: If you love perfectly cooked rice every time, a rice cooker can be a great investment.
  • Mixing bowls: For prepping the sauce and mixing ingredients.

Serving Suggestions

To serve your Sweet Chili Chicken Bowl, consider these ideas:

  • Garnish: Top with additional fresh herbs, lime wedges, or sesame seeds for extra flavor and crunch.
  • Side dishes: Pair with a simple green salad or steamed dumplings to complete the meal.
  • Bowl Style: Serve in deep bowls for a comforting feel or on a plate for a more elegant presentation.

In conclusion, this Sweet Chili Chicken Bowl is not just a recipe; it’s an invitation to enjoy cooking and eating well. With its simple steps and delightful flavors, it’s sure to become a family favorite. So gather your ingredients, follow the steps, and most importantly, enjoy the process of cooking and sharing this delicious meal with those you love!

Flavorful Sweet Chili Chicken Bowl Recipe with Easy Coconut Lime Drizzle

Prep Time 10 minutes
Cook Time 30 minutes
Total Time 40 minutes
Servings 4 servings
Calories 550
A vibrant and easy-to-make chicken bowl featuring sweet chili sauce, coconut lime drizzle, and fresh veggies for a satisfying meal.

Ingredients

Protein

  • 1 lb boneless, skinless chicken thighs
  • 0.5 cup sweet chili sauce
  • 0.33 cup full-fat canned coconut milk
  • 1 large lime (zest and juice)
  • 2 cloves garlic, minced
  • 1.5 cups cooked jasmine or basmati rice ((about ¾ cup dry, 150g))
  • 2 cups mixed veggies (bell peppers, snap peas, shredded carrots, or preferred)
  • 0.5 cup fresh cilantro, chopped
  • to taste Salt and freshly cracked pepper
  • 2 tbsp olive oil

Instructions 

  • Cook the rice: rinse dry rice, combine with water, boil, simmer for 15 mins, then fluff.
  • Pat chicken dry, season with salt and pepper.
  • Heat 1 tbsp olive oil, cook chicken 5 mins per side until golden and cooked through, then slice into strips.
  • In the same skillet, heat remaining oil, sauté veggies and garlic for 5 mins until tender-crisp, season with salt and pepper.
  • Whisk coconut milk, lime juice and zest, and a pinch of salt to make the coconut lime drizzle.
  • Assemble bowls: place rice, top with veggies and chicken, drizzle with coconut lime sauce, and garnish with cilantro.

Notes

For extra flavor, marinate the chicken in some sweet chili sauce before cooking.
Calories: 550kcal
Cost: $15
Course: Main Course
Cuisine: Asian
Keyword: bowl, Chicken, Coconut, sweet chili

Discover the Ultimate Peach Smoothie Recipe

Welcome to your new go-to Peach Smoothie recipe! This delightful blend of ripe peaches and creamy yogurt offers a delicious way to kickstart your day or enjoy a refreshing snack. With just a few simple ingredients, you can whip up a peach smoothie that is both nutritious and satisfying. Perfect for breakfast or an afternoon treat, this recipe is designed to be easy, quick, and full of flavor. Let’s dive into why you’ll love this recipe!

Why You’ll Love This Recipe

  • Quick and Easy: This peach smoothie takes only minutes to prepare, making it perfect for busy mornings or impromptu snacks.
  • Nutritious Ingredients: Packed with vitamins, minerals, and probiotics, it supports your overall health while tasting amazing.
  • Customizable: Adjust the sweetness and texture to your liking with simple ingredient swaps or additions.
  • Kid-Friendly: With its sweet and creamy flavor, this smoothie is sure to be a hit with children and adults alike!
  • Dairy-Free Option: Simply substitute yogurt and milk with plant-based alternatives for a delicious dairy-free version.

Ingredient Breakdown

Let’s take a closer look at the ingredients you’ll need for this refreshing peach smoothie and some possible substitutions:

  • 1–2 ripe peaches: Fresh peaches add a sweet, juicy flavor. If out of season, feel free to use 1 1/2 cups of frozen peach chunks.
  • 1 banana: Fresh or frozen, bananas contribute creaminess and natural sweetness.
  • 1/2–3/4 cup yogurt: Use plain or vanilla yogurt for a creamy texture. Alternatives include coconut yogurt for a dairy-free option.
  • 1/2 cup milk: Any milk works here—dairy, almond, oat, or soy milk are all great choices!
  • Squeeze of lemon juice: This balances the sweetness and adds a bright, zesty flavor.
  • Sweetener: Add honey or maple syrup to taste; you can also skip this if you prefer a less sweet smoothie.
  • Optional ingredients: Enhance your smoothie with more frozen fruit, chia seeds, a pinch of cinnamon, or even a scoop of protein powder or nut butter for added nutrition.

Pro Tips for the Perfect Peach Smoothie

Delicious peach smoothie in a glass with a straw, surrounded by fresh peaches and banana.

Want to ensure your smoothie turns out amazing every time? Check out these expert tips:

  • Use ripe peaches: The riper the peaches, the sweeter and more flavorful your smoothie will be.
  • Freeze your bananas: For a thicker, creamier smoothie, freeze bananas ahead of time.
  • Blend in stages: Start with liquids, then add solids for a smoother blend.
  • Adjust thickness: For a thicker smoothie, add less milk or include more frozen fruit.
  • Experiment with flavors: Don’t be afraid to mix in different fruits or spices to find your perfect blend.
  • Chill your ingredients: For a refreshing cold smoothie, use chilled ingredients or add ice.
  • Make it a meal: Boost the nutrient content by adding a handful of spinach or kale.
  • Use a high-speed blender: This ensures a silky-smooth texture without any chunks.

Common Mistakes and Troubleshooting

Even the best of us can make mistakes! Here are some common issues and how to avoid them:

  • Too thick: If your smoothie is too thick, simply blend in more milk until you reach your desired consistency.
  • Too sweet: Balance out excessive sweetness with a squeeze of lemon juice or a handful of spinach.
  • Not smooth enough: If you end up with bits of fruit, make sure to blend long enough or invest in a high-quality blender.
  • Too watery: Using fresh peaches instead of frozen can sometimes lead to a watery consistency. Adjust with ice or frozen fruit.

Delicious Variations of the Peach Smoothie

Feeling adventurous? Try one of these tasty variations:

  • Peach-Banana Smoothie: Enhance the peach flavor by adding an extra banana for a sweeter treat.
  • Berry Peach Smoothie: Toss in mixed berries for a tangy twist on the classic recipe.
  • Green Peach Smoothie: Add a handful of spinach or kale for a nutrient boost without sacrificing flavor.
  • Peach Protein Smoothie: Mix in protein powder or Greek yogurt for post-workout recovery.

Storage and Make-Ahead Instructions

Want to prepare your peach smoothie in advance?

  • Make it ahead: Blend your smoothie and store it in an airtight container in the refrigerator for up to 24 hours.
  • Freezing: You can freeze your smoothie in individual portions for quick grab-and-go breakfasts. Just blend and pour into freezer-safe containers.
  • Thawing: Thaw overnight in the fridge or blend directly from frozen with a bit of extra liquid for a quick fix.

Frequently Asked Questions

Here are some common questions about making a peach smoothie:

  • Can I use canned peaches? Yes! Canned peaches work well but remember to drain them to avoid excess liquid.
  • Is it necessary to peel the peaches? No, you can leave the skin on for added fiber and nutrients.
  • Can I make this smoothie without yogurt? Absolutely! Substitute yogurt with an extra banana or use avocado for creaminess.
  • What can I add for extra protein? Consider adding protein powder, nut butter, or Greek yogurt.
  • How can I make this smoothie vegan? Use plant-based yogurt and milk to keep it entirely vegan.
  • Can I use frozen bananas? Yes! Frozen bananas add a wonderful creamy texture to your smoothie.
  • How many servings does this recipe make? This recipe makes approximately two servings.
  • Can I add greens to my smoothie? Definitely! Spinach or kale blends well without altering the flavor significantly.

Nutritional Tips and Dietary Adaptations

For a healthier smoothie experience, consider these nutritional tips:

  • Increase fiber: Add chia seeds or flaxseeds to boost fiber content.
  • Lower sugar: Use less sweetener or opt for stevia for a low-calorie option.
  • Boost antioxidants: Add a handful of berries for added antioxidants and flavor.
  • Healthy fats: Include a spoonful of nut butter or avocado for healthy fats and creaminess.

Essential Equipment for Smoothie Making

To make your peach smoothie, you’ll need:

  • High-speed blender: A good blender is crucial for achieving that silky, smooth texture.
  • Measuring cups and spoons: Ensure you have the right amounts for perfect flavor balance.
  • Spatula: Use it to scrape down the sides of the blender for thorough blending.
  • Air-tight containers: For storing leftovers or prepped smoothies.

Serving Suggestions

Enjoy your peach smoothie in various ways:

  • In a bowl: Pour your smoothie into a bowl and top with granola, fresh fruit, or nuts for added texture.
  • As a drink: Serve it in a tall glass with a straw for a refreshing sip.
  • With a meal: Pair it with whole-grain toast or a nutritious muffin for a balanced breakfast.

Conclusion

Now that you have the ultimate guide to making a refreshing peach smoothie, you can challenge yourself to get creative in the kitchen! Remember, cooking is all about experimenting and having fun. With just a few simple ingredients and some inspiration, you’ll be able to whip up a smoothie that not only tastes great but also nourishes your body. So grab your blender and enjoy this delicious peach smoothie today!

Peach Smoothie

Prep Time 5 minutes
Total Time 5 minutes
Servings 2 cups
Calories 250
A refreshing and nutritious peach smoothie perfect for a quick breakfast or snack.

Ingredients

Base

  • 1.5 cups frozen peach chunks (or fresh peaches, pitted and sliced)
  • 1 banana banana (fresh or frozen)
  • 0.75 cup plain or vanilla yogurt
  • 0.5 cup milk or plant milk
  • 1 squeeze lemon juice
  • 2 teaspoons honey or maple syrup (to taste)
  • optional more frozen fruit or ice
  • 1 tablespoon chia seeds (optional)
  • pinch cinnamon (optional)
  • few basil leaves basil leaves (optional)
  • scoop protein powder or nut butter protein powder or nut butter (optional)

Instructions 

  • Add liquid and yogurt to blender.
  • Add banana, peaches, and sweetener, then blend until smooth.
  • Blend in extra milk for a thinner drink or ice for a frosty shake.

Notes

You can customize sweetness and add extras like chia seeds or basil for extra flavor.
Calories: 250kcal
Cost: $8
Course: Breakfast, Snack
Cuisine: American
Keyword: Peach, Smoothie

If you’re looking for a quick, delicious weeknight meal that pleases the whole family, look no further! This Sticky Chicken Bowl recipe is not just simple to prepare, but it’s also packed with flavor and nutrition. Imagine tender chicken strips enveloped in a sweet-savory sticky sauce, served over fluffy rice and vibrant broccoli. In under 30 minutes, you can have a satisfying dinner on the table, making this dish a perfect choice for busy evenings. Let’s dive into the details of this delightful recipe!

Why You’ll Love This Recipe

Here are just a few reasons why this dish will become a staple in your kitchen:

  • Quick to Prepare: You can whip up these sticky chicken rice bowls in under 30 minutes, making them ideal for those hectic weeknights.
  • Customizable Ingredients: Feel free to swap out the chicken for tofu or use different veggies based on your preferences. It’s adaptable to fit your dietary needs.
  • Flavor Explosion: The combination of the tender chicken and the luscious, sticky sauce creates a memorable meal that everyone will love.
  • Great for Meal Prep: Prepare a double batch, and you’ll have delicious leftovers for lunches or quick dinners later in the week.
  • Healthy and Nourishing: Packed with protein and veggies, this dish brings a balanced meal to your table without compromising on flavor.

Key Ingredients for Sticky Chicken Bowls

Let’s take a closer look at the ingredients you’ll need to create this delightful dish:

  • 2 cups uncooked rice: The base of the dish, providing a fluffy texture that soaks up the sauce perfectly. You can use jasmine or brown rice depending on your preference.
  • 2 small heads broccoli, chopped: Adds a pop of color and nutrition, making the dish visually appealing and healthy.
  • 3 large chicken breasts: The star of the show! Tender and juicy, they absorb all the wonderful flavors.
  • 2 tbsp olive oil: For cooking the chicken, bringing in healthy fats and flavor.
  • 1/2 cup soy sauce: This gives the sticky sauce its savory depth.
  • 1/2 cup honey: Adds sweetness to balance the flavors, making the sauce irresistible.
  • 1/4 cup rice vinegar: For a touch of acidity that brightens the dish.
  • 3 cloves garlic, minced: Infuses the chicken with aromatic flavor.
  • 2 tbsp sriracha: Adds a kick of heat, which you can adjust to your taste.
  • 2 tsp sesame oil: Enhances the flavor profile with its nutty essence.
  • 1 tsp ground ginger: Offers a warm spice that complements the other flavors.
  • 2 tsp arrowroot powder: This thickens the sauce without adding extra calories.
  • Sesame seeds for topping: For a lovely crunch and garnish.

Step-by-Step Instructions

Now, let’s get cooking! Follow these simple steps for a delicious meal:

  1. Cook the rice according to package instructions and set aside.
  2. Chop broccoli into small florets and set aside.
  3. Slice chicken breasts into strips and season with salt, pepper, paprika, chili powder, onion powder, and oregano.
  4. Heat olive oil in a skillet over medium-high heat, add chicken, and cook until golden and fully cooked through, about 5-7 minutes.
  5. Steam or sauté broccoli in the same pan or separately until tender, about 3-5 minutes.
  6. In a bowl, whisk together the sticky sauce ingredients.
  7. Pour the sauce into the skillet with the chicken, simmer until thickened, about 2-3 minutes.
  8. For the spicy mayo, mix mayo, sriracha, and water until pourable.
  9. Assemble bowls with a base of rice, topped with chicken, broccoli, a drizzle of spicy mayo, and finished with sesame seeds.

Pro Tips for Perfect Sticky Chicken Bowls

Delicious sticky chicken bowl topped with sesame seeds and garnished with greens.

To elevate your cooking game, keep these expert tips in mind:

  • Use Fresh Ingredients: Fresh garlic and ginger will enhance the flavors of the sauce.
  • Don’t Overcook the Chicken: Aim for juicy, tender chicken by monitoring the cooking time closely.
  • Customize Your Veggies: Feel free to mix in bell peppers, snap peas, or carrots for added nutrition and color.
  • Adjust the Sweetness: If you prefer a less sweet sauce, reduce the honey or substitute it with agave syrup.
  • Meal Prep: Prepare the chicken and sauce in advance and combine with rice and veggies when ready to eat.
  • Double the Sauce: If you love sauce, make a double batch for extra drizzling.
  • Serve Hot: Enjoy your sticky chicken bowls warm for the best flavor experience.
  • Store Properly: Allow leftovers to cool completely before storing them in airtight containers.

Common Mistakes and Troubleshooting

Even the best of us make mistakes in the kitchen! Here are some common pitfalls and how to avoid them:

  • Chicken Not Cooked Through: Always check the internal temperature; it should reach 165°F (74°C).
  • Sauce Too Thick: If your sauce thickens too much, add a splash of water or broth to loosen it up.
  • Overcooked Broccoli: Keep an eye on your broccoli while cooking to maintain its vibrant color and crunch.
  • Sticky Sauce Not Sweet Enough: Adjust the honey or add a bit of brown sugar for extra sweetness if needed.

Variations to Try

Feel like mixing things up? Here are some variations to this recipe:

  • Vegetarian Version: Substitute chicken with tofu or tempeh for a plant-based option.
  • Spicy Kick: Increase the amount of sriracha or add chopped jalapeños for a fiery touch.
  • Citrus Twist: Add the juice of a lime or lemon to the sauce for a fresh zing.
  • Asian-Inspired: Incorporate bok choy or snap peas and serve with sesame oil drizzled on top.

Storage and Make-Ahead Instructions

Planning ahead can make your weeknights even smoother. Here’s how to store and reheat:

  • Refrigerator: Store leftovers in an airtight container for up to 3 days.
  • Freezing: You can freeze the cooked chicken and sauce separately for up to 3 months. Thaw overnight in the fridge before reheating.
  • Reheating: Reheat in a skillet over medium heat or in the microwave until heated through. Add a splash of water to keep it moist.
  • Meal Prep: Prepare chicken and sauce in advance, and combine with fresh rice and veggies when ready to eat.

FAQs

Got questions? Here are some common inquiries about the recipe:

  • Can I make this dish ahead of time?: Yes! You can prepare everything and store it in the fridge, then reheat when ready to serve.
  • What can I substitute for soy sauce?: Use tamari for a gluten-free option or coconut aminos for a soy-free alternative.
  • Is this recipe healthy?: Absolutely! It’s packed with protein and veggies, making it a balanced meal option.
  • Can I use brown rice?: Yes! Brown rice is an excellent choice for added fiber and nutrients.
  • What other vegetables can I include?: Feel free to add bell peppers, green beans, or carrots for variety.
  • How spicy is the dish?: The spice level can be adjusted by modifying the amount of sriracha used.
  • Can I use chicken thighs instead of breasts?: Yes, chicken thighs will work beautifully and add extra juiciness.
  • What’s the best way to reheat leftovers?: Gently reheat in a skillet or microwave, adding a bit of water to prevent drying out.

Nutrition Tips and Dietary Adaptations

This dish can easily be adjusted to fit various dietary needs:

  • Low-Carb Option: Substitute rice with cauliflower rice for a lighter meal.
  • Gluten-Free: Use tamari or coconut aminos in place of soy sauce.
  • Dairy-Free: The recipe is naturally dairy-free, making it suitable for various diets.
  • Paleo-Friendly: Use honey as the sweetener and ensure all other ingredients are compliant.

Equipment Recommendations

To make your cooking experience smoother, here are some essential tools:

  • Non-Stick Skillet: Perfect for cooking chicken evenly without sticking.
  • Rice Cooker: For perfectly cooked rice every time.
  • Whisk: Useful for blending the sauce ingredients smoothly.
  • Sharp Knife: For easily slicing chicken and chopping veggies.

Serving Suggestions

When it comes to serving, consider these ideas:

  • Garnish with Fresh Herbs: Chopped cilantro or green onions can elevate the dish.
  • Add a Side Salad: A simple cucumber or mixed greens salad pairs wonderfully.
  • Serve with Additional Sauce: Offer extra sauce on the side for those who love a little more flavor.
  • Pair with a Drink: A light iced tea or sparkling water complements the flavors beautifully.

In conclusion, these Effortless Sticky Chicken Bowls are not just a meal; they’re an experience. With their delightful flavors and simple preparation, you can make every weeknight feel special. So gather your ingredients, roll up your sleeves, and enjoy the process of creating something delicious. Happy cooking!

Sticky Chicken Bowls Recipe

Prep Time 10 minutes
Cook Time 20 minutes
Total Time 30 minutes
Servings 4 servings
Calories 650
A flavorful and easy-to-make bowl featuring tender chicken, broccoli, and rice topped with spicy mayo and sesame seeds.

Ingredients

Rice

  • 2 cups uncooked rice

Broccoli

  • 2 small heads broccoli, chopped

Chicken

  • 3 large chicken breasts

Sauces & Oils

  • 2 tbsp olive oil
  • 1 tsp salt
  • 1/2 tsp pepper
  • 1 tsp chili powder
  • 1 tsp smoked paprika
  • 1 tsp onion powder
  • 1 tsp oregano

Sauce ingredients

  • 1/2 cup soy sauce
  • 1/2 cup honey
  • 1/4 cup rice vinegar
  • 3 cloves garlic, minced
  • 2 tbsp sriracha
  • 2 tsp sesame oil
  • 1 tsp ground ginger
  • 2 tsp arrowroot powder mixed with water (to make slurry)

Spicy Mayo

  • 1/2 cup mayo
  • 1 tbsp sriracha
  • 2-3 tbsp water (to thin mayo)

Toppings

  • to taste sesame seeds (for topping)

Instructions 

  • Cook rice and set aside.
  • Season chicken, cook until golden.
  • Steam or sauté broccoli until tender.
  • Combine sauce ingredients, simmer until thickened, then add chicken.
  • Mix mayo with sriracha and water for spicy mayo.
  • Assemble bowls with rice, chicken, broccoli, drizzle spicy mayo, and top with sesame seeds.

Notes

Use fresh ingredients for best flavor. Adjust spice level to taste.
Calories: 650kcal
Cost: $15
Course: Main Course
Cuisine: Asian
Keyword: broccoli, Chicken, rice

Why This Mango Banana Smoothie Will Brighten Your Day

If you’re looking for a quick and delicious way to kickstart your day, this Mango Banana Smoothie is the perfect answer! Bursting with tropical flavors and packed with nutrients, it takes just minutes to whip up and can be enjoyed anytime. Made with frozen mango, ripe bananas, and creamy Greek yogurt, this smoothie is not only refreshing but also incredibly satisfying. Let’s dive into the reasons why you’ll love this recipe!

  • Quick and Easy: Ready in under 5 minutes, making it perfect for busy mornings or a snack on the go.
  • Nutrient-Packed: Full of vitamins, minerals, and protein, this smoothie will fuel your day with energy.
  • Customizable: Adjust the ingredients based on your taste preferences or dietary needs—there’s a variation for everyone!
  • Deliciously Creamy: The combination of mango and banana creates a creamy texture that’s simply irresistible.
  • Great for Weight Management: Low in calories while being filling due to the fiber from fruits and yogurt, making it a smart choice.

The Perfect Ingredients for Your Mango Banana Smoothie

Let’s take a closer look at the ingredients you’ll need to create this delicious smoothie:

  • 2 cups frozen mango: The star of our show! Look for mangoes that yield slightly to gentle pressure, indicating perfect ripeness.
  • 1 ripe banana: Preferably frozen for extra creaminess, but room temperature works too.
  • ¼ cup Greek yogurt: Adds protein and that silky texture we all love in a smoothie.
  • 1 tablespoon chia seeds: A great source of fiber and omega-3 fatty acids. You can also substitute with flax seeds if you prefer.
  • 1 ½ cups whole milk: For a creamier texture; you can swap with almond milk or coconut milk for a dairy-free option.

How to Make the Perfect Mango Banana Smoothie

Creating your Mango Banana Smoothie is as easy as 1-2-3! Follow these simple steps:

  1. Place all the ingredients in a high-speed blender.
  2. Blend until smooth and creamy, about 60–120 seconds.
  3. Taste the smoothie. Add more milk if it’s too thick. Enjoy immediately or store in the fridge for up to 24 hours.

Variations to Keep Your Smoothie Game Fresh

A vibrant mango banana smoothie in a glass showcasing its rich texture.

Don’t be afraid to mix it up! Here are some fun variations to try:

  • Tropical Twist: Add a handful of spinach for a nutrient boost and a tablespoon of coconut flakes for that tropical vibe.
  • Berry Delight: Mix in a half cup of frozen berries for a berry-flavored twist on the classic recipe.
  • Peanut Butter Bliss: Add a tablespoon of peanut butter for a protein-packed smoothie that’s rich and fulfilling.
  • Green Power: Spinach or kale can be added for extra vitamins without altering the flavor significantly.

Pro Tips for Smoothie Success

Elevate your smoothie game with these expert tips:

  • Use Frozen Fruit: Frozen fruits not only chill your smoothie but also add thickness without the need for ice.
  • Layer Your Ingredients: Add liquids first, followed by soft ingredients, and finally, frozen fruits to ensure a smooth blend.
  • Don’t Overfill: If your blender struggles, blend in batches to achieve the perfect texture without damaging your machine.
  • Taste as You Go: Adjust sweetness or consistency by adding honey, more fruit, or liquid until it’s just right for you.
  • Chill Your Glass: For an extra refreshing experience, chill your serving glass in the freezer before pouring your smoothie.
  • Prep Ahead: Portion your smoothie ingredients into ziplock bags and freeze for a quick grab-and-blend breakfast.
  • Keep it Clean: Clean your blender immediately after use to avoid tough buildup. Just add soap and water, blend, and rinse!
  • Experiment!: Don’t hesitate to try new fruits, nuts, or seeds to discover your favorite combinations.

Common Mistakes and Troubleshooting

Even the best chefs can make mistakes! Here’s how to avoid common pitfalls:

  • Too Thick?: If your smoothie is too thick, add more liquid gradually until you reach your desired consistency.
  • Too Sweet?: Balance out sweetness with a squeeze of lemon juice or a handful of greens to cut the sugar’s intensity.
  • Lumpy Smoothie?: Ensure you blend long enough; if lumps persist, let the blender run for another 10-15 seconds.
  • Unbalanced Flavor?: If your smoothie tastes off, consider adjusting with a pinch of salt or a dash of vanilla extract.

Storage and Make-Ahead Instructions

This smoothie can be stored in an airtight container in the fridge for up to 24 hours. However, the best way to enjoy it is fresh! If you want to prepare it ahead of time:

  • Freeze Ingredients: Prep and freeze your ingredients in individual bags for a quick blend in the morning.
  • Blend and Freeze: Blend your smoothie, then freeze it in ice cube trays for a refreshing frozen treat or smoothie pops.

Frequently Asked Questions

Curious about this smoothie? Here are some common questions:

  • Can I use fresh mango instead of frozen? Yes, but you’ll need to add ice to achieve a thick texture.
  • Is this smoothie vegan-friendly? You can make it vegan by using plant-based yogurt and milk.
  • Can I add protein powder? Absolutely! Add a scoop to boost the protein content further.
  • How can I make it dairy-free? Substitute Greek yogurt with coconut yogurt and use almond or oat milk.
  • What if I don’t have chia seeds? Flax seeds or hemp seeds are great alternatives.
  • Can I make this smoothie in advance? Yes, but it’s best enjoyed fresh. If making ahead, store in the fridge for no longer than 24 hours.
  • Is it okay to add greens? Definitely! Spinach or kale can be added without significantly altering the flavor.
  • How can I make it sweeter? Add honey, agave syrup, or a medjool date for natural sweetness.

Nutritional Tips and Dietary Adaptations

This Mango Banana Smoothie is not only tasty but also nutritious! Here are some dietary tips:

  • Protein Boost: Add nut butter or protein powder to increase protein content, making it a perfect post-workout snack.
  • Fiber Power: The chia seeds add fiber, which is great for digestion. Feel free to add more fruits rich in fiber like berries.
  • Low-Calorie Options: Substitute full-fat yogurt with low-fat or non-fat versions for a lighter smoothie.

Equipment Recommendations

For the best blending experience, consider these tools:

  • High-Speed Blender: A powerful blender ensures a smooth consistency, especially with frozen ingredients.
  • Measuring Cups: Accurate measurements help achieve the perfect balance of flavors.
  • Spatula: Use a spatula to scrape down the sides of your blender for even mixing.

Serving Suggestions

Serve your Mango Banana Smoothie in a chilled glass, and consider these fun serving ideas:

  • Garnish with Fresh Fruit: Top with slices of banana or mango for a beautiful presentation.
  • Add a Straw: A fun straw can make your smoothie even more enjoyable, especially for kids!
  • Pair with a Snack: Enjoy your smoothie alongside a handful of nuts or a slice of whole-grain toast for a balanced meal.

In conclusion, this Mango Banana Smoothie is not just a drink; it’s a delightful experience that brings together flavor and nutrition in a simple, quick recipe. Whether you’re starting your day or needing a refreshing snack, this smoothie is sure to brighten your day. So grab your blender, and let’s make something delicious together!

Mango Banana Smoothie Recipe

Prep Time 5 minutes
Total Time 5 minutes
Servings 2 cups
Calories 250
A delicious and refreshing smoothie combining tropical mango, creamy banana, and nutritious Greek yogurt for a quick, healthy treat.

Ingredients

Fruits

  • 2 cups frozen mango
  • 1 piece banana

Dairy & Seeds

  • ¼ cup Greek yogurt
  • 1 tablespoon chia seeds

Liquid

  • 1 ½ cups whole milk

Instructions 

  • Place all ingredients in a high-speed blender.
  • Blend until smooth and creamy, about 1 minute.
  • Taste and add more milk if needed. Serve immediately.

Notes

Use ripe bananas for best flavor.
Calories: 250kcal
Cost: $8
Course: Breakfast, Snack
Cuisine: Fusion
Keyword: Banana, Mango, Smoothie

Start Your Day Right: The Ultimate Protein-Packed Smoothie Bowl

Welcome to the world of delicious mornings! If you’re looking for a quick, nutritious breakfast that can energize your day, look no further than this protein-packed smoothie bowl. With a creamy base of Greek yogurt and your favorite frozen fruits, this smoothie bowl is not only easy to whip up but also customizable to your taste. Let’s dive into why this smoothie bowl is a must-try!

Why You’ll Love This Recipe

  • Quick and Easy: This smoothie bowl can be blended in just 5 minutes, making it perfect for busy mornings.
  • High in Protein: Packed with Greek yogurt, it provides a substantial protein boost to keep you full and satisfied.
  • Customizable: Feel free to switch up the fruits and toppings based on what you have at home.
  • Rich in Nutrients: The combination of fruits and yogurt delivers essential vitamins and minerals.
  • Great for Meal Prep: You can prepare the base in advance and add toppings just before serving.

Ingredients Breakdown

Let’s look at what you’ll need to create this delightful smoothie bowl:

  • Greek Yogurt: 3/4 cup plain or vanilla for creaminess and protein.
  • Frozen Fruit: 1 to 1 1/2 cups (banana, berries, or mango work wonders). You can also use fresh fruit if you prefer a different texture.
  • Milk or Juice: 2–4 tablespoons to adjust consistency. Almond milk or coconut water are great options.
  • Sweetener: 1 teaspoon of honey or maple syrup (optional, depending on your taste).
  • Toppings: Fresh fruit, granola, seeds, or nut butter to add texture and flavor.

Substitutions

  • Yogurt: Try using dairy-free yogurt for a vegan option.
  • Fruit: Any frozen fruit works; just avoid overly watery fruits to maintain thickness.
  • Liquid: Swap out milk for yogurt for a creamier consistency or use coconut milk for a tropical twist.

How to Make Your Smoothie Bowl

A refreshing bowl of Greek yogurt smoothie with toppings, showcasing a variety of colors and textures.

Ready to get blending? Follow these simple steps:

  1. Add Greek yogurt and your choice of frozen fruit to a blender.
  2. Pour in a splash of milk or juice to help with blending.
  3. Blend until smooth and thick; stop to scrape down the sides if necessary.
  4. Taste the mixture and add sweetener if desired; blend briefly to mix.
  5. Transfer to a bowl and spread evenly to create a base.
  6. Top with fresh fruit, granola, seeds, or nut butter according to your preference.
  7. Serve immediately and enjoy the deliciousness!

Pro Tips for the Perfect Smoothie Bowl

  • Use Frozen Fruits: They create a thicker consistency and chill your smoothie.
  • Adjust Sweetness: If using sweet fruits, consider omitting additional sweeteners.
  • Layer Textures: Combine crunchy toppings like granola with soft fruits for a satisfying bite.
  • Experiment with Spices: A pinch of cinnamon or nutmeg can elevate the flavor.
  • Keep It Fresh: Prepare your toppings in advance to save time on busy mornings.
  • Chill Your Bowl: For an extra cool treat, chill your serving bowl beforehand.
  • Blend in Greens: Add a handful of spinach or kale for a nutrient boost without compromising taste.
  • Mind the Liquid: Start with less liquid; you can always add more to adjust the thickness.

Common Mistakes and Troubleshooting

Even the best cooks make mistakes! Here are some common pitfalls and how to avoid them:

  • Too Thin: If your smoothie is too runny, add more frozen fruit or yogurt to thicken it up.
  • Too Sweet: Use less sweet fruit or skip the added sweeteners if your base is already sweet.
  • Not Blending Smoothly: Make sure your blender is powerful enough and that you’re using enough liquid to help it blend.
  • Poor Flavor: Always taste as you go! Adjust flavors by adding more fruit or sweetener as needed.

Delicious Variations to Try

  • Berry Blast: Use a mix of frozen strawberries, blueberries, and raspberries topped with coconut flakes.
  • Tropical Paradise: Blend mango and pineapple with coconut milk, topped with chia seeds.
  • Chocolate Delight: Add cocoa powder to your base and top with sliced bananas and almond butter.
  • Green Machine: Blend spinach with banana and mango, topped with pumpkin seeds for added crunch.

Storage and Make-Ahead Instructions

You can prepare your smoothie bowl base in advance. Store it in an airtight container in the refrigerator for up to 2 days. Just remember to add toppings fresh to maintain their texture and flavor.

Frequently Asked Questions

  • Can I use fresh fruit instead of frozen? Yes, but your smoothie may be thinner. Consider adding ice for thickness.
  • How can I make this smoothie bowl vegan? Replace Greek yogurt with a plant-based yogurt and avoid honey.
  • What can I add for extra protein? Consider adding protein powder, nut butter, or seeds.
  • Can I freeze leftovers? Yes, you can freeze the smoothie, but the texture may change once thawed.
  • How do I know if my smoothie is thick enough? It should be thick enough to hold the toppings without sinking.
  • What are some good toppings? Fresh fruit, granola, nuts, seeds, and nut butter are all great options!
  • How can I adjust the sweetness? Taste as you blend, and add sweeteners gradually to reach your desired taste.
  • Is this smoothie bowl suitable for kids? Absolutely! It’s a fun and nutritious way to get kids to eat fruits.

Nutritional Tips and Dietary Adaptations

This smoothie bowl is not only delicious but also packed with nutrition. Here are some adaptations you can consider:

  • Low-Calorie Option: Use non-fat yogurt and limit high-calorie toppings.
  • High-Fiber Option: Incorporate flaxseeds or chia seeds into the mix for added fiber.
  • Gluten-Free: Ensure your toppings, like granola, are certified gluten-free.
  • Low-Sugar: Opt for unsweetened yogurt and use less sweet fruit.

Equipment Recommendations

To make the best smoothie bowl, here’s what you’ll need:

  • High-Powered Blender: A good blender ensures smooth blending of frozen fruits.
  • Measuring Cups: For precise ingredient measurements.
  • Spatula: To scrape down the sides of your blender.
  • Bowl and Spoon: For serving and enjoying your creation.

Serving Suggestions

Serve your smoothie bowl immediately after preparing for the best taste and texture. It’s perfect for breakfast, an afternoon snack, or even a light dessert. Enjoy it with a warm cup of tea or coffee for a delightful start to your day!

Conclusion

There you have it! This protein-packed smoothie bowl is not only a feast for the eyes but also a nourishing way to kickstart your day. The beauty of this recipe lies in its versatility and simplicity—don’t hesitate to experiment with different ingredients and toppings. Remember, cooking is about having fun and enjoying the process! So grab your blender, and let’s make breakfast exciting!

Protein-Packed Smoothie Bowl with Greek Yogurt

Prep Time 5 minutes
Total Time 5 minutes
Servings 2 servings
Calories 250
A delicious and nutritious smoothie bowl packed with protein, perfect for a quick breakfast or snack.

Ingredients

Dairy & Frozen

  • 0.75 cup Greek yogurt (plain or vanilla)
  • 1.25 cups frozen fruit (banana, berries, mango, etc.)
  • 3 tablespoons milk or juice
  • 1 teaspoon honey or maple syrup (optional)

Toppings

  • Fresh fruit, granola, seeds, nut butter (for topping)

Instructions 

  • Add yogurt and frozen fruit to a blender.
  • Add a splash of milk or juice and blend until smooth.
  • Taste and add sweetener if needed, then blend briefly.
  • Pour into a bowl and add toppings as desired.
  • Serve immediately.

Notes

You can customize toppings for added flavor and texture.
Calories: 250kcal
Cost: $8
Course: Breakfast
Cuisine: American
Keyword: Healthy, Smoothie, Yogurt

Welcome to your new favorite weeknight meal! If you’re looking for a quick, satisfying dish that’s bursting with flavor, these Chicken and Rice Wraps are just what you need. Packed with tender chicken, hearty rice, and zesty seasonings, these wraps are perfect for busy nights when you want something delicious without spending hours in the kitchen. Let’s dive into why you’ll love this recipe and how to make it effortlessly!

Why You’ll Love This Recipe

These wraps are not just any ordinary meal; they offer a delightful blend of flavors and convenience. Here are some reasons to get excited about them:

  • Quick and Easy: With minimal prep and cooking time, you can have these wraps ready in under 30 minutes.
  • Customizable: Feel free to swap out ingredients based on what you have at home—different proteins, veggies, or sauces can elevate this dish!
  • Meal Prep Friendly: You can prepare these wraps ahead of time, making them ideal for lunches or quick dinners.
  • Kid-Approved: The familiar combination of chicken, rice, and cheese makes this meal a hit with children and adults alike.
  • Flavor-Packed: Each bite offers a burst of flavor thanks to the spices and fresh ingredients.

Ingredient Breakdown and Substitutions

Let’s take a closer look at the ingredients that make these wraps so delicious, along with some easy substitutions:

  • Chicken Tenders (1.5 pounds): You can use boneless chicken breasts or thighs if that’s what you have on hand.
  • Olive Oil (4 tablespoons total): This adds flavor and moisture. Feel free to replace it with canola oil or avocado oil.
  • Wild Rice (3 cups, already cooked): Brown rice or quinoa can also work well in these wraps.
  • Corn Kernels (1 cup): Fresh or frozen corn works great. You can also substitute with black beans for a different taste.
  • Shredded Cheddar Cheese (1.5 cups): Use your favorite cheese—Monterey Jack or pepper jack for a spicy kick.
  • Flour Tortillas (5 large): Whole wheat or corn tortillas can be excellent alternatives.
  • Fresh Cilantro (small handful, chopped): If you’re not a fan, parsley or green onions can be used instead.

Expert Tips for Perfect Chicken and Rice Wraps

To ensure your wraps are not only good but truly great, keep these expert tips in mind:

  • Marinate the Chicken: Allow chicken to marinate for at least 30 minutes in olive oil, lime juice, garlic, cumin, salt, and pepper for maximum flavor.
  • Cook on Medium Heat: When cooking the chicken, do so over medium heat to achieve a golden brown exterior without drying it out.
  • Don’t Overfill: When assembling the wraps, be mindful not to overfill them to avoid tearing the tortillas.
  • Wrap Tightly: After filling, roll the wraps tightly for easier handling and better presentation.
  • Let Them Rest: Allow the assembled wraps to sit for a few minutes before cutting to help them hold together.
  • Add Freshness: Consider adding fresh veggies like lettuce or avocado for a crisp texture and added nutrition.
  • Experiment with Sauces: A drizzle of ranch, hot sauce, or your favorite dressing can elevate the flavor even further.
  • Serve with Dips: Pair these wraps with salsa, guacamole, or a yogurt dip for a delightful experience.

Common Mistakes and Troubleshooting

Delicious chicken and rice wraps showcased on a plate, showcasing their ingredients.

Even the best chefs can encounter hiccups in the kitchen. Here are some common mistakes to avoid:

  • Overcooking Chicken: Keep an eye on the chicken to prevent it from becoming dry. It should be cooked to a juicy internal temperature of 165°F.
  • Using Cold Tortillas: Warm your tortillas before assembling to make them more pliable and easier to roll.
  • Skipping Seasoning: Don’t be shy with spices! Season every layer of your wrap for maximum flavor.
  • Neglecting to Taste: Always taste your filling before assembling. Adjust seasoning as needed!

Flavor Variations You Can Try

Once you’ve mastered the basic wrap, feel free to get creative! Here are some variations to try:

  • BBQ Chicken Wraps: Mix shredded BBQ chicken with coleslaw for a tangy twist.
  • Buffalo Chicken Wraps: Add buffalo sauce and blue cheese crumbles for a spicy kick.
  • Veggie-Loaded Wraps: Substitute the chicken with grilled vegetables like bell peppers, zucchini, and onions.
  • Breakfast Wraps: Use scrambled eggs, cheese, and salsa for a hearty breakfast option.

Storage and Make-Ahead Instructions

If you want to prepare these wraps in advance, here’s how to do it:

  • Refrigeration: Store assembled wraps in an airtight container in the fridge for up to 3 days.
  • Freezing: You can freeze unassembled wraps. Just thaw in the fridge overnight before cooking.
  • Reheating: Warm in a skillet over medium heat or in a microwave for quick reheating.

Frequently Asked Questions

Got questions? We’ve got answers! Here are some common queries about these wraps:

  • Can I use leftover chicken? Yes! Leftover cooked chicken works perfectly in this recipe.
  • What if I don’t have wild rice? Brown rice or quinoa are great alternatives.
  • Are these wraps gluten-free? Use gluten-free tortillas to make this meal suitable for a gluten-free diet.
  • Can I add beans for protein? Absolutely! Black beans or pinto beans are great additions.
  • How can I enhance the flavor? Experiment with different spices and sauces to suit your taste.
  • Can I make these wraps vegan? Yes! Substitute chicken with chickpeas or tofu and use vegan cheese.
  • How do I prevent soggy wraps? Avoid adding too much sauce or wet ingredients when assembling.
  • What sides pair well with these wraps? Serve with a salad, chips, or fruit for a complete meal.

Nutrition Tips and Dietary Adaptations

These wraps can be tailored to fit various dietary needs:

  • Low-Carb Option: Use lettuce wraps instead of tortillas for a low-carb meal.
  • High-Protein: Add additional protein sources like beans, nuts, or seeds.
  • Vegan-Friendly: Use plant-based proteins and dairy-free cheese to create a delicious vegan wrap.

Equipment Recommendations

Here’s a quick list of kitchen tools that will make your cooking experience smoother:

  • Non-stick Skillet: Ideal for cooking chicken without sticking.
  • Meat Thermometer: Ensures your chicken is cooked perfectly.
  • Cutting Board: Essential for prepping your ingredients safely.
  • Sharp Knife: For easy chopping of veggies and herbs.

Serving Suggestions

When it comes to serving, consider these options to make your meal even more enjoyable:

  • Fresh Salad: A simple mixed greens salad with vinaigrette pairs beautifully with the wraps.
  • Chips and Salsa: Crunchy tortilla chips with salsa make for a fun side.
  • Fruit Salad: A refreshing fruit salad can balance the savory flavors of the wraps.

Conclusion

And there you have it! Your ultimate guide to making Quick and Flavorful Chicken and Rice Wraps. This recipe is not only easy to follow but also allows for endless customization, making it a great option for any night of the week. Embrace the joy of cooking and share these delicious wraps with your family and friends. Happy cooking!

Easy Chicken and Rice Wraps

Prep Time 15 minutes
Cook Time 20 minutes
Total Time 35 minutes
Servings 4 servings
Calories 650
Delicious and easy chicken and rice wraps perfect for a quick lunch or dinner. Packed with flavorful ingredients and fresh cilantro.

Ingredients

Protein

  • 1.5 pounds chicken tenders
  • 3 tablespoons olive oil (used in parts)
  • 3 cups wild rice (already cooked)
  • 1 cup corn kernels
  • 1.5 cups shredded cheddar cheese

Wraps

  • 5 large flour tortillas
  • 1 tablespoon olive oil
  • Juice from half a lemon lemon juice
  • 2 cloves garlic (minced)
  • 1 tablespoon ground cumin
  • 1 teaspoon salt
  • 1/2 teaspoon ground black pepper
  • Juice from one and a half limes lime juice
  • 1 teaspoon sugar

Herbs & Garnish

  • A small handful fresh cilantro, chopped

Instructions 

  • Cook chicken tenders in olive oil until browned and cooked through.
  • Mix cooked chicken with lime juice, lemon juice, garlic, cumin, salt, pepper, and sugar.
  • Warm the flour tortillas and fill with rice, chicken mixture, cheese, and cilantro.
  • Roll up the wraps tightly and serve.

Notes

For extra flavor, add a dollop of sour cream or salsa.
Calories: 650kcal
Cost: $15
Course: Main Course
Cuisine: American
Keyword: Chicken, Wraps

Introducing the Quick and Wholesome Rotisserie Chicken Bowl

Welcome to your new favorite weeknight meal! This Quick and Wholesome Rotisserie Chicken Bowl is designed for busy nights when you want something delicious yet effortless. With its balance of flavors, fresh ingredients, and customizable options, this bowl provides the perfect solution for satisfying your cravings without the stress. In just a matter of minutes, you can create a meal that not only nourishes your body but also delights your taste buds. Let’s dive into the details of this fantastic recipe!

Why You’ll Love This Recipe

  • Time-Saving: Using pre-cooked rotisserie chicken means you can have this meal ready in under 30 minutes.
  • Customizable: Adjust the ingredients to fit your dietary needs or preferences. Whether you prefer brown rice, quinoa, or even cauliflower rice, the choice is yours!
  • Flavor-Packed: The combination of fresh vegetables, creamy sauce, and savory chicken creates a deliciously satisfying meal.
  • Balanced Nutrition: Packed with protein, fiber, and healthy fats, this bowl will keep you full and energized.
  • Meal Prep Friendly: Perfect for batch cooking! Make several bowls in advance for easy grab-and-go lunches or dinners throughout the week.

Ingredient Breakdown

Here’s what you’ll need to make your Rotisserie Chicken Bowl:

  • 2 cups cooked brown rice: You can substitute with quinoa or cauliflower rice for a low-carb option.
  • 2 cups shredded rotisserie chicken: Skin removed for a healthier choice. You can also use leftover chicken if you have it!
  • 1 cup cherry tomatoes, halved: These add a delightful burst of sweetness and color.
  • 1 cup cucumber, diced: For a refreshing crunch.
  • 1 cup steamed broccoli florets: Rich in vitamins and adds a nice texture.
  • 1 avocado, sliced: Creamy and full of healthy fats.
  • 1/4 cup red onion, thinly sliced: For a touch of sharpness and flavor.
  • 1/4 cup sauce: Choose from tzatziki, hummus, sriracha mayo, or green goddess dressing.
  • 2 tablespoons fresh cilantro or parsley, chopped: For a burst of freshness at the end.
  • 1 tablespoon toasted sesame seeds: Adds a nutty flavor and crunch.
  • Lemon wedges: A squeeze of lemon brightens every bite!

How to Make Your Rotisserie Chicken Bowl

Juicy rotisserie chicken bowl presented with vibrant toppings and sauces.

Follow these simple steps to create your delicious bowl:

  1. Cook grains according to package directions if not already prepared.
  2. Distribute cooked grains evenly in the base of each serving bowl.
  3. Top each bowl with a generous portion of shredded rotisserie chicken.
  4. Artfully arrange tomatoes, cucumber, steamed broccoli, avocado, and red onion around the chicken.
  5. Drizzle with sauce of choice or serve sauces on the side for customization.
  6. Top with fresh herbs, sesame seeds, and a lemon wedge.
  7. Serve immediately while warm.

Expert Pro Tips

  • Perfectly cooked grains: Make sure your rice or quinoa is fluffy and not too sticky. Rinse grains before cooking for the best texture.
  • Chicken options: If you don’t have rotisserie chicken, you can quickly grill or pan-cook chicken breast for a fresh alternative.
  • Vegetable variations: Feel free to swap in any veggies you have on hand, such as bell peppers, carrots, or spinach.
  • Make it spicy: Add jalapeños or a dash of hot sauce for a kick!
  • Dress it up: Experiment with different sauces like a peanut sauce or yogurt dressing for new flavors.
  • Texture matters: Use a mix of crunchy and creamy elements to keep each bite interesting.
  • Batch cooking: Prepare extra chicken and grains for quick assembly on busy nights.
  • Storing leftovers: Keep bowls separate in the fridge to maintain freshness, especially for ingredients like avocado.

Common Mistakes and Troubleshooting

Here are a few tips to avoid common pitfalls:

  • Overcooked veggies: Steam broccoli just until tender to maintain a vibrant color and nutrients.
  • Dry chicken: If your chicken seems dry, try adding more sauce or using the chicken drippings for flavor.
  • Too much sauce: Start with a small amount and add more according to your taste preference to avoid overpowering the other flavors.

Delicious Variations to Try

Switch things up with these fun variations:

  • Southwest Chicken Bowl: Swap in black beans, corn, and a chipotle sauce for a zesty twist.
  • Asian-Inspired Bowl: Use jasmine rice, add edamame, shredded carrots, and drizzle with teriyaki sauce.
  • Mediterranean Bowl: Incorporate feta cheese, kalamata olives, and a drizzle of olive oil with lemon juice.
  • Breakfast Bowl: Top with a fried egg for a breakfast-inspired take on this recipe!

Storage and Make-Ahead Instructions

This meal is great for meal prep! Here’s how to store:

  • Refrigerator: Store individual components in airtight containers for up to 4 days. Assemble bowls when ready to eat.
  • Freezer: You can freeze shredded chicken, cooked grains, and prepped veggies separately for up to 3 months.
  • Reheating: Warm in the microwave or on the stovetop, adding a splash of water or broth to keep everything moist.

Frequently Asked Questions (FAQs)

  • Can I use frozen vegetables? Absolutely! Just steam them before adding to your bowl.
  • Is this recipe gluten-free? Yes, as long as you choose gluten-free grains like rice or quinoa.
  • How can I add more protein? Consider adding beans, nuts, or chickpeas for an extra protein boost.
  • What if I don’t like broccoli? You can substitute with any other sautéed or steamed vegetables you enjoy.
  • Can I make this vegetarian? Yes! Simply omit the chicken and add more beans or tofu.
  • What sauces work best? Any creamy or tangy sauce complements the ingredients well; experiment to find your favorite!
  • Can I make this dish dairy-free? Yes, use dairy-free sauces and avoid cheese.
  • How do I ensure my avocado doesn’t brown? Squeeze lemon juice over the cut avocado to keep it fresh longer.

Nutritional Tips and Dietary Adaptations

This bowl is not just tasty but also nourishing. Here’s how to make it even better for you:

  • High Protein: Use legumes like black beans or chickpeas along with shredded chicken.
  • Low Carb: Opt for cauliflower rice instead of brown rice for a lighter meal.
  • Heart-Healthy: Include a variety of colorful veggies to maximize nutrient intake.
  • Vegan Option: Replace chicken with grilled tofu and use plant-based sauces.

Equipment Recommendations

To make your cooking experience smooth, consider these tools:

  • Rice Cooker: A great way to prepare perfectly cooked rice or quinoa every time.
  • Steamer Basket: Ideal for quickly steaming your veggies while retaining their nutrients.
  • Sharp Knife: Essential for efficiently chopping your fresh ingredients.
  • Mixing Bowls: Perfect for assembling and storing your meal components.

Serving Suggestions

Here are a few ideas on how to serve your Rotisserie Chicken Bowl:

  • Garnish: Add extra herbs or seeds on top for visual appeal and flavor.
  • Family Style: Serve all ingredients in separate bowls and let everyone assemble their own.
  • Pair with a Salad: A fresh green salad on the side complements the bowl perfectly.

In conclusion, the Quick and Wholesome Rotisserie Chicken Bowl is not just a meal; it’s a canvas for your culinary creativity! With its ease of preparation and endless customization options, this dish will quickly become a staple in your kitchen. Whether you’re feeding your family or meal prepping for the week, you can feel confident knowing that you’re serving something nutritious and delicious. Enjoy cooking, and remember that great food is all about experimenting and having fun in the kitchen!

Rotisserie Chicken Bowl

Prep Time 10 minutes
Cook Time 15 minutes
Total Time 25 minutes
Servings 4 servings
Calories 550
A quick and nutritious bowl combining shredded rotisserie chicken, fresh vegetables, and flavorful toppings for a satisfying meal.

Ingredients

Grains

  • 2 cups cooked brown rice

Protein

  • 2 cups shredded rotisserie chicken, skin removed

Vegetables

  • 1 cup cherry tomatoes, halved
  • 1 cup cucumber, diced
  • 1 cup steamed broccoli florets

Fruits & Toppings

  • 1 item avocado, sliced
  • 0.25 cup red onion, thinly sliced
  • 0.25 cup tzatziki sauce or hummus or sriracha mayo or green goddess dressing
  • 2 tablespoons fresh cilantro or parsley, chopped
  • 1 tablespoon toasted sesame seeds
  • 1 item lemon wedges

Instructions 

  • Cook grains according to package directions.
  • Distribute cooked grains in bowls and top with shredded chicken.
  • Add vegetables and sliced avocado around the chicken.
  • Drizzle with sauce or serve on the side.
  • Garnish with herbs, sesame seeds, and lemon wedges. Serve immediately.

Notes

Feel free to customize toppings and sauces for variety.
Calories: 550kcal
Cost: $15
Course: Main Course
Cuisine: American
Keyword: bowl, Chicken, Healthy

Welcome to your new favorite weeknight comfort food! This creamy tomato soup recipe is not only delicious but also incredibly simple to make. With just a handful of ingredients, you can whip up a batch in about 30 minutes that will warm your heart and fill your belly. Whether you’re enjoying it with a crispy grilled cheese sandwich or on its own, this soup is sure to become a staple in your kitchen.

In this article, we’ll cover everything from the ingredients to expert tips, common mistakes, and variations to keep things exciting. Let’s dive in!

Why You’ll Love This Recipe

  • Quick and Easy: You can make this soup in under 30 minutes, making it perfect for busy weeknights.
  • Comforting Flavor: The combination of tomatoes, cream, and herbs creates a rich and cozy flavor that’s hard to resist.
  • Versatile: This recipe is easily customizable with different herbs and spices, allowing you to make it your own.
  • Healthy Ingredients: Packed with nutrients from tomatoes and optional fresh herbs, this soup is a wholesome meal choice.
  • Perfect Pairing: This creamy tomato soup pairs wonderfully with grilled cheese sandwiches, crusty bread, or a fresh salad.

Key Ingredients for Creamy Tomato Soup

Let’s break down the essential ingredients you’ll need to create this delightful dish:

  • 1 28-ounce can canned tomatoes: Choose crushed, whole, or diced tomatoes; whole tomatoes give the best texture if you like to break them up by hand.
  • 1 medium onion, diced: Yellow or sweet onions work well for a balanced sweetness.
  • 2-4 cloves garlic, minced: Adjust the amount based on your preference for garlic flavor.
  • 2 cups chicken or vegetable broth: Low-sodium broth is recommended to control the saltiness of the soup.
  • 1/2 cup heavy cream or coconut milk: Heavy cream provides a rich flavor, while coconut milk adds a subtle coconut note.
  • 2 tablespoons olive oil: For sautéing the onion and garlic to enhance their flavors.
  • Salt and freshly ground black pepper: Essential for seasoning to taste.
  • Fresh or dried basil, thyme, or parsley: Use these for finishing touches to elevate the flavor.

How to Prepare It

Follow these simple steps to create your creamy tomato soup:

  • Step 1: In a large pot, heat the olive oil over medium heat. Add the diced onion and sauté until translucent, about 5 minutes.
  • Step 2: Stir in the minced garlic and cook for an additional 1-2 minutes until fragrant.
  • Step 3: Pour in the canned tomatoes (with their juices) and the broth. Bring the mixture to a boil, then reduce the heat and let it simmer for about 10-15 minutes.
  • Step 4: Once the soup has simmered, use an immersion blender to puree the soup until smooth. Alternatively, you can carefully transfer it to a blender in batches.
  • Step 5: Stir in the cream (or coconut milk) and season with salt and pepper to taste. Heat through for a few more minutes.
  • Step 6: Serve hot, garnished with fresh herbs if desired.

Pro Tips for the Perfect Creamy Tomato Soup

Close-up of a rich, creamy tomato soup, highlighting its vibrant red color.
  • Use Quality Tomatoes: Opt for a good brand of canned tomatoes; San Marzano tomatoes are often considered the best for their flavor.
  • Adjust the Consistency: If the soup is too thick for your liking, add more broth or water until you reach your desired consistency.
  • Fresh Herbs: Adding fresh herbs right at the end enhances the flavor significantly; consider using basil or parsley.
  • Blend Well: For an ultra-smooth texture, make sure to blend the soup thoroughly. An immersion blender is ideal for this.
  • Flavor Boost: A splash of balsamic vinegar or a pinch of red pepper flakes can bring a new dimension to the flavor profile.
  • Make It Vegan: Substitute heavy cream with coconut milk or cashew cream for a dairy-free version.
  • Freezing Tip: This soup freezes well, so consider making a double batch to have on hand for busy days.
  • Storage: Store leftover soup in an airtight container in the refrigerator for up to 5 days.

Common Mistakes and Troubleshooting

Here are some common pitfalls to avoid when making creamy tomato soup:

  • Burning the Onions: Make sure to sauté the onions over medium heat; too high can burn them, resulting in a bitter flavor.
  • Overblending: If you overblend the soup, you may lose some texture; blend just until smooth.
  • Too Much Acid: If the soup tastes too acidic, balance it out with a pinch of sugar or a splash of cream.
  • Missing Flavor: If the soup lacks flavor, ensure you season it well with salt, pepper, and herbs.

Variations to Try

Get creative with your creamy tomato soup! Here are some delicious variations:

  • Spicy Tomato Soup: Add red pepper flakes or diced jalapeños for a kick.
  • Herbed Tomato Soup: Incorporate fresh herbs like thyme, rosemary, or dill for an aromatic twist.
  • Roasted Tomato Soup: Roast fresh tomatoes and garlic before blending for a deep, caramelized flavor.
  • Cheesy Tomato Soup: Stir in shredded cheese while the soup is hot for a creamy, cheesy texture.

Storage and Make-Ahead Instructions

This soup is perfect for meal prep! Here’s how to store and reheat your creamy tomato soup:

  • Refrigeration: Store in airtight containers in the fridge for up to 5 days.
  • Freezing: Allow the soup to cool completely before transferring it to freezer-safe containers. It can be frozen for up to 3 months.
  • Reheating: Reheat on the stovetop over low heat, stirring occasionally. If the soup thickens, add a splash of broth or water to adjust the consistency.

Frequently Asked Questions

Here are some common questions about creamy tomato soup:

  • Can I use fresh tomatoes instead of canned? Yes, you can use fresh tomatoes, but you may need to adjust the cooking time.
  • Can I freeze creamy tomato soup? Absolutely! Let it cool, then freeze in containers for easy future meals.
  • Does homemade cream of tomato soup curdle? If you add cream too quickly or to boiling soup, it can curdle. Always lower the heat before adding.
  • What can I serve with tomato soup? Grilled cheese sandwiches, croutons, or a fresh garden salad are perfect companions.
  • How do I thicken tomato soup? You can thicken it by adding a cornstarch slurry or by simmering it longer to reduce liquid.
  • Can I make this soup dairy-free? Yes, substitute heavy cream with coconut milk or a dairy-free cream alternative.
  • What is the best way to store leftovers? Store leftovers in an airtight container in the fridge for up to 5 days.
  • Can I make this soup in advance? Yes! It’s great for meal prep and can be stored in the fridge or freezer.

Nutrition Tips and Dietary Adaptations

This creamy tomato soup can be a healthy addition to your meal rotation. Here are some nutrition tips:

  • Low-Calorie Option: Use low-fat cream or skip the cream altogether for a lighter soup.
  • Boost Fiber: Add cooked lentils or beans for added protein and fiber.
  • Gluten-Free: This recipe is naturally gluten-free; simply ensure all your ingredients are gluten-free.

Equipment Recommendations

Here’s what you’ll need to make this creamy tomato soup:

  • Large Pot: For sautéing and simmering the soup.
  • Immersion Blender: Perfect for blending the soup directly in the pot.
  • Measuring Cups and Spoons: Essential for accurate ingredient measurements.
  • Cutting Board and Knives: For chopping your vegetables.

Serving Suggestions

When it comes to enjoying your creamy tomato soup, here are some delightful ways to serve it:

  • With Grilled Cheese: The classic pairing! Try different cheeses for a unique twist.
  • Croutons: Homemade or store-bought croutons add a nice crunch.
  • Fresh Herbs: Garnish with fresh basil or parsley for an extra pop of flavor.
  • Drizzle of Olive Oil: A drizzle of high-quality olive oil adds richness.

Now that you have everything you need to make the ultimate creamy tomato soup, it’s time to get cooking! Remember, cooking is all about enjoying the process—so relax, have fun, and savor every spoonful of your homemade creation. Thank you for joining me on this culinary journey, and I hope this soup brings warmth and joy to your table!

Creamy Tomato Soup

Prep Time 10 minutes
Cook Time 20 minutes
Total Time 30 minutes
Servings 4 servings
Calories 220
A rich and comforting tomato soup with a creamy finish, perfect for a cozy meal.

Ingredients

Canned Tomatoes

  • 1 can 28-ounce canned tomatoes (crushed, whole, or diced) (Whole tomatoes give the best texture if you like to break them up by hand.)

Onion

  • 1 medium medium onion, diced (Yellow or sweet onions work well.)

Garlic

  • 2-4 cloves garlic, minced (Adjust to taste.)

Broth

  • 2 cups chicken or vegetable broth (Use low-sodium broth if preferred.)

Heavy Cream or Coconut Milk

  • 0.5 cup heavy cream or coconut milk (Coconut milk adds a subtle coconut note.)

Olive Oil

  • 2 tablespoons olive oil (For sautéing.)

Salt and Pepper

  • to taste Salt and freshly ground black pepper

Herbs for finishing

  • optional Fresh or dried basil, thyme, or parsley (For finishing.)

Instructions 

  • Heat olive oil in a large pot over medium heat and sauté diced onion until translucent, about 5 minutes.
  • Add minced garlic and cook for another minute.
  • Pour in the canned tomatoes and broth, bring to a boil, then reduce heat and simmer for 15 minutes.
  • Use an immersion blender to puree the soup until smooth, then stir in heavy cream or coconut milk.
  • Season with salt and pepper, garnish with herbs if desired, and serve hot.

Notes

For a richer flavor, roast the tomatoes before adding them to the soup.
Calories: 220kcal
Cost: $12
Course: Soup
Cuisine: American
Keyword: comfort food, cream, Tomato