Author

Steven

Browsing

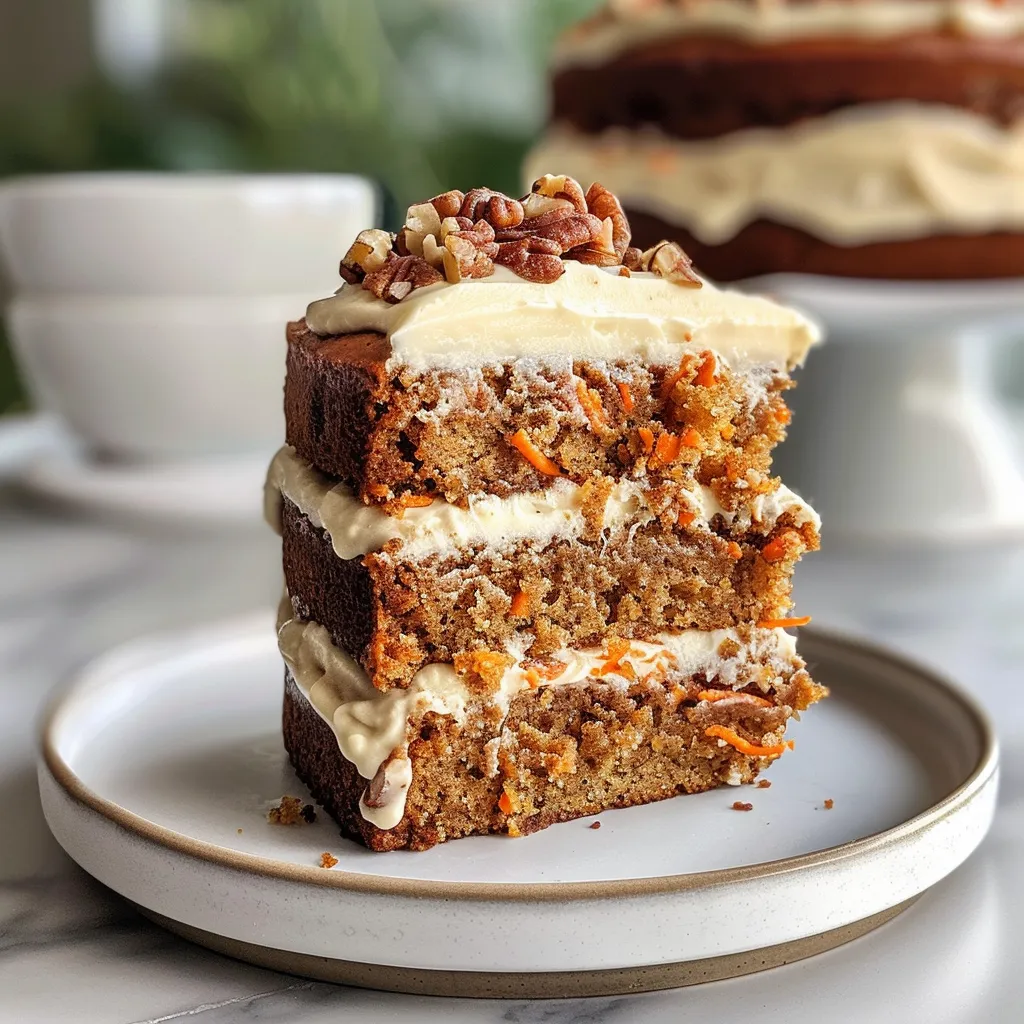
Why You’ll Fall in Love with Mini Carrot Cakes

Are you ready to delight your taste buds and impress your friends with a dessert that’s as charming as it is delicious? This Mini Carrot Cake recipe, topped with a luscious Brown Butter Cream Cheese Frosting, is perfect for any occasion. Whether you’re celebrating a birthday, hosting a tea party, or simply indulging in a mid-week treat, these mini carrot cakes will bring smiles to faces and joy to hearts. Not only are they adorable, but they also pack a punch of flavor and texture that will have you coming back for more.

In this guide, I’ll walk you through every step, ensuring you feel confident and excited to whip up these delightful mini cakes in your own kitchen. Let’s dive into why this recipe is a must-try!

  • Perfectly Portion-Controlled: Each mini carrot cake is perfectly sized for a personal treat, making them ideal for parties or a sweet snack.
  • Easy to Make: Even beginner bakers can master this recipe with its straightforward instructions and simple ingredients.
  • Flavorful and Moist: The combination of freshly grated carrots, warm spices, and creamy frosting creates a flavor explosion with every bite.
  • Versatile for Any Occasion: These cute cakes are perfect for Easter, birthdays, or just a cozy night in.
  • Make-Ahead Friendly: You can bake and freeze these cakes ahead of time, making dessert planning a breeze!

Ingredients You’ll Need

Before we get started, let’s take a closer look at the ingredients required for this delightful recipe. You’ll find that most of these items are pantry staples, making it easy to whip them up whenever the craving strikes.

  • All-Purpose Flour: 2 cups (250g) – This forms the base of our cake.
  • Baking Powder & Baking Soda: 1 tsp (5g) and 1/2 tsp (2.5g) – These leavening agents ensure our cakes rise beautifully.
  • Ground Cinnamon: 1 tsp (5g) – Adds warm, aromatic spice to the batter.
  • Ground Nutmeg: 1/2 tsp (2.5g) – Provides a subtle earthiness that complements the carrots.
  • Salt: 1/2 tsp (2.5g) – Balances the sweetness of the cake.
  • Granulated Sugar: 1 cup (200g) – Sweetens our cakes perfectly.
  • Brown Sugar: 1/2 cup (100g) – Enhances the moisture and flavor with its rich, caramel notes.
  • Vegetable Oil: 1/2 cup (120ml) – Keeps the cake moist and tender.
  • Eggs: 2 large – Binds the ingredients together.
  • Vanilla Extract: 1 tsp (5ml) – Adds depth to the flavor profile.
  • Grated Carrots: 2 cups (200g), lightly packed – The star of our cake, adding natural sweetness and moisture.
  • Chopped Nuts: 1/2 cup (50g) (optional) – Walnuts or pecans for added crunch.
  • Unsalted Butter: 1/2 cup (115g) – Used in the frosting, adds richness.
  • Cream Cheese: 8 oz (225g), softened – Our frosting base, creamy and delicious.
  • Powdered Sugar: 3 1/4 cups (400g) – Sweetens and thickens our frosting.
  • Milk or Cream: 1–2 tbsp (15–30ml) as needed – Adjusts the frosting consistency.

Step-by-Step Instructions

Now that we have our ingredients ready, let’s get baking! Follow these simple steps to create your mini carrot cakes:

  1. Preheat your oven: Set it to 350°F (175°C). Grease or line a 12-cup muffin tin.
  2. Prepare the dry ingredients: In a bowl, whisk together the flour, baking powder, baking soda, cinnamon, nutmeg, and salt.
  3. Mix the wet ingredients: In another bowl, combine the granulated sugar, brown sugar, vegetable oil, eggs, and vanilla extract. Beat until smooth.
  4. Combine the mixtures: Gradually add the dry ingredients to the wet ingredients, mixing until just combined. Fold in the grated carrots and nuts, if using.
  5. Fill the muffin tin: Spoon the batter into each muffin cup, filling them about 2/3 full.
  6. Bake: Place in the oven and bake for 20–25 minutes or until a toothpick inserted comes out clean.
  7. Cool: Let the cakes cool in the tin for a few minutes before transferring them to a wire rack.
  8. Prepare the frosting: In a saucepan, melt the butter over medium heat. Cook until it turns golden brown and develops a nutty aroma (about 5–7 minutes). Allow it to cool slightly.
  9. Make the frosting: Beat the softened cream cheese until smooth. Gradually add the powdered sugar, followed by the browned butter and vanilla. Beat until fluffy and adjust with milk or cream as necessary.
  10. Frost the cakes: Once the mini cakes are completely cooled, frost them generously with the cream cheese frosting. Garnish with chopped nuts or a sprinkle of cinnamon, if desired.

Expert Tips for Baking Success

Detailed view of a mini carrot cake, showcasing its layers and creamy frosting.

To ensure your mini carrot cakes turn out perfectly every time, keep these tips in mind:

  • Don’t overmix: Mix the batter until just combined to maintain a light and fluffy texture.
  • Choose fresh carrots: Freshly grated carrots will provide the best flavor and moisture.
  • Experiment with spices: Feel free to add a pinch of ginger or cloves for an extra flavor kick.
  • Check doneness: Always test with a toothpick; it should come out clean when the cakes are done.
  • Brown butter carefully: Watch the butter closely; it can go from browned to burnt quickly.
  • Chill the frosting: If it’s too soft, refrigerate for 10-15 minutes to firm it up before frosting.
  • Use a piping bag: For a decorative touch, use a piping bag to frost your cakes.
  • Let it cool: Make sure the cakes are completely cool before frosting to prevent melting.

Common Mistakes to Avoid

Here are some common pitfalls to watch out for when making your mini carrot cakes:

  • Overmixing the batter: This can lead to dense cakes; mix just until ingredients are combined.
  • Using pre-grated carrots: They often lack moisture and flavor; fresh is best!
  • Baking too long: Keep an eye on your cakes; they can dry out if overbaked.
  • Skipping the cooling step: Frosting warm cakes can lead to a gooey mess.

Delicious Variations to Try

Feeling adventurous? Here are some delicious twists on the classic mini carrot cake:

  • Pineapple Surprise: Add 1/2 cup of crushed pineapple to the batter for a tropical twist.
  • Spiced Up: Incorporate 1 tsp of ground ginger for an extra spice kick.
  • Nutty Delight: Use a mix of walnuts and pecans for added texture and flavor.
  • Chocolate Drizzle: Drizzle melted chocolate over the top for a decadent finish.

Storage Instructions

These mini carrot cakes can be stored easily and are perfect for make-ahead baking:

  • At Room Temperature: Store in an airtight container for up to 3 days.
  • In the Refrigerator: They can last for up to a week; just make sure to keep them covered.
  • Freezer Storage: Freeze unfrosted cakes in an airtight container for up to 3 months. Thaw before frosting.

Frequently Asked Questions

Here are some common questions about making mini carrot cakes:

  • Can I use whole wheat flour? Yes, but it may change the texture slightly; consider a mix of both flours for best results.
  • What if I don’t have brown sugar? You can substitute with white sugar, but the taste will be less rich.
  • Can I replace the eggs? Yes, you can use flax eggs or applesauce as substitutes.
  • How do I make this gluten-free? Use a 1:1 gluten-free baking flour blend.
  • What’s the best way to grate carrots? A box grater or food processor works best for quick and even grating.
  • Can I make this as a full-sized cake? Absolutely! Just bake in a 9-inch round cake pan and adjust the baking time.
  • How can I make the frosting less sweet? Reduce the powdered sugar or add a touch more cream cheese.
  • Are these cakes suitable for kids? Yes, they’re a wholesome treat that kids will love!

Nutritional Value and Dietary Adaptations

These mini carrot cakes not only taste delicious but can also fit into various dietary needs:

  • Lower Sugar: Replace sugars with a sugar substitute suitable for baking.
  • Dairy-Free Option: Use a dairy-free cream cheese alternative and coconut oil for the frosting.
  • Vegan Adaptation: Substitute eggs with flax eggs and use plant-based milk.
  • Nut-Free Option: Simply omit the nuts from the recipe without sacrificing flavor.

Equipment Recommendations

To make your baking experience smoother, here’s a list of recommended tools:

  • 12-Cup Muffin Tin: Essential for baking the mini cakes.
  • Mixing Bowls: Use a set of various sizes for easy mixing.
  • Whisk: A good whisk is crucial for combining dry and wet ingredients effectively.
  • Spatula: Great for folding in the carrots and nuts.
  • Cooling Rack: Helps cakes cool evenly.
  • Hand Mixer: For quick and easy frosting preparation.

Serving Suggestions

To elevate your mini carrot cakes, consider these serving ideas:

  • Decorative Touch: Top each cake with a candied carrot or a sprinkle of coconut for an extra flair.
  • Pair with Tea: Serve alongside a cup of herbal tea for a delightful afternoon treat.
  • Ice Cream Side: A scoop of vanilla ice cream pairs beautifully with the warm spices.
  • Festive Platter: Arrange mini cakes on a cake stand for a stunning dessert presentation.

In conclusion, these delightful mini carrot cakes are sure to be a hit in your kitchen. With their rich flavors, charming presentation, and versatile nature, they make for the perfect dessert for any occasion. So gather your ingredients and get ready to bake a sweet treat that’s sure to bring joy to every bite!

Mini Carrot Cake with Brown Butter Cream Cheese Frosting

Prep Time 15 minutes
Cook Time 20 minutes
Total Time 35 minutes
Servings 12 muffins
Calories 250
A delightful mini carrot cake topped with rich brown butter cream cheese frosting, perfect for a cozy treat or special occasion.

Ingredients

Dry Ingredients

  • 2 cups all-purpose flour
  • 1 tsp baking powder
  • 1/2 tsp baking soda
  • 1 tsp ground cinnamon
  • 1/2 tsp ground nutmeg
  • 1/2 tsp salt

Wet Ingredients

  • 1 cup granulated sugar
  • 1/2 cup packed brown sugar
  • 1/2 cup vegetable oil
  • 2 large eggs
  • 1 tsp vanilla extract

Carrots and Nuts

  • 2 cups grated carrots (lightly packed)
  • 1/2 cup chopped nuts (walnuts or pecans) (optional)

Frosting

  • 8 oz unsalted butter
  • 225 g cream cheese, softened
  • 3 1/4 cups powdered sugar
  • 1 tsp vanilla extract
  • 1–2 tbsp milk or cream (as needed)

Instructions 

  • Preheat oven to 350°F (175°C). Grease or line a muffin tin. Mix dry ingredients. Beat sugars, oil, eggs, vanilla; combine with dry. Fold in carrots and nuts. Fill muffin cups and bake 20–25 minutes. Cool.
  • Make browned butter: melt butter until golden and nutty. Cool slightly. Beat cream cheese, add powdered sugar, browned butter, vanilla. Adjust with milk if needed.
  • Once cooled, frost muffins generously. Garnish as desired.

Notes

Ensure the cakes are completely cooled before frosting to prevent melting.
Calories: 250kcal
Cost: $15
Course: Dessert
Keyword: cake, carrot, frosting

Elevate Your Mornings with Egg and Cheese Toasts

There’s something magical about a simple breakfast that can transform your day. Egg and cheese toasts are not just a quick meal; they are an exciting way to start your morning with flavor and creativity. In just a few minutes, you can whip up a delicious breakfast that satisfies your cravings while keeping your cooking stress-free. This recipe is perfect for busy mornings, lazy weekends, or whenever you need a delightful pick-me-up. Join me as we dive into the world of egg and cheese toasts, a breakfast staple that combines simplicity with endless possibilities!

Why You’ll Love This Recipe

  • Quick and Easy: Ready in just 15 minutes, this recipe fits perfectly into your busy schedule, making it a go-to choice for any morning.
  • Customizable: Use your favorite bread and cheese combinations for a unique twist each time. Whether you prefer sourdough or whole grain, the choice is yours!
  • Flavor Packed: Fresh herbs and a blend of cheeses create a deliciously savory experience that awakens your taste buds.
  • Healthy Option: With easy substitutions, you can tailor the recipe to meet your dietary preferences, whether you’re vegan, gluten-free, or just watching your calories.
  • Kid-Friendly: This recipe is fun to make and even more fun to eat, making it a hit with the little ones. Encourage them to customize their toasts with toppings they love!

Ingredients You’ll Need

To create your perfect egg and cheese toast, gather the following ingredients:

  • 2 slices of bread: Choose from white, whole grain, or sourdough based on your preference.
  • 1 large egg: Fresh eggs are best for a fluffy texture.
  • ½ cup grated cheese: Cheddar, Gruyere, or your favorite cheese will work nicely.
  • 1 tsp finely chopped fresh herbs: Thyme or rosemary add a lovely aromatic touch.
  • Salt and black pepper to taste: Essential for enhancing flavors.
  • Pinch of cayenne (optional): Adds a hint of spice for those who enjoy a kick!

How to Make Egg and Cheese Toasts

Close-up image of breakfast toasts featuring a fried egg and melted cheese, with herbs adding a pop of color.

This recipe offers two convenient methods: baking in the oven or using an air fryer. Both methods yield delightful results!

Oven Method

  1. Preheat your oven to 400°F.
  2. Lightly toast the bread in a toaster or broiler until golden brown.
  3. In a mixing bowl, lightly beat the egg and mix in the grated cheese, herbs, salt, pepper, and optional cayenne.
  4. Spread the egg mixture evenly over each slice of toast.
  5. Place on a baking sheet and bake for 10–12 minutes until golden brown and puffed.

Air Fryer Method

  1. Preheat your air fryer to 370°F.
  2. Lightly toast the bread if desired, but it’s optional.
  3. Prepare the egg mixture as described above.
  4. Spread the mixture over the bread slices.
  5. Place the toasts in the air fryer basket and cook for 5–7 minutes until bubbly and cooked through.

Pro Tips for Perfect Toasts

  • Choose the right bread: Sturdy breads like sourdough or whole grain hold up better under the egg mixture.
  • Experiment with cheeses: Try a mix of cheeses like mozzarella for creaminess and parmesan for a punch of flavor!
  • Don’t skip the herbs: Fresh herbs enhance the overall flavor and add a vibrant touch.
  • Keep an eye on cooking time: Ovens and air fryers can vary, so check your toasts a minute or two before the suggested time.
  • Let it cool slightly: Allowing the toasts to cool for a minute helps set the egg mixture.
  • Use leftovers wisely: If you have veggies or meats, add them into the egg mixture for a heartier breakfast.
  • Make it sweet: Swap out cheese for sweet toppings like ricotta and honey for a dessert twist!
  • Consider serving options: Serve with a side of fresh fruit or a light salad for a balanced meal.

Common Mistakes and Troubleshooting

  • Overcooking: Keep an eye on your toasts in the oven or air fryer to avoid drying them out.
  • Too much liquid: If the egg mixture is too runny, add a bit more cheese to help it set better on the toast.
  • Skipping the toasting step: Lightly toasting the bread first helps prevent sogginess.
  • Not seasoning: A pinch of salt and pepper can elevate the flavors significantly—don’t skip it!

Delicious Variations to Try

  • Faux-Monsieur: Add a layer of savory Dijon and Gruyere cheese for a French-inspired delight.
  • Italian Tomato Toast: Top with sliced tomatoes, fresh basil, and mozzarella for a Caprese twist.
  • Honey Apple Walnut: Spread with ricotta, add thin apple slices, walnuts, and a drizzle of honey for a sweet crunch.
  • Spicy Avocado Toast: Mash avocado on the toast and top with the egg mixture for a creamy, spicy kick.

Storage and Make-Ahead Instructions

If you want to prepare these toasts ahead of time, consider making the egg mixture the night before. Store it in the refrigerator, tightly covered. In the morning, simply spread it on your bread and cook as instructed!

Leftover toasts can be stored in an airtight container in the refrigerator for up to two days. Reheat them in the oven or air fryer for the best results.

Frequently Asked Questions

  • Can I use a different type of cheese? Absolutely! Feel free to experiment with your favorites.
  • Is this recipe good for meal prep? Yes, you can prepare the egg mixture in advance and assemble the toasts in the morning.
  • Can I make these without eggs? Yes, try using a mixture of silken tofu or chickpea flour for a vegan option.
  • How do I prevent my toast from getting soggy? Lightly toasting the bread first helps maintain its structure.
  • What can I serve with egg and cheese toasts? Fresh fruits, salads, or a side of yogurt work well!
  • How can I spice this up? Add hot sauce or spices like paprika or chili flakes for an extra kick.
  • Can I freeze these? It’s best to freeze the egg mixture separately, as the cooked toast might not reheat well.
  • What’s the best way to reheat leftovers? Reheat in the oven or air fryer for best texture; microwaving can make them soggy.

Nutritional Tips and Dietary Adaptations

These egg and cheese toasts can fit into various dietary needs:

  • Gluten-Free: Use gluten-free bread to enjoy this recipe without worry.
  • Low-Carb: Replace the bread with slices of avocado or zucchini for a keto-friendly option.
  • Vegan: Substitute the egg with a flaxseed mixture or a chickpea flour batter.
  • Low-Calorie: Opt for low-fat cheese and skip the butter for a lighter toast.

Equipment Recommendations

You’ll need the following for making these delicious toasts:

  • Toaster or Broiler: For lightly toasting your bread.
  • Baking Sheet: For the oven method.
  • Air Fryer: For a quicker and crispier option.
  • Mixing Bowl: To prepare your egg mixture.
  • Spatula: For spreading the mixture evenly over the bread.

Serving Suggestions

Serve your egg and cheese toasts hot out of the oven or air fryer. Pair them with:

  • A light salad: A simple side salad can complement the richness of the toasts.
  • Fresh fruit: Seasonal fruits add a refreshing touch.
  • A hot beverage: Coffee or tea are perfect companions for this breakfast treat.

Embrace the joy of cooking with these egg and cheese toasts, a breakfast option that’s not just easy but also incredibly satisfying. Whether you opt for the oven or air fryer, you can create a delightful start to your day with minimal effort. Ready to elevate your mornings? Let’s get cooking!

Egg and Cheese Toasts – The Simple Breakfast I Always Come Back To

Prep Time 5 minutes
Cook Time 12 minutes
Total Time 17 minutes
Servings 2 servings
Calories 250
A quick and satisfying breakfast featuring toasted bread topped with a cheesy egg mixture, perfect for any morning.

Ingredients

Bread

  • 2 slices bread (white, whole grain, or sourdough)

Egg

  • 1 large large egg

Cheese

  • 0.5 cup grated cheese (cheddar, gruyere, or your choice)

Herbs

  • 1 tsp finely chopped fresh herbs (thyme or rosemary)

Salt and Pepper

  • to taste Salt and black pepper

Cayenne

  • pinch Pinch of cayenne (optional)

Instructions 

  • Preheat oven to 400°F or air fryer to 370°F.
  • Toast bread until golden brown.
  • Beat egg, mix in cheese, herbs, salt, pepper, and cayenne.
  • Spread mixture over toast slices.
  • Bake for 10–12 minutes or air fry for 5–7 minutes until bubbly.

Notes

Use your favorite cheese and herbs for variety.
Calories: 250kcal
Cost: $5
Course: Breakfast
Keyword: Cheese, Egg, Toast

Elevate Your Mealtime with This Vibrant Chicken Quinoa Salad

Welcome to your new favorite recipe! This Chicken Quinoa Salad is not just a dish; it’s a celebration of fresh flavors and wholesome ingredients. Perfect for busy weeknights or meal prep, this salad is designed to brighten your dinner table while providing a nutritious boost. With protein-packed quinoa and juicy chicken, combined with a medley of crisp veggies, you’ll discover how easy it is to create a meal that’s as satisfying as it is delicious. Let’s dive into why you’ll love this recipe!

Why You’ll Love This Recipe

  • Quick to Prepare: This salad comes together in just 30 minutes, making it an ideal choice for those hectic evenings.
  • Meal Prep Friendly: Perfect for making ahead, this salad lasts in the fridge for up to five days, maintaining its freshness and flavor.
  • Customizable Ingredients: Feel free to swap in your favorite veggies or proteins—this salad is incredibly versatile!
  • Nutrient-Dense: Packed with protein from chicken and quinoa, plus vitamins from fresh vegetables, it’s a wholesome choice for lunch or dinner.
  • Delicious Versatility: Serve it as a main dish or a side, and watch it disappear at gatherings!

Ingredient Breakdown

Let’s take a closer look at the ingredients that make this salad shine:

For the Salad

  • 2 cups cooked quinoa (cooled): Quinoa is a superfood packed with protein and fiber. Make sure to rinse it before cooking to remove bitterness.
  • 2 cups cooked chicken breast (chopped): Grilled, baked, or rotisserie chicken works great. You can even use leftovers!
  • 1 cup cherry tomatoes (halved): These sweet, juicy gems add color and flavor.
  • 1 large cucumber (diced): Provides a refreshing crunch to the salad.
  • 1/4 cup red onion (finely chopped): Adds a zesty kick—feel free to adjust based on your taste!

For the Dressing

  • 3 tbsp extra-virgin olive oil: A healthy fat that helps to blend flavors.
  • 2 tbsp fresh lemon juice: Brightens the salad and adds a tangy flavor.
  • 1 clove garlic (minced or grated): Infuses the dressing with depth.
  • 1/2 tsp dried oregano or Italian seasoning: Enhances the flavor with aromatic notes.
  • Salt and black pepper (to taste): Essential for seasoning!

Optional Add-Ins

  • Fresh parsley or basil (chopped): Adds freshness and a pop of color.
  • Avocado slices: Creamy texture that complements the crunch.
  • Feta cheese: A tangy addition that elevates the flavor profile.

Step-by-Step Cooking Instructions

A close-up shot of a Chicken Quinoa Salad served in a bowl, showcasing its bright ingredients.

Follow these simple steps to whip up your Chicken Quinoa Salad:

  1. Rinse quinoa under cold water using a fine mesh strainer.
  2. Cook quinoa according to package instructions. Fluff with a fork and let cool completely.
  3. If needed, cook chicken and chop it into bite-sized pieces.
  4. In a large mixing bowl, combine the quinoa and chicken.
  5. Add cherry tomatoes, cucumber, and red onion to the bowl.
  6. In a separate small bowl, whisk together olive oil, lemon juice, garlic, oregano, salt, and pepper.
  7. Pour the dressing over the salad and toss gently until evenly combined.
  8. Let rest for 10–15 minutes before serving to allow flavors to meld. Adjust seasoning as needed.

Pro Tips for Perfect Results

  • Rinse Your Quinoa: Rinsing helps remove excess starch and bitterness.
  • Use Leftover Chicken: Save time by using rotisserie chicken or leftovers from your last meal.
  • Let It Chill: For the best flavor, let the salad sit in the fridge for at least 30 minutes before serving.
  • Adjust Seasoning: Taste and adjust your dressing to suit your palate.
  • Store Separately: If preparing ahead, keep dressing separate until serving to maintain freshness.
  • Mix and Match: Feel free to add other veggies like bell peppers or corn!
  • Don’t Overcook Quinoa: Follow package instructions carefully to avoid mushy quinoa.
  • Use Fresh Herbs: Fresh herbs can greatly enhance flavor; try dill or cilantro for a different twist!

Common Mistakes and Troubleshooting

Here are some common pitfalls and how to avoid them:

  • Overcooked Quinoa: This can lead to a mushy texture. Ensure you follow cooking times and check for the little “tail” to know when it’s done.
  • Too Much Dressing: Start with a little and add more as needed. You can always add more, but taking it out is tricky!
  • Skipping the Resting Time: Letting the salad rest allows flavors to meld, enhancing the overall taste.
  • Neglecting Seasoning: Always taste and adjust with salt and pepper to elevate flavors.

Variations to Try

Feel free to get creative with these variations:

  • Mediterranean Twist: Add olives, sun-dried tomatoes, and feta for a Mediterranean flair.
  • Southwest Style: Incorporate black beans, corn, and cilantro with a lime vinaigrette.
  • Asian-Inspired: Use sesame oil, soy sauce, and add edamame and shredded carrots.
  • Fruit-Infused: Toss in diced apples or mandarin oranges for a sweet contrast.

Storage and Make-Ahead Instructions

This salad is perfect for meal prep:

  • Refrigeration: Store in an airtight container for up to five days.
  • Freezing: While not recommended due to texture changes, the dressing can be frozen separately for up to a month.
  • Make Ahead: Prepare the salad components a day in advance and mix just before serving for optimal freshness.

Frequently Asked Questions

Here are some common questions you might have:

  • Can I use quinoa flour instead of cooked quinoa? No, quinoa flour is not a substitute for cooked quinoa.
  • How can I make this salad vegan? Substitute chicken with chickpeas or tofu and use agave nectar in the dressing.
  • What can I serve with this salad? It pairs wonderfully with grilled vegetables or a hearty soup.
  • Can I add nuts or seeds? Absolutely! Almonds or sunflower seeds add a nice crunch.
  • Is this salad gluten-free? Yes, quinoa is gluten-free, making this salad suitable for gluten-sensitive diets.
  • How do I know if the chicken is cooked through? Use a meat thermometer; chicken should reach an internal temperature of 165°F (75°C).
  • Can I use frozen vegetables? While fresh is best, frozen veggies work well if thawed and drained properly.
  • What’s the best way to reheat leftovers? If you prefer warm, reheat gently in the microwave, but it’s just as tasty cold!

Nutritional Benefits and Dietary Adaptations

This Chicken Quinoa Salad is not just delicious; it’s packed with health benefits:

  • High in Protein: With chicken and quinoa, it’s an excellent source of protein for muscle repair and growth.
  • Rich in Fiber: Quinoa and veggies provide dietary fiber, supporting digestive health.
  • Vitamins and Minerals: Each ingredient brings a wealth of vitamins—like vitamin C from tomatoes and vitamin K from cucumbers.
  • Heart-Healthy Fats: Olive oil offers monounsaturated fats that are good for heart health.

Equipment Recommendations

To make this salad, you’ll need:

  • Fine Mesh Strainer: For rinsing quinoa effectively.
  • Large Mixing Bowl: To combine all ingredients comfortably.
  • Small Bowl: For whisking the dressing.
  • Measuring Cups and Spoons: For accuracy in ingredient amounts.
  • Chef’s Knife: For chopping veggies and chicken.

Serving Suggestions

Enjoy this Chicken Quinoa Salad on its own, or serve it alongside:

  • Grilled Shrimp: A protein-packed addition that complements the salad.
  • Roasted Vegetables: Enhance your meal with a side of seasonal roasted veggies.
  • Garlic Bread: Perfect for dipping into any leftover dressing!
  • Fruit Salad: A refreshing side to balance the savory flavors of the salad.

In conclusion, this Chicken Quinoa Salad is an all-around winner! With its vibrant flavors and nutritional benefits, it’s a dish that suits any occasion—from busy weeknights to leisurely weekend lunches. So gather your ingredients, and let’s get cooking! Remember, cooking should be enjoyable and rewarding, and with this recipe, you’ll be well on your way to creating something truly delicious. Happy cooking!

Chicken Quinoa Salad

Prep Time 15 minutes
Cook Time 20 minutes
Total Time 35 minutes
Servings 4 servings
Calories 350
A fresh and hearty salad combining cooked quinoa, tender chicken, and vibrant vegetables, perfect for a healthy meal.

Ingredients

For the Salad

  • 2 cups cooked quinoa (cooled)
  • 2 cups cooked chicken breast (chopped (grilled, baked, or rotisserie))
  • 1 cup cherry tomatoes (halved)
  • 1 large cucumber (diced)
  • 1/4 cup red onion (finely chopped)

For the Dressing

  • 3 tbsp extra-virgin olive oil
  • 2 tbsp fresh lemon juice
  • 1 clove garlic (minced or grated)
  • 1/2 tsp dried oregano or Italian seasoning

Salt and black pepper

  • to taste Salt and black pepper

Optional Add-Ins

  • as desired Fresh parsley or basil (chopped)
  • as desired Avocado slices
  • as desired Feta cheese

Instructions 

  • Rinse quinoa under cold water and cook according to package instructions. Let cool.
  • Cook chicken, then chop into bite-sized pieces.
  • Combine quinoa, chicken, cherry tomatoes, cucumber, and red onion in a large bowl.
  • Whisk together olive oil, lemon juice, garlic, oregano, salt, and pepper for the dressing.
  • Pour dressing over the salad and toss gently. Let rest for 10–15 minutes before serving.

Notes

Feel free to add fresh herbs or avocado for extra flavor and nutrition.
Calories: 350kcal
Cost: $15
Course: Salad
Cuisine: International
Keyword: Chicken, Healthy, quinoa

Discover the Magic of a 5-Ingredient Chicken Dinner

Are you ready to transform your weeknight dinners into something truly special? This 5-Ingredient Chicken Dinner is not just a meal; it’s a delightful experience that brings your family together without the stress of complicated recipes. In just about 30 minutes, you can whip up a flavorful dish that’s sure to impress everyone at the table. Let’s dive into why this recipe is a must-try for busy cooks!

Why You’ll Love This Recipe

This chicken dinner is packed with benefits that make it perfect for any home cook:

  • Quick Preparation: With only five ingredients, this recipe comes together in no time—ideal for those hectic weeknights!
  • Minimal Cleanup: Fewer ingredients mean fewer dishes, allowing you to enjoy your meal without the burden of a messy kitchen.
  • Kid-Friendly Flavors: Even picky eaters will enjoy this dish, making it a perfect family meal that everyone will love.
  • Versatile Ingredients: The ingredients are pantry staples, so you won’t need to make last-minute grocery runs.
  • Healthy and Delicious: This recipe is not only simple but also nutritious, ensuring your family enjoys a wholesome meal.

Ingredient Breakdown

Let’s take a closer look at the star ingredients of this effortless chicken dinner:

  • 2 boneless chicken fillets: Chicken breasts or thighs work well; just ensure they are evenly sized for consistent cooking.
  • 1 tbsp olive oil: This adds flavor and prevents sticking. You can substitute with avocado oil or melted butter if desired.
  • 1 tsp salt: Enhances the natural flavors of the chicken. Feel free to adjust based on dietary needs.
  • 1 tsp black pepper: Adds a nice kick; use freshly ground for the best flavor.
  • 1 tsp garlic powder: For that aromatic flavor; you can also use fresh minced garlic if you prefer.

Step-by-Step Instructions

Visually appealing presentation of a simple chicken dish with ingredients.

Follow these simple steps to create your delicious 5-Ingredient Chicken Dinner:

  1. Preheat the oven: Set it to 375°F (190°C) to ensure an even cook.
  2. Season the chicken: Rub the chicken fillets with salt, pepper, and garlic powder, ensuring even coverage.
  3. Heat the oil: In a pan over medium heat, warm the olive oil until shimmering.
  4. Cook the chicken: Place the seasoned chicken in the pan and cook for about 5 minutes on each side until golden brown.
  5. Transfer to oven: Once seared, move the chicken to the preheated oven and bake for 15 minutes, or until the internal temperature reaches 165°F (75°C).

Pro Tips for Perfect Chicken

To ensure your chicken turns out perfectly every time, keep these expert tips in mind:

  • Use a meat thermometer: This is the best way to ensure your chicken is cooked through without being dry.
  • Let it rest: After cooking, allow the chicken to rest for 5 minutes before slicing, which helps retain moisture.
  • Customize seasoning: Feel free to add your favorite herbs or spices to the seasoning mix for a personalized touch.
  • Marinate ahead: If you have time, marinating the chicken for a few hours can enhance flavor.
  • Don’t overcrowd the pan: Cook in batches if necessary to get that perfect sear.
  • Use a cast-iron skillet: This retains heat well and provides a nice crust.
  • Experiment with sides: Pair with roasted veggies or a simple salad for a complete meal.
  • Try different cooking methods: This recipe can be adapted for grilling or air frying!

Common Mistakes and Troubleshooting

Here are some common pitfalls to avoid while making this chicken dinner:

  • Not preheating the oven: Ensure your oven is hot enough before baking; this helps retain juiciness.
  • Overcooking the chicken: Keep an eye on cooking times and use a thermometer to prevent dryness.
  • Skipping the seasoning: Don’t underestimate the power of seasoning! It can make or break your dish.
  • Not resting the chicken: Skipping this step can lead to dry meat. Always let it rest!

Variations to Try

Feeling adventurous? Here are some fun variations to switch things up:

  • Herb-Infused Chicken: Add dried herbs like thyme or rosemary to the seasoning mix for an aromatic twist.
  • Spicy Chicken: Incorporate cayenne pepper or chili powder for a bit of heat.
  • Sweet and Tangy Glaze: Brush with a mixture of honey and soy sauce before baking for a sweet flavor profile.
  • Citrus Zing: Squeeze fresh lemon or lime juice over the chicken before serving for a refreshing finish.

Storage and Make-Ahead Instructions

You can easily store leftovers or prepare this meal in advance:

  • Refrigerate: Store in an airtight container for up to 3 days.
  • Freeze: Freeze cooked chicken for up to 2 months. Thaw in the fridge before reheating.
  • Make-ahead: Season your chicken and store it in the fridge for up to 24 hours before cooking to enhance flavor.

Comprehensive FAQ

Here are answers to some common questions about this recipe:

  • Can I use frozen chicken? Yes, but make sure to thaw it completely before cooking.
  • What can I serve with this chicken? This dish pairs well with rice, quinoa, or a fresh salad.
  • Can I use different proteins? Absolutely! This recipe works well with pork or tofu as well.
  • Is this recipe gluten-free? Yes, it is naturally gluten-free; just ensure your seasoning is gluten-free as well.
  • How can I make it dairy-free? This recipe is already dairy-free, so you’re all set!
  • What’s the best way to reheat leftovers? Use the oven to maintain the chicken’s texture or microwave in short intervals.
  • Can I double the recipe? Yes, just ensure you have a large enough pan and adjust cooking times as needed.
  • How do I know when the chicken is done? Use a meat thermometer to check for an internal temperature of 165°F (75°C).

Nutrition Tips and Dietary Adaptations

This recipe is not only simple but can be adapted to fit various dietary needs:

  • Low-carb option: Serve with steamed vegetables instead of grains.
  • Paleo-friendly: The ingredients are compliant; just ensure your oil is suitable.
  • Keto adaptation: Pair with a high-fat sauce or side to meet your macros.
  • Vegetarian version: Substitute chicken with hearty vegetables like portobello mushrooms.

Equipment Recommendations

Here’s what you’ll need to make this chicken dinner:

  • Oven-safe skillet: Ideal for searing and transferring to the oven.
  • Meat thermometer: Essential for checking doneness.
  • Cutting board and knife: For preparing your chicken and any sides.
  • Mixing bowl: For combining your seasonings.

Serving Suggestions

Elevate your meal with these serving ideas:

  • Fresh Salad: A light green salad with a vinaigrette pairs beautifully.
  • Grain Bowl: Serve over a bed of quinoa or brown rice for a hearty meal.
  • Vegetable Medley: Roasted or steamed veggies make for a colorful and nutritious side.
  • Garlic Bread: For a comforting touch, serve with garlic bread on the side.

With this 5-Ingredient Chicken Dinner, you’re set to impress your family with minimal effort! Remember, cooking is about enjoying the process, so embrace the creativity and have fun in the kitchen. Now, go ahead and make this meal your own; you’ve got this!

5-Ingredient Chicken Dinner That’ll Blow Your Family Away

Prep Time 10 minutes
Cook Time 20 minutes
Total Time 30 minutes
Servings 2 servings
Calories 250
This simple yet delicious chicken dinner uses just five ingredients to create a flavorful meal your family will love.

Ingredients

Main

  • 2 pieces boneless chicken fillets
  • 1 tbsp olive oil
  • 1 tsp salt
  • 1 tsp black pepper
  • 1 tsp garlic powder

Instructions 

  • Preheat oven to 375°F (190°C).
  • Season chicken with salt, pepper, and garlic powder.
  • Heat oil in pan over medium heat.
  • Cook chicken for 5 minutes per side.
  • Transfer to oven and bake for 15 minutes.

Notes

Ensure chicken is cooked through before serving.
Calories: 250kcal
Cost: $10
Course: Dinner
Cuisine: American
Keyword: Chicken

Welcome to a delicious new way to start your day! This Avocado Egg Sandwich is more than just a meal; it’s a celebration of flavors and nutrition that can transform your breakfast (or lunch!) into something truly special. Packed with creamy avocado, protein-rich eggs, and fresh veggies, this sandwich is not only simple to make but also incredibly satisfying. Get ready to impress yourself and your loved ones with this delightful dish!

In this guide, we will explore everything you need to know to create the ultimate Avocado Egg Sandwich. From the ingredients to expert tips, variations, and even common mistakes to avoid, we’ve got you covered! Let’s dive in and make breakfast exciting again!

Why You’ll Love This Recipe

This Avocado Egg Sandwich is a perfect blend of flavors and textures, and here are just a few reasons why you’ll absolutely adore it:

  • Quick and Easy: Whipping up this sandwich takes just 15 minutes! Perfect for those busy mornings when you need something delicious but don’t have a lot of time.
  • Nutritious Powerhouse: Each bite is loaded with healthy fats from the avocado, protein from the eggs, and essential vitamins from the fresh veggies, making it a well-balanced meal.
  • Flavor Fusion: The creamy avocado combined with the egg-mayo salad creates a rich, satisfying flavor that will keep your taste buds delighted.
  • Customizable: You can easily adjust the ingredients to suit your dietary needs or personal preferences, whether you’re vegan, vegetarian, or gluten-free.
  • Visually Appealing: The vibrant colors of this sandwich make it not only delicious but also a feast for the eyes!

Ingredients for Avocado Egg Sandwich

To make this scrumptious sandwich, gather the following ingredients:

  • 1 ripe avocado
  • 4 hard-boiled eggs
  • 6 slices of tomatoes
  • 4 pieces of lettuce (your choice of type)
  • 4 slices of bread (whole grain, sourdough, or gluten-free)
  • Salt & pepper to taste
  • 2-3 tbsp mayonnaise
  • 1 tbsp lemon juice (freshly squeezed for best flavor)
  • Chili flakes (optional, for a spicy kick)

How to Make Avocado Egg Sandwich

Ready to make your Avocado Egg Sandwich? Just follow these simple steps:

  1. Boil the eggs: Begin by boiling the eggs in a pot of water for about 10 minutes. If you have an egg boiler, it makes this step even easier!
  2. Prepare the avocado spread: In a small bowl, mash the ripe avocado with a fork until smooth. Add a pinch of salt, pepper, and a squeeze of lemon juice. Mix well.
  3. Make the egg-mayo salad: Chop the hard-boiled eggs and transfer them to a bowl. Mix with mayonnaise, salt, and pepper to taste.
  4. Toast the bread: Lightly toast your bread slices for extra crunch and warmth.
  5. Assemble the sandwich: Spread a generous layer of the mashed avocado on one slice of toasted bread. Next, add a layer of the egg-mayo salad, followed by fresh lettuce and juicy tomato slices. Top it off with another slice of bread.
  6. Serve: Slice the sandwich in half and serve immediately. Enjoy your delicious creation!

Pro Tips for the Perfect Avocado Egg Sandwich

A deliciously stacked avocado egg sandwich featuring lettuce, tomatoes, and spices, viewed from the side.

Here are some expert insights to ensure your sandwich turns out perfectly every time:

  • Choose the right avocado: Make sure your avocado is ripe but not overripe. It should yield slightly when gently pressed.
  • Perfectly boiled eggs: For hard-boiled eggs, start with cold water, bring to a boil, then cover and let sit off the heat for 10-12 minutes before cooling.
  • Fresh ingredients: Opt for the freshest ingredients, especially for the veggies. Crisp lettuce and ripe tomatoes enhance the sandwich’s overall flavor.
  • Experiment with spices: Don’t hesitate to add your favorite herbs or spices to the avocado spread for an extra flavor boost.
  • Use quality bread: The choice of bread can elevate your sandwich. Try different types to find your favorite!
  • Make it ahead: Prep the avocado spread and egg mixture the night before for a quick assembly in the morning.
  • Storage: If you have leftover ingredients, store them separately to maintain freshness, especially the avocado, which can brown quickly.
  • Get creative: Feel free to add other ingredients like bacon, cheese, or sprouts for added flavor!

Common Mistakes to Avoid

Even the best cooks can encounter hiccups in the kitchen. Here are some common mistakes to avoid when making your Avocado Egg Sandwich:

  • Overcooking the eggs: This can lead to a rubbery texture. Stick to the recommended cooking time.
  • Using underripe avocados: An underripe avocado will be hard and lack flavor. Ensure it’s ripe for the best results.
  • Too much mayo: While it adds creaminess, too much can overpower the other flavors. Start with a small amount and adjust to taste.
  • Neglecting seasoning: Don’t skip the salt and pepper! They enhance the flavors of the ingredients.

Variations of the Avocado Egg Sandwich

Feeling adventurous? Here are some delicious variations to try:

  • Spicy Avocado Egg Sandwich: Add sliced jalapeños or a dash of hot sauce for a spicy kick.
  • Veggie-Packed Version: Include sliced cucumbers, radishes, or sprouts for added crunch and nutrition.
  • Breakfast Bagel: Swap the bread for a toasted bagel for a hearty breakfast option.
  • Avocado Egg Salad Wrap: Instead of sandwich bread, use a tortilla to create a wrap for a portable option.

Storage and Make-Ahead Instructions

If you want to prepare your sandwich ahead of time, here’s how to store the components:

  • Avocado spread: Store in an airtight container with a piece of plastic wrap pressed directly onto the surface to prevent browning.
  • Egg-mayo salad: Keep it in a separate container in the fridge to maintain freshness.
  • Assembled sandwiches: Best eaten fresh, but if you must store, wrap tightly in foil and refrigerate for up to a day.

Frequently Asked Questions (FAQs)

Here are some common questions about the Avocado Egg Sandwich:

  • Can I use different types of bread? Absolutely! Feel free to experiment with whole grain, sourdough, or gluten-free options.
  • How do I prevent the avocado from browning? Adding lemon juice helps slow down the browning process.
  • Can I make this sandwich vegan? Yes! Substitute the eggs with tofu or chickpea salad and use vegan mayo.
  • What can I add for extra protein? Consider adding a slice of turkey or chicken for a heartier sandwich.
  • Can I use frozen avocado? Yes, you can use frozen avocado; just thaw it before use.
  • Is this sandwich gluten-free? It can be, depending on the type of bread you choose!
  • How long does the sandwich last in the fridge? It’s best eaten fresh, but it can last up to a day if stored properly.
  • Can I make this sandwich ahead of time? Yes, you can prepare the avocado spread and egg-mayo salad ahead of time, but it’s best to assemble the sandwich just before eating.

Nutritional Tips and Dietary Adaptations

This Avocado Egg Sandwich is not only delicious but also offers numerous health benefits. Here’s how you can adapt it to your dietary needs:

  • Low-carb option: Use lettuce leaves instead of bread for a low-carb, keto-friendly version.
  • High-protein boost: Add extra eggs or incorporate a protein-rich spread, such as hummus.
  • Heart-healthy: Use whole grain bread and add seeds like chia or flax for added fiber and omega-3 fatty acids.

Equipment Recommendations

To make the Avocado Egg Sandwich, you’ll need some basic kitchen tools:

  • Pot or Egg Boiler: For boiling the eggs efficiently.
  • Mixing Bowls: For preparing the avocado spread and egg-mayo salad.
  • Toaster: To lightly toast the bread for added crunch.
  • Knife: For slicing the vegetables and sandwich.

Serving Suggestions

This sandwich pairs wonderfully with a variety of sides. Consider serving it with:

  • Fresh Fruit: A side of seasonal fruit adds a refreshing touch.
  • Chips or Crisps: A small portion of chips provides a satisfying crunch.
  • Salad: A light green salad can complement the sandwich beautifully.

Wrapping It Up

There you have it—a comprehensive guide to creating the ultimate Avocado Egg Sandwich! With its delightful flavors, straightforward preparation, and nutritional benefits, this sandwich is sure to become a staple in your breakfast repertoire. So gather your ingredients, roll up your sleeves, and get ready to impress your taste buds. Cooking should be fun and rewarding, and this sandwich is just the beginning of your culinary adventures. Happy cooking!

Avocado Egg Sandwich

Prep Time 10 minutes
Cook Time 10 minutes
Total Time 20 minutes
Servings 2 servings
Calories 350
A delicious and nutritious sandwich combining creamy avocado, hard-boiled eggs, fresh vegetables, and bread for a quick, satisfying meal.

Ingredients

Main

  • 1 piece ripe avocado
  • 4 pieces eggs (hard boiled)
  • 6 slices tomatoes
  • 4 pieces lettuce
  • 4 slices bread
  • 1 pinch Salt & pepper
  • 2-3 tbsp mayonnaise
  • 1 tsp Lemon juice
  • to taste Chilli flakes (optional)

Instructions 

  • Boil the eggs for 10 minutes, then peel and chop.
  • Mash the avocado with lemon juice, salt, pepper, and chilli flakes.
  • Mix chopped eggs with mayonnaise, salt, and pepper.
  • Toast bread slices lightly.
  • Spread avocado on bread, add egg-mayo mixture, lettuce, and tomato, then top with another bread slice.
  • Slice in half and serve.

Notes

For extra flavor, add a dash of hot sauce or herbs.
Calories: 350kcal
Cost: $10
Course: Breakfast, Snack
Cuisine: International
Keyword: Avocado, Egg, Sandwich

Discover the Ultimate Comfort: Cream of Vegetable Soup

Welcome to your go-to recipe for a warm, soothing bowl of cream of vegetable soup. This delightful dish combines a medley of fresh vegetables with creamy goodness, crafting a meal that’s not only comforting but also packed with flavor. If you’re looking for a way to elevate your weeknight dinners or impress your guests, you’ve found it! Let’s dive into this nourishing comfort food that’s perfect for any occasion.

Why You’ll Love This Recipe

  • Easy Preparation: With just a few simple steps, you can whip up this delicious soup in under an hour, making it perfect for busy weeknights.
  • Versatile Ingredients: Feel free to customize the vegetables based on what you have on hand or what’s in season, allowing for endless variations.
  • Health Boost: Packed with fresh veggies, this soup is not only comforting but also loaded with nutrients, making it a wholesome choice for your family.
  • Perfectly Creamy: The addition of cream or coconut milk gives this soup a rich and velvety texture that’s simply irresistible.
  • Meal Prep Friendly: This soup stores well, making it ideal for batch cooking. Enjoy it throughout the week for a quick and satisfying meal.

Ingredients for Cream of Vegetable Soup

Gather these fresh ingredients to create the perfect soup:

  • 2 cups carrots, chopped
  • 2 cups celery, chopped
  • 1 medium onion, diced
  • 2 cups Yukon Gold potatoes, diced
  • 4 cups low-sodium vegetable broth
  • 1 cup heavy cream or coconut milk
  • 3 cloves garlic, minced
  • 2 tsp fresh thyme (or 1 tsp dried)
  • 2 tbsp fresh parsley (or 1 tbsp dried)

Step-by-Step Instructions

A side view of a hearty cream of vegetable soup, showcasing its creamy consistency and colorful ingredients.

Let’s get started on this delicious journey!

  • Prepare your vegetables: Wash and chop the carrots, celery, onion, and potatoes into small pieces.
  • SautĂ© aromatics: In a large pot over medium heat, add olive oil and sautĂ© the onions and garlic until soft and fragrant (about 2 minutes).
  • Add vegetables: Stir in the chopped carrots, celery, and potatoes; cook for an additional 5 minutes to enhance their flavors.
  • Pour in broth: Add vegetable broth to cover the veggies completely; bring to a boil, then reduce heat and simmer for about 20 minutes until tender.
  • Blend until smooth: Using an immersion blender, blend the soup directly in the pot, or transfer in batches to a blender for a creamy consistency.
  • Stir in cream: Return the soup to low heat; mix in the cream or coconut milk along with thyme and parsley. Warm through without boiling.

Pro Tips for Perfecting Your Soup

Follow these expert insights to elevate your cream of vegetable soup:

  • Use seasonal vegetables: Incorporate veggies that are in season for the best flavor and nutrition.
  • Adjust the thickness: If you prefer a thicker soup, blend a portion of the vegetables before returning them to the pot.
  • Herb variations: Experiment with different herbs like dill or basil to create unique flavor profiles.
  • Spice it up: Add a pinch of cayenne pepper or smoked paprika for a subtle kick.
  • Fresh garnish: Top with croutons or a sprinkle of fresh herbs just before serving for added texture and flavor.
  • Cook in batches: Double the recipe to have leftovers for quick meals during the week.
  • Serving suggestions: Pair with crusty bread or a fresh salad for a complete meal.
  • Opt for low-fat options: Use low-fat cream or a dairy-free alternative to make the soup lighter.
  • Freeze for later: This soup freezes beautifully, so store any extras in airtight containers for a future meal.

Common Mistakes and Troubleshooting

Avoid these pitfalls to ensure your soup turns out perfectly every time:

  • Overcooking vegetables: Cooking too long can lead to mushiness; aim for tender but still vibrant vegetables.
  • Not blending enough: If your soup isn’t creamy enough, blend for longer or add more cream for richness.
  • Skipping seasoning: Taste as you go! Seasoning is crucial for bringing out the flavors of the vegetables.
  • Incorrect broth-to-water ratio: Use enough broth for depth of flavor; diluting with water can make the soup bland.

Delicious Variations

Don’t hesitate to switch things up with these creative ideas:

  • Cheesy Vegetable Soup: Stir in shredded cheese towards the end for a cheesy twist on this classic recipe.
  • Spicy Vegetable Soup: Add diced jalapeños or red pepper flakes for a spicy kick that livens things up.
  • Asian-Inspired: Incorporate miso paste and top with green onions and sesame seeds for a unique flavor.
  • Herbed Creamy Soup: Use fresh herbs like dill, chives, or tarragon for a refreshing taste profile.

Storage and Make-Ahead Instructions

This cream of vegetable soup is great for meal prep:

  • Refrigeration: Store in an airtight container in the fridge for up to 4 days.
  • Freezing: Allow the soup to cool completely before transferring to freezer bags or containers. It can be frozen for up to 3 months.
  • Thawing: To reheat, thaw in the fridge overnight and warm gently on the stove, adding a splash of broth if needed.

FAQs About Cream of Vegetable Soup

Here are some common questions answered:

  • Can I use frozen vegetables? Yes, frozen vegetables are a great time-saver and work well in this soup.
  • How do I make this soup dairy-free? Substitute heavy cream with coconut milk or a plant-based cream alternative.
  • What vegetables can I add? Feel free to add your favorites, such as peas, corn, or bell peppers.
  • How do I thicken the soup? Blend a portion of the soup or add a roux for a thicker texture.
  • Can I add meat? Absolutely! Shredded chicken or diced ham can make it heartier.
  • What’s the best way to reheat? Reheat gently on the stove over low heat to preserve flavor and texture.
  • Is this soup suitable for kids? Yes! It’s mild and packed with nutrients, making it a great option for picky eaters.
  • How can I enhance the flavor? Add a splash of lemon juice or a dash of soy sauce for additional depth.

Nutritional Tips and Dietary Adaptations

Make this soup suit your dietary needs:

  • Vegan Option: Replace cream with a plant-based alternative and ensure your broth is vegan-friendly.
  • Low-Carb Version: Substitute potatoes with cauliflower for a low-carb alternative without sacrificing creaminess.
  • Gluten-Free: This recipe is naturally gluten-free; just ensure your broth is labeled as such.
  • High-Protein Boost: Add cooked lentils or beans for a protein-packed version.

Recommended Equipment

To make your cooking experience smooth, consider these essential tools:

  • Large Pot: A sturdy pot is key for sautĂ©ing and simmering your soup.
  • Immersion Blender: Perfect for blending directly in the pot without the mess of transferring.
  • Knife and Cutting Board: Sharp knives and sturdy cutting boards make prep a breeze.

Serving Suggestions

Pair your cream of vegetable soup with these delicious sides:

  • Crusty Bread: Serve with a slice of freshly baked bread for dipping.
  • Green Salad: A simple side salad adds freshness and crunch.
  • Cheese Toast: Top slices of bread with cheese and broil until bubbly for a cheesy accompaniment.

In conclusion, this cream of vegetable soup is not just a recipe; it’s a comforting hug in a bowl that brings warmth and nourishment to your table. With its easy preparation, versatile ingredients, and room for creativity, you’ll find yourself returning to this soup time and again. So grab your apron, let’s get cooking, and embrace the joy of making this delicious dish!

🍽 Looking for More Recipes to Cook Every Day?

Get my full cookbook with 50 Recipes You’ll Want to Cook Again and Again perfect for busy days and family dinners.

🍗 Download Your Cookbook Now

Instant download • 50 tested recipes

Cream of Vegetable Soup

Prep Time 10 minutes
Cook Time 30 minutes
Total Time 40 minutes
Servings 4 servings
Calories 250
A comforting and creamy vegetable soup perfect for a cozy meal, packed with fresh flavors and easy to prepare.

Ingredients

Vegetables

  • 2 cups carrots, chopped
  • 2 cups celery, chopped
  • 1 medium onion, diced
  • 2 cups Yukon Gold potatoes, diced

Broth and Dairy

  • 4 cups low-sodium vegetable broth
  • 1 cup heavy cream or coconut milk

Aromatics and Herbs

  • 3 cloves garlic, minced
  • 2 tsp fresh thyme (or 1 tsp dried)
  • 2 tbsp fresh parsley (or 1 tbsp dried)

Instructions 

  • Wash and chop vegetables into small pieces.
  • SautĂ© onions and garlic in olive oil until soft, about 2 minutes.
  • Add carrots, celery, and potatoes; cook for 5 minutes.
  • Pour in broth, bring to a boil, then simmer for 20 minutes until tender.
  • Blend until smooth, then stir in cream, thyme, and parsley; warm through.

Notes

For a vegan version, use coconut milk and vegetable broth.
Calories: 250kcal
Cost: $15
Course: Soup
Cuisine: American
Keyword: Vegetables

Looking for a quick and satisfying meal that the whole family will love? This beef fried rice recipe is your answer! Packed with flavor and nutrients, it’s a great way to use leftover rice and make a delicious dish in no time. Whether you’re a busy professional or a parent juggling multiple tasks, this recipe is designed to help you whip up a comforting meal without the stress.

Why You’ll Love This Recipe

This beef fried rice is not just another recipe; it’s a culinary experience that brings the family together. Here’s why you’ll adore it:

  • Quick Preparation: Ready in under 30 minutes, perfect for weeknight dinners.
  • Versatile Ingredients: Customize with your favorite veggies and proteins.
  • Great for Leftovers: Use day-old rice for the best texture, saving you time and reducing waste.
  • Flavorful and Satisfying: The combination of soy sauce and sesame oil elevates the dish, making it a family favorite.
  • Easy Cleanup: One-pan recipe means less time washing dishes!

Beef Fried Rice Ingredients

Gather the following ingredients for a delicious beef fried rice:

  • 4 cups Cooked white rice: Use day-old rice for the best texture; it’s less sticky and absorbs flavors beautifully.
  • 3 tablespoons Soy sauce: This adds a savory depth; you can use low-sodium if preferred.
  • 1 pound Ground beef: Choose lean ground beef for a healthier option.
  • 2 cloves Garlic: Freshly minced for an aromatic kick.
  • 1 cup Frozen peas and carrots: Convenient mix that adds color and nutrients.
  • 3 stalks Green onions: Chopped for garnish and flavor.
  • 1 tablespoon Sesame oil: Enhances the nutty flavor.
  • 1 teaspoon Black pepper: Just a pinch for added seasoning.

How to Make Beef Fried Rice

Creating this flavorful dish is easier than you might think! Follow these simple steps:

Step 1: Prep Everything First

Before you start cooking, make sure to have everything prepped. Chop your vegetables, measure out your ingredients, and have your sauces ready. This will make the cooking process much smoother.

Step 2: Cook the Beef

In a large skillet or wok over medium-high heat, add a splash of oil. Once hot, add the ground beef and cook until browned. Drain excess fat if necessary.

Step 3: Add Aromatics

Add the minced garlic to the beef and stir-fry for about a minute until fragrant.

Step 4: Stir in the Vegetables

Add the frozen peas and carrots to the skillet, cooking for another 2-3 minutes until heated through.

Step 5: Incorporate the Rice

Next, add the cooked rice to the skillet. Break up any clumps and mix thoroughly with the beef and vegetables.

Step 6: Season the Dish

Drizzle the soy sauce and sesame oil over the rice mixture. Stir well to ensure even distribution. Season with black pepper to taste.

Step 7: Add Green Onions

Finally, stir in the chopped green onions just before serving for a fresh flavor boost.

Pro Tips for the Best Beef Fried Rice

Delicious beef fried rice showing the textures of ground beef and mixed vegetables.

To elevate your fried rice game, consider these expert insights:

  • Use day-old rice: Freshly cooked rice can be too sticky, while day-old rice has the ideal texture.
  • High heat is key: Cooking on high heat helps achieve that delicious, slightly crispy texture.
  • Don’t overcrowd the pan: If you have a lot of ingredients, consider cooking in batches to maintain that perfect fry.
  • Experiment with sauces: Try adding oyster sauce or a splash of chili sauce for an extra kick.
  • Garnish generously: Fresh herbs or sesame seeds can take your dish to the next level.
  • Pre-cook proteins: If adding shrimp or chicken, ensure they’re fully cooked before combining them with the rice.
  • Adjust for dietary needs: Swap out proteins or use gluten-free soy sauce to cater to dietary preferences.
  • Incorporate other vegetables: Bell peppers, broccoli, or corn can add a delightful crunch.

Common Mistakes and Troubleshooting

Even the best cooks make mistakes! Here’s how to avoid common pitfalls:

  • Overcooked rice: If your rice is too soft, use less liquid when cooking next time.
  • Too salty: Balance with extra vegetables or a splash of vinegar if you find it overly salty.
  • Sticking to the pan: Ensure your pan is hot enough and use enough oil to prevent sticking.

Beef Fried Rice Variations to Explore

Feel free to get creative with these variations:

  • Chicken Fried Rice: Substitute chicken for beef for a lighter option.
  • Vegetable Fried Rice: Omit the meat and load up on your favorite veggies.
  • Spicy Beef Fried Rice: Add sriracha or chili paste for a spicy twist.
  • Beef and Egg Fried Rice: Stir in scrambled eggs for added protein and richness.

How to Store and Freeze Beef Fried Rice

Leftovers? No problem! Follow these simple storage tips:

  • Refrigerate: Store in an airtight container for up to 3-4 days in the fridge.
  • Freeze: Portion into freezer-safe bags and freeze for up to 3 months.
  • Reheat: Thaw overnight in the fridge, then reheat in a skillet or microwave until heated through.

Comprehensive FAQ About Beef Fried Rice

Here are some common questions about making beef fried rice:

  • Can I use brown rice?: Absolutely! Brown rice works well, but you may need to adjust cooking time.
  • How do I make it vegetarian?: Simply omit the beef and use tofu or tempeh instead.
  • What other sauces can I use?: Feel free to experiment with teriyaki or hoisin sauce for different flavors.
  • Can I add eggs?: Yes! Scramble them separately and mix them in during the last step.
  • How long does it last in the fridge?: Beef fried rice can last 3-4 days if stored properly.
  • What’s the best way to reheat it?: Use a skillet for the best texture or microwave if you’re short on time.
  • Can I use leftover steak?: Definitely! Just slice it thinly and toss it in at the end.
  • What’s a good side dish?: Serve with spring rolls or a simple salad for a complete meal.

Nutritional Tips and Dietary Adaptations

For a healthier twist on this recipe, consider the following:

  • Lean proteins: Opt for lean ground beef or chicken to reduce fat content.
  • Increase veggies: Add more vegetables to boost fiber and nutrients.
  • Low-sodium soy sauce: Use low-sodium options to control sodium intake.
  • Whole grain rice: Substitute with brown rice or quinoa for added health benefits.

Essential Equipment Recommendations

Here’s a list of tools that can make your cooking experience smoother:

  • Wok or large skillet: Ideal for even cooking and high heat.
  • Spatula: A sturdy spatula helps in tossing the ingredients evenly.
  • Measuring cups and spoons: Ensure accurate ingredient measurements.

Serving Suggestions

To make your meal even more delightful, consider these serving ideas:

  • Garnish: Top with additional green onions or sesame seeds for a fresh touch.
  • Side dishes: Pair with a simple cucumber salad or spring rolls for added crunch.
  • Drinks: Serve with iced tea or sparkling water for a refreshing accompaniment.

Cooking is about creativity, and this beef fried rice recipe is a perfect canvas for your culinary expression. Remember, the key to great cooking is confidence and practice. Enjoy the process and the delicious flavors you create!

Beef Fried Rice

Prep Time 10 minutes
Cook Time 15 minutes
Total Time 25 minutes
Servings 4 servings
Calories 450
A quick and flavorful dish combining tender ground beef with savory fried rice, perfect for a satisfying meal.

Ingredients

Main ingredients

  • 4 cups Cooked white rice (Use day-old rice for the best texture.)
  • 3 tablespoons Soy sauce (Low-sodium if preferred.)
  • 1 pound Ground beef (Choose lean ground beef for a healthier option.)
  • 2 cloves Garlic (Freshly minced.)
  • 1 cup Frozen peas and carrots (Convenient mix.)
  • 3 stalks Green onions (Chopped.)
  • 1 tablespoon Sesame oil (Enhances the nutty flavor.)
  • 1 teaspoon Black pepper (Just a pinch.)

Instructions 

  • Heat sesame oil in a large skillet over medium heat.
  • Add minced garlic and ground beef; cook until beef is browned.
  • Stir in frozen peas and carrots; cook for 2-3 minutes.
  • Add cooked rice, soy sauce, and black pepper; stir well and cook for another 3-4 minutes.
  • Garnish with chopped green onions before serving.

Notes

Use day-old rice for the best texture and flavor.
Calories: 450kcal
Cost: $12
Course: Main Course
Cuisine: Asian
Keyword: Beef, Fried Rice

Whip up these delicious High Protein Garlic Parmesan Pasta Bowls in no time! Packed with flavor and nutrition, this simple recipe features grilled chicken and creamy cheese, making for a meal that fuels your day. Perfect for busy weeknights, this dish is not just about filling your tummy; it’s about enjoying a comforting, satisfying meal that you can feel good about. Let’s dive into why you’re going to love this recipe and how to make it your own!

Why You’ll Love This Recipe

  • Quick Preparation: Ready in under 30 minutes, making it ideal for weeknight dinners after a long day.
  • High in Protein: Each serving contains a whopping 36g of protein, helping you stay full and satisfied.
  • Customizable Flavors: The recipe allows you to twist it up with different proteins, vegetables, or sauces based on your mood.
  • Meal Prep Friendly: Perfect for making ahead and storing, ensuring you have nutritious options ready to go.
  • Kid-Approved: Creamy, cheesy, and flavorful—this dish is sure to be a hit with the whole family!

Gathering Your Flavor Powerhouses

Here’s what you’ll need to create these amazing bowls. Each ingredient plays a vital role in building flavor and nutrition.

Ingredients

  • 120 g cooked penne or rigatoni: Choose whole wheat or gluten-free options if desired.
  • 120 g grilled chicken breast, sliced: For a vegetarian version, swap with grilled tofu or chickpeas.
  • 1 tsp olive oil: Essential for sautĂ©ing the garlic to aromatic perfection.
  • 1 clove garlic, minced: Adds a rich, fragrant base to the sauce.
  • 30 g light cream cheese: Provides a creamy texture without excess calories.
  • 15 g grated parmesan: For that irresistible cheesy flavor.
  • 30 ml unsweetened almond milk: Use any milk of your choice for a creamy finish.
  • Salt and pepper, to taste: Essential for enhancing all the flavors.
  • Fresh parsley or spinach (optional): Adds a pop of color and extra nutrients.

Let’s Get Cooking: Step-by-Step Directions

Now that you have your ingredients ready, let’s walk through the cooking process to create these flavorful bowls.

Instructions

  1. Cook pasta until al dente. Drain and set aside.
  2. In a pan, heat olive oil over medium heat and sauté garlic until fragrant, about 1 minute.
  3. Add cream cheese and almond milk to the pan, stirring until smooth and creamy.
  4. Mix in grated parmesan and season with salt and pepper to taste.
  5. Stir in the cooked pasta, tossing until it’s all coated in the delicious sauce.
  6. Top with sliced grilled chicken and optional greens like spinach or parsley.
  7. Divide into meal prep containers and refrigerate for up to 4 days.

Pro Tips for Cooking Success

Vibrant pasta bowl showcasing penne or rigatoni, grilled chicken, and melted cheese.
  • Cook Pasta Perfectly: Make sure to cook your pasta until it’s just al dente—this prevents it from becoming mushy when mixed with the sauce.
  • Use a Rotisserie Chicken: For a time-saver, purchase a pre-cooked rotisserie chicken and shred it for use in this recipe.
  • Adjust Creaminess: If you prefer a creamier sauce, simply add more cream cheese or a splash of milk.
  • Experiment with Seasonings: Feel free to add herbs like oregano or basil to elevate the flavor profile.
  • Leftover Love: This dish stores well, making it perfect for meal prep or leftovers.
  • Don’t Overheat the Sauce: Heat gently to maintain the creaminess of the cheese without curdling.
  • Fresh Ingredients Matter: Fresh garlic and high-quality parmesan make a big difference in flavor.
  • Mix in Veggies: For added nutrition, toss in sautĂ©ed vegetables like bell peppers or spinach.

Common Mistakes and Troubleshooting

Even the best cooks encounter hiccups! Here are some common mistakes to avoid and how to fix them.

  • Overcooked Pasta: If your pasta is mushy, try to cook it for a shorter time next time. Always check a minute or two before the package instructions.
  • Too Thick Sauce: If your sauce is too thick, add a bit more almond milk to reach the desired consistency.
  • Flavorless Dish: Always taste and adjust seasonings before serving. A pinch of salt or a sprinkle of cheese can elevate the dish immensely.
  • Clumpy Sauce: If the sauce clumps, ensure you’re stirring continuously while adding the cream cheese and milk.

Make It Your Own: Delicious Twists & Swaps

There’s no limit to how you can adapt this recipe! Here are some variations to inspire your creativity:

  • Veggie Delight: Add roasted vegetables like zucchini, bell peppers, or broccoli for a colorful, nutrient-packed dish.
  • Spicy Kick: Incorporate red pepper flakes or a dash of hot sauce to spice things up.
  • Seafood Option: Swap grilled chicken for shrimp or scallops for a seafood-inspired bowl.
  • Herb-Infused: Mix in fresh herbs like basil or cilantro for a refreshing twist.

Storage and Make-Ahead Instructions

Planning ahead? This recipe is perfect for meal prep!

  • Refrigerate: Store in airtight containers for up to 4 days in the fridge.
  • Freeze: You can freeze portions for up to 3 months. Just reheat in the microwave or on the stove before serving.
  • Make Ahead: Prepare the sauce and cook the pasta a day in advance. Just combine and heat when ready to serve!

Comprehensive FAQ

1. Can I use gluten-free pasta?

Absolutely! Gluten-free pasta works perfectly in this recipe.

2. How can I make this recipe vegetarian?

Substitute the grilled chicken with grilled tofu, chickpeas, or your favorite plant-based protein.

3. What can I use instead of cream cheese?

You can use Greek yogurt for a lighter option or any non-dairy cream cheese if you’re looking for a vegan alternative.

4. Can I add more vegetables?

Yes! Feel free to toss in any of your favorite vegetables. Just sauté them with the garlic.

5. How do I reheat leftovers?

Reheat in the microwave or on the stovetop with a splash of milk to bring back the creaminess.

6. Is this recipe good for meal prep?

Yes! It stores well and is perfect for meal prepping for the week.

7. Can I use different cheese?

Definitely! Swap in mozzarella, feta, or any cheese you love for a different flavor.

8. How can I make this dish lighter?

Use less cream cheese or opt for low-fat versions of the ingredients.

Nutrition Tips and Dietary Adaptations

This recipe is not only delicious but also nutritious! Here are some tips to adapt it to fit your dietary needs:

  • High Protein: Each serving contains 36g of protein, making it ideal for muscle recovery.
  • Low Carb Option: Substitute pasta with spiralized zucchini or cauliflower rice for a low-carb meal.
  • Dairy-Free: Use non-dairy cream cheese and almond milk for a completely dairy-free dish.
  • Low Calorie: Cut down on the cream cheese and parmesan to reduce calories while still enjoying a flavorful meal.

Equipment Recommendations

Here’s what you’ll need to get started:

  • Large Pot: For boiling pasta.
  • Non-Stick Skillet: Ideal for sautĂ©ing garlic and making the sauce without sticking.
  • Measuring Cups and Spoons: For accuracy in your ingredients.
  • Meal Prep Containers: Essential for storing leftovers or meal prepping for the week.

Serving Suggestions

This dish shines when served fresh! Here are some creative serving ideas:

  • Garnish: Top with extra parmesan and fresh herbs for a beautiful presentation.
  • Side Salad: Pair with a simple side salad for added crunch and freshness.
  • Bread Pairing: Serve with garlic bread or a warm baguette to soak up the extra sauce.
  • Wine Pairing: A light white wine like Sauvignon Blanc complements the garlic and creaminess beautifully.

Enjoy cooking and remember, great food doesn’t require perfection—just clear steps, good ingredients, and a willingness to try. You’ve got this!

High Protein Garlic Parmesan Pasta Bowls (384 Cal + 36g Protein)

Prep Time 10 minutes
Cook Time 15 minutes
Total Time 25 minutes
Servings 2 servings
Calories 384
A delicious and protein-packed pasta dish featuring garlic, parmesan, and tender chicken, perfect for a quick and satisfying meal.

Ingredients

Pasta

  • 120 g cooked penne or rigatoni

Protein

  • 120 g grilled chicken breast, sliced

Sauce & Flavorings

  • 1 tsp olive oil
  • 1 clove garlic, minced
  • 30 g light cream cheese
  • 15 g grated parmesan
  • 30 ml unsweetened almond milk

Seasonings

  • to taste Salt and pepper

Optional greens

  • optional Fresh parsley or spinach

Instructions 

  • Cook pasta until al dente, then drain and set aside.
  • Heat olive oil in a pan and sautĂ© garlic until fragrant.
  • Add cream cheese and almond milk, stirring until smooth. Mix in parmesan and season with salt and pepper.
  • Combine pasta with the sauce, tossing to coat evenly.
  • Top with grilled chicken and optional greens, then divide into containers and refrigerate.

Notes

For extra flavor, sprinkle additional parmesan or fresh herbs before serving.
Calories: 384kcal
Cost: $15
Course: Main Course
Cuisine: Italian
Keyword: Chicken, High-Protein, Pasta

Are you looking for a meal that’s not only nutritious but also bursting with flavor? Look no further! This chicken salad bowl is the perfect solution for busy weeknights, offering a balance of protein, fresh vegetables, and a delightful dressing that ties everything together. With simple ingredients and clear steps, you’ll find that this recipe is not only easy to make but also incredibly satisfying. Let’s dive into how this recipe can transform your cooking experience!

Why You’ll Love This Recipe

  • Quick Preparation: With just 30 minutes from start to finish, you can enjoy a delicious homemade meal after a long day.
  • Customizable Ingredients: This chicken salad bowl allows you to swap out vegetables and dressings based on your preferences or what you have on hand.
  • Healthy Eating: Packed with lean protein and vibrant vegetables, this dish supports a balanced diet without sacrificing flavor.
  • Meal Prep Friendly: Make a larger batch to enjoy for lunch or dinner throughout the week—perfect for meal prepping!
  • Kid-Friendly: The colorful ingredients and tasty dressing can entice even the pickiest eaters, making dinner a breeze.

Essential Ingredients Breakdown

Let’s take a closer look at what you’ll need to create this delicious chicken salad bowl, along with some helpful substitution suggestions.

  • 1.5 lbs boneless, skinless chicken breasts: Pounded to even thickness for even cooking. Substitution: Use tofu for a vegetarian option.
  • 2 tbsp olive oil: Essential for cooking the chicken. Substitution: Avocado oil works great too.
  • 1 tsp garlic powder: Adds depth of flavor. Substitution: Fresh minced garlic can be used for a stronger taste.
  • 1 tsp paprika: Smoked paprika adds a lovely smoky flavor. Substitution: Regular paprika can be used if you prefer.
  • 6 cups mixed greens: A vibrant base for the salad. Substitution: Spinach, kale, or arugula can be used based on preference.
  • 2 cups cherry tomatoes: These add sweetness and color. Substitution: Diced regular tomatoes are fine too.
  • 1 cucumber: For crunch and hydration. Substitution: Zucchini can also work well.
  • 1 red bell pepper: Adds sweetness and a pop of color. Substitution: Any color bell pepper will do.
  • 1 avocado: Provides creaminess. Substitution: Use hummus for a different texture.
  • 1/4 cup sunflower seeds: For crunch and healthy fats. Substitution: Pumpkin seeds for a nut-free option.

Step-by-Step Instructions

Follow these easy steps to create your chicken salad bowl:

  • Combine garlic powder, paprika, salt, and pepper in a small bowl. Place chicken breasts between plastic wrap and pound to 3/4-inch even thickness using a meat mallet. Rub the seasoning mixture thoroughly over both sides of each breast, pressing gently so it adheres.
  • Heat olive oil in a large skillet over medium-high heat until it shimmers (about 375°F). Add chicken breasts without overcrowding and cook undisturbed for 6-8 minutes until golden-brown crust forms. Flip and cook another 6-8 minutes until internal temperature reaches 165°F.
  • Transfer cooked chicken to a cutting board and let rest for 5 minutes. While it rests, whisk together olive oil, lemon juice, Dijon mustard, minced garlic, honey, salt, and pepper in a small bowl until emulsified and smooth.
  • Slice the rested chicken against the grain into 1/2-inch strips. In a large mixing bowl, combine mixed greens, cherry tomatoes, cucumber, bell pepper, red onion, and sunflower seeds.
  • Pour dressing over the salad and toss gently until everything is lightly coated. Divide salad evenly among four bowls, top each with sliced chicken and fresh avocado slices. Serve immediately for best texture.

Pro Tips for the Perfect Chicken Salad Bowl

Detailed image of a chicken salad bowl garnished with red bell peppers and a drizzle of olive oil.
  • Perfect Chicken: Ensure your chicken is pounded evenly for consistent cooking. This helps avoid dry spots.
  • Let it Rest: Always allow your chicken to rest after cooking; this keeps it juicy.
  • Dress at the Right Time: Dress your salad just before serving to keep everything fresh and crisp.
  • Mixing Greens: Experiment with different greens for varied texture and flavor.
  • Make it Ahead: Prepare components in advance and assemble just before eating for fresh results.
  • Flavor Boost: Consider adding fresh herbs like basil or cilantro for an extra flavor kick.
  • Watch Your Temperature: Use a meat thermometer to ensure chicken is properly cooked.
  • Seasonal Variations: Customize your salad to reflect seasonal vegetables for the best flavor.

Common Mistakes and Troubleshooting

Even the best cooks can run into hiccups! Here are some common mistakes and ways to fix them:

  • Dry Chicken: If your chicken turns out dry, make sure to check the internal temperature and avoid overcooking.
  • Too Much Dressing: Start with a little dressing; you can always add more if needed.
  • Wilting Greens: If your salad wilts quickly, try dressing it right before serving.
  • Flavorless Salad: Enhance flavors with fresh herbs, citrus zest, or a splash of vinegar.

Variations to Try

Make this chicken salad bowl your own with these creative variations:

  • Mediterranean Twist: Add olives, feta cheese, and artichokes for a Mediterranean flair.
  • Southwest Style: Incorporate black beans, corn, and avocado with a chipotle dressing.
  • Asian-Inspired: Use sesame oil, soy sauce, and top with crispy wontons and scallions.
  • Fruit-Infused: Mix in diced apples, cranberries, or mandarin oranges for a touch of sweetness.

Storage and Make-Ahead Instructions

This chicken salad bowl is perfect for meal prep! Store the components separately to preserve freshness:

  • Chicken: Cooked chicken can be stored in the fridge for up to 4 days; reheat before serving.
  • Salad Components: Keep greens and vegetables in airtight containers; they will last about 3 days.
  • Dressing: Make the dressing ahead of time and store it in the fridge for up to a week.

Frequently Asked Questions

Here are some common questions about this chicken salad bowl:

  • Can I use leftover chicken? Absolutely! Leftover rotisserie chicken works perfectly.
  • What can I substitute for the sunflower seeds? Pumpkin seeds, nuts, or even croutons will add a nice crunch.
  • Is this recipe gluten-free? Yes, as long as you check that your mustard and any additional ingredients are gluten-free.
  • Can I add grains to this salad? Quinoa or brown rice can be great additions for extra fiber.
  • How can I make this salad vegan? Substitute chicken with chickpeas or grilled tofu and use a plant-based dressing.
  • Can I freeze this salad? It’s best enjoyed fresh, but you can freeze cooked chicken separately.
  • What dressing pairs well with this salad? A light vinaigrette or a creamy herb dressing complements it beautifully.
  • Can I prepare this salad the night before? Yes, just keep the dressing separate until you’re ready to serve.

Nutrition Tips and Dietary Adaptations

This chicken salad bowl is not just tasty but also nutritious!

  • Protein-Packed: Chicken provides high-quality protein essential for muscle repair and growth.
  • Fiber-Rich: Incorporating a variety of vegetables ensures you get plenty of fiber for digestive health.
  • Heart-Healthy Fats: Avocado and olive oil contribute beneficial fats that support heart health.
  • Low-Carb Option: For a low-carb meal, skip the grains and focus on the veggies!

Equipment Recommendations

To make your cooking experience smoother, consider having these handy:

  • Meat Mallet: For pounding chicken to an even thickness.
  • Skillet: A non-stick skillet makes cooking chicken easier and cleanup simpler.
  • Mixing Bowls: Use various sizes for mixing and serving.
  • Whisk: Essential for blending dressings smoothly.

Serving Suggestions

Serve your chicken salad bowl with:

  • Whole Grain Bread: For a complete meal, pair with toasted whole-grain bread or rolls.
  • Soup: A light soup, like tomato basil, complements the salad well.
  • Chips: Serve with crunchy pita chips or veggie chips for extra texture.

In conclusion, this chicken salad bowl is not just a meal; it’s a celebration of fresh ingredients and flavors that transforms your dinner routine. Remember, cooking is about enjoying the process, so don’t stress about perfection—just have fun! Happy cooking!

Chicken Salad Bowl

Prep Time 15 minutes
Cook Time 15 minutes
Total Time 30 minutes
Servings 4 servings
Calories 450
A fresh and hearty chicken salad bowl packed with colorful vegetables and a tangy lemon dressing, perfect for a healthy lunch or dinner.

Ingredients

Protein

  • 1.5 lbs boneless, skinless chicken breasts (pounded to even thickness)
  • 2 tbsp olive oil (for cooking chicken)

Seasonings

  • 1 tsp garlic powder
  • 1 tsp paprika (smoked preferred)
  • 1/2 tsp salt
  • 1/2 tsp black pepper

Salad & Vegetables

  • 6 cups mixed greens (spinach and arugula work great)
  • 2 cups cherry tomatoes (halved)
  • 1 diced cucumber
  • 1 sliced red bell pepper
  • 1/2 sliced red onion (soaked in cold water 10 minutes)
  • 1 sliced avocado
  • 1/4 cup sunflower seeds (toasted for extra crunch)

Dressing

  • 1/4 cup olive oil (for dressing)
  • 2 tbsp fresh lemon juice
  • 1 tbsp Dijon mustard
  • 1 clove garlic (minced)
  • 1 tsp honey

Instructions 

  • Mix garlic powder, paprika, salt, and pepper. Pound chicken to even thickness, season thoroughly.
  • Cook chicken in olive oil over medium-high heat for 6-8 minutes per side until internal temp reaches 165°F. Rest 5 minutes, then slice.
  • Whisk together olive oil, lemon juice, Dijon mustard, minced garlic, honey, salt, and pepper for dressing.
  • Combine greens, tomatoes, cucumber, bell pepper, onion, and sunflower seeds in a large bowl. Toss with dressing.
  • Divide salad among bowls, top with sliced chicken and avocado. Serve immediately.

Notes

For extra flavor, marinate chicken with spices before cooking.
Calories: 450kcal
Cost: $15
Course: Main Course
Cuisine: American
Keyword: Chicken, Salad

Unlock the Secrets to Effortless Cooking with One-Skillet Chicken and Rice

Welcome to a world where cooking feels less like a chore and more like a delightful experience! In this guide, we’ll explore how to create a delicious one-skillet chicken and rice meal that’s perfect for busy nights. This dish not only satisfies your hunger but also brings comfort to your table without the fuss of complicated recipes. Whether you’re a seasoned pro or just starting out, this recipe will empower you to whip up a flavorful meal in no time!

Let’s dive into what makes this recipe a must-try, along with tips, variations, and everything you need to know to make your cooking experience enjoyable and stress-free.

Why You’ll Love This Recipe

This one-skillet chicken and rice dish is designed for everyone—from busy professionals to families looking for a hearty meal. Here are several reasons why you’ll fall in love with it:

  • One-Pan Convenience: Everything cooks in one skillet, meaning fewer dishes to wash afterwards!
  • Quick and Easy: This recipe takes about 40 minutes from start to finish, making it perfect for weeknight dinners.
  • Flavorful Ingredients: The combination of spices and fresh vegetables ensures every bite is bursting with flavor.
  • Customizable: You can easily modify the recipe to suit your taste preferences or dietary needs.
  • Hearty and Satisfying: With tender chicken thighs and fluffy rice, this dish is both filling and comforting.

Essential Ingredients: What You Need

Gather these ingredients for your one-skillet chicken and rice:

  • 4 boneless, skinless chicken thighs: Juicy and flavorful, chicken thighs hold up well during cooking.
  • 1 tablespoon olive oil: This adds richness and helps brown the chicken.
  • 1 onion, diced: Provides a sweet and savory base.
  • 3 cloves garlic, minced: Adds aromatic depth.
  • 1 bell pepper, diced: For color and crunch.
  • 1 cup long-grain rice: The star of our dish, absorbing flavors beautifully.
  • 2 cups chicken broth: Enhances the chicken and rice with savory goodness.
  • 1 teaspoon paprika: Adds a touch of warmth and color.
  • Salt and pepper to taste: Essential for seasoning.
  • Fresh parsley for garnish: A pop of color and freshness.

Pro Tips for Perfecting Your Dish

Side view of a delicious one-pan meal showcasing golden chicken and rice.

To help you create a flawless one-skillet chicken and rice, consider these expert insights:

  • Brown the Chicken: Searing the chicken thighs until golden brown enhances flavor and texture.
  • Toast the Rice: Toasting the rice briefly before adding liquid enhances its nutty flavor.
  • Don’t Skip the Broth: Using chicken broth instead of water infuses the rice with rich flavor.
  • Cover the Skillet: Keeping the skillet covered while cooking helps the rice cook evenly and absorb moisture.
  • Let it Rest: Allow the dish to sit for a few minutes after cooking for the best texture.
  • Garnish Generously: Fresh herbs like parsley not only add flavor but also brighten the dish.
  • Adjust Cooking Time: Depending on your stove, you may need to tweak the cooking time slightly.
  • Experiment with Spices: Feel free to add herbs or spices that you love!

Common Mistakes and Troubleshooting

Even the best cooks make mistakes! Here are some common issues and how to fix them:

  • Rice Too Hard: If the rice is undercooked, add a splash more broth and cook a bit longer.
  • Chicken Not Cooked Through: Ensure the chicken reaches an internal temperature of 165°F for safety.
  • Burnt Rice: If the rice is sticking to the skillet, reduce the heat and add a bit more liquid.
  • Flavor Lacking: Always taste and adjust seasoning before serving; a pinch of salt or a squeeze of lemon can elevate the dish.

Delicious Variations to Try

While this recipe is fantastic as is, here are some variations to keep things exciting:

  • Vegetarian Version: Replace chicken with chickpeas or tofu for a plant-based alternative.
  • Spicy Kick: Add red pepper flakes or jalapeños to the skillet for some heat.
  • Creamy Delight: Stir in a splash of heavy cream or coconut milk during the last few minutes of cooking.
  • Herb Infusion: Try adding fresh thyme, rosemary, or cilantro for an aromatic twist.

Storage and Make-Ahead Instructions

This dish is also great for meal prepping! Here’s how to store and reheat:

  • Refrigeration: Store leftovers in an airtight container for up to 4 days.
  • Freezing: This dish can be frozen for up to 3 months. Thaw overnight in the fridge before reheating.
  • Reheating: Warm in the microwave or on the stovetop, adding a splash of broth to keep it moist.

Frequently Asked Questions

Here are some common questions to help you on your cooking journey:

  • Can I use chicken breasts instead of thighs?: Yes, but cooking times may vary; breasts cook faster.
  • What type of rice is best?: Long-grain rice works best for this recipe due to its texture.
  • How can I make this dish gluten-free?: Use gluten-free broth and check all labels for any hidden gluten.
  • Can I add more vegetables?: Absolutely! Feel free to include peas, carrots, or zucchini.
  • What if I don’t have chicken broth?: Water can be used, but the flavor will be less rich.
  • How do I know when the chicken is done?: Use a meat thermometer; it should read 165°F.
  • Can I make this in advance?: Yes! Prepare it a day ahead and reheat when needed.
  • What’s the best way to serve this?: Enjoy it straight from the skillet or with a side salad for a complete meal.

Nutritional Tips and Dietary Adaptations

Looking to boost the nutrition of your one-skillet chicken and rice? Here are some tips:

  • Add Veggies: Include a variety of colorful vegetables to increase fiber and nutrients.
  • Opt for Brown Rice: For a whole grain option, substitute white rice with brown rice.
  • Watch Your Portions: Keep an eye on serving sizes to maintain a balanced diet.

Recommended Kitchen Equipment

To make your cooking experience even smoother, here are some tools that might come in handy:

  • Non-Stick Skillet: Ideal for even cooking and easy cleanup.
  • Meat Thermometer: To ensure your chicken is perfectly cooked.
  • Wooden Spoon: Great for stirring without scratching your skillet.

Serving Suggestions for Your Skillet Meal

To round out your meal, consider these serving ideas:

  • Serve with a Salad: A light green salad complements the richness of the dish.
  • Bread on the Side: Crusty bread is perfect for soaking up the savory broth.
  • Pair with Wine: A crisp white wine pairs beautifully with chicken dishes.

With this comprehensive guide to one-skillet chicken and rice, you’re well on your way to becoming a confident home cook! So, roll up your sleeves, gather your ingredients, and let’s get cooking. Remember, great food doesn’t require perfection—just a willingness to try. Enjoy your cooking adventure!

One-Skillet Chicken and Rice

Prep Time 10 minutes
Cook Time 30 minutes
Total Time 40 minutes
Servings 4 servings
Calories 550
A quick and flavorful one-skillet meal combining tender chicken thighs with savory rice and vegetables.

Ingredients

Protein

  • 4 pieces boneless, skinless chicken thighs
  • 1 tablespoon olive oil
  • 1 unit onion, diced
  • 3 cloves garlic, minced
  • 1 unit bell pepper, diced
  • 1 cup long-grain rice
  • 2 cups chicken broth
  • 1 teaspoon paprika
  • to taste Salt and pepper
  • for garnish Fresh parsley

Instructions 

  • Season chicken with salt, pepper, and paprika; sear until golden, then set aside.
  • SautĂ© onion for 3-4 minutes, add garlic and bell pepper, cook 2 more minutes.
  • Stir in rice, toast for 1-2 minutes, add broth, bring to simmer.
  • Return chicken to skillet, cover, cook 25 minutes until rice is tender.
  • Fluff rice, garnish with parsley, and serve.

Notes

Use a lid to help the rice cook evenly and retain moisture.
Calories: 550kcal
Cost: $15
Course: Main Course
Cuisine: American
Keyword: Chicken, rice, skillet