Author

Steven

Browsing

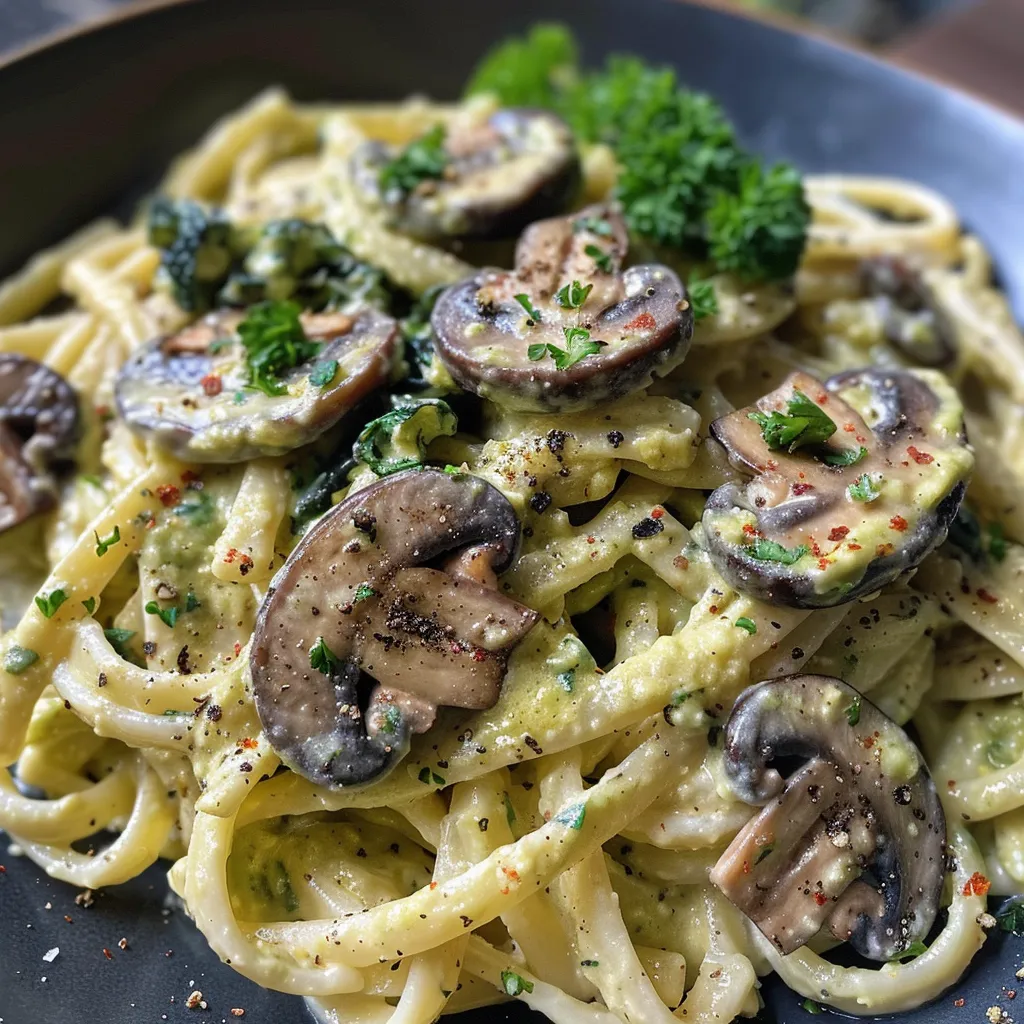
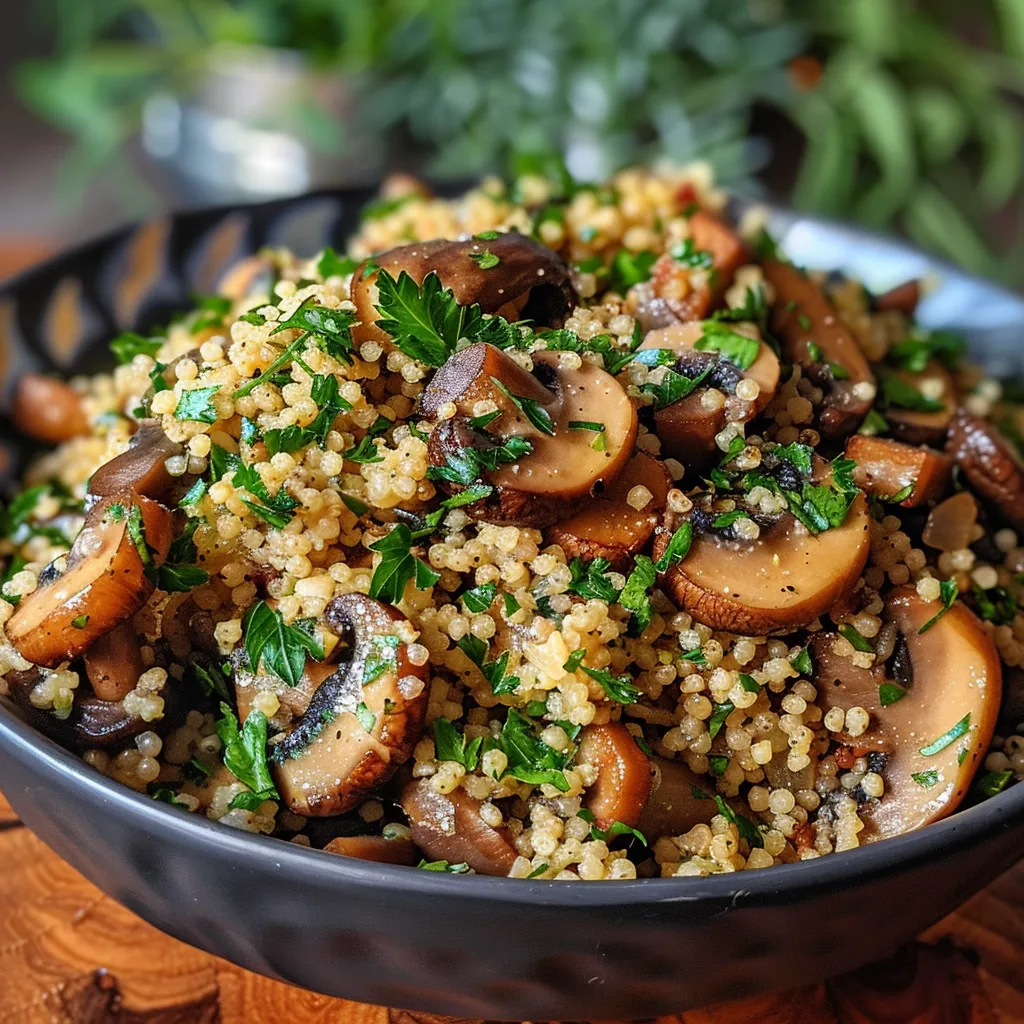
Discover the Joy of Cooking with Cremini Mushroom Herb Couscous Stuffing

Welcome to your new favorite weeknight dish! This Cremini Mushroom Herb Couscous Stuffing is a delightful twist on traditional stuffing, combining the earthy flavors of cremini mushrooms with fresh herbs and hearty couscous. Perfect for busy evenings, this recipe is not only simple to follow but also packed with flavors that are sure to impress. Whether you’re looking for a satisfying side or a vegetarian main course, this dish is here to elevate your dining experience.

Why You’ll Love This Recipe

  • Quick Preparation: With only 30 minutes from start to finish, this dish is perfect for those hectic weeknights when time is of the essence.
  • Versatile Side Dish: This couscous stuffing pairs well with a variety of main dishes, making it a great addition to any meal.
  • Flavorful Ingredients: The combination of garlic, shallot, and fresh herbs creates a savory depth that will tantalize your taste buds.
  • Vegetarian-Friendly: A perfect option for vegetarian meals, this dish is hearty enough to satisfy meat-eaters and vegetarians alike.
  • Make-Ahead Friendly: Prepare this dish in advance and simply reheat to serve, saving you time and effort on busy days.

Ingredients Breakdown

Here’s what you’ll need to create this delicious dish:

  • 1 cup Sprouts Bulk Wheat Couscous: A great base that absorbs flavors beautifully.
  • 1 cup Sprouts Brand Organic Vegetable Broth: Provides a rich flavor profile compared to using water.
  • 2 Tbsp Olive Oil: Adds moisture and enhances the overall flavor.
  • 3 cups Cremini Mushrooms, sliced thin: These mushrooms are the star of the dish, providing an earthy taste.
  • 1 small Shallot, minced: Offers a subtle sweetness and depth.
  • 4 cloves of Garlic, minced: Essential for that aromatic flavor.
  • 1 handful Italian Parsley, chopped: Adds brightness and freshness.
  • 1 sprig Fresh Rosemary, chopped: A fragrant herb that complements the mushrooms.
  • 1 Tbsp Fresh Thyme: A classic herb that enhances the savory flavors.
  • 1 tsp Salt: Balances and brings out the flavors of all ingredients.

Step-by-Step Instructions

Side view of a savory Cremini Mushroom Couscous Stuffing with herbs.

Let’s get cooking! Follow these simple steps:

  1. In a small saucepan, bring the vegetable broth to a boil.
  2. Add the couscous, stir, and remove from heat. Cover and let it sit for 5 minutes, then fluff with a fork.
  3. In a large skillet over medium heat, add the olive oil, followed by the sliced cremini mushrooms, minced shallot, and garlic. Cook until the mushrooms have wilted and are golden brown.
  4. Once the mushrooms are cooked, add the fluffed couscous into the skillet and toss everything together.
  5. Remove from heat and stir in the chopped parsley, rosemary, thyme, and sprinkle with salt to taste. Serve warm and enjoy!

Pro Tips for Perfect Couscous Stuffing

  • Quality Broth: Using a high-quality vegetable broth will significantly enhance the flavor of your couscous.
  • Don’t Overcook: Be careful not to overcook the mushrooms; they should be tender but still have some texture.
  • Herb Freshness: Use fresh herbs whenever possible for the best flavor; dried herbs can be used in a pinch but may alter the flavor.
  • Adjust for Taste: Feel free to adjust the amount of garlic and shallots based on your preference.
  • Texture Balance: For a different texture, consider adding toasted pine nuts or walnuts for a delightful crunch.

Common Mistakes and Troubleshooting

Here are some common pitfalls to avoid:

  • Too Much Liquid: If your couscous is too soggy, reduce the broth slightly next time.
  • Overcooking Mushrooms: Ensure that you don’t cook mushrooms down too much; they should retain some bite.
  • Flavor Balance: Taste your mixture before serving; you can always add more seasoning if needed.

Delicious Variations to Try

Mix it up with these creative twists:

  • Cheesy Couscous: Stir in some grated Parmesan or feta cheese for a rich, creamy texture.
  • Spinach and Feta: Add fresh spinach and crumbled feta cheese to enhance both flavor and nutrition.
  • Spicy Kick: Incorporate red pepper flakes or diced jalapeños for a spicy version.
  • Nutty Addition: Add toasted almonds or pecans for added crunch and flavor.

Storage and Make-Ahead Instructions

This dish can be made ahead of time and stored in the fridge for up to 3 days. To reheat, simply warm it in a skillet over low heat with a splash of vegetable broth to keep it moist. You can also freeze this stuffing in an airtight container for up to 2 months. Thaw overnight in the fridge before reheating.

Frequently Asked Questions

  • Can I use instant couscous instead of traditional couscous? Yes, instant couscous can be used, but the cooking time may vary.
  • What can I serve with Couscous Stuffing? This dish pairs wonderfully with grilled chicken, roasted vegetables, or a fresh salad.
  • Can I make this dish vegan? Absolutely! Just ensure that your vegetable broth is vegan-friendly.
  • How do I store leftovers? Keep in an airtight container in the refrigerator for up to 3 days.
  • Can I add meat to this recipe? Yes, cooked ground turkey or chicken can be added for a heartier meal.
  • What type of mushrooms can I use? Besides cremini, you can also use button mushrooms or shiitake mushrooms for a different flavor.
  • How can I make this dish gluten-free? Substitute couscous with quinoa or rice for a gluten-free option.
  • Is this recipe suitable for meal prep? Yes, it’s a great meal prep option as it reheats well.

Nutritional Tips and Dietary Adaptations

This recipe is relatively low in calories and packed with nutrients from the mushrooms and herbs. To enhance its nutritional profile:

  • Increase Fiber: Add in some chopped kale or spinach for added fiber and vitamins.
  • Reduce Sodium: Use low-sodium broth to keep salt levels in check.
  • Boost Protein: Consider adding legumes like chickpeas or lentils for an added protein punch.

Essential Kitchen Equipment

To make your cooking experience smooth, ensure you have:

  • Cutting Board: A sturdy cutting surface for chopping your vegetables and herbs.
  • Sharp Knife: A good knife will make chopping and slicing quick and easy.
  • Large Skillet: Useful for sautĂ©ing the mushrooms and combining all ingredients.
  • Small Saucepan: Ideal for boiling the vegetable broth and cooking the couscous.

Serving Suggestions

This Cremini Mushroom Herb Couscous Stuffing can stand alone as a main dish or serve it alongside a variety of proteins. Try it with:

  • Grilled Chicken: The savory flavors complement the smoky chicken beautifully.
  • Roasted Salmon: Adds a rich, buttery flavor that pairs perfectly with the herbs.
  • Vegetarian Meatloaf: A hearty option for a satisfying vegetarian meal.
  • Fresh Salad: A light side of greens balances out the richness of the stuffing.

Thank you for joining me on this culinary adventure! I hope this Cremini Mushroom Herb Couscous Stuffing brings warmth and joy to your table. Remember, cooking is about having fun and experimenting with flavors, so don’t hesitate to make this recipe your own. Happy cooking!

Cremini Mushroom Herb Couscous Stuffing

Prep Time 10 minutes
Cook Time 15 minutes
Total Time 25 minutes
Servings 4 servings
Calories 250
A flavorful and herbaceous couscous stuffing featuring cremini mushrooms, perfect as a side dish or stuffing for vegetables.

Ingredients

Grains

  • 1 cup Sprouts Bulk Wheat Couscous
  • 1 cup Sprouts Brand Organic vegetable broth
  • 2 Tbsp olive oil
  • 3 cups cremini mushrooms, sliced thin
  • 1 small shallot, minced
  • 4 cloves garlic, minced
  • 1 handful Italian parsley, chopped
  • 1 sprig fresh rosemary, chopped
  • 1 Tbsp fresh thyme
  • 1 tsp salt

Instructions 

  • Bring vegetable broth to a boil, add couscous, stir, remove from heat, cover, and let sit for 5 minutes.
  • Fluff couscous with a fork.
  • In a skillet, heat olive oil over medium heat, cook mushrooms, shallot, and garlic until mushrooms wilt.
  • Add cooked couscous to the skillet and toss to combine.
  • Remove from heat, stir in parsley, rosemary, thyme, and sprinkle with salt.

Notes

For extra flavor, toast the couscous before cooking.
Calories: 250kcal
Cost: $12
Course: Side Dish
Cuisine: Mediterranean
Keyword: couscous, herbs, Mushrooms

Indulge in Creamy California Avocado Alfredo Pasta Tonight!

Are you ready to elevate your dinner game with a dish that’s as delicious as it is easy to prepare? This Creamy California Avocado Alfredo Pasta is not only a comforting meal but also a delightful way to enjoy the rich flavors of fresh avocados. Packed with nutrients like vitamin A, vitamin C, and healthy fats, this dish is perfect for any weeknight dinner. In under 30 minutes, you can whip up a plate that will impress your family and friends!

Why You’ll Love This Recipe

  • Quick and Easy: Just 30 minutes from start to finish means you can enjoy gourmet dining without the hassle.
  • Nutritious Goodness: Loaded with essential vitamins like vitamin A and vitamin C, this dish is good for your health and your taste buds.
  • Flavorful Ingredients: The combination of California avocados, cashews, and nutritional yeast creates a creamy texture without dairy.
  • Customizable: Whether you’re vegan, gluten-free, or just looking to switch things up, this recipe is flexible!
  • Impressive Presentation: Garnish with fresh herbs and chili flakes for a beautiful dish that’s sure to wow your guests.

Ingredient Breakdown

Let’s dive into what you’ll need for this delectable pasta dish.

  • Coconut oil: A great alternative to butter that adds a subtle sweetness. Substitute with olive oil if preferred.
  • Yellow onion: Provides a savory base. Shallots or scallions can also work well.
  • Salt and pepper: Essential for seasoning. Use sea salt for a gourmet touch.
  • Baby Portobello mushrooms: Their earthy flavor complements the sauce beautifully. You can substitute with button mushrooms if needed.
  • Raw cashews: Soaking them adds creaminess. If you’re nut-free, try sunflower seeds!
  • Fresh lemon juice: Adds brightness. Lime juice can be a zesty alternative.
  • California avocado: The star of the dish! Ensure it’s ripe for the best flavor.
  • Nutritional yeast: Offers a cheesy flavor without dairy. This can be omitted if not available.
  • Fresh kale: Nutrient-packed and a great way to add color. Spinach is a good substitute.
  • Spaghetti noodles: Choose your favorite type, whether gluten-free or whole wheat.
  • Fresh parsley and crushed red pepper: For garnish and added flavor.

Pro Tips for Success

Side view of California Avocado Alfredo pasta topped with green parsley.
  • Perfect avocados: Look for avocados that yield slightly to pressure for optimal ripeness.
  • Soak cashews: This step is crucial! If time is tight, use hot water to soak them quickly.
  • Reserve pasta water: This starchy liquid helps to thicken your sauce and bind everything together.
  • Cook pasta al dente: This will keep the noodles from becoming mushy when mixed with the sauce.
  • Blend until smooth: For the creamiest sauce, ensure your ingredients are well-blended without any chunks.
  • Adjust seasoning: Always taste your sauce before serving to ensure it’s perfectly seasoned.
  • Garnish generously: A sprinkle of fresh herbs and a dash of red pepper flakes can elevate your dish visually and flavor-wise.
  • Meal prep: This dish can easily be made ahead of time and reheated, making it perfect for busy weeknights.

Common Mistakes and Troubleshooting

  • Overcooking pasta: Keep an eye on your noodles! They should have a slight bite to them.
  • Too thick sauce: If your sauce is too thick, add more reserved pasta water gradually until you reach the desired consistency.
  • Not enough seasoning: Always taste as you go! Don’t hesitate to add more salt or pepper.
  • Underripe avocados: If your avocados aren’t ripe enough, they won’t blend smoothly. Allow them to ripen at room temperature.

Delicious Variations

Get creative with your creamy pasta! Here are some delightful twists:

  • Avocado Alfredo Zoodles: Substitute spaghetti with spiralized zucchini for a low-carb option.
  • Vegan Avocado Pesto Dish: Blend fresh basil with avocados for a flavorful pesto sauce.
  • Spicy Avocado Pasta: Add diced jalapeños or a splash of sriracha for a kick!
  • Protein Boost: Toss in some cooked chickpeas or grilled chicken for added protein.

Storage and Make-Ahead Instructions

This creamy pasta is best enjoyed fresh, but you can easily make it ahead of time!

  • Refrigeration: Store leftovers in an airtight container for up to 3 days.
  • Freezing: Not recommended due to the creamy texture, but you can freeze the sauce separately for future use.
  • Reheating: Gently reheat on the stove over low heat, adding a splash of water to revive the sauce.

Frequently Asked Questions

  • Can I make this gluten-free? Absolutely! Just use gluten-free pasta or zoodles.
  • What can I substitute for cashews? Sunflower seeds or silken tofu can work well as alternatives.
  • How do I store leftover sauce? Keep it in the fridge in an airtight container for up to 3 days.
  • Can I use other vegetables? Yes! Feel free to add spinach, broccoli, or any veggies you enjoy.
  • Is this recipe kid-friendly? Definitely! The creamy texture and mild flavors are great for kids.
  • Can I add cheese? For a non-vegan version, sprinkle with parmesan cheese before serving!
  • How can I make it spicier? Add crushed red pepper flakes or diced chili peppers to the sauce.
  • What nutrients do avocados provide? Avocados are rich in vitamins such as vitamin A, vitamin C, and healthy omega fatty acids.

Nutrition Tips and Dietary Adaptations

This recipe is not only delicious but also packed with nutrients. Here’s how to make it even healthier:

  • Add greens: Boost the nutrient content further by including more leafy greens like spinach or arugula.
  • Swap pasta: Use whole grain or bean-based pasta for added fiber and protein.
  • Vegan cheese: Incorporate vegan cheese for a cheesy flavor without dairy.

Essential Equipment Recommendations

To whip up this delightful dish, you’ll need a few kitchen essentials:

  • High-speed blender: For creating the smooth sauce.
  • Large pot: To cook the pasta effectively.
  • Large skillet: To sautĂ© the onions and mushrooms perfectly.

Serving Suggestions

Serve your Creamy California Avocado Alfredo Pasta with:

  • Fresh salad: A simple green salad drizzled with lemon vinaigrette.
  • Garlic bread: Crunchy garlic bread pairs beautifully with the creamy pasta.
  • Wine: A chilled glass of white wine enhances the flavor of this dish.

Conclusion

This Creamy California Avocado Alfredo Pasta is a testament to how simple ingredients can come together to create something extraordinary. With its rich flavors and creamy texture, it’s the perfect dish for any occasion. So gather your ingredients, invite a friend or two, and enjoy a delightful culinary experience that you can feel good about. Happy cooking!

California Avocado Alfredo Pasta

Prep Time 10 minutes
Cook Time 25 minutes
Total Time 35 minutes
Servings 4 servings
Calories 650
A creamy, plant-based pasta dish featuring fresh California avocado and a flavorful mushroom onion sauce, perfect for a wholesome meal.

Ingredients

Main ingredients

  • 2 Tbsp. coconut oil
  • 1 large yellow onion (sliced into thin half-moons)
  • 1/8 tsp. salt (or to taste)
  • 1/8 tsp. black pepper (or to taste)
  • 2 cups baby Portobello mushrooms (sliced)
  • 1 cup raw cashews (soaked in hot water for 30 minutes, then drained)
  • 0.5 cup water
  • 1 clove garlic
  • 3 Tbsp. fresh lemon juice
  • 1 ripe Fresh California Avocado (seeded and peeled)
  • 1 Tbsp. nutritional yeast
  • 3/4 cup fresh kale (chopped)
  • 1 lb. spaghetti noodles (gluten-free, whole wheat, etc.)
  • 1/8 tsp. fresh parsley (to garnish)
  • 1/8 tsp. crushed red pepper (to garnish)

Instructions 

  • Bring a large pot of salted water to a boil and cook the pasta according to package instructions, reserving 1/3 cup of starchy water before draining.
  • Heat coconut oil in a skillet over medium heat, cook onions for 2 minutes, season with salt and pepper, then cook for 15 minutes until translucent.
  • Transfer 1/3 of the sautĂ©ed onions to a blender, then reheat the skillet, cook mushrooms for 5 minutes, toss, and cook another 5-6 minutes.
  • In the blender, add soaked cashews, water, garlic, lemon juice, avocado, nutritional yeast, and kale; blend until smooth, adding water as needed, and season with salt and pepper.
  • Combine cooked pasta, reserved water, mushroom onion mixture, and sauce in a large bowl; toss to coat evenly, then serve topped with parsley and red pepper.

Notes

For extra creaminess, blend a little more avocado into the sauce.
Calories: 650kcal
Cost: $15
Course: Main Course
Cuisine: California
Keyword: Avocado

Discover the Joy of Creamy Corn Pasta

Welcome to a delightful culinary adventure where comfort food meets creativity! Our Creamy Corn Pasta recipe combines the sweetness of fresh corn with the satisfying texture of spaghetti, creating a dish that is not only delicious but also incredibly easy to make. Perfect for weeknight dinners or special occasions, this recipe is all about bringing joy back into the kitchen and making cooking feel approachable and fun.

Why You’ll Love This Recipe

  • Simple Ingredients: You’ll need just a handful of pantry staples and fresh corn to create this mouthwatering dish.
  • Quick to Prepare: In less than 30 minutes, you can whip up a creamy pasta dish that will impress anyone at your table.
  • Versatile Flavor: The combination of sweet corn and garlic creates a rich, savory flavor profile that pairs perfectly with any pasta.
  • Healthy Twist: This recipe incorporates fresh vegetables and can be adapted to accommodate various dietary preferences.
  • Make Ahead: Prepare the sauce in advance and store it for a quick meal on busy nights.

Essential Ingredients

To make this Creamy Corn Pasta, here’s what you need:

  • Spaghetti or any pasta: 150 grams (or your favorite pasta type, like penne or fusilli).
  • Water: 2 liters, for boiling the pasta.
  • Salt: 2 teaspoons, to enhance the flavor of the pasta.
  • Olive Oil: 2 tablespoons, for sautĂ©ing.
  • Garlic: 3 cloves, peeled and sliced for aromatic depth.
  • Lemon Zest: 1 teaspoon, to add brightness.
  • Green Onions: 2, chopped roughly for freshness.
  • Sweet Corn Kernels: 3 cups, fresh or frozen for sweetness.
  • Italian Seasoning: 1 teaspoon, for added flavor complexity.
  • Red Chilli Flakes: 1 teaspoon, for a touch of heat.
  • Boiled Potato: ÂĽ cup, to create a creamy texture.
  • Parmesan Cheese: ÂĽ cup, for richness and depth.
  • Lemon Juice: 3 tablespoons or to taste, for acidity.

Pro Tips for Success

Close-up view of luscious spaghetti in a creamy corn sauce.
  • Use Fresh Corn: Whenever possible, opt for fresh sweet corn to maximize flavor. Frozen corn is a good alternative if fresh is unavailable.
  • Don’t Overcook the Pasta: Follow package instructions closely; al dente pasta holds its shape better and absorbs the sauce beautifully.
  • Reserve Pasta Water: Always keep some pasta cooking water on hand. It helps thicken the sauce and adds flavor.
  • Blend Thoroughly: For the smoothest sauce, ensure you blend the corn and potatoes until creamy.
  • Adjust Seasoning: Taste your sauce and adjust salt, lemon juice, and seasoning to suit your palate.
  • Experiment with Cheese: Feel free to swap Parmesan for Pecorino or any cheese you enjoy for a unique twist.
  • Add Protein: Consider adding grilled chicken, shrimp, or chickpeas for a heartier meal.
  • Garnish Generously: Fresh herbs like basil or parsley can elevate the dish’s presentation and flavor.

Avoid Common Mistakes

  • Not Salting the Water: Always add salt to boiling water before cooking pasta; it enhances flavor significantly.
  • Overcooking the Corn: SautĂ© the corn just until it begins to brown; overcooked corn loses its sweetness and crunch.
  • Skipping the Blending Step: Blending the sauce with potatoes is key to achieving that creamy texture; don’t skip it!
  • Forgetting to Reserve Pasta Water: This step is crucial for achieving the perfect sauce consistency.

Delicious Variations

Feeling adventurous? Here are some fun variations to try:

  • Spicy Corn Pasta: Add diced jalapeños or a dash of hot sauce for an extra kick.
  • Herbed Corn Pasta: Mix in fresh herbs like basil, cilantro, or dill for a flavorful twist.
  • Cheesy Corn Pasta: Increase the Parmesan or add mozzarella for extra gooeyness.
  • Veggie-Packed Corn Pasta: Toss in spinach, zucchini, or bell peppers for added nutrients and color.

Storage and Make-Ahead Instructions

This Creamy Corn Pasta can be made ahead of time and stored in the refrigerator for up to three days. To store:

  • Cool Completely: Allow the pasta to cool to room temperature before storing.
  • Use Airtight Containers: Transfer to airtight containers to maintain freshness.
  • Reheat Gently: When ready to eat, gently reheat on the stove over medium heat, adding a splash of water or broth to loosen the sauce.

Frequently Asked Questions

  • Can I use frozen corn? Yes, frozen corn works well! Just ensure it’s thawed before cooking.
  • What can I substitute for Parmesan cheese? Try using nutritional yeast for a vegan option or any hard cheese you prefer.
  • Is this recipe gluten-free? Absolutely! Use gluten-free pasta of your choice.
  • Can I make this recipe vegan? Yes, omit the cheese and use a plant-based alternative.
  • How can I make this dish spicier? Add more red chili flakes or fresh chopped chilies to the sauce.
  • What’s the best way to reheat leftover pasta? Reheat on low heat in a saucepan, adding a bit of water to help loosen the sauce.
  • Can I add meat to this recipe? Definitely! Grilled chicken or shrimp make great additions.
  • How long does cooked corn pasta last in the fridge? It can last for up to three days if stored properly.

Nutritional Tips and Dietary Adaptations

This creamy corn pasta can be adapted to fit various dietary needs:

  • Lower Calorie: Use whole wheat pasta and reduce the amount of cheese.
  • High Protein: Add grilled chicken or chickpeas to boost protein content.
  • Low-Carb: Substitute pasta with zucchini noodles or spaghetti squash for a lighter option.

Essential Equipment

Here’s what you’ll need to whip up this recipe:

  • Large Pot: For boiling pasta.
  • Skillet: To sautĂ© the corn and garlic.
  • Blender: For creating the creamy sauce.
  • Measuring Cups and Spoons: For accurate ingredient measurements.

Serving Suggestions

Serve this Creamy Corn Pasta warm, garnished with additional Parmesan and fresh herbs. Pair it with a crisp green salad or some garlic bread for a complete meal. Enjoy every delightful bite!

Conclusion

Cooking should be an enjoyable experience, and our Creamy Corn Pasta recipe is designed to inspire confidence in the kitchen. With simple ingredients and straightforward steps, you’ll create a dish that is both comforting and satisfying. So gather your ingredients and get ready to delight in every bite!

Creamy Corn Pasta Recipe Sweet Corn Pasta

Prep Time 10 minutes
Cook Time 20 minutes
Total Time 30 minutes
Servings 4 servings
Calories 520
A delicious and creamy pasta dish featuring sweet corn, garlic, and Parmesan cheese, perfect for a quick and satisfying meal.

Ingredients

Pasta

  • 150 grams Spaghetti or any pasta
  • 2 liters Water
  • 2 tsp Salt
  • 2 tbsp Olive Oil
  • 3 cloves Garlic peeled and sliced
  • 1 tsp Lemon Zest
  • 2 no Green Onions chopped roughly
  • 3 cups Sweet corn kernels
  • 0.5 cup Water (additional for cooking corn)
  • 1 tsp Italian Seasoning
  • 1 tsp Red Chilli Flakes
  • 0.25 cup Boiled Potato
  • 0.25 cup Parmesan Cheese
  • 3 tbsp Lemon Juice (or to taste)

Instructions 

  • Heat olive oil, sautĂ© garlic, green onions, and lemon zest for a few seconds.
  • Add sweet corn, cook until slightly colored, then add water, cover, and simmer for 8-10 minutes.
  • Remove some corn mixture, blend cooled corn with potatoes, Parmesan, and lemon juice until creamy, adding pasta water as needed.
  • Cook pasta in boiling salted water, then combine with corn sauce, reserved corn, and pasta water. Mix well and serve immediately.

Notes

Use fresh sweet corn for best flavor. Adjust lemon juice to taste.
Calories: 520kcal
Cost: $10
Course: Main Course
Cuisine: International
Keyword: Corn, Creamy, Pasta

Discover the Joy of Grilled Shrimp Rice Bowls

Welcome to a culinary adventure that will elevate your weeknight dinners! If you’ve been searching for a quick, healthy, and delicious meal, look no further than these Grilled Shrimp Rice Bowls with Sweet Teriyaki Sauce. Packed with vibrant flavors and fresh ingredients, this recipe is designed to make your cooking experience enjoyable and stress-free. Let’s dive into what makes this recipe a must-try!

Why You’ll Love This Recipe

  • Quick and Easy: With minimal prep and cook time, you can whip up this dish in under 30 minutes, perfect for busy weeknights.
  • Flavor-Packed: The sweet teriyaki sauce complements the shrimp beautifully, creating a delightful balance of flavors.
  • Customizable: Feel free to swap in your favorite vegetables or grains, allowing everyone to personalize their bowl.
  • Healthy Ingredients: This dish features lean protein, fresh vegetables, and wholesome rice, making it a nutritious choice!
  • Great for Leftovers: Leftover shrimp and rice can be easily reheated or transformed into a new meal.

Ingredients Breakdown

Let’s take a closer look at the ingredients needed for these grilled shrimp rice bowls. Each ingredient plays a vital role in achieving the perfect flavor and texture.

Main Ingredients

  • 1 lb Large shrimp: Peeled and deveined, the star of the dish. Look for fresh or frozen shrimp that are firm to the touch.
  • 2 tablespoons Olive oil: Helps to keep the shrimp moist while grilling.
  • 2 cloves Garlic: Minced for aromatic flavor.
  • 1 tablespoon Fresh ginger: Grated to add a zesty kick to the teriyaki sauce.
  • Salt and pepper: To taste, enhancing the natural flavors of the shrimp.

For the Sweet Teriyaki Sauce

  • 1/2 cup Soy sauce: The base of the teriyaki sauce, providing depth and saltiness.
  • 1/4 cup Honey: Adds sweetness and helps to thicken the sauce.
  • 2 tablespoons Rice vinegar: A touch of acidity balances the sweetness.
  • 1 tablespoon Sesame oil: Adds a nutty flavor to the sauce.
  • 1 tablespoon Cornstarch: Used to thicken the sauce.
  • 2 tablespoons Water: To mix with cornstarch for a smooth sauce texture.

For Garnishing

  • 1 teaspoon Sesame seeds: Toasted for a crunchy topping.
  • 2 Green onions: Sliced for freshness and color.
  • 2 cups Cooked jasmine or brown rice: The hearty base of your bowl.
  • 1 cup Steamed broccoli: For a pop of color and nutrition.
  • 1 cup Shredded carrots: Adds a sweet crunch.
  • 1 Avocado: Sliced, for creaminess.
  • Lime wedges: For serving, adding a zesty finish.

Step-by-Step Cooking Instructions

Juicy grilled shrimp served over jasmine rice with avocado and colorful vegetables.

Now that we’ve gathered our ingredients, let’s get cooking! Follow these simple steps to create your flavorful grilled shrimp rice bowls.

  1. Prepare the Teriyaki Sauce: In a small saucepan, combine soy sauce, honey, rice vinegar, sesame oil, and ginger. In a separate bowl, mix cornstarch and water until smooth, then stir into the saucepan. Cook over medium heat until the sauce thickens. Set aside.
  2. Marinate the Shrimp: In a bowl, toss the shrimp with olive oil, minced garlic, salt, and pepper. Let it marinate for about 10 minutes.
  3. Grill the Shrimp: Preheat your grill or grill pan over medium-high heat. Grill shrimp for about 2-3 minutes on each side or until they turn pink and opaque.
  4. Assemble the Bowls: Start with a base of rice, then top with grilled shrimp, steamed broccoli, shredded carrots, and avocado slices. Drizzle with teriyaki sauce and garnish with sesame seeds and green onions.
  5. Serve: Add lime wedges on the side for a fresh squeeze to enhance the flavors.

Pro Tips for Perfect Grilled Shrimp

To ensure your shrimp come out perfectly grilled, here are some expert insights:

  • Don’t Overcrowd: Give shrimp enough space on the grill to cook evenly and achieve that nice char.
  • Keep it Moving: Turn shrimp regularly for even cooking and prevent them from drying out.
  • Watch the Time: Shrimp cook quickly, so keep an eye on them to avoid overcooking.
  • Use Fresh Ingredients: Fresh shrimp and vegetables make a noticeable difference in flavor and texture.
  • Experiment with Marinades: Feel free to try different marinades for variety—citrus, spicy, or herb-infused options work great!
  • Pre-heat Grill: Ensure your grill is hot before adding shrimp to prevent sticking.
  • Let it Rest: Allow grilled shrimp to rest for a couple of minutes before serving to retain moisture.
  • Adjust Sauce Thickness: If you prefer a thinner sauce, reduce the cornstarch; for thicker, increase it slightly.

Common Mistakes and Troubleshooting

Even the best cooks make mistakes! Here are some common pitfalls and how to avoid them:

  • Overcooked Shrimp: Remove shrimp from heat as soon as they turn pink and opaque; they continue to cook off the grill.
  • Too Salty Teriyaki Sauce: If your sauce is too salty, add a teaspoon of sugar to balance the flavors.
  • Sticky Rice: Rinse rice before cooking to remove excess starch and prevent sticking.
  • Bland Vegetables: Season vegetables lightly with salt and pepper to enhance their flavor before adding to the bowl.

Variations to Try

One of the best parts of cooking is experimenting! Here are some fun variations to try with your grilled shrimp rice bowls:

  • Spicy Grilled Shrimp: Add red pepper flakes or sriracha to the marinade for a spicy kick.
  • Quinoa Bowls: Substitute brown rice with quinoa for a protein-packed alternative.
  • Veggie-Loaded Bowls: Add bell peppers, snap peas, or zucchini for added crunch and nutrients.
  • Teriyaki Chicken Bowls: Swap shrimp with grilled chicken for a different protein option.

Storage and Make-Ahead Instructions

This recipe is perfect for meal prep! Here’s how to store your leftovers:

  • Refrigeration: Store leftover shrimp and rice in airtight containers for up to 3 days.
  • Freezing: Shrimp can be frozen for up to 2 months. Reheat gently to avoid overcooking.
  • Make-Ahead Sauce: Prepare the teriyaki sauce a day in advance; it tastes even better after the flavors meld together!

Frequently Asked Questions

Here are some common questions about this recipe:

  • What type of shrimp should I use? Fresh or frozen large shrimp works best for grilling.
  • Can I make the teriyaki sauce ahead of time? Absolutely! It can be stored in the fridge for up to a week.
  • What can I substitute for rice? Quinoa, cauliflower rice, or even noodles are great alternatives!
  • How can I make the dish spicier? Add chili paste or fresh chopped jalapeños to the shrimp marinade.
  • Are there any vegetarian options? Substitute shrimp with tofu or chickpeas for a plant-based version.
  • Can I use different vegetables? Yes! Customize with seasonal veggies like bell peppers or snap peas.
  • What’s the best way to store leftovers? Keep them in airtight containers in the fridge for up to 3 days.
  • How do I reheat leftovers? Gently microwave or warm in a skillet over low heat to avoid overcooking the shrimp.

Nutritional Tips and Dietary Adaptations

For those mindful of nutrition, here’s how to adapt this recipe:

  • Low-Carb Option: Replace rice with cauliflower rice for a low-carb alternative.
  • Gluten-Free: Use gluten-free soy sauce and ensure all other ingredients are gluten-free.
  • Dairy-Free: This recipe is naturally dairy-free, making it suitable for those with lactose intolerance.
  • High-Protein: Add more shrimp or incorporate edamame for an extra protein boost.

Equipment Recommendations

To make your cooking process even smoother, here are some essential tools:

  • Grill or Grill Pan: A good quality grill ensures even cooking and adds a delicious char.
  • Non-Stick Saucepan: Ideal for making the teriyaki sauce without sticking.
  • Measuring Cups and Spoons: Accurate measurements lead to perfect flavor balance!
  • Sharp Knife: Essential for preparing your ingredients quickly and safely.

Serving Suggestions

To complete your meal, consider these serving ideas:

  • Fresh Salad: Serve with a side of mixed greens or a cucumber salad for a refreshing crunch.
  • Fruit Salsa: A mango or pineapple salsa adds a tropical touch to your meal.
  • Chilled Beverage: Pair with a chilled iced tea or lemonade for a refreshing drink.
  • Additional Toppings: Offer toppings like pickled ginger or crushed peanuts for added texture.

In conclusion, these Grilled Shrimp Rice Bowls with Sweet Teriyaki Sauce are not just a meal; they are an experience that brings joy and flavor to your table. With simple ingredients, quick preparation, and endless customization options, you can turn any weeknight into a delightful culinary adventure. So grab your apron and get ready to impress your family and friends with this delicious dish!

Grilled Shrimp Rice Bowls with Sweet Teriyaki Sauce

Prep Time 10 minutes
Cook Time 15 minutes
Total Time 25 minutes
Servings 4 servings
Calories 550
Enjoy a flavorful and healthy rice bowl featuring succulent grilled shrimp topped with a sweet and savory teriyaki sauce, complemented by fresh vegetables and creamy avocado.

Ingredients

Protein

  • 1 lb Large shrimp, peeled and deveined

Oil

  • 2 tablespoons Olive oil

Aromatics

  • 2 cloves Garlic, minced
  • 1 tablespoon Fresh ginger, grated

Seasonings

  • to taste Salt and pepper

Sauce ingredients

  • 0.5 cup Soy sauce
  • 0.25 cup Honey
  • 1 tablespoon Rice vinegar
  • 1 tablespoon Sesame oil
  • 1 teaspoon Cornstarch
  • 2 tablespoons Water

Garnishes

  • to taste Sesame seeds
  • to taste Green onions, sliced

Base

  • 2 cups Cooked jasmine or brown rice
  • 1 cup Steamed broccoli
  • 1 cup Shredded carrots
  • 1 piece Avocado, sliced
  • to taste Lime wedges for serving

Instructions 

  • Marinate shrimp with garlic, ginger, salt, and pepper.
  • Cook shrimp on grill or skillet until pink and cooked through.
  • Mix soy sauce, honey, rice vinegar, sesame oil, and cornstarch; heat until thickened to make teriyaki sauce.
  • Assemble bowls with rice, vegetables, shrimp, avocado, and drizzle with sauce. Garnish with sesame seeds and green onions.

Notes

For extra flavor, marinate the shrimp for 15 minutes before cooking.
Calories: 550kcal
Cost: $15
Course: Main Course
Cuisine: Asian
Keyword: shrimp

Welcome to your new favorite weeknight meal! These BBQ Beef and Avocado Wraps are not just delicious; they’re also quick to prepare, making them the perfect solution for your busy evenings. In under 30 minutes, you can enjoy a meal that combines tender beef, creamy avocado, and fresh veggies, all wrapped up in a soft tortilla. Let’s dive into why this recipe will not only satisfy your taste buds but also become a staple in your cooking repertoire.

Why You’ll Love This Recipe

This recipe isn’t just about good taste; it offers numerous benefits that make it a must-try:

  • Speedy Preparation: Whip this meal up in under 30 minutes, perfect for those hectic weeknights.
  • Flavor Explosion: The combination of BBQ beef, creamy avocado, and fresh ingredients makes each bite a delightful experience.
  • Customizable: Adjust the ingredients to suit your taste or dietary needs—vegetarian options are easy to implement!
  • Healthy Ingredients: Packed with protein, healthy fats, and fresh veggies, this wrap is nutritious without sacrificing flavor.
  • Easy Cleanup: With minimal cooking equipment required, you’ll spend less time cleaning and more time enjoying your meal.

Ingredient Breakdown

Let’s take a closer look at the ingredients you’ll need for these wraps, along with some great substitutions:

  • Beef: 1 lb of flank steak or ribeye, thinly sliced. If you’re looking for alternatives, try chicken or tofu for a different protein.
  • BBQ Sauce: ½ cup of your favorite brand or homemade. Consider using a sugar-free option for a healthier twist.
  • Olive Oil: 1 tbsp for cooking. Feel free to substitute with avocado oil for a higher smoke point.
  • Avocado: 1 ripe avocado, sliced. For a zesty kick, you can add guacamole instead.
  • Tortillas: 4 large flour tortillas. Corn tortillas work beautifully for a gluten-free version.
  • Lettuce: 1 cup of shredded lettuce adds a fresh crunch. Spinach or arugula can be used as alternatives.
  • Cherry Tomatoes: ½ cup, halved. Opt for diced bell peppers for a different flavor profile.
  • Red Onion: ÂĽ cup, thinly sliced. Green onions or shallots can be substituted for a milder taste.
  • Shredded Cheese: ½ cup of cheddar, pepper jack, or mozzarella. Skip the cheese for a dairy-free version.
  • Lime Juice: 1 tbsp for brightness. Lemon juice works as a great substitute.
  • Seasoning: Salt and pepper to taste.

Step-by-Step Instructions

Now that we have everything ready, here’s how to put it all together:

Step 1: Marinate and Cook the Beef

Start by marinating your sliced beef in BBQ sauce for at least 10 minutes to infuse it with flavor. Heat 1 tbsp of olive oil in a large skillet over medium-high heat. Add the marinated beef and cook for about 5-7 minutes, or until it’s browned and cooked through. Set it aside.

Step 2: Prepare the Vegetables

While the beef is cooking, prepare your vegetables. Slice the avocado, halve the cherry tomatoes, and shred the lettuce. Thinly slice the red onion.

Step 3: Assemble the Wraps

Lay out a tortilla and start layering your ingredients. Begin with a generous portion of beef, followed by avocado slices, shredded lettuce, cherry tomatoes, red onion, and a sprinkle of cheese. Drizzle with lime juice for added flavor.

Step 4: Wrap It Up

Fold in the sides of the tortilla and then roll it up tightly from the bottom. Repeat this process for the remaining tortillas and filling.

Step 5: Serve & Enjoy

Cut the wraps in half and serve immediately. These wraps are delicious on their own but can be paired with a side of chips or a fresh salad.

Pro Tips for Perfect Wraps

Side view of a BBQ Beef and Avocado Wrap filled with colorful vegetables and cheese.

To ensure your BBQ Beef and Avocado Wraps turn out perfectly every time, consider these expert insights:

  • Choose Quality Meat: Opt for grass-fed beef for better flavor and nutrition.
  • Let the Beef Rest: Allow the cooked beef to rest for a few minutes before slicing to retain moisture.
  • Warm the Tortillas: Gently warm the tortillas in a skillet to make them more pliable and enhance their flavor.
  • Layer Strategically: Place heavier ingredients like beef at the bottom to prevent the wrap from falling apart.
  • Use Fresh Ingredients: Fresh veggies not only taste better but also add to the nutritional value of your meal.
  • Experiment with Sauces: Try different sauces like ranch, sriracha, or even a yogurt-based sauce for variety.
  • Keep It Balanced: Aim for a balance of protein, fats, and carbs in your wrap for a satisfying meal.
  • Make Ahead: Prep the ingredients in advance for quicker assembly on busy nights.
  • Cut Carefully: Use a sharp knife to cut the wraps for clean edges and a more appealing presentation.
  • Don’t Overstuff: Less is more; overstuffed wraps can be difficult to handle.

Common Mistakes and Troubleshooting

Here are a few common pitfalls to avoid while making your BBQ Beef and Avocado Wraps:

  • Dry Beef: Overcooking can lead to tough beef. Keep an eye on it to ensure it remains juicy.
  • Soggy Wraps: Excess moisture from the veggies can make the wrap soggy. Pat veggies dry before adding them.
  • Too Much BBQ Sauce: While flavorful, too much sauce can overpower the other ingredients. Use it wisely!
  • Unripe Avocado: Ensure your avocado is ripe for the best flavor and texture.

Variations to Try

If you’re looking to switch things up, here are some delicious variations of this wrap:

  • Spicy BBQ Beef Wrap: Add jalapeños or a drizzle of hot sauce for an extra kick.
  • Vegetarian BBQ Wrap: Substitute the beef with grilled veggies or jackfruit for a plant-based option.
  • BBQ Chicken Wrap: Swap out the beef for shredded rotisserie chicken for an equally tasty alternative.
  • Breakfast Wrap: Add scrambled eggs and swap out BBQ sauce for a tangy hollandaise for a breakfast twist.

Storage and Make-Ahead Instructions

These wraps can be made ahead of time and stored in the fridge for easy meals. Here’s how:

  • Refrigeration: Store wrapped in plastic wrap or in an airtight container for up to 2 days.
  • Freezing: While it’s best to enjoy them fresh, you can freeze unassembled ingredients for up to 3 months. Thaw in the fridge before assembling.

Frequently Asked Questions

Here are some common questions about BBQ Beef and Avocado Wraps:

  • Can I use a different protein? Absolutely! Chicken, turkey, or even tofu work great.
  • How can I make this wrap gluten-free? Use gluten-free tortillas and check your BBQ sauce for gluten.
  • What can I serve with these wraps? They pair wonderfully with a side salad, chips, or grilled vegetables.
  • Is this recipe good for meal prep? Yes! It’s perfect for making ahead of time for quick lunches or dinners.
  • Can I use leftover beef? Definitely! Leftover grilled or roasted beef can be a great addition.
  • How do I keep the wraps from getting soggy? Use dry ingredients and avoid over-saucing.
  • Can I make this recipe spicy? Yes! Add spicy BBQ sauce or jalapeños for heat.
  • What’s the best way to reheat the wraps? If they’re assembled, heat them in a skillet over low heat until warmed through.

Nutrition Tips and Dietary Adaptations

This recipe is not only delicious but also adaptable for various dietary needs:

  • Low-Carb Option: Use lettuce wraps instead of tortillas to cut down on carbs.
  • Higher Protein: Add beans or legumes to boost protein content.
  • Vegan Option: Replace beef with marinated tempeh and cheese with a vegan alternative.
  • Dairy-Free: Simply leave out the cheese or use a dairy-free alternative.

Equipment Recommendations

For this recipe, you’ll need:

  • Skillet: A large skillet is best for cooking the beef evenly.
  • Cutting Board and Knife: For slicing your vegetables and beef.
  • Mixing Bowl: For marinating the beef.
  • Tongs: To easily flip the beef in the skillet.

Serving Suggestions

These wraps are versatile and can be served in a variety of ways:

  • With Dips: Serve with ranch, salsa, or guacamole for added flavor.
  • As a Platter: Slice the wraps into pinwheels and serve as finger food for parties.
  • With a Side: Pair with sweet potato fries or a fresh coleslaw for a complete meal.

In conclusion, these BBQ Beef and Avocado Wraps are not just a meal; they’re an experience! With their rich flavors and customizable options, they can easily become a family favorite. So gather your ingredients, roll up your sleeves, and let’s make cooking fun again! Enjoy your culinary adventure!

BBQ Beef and Avocado Wrap

Prep Time 10 minutes
Cook Time 10 minutes
Total Time 20 minutes
Servings 4 servings
Calories 650
Enjoy a flavorful and satisfying wrap combining tender BBQ beef, fresh avocado, and crisp vegetables in a soft tortilla.

Ingredients

Meat

  • 1 lb beef flank steak or ribeye, thinly sliced
  • 0.5 cup BBQ sauce (your favorite brand or homemade)
  • 1 tbsp olive oil

Vegetables

  • 1 large avocado, sliced
  • 4 large flour tortillas
  • 1 cup shredded lettuce
  • 0.5 cup cherry tomatoes, halved
  • 0.25 cup red onion, thinly sliced
  • 0.5 cup shredded cheese (cheddar, pepper jack, or mozzarella)
  • 1 tbsp lime juice

Seasoning

  • to taste Salt and pepper

Instructions 

  • Heat olive oil in a skillet and cook the sliced beef until browned and cooked through.
  • Mix cooked beef with BBQ sauce and lime juice.
  • Spread the beef mixture onto each tortilla, then top with avocado, lettuce, tomatoes, onion, and cheese.
  • Roll up the tortillas tightly to form wraps.
  • Serve immediately or wrap in foil for later.

Notes

For a spicier kick, add some hot sauce or jalapeños.
Calories: 650kcal
Cost: $15
Course: Dinner, Lunch
Cuisine: American
Keyword: BBQ, Beef, Wrap

Discover the Joy of Quick and Delicious Vegan Hummus Wraps

Are you looking for a quick and nourishing meal that doesn’t skimp on flavor? These Quick and Delicious Vegan Hummus Wraps are your answer! Perfect for a busy lunch or a light dinner, these wraps are packed with fresh vegetables and creamy hummus, making them a delightful option for any day. In this comprehensive guide, I’ll walk you through everything you need to know to make these wraps a staple in your kitchen.

With just a few simple ingredients, you’ll learn how to create a meal that’s not only healthy but also incredibly satisfying. Let’s dive into the world of vegan hummus wraps!

Why You’ll Love This Recipe

  • Quick and Easy: These wraps take only 15 minutes to prepare, making them perfect for those busy days when you need a meal in a hurry.
  • Healthy and Nutritious: Packed with fresh vegetables and plant-based protein from hummus, they provide a balanced meal that fuels your day.
  • Customization Galore: You can easily swap ingredients based on what you have on hand, allowing for endless variations of flavor and texture.
  • Great for Meal Prep: Make a batch ahead of time and store them in the fridge for quick grab-and-go lunches throughout the week.
  • Kid-Friendly: These wraps are a hit with kids! Get them involved in making their own wraps for added fun at mealtime.

Key Ingredients for Your Easy Hummus Wrap

Before we get into the preparation, let’s take a closer look at the ingredients you’ll need:

  • 2 burrito-size flour tortillas: Choose whole wheat or spinach tortillas for a healthier alternative.
  • 1/2 cup of hummus: Use your favorite flavor, whether it’s classic, roasted red pepper, or garlic.
  • 2 to 3 vegan deli slices (optional): These add protein and texture but can be omitted for a lighter wrap.
  • 1/2 of a red bell pepper, thinly sliced: Adds sweetness and crunch.
  • 1/2 of a cucumber, thinly sliced: Provides hydration and a refreshing taste.
  • 1/2 cup of spinach: A nutrient-rich green that packs in vitamins.

Step-by-Step Instructions to Make a Delicious Vegan Wrap

A vibrant hummus wrap showcasing layers of red bell pepper and cucumber.

Follow these easy steps to create your delicious hummus wraps:

  • Spread the hummus evenly in the middle of each tortilla.
  • Layer on the deli slices if using, followed by the red bell pepper, cucumber, and spinach.
  • Roll the wrap tightly, folding and tucking in the filling as you go.
  • Fold the sides of the wrap to keep everything secure.
  • Optionally, cut the wraps in half for easier eating.
  • Roll the wraps fairly tightly to prevent them from coming apart while eating.

Pro Tips for the Perfect Wrap

Here are some expert insights to elevate your wrap-making game:

  • Use Fresh Ingredients: Fresh vegetables enhance the flavor and texture of your wraps.
  • Don’t Overfill: Less is more! Overfilling can make rolling difficult and messy.
  • Warm Your Tortillas: A quick 10 seconds in the microwave can make your tortillas more pliable.
  • Experiment with Seasonings: A sprinkle of salt, pepper, or your favorite spices can add a flavor boost.
  • Try Different Hummus Flavors: Variety is the spice of life! Experiment with different hummus flavors for unique wraps.
  • Pack them Right: If you’re taking these wraps on the go, wrap them in parchment paper to keep them fresh.
  • Use a Sharp Knife: A sharp knife ensures a clean cut when slicing your wraps in half.
  • Chill for a Better Bite: Letting wrapped tortillas chill in the fridge for 30 minutes can help flavors meld.

Common Mistakes and Troubleshooting

Even the best home cooks make mistakes! Here are some common pitfalls and how to avoid them:

  • Wraps Falling Apart: Ensure you’re rolling tightly and not overstuffing your wraps.
  • Soggy Wraps: Use dry veggies and consider adding a layer of hummus only on the tortilla, not the veggies.
  • Too Much Hummus: While it’s delicious, too much can make your wrap messy. Stick to the recommended amount.

Variations for Your Vegan Hummus Wraps

Feeling creative? Here are some delicious variations to try:

  • Spicy Kick: Add sliced jalapeños or a drizzle of sriracha for some heat.
  • Protein-Packed: Include cooked chickpeas or tofu for extra protein.
  • Mediterranean Style: Swap veggies for olives, feta cheese (if not strictly vegan), and sun-dried tomatoes.
  • Asian-Inspired: Use sesame dressing, shredded carrots, and sliced avocado for a fresh twist.

Storage and Make-Ahead Instructions

These wraps are perfect for meal prep! Here’s how to store them:

  • Refrigerate: Store wraps in an airtight container in the fridge for up to 3 days.
  • Freezing: You can freeze these wraps, but it’s best to add fresh veggies after thawing for the best texture.
  • Make-Ahead: Prepare the wraps in advance, but avoid adding wet ingredients until ready to eat to maintain crispness.

Comprehensive FAQ

Got questions? Here are some frequently asked ones:

  • Can I use a gluten-free tortilla? Yes! Gluten-free tortillas work great in this recipe.
  • How do I keep the wrap from getting soggy? Ensure your vegetables are dry and consider adding a thin layer of hummus on the tortilla only.
  • What type of hummus is best? Use any flavor you enjoy! Classic, roasted red pepper, or garlic all work well.
  • Are vegan deli slices necessary? No, they are optional. Feel free to omit or substitute with another protein source.
  • Can I make these wraps in advance? Yes, but add fresh ingredients like spinach right before eating for the best texture.
  • What if I don’t have hummus? You can substitute with any spread like avocado, vegan cream cheese, or pesto.
  • How do I pack these for lunch? Wrap tightly in parchment paper or foil to keep them fresh.
  • Can I add fruit to my wraps? Absolutely! Sliced apples or pears can add a refreshing sweetness.

Nutritional Tips and Dietary Adaptations

These wraps can fit into various dietary needs:

  • Low-Calorie: Use lettuce leaves instead of tortillas for a lighter option.
  • High-Protein: Add beans, chickpeas, or edamame for extra protein.
  • Whole Food Plant-Based: Stick to whole ingredients without added oils or preservatives.

Essential Equipment Recommendations

To make your wrap-making experience seamless, here’s what I recommend:

  • Cutting Board: A sturdy board for slicing veggies.
  • Chef’s Knife: A sharp knife makes prep quick and easy.
  • Mixing Bowl: Useful for combining ingredients if you’re making a batch.
  • Storage Containers: Airtight containers keep your wraps fresh in the fridge.

Serving Suggestions

Wondering how to serve these delicious wraps? Here are some ideas:

  • With a Side Salad: A light salad complements the wraps perfectly.
  • Chips or Veggies: Serve with some baked chips or fresh veggies for a crunchy side.
  • Dipping Sauce: Pair with a tangy dressing or extra hummus for dipping.

In conclusion, these Quick and Delicious Vegan Hummus Wraps are not only easy to make but also an excellent way to enjoy a healthy meal filled with flavor. Whether you’re a busy professional, a parent, or just someone who loves good food, this recipe is designed for you. So gather your ingredients, get in the kitchen, and enjoy the process of making these delightful wraps. Happy cooking!

Easy Vegan Hummus Wraps

Prep Time 10 minutes
Total Time 10 minutes
Servings 2 wraps
Calories 250
These quick and delicious vegan hummus wraps are perfect for a healthy lunch or snack, packed with fresh vegetables and creamy hummus.

Ingredients

burrito size flour tortillas

  • 1/2 cup hummus
  • 2 to 3 slices vegan deli slices (optional)
  • 1/2 red bell pepper red bell pepper (thinly sliced)
  • 1/2 cucumber cucumber (thinly sliced)
  • 1/2 cup spinach

Instructions 

  • Spread hummus in the center of each tortilla.
  • Add deli slices, bell pepper, cucumber, and spinach on top of the hummus.
  • Roll the tortilla tightly like a burrito, folding in the sides.
  • Optionally, cut the wraps in half.

Notes

Use fresh vegetables for the best flavor and texture.
Calories: 250kcal
Cost: $10
Course: Lunch, Snack
Cuisine: vegan
Keyword: Hummus, Vegetables, Wraps

Unleash Flavor and Simplicity in Your Kitchen

If you’re looking for a delightful meal that combines ease with flavor, Creamy Chicken Spinach Wraps are just the ticket! These wraps are not only a quick and satisfying option for busy weeknights but also make for a delicious lunch that you can prepare ahead of time. In this guide, we’ll explore everything you need to know to create these wraps, from ingredients to expert tips, making sure you feel confident and excited in the kitchen.

Why You’ll Love This Recipe

  • Quick Preparation: With just 20 minutes from start to finish, you’ll have a delicious meal ready in no time!
  • Family-Friendly: Everyone loves wraps, and the creamy filling is sure to please even the pickiest eaters.
  • Versatile Ingredients: Use rotisserie chicken for convenience or customize the filling to your taste with fresh veggies.
  • Nutritious & Delicious: Spinach adds essential nutrients, making these wraps a wholesome choice.
  • Perfect for Meal Prep: Make the filling ahead of time and simply assemble when ready to eat!

Ingredients You’ll Need for Creamy Chicken Spinach Wraps

Gather the following ingredients to create your creamy chicken spinach wraps:

  • 4 pieces flour tortillas: Serves as the base for the wraps. Feel free to use whole wheat or gluten-free tortillas for a healthier twist.
  • 2 cups shredded cooked chicken: Rotisserie chicken works well for convenience, or use leftover chicken from a previous meal.
  • 1 cup finely chopped fresh spinach: Adds nutrients and vibrant color.
  • 1/2 cup cream cheese: Provides a rich, creamy texture. You can use low-fat cream cheese if desired.
  • 1/4 cup mayonnaise: Complements the cream cheese and adds a tangy flavor.
  • 1/2 teaspoon garlic powder: For flavoring; fresh minced garlic could be used for a stronger taste.
  • Salt and pepper: To taste; always season to enhance the flavors.
  • Shredded cheese: For extra flavor; consider cheddar or mozzarella.
  • Sliced tomatoes: For added freshness and texture in your wraps.

How to Make Creamy Chicken Spinach Wraps

A side view of a deliciously packed chicken spinach wrap on a wooden chopping board.

Follow these simple steps to create your delicious wraps:

Step 1: Prepare the Filling

In a mixing bowl, combine the shredded chicken, chopped spinach, cream cheese, mayonnaise, garlic powder, salt, and pepper. Mix thoroughly until everything is well incorporated.

Step 2: Assemble the Wraps

Lay a tortilla flat on a clean surface. Spoon a generous amount of the filling onto the center of the tortilla.

Step 3: Roll the Wraps

Fold in the sides of the tortilla, then roll it up tightly from the bottom to the top. Ensure the filling is secure within the wrap.

Step 4: Cook the Wraps (Optional)

If you like your wraps warm and slightly crispy, heat a skillet over medium heat. Place the wraps seam-side down and cook for about 2-3 minutes on each side until golden brown.

Step 5: Serve & Enjoy!

Slice the wraps in half, serve with sliced tomatoes on the side, and enjoy your meal!

Pro Tips for Making Creamy Chicken Spinach Wraps

  • Customize the Filling: Feel free to add other veggies like bell peppers, onions, or mushrooms for added flavor and nutrition.
  • Experiment with Spices: Add herbs like dill or basil to elevate the flavor profile.
  • Use Fresh Ingredients: Fresh spinach and high-quality chicken will enhance the overall taste.
  • Adjust the Creaminess: If you prefer a lighter wrap, reduce the amount of cream cheese and mayonnaise.
  • Warm Tortillas: Warm tortillas slightly before filling to make them more pliable and easier to roll.
  • Chill the Filling: For a cool wrap, chill the filling in the refrigerator before assembling.
  • Grill for Flavor: Try grilling the wraps for a smoky flavor.
  • Store Properly: If storing, wrap tightly in plastic wrap to prevent drying out.

Common Mistakes and Troubleshooting

  • Wraps Falling Apart: Ensure the filling is not overstuffed and roll tightly.
  • Too Dry: Adjust the amount of cream cheese or mayonnaise for a creamier filling.
  • Flavorless Filling: Always season your filling well; don’t skimp on the salt and pepper!
  • Burnt Tortillas: Cook on medium heat and keep an eye on them to prevent burning.

Variations & Substitutions

Here are some tasty variations you might enjoy:

  • Buffalo Chicken Spinach Wrap: Add hot sauce and blue cheese crumbles for a spicy twist.
  • Vegetarian Spinach Wrap: Replace chicken with black beans and add more veggies.
  • Greek Spinach Wrap: Incorporate feta cheese, olives, and cucumbers into the filling.
  • Breakfast Spinach Wrap: Use scrambled eggs and breakfast sausage for a morning treat.

Storage and Make-Ahead Instructions

These wraps can be prepared ahead of time:

  • Refrigeration: Store assembled wraps in an airtight container in the refrigerator for up to 2 days.
  • Freezing: For longer storage, freeze unassembled wraps, then thaw and cook when ready to eat.
  • Make-Ahead Filling: You can prepare the filling a day in advance and keep it in the refrigerator.

Frequently Asked Questions

  • Can I use a different type of protein? Yes! Feel free to substitute with turkey, beef, or even tofu.
  • How can I make this recipe gluten-free? Use gluten-free tortillas and ensure all ingredients are certified gluten-free.
  • What can I serve with these wraps? They pair well with a side salad, some crunchy veggies, or a light dip.
  • Can I make these wraps ahead of time? Absolutely! Just store them in the fridge and enjoy them cold or reheated.
  • What’s the best way to store leftovers? Wrap them tightly in plastic wrap or store in an airtight container.
  • How spicy are these wraps? They are not spicy unless you add hot sauce or spicy ingredients.
  • Is this recipe kid-friendly? Yes! Kids typically enjoy the creamy texture and the fun of eating wraps.
  • Can I make these vegan? You can swap out chicken for chickpeas or lentils and use vegan cream cheese and mayo.

Nutrition Tips and Dietary Adaptations

For a healthier version of these wraps, consider the following:

  • Increase Vegetables: Add more spinach or other veggies to boost fiber and nutrients.
  • Low-Fat Options: Use low-fat cream cheese and mayonnaise for a lighter filling.
  • Whole Grain Tortillas: Opt for whole grain or spinach tortillas for added nutrients.
  • Protein Variations: Incorporate lean proteins like turkey or legumes for a healthier twist.

Equipment Recommendations

To make your cooking experience smoother, here are some recommended tools:

  • Mixing Bowl: A good-sized bowl for mixing your filling.
  • Skillet: For warming and grilling your wraps if desired.
  • Sharp Knife: For slicing your wraps cleanly.

Serving Suggestions

These wraps can be served in various ways:

  • Dip Options: Serve with ranch dressing, hummus, or salsa for added flavor.
  • Garnish: Fresh herbs like cilantro or parsley can brighten up the dish.
  • Side Dishes: Pair with a light salad or some crunchy carrot sticks to complete the meal.

Making Creamy Chicken Spinach Wraps is a fantastic way to enjoy a quick, nutritious meal that doesn’t compromise on flavor. With a few simple steps, you can create a dish that your family will love, and you’ll feel great about serving. So roll up your sleeves, gather your ingredients, and get ready to savor this delightful recipe!

Creamy Chicken Spinach Wraps

Prep Time 10 minutes
Cook Time 5 minutes
Total Time 15 minutes
Servings 4 pieces
Calories 450
Enjoy these delicious and easy-to-make wraps filled with tender chicken, fresh spinach, and a creamy sauce, perfect for a quick lunch or dinner.

Ingredients

Base

  • 4 pieces flour tortillas (Serve as the base for the wraps.)

Protein

  • 2 cups shredded cooked chicken (Rotisserie chicken works well for convenience.)

Vegetables

  • 1 cup finely chopped fresh spinach (Adds nutrients and color.)

Dairy

  • 0.5 cup cream cheese (Provides a rich, creamy texture.)
  • 0.25 cup mayonnaise (Complements the cream cheese.)

Seasonings

  • 0.5 teaspoon garlic powder (For flavoring.)
  • to taste salt and pepper (For seasoning.)

Extras

  • shredded cheese shredded cheese (For extra flavor.)
  • sliced tomatoes sliced tomatoes (For extra texture.)

Instructions 

  • Spread the cream cheese and mayonnaise mixture evenly over each tortilla.
  • Layer shredded chicken, chopped spinach, shredded cheese, and sliced tomatoes on top.
  • Sprinkle garlic powder, salt, and pepper over the fillings.
  • Roll up each tortilla tightly to form wraps.
  • Slice in half if desired and serve immediately.

Notes

Feel free to add more vegetables or cheese for extra flavor.
Calories: 450kcal
Cost: $12
Course: Main Course
Cuisine: American
Keyword: Chicken, Creamy, Wraps

If you’re looking for a quick and vibrant dish to elevate your dinner table, look no further! This Lemon Butter Veggie Rice Pilaf is not only simple to make but also bursts with flavor, making it the perfect side for any meal. In this article, we’ll dive deep into the recipe, sharing tips, variations, and everything you need to know to create a delicious pilaf that will impress your family and friends.

Why You’ll Love This Recipe

Here are just a few reasons why this veggie rice pilaf is a must-try:

  • Quick to prepare: Ready in under 30 minutes, making it an ideal choice for busy weeknights.
  • Flavor-packed: The combination of lemon, butter, and fresh vegetables creates a deliciously bright flavor.
  • Versatile: Perfect as a side dish or a main meal, and pairs well with various proteins.
  • Healthy ingredients: Loaded with veggies and whole grains, this dish is nutritious and satisfying.
  • Customizable: Easy to adapt with your favorite vegetables or herbs, ensuring it suits your taste.

Lemon Butter Veggie Rice Pilaf Ingredients

To make this delightful lemon butter veggie rice pilaf, you’ll need the following ingredients:

  • 1.5 cups long-grain white rice (rinsed)
  • 2.25 cups vegetable broth
  • 2 tbsp unsalted butter
  • 2 tbsp fresh lemon juice (for flavor)
  • 2 cloves garlic (minced)
  • 1 cup carrots (diced finely)
  • 0.5 cup peas (fresh or frozen)
  • 1 cup bell peppers (red or yellow, diced)
  • 0.5 cup onion (finely chopped)
  • 2 tbsp fresh parsley (chopped)
  • 1 tbsp lemon zest (to sprinkle on top)

How to Make Lemon Butter Veggie Rice Pilaf

Follow these simple steps to create your lemon butter veggie rice pilaf:

  1. In a large skillet, melt the butter over medium heat. Add the onions and sauté until they become translucent.
  2. Stir in the garlic and cook for about 1 minute until fragrant.
  3. Add the rice and toast it for 2-3 minutes, stirring frequently to prevent sticking.
  4. Pour in the vegetable broth and bring to a boil. Reduce heat to low, cover, and simmer for 15-20 minutes until the rice absorbs the liquid.
  5. In the last 5 minutes of cooking, add the carrots, peas, and bell peppers.
  6. Once cooked, remove from heat, fluff with a fork, and stir in the lemon juice, lemon zest, and parsley.

Pro Tips for Making the Perfect Rice Pilaf

Delicious Lemon Butter Veggie Rice Pilaf in a white bowl garnished with parsley.

To ensure your veggie rice pilaf turns out wonderfully, consider these expert tips:

  • Rinse the rice: This helps remove excess starch, ensuring a fluffier texture.
  • Use broth: For added flavor, substitute water with vegetable broth when cooking the rice.
  • Fresh veggies: Opt for fresh vegetables whenever possible for the best taste and texture.
  • Experiment with herbs: Fresh herbs like dill or thyme can add a unique twist to the dish.
  • Make it colorful: Use a variety of colored bell peppers to enhance the visual appeal of your pilaf.
  • Adjust the acidity: If you prefer a more pronounced lemon flavor, feel free to add more lemon juice or zest!
  • Keep it covered: Let the pilaf sit covered for a few minutes after cooking to allow the flavors to meld.
  • Taste as you go: Always taste your pilaf before serving to adjust seasonings as needed.

Common Mistakes and Troubleshooting

Even seasoned cooks can run into issues. Here are some common mistakes and how to avoid them:

  • Overcooking the rice: Keep an eye on the cooking time to avoid mushy rice. It’s better to check a few minutes early.
  • Not enough liquid: If your rice seems dry, it may need a splash more broth or water. Add gradually until desired consistency.
  • Skipping the toasting step: Don’t skip toasting the rice; it enhances the nuttiness and overall flavor!
  • Under-seasoning: Taste and adjust the seasoning. A pinch of salt or extra lemon can elevate the dish.

Variations & Substitutions for Lemon Butter Veggie Rice Pilaf

Feel free to get creative! Here are some ideas:

  • Protein boost: Add cooked chicken, shrimp, or tofu for a heartier meal.
  • Grain alternatives: Substitute rice with quinoa or couscous for a different texture and flavor profile.
  • Spicy kick: Incorporate red pepper flakes or diced jalapeños for some heat.
  • Nutty crunch: Top with toasted pine nuts or slivered almonds for added texture.

How to Store and Freeze Lemon Butter Veggie Rice Pilaf

To keep your pilaf fresh:

  • Allow it to cool completely.
  • Store in an airtight container in the fridge for up to 3-4 days.
  • To freeze, portion into freezer-safe containers and freeze for up to 3 months. Reheat in the microwave or on the stovetop, adding a splash of broth to revive the moisture.

Lemon Butter Veggie Rice Pilaf Recipe FAQs

Got questions? Here are some frequently asked questions:

  • Can I use brown rice? Yes, but you will need to adjust the cooking time and add more liquid.
  • What can I serve with this pilaf? It pairs well with grilled chicken, fish, or a hearty salad.
  • Is this recipe vegan? Yes, simply replace the butter with olive oil or your favorite vegan butter.
  • Can I make this dish ahead of time? Absolutely! Make it ahead and reheat when ready to serve.
  • What if I don’t have vegetable broth? Water can work in a pinch, but broth enhances the flavor significantly.
  • Can I add other vegetables? Yes, feel free to include any veggies you like or have on hand.
  • How do I get the best flavor? Use fresh ingredients and taste as you go to adjust seasonings.
  • How should I reheat leftovers? Reheat in the microwave or stovetop, adding a little liquid to prevent drying out.

Nutrition Tips and Dietary Adaptations

This lemon butter veggie rice pilaf is not only delicious but also nutritious. Here are some tips to enhance its health benefits:

  • Increase fiber: Add more vegetables or use brown rice for a fiber boost.
  • Limit fat: Reduce the amount of butter used or substitute with olive oil.
  • Pack in protein: Incorporate beans or legumes for a plant-based protein source.

Equipment Recommendations

To make this pilaf, you’ll need:

  • A large skillet or sautĂ© pan for cooking.
  • A wooden spoon or spatula for stirring.
  • A measuring cup for precise ingredient measurements.

Serving Suggestions

Serve your lemon butter veggie rice pilaf as a delightful side dish or make it a complete meal by pairing it with:

  • Grilled chicken or fish for a protein addition.
  • Roasted vegetables to complement the flavors.
  • A light salad for a refreshing contrast.

In conclusion, this lemon butter veggie rice pilaf is a fantastic way to brighten up your meals. With its vibrant colors and fresh flavors, it’s sure to become a favorite in your kitchen. So gather your ingredients, follow the steps, and enjoy the journey of cooking. Remember, cooking is all about confidence and creativity—so have fun with it!

Easy Lemon Butter Veggie Rice Pilaf That Brightens Every Meal

Prep Time 10 minutes
Cook Time 20 minutes
Total Time 30 minutes
Servings 4 servings
Calories 250
This vibrant rice pilaf combines fresh vegetables, lemon, and butter for a flavorful and colorful side dish that's perfect for any meal.

Ingredients

Rice and Broth

  • 1.5 cups long-grain white rice (rinsed)
  • 2.25 cups vegetable broth

Butter and Lemon

  • 2 tbsp unsalted butter
  • 2 tbsp fresh lemon juice (for flavor)

Aromatics and Vegetables

  • 2 cloves garlic (minced)
  • 1 cup carrots (diced finely)
  • 0.5 cup peas (fresh or frozen)
  • 1 cup bell peppers (red or yellow, diced)
  • 0.5 cup onion (finely chopped)
  • 2 tbsp fresh parsley (chopped)
  • 1 tbsp lemon zest (sprinkle on top)

Instructions 

  • In a pot, cook the rice with vegetable broth until tender, about 15 minutes.
  • Meanwhile, sautĂ© garlic, onions, carrots, and bell peppers in butter until vegetables are tender, about 5 minutes.
  • Mix cooked rice with sautĂ©ed vegetables, peas, lemon juice, and parsley. Stir well.
  • Sprinkle lemon zest on top before serving.

Notes

For extra flavor, add a pinch of black pepper or a squeeze of additional lemon.
Calories: 250kcal
Cost: $12
Course: Side Dish
Cuisine: Fusion
Keyword: Vegetables

Unlock the Magic of Quick and Flavor-Packed Mushroom Wraps

If you’re looking for a delicious and satisfying meal that can be whipped up in no time, you’ve landed in the right place! These Easy Mushroom Wraps are not only packed with flavor but also incredibly versatile, making them perfect for busy weeknights or a delightful lunch. Let’s dive into the world of mushrooms and wraps, and I’ll guide you through every step to ensure your cooking experience is exciting and stress-free!

Why You’ll Love This Recipe

Here are just a few reasons why you’re going to fall head over heels for these mushroom wraps:

  • Quick to Prepare: With just a few ingredients and minimal prep time, you can have a hearty meal ready in under 30 minutes.
  • Flavor Explosion: The combination of garlic, smoked paprika, and fresh herbs creates a delightful flavor profile that will have your taste buds dancing.
  • Customizable: Feel free to mix and match ingredients based on what you have on hand or your dietary preferences—these wraps are incredibly adaptable!
  • Healthy and Nutritious: Packed with vitamins and minerals from mushrooms and spinach, these wraps are not only tasty but also a healthy choice.
  • Perfect for Meal Prep: Make a batch ahead of time, store them in the fridge, and enjoy quick meals throughout the week!

Ingredient Breakdown and Substitutions

Now, let’s talk about the key players in this recipe:

  • Olive Oil: This is for sautĂ©ing. You can substitute with avocado oil or any neutral oil if needed.
  • Mushrooms: Button, chestnut, or cremini mushrooms work beautifully. If you’re feeling adventurous, try portobello or shiitake for a different flavor.
  • Garlic: Fresh garlic adds a robust flavor. If you don’t have fresh, use 1/4 teaspoon of garlic powder.
  • Smoked Paprika: This gives a lovely smoky depth. Regular paprika can be used for a milder flavor.
  • Dried Herbs: A mix of rosemary and thyme works wonders. You can also use Italian seasoning or fresh herbs if available.
  • Black Pepper and Ground Cumin: Essential for seasoning. Adjust to taste!
  • Sugar: Just a pinch to balance the flavors; feel free to omit if you prefer.
  • Soy Sauce: Adds umami and depth. For a gluten-free option, use tamari.
  • Tortilla Wraps: Use any type you like—flour, corn, or even lettuce wraps for a low-carb option.
  • Vegan Garlic Mayo: Adds creaminess. You can substitute with hummus or guacamole if desired.
  • Spinach: Fresh baby spinach is ideal, but you can use kale or arugula for a different twist.
  • Avocado: Adds healthy fats and creaminess. Substitute with sliced cucumber or leave out if you prefer.
  • Cherry Tomatoes or Red Pepper: For a burst of freshness and color. You can also use diced bell peppers or roasted veggies.
  • Parsley: For garnish and added flavor. Feel free to substitute with cilantro or omit altogether.

Pro Tips for Perfect Mushroom Wraps

Side view of easy mushroom wraps showcasing sliced mushrooms, herbs, and a drizzle of sauce.

Want to elevate your wrap game? Try these expert insights:

  • Don’t Overcrowd the Pan: When sautĂ©ing mushrooms, give them enough space to release their moisture and achieve a nice caramelization.
  • Mix Flavors: Experiment with different spices to find your favorite blend—cumin, chili powder, or even a dash of curry powder can add an exciting twist!
  • Make It Creamy: For extra creaminess, add a dollop of your favorite spread inside the wraps before filling them with the sautĂ©ed mixture.
  • Keep Filling Simple: Too much filling can make wrapping difficult. Stick to a modest amount to keep them manageable.
  • Warm Your Tortillas: Heating your tortillas for a few seconds in a pan or microwave makes them pliable and easier to wrap.
  • Fresh Ingredients Matter: Use the freshest vegetables and herbs you can find for the best flavor.
  • Don’t Skip the SautĂ©: SautĂ©ing the mushrooms brings out their natural flavors and enhances the overall taste of the wraps.
  • Experiment with Cheese: A sprinkle of feta or goat cheese can add a rich, tangy flavor that complements the mushrooms beautifully.
  • Garnish Wisely: A sprinkle of sesame seeds or crushed red pepper can add visual appeal and an extra layer of flavor.

Common Mistakes and Troubleshooting

Even the best cooks make mistakes, but fear not! Here’s how to troubleshoot:

  • Wraps Falling Apart: If your wraps are breaking, ensure your tortillas are warm and pliable. Also, avoid overfilling them.
  • Too Much Liquid: If your mushrooms release too much moisture, cook them longer to reduce the liquid before adding other ingredients.
  • Flavorless Filling: Always taste and adjust seasonings. Adding a splash of soy sauce or a squeeze of lemon can elevate flavors dramatically.
  • Greasy Wraps: If the filling feels too oily, reduce the amount of oil you use when sautĂ©ing the mushrooms.

Variations to Try

Looking to switch things up? Here are some tasty variations:

  • Southwestern Style: Add black beans, corn, and a sprinkle of taco seasoning for a southwestern twist.
  • Asian-Inspired: Incorporate sesame oil, green onions, and shredded carrots for an Asian flair.
  • Breakfast Wrap: Add scrambled eggs or tofu for a satisfying breakfast option.
  • Caprese Style: Include fresh mozzarella, basil, and a drizzle of balsamic glaze for a fresh take.

Storage and Make-Ahead Instructions

You can easily make these wraps ahead of time:

  • Refrigerating: Store assembled wraps in an airtight container in the fridge for up to 3 days. Keep sauces separate until ready to serve.
  • Freezing: These wraps can be frozen, but it’s best to freeze the filling separately. Assemble and wrap after thawing.
  • Reheating: Warm them in the microwave or on a skillet until heated through before serving.

FAQ: Common Questions About Mushroom Wraps

Got questions? Here are some answers!

  • Can I use other vegetables? Absolutely! Feel free to add bell peppers, zucchini, or whatever veggies you have on hand.
  • Are these wraps vegan? Yes, just make sure to use vegan mayo and tortillas.
  • How can I make them gluten-free? Use gluten-free tortillas and check the soy sauce for gluten-free options.
  • What can I serve with these wraps? Pair them with a side salad, sweet potato fries, or a light soup for a complete meal.
  • How do I keep them from getting soggy? Avoid adding too much liquid to the filling and store them properly.
  • Can I add protein? Yes! Grilled chicken, tofu, or beans are great additions.
  • How long do they last in the fridge? They should be good for up to 3 days when stored properly.
  • Can I make them in advance? Yes, they’re perfect for meal prep! Just store them in the fridge until you’re ready to eat.

Nutritional Tips and Dietary Adaptations

Here are some tips to keep your wraps nutritious:

  • Boost Fiber: Add more veggies like spinach or kale to increase your fiber intake.
  • Healthy Fats: Avocado is a great source of healthy fats. Don’t skip it!
  • Control Portions: Use smaller tortillas for a lighter option, or pack them with more veggies for a filling meal without excess calories.

Essential Equipment for Making Mushroom Wraps

Before you start, make sure you have the right tools:

  • Nonstick Skillet: Perfect for sautĂ©ing without sticking.
  • Sharp Knife: For easy slicing of vegetables.
  • Cutting Board: A good surface for prep work.
  • Spatula: For flipping and folding without mess.

Serving Suggestions

Ready to serve your wraps? Here are some ideas:

  • Garnish: Top with a sprinkle of fresh herbs or a drizzle of your favorite sauce.
  • Side Dishes: Serve with a light salad or a bowl of soup for a balanced meal.
  • Dipping Sauce: Consider serving with a side of salsa or spicy mayo for an extra kick!

Final Thoughts on Your Culinary Adventure

Cooking doesn’t have to be complicated or intimidating. With these Quick and Flavor-Packed Mushroom Wraps, you’ll discover how easy it is to create a delicious meal that’s full of flavor and nutrients. So roll up your sleeves, gather your ingredients, and let’s make cooking fun and enjoyable again. Remember, every great chef started as a beginner, and I’m here to support you every step of the way. Happy cooking!

Easy Mushroom Wraps

Prep Time 10 minutes
Cook Time 15 minutes
Total Time 25 minutes
Servings 4 servings
Calories 350
Delicious and healthy mushroom wraps packed with flavor and fresh ingredients, perfect for a quick lunch or dinner.

Ingredients

Vegetables and Herbs

  • 2 tablespoons olive oil
  • 4 cups mushrooms button or chestnut cremini, sliced
  • 2 cloves garlic minced
  • 1 teaspoon smoked paprika
  • 1 teaspoon dried herbs or mix of rosemary and thyme
  • 0.5 teaspoon black pepper
  • 0.5 teaspoon ground cumin
  • 0.25 teaspoon sugar
  • 1 pinch cayenne pepper
  • 2 tablespoons soy sauce

Wraps

  • 4 large tortilla wraps
  • 2 tablespoons vegan garlic mayo

Fresh Toppings

  • 3 cups baby spinach
  • 1 avocado sliced
  • 0.66 cup cherry tomatoes or red pepper sliced
  • 1 small handful parsley roughly chopped

Instructions 

  • Heat olive oil in a pan and sautĂ© garlic, mushrooms, paprika, herbs, black pepper, cumin, sugar, cayenne, and soy sauce until mushrooms are tender.
  • Warm the tortillas and spread vegan garlic mayo on each.
  • Divide sautĂ©ed mushrooms, spinach, avocado, cherry tomatoes, and parsley among the wraps.
  • Roll up the wraps tightly and serve immediately.

Notes

For extra flavor, add a squeeze of lemon or a dash of hot sauce.
Calories: 350kcal
Cost: $12
Course: Main Course
Cuisine: Fusion
Keyword: Mushrooms

Transform Your Dinner Routine with a Spicy Chipotle Buddha Bowl

Are you ready to elevate your weeknight dinners? This Spicy Chipotle Buddha Bowl with Cauliflower Rice is here to bring vibrant flavors and satisfying textures right to your table. Infused with a zesty chipotle sauce, creamy avocado, and a medley of fresh veggies, this meal is not only delicious but also a feast for the eyes. Let’s dive into why this recipe is a must-try!

Why You’ll Love This Recipe

This Buddha bowl is more than just a pretty dish; it’s a complete meal that offers a variety of benefits:

  • Flavor Explosion: The combination of spicy chipotle and creamy Greek yogurt creates a balanced sauce that enhances every ingredient.
  • Healthy and Nutritious: Packed with plant-based ingredients, this bowl provides essential vitamins, minerals, and healthy fats.
  • Customizable: Easily swap ingredients based on your preferences or what you have on hand for a unique twist each time.
  • Quick and Easy: Perfect for busy weeknights, this recipe can be prepared in under 30 minutes.
  • Low Carb Option: Cauliflower rice serves as a fantastic low-carb substitute for traditional grains, making this dish suitable for various dietary needs.

Ingredients You’ll Need

Here’s what you’ll need to create your own Spicy Chipotle Buddha Bowl:

  • 1 head cauliflower
  • 1 head broccoli
  • 16 ounces white mushrooms
  • 3 tablespoons olive oil, divided
  • Garlic powder, to taste
  • Salt and pepper, to taste
  • 1 avocado, sliced
  • 2 scallions, chopped (green parts)
  • 1 cup plain Greek yogurt
  • 1/2 can (or to taste) chipotle chili peppers in adobo sauce
  • Juice of 1/2 lime
  • 3 cloves garlic, minced
  • Salt, to taste

How to Make Your Buddha Bowl

Side view of a vibrant Buddha Bowl featuring cauliflower rice, avocado, and vegetables.

Let’s break down the process into simple steps that anyone can follow:

Step 1: Preheat Your Oven

Set your oven to 450°F and move the rack to the middle. This high temperature will help roast your veggies to perfection!

Step 2: Prepare the Chipotle Sauce

In a blender, combine the Greek yogurt, chipotle chili peppers, lime juice, minced garlic, and salt. Blend until smooth and set aside in a jar.

Step 3: Roast Your Vegetables

Cut the broccoli into bite-sized florets and halve or quarter the mushrooms. Toss them with 2 tablespoons of olive oil, garlic powder, salt, and pepper on a baking sheet. Roast in the oven for 15-20 minutes until tender and slightly caramelized.

Step 4: Make the Cauliflower Rice

Cut the cauliflower into florets and pulse in a food processor until it resembles rice or couscous. This step is crucial for the texture of the bowl!

Step 5: Cook the Cauliflower Rice

Heat 1 tablespoon of olive oil in a skillet over medium heat. Add the cauliflower rice and some salt, cooking for about 10 minutes until it reaches your desired tenderness.

Step 6: Assemble the Bowl

Slice the avocado and chop the scallions. Layer the cauliflower rice, roasted vegetables, sliced avocado, and scallions in a bowl. Drizzle generously with the chipotle sauce and enjoy!

Pro Tips for Perfecting Your Bowl

Here are some expert insights to make sure your Buddha bowl turns out wonderfully:

  • Texture Matters: Make sure to roast the vegetables until they’re golden brown for a depth of flavor.
  • Adjust the Heat: If you prefer a milder flavor, use less chipotle or add a bit more yogurt to balance it out.
  • Fresh Ingredients: Use the freshest veggies you can find; they make a huge difference in flavor.
  • Customize Your Greens: Feel free to add any greens you love, like spinach or kale, for extra nutrients.
  • Meal Prep Friendly: Prepare the sauce and rice ahead of time for a quick assembly during the week.
  • Experiment: Try adding nuts or seeds for an extra crunch!
  • Storage Tip: Keep leftovers in an airtight container in the fridge for up to 3 days.
  • Garnish Idea: A sprinkle of sesame seeds or a squeeze of lime can elevate the presentation!

Common Mistakes and Troubleshooting

Here are a few common pitfalls to avoid:

  • Overcooking Cauliflower Rice: Monitor closely while cooking to avoid mushy rice. Aim for a tender yet slightly crunchy texture.
  • Burning Vegetables: Keep an eye on the roasting process—oven temperatures can vary. Stir halfway through to ensure even cooking.
  • Too Much Sauce: Start with a little sauce when assembling your bowl; you can always add more if needed.
  • Skipping the Seasoning: Don’t forget to season every component of the bowl for balanced flavor!

Variations to Try

Feeling adventurous? Here are some exciting variations you can try:

  • Protein Boost: Add grilled chicken, tofu, or chickpeas for a hearty protein kick.
  • Spicy Twist: Incorporate jalapeños or red pepper flakes to amplify the spice level.
  • Seasonal Veggies: Substitute seasonal vegetables like zucchini or bell peppers when available.
  • Grain Swap: For a different twist, try quinoa or brown rice instead of cauliflower rice.

Storage and Make-Ahead Instructions

This dish is perfect for meal prep! Here’s how to store it:

  • Refrigerate: Store in airtight containers in the fridge for up to 3 days.
  • Freeze: You can freeze the roasted vegetables and cauliflower rice separately, but the sauce is best fresh.
  • Reheat: Gently reheat in the microwave or on the stovetop, adding a splash of water to maintain moisture.

Frequently Asked Questions

Here are some common questions about the Spicy Chipotle Buddha Bowl:

  • Can I use frozen cauliflower rice? Yes, frozen cauliflower rice is a great time-saver. Just thaw it before cooking.
  • What can I substitute for Greek yogurt? You can use sour cream or a dairy-free yogurt alternative if you prefer.
  • Is this dish gluten-free? Absolutely! All ingredients are naturally gluten-free.
  • Can I make this vegan? Yes, just replace the yogurt with a plant-based alternative and omit any animal proteins.
  • How spicy is the chipotle sauce? The spice level can be adjusted based on how many chipotle peppers you use.
  • What else can I add to the bowl? Feel free to add nuts, seeds, or extra veggies like corn or peas.
  • How long does it take to prepare? The entire meal can be ready in about 30 minutes!
  • Can I use other sauces? Absolutely! Feel free to experiment with tahini or a sesame dressing for a different flavor profile.

Nutritional Tips and Dietary Adaptations

This Buddha bowl is not only filling but also packed with nutrients. Here are some tips to make the most of it:

  • Incorporate Healthy Fats: Avocado provides healthy fats that keep you feeling full longer.
  • Fiber-Rich: The combination of vegetables and cauliflower rice ensures a high fiber content, great for digestion.
  • Vitamins & Minerals: Broccoli and mushrooms are rich in antioxidants, making this bowl a powerhouse of nutrients.
  • Low Carb Friendly: Ideal for those following a low-carb diet while still being satisfying.

Equipment Recommendations

To prepare this delicious Buddha bowl, you’ll need:

  • Blender or Food Processor: Essential for making the chipotle sauce and cauliflower rice.
  • Baking Sheet: For roasting your vegetables to perfection.
  • Skillet: For cooking the cauliflower rice.
  • Measuring Cups and Spoons: To ensure accurate ingredient amounts.

Serving Suggestions

To make your meal even more delightful:

  • Add a Side Salad: A light green salad can complement the bowl beautifully.
  • Pair with a Beverage: Consider a refreshing iced tea or sparkling water to cleanse your palate.
  • Use Colorful Bowls: Presenting your Buddha bowl in vibrant dishes makes it visually appealing!

Conclusion

This Spicy Chipotle Buddha Bowl with Cauliflower Rice is not just a meal; it’s an experience. With its bold flavors, nutritional balance, and ease of preparation, it’s perfect for anyone looking to spice up their weeknight dinners. So gather your ingredients, embrace your culinary creativity, and enjoy a delicious bowl that’s sure to impress. Happy cooking!

Spicy Chipotle Buddha Bowl with Cauliflower Rice

Prep Time 15 minutes
Cook Time 20 minutes
Total Time 35 minutes
Servings 4 servings
Calories 450
A flavorful and healthy Buddha bowl featuring roasted vegetables, spicy chipotle dressing, and cauliflower rice for a satisfying meal.

Ingredients

Vegetables

  • 1 head cauliflower (cut into florets)
  • 1 head broccoli (cut into florets)
  • 16 ounces white mushrooms (halved or quartered)

Dressing & Flavorings

  • 3 tablespoons olive oil (divided)
  • to taste garlic powder
  • to taste salt and pepper
  • 1 whole avocado (sliced)
  • 2 scallions chopped green parts
  • 1 cup plain Greek yogurt
  • 1/2 can chipotle chili peppers in adobo sauce (to taste)
  • Juice of 1/2 lime lime juice
  • 3 cloves garlic (minced)

Instructions 

  • Preheat oven to 450°F (230°C). Toss broccoli and mushrooms with 2 tbsp olive oil, garlic powder, salt, and pepper; roast for 15-20 minutes.
  • Cut cauliflower into florets and process in a food processor until rice-like. Cook in a skillet with 1 tbsp olive oil and salt for 10 minutes.
  • Blend Greek yogurt, chipotle peppers, lime juice, garlic, and salt until smooth; set aside.
  • Slice avocado and scallions. Assemble bowls with cauliflower rice, roasted vegetables, avocado, scallions, and drizzle with dressing.

Notes

Feel free to add your favorite toppings or adjust spice levels to taste.
Calories: 450kcal
Cost: $15
Course: Main Course
Cuisine: Fusion
Keyword: Gluten-Free, Healthy, Vegetarian