Author

Steven

Browsing

Embrace Autumn with the Ultimate Cheddar Pumpkin Grilled Cheese

As the crisp autumn air settles in, there’s nothing quite like curling up with a warm, comforting sandwich. This Cheddar Pumpkin Grilled Cheese is not just any sandwich; it’s a delightful fusion of creamy pumpkin and sharp cheddar that transforms the classic grilled cheese into a seasonal masterpiece. In just a few simple steps, you can create a dish that is not only satisfying but also bursting with flavor. Ready to explore how to make this cozy treat? Let’s get started!

Why You’ll Love This Recipe

  • Flavorful twist: Combining pumpkin with cheddar gives a rich, savory depth to your sandwich, making it perfect for fall.
  • Quick and easy: This recipe takes only around 20 minutes from start to finish, ideal for busy weeknights.
  • Nutritious ingredients: Pumpkin is packed with vitamins and fiber, making this grilled cheese a healthier option compared to traditional varieties.
  • Customizable: With various ingredient substitutions and variations, you can tailor this dish to your taste!
  • Perfect for all occasions: Whether it’s a cozy night in or a casual gathering, this sandwich impresses every time.

Gather Your Ingredients

Before diving into the cooking process, let’s ensure you have everything you need. Here’s what you’ll require for this delicious Cheddar Pumpkin Grilled Cheese:

  • 1 cup 100% pure pumpkin
  • 1 cup shredded cheddar cheese
  • 1/4 teaspoon salt
  • 1/2 teaspoon chili powder
  • 1/2 teaspoon paprika
  • 8 slices white whole grain bread (or your favorite)
  • Butter (enough to spread on the slices of bread)
  • 2 cups arugula (approximately)

Step-by-Step Instructions

Juicy grilled cheese sandwich featuring cheddar and pumpkin, set against a simple background.

Now that you have your ingredients ready, let’s walk through the simple steps to create your Cheddar Pumpkin Grilled Cheese.

  • Preheat the oven: Set it to 450 degrees Fahrenheit to ensure your sandwiches bake to perfection.
  • Mix the filling: In a medium bowl, combine the pumpkin, shredded cheese, salt, chili powder, and paprika. This mixture is where all the magic happens!
  • Butter the bread: Generously butter one side of each slice of bread. This will help achieve that golden, crispy crust.
  • Assemble the sandwiches: Lay 4 slices of bread butter side down on a baking sheet. Distribute half of the pumpkin mixture on top, followed by a handful of arugula.
  • Layer it up: Spread the remaining pumpkin mixture over the arugula and top with the other 4 slices of bread, butter side up.
  • Bake: Place the baking sheet in the oven and bake for 6-8 minutes, then flip the sandwiches and bake for an additional 6 minutes until golden brown and crispy.

Serving Suggestions

Your Cheddar Pumpkin Grilled Cheese is ready to be devoured! Here are some serving suggestions to elevate your meal:

  • Pair with soup: Serve it alongside a warm bowl of tomato soup for a classic combination.
  • Add dips: Try a tangy dipping sauce like ranch or a spicy aioli for an extra kick.
  • Fresh salad: A light arugula salad with a lemon vinaigrette complements the richness of the sandwich.

Storage and Make-Ahead Instructions

If you want to prepare this dish ahead of time or store leftovers, here’s how:

  • Make-Ahead: You can prepare the pumpkin mixture in advance and store it in the refrigerator for up to 3 days.
  • Storing leftovers: Store any uneaten sandwiches in an airtight container in the fridge for up to 2 days. Reheat in the oven to maintain crispiness.

Common Mistakes and Troubleshooting

Even with the best intentions, things can go awry in the kitchen. Here’s how to avoid common pitfalls:

  • Overcooking: Keep an eye on the sandwiches while baking to prevent them from burning.
  • Too much filling: While it’s tempting to pile on the pumpkin mixture, too much can make the sandwich soggy. Stick to the recommended amounts.
  • Choosing the wrong bread: Opt for a sturdy bread like whole grain or sourdough to hold up to the filling.

Pro Tips for the Best Cheddar Pumpkin Grilled Cheese

Ready to take your grilled cheese to the next level? Here are some expert insights:

  • Use freshly grated cheese: It melts better than pre-shredded cheese, giving you that gooey goodness.
  • Experiment with spices: Don’t be afraid to add your favorite spices to the pumpkin mixture for a personalized touch.
  • Try different cheeses: Mix cheddar with mozzarella or pepper jack for an extra flavor boost.
  • Add greens: Incorporating spinach or kale into the filling can add nutrition and flavor.
  • For extra crispiness: Use a baking sheet with a wire rack to allow heat circulation under the sandwiches.

Delicious Variations

Want to mix things up? Here are some fun variations to try:

  • Sweet and Savory: Add slices of apple or pear for a sweet contrast to the savory cheese.
  • Spicy Kick: Incorporate jalapeños or sriracha into the pumpkin mixture for heat.
  • Herbed Delight: Mix in fresh herbs like thyme or rosemary for an aromatic touch.
  • Meaty Option: Add cooked bacon or turkey for a heartier sandwich.

Frequently Asked Questions

Here are some common questions to help you with your Cheddar Pumpkin Grilled Cheese experience:

  • Can I use pumpkin pie filling instead of puree? No, pumpkin pie filling contains added spices and sugars that can alter the flavor.
  • What type of bread works best? Sturdy breads like sourdough or whole grain are ideal as they hold up better during cooking.
  • Can I make this sandwich vegan? Yes! Use vegan cheese and butter substitutes to create a plant-based version.
  • How do I store leftover sandwiches? Store in an airtight container in the fridge and reheat in the oven for best results.
  • Can I freeze these sandwiches? Yes, you can freeze the assembled sandwiches before baking. Just thaw and bake when ready to eat.
  • What other cheeses work well? Gouda, mozzarella, or Gruyère are great alternatives to cheddar.
  • How can I make this healthier? Use whole grain bread and add more veggies to the filling for added nutrients.
  • Is it gluten-free? Use gluten-free bread to make this recipe suitable for gluten-sensitive diets.

Nutritional Tips and Dietary Adaptations

This Cheddar Pumpkin Grilled Cheese can be adapted to fit various dietary needs:

  • Gluten-Free: Swap regular bread for gluten-free alternatives.
  • Dairy-Free: Use dairy-free cheese and butter to make it vegan.
  • Low-Carb: Consider using lettuce wraps instead of bread for a low-carb option.

Equipment Recommendations

To make the cooking process smoother, here are some handy tools:

  • Baking sheet: A sturdy sheet is essential for even baking.
  • Medium bowl: For mixing your pumpkin filling.
  • Spatula: Useful for flipping your sandwiches without losing any filling!

Conclusion

Your journey to creating the ultimate Cheddar Pumpkin Grilled Cheese is just a few steps away. With its comforting flavors and easy preparation, this recipe is sure to become a staple in your home. Remember, cooking is all about enjoying the process and making it your own. So gather your ingredients, invite a friend over, and enjoy this delightful fall sandwich together. Happy cooking!

Cheddar Pumpkin Grilled Cheese

Prep Time 10 minutes
Cook Time 14 minutes
Total Time 24 minutes
Servings 4 slices
Calories 350
A delicious twist on classic grilled cheese, combining pumpkin and cheddar for a flavorful, seasonal sandwich.

Ingredients

Pumpkin and Cheese Mixture

  • 1 cup 100% pure pumpkin
  • 1 cup shredded cheddar cheese
  • 0.25 teaspoon salt
  • 0.5 teaspoon chili powder
  • 0.5 teaspoon paprika
  • 8 slices white whole grain bread (or your favorite)
  • enough butter (for spreading on bread slices)
  • 2 cups arugula (approximately)

Instructions 

  • Preheat oven to 450°F (230°C).
  • Mix pumpkin, cheese, salt, chili powder, and paprika in a bowl.
  • Butter bread slices, assemble sandwiches with pumpkin mixture and arugula, then top with remaining bread.
  • Bake for 6-8 minutes, flip, then bake 6 more minutes until golden and crispy.

Notes

Use fresh arugula for the best flavor and texture.
Calories: 350kcal
Cost: $12
Course: Main Course
Cuisine: American
Keyword: cheddar, Grilled Cheese, pumpkin

Unleash Your Inner Chef with S’mores on Toast

If you’ve ever found yourself craving a sweet treat but don’t want to spend hours in the kitchen, then you’re in for a delightful surprise! S’mores on toast is the perfect answer, combining the classic flavors of s’mores with the ease of a quick snack. In just three simple steps, you can create a decadent dessert that your family will love. This recipe is not only a nod to nostalgia but also an easy way to introduce your kids to the magic of cooking. Let’s dive into this fun and delicious creation!

Why You’ll Love This Recipe

This S’mores on Toast recipe isn’t just about satisfying your sweet tooth; it brings with it a plethora of delightful benefits:

  • Quick and Easy: With only three ingredients and minimal preparation, you can whip this up in under 10 minutes!
  • Kid-Friendly: Perfect for sleepovers, my kids love getting involved in the kitchen with this simple recipe.
  • Customizable: You can easily switch up the toppings or spreads to suit your taste!
  • Great for Any Occasion: Whether it’s a cozy evening at home or a fun gathering with friends, this recipe fits right in.
  • Minimal Cleanup: Since you’re only using one slice of bread and one pan, cleanup is a breeze.

Ingredients Breakdown

Here’s what you’ll need to create this irresistible S’mores on Toast:

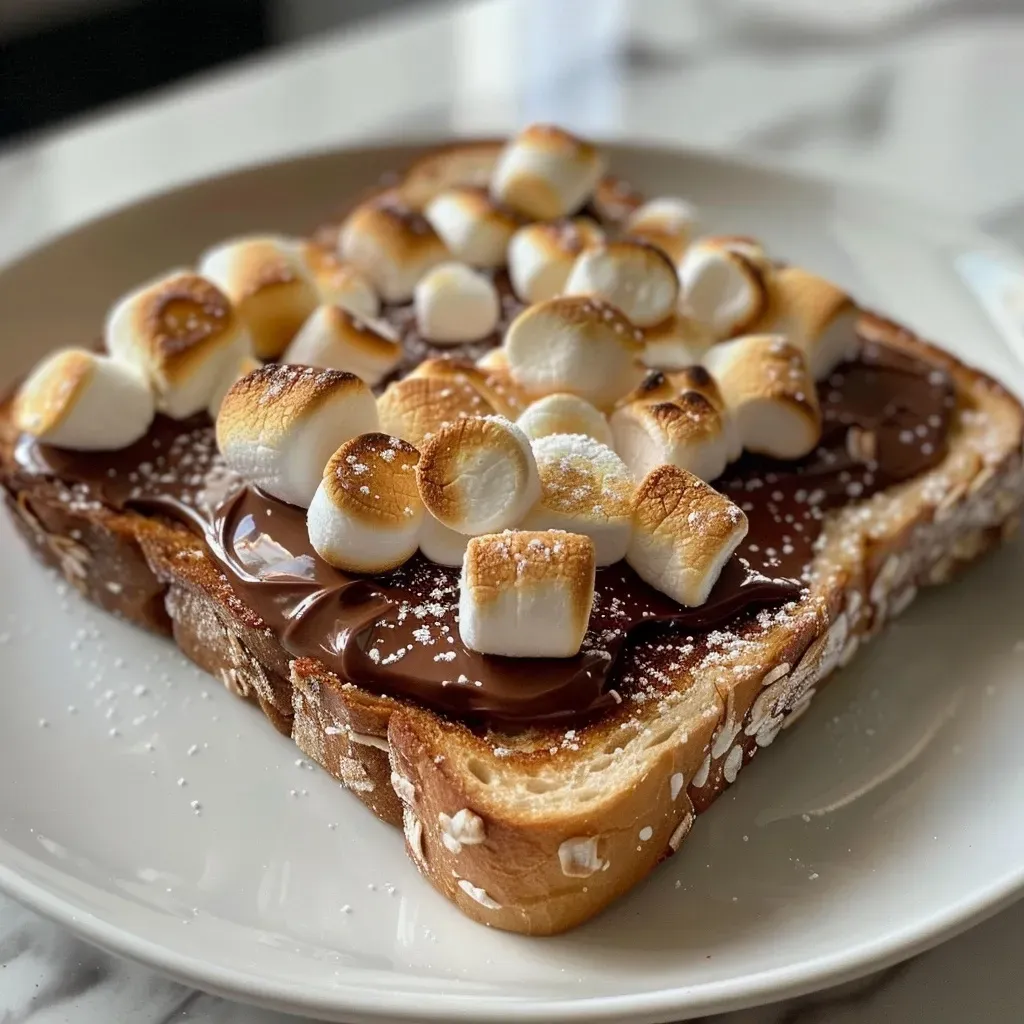
  • Nutella (or chocolate spread): This creamy chocolatey goodness serves as the base for your s’mores.
  • Slice of bread: Choose your favorite type—white, whole grain, or even gluten-free!
  • Marshmallows: Mini marshmallows work best for even melting, but you can use large ones if you prefer.

Substitutions & Variations

Side view of a slice of toast topped with Nutella, roasted marshmallows, and a golden-brown crust.

If you’re looking to switch things up, here are some fabulous alternatives:

  • Peanut Butter: Swap Nutella for peanut butter for a delightful twist!
  • Flavored Spreads: Try almond butter or cookie butter for unique flavor profiles.
  • Different Breads: Use brioche or croissant for an indulgent brunch option.
  • Fruit Additions: Add sliced bananas or strawberries for a fresh twist.

Pro Tips for Perfect S’mores on Toast

To ensure your s’mores toast is nothing short of perfection, keep these expert tips in mind:

  • Toasting Technique: Use a toaster oven or skillet for best results—watch closely to prevent burning!
  • Even Spread: Make sure to spread the Nutella evenly for balanced flavors.
  • Marshmallow Placement: Place marshmallows close together for that gooey texture.
  • Watch the Time: Toast until marshmallows are golden brown, about 2-3 minutes.
  • Experiment with Toppings: Don’t hesitate to sprinkle crushed graham crackers or drizzle caramel on top!
  • Use Fresh Ingredients: Fresh bread and high-quality chocolate spread make a significant difference in flavor.
  • Layer It Up: For a more decadent treat, add a second slice of bread on top, creating a s’mores sandwich!
  • Let it Cool: Allow your toast to cool slightly before serving, as the filling can be very hot!

Common Mistakes and Troubleshooting

Even the most seasoned cooks can run into a hiccup. Here are common pitfalls and how to avoid them:

  • Burnt Toast: If your toast burns, lower the heat and keep a close eye on it.
  • Too Much Spread: Using too much Nutella can make it overly sweet—aim for a thin layer!
  • Uneven Melting: If some marshmallows aren’t melting evenly, adjust their placement on the bread.
  • Ingredient Substitutions: If using alternative ingredients, be mindful that the texture and flavor may vary.

Storage & Make-Ahead Instructions

Want to enjoy this treat later? Here’s how to store it:

  • Unmade Toast: You can prepare the toast without toasting it ahead of time and store it in an airtight container for 1-2 days.
  • Leftover Toast: If you have any leftover S’mores on Toast, store them in the fridge for up to 1 day. Reheat in the toaster oven before serving!

Frequently Asked Questions

Here are some common questions about S’mores on Toast that might help you:

  • Can I use gluten-free bread? Absolutely! Gluten-free bread works just as well.
  • What can I substitute for marshmallows? Try marshmallow fluff or even whipped cream as an alternative.
  • How can I make this healthier? Use whole grain bread and reduce the amount of chocolate spread.
  • Can I use a microwave? Yes, but the texture won’t be as crispy. Use a low setting and check frequently.
  • Are there nut-free alternatives? Yes! Use sunflower seed butter in place of nut spreads.
  • How do I ensure the marshmallows melt perfectly? Toast them until they are golden brown and gooey—keep an eye on them!
  • Can I make these vegan? Yes! Use dairy-free chocolate and marshmallows for a vegan-friendly version.
  • What toppings do you recommend? Try nuts, coconut flakes, or even a sprinkle of sea salt for an extra flavor boost!

Nutritional Tips and Dietary Adaptations

Your S’mores on Toast can be a fun treat, and with a few tweaks, you can make it fit your dietary needs:

  • Control Portions: Stick to one slice of bread for a more portion-controlled treat.
  • Explore Sugar Alternatives: Use natural sweeteners like honey or agave nectar if you prefer.
  • Boost Fiber: Opt for whole grain bread to increase dietary fiber.

Essential Equipment

Here are a few tools that can help you make this recipe a breeze:

  • Toaster Oven or Skillet: For toasting your s’mores to perfection.
  • Spatula: To help flip or transfer your toast easily.
  • Measuring Spoons: For spreading the right amount of Nutella or other toppings.

Serving Suggestions

For a fantastic presentation, consider serving your S’mores on Toast with:

  • Fresh Berries: Strawberries or raspberries add a refreshing touch.
  • Ice Cream: A scoop of vanilla or chocolate ice cream makes it a decadent dessert.
  • Drinks: Pair with milk, hot chocolate, or a fruity smoothie for a delightful balance.

Conclusion

Creating delicious S’mores on Toast is not only simple, but it’s also an enjoyable activity that can bring friends and family together. With the versatility of ingredients and toppings, this recipe can be tailored to your taste and dietary needs. So, gather your ingredients, unleash your creativity, and let’s make some toast that will leave everyone wanting more! Happy cooking!

S’mores on Toast

Prep Time 2 minutes
Cook Time 3 minutes
Total Time 5 minutes
Servings 1 serving
Calories 250
A quick and delicious treat combining the classic flavors of s’mores on a toasted slice of bread.

Ingredients

Main

  • 1 slice bread
  • 2 tablespoons Nutella (or chocolate spread)
  • 4 marshmallows marshmallows

Instructions 

  • Spread Nutella on the bread slice.
  • Top with marshmallows.
  • Toast until golden and marshmallows are melty.

Notes

Use a toaster or oven to achieve a perfect golden finish.
Calories: 250kcal
Cost: $3
Course: Snack
Cuisine: American
Keyword: chocolate, S’mores, Toast

Unlock the Secrets to Delicious Peanut Butter Energy Bars

If you’re looking for a quick, nutritious, and satisfying snack, you’ve come to the right place! These Peanut Butter Energy Bars are not only easy to make but also packed with wholesome ingredients to fuel your day. Combining creamy peanut butter, sweet medjool dates, and hearty oats, these bars are perfect for busy days when you need a nutritious pick-me-up. In this definitive guide, we’ll cover everything from the benefits of these energy bars to expert tips and variations you can try. Let’s dive in!

Why You’ll Love This Recipe

  • Quick & Easy: With just a few simple steps, you can whip up these energy bars in no time, making them perfect for a busy lifestyle.
  • Nutritious Ingredients: Made with whole foods like oats, dates, and peanut butter, these bars are a healthy snack option for any time of day.
  • Customizable: Feel free to get creative! Add your favorite nuts, seeds, or dried fruits for a personal touch.
  • No-Bake Convenience: Simply mix, press, and chill—no oven required!
  • Great for Meal Prep: Make a batch ahead of time to have on hand for snacks, breakfast, or post-workout fuel.

Ingredients Breakdown

Here’s what you’ll need to make these delicious Peanut Butter Energy Bars along with some substitution options:

  • Rolled Oats (2 cups): These provide the base of the bars. You can substitute with quick oats, but the texture may vary.
  • Medjool Dates (10 pitted): They add natural sweetness and stickiness. If you can’t find medjool dates, try using dried figs or apricots.
  • Natural Peanut Butter (1 cup): Look for a brand without added sugar or oils. For a nut-free option, almond or sunflower seed butter works well.
  • Honey (1/2 cup): Acts as a binding agent and sweetener. Maple syrup can be a great vegan alternative.
  • Chia Seeds (1/4 cup): These provide fiber and healthy fats. You can swap them for flaxseeds if desired.
  • Vanilla Extract (1 tsp): For added flavor. Feel free to use almond extract for a different twist.
  • Salt (1/2 tsp): Enhances the flavors of the other ingredients.
  • Chocolate Chips (1 cup): Use dark or semi-sweet. For a healthier option, try cacao nibs.
  • Coconut Oil (1 tsp): Helps to melt the chocolate for the topping. Optional, but adds a nice flavor.
  • Flaky Sea Salt: A sprinkle on top for that gourmet touch!

Step-by-Step Instructions

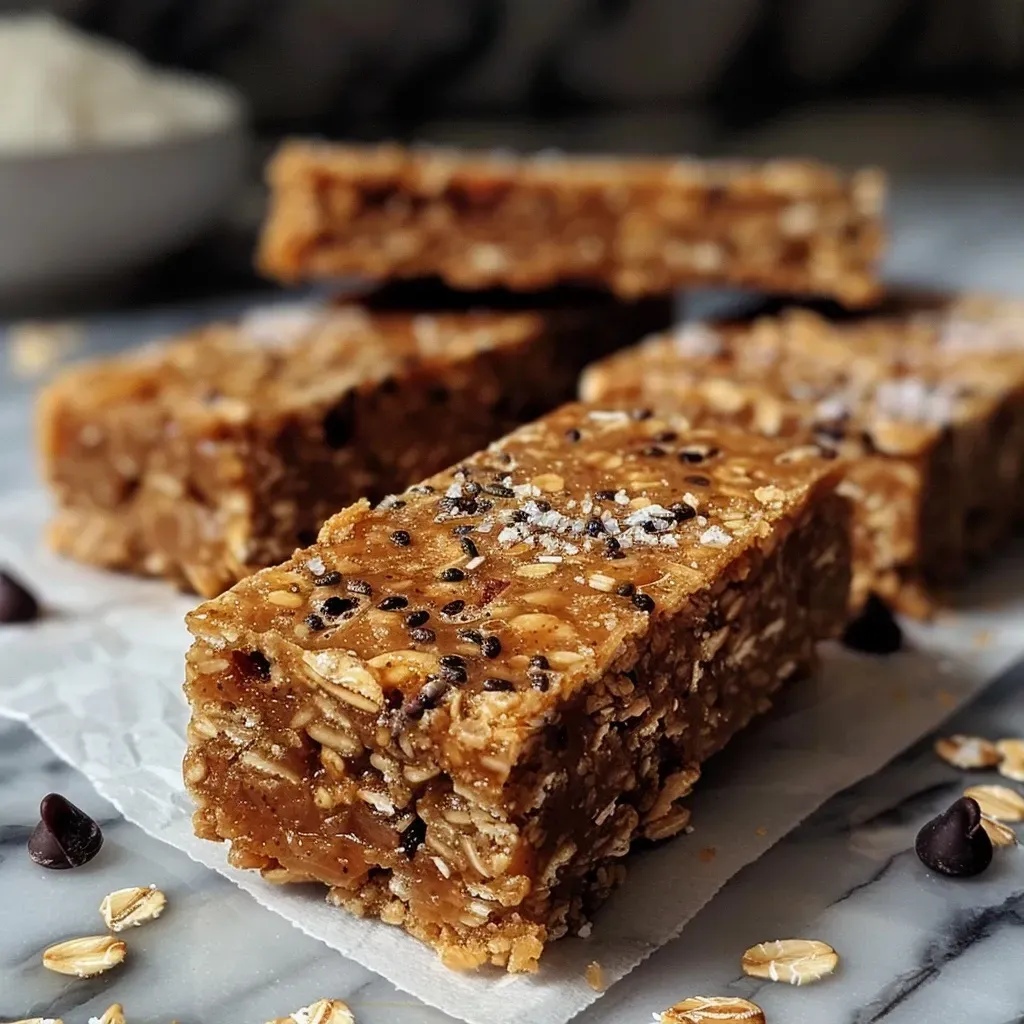
Side angle photo of energy bars made with oats, dates, and natural peanut butter.

Let’s get started on making these delightful energy bars:

  1. Blend the Oats: In a food processor, blend the rolled oats until they reach a fine consistency.
  2. Add the Dates: If your dates are hard, soak them in hot water for about 5 minutes. Add them to the food processor and blend until combined.
  3. Mix in Other Ingredients: Add the peanut butter, honey, chia seeds, vanilla extract, and salt. Blend until everything is well combined, and a dough forms.
  4. Press into Pan: Line an 8×8 inch pan with parchment paper. Press the dough evenly into the pan.
  5. Melt Chocolate: In a small bowl, microwave the chocolate chips and coconut oil in 30-second increments until smooth. Pour over the pressed dough and sprinkle with flaky sea salt.
  6. Chill: Place the pan in the freezer for at least 30 minutes or the fridge for 2 hours to set.
  7. Cut & Serve: Once set, remove from the pan, cut into squares, and enjoy! Store any leftovers in the fridge or freezer.

Pro Tips for Perfect Energy Bars

  • Texture Matters: For the best chewy texture, use old-fashioned rolled oats rather than quick oats.
  • Sweetness Level: Adjust the sweetness by adding more or less honey based on your preference.
  • Don’t Overblend: Stop blending as soon as the mixture holds together to maintain some texture.
  • Keep Cool: Always store these bars in the fridge to maintain their firmness.
  • Slice When Cold: For cleaner cuts, slice the bars when they are chilled.
  • Experiment with Flavors: Add spices like cinnamon or nutmeg for a flavor boost.
  • Try Different Nuts: Feel free to mix in chopped nuts, such as almonds or walnuts, for added crunch.
  • Use a Food Processor: If you don’t have one, a high-powered blender can work as well.

Common Mistakes & Troubleshooting

Even the best cooks can make mistakes! Here are some common pitfalls and how to avoid them:

  • Bars Too Crumbly: If the mixture is dry and crumbly, try adding more peanut butter or honey to help bind it.
  • Too Sticky: If the mixture is too sticky, add a bit more oats to balance it out.
  • Chocolate Not Melting: Make sure to heat the chocolate slowly in the microwave to prevent burning.
  • Not Setting Properly: If the bars don’t set, make sure you chilled them long enough. They may need more time in the fridge or freezer.

Variations to Try

Here are some fun twists to customize your Peanut Butter Energy Bars:

  • Chocolate Chip Banana: Add mashed banana to the mixture for a fruity flavor boost.
  • Nutty Crunch: Incorporate chopped nuts like almonds or pecans for added crunch.
  • Trail Mix Bars: Mix in dried fruits, seeds, or even cacao nibs for a trail mix-inspired bar.
  • Spiced Pumpkin: Add pumpkin puree and pumpkin spice for a fall-inspired treat.

Storage & Make-Ahead Instructions

To keep your energy bars fresh and delicious:

  • Refrigerator: Store them in an airtight container in the fridge for up to 2 weeks.
  • Freezer: For longer storage, wrap each bar in plastic wrap and store them in a freezer-safe container for up to 3 months.

Frequently Asked Questions

Got questions? We’ve got answers!

  • Can I make these energy bars vegan? Yes! Just substitute honey with maple syrup.
  • How do I know when they’re ready to eat? They should be firm to the touch after chilling in the fridge or freezer.
  • Can I use other nut butters? Absolutely! Almond butter or sunflower seed butter work great as alternatives.
  • What if I don’t like chocolate? You can leave out the chocolate chips or use dried fruit instead.
  • Are these energy bars healthy? Yes! They are packed with nutrients and made from wholesome ingredients.
  • How many bars does this recipe make? This recipe typically yields 12 bars, depending on how you cut them.
  • Can I add protein powder? Yes, you can mix in a scoop of your favorite protein powder for an extra boost.
  • What’s the best way to cut the bars? A sharp knife works best. For cleaner cuts, slice while they’re cold!

Nutrition Tips & Dietary Adaptations

These Peanut Butter Energy Bars can fit into many dietary needs:

  • Gluten-Free: Use certified gluten-free oats to make these bars gluten-free.
  • Lower Sugar: Use less honey or opt for a sugar-free syrup to reduce sugar content.
  • High-Protein: Add protein powder or seeds like hemp or pumpkin seeds to increase protein content.

Recommended Equipment

To make these bars, you’ll need:

  • Food Processor: Essential for blending the ingredients smoothly.
  • 8×8 Pan: Perfect size for pressing the energy bar mixture.
  • Parchment Paper: Helps to easily lift the bars out of the pan.
  • Measuring Cups and Spoons: Accurate measurements ensure the best results.

Serving Suggestions

These tasty energy bars are versatile and can be enjoyed in many ways:

  • On-the-Go: Perfect for a quick breakfast or snack while rushing out the door.
  • Post-Workout: A great way to refuel after a workout session.
  • With Coffee or Tea: Pair with your favorite beverage for a delightful afternoon treat.

Conclusion

Now that you have all the insider tips and tricks, you’re ready to create your own batch of Peanut Butter Energy Bars. With their delicious flavor and nutritious ingredients, you’ll be so happy you made them. Embrace your cooking creativity, experiment with flavors, and enjoy these bars as a convenient snack to keep you energized throughout your busy days. Happy cooking!

Peanut Butter Energy Bars

Prep Time 15 minutes
Cook Time 10 minutes
Total Time 25 minutes
Servings 12 bars
Calories 250
These homemade peanut butter energy bars are perfect for a quick, nutritious snack to fuel your day.

Ingredients

Dry ingredients

  • 2 cups rolled oats
  • 1 cup natural peanut butter
  • 1/2 cup honey
  • 1/4 cup chia seeds
  • 1 tsp vanilla
  • 1/2 tsp salt

Add-ins

  • 1 cup chocolate chips
  • 1 tsp coconut oil
  • flakey sea salt flakey sea salt

Instructions 

  • Blend oats until fine in a food processor.
  • Add soaked dates and blend until combined.
  • Add peanut butter, honey, chia seeds, vanilla, and salt; blend until a ball forms.
  • Press mixture into an 8x8 pan lined with parchment paper.
  • Melt chocolate chips and coconut oil; pour over the pressed mixture and sprinkle with sea salt.
  • Freeze for 30 minutes or refrigerate for 2 hours before cutting into bars.

Notes

Store in the fridge or freezer for best freshness.
Calories: 250kcal
Cost: $10
Course: Snack
Cuisine: American
Keyword: peanut butter

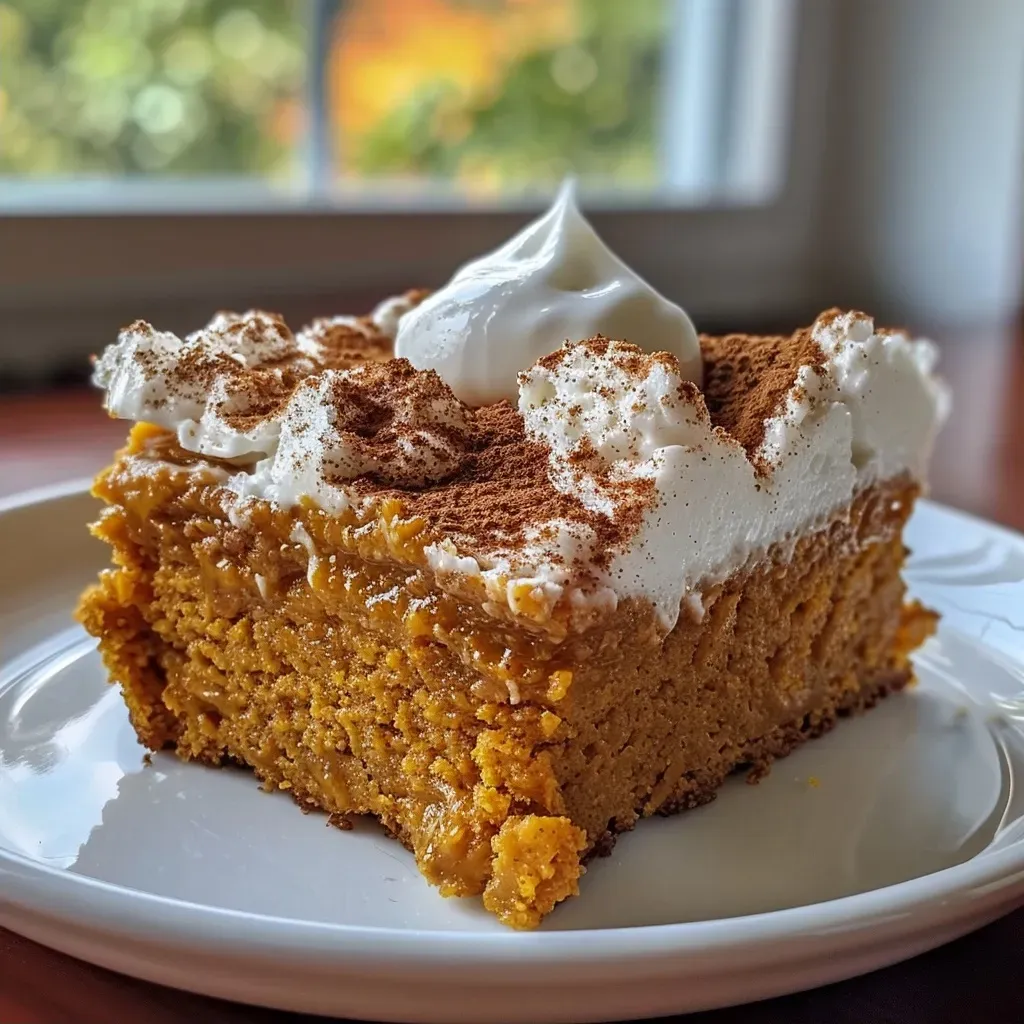
Start Your Day Right with This Wholesome Pumpkin Protein Breakfast Cake

Welcome to your new favorite morning staple! If you’re looking for a delicious way to kickstart your day, look no further than this Pumpkin Protein Breakfast Cake. Packed with nourishing ingredients, it’s not just a treat for your taste buds, but a powerhouse of nutrition. Whether you’re a busy professional or a parent juggling a thousand tasks, this recipe is designed to fit effortlessly into your routine. Let’s dive into why this breakfast cake is the perfect way to fuel your mornings!

Why You’ll Love This Recipe

This pumpkin protein breakfast cake is not only delicious but also brings a variety of benefits to your morning routine. Here are a few reasons why you’ll adore it:

  • High in Protein: With the addition of protein powder and egg whites, this cake packs a protein punch, helping you stay full longer and supporting muscle recovery.
  • Quick and Easy: This recipe takes only 10 minutes of prep time, making it an ideal choice for busy mornings.
  • Nutritious Ingredients: The use of pumpkin puree adds vitamins and minerals, including vitamin A and fiber, contributing to a healthy breakfast.
  • Customizable: You can easily tweak the recipe to suit your taste—add your favorite nuts, seeds, or even swap out the sweetener!
  • Deliciously Satisfying: With warm spices and a hint of sweetness, this breakfast cake is a delightful way to indulge without the guilt.

Ingredient Breakdown

Understanding each ingredient in this recipe is essential for ensuring a successful bake. Let’s explore what you’ll need:

  • Pumpkin Puree: Adds moisture and a rich flavor. You can substitute with sweet potato puree if needed.
  • Egg Whites: Provide structure and help create a fluffy texture. You can replace them with more whole eggs if you prefer.
  • Whole Egg: Contributes to the richness of the cake; opt for large eggs for the best results.
  • Vanilla Extract: A must for depth of flavor—pure extracts are best for maximum taste.
  • Maple Syrup: Adds sweetness naturally. You can substitute with honey or agave syrup.
  • Unflavored Protein Powder: Boosts the protein content without altering the flavor. Choose a brand that suits your dietary needs.
  • Gluten-Free Oat Flour: Gives the cake structure; you can use almond flour or a gluten-free blend if needed.
  • Grain-Free Baking Powder: Ensures the cake rises; check that it’s gluten-free if required.
  • Pumpkin Spice: A blend of spices that enhances the fall flavor profile. You can make your own with cinnamon, nutmeg, and ginger.

How to Make Pumpkin Protein Breakfast Cake

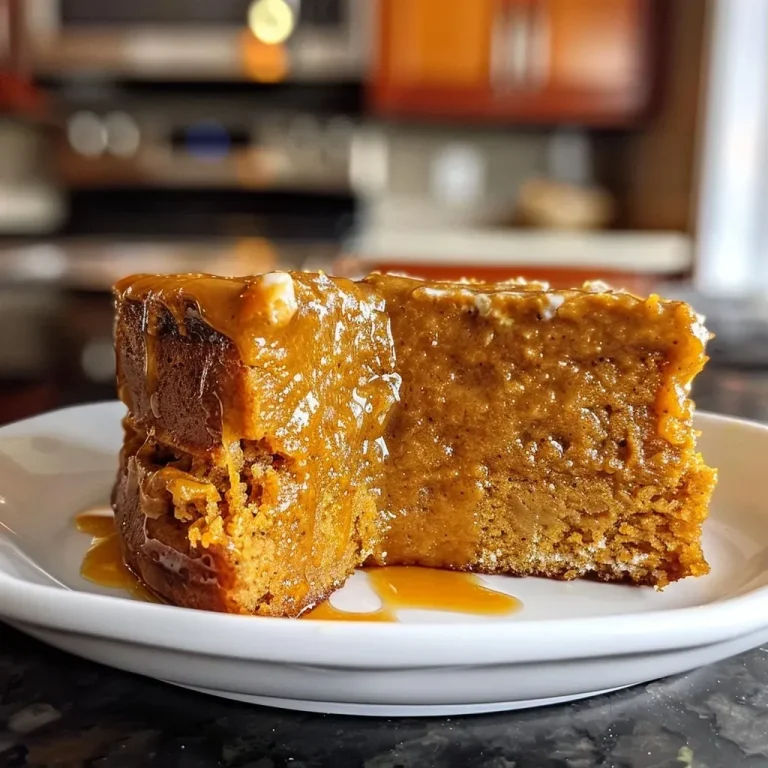
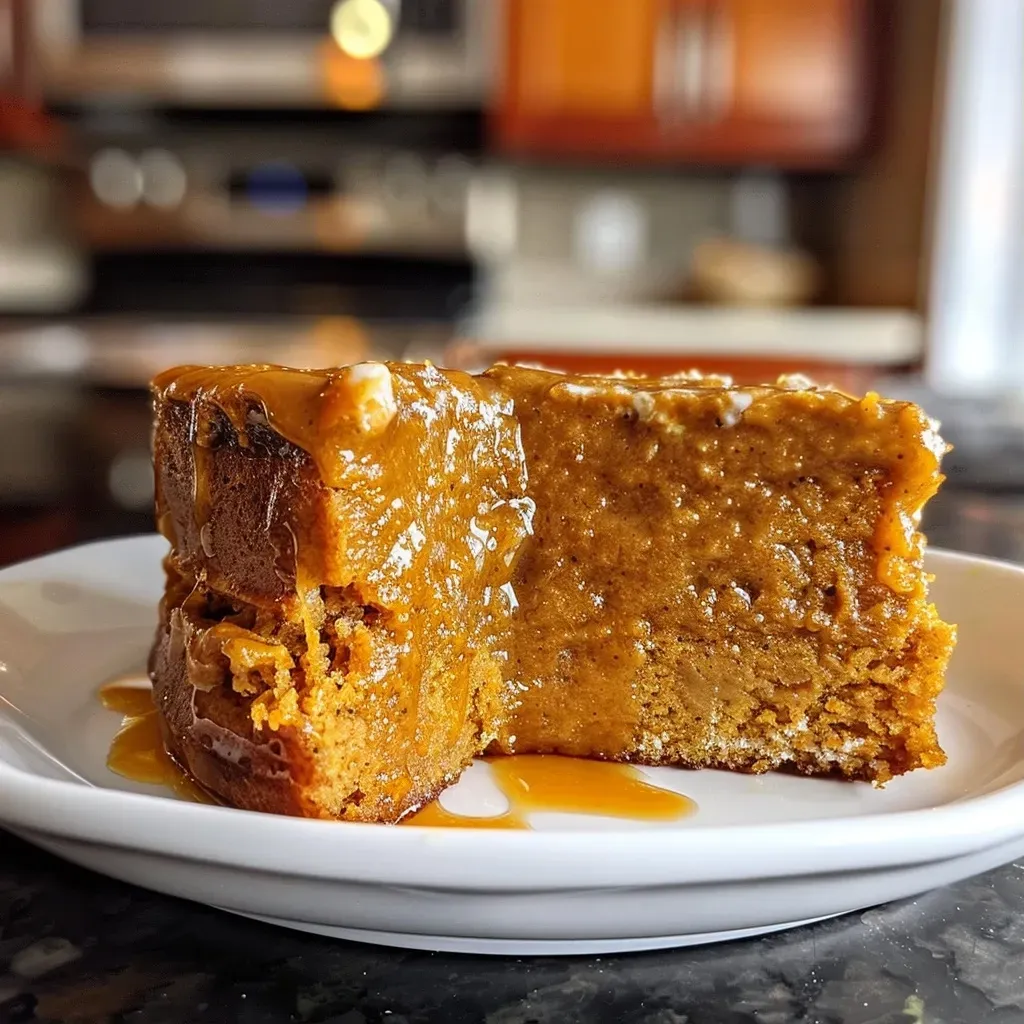
Side view photo of a hearty Pumpkin Protein Breakfast Cake sliced to reveal its texture.

Now that we’ve gathered our ingredients, let’s get into the simple steps to create this delightful breakfast cake:

  1. Preheat the Oven: Preheat your oven to 350°F (175°C) and grease a 7×5.25″ baking dish.
  2. Mix Wet Ingredients: In a medium bowl, whisk together the pumpkin puree, egg whites, whole egg, vanilla extract, and maple syrup until well combined.
  3. Combine Dry Ingredients: Add the protein powder, baking powder, oat flour, and pumpkin spice to the wet mixture. Fold gently until you form a smooth batter.
  4. Pour and Bake: Transfer the batter to your greased baking dish and place it in the oven. Bake for about 25 minutes or until the cake is set in the center.
  5. Cool and Serve: Allow the cake to cool slightly before serving. Top with additional maple syrup, yogurt, or sliced bananas for extra flavor!

Pro Tips for Perfect Pumpkin Protein Breakfast Cake

To ensure your breakfast cake turns out perfectly every time, here are some expert tips:

  • Don’t Overmix: Gently fold the batter to keep the texture light and fluffy.
  • Check for Doneness: A toothpick inserted in the center should come out clean when the cake is done.
  • Let It Cool: Allow the cake to cool in the pan for a bit; this helps it firm up and makes it easier to slice.
  • Play with Flavors: Feel free to add chocolate chips, nuts, or dried fruit for added texture and flavor.
  • Storage: This cake can be stored in an airtight container in the fridge for up to a week.
  • Freeze for Later: Slice and freeze individual pieces for a quick breakfast option later on.
  • Use Fresh Pumpkin Spice: If possible, use freshly ground spices for the best flavor.
  • Watch the Baking Time: Ovens can vary, so keep an eye on your cake the last few minutes of baking.

Common Mistakes and Troubleshooting

Even the best of us can make mistakes in the kitchen! Here are some common issues and how to avoid them:

  • Dry Cake: If your cake turns out dry, it may have been overbaked. Always check for doneness a few minutes before the suggested time.
  • Too Dense: Overmixing the batter can lead to a dense cake. Be gentle when combining ingredients.
  • Flavor Issues: If the flavor is lacking, try adjusting the spices or adding a pinch of salt to enhance sweetness.
  • Sticking to the Pan: Ensure you grease your baking dish well to prevent sticking.

Variations to Try

Looking to switch things up? Here are some fun variations you can try with this recipe:

  • Chocolate Chip Pumpkin Protein Cake: Add 1/2 cup of dark chocolate chips for a delightful twist.
  • Nuts and Seeds: Stir in your favorite nuts like walnuts or pecans for added crunch.
  • Banana Pumpkin Breakfast Cake: Substitute half of the pumpkin puree with mashed bananas for a fruity flavor.
  • Spiced Apple Variation: Add diced apples and a sprinkle of cinnamon for a fall-inspired treat.

Storage and Make-Ahead Instructions

This breakfast cake is perfect for meal prep! Here’s how to store and prepare it:

  • Refrigerate: Store leftovers in an airtight container in the fridge for up to 5 days.
  • Freeze: Wrap slices in plastic wrap and place them in a freezer bag for up to 3 months. Thaw in the fridge overnight when ready to enjoy.
  • Make Ahead: You can prepare the batter a day in advance. Just store it in the refrigerator and bake it fresh in the morning!

Comprehensive FAQ

Here are some frequently asked questions that might help you while making this recipe:

  • Can I use regular flour instead of oat flour? Yes, but keep in mind it may alter the texture slightly.
  • Is this cake gluten-free? Yes, if you use gluten-free oat flour and baking powder.
  • How can I make this vegan? Substitute eggs with flax eggs and use a plant-based protein powder.
  • What can I use instead of maple syrup? Honey or agave syrup can be great alternatives.
  • Can I bake this in a larger dish? Yes, just adjust the baking time as needed to account for the larger volume.
  • How do I know when the cake is done? A toothpick inserted in the center should come out clean when it’s fully baked.
  • Can I add protein powder flavors? Absolutely! Chocolate or vanilla protein powder can add a nice twist.
  • How do I serve this breakfast cake? Enjoy it warm with toppings like yogurt, fresh fruit, or nut butter for a delightful breakfast!

Nutrition Tips and Dietary Adaptations

This recipe is not only delicious but can also be adapted to meet various dietary needs:

  • Low-Carb Option: Use almond flour instead of oat flour and check your protein powder for carb content.
  • Dairy-Free: Ensure your toppings are dairy-free, and use a non-dairy yogurt option.
  • Nut-Free: If you’re avoiding nuts, simply skip any nut toppings or additions.
  • Increase Fiber: Add chia seeds or flaxseeds to the batter for an extra fiber boost.

Equipment Recommendations

To make this process as smooth as possible, here’s a list of recommended tools:

  • Mixing Bowls: A set of various sizes for mixing ingredients.
  • Whisk: Essential for blending wet ingredients smoothly.
  • Baking Dish: A 7×5.25″ dish works perfectly for this recipe.
  • Spatula: For folding ingredients and scraping the batter into the dish.
  • Oven Thermometer: To ensure your oven is at the right temperature for baking.

In conclusion, this pumpkin protein breakfast cake is a delightful and nutritious way to start your day. With its simple ingredients and straightforward steps, you’ll find that homemade breakfasts can be both easy and rewarding. So, roll up your sleeves, gather your ingredients, and let’s get baking! You’ve got this!

Pumpkin Protein Breakfast Cake

Prep Time 10 minutes
Cook Time 25 minutes
Total Time 35 minutes
Servings 4 pieces
Calories 180
A nutritious and delicious breakfast cake combining pumpkin, protein, and warm spices, perfect for a quick morning boost.

Ingredients

Base

  • 1/2 cup pumpkin puree
  • 2 egg whites egg whites
  • 1 whole egg
  • 1 tsp vanilla extract
  • 2 tsp maple syrup (see notes)
  • 1 scoop unflavored protein powder
  • 2 tbsp gluten free oat flour
  • 1 tsp grain free baking powder
  • 1 tsp pumpkin spice

Instructions 

  • Preheat oven to 350°F (175°C) and grease a 7x5.25" baking dish.
  • Whisk pumpkin, eggs, egg whites, vanilla, and maple syrup until combined.
  • Mix in protein powder, baking powder, oat flour, and pumpkin spice until batter forms.
  • Pour batter into dish and bake for 25 minutes until set.
  • Cool slightly and serve topped with extra maple syrup, yogurt, or banana.

Notes

This cake is a great way to start your day with protein and seasonal flavors.
Calories: 180kcal
Cost: $15
Course: Breakfast
Keyword: pumpkin

Transform Your Weeknight Dinners with Vegan Bratwurst and Zesty Lemon-Paprika Risotto

Welcome, fellow food lovers! If you’re looking for a delightful and satisfying meal that’s as easy to prepare as it is delicious, you’ve come to the right place. This Vegan Bratwurst paired with Zesty Lemon-Paprika Risotto is not just a dish; it’s a celebration of flavors that will elevate your weeknight dinners. Cooking doesn’t have to be complicated, and with this recipe, you’ll impress your family and friends with minimal effort. Let’s dive into why you’ll love this recipe and how to make it shine in your kitchen!

Why You’ll Love This Recipe

  • Flavor-packed experience: The combination of vegan bratwurst and creamy lemon-paprika risotto offers a delightful contrast that excites the palate.
  • Quick and easy: This dish can be prepared in under 30 minutes, making it perfect for busy weeknights when you want something scrumptious without the fuss.
  • Healthy and satisfying: Packed with plant-based ingredients, this meal is not only hearty but also rich in nutrients, ensuring you feel good after eating.
  • Versatile serving options: Pair it with a fresh salad or some steamed veggies to create a well-rounded meal that caters to all tastes.
  • Impressive presentation: The vibrant colors and textures make this dish visually appealing, perfect for impressing dinner guests or family alike.

Ingredients Breakdown

Here’s what you’ll need to create this fantastic Vegan Bratwurst and Zesty Lemon-Paprika Risotto:

  • 20 g Fresh parsley: A bright herb to add freshness to your dish.
  • 4 Shallots: These provide a subtle sweetness and depth of flavor.
  • 1 Lemon: Zest and juice for that zesty kick.
  • 200 g Roasted bell peppers (jarred): Adds sweetness and color.
  • 180 g Risotto rice: The foundation of creamy risotto.
  • 180 g Vegan bratwurst: The heart of this dish, providing protein and flavor.
  • 30 g Vegan sour cream alternative: For creaminess without dairy.
  • Salt: Essential for seasoning.
  • 2 Cloves garlic: A must-have for aromatic goodness.
  • 0.7 l Vegetable broth: The liquid gold that brings everything together.
  • 2 tbsp Olive oil: For sautéing and flavor.

Pro Tips for Perfection

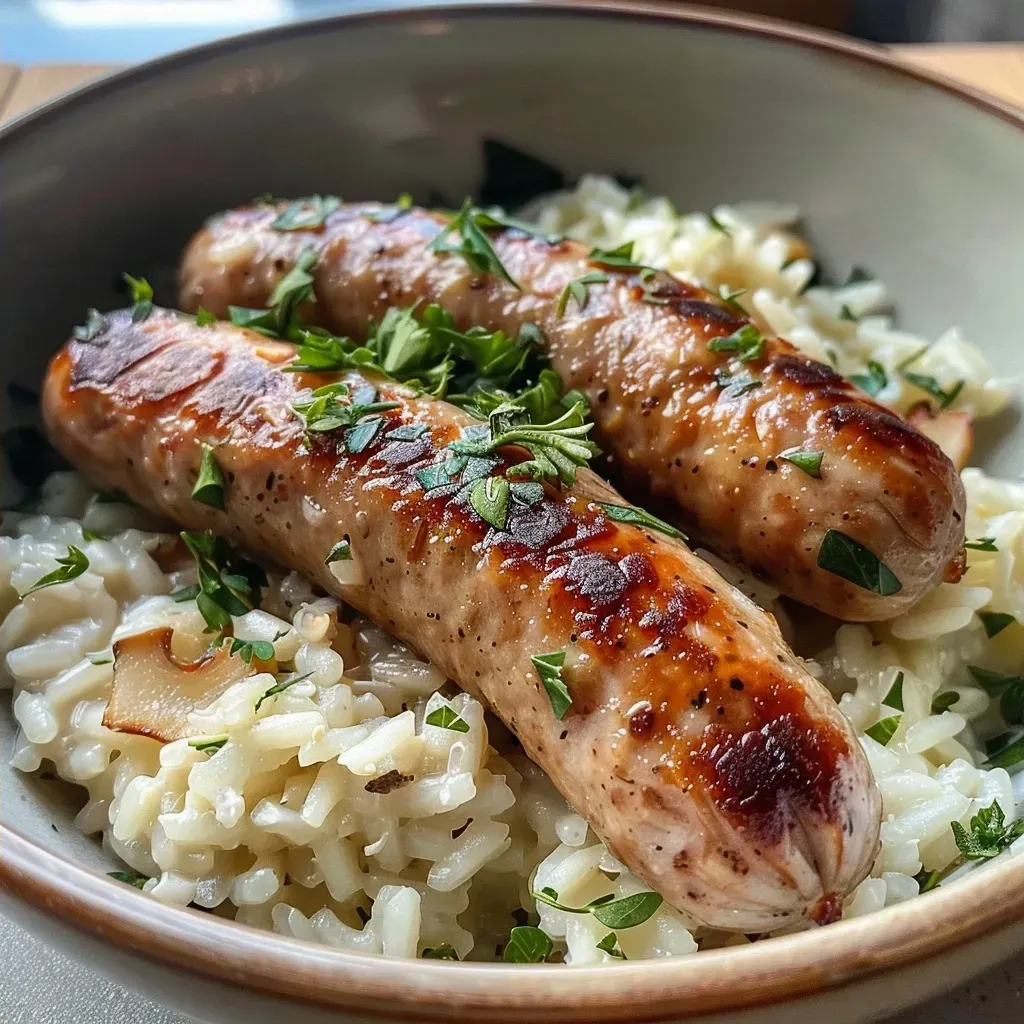
A vibrant dish featuring vegan bratwurst alongside a creamy lemon-paprika risotto, garnished with fresh parsley.
  • Use high-quality vegetable broth: The flavor of your risotto largely depends on the broth, so choose one that you love.
  • Don’t rush the risotto: Stirring frequently until the rice absorbs the broth is key to achieving that creamy texture.
  • Experiment with spices: Add a pinch of smoked paprika or cayenne for an extra kick.
  • Make it a one-pot dish: Cook the bratwurst in the same pot as the risotto for added flavor.
  • Adjust your consistency: If the risotto is too thick, add a bit more broth until you reach your desired creaminess.
  • Let it rest: Allow the risotto to sit for a minute before serving; it helps enhance the flavors.
  • Garnish generously: Fresh parsley and a squeeze of lemon juice just before serving elevate the dish.
  • Pair wisely: Serve with a light salad to balance the richness of the risotto.

Common Mistakes and Troubleshooting

Even the most experienced cooks can encounter challenges. Here are some common pitfalls and how to avoid them:

  • Risotto is too sticky: If your risotto turns out sticky, you may have added too much liquid too quickly. Ensure to add broth gradually.
  • Bratwurst is dry: Overcooking can lead to dry sausages. Cook them just until heated through for the best flavor.
  • Flavor is lacking: Taste and adjust seasoning throughout cooking. Don’t be afraid to add more salt or spices as needed.
  • Too thick risotto: If it seems too thick, slowly add more broth or water until you reach the desired consistency.
  • Not creamy enough: Make sure to stir frequently and allow the rice to release its starches for creaminess.

Variations to Explore

If you’re feeling adventurous, here are some variations to customize your dish:

  • Smoky flavor: Use smoked vegan bratwurst for a deeper, richer taste.
  • Vegetable-loaded risotto: Add peas, spinach, or asparagus for extra nutrients and color.
  • Different grains: Try using quinoa or farro instead of risotto rice for a unique twist.
  • Asian-inspired: Swap lemon for lime and add soy sauce or shio koji for an umami boost.

Storage and Make-Ahead Instructions

This dish is perfect for meal prep. Here’s how to store and reheat it:

  • Refrigerate leftovers: Store in an airtight container for up to 3 days.
  • Freeze for later: If you want to make it ahead, you can freeze the risotto (without the bratwurst) for up to 1 month.
  • Reheat gently: When reheating, add a splash of vegetable broth to loosen up the risotto and prevent it from drying out.

Frequently Asked Questions

Here are some common questions about this recipe:

  • Can I use regular bratwurst instead of vegan? Absolutely! Just adjust the cooking time as necessary.
  • Is risotto gluten-free? Yes, if you use gluten-free broth and ensure your rice is certified gluten-free.
  • Can I make this dish ahead of time? Yes, you can prepare the risotto ahead of time and reheat it when ready to serve.
  • What can I substitute for vegan sour cream? You can use cashew cream or a coconut yogurt alternative.
  • How do I make it spicier? Add crushed red pepper flakes or cayenne pepper to the risotto as it cooks.
  • Can I add other vegetables? Yes! Feel free to incorporate your favorite vegetables.
  • What’s the best way to store leftovers? Store them in an airtight container in the refrigerator for up to 3 days.
  • Can I use brown rice instead of risotto rice? You can, but the cooking time will vary, and the texture will be different.

Nutritional Tips and Dietary Adaptations

This Vegan Bratwurst and Zesty Lemon-Paprika Risotto is not only delicious but also nutritious. Here are some tips to enhance its health benefits:

  • Add more veggies: Incorporate a variety of colorful vegetables to boost fiber and vitamins.
  • Control portion sizes: Enjoy a reasonable serving to maintain a balanced diet.
  • Check labels: Ensure that your vegan bratwurst and broth are low in sodium if you’re watching your salt intake.
  • Boost protein: Consider adding legumes like chickpeas or lentils to increase the protein content.

Essential Equipment for Success

To prepare this dish effectively, you’ll need:

  • Heavy-bottomed pot: Ideal for even cooking and preventing sticking.
  • Wooden spoon: Perfect for stirring the risotto without scratching your pot.
  • Measuring cups and spoons: Accurate measurements ensure consistent results.
  • Cutting board and knife: Essential for prepping your vegetables and bratwurst.

Serving Suggestions

Enhance your dining experience by serving this dish with:

  • Simple green salad: A light salad with lemon vinaigrette complements the richness of the risotto.
  • Steamed asparagus: Bright and nutritious, it adds a lovely crunch to your meal.
  • Garlic bread: For a comforting carbohydrate addition, serve with warm garlic bread.
  • Red wine: A nice glass of red wine pairs beautifully with the flavors of bratwurst.

Now that you have all the tools and tips you need, it’s time to get cooking! Enjoy making this Vegan Bratwurst and Zesty Lemon-Paprika Risotto, and remember, cooking is all about enjoying the process. Embrace your creativity, and let your kitchen be a place of joy and flavor. Happy cooking!

Vegane Bratwurst mit Zitronen-Paprika-Risotto

Prep Time 10 minutes
Cook Time 25 minutes
Total Time 35 minutes
Servings 2 people
Calories 550
Enjoy a flavorful vegan dish combining savory bratwurst with a zesty lemon and paprika risotto.

Ingredients

Vegetables

  • 20 g Petersilie, frisch
  • 4 pieces Schalotten
  • 1 piece Zitrone (for zest and juice)
  • 200 g geröstete Paprikas, im Glas
  • 180 g Risottoreis
  • 180 g Vegane Bratwürste
  • 30 g vegane Schmand-Alternative
  • Salz Salz (to taste)
  • 2 Zehe(n) Knoblauch (minced)
  • 0.7 l Gemüsebrühe
  • 2 EL Olivenöl

Instructions 

  • Knoblauch schälen und hacken.
  • Schalotten schälen und würfeln.
  • Risotto zubereiten: Risottoreis in Olivenöl anschwitzen, nach und nach Gemüsebrühe hinzufügen, bis der Reis cremig ist. Zitronenschale und -saft unterrühren.
  • Vegane Bratwürste anbraten und in Scheiben schneiden. Paprika hinzufügen.
  • Bratwürste und Paprika unter das Risotto mischen, vegane Schmand-Alternative einrühren, mit Salz abschmecken und servieren.

Notes

Für extra Geschmack, frische Kräuter hinzufügen.
Calories: 550kcal
Cost: $15
Course: Main Course
Cuisine: German
Keyword: bratwurst, Risotto, Vegan

Discover the Cozy Comfort of Pumpkin Shakshuka

Welcome to the world of Pumpkin Shakshuka, where rich flavors meet warm, comforting meals. This delightful twist on the classic shakshuka recipe features baked eggs nestled in a hearty tomato and pumpkin stew, perfect for a cozy dinner or a satisfying brunch. With the chill of autumn in the air, there’s no better time to embrace this savory pumpkin dish. In this comprehensive guide, we’ll break down everything you need to know to create the perfect pumpkin shakshuka, ensuring you feel confident and excited as you cook!

Why You’ll Love This Recipe

  • Flavor Explosion: The combination of sweet pumpkin, savory tomatoes, and aromatic spices creates a dish that’s layered with deliciousness. You’ll find every bite bursting with flavor!
  • Easy to Make: With simple ingredients and straightforward steps, this pumpkin shakshuka is perfect for both novice and experienced cooks. You can whip it up in just under 30 minutes!
  • Healthy & Wholesome: Packed with nutrients from the pumpkin and eggs, this dish is a fantastic source of fiber and protein, making it a nourishing choice for any meal.
  • Versatile Dish: Whether served for breakfast, lunch, or dinner, this shakshuka recipe can easily adapt to suit any meal. You can enjoy it with crusty bread or as a standalone dish!
  • Great for Meal Prep: This pumpkin shakshuka stores well and can be reheated, making it an excellent option for meal prep. Enjoy it throughout the week for quick, comforting meals.

Ingredient Breakdown

Here’s what you’ll need to create your pumpkin shakshuka:

  • 1 Tablespoon olive oil: For sautéing and adding richness.
  • 1 small yellow onion (diced small): Provides a sweet base flavor.
  • 4 garlic cloves (minced): A must for depth and aroma.
  • 1 red bell pepper (veins removed and chopped small): Adds sweetness and texture.
  • 1 cup pumpkin puree: The star of the dish, adding creaminess and flavor.
  • 28 ounces fire roasted tomatoes: For that rich, tangy tomato base.
  • 1/2 teaspoon crushed red pepper flakes (optional): Adds a kick of heat, if desired.
  • 1 teaspoon smoked paprika: Infuses a warm, smoky flavor.
  • 1 teaspoon ground cumin: Complements the pumpkin beautifully.
  • Salt and pepper (to taste): Essential for seasoning.
  • 6 large eggs: The perfect poached addition to the stew.
  • Fresh parsley (for garnish): For a pop of color and freshness.

Ingredient Substitutions

  • Pumpkin Puree: Don’t have pumpkin puree? You can use butternut squash puree or sweet potato puree as alternatives.
  • Fire Roasted Tomatoes: If unavailable, regular canned tomatoes will work, but consider adding a pinch of smoked paprika for flavor.
  • Red Bell Pepper: Substitute with yellow or orange bell peppers for a different color and flavor.
  • Fresh Parsley: Cilantro or green onions can be used for a different herbaceous note.

How to Make Pumpkin Shakshuka

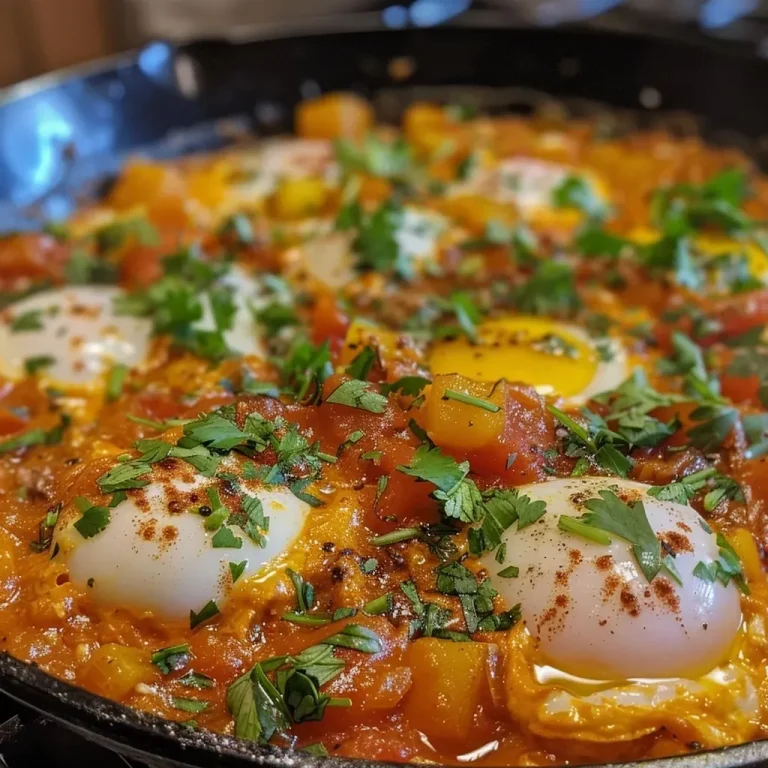
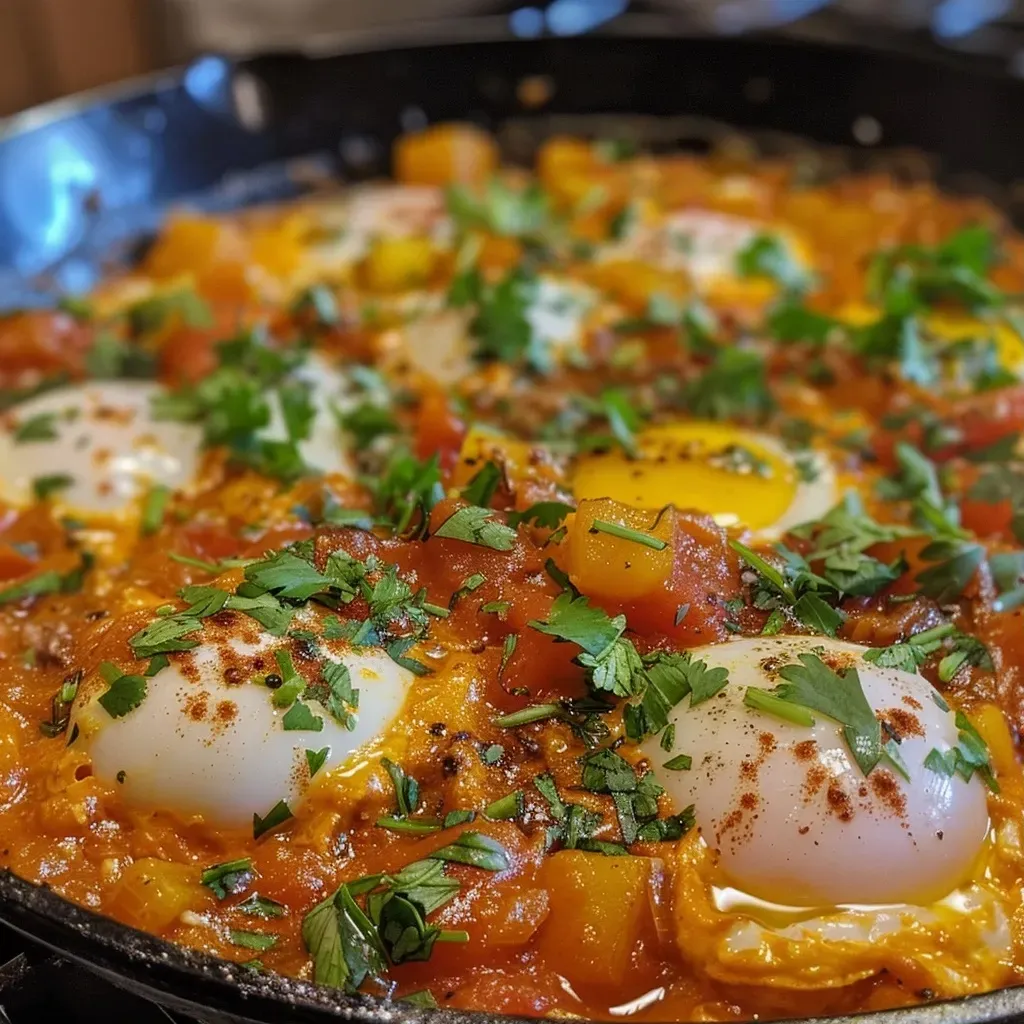
Side view of a bowl of Pumpkin Shakshuka featuring golden eggs nestled in rich tomato stew.

Now, let’s get cooking! Follow these step-by-step instructions to create your delicious pumpkin shakshuka:

  1. Heat the olive oil in a cast iron skillet over medium heat. Add the onion and sauté until translucent, about 2 minutes.
  2. Add in the garlic and bell peppers, cooking until they begin to brown. Stir in the pumpkin puree, fire-roasted tomatoes, and your spices until combined. Allow it to simmer for 2-3 minutes and season with salt and pepper to taste.
  3. Create six shallow wells in the tomato mixture and crack an egg into each. Cover with a lid and cook until the whites are set but the yolks are still runny, about 8 minutes.
  4. Garnish with fresh parsley and serve hot, spooned onto a slice of crusty garlic toast for a filling and savory meal.

Pro Tips for Perfect Pumpkin Shakshuka

  • Don’t rush the cooking: Allow the vegetables to sauté properly for maximum flavor development.
  • Use fresh spices: Fresh spices can significantly enhance the dish’s flavor. Make sure your spices are fresh for the best results.
  • Adjust the heat: If you prefer a spicier shakshuka, feel free to increase the amount of crushed red pepper flakes.
  • Perfectly poached eggs: For runny yolks, keep an eye on the eggs while they cook. Adjust the cooking time to your preference.
  • Variations are welcome: Don’t hesitate to experiment with additional veggies or spices to make the dish your own!
  • Store leftovers properly: Keep any leftovers in an airtight container in the fridge for up to 3 days.

Common Mistakes & Troubleshooting

Even the best cooks can make mistakes! Here are a few common pitfalls and how to avoid them:

  • Too watery? If your shakshuka is too watery, allow it to simmer uncovered for a few extra minutes to thicken.
  • Eggs overcooked? If you accidentally overcook the eggs, try using a lid to cover the skillet; this will help steam the tops of the eggs without cooking them too long.
  • Lack of flavor? Always taste and adjust the seasoning as you go. Don’t be afraid to add more spices or salt if needed.

Variations to Try

Want to switch things up? Here are a few delicious variations on the classic pumpkin shakshuka:

  • Cheesy Pumpkin Shakshuka: Sprinkle crumbled feta or goat cheese over the top before serving for a creamy tang.
  • Spicy Shakshuka: Add diced jalapeños or spicy sausage for an added kick.
  • Veggie-Packed Shakshuka: Toss in additional vegetables, like spinach or kale, for extra nutrients.
  • Herbed Shakshuka: Experiment with fresh herbs like thyme or basil for a burst of freshness.

Storing and Make-Ahead Instructions

This pumpkin shakshuka can be made ahead of time and stored for later enjoyment:

  • Refrigeration: Allow the shakshuka to cool, then store it in an airtight container in the fridge for up to 3 days.
  • Freezing: While the eggs may not hold their perfect texture, you can freeze the pumpkin base for up to 2 months. Reheat gently on the stove, then add fresh eggs.
  • Make Ahead: Prepare the pumpkin stew in advance and store it. When ready to serve, simply crack in the eggs and cook.

Frequently Asked Questions

  • Can I use fresh pumpkin instead of canned? Yes! If you have fresh pumpkin, roast it first, then puree it before adding it to the recipe.
  • What can I serve with pumpkin shakshuka? This dish pairs beautifully with crusty bread, pita, or even over rice for a hearty meal.
  • Can I make it vegan? Absolutely! Substitute the eggs with tofu or chickpeas for a plant-based version.
  • How do I know when the eggs are done? The whites should be set, while the yolks remain runny. Adjust cooking time based on your preference.
  • Is it okay to reheat shakshuka? Yes! Just gently reheat on the stove or in the microwave until warmed through.
  • Can I add meat to this dish? Yes! Chorizo or ground turkey can be added for extra protein and flavor.
  • How long can I store leftovers? Leftovers can be stored in the fridge for up to 3 days.
  • Is pumpkin shakshuka suitable for kids? Yes! The flavors are mild and comforting, making it a great choice for family meals.

Nutrition Tips and Dietary Adaptations

This pumpkin shakshuka is not only delicious but also nutritious! Here are some tips to make it even healthier:

  • Increase veggie intake: Add more vegetables like spinach or zucchini for extra vitamins and fiber.
  • Use low-sodium tomatoes: Opting for low-sodium canned tomatoes can help manage salt intake.
  • Make it gluten-free: Serve shakshuka with gluten-free bread or over quinoa for a gluten-free option.

Recommended Equipment

To make this pumpkin shakshuka, you’ll need:

  • Cast Iron Skillet: A must-have for even cooking and excellent heat retention.
  • Cutting Board and Knife: Essential for prepping your ingredients.
  • Measuring Cups and Spoons: For accurate ingredient measurements.
  • Lid: To cover the skillet while cooking the eggs.

Serving Suggestions

Serve your pumpkin shakshuka hot from the skillet, garnished with fresh parsley. Pair it with:

  • Crusty Bread: Perfect for dipping and soaking up the delicious sauce.
  • Garlic Toast: Adds a delightful crunch and flavor.
  • Salad: A simple green salad can balance the meal.

Embrace the warmth and flavor of this pumpkin shakshuka recipe. Whether you’re cooking for a crowd or just for yourself, this dish is sure to bring joy and satisfaction to your meal. Thank you for joining me on this culinary journey, and happy cooking!

Pumpkin Shakshuka (Baked Eggs in Tomato Stew)

Prep Time 10 minutes
Cook Time 15 minutes
Total Time 25 minutes
Servings 4 servings
Calories 220
A hearty and flavorful breakfast dish featuring baked eggs in a spiced pumpkin and tomato sauce, perfect for a cozy morning.

Ingredients

olive oil

  • 1 Tablespoon olive oil

vegetables

  • 1 small yellow onion yellow onion (diced small)
  • 4 garlic cloves garlic cloves (minced)
  • 1 red bell pepper red bell pepper (veins removed and chopped small)

canned goods

  • 1 cup pumpkin puree
  • 28 ounces fire roasted tomatoes

spices

  • 1/2 teaspoon crushed red pepper flakes (optional)
  • 1 teaspoon smoked paprika
  • 1 teaspoon ground cumin

seasoning

  • to taste salt and pepper

eggs

  • 6 large eggs large eggs

garnish

  • as needed fresh parsley (for garnish)

Instructions 

  • Heat olive oil in a skillet over medium heat. Add onion and saute until translucent, about 2 minutes.
  • Add garlic and bell peppers; cook until browned. Stir in pumpkin puree, tomatoes, and spices; simmer 2-3 minutes. Season with salt and pepper.
  • Create six wells in the sauce and crack eggs into each. Cover and cook until whites are set, about 8 minutes.
  • Garnish with parsley and serve with crusty bread or toast.

Notes

Use fresh herbs for best flavor. Adjust spice level to taste.
Calories: 220kcal
Cost: $12
Course: Breakfast
Cuisine: Middle Eastern
Keyword: pumpkin

Get Ready for a Spooktacular Halloween

Halloween is just around the corner, and what better way to celebrate than with some deliciously fun treats? Today, I’m excited to share my recipe for Mummy Hot Dogs! This delightful dish is not only easy to make but also perfect for both kids and adults alike. With just a few simple ingredients, you can whip up a spooky snack that’s sure to be a hit at any Halloween gathering. Let’s dive into this recipe that’s bound to bring smiles and giggles to your Halloween festivities!

Why You’ll Love This Recipe

  • Quick and Easy: This recipe takes about 30 minutes from start to finish, making it perfect for last-minute party prep.
  • Kid-Friendly Fun: Kids love helping out in the kitchen, and wrapping the hot dogs in dough is a great way to get them involved!
  • Customizable: You can easily tweak the ingredients and serve with different dips to cater to your family’s tastes.
  • Perfect for Parties: Not only do they look adorable, but they also make for a hearty snack that keeps everyone satisfied.
  • Minimal Ingredients: With just a few pantry staples, you can create a festive treat without breaking the bank.

Ingredients You’ll Need

To create these adorable Mummy Hot Dogs, gather the following ingredients:

  • 1 (14–16 oz) package mini hot dogs: Cocktail franks work best, but feel free to use your favorite brand!
  • 1 (8 oz) can refrigerated crescent roll dough: This dough provides the perfect flaky texture to resemble mummy bandages.
  • Yellow mustard: For adding the eyes and a bit of tangy flavor.
  • Mayonnaise: Optional, but adds creaminess when you want to mix things up.
  • Black sesame seeds or candy eyes: These will give your mummies personality!
  • Ketchup: A classic dipping sauce that adds a “bloody” effect.
  • Extra mustard: For those who enjoy a zesty kick!

Step-by-Step Directions

Juicy Mummy Hot Dogs with black sesame seeds for eyes on a plate.

Now, let’s walk through the steps to create these spooky snacks:

  1. Preheat your oven to 375°F (190°C): Make sure it’s fully heated before you pop in your mummies. Line a baking sheet with parchment paper for easy cleanup.
  2. Prepare the dough: Open the can of crescent roll dough and unroll it on a cutting board. Pinch any perforations together, then slice it into thin strips (about ¼ inch wide) using a knife or pizza cutter.
  3. Wrap the hot dogs: Pat the mini hot dogs dry. Wrap each one with 2–3 strips of dough, crisscrossing to mimic bandages, and leave a small gap at the top for the eyes. Place them on the prepared baking sheet.
  4. Bake: Pop the baking sheet into the oven and bake for 12–14 minutes, or until the dough is puffed and golden brown.
  5. Decorate your mummies: Once baked, use a tiny dab of yellow mustard or mayonnaise in the eye gap, then press on two black sesame seeds or candy eyes.
  6. Serve: Arrange your Mummy Hot Dogs on a platter and serve with bowls of “bloody” ketchup and extra mustard for dipping.

Pro Tips for Perfect Mummy Hot Dogs

  • Keep it dry: Pat the mini hot dogs dry before wrapping to ensure the dough sticks better and bakes evenly.
  • Don’t overcrowd: Give each mummy some space on the baking sheet to ensure they cook evenly and the dough crisps up nicely.
  • Experiment with spices: Feel free to sprinkle some garlic powder or Italian seasoning on the dough before baking for an extra flavor boost.
  • Use different shapes: Get creative! Try using other types of dough, like puff pastry, for a flakier version.
  • Make them ahead: Wrap your hot dogs in dough and refrigerate them until you’re ready to bake. This way, you can prepare them earlier in the day.
  • Garnish creatively: Consider adding more toppings like chopped herbs or edible glitter for a festive touch!
  • Serve with variety: Provide a selection of dips, including ranch, cheese sauce, or even a spicy mustard to cater to different taste preferences.
  • Involve the kids: Let children help with wrapping the dough around the hot dogs. It’s a fun activity that makes them excited about their food!

Common Mistakes and Troubleshooting

Even the best of us can have a few hiccups in the kitchen. Here are some common mistakes to avoid:

  • Overbaking: Keep an eye on your mummies while baking, as ovens can vary. You want them golden, not burnt!
  • Not sealing the dough: Make sure the dough strips are well-sealed to prevent them from unraveling during baking.
  • Using cold hot dogs: For better wrapping, let the mini hot dogs sit at room temperature for about 10 minutes before using.
  • Too much dough: Avoid wrapping too many strips; it can lead to soggy mummies. Aim for a balanced coverage.

Delicious Variations to Try

If you’re looking to spice things up, here are some fun variations of the Mummy Hot Dogs you can try:

  • Cheesy Mummy Hot Dogs: Place a slice of cheese inside the dough wrap for a gooey surprise.
  • Vegetarian Option: Use veggie hot dogs or even small zucchinis wrapped in dough for a healthier twist.
  • Spicy Mummy Hot Dogs: Add a slice of jalapeño inside the wrap for those who like a kick.
  • Mummy Pizza Dogs: Spread a bit of pizza sauce on the hot dogs before wrapping, then serve with marinara for dipping.

Storage and Make-Ahead Instructions

These Mummy Hot Dogs can be made ahead of time, making them a great option for busy families. Here’s how to store and prepare them:

  • Refrigeration: Store leftover baked Mummy Hot Dogs in an airtight container in the fridge for up to 3 days.
  • Freezing: You can also freeze the unbaked wrapped hot dogs. Just place them on a baking sheet to freeze individually, then transfer them to a freezer-safe bag. They will last up to 2 months!
  • Reheating: To reheat, bake them straight from the fridge or freezer at 375°F (190°C) for about 15 minutes or until heated through.

Frequently Asked Questions

Here are some common questions about making Mummy Hot Dogs:

  • Can I use regular-sized hot dogs? Absolutely! Just adjust the dough coverage and baking time accordingly.
  • What can I use instead of crescent roll dough? You can use puff pastry or even biscuit dough for a different texture.
  • How can I make them healthier? Consider using turkey or chicken hot dogs and whole wheat dough.
  • Can I prepare them the night before? Yes! Just wrap them in dough and refrigerate until ready to bake.
  • What dips pair well with Mummy Hot Dogs? Ketchup, mustard, ranch dressing, or cheese sauce are all great choices!
  • How do I prevent the dough from getting soggy? Ensure the hot dogs are dry before wrapping and avoid excess moisture from dips.
  • Can I use different toppings for the eyes? Yes! You can use small chocolate chips, raisins, or even small pieces of bell pepper.
  • What if I don’t have sesame seeds or candy eyes? You can skip them or use small dots of sauce to create eyes instead.

Nutrition Tips and Dietary Adaptations

Here are some nutrition tips to consider when making these Mummy Hot Dogs:

  • Consider alternatives: Use low-fat hot dogs or turkey versions to reduce calories and fat.
  • Watch the sodium: If you’re concerned about sodium intake, choose low-sodium hot dogs and avoid adding too much salt.
  • Gluten-free option: Look for gluten-free crescent roll dough or use vegetables as a wrap.
  • Add veggies: Serve with fresh veggie sticks for a healthy crunch alongside your mummies!

Essential Equipment Recommendations

To make your Mummy Hot Dogs, you’ll need the following:

  • Baking sheet: A standard-sized baking sheet lined with parchment paper for easy cleanup.
  • Pizza cutter or knife: To cut the dough into strips easily.
  • Mixing bowls: For mixing any dips or toppings.
  • Measuring cups: If you’re experimenting with different ingredients or spices.

Serving Suggestions

When it comes to serving these spooky treats, presentation is key! Here are some fun ideas:

  • Halloween-themed platter: Arrange the Mummy Hot Dogs on a festive platter alongside other Halloween snacks like veggie sticks, chips, or spooky treats.
  • Creative garnishes: Add some fake spider webs (cotton candy) or plastic spiders for an extra spooky effect!
  • Themed drinks: Pair with a “bloody” punch or spooky mocktails to complete your Halloween menu.

Conclusion

There you have it! A simple, fun, and delicious recipe for Mummy Hot Dogs that will surely be a hit at your Halloween gatherings. Remember, cooking should be enjoyable and stress-free. With just a few ingredients and some creativity, you can create memorable meals that delight. So gather your family, roll up your sleeves, and get ready to enjoy some spooky fun in the kitchen. Happy cooking!

Mummy Hot Dogs

Prep Time 10 minutes
Cook Time 15 minutes
Total Time 25 minutes
Servings 8 pieces
Calories 150
A fun and spooky snack perfect for Halloween parties or kids' gatherings. These mummy hot dogs are easy to make and delightfully creepy.

Ingredients

Meat

  • 1 package mini hot dogs (cocktail franks)
  • 1 can refrigerated crescent roll dough
  • Yellow mustard
  • Mayonnaise
  • Black sesame seeds or candy eyes
  • Ketchup
  • Extra mustard

Instructions 

  • Preheat oven to 375°F (190°C). Line a baking sheet with parchment.
  • Unroll crescent dough and cut into ¼ inch strips.
  • Pat hot dogs dry, wrap with dough strips leaving space for eyes, and place on baking sheet.
  • Bake for 12–14 minutes until golden and puffy.
  • Use mustard or mayonnaise for eyes, then add sesame seeds or candy eyes.
  • Serve with ketchup and extra mustard for dipping.

Notes

Ensure dough is fully wrapped but leaves space for eyes to stick out.
Calories: 150kcal
Cost: $10
Course: Appetizer
Keyword: hot dogs

Embrace Your Cooking Journey with Bariatric Pear Spice Protein Bread

Welcome to your next culinary adventure! If you’re looking for a delicious, nourishing, and easy-to-make recipe, you’ve landed in the right place. This Bariatric Pear Spice Protein Bread is not just a recipe; it’s a pathway to enjoying wholesome, satisfying meals that align with your healthy lifestyle. Packed with protein and flavor, this bread will delight your taste buds while keeping your nutrition on track. Let’s dive into the magic of this recipe, which combines the comforting taste of pears with the warm spices of cinnamon and nutmeg.

Why You’ll Love This Recipe

Before we get into the nitty-gritty, here are a few reasons why this Bariatric Pear Spice Protein Bread will quickly become a staple in your kitchen:

  • High in Protein: This recipe packs a protein punch, making it perfect for those on a bariatric diet looking to maintain muscle mass.
  • Easy to Make: With simple steps and common ingredients, you’ll whip this up in no time, even on your busiest days!
  • Versatile: Enjoy it as a breakfast option, a healthy snack, or even dessert. It’s the kind of bread that fits any occasion.
  • Customizable: Adapt the ingredients to suit your taste or dietary needs, making it a truly personal dish.
  • Deliciously Aromatic: The smell of baking pears and spices fills your kitchen, creating a warm and inviting atmosphere.

Ingredient Breakdown

Let’s explore the ingredients that make this bread not only nutritious but also incredibly tasty. Each component plays a crucial role:

  • 1½ cups pear butter or unsweetened applesauce: This adds moisture and natural sweetness. If you’re looking for a twist, try pumpkin purée for a seasonal flavor.
  • ½ cup no-calorie sweetener: Balances the flavors without the extra carbs. When using natural applesauce, consider adding a pinch of apple pie spice for a delightful kick.
  • 1 tsp vanilla extract: Rounds out the flavor, giving your bread that bakery-like aroma.
  • 2 large eggs: Provides structure and richness to the bread.
  • Up to ⅔ cup almond milk: Adjust for the perfect batter consistency; it should be thick but pourable.
  • 1 cup oat flour: A great source of fiber, it contributes to the bread’s lovely texture.
  • 1 cup soy flour: Boosts protein content and adds a nutty flavor.
  • ½ cup flax meal: Packed with omega-3s, it promotes heart health and adds moisture.
  • ¼ tsp salt: Enhances all the flavors in the bread.
  • 1 tsp baking powder: Helps the bread rise beautifully.
  • 1 tsp cinnamon + ¼ tsp nutmeg (optional): These spices elevate the flavor profile, making each bite a warm hug in your mouth.

Step-by-Step Instructions

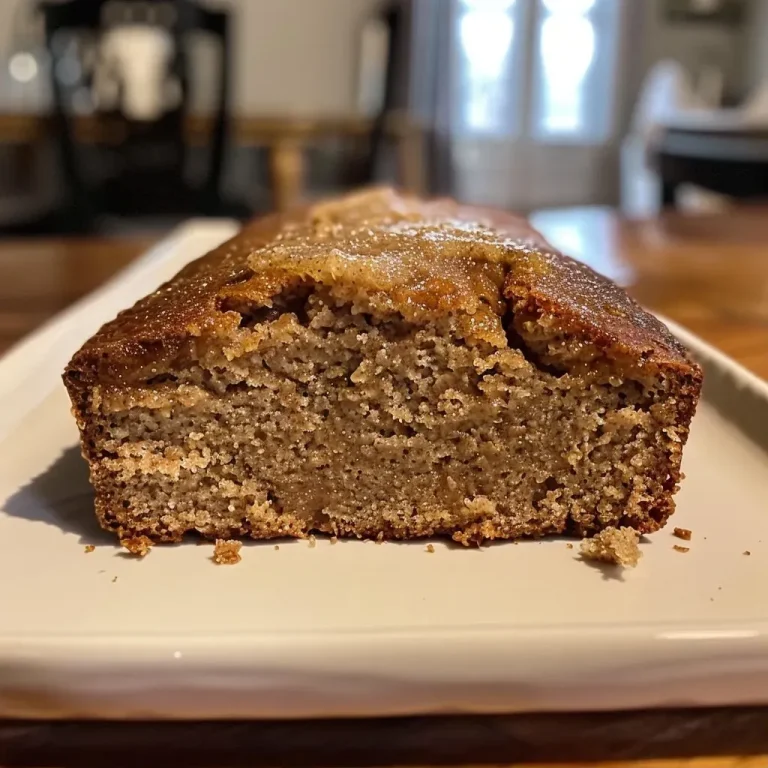
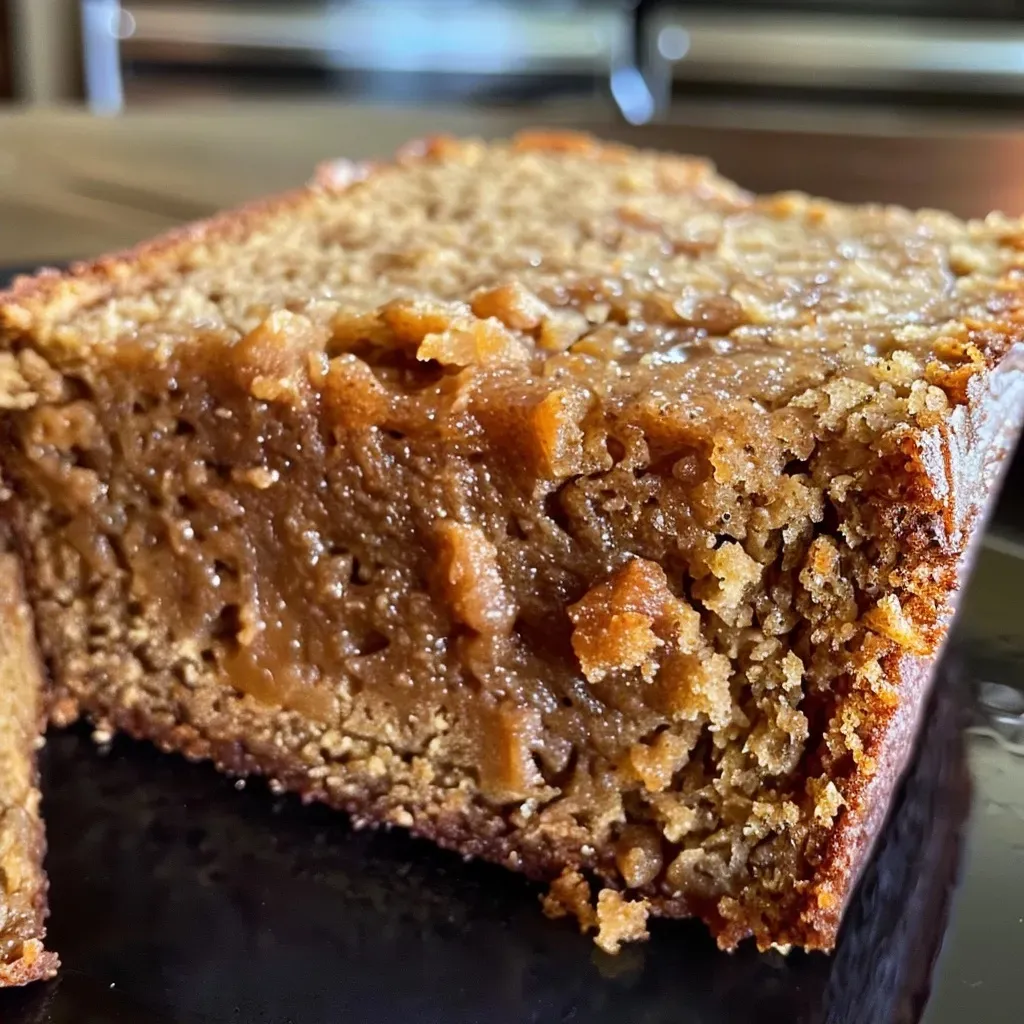
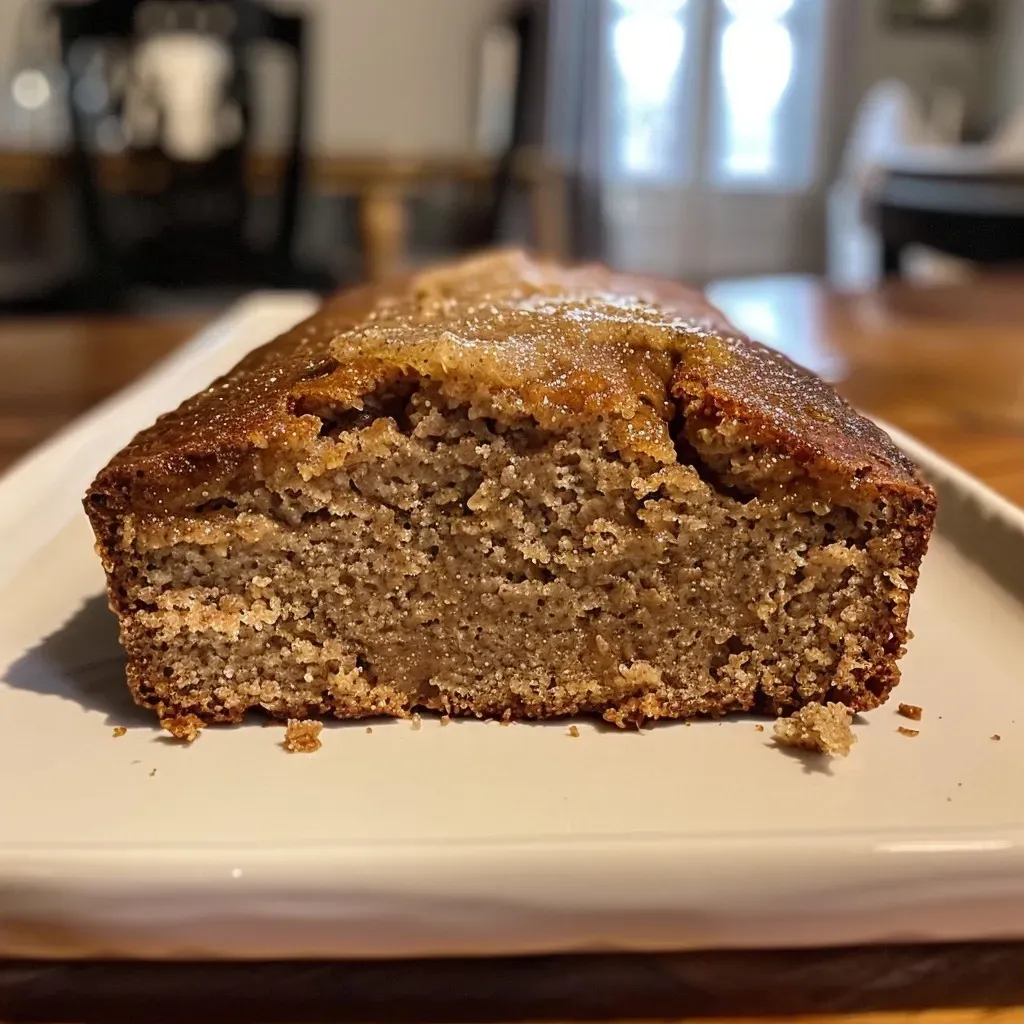
A moist slice of Bariatric Pear Spice Protein Bread showcasing its rich texture and spices.

Now, let’s get cooking! Follow these straightforward steps to create your Bariatric Pear Spice Protein Bread:

  1. Preheat your oven to 350°F (175°C) and spray your loaf pan or mini muffin tin with non-stick cooking spray.
  2. In a large mixing bowl, whisk together the wet ingredients: pear butter (or applesauce), eggs, vanilla, and almond milk until smooth.
  3. In another bowl, whisk together all the dry ingredients: oat flour, soy flour, flax meal, baking powder, salt, and spices.
  4. Gently fold the dry mixture into the wet mixture until just combined. Avoid over-mixing to keep your bread tender.
  5. If the batter is too thick, add a bit more almond milk to reach a thick, oatmeal-like consistency.
  6. Pour the batter into your prepared loaf pan or divide it among mini muffin tins.
  7. Bake in the preheated oven: 25-30 minutes for a loaf, or 15-20 minutes for muffins, until a toothpick inserted into the center comes out clean.
  8. Allow the bread to cool completely before slicing or freezing for future enjoyment.

Pro Tips for Perfect Pear Spice Protein Bread

Want to elevate your baking game? Here are some expert insights:

  • Ensure freshness: Use fresh ingredients for the best flavor. Check the expiration dates on your baking powder and sweetener.
  • Measure accurately: For the best results, use a kitchen scale for measuring your flours and sweeteners.
  • Mix gently: Over-mixing can lead to a dense bread. Mix until just combined for a light texture.
  • Add nuts or seeds: For extra crunch and nutrition, consider folding in chopped walnuts or pumpkin seeds.
  • Experiment with spices: Don’t hesitate to adjust the spices to your personal preference; a bit of ginger or clove can add a delightful twist.
  • Cool properly: Let the bread cool in the pan for a few minutes before transferring to a cooling rack to maintain its shape.
  • Store correctly: Keep your bread in an airtight container to maintain freshness, or slice and freeze for quick access.
  • Use different sweeteners: If you prefer a natural option, consider using honey or maple syrup, adjusting the liquid ingredients accordingly.

Common Mistakes and Troubleshooting

Baking can sometimes feel overwhelming, but here are common pitfalls to avoid:

  • Too dry or dense: This could be due to over-measuring flour. Use the spoon-and-level method to measure accurately.
  • Not rising: Ensure your baking powder is fresh. Old leavening agents can lead to flat bread.
  • Too sweet: If you find the bread too sweet, reduce the sweetener slightly next time.
  • Flavorless bread: Don’t skip the spices! They are essential for a warm, inviting flavor.

Delicious Variations to Try

Put your unique spin on this recipe with these fun variations:

  • Add fruits: Mix in blueberries or chopped apples for added texture and flavor.
  • Nut butter swirl: Create a nut butter swirl for a rich, creamy texture that enhances every slice.
  • Chocolate chips: For a bit of indulgence, fold in dark chocolate chips for a sweet surprise.
  • Savory twist: Replace some spices with herbs like rosemary for a savory version perfect for sandwiches.

Storage and Make-Ahead Instructions

Want to make this bread ahead of time? Here’s how to store it:

  • Room temperature: Keep in an airtight container for up to 3 days.
  • Refrigerator: Store in the fridge for up to a week; just make sure it’s well wrapped.
  • Freezer: Slice and freeze for up to 3 months. Thaw overnight in the fridge or toast directly from frozen.

Comprehensive FAQ

Still have questions? Here are some common queries about this recipe:

  • Can I use other fruit purees? Yes, you can substitute with applesauce, pumpkin puree, or even mashed bananas!
  • Is this recipe gluten-free? Substitute oat flour with a gluten-free blend for a gluten-free version.
  • How can I make it vegan? Use flax eggs instead of regular eggs and ensure your sweetener is vegan-friendly.
  • What if I don’t have pear butter? Unsweetened applesauce is a great alternative; just adjust sweetness to taste.
  • Can I add protein powder? Yes, just reduce the amount of flour slightly to accommodate the protein powder.
  • How do I know when it’s done? A toothpick inserted into the center should come out clean when the bread is fully baked.
  • Can I make mini muffins instead? Absolutely! Just adjust the baking time to 15-20 minutes.
  • What is the best way to slice the bread? Use a serrated knife for clean slices without squishing the bread.

Nutritional Tips and Dietary Adaptations

This recipe is not only delicious but also nutritious:

  • High Fiber: The combination of oat flour, flax meal, and fruit ensures a good fiber intake, essential for digestive health.
  • Low Sugar: By using no-calorie sweeteners and natural fruit sugars, this bread is suitable for those monitoring sugar intake.
  • Protein-Rich: The addition of soy flour and eggs boosts the protein content, making it a filling option for breakfast or snacks.

Essential Equipment Recommendations

To achieve the best results, consider using the following kitchen tools:

  • Mixing bowls: A set of various sizes for mixing wet and dry ingredients.
  • Whisk: Essential for blending your wet ingredients smoothly.
  • Loaf pan or mini muffin tin: Choose based on your preferred serving size.
  • Measuring cups and spoons: Accurate measurements are key to successful baking.
  • Cooling rack: Allows for even cooling to prevent sogginess.

Serving Suggestions

Enjoy your Bariatric Pear Spice Protein Bread in various delightful ways:

  • With nut butter: Spread almond or peanut butter for a protein-rich breakfast.
  • Top with Greek yogurt: A delicious way to add creaminess and extra protein.
  • Serve warm: A slice lightly toasted with a drizzle of honey or maple syrup is heavenly.

In conclusion, this Bariatric Pear Spice Protein Bread is more than just a recipe; it’s a celebration of flavors and nutrition that fits perfectly into your lifestyle. So, gather your ingredients, roll up your sleeves, and enjoy the process of baking. Remember, cooking is about confidence and creativity. Happy baking, and I can’t wait to hear how yours turns out!

Bariatric Pear Spice Protein Bread Recipe

Prep Time 10 minutes
Cook Time 30 minutes
Total Time 40 minutes
Servings 8 slices
Calories 180
A healthy, high-protein bread perfect for bariatric diets, combining the sweetness of pears with warm spices.

Ingredients

Wet ingredients

  • 1.5 cups pear butter or unsweetened applesauce
  • 0.5 cup no-calorie sweetener
  • 1 tsp vanilla
  • 2 large eggs
  • up to 0.67 cup almond milk (adjust as needed)

Dry ingredients

  • 1 cup oat flour
  • 1 cup soy flour
  • 0.5 cup flax meal
  • 0.25 tsp salt
  • 1 tsp baking powder
  • 1 tsp cinnamon
  • 0.25 tsp nutmeg (optional)

Instructions 

  • Preheat oven to 350°F (175°C). Spray loaf pan or muffin tin.
  • Whisk wet ingredients until smooth, then whisk dry ingredients separately.
  • Combine wet and dry, adding almond milk to reach a thick batter.
  • Pour batter into pan or muffin tins and bake for 25–30 minutes.
  • Cool before slicing or freezing.

Notes

This bread is high in protein and fiber, making it ideal for bariatric diets.
Calories: 180kcal
Cost: $15
Course: Breakfast
Cuisine: American
Keyword: baking, bariatric, Protein

Discover the Wholesome Twist on Classic Apple Crumble

Are you ready to transform your dessert game while boosting your protein intake? This delightful high protein apple crumble is not just a treat; it’s a guilt-free indulgence that combines the warmth of baked apples with the satisfying crunch of a protein-packed topping. Perfect for breakfast or as a snack, this recipe is designed to fit seamlessly into your healthy lifestyle. Let’s dive in and discover just how easy it is to whip up this delicious dish!

Why You’ll Love This Recipe

  • Quick and Easy: Prep takes under 15 minutes, making it perfect for busy mornings or last-minute cravings.
  • Protein-Powered: Each serving is loaded with high protein, keeping you full and satisfied for longer.
  • Flavorful and Wholesome: A charming blend of sweet apples, warm spices, and a crunchy topping that feels indulgent.
  • Versatile: Enjoy it warm for breakfast or as a healthy dessert. You can even customize it with your favorite fruits!
  • Diet-Friendly: This recipe can be made gluten-free and dairy-free, ensuring everyone can enjoy it.

Ingredients Breakdown: Make It Yours

Here’s what you’ll need to create your own protein apple crumble:

  • 4 large apples: Diced (Granny Smith or Honeycrisp work best for a sweet-tart flavor)
  • 1/4 cup sweetener: Choose between brown sugar, coconut sugar, or a sugar alternative like stevia.
  • 1 teaspoon cinnamon: For that warm, comforting flavor.
  • A squeeze of lemon juice: Enhances the apples’ sweetness and keeps them fresh.
  • 1/2 teaspoon vanilla extract: Adds depth to the flavor.
  • 1 cup rolled oats: The base of your crumble, providing fiber and texture.
  • 2 scoops isolate protein powder: Boosts the protein content significantly.
  • 1/4 teaspoon cinnamon: For extra flavor in the crumble.
  • 1/4 cup maple syrup: Natural sweetness that complements the oats.
  • 1/4 cup almond milk: Adjusts the consistency of the crumble.

Step-by-Step Instructions

Side view of a warm apple crumble, featuring diced apples and a golden brown oat topping.

Follow these simple steps to create your high protein apple crumble:

  1. Preheat your oven to 350°F (180°C).
  2. In a skillet, slice your apples thinly and pan-fry them with the sweetener, cinnamon, lemon juice, and vanilla extract for about 5-10 minutes until softened.
  3. Add a splash of water if needed to deglaze the pan.
  4. While the apples are cooking, prepare the crumble by mixing the oats, protein powder, and cinnamon in a bowl.
  5. Stir in the maple syrup, then gradually add almond milk until the mixture sticks together.
  6. Transfer the sautéed apples to a small baking dish, and sprinkle the protein crumble on top.
  7. Bake for 15-20 minutes until the top is golden and crunchy.
  8. Serve warm, topped with a dollop of Greek yogurt for added creaminess.

Pro Tips for Perfecting Your Crumble

  • Choose the Right Apples: Opt for apples that hold their shape when cooked, like Granny Smith or Fuji, for the best texture.
  • Customize Your Sweetener: Feel free to adjust the sweetness to your preference. If you love it sweeter, add more maple syrup or sweetener.
  • Experiment with Spices: Add nutmeg or ginger for a different flavor profile that complements the apples beautifully.
  • Texture Matters: If your crumble is too dry, add a splash more almond milk; if it’s too wet, add a bit more oats or protein powder.
  • Serve it Right: Enjoy it warm right out of the oven, or chill it for a refreshing snack later.
  • Make it Ahead: Prep the apples and crumble separately and store them in the fridge for an easy bake-off later.
  • Mix Up the Fruits: Try adding berries or pears for a delicious twist on the classic apple crumble.
  • Mind the Baking Time: Keep an eye on your crumble to ensure it doesn’t over-bake; you want a golden top, not burnt!

Common Mistakes and Troubleshooting

Here are some common pitfalls to avoid when making your crumble:

  • Overcooking Apples: If your apples turn mushy, reduce the cooking time in the skillet to maintain their structure.
  • Dry Crumble: If your crumble doesn’t hold together, it may need more liquid. Add a little almond milk to bind it.
  • Too Sweet or Not Sweet Enough: Adjust the sweetener to your taste. Remember, the type of apple can also affect sweetness.

Delicious Variations to Try

Feeling adventurous? Here are some variations to keep your crumble exciting:

  • Berry Blast: Mix in a cup of fresh or frozen berries for a fruity twist.
  • Nutty Delight: Add chopped nuts like walnuts or pecans for extra crunch and healthy fats.
  • Chocolate Chip: Stir in a handful of dark chocolate chips before baking for a dessert-like experience.
  • Maple Pecan: Swap the oats for crushed pecans for a different texture and flavor.

Storage and Make-Ahead Instructions

This high protein apple crumble is perfect for meal prep:

  • Store in the Fridge: Keep leftovers in an airtight container in the fridge for up to 3 days.
  • Reheat Before Serving: Enjoy leftovers warmed up in the microwave or oven for that fresh-baked taste.
  • Make Ahead: Prepare the apple filling and crumble separately. Combine and bake when you’re ready to serve.

Frequently Asked Questions (FAQ)

  • Can I make this recipe gluten-free? Absolutely! Just use gluten-free oats.
  • How can I reduce sugar in this recipe? You can use a sugar alternative like stevia or monk fruit sweetener.
  • What type of protein powder should I use? Any isolate protein powder works well; choose your favorite flavor.
  • Can I use frozen apples? Yes! Just make sure to thaw and drain excess moisture before cooking.
  • Is it okay to skip the sweetener? You can if your apples are sweet enough. Adjust according to taste!
  • How long can I store leftovers? Store in the fridge for up to 3 days; reheat before enjoying.
  • What can I serve with the crumble? Greek yogurt, a scoop of ice cream, or whipped cream make delightful toppings!
  • Can I bake this in advance? Yes, you can prepare it a day ahead and store it in the fridge before baking.

Nutritional Tips and Dietary Adaptations

Making this dish fit your dietary needs is easy:

  • High Protein: With protein powder, you can boost the protein content significantly.
  • Low Sugar: Use sugar alternatives to keep the sweetness without the calories.
  • Dairy-Free: Substitute Greek yogurt with almond or coconut yogurt for a dairy-free option.
  • Vegan Option: Replace the eggs with a flax egg and ensure your protein powder is plant-based.

Essential Equipment for Success

To create your high protein apple crumble, you’ll need:

  • Skillet: For sautéing the apples.
  • Baking Dish: A small to medium-sized dish is perfect for baking.
  • Mixing Bowls: For combining your crumble ingredients.
  • Measuring Cups and Spoons: Accurate measurements make all the difference!

Serving Suggestions

Elevate your apple crumble experience:

  • Top with Greek Yogurt: Adds creaminess and extra protein.
  • Serve with Ice Cream: A scoop of vanilla ice cream pairs beautifully with the warm crumble.
  • Garnish with Nuts: Sprinkle chopped nuts or seeds for added crunch.

In conclusion, this high protein apple crumble not only satisfies your sweet tooth but also provides nourishment and comfort. It’s a dish that proves healthy can be delicious, and with just a few tweaks, you can make it your own. Whether you’re enjoying it for breakfast, dessert, or a midday snack, I hope this recipe inspires your culinary journey. Happy cooking!

High protein Apple crumble

Prep Time 10 minutes
Cook Time 20 minutes
Total Time 30 minutes
Servings 4 servings
Calories 350
A delicious high-protein apple crumble that's easy to make and perfect for a healthy dessert or snack.

Ingredients

Apple filling

  • 4 big apple, diced
  • 1/4 cup sweetener
  • 1 teaspoon cinnamon
  • A squeeze lemon juice
  • 1/2 teaspoon vanilla extract

Crumble topping

  • 1 cup rolled oats
  • 2 scoop isolate protein powder
  • 1/4 teaspoon cinnamon
  • 1/4 cup maple syrup
  • 1/4 cup almond milk

Instructions 

  • Preheat oven to 180°C (350°F).
  • Slice apples and cook with cinnamon, sweetener, lemon juice, and vanilla for 5-10 minutes until softened.
  • Mix oats, protein powder, cinnamon, maple syrup, and almond milk to form crumble.
  • Add apples to a baking dish, top with crumble, and bake for 15-20 minutes until golden.

Notes

Use fresh apples for best flavor and texture.
Calories: 350kcal
Cost: $12
Course: Dessert
Keyword: apple, Crumble, Protein

Whisking Up Warmth: The Perfect Gingerbread Cupcakes for Every Occasion

As the seasons change and the air turns crisp, nothing warms the heart quite like the aroma of freshly baked gingerbread cupcakes. These delightful treats are not only a feast for the senses but also a celebration of holiday flavors that can brighten any gathering. With rich spices, a hint of molasses, and a luscious cream cheese frosting, these gingerbread cupcakes are sure to become a cherished recipe in your kitchen. Join me on this journey as we explore everything you need to know about making these scrumptious cupcakes—perfect for cozy gatherings or festive celebrations!

Why You’ll Love This Recipe

These gingerbread cupcakes are more than just delicious; they offer a variety of benefits that make them a must-try!

  • Festive Flavor: Infused with warm spices like ginger, cinnamon, and cloves, these cupcakes are full of holiday cheer.
  • Easy to Make: With simple, step-by-step instructions, you’ll find whipping up a batch a breeze, even on the busiest of days.
  • Moist and Flavorful: The combination of molasses and hot water ensures that the cupcakes are incredibly moist and flavorful.
  • Versatile Toppings: Whether you prefer cream cheese frosting or a dusting of powdered sugar, these cupcakes can be dressed up or down.
  • Perfect for Any Occasion: From holiday parties to casual get-togethers, these cupcakes fit seamlessly into any event.

Ingredients for Gingerbread Cupcakes

Let’s gather our ingredients. Here’s what you’ll need to create these delightful gingerbread cupcakes:

  • 1 ½ cups all-purpose flour: The base of your cupcakes; sifting helps to aerate.
  • 1 teaspoon baking soda: Essential for leavening, giving the cupcakes their lift.
  • 1 teaspoon ground ginger: Adds a warm, spicy flavor that’s unmistakably gingerbread.
  • 1 teaspoon ground cinnamon: Enhances the flavor profile, creating a cozy aroma.
  • ¼ teaspoon ground cloves: A little goes a long way in delivering that classic gingerbread taste.
  • ¼ teaspoon salt: Balances sweetness and enhances flavors.
  • ½ cup unsalted butter, softened: Ensures a rich and tender crumb.
  • ½ cup brown sugar: Adds moisture and depth of flavor.
  • ½ cup molasses: The star ingredient that gives these cupcakes their signature taste and color.
  • 1 large egg: Acts as a binder for the batter.
  • ½ cup hot water: Helps dissolve the molasses and keeps the batter moist.

Making the Cream Cheese Frosting

Juicy gingerbread cupcakes topped with smooth cream cheese icing, showcasing a side perspective.

For the perfect topping, you’ll need:

  • 8 oz cream cheese, softened: The creamy base for our frosting.
  • ¼ cup butter, softened: Adds richness and helps create a smooth texture.
  • 2 cups powdered sugar: Sweetens the frosting while giving it structure.
  • 1 teaspoon vanilla extract: Enhances the overall flavor.

How to Make Gingerbread Cupcakes: Step-by-Step

Ready to get baking? Follow these straightforward steps:

  1. Preheat your oven to 350°F (175°C) and line a muffin tin with cupcake liners.
  2. In a medium bowl, mix together the flour, baking soda, ginger, cinnamon, cloves, and salt.
  3. In a separate bowl, beat the softened butter and brown sugar until creamy and fluffy. Add the molasses and egg, mixing well.
  4. Gradually stir in the dry ingredients, alternating with the hot water until you achieve a smooth batter.
  5. Fill each liner about two-thirds full with the batter and bake for 18–20 minutes or until a toothpick inserted in the center comes out clean.
  6. Once baked, allow the cupcakes to cool completely on a wire rack.

Making the Frosting

While the cupcakes are cooling, let’s prepare the frosting:

  1. In a mixing bowl, beat the softened cream cheese and butter together until smooth.
  2. Gradually add the powdered sugar, mixing until fluffy. Stir in the vanilla extract.
  3. Once the cupcakes have cooled, generously frost each with the cream cheese frosting. Feel free to get creative with your presentation!

Expert Tips for Perfect Gingerbread Cupcakes

To help you achieve the best results, here are some expert tips:

  • Use room temperature ingredients: Eggs and butter mix more easily, ensuring a smoother batter.
  • Don’t overmix: Mix just until combined to avoid dense cupcakes.
  • Check doneness: Insert a toothpick into the center; if it comes out clean or with a few crumbs, they’re ready!
  • Let cool completely: Allowing cupcakes to cool fully before frosting prevents the frosting from melting.
  • Experiment with spices: Feel free to adjust the spices based on your preference for a more personalized flavor.
  • Make it festive: Top with holiday-themed sprinkles or even a drizzle of caramel sauce for a fun twist!

Common Mistakes and Troubleshooting

Even the best bakers can run into issues. Here are some common mistakes and how to avoid them:

  • Dry cupcakes: Ensure not to overbake and keep an eye on the timer.
  • Sunken centers: This can occur if the batter is too thin; make sure to add the hot water gradually.
  • Frosting too runny: If your frosting is too thin, add a little more powdered sugar until you reach the desired consistency.

Variations on Gingerbread Cupcakes

Feel free to mix things up! Here are some delicious variations to try:

  • Gingerbread Latte Cupcakes: Add a tablespoon of espresso powder to the batter for a delightful coffee flavor.
  • Chocolate Chip Gingerbread Cupcakes: Fold in some mini chocolate chips for a sweet twist.
  • Pumpkin Spice Variation: Substitute half of the molasses with pumpkin puree for a fall-inspired treat.
  • Nutty Gingerbread Cupcakes: Add chopped nuts, like pecans or walnuts, for added texture and flavor.

Storage and Make-Ahead Instructions

Want to prepare ahead of time? Here’s how to store your cupcakes:

  • Room Temperature: Store unfrosted cupcakes in an airtight container for up to 3 days.
  • Refrigerate: Frosted cupcakes can be stored in the refrigerator for up to a week; just allow to come to room temperature before serving.
  • Freezing: You can freeze unfrosted cupcakes for up to 3 months. Thaw at room temperature and frost when ready to serve!

Frequently Asked Questions About Gingerbread Cupcakes

Here are some common questions that may help you while baking:

  • How do I prevent my gingerbread cupcakes from sinking in the middle? Ensure your ingredients are fresh and avoid overmixing the batter.
  • Can I use blackstrap molasses instead of regular molasses? Yes, but be aware that it has a stronger flavor, so you may want to adjust the spices accordingly.
  • Can I make these cupcakes gluten-free? Absolutely! Substitute the all-purpose flour with a gluten-free blend.
  • How long do gingerbread cupcakes last? Properly stored, they can last up to a week in the refrigerator.
  • What’s the best way to frost these cupcakes? Use a piping bag for decorative swirls or simply spread with a knife for a rustic look.
  • Can I make mini versions? Yes! Just adjust the baking time to about 12-15 minutes.
  • What spices can I use in addition to ginger and cinnamon? Allspice or nutmeg can add additional warmth and flavor.
  • Can I make these cupcakes vegan? Yes, substitute the egg with flaxseed meal and use a vegan butter alternative.

Nutrition Tips and Dietary Adaptations

For those mindful of nutrition, here are some helpful tips:

  • Reduce sugar: You can cut down on the brown sugar slightly without compromising flavor.
  • Use whole wheat flour: A healthier alternative that adds fiber.
  • Consider sugar substitutes: Options like coconut sugar or stevia can be used for lower-calorie versions.

Equipment Recommendations

To ensure a smooth baking experience, here are some recommended tools:

  • High-quality muffin tin: Invest in a good muffin tin for even baking.
  • Silicone baking mats: These prevent sticking and make cleanup a breeze.
  • Mixing bowls: A set of various sizes helps with ingredient prep.
  • Electric mixer: Makes creaming butter and sugar much easier!

Serving Suggestions

Serve these gingerbread cupcakes with a warm cup of tea or coffee for a delightful treat. Consider pairing with:

  • Whipped cream: A dollop adds a light touch.
  • Spiced apple cider: Complements the flavors beautifully.
  • Holiday-themed plates: Presenting your cupcakes on festive dishes can elevate their appeal!

In conclusion, these gingerbread cupcakes are more than just a recipe; they embody the warmth and joy of the holiday season. With clear instructions, helpful tips, and endless variations, you’ll find that baking these cupcakes is a rewarding experience. So, roll up your sleeves and get ready to create some delightful memories in your kitchen. Happy baking!

Gingerbread Cupcakes

Prep Time 15 minutes
Cook Time 20 minutes
Total Time 35 minutes
Servings 12 cupcakes
Calories 250
Delight in these spiced gingerbread cupcakes topped with creamy frosting, perfect for holiday celebrations or cozy gatherings.

Ingredients

Dry Ingredients

  • 1 ½ cups all-purpose flour
  • 1 teaspoon baking soda
  • 1 teaspoon ground ginger
  • 1 teaspoon ground cinnamon
  • ¼ teaspoon ground cloves
  • ¼ teaspoon salt

Wet Ingredients

  • ½ cup unsalted butter, softened
  • ½ cup brown sugar
  • ½ cup molasses
  • 1 large egg
  • ½ cup hot water

Frosting

  • 8 oz cream cheese, softened
  • ¼ cup butter, softened
  • 2 cups powdered sugar
  • 1 teaspoon vanilla extract

Instructions 

  • Preheat oven to 350°F (175°C) and line a muffin tin with cupcake liners.
  • Mix dry ingredients; beat butter and sugar, add molasses and egg.
  • Combine wet and dry, add hot water until smooth, fill liners, and bake 18–20 mins.
  • Cool cupcakes; beat cream cheese and butter, add powdered sugar and vanilla for frosting.
  • Frost cupcakes and decorate as desired.

Notes

Ensure cupcakes are completely cooled before frosting to prevent melting.
Calories: 250kcal
Cost: $15
Course: Dessert
Cuisine: American
Keyword: gingerbread