Author

Steven

Browsing

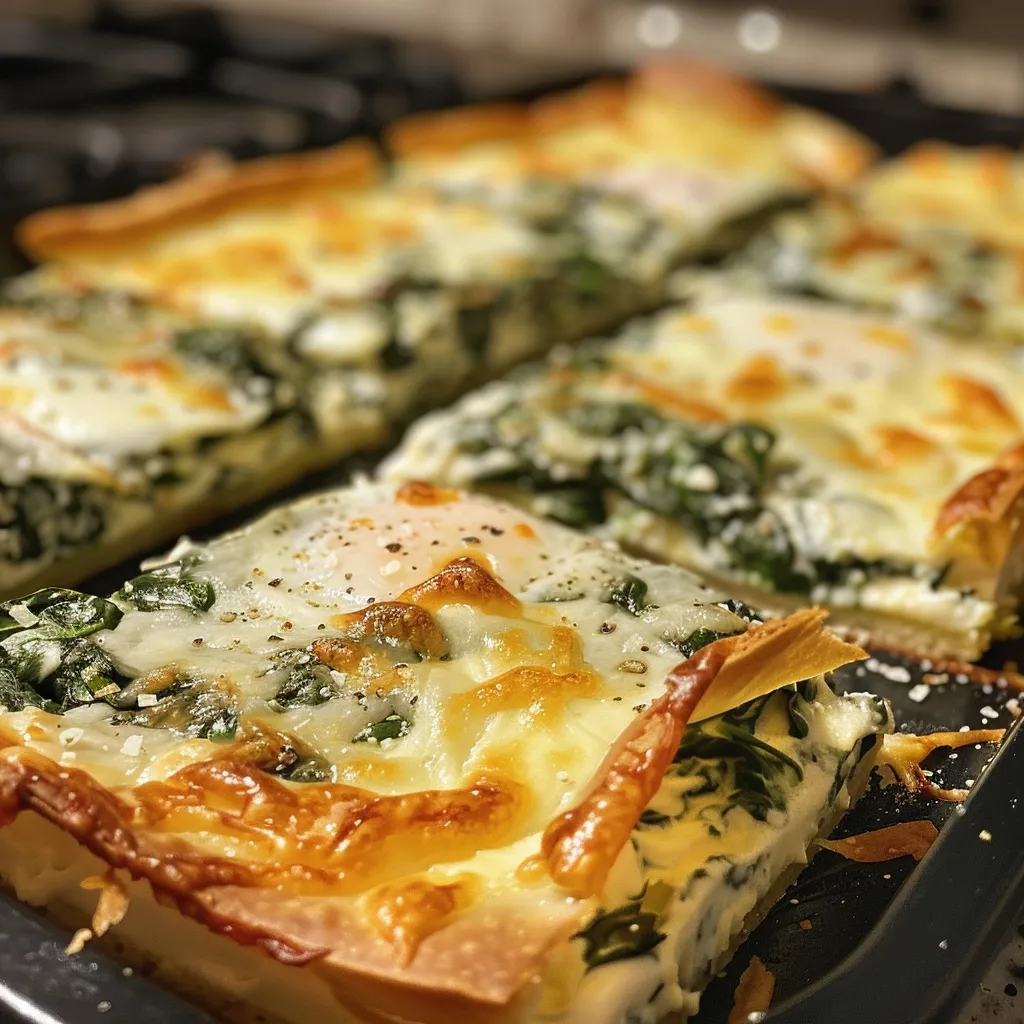
Discover the Ultimate Spinach Cheese Crisps Recipe

Welcome to the world of Spinach Cheese Crisps, a delightful low-carb snack that perfectly balances flavor and nutrition! In this article, you’ll learn how to create these irresistible treats from scratch, transforming simple ingredients into a crispy, cheesy delight. Whether you’re looking for a healthy appetizer or a snack to satisfy your cravings, this recipe will soon become your go-to!

As a passionate cook, I believe that good food doesn’t have to be complicated. That’s why I’m excited to share this easy, step-by-step guide that will help you whip up these delicious spinach cheese crisps in no time. Let’s dive in!

Why You’ll Love This Recipe

These crispy snacks aren’t just tasty—they come with a host of benefits:

  • Low-Carb Delight: Perfect for those following a low-carb diet, these crisps are a great way to indulge without the guilt.
  • Quick and Easy: With just a few simple ingredients and minimal prep time, you can have these ready in under 30 minutes!
  • Versatile Snack: Enjoy them as an appetizer, a party snack, or a healthy afternoon pick-me-up.
  • Nutritious Ingredients: Packed with fresh spinach and creamy cheeses, they deliver both flavor and essential nutrients.
  • Family-Friendly: These crisps are sure to please even the pickiest eaters—everyone will love the cheesy goodness!

Ingredients Breakdown

Let’s take a closer look at the ingredients you’ll need to make these delicious spinach cheese crisps:

  • 2 cups fresh spinach: Finely chopped and packed with vitamins, spinach adds a vibrant color and essential nutrients.
  • 1 cup cream cheese: Soften to room temperature; it adds richness and helps bind the mixture.
  • 1 cup shredded mozzarella cheese: This cheese provides that gooey, melty texture we all love.
  • ½ cup grated Parmesan cheese: Adds a sharp, nutty flavor that elevates the overall taste.
  • 1 tsp garlic powder: This enhances the flavor profile with a delicious garlicky kick.
  • ½ tsp onion powder: Adds depth and sweetness to balance the flavors.
  • ½ tsp salt: Essential for enhancing the overall taste of the crisps.

Feel free to customize the ingredients based on your preferences! For example, you can substitute fresh spinach with frozen spinach (thawed and drained) or experiment with different cheese variations.

Step-by-Step Instructions

Appetizing spinach cheese crisps with melted cheese visible, ready to eat.

Now that you have your ingredients ready, let’s dive into the cooking process!

  • 1️⃣ Prepare the Cheese Base: Soften the cream cheese to room temperature for easy mixing. In a large bowl, combine cream cheese, shredded mozzarella, and grated parmesan. Mix until smooth and fully blended.
  • 2️⃣ Add Spinach and Seasoning: Finely chop fresh spinach and pat dry if wet. Stir spinach into the cheese blend. Add garlic powder, onion powder, and salt. Mix thoroughly until well combined.
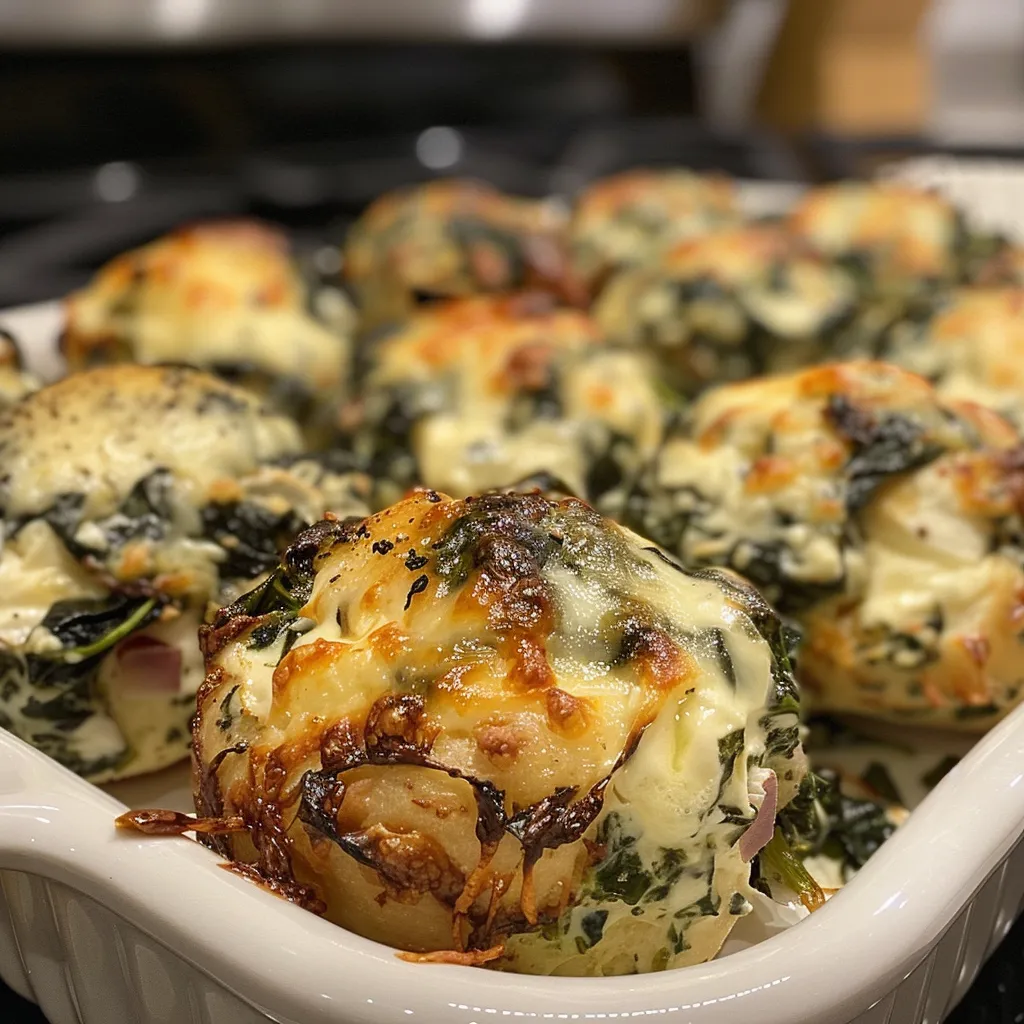
  • 3️⃣ Shape the Crisps: Preheat your oven to 350°F (175°C). Line a baking sheet with parchment paper or a silicone mat. Scoop tablespoon-sized portions onto the tray and flatten them slightly to form mounds.
  • 4️⃣ Bake the Crisps: Bake for 12–15 minutes until edges are golden brown and centers are bubbly. Keep an eye on them to avoid overbaking—they should be crispy but not burnt!
  • 5️⃣ Cool and Serve: Let the crisps cool on the pan for 5 minutes. Transfer them to a wire rack to crisp further. Serve warm or at room temperature for the best flavor!

Pro Tips for Perfect Crisps

To ensure your spinach cheese crisps turn out perfectly every time, consider these expert tips:

  • Pat Dry the Spinach: Make sure to remove excess moisture from the spinach to achieve crispy results.
  • Mix Thoroughly: Ensure all ingredients are well mixed to create a uniform flavor throughout the crisps.
  • Watch the Baking Time: Keep an eye on your crisps while baking. The ideal texture is golden brown and crispy on the edges.
  • Experiment with Cheeses: Feel free to try different cheese combinations for unique flavors. Cheddar, gouda, or feta work beautifully!
  • Adjust Seasoning: Taste the mixture before baking and adjust the seasoning according to your preference.
  • Use a Cookie Scoop: For uniform sizes, use a cookie scoop to portion out the mixture.
  • Don’t Crowd the Pan: Give each crisp space on the baking sheet to allow for even cooking.
  • Let Cool Completely: Allow the crisps to cool completely before serving to maximize crunchiness.

Common Mistakes and Troubleshooting

Even the best cooks can encounter challenges. Here are some common mistakes to avoid:

  • Too Much Moisture: If your crisps are soggy, it’s likely due to excess moisture in the spinach. Always dry it well before mixing.
  • Overbaking: Keep an eye on the oven; overbaked crisps can become too hard and lose their delightful texture.
  • Uneven Sizes: If some crisps are thick while others are thin, they may cook unevenly. Use a scoop for consistency.

Delicious Variations

Feel free to get creative with your spinach cheese crisps! Here are some tasty variations to try:

  • Spicy Kick: Add a pinch of crushed red pepper flakes for a spicy twist.
  • Herbed Delight: Incorporate fresh herbs like basil or dill for added flavor and freshness.
  • Cheesy Bacon Crisps: Mix in crumbled, cooked bacon for an extra savory touch.
  • Vegan Option: Swap out dairy for vegan cream cheese and nutritional yeast for a cheesy flavor without the dairy.

Storage and Make-Ahead Instructions

Want to prepare your crisps in advance? Here’s how to store and reheat them effectively:

  • Make-Ahead: Prepare the cheese mixture and shape into mounds. Cover and refrigerate for up to 24 hours before baking.
  • Storage: Store leftover crisps in an airtight container at room temperature for up to 2 days. For longer storage, refrigerate for up to 5 days.
  • Reheating: To reheat, place crisps in a preheated oven at 350°F (175°C) for 5-7 minutes until warmed through and crispy again.

Frequently Asked Questions

Here are some common questions about making spinach cheese crisps:

  • Can I use frozen spinach? Yes! Just make sure to thaw and drain it well to remove excess moisture.
  • What’s the best way to serve these crisps? They’re delicious on their own but pair wonderfully with dips like marinara, ranch, or hummus.
  • How can I make these dairy-free? Use a dairy-free cream cheese alternative and adjust the seasonings accordingly.
  • Can I freeze spinach cheese crisps? Yes! Freeze them in a single layer, then transfer to an airtight container. Reheat directly from frozen.
  • What if my crisps are too salty? Taste the mixture before baking and adjust the salt to your liking. You can also balance it out with a bit of sugar or more cheese.
  • Are they gluten-free? Absolutely! All the ingredients used in this recipe are naturally gluten-free.
  • What is the best cheese for melting? Mozzarella is ideal for that gooey texture, but you can mix in other cheeses for extra flavor.
  • How can I make them spicier? Add more crushed red pepper flakes or diced jalapeños to the mixture before baking.

Nutritional Tips and Dietary Adaptations

These spinach cheese crisps are not just delicious but also packed with nutritional benefits:

  • Rich in Vitamins: Spinach is an excellent source of vitamins A, C, and K.
  • Protein-Packed: The combination of cream cheese and mozzarella provides a good dose of protein to keep you satisfied.
  • Low Calorie: These crisps are a guilt-free snack option, making them perfect for any diet.

Essential Equipment Recommendations

To make your cooking experience smooth and enjoyable, here’s a list of essential tools you’ll need:

  • Baking Sheet: A sturdy, non-stick baking sheet is essential for even cooking.
  • Parchment Paper: Prevents sticking and ensures easy cleanup.
  • Mixing Bowl: A large bowl for combining your ingredients thoroughly.
  • Cookie Scoop: Ensures even portioning for uniform crisps.

Serving Suggestions

Looking for ways to enjoy your spinach cheese crisps? Here are some tasty serving ideas:

  • Dip It: Serve with a side of your favorite dip, such as marinara sauce or a creamy ranch dressing.
  • Pair with Drinks: They make fantastic companions to wine, beer, or your favorite cocktail.
  • Make a Platter: Include these crisps on a charcuterie board with assorted cheeses, olives, and nuts for a delightful snack spread.

In conclusion, these Spinach Cheese Crisps offer a perfect balance of flavor and nutrition, making them an ideal choice for any occasion. With easy-to-follow instructions and tons of tips for success, you’ll be well on your way to impressing your family and friends with this delightful snack. Remember, cooking should be fun and rewarding—so enjoy every moment in the kitchen!

Spinach Cheese Crisps – The Best 2025 Cheesy Low-Carb Snack

Prep Time 10 minutes
Cook Time 15 minutes
Total Time 25 minutes
Servings 4 pieces
Calories 150
A delicious low-carb snack combining cheesy flavors with fresh spinach, baked to crispy perfection.

Ingredients

Dough

  • 2 cups fresh spinach, finely chopped
  • 1 cup cream cheese, softened
  • 1 cup shredded mozzarella cheese
  • ½ cup grated Parmesan cheese
  • 1 tsp garlic powder
  • ½ tsp onion powder
  • ½ tsp salt

Instructions 

  • Mix cream cheese, mozzarella, and Parmesan until smooth.
  • Stir in chopped spinach and seasonings.
  • Preheat oven to 350°F (175°C). Scoop and flatten portions on a baking sheet.
  • Bake for 12–15 minutes until golden and bubbly.
  • Cool briefly, then serve warm or room temperature.

Notes

For extra crispiness, bake a few minutes longer, but watch to prevent overbaking.
Calories: 150kcal
Cost: $15
Course: Appetizer
Cuisine: American
Keyword: Cheese, Low-Carb, Spinach

Start Your Day Right with a Cozy Baked Feta Egg Dish

Cooking brings joy and satisfaction, especially when you create something delicious that brings the family together. This Baked Feta Eggs with Spinach and Tomatoes recipe is not just a meal; it’s a comforting experience that transforms ordinary ingredients into a delightful dish that can brighten any morning. In just a few simple steps, you can enjoy the creamy feta, vibrant veggies, and perfectly baked eggs that encapsulate the flavors of Mediterranean cuisine. Let’s dive into why you’ll love this recipe!

Why You’ll Love This Recipe

  • Flavor Explosion: The combination of creamy feta, sweet roasted tomatoes, and fresh spinach creates a burst of taste in every bite.
  • Quick and Easy: Ready in under 40 minutes, this dish is perfect for busy mornings or a leisurely brunch.
  • Customizable: Swap ingredients based on what you have at home—feel free to add different veggies or proteins!
  • Impressive Presentation: Serve it in individual ramekins or a large dish for an elegant touch that will wow your guests.
  • Healthy and Nutritious: Packed with vitamins and protein, this dish provides a light yet satisfying meal to fuel your day.

Ingredients for Baked Feta Eggs

Gathering the right ingredients is crucial for a successful dish. Here’s what you’ll need:

  • 2 cups cherry or grape tomatoes: These sweet and juicy tomatoes add a lovely base for your dish.
  • 1 red bell pepper, diced: Offers a sweet crunch and beautiful color.
  • ½ small red onion, diced: Adds a mild sweetness and depth of flavor.
  • 3 garlic cloves, minced: For that aromatic punch!
  • 8 ounces feta cheese: The star ingredient that brings creaminess and tang.
  • 4 tablespoons olive oil: Enhances flavors and aids in roasting.
  • 1 teaspoon dried oregano: A classic herb that complements Mediterranean dishes.
  • 1 teaspoon sea salt (or kosher salt): Essential for flavor enhancement.
  • ½ teaspoon dried thyme: Adds an earthy note.
  • ½ teaspoon ground black pepper: For a bit of heat.
  • ½ teaspoon red pepper flakes: Optional for those who like a kick!
  • 1 cup baby spinach, chopped: A fresh touch that’s packed with nutrients.
  • 4 large eggs: The protein powerhouse that binds the dish together.
  • Optional toppings: Chopped fresh parsley, basil, green onions, or chives for garnish.

How to Make Baked Feta Eggs with Spinach and Tomatoes

Delicious serving of baked feta eggs, showcasing vibrant ingredients.

Follow these simple steps to create your dish:

  1. Preheat the oven to 400°F (200°C).
  2. If using ramekins: Divide the cherry tomatoes, bell pepper, red onion, garlic, and feta into four oven-safe dishes. Alternatively, use one large dish (an 8×8 or 9×11-inch pan) with the feta block in the center.
  3. Drizzle olive oil over each ramekin or over the large dish.
  4. Mix oregano, salt, thyme, black pepper, and red pepper flakes, then sprinkle evenly over the veggies and feta.
  5. Bake for 25 minutes until the tomatoes are roasted and the feta is soft and golden.
  6. Carefully stir in the chopped spinach.
  7. Create wells for the eggs and crack one egg into each well.
  8. Bake an additional 10 minutes until the egg whites are set and yolks are slightly soft.
  9. Garnish with fresh herbs, and serve warm or at room temperature.

Pro Tips for Success

  • Use quality feta: Opt for a block of feta cheese instead of crumbled for better texture and taste.
  • Adjust your baking times: If you prefer firmer yolks, add a few extra minutes to the second bake.
  • Experiment with toppings: Try adding crumbled bacon or a sprinkle of parmesan for additional flavor.
  • Don’t overcrowd the dish: Ensure the veggies have enough space to roast properly and release their flavors.
  • Make it vegan: Substitute eggs with silken tofu for a plant-based version.
  • Use seasonal veggies: Feel free to swap the bell pepper for zucchini or asparagus, depending on what’s in season.
  • Storage: This dish can be stored in the fridge for up to three days, making it great for meal prep.
  • Reheat gently: For the best texture, reheat in the oven instead of the microwave.

Common Mistakes and Troubleshooting

Even seasoned cooks can run into issues. Here are a few mistakes to avoid:

  • Overcooking the eggs: Keep an eye on the eggs during the last baking phase. Remove them from the oven once the whites are set but the yolks remain soft.
  • Not preheating the oven: Preheating ensures even cooking and helps achieve that desired golden-brown feta.
  • Using too much salt: Feta can be salty on its own, so adjust the salt in the recipe according to your taste.

Variations You Can Try

This recipe is incredibly versatile! Here are some delicious variations to keep things interesting:

  • Add protein: Incorporate cooked sausage or chicken for a heartier meal.
  • Make it spicy: Add sliced jalapeños or a dash of hot sauce for extra heat.
  • Switch up the greens: Kale or Swiss chard can be used instead of spinach.
  • Go Mediterranean: Add olives or artichokes for a more authentic Mediterranean flavor.

Storing and Make-Ahead Instructions

This dish is perfect for meal prep! Here’s how to store it:

  • Refrigerate: Store leftovers in an airtight container in the fridge for up to three days.
  • Reheat: For best results, reheat in the oven at 350°F (180°C) until warmed through.
  • Make-ahead: Prepare the veggie and feta mix a day in advance, then bake just before serving.

FAQs About Baked Feta Eggs

Got questions? Here are some common inquiries about this delightful dish:

  • Can I use other cheeses? Absolutely! Goat cheese or ricotta can be wonderful substitutes.
  • What can I serve with this dish? Pair it with crusty bread or a fresh salad for a complete meal.
  • Is it gluten-free? Yes, this recipe is naturally gluten-free!
  • Can I freeze leftovers? While it’s best fresh, you can freeze it for up to a month. Just reheat gently when ready to serve.
  • Can I use frozen spinach? Yes, just make sure to thaw and drain it well before adding.
  • How do I know when the eggs are done? The whites should be set and the yolks slightly jiggly; they will continue to cook after you remove them from the oven.
  • Can I make this recipe without eggs? Yes! You can replace them with silken tofu or omit them for a vegan version.
  • What’s the best way to serve this dish? It’s best served warm, garnished with fresh herbs for a pop of flavor and color.

Nutritional Benefits and Dietary Adaptations

This dish is not only delicious but also nutritious:

  • High in protein: Eggs and feta offer a good protein boost to start your day.
  • Loaded with vitamins: Spinach and tomatoes provide essential vitamins A and C.
  • Low in carbs: This dish is a great option for those following a low-carb or ketogenic diet.
  • Dairy-free option: Use a plant-based cheese alternative for a dairy-free version.

Equipment Recommendations

Here’s what you’ll need to make this dish:

  • Oven-safe ramekins: Perfect for individual servings, but a large baking dish works too.
  • Mixing bowl: For combining your veggies and seasonings.
  • Measuring spoons and cups: Essential for accuracy in your recipe.
  • Sharp knife: For easy chopping of your veggies.

Serving Suggestions

Enjoy your Baked Feta Eggs with:

  • Crusty bread: Perfect for mopping up all that delicious feta and egg goodness.
  • Fresh salad: A light side salad can balance the richness of the dish.
  • Fruit platter: A mix of fresh fruits can add a refreshing touch.
  • Yogurt: A dollop of Greek yogurt can enhance the Mediterranean flavors.

Cooking is all about creativity and comfort. This Baked Feta Eggs with Spinach and Tomatoes dish is a wonderful way to start your day, bringing together flavors and nutrition in a simple, enjoyable format. Remember, great food doesn’t require perfection—just a willingness to experiment and enjoy the process. So grab your ingredients, roll up your sleeves, and let’s make breakfast magic happen!

Baked Feta Eggs with Spinach and Tomatoes

Prep Time 10 minutes
Cook Time 35 minutes
Total Time 45 minutes
Servings 4 servings
Calories 250
A flavorful baked egg dish featuring roasted tomatoes, feta, and fresh spinach, perfect for a nutritious breakfast or brunch.

Ingredients

Vegetables and Feta

  • 2 cups cherry or grape tomatoes
  • 1 red bell pepper diced
  • ½ small red onion, diced
  • 3 cloves garlic, minced
  • 8 ounces feta cheese
  • 4 tablespoons olive oil
  • 1 teaspoon dried oregano
  • 1 teaspoon sea salt ((or kosher salt))
  • ½ teaspoon dried thyme
  • ½ teaspoon ground black pepper
  • ½ teaspoon red pepper flakes
  • 1 cup baby spinach, chopped
  • 4 large eggs

Optional toppings

  • chopped fresh parsley, basil, green onions, or chives (for garnish)

Instructions 

  • Preheat oven to 400°F (200°C).
  • Divide tomatoes, bell pepper, onion, garlic, and feta into ramekins or combine in a baking dish; drizzle with olive oil.
  • Sprinkle with oregano, salt, thyme, black pepper, and red pepper flakes; bake for 25 minutes.
  • Stir in chopped spinach, create wells, and crack eggs into each; bake for 10 minutes until whites are set.
  • Garnish with herbs and serve warm or at room temperature.

Notes

Use fresh herbs for best flavor and serve immediately.
Calories: 250kcal
Cost: $15
Course: Breakfast, Brunch
Cuisine: Mediterranean
Keyword: Eggs, Feta, Tomatoes

Your New Favorite Appetizer: Spinach Ricotta Bites

If you’re looking for a delicious and effortless appetizer that will impress your guests and satisfy your cravings, look no further! These spinach ricotta bites are perfect for any occasion, from casual gatherings to elegant dinner parties. Packed with flavor and nutrients, they’re not just tasty; they’re also easy to make. With this comprehensive guide, you’ll learn how to create these delightful bites that are sure to become a staple in your recipe rotation.

Why You’ll Love This Recipe

These spinach ricotta bites are more than just a quick snack; they come with a host of benefits that make them a must-try:

  • Nutritious: Packed with vitamins and minerals from spinach and protein from ricotta cheese, these bites are a wholesome choice.
  • Quick and Easy: With simple steps, you can whip these up in under 40 minutes, making them perfect for last-minute gatherings.
  • Versatile: Customize the ingredients to suit your taste or dietary needs, ensuring everyone can enjoy them.
  • Perfect for Meal Prep: Make a batch ahead of time and store them for quick snacks or appetizers throughout the week.
  • Crowd-Pleasing: With their delicious flavor and appealing bite-sized form, they’re sure to be a hit at any gathering.

Ingredients for Spinach Ricotta Bites

To make these delightful bites, you’ll need the following ingredients:

  • 2 tablespoons butter
  • 1 small yellow onion, chopped
  • 1 clove garlic, minced
  • 2 large eggs, beaten
  • 1 cup ricotta cheese (low or full-fat ricotta will work)
  • 1/2 cup mozzarella cheese, shredded
  • 1/2 cup parmesan cheese, grated
  • 10-ounce package frozen chopped spinach, defrosted and drained well (squeeze out as much liquid as possible)
  • 1/4 teaspoon kosher salt

### Ingredient Substitutions

  • Cheese Variations: Try using feta or goat cheese for a tangy twist.
  • Vegetarian Additions: Add diced bell peppers or mushrooms for extra flavor and texture.
  • Gluten-Free Option: Substitute breadcrumbs with almond flour or gluten-free breadcrumbs.
  • Seasoning Enhancements: Spice it up with red pepper flakes or Italian herbs for added flavor.

How to Make Spinach Ricotta Bites: Easy Baking Guide

A portion of Spinach Ricotta Bites with melted cheese peeking through the golden crust.

Now that you have your ingredients ready, let’s get started on making these delicious bites!

Step 1: Preheat the Oven

Preheat your oven to 375°F (190°C). Coat a mini muffin tin with grease or use paper liners to line it.

Step 2: Prepare the Onion and Garlic

Melt the butter in a small skillet over medium heat. Toss the chopped onion into the skillet and cook for around 5 minutes, or until it turns clear and soft. Stir in the minced garlic and cook for another minute, then take it off the burner and let it cool for a few minutes.

Step 3: Combine the Ingredients

In a large mixing bowl, combine the beaten eggs, ricotta cheese, shredded mozzarella, grated parmesan, and drained spinach. Add the sautéed onion and garlic mixture, and season with kosher salt. Mix until all ingredients are well combined.

Step 4: Fill the Muffin Tin

Spoon the mixture into the prepared mini muffin tin, filling each cup to the top.

Step 5: Bake

Bake in the preheated oven for 20-25 minutes, or until the tops are golden brown and the bites are set.

Step 6: Cool and Serve

Allow the spinach ricotta bites to cool in the muffin tin for a few minutes before transferring them to a wire rack to cool completely. Serve warm or at room temperature as a delicious appetizer or snack.

Tips for the Best Spinach Ricotta Bites

To ensure your spinach ricotta bites turn out perfectly every time, consider these expert tips:

  • Use Fresh Ingredients: Fresh spinach and high-quality cheeses make a noticeable difference in flavor.
  • Don’t Overmix: Mix just until combined; overmixing can lead to tough bites.
  • Drain Spinach Thoroughly: Squeeze out as much liquid as possible to avoid soggy bites.
  • Experiment with Cheese: Different cheeses can completely change the flavor profile of your bites.
  • Check for Doneness: The bites should be firm and golden; adjust baking time as needed.

Common Mistakes and Troubleshooting

If you’re new to making spinach ricotta bites, here are some common pitfalls and how to avoid them:

  • Too Soggy: Ensure spinach is thoroughly drained. If using fresh spinach, sauté it first to remove moisture.
  • Not Enough Flavor: Don’t skip the onion and garlic; they are essential for flavor.
  • Burnt Tops: Rotate the muffin tin halfway through baking to ensure even cooking.
  • Sticking to the Tin: Grease the muffin tin well or use liners to prevent sticking.

Variations and Additions

These spinach ricotta bites are incredibly versatile. Here are some delicious variations to try:

  • Sun-Dried Tomato and Feta: Add chopped sun-dried tomatoes and replace mozzarella with feta for a Mediterranean twist.
  • Spicy Jalapeño: Mix in diced jalapeños for a kick of heat.
  • Herbed Mix: Incorporate fresh herbs like basil or dill for a refreshing flavor.
  • Cheesy Bacon: Add crispy bacon bits and extra cheese for a heartier version.

Storage and Make-Ahead Instructions

These bites can be prepared in advance, making them perfect for meal prep:

  • Storing: Keep leftovers in an airtight container in the fridge for up to 4 days.
  • Freezing: Freeze baked bites in a single layer, then transfer to a freezer bag. They last for up to 3 months.
  • Reheating: Reheat in the oven at 350°F (175°C) for about 10 minutes or until warmed through.

Frequently Asked Questions (FAQ)

Here are some common questions about making spinach ricotta bites:

  • Can I use fresh spinach instead of frozen? Yes, just sauté and drain it before adding.
  • How can I make these gluten-free? Use gluten-free breadcrumbs or omit them altogether.
  • What should I serve with these? Pair them with a light salad or a dipping sauce for a complete meal.
  • Are they good for meal prep? Absolutely! They store well and can be enjoyed throughout the week.
  • Can I make them in a regular-sized muffin tin? Yes, just adjust the baking time accordingly.
  • How do I know when they are done? They should be golden brown on top and firm to the touch.
  • What other cheese can I use? Feel free to experiment with different cheeses like goat cheese or cheddar.
  • Is this recipe kid-friendly? Yes! They’re mild in flavor and perfect for little hands.

Nutritional Tips and Dietary Adaptations

These spinach ricotta bites can be tailored to fit various dietary needs:

  • Low-Carb: Skip the breadcrumbs and use almond flour instead.
  • Vegan Option: Substitute eggs with flaxseed meal and ricotta with tofu or cashew cheese.
  • Low-Fat: Use low-fat cheese options and reduce the butter.

Equipment Recommendations

To make these bites, here are some kitchen tools that will come in handy:

  • Mini Muffin Tin: Essential for shaping the bites into perfectly sized portions.
  • Mixing Bowls: Use a large bowl for combining ingredients and a smaller one for sautéing.
  • Silicone Spatula: Great for mixing and transferring the batter without sticking.

Serving Suggestions

These bites can be served in a variety of ways:

  • As an Appetizer: Serve warm with a side of marinara sauce for dipping.
  • Snack Time: Enjoy them cold or reheated as a quick snack.
  • As Part of a Meal: Pair with a fresh salad or roasted vegetables for a balanced dish.

In conclusion, these spinach ricotta bites are not just an easy appetizer; they’re a delightful addition to your cooking repertoire. With their rich flavors and satisfying textures, you’ll find they’re perfect for any occasion. So gather your ingredients, get cooking, and enjoy the process of making something fantastic for yourself and your loved ones. Happy cooking!

Spinach Ricotta Bites: The Perfect Easy Appetizer for Every Occasion

Prep Time 10 minutes
Cook Time 20 minutes
Total Time 30 minutes
Servings 12 pieces
Calories 150
These savory spinach ricotta bites are quick to make and perfect for any gathering. They combine cheesy goodness with healthy spinach in a delightful mini muffin form.

Ingredients

Dairy

  • 2 tablespoons butter
  • 1 small yellow onion, chopped
  • 1 clove garlic, minced
  • 2 large eggs, beaten
  • 1 cup ricotta cheese ((low or full-fat))
  • 1/2 cup mozzarella cheese, shredded
  • 1/2 cup parmesan cheese, grated
  • 10 ounces frozen chopped spinach, defrosted and drained (squeeze out excess liquid)
  • 1/4 teaspoon kosher salt

Instructions 

  • Preheat oven to 375°F (190°C) and prepare mini muffin tin.
  • Sauté onion in butter until soft, then add garlic and cool.
  • Mix eggs, ricotta, cheeses, spinach, onion, garlic, and salt in a bowl.
  • Fill muffin cups with mixture and bake for 20-25 minutes until golden.
  • Cool briefly, then serve warm or at room temperature.

Notes

Use a mini muffin tin for perfect bite-sized portions.
Calories: 150kcal
Cost: $15
Course: Appetizer
Keyword: Cheese, Ricotta, Spinach

Discover the Joy of Cooking with Roasted Parmesan & Garlic Cauliflower

Are you ready to elevate your vegetable game? Roasted Parmesan & Garlic Cauliflower is a dish that brings together simple ingredients and bold flavors, transforming an ordinary vegetable into a delightful culinary experience. This roasted cauliflower recipe is perfect for any occasion, whether it’s a weeknight dinner or a festive gathering. With just a few steps, you’ll create a dish that’s crispy on the outside, tender on the inside, and packed with flavor. Let’s dive into why you’ll love this recipe and how to make it shine!

Why You’ll Love This Recipe

  • Flavor Explosion: The combination of garlic and Parmesan adds depth to the cauliflower, making it an irresistible side dish.
  • Easy Preparation: With just a few ingredients and minimal prep time, you can whip up this dish with ease.
  • Healthy & Nutritious: Packed with vitamins, minerals, and fiber, cauliflower is a great addition to any healthy diet.
  • Versatile Serving Options: Enjoy it as a standalone dish, toss it into salads, or serve it alongside your favorite proteins.
  • Impressive Presentation: The golden, crispy edges make this roasted cauliflower a beautiful addition to your table.

Ingredients You’ll Need

To create this mouthwatering Roasted Parmesan & Garlic Cauliflower, gather the following ingredients:

  • 1 large head of cauliflower (about 2 lbs)
  • 3 tablespoons extra virgin olive oil
  • 4 cloves fresh garlic, minced
  • 1 teaspoon garlic powder
  • 1/2 teaspoon smoked paprika
  • 1/2 teaspoon kosher salt
  • 1/4 teaspoon freshly ground black pepper
  • 1/2 cup finely grated Parmesan cheese, divided

Ingredient Substitutions

If you’re missing an ingredient or looking to modify the recipe, consider these substitutions:

  • Cauliflower: Broccoli or Brussels sprouts can be used for a different flavor profile.
  • Olive Oil: Avocado oil or melted coconut oil works well as alternatives.
  • Parmesan Cheese: Nutritional yeast for a vegan option or Pecorino Romano for a sharper taste.
  • Spices: Experiment with Italian seasoning or cayenne for a spicy kick!

How to Make It

Detailed shot of perfectly roasted cauliflower garnished with crispy Parmesan and garlic.

Follow these simple steps to create your Roasted Parmesan & Garlic Cauliflower:

  1. Preheat your oven to 425°F (220°C). Line a large, rimmed baking sheet with parchment paper for easy cleanup.
  2. Prepare the cauliflower by removing the leaves and thick stem. Chop the head into bite-sized florets, about 1-2 inches in size. Make sure they are thoroughly dry.
  3. In a large mixing bowl, whisk together the extra virgin olive oil, minced fresh garlic, garlic powder, smoked paprika, kosher salt, and black pepper until well combined.
  4. Add the dry cauliflower florets to the bowl with the oil and spice mixture. Toss thoroughly until every floret is evenly coated.
  5. Sprinkle in half of the grated Parmesan cheese (1/4 cup) and toss again to distribute the cheese.
  6. Spread the seasoned cauliflower in a single, even layer on the prepared baking sheet. Be sure not to overcrowd the pan, as this will steam the cauliflower instead of roasting it. Use two pans if necessary.
  7. Roast for 20 minutes, or until the cauliflower is starting to brown and become tender.
  8. Carefully remove the baking sheet from the oven. Sprinkle the remaining 1/4 cup of Parmesan cheese over the top of the florets.
  9. Return the pan to the oven and roast for an additional 10-12 minutes, or until the cauliflower is deeply golden brown, the edges are crispy, and the cheese is melted and bubbly.
  10. Remove from the oven and let it cool for a minute. Garnish with chopped fresh flat-leaf parsley, if using. Serve immediately with lemon wedges on the side for squeezing.

Pro Tips for Perfect Roasting

  • Don’t overcrowd the pan: Giving the florets space allows them to roast evenly and become crispy.
  • Use fresh garlic: Fresh garlic enhances flavor far better than garlic powder alone.
  • Experiment with seasoning: Feel free to adjust spices based on your preference—add chili flakes for heat or herbs for freshness.
  • Check for doneness: Cauliflower should be tender and caramelized; adjust roasting time based on your oven.
  • Finish with a squeeze of lemon: A splash of fresh lemon juice right before serving brightens the flavors.
  • Storing leftovers: Store any leftovers in an airtight container in the fridge for up to 3 days.
  • Reheat in the oven: To revive the crispiness, reheat leftovers in the oven instead of the microwave.
  • Make it cheesy: Add more Parmesan or try different cheeses for a unique twist!

Common Mistakes and Troubleshooting

Here are some common pitfalls to avoid when making roasted cauliflower:

  • Not drying the cauliflower: Excess moisture will lead to steaming rather than roasting. Ensure florets are completely dry before seasoning.
  • Overcrowding the pan: Crowded florets will steam instead of roast, leading to less crispy texture. Use multiple pans if needed.
  • Not preheating the oven: Always preheat your oven for optimal roasting temperatures and results.
  • Skipping the cheese at the end: Adding cheese midway through roasting ensures it melts beautifully and forms a delicious crust.

Variations to Try

Add a twist to your roasted cauliflower with these delightful variations:

  • Buffalo Roasted Cauliflower: Toss florets in buffalo sauce after initial roasting for a spicy kick.
  • Asian-Inspired: Use sesame oil, soy sauce, and top with sesame seeds and scallions for an Asian flair.
  • Indian Spices: Combine garam masala and turmeric for a flavorful Indian twist.
  • Herb Medley: Toss with fresh herbs like thyme, rosemary, or oregano before roasting for an aromatic touch.

Storage and Make-Ahead Instructions

This roasted cauliflower is great for meal prepping! Here’s how to store and reheat it:

  • Store leftovers in an airtight container in the refrigerator for up to 3 days.
  • Reheat in a preheated oven at 350°F (175°C) for about 10-15 minutes until heated through and crispy again.
  • You can prepare the cauliflower and toss it in oil and spices up to a day in advance—just roast it when you’re ready to serve!

Nutrition Tips and Dietary Adaptations

This recipe is naturally gluten-free and can be made vegan by omitting the Parmesan cheese or using a plant-based alternative. Here are some additional nutrition tips:

  • Boost fiber intake: Add roasted chickpeas to the dish for extra protein and fiber.
  • Low-carb option: Cauliflower is a fantastic low-carb substitute for rice or potatoes.
  • Rich in antioxidants: Cauliflower is packed with vitamins C and K, supporting your immune system.

Equipment Recommendations

To make your cooking experience smoother, consider having the following equipment:

  • Large Baking Sheet: A heavy-duty, rimmed baking sheet is ideal for even roasting.
  • Parchment Paper: Lining your baking sheet prevents sticking and makes cleanup easier.
  • Mixing Bowls: A couple of mixing bowls are essential for preparing your ingredients.
  • Whisk: A whisk helps combine your oil and spices thoroughly.

Serving Suggestions

Serve your Roasted Parmesan & Garlic Cauliflower alongside these delicious options:

  • Grilled Chicken: A perfect protein pairing that complements the flavors.
  • Quinoa Salad: Mix it with a refreshing quinoa salad for a wholesome meal.
  • Pasta Dishes: Toss it with pasta and your favorite sauce for extra flavor.
  • As a Snack: Enjoy it warm or cold as a healthy snack throughout the day!

Frequently Asked Questions

Here are some common questions about roasted cauliflower:

  • Can I use frozen cauliflower? Yes, but fresh cauliflower is recommended for the best texture.
  • How do I know when it’s done? The cauliflower should be tender and golden brown with crispy edges.
  • Can I make it ahead of time? Yes! Prep the florets and season them ahead; roast them just before serving.
  • What can I pair it with? It pairs well with chicken, fish, or as part of a vegetarian meal.
  • Is it healthy? Absolutely! Cauliflower is low in calories and high in nutrients.
  • Can I add more cheese? Of course! Feel free to adjust the cheese quantity to your liking.
  • What’s the best way to store leftovers? Store in an airtight container in the fridge for up to 3 days.
  • Can I grill the cauliflower instead? Yes! Grilling gives it a lovely smoky flavor.

With this comprehensive guide to Roasted Parmesan & Garlic Cauliflower, you’re all set to impress yourself and your guests. Remember, the secret to great cooking is confidence and creativity—don’t be afraid to experiment! Enjoy every bite of this delicious dish and the joy it brings to your kitchen.

Perfect Roasted Parmesan & Garlic Cauliflower

Prep Time 10 minutes
Cook Time 30 minutes
Total Time 40 minutes
Servings 4 servings
Calories 180
This flavorful roasted cauliflower is coated in garlic, spices, and Parmesan, then baked to crispy perfection. A delicious side or snack with cheesy, garlicky goodness.

Ingredients

Cauliflower

  • 1 large head cauliflower (about 2 lbs)
  • 3 tablespoons extra virgin olive oil
  • 4 cloves fresh garlic, minced
  • 1 teaspoon garlic powder
  • 1/2 teaspoon smoked paprika
  • 1/2 teaspoon kosher salt
  • 1/4 teaspoon freshly ground black pepper
  • 1/2 cup finely grated Parmesan cheese, divided

Instructions 

  • Preheat oven to 425°F (220°C). Line a baking sheet with parchment.
  • Chop cauliflower into bite-sized florets and dry thoroughly.
  • Mix olive oil, garlic, spices, and salt in a bowl. Toss cauliflower to coat.
  • Spread cauliflower on the baking sheet. Roast for 20 minutes.
  • Sprinkle half of Parmesan, roast 10-12 more minutes until golden and crispy. Add remaining Parmesan, serve hot.

Notes

For extra flavor, garnish with chopped parsley and a squeeze of lemon before serving.
Calories: 180kcal
Cost: $15
Course: Side Dish
Cuisine: American
Keyword: Cauliflower

Welcome to Your New Favorite Banana Smoothie Recipe!

If you’re looking for a quick, nutritious, and utterly delicious way to kickstart your day, you’ve landed in the right place! This banana smoothie is not only easy to whip up but also packed with flavor and health benefits. In just a few minutes, you can blend together frozen bananas, creamy Greek yogurt, and a splash of milk into a refreshing drink that’s perfect for breakfast or a mid-afternoon snack. Let’s dive into the details of this effortless recipe!

Why You’ll Love This Recipe

  • Quick & Easy: Perfect for busy mornings; you can blend this smoothie in under 5 minutes!
  • Nutritious Boost: Packed with potassium from bananas and protein from Greek yogurt, this smoothie will keep you energized.
  • Customizable: Change up the flavors and ingredients to suit your taste; it’s versatile enough to adapt!
  • Kid-Friendly: A fun and tasty way to sneak in some healthy ingredients for picky eaters.
  • Deliciously Creamy: The combination of frozen bananas and yogurt creates the perfect smooth texture.

Banana Smoothie Ingredients

Let’s break down the ingredients you’ll need to make this banana smoothie, along with some handy substitutions!

  • 1 cup sliced banana: Frozen bananas (about 1 large banana) yield the best results, enhancing the creaminess.
  • ¼ cup Greek yogurt: Use either plain or vanilla for a hint of sweetness. For a dairy-free option, you can substitute with almond or coconut yogurt.
  • ¼ cup milk: Any kind works—dairy, almond, oat, or soy milk are all great choices.
  • ¼ teaspoon vanilla extract: Adds a lovely aromatic flavor. Feel free to increase this for a more pronounced taste.

How to Make a Banana Smoothie

Top-down view of a smoothie with a spoon resting beside it, showcasing its fresh ingredients.

Making your smoothie is as simple as following these steps:

  • Blend: Place all ingredients in a blender. Blend until smooth, adding more milk if needed to reach your desired consistency.
  • Serve: Pour into a glass and enjoy immediately for the best taste and texture!

Pro Tips for the Perfect Banana Smoothie

Here are some expert insights to elevate your smoothie game:

  • Use ripe bananas: The sweeter, brown-spotted bananas provide the best flavor.
  • Chill your ingredients: If you prefer a colder smoothie, chill your milk and yogurt beforehand.
  • Experiment with add-ins: A spoonful of peanut butter or a handful of spinach can add nutrition without compromising flavor.
  • Don’t over-blend: Blend just until smooth; over-blending can make your smoothie too runny.
  • Adjust sweetness: If your bananas aren’t super ripe, consider adding a touch of honey or maple syrup.
  • Use a high-powered blender: A strong blender will ensure a silky-smooth consistency, especially if you’re adding frozen fruits.
  • Try different milks: Different types of milk can change the flavor profile—experiment to find your favorite!
  • Make it thicker: If you like a thicker smoothie, add more frozen bananas or a scoop of oats.

Common Mistakes and Troubleshooting

Here are some common pitfalls and how to avoid them:

  • Too thin: If your smoothie is too watery, add more frozen bananas or Greek yogurt.
  • Too thick: Add a splash of milk to loosen it up.
  • Not sweet enough: Increase the ripeness of your bananas or add a natural sweetener.
  • Chunky texture: Make sure to blend long enough to break down all ingredients.

Recipe Variations

Want to mix things up? Here are some delicious variations to try:

  • Chocolate Banana Smoothie: Add 1 tablespoon of cocoa powder for a chocolatey twist.
  • Peanut Butter Banana Smoothie: Mix in 1 tablespoon of peanut butter for extra creaminess and protein.
  • Green Banana Smoothie: Add a handful of spinach or kale for an extra nutrient boost.
  • Berry Banana Smoothie: Toss in a handful of your favorite berries for a fruity explosion.

Storage and Make-Ahead Instructions

This banana smoothie is best enjoyed fresh. However, if you want to prepare it in advance, follow these tips:

  • Make-ahead: Prepare the ingredients and freeze them in a bag. Simply blend when you’re ready!
  • Storage: If you have leftovers, store in an airtight container in the fridge for up to 24 hours. It may separate, so give it a good shake before drinking.

Frequently Asked Questions

Here are some common questions about making banana smoothies:

  • Can I use fresh bananas instead of frozen? Yes! Fresh bananas can be used, but the smoothie will be less creamy. Consider adding ice for texture.
  • Can I make this smoothie vegan? Absolutely! Just use plant-based yogurt and milk.
  • How long will it last in the fridge? It’s best consumed right away, but can last in the fridge for up to 24 hours.
  • Can I add protein powder? Yes! This is a fantastic way to boost protein content.
  • What can I substitute for Greek yogurt? You can use regular yogurt, dairy-free yogurt, or even silken tofu for a protein boost.
  • Can I add other fruits? Definitely! Feel free to mix in berries, mango, or any other favorite fruits.
  • Is this smoothie good for weight loss? Yes! It’s low in calories and high in nutrients, making it a great choice for a healthy snack.
  • How can I make it more filling? Add a scoop of oats, chia seeds, or nut butter to increase fiber and healthy fats.

Nutrition Tips and Dietary Adaptations

This banana smoothie is not only delicious but can also be tailored to fit your dietary needs:

  • For Weight Loss: Opt for unsweetened almond milk and reduce the yogurt portion.
  • For High Protein: Use Greek yogurt or add a scoop of protein powder.
  • For Low-Carb: Skip the yogurt and use unsweetened nut milk.
  • For Dairy-Free: Choose plant-based yogurt and milk alternatives.

Equipment Recommendations

Making your banana smoothie is simple with the right tools. Here’s what you’ll need:

  • High-Speed Blender: A powerful blender ensures a smooth texture. Brands like Vitamix or Ninja work wonders.
  • Measuring Cups: Accurate measurements help achieve the perfect balance of ingredients.
  • Smoothie Cups: Invest in reusable cups or bottles for easy transport.

Serving Suggestions

Your banana smoothie is delicious on its own, but here are some serving ideas:

  • Top with granola: Adds a nice crunch and makes it feel more substantial.
  • Garnish with banana slices: For a beautiful presentation, add a few slices on top.
  • Pair with a healthy snack: Enjoy with a handful of nuts or a piece of toast for a complete meal.

Conclusion

Now that you know how to make the best banana smoothie, you’re ready to blend up this delightful drink anytime you want! Whether you’re enjoying it for breakfast, as a post-workout snack, or simply a refreshing treat, this smoothie is sure to satisfy. Remember, cooking is about having fun and experimenting—don’t hesitate to make this recipe your own. Happy blending!

Best Banana Smoothie

Prep Time 5 minutes
Total Time 5 minutes
Servings 1 cup
Calories 250
A creamy and delicious banana smoothie perfect for a quick breakfast or snack. Packed with natural sweetness and protein, it's both satisfying and nutritious.

Ingredients

Fruits

  • 1 cup sliced banana (frozen is best, about 1 large banana) (Use frozen for creamier texture)
  • 0.25 cup Greek yogurt (plain or vanilla)
  • 0.25 cup milk (dairy, almond, oat milk, etc.)
  • 0.25 teaspoon vanilla extract

Instructions 

  • Place all ingredients in a blender.
  • Blend until smooth, adding more milk if needed.
  • Serve immediately.

Notes

For extra creaminess, add a handful of ice or a spoonful of honey.
Calories: 250kcal
Cost: $4
Course: Breakfast, Snack
Cuisine: American
Keyword: Banana

Unlock the Flavor: Your Guide to Crispy Chickpea Fries

Are you ready to discover a new favorite snack that’s both delicious and nutritious? These chickpea fries are not only easy to make but also packed with flavor and health benefits. With just a handful of ingredients, you can whip up a batch of crispy delights that will impress your taste buds and keep your hunger at bay. Let’s dive into this amazing recipe and transform your snacking game!

Why You’ll Love This Recipe

This chickpea fries recipe is sure to become your go-to for several reasons:

  • High in Protein: Made from chickpea flour and canned chickpeas, these fries are naturally rich in protein, making them a great snack option that helps keep you satisfied.
  • Versatile Flavor: You can customize the spices and seasonings to fit your taste. From cumin to red pepper flakes, the possibilities are endless!
  • Quick and Easy: With a prep time of just 10 minutes and baking time of about 25 minutes, you can have these crispy chickpea fries ready in no time.
  • Plant-Based Goodness: For those following a vegan or plant-based diet, these fries are a perfect choice, ensuring you enjoy a crunchy snack without any animal products.
  • Perfect for Dipping: Pair them with your favorite sauces or dips for a complete snacking experience!

Ingredients Breakdown

Here’s what you’ll need to make these crispy chickpea fries:

  • 2 cups canned chickpeas (drained and rinsed, approximately 400g)
  • 2 tablespoons cornstarch (16g) – to help achieve that perfect crunch
  • 1/4 cup water (60ml) – adjust if needed for consistency
  • 2 tablespoons olive oil (30ml) – for roasting and added flavor
  • 1 tablespoon apple cider vinegar (15ml) – to enhance flavor and texture
  • Salt (to taste)
  • Preferred spices: cumin, red pepper flakes, thyme, etc.
  • Topping: Sesame seeds for that extra crunch

Feel free to substitute the chickpeas with dry chickpeas that you cook yourself, or use different oils or spices based on what you have at hand!

Step-by-Step Directions

Appetizing close-up of chickpea fries, highlighting their crispy surface and seasonings.

Follow these simple steps to create your own crispy chickpea fries:

  1. Blend Ingredients: Combine all ingredients (except sesame seeds) in a blender and blend until smooth. You want a thick, homogenous mixture.
  2. Shape Fries: Shape the mixture into fry shapes on a baking tray lined with parchment paper. Don’t worry about them being perfect; rustic is charming!
  3. Add Sesame Seeds: Sprinkle sesame seeds on top of each fry for an added nutty flavor and texture.
  4. Bake: Bake in a preheated oven at 200°C (390°F) for 20-25 minutes, or until golden brown and crispy. Flip halfway through for even cooking.

Pro Tips for Perfect Chickpea Fries

Maximize your success with these expert insights:

  • Texture Matters: Ensure your chickpea mixture is smooth but not too watery; adjust water as needed.
  • Keep Them Thin: Shape fries to be about 1/2 inch thick for optimal crispness.
  • Preheat Your Oven: This is crucial for achieving that golden crunch.
  • Don’t Crowd the Pan: Give fries space on the baking sheet to ensure even cooking and crispiness.
  • Experiment with Spices: Different spices can completely alter the flavor profile—don’t hesitate to get creative!
  • For Extra Crispiness: Broil for the last 2-3 minutes, but watch closely to prevent burning.
  • Make It a Meal: Serve with a salad or as a side to your favorite plant-based burger.
  • Cool Before Serving: Allow fries to cool slightly for the best texture before serving.

Common Mistakes and Troubleshooting

Even the most seasoned cooks encounter hurdles! Here’s how to avoid common pitfalls:

  • Too Soft?: If your fries are too soft after baking, they may need more cornstarch or a longer bake time.
  • Sticking to the Pan?: Ensure your baking sheet is well-padded with parchment paper and lightly greased.
  • Flavorless?: Adjust seasoning! Taste the mixture before baking to ensure it’s flavorful enough.
  • Not Crispy Enough?: Try baking at a higher temperature or for a longer time, flipping halfway through.

Variations to Try

Mix things up with these exciting variations:

  • Spicy Chickpea Fries: Add cayenne pepper or chili powder for a kick.
  • Herbed Fries: Incorporate fresh herbs like rosemary or oregano for a fragrant twist.
  • Cheesy Flavor: Mix in nutritional yeast for a cheesy flavor without dairy.
  • Sweet Potato Chickpea Fries: Substitute half the chickpeas with cooked sweet potatoes for a naturally sweet version.

Storing and Make-Ahead Instructions

Want to prepare in advance? Here’s how:

  • Make Ahead: Shape the fries and chill them on the baking sheet for up to 1 hour before baking.
  • Storage: Store any leftovers in an airtight container in the fridge for up to 3 days.
  • Reheating: Reheat in the oven to restore crispiness, about 10-15 minutes at 200°C (390°F).

Frequently Asked Questions

Let’s tackle some common queries about chickpea fries:

  • Can I use dry chickpeas? Yes! Cook them until soft and blend them into the mixture.
  • How do I make this recipe gluten-free? This recipe is already gluten-free, but ensure your cornstarch is certified gluten-free.
  • Can I air fry these fries? Absolutely! Air fry at 200°C (390°F) for about 15-20 minutes, flipping halfway.
  • What dipping sauces pair well? Try tahini sauce, hummus, or a spicy aioli for a delicious pairing.
  • Can I freeze these fries? Yes! Freeze the uncooked shaped fries and bake straight from frozen.
  • Are chickpea fries healthy? Yes! They are high in protein and fiber, low in fat, and packed with nutrients.
  • What spices work best? Experiment with garlic powder, paprika, or even curry powder for unique flavors!
  • How do I know when they’re done? Look for a golden brown color and a crispy texture.

Nutrition Tips and Dietary Adaptations

Here are some health-conscious adjustments:

  • Lower Calorie Option: Reduce the olive oil or use a spray oil for baking.
  • Whole Foods: Use whole grain chickpea flour for added fiber.
  • Nut-Free Option: Omit sesame seeds if you have nut allergies.

Essential Equipment Recommendations

To make your cooking experience seamless, here’s what you’ll need:

  • Blender: For smooth mixing of ingredients.
  • Baking Sheet: Preferably lined with parchment paper for easy cleanup.
  • Measuring Cups and Spoons: For precise ingredient measurements.
  • Spatula: To shape the fries and flip them during baking.

Serving Suggestions

Want to elevate your snacking experience? Here are some serving ideas:

  • As an Appetizer: Serve with a selection of dips for a party or gathering.
  • On a Salad: Toss these fries on a fresh salad for added crunch.
  • With a Sandwich: Pair with your favorite sandwich for a satisfying meal.

In conclusion, these crispy chickpea fries are a delightful and healthy snack that everyone can enjoy. With their crunchy texture and customizable flavors, you can make them your own. So gather your ingredients and start cooking! Remember, cooking should be fun, and with these easy steps, you’ll be on your way to enjoying a delicious treat in no time!

Crispy Chickpea Fries

Prep Time 10 minutes
Cook Time 25 minutes
Total Time 35 minutes
Servings 4 pieces
Calories 250
Enjoy these crunchy, protein-packed chickpea fries topped with sesame seeds for a delicious snack or side dish.

Ingredients

Main

  • 2 cups canned chickpeas (drained and rinsed) (approximately 400g)
  • 2 tablespoons cornstarch (16g)
  • 1/4 cup water (60ml)
  • 2 tablespoons olive oil (30ml)
  • 1 tablespoon apple cider vinegar (15ml)
  • to taste N/A Salt (to taste)
  • Preferred N/A spices (such as cumin, red pepper flakes, thyme, etc.) (as desired)
  • 1 tablespoon Sesame seeds (for topping)

Instructions 

  • Blend all ingredients (except sesame seeds) until smooth.
  • Shape the mixture into fry shapes on a parchment-lined tray.
  • Sprinkle sesame seeds on top of each fry.
  • Bake at 200°C (390°F) for 20-25 minutes until golden and crispy.

Notes

For extra flavor, add your favorite spices to the mixture before shaping.
Calories: 250kcal
Cost: $12
Course: Appetizer, Snack
Cuisine: Vegetarian
Keyword: Chickpeas

Welcome to your go-to recipe for oatmeal waffles, where simplicity meets deliciousness! These waffles are not only quick to make but also packed with nutrients, making them a perfect choice for breakfast or a delightful snack. In under 30 minutes, you’ll have warm, fluffy waffles that are sure to please everyone at the table. Let’s dive into why this recipe is a must-try!

Why You’ll Love This Recipe

  • Quick and easy: With just a few ingredients and a blender, you can have these waffles ready in no time.
  • Nutritious: Made with rolled oats, these waffles are high in fiber and can help keep you feeling full longer.
  • Customizable: Feel free to add your favorite mix-ins like berries, nuts, or chocolate chips to elevate your waffles.
  • Freezer-friendly: Make a big batch and freeze them for busy mornings—simply pop them in the toaster for a quick meal!
  • Perfect for all diets: This recipe is naturally gluten-free (just ensure your oats are certified), dairy-free, and can be adapted for vegan diets.

Ingredient Breakdown

Let’s take a closer look at the ingredients that make these oat waffles not only delicious but also nutritious:

  • Rolled oats: The star of the recipe! They provide a hearty texture and are a great source of fiber.
  • Baking powder: This ingredient helps the waffles rise, giving them that fluffy texture we all love.
  • Sea salt: A pinch enhances the flavors and balances the sweetness.
  • Cinnamon: This aromatic spice adds warmth and depth to the waffles.
  • Water: Used to blend everything together; feel free to substitute with milk for a creamier texture.
  • Coconut oil: Adds moisture and a subtle coconut flavor—can be replaced with any neutral oil.
  • Egg: Binds the ingredients and adds richness. For a vegan option, use a flax egg or applesauce.
  • Maple syrup: A natural sweetener that pairs beautifully with the oats.
  • Vanilla extract: Enhances the overall flavor profile.

How to Make Wholesome Oat Waffles

Making these waffles is as easy as 1-2-3! Here’s a step-by-step guide:

  1. Place all of the ingredients in a blender and blend until smooth.
  2. Allow the batter to sit in the blender for 10 minutes while you preheat your waffle iron.
  3. Spoon 1/4-1/3 cup of batter onto the heated waffle iron and cook until lightly browned and crisp (about 2-5 minutes). Enjoy!

Pro Tips for Perfect Waffles

Side profile of freshly made oat waffles, adorned with a hint of cinnamon.

To ensure your waffles turn out perfectly every time, check out these expert insights:

  • Preheat your waffle iron: A properly heated waffle iron will give you a crisp exterior and fluffy interior.
  • Don’t overmix the batter: Blend just until combined to keep the waffles light and airy.
  • Let the batter rest: This allows the oats to absorb moisture for better texture.
  • Use a non-stick spray: Even if your waffle iron is non-stick, a light spray can help with easy release.
  • Experiment with toppings: Try fresh fruit, yogurt, or nut butter to enhance your waffles.
  • Check doneness: Waffles should be golden brown and crisp before removing from the iron.
  • Keep warm: If making multiple batches, keep finished waffles warm in a low oven (200°F) until serving.

Common Mistakes and Troubleshooting

We all make mistakes in the kitchen, but don’t worry! Here are some common issues and how to fix them:

  • Waffles sticking to the iron: Ensure your waffle iron is well-greased and preheated. If sticking persists, check your batter consistency.
  • Waffles too dense: This can happen if you overmix the batter. Blend just until smooth for a light result.
  • Uneven cooking: Make sure to evenly spread the batter and close the lid of the waffle iron completely.
  • Waffles not crisping up: Ensure your waffle iron is hot enough and consider adding a bit more oil to the batter.

Variations to Try

Want to mix things up? Here are some delicious variations on your oatmeal waffles:

  • Berry Bliss: Add a cup of fresh or frozen berries (like blueberries or strawberries) into the batter for a fruity twist.
  • Chocolate Chip: Stir in some dark chocolate chips for a decadent treat that both kids and adults will love.
  • Nutty Banana: Mash half a ripe banana into the batter and add chopped nuts for added texture and flavor.
  • Spiced Pumpkin: Incorporate 1/4 cup of pumpkin puree and a dash of nutmeg for a seasonal spin.

Storage and Make-Ahead Instructions

Planning ahead? Here’s how to store and reheat your waffles:

  • Refrigerator: Store cooked waffles in an airtight container for up to 3 days.
  • Freezer: Place cooled waffles in a single layer on a baking sheet to freeze, then transfer to a freezer bag for up to 3 months.
  • Reheating: For best results, reheat frozen waffles in a toaster or oven until heated through and crisp.

Frequently Asked Questions

Got questions? We’ve got answers! Here are some common inquiries about oatmeal waffles:

  • Can I use quick oats instead of rolled oats? Yes, but the texture will be slightly different—rolled oats give a heartier result.
  • Can I make these waffles vegan? Absolutely! Substitute the egg with a flax egg or 1/4 cup of applesauce.
  • What can I use instead of coconut oil? Any neutral oil works, such as canola or vegetable oil.
  • How do I know when the waffles are done? They should be golden brown and crisp; check your waffle iron’s indicator light if it has one.
  • Can I double this recipe? Yes, simply double the ingredients and adjust cooking time as needed.
  • What toppings go well with oatmeal waffles? Try yogurt, fresh fruit, maple syrup, or nut butter for delicious combinations!
  • How do I make a smaller batch? Halve the ingredients for a smaller serving size.
  • Are these waffles gluten-free? Yes, as long as you use certified gluten-free oats!

Nutritional Tips and Dietary Adaptations

These waffles can be tailored to fit various dietary needs:

  • Low-carb: Substitute rolled oats with almond flour or coconut flour for a lower-carb option.
  • High-protein: Add a scoop of protein powder to the batter for an extra protein boost.
  • Dairy-free: Use almond milk or oat milk instead of water for a creamier batter.

Equipment Recommendations

To get the best results from this recipe, here’s what you’ll need:

  • High-speed blender: For smooth batter consistency.
  • Waffle iron: A reliable non-stick waffle iron will yield the best results.
  • Mixing bowls: Handy for measuring and preparing ingredients.

Serving Suggestions

Serve your delicious oat waffles with a variety of toppings:

  • Fresh fruit: Sliced bananas, berries, or apples add a refreshing touch.
  • Yogurt: A dollop of Greek yogurt makes a protein-packed addition.
  • Nut butter: Spread almond or peanut butter for added richness and flavor.
  • Maple syrup: Drizzle with pure maple syrup for classic sweetness.

With these tips and variations, you’re well-equipped to create the perfect batch of oatmeal waffles that everyone will love. Remember, cooking is about exploring flavors and enjoying the process. So grab your ingredients and let’s make some delicious memories in the kitchen!

Thank you for joining me on this culinary adventure. I’m glad you’re here, and I hope you enjoy making these wholesome oat waffles as much as I do. Happy cooking!

Oat Waffles

Prep Time 10 minutes
Cook Time 5 minutes
Total Time 15 minutes
Servings 2 servings
Calories 180
Enjoy these healthy and delicious oat waffles, perfect for a quick breakfast or brunch.

Ingredients

Dry ingredients

  • 2/3 cup rolled oats
  • 1 tsp baking powder
  • 1/4 tsp sea salt
  • 1/8 tsp cinnamon

Wet ingredients

  • 3/8 cup water
  • 2 tbsp melted coconut oil
  • 1 egg egg
  • 1 tbsp maple syrup
  • 1/2 tsp vanilla

Instructions 

  • Blend all ingredients until smooth, then let sit for 10 minutes.
  • Preheat waffle iron.
  • Spoon batter onto waffle iron and cook until golden (2-5 minutes).
  • Serve and enjoy!

Notes

For extra flavor, add fresh fruit or nuts.
Calories: 180kcal
Cost: $8
Course: Breakfast
Cuisine: American
Keyword: Oats

Start Your Day Right with Apple Cinnamon Overnight Oats

Are you tired of the morning rush and looking for a delicious yet nutritious breakfast option? Look no further! Our Apple Cinnamon Overnight Oats recipe is designed for busy mornings, allowing you to prep the night before and wake up to a delightful meal that fuels your day. With just a few simple ingredients and minimal effort, these creamy oats are packed with flavor, and they’re perfect for anyone wanting to enjoy a wholesome breakfast without the stress.

Why You’ll Love This Recipe

This recipe isn’t just easy to make; it’s also versatile and packed with benefits. Here are five reasons why you’ll love our Apple Cinnamon Overnight Oats:

  • Quick and Easy: Prep takes just 10 minutes! Combine ingredients and let the fridge do the work overnight.
  • Nutritious Start: Rolled oats provide fiber and energy, while apples add natural sweetness and vitamins.
  • Customizable: Use your favorite milk or yogurt and experiment with different fruits or spices!
  • Dairy-Free Options: Easily make this recipe vegan by opting for almond milk and skipping the yogurt.
  • Meal Prep Friendly: Make multiple servings at once and store them in jars for grab-and-go breakfasts all week!

Ingredients You’ll Need

Gather these simple ingredients to create your Apple Cinnamon Overnight Oats:

  • 1 cup rolled oats: Choose old-fashioned oats for the best texture.
  • 1 cup almond milk: Or any milk of your choice for a creamy base.
  • 1 apple, diced: Gala or Honeycrisp apples work wonderfully for sweetness and crunch.
  • 1 tsp cinnamon: Adds that warm, cozy flavor we all love.
  • 1 tsp maple syrup (optional): For added sweetness if desired.
  • 1/4 cup yogurt (optional): Use Greek or dairy-free yogurt for creaminess.

How to Make Apple Cinnamon Overnight Oats

Freshly prepared apple cinnamon overnight oats with a hint of cinnamon sprinkled on top.

Follow these simple steps to prepare your oats:

  1. In a bowl or jar, combine the rolled oats, almond milk, diced apple, cinnamon, and maple syrup.
  2. Stir well until all ingredients are mixed evenly.
  3. If you prefer a creamier texture, fold in the yogurt at this stage.
  4. Cover the bowl or jar and refrigerate overnight so the flavors meld beautifully.
  5. In the morning, give it a good stir and enjoy it cold, or warm it up in the microwave for a comforting dish.

Pro Tips for Perfect Overnight Oats

To ensure your Apple Cinnamon Overnight Oats turn out perfectly every time, consider these expert insights:

  • Use airtight containers: This keeps your oats fresh and prevents any fridge odors from seeping in.
  • Let it sit longer: The longer the oats soak, the creamier they become! Aim for at least 6 hours.
  • Mix in extras: Consider adding chia seeds or flaxseed for added nutrition and texture.
  • Choose seasonal fruits: In the fall, add roasted pumpkin; in the summer, try fresh berries!
  • Adjust flavors: Feel free to tweak the cinnamon or maple syrup based on your personal taste.
  • Try different milks: Coconut milk or oat milk can add unique flavors to your oats.
  • Be mindful of portions: If you’re making multiple servings, keep the ingredient ratios consistent.
  • Garnish before serving: Add nuts, seeds, or additional fruits on top for a beautiful presentation.

Common Mistakes and Troubleshooting

Even simple recipes can have their hiccups. Here’s how to avoid some common pitfalls:

  • Too thick: If your oats are too thick in the morning, add a splash more milk to loosen them up.
  • Too mushy: Ensure you’re using the right type of oats—old-fashioned is best for texture.
  • Flavorless: Don’t skip the cinnamon or maple syrup! They are key to enhancing the overall flavor.
  • Not enough sweetness: You can always add a drizzle of honey or more maple syrup in the morning.

Delicious Variations to Try

Want to mix things up? Here are four delicious variations of the classic Apple Cinnamon Overnight Oats:

  • Pear and Ginger: Substitute the apple with diced pear and add a pinch of ground ginger for a spicy twist.
  • Chocolate Chunk: Add cocoa powder and dark chocolate chunks for a dessert-like version.
  • Nut Butter Delight: Stir in a tablespoon of almond or peanut butter for added protein and creaminess.
  • Berry Blast: Replace apple with mixed berries for a refreshing summer version!

Storage and Make-Ahead Instructions

Your Apple Cinnamon Overnight Oats can be stored easily, making them perfect for meal prep:

  • Fridge Storage: Keep in an airtight container for up to 5 days. Each jar can be taken out as needed.
  • Freeze: For longer storage, freeze portions in jars, but remember to leave space for expansion.
  • Thawing: When freezing, transfer to the fridge to thaw overnight before consuming.

Frequently Asked Questions

Here are some common questions about making Apple Cinnamon Overnight Oats:

  • How long do these oats last in the fridge? They can be stored for up to 5 days.
  • Can I use steel-cut oats? Yes, but they require longer soaking time and more liquid.
  • Do I need to peel the apples? It’s optional! Leaving the skin on adds extra fiber.
  • Can I make this recipe vegan? Absolutely! Just use almond milk and skip the yogurt.
  • What’s the best way to serve them? You can enjoy them cold straight from the fridge or warm them in the microwave.
  • Can I add protein powder? Yes, mix a scoop into your oats for an extra protein boost!
  • Are there gluten-free options? Yes, ensure to use certified gluten-free oats.
  • What other toppings can I add? Nuts, seeds, coconut flakes, or more fruits work great!

Nutrition Tips and Dietary Adaptations

To make your breakfast even more nutritious, consider these tips:

  • Add protein: Incorporate Greek yogurt or a protein powder to enhance your breakfast.
  • Incorporate healthy fats: Add nuts or seeds for extra crunch and nutritional benefits.
  • Go for whole foods: Always opt for whole, unprocessed ingredients when possible.

Kitchen Equipment Recommendations

To make this recipe, you’ll need some basic kitchen tools:

  • Measuring cups: For accurate ingredient measurements.
  • Bowl or jars: To mix and store your overnight oats.
  • Spoon or spatula: For stirring ingredients together.
  • Microwave or stovetop: For warming your oats if preferred.

Serving Suggestions

Here are a few fun ways to serve your Apple Cinnamon Overnight Oats:

  • Top with fresh fruits: Add additional slices of apple or banana on top before serving.
  • Drizzle with honey: A touch of honey can enhance the sweetness.
  • Sprinkle with nuts: Chopped walnuts or pecans add a delightful crunch.

Now that you’re armed with this delicious Apple Cinnamon Overnight Oats recipe and all the tips to make it your own, you’re ready to enjoy a nourishing breakfast that fits perfectly into your busy lifestyle. Remember, cooking should be fun and stress-free, so don’t hesitate to experiment and find what works best for you. Happy cooking!

Apple Cinnamon Overnight Oats

Prep Time 10 minutes
Total Time 10 minutes
Servings 2 servings
Calories 250
A quick and nutritious breakfast that combines the flavors of apple and cinnamon with creamy oats, perfect for busy mornings.

Ingredients

Base

  • 1 cup rolled oats
  • 1 cup almond milk
  • 1 apple diced apple
  • 1 tsp cinnamon
  • 1 tsp maple syrup (optional)
  • 1/4 cup yogurt (optional)

Instructions 

  • Combine oats, almond milk, apple, cinnamon, and maple syrup in a jar or bowl.
  • Stir well until evenly mixed.
  • If desired, fold in yogurt for creaminess.
  • Cover and refrigerate overnight.
  • In the morning, stir and enjoy cold or warm.

Notes

Prepare the night before for a quick breakfast.
Calories: 250kcal
Cost: $4
Course: Breakfast
Cuisine: American
Keyword: Oats

Unlock the Delight of Easy Spinach Cheese Squares

If you’re looking for a deliciously simple snack or light meal that packs a nutritional punch, look no further than these easy spinach cheese squares. In just a little over half an hour, you can create a dish that’s not only delightful to the palate but also incredibly satisfying. This recipe brings together fresh spinach and rich cheeses for a treat that’s perfect for kids, adults, and everyone in between. Let’s dive into why you’ll love this recipe and how to make it shine in your kitchen!

Why You’ll Love This Recipe

These easy spinach cheese squares are more than just a snack—they’re a versatile dish that can be enjoyed at any time of the day. Here are five reasons to whip up this recipe:

  • Nutritious and Delicious: Packed with vitamins and minerals from fresh spinach, this dish is a great way to incorporate greens into your diet without compromising on flavor.
  • Quick and Easy: With minimal prep and cook time, you can have these squares ready to serve in about 30 minutes, making them an ideal choice for busy weeknights.
  • Versatile Serving Options: Enjoy them warm as a snack, serve them cold at a picnic, or pair them with a salad for a light lunch.
  • Kid-Friendly: The cheesy goodness and flavorful spinach make these squares a hit with kids, ensuring they’ll be gobbled up in no time.
  • Customizable: Feel free to experiment with different cheeses or add-ins to suit your taste preferences!

Ingredients Breakdown

To create these spinach cheese squares, you’ll need just a few simple ingredients. Here’s what you’ll be using:

  • Fresh Spinach (2 cups, packed): Look for vibrant, green leaves. For convenience, you can also use frozen spinach—just make sure it’s well-drained.
  • Cream Cheese (8 oz): This adds a rich creaminess. If you prefer a lighter version, consider using low-fat cream cheese or Greek yogurt.
  • Shredded Cheese (1 cup, any blend): Cheddar, mozzarella, or a mix will work beautifully, offering that gooey, melty texture.
  • Eggs (2 large): These act as a binder, helping hold the squares together.
  • All-Purpose Flour (1/2 cup): A key ingredient that helps to create the right consistency. For a gluten-free option, almond flour or oat flour can be great alternatives.
  • Garlic Powder (1 teaspoon): Adds a lovely depth of flavor. You can also use minced fresh garlic for extra zest.
  • Salt and Black Pepper (to taste): Essential for enhancing the flavors of the dish.

Step-by-Step Instructions

A slice of spinach cheese square with a creamy interior, garnished with herbs.

Ready to get cooking? Let’s break down the steps to ensure your spinach cheese squares turn out perfectly every time.

  • Step 1: Preheat Your Oven: Set your oven to 350°F (175°C) to prepare for baking.
  • Step 2: Prepare the Spinach: Wash the fresh spinach thoroughly and sauté it in a pan over medium heat for about 2-3 minutes until wilted. This helps release excess moisture.
  • Step 3: Combine Ingredients: In a large mixing bowl, combine the sautéed spinach, cream cheese, shredded cheese, eggs, flour, garlic powder, salt, and pepper. Mix until all ingredients are well incorporated.
  • Step 4: Transfer to Baking Dish: Pour the mixture into a greased 9×9 inch baking dish and smooth the top with a spatula.
  • Step 5: Bake: Place in the oven and bake for 25-30 minutes or until the top is golden and a toothpick inserted in the center comes out clean.
  • Step 6: Cool and Cut: Allow to cool for about 10 minutes before cutting into squares. This allows them to set properly.

Pro Tips for Perfect Spinach Cheese Squares

Here are some expert insights to elevate your cooking experience:

  • Ensure Thorough Drainage: If using frozen spinach, make sure to squeeze out as much water as possible to avoid soggy squares.
  • Experiment with Cheese: Try different combinations of cheese for various flavor profiles. Feta or goat cheese can add a tangy twist!
  • Spice It Up: Add a pinch of red pepper flakes or chopped jalapeños for a kick.
  • Fresh Herbs: Incorporating fresh herbs like dill, parsley, or basil can enhance the flavor immensely.
  • Storage Tips: Store leftovers in an airtight container in the fridge for up to 3 days. Reheat in the oven for the best texture.
  • Make Ahead: You can prepare the mixture a day in advance and simply bake it when ready to serve!
  • Cutting Technique: Use a sharp knife to cut clean squares after they’ve cooled slightly to maintain shape.
  • Presentation Matters: Serve with a dollop of sour cream or a side of marinara sauce for an extra touch of flavor.

Common Mistakes to Avoid

Even simple recipes can have pitfalls. Here are some common mistakes and how to troubleshoot them:

  • Overmixing the Batter: This can lead to tough squares. Mix until just combined for a lighter texture.
  • Underbaking: Make sure to bake until golden brown. If you notice it’s browning too quickly, cover with foil.
  • Neglecting Seasoning: Don’t forget to season your mixture! Taste and adjust salt and pepper before baking.

Variations to Try

Feel free to customize your spinach cheese squares with these delicious variations:

  • Herbed Spinach Cheese Squares: Add fresh herbs like thyme or oregano for an aromatic twist.
  • Spicy Jalapeño Spinach Cheese Squares: Incorporate diced jalapeños for a spicy kick that complements the cheese.
  • Sun-Dried Tomato Spinach Cheese Squares: Mix in chopped sun-dried tomatoes for a burst of flavor and color.
  • Meat Lover’s Spinach Cheese Squares: Add cooked crumbled sausage or bacon for a hearty version.

Storage and Make-Ahead Instructions

These spinach cheese squares are perfect for meal prep! Here’s how to store and prepare them ahead of time:

  • Refrigerator: Store in an airtight container in the fridge for up to 3 days. Reheat in the oven or microwave.
  • Freezer: Freeze cut squares in a single layer on a baking sheet, then transfer to a freezer bag for up to 2 months. Reheat from frozen in the oven.
  • Prepare Ahead: You can prepare the mixture ahead of time and store it covered in the fridge for up to 24 hours before baking.

FAQs

Here are some frequently asked questions about this recipe:

  • Can I use frozen spinach? Yes, just ensure it’s well drained before mixing.
  • What can I substitute for cream cheese? Greek yogurt or low-fat cream cheese are great alternatives.
  • How do I know when they are done baking? They are done when golden on top and a toothpick inserted in the center comes out clean.
  • Can I add meat to this recipe? Absolutely! Cooked sausage or bacon can be great additions.
  • How do I store leftovers? Keep them in an airtight container in the fridge for up to 3 days.
  • Can I freeze these squares? Yes, freeze in a single layer before transferring to a freezer bag.
  • What is the best way to reheat them? Reheat in the oven for optimal texture, or microwave for convenience.
  • Are these squares gluten-free? You can make them gluten-free by using almond flour or a gluten-free flour blend.

Nutritional Tips and Dietary Adaptations

These spinach cheese squares are not only delicious but can also be tailored to fit various dietary needs:

  • Low-Carb Option: Swap flour for almond flour or omit it altogether for a low-carb version.
  • Dairy-Free Option: Use dairy-free cream cheese and cheese alternatives such as cashew cheese.
  • Vegan Option: Substitute eggs with flax eggs (1 tablespoon flaxseed meal + 2.5 tablespoons water) and use vegan cheese.

Essential Equipment

To make the process smoother, here’s what you’ll need:

  • Mixing Bowl: A large bowl for combining ingredients.
  • Baking Dish: A 9×9 inch pan is ideal for even baking.
  • Spatula: Useful for spreading the mixture evenly.
  • Oven Mitts: Safety first! Always use mitts when handling hot dishes.

Serving Suggestions

These easy spinach cheese squares can be enjoyed in various delightful ways:

  • As a Snack: Serve warm with a side of marinara or ranch dressing for dipping.
  • As a Meal: Pair with a fresh salad for a satisfying lunch or light dinner.
  • At Gatherings: Cut into smaller squares for appetizers at parties or potlucks.

Conclusion

These easy spinach cheese squares are a fantastic way to enjoy a nutritious snack or meal that’s quick to prepare and pleasing to the palate. With their cheesy goodness and vibrant spinach, they’re sure to become a staple in your kitchen. So gather your ingredients, follow the steps, and enjoy the delightful flavors you’ve created. Happy cooking, and remember, great meals don’t require perfection—just a willingness to try!

Easy Spinach Cheese Squares

Prep Time 10 minutes
Cook Time 30 minutes
Total Time 40 minutes
Servings 9 pieces
Calories 250
Delicious and cheesy spinach squares perfect for a quick snack or appetizer. Simple to make and full of flavor.

Ingredients

Main

  • 2 cups Fresh Spinach (packed)
  • 8 oz Cream Cheese
  • 1 cup Shredded Cheese (any blend)
  • 2 large Eggs
  • 1/2 cup All-Purpose Flour
  • 1 teaspoon Garlic Powder
  • to taste Salt and Black Pepper

Instructions 

  • Preheat oven to 350°F (175°C).
  • Sauté spinach until wilted, then mix with other ingredients.
  • Pour mixture into a greased 9x9 inch dish and smooth top.
  • Bake for 25-30 minutes until golden.
  • Cool for 10 minutes before cutting into squares.

Notes

Use any shredded cheese for variety and flavor.
Calories: 250kcal
Cost: $10
Course: Appetizer
Cuisine: American
Keyword: Spinach

Delightfully Healthy Blueberry Muffins: Your New Go-To Recipe

Welcome to your ultimate guide for making diabetic blueberry muffins that are not only delicious but also friendly for your blood sugar levels! If you’re seeking a scrumptious treat that combines wholesome ingredients with an easy-to-follow recipe, you’ve come to the right place. In this article, we’ll explore everything from the ingredients you’ll need to tips for making the perfect muffins. Let’s dive in!

Why You’ll Love This Recipe

These muffins are perfect for breakfast, a snack, or even a light dessert. Here’s why you’ll love making them:

  • Diabetic Friendly: Made with whole wheat flour and natural sweeteners, these muffins help manage your sugar levels.
  • Rich in Fiber: The use of whole grains and blueberries adds fiber, which is great for digestion and keeping you full.
  • Easy Preparation: With just a few simple steps, you can whip up a batch in no time.
  • Versatile: These muffins can be enjoyed fresh or frozen, making them a perfect make-ahead option.
  • Deliciously Nutritious: Packed with antioxidants from blueberries, they provide health benefits while satisfying your sweet tooth.

Ingredient Breakdown

Understanding the ingredients in your diabetic blueberry muffins is crucial for both taste and health. Here’s what you’ll need:

  • 1 ½ cups whole wheat flour: A healthier alternative to white flour, it adds fiber and nutrients.
  • 1 cup fresh blueberries: These antioxidants help manage blood sugar levels and bring natural sweetness.
  • ½ cup plain Greek yogurt: This adds moisture and protein, enhancing the texture of your muffins.
  • ¾ cup natural sweetener: Use stevia or erythritol for a low-calorie, diabetic-friendly option.
  • 2 large eggs: Eggs bind the ingredients and provide protein.
  • ½ teaspoon baking powder: This helps your muffins rise.
  • ½ teaspoon baking soda: A leavening agent that works with the yogurt for a fluffy texture.
  • Pinch of salt: Enhances the flavors of the other ingredients.

Ingredient Substitutions

Freshly baked blueberry muffins with a healthy twist, highlighting their whole wheat texture and colorful blueberries.

Don’t have everything on hand? Here are some easy swaps:

  • Flour: Use almond flour or oat flour for a gluten-free option.
  • Sweetener: Maple syrup or honey can be used but keep in mind they will add sugar.
  • Greek Yogurt: Unsweetened applesauce can be a great alternative for lower fat content.

How to Prepare Diabetic Blueberry Muffins

Follow these simple steps for baking your muffins:

  1. Preheat your oven: Set it to 350°F (175°C) and prepare a muffin tin with liners or grease it lightly.
  2. Mix dry ingredients: In a bowl, combine the whole wheat flour, baking powder, baking soda, and a pinch of salt.
  3. Whisk wet ingredients: In another bowl, mix the eggs, Greek yogurt, and natural sweetener until smooth.
  4. Combine mixtures: Gently fold the wet ingredients into the dry ingredients until just blended.
  5. Add blueberries: Carefully fold in the fresh blueberries to prevent them from breaking.
  6. Fill muffin cups: Fill each cup about two-thirds full with the batter.
  7. Bake: Place in the oven and bake for 20-25 minutes, or until golden brown and a toothpick comes out clean.

Pro Tips for Perfect Muffins

To ensure your muffins turn out perfectly every time, consider these expert insights:

  • Room temperature ingredients: Ensure your eggs and yogurt are at room temperature for better mixing.
  • Don’t overmix: Overmixing can make your muffins dense; mix until just combined.
  • Cool before serving: Allow muffins to cool in the tin for a few minutes before transferring to a wire rack.
  • Experiment with flavors: Add spices like cinnamon or nutmeg for a flavor boost.
  • To freeze: Place cooled muffins in an airtight container or freezer bag for up to 3 months.
  • Check doneness: Use a toothpick to test; it should come out clean when the muffins are fully cooked.

Common Mistakes and Troubleshooting

Even the best cooks face challenges. Here are common mistakes and how to fix them:

  • Dense muffins: This usually happens due to overmixing or too much flour. Make sure to measure accurately!
  • Too dry: If your muffins are dry, you might have overbaked them or not added enough moisture. Consider adding an extra tablespoon of yogurt next time.
  • Burned tops: If your muffins burn on top, try lowering the oven temperature by 25°F and checking for doneness sooner.

Variations You Can Try

Make this recipe your own by trying out these variations:

  • Nutty Addition: Fold in ½ cup of chopped walnuts or almonds for added crunch and healthy fats.
  • Chocolate Chip: Add a handful of sugar-free chocolate chips for a sweet twist.
  • Banana Blueberry: Mix in ½ mashed banana for extra moisture and natural sweetness.
  • Coconut Flavored: Incorporate ¼ cup of shredded unsweetened coconut for a tropical flair.

Storage and Make-Ahead Instructions

These muffins are perfect for meal prep! Here’s how to store and prepare them ahead:

  • Room Temperature: Store in an airtight container for 2-3 days.
  • Refrigerator: Keep them in the fridge for up to a week.
  • Freezing: Freeze muffins in a single layer, then transfer to an airtight container. They can last up to 3 months.
  • Reheating: Warm them in the microwave for 15-20 seconds or in the oven at 350°F for about 10 minutes.

Nutrition Tips and Dietary Adaptations

To maximize the health benefits of your muffins:

  • Watch your portions: Enjoy one muffin at a time to keep your sugar levels in check.
  • Prioritize whole ingredients: Opt for organic blueberries and natural sweeteners wherever possible.
  • Pair with protein: Enjoy your muffin with a side of scrambled eggs or Greek yogurt for a balanced meal.

Equipment Recommendations

For the best results, here’s the kitchen equipment you’ll need:

  • Muffin tin: A standard 12-cup muffin tin is perfect for this recipe.
  • Mixing bowls: Use at least two medium bowls for mixing dry and wet ingredients.
  • Whisk: A good whisk helps combine ingredients thoroughly.
  • Measuring cups and spoons: Accurate measurements are crucial for baking success.
  • Cooling rack: This allows muffins to cool evenly after baking.

Serving Suggestions

These muffins are as versatile as they are delicious! Here are some serving ideas:

  • Breakfast: Pair with a side of fruit and yogurt for a complete meal.
  • Snack: Enjoy them with a cup of tea or coffee for a delightful afternoon pick-me-up.
  • Brunch: Serve these muffins alongside scrambled eggs and fresh fruit for a balanced brunch spread.

Frequently Asked Questions

Let’s answer some common questions about these muffins:

  • Can I use frozen blueberries? Yes! Frozen blueberries work well; just fold them in while still frozen.
  • How do I know when my muffins are done? Insert a toothpick; if it comes out clean, they’re ready!
  • Can I make these muffins vegan? Yes! Substitute eggs with flax eggs and Greek yogurt with plant-based yogurt.
  • How many carbs are in these muffins? Each muffin typically contains 15-20 grams of carbs, depending on the sweetener used.
  • Can I add other fruits? Absolutely! Try adding chopped apples or peaches for a fruity twist.
  • What’s the best way to store leftovers? Keep them in an airtight container at room temperature or in the fridge for longer shelf life.
  • Can these muffins be made ahead of time? Yes! They freeze well for up to 3 months.
  • Are these muffins gluten-free? You can make them gluten-free by using almond or oat flour instead of whole wheat flour.

Conclusion

Now that you have the ultimate recipe for diabetic blueberry muffins, it’s time to get cooking! Remember, cooking is all about enjoying the process and experimenting with flavors. These muffins are perfect for anyone looking to enjoy a tasty treat without compromising their health. So gather your ingredients, preheat that oven, and let’s make some delicious memories in the kitchen!

Diabetic Blueberry Muffins

Prep Time 10 minutes
Cook Time 20 minutes
Total Time 30 minutes
Servings 12 muffins
Calories 150
Enjoy these healthy, low-sugar blueberry muffins perfect for a diabetic-friendly snack or breakfast.

Ingredients

Dry ingredients

  • 1 ½ cups whole wheat flour
  • ½ cup plain Greek yogurt
  • ¾ cup natural sweetener (stevia or erythritol)
  • 2 large eggs
  • ½ teaspoon baking powder
  • ½ teaspoon baking soda
  • Pinch salt

Blueberries

  • 1 cup fresh blueberries (or frozen)

Instructions 

  • Preheat oven to 350°F (175°C) and prepare muffin tin.
  • Mix dry ingredients: flour, baking powder, baking soda, and salt.
  • Whisk eggs, Greek yogurt, and sweetener until smooth.
  • Combine wet and dry mixtures gently, then fold in blueberries.
  • Fill muffin cups two-thirds full and bake for 20-25 minutes.

Notes

Use frozen blueberries if fresh are unavailable; do not thaw before adding.
Calories: 150kcal
Cost: $12
Course: Breakfast
Cuisine: American
Keyword: Blueberry, Diabetic, Healthy