Author

Steven

Browsing

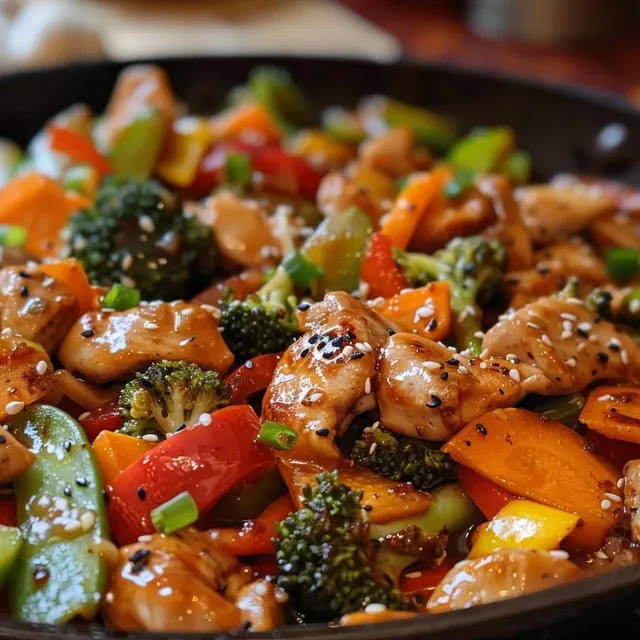
Unlock Flavor with Your Smoky Chipotle Chicken Bowl

Welcome to your new favorite weeknight dinner! The Smoky Chipotle Chicken Bowl is not only a feast for the senses, but it’s also a protein-packed meal that’s quick, easy, and bursting with vibrant flavors. Whether you’re winding down after a long day or looking to impress guests, this dish delivers satisfaction without the stress. Let’s dive into why you’ll love this recipe and how to make it perfectly every time!

Why You’ll Love This Recipe

This isn’t just any chicken bowl; it’s a culinary escape that you can create right in your kitchen. Here are a few reasons to get excited:

  • Quick & Easy: With minimal prep and cooking time, this recipe will have you enjoying dinner in under 30 minutes.
  • High in Protein: Each serving offers a whopping 38g of protein, making it a great choice for a post-workout meal!
  • Customizable: Feel free to swap ingredients based on your pantry. You can make it vegetarian or vegan by using tofu or beans instead.
  • Flavor Explosion: The smoky chipotle and creamy sauce create a harmonious balance that will tantalize your taste buds.
  • Meal Prep Friendly: Perfect for making ahead and storing, ensuring you have delicious meals ready for busy days.

Ingredients Breakdown

Let’s gather everything we need to create this delightful dish. Here’s what you’ll need:

  • Chicken: 2 pieces boneless skinless chicken breasts or thighs. Feel free to use tofu or a plant-based substitute for a vegetarian option.
  • Olive Oil: 2 tablespoons, for marinating and cooking.
  • Lime Juice: 2 tablespoons (fresh is best!). This adds brightness to the dish.
  • Garlic: 2 cloves, minced, for that aromatic punch.
  • Chipotle Chili Powder: 1 teaspoon, to impart that signature smoky flavor.
  • Smoked Paprika: 1 teaspoon, enhancing the depth of flavor.
  • Cumin: 1 teaspoon, for an earthy undertone.
  • Salt: 1 teaspoon, to enhance all flavors.
  • Black Pepper: ½ teaspoon, for a slight kick.
  • Black Beans: 1 cup, canned works great (and rinsed!), adding fiber and protein.
  • Corn: 1 cup (grilled, roasted, or canned), for sweetness and texture.
  • Avocado: 1, sliced, for creaminess.
  • Cilantro: ¼ cup, chopped, for freshness.
  • Sour Cream or Greek Yogurt: ½ cup, for the creamy sauce.
  • More Lime Juice: 2 tablespoons, for the sauce to brighten it up.
  • Chipotle Peppers in Adobo: 1 tablespoon, minced, to intensify the smoky flavor.
  • Garlic Powder: 1 teaspoon, for added flavor.
  • Honey: 1 teaspoon, balancing the heat of the chipotle.

How to Make Your Smoky Chipotle Chicken Bowl

Ready to cook? Let’s break it down step-by-step:

  • Step 1: In a medium mixing bowl, whisk together olive oil, lime juice, minced garlic, chipotle chili powder, smoked paprika, cumin, salt, and black pepper until well combined.
  • Step 2: Add chicken to the marinade, turning to coat completely. Cover and refrigerate for at least 30 minutes (or overnight for deeper flavor).
  • Step 3: Heat a grill or large skillet over medium-high heat. Remove chicken from marinade and cook for 6-7 minutes per side until the internal temperature reaches 165°F and the chicken has beautiful char marks.
  • Step 4: Let the chicken rest for 5 minutes, then slice into strips.
  • Step 5: While the chicken rests, warm black beans in a small saucepan or microwave, adding a pinch of cumin and salt. Char corn in a hot dry skillet for about 3-4 minutes until golden spots appear.
  • Step 6: Make the creamy chipotle sauce by whisking together sour cream or Greek yogurt, lime juice, minced chipotle peppers, garlic powder, and honey in a small bowl. Adjust heat level to your preference.
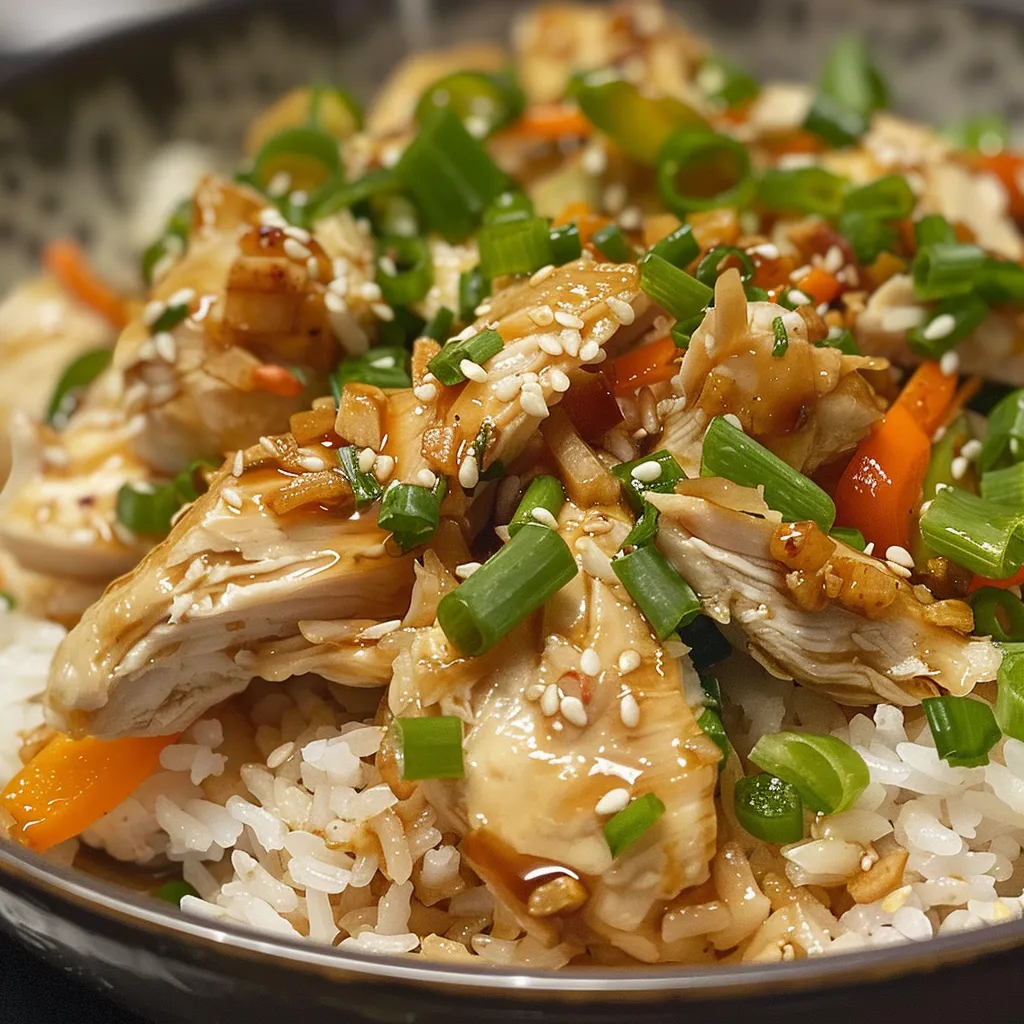
  • Step 7: Assemble your bowls by layering warm black beans, charred corn, sliced avocado, and sliced chicken. Drizzle generously with creamy chipotle sauce and finish with fresh cilantro.

Pro Tips for Perfect Chipotle Chicken Bowls

To ensure your chicken bowls turn out perfect every time, here are some expert tips:

  • Marinate Longer: For deeper flavor, marinate the chicken overnight.
  • Grill Marks: Ensure your grill or skillet is hot enough before adding the chicken for those beautiful char marks.
  • Fresh Ingredients: Use fresh herbs and produce wherever possible for the best flavor.
  • Adjust Spice Level: Feel free to add more or less chipotle seasoning according to your heat preference.
  • Layer Wisely: Start with beans as a base, then add corn, chicken, and toppings to create a visually appealing bowl.
  • Chill Your Avocado: Keep your avocado slices in the fridge until serving to maintain their freshness.
  • Customize Toppings: Try adding cheese, salsa, or different veggies like bell peppers or jalapeños.
  • Meal Prep: Cook extra chicken and store it for future meals. It reheats well!
  • Serve Warm: The components should be warm, especially the beans and chicken, to create a satisfying meal.
  • Garnish Generously: Don’t skimp on the cilantro or drizzle of sauce; they add great flavor!

Common Mistakes and Troubleshooting

If you run into issues, here are some common mistakes and solutions:

  • Dry Chicken: If your chicken turns out dry, it may have been overcooked. Use a meat thermometer to ensure it’s cooked to 165°F.
  • Too Spicy: If it’s too spicy, balance it with more sour cream or yogurt in the sauce.
  • Bland Flavor: If the dish lacks flavor, you may need to adjust the seasoning or add more lime juice.
  • Overcooked Vegetables: If your corn is mushy, cook it just enough to get char marks rather than cooking it all the way through.

Variations to Try

This dish is incredibly versatile. Here are some variations to keep things exciting:

  • Vegetarian Version: Replace chicken with grilled portobello mushrooms or seasoned tofu for a vegetarian option.
  • Spicy Kick: Add diced jalapeños or a splash of hot sauce to the creamy chipotle sauce for extra heat.
  • Quinoa Base: Swap rice for quinoa to make the dish gluten-free and boost the protein content.
  • Southwestern Twist: Add roasted sweet potatoes and black olives for a different flavor profile.

Storage and Make-Ahead Instructions

Planning ahead? Here’s how to store and reheat your Smoky Chipotle Chicken Bowl:

  • Refrigeration: Store leftovers in an airtight container in the fridge for up to 3 days.
  • Freezing: You can freeze the chicken and beans separately for up to 2 months.
  • Reheating: Reheat in the microwave or on the stovetop until warmed through, adding a splash of water to prevent drying out.
  • Make-Ahead: Marinate the chicken the night before for maximum flavor, and pre-chop veggies for quick assembly.

Comprehensive FAQ

Got questions? We’ve got answers! Here are some frequently asked questions:

  • Can I use chicken thighs instead of breasts? Yes, chicken thighs can add extra juiciness and flavor.
  • What can I substitute for black beans? You can use pinto beans or chickpeas as alternatives.
  • Is this recipe gluten-free? Yes, all ingredients are naturally gluten-free; just ensure your sauces are gluten-free.
  • Can I make this dish vegan? Absolutely! Substitute chicken with grilled tofu and use dairy-free yogurt.
  • How can I make it spicier? Increase the amount of chipotle chili powder or add fresh jalapeños.
  • What toppings do you recommend? Avocado, cheese, salsa, and fresh lime are all great options!
  • How do I store leftovers? Keep them in an airtight container in the fridge for up to 3 days.
  • Can I prep this dish ahead of time? Yes, marinate the chicken and chop veggies the night before for quick assembly.

Nutrition Tips and Dietary Adaptations

Here are some tips to make this dish fit your nutritional needs:

  • Low-Carb Option: Serve the chicken and toppings over leafy greens instead of rice for a low-carb meal.
  • Increase Fiber: Add more beans or a variety of veggies to boost fiber content.
  • Healthy Fats: Avocado is a great source of healthy fats, so don’t skip it!
  • Calorie Awareness: Keep an eye on portion sizes, especially with sauces and toppings.

Equipment Recommendations

To make your cooking experience seamless, here are some recommended equipment:

  • Non-Stick Skillet: For easy cooking and cleanup when grilling the chicken.
  • Meat Thermometer: To ensure your chicken is perfectly cooked every time.
  • Mixing Bowls: For marinating and preparing your sauces.
  • Cutting Board: A sturdy board for chopping ingredients ensures safety and efficiency.

Serving Suggestions

Here are a few ideas to elevate your serving experience:

  • Family Style: Serve everything on a large platter for a fun, family-style dinner.
  • Garnish: Top with extra cilantro, lime wedges, and a sprinkle of cheese for a finishing touch.
  • Pair with Sides: Serve with tortilla chips, a side salad, or corn on the cob for a complete meal.

Conclusion

The Smoky Chipotle Chicken Bowl is more than just a recipe; it’s a way to bring excitement to your weeknight meals. With its rich flavors and endless possibilities for customization, you’ll find yourself returning to this dish again and again. So, grab your ingredients and get ready to savor every bite! Happy cooking!

Smoky Chipotle Chicken Bowl: 38g Protein Per Serving

Prep Time 10 minutes
Cook Time 20 minutes
Total Time 30 minutes
Servings 4 servings
Calories 550
A flavorful and protein-packed chicken bowl with smoky chipotle flavors, perfect for a quick and satisfying meal.

Ingredients

Protein

  • 2 pieces boneless skinless chicken breasts or thighs
  • 2 tbsp olive oil
  • 2 tbsp lime juice (fresh preferred)
  • 2 cloves garlic (minced)
  • 1 tsp chipotle chili powder
  • 1 tsp smoked paprika
  • 1 tsp cumin
  • 1 tsp salt
  • 0.5 tsp black pepper
  • 1 cup cooked black beans (canned works great, rinsed)
  • 1 cup corn (grilled, roasted, or canned)
  • 1 piece avocado (sliced)
  • 0.25 cup fresh cilantro (chopped)
  • 0.5 cup sour cream (or Greek yogurt)
  • 2 tbsp lime juice (for sauce)
  • 1 tbsp chipotle peppers (in adobo, minced)
  • 1 tsp garlic powder
  • 1 tsp honey

Instructions 

  • Whisk together olive oil, lime juice, minced garlic, chipotle chili powder, smoked paprika, cumin, salt, and black pepper until well combined.
  • Marinate chicken in the mixture for at least 30 minutes, then grill or pan-fry until cooked through and charred, about 6-7 minutes per side. Rest and slice into strips.
  • Warm black beans and char the corn in a skillet. Prepare the chipotle sauce by mixing sour cream, lime juice, minced chipotle, garlic powder, and honey.
  • Assemble bowls with beans, corn, sliced avocado, and chicken. Drizzle with chipotle sauce and garnish with cilantro.

Notes

Adjust heat level by adding more or less chipotle peppers.
Calories: 550kcal
Cost: $15
Course: Main Course
Cuisine: Mexican
Keyword: Chicken

Unlock the Joy of Cooking with Quick and Wholesome Spinach Wraps

Are you ready to transform your breakfast routine with a deliciously simple recipe? These Easy Egg Cottage Cheese Spinach Wraps offer a delightful combination of nutrition and flavor, perfect for busy mornings or a quick lunch. In this guide, we’ll walk through everything you need to know to whip up these tasty wraps, ensuring that you feel confident and excited to cook. Let’s dive into the wonderful world of spinach wraps and discover why they might just become your new favorite meal!

Why You’ll Absolutely Love This Recipe

  • Quick and Simple: This recipe is designed for speed, taking only 30 minutes from start to finish, making it ideal for those hectic mornings.
  • Nutritious Ingredients: Packed with protein-rich eggs and cottage cheese, these wraps provide a healthy start to your day.
  • Versatile Flavor: With the addition of fresh spinach, garlic, and onion powder, these wraps are bursting with flavor that can be easily customized.
  • Make Ahead Option: Prepare a batch in advance, making them a convenient grab-and-go option for busy days.
  • Kid-Friendly: These wraps are a fun way to introduce kids to healthy eating, and they can enjoy helping out in the kitchen!

Key Ingredients You’ll Need

Understanding the ingredients is key to making the perfect spinach wrap. Here’s what you’ll need:

  • 1.5 cups fresh baby spinach: Packed with vitamins and minerals, spinach adds a vibrant green color and earthy flavor.
  • 3 large eggs: The protein powerhouse that binds everything together and adds a fluffy texture.
  • 1/4 cup cottage cheese: This creamy ingredient not only enhances the texture but also boosts protein content.
  • 1/4 teaspoon garlic powder: For a subtle yet flavorful kick, enhancing the overall taste profile.
  • 1/4 teaspoon onion powder: Adds depth and a hint of sweetness.

Step-by-Step Instructions

A detailed side view of a hearty egg spinach wrap, featuring a blend of creamy cottage cheese and leafy greens.

Let’s get cooking! Follow these easy steps to create your spinach wraps:

  1. Preheat your oven: Set your oven to 350°F (175°C) and line a standard rimmed baking sheet with parchment paper for easy cleanup.
  2. Blend the ingredients: In a high-speed blender, combine the spinach, eggs, cottage cheese, garlic powder, and onion powder. Blend until smooth and bright green, about 30 to 60 seconds.
  3. Spread the mixture: Pour the blended mixture onto the prepared parchment paper, spreading it into a large, even rectangle.
  4. Bake to perfection: Place in the oven and bake for 10 to 15 minutes, until the edges are slightly golden and the center feels firm.
  5. Cool and serve: Allow the wrap to cool for at least 5 minutes. Carefully flip it over, peel off the parchment, and cut into three equal wraps. Enjoy!

Pro Tips for the Perfect Spinach Wraps

To ensure the best results, consider these expert tips:

  • Use fresh ingredients: Opt for fresh spinach and high-quality eggs for the best flavor and nutrition.
  • Adjust seasonings to taste: Feel free to tweak the garlic and onion powder to suit your palate or experiment with fresh herbs.
  • Don’t skip the parchment paper: It makes it easier to remove the wraps from the baking sheet without tearing.
  • Let cool before cutting: This helps the wraps set and makes them easier to handle.
  • Experiment with toppings: Add salsa, Greek yogurt, or avocado for extra flavor and creaminess.
  • Try different cheeses: Swap cottage cheese for ricotta or cream cheese for a different taste.
  • Opt for a nonstick pan: This helps the mixture release easily, avoiding any sticking mishaps.
  • Make a double batch: These wraps freeze well, so make extra for future meals!

Common Mistakes and Troubleshooting

Even the best cooks make mistakes! Here are some common pitfalls and how to avoid them:

  • Wraps are too thin: Ensure your blend is thick enough and spread it evenly on the baking sheet.
  • Burnt edges: Keep an eye on the wraps as they bake; ovens can vary in temperature.
  • Wraps stick to the parchment: Always use parchment paper or a silicone baking mat for easy release.
  • Flavorless wraps: Don’t be shy with the spices! Taste the mixture before baking and adjust seasonings as needed.

Variations and Easy Substitutions

Feel free to get creative! Here are some fun variations to try:

  • Veggie-packed: Add chopped bell peppers, onions, or mushrooms to the mixture for added nutrition.
  • Herbed wraps: Incorporate fresh herbs like basil, cilantro, or parsley for a burst of flavor.
  • Cheesy wraps: Mix in shredded cheese such as mozzarella or cheddar for extra creaminess.
  • Spicy twist: Add a pinch of red pepper flakes or diced jalapeños for a spicy kick.

Storage and Make-Ahead Instructions

Want to prepare your wraps in advance? Here’s how to store them:

  • Refrigeration: Store wraps in an airtight container in the fridge for up to 3 days.
  • Freezing: Wrap individual portions in plastic wrap and place them in a freezer-safe bag for up to 2 months. Thaw in the fridge before reheating.
  • Reheating: Gently warm in the microwave or heat in a skillet until warmed through.

Comprehensive FAQ

Here are some frequently asked questions about these wraps:

  • Can I use frozen spinach?: Yes, but make sure to thaw and drain it well to avoid excess moisture.
  • What can I serve with these wraps?: They pair well with fresh fruit, yogurt, or a green salad.
  • Are these wraps gluten-free?: Yes, as long as you use gluten-free ingredients!
  • Can I make them dairy-free?: Substitute cottage cheese with a dairy-free alternative like tofu or cashew cream.
  • How do I know when they are done?: The edges should be slightly golden and the center firm to the touch.
  • Can I add protein?: Absolutely! Consider adding cooked chicken, turkey, or beans for an extra protein boost.
  • Are they suitable for meal prep?: Yes! They are perfect for meal prep and can be stored in the fridge or freezer.
  • How do I make them more flavorful?: Experiment with different spices, herbs, and toppings to enhance the flavor!

Nutritional Tips and Dietary Adaptations

These wraps are not only delicious but also nutritious. Here are some tips to keep them healthy:

  • Low-carb option: For a low-carb meal, skip the wraps and serve the filling in a bowl with fresh veggies.
  • Keto-friendly: Use egg whites instead of whole eggs and skip the cottage cheese.
  • Vegan adaptation: Replace eggs with a flaxseed meal or chia seed mixture and use a plant-based cheese option.
  • Boost fiber: Add in some black beans or lentils for added fiber and nutrients.

Essential Equipment Recommendations

Having the right tools can make your cooking experience more enjoyable:

  • High-speed blender: Essential for blending your ingredients into a smooth mixture.
  • Parchment paper: Makes for easy cleanup and prevents sticking.
  • Nonstick baking sheet: A great option for even cooking and easy removal.
  • Spatula: Useful for spreading the mixture evenly on the baking sheet.

Serving Suggestions

Once your wraps are ready, here are some delicious ideas for serving:

  • Top with salsa: Adds a zesty kick and freshness.
  • Serve with yogurt: A dollop of Greek yogurt can enhance creaminess.
  • Add avocado: Sliced or mashed avocado complements the flavors beautifully.
  • Pair with a side salad: Lighten up your meal with a refreshing salad.

Conclusion: Embrace the Joy of Cooking

Cooking should be a joyful experience, and these Easy Egg Cottage Cheese Spinach Wraps are a testament to that. With simple ingredients and straightforward steps, you’ll have a nutritious meal ready in no time. Whether you’re a seasoned chef or a kitchen novice, I hope this guide inspires you to get cooking and enjoy the flavors of homemade food. Remember, it’s not about perfection; it’s about having fun and nourishing your body with delicious meals. Happy cooking!

Easy Egg Cottage Cheese Spinach Wraps

Prep Time 5 minutes
Cook Time 15 minutes
Total Time 20 minutes
Servings 3 wraps
Calories 180
A quick and healthy recipe for spinach and egg wraps with cottage cheese, perfect for a nutritious breakfast or snack.

Ingredients

Vegetables and Dairy

  • 1.5 cups fresh baby spinach (tightly packed)
  • 3 large eggs
  • 1/4 cup cottage cheese
  • 1/4 teaspoon garlic powder
  • 1/4 teaspoon onion powder

Instructions 

  • Preheat oven to 350°F (175°C) and line a baking sheet with parchment.
  • Combine spinach, eggs, cottage cheese, garlic powder, and onion powder in a blender and blend until smooth.
  • Pour mixture onto parchment and spread into a rectangle.
  • Bake for 10-15 minutes until firm and edges are golden.
  • Cool for 5 minutes, flip, peel parchment, and cut into three wraps.

Notes

Use fresh spinach for best flavor and texture.
Calories: 180kcal
Cost: $8
Course: Breakfast
Cuisine: Healthy
Keyword: Cottage Cheese, Egg, Spinach

Welcome to Your New Favorite Cookie Recipe!

Are you ready to embark on a delicious baking adventure? Today, we’ll create Tropical Coconut Cookies that are not only easy to make but also bursting with flavor! These chewy delights will transport you straight to a sunny beach with their irresistible tropical taste. Whether you’re an experienced baker or just starting out, this recipe is designed to be approachable and rewarding. Let’s dive into the world of baking and discover why these coconut cookies are a must-try!

Why You’ll Love This Recipe

Here are some reasons why these coconut cookies will quickly become a staple in your baking repertoire:

  • Simple to Make: With straightforward ingredients and steps, you’ll whip these cookies up in no time!
  • Chewy Texture: Enjoy a delightful chewiness that stays fresh even the next day.
  • Versatile Flavor: Customize with your favorite add-ins like chocolate chips or nuts!
  • Diet-Friendly Options: Easily adaptable for gluten-free or dairy-free diets.
  • Perfect for Any Occasion: Great for parties, snacks, or a sweet treat for yourself!

Ingredient Breakdown

Let’s gather our ingredients! Here’s what you’ll need for these chewy coconut cookies, along with some substitution options:

  • 1 cup Butter (can substitute with margarine for a dairy-free version)
  • 1/2 cup Shortening (for a healthier option, try coconut oil)
  • 1 cup Brown Sugar (coconut sugar is a great lower glycemic alternative)
  • 2 large Eggs (aquafaba works well as a vegan substitute)
  • 2 tbsp Water (milk or non-dairy milk can enhance flavor)
  • 1 tsp Vanilla Extract (almond extract is a delicious alternative)
  • 2 cups All-Purpose Flour (gluten-free flour blends can be used)
  • 1 tsp Baking Powder (ensure it’s fresh for the best results)
  • 1 tsp Baking Soda
  • 1/2 tsp Salt (non-iodized salt is preferable for baking)
  • 1 cup Shredded Coconut (can use sweetened or unsweetened, depending on your preference)

Step-by-Step Instructions

Ready to bake? Follow these easy steps to make your coconut cookies:

  1. Preheat your oven to 350°F (175°C) and line a baking sheet with parchment paper.
  2. In a large bowl, cream together the butter, shortening, and brown sugar until light and fluffy.
  3. Add the eggs, water, and vanilla extract, mixing well until fully combined.
  4. In a separate bowl, whisk together the flour, baking powder, baking soda, and salt.
  5. Gradually add the dry ingredients to the wet mixture, stirring until just combined.
  6. Fold in the shredded coconut until evenly distributed throughout the dough.
  7. Drop spoonfuls of dough onto the prepared baking sheet, spacing them about 2 inches apart.
  8. Bake for 10-12 minutes or until the edges are lightly golden but the centers are still soft.
  9. Cool on the baking sheet for a few minutes before transferring to a wire rack to cool completely.

Pro Tips for Perfect Cookies

Want to elevate your cookie game? Here are some expert insights:

  • Room Temperature Ingredients: Ensure your butter and eggs are at room temperature for better mixing.
  • Don’t Overmix: Mix until just combined to keep your cookies tender.
  • Chill the Dough: For thicker cookies, chill the dough for 30 minutes before baking.
  • Keep an Eye on Baking Time: Ovens vary, so check your cookies a minute or two early.
  • Experiment with Toppings: Add chocolate chips, nuts, or dried fruit for a twist!
  • Store Properly: Keep cookies in an airtight container to maintain freshness.
  • Make a Double Batch: These cookies freeze well—just wrap them in plastic wrap and store in the freezer!
  • Test for Doneness: Cookies will firm up as they cool, so don’t be afraid of slightly under-baking!

Common Mistakes and Troubleshooting

Even seasoned bakers can run into issues. Here’s how to avoid common pitfalls:

  • Too Dry or Crumbly: This usually means too much flour. Use a kitchen scale for accuracy.
  • Flat Cookies: If your cookies spread too much, try chilling the dough or adding a bit more flour.
  • Overbaking: Watch your cookies closely; they should look set but not browned all over.
  • Uneven Baking: Rotate your baking sheet halfway through for even results.

Delicious Variations to Try

Feeling adventurous? Here are some fun variations to customize your coconut cookies:

  • Coconut Chocolate Chip Cookies: Add 1 cup of chocolate chips for a sweet and tropical blend.
  • Macadamia Nut Coconut Cookies: Fold in 1 cup of chopped macadamia nuts for a delightful crunch.
  • Almond Joy Cookies: Mix in chocolate chips and chopped almonds for a candy-inspired treat!
  • Coconut Lime Cookies: Add 1 tablespoon of lime zest for a refreshing citrus twist.

Storage and Make-Ahead Instructions

Keep your cookies fresh and delicious:

  • Storage: Store cookies in an airtight container at room temperature for up to 5 days or refrigerate for up to 1 week.
  • Freezing: Freeze cookies in a single layer, then transfer to a zip-top bag for up to 3 months.
  • Make-Ahead Dough: Prepare the dough and refrigerate for up to 3 days before baking.

Frequently Asked Questions

Here are some common questions about these delicious cookies:

  • Can I make these cookies gluten-free? Yes, just substitute the all-purpose flour with a gluten-free blend.
  • What kind of coconut should I use? You can use sweetened or unsweetened shredded coconut, depending on your taste preference.
  • How can I make these cookies vegan? Substitute the eggs with aquafaba and use margarine instead of butter.
  • What can I serve with these cookies? Pair them with a cup of tea, coffee, or a scoop of vanilla ice cream!
  • How do I know when the cookies are done? The edges should be lightly golden, and the centers will look slightly soft.
  • Can I add spices? Absolutely! Consider adding a pinch of cinnamon or nutmeg for extra warmth.
  • What if my dough is too sticky? If the dough feels too sticky, chill it in the fridge for 30 minutes.
  • Can I double the recipe? Yes, feel free to double the ingredients for a larger batch!

Nutritional Tips and Dietary Adaptations

Here are some options to make your cookies even healthier:

  • Reduce Sugar: Use less brown sugar or substitute with a sugar alternative.
  • Healthy Fats: Use avocado oil instead of butter for a heart-healthy swap.
  • Fiber Boost: Add oats or ground flaxseed to increase the fiber content.

Essential Equipment for Baking

To make your baking experience enjoyable, here’s what you’ll need:

  • Mixing Bowls: Have a set of varying sizes for mixing and measuring.
  • Baking Sheets: Use light-colored, non-stick baking sheets for even baking.
  • Parchment Paper: Line your baking sheets to prevent sticking and for easy cleanup.
  • Measuring Cups and Spoons: Accurate measurements are key to baking success.
  • Wire Rack: Cool your cookies properly to maintain their texture.

Serving Suggestions

How to enjoy these cookies? Here are a few ideas:

  • With Coffee or Tea: Enjoy them alongside your favorite hot beverage.
  • As Dessert: Serve warm with a scoop of ice cream for an indulgent treat.
  • Gift Them: Pack in a decorative box for a lovely homemade gift!

Conclusion

There you have it! A detailed guide to making the most delightful Tropical Coconut Cookies that are sure to become a favorite. With simple steps, adaptable ingredients, and delicious variations, you can bring the tropical taste of coconut into your kitchen with ease. Remember, cooking should be fun and stress-free. So roll up your sleeves, gather your ingredients, and let’s bake some cookies!

Coconut Cookies: Chewy Delights with a Tropical Twist

Prep Time 15 minutes
Cook Time 10 minutes
Total Time 25 minutes
Servings 24 cookies
Calories 150
Enjoy these chewy coconut cookies that bring a tropical flavor to your baking repertoire, perfect for a sweet treat or snack.

Ingredients

Dairy & Fat

  • 1 cup Butter (can substitute with margarine for a dairy-free version)
  • 0.5 cup Shortening (for a healthier option, try coconut oil)
  • 1 cup Brown Sugar (coconut sugar is a great lower glycemic alternative)

Eggs & Substitutes

  • 2 large Eggs (aquafaba works well as a vegan substitute)
  • 2 tbsp Water (milk or non-dairy milk can enhance flavor)

Flavorings

  • 1 tsp Vanilla Extract (almond extract is a delicious alternative)

Dry Ingredients

  • 2 cups All-Purpose Flour (gluten-free flour blends can be used)
  • 1 tsp Baking Powder (ensure it’s fresh for the best results)
  • 1 tsp Baking Soda
  • 0.5 tsp Salt (non-iodized salt is preferable for baking)

Coconut & Shredded Coconut

  • 1 cup Shredded Coconut (can use sweetened or unsweetened, depending on your preference)

Instructions 

  • Preheat oven to 350°F (175°C) and line baking sheets with parchment paper.
  • Cream together butter, shortening, and brown sugar until smooth.
  • Add eggs (or aquafaba), water, and vanilla; mix well.
  • In a separate bowl, whisk together flour, baking powder, baking soda, salt, and shredded coconut. Gradually add dry ingredients to wet mixture, mixing until combined.
  • Drop spoonfuls of dough onto prepared baking sheets and bake for 10 minutes or until golden brown.

Notes

For a chewier texture, slightly underbake the cookies and let them cool on the baking sheet.
Calories: 150kcal
Cost: $12
Course: Dessert
Cuisine: Tropical
Keyword: Coconut

Warm Up with Nourishing Turkey Vegetable Soup

As the seasons shift and the air gets a bit crisper, there’s nothing more comforting than a steaming bowl of Turkey Vegetable Soup. This hearty dish is perfect for busy weeknights, offering nutrition and flavor in every spoonful. Packed with fresh ingredients, it’s not just a meal; it’s a warm hug in a bowl. And guess what? It’s easy to make and adaptable to your pantry’s offerings. Let’s dive into why this soup deserves a spot in your kitchen!

Why You’ll Love This Recipe

This Turkey Vegetable Soup is more than just a delicious meal; it’s a versatile, nourishing option that you can feel good about serving. Here are some compelling reasons to whip up a batch:

  • Quick and Easy: This recipe comes together in under an hour, making it perfect for a weeknight dinner.
  • Healthy Ingredients: It’s loaded with vegetables and lean protein, making it a great choice for those looking to eat healthier.
  • Customizable: You can easily swap out veggies or proteins based on what you have on hand, including leftover turkey!
  • Freezer-Friendly: Make a big batch and freeze portions for those days when you need a quick meal.
  • Flavor-Packed: The blend of herbs and spices enhances the turkey and vegetables, creating a rich and satisfying flavor profile.

Ingredient Breakdown

Let’s take a closer look at what goes into this delicious soup. Here’s a detailed list of ingredients along with some potential substitutions to keep your cooking flexible:

  • Ground Turkey: 2 pounds. You can replace it with ground chicken or beef if preferred.
  • Onion: 1 large, chopped. Yellow or sweet onions work well here.
  • Garlic: 4 cloves, smashed and minced. Fresh garlic adds depth; however, garlic powder can be used in a pinch.
  • Spices: Include kosher salt, black pepper, oregano, garlic powder, smoked paprika, celery seed, basil, crushed red pepper, and thyme.
  • Broth: 10-12 cups chicken or turkey broth. For a vegetarian version, use vegetable broth.
  • Vegetables: Carrots, celery, sweet potato, coleslaw cabbage, zucchini, and yellow squash. Feel free to substitute with your favorites or seasonal veggies.
  • Canned Tomatoes: 1 can (14 oz) of diced tomatoes (fire-roasted adds a nice touch!).
  • Beans: 1 can (14 oz) of white beans for added protein and fiber.
  • Garnishes: Fresh parsley, pesto, or parmesan cheese for a delicious finishing touch.

Step-by-Step Instructions

Now, let’s break down how to make this comforting vegetable soup with turkey. Follow these easy steps to prepare your pot of goodness!

  1. In a large soup pot (at least a 6-quart capacity), add the ground turkey and chopped onion. Sauté over medium-high heat, crumbling the turkey as it cooks until it’s browned.
  2. Turn off the heat and drain excess fat. To do this, tilt the pot and spoon the fat into a bowl lined with foil for easy disposal.
  3. Turn the heat back on to medium. Add minced garlic and all spices: kosher salt, black pepper, oregano, garlic powder, smoked paprika, celery seed, basil, crushed red pepper, and thyme. Cook until fragrant.
  4. Add broth to the pot. I recommend using a combination of chicken broth and water with turkey base for enhanced flavor.
  5. Bring the heat to high and wait for the broth to boil. Add the harder vegetables first: carrots, celery, sweet potato, and coleslaw cabbage.
  6. Once boiling, add the can of diced tomatoes (juice included) and drained white beans.
  7. Reduce heat to medium and let simmer for about 20 minutes, until the veggies are nearly fork-tender.
  8. Add chopped zucchini and yellow squash, continuing to simmer for another 5-10 minutes until tender.
  9. If foam appears on the surface, skim it off. Remove any fresh thyme stems before serving.
  10. Serve hot, garnished with pesto or parmesan if desired. Enjoy your nourishing bowl of Turkey Vegetable Soup!

Pro Tips for Success

Here are some expert tips to ensure your soup turns out perfect every time:

  • Prep Ahead: Chop your veggies ahead of time and store them in the fridge to save time on cooking day.
  • Don’t Rush the Flavors: Allow the spices to cook with the turkey and garlic before adding the broth, enhancing the flavor.
  • Adjust Consistency: If you prefer a thicker soup, mash some of the beans before adding them in.
  • Season Gradually: Always taste and adjust the seasoning throughout the cooking process for the best flavor.
  • Experiment: Feel free to add your favorite herbs or spices to make this soup uniquely yours.

Common Mistakes and Troubleshooting

Even the best cooks can make mistakes! Here are some common issues and how to avoid them:

  • Too Salty: If your soup is too salty, add a diced potato while cooking; it will absorb excess salt.
  • Undercooked Vegetables: Make sure to cut vegetables into uniform sizes for even cooking.
  • Bland Flavor: If the soup lacks flavor, try adding more spices or a splash of vinegar to brighten it up.
  • Too Thick: If the soup is thicker than desired, slowly add more broth until you reach your preferred consistency.

Variations to Try

This Turkey Vegetable Soup is incredibly flexible. Here are a few variations you can experiment with:

  • Spicy Kick: Add diced jalapeños or a splash of hot sauce for a spicier soup.
  • Italian Flair: Toss in a handful of spinach and a pinch of Italian seasoning for a twist.
  • Southwestern Style: Incorporate black beans, corn, and diced green chiles for a southwest vibe.
  • Low-Carb Version: Replace the sweet potato with cauliflower for a low-carb option.

Storage and Make-Ahead Instructions

This soup is perfect for meal prep! Here’s how to store and reheat:

  • Refrigerate: Store in an airtight container for up to 4 days.
  • Freeze: Portion into freezer-safe containers for up to 3 months. Thaw in the fridge overnight before reheating.
  • Reheat: Warm on the stovetop over medium heat or in the microwave until heated through.

Frequently Asked Questions

Got questions? Here are some FAQs about this nourishing soup:

  • Can I use leftover turkey? Absolutely! Shredded leftover turkey is a great addition.
  • Is this soup gluten-free? Yes, as long as you use gluten-free broth and avoid any contaminated ingredients.
  • How can I make this vegetarian? Substitute ground turkey with lentils or chickpeas and use vegetable broth.
  • Can I add more vegetables? Definitely! Feel free to throw in any veggies you have on hand.
  • How do I make this soup spicier? Add more crushed red pepper or fresh jalapeños for an extra kick.
  • Can I make this in a slow cooker? Yes! Sauté the turkey and onions first, then add everything to the slow cooker for 6-8 hours on low.
  • What’s the best way to garnish? A dollop of pesto or a sprinkle of fresh parsley adds a nice finishing touch!
  • How do I store leftovers? Cool completely before transferring to an airtight container for storage.

Nutritional Tips and Dietary Adaptations

This soup can be tailored to fit various dietary needs:

  • Low-Calorie: Skip the cheese and use only lean ground turkey.
  • High-Protein: Include more beans or lean turkey for a protein boost.
  • Vegetarian/Vegan: Use plant-based meat alternatives and vegetable broth.
  • Low-Carb: Swap starchy vegetables for leafy greens or zucchini noodles.

Essential Equipment Recommendations

To make this recipe, you’ll need:

  • Large Soup Pot: A minimum of 6-quart capacity is ideal for this hearty soup.
  • Cutting Board and Knife: For chopping your veggies efficiently.
  • Measuring Cups and Spoons: To ensure accurate ingredient measurements.
  • Wooden Spoon: Great for stirring and preventing sticking.

Serving Suggestions

Serve your Nourishing Turkey Vegetable Soup with:

  • Crusty Bread: A slice of sourdough or a baguette pairs perfectly for dipping.
  • Salad: A light green salad with a vinaigrette balances the richness of the soup.
  • Cheese: A sprinkle of parmesan or feta adds a flavorful touch.
  • Herbs: Fresh herbs like basil or cilantro can brighten up the dish.

So there you have it—the ultimate guide to making a delicious and nourishing Turkey Vegetable Soup. I hope you feel inspired to give this recipe a try! Remember, cooking is all about enjoying the process and sharing good food with loved ones. Happy cooking!

Turkey Vegetable Soup

Prep Time 15 minutes
Cook Time 35 minutes
Total Time 50 minutes
Servings 6 servings
Calories 350
A hearty and flavorful soup combining ground turkey with a variety of fresh vegetables, perfect for a comforting meal.

Ingredients

Meat

  • 2 pounds ground turkey

Vegetables

  • 1 large onion (chopped)
  • 4 cloves garlic (smashed and minced)
  • 4 teaspoons kosher salt
  • 1 teaspoon black pepper
  • 1 tablespoon oregano
  • 0.5 teaspoon garlic powder
  • 0.5 teaspoon smoked paprika
  • 0.25 teaspoon celery seed
  • 1 teaspoon basil
  • 0.25 teaspoon crushed red pepper
  • 0.5 teaspoon dried thyme (or 6 fresh thyme sprigs)

Broth and Water

  • 10 cups chicken or turkey broth
  • 4 cups water (with 4 teaspoons turkey base)

Vegetables (continued)

  • 4 large carrots (chopped)
  • 1.5 cups celery (chopped)
  • 1 sweet potato peeled and chopped
  • 2 cups coleslaw cabbage (or more to taste)
  • 1 14-oz can diced tomatoes (fire roasted preferred)
  • 1 14-oz can white beans
  • 1 medium zucchini (chopped)
  • 1 yellow squash chopped

Garnishes

  • to taste chopped parsley (optional; low calorie)
  • to taste pesto (optional; not low calorie)
  • to taste parmesan cheese (optional; not low calorie)

Instructions 

  • Sauté ground turkey and onion in a large pot until cooked; drain excess fat.
  • Add garlic and spices; cook until fragrant. Pour in broth and water, then bring to a boil.
  • Add carrots, celery, sweet potato, coleslaw, tomatoes, and beans; simmer for 20 minutes until vegetables are tender.
  • Add zucchini and yellow squash; simmer for another 5-10 minutes until tender. Remove thyme sprigs if used.
  • Skim foam if needed. Serve hot, garnished with parsley, pesto, and parmesan if desired.

Notes

This soup is versatile and forgiving; adjust vegetable amounts to your preference.
Calories: 350kcal
Cost: $15
Course: Main Course, Soup
Cuisine: American
Keyword: Soup, Turkey, Vegetables

Welcome to your new go-to recipe for chicken and rice meal prep! This easy chicken and rice dish is packed with tender chicken, fragrant rice, and vibrant veggies, making it the perfect solution for busy weekdays. If you’re looking for a way to simplify your cooking and make healthy eating a breeze, you’re in the right place. Let’s dive into a comprehensive guide that will turn you into a meal prep pro.

Why You’ll Love This Recipe

  • Simple Preparation: With straightforward steps, you’ll be able to whip this up quickly, even on the busiest of nights.
  • Customizable Ingredients: Use your favorite vegetables and proteins to create a dish that suits your taste buds.
  • Nutritious and Balanced: This recipe combines lean protein, whole grains, and vegetables, making it a wholesome meal option.
  • Perfect for Meal Prep: Make it ahead of time and enjoy delicious leftovers throughout the week.
  • Budget-Friendly: Utilizing affordable ingredients, this dish is easy on the wallet while still being satisfying.

Ingredients Breakdown

Here’s what you’ll need for the Chicken Rice Meal Prep:

  • 4 breasts boneless, skinless chicken (about 1.5 lbs): Chicken thighs can also be used for a richer flavor.
  • 1 cup long-grain rice: Jasmine or basmati rice works well, but feel free to experiment with brown rice for a healthier option.
  • 2 cups low-sodium chicken broth: This adds depth of flavor; water can be substituted in a pinch.
  • 1 tablespoon fresh ginger (grated): Adds a wonderful zing; ground ginger is a viable substitute.
  • 4 green onions (chopped): Fresh herbs like cilantro or parsley can enhance the flavor.
  • 1 cup mixed vegetables (bell peppers and carrots): Any seasonal veggies can be added for variety.
  • 3 tablespoons low-sodium soy sauce: Tamari is a gluten-free alternative.
  • 2 tablespoons sesame oil: Extra virgin olive oil can replace this for a different taste.
  • 1 tablespoon honey or brown sugar: For a touch of sweetness, adjust to your preference.

Step-by-Step Instructions

Ready to cook? Follow these simple steps:

  1. Prep your ingredients by washing and chopping vegetables into bite-sized pieces.
  2. In a large skillet over medium heat, heat a tablespoon of oil. Cook diced chicken seasoned with salt and pepper until golden brown (about 5-7 minutes).
  3. Add chopped vegetables and grated ginger; sauté until softened (approximately 3-4 minutes).
  4. In another pot, combine rinsed rice with chicken broth, bring to a boil then cover until cooked (about 15-20 minutes).
  5. Whisk soy sauce, sesame oil, and honey/brown sugar in a bowl; pour over chicken and veggies once tender.
  6. Fluff cooked rice with a fork and mix into the skillet until everything is well coated (2-3 minutes).

Pro Tips for Perfect Chicken Rice Meal Prep

Freshly prepared chicken rice dish showcasing vibrant colors and textures.
  • Cook in Batches: Make a larger quantity and portion it out for the week.
  • Storage Containers: Use airtight containers to keep your meals fresh longer.
  • Reheat Wisely: To avoid a dry meal, add a splash of chicken broth when reheating.
  • Fresh Herbs: Top with fresh herbs right before serving for vibrant flavor.
  • Spice It Up: Add chili flakes or hot sauce if you like a bit of heat.
  • Include Healthy Fats: A sprinkle of nuts or seeds can add crunch and nutrition.
  • Portion Control: Use a measuring cup to ensure even portions in your meal prep.
  • Experiment with Marinades: Marinate your chicken overnight for richer flavor.

Common Mistakes and Troubleshooting

Here are some common pitfalls and how to avoid them:

  • Overcooked Chicken: Keep an eye on the cooking time—chicken breasts can dry out quickly.
  • Sticky Rice: Rinse rice thoroughly to remove excess starch before cooking.
  • Unevenly Cooked Vegetables: Cut veggies to similar sizes for consistent cooking.
  • Too Much Liquid: Adjust broth based on the type of rice used for optimal cooking.

Variations to Try

Feeling adventurous? Here are some variations:

  • Teriyaki Chicken Rice: Add teriyaki sauce instead of soy sauce for a sweeter flavor.
  • Curry Chicken Rice: Incorporate curry powder or paste for an aromatic twist.
  • Mexican Chicken Rice: Use black beans and corn, and top with avocado for a fiesta feel.
  • Vegetarian Option: Substitute chicken with tofu or chickpeas for a plant-based meal.

Storage and Make-Ahead Instructions

This Chicken Rice Meal Prep is designed for convenience:

  • Refrigerator: Store in airtight containers for up to 4 days.
  • Freezer: Freeze portions in freezer-safe bags for up to 3 months.
  • Thawing: Let frozen meals thaw in the fridge overnight before reheating.
  • Reheating: Microwave or heat on the stove until warmed through, adding a bit of broth if needed.

Comprehensive FAQ

  • Can I use brown rice instead of white? Yes, just increase the cooking time as brown rice takes longer to cook.
  • Can I make this dish vegetarian? Absolutely! Substitute chicken with tofu or legumes.
  • How long does this meal last in the fridge? It’s best consumed within 4 days for optimal freshness.
  • Can I freeze this meal prep? Yes, it’s great for freezing and reheating later.
  • What if I don’t have sesame oil? Extra virgin olive oil is a good alternative.
  • Can I add other vegetables? Definitely! Feel free to add any seasonal vegetables you enjoy.
  • Is this recipe good for weight loss? Yes, it’s balanced and portion-controlled, making it a great choice.
  • What’s the best way to reheat it? Add a splash of broth and reheat in the microwave or on the stovetop to avoid dryness.

Nutrition Tips and Dietary Adaptations

This Chicken Rice Meal Prep is not only delicious but also nutritious. Here are some tips:

  • Protein Boost: Add a scoop of protein powder to the rice while cooking for an extra protein kick.
  • Low-Carb Option: Swap rice for cauliflower rice for a lower-carb meal.
  • Whole Grains: Opt for brown rice or quinoa for added fiber and nutrients.
  • Gluten-Free: Ensure soy sauce is gluten-free if you have dietary restrictions.

Equipment Recommendations

To make this meal prep easier, here are some essential tools:

  • Non-Stick Skillet: Perfect for sautéing chicken and veggies without sticking.
  • Pot with Lid: Ideal for cooking rice to perfection.
  • Sharp Knife: A good knife is essential for chopping ingredients efficiently.
  • Cutting Board: A solid cutting board keeps your workspace organized.
  • Measuring Cups and Spoons: Ensure accurate measurements for consistent results.

Serving Suggestions

This Chicken Rice Meal Prep is versatile and can be enjoyed in various ways:

  • Garnish: Top with fresh cilantro or sesame seeds for added flavor and texture.
  • Side Dishes: Serve with a side salad or steamed vegetables for a complete meal.
  • Wrap It Up: Use as a filling for lettuce wraps for a fresh twist.
  • Make It a Bowl: Layer with avocado, salsa, or your favorite sauce for a delicious rice bowl.

Now you have everything you need to create the ultimate Chicken Rice Meal Prep! With this comprehensive guide, you’ll not only feel confident in your cooking skills but also enjoy delicious, healthy meals all week long. So gather your ingredients, roll up your sleeves, and let’s get cooking! Remember, great food doesn’t require perfection—just clear steps, good ingredients, and a willingness to try. Happy cooking!

Chicken Rice Meal Prep

Prep Time 10 minutes
Cook Time 25 minutes
Total Time 35 minutes
Servings 4 servings
Calories 550
A quick and flavorful chicken rice bowl perfect for meal prep, combining tender chicken, vegetables, and savory sauce.

Ingredients

Protein

  • 4 pieces boneless, skinless chicken breasts (about 1.5 lbs)
  • 1 cup long-grain rice
  • 2 cups low-sodium chicken broth
  • 1 tablespoon fresh ginger (grated)
  • 4 green onions green onions (chopped)
  • 1 cup mixed vegetables (bell peppers and carrots)
  • 3 tablespoons low-sodium soy sauce
  • 2 tablespoons sesame oil
  • 1 tablespoon honey or brown sugar

Instructions 

  • Wash and chop vegetables; set aside.
  • Cook chicken in a skillet with oil until golden (5-7 min).
  • Add vegetables and ginger; sauté until softened (3-4 min).
  • Cook rice with chicken broth until tender (15-20 min).
  • Mix soy sauce, sesame oil, honey; pour over chicken and veggies.
  • Fluff rice and combine with chicken and vegetables; serve.

Notes

For extra flavor, marinate chicken beforehand or add chili flakes for spice.
Calories: 550kcal
Cost: $15
Course: Main Course
Cuisine: Asian
Keyword: Chicken, Meal Prep, rice

Are you ready to satisfy your sweet tooth without the guilt? This Chocolate Protein Mug Cake is your new go-to dessert that combines rich chocolate flavor with a healthy dose of protein. In just a few minutes, you can whip up a delicious treat that’s not only satisfying but also packed with nutrients. Perfect for any time of day, this mug cake recipe is ideal for those who crave something sweet yet want to keep it healthy.

In this article, we’ll dive deep into everything you need to know about making the best chocolate protein mug cake, including ingredient breakdowns, variations, expert tips, and a comprehensive FAQ section. Let’s get started!

Why You’ll Love This Recipe

  • Quick and Easy: This mug cake can be prepared in under 5 minutes, making it a fantastic choice for busy days or late-night cravings.
  • High in Protein: With the inclusion of protein powder, this dessert not only satisfies your sweet cravings but also contributes to your daily protein intake.
  • Customizable: Feel free to tweak the ingredients to suit your taste or dietary needs, with various substitutions available.
  • Guilt-Free Indulgence: Enjoy a delicious dessert that won’t derail your healthy eating goals, thanks to wholesome ingredients.
  • Perfect for Portion Control: Made in a single mug, this recipe eliminates the temptation of overindulging.

Ingredients Breakdown

Let’s take a closer look at the ingredients that make this chocolate protein mug cake so delicious and nutritious.

  • 1 scoop chocolate protein powder: This is the base of your cake. Choose a flavor you adore, whether it’s whey or plant-based. It’s essential to ensure your protein powder is high quality for the best flavor.
  • 1/4 cup almond flour: Provides a gluten-free base and adds a nutty flavor. Substitute with coconut flour if desired, but use less (about 3 tablespoons) as it absorbs more liquid.
  • 2 tbsp cocoa powder: Opt for unsweetened cocoa for a rich chocolate taste. Dutch-process cocoa gives a deeper flavor.
  • 1/4 tsp baking powder: This ingredient helps your cake rise and become fluffy.
  • 1/4 cup unsweetened almond milk: Use any milk of your choice, such as oat or soy milk, for a creamy texture.
  • 1 tbsp maple syrup: Acts as a natural sweetener. You can also use honey or agave syrup.
  • 1/2 tsp vanilla extract: Adds depth to the flavor profile; feel free to use other extracts like almond or hazelnut.
  • 1 tbsp dark chocolate chips (optional): For extra indulgence! Choose dairy-free if you prefer a vegan version.

Pro Tips for the Perfect Mug Cake

To ensure your mug cake turns out perfectly every time, consider these expert tips:

  • Microwave wattage: Cooking times may vary based on your microwave. Start with 1 minute, then add additional seconds if needed.
  • Use a large mug: Ensure your mug is big enough to allow the cake to rise without overflowing.
  • Mix well: Be sure to mix the dry and wet ingredients thoroughly to avoid clumps and ensure even baking.
  • Let it cool: Allow the cake to cool for at least 1 minute before digging in to avoid burning your mouth.
  • Experiment with flavors: Try different protein powder flavors or add spices like cinnamon or nutmeg for a unique twist.
  • Don’t overcook: Keep a close eye on the cooking time to avoid a dry mug cake. It should be moist and fluffy.
  • Top it off: Enhance your mug cake with toppings like Greek yogurt, fresh fruits, or nut butter for added flavor and nutrition.
  • Make it a meal: Pair your cake with a protein shake for a balanced post-workout meal.

Common Mistakes and Troubleshooting

A tempting chocolate protein mug cake with melted chocolate chips on top, captured in natural light.

Even the best home cooks can run into issues. Here are some common mistakes and how to troubleshoot them:

  • Dry cake: If your cake turns out dry, it may have been overcooked. Reduce the cooking time by 10-15 seconds next time.
  • Dense texture: A dense mug cake often results from using too much almond flour or protein powder. Stick to the recommended amounts for best results.
  • Not rising: Ensure your baking powder is fresh; expired baking powder can lead to a flat cake.
  • Too sweet or not sweet enough: Adjust the maple syrup to your taste or experiment with different sweeteners to find your perfect balance.

Variations of the Chocolate Protein Mug Cake

Mix things up with these delicious variations:

  • Peanut Butter Swirl: Add a tablespoon of peanut butter to the batter for a rich, nutty flavor. You can also top it with a dollop after cooking.
  • Chocolate Chip Cookie: Substitute almond flour with whole wheat flour and add chocolate chips for a chocolate chip cookie mug cake.
  • Mint Chocolate: Incorporate a few drops of peppermint extract into the batter for a refreshing twist.
  • Berry Delight: Mix in fresh or frozen berries like raspberries or blueberries for a fruity burst.

Storage and Make-Ahead Instructions

If you want to prepare your chocolate protein mug cake in advance, here’s how:

  • Make ahead: You can mix the dry ingredients in advance and store them in an airtight container. When you’re ready to enjoy, just add the wet ingredients and microwave.
  • Storage: While this mug cake is best enjoyed fresh, you can store leftovers in the fridge for up to 1 day. Reheat in the microwave for a few seconds before serving.

Frequently Asked Questions

Here are some common questions about the chocolate protein mug cake:

  • Can I use other protein powders? Yes! You can use any protein powder you enjoy. Just keep in mind that flavors can vary.
  • Is this recipe gluten-free? Yes, when using almond flour, this recipe is gluten-free. Always check your protein powder for gluten content.
  • Can I make this mug cake vegan? Absolutely! Use plant-based protein powder, non-dairy milk, and leave out any animal products.
  • What if I don’t have almond flour? You can substitute with oat flour or all-purpose flour, keeping in mind that it may change the nutritional profile.
  • How can I make it lower in sugar? Reduce the amount of maple syrup or use a sugar substitute like erythritol.
  • Can I bake this in the oven? While this recipe is designed for the microwave, you can bake it in the oven at 350°F (175°C) for about 12-15 minutes in a small oven-safe dish.
  • What toppings do you recommend? Greek yogurt, nut butter, or fresh fruit are great toppings that complement the flavors of the cake.
  • How does this mug cake fit into a healthy diet? This mug cake is high in protein and made with wholesome ingredients, making it a nutritious option for satisfying your sweet cravings.

Nutrition Tips and Dietary Adaptations

This chocolate protein mug cake is not only delicious but also versatile. Here are some nutritional tips and dietary adaptations to consider:

  • High-Protein Option: Choose a protein powder with added branched-chain amino acids (BCAAs) for even more muscle recovery benefits.
  • Lower-Calorie Version: Opt for a sugar-free sweetener and reduce the amount of almond flour for a lighter dessert.
  • Fiber Boost: Add in a tablespoon of chia seeds or ground flaxseed to increase fiber content.
  • Nutrient-Rich Add-ins: Consider adding a tablespoon of spinach or kale powder for an extra nutrient boost without altering the flavor significantly.

Equipment Recommendations

To make your life easier, here’s a list of equipment you’ll need:

  • Microwave-safe mug: Choose a sturdy mug that can withstand high temperatures.
  • Mixing utensils: A fork or small whisk works perfectly for mixing your ingredients.
  • Measuring cups and spoons: Accurate measurements are key to achieving the best results.

Serving Suggestions

Enjoy your chocolate protein mug cake straight from the mug or elevate it with these serving ideas:

  • Top with Greek yogurt: A dollop of Greek yogurt adds creaminess and protein.
  • Pair with fresh fruit: Serve with sliced strawberries or bananas for a fresh touch.
  • Drizzle with nut butter: A drizzle of almond or peanut butter enhances flavor and adds healthy fats.

In conclusion, this Chocolate Protein Mug Cake is more than just a quick treat—it’s a delightful, guilt-free indulgence that everyone can enjoy. With its simplicity, versatility, and rich flavor, it’s the perfect solution to satisfy your sweet cravings without compromising on nutrition. So grab your ingredients, and let’s get cooking! You’re just minutes away from enjoying this delicious, protein-packed dessert.

Chocolate Protein Mug Cake

Prep Time 2 minutes
Cook Time 1 minute
Total Time 3 minutes
Servings 1 serving
Calories 250
A quick and delicious microwave mug cake packed with protein and rich chocolate flavor, perfect for a healthy treat.

Ingredients

dry ingredients

  • 1 scoop chocolate protein powder
  • 0.25 cup almond flour
  • 2 tbsp cocoa powder
  • 0.25 tsp baking powder

wet ingredients

  • 0.25 cup unsweetened almond milk
  • 1 tbsp maple syrup
  • 0.5 tsp vanilla extract
  • 1 tbsp dark chocolate chips (optional) (optional)

Instructions 

  • Combine dry ingredients in a microwave-safe mug.
  • Add wet ingredients and mix until smooth.
  • Stir in chocolate chips if using.
  • Microwave on high for 1 minute until risen and cooked.
  • Let cool briefly before enjoying.

Notes

This mug cake is best enjoyed fresh. Feel free to add more chocolate chips for extra indulgence.
Calories: 250kcal
Cost: $4
Course: Dessert
Keyword: chocolate, mug cake, Protein

Embrace Comfort with This Easy Keto Broccoli Cheddar Soup

Welcome to your next favorite weeknight meal! This Keto Creamy Broccoli Cheddar Soup is not just a recipe; it’s a warm hug in a bowl. Packed with rich flavors and creamy goodness, this soup is perfect for those chilly evenings when you crave something delicious yet healthy. With its low-carb profile, it’s an ideal choice for anyone following a keto lifestyle. Let’s dive into why you’ll love this recipe and how to make it shine in your kitchen!

Why You’ll Love This Recipe

  • Quick and Easy: This soup can be prepared in under 30 minutes, making it a perfect option for busy weeknights.
  • Low Carb Delight: With minimal carbs, it’s a guilt-free comfort food that fits seamlessly into your keto diet.
  • Flavor Explosion: The combination of fresh broccoli and sharp cheddar creates a taste experience that you’ll love.
  • Customizable: Personalize it with your favorite spices or proteins to make it your own.
  • Meal Prep Friendly: This soup stores well, making it a great option for meal prep or leftovers!

Ingredients Breakdown

Let’s take a closer look at the ingredients you’ll need to create this delicious soup:

  • 4 cups broccoli florets: Fresh or frozen, broccoli is the star of this dish, providing both flavor and nutrition.
  • 2 cups chicken broth: A rich broth adds depth to the flavor; feel free to substitute with vegetable broth for a vegetarian option.
  • 1 cup heavy cream: This ingredient adds a luxurious creaminess to the soup. For a lighter version, you can use half-and-half.
  • 2 cups shredded cheddar cheese: Use sharp cheddar for a bolder flavor. You can also explore other cheese options like Gruyère for a twist.
  • 1/2 cup cream cheese: This contributes to the creamy texture and rich flavor. For a dairy-free option, consider using a cashew cream.
  • 2 cloves garlic, minced: Garlic adds a lovely aroma and flavor. You can increase or decrease this based on your preference.
  • 1/2 tsp onion powder: This enhances the overall flavor profile without the need for fresh onions.
  • Salt and pepper, to taste: Essential for seasoning, adjust these to suit your palate.

How to Make Keto Creamy Broccoli Cheddar Soup

Follow these easy steps to whip up your soup:

  1. In a large pot, combine broccoli, chicken broth, garlic, and onion powder. Bring to a boil, then reduce heat and simmer until the broccoli is tender.

  2. Using an immersion blender, puree the soup to your desired consistency. For a chunkier texture, blend just half of the soup.

  3. Add heavy cream, cream cheese, and cheddar cheese, stirring until melted and smooth. This is where the magic happens!

  4. Season with salt and pepper, and serve warm. Enjoy the comforting aroma and delicious flavors!

Pro Tips for Perfecting Your Soup

  • Fresh Ingredients: Always opt for fresh broccoli for the best flavor and nutrition profile.
  • Blend to Preference: If you prefer a chunkier soup, blend only half of the mixture and leave the rest unblended.
  • Cheese Choices: Experiment with different types of cheese for unique flavor combinations.
  • Herb Infusion: Add fresh herbs like thyme or parsley for a burst of freshness.
  • Spice It Up: Consider adding a pinch of cayenne pepper for a spicy kick.
  • Storage Savvy: Store leftovers in an airtight container in the fridge for up to 3 days.
  • Freezing Tips: This soup freezes well, so make a double batch for future meals!
  • Reheat Gently: When reheating, do so on low heat to avoid curdling the cream.

Common Mistakes to Avoid

  • Overcooking Broccoli: Keep an eye on your broccoli to prevent it from becoming mushy; a tender crunch is ideal.
  • Skipping the Blend: Blending is essential for that creamy texture; don’t skip this step!
  • Too Much Salt: Always taste before adding more salt; it’s easy to overdo it.
  • Ignoring Seasoning: Don’t forget to season well! It makes a big difference in flavor.

Variations to Try

Spice things up with these fun variations:

  • Keto Loaded Broccoli Cheddar Soup: Add cooked bacon or sausage for a protein boost.
  • Vegetarian Version: Use vegetable broth and add chickpeas for extra protein.
  • Spicy Broccoli Cheddar: Incorporate jalapeños or red pepper flakes for heat.
  • Nutty Broccoli Soup: Stir in some toasted almonds or walnuts for added texture and flavor.

Storage and Make-Ahead Instructions

Planning ahead? Here’s how to store and reheat your soup:

  • Refrigeration: Store in an airtight container for up to 3 days. Reheat on the stovetop over low heat.
  • Freezing: Freeze soup in portions for up to 3 months. Thaw in the fridge overnight before reheating.
  • Make-Ahead: Prepare the soup in advance and store without adding cheese; stir in cheese before serving.

Frequently Asked Questions (FAQs)

  • Can I use frozen broccoli? Yes, frozen broccoli works well and saves prep time!
  • What kind of cheddar works best? Sharp cheddar gives the best flavor, but feel free to experiment with different cheeses.
  • How do I thicken the soup without flour? The cream cheese and pureeing will thicken the soup naturally.
  • Is this soup gluten-free? Yes, all ingredients used in this recipe are gluten-free.
  • Can I make this dairy-free? Substitute cream and cheese with coconut milk and a dairy-free cream cheese.
  • How can I add more protein? Consider stirring in cooked chicken or tofu for extra protein.
  • What can I serve with this soup? Pair it with a side salad or low-carb bread for a complete meal.
  • How can I enhance the flavor? Add herbs and spices according to your taste preference!

Nutritional Information

For those tracking their macros, here’s a quick overview of the nutritional information per serving:

  • Calories: 350
  • Fat: 30g
  • Protein: 15g
  • Net Carbs: 6g

Equipment Recommendations

Here’s what you’ll need to make this soup:

  • Immersion Blender: Perfect for pureeing the soup right in the pot.
  • Large Pot: A sturdy pot is essential for cooking the soup evenly.
  • Measuring Cups and Spoons: Accurate measurements ensure the best results.

Serving Suggestions

This soup is versatile and pairs well with:

  • Side Salad: A fresh green salad complements the richness of the soup.
  • Low-Carb Bread: Enjoy a slice of low-carb bread or cauliflower bread for dipping.
  • Crackers: Homemade cheese crackers can add a satisfying crunch.

Final Thoughts

This Keto Creamy Broccoli Cheddar Soup is more than just a recipe; it’s a delightful way to enjoy a classic comfort food while sticking to your health goals. With its rich flavors and creamy texture, it’s bound to become a staple in your kitchen. Remember, cooking should be fun, so don’t hesitate to make it your own! Enjoy every spoonful, and happy cooking!

Keto Creamy Broccoli Cheddar Soup

Prep Time 10 minutes
Cook Time 20 minutes
Total Time 30 minutes
Servings 4 cups
Calories 450
A rich and creamy low-carb soup combining tender broccoli and sharp cheddar for a comforting meal.

Ingredients

Main ingredients

  • 4 cups broccoli florets
  • 2 cups chicken broth
  • 1 cup heavy cream
  • 2 cups shredded cheddar cheese
  • 1/2 cup cream cheese
  • 2 cloves garlic, minced
  • 1/2 tsp onion powder
  • to taste salt and pepper Salt and pepper

Instructions 

  • Combine broccoli, chicken broth, garlic, and onion powder in a large pot. Bring to a boil, then simmer until tender.
  • Puree the soup with an immersion blender to desired consistency.
  • Add heavy cream, cream cheese, and cheddar, stirring until melted and smooth.
  • Season with salt and pepper, then serve warm.

Notes

This soup is perfect for a low-carb, keto-friendly meal.
Calories: 450kcal
Cost: $15
Course: Soup
Cuisine: keto
Keyword: broccoli, cheddar, Creamy

Unlock the Secrets to the Perfect Chicken and Vegetable Stir Fry

If you’re looking for a quick and delicious weeknight meal that’s better than takeout, you’ve come to the right place! This savory chicken and vegetable stir fry is not only packed with flavor but also incredibly easy to make. With tender chicken, fresh vegetables, and a mouthwatering sauce, this recipe is a surefire way to impress your family and friends. In this guide, we’ll journey through every step to ensure you create a dish that’s filled with flavor and joy.

Why You’ll Love This Recipe

This chicken and vegetable stir fry isn’t just another dinner option; it’s a culinary adventure! Here are some compelling reasons to give it a try:

  • Quick Preparation: Ready in just 25 minutes, this stir fry is perfect for busy weeknights.
  • Customizable Ingredients: You can swap in your favorite vegetables or proteins, making it versatile for different tastes.
  • Healthier than Takeout: Control the ingredients to make a nutritious meal without the extra calories and sodium.
  • One-Pan Wonder: With everything cooked in one pan, cleanup is a breeze, allowing you to spend more time enjoying your meal.
  • Flavor Explosion: The combination of soy sauce, ginger, and fresh veggies creates a dish bursting with flavor and color.

Ingredients Breakdown

To make this savory chicken and vegetable stir fry, you’ll need the following ingredients:

  • 500 g boneless, skinless chicken breast: Thinly sliced for quick cooking and tenderness.
  • 1 tablespoon cornstarch: Helps to create a light coating on the chicken, making it crispy.
  • 3 tablespoons soy sauce: A key ingredient that adds depth and umami flavor.
  • 1 teaspoon sesame oil: Provides a rich, nutty flavor that enhances the overall dish.
  • 1 teaspoon grated fresh ginger: Adds a zesty kick that brightens the flavors.
  • 1 tablespoon vegetable oil: For frying the ingredients at high heat.
  • 1 red bell pepper: Sliced for sweetness and color.
  • 1 green bell pepper: Adds freshness and crunch.
  • 1 carrot: Julienned for texture and vibrant color.
  • 150 g broccoli florets: Perfect for adding greens and fiber.
  • 100 g snap peas: Adds a sweet crunch to the stir fry.
  • 2 cloves garlic: Minced for aromatic flavor.
  • 120 ml chicken stock: Provides moisture and enhances the sauce.
  • 1 tablespoon oyster sauce: Adds a savory depth to the dish.
  • 1 tablespoon sugar: Balances the flavors and enhances the sauce’s richness.
  • 1 teaspoon rice vinegar: Adds brightness and acidity to the sauce.

If you’re missing any of these ingredients, here are some substitutions you can consider:

  • Chicken breast: You can use thigh meat for more juiciness or even tofu for a vegetarian option.
  • Oyster sauce: Substitute with hoisin sauce for a sweeter flavor or leave it out altogether.
  • Snap peas: Any other crunchy vegetable like green beans or zucchini can work well.
  • Chicken stock: Vegetable stock can be used for a lighter option.

Step-by-Step Instructions

Side view of a delicious chicken stir fry filled with colorful vegetables, ready to be served.

Now, let’s dive into the detailed steps to create this delicious stir fry:

Step 1: Marinate the Chicken

In a bowl, combine the thinly sliced chicken with cornstarch, 1 tablespoon of soy sauce, sesame oil, and grated ginger. Mix well to coat the chicken evenly and let it rest for about 10 minutes. This step is crucial for tenderizing the chicken and infusing it with flavor.

Step 2: Prepare the Sauce

In another bowl, whisk together the chicken stock, remaining soy sauce, oyster sauce, sugar, rice vinegar, and a touch of cornstarch. This sauce will thicken beautifully when cooked and provide a glossy finish to your stir fry.

Step 3: Cook the Chicken

Heat half of the vegetable oil in a wok or large pan over medium-high heat. Once hot, add the marinated chicken and stir-fry for 3-4 minutes until it’s just done and slightly golden. Remove the chicken from the pan and set it aside.

Step 4: Stir-Fry the Vegetables

In the same pan, add the remaining oil. Toss in the minced garlic and cook for about 30 seconds until fragrant. Then, add the broccoli, carrot, and bell peppers. Stir-fry these vegetables for about 3-4 minutes, ensuring they remain bright and slightly crunchy.

Step 5: Combine Everything

Add the snap peas back into the pan with the vegetables, followed by the cooked chicken. Pour the prepared sauce over the mixture and stir continuously until the sauce thickens and coats everything evenly. This should take about 1-2 minutes. Serve hot over rice or noodles for a complete meal!

Pro Tips for the Best Stir Fry

To elevate your stir fry game, consider these expert tips:

  • Prep Ahead: Chop all your vegetables and slice the chicken beforehand to make the cooking process quick and seamless.
  • Use High Heat: Cooking on high heat helps to sear the chicken quickly, locking in flavors and moisture.
  • Don’t Overcrowd the Pan: Cooking in batches ensures even cooking and the perfect texture for each ingredient.
  • Fresh Ingredients: Using fresh, seasonal vegetables not only enhances flavor but also adds vibrant color to your dish.
  • Adjust Sauce to Taste: Feel free to tweak the sauce ingredients based on your flavor preferences, like adding more sugar for sweetness or soy sauce for saltiness.
  • Garnish Wisely: Top your stir fry with sesame seeds or sliced green onions for an added crunch and flavor boost.
  • Use a Wok: If you have one, a wok is ideal for stir frying due to its shape and high sides, which help in tossing ingredients.
  • Make it Spicy: Add chili flakes or sriracha to the sauce for those who enjoy a bit of heat.

Common Mistakes and Troubleshooting

Even the best cooks can make mistakes, so here’s how to avoid common pitfalls:

  • Overcooking Chicken: Ensure that the chicken is cooked just until no longer pink to keep it tender.
  • Watery Sauce: If your sauce is too runny, let it simmer a bit longer to thicken up, or add a cornstarch slurry.
  • Soggy Vegetables: Stir-fry quickly over high heat to retain the crunchiness of the vegetables.
  • Too Much Sauce: Adjust the amount based on how saucy you prefer your stir fry; it can be a delicate balance.

Variations to Try

Feel free to switch things up with these tasty variations:

  • Beef Stir Fry: Substitute chicken with thinly sliced beef for a hearty alternative.
  • Vegetarian Delight: Replace chicken with tofu or tempeh and load up on extra veggies.
  • Spicy Garlic Chicken: Add extra garlic and a splash of chili oil to the marinade for a spicy kick.
  • Teriyaki Twist: Swap out soy sauce for teriyaki sauce for a sweeter, more robust flavor.

Storage and Make-Ahead Instructions

If you want to prepare your stir fry in advance, here’s how:

  • Make-Ahead: Chop vegetables and marinate the chicken a few hours before cooking.
  • Storage: Store any leftovers in an airtight container in the fridge for up to 3 days.
  • Freezing: This dish can be frozen for up to 2 months; just reheat on the stovetop.

Frequently Asked Questions

Here are some common questions that might help you with your stir fry:

  • Can I use frozen vegetables? Yes, but be sure to thaw and drain them well before cooking to avoid excess moisture.
  • How do I make it gluten-free? Use gluten-free soy sauce and ensure any stock or sauces are also gluten-free.
  • What’s the best way to reheat leftovers? Reheat in a pan over medium heat to maintain texture, adding a splash of water if needed.
  • Can I add nuts? Absolutely! Cashews or peanuts would add a delightful crunch.
  • How can I make it less salty? Use low-sodium soy sauce, and balance with more vegetables or rice.
  • What kind of rice should I serve with it? Jasmine or basmati rice pairs beautifully with this stir fry.
  • Can I add more protein? Yes, you can mix in shrimp, pork, or even egg for added protein.
  • Is this recipe kid-friendly? Definitely! You can adjust the spice levels to suit younger palates.

Nutrition Tips and Dietary Adaptations

This chicken and vegetable stir fry is not only delicious but also packed with nutritional benefits:

  • High in Protein: Chicken breast is a great source of lean protein, essential for muscle repair and growth.
  • Rich in Vitamins: Fresh vegetables provide a variety of vitamins and minerals, enhancing your overall health.
  • Low in Carbs: If you’re watching your carb intake, serve this stir fry on its own or with cauliflower rice.
  • Customizable for Dietary Needs: Easily adapt to vegetarian, vegan, or gluten-free diets by changing up the protein and sauces.

Equipment Recommendations

To make your cooking experience smooth and enjoyable, here are some recommended tools:

  • Wok or Large Skillet: Ideal for stir-frying, allowing for high heat and easy tossing.
  • Sharp Knife: A good knife is essential for slicing your ingredients evenly.
  • Cutting Board: Use a sturdy cutting board to prep your veggies and chicken.
  • Measuring Cups and Spoons: Accurate measurements ensure balanced flavors in your stir fry.

Serving Suggestions

To complete your meal, consider these serving ideas:

  • Over Rice: Serve atop fluffy jasmine or brown rice for a filling meal.
  • With Noodles: Toss with cooked noodles for a heartier version.
  • Fresh Herbs: Garnish with chopped cilantro or green onions for a fresh touch.
  • Side Dishes: Pair with a light salad or spring rolls for a balanced meal.

In conclusion, this savory chicken and vegetable stir fry is not just a meal; it’s an opportunity to create something delicious and nourishing. With simple ingredients, clear steps, and plenty of room for creativity, you’ll find that cooking can be both enjoyable and rewarding. So gather your ingredients, fire up the stove, and let’s make a meal that will have everyone coming back for seconds!

Savory Chicken and Vegetable Stir Fry Better Than Takeout

Prep Time 10 minutes
Cook Time 10 minutes
Total Time 20 minutes
Servings 4 servings
Calories 350
A quick and flavorful stir fry combining tender chicken with colorful vegetables, perfect for a satisfying homemade meal.

Ingredients

Protein

  • 500 g boneless, skinless chicken breast, thinly sliced
  • 1 tablespoon cornstarch
  • 3 tablespoons soy sauce, divided
  • 1 teaspoon sesame oil
  • 1 teaspoon grated fresh ginger

Vegetables

  • 1 tablespoon vegetable oil
  • 1 red bell pepper sliced (about 150 g)
  • 1 green bell pepper sliced (about 150 g)
  • 1 carrot julienned (about 100 g)
  • 150 g broccoli florets
  • 100 g snap peas
  • 2 cloves garlic, minced
  • 120 ml chicken stock
  • 1 tablespoon oyster sauce
  • 1 tablespoon sugar
  • 1 teaspoon rice vinegar

Instructions 

  • Mix chicken with cornstarch, 1 tbsp soy sauce, sesame oil, and ginger. Rest 10 min.
  • Whisk chicken stock, remaining soy sauce, oyster sauce, sugar, rice vinegar, and cornstarch.
  • Heat oil, cook chicken 3–4 min, then remove.
  • Add remaining oil, garlic, broccoli, carrots, peppers; stir fry 3–4 min. Add snap peas, cook 1–2 min.
  • Return chicken, pour sauce, cook until thickened. Serve hot.

Notes

Use fresh vegetables for best flavor and texture.
Calories: 350kcal
Cost: $15
Course: Main Course
Cuisine: Asian
Keyword: Chicken, Stir Fry, Vegetables

Welcome to Your New Favorite Weeknight Recipe!

Get ready to elevate your dinner game with these Effortless Chicken Teriyaki Bowls. This delightful dish combines tender chicken thighs, vibrant vegetables, and a homemade teriyaki sauce that packs a flavor punch. Whether you’re a seasoned cook or just starting your culinary journey, this recipe is designed to be simple and satisfying, making it perfect for busy weeknights. In under 30 minutes, you’ll have a meal that not only tastes amazing but also brings a smile to your dinner table!

Why You’ll Love This Recipe

  • Quick and Easy: From prep to plate in just 30 minutes, this recipe is perfect for those hectic evenings.
  • Flavorful Homemade Sauce: Skip the store-bought options! You’ll whip up a delicious teriyaki sauce that balances sweetness and savory notes.
  • Customizable Ingredients: Feel free to swap out veggies or protein to suit your tastes or use what you have on hand.
  • Healthier Choice: By using boneless skinless chicken thighs and fresh ingredients, you can create a nutritious meal that doesn’t skimp on flavor.
  • Perfect for Meal Prep: Make extra servings for lunch the next day—these bowls store well and taste great reheated!

Ingredients You’ll Need for Teriyaki Chicken Bowls

Here’s a breakdown of the ingredients needed for these delicious bowls, including some handy substitutions:

  • Oil Spray: Use a light olive oil spray for cooking; or substitute with coconut oil for added flavor.
  • Chicken Thighs: 6 large boneless skinless chicken thighs work best; you can also use chicken breasts, but thighs provide more moisture.
  • Honey: 2 teaspoons for sweetness; if you prefer, maple syrup is a great alternative.
  • Garlic: 6 cloves fresh garlic (or 1 teaspoon garlic powder); fresh garlic gives a bolder flavor.
  • Ginger: 1 inch fresh ginger (or 1/4 teaspoon powdered ginger); fresh ginger adds a wonderful zing.
  • Soy Sauce: 2 tablespoons; opt for low-sodium to control salt levels.
  • Rice Vinegar: 1 teaspoon; can be substituted with apple cider vinegar if needed.
  • Brown Sugar: 2 tablespoons for a rich sweetness; coconut sugar is a great unrefined substitute.
  • Low Sodium Soy Sauce: 3 tablespoons; helps keep the dish lighter.
  • Sesame Oil: 1 teaspoon for a nutty flavor; feel free to omit if allergic to nuts.
  • Pineapple Chunks: 2 cups (fresh or canned); they add a delightful sweetness and tropical touch.
  • Broccoli: 1 large head (about 10-12 ounces); you can replace it with any seasonal vegetable like bell peppers or snap peas.
  • Olive Oil: 3 tablespoons for sautéing; avocado oil is an excellent high-heat option.
  • Salt and Pepper: 1 teaspoon each; adjust according to your taste.
  • Garlic Powder: 2 teaspoons for an extra garlic kick.

How to Make Easy Chicken Teriyaki Bowls

Close-up image of a Chicken Teriyaki Bowl highlighting juicy chicken, fresh broccoli, and sweet pineapple pieces.

Ready to get cooking? Follow these simple steps to create your own teriyaki bowls:

Step 1: Prepare the Teriyaki Sauce

In a bowl, whisk together the soy sauce, honey, garlic, ginger, rice vinegar, brown sugar, and sesame oil until well combined. This sauce is key to the flavor of your chicken teriyaki bowls!

Step 2: Cook the Chicken

Heat a large skillet over medium-high heat and spray with oil. Add the chicken thighs, cooking for about 6-7 minutes on each side until golden brown and cooked through. Use a meat thermometer to ensure the internal temperature reaches at least 165 degrees Fahrenheit.

Step 3: Sauce the Chicken

Once the chicken is cooked, add the teriyaki sauce to the skillet and let it simmer for an additional 2-3 minutes. This allows the chicken to soak up all that delicious flavor!

Step 4: Prepare the Vegetables

In a separate pot, steam the broccoli until bright green and tender but still crisp, about 4-5 minutes. You can also sauté it in olive oil for added flavor.

Step 5: Assemble the Bowls

Start with a base of rice or quinoa, then add the teriyaki chicken, steamed broccoli, and fresh pineapple chunks. Drizzle with extra teriyaki sauce if desired, and garnish with sesame seeds and chopped green onions.

Pro Tips for Making Easy Teriyaki Chicken Bowls

  • Don’t overcrowd the pan: This ensures even cooking and browning of the chicken.
  • Rest the chicken: Letting the chicken sit for a few minutes after cooking helps retain juices.
  • Prep ahead: Marinate the chicken in the teriyaki sauce the night before for deeper flavor.
  • Use fresh ingredients: Fresh garlic and ginger make a significant difference in flavor.
  • Experiment with veggies: Feel free to add bell peppers, carrots, or snap peas for extra nutrition and color.
  • Adjust sweetness: Tailor the amount of sugar in the sauce to your taste; add more for a sweeter profile.
  • Use an air fryer: For a healthier option, try air-frying the chicken thighs for a crispy texture.
  • Make it gluten-free: Substitute soy sauce for tamari or coconut aminos.

Common Mistakes and Troubleshooting

Even the best cooks encounter hiccups! Here’s how to troubleshoot common issues:

  • Chicken looks dry: Ensure your chicken doesn’t overcook; using a meat thermometer can help.
  • Broccoli is too brown: Steam the broccoli separately to maintain its bright color and crunch.
  • The sauce is too salty: Add a touch of honey or brown sugar to balance the saltiness.
  • The dish is not saucy enough: Double the sauce recipe if you prefer a more generous coating.

Variations on Teriyaki Chicken Bowls

Here are some creative twists you can try!

  • Shrimp Teriyaki: Substitute chicken with shrimp for a quick seafood version.
  • Vegetarian Delight: Replace chicken with tofu or tempeh for a plant-based meal.
  • Spicy Teriyaki: Add a splash of sriracha or red pepper flakes to the sauce for a spicy kick.
  • Grilled Teriyaki Bowls: Use grilled chicken for a smoky flavor that complements the teriyaki sauce beautifully.

Storage and Make-Ahead Instructions

These teriyaki bowls make excellent leftovers! Here’s how to store them:

  • Refrigerate: Store in an airtight container for up to 3 days.
  • Reheat: Warm in the microwave or on the stovetop, adding a splash of water to keep it moist.
  • Make Ahead: Prepare the teriyaki sauce in advance and store in the fridge for up to a week.

FAQs About Chicken Teriyaki Bowls

  • Can I use chicken breast instead of thighs? Absolutely! Just be mindful that chicken breasts can dry out quicker.
  • What can I substitute for soy sauce? Try tamari or coconut aminos for a gluten-free option.
  • How spicy is this recipe? It’s mild, but feel free to add chili paste or sriracha for heat.
  • Can I freeze leftover teriyaki bowls? Yes, but the texture of vegetables may change once thawed.
  • What side dishes pair well? Serve with steamed rice, quinoa, or a simple cucumber salad.
  • How do I store leftover sauce? Keep it in an airtight container in the fridge for up to a week.
  • Can I use frozen chicken? Yes, but make sure it’s fully thawed before cooking for even results.
  • What’s the best way to cut chicken thighs? Cut against the grain into bite-sized pieces for tender bites.

Nutrition Tips and Dietary Adaptations

This recipe can easily be adapted to fit various dietary needs:

  • Low-Carb Option: Serve with cauliflower rice instead of traditional rice.
  • Low-Sodium Version: Choose low-sodium soy sauce and adjust the salt to taste.
  • Gluten-Free: Ensure all sauces and ingredients are labeled gluten-free.
  • Whole30 Compatible: Use coconut aminos and eliminate any sugar.

Essential Equipment Recommendations

To make your cooking experience seamless, consider having the following on hand:

  • High-Quality Chef’s Knife: For easy chopping and slicing.
  • Non-stick Skillet: Ideal for cooking chicken without sticking.
  • Meat Thermometer: Ensures your chicken is perfectly cooked.
  • Whisk: For mixing your teriyaki sauce thoroughly.
  • Steamer Basket: To perfectly steam your veggies.

Serving Suggestions

Complete your meal with these serving ideas:

  • Garnish: Top with sesame seeds, chopped scallions, or cilantro for freshness.
  • Pair with Sides: Serve alongside steamed edamame or a light salad.
  • Bowl Variations: Add a scoop of kimchi or pickled vegetables for an extra zing.

In conclusion, these Effortless Chicken Teriyaki Bowls are a quick, delicious option for any weeknight meal. With a rich, homemade teriyaki sauce and customizable ingredients, you can enjoy a comforting dish that suits your taste. Don’t hesitate to experiment with flavors and ingredients, and remember that cooking is all about confidence and creativity. Happy cooking!

Chicken Teriyaki Bowls

Prep Time 15 minutes
Cook Time 20 minutes
Total Time 35 minutes
Servings 4 servings
Calories 520
Enjoy flavorful chicken teriyaki served over fresh vegetables and pineapple for a delicious and easy meal.

Ingredients

oil spray

  • 6 pieces boneless skinless chicken thighs
  • 2 teaspoons honey
  • 6 cloves garlic cloves (or 1 teaspoon garlic powder)
  • 1 inch ginger (or 1/4 teaspoon powdered ginger)
  • 2 tablespoons soy sauce
  • 1 teaspoon rice vinegar
  • 2 tablespoons brown sugar
  • 3 tablespoons low sodium soy sauce
  • 1 teaspoon sesame seed oil
  • 0.5 teaspoon rice vinegar
  • 2 cloves garlic cloves (microplaned or finely minced)
  • 0.5 inch ginger (microplaned or finely minced)
  • 2 cups pineapple chunks (fresh or canned)
  • 1 large head broccoli (about 10-12 ounces (300-350 grams yields approximately 4 cups of florets))
  • 3 tablespoons olive oil
  • 1 teaspoon salt
  • 1 teaspoon pepper
  • 2 teaspoons garlic powder

Instructions 

  • Spray a large skillet with oil and cook chicken thighs until browned and cooked through, about 6-8 minutes per side.
  • In a small bowl, whisk together soy sauce, honey, rice vinegar, brown sugar, sesame oil, and minced garlic and ginger to make the sauce.
  • Steam or sauté broccoli until tender, about 5 minutes.
  • Slice cooked chicken and combine with pineapple chunks and vegetables. Pour sauce over and toss to coat.
  • Serve over rice or noodles if desired.

Notes

For extra flavor, marinate the chicken in the sauce for 30 minutes before cooking.
Calories: 520kcal
Cost: $15
Course: Main Course
Cuisine: Japanese
Keyword: Chicken, Teriyaki

Discover the Comfort of High-Protein Weight Loss Soup

Looking for a nourishing meal that aligns with your health goals? This High-Protein Weight Loss Soup is your answer! Packed with lean turkey, vibrant vegetables, and aromatic spices, this soup is not only delicious but also easy to prepare. In just a short time, you can whip up a batch that’s perfect for meal prep, helping you stay on track with your weight loss journey. Let’s dive into why this soup is a fantastic choice!

Why You’ll Love This Recipe

  • Nutritious and Filling: With a hearty mix of protein and vegetables, this soup keeps you full and satisfied.
  • Quick and Easy: You can have this soup ready in about 40 minutes, making it ideal for busy weeknights.
  • Versatile Ingredients: Customize it with your favorite veggies and spices to suit your taste.
  • Meal Prep Friendly: This soup stores well, making it perfect for meal planning for the week.
  • Flavorful and Comforting: The combination of herbs and spices creates a rich flavor that everyone will love.

Ingredient Breakdown

Here’s what you’ll need to make this comforting soup, along with some substitutions if you’re missing an ingredient:

  • 4 tbsp avocado oil: For sautéing, can substitute with olive oil.
  • 2 large yellow onions, chopped: For a sweeter flavor, use shallots.
  • 4 tsp minced garlic: Fresh is best, but garlic powder works in a pinch.
  • 4 lbs ground turkey or chicken: Both are lean meats full of protein; ground beef or plant-based crumbles can be used for a different flavor.
  • 16 cups chicken broth: Use homemade for a deeper flavor or low-sodium store-bought.
  • 4 tsp sea salt: Adjust according to your taste preference.
  • 4 tbsp Italian seasoning: A blend of herbs enhances the soup’s flavor; you can mix your own if desired.
  • 4 tsp garlic powder: Optional; enhances the garlic flavor.
  • 2 tsp paprika: Smoked paprika can add a lovely depth.
  • ½ tsp cayenne pepper: Adjust to taste for desired spiciness.
  • 1 large lemon (optional): Adds brightness; you can skip if you prefer a less tangy soup.
  • 1 tsp turmeric (optional): Great for anti-inflammatory benefits.
  • 4 cups carrots, peeled and chopped: For sweetness and texture; other root veggies like parsnips work too.
  • 2 cups celery, chopped: Adds crunch; can replace with bell peppers.
  • 2 cups green beans, cut into 2-inch pieces: Fresh or frozen will work.
  • 4 cups sweet potatoes, peeled and cubed: For a hearty feel; regular potatoes can be substituted.
  • 3 cups cabbage, shredded: Adds volume and nutrition; kale is a good alternative.
  • 2 cans (28 oz) diced tomatoes: Use crushed tomatoes for a smoother texture.
  • 2 cans (14.5 oz) chickpeas, drained and rinsed: They add protein and fiber; you can replace them with white beans.
  • 2–3 cups zucchini, quartered: Adds bulk; summer squash works too.
  • Fresh parsley or thyme (for garnish): Adds a pop of color and freshness.

Pro Tips for Perfect Soup

  • Brown the Meat: Sautéing the ground turkey until browned adds a rich flavor to your soup.
  • Don’t Skip the Broth: The quality of your broth is crucial; a homemade broth will elevate the dish.
  • Adjust Seasonings: Taste and adjust salt and spices as the soup simmers to achieve the perfect flavor.
  • Chop Evenly: Cut vegetables into uniform sizes for even cooking.
  • Let it Simmer: Allowing the soup to simmer for at least 20 minutes helps the flavors meld beautifully.
  • Cool Before Storing: Let the soup cool completely before transferring to storage containers.
  • Try Different Herbs: Experiment with fresh herbs like basil or cilantro for a twist on flavor.
  • Use a Slow Cooker: For convenience, you can throw everything in a slow cooker for a few hours.

Common Mistakes and Troubleshooting

Here are some common pitfalls and how to avoid them:

  • Overcooking Vegetables: Ensure you add delicate veggies like zucchini later in the cooking process to prevent mushiness.
  • Too Much Salt: Always start with less salt; you can always add more, but it’s hard to fix a salty soup.
  • Not Using Enough Liquid: If the soup seems too thick, add more broth or water until you reach your desired consistency.
  • Ignoring Texture: If you prefer a creamier soup, consider blending a portion after cooking.

Variations to Try

Feel free to mix things up with these delicious variations:

  • Spicy Southwest: Add corn, black beans, and chili powder for a kick.
  • Asian-Inspired: Use ginger, soy sauce, and bok choy for a different flavor profile.
  • Italian Style: Toss in some tortellini and swap Italian seasoning for fresh basil and oregano.
  • Vegetarian Version: Substitute turkey with lentils or quinoa for a plant-based option.

Storage and Make-Ahead Instructions

This soup is perfect for meal prep! Here’s how to store it:

  • Refrigeration: Store in an airtight container for up to 5 days.
  • Freezing: Freeze in portions for up to 3 months. Make sure to leave space for expansion.
  • Reheating: Reheat on the stove or in the microwave until warmed through. Add a splash of broth if it’s too thick.

Frequently Asked Questions

Here are some common questions about High-Protein Weight Loss Soup:

  • Can I use different proteins? Absolutely! Ground chicken, beef, or plant-based alternatives work well.
  • What if I don’t like spicy food? Simply omit the cayenne pepper or use a milder spice.
  • Is this soup gluten-free? Yes, as long as you use gluten-free broth and check your canned ingredients.
  • Can I make this soup in advance? Yes! This soup tastes even better the next day as flavors develop.
  • How can I thicken the soup? You can blend a portion of the soup or add a cornstarch slurry.
  • What side dishes pair well? Serve with crusty bread or a light salad for a complete meal.
  • Can I add more vegetables? Definitely! Feel free to add any seasonal vegetables you enjoy.
  • How do I enhance the flavors? A splash of vinegar or lemon juice just before serving can brighten the flavors.

Nutrition Tips and Dietary Adaptations

This soup is not just delicious; it’s also nutritious:

  • High Protein: With lean meats and beans, it’s great for muscle maintenance.
  • Low Calorie: Packed with veggies, it’s filling without excess calories.
  • Customizable: Adjust ingredients to fit dietary preferences like low-carb or vegetarian.

Essential Equipment Recommendations

To make this soup, here’s what you’ll need:

  • Large Pot: A sturdy pot is essential for making soups.
  • Wooden Spoon: For stirring ingredients without scratching your pot.
  • Measuring Cups and Spoons: Accurate measurements ensure perfect flavors.

Serving Suggestions

Serve this soup hot, garnished with fresh herbs. Pair it with a slice of whole-grain bread or a side salad for a balanced meal. You can also top it with a dollop of Greek yogurt or avocado for creaminess!

In conclusion, this High-Protein Weight Loss Soup is a fantastic addition to your recipe collection. It’s not just about nourishing your body; it’s about enjoying the cooking process and feeling confident in your meals. So grab your ingredients, gather your family, and let’s make some comforting soup together!

High-Protein Weight Loss Soup

Prep Time 15 minutes
Cook Time 45 minutes
Total Time 1 hour
Servings 8 servings
Calories 250
A hearty, nutritious soup packed with lean proteins and vegetables to support weight loss and overall health.

Ingredients

Broth and liquids

  • 4 tbsp avocado oil
  • 2 large yellow onions, chopped
  • 4 tsp minced garlic
  • 16 cups chicken broth
  • 4 tsp sea salt

Spices and seasonings

  • 4 tbsp Italian seasoning
  • 4 tsp garlic powder
  • 2 tsp paprika
  • 0.5 tsp cayenne pepper (Adjust to taste)

Vegetables

  • 4 cups carrots, peeled and chopped
  • 2 cups celery, chopped
  • 2 cups green beans, cut into 2-inch pieces
  • 4 cups sweet potatoes, peeled and cubed
  • 3 cups cabbage, shredded
  • 2 cans (28 oz) diced tomatoes
  • 2 cans (14.5 oz) chickpeas, drained and rinsed
  • 2-3 cups zucchini, quartered (Adjust based on preference)

Garnish

  • to taste fresh parsley or thyme (For garnish)

Instructions 

  • Heat avocado oil in a large pot and sauté chopped onions and minced garlic until fragrant.
  • Add ground turkey or chicken and cook until browned.
  • Pour in chicken broth, add spices, and bring to a boil.
  • Add chopped vegetables and simmer until tender, about 30 minutes.
  • Adjust seasoning, add lemon juice and turmeric if desired, garnish with parsley or thyme, and serve hot.

Notes

This soup is rich in protein and fiber, making it ideal for weight loss and muscle maintenance.
Calories: 250kcal
Cost: $15
Course: Soup
Cuisine: Healthy
Keyword: High-Protein