Author

Steven

Browsing

Transform Your Mornings with Overnight Chia Pudding

Are you tired of the same old breakfast routine? If you’re looking for a quick, nutritious, and delicious morning treat, then overnight chia pudding is your answer! This creamy delight is not only easy to make, but it also packs a powerful nutritional punch. With just four simple ingredients, you can prepare a breakfast that fuels your day and satisfies your taste buds. Let’s dive into why you’ll love this chia pudding recipe and how to make it your own!

Why You’ll Love This Recipe

This overnight chia pudding recipe is a game-changer. Here are five reasons to give it a try:

  • Quick Preparation: With minimal effort, you can whip up a batch in just a few minutes. Set it in the fridge before bed, and wake up to a ready-made breakfast!
  • Nutrient-Dense: Chia seeds are loaded with fiber, protein, and omega-3 fatty acids, making this pudding a healthy start to your day.
  • Customizable: You can easily adjust the flavors and ingredients to suit your preferences. Whether you like it sweet, fruity, or chocolatey, the possibilities are endless!
  • Meal Prep Friendly: Make several servings at once for a hassle-free week of breakfasts. Simply store them in jars for easy grab-and-go options!
  • Guilt-Free Indulgence: This pudding is a delicious way to satisfy your sweet tooth without overindulging. It’s creamy, sweet, and oh-so-satisfying!

Ingredient Breakdown

Let’s look at the simple ingredients needed to make this chia pudding:

  • 1/4 cup chia seeds: These tiny seeds swell up and create a gel-like pudding when mixed with liquid. They’re packed with nutrients!
  • 1 cup milk or milk alternative: Use your favorite milk option—almond, coconut, soy, or dairy milk all work beautifully. For a creamier texture, try full-fat coconut milk!
  • 1 tablespoon sweetener: Adjust this to your taste. Options include honey, maple syrup, agave nectar, or even stevia for a low-calorie choice.
  • 1/2 teaspoon vanilla extract: This adds a lovely flavor to the pudding. Feel free to experiment with other extracts like almond or coconut!

How to Make Overnight Chia Pudding

Making overnight chia pudding is straightforward. Follow these simple steps for a delightful breakfast:

  • In a bowl or jar, combine chia seeds, milk, sweetener, and vanilla extract.
  • Stir well to prevent clumping. It’s important to mix thoroughly!
  • Cover and refrigerate overnight (or at least 4 hours) to allow the chia seeds to absorb the liquid and swell.
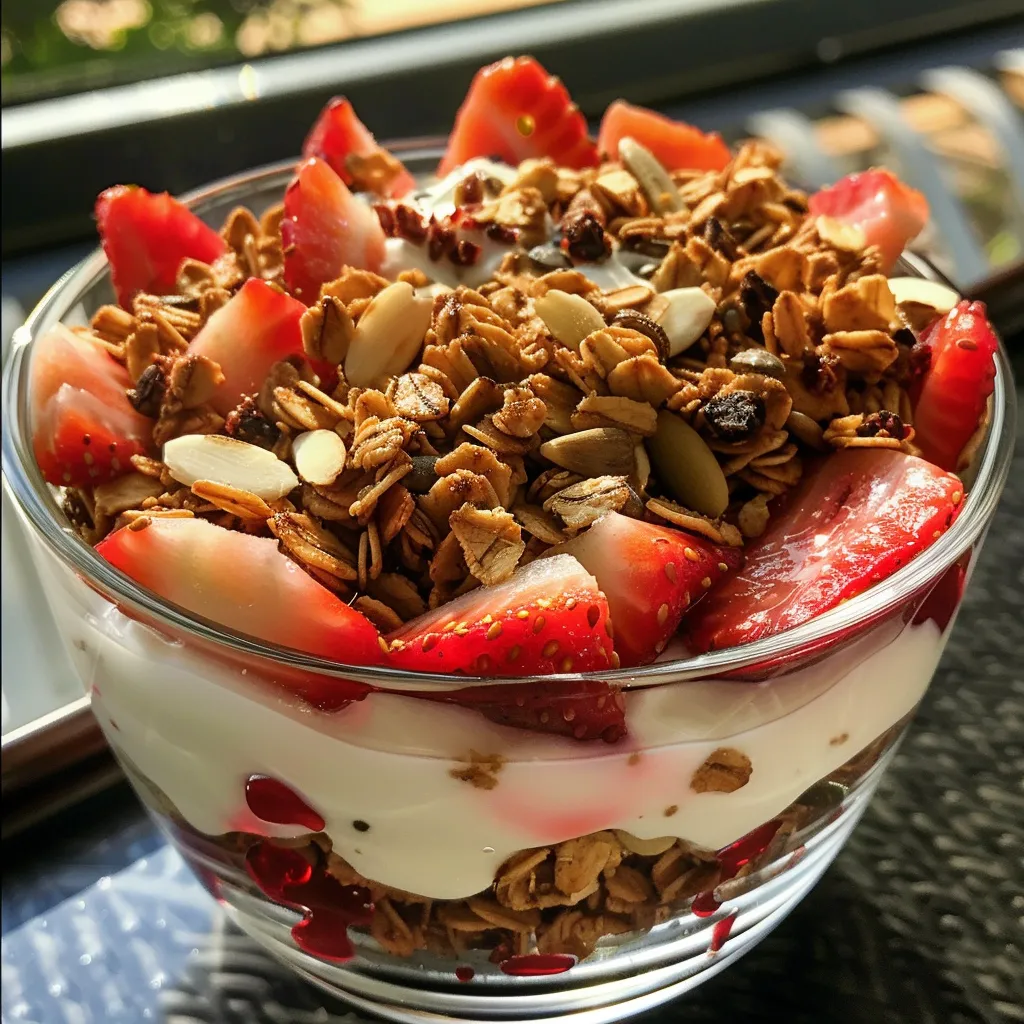
  • In the morning, give it a good stir and enjoy! Top with your favorite fruits, nuts, or granola for added flavor and texture.

Pro Tips for Perfect Chia Pudding

Here are some expert insights to ensure your chia pudding turns out perfect every time:

  • Soaking Time: Allow the pudding to soak for at least 4 hours, but overnight is best for optimal texture and flavor.
  • Mixing Technique: Stir the mixture twice during the first hour of soaking to prevent clumping of chia seeds.
  • Flavor Enhancements: Add spices like cinnamon or cocoa powder for extra flavor. You can also mix in fruits before soaking!
  • Storage Tips: Store in airtight containers in the fridge for up to five days. This makes it perfect for meal prep!
  • Portion Control: Use small jars for individual servings, making it easy to grab and go!
  • Texture Preferences: If you prefer a smoother texture, blend the ingredients before refrigerating.
  • Layering: For a delightful presentation, layer your chia pudding with fruits and nuts in a glass.
  • Experiment: Don’t be afraid to try different milk alternatives and sweeteners to find your perfect combination!

Common Mistakes and Troubleshooting

Even the best of us can make mistakes in the kitchen! Here are some common pitfalls to avoid when making chia pudding:

  • Too Thick: If your pudding is too thick, simply stir in a little more milk to reach your desired consistency.
  • Clumping: Ensure you stir the mixture well when first combining the ingredients to avoid clumps of chia seeds.
  • Too Sweet: Start with less sweetener; you can always add more after tasting!
  • Not Enough Time: Allowing insufficient soaking time can lead to a grainy texture. Always aim for at least 4 hours.

Delicious Variations

Get creative with your chia pudding! Here are some fun variations to try:

  • Chocolate Chia Pudding: Add 2 tablespoons of unsweetened cocoa powder to the base mixture for a rich, chocolatey treat.
  • Berry Bliss: Stir in fresh or frozen berries before soaking for a fruity explosion of flavor.
  • Tropical Paradise: Use coconut milk as your base and top with pineapple and shredded coconut for a tropical twist.
  • Nutty Delight: Mix in a tablespoon of nut butter like almond or peanut butter for added creaminess and protein.

Storage and Make-Ahead Instructions

Your overnight chia pudding is perfect for meal prep! Here’s how to properly store it:

  • Store in airtight containers in the refrigerator for up to five days. Mason jars are a great option!
  • If you’re making multiple servings, prepare them in individual jars for quick breakfasts.
  • Don’t add toppings until right before you eat to keep them fresh and crunchy.

FAQ: Your Chia Pudding Questions Answered

Here are some frequently asked questions about chia pudding:

  • How long can chia pudding last in the fridge? Chia pudding can last up to five days when stored properly in an airtight container.
  • Can I use water instead of milk? Yes! You can use water, but using milk or a milk alternative enhances the flavor and creaminess.
  • What sweeteners can I use? You can use honey, maple syrup, agave, or even stevia. Adjust to your taste!
  • Can I heat chia pudding? While it’s typically served cold, you can warm it gently if you prefer a warm breakfast.
  • What are the health benefits of chia seeds? Chia seeds are high in fiber, protein, omega-3 fatty acids, and antioxidants, making them incredibly nutritious.
  • Can I freeze chia pudding? Yes, you can freeze it, but the texture may change. It’s best enjoyed fresh!
  • How do I make it vegan? Simply use plant-based milk and a vegan sweetener like maple syrup.
  • Can chia pudding be made without sweetener? Absolutely! The natural flavor of the pudding can be enjoyed without added sweeteners.

Nutritional Tips and Dietary Adaptations

This chia pudding is versatile and can easily be adapted to fit various dietary needs:

  • For Keto Dieters: Use unsweetened almond milk and a keto-friendly sweetener to keep carbs low.
  • For Gluten-Free: Chia pudding is naturally gluten-free, making it an excellent choice for those with gluten sensitivities.
  • For High Protein: Add protein powder or Greek yogurt to your pudding for an extra protein boost.

Equipment Recommendations

To make your chia pudding, you’ll need a few basic kitchen tools:

  • Mixing Bowl or Jar: A bowl or jar for mixing your chia pudding ingredients.
  • Spoon or Whisk: Use a spoon or whisk to stir the ingredients well.
  • Airtight Containers: For storing the pudding in the fridge, use small airtight containers or mason jars.

Serving Suggestions

Enjoy your chia pudding in various ways:

  • Top with fresh fruits, nuts, and granola for added crunch.
  • Serve it with a dollop of yogurt or a drizzle of nut butter for extra creaminess.
  • Pair it with a side of toast or smoothie for a balanced breakfast.

In conclusion, overnight chia pudding is a simple yet delightful way to start your day. With endless variations and health benefits, you can create a breakfast that you love and that keeps you feeling great. So grab your chia seeds and get ready to enjoy a tasty, nutritious morning treat!

Over Night Chia Pudding

Prep Time 5 minutes
Total Time 5 minutes
Servings 2 servings
Calories 200
A simple and nutritious overnight treat that’s perfect for a quick breakfast or snack. Just mix, refrigerate, and enjoy!

Ingredients

Dried ingredients

  • 0.25 cup chia seeds
  • 1 cup milk or milk alternative
  • 1 tablespoon sweetener (adjust to taste)
  • 0.5 teaspoon vanilla extract

Instructions 

  • Combine chia seeds, milk, sweetener, and vanilla extract in a bowl or jar.
  • Stir well to prevent clumping.
  • Cover and refrigerate overnight or at least 4 hours.
  • In the morning, stir again and enjoy!

Notes

You can customize the sweetness or add toppings like fruits or nuts.
Calories: 200kcal
Cost: $5
Course: Breakfast
Cuisine: International
Keyword: Chia Seeds

Start Your Day Right with Berry Delight Protein Oats

Welcome to your new favorite breakfast! If you’re looking for a delicious and nutritious way to kickstart your morning, look no further than these Berry Delight Protein Oats. Packed with flavor and essential nutrients, this recipe combines rolled oats, mixed berries, and protein powder to create a wholesome meal that will energize your day. Let’s explore why you’ll love this recipe and how you can easily make it at home.

Why You’ll Love This Recipe

  • Nutritious and Satisfying: This recipe is loaded with protein and fiber, making it a perfect breakfast for keeping you full and satisfied until lunchtime.
  • Quick and Easy: It takes less than 15 minutes to prepare, meaning you can enjoy a wholesome meal even on your busiest mornings.
  • Customizable: You can easily tweak the ingredients to suit your taste preferences or dietary needs, whether you want to go dairy-free or add extra sweetness.
  • Berry Goodness: The mixed berries not only add vibrant color but are also rich in antioxidants, supporting your overall health.
  • Meal Prep Friendly: Make a big batch and store it for quick breakfasts throughout the week, saving you time and effort!

Ingredients Breakdown

Here’s what you’ll need to make these Berry Delight Protein Oats:

  • 1 cup rolled oats: Rolled oats are the best choice for creamy texture. Avoid instant or steel-cut oats for this recipe.
  • 2 cups water or milk of choice: You can use any milk you prefer—almond, soy, or dairy milk all work wonderfully.
  • 1 scoop vanilla protein powder: This adds a protein boost, making your oats more filling. Use your favorite brand, whether whey, plant-based, or casein.
  • 1 cup mixed berries: Fresh or frozen strawberries, blueberries, and raspberries add sweetness and nutrients.
  • 1 tablespoon honey or maple syrup (optional): Sweeten to taste, or skip for a lower-sugar option.
  • 1/4 teaspoon cinnamon: This spice adds warmth and depth to the flavor.
  • Pinch of salt: Enhances the overall flavor of the dish.

How to Make Berry Delight Protein Oats

Close-up image of a delicious bowl of Berry Delight Protein Oats highlighting juicy berries and a creamy base.

Now, let’s get cooking! Follow these simple steps to prepare your Berry Delight Protein Oats:

  1. In a saucepan, combine the rolled oats, water or milk, and a pinch of salt. Bring to a boil over medium heat.
  2. Once boiling, reduce the heat and let it simmer for about 5 minutes until the oats are creamy and cooked through.
  3. Stir in the vanilla protein powder and cinnamon. Mix well until everything is combined and creamy.
  4. Add the mixed berries to the pot, stirring gently. Cook for another 1-2 minutes until the berries are heated through but still vibrant.
  5. Spoon the oatmeal into bowls and drizzle with honey or maple syrup if desired. Enjoy your Berry Delight Protein Oats immediately!

Pro Tips for Perfect Oats

  • Soak the oats: For an ultra-creamy texture, soak your oats overnight in the liquid, then cook them in the morning.
  • Experiment with flavors: Add vanilla extract or a banana for a different flavor profile.
  • Mix in chia seeds: Add a tablespoon of chia seeds for extra fiber and omega-3 fatty acids.
  • Adjust protein levels: If you want a higher protein content, use two scoops of protein powder.
  • Don’t overcook: Keep an eye on the oats while cooking to prevent them from becoming mushy.
  • Top wisely: Consider toppings like sliced almonds, coconut flakes, or a dollop of Greek yogurt for added texture and flavor.
  • Use seasonal fruits: Change up the berries according to what’s in season for the freshest taste.
  • Chill before serving: For a refreshing breakfast in warmer months, let the oats cool and serve chilled.

Common Mistakes and Troubleshooting

Even the best recipes can have hiccups. Here are some common mistakes and how to avoid them:

  • Too watery: If you find your oats are too runny, cook them a bit longer, or add a little more oats to absorb the liquid.
  • Overcooked oats: If they become mushy, reduce the cooking time slightly next time.
  • Not sweet enough: Adjust the amount of honey or maple syrup to your taste; you can also add a touch of brown sugar if needed.
  • Berry overload: If using frozen berries, ensure they’re not too mushy; add them towards the end of cooking to maintain some shape.

Variations to Try

Feeling adventurous? Here are some fun variations to switch up your Berry Delight Protein Oats:

  • Peanut Butter Banana Oats: Replace the berries with sliced bananas and swirl in a tablespoon of peanut butter for a creamy, nutty flavor.
  • Chocolate Protein Oats: Swap the vanilla protein powder for chocolate flavor and top with chocolate chips or cocoa powder.
  • Apple Cinnamon Delight: Use diced apples instead of berries and add extra cinnamon for a comforting twist.
  • Nutty Berry Crunch: Stir in chopped nuts like walnuts or pecans for added crunch and healthy fats.

Storage and Make-Ahead Instructions

These Berry Delight Protein Oats can be easily stored or made ahead:

  • Refrigerate: Store leftover oats in an airtight container in the fridge for up to 3 days.
  • Reheat: Warm them on the stove or in the microwave with a splash of water or milk to loosen the texture.
  • Overnight oats: Prepare them the night before by mixing all ingredients except the berries and refrigerate. Add berries in the morning.

Frequently Asked Questions

Here are some common questions about this recipe:

  • Can I use instant oats? Instant oats can be used, but they may result in a mushier texture.
  • Is this recipe suitable for meal prep? Absolutely! Make a larger batch and portion it out for quick breakfasts.
  • How can I make this recipe vegan? Use a plant-based protein powder and non-dairy milk, and skip the honey or use maple syrup.
  • Can I add more protein? Yes! You can increase the protein by adding more protein powder or incorporating Greek yogurt.
  • What other fruits can I use? Feel free to use any fruits you love—bananas, peaches, or even dried fruits work well.
  • Can I freeze these oats? Yes, you can freeze the prepared oats, but texture may change upon thawing.
  • What’s the best way to serve these oats? Serve them warm topped with fresh fruit, nuts, or a drizzle of nut butter.
  • How can I enhance the flavor? Adding spices like nutmeg or cardamom can elevate the flavor profile.

Nutritional Tips and Dietary Adaptations

This recipe is not only delicious but also nutritious. Here’s how to make it even healthier:

  • Fiber boost: Add flaxseeds or chia seeds for extra fiber and omega-3 fatty acids.
  • Low-sugar option: Use unsweetened almond milk and skip the sweeteners for a low-sugar version.
  • Gluten-free: Ensure that you’re using certified gluten-free rolled oats if you have a gluten intolerance.
  • Protein-packed: Use a higher protein powder or Greek yogurt for a more substantial protein boost.

Equipment Recommendations

To make your cooking experience even better, consider these essential tools:

  • Nonstick saucepan: A good-quality nonstick saucepan helps prevent sticking and makes cleanup easier.
  • Measuring cups and spoons: Accurate measurements ensure that your oats turn out perfectly every time.
  • Spatula or wooden spoon: For stirring and mixing, a sturdy spatula or wooden spoon is a must.
  • Bowl and fork: For serving, choose your favorite bowl and fork to enjoy your delicious oats.

Serving Suggestions

Once your Berry Delight Protein Oats are ready, consider these delicious serving options:

  • Fresh fruit toppings: Add sliced strawberries, blueberries, or even diced mango for a refreshing touch.
  • Nut butter drizzle: A drizzle of almond or peanut butter adds creaminess and flavor.
  • Coconut flakes: Sprinkle some unsweetened coconut flakes on top for a tropical vibe.
  • Granola crunch: Add a handful of granola for a satisfying crunch and extra texture.

In conclusion, making your Berry Delight Protein Oats is not just easy; it’s a delightful way to fuel your body and start your day on the right foot. With endless possibilities for customization, you can make this recipe work for you and your family. So, gather your ingredients, roll up your sleeves, and enjoy cooking! Remember, great food doesn’t require perfection—just love and good ingredients. Happy cooking!

Berry Delight Protein Oats

Prep Time 5 minutes
Cook Time 10 minutes
Total Time 15 minutes
Servings 2 servings
Calories 350
A delicious and nutritious oatmeal recipe packed with berries and protein to energize your day.

Ingredients

Dried Goods

  • 1 cup rolled oats
  • 2 cups water or milk of choice
  • 1 scoop vanilla protein powder
  • 1 cup mixed berries (strawberries, blueberries, raspberries)
  • 1 tablespoon honey or maple syrup (optional)
  • 0.25 teaspoon cinnamon
  • Pinch salt

Instructions 

  • Combine oats, water or milk, and salt in a saucepan. Bring to a boil, then simmer for 5 minutes.
  • Stir in protein powder and cinnamon until well mixed.
  • Add berries and cook for 1-2 minutes until heated.
  • Serve in bowls and drizzle with honey or syrup if desired. Enjoy!

Notes

Feel free to top with additional berries or nuts for extra texture.
Calories: 350kcal
Cost: $8
Course: Breakfast
Cuisine: American
Keyword: Berries, Oats, Protein

Mastering the Mediterranean Chicken Zucchini Bake

Welcome to your new favorite weeknight recipe: the Mediterranean Chicken Zucchini Bake! This dish is not just a meal; it’s a flavorful experience that combines tender chicken, fresh vegetables, and delightful Mediterranean spices. Perfect for anyone looking to enjoy a healthy, easy-to-make dinner without the fuss, this recipe will quickly become a staple in your kitchen.

In this comprehensive guide, we’ll explore everything you need to know about making the perfect Mediterranean Chicken Zucchini Bake, from ingredient breakdowns to expert tips and tricks. Let’s dive in!

Why You’ll Love This Recipe

  • Quick and Easy: This dish can be prepared in under an hour, making it perfect for busy weeknights.
  • Healthy Ingredients: Packed with lean protein, fresh vegetables, and healthy fats, this Mediterranean chicken zucchini bake is a nourishing choice.
  • Flavor Explosion: The combination of herbs and spices elevates the dish, providing robust Mediterranean flavors that will delight your palate.
  • One-Pan Wonder: Minimal cleanup is required, as everything cooks in a single baking dish!
  • Versatility: Great for meal prep or as a dinner party centerpiece, this dish is sure to impress.

Ingredient Breakdown

To create this mouthwatering Mediterranean Chicken Zucchini Bake, gather the following ingredients:

  • 2 boneless, skinless chicken breasts: Cut into bite-sized pieces for even cooking.
  • 2 medium zucchinis: Slice into half-moons to ensure a tender texture.
  • 1 cup cherry tomatoes: Halved to add sweetness and color.
  • ½ red onion: Thinly sliced for a mild, sweet flavor.
  • 2 cloves garlic: Minced, to enhance the dish’s aroma.
  • 2 tablespoons olive oil: A healthy fat that adds richness.
  • 1 teaspoon dried oregano: A classic Mediterranean herb for flavor.
  • ½ teaspoon dried basil: Complementary to oregano, adding depth.
  • ½ teaspoon smoked paprika: For a hint of smokiness.
  • ½ teaspoon salt: To enhance all flavors.
  • ¼ teaspoon black pepper: For seasoning.
  • ¼ teaspoon red pepper flakes: Optional, for a spicy kick.
  • ½ cup shredded mozzarella cheese: Or substitute feta for a more authentic Mediterranean touch.
  • ¼ cup grated Parmesan cheese: Adds a nutty flavor and creates a delicious crust.
  • 2 tablespoons fresh parsley: Chopped, for garnish and freshness.

Substitutions

If you’re missing any ingredients or want to make a few tweaks, here are some great substitutions:

  • Chicken: Use boneless turkey or tofu for a lighter option.
  • Zucchini: Try eggplant or bell peppers for different textures and flavors.
  • Cheese: Goat cheese or a dairy-free alternative can work well too.
  • Herbs: Fresh herbs like thyme or rosemary can be used instead of dried.

Step-by-Step Instructions

Let’s get cooking! Follow these simple steps for a delicious Mediterranean Chicken Zucchini Bake:

  1. Preheat your oven to 375°F (190°C).
  2. Lightly grease a 9×13-inch baking dish with olive oil.
  3. In a large bowl, toss the chicken, zucchini, cherry tomatoes, red onion, and garlic with the olive oil and Mediterranean seasoning until everything is evenly coated.
  4. Spread the chicken and vegetable mixture evenly in the prepared baking dish.
  5. Sprinkle the mozzarella and Parmesan cheese over the top.
  6. Cover with foil and bake for 20 minutes.
  7. Remove the foil and bake for another 10-15 minutes, until the cheese is golden and bubbly, and the chicken reaches an internal temperature of 165°F (75°C).
  8. Garnish with fresh parsley and serve warm.
  9. Pair with rice, quinoa, or crusty bread for a complete meal!

Pro Tips for Perfecting Your Bake

  • Cut Evenly: Ensure all vegetables are cut evenly to promote even cooking.
  • Use Fresh Herbs: Whenever possible, opt for fresh herbs to enhance the Mediterranean flavors.
  • Don’t Overbake: Keep an eye on the bake to prevent overcooking, leading to dry chicken.
  • Rest Before Serving: Allow the bake to rest for about 5 minutes after taking it out of the oven for better flavor.
  • Make It Ahead: Prepare the dish in advance and store it in the fridge for easy reheating.
  • Experiment with Spices: Feel free to add your favorite spices to customize the flavor profile.
  • Watch the Cheese: For a crispy topping, broil the dish for the last few minutes of cooking.
  • Pair Wisely: Serve with sides that complement the Mediterranean theme.

Common Mistakes and Troubleshooting

Here are some common pitfalls to avoid when making your Mediterranean Chicken Zucchini Bake:

  • Soggy Vegetables: To prevent this, ensure zucchini is sliced evenly and consider lightly salting them before baking to draw out excess moisture.
  • Dry Chicken: Use an instant-read thermometer to check for doneness, ensuring the chicken is cooked but not overdone.
  • Uneven Cooking: Stir the mixture halfway through baking to ensure even cooking and flavor distribution.

Variations on the Mediterranean Chicken Zucchini Bake

Here are some fun twists to try with your Mediterranean Chicken Zucchini Bake:

  • Italian Style: Add marinara sauce and Italian herbs for a pizza-inspired version.
  • Greek Twist: Incorporate Kalamata olives and feta cheese for a Greek flavor profile.
  • Spicy Southwest: Include black beans, corn, and taco seasoning for a zesty kick.
  • Veggie-Loaded: Skip the chicken and double the vegetables for a hearty vegetarian bake.

Storage and Make-Ahead Instructions

This Mediterranean Chicken Zucchini Bake is perfect for meal prep! Here’s how to store and reheat:

  • Refrigeration: Store leftovers in an airtight container in the fridge for up to 3 days.
  • Freezing: Freeze the unbaked mixture for up to 3 months. Thaw in the refrigerator before baking.
  • Reheating: Warm leftovers in the oven at 350°F (175°C) until heated through, about 15-20 minutes.

FAQ: Your Mediterranean Chicken Zucchini Bake Questions Answered

  • Can I use other proteins? Yes! Turkey, shrimp, or tofu are great substitutes.
  • What’s the best way to cut zucchini? Slice into half-moons or rounds for even cooking.
  • How can I make this dish spicier? Add more red pepper flakes or diced jalapeños to the mix.
  • Can I prepare this in advance? Absolutely! Assemble the dish a day ahead and bake when ready.
  • Is this dish gluten-free? Yes, all ingredients are naturally gluten-free.
  • What can I serve with this dish? Pair it with quinoa, a fresh salad, or crusty bread.
  • How do I know when the chicken is done? Use an instant-read thermometer; chicken should reach 165°F (75°C).
  • Can I add more vegetables? Definitely! Feel free to experiment with your favorites.

Nutrition Tips and Dietary Adaptations

This Mediterranean Chicken Zucchini Bake is not just delicious but also nutritious! Here are some tips:

  • Lean Protein: Chicken is a great source of protein; consider using skinless thighs for extra moisture.
  • Incorporate Whole Grains: Serve with brown rice or quinoa for added fiber.
  • Boost Veggies: Add more non-starchy vegetables for extra nutrients without adding many calories.
  • Low-Fat Options: Choose low-fat cheese to reduce calories and fat content.

Equipment Recommendations

To make your Mediterranean Chicken Zucchini Bake, you’ll need:

  • 9×13-inch baking dish: Essential for the baking process.
  • Large mixing bowl: For tossing ingredients together.
  • Sharp knife: For cutting vegetables and chicken.
  • Measuring spoons: To accurately measure spices and oils.

Serving Suggestions

For a complete meal, consider pairing your Mediterranean Chicken Zucchini Bake with:

  • Quinoa Salad: A refreshing side that complements the dish perfectly.
  • Garlic Bread: For those who love a little crunch with their meal.
  • Greek Yogurt: A dollop on top can add creaminess and a tangy flavor.
  • Fresh Lemon Wedges: Squeeze over the bake before serving for brightness.

Conclusion

Your Mediterranean Chicken Zucchini Bake is now ready to shine! With its vibrant flavors, ease of preparation, and nutritional benefits, it’s no wonder this dish is a home cook’s favorite. Feel confident as you whip up this recipe, knowing it will bring joy to your dinner table. So, gather your ingredients, roll up your sleeves, and let’s make cooking an exciting adventure!

Mediterranean Chicken Zucchini Bake – Healthy, Flavorful & Easy!

Prep Time 10 minutes
Cook Time 30 minutes
Total Time 40 minutes
Servings 4 servings
Calories 450
A delicious and healthy baked chicken dish featuring fresh vegetables and Mediterranean flavors, perfect for a quick weeknight dinner.

Ingredients

Protein

  • 2 pieces boneless, skinless chicken breasts (cut into bite-sized pieces)

Vegetables

  • 2 medium zucchinis (sliced into half-moons)
  • 1 cup cherry tomatoes (halved)
  • ½ red onion red onion (thinly sliced)
  • 2 cloves garlic (minced)

Seasonings & Oils

  • 2 tablespoons olive oil
  • 1 teaspoon dried oregano
  • ½ teaspoon dried basil
  • ½ teaspoon smoked paprika
  • ½ teaspoon salt
  • ¼ teaspoon black pepper
  • ¼ teaspoon red pepper flakes (optional, for heat)

Cheese

  • ½ cup shredded mozzarella cheese (or feta for a Mediterranean touch)
  • ¼ cup grated Parmesan cheese

Garnish

  • 2 tablespoons fresh parsley (chopped, for garnish)

Instructions 

  • Preheat oven to 375°F (190°C).
  • Toss chicken, zucchini, cherry tomatoes, onion, and garlic with olive oil and spices.
  • Spread mixture in a baking dish, top with cheeses.
  • Cover with foil and bake for 20 minutes, then uncover and bake 10-15 minutes until golden and cooked through.
  • Garnish with parsley and serve warm.

Notes

For extra flavor, add a squeeze of lemon before serving.
Calories: 450kcal
Cost: $15
Course: Main Course
Cuisine: Mediterranean
Keyword: bake, Chicken, Zucchini

Welcome to a world of flavor and simplicity! If you’re looking for a quick and healthy snack or breakfast, you’ve landed in the right place. The strawberry yogurt parfait is a delightful combination of creamy yogurt, fresh strawberries, and crunchy granola that you can whip up in no time. Perfect for busy mornings or a sweet afternoon treat, this recipe is not only easy to make but also packed with nutrients and flavor. Let’s dive in!

Why You’ll Love This Recipe

This strawberry yogurt parfait is not just a treat for the taste buds; it offers numerous benefits that make it a must-try:

  • Quick and Easy: Assemble this parfait in under 10 minutes, making it ideal for busy individuals or families.
  • Customizable: Use your favorite fruits, yogurt types, and granola for a personalized touch.
  • Health Benefits: Packed with antioxidants from strawberries and protein from yogurt, it’s a nutritious choice.
  • Make-Ahead Friendly: Prepare it the night before for a grab-and-go breakfast.
  • Visually Appealing: The layers of color create an inviting presentation that’s perfect for brunch or gatherings.

Ingredients for Your Strawberry Yogurt Parfait

Here’s what you’ll need to create this delicious parfait:

  • 2 cups vanilla yogurt: Greek or plant-based alternatives work great too!
  • 1.5 cups fresh strawberries: Make sure to hull and slice them for the best flavor.
  • 1 cup granola: Choose homemade or low-calorie options based on your dietary needs.
  • 2 tbsp honey: Optional for those who prefer a sweeter touch.
  • 1 tbsp chia seeds: Optional for an extra boost of fiber and nutrition.

How to Make Your Strawberry Yogurt Parfait

Ready to create layers of deliciousness? Follow these simple steps:

  1. Wash and hull the strawberries, then slice them into small pieces.
  2. In a clear glass, start by adding 2 tablespoons of yogurt as the base layer.
  3. Add a spoonful of sliced strawberries on top of the yogurt.
  4. Sprinkle a layer of granola over the strawberries.
  5. Repeat the layers (yogurt, strawberries, granola) until the glass is full.
  6. Drizzle honey or add chia seeds on top if using.
  7. Serve immediately for crunch, or chill for 15 minutes for a blended flavor.

Pro Tips for the Perfect Parfait

A delicious parfait featuring vanilla yogurt, sliced strawberries, and a sprinkle of granola.

Want to elevate your parfait game? Here are some expert tips:

  • Layering: For best results, layer ingredients in a clear glass to showcase the beautiful colors.
  • Texture Variation: Mix in different textures by adding nuts or seeds for crunch.
  • Freshness Matters: Use fresh, ripe strawberries for optimal sweetness and flavor.
  • Homemade Granola: Try making your own granola to control sweetness and flavor.
  • Chill Time: Allowing the parfait to chill enhances the flavors as they meld together.
  • Health Boost: Add a scoop of protein powder to the yogurt for an extra health kick.
  • Vegan Swap: Substitute yogurt with coconut yogurt and honey with maple syrup for a vegan version.
  • Mix Fruit: Experiment with other fruits like blueberries or bananas to switch up the flavor profile.

Common Mistakes and Troubleshooting

Even the best cooks make mistakes! Here are some common pitfalls and how to avoid them:

  • Using Overripe Fruit: Always opt for fresh, firm strawberries to prevent a mushy parfait.
  • Too Much Granola: Keep granola balanced to ensure it doesn’t overpower the yogurt and strawberries.
  • Assembling Too Early: If prepared too early, the layers may become soggy. Assemble just before serving or store granola separately.

Variations & Substitutions

Mix things up with these delicious variations:

  • Tropical Twist: Use mango and coconut yogurt for a tropical version.
  • Berry Medley: Combine strawberries with raspberries and blueberries for a mixed berry parfait.
  • Nutty Delight: Add chopped nuts like almonds or walnuts for added crunch and flavor.
  • Chocolate Indulgence: Stir in cocoa powder to the yogurt or add chocolate granola for a dessert-like treat.

Storage and Make-Ahead Instructions

Planning ahead? Here’s how to store your parfait:

  • Refrigeration: Store assembled parfaits in the refrigerator for up to 24 hours for best freshness.
  • Granola Storage: Keep granola separate until serving to maintain its crunch.
  • Make-Ahead: Prepare yogurt and fruit the night before, then layer in the morning.

Frequently Asked Questions

Got questions? Here are some common queries about strawberry yogurt parfaits:

  • Are strawberry yogurt parfaits healthy? Yes! They provide a great balance of protein, fiber, and vitamins.
  • How can I make it vegan? Use plant-based yogurt and maple syrup instead of honey.
  • Can I use frozen strawberries? Yes, but fresh strawberries provide the best texture and flavor.
  • How do I prevent my parfait from becoming soggy? Layer granola just before serving and store it separately when possible.
  • Can I add other fruits? Absolutely! Feel free to mix in your favorite fruits for variety.
  • Is this a good option for meal prep? Yes! It’s ideal for quick breakfasts or snacks throughout the week.
  • What can I substitute for granola? Try oats, crushed nuts, or seeds as a crunchy topping.
  • How can I enhance the flavor of the yogurt? Consider adding a splash of vanilla extract or a sprinkle of cinnamon.

Nutrition Tips and Dietary Adaptations

This parfait is versatile! Here are some nutritional tips:

  • Protein Boost: Add a scoop of protein powder to your yogurt for a post-workout treat.
  • Low Sugar Option: Use unsweetened yogurt and skip the honey for a lower sugar version.
  • Gluten-Free: Ensure your granola is gluten-free if you have dietary restrictions.
  • High Fiber: Incorporate chia seeds or flaxseeds for added fiber and omega-3 fatty acids.

Essential Equipment for Your Parfait

Here’s what you need to make your parfait:

  • Clear Glasses: Ideal for showcasing the beautiful layers of your parfait.
  • Sharp Knife: For easily slicing strawberries and other fruits.
  • Mixing Bowls: Handy for preparing your yogurt and fruit layers.
  • Measuring Cups: To ensure accurate ingredient amounts for perfect results.

Serving Suggestions

To make your parfait even more delightful:

  • Brunch Favorite: Serve it as a centerpiece at your next brunch gathering.
  • On-the-Go: Pack it in a mason jar for a nutritious snack or quick breakfast.
  • Pairing: Complement with a side of whole grain toast or an omelet for a balanced meal.

In conclusion, your strawberry yogurt parfait journey begins here! With its vibrant colors, delicious flavors, and ease of preparation, this recipe will quickly become a favorite in your kitchen. Remember, cooking is about confidence and creativity—so feel free to experiment with flavors and textures. Enjoy every bite!

Strawberry Yogurt Parfait

Prep Time 10 minutes
Total Time 10 minutes
Servings 2 servings
Calories 250
A delicious and healthy layered dessert perfect for breakfast or a snack, combining creamy yogurt, fresh strawberries, and crunchy granola.

Ingredients

Base Layer

  • 2 cups vanilla yogurt (Greek or plant-based alternatives optional)
  • 1.5 cups fresh strawberries (hulled and sliced)
  • 1 cup granola (homemade or low-calorie preferred)
  • 2 tbsp honey (optional – for extra sweetness)
  • 1 tbsp chia seeds (optional – for extra fiber and nutrition)

Instructions 

  • Layer yogurt, strawberries, and granola in a glass.
  • Repeat layers until full.
  • Drizzle honey or sprinkle chia seeds on top.
  • Serve immediately or chill for 15 minutes.

Notes

For added flavor, try using flavored yogurt or adding a few mint leaves.
Calories: 250kcal
Cost: $10
Course: Breakfast, Snack
Cuisine: American
Keyword: Granola, strawberries, Yogurt

Discover the Joy of Cooking with a Romaine Caesar Bowl

If you’re in search of a meal that’s both satisfying and simple to prepare, look no further than this Romaine Caesar Bowl. Packed with fresh ingredients and topped with a creamy homemade dressing, it’s a dish that not only elevates your dinner but also brings a sense of confidence to your cooking. Whether you’re a busy professional or a culinary novice, this recipe is designed to be approachable, adaptable, and utterly delicious. Let’s dive into why you’ll love making this bowl of goodness.

Why You’ll Love This Recipe

  • Quick and Easy: You can have this Romaine Caesar Bowl ready in under 30 minutes, making it perfect for those busy weeknights.
  • Customizable: Whether you prefer grilled chicken, roasted chickpeas, or shrimp, this recipe allows you to switch up the protein to suit your taste.
  • Fresh Ingredients: Crisp romaine lettuce, juicy cherry tomatoes, and homemade croutons make this salad vibrant and full of flavor.
  • Healthier Option: Using Greek yogurt in the dressing adds creaminess without all the calories, helping you stay on track with your health goals.
  • Meal Prep Friendly: You can prepare the components in advance, making it easy to assemble when hunger strikes.

Ingredient Breakdown

Let’s take a closer look at the ingredients that make this Romaine Caesar Bowl shine, along with some handy substitutions.

  • Romaine Lettuce: Fresh and crisp, it forms the base of this salad. You can substitute with kale or spinach for a different texture.
  • Cherry Tomatoes: These add a burst of sweetness and color. If you’re not a fan, feel free to leave them out or replace them with diced cucumbers.
  • Shaved Parmesan Cheese: A classic in Caesar salads. If you prefer, you can use nutritional yeast for a dairy-free option.
  • Day-Old Bread: Perfect for homemade croutons. Any stale bread works; consider using whole grain for extra fiber.
  • Olive Oil: Use extra virgin for the best flavor. Can be swapped with avocado oil if desired.
  • Garlic Powder: For a hint of garlic flavor. Fresh minced garlic can be used if you want a stronger kick.
  • Protein: Choose between grilled chicken, roasted chickpeas, or grilled shrimp. Each option adds a unique flavor to the bowl.
  • Mayonnaise: This forms the creamy base of the dressing. You can substitute with vegan mayo or use avocado for a healthier twist.
  • Plain Greek Yogurt: Adds tanginess and creaminess. Feel free to use regular yogurt or skip it entirely for a lighter dressing.
  • Lemon Juice: Freshly squeezed for the best taste. Bottled lemon juice works in a pinch but lacks the brightness.
  • Dijon Mustard and Worcestershire Sauce: These ingredients add depth to the dressing. If you’re avoiding Worcestershire sauce, try coconut aminos for a similar flavor.

Pro Tips for the Perfect Bowl

Detailed image of a Romaine Caesar Bowl filled with chopped romaine, croutons, and a sprinkle of Parmesan.
  • Rinse and Dry: Make sure to wash and dry your romaine thoroughly to avoid a soggy salad.
  • Make Ahead: Prep your ingredients (like washing lettuce and roasting chickpeas) in advance to save time.
  • Crouton Perfection: Bake croutons until golden brown for the best texture—don’t skip this step!
  • Adjust the Dressing: Taste your dressing as you go and adjust the seasoning to your preference—add more lemon juice for tang or more mayo for creaminess.
  • Layering: When assembling, layer your ingredients in a way that the dressing coats everything evenly.
  • Chill the Bowl: For a refreshing twist, chill your salad bowl in the fridge before serving.
  • Garnish Wisely: Add extra shaved Parmesan or a sprinkle of fresh herbs (like parsley or basil) for a gourmet touch.
  • Crunch Factor: Add nuts or seeds (like sunflower seeds) for additional crunch and nutrition.
  • Seasoning: Don’t forget to season each component with salt and pepper for enhanced flavor.
  • Experiment: Don’t hesitate to try different dressings or toppings to keep things exciting!

Common Mistakes and Troubleshooting

Even the best recipes can have their challenges. Here’s how to troubleshoot some common mistakes.

  • Too Much Dressing: If your salad is drowning in dressing, add more greens or croutons to balance it out.
  • Soggy Croutons: If your croutons lose their crunch, store them in an airtight container to maintain texture.
  • Soggy Salad: Always serve the dressing on the side if you’re preparing the salad ahead of time.
  • Flavorless Dressing: If your dressing lacks flavor, try adding more garlic, lemon juice, or salt.
  • Overcooked Protein: Keep an eye on your protein while cooking; overcooking can lead to dryness, especially with chicken.

Variations to Spice Things Up

This Romaine Caesar Bowl is versatile. Here are some creative variations you might enjoy:

  • Greek Caesar Bowl: Swap out the dressing for a tzatziki-style dressing and add olives and feta cheese.
  • Vegan Caesar Bowl: Use chickpeas or tofu as the protein and substitute the dressing with a cashew-based version.
  • Spicy Caesar Bowl: Add sliced jalapeños or a dash of hot sauce to the dressing for a kick.
  • Asian-Inspired Bowl: Incorporate sesame oil in the dressing and top with shredded carrots and edamame.

Storage and Make-Ahead Instructions

This salad can be prepped ahead of time, making it a great option for meal prep. Here’s how to store it:

  • Salad Components: Store the chopped romaine, tomatoes, and protein separately in airtight containers in the fridge for up to 3 days.
  • Dressing: The dressing can be kept in an airtight container for up to a week. Shake well before using.
  • Croutons: Store leftover croutons in an airtight container at room temperature for up to a week.

Frequently Asked Questions

Here are answers to some common questions about the Romaine Caesar Bowl:

  • Can I make this bowl gluten-free? Yes! Use gluten-free bread for croutons or skip them entirely.
  • How can I add more protein? Besides grilled chicken or chickpeas, consider adding hard-boiled eggs or quinoa.
  • Is this recipe suitable for meal prep? Absolutely! Prep your ingredients in advance for a quick assembly during the week.
  • Can I use another type of lettuce? Yes! Feel free to substitute with kale or arugula for different flavors.
  • What can I use instead of mayonnaise? Avocado, tahini, or a vegan mayo are great alternatives.
  • How do I store leftover salad? Store leftovers in an airtight container, but note that the lettuce may wilt.
  • Can I freeze croutons? Yes! Freeze them in an airtight container for longer storage.
  • What if I don’t like anchovies? You can simply omit them from the dressing without losing flavor.

Nutritional Tips and Dietary Adaptations

For those looking to adapt this recipe to fit specific dietary needs, consider the following:

  • Low-Calorie Option: Choose grilled chicken and minimize the amount of dressing used.
  • High-Protein Option: Add extra grilled chicken or chickpeas for a protein boost.
  • Dairy-Free Option: Use nutritional yeast instead of Parmesan and omit Greek yogurt from the dressing.
  • Low-Carb Option: Skip the croutons and add more protein and vegetables to the bowl.

Essential Equipment Recommendations

To make preparing your Romaine Caesar Bowl a breeze, here are some helpful kitchen tools:

  • Chef’s Knife: A good knife will make chopping your ingredients quick and easy.
  • Cutting Board: Opt for a large board to give yourself plenty of space.
  • Mixing Bowl: A large bowl is essential for tossing all your ingredients together.
  • Baking Sheet: Use this for roasting your croutons to perfection.
  • Whisk: A whisk is perfect for combining your dressing ingredients smoothly.

Serving Suggestions

To enhance your dining experience, consider these serving ideas:

  • Pair with Soup: This salad goes perfectly with a warm bowl of tomato soup for a cozy meal.
  • Serve Family Style: Place all components on the table and let everyone build their own bowl.
  • Garnish with Fresh Herbs: Adding fresh basil or parsley can elevate the dish visually and flavor-wise.
  • Include a Side of Bread: A crusty baguette or garlic bread complements the salad wonderfully.

With this comprehensive guide to creating a Romaine Caesar Bowl, you’re not just following a recipe; you’re embarking on a culinary adventure. Cooking should be fun, and with the right ingredients and a little creativity, you can make magic in your kitchen. So gather your ingredients, channel your inner chef, and enjoy every bite of this delicious salad bowl!

Romaine Caesar Bowl

Prep Time 15 minutes
Cook Time 10 minutes
Total Time 25 minutes
Servings 4 servings
Calories 450
A fresh and hearty salad featuring crisp romaine, savory Parmesan, and your choice of protein, all tossed in a creamy Caesar dressing.

Ingredients

Vegetables and Greens

  • 2 large heads romaine lettuce, washed, dried, and chopped
  • 1 cup cherry tomatoes, halved (optional)
  • ½ cup shaved Parmesan cheese

Bread and Protein

  • 3 cups day-old bread, cubed
  • 2 tablespoons olive oil
  • ½ teaspoon garlic powder
  • ¼ teaspoon salt
  • ¼ teaspoon black pepper
  • 2 pieces grilled chicken breasts, sliced (or chickpeas or shrimp)
  • ¼ cup mayonnaise
  • 2 tablespoons plain Greek yogurt
  • 2 tablespoons freshly squeezed lemon juice
  • 2 teaspoons Dijon mustard
  • 2 teaspoons Worcestershire sauce
  • 1 clove garlic, minced
  • ¼ cup grated Parmesan cheese

Notes

  • Salt and black pepper, to taste

Instructions 

  • Preheat oven to 375°F (190°C). Toss bread cubes with olive oil, garlic powder, salt, and pepper. Bake for 8-10 minutes until golden and crisp. Cool before serving.
  • Mix mayonnaise, Greek yogurt, lemon juice, Dijon mustard, Worcestershire, minced garlic, anchovies (if using), Parmesan, salt, and pepper to make dressing.
  • Cook protein: grill chicken, roast chickpeas, or grill shrimp. Slice or prepare as needed.
  • Toss chopped romaine with half the dressing. Add cherry tomatoes and Parmesan, then combine gently.
  • Top salad with croutons and protein. Drizzle remaining dressing and serve immediately.

Notes

For extra flavor, add more anchovies or Parmesan as desired.
Calories: 450kcal
Cost: $15
Course: Salad
Cuisine: American
Keyword: Caesar, Chicken, Romaine

Discover the Ultimate Chicken and Quinoa Bowl

If you’re looking for a vibrant and nutritious meal that’s both satisfying and easy to prepare, you’ve arrived at the right place! This Chicken and Quinoa Bowl is more than just a recipe; it’s a celebration of flavors and textures that will make your weeknight dinners exciting again. Packed with protein and wholesome ingredients, this bowl is perfect for busy weeknights when you want to enjoy a healthy meal without the hassle.

Why You’ll Love This Recipe

This Chicken and Quinoa Bowl is not only delicious but also incredibly versatile. Here are some reasons why you’ll want to make it again and again:

  • High Protein Content: With lean chicken breast and quinoa, this bowl is loaded with protein to keep you full and satisfied.
  • Quick and Easy: This recipe takes under 50 minutes from prep to plate, making it ideal for busy evenings.
  • Customizable: You can easily swap out ingredients to suit your tastes or dietary needs.
  • Meal Prep Friendly: Make a big batch and store it for quick lunches throughout the week.
  • Flavor-Packed: The marinade infuses the chicken with zesty flavors that complement the fresh toppings perfectly.

Ingredient Breakdown

Let’s dive into the ingredients you’ll need to create this delicious Chicken and Quinoa Bowl:

  • 1.5 lbs boneless, skinless chicken breast: A lean protein source, perfect for a healthy meal.
  • 2 limes (juice and zest, about 1/3 cup): Adds a bright, zesty flavor to the marinade.
  • 2 tbsp olive oil: Helps to tenderize the chicken and adds healthy fats.
  • 2 tbsp chopped cilantro: Fresh herbs give a burst of flavor.
  • 1 tbsp chili powder: Adds a kick of heat to the dish.
  • 1 tsp cumin: Provides a warm, earthy flavor.
  • 1 tbsp honey: Balances the acidity of lime with a hint of sweetness.
  • Salt and pepper, to taste: Enhances all the flavors.
  • 2 cups cooked quinoa (from 1 cup dry quinoa): A complete protein and base for the bowl.
  • 2 cups greens (Romaine or butter lettuce): Adds crunch and freshness.
  • 1 cup canned black beans, rinsed and drained: Boosts protein and fiber.
  • 1 cup corn (fresh or frozen, thawed): Sweetness and texture.
  • 1 cup cherry tomatoes, halved: Bright and juicy pop of flavor.
  • 1/4 cup chopped cilantro: For garnish and added freshness.
  • Optional toppings: avocado, lime wedges, Greek yogurt for creaminess.

Pro Tips for Perfecting Your Bowl

Here are some expert insights to ensure your Chicken and Quinoa Bowl turns out perfectly:

  • Marinate the Chicken: For maximum flavor, let the chicken marinate for at least 30 minutes, or up to 2 hours if you have the time.
  • Cook the Quinoa Properly: Rinse quinoa before cooking to remove its natural bitterness. Use a 2:1 water-to-quinoa ratio for fluffy results.
  • Grill for Flavor: If possible, grill the chicken instead of pan-searing it for a smoky flavor.
  • Don’t Overcrowd the Pan: When searing chicken, give each piece enough space to cook evenly.
  • Rest the Chicken: Let the chicken rest after grilling to keep it juicy.
  • Balance Your Bowl: Layer your ingredients for a beautiful presentation and even distribution of flavors.
  • Make Ahead: Prepare components like quinoa and chicken in advance for easy assembly later.
  • Try Different Dressings: Experiment with different dressings (like tahini or yogurt-based) for added flavor.

Common Mistakes and Troubleshooting

Even the best cooks make mistakes! Here’s how to avoid common pitfalls:

  • Overcooked Quinoa: Keep an eye on the cooking time and let quinoa sit covered for 5 minutes after cooking to absorb any remaining water.
  • Dry Chicken: Ensure your chicken doesn’t cook beyond 165°F. Using a meat thermometer can help.
  • Bland Flavors: Always taste and adjust seasoning before serving. Don’t be afraid to add more salt or lime juice!

Variations to Try

Mix things up with these fun variations:

  • Spicy Chipotle Chicken: Add chipotle powder to the marinade for a smoky heat.
  • Vegetarian Version: Substitute chicken with grilled tofu or chickpeas for a plant-based option.
  • Asian-Inspired Bowl: Use soy sauce and ginger in the marinade and top with sesame seeds and green onions.
  • Southwest Bowl: Add avocado, salsa, and cilantro lime dressing for a zesty twist.

Storage and Make-Ahead Instructions

This Chicken and Quinoa Bowl stores well, making it perfect for meal prep. Here’s how to keep it fresh:

  • Refrigerate: Store in an airtight container for up to 4 days.
  • Freezing: Cooked quinoa and chicken can be frozen for up to 3 months.
  • Reheat Carefully: When reheating, add a splash of water to keep the quinoa moist.

Frequently Asked Questions (FAQ)

Here are some common questions about this recipe:

  • Can I use brown rice instead of quinoa? Yes, brown rice is a great substitute, but cooking times will vary.
  • How do I know when the chicken is done? The internal temperature should reach 165°F. A meat thermometer is your best friend!
  • Can I make this bowl vegan? Absolutely! Substitute chicken with grilled tofu and use maple syrup instead of honey.
  • What other toppings can I add? Consider adding nuts, seeds, or different vegetables like roasted sweet potatoes.
  • How spicy is this recipe? The spice level can be adjusted to your preference by modifying the chili powder amount.
  • Is this recipe gluten-free? Yes, all ingredients are gluten-free, making it suitable for those with gluten sensitivities.
  • Can I use frozen chicken? It’s best to thaw the chicken first to ensure even cooking.
  • How long does it take to prepare this dish? The total time is around 50 minutes, including preparation and cooking.

Nutritional Tips and Dietary Adaptations

This Chicken and Quinoa Bowl is not only delicious but also packed with nutrients:

  • High Fiber: The combination of quinoa, beans, and veggies provides excellent fiber.
  • Healthy Fats: Olive oil and avocado offer heart-healthy fats that are essential for a balanced diet.
  • Micronutrient Rich: Ingredients like tomatoes and greens add essential vitamins and minerals.
  • Low Glycemic Index: Quinoa keeps your blood sugar steady, making it a great choice for energy.

Essential Equipment Recommendations

To make this recipe, you’ll need the following kitchen essentials:

  • Good Quality Skillet: Ideal for searing chicken evenly.
  • Pot for Cooking Quinoa: A medium saucepan works best.
  • Meat Thermometer: Ensures perfectly cooked chicken every time.
  • Mixing Bowl: For marinating the chicken.

Serving Suggestions

To round off your meal, consider serving your Chicken and Quinoa Bowl with:

  • Warm Pita Bread: Perfect for scooping up all the delicious ingredients.
  • Greek Salad: A refreshing side that complements the flavors beautifully.
  • Yogurt Sauce: A cool, creamy addition that balances the spiciness.

Final Thoughts

With its bright flavors and nutritious ingredients, this Chicken and Quinoa Bowl is a fantastic addition to your weeknight meal rotation. Remember, cooking is all about having fun and experimenting. Don’t hesitate to adjust the ingredients to fit your preferences. Enjoy every bite, and happy cooking!

Chicken & Quinoa Dinner Bowl

Prep Time 15 minutes
Cook Time 20 minutes
Total Time 35 minutes
Servings 4 servings
Calories 550
A vibrant and healthy bowl combining grilled chicken, quinoa, and fresh vegetables for a satisfying meal.

Ingredients

Protein

  • 1.5 lbs boneless, skinless chicken breast
  • 2 limes limes (juice and zest) (about 1/3 cup juice)
  • 2 tbsp olive oil
  • 2 tbsp chopped cilantro
  • 1 tbsp chili powder
  • 1 tsp cumin
  • 1 tbsp honey
  • to taste salt and pepper
  • 2 cups cooked quinoa (from 1 cup dry quinoa)
  • 2 cups greens (Romaine or butter lettuce)
  • 1 cup canned black beans (rinsed and drained)
  • 1 cup corn (fresh or frozen, thawed)
  • 1 cup cherry tomatoes (halved)
  • 1/4 cup chopped cilantro

optional toppings

  • 1 avocado avocado
  • 1 lime lime wedges
  • 1 cup Greek yogurt

Instructions 

  • Whisk lime juice, olive oil, cilantro, chili powder, cumin, honey, salt, and pepper to make the marinade.
  • Add chicken to marinade and refrigerate for 30–120 minutes.
  • Cook quinoa according to package; fluff and set aside.
  • Grill chicken 5–6 minutes per side until cooked; rest and slice.
  • Assemble bowls with quinoa, greens, beans, corn, tomatoes, cilantro, and chicken. Add optional toppings.

Notes

Feel free to customize toppings for extra flavor and nutrition.
Calories: 550kcal
Cost: $15
Course: Main Course
Cuisine: American
Keyword: Chicken, Healthy, quinoa

Why You’ll Fall in Love with Banana Oat Bars

Looking for a delightful, nutritious treat? Our Healthy Banana Chocolate Chip Oat Bars are not just scrumptious—they’re your new go-to snack! Packed with ripe bananas, creamy peanut butter, and wholesome oats, these bars are a perfect blend of flavor and nutrition. Whether you’re rushing out the door for breakfast or need a sweet pick-me-up, these bars have got you covered!

Here’s why you’ll adore making and eating these bars:

  • Quick and easy preparation: With just a few simple steps, you can whip up a batch in no time, making them perfect for busy mornings.
  • Nutritious and satisfying: Loaded with oats and bananas, these bars are not only tasty but also fill you up, keeping hunger at bay.
  • Natural sweetness: Thanks to ripe bananas and maple syrup, you won’t miss the refined sugars in traditional snacks.
  • Customizable options: Feel free to experiment with different mix-ins and toppings to suit your taste!
  • Perfect for meal prep: Make a big batch at the beginning of the week, and you have a healthy snack ready to go whenever you need it.

Ingredients Breakdown

Creating these delicious bars is simple, but understanding your ingredients is key to success! Here’s what you need:

  • 3 medium ripe bananas: These should be well-ripened for maximum sweetness and moisture.
  • 2 large eggs: They help bind the ingredients together and add protein.
  • ½ cup pure maple syrup: A natural sweetener that complements the banana flavor beautifully.
  • ¾ cup creamy peanut butter: Adds richness and healthy fats. You can substitute with almond butter or sunflower seed butter if needed.
  • ¼ cup avocado oil or unsweetened applesauce: For moisture; applesauce is a great low-fat alternative.
  • 2 teaspoons pure vanilla extract: Enhances the overall flavor!
  • 2½ cups old-fashioned oats: The star ingredient that gives these bars their hearty texture.
  • 1 teaspoon baking powder: Helps the bars rise slightly.
  • 1 teaspoon ground cinnamon: Adds warmth and spice.
  • 1 teaspoon kosher salt: Balances the sweetness.
  • ¾ cup chocolate chips: Because who doesn’t love a little chocolate? You can use dark or semi-sweet varieties.
  • 1 tablespoon flaky sea salt (optional): A sprinkle on top for a delightful contrast of flavors.

Step-by-Step Instructions

Now, let’s dive into the process of making these delightful bars!

  1. Preheat the oven to 350°F (175°C) and line a baking dish (approximately 9×9 inches) with parchment paper for easy removal.
  2. In a large bowl, combine the mashed bananas, eggs, maple syrup, peanut butter, oil or applesauce, and vanilla extract. Mix until smooth and creamy.
  3. In another bowl, whisk together the oats, baking powder, cinnamon, and salt.
  4. Gradually add the dry mixture to the wet ingredients, stirring gently until just combined. Be careful not to over-mix!
  5. Fold in the chocolate chips until evenly distributed.
  6. Pour the mixture into the prepared baking dish and spread it evenly. Top with additional chocolate chips if desired.
  7. Bake for 30 minutes or until the top is golden brown and a toothpick inserted in the center comes out clean.
  8. Let cool completely in the pan before lifting out and cutting into squares.

Pro Tips for Baking Success

Close-up shot featuring banana chocolate chip oat bars with a sprinkle of flaky sea salt on top.

Here are some expert insights to elevate your banana oat bars to the next level:

  • Use overripe bananas: The riper, the better! They are sweeter and lend more moisture.
  • Don’t skip the resting time: After baking, let them cool completely to achieve the right texture.
  • Experiment with mix-ins: Feel free to add nuts, dried fruit, or seeds for added texture and nutrition.
  • Check for doneness: Ovens vary, so keep an eye on your bars as they bake.
  • Store properly: Keep the bars in an airtight container at room temperature or refrigerate for longer shelf life.

Common Mistakes and Troubleshooting

Even the best cooks make mistakes! Here are some common pitfalls to avoid:

  • Overmixing the batter: This can lead to tough bars. Mix until just combined.
  • Using unripe bananas: They won’t provide the sweet, moist texture needed for these bars.
  • Not measuring ingredients accurately: Baking is a science, so be precise with your measurements!

Variations to Try

Want to shake things up? Here are some fun variations you can try:

  • Nutty banana oatmeal bars: Add ½ cup of chopped walnuts or pecans for an extra crunch.
  • Chocolate almond joy: Mix in shredded coconut and almond slices for a tropical twist.
  • Peanut butter chocolate chip: Increase the peanut butter to 1 cup and reduce the chocolate chips for a more intense peanut flavor.
  • Spiced pumpkin bars: Substitute 1 cup of mashed pumpkin for the bananas and add pumpkin spice for a seasonal treat.

Storage and Make-Ahead Instructions

These bars are perfect for meal prepping! Here’s how to store them:

  • Room temperature: Keep in an airtight container for up to 3 days.
  • Refrigerator: Store in the fridge for up to a week to keep them fresh and moist.
  • Freezer: For longer storage, freeze the bars. Wrap them individually and place them in a freezer-safe bag for up to 3 months. Thaw overnight in the fridge before enjoying.

Frequently Asked Questions

Got questions? We’ve got answers! Here are some common inquiries about these bars:

  • Can I use instant oats instead of old-fashioned? While instant oats can be used, they won’t provide the same chewy texture.
  • Can I make these bars vegan? Yes! Substitute eggs with flax eggs and use maple syrup as your sweetener.
  • What can I use instead of peanut butter? Almond butter, sunflower seed butter, or even tahini work great!
  • How can I make these bars gluten-free? Ensure to use certified gluten-free oats and check other ingredients for cross-contamination.
  • Can I add protein powder? Absolutely! Just replace a portion of the oats with protein powder for added nutrition.
  • Are these bars kid-friendly? Definitely! With the sweetness of bananas and chocolate, kids will love them.
  • What if I don’t have maple syrup? Honey or agave syrup can be used as alternatives.
  • How do I know when they are done baking? They should be golden brown on top, and a toothpick should come out clean.

Nutritional Tips and Dietary Adaptations

Want to make these bars even healthier? Here are some tips:

  • Reduce sugar: You can cut down on maple syrup if your bananas are very ripe.
  • Increase fiber: Add chia seeds or flaxseeds to boost fiber content.
  • Make it high-protein: Incorporate Greek yogurt into the mix for added protein.

Recommended Equipment

To make your baking experience smooth, here’s what you’ll need:

  • Baking dish: A 9×9-inch pan works perfectly for these bars.
  • Parchment paper: Essential for easy removal and cleanup.
  • Mixing bowls: Use two separate bowls for wet and dry ingredients.
  • Whisk and spatula: For mixing and folding ingredients together.

Serving Suggestions

These banana oat bars can be enjoyed in many ways:

  • As a breakfast option: Pair with a dollop of yogurt and fresh fruit.
  • Afternoon snack: Enjoy with a cup of tea or coffee.
  • Post-workout fuel: A great source of carbohydrates and protein to recharge after exercise.

In conclusion, these Healthy Banana Chocolate Chip Oat Bars are not just easy to make; they’re a wholesome treat that fits perfectly into any lifestyle. Remember, cooking is all about enjoying the journey, so have fun experimenting with flavors and textures. Happy baking!

Healthy Banana Chocolate Chip Oat Bars

Prep Time 10 minutes
Cook Time 30 minutes
Total Time 40 minutes
Servings 12 bars
Calories 220
These wholesome banana oat bars are packed with flavor and healthy ingredients, perfect for a quick snack or breakfast on the go.

Ingredients

Wet ingredients

  • 3 medium ripe bananas, mashed
  • 2 large eggs
  • ½ cup pure maple syrup
  • ¾ cup creamy peanut butter
  • ¼ cup avocado oil or unsweetened applesauce
  • 2 teaspoons pure vanilla extract or almond extract

Dry ingredients

  • cups old-fashioned oats
  • 1 teaspoon baking powder
  • 1 teaspoon ground cinnamon
  • 1 teaspoon kosher salt
  • ¾ cup chocolate chips (plus more for topping)
  • 1 tablespoon flaky sea salt (for topping, optional but delicious!)

Instructions 

  • Preheat oven to 350°F (175°C) and line a baking dish with parchment paper.
  • Mix mashed bananas, eggs, maple syrup, peanut butter, oil or applesauce, and vanilla until smooth.
  • Combine oats, baking powder, cinnamon, and salt in a separate bowl.
  • Gradually add dry ingredients to wet, stirring until just combined, then fold in chocolate chips.
  • Pour into the prepared dish, top with extra chocolate chips and sea salt if desired, then bake for 30 minutes.

Notes

Store in an airtight container for best freshness.
Calories: 220kcal
Cost: $15
Course: Snack
Cuisine: American
Keyword: Banana, chocolate, Oats

Unlock the Secrets to Quick and Delectable Garlic Butter Chicken Bites

If you’re looking for a quick, mouthwatering meal that feels like a treat but takes only 15 minutes to prepare, you’ve come to the right place! These Garlic Butter Chicken Bites will tantalize your taste buds and become a go-to favorite in your kitchen. The combination of tender chicken, rich garlic butter, and fresh herbs creates a dish that is both satisfying and simple to make. Let’s dive into why you’ll love this recipe!

Why You’ll Love This Recipe

  • Speedy Preparation: Perfect for busy weeknights, this recipe comes together in just 15 minutes, so you can enjoy a homemade meal without the stress.
  • Flavor Packed: The rich garlic butter sauce elevates the chicken, making each bite a delightful experience that’s sure to impress.
  • Versatile Ingredients: You can easily customize the dish with your favorite herbs and spices or modify it based on what you have on hand.
  • Easy Cleanup: With everything cooked in a single skillet, you’ll spend less time cleaning up and more time enjoying your meal.
  • Family-Friendly: This dish appeals to both kids and adults, making it a great choice for family dinners.

Ingredients Breakdown

Here’s what you’ll need to make these delicious Garlic Butter Chicken Bites:

  • 2 pounds Boneless, Skinless Chicken Breasts: Fresh chicken yields the best results. You can substitute with chicken thighs for a richer flavor.
  • 1/2 cup All-Purpose Flour: This helps achieve a crispy exterior. For a gluten-free option, substitute with cornstarch.
  • 1 teaspoon Dried Oregano: Fresh oregano can brighten the flavor profile.
  • 1 teaspoon Dried Basil: Alternatively, use Italian seasoning for a blend of herbs.
  • 1 teaspoon Sweet Paprika: Smoked paprika can enhance the flavor with a hint of smokiness.
  • 1 teaspoon Salt: Adjust according to your taste preferences.
  • 1/2 teaspoon Freshly Ground Pepper: Freshly ground adds a depth of flavor that pre-ground doesn’t.
  • 2 tablespoons Olive Oil: Feel free to use any neutral oil of your choice.
  • 3 tablespoons Unsalted Butter: For a dairy-free version, consider using plant-based butter.
  • 4 cloves Garlic: Fresh minced garlic gives the best flavor.
  • 1/4 cup Fresh Parsley: Green onions can be substituted for a different twist.

Step-by-Step Instructions

Side view of cooked chicken bites drenched in garlic butter sauce.

Follow these simple steps to whip up your Garlic Butter Chicken Bites:

  • Step 1: Preparing the Chicken – Cut the chicken breasts into bite-sized pieces, ensuring they are uniform for even cooking.
  • Step 2: Coating the Chicken – In a bowl, mix the flour, salt, pepper, and paprika. Toss the chicken pieces in this mixture until they are evenly coated.
  • Step 3: Cooking the Chicken Bites – Heat the olive oil in a large skillet over medium-high heat. Add the chicken and cook until golden brown and cooked through, about 5-6 minutes, flipping halfway.
  • Step 4: Preparing the Garlic Butter Sauce – Reduce the heat to low, add the butter and minced garlic to the skillet, and cook until fragrant, about 1 minute.
  • Step 5: Tossing the Chicken in Garlic Butter – Return the chicken to the skillet, tossing it in the garlic butter sauce until evenly coated. Garnish with fresh parsley.
  • Step 6: Serving – Serve immediately, and enjoy the delightful flavors!

Expert Tips for Success

  • Quality of Chicken: Always use fresh chicken for the best results—frozen can affect the texture.
  • Perfect Browning: Make sure not to overcrowd the skillet; this ensures the chicken pieces brown nicely.
  • Don’t Rush the Garlic: Garlic can burn quickly; add it after the chicken is nearly done cooking.
  • Flavor Boost: For extra flavor, consider adding a squeeze of lemon juice or a pinch of red pepper flakes when sautéing the garlic.
  • Resting Time: Let the cooked chicken rest for a few minutes before serving to retain moisture.
  • Herb Variations: Experiment with different herbs like thyme or rosemary for unique flavor profiles.
  • Make it Spicy: If you enjoy a kick, add crushed red pepper or hot sauce to the garlic butter.
  • Garnish Ideas: A sprinkle of grated Parmesan can add a savory touch to this dish.

Common Mistakes and Troubleshooting

Here are some common pitfalls and how to avoid them:

  • Overcooked Chicken: Cooking chicken for too long can make it dry. Use a meat thermometer; it should read 165°F when done.
  • Burnt Garlic: Garlic cooks quickly; watch it closely and remove it from heat as soon as it’s fragrant.
  • Flour Clumps: Ensure the chicken is evenly coated to avoid clumps during cooking.
  • Too Much Oil: Use just enough oil to coat the bottom of the skillet; excess can make the dish greasy.

Variations to Try

Feel free to get creative with these variations:

  • Asian-Inspired: Add soy sauce, ginger, and sesame oil for an Asian twist.
  • Herb Butter: Mix in fresh thyme and rosemary with the garlic butter for a fragrant touch.
  • Buffalo Chicken Bites: Toss the cooked chicken in buffalo sauce for a spicy kick.
  • Citrus Zest: Add lemon or lime zest to the butter sauce for a bright, refreshing flavor.

Storage and Make-Ahead Instructions

If you want to prepare this dish ahead of time:

  • Make-Ahead: You can coat the chicken in flour and seasonings the night before and store it in the fridge.
  • Storage: Store leftovers in an airtight container in the fridge for up to 3 days.
  • Reheating: Reheat in a skillet over low heat to maintain tenderness.

Frequently Asked Questions

  • Can I use chicken thighs instead of breasts? Yes, chicken thighs are juicier and can add more flavor.
  • What if I don’t have fresh garlic? You can use garlic powder, but fresh gives the best flavor.
  • Can I freeze the chicken bites? Yes, but it’s best to freeze them before cooking. Thaw in the fridge before cooking.
  • What sides go well with this dish? Pair with steamed vegetables, rice, or a fresh salad.
  • How can I make this dish dairy-free? Use plant-based butter instead of regular butter.
  • Is this recipe suitable for meal prep? Absolutely! It’s perfect for quick lunches during the week.
  • Can I add vegetables to this recipe? Yes, consider adding bell peppers or broccoli for added nutrition.
  • How spicy can I make these chicken bites? Adjust the heat by adding more or less of your favorite hot sauce or spices.

Nutritional Tips and Dietary Adaptations

This recipe is not only delicious but can also be adjusted to meet various dietary needs:

  • Low-Carb Option: Skip the flour for a low-carb version and increase the herbs and spices.
  • Gluten-Free: Use cornstarch instead of flour to keep the recipe gluten-free.
  • High-Protein: Adding a side of quinoa or legumes can enhance the protein content of your meal.

Recommended Equipment

  • Large Skillet: A heavy-duty skillet is best for even cooking and browning.
  • Sharp Knife: For easily cutting the chicken into bite-sized pieces.
  • Tongs: Useful for flipping and tossing the chicken while cooking.

Serving Suggestions

To elevate your dining experience:

  • Serve with Rice: The garlic butter sauce pairs perfectly with fluffy rice or couscous.
  • Add a Salad: A fresh garden salad can provide a nice contrast to the warm chicken bites.
  • Garnish: Consider a sprinkle of fresh herbs or a squeeze of lemon for an extra pop of flavor.

In conclusion, these Garlic Butter Chicken Bites are a fantastic addition to your weeknight dinner rotation. They are quick, flavorful, and versatile, making them a hit for everyone at the table. So gather your ingredients and get ready to enjoy a delightful meal that’s simple to prepare and hard to resist!

Quick & Tasty 15-Minute Garlic Butter Chicken Bites at Home

Prep Time 5 minutes
Cook Time 10 minutes
Total Time 15 minutes
Servings 4 servings
Calories 350
Enjoy tender, flavorful chicken bites coated in garlic butter, perfect for a quick and satisfying meal.

Ingredients

Protein

  • 2 pounds Boneless, Skinless Chicken Breasts (fresh chicken yields the best results)

Dry Ingredients

  • 1/2 cup All-Purpose Flour (substitute with cornstarch for gluten-free)
  • 1 teaspoon Dried Oregano (use fresh for brighter flavor)
  • 1 teaspoon Dried Basil (Italian seasoning can be used as substitute)
  • 1 teaspoon Sweet Paprika (smoked paprika enhances flavor)
  • 1 teaspoon Salt (adjust according to taste)
  • 1/2 teaspoon Freshly Ground Pepper

Cooking Oils

  • 2 tablespoons Olive Oil (switch with any neutral oil of your choice)

Dairy & Butter

  • 3 tablespoons Unsalted Butter (consider plant-based for dairy-free)
  • 4 cloves Garlic Cloves (fresh minced garlic preferred)
  • 1/4 cup Fresh Parsley (green onions can be substituted)

Instructions 

  • Cut chicken into bite-sized pieces and season with salt, pepper, oregano, basil, and paprika.
  • Dredge chicken pieces in flour or cornstarch until coated.
  • Heat olive oil in a large skillet over medium-high heat. Cook chicken until golden and cooked through, about 7-8 minutes.
  • Add minced garlic and butter to the skillet; cook for 1-2 minutes until fragrant.
  • Stir in chopped parsley, cook for another minute, then serve hot.

Notes

For extra flavor, add a squeeze of lemon before serving.
Calories: 350kcal
Cost: $15
Course: Main Course
Cuisine: American
Keyword: Chicken, Garlic, Quick

Cooking at home can feel overwhelming, especially on busy weeknights. But fear not, my culinary friends! This One-Pan Roasted Chicken and Vegetables recipe simplifies your dinner routine while delivering rich flavors and satisfying textures. With tender chicken thighs nestled among vibrant vegetables, this dish is as easy to prepare as it is to clean up. Let’s dive into why you’ll love this recipe, how to make it, and some valuable tips to elevate your cooking experience.

Why You’ll Love This Recipe

This recipe is perfect for anyone looking to make a delicious meal with minimal fuss. Here are five reasons you’ll adore this one-pan wonder:

  • Minimal Cleanup: Cooking everything on a single sheet pan means you can enjoy your meal without worrying about a pile of dishes afterward.
  • Flavorful and Nutritious: This recipe combines juicy chicken and colorful veggies, providing a balanced meal that’s both satisfying and healthy.
  • Versatile Ingredients: You can easily customize the vegetables to suit your taste or what you have on hand, making it a flexible choice for any kitchen.
  • Quick Prep Time: With just a few simple steps, you can have this dish in the oven in no time, perfect for busy weeknights!
  • Impressive Presentation: The beautiful colors of the roasted vegetables alongside the golden chicken make for a visually stunning dish to impress your family or guests.

Ingredients You’ll Need

Here’s everything you’ll need to create this mouthwatering dish:

  • 4 bone-in, skin-on chicken thighs: These add rich flavor; chicken breasts can be substituted if preferred.
  • 3 medium potatoes: Cut into wedges for a hearty side that roasts beautifully.
  • 2 large carrots: Peeled and sliced to add sweetness and color.
  • 1 red onion: Cut into wedges for a touch of savory depth.
  • 2 tablespoons olive oil: Essential for roasting and adding flavor.
  • 1 teaspoon garlic powder: For a robust aromatic profile.
  • 1 teaspoon paprika: Adds warmth and a hint of smokiness.
  • 1/2 teaspoon dried thyme: Or rosemary for a fragrant herbal note.
  • Salt and pepper to taste: Essential for enhancing flavors.
  • 1 tablespoon fresh parsley: Optional, for a fresh garnish.

How to Make One-Pan Roasted Chicken and Vegetables

Ready to get cooking? Here’s your step-by-step guide:

  1. Preheat your oven to 400°F (200°C).
  2. Prepare the vegetables: In a large mixing bowl, combine the potato wedges, carrot slices, and onion wedges. Drizzle with olive oil, and sprinkle with garlic powder, paprika, thyme, salt, and pepper. Toss until evenly coated.
  3. Season the chicken: Pat the chicken thighs dry with paper towels. Rub them with a little olive oil and season generously with salt, pepper, and any additional herbs or spices you like.
  4. Arrange everything on the pan: Spread the seasoned vegetables evenly on a large baking sheet or roasting pan. Nestle the chicken thighs into the middle of the vegetables, skin side up.
  5. Roast to perfection: Place the pan in the preheated oven and roast for about 35-45 minutes, or until the chicken reaches an internal temperature of 165°F (75°C), and the vegetables are tender and golden brown.
  6. Serve and enjoy: Once cooked, remove the pan from the oven and let the chicken rest for a few minutes before serving. Garnish with fresh parsley if desired.

Pro Tips for Making One-Pan Roasted Chicken & Veggies

Make your cooking experience even better with these expert insights:

  • Uniform sizes: Cut your vegetables into similar sizes to ensure even cooking and avoid undercooked or burnt pieces.
  • Pat the chicken dry: This step is crucial for achieving crispy skin. Moisture can lead to steaming rather than roasting.
  • Experiment with herbs: Fresh herbs like rosemary or thyme can enhance the flavor profile. Don’t hesitate to mix and match!
  • Use parchment paper: Lining your baking sheet with parchment makes for easy cleanup and prevents sticking.
  • Let it rest: Allow the chicken to rest for a few minutes after roasting. This helps retain juices, ensuring a moist and flavorful bite.
  • High-quality olive oil: Use extra virgin olive oil for the best flavor and health benefits.
  • Swap out veggies: Feel free to switch in your favorite roasted veggies, like bell peppers, Brussels sprouts, or zucchini.
  • Season generously: Don’t shy away from seasoning. It’s essential for flavor depth.

Common Mistakes and Troubleshooting

Here are some potential pitfalls and how to avoid them:

  • Overcrowding the pan: If your pan is too full, the veggies might steam instead of roast. Use a larger pan if necessary.
  • Not preheating the oven: Make sure your oven is fully preheated to ensure even cooking and crispiness.
  • Skipping the resting time: Cutting into the chicken too soon can lead to dry meat. Patience is key!
  • Not checking the chicken temperature: Always use a meat thermometer to ensure chicken is cooked through.

Variations to Try

Feel free to switch things up! Here are some variations you can try:

  • Citrus twist: Add slices of lemon or orange to the pan for a zesty flavor boost.
  • Spicy kick: Mix in a pinch of cayenne pepper or red pepper flakes for some heat.
  • Asian-inspired: Toss in soy sauce and sesame oil with the veggies for a different flavor profile.
  • Italian flair: Use Italian seasoning and add cherry tomatoes for a vibrant twist.

Storage and Make-Ahead Instructions

This dish is perfect for meal prep! Here’s how to store it properly:

  • Refrigeration: Store leftovers in an airtight container for up to 3 days.
  • Freezing: You can freeze the cooked chicken and vegetables for up to 3 months. Reheat in the oven until warmed through.
  • Make-ahead: Prepare the veggies and season the chicken a day in advance. Just pop it in the oven when you’re ready to eat!

Frequently Asked Questions

Here are some common questions about this recipe:

  • Can I use boneless chicken? Yes, but adjust the cooking time to ensure the chicken cooks through.
  • What vegetables work best? Feel free to use any hardy veggies like broccoli, cauliflower, or sweet potatoes.
  • How do I know when the chicken is done? Use a meat thermometer to check for an internal temperature of 165°F (75°C).
  • Can I double this recipe? Absolutely! Just make sure to use a larger pan and adjust cooking time as needed.
  • Is this dish gluten-free? Yes, all ingredients are naturally gluten-free.
  • Can I make this in a slow cooker? Yes, you can adapt this recipe for a slow cooker, but the texture will differ.
  • How do I reheat leftovers? Reheat in the oven or microwave until warmed through.
  • What can I serve with this dish? A simple salad or crusty bread makes great accompaniments.

Nutrition Tips and Dietary Adaptations

This recipe is not just delicious; it can also fit different dietary needs:

  • Low-carb option: Substitute potatoes with cauliflower florets for a lower-carb meal.
  • Dairy-free: This recipe is naturally dairy-free, making it suitable for lactose-intolerant individuals.
  • High-protein: Add an extra chicken thigh or two for a protein-packed dinner.

Equipment Recommendations

To make your cooking experience seamless, consider the following essential tools:

  • Large baking sheet: A sturdy, non-stick baking sheet is key for roasting.
  • Mixing bowl: For tossing your veggies and seasonings.
  • Meat thermometer: Ensures your chicken is cooked to perfection.
  • Cutting board and knife: For prepping your ingredients efficiently.

Serving Suggestions

To make your meal even more delightful, consider these serving ideas:

  • Pair with a fresh salad: A light green salad can balance the hearty chicken and veggies.
  • Serve with crusty bread: Perfect for soaking up any delicious juices from the pan.
  • Garnish with fresh herbs: A sprinkle of fresh parsley or basil can brighten the dish.

In conclusion, this One-Pan Roasted Chicken and Vegetables recipe is a fantastic way to simplify your cooking while still enjoying a hearty meal. With minimal effort and maximum flavor, it’s bound to become a favorite in your kitchen. So gather your ingredients, follow these easy steps, and get ready to impress yourself and your loved ones with a delicious home-cooked dinner!

One-Pan Roasted Chicken and Vegetables

Prep Time 10 minutes
Cook Time 40 minutes
Total Time 50 minutes
Servings 4 servings
Calories 550
A simple and flavorful one-pan meal featuring tender roasted chicken thighs with seasoned vegetables, perfect for a quick dinner.

Ingredients

Protein

  • 4 pieces bone-in, skin-on chicken thighs (or chicken breasts if preferred)

Vegetables

  • 3 medium potatoes (cut into wedges)
  • 2 large carrots (peeled and sliced)
  • 1 red onion (cut into wedges)

Seasonings & Oil

  • 2 tablespoons olive oil
  • 1 teaspoon garlic powder
  • 1 teaspoon paprika
  • 1/2 teaspoon dried thyme (or rosemary)
  • to taste Salt and pepper
  • 1 tablespoon fresh parsley (optional, for garnish)

Instructions 

  • Preheat oven to 400°F (200°C).
  • Toss vegetables with olive oil and seasonings.
  • Pat chicken dry, rub with oil, and season.
  • Arrange vegetables on a baking sheet, nestle chicken on top, and roast for 35-45 minutes.
  • Let rest briefly, garnish with parsley, and serve.

Notes

Ensure chicken reaches an internal temperature of 165°F (75°C) before serving.
Calories: 550kcal
Cost: $15
Course: Main Course
Cuisine: American
Keyword: Chicken, roasted, Vegetables

Transform Your Dinner Routine with Colorful Stuffed Peppers

Welcome to a delicious journey where cooking meets creativity! If you’re looking for a comforting and vibrant dish that’s perfect for family dinners or gatherings, you’ve landed in the right place. Today, we’re diving into the world of stuffed peppers, a dish that not only pleases the eye but also satisfies the palate. These bell peppers are filled to the brim with a flavorful mix of ground beef, rice, and cheese—making them a wholesome meal that can be ready in just 35 minutes!

In this article, you’ll discover how to make these delightful stuffed peppers from scratch, along with tips, variations, and answers to common questions. Let’s get cooking!

Why You’ll Love This Recipe

This stuffed pepper recipe is more than just a meal; it’s a comforting experience packed with benefits:

  • Quick and easy: Ready in under 40 minutes, making it ideal for busy weeknights.
  • Customizable: Fill these peppers with your favorite ingredients or whatever you have on hand.
  • Healthy and nutritious: A balanced meal that’s loaded with vegetables, protein, and grains.
  • Perfect for leftovers: Easily stored and reheated, they taste just as good the next day.
  • Family-friendly: Kids and adults alike will enjoy this colorful, fun-to-eat dish!

Gather Your Ingredients

Before we begin, let’s look at what you’ll need for this delicious recipe:

  • 4 large bell peppers: Choose any color you love—red, yellow, green, or orange for vibrant colors.
  • 1 pound lean ground beef or turkey: For a healthier option, turkey is a great substitute.
  • 1 cup cooked rice: White, brown, or even quinoa can work well here.
  • 1 can (15 oz) diced tomatoes: These will add moisture and flavor.
  • 1 small onion, diced: Adds sweetness and depth to the filling.
  • 2 cloves garlic, minced: For that aromatic touch.
  • 1 teaspoon dried oregano: A classic herb that complements the dish.
  • Salt and pepper to taste: Essential for seasoning.
  • 1 cup shredded cheese: Cheddar, mozzarella, or a blend works beautifully.

Step-by-Step Instructions

Let’s put it all together! Follow these simple steps to create your stuffed peppers:

  1. Preheat: Set your oven to 375°F (190°C).
  2. Prepare the peppers: Cut the tops off the bell peppers, remove the seeds, and set them aside.
  3. Sauté the onion: In a skillet over medium heat, sauté the diced onion until translucent (about 5 minutes). Add minced garlic and cook for an additional minute until fragrant.
  4. Cook the meat: Stir in the ground meat of choice, cooking until browned. Add the cooked rice, diced tomatoes (with juice), oregano, salt, and pepper. Stir until fully combined.
  5. Fill the peppers: Spoon the meat mixture generously into each bell pepper, packing it down slightly.
  6. Bake: Place the stuffed peppers upright in a baking dish. Pour a small amount of water at the bottom and bake for 25 minutes.
  7. Add cheese: Remove the dish from the oven, sprinkle the shredded cheese on top, and bake for an additional 5-10 minutes, or until the cheese is bubbly and slightly golden.
  8. Serve: Let them cool for a minute before serving and garnish with fresh herbs if desired.

Expert Tips for Perfect Stuffed Peppers

To ensure your stuffed peppers turn out perfectly every time, keep these expert tips in mind:

  • Choose ripe peppers: Make sure your peppers are firm and free of blemishes for the best flavor.
  • Don’t overstuff: Leave a little space at the top to allow for expansion while baking.
  • Adjust the cook time: If you prefer your peppers softer, extend the baking time by a few minutes.
  • Experiment with spices: Feel free to add your favorite spices or herbs to the meat mixture for extra flavor.
  • Try different grains: Substitute traditional rice with farro, quinoa, or even couscous for a twist.
  • Make it vegetarian: Swap the meat for black beans or lentils for a filling vegetarian option.
  • Use leftover veggies: Toss in any leftover vegetables you have in your fridge for added nutrition.
  • Freezing tips: Stuffed peppers freeze well—just make sure to wrap them tightly before storing!

Common Mistakes and Troubleshooting

Don’t worry if things don’t go perfectly; here are common pitfalls and how to avoid them:

  • Peppers too crunchy: If your peppers are undercooked, simply bake them a bit longer until they reach your desired tenderness.
  • Filling too dry: Ensure you’re using sufficient moisture like diced tomatoes. Adding a splash of broth can help too!
  • Cheese not melting: If your cheese isn’t bubbling, check your oven temperature or bake a few minutes longer.
  • Filling spilling out: Be sure to pack the filling tightly and don’t overstuff your peppers.

Delicious Variations to Try

Mix things up with these creative variations of stuffed peppers:

  • Italian Style: Incorporate Italian sausage, marinara sauce, and mozzarella cheese for a classic Italian twist.
  • Mexican Fiesta: Use seasoned ground turkey, black beans, corn, and top with salsa and avocado.
  • Greek-Inspired: Fill with ground lamb, feta cheese, and spinach for a Mediterranean flair.
  • Breakfast Peppers: Stuff with scrambled eggs, sausage, and cheddar for a hearty breakfast option!

Storage and Make-Ahead Instructions

Planning ahead? Here’s how to store your stuffed peppers:

  • Refrigeration: Store leftovers in an airtight container for up to 4 days.
  • Freezing: Wrap individual peppers in plastic wrap and freeze for up to 3 months. Thaw in the refrigerator before reheating.
  • Make-ahead: Prepare the stuffing a day in advance and stuff the peppers just before baking.

Frequently Asked Questions

Here are some common questions about stuffed peppers:

  • Can I use other types of peppers? Absolutely! Mini peppers, poblano, or even zucchini can work well.
  • Do I have to cook the rice beforehand? Yes, pre-cooked rice will ensure your stuffed peppers cook evenly.
  • Can I make them vegan? Yes! Use lentils or beans in place of meat and skip the cheese or use a dairy-free alternative.
  • What can I serve with stuffed peppers? They pair wonderfully with a side salad, garlic bread, or quinoa for a complete meal.
  • How do I know when they’re done? The peppers should be tender, and the filling should be hot throughout.
  • Can I grill stuffed peppers? Yes! They can be grilled over medium heat for a delicious smoky flavor.
  • What’s the best way to reheat stuffed peppers? Heat in the microwave or re-bake them in the oven until warmed through.
  • Can I use brown rice instead of white? Yes, but remember that brown rice takes longer to cook!

Nutritional Tips and Dietary Adaptations

This recipe can easily be adapted to fit various dietary needs:

  • Low-carb option: Swap out the rice for cauliflower rice or omit grains altogether.
  • Gluten-free: Ensure all ingredients, especially any sauces, are certified gluten-free.
  • Low-calorie version: Use leaner meat options and reduce cheese for a lighter meal.

Essential Equipment for Stuffed Peppers

To make your cooking experience smoother, here’s what you’ll need:

  • Baking dish: A 9×13 inch dish is perfect for holding all your stuffed peppers.
  • Skillet: For sautéing the onion and garlic—non-stick is ideal.
  • Knife and cutting board: Essential for prepping your peppers and veggies.
  • Mixing spoon: To combine your filling ingredients.

Serving Suggestions

Make your meal complete with these serving ideas:

  • Fresh herbs: Top your stuffed peppers with chopped parsley or basil for added freshness.
  • Side salad: A light mixed greens salad with vinaigrette complements the richness of the peppers.
  • Crusty bread: Serve with a loaf of garlic bread or a baguette for a fulfilling dining experience.

By now, you’ve got everything you need to make mouthwatering stuffed peppers! Remember, cooking should be a joyful and creative process. So, gather your ingredients, follow these steps, and don’t be afraid to make this dish your own. Happy cooking, and enjoy your colorful meal!

Stuffed Peppers

Prep Time 15 minutes
Cook Time 30 minutes
Total Time 45 minutes
Servings 4 servings
Calories 350
A delicious and hearty dish featuring bell peppers filled with seasoned ground meat, rice, and cheese, baked to perfection.

Ingredients

Bell Peppers

  • 4 large bell peppers (any color)
  • 1 pound lean ground beef or turkey
  • 1 cup cooked rice
  • 1 can (15 oz) diced tomatoes
  • 1 small onion, diced
  • 2 cloves garlic, minced
  • 1 teaspoon dried oregano
  • to taste Salt and pepper
  • 1 cup shredded cheese (cheddar, mozzarella, or a blend)

Instructions 

  • Preheat oven to 375°F (190°C). Cut tops off peppers, remove seeds.
  • Sauté diced onion until translucent, add garlic, cook 1 min.
  • Cook ground meat until browned, add rice, tomatoes, oregano, salt, pepper. Mix well.
  • Stuff peppers with meat mixture, place in baking dish, add water, bake 25 min.
  • Top with cheese, bake 5-10 min until bubbly. Cool slightly before serving.

Notes

You can customize the filling with different cheeses or spices for variety.
Calories: 350kcal
Cost: $15
Course: Main Course
Cuisine: American
Keyword: Stuffed Peppers