Author

Steven

Browsing

Are you looking for a refreshing way to wind down after a long day? This detox drink combines the hydrating properties of cucumbers, the zesty kick of ginger, and the bright flavor of lemon to create a soothing beverage perfect for evening consumption. Not only is it delicious, but it also supports your body’s natural detoxification processes. Let’s dive into this revitalizing recipe!

Why You’ll Love This Recipe

This Detox Cucumber Ginger Bedtime Drink isn’t just another beverage; it’s a blend of flavors and health benefits that can transform your evenings. Here’s what makes this drink special:

  • Hydration boost: The cucumbers and water in this drink help keep you hydrated, especially important as you wind down for the night.
  • Digestive support: Ginger is known for its digestive benefits, helping to ease any discomfort and promote gut health.
  • Detoxification: Lemon and cucumber work together to cleanse your body, flushing out toxins and pesticide residues.
  • Calming effect: The soothing properties of this drink can help you relax, making it an ideal choice for bedtime.
  • Customizable flavor: Adjust the ingredients to suit your taste—add mint for freshness or honey for sweetness!

Ingredients Breakdown

Here’s what you’ll need to make this delightful drink:

  • 500ml (2 cups) warm water: This serves as the base for your drink.
  • 2 tablespoons baking soda: Helps remove any waxy coatings and pesticide residues on the cucumbers.
  • 2-3 medium cucumbers (approximately 400g / 14 oz): Hydrating and full of nutrients.
  • 2-3cm (1 inch) fresh ginger root, peeled: Adds a zesty kick and supports digestion.
  • Juice of 1 large lemon (approximately 60ml / 4 tablespoons): Provides a refreshing citrus flavor and vitamin C.
  • 1 tablespoon fresh mint leaves or 1 teaspoon dried mint: Optional, but adds a refreshing twist.
  • 500ml (2 cups) filtered water: For blending.
  • Ice cubes (optional): For serving chilled.
  • 1 teaspoon honey or stevia (optional): For a touch of sweetness.
  • Pinch of sea salt (optional): Helps with electrolyte balance.

Feel free to substitute ingredients based on what you have on hand or your personal preferences. For example, you can swap lemon for lime or use a different sweetener.

Step-by-Step Instructions

Let’s get started! Follow these simple steps to create your Detox Cucumber Ginger Bedtime Drink:

  • Fill a large bowl with warm water and dissolve the baking soda completely.
  • Wash the cucumbers thoroughly under running water, then place them in the baking soda solution for 15 minutes.
  • After soaking, rinse the cucumbers under cold running water to remove any baking soda residue.
  • Cut the cleaned cucumbers into large chunks, leaving the skin on for added nutrients.
  • Peel the fresh ginger root using a spoon or vegetable peeler.
  • Roll the lemon on a hard surface while applying pressure to release more juice; then cut and squeeze to extract all the juice.
  • In a high-powered blender, combine the cucumber chunks, peeled ginger, fresh lemon juice, and mint leaves.
  • Add 250ml (1 cup) of filtered water to the blender and blend on high speed for 60-90 seconds until smooth.
  • Add the remaining 250ml (1 cup) of water and blend briefly to combine.
  • Pour the blended mixture through a fine-mesh sieve or cheesecloth into a pitcher.
  • For an ultra-smooth drink, strain the mixture a second time through a finer sieve or coffee filter.
  • Taste the strained drink and adjust flavors as needed.
  • Chill the drink in the refrigerator for at least 30 minutes before serving, or serve immediately over ice cubes.
  • Stir well before serving, and pour into glasses, garnishing with fresh mint leaves or cucumber slices if desired.

Pro Tips for the Best Detox Drink

Side view of a Detox Cucumber Ginger Bedtime Drink, showcasing fresh ingredients like cucumbers and ginger.

To ensure your Detox Cucumber Ginger Drink is perfect every time, consider these expert insights:

  • Soaking cucumbers: Soaking in baking soda not only cleans the cucumbers but also helps remove waxy coatings and pesticide residues.
  • Adjust the ginger: If you’re sensitive to ginger’s spiciness, start with less and add more to taste.
  • Let it chill: Allowing the drink to chill enhances the flavors, making it more refreshing.
  • Experiment with herbs: Try adding fresh basil or cilantro for a unique twist on flavors.
  • Storage tips: Keep the drink in the fridge for up to three days, but remove solids after 24 hours to prevent bitterness.
  • Serving suggestions: Serve in clear glasses to showcase the vibrant colors and garnishes!
  • Hydration reminder: Drink plenty of water throughout the day to maximize the detox benefits.
  • Mindful consumption: Enjoy your drink mindfully to enhance relaxation before bedtime.

Common Mistakes and Troubleshooting

Even the best recipes can hit snags. Here’s how to avoid common pitfalls:

  • Not rinsing cucumbers: Failing to rinse them after soaking can lead to a bitter taste.
  • Over-blending: Blend just until smooth; over-blending can create a frothy texture.
  • Skipping the chilling step: This drink is best served cold, so don’t skip the chill time!
  • Using too much ginger: If the drink becomes too spicy, dilute it with more water and lemon juice.

Variations to Try

Here are some fun variations to keep your detox drink exciting:

  • Berry Infusion: Add a handful of strawberries or blueberries for a fruity twist.
  • Spicy Kick: Include a pinch of cayenne pepper for an added kick.
  • Herbal Blend: Use fresh rosemary or thyme instead of mint for a unique flavor profile.
  • Green Tea Boost: Replace some of the water with brewed green tea for extra antioxidants.

Storage and Make-Ahead Instructions

Want to prepare this drink ahead of time? Here’s how:

  • Make the drink in advance and store it in an airtight container in the refrigerator for up to three days.
  • Remove any solids like cucumber chunks after 24 hours to preserve the flavor.
  • Serve chilled or over ice for a refreshing treat!

Frequently Asked Questions

Here are some common questions and answers about this detox drink:

  • Can I make this drink without ginger? Yes, you can omit ginger for a milder flavor.
  • How many calories are in this drink? The drink is very low in calories, especially if you skip the honey.
  • Can I use frozen cucumbers? Fresh cucumbers are recommended, but frozen can work in a pinch for blending.
  • Is this drink suitable for kids? Yes, it’s a healthy, hydrating option for children as well!
  • Can I add other fruits? Absolutely! Feel free to experiment with different fruits for flavor.
  • How often can I drink this? Enjoy this detox drink daily as part of a balanced diet!
  • What should I do if the drink is too sour? Add a bit of honey or stevia to balance the tartness.
  • Is this drink safe for pregnant women? Consult with a healthcare provider, but generally, the ingredients are safe.

Nutritional Tips and Dietary Adaptations

This detox drink aligns well with various dietary preferences:

  • Low-calorie option: Perfect for weight management, as it’s hydrating and low in calories.
  • Vegan-friendly: All ingredients are plant-based, making it suitable for vegans.
  • Gluten-free: Naturally gluten-free, making it safe for those with gluten sensitivities.
  • Adjustable sweetness: Use natural sweeteners like honey or stevia for a healthier sweetener option.

Equipment Recommendations

To make this detox drink, you’ll need:

  • High-powered blender: Essential for achieving a smooth consistency.
  • Fine-mesh sieve or cheesecloth: For straining the mixture.
  • Bowl for soaking: To soak cucumbers in the baking soda solution.
  • Measuring cups and spoons: For accurate ingredient measurements.

Serving Suggestions

Serve your Detox Cucumber Ginger Bedtime Drink in style!

  • Garnish: Add cucumber slices or mint leaves for a beautiful presentation.
  • Glassware: Use clear glasses to showcase the vibrant colors of the drink.
  • Pair with snacks: Enjoy alongside light snacks like whole grain crackers or fresh veggies.

Conclusion

Your evenings don’t have to be dull or stressful. This Detox Cucumber Ginger Bedtime Drink is not only a delicious way to hydrate but also a wonderful ritual to help you unwind. With its simple preparation and numerous health benefits, you can enjoy a soothing experience that supports your body. So grab your ingredients, mix it up, and cheers to a refreshing end to your day!

Detox Cucumber Ginger Bedtime Drink

Prep Time 15 minutes
Total Time 15 minutes
Servings 2 cups
Calories 50
A refreshing and detoxifying bedtime drink made with cucumber, ginger, lemon, and mint to promote relaxation and hydration.

Ingredients

Water

  • 500 ml warm water
  • 2 tablespoons sodium bicarbonate baking soda
  • 2-3 medium cucumbers (approximately 400g)
  • 1 inch fresh ginger root (about 2-3cm)
  • 60 ml juice of 1 large lemon
  • 4 tablespoons fresh lemon juice
  • 1 tablespoon fresh mint leaves (or 1 teaspoon dried mint)
  • 250 ml filtered water
  • Ice cubes optional Ice cubes (optional)
  • 1 teaspoon honey or stevia (for sweetness, optional)
  • Pinch sea salt (for electrolyte balance, optional)

Instructions 

  • Dissolve baking soda in warm water in a large bowl.
  • Wash cucumbers thoroughly, soak in baking soda solution for 15 minutes, then rinse.
  • Cut cucumbers into chunks, peel ginger, and extract lemon juice.
  • Blend cucumber, ginger, lemon juice, and mint with 250ml filtered water until smooth.
  • Add remaining water, strain through a fine sieve, and chill or serve immediately over ice.

Notes

Adjust sweetness and flavor as desired. For a colder drink, add ice cubes before serving.
Calories: 50kcal
Cost: $10
Course: Beverage
Keyword: Cucumber, detox, ginger

Discover the Magic of an Iced Caramel Latte at Home

If you’ve ever found yourself craving a delicious iced caramel latte from your favorite café, you’re not alone! This delightful drink, with its rich flavor and creamy texture, is a popular choice for coffee lovers everywhere. But what if I told you that you can enjoy this treat right in the comfort of your own home? With just a few simple ingredients and less than five minutes of your time, you can whip up a cozy homemade caramel latte that rivals any coffee shop creation. Get ready to indulge in this sweet, creamy drink that’s perfect any time you crave a coffee pick-me-up!

Why You’ll Love This Recipe

This iced caramel latte recipe is not just about the delicious taste; it also comes with a plethora of benefits that will make you fall in love with it even more:

  • Quick and Easy: This recipe takes less than 5 minutes to prepare, making it perfect for busy mornings or an afternoon treat.
  • Cost-Effective: Skip the $7 café price tag and enjoy the same rich flavor at home for a fraction of the cost.
  • Customizable: You can easily adjust the sweetness by adding more or less caramel syrup, or even experimenting with different milk options.
  • Perfect for Any Diet: Whether you’re dairy-free, vegan, or just watching your sugar intake, this recipe can be adapted to meet your dietary needs.
  • Fun to Make: Enjoy the process of creating your own coffee drink, making it an exciting addition to your kitchen routine.

Ingredients You Need for the Perfect Iced Caramel Latte

Before we dive into the recipe, let’s gather all the ingredients you need to craft this delicious drink:

  • 120 ml fresh milk: Whole milk or oat milk works great for a creamy texture.
  • 60 ml strong espresso: Brewed coffee works too, just ensure it’s strong!
  • 20 ml caramel syrup: The star ingredient that adds sweetness and flavor.
  • Ice cubes: Enough to fill your glass for that refreshing chill.
  • 15 ml whipped cream (optional): For a luxurious finish.
  • Extra caramel drizzle: A delightful topping to elevate your drink.

Step-by-Step Instructions to Make Your Iced Caramel Latte

Side view of a delicious iced caramel latte with ice cubes and a drizzle of caramel on top.

Now that you have your ingredients ready, let’s jump into the simple steps to create your iced caramel latte:

  • Brew the espresso: Prepare a strong espresso using your coffee machine or moka pot. Let it cool slightly for 1-2 minutes.
  • Add caramel syrup: Pour the caramel syrup into the bottom of your glass. This gives the drink its signature sweetness and flavor.
  • Add ice and milk: Fill the glass with ice cubes, then pour in cold milk over the caramel syrup.
  • Add espresso: Gently pour the espresso shot over the milk; it will create a beautiful layered effect.
  • Finish and serve: Top with whipped cream and drizzle with extra caramel. Stir before drinking and enjoy!

Pro Tips for the Best Iced Caramel Latte

Here are some expert tips to ensure your iced caramel latte turns out perfectly every time:

  • Use fresh ingredients: High-quality espresso and fresh milk make a world of difference in flavor.
  • Chill your glass: For an extra refreshing experience, chill your glass in the freezer for a few minutes before preparing your drink.
  • Experiment with flavors: Add a splash of vanilla or hazelnut syrup for a different twist.
  • Adjust the sweetness: If you prefer a less sweet drink, start with half the caramel syrup and adjust to taste.
  • Make it iced coffee: If you’re out of espresso, strong brewed coffee can work just as well!
  • Store leftover caramel syrup: Keep any leftover syrup in the fridge for future drinks.
  • Use a milk frother: For added creaminess, froth your milk before adding it to the glass.
  • Layer it right: Pour the espresso gently to maintain the beautiful layers of the drink.

Common Mistakes and Troubleshooting

Even the best of us can make mistakes in the kitchen! Here are some common pitfalls to avoid:

  • Weak espresso: Make sure your espresso is strong enough; weak coffee can lead to a diluted flavor.
  • Too much ice: Avoid overfilling with ice, which can water down your drink.
  • Skipping the cooling step: Let your espresso cool slightly before adding it to prevent it from melting the ice too quickly.
  • Not mixing well: Make sure to stir your drink before enjoying it to combine the flavors!

Delicious Variations to Try

Once you’ve mastered the classic iced caramel latte, why not try some fun variations?

  • Vanilla Iced Caramel Latte: Add a splash of vanilla syrup for a sweet twist.
  • Mocha Iced Caramel Latte: Mix in some chocolate syrup for a rich mocha flavor.
  • Nutty Iced Caramel Latte: Use almond milk and add a drizzle of almond syrup for a nutty touch.
  • Coconut Iced Caramel Latte: Swap regular milk for coconut milk for a tropical flair.

Storage and Make-Ahead Instructions

If you want to prepare your iced caramel latte ingredients ahead of time, here’s how:

  • Caramel Syrup: Make a batch of caramel syrup and store it in an airtight container in the refrigerator for up to two weeks.
  • Espresso or Coffee: Brew extra espresso or coffee and store it in the fridge. Use it within 3-4 days for the best flavor.
  • Milk: Keep your milk fresh in the fridge and use it within its expiration date.

Frequently Asked Questions

Here are some common questions about making iced caramel lattes:

  • Can I use flavored coffee? Absolutely! Flavored coffee can add unique tastes to your latte.
  • What type of milk is best? Whole milk gives a rich texture, while oat milk is great for a dairy-free version.
  • Can I make this with cold brew? Yes! Cold brew coffee can be used for a smoother flavor.
  • What if I don’t have caramel syrup? You can easily make your own by combining sugar and water on the stove!
  • How can I reduce calories? Use low-fat milk and skip the whipped cream for a lighter version.
  • What’s the best way to sweeten my latte? Adjust the amount of caramel syrup to suit your taste; you can also use sugar-free alternatives!
  • Can I freeze my iced caramel latte? While it’s best enjoyed fresh, you can freeze the espresso and milk mixture in ice cube trays for a later treat.
  • How do I make it vegan? Simply use plant-based milk and ensure your caramel syrup is vegan-friendly!

Nutrition Tips and Dietary Adaptations

To make this recipe fit various dietary needs, consider the following tips:

  • Low Sugar: Use sugar-free caramel syrup or adjust the quantity to suit your preference.
  • Dairy-Free: Oat milk, almond milk, or coconut milk are excellent substitutes.
  • Protein Boost: Add a scoop of protein powder to your milk for a post-workout treat.

Essential Equipment for Your Iced Caramel Latte

To make your iced caramel latte, you’ll need a few key pieces of equipment:

  • Coffee machine or moka pot: For brewing strong espresso or coffee.
  • Measuring jigger: To measure your ingredients accurately.
  • Glass: A tall glass works best for layering your drink.
  • Spoon: For stirring and mixing your latte.

Serving Suggestions

To elevate your iced caramel latte experience, consider these serving suggestions:

  • Pair with pastries: Enjoy your latte alongside a buttery croissant or a slice of cake.
  • Garnish with spices: A sprinkle of cinnamon or nutmeg can add a delightful touch.
  • Enjoy it iced: Serve immediately over ice for the best taste!

Now that you have everything you need to create a delicious iced caramel latte at home, it’s time to get started! Remember, cooking should be fun and stress-free. So grab your ingredients, follow these simple steps, and enjoy your new favorite coffee drink. Happy brewing!

Iced Caramel Latte 5-Minute Starbucks Copycat Recipe

Prep Time 2 minutes
Cook Time 3 minutes
Total Time 5 minutes
Servings 1 cup
Calories 180
Enjoy a quick and delicious homemade iced caramel latte that rivals Starbucks, ready in just 5 minutes.

Ingredients

Dairy and flavorings

  • 120 ml fresh milk (whole or oat milk)
  • 60 ml strong espresso
  • 20 ml caramel syrup
  • enough ice cubes Ice cubes (to fill the glass)
  • 15 ml whipped cream (optional)
  • for topping drizzle Extra caramel drizzle (for topping)

Instructions 

  • Brew the espresso and let it cool for 1-2 minutes.
  • Pour caramel syrup into the bottom of the glass.
  • Fill the glass with ice, then pour in cold milk.
  • Gently pour the espresso over the milk to create layers.
  • Top with whipped cream, drizzle with caramel, stir, and enjoy.

Notes

Use chilled ingredients for best layering effect.
Calories: 180kcal
Cost: $8
Course: Beverage
Cuisine: coffee
Keyword: iced latte

Indulge in the Ultimate Strawberry Banana Milkshake Adventure

Welcome to your new favorite treat! This Strawberry Banana Milkshake is not just a drink; it’s a delightful experience that brings joy to any day. Whether you’re cooling down on a hot summer afternoon or simply craving something sweet, this super creamy milkshake is sure to please. With its blend of fresh and frozen ingredients, you’ll discover how easy it is to whip up a delicious, refreshing drink right at home.

In this guide, we’ll explore why this strawberry banana milkshake is a must-try, dive deep into the ingredients, offer pro tips for the best results, and provide variations to keep things exciting. Get ready to blend!

Why You’ll Love This Recipe

  • Quick and Easy: You can make this milkshake in just five minutes, making it a perfect treat for busy days!
  • Creamy Texture: The combination of banana and vanilla ice cream creates a smooth, rich texture that feels indulgent.
  • Healthier Option: By using frozen fruits and natural sweeteners like honey, you can enjoy a guilt-free dessert.
  • Customizable Flavors: Add in extras like peanut butter or chocolate syrup for a unique twist each time.
  • Perfect for Meal Planning: This milkshake makes for a refreshing snack or breakfast, fitting seamlessly into your meal prep.

Ingredients Breakdown

Let’s take a closer look at the ingredients that make this creamy strawberry banana milkshake so special:

  • 1 large ripe banana: Peeled, sliced, and frozen. Ripe bananas add natural sweetness and creaminess.
  • 1 cup frozen strawberries: These provide a refreshing flavor and a beautiful pink hue.
  • 1 cup whole milk or unsweetened almond milk: Milk adds richness; almond milk keeps it dairy-free.
  • 2 large scoops vanilla ice cream: Approximately 1/2 cup, this is the secret to that super creamy texture.
  • 1 tablespoon honey or maple syrup (optional): For those who prefer a sweeter milkshake, this is a great natural sweetener.
  • Toppings: Whipped cream, fresh strawberry slices, or banana chips are great for adding flair and flavor.

Now that you have your ingredients ready, let’s dive into the preparation!

How to Make Your Strawberry Banana Milkshake

Side view of a thick strawberry banana milkshake with vibrant colors and decorative toppings.
  1. Add the frozen banana slices, frozen strawberries, milk, vanilla ice cream, and honey (if using) to your blender.
  2. Blend on high until the mixture is completely smooth and ultra-creamy. If the shake is too thick, add a splash more milk until you reach your desired consistency.
  3. Taste and adjust sweetness if needed. Blend again briefly to combine.
  4. Pour the milkshake into two tall glasses.
  5. Top with whipped cream, strawberry slices, or banana chips for extra flair and flavor.
  6. Serve immediately and enjoy!

Pro Tips for the Perfect Milkshake

  • Use frozen fruits: They help create a thicker milkshake and keep it cold without needing extra ice.
  • Blend in stages: If your blender struggles, blend the ingredients in batches for a smoother consistency.
  • Adjust consistency: Add more milk for a thinner shake or more ice cream for a thicker one.
  • Experiment with flavors: Try adding a scoop of peanut butter or a splash of chocolate syrup for a different twist.
  • Chill your glasses: For a frosty treat, chill your serving glasses in the freezer before pouring in the milkshake.
  • Make it healthier: Substitute sugar with dates or add spinach for an extra nutrient boost.
  • Use a high-powered blender: This ensures all ingredients mix smoothly for that perfect texture.
  • Don’t skip the toppings: They add a delightful crunch and visual appeal!

Common Mistakes and Troubleshooting

Even the best home cooks can run into hiccups! Here are some common mistakes and how to fix them:

  • Milkshake is too thick: Simply add a little more milk and blend until you reach your desired consistency.
  • Too sweet: If your milkshake turns out too sweet, balance it with a pinch of salt or a bit more milk.
  • Not creamy enough: Ensure you’re using enough ice cream and frozen fruits for that rich texture.
  • Fruit isn’t flavorful: Use ripe bananas and fresh, high-quality strawberries for the best flavor.

Delicious Variations

Feeling adventurous? Here are some fun variations to try:

  • Chocolate Strawberry Banana: Add 1-2 tablespoons of chocolate syrup for a delicious twist.
  • Peanut Butter Banana: Blend in a tablespoon of peanut butter for a protein-packed treat.
  • Berry Blast: Swap out some strawberries for frozen blueberries or raspberries for a mixed berry flavor.
  • Vegan Delight: Use coconut or cashew-based ice cream and dairy-free milk for a vegan version.

Storage and Make-Ahead Instructions

This milkshake is best enjoyed fresh, but if you have leftovers:

  • Refrigerate: Store in an airtight container for up to 24 hours. Just give it a good shake before serving.
  • Freeze: You can freeze the milkshake for about an hour, but it’s best consumed fresh for optimal texture.

Frequently Asked Questions

  • Can I use fresh strawberries instead of frozen? Yes! However, the shake won’t be as thick, and you may want to add some ice to compensate.
  • What if I don’t have vanilla ice cream? You can substitute it with any flavor you like, or use frozen yogurt for a lighter option.
  • Is this milkshake healthy? It can be! By using less ice cream and more fruit, you can create a healthier version.
  • Can I make this ahead of time? It’s best made fresh, but you can prepare the ingredients in advance and blend them when ready.
  • Can I add protein powder? Absolutely! Just add a scoop to boost the protein content.
  • Is it possible to make this dairy-free? Yes! Just use dairy-free ice cream and almond or oat milk.
  • How can I make it sweeter? Adjust sweetness with honey, maple syrup, or a banana.
  • Can I add other fruits? Yes! Feel free to experiment with other fruits like mango or peach for different flavors.

Nutrition Tips and Dietary Adaptations

Here are some tips to consider for a balanced approach to your milkshake:

  • Protein boost: Add Greek yogurt or protein powder for a filling, post-workout drink.
  • Lower sugar: Use unsweetened almond milk and limit the amount of added sweeteners.
  • Fiber-rich: Add chia seeds or flaxseeds for additional fiber and nutrients.
  • Portion control: Keep servings moderate—this milkshake is delicious, but moderation is key!

Equipment Recommendations

To make your milkshake, you’ll need:

  • High-powered blender: Essential for achieving that smooth, creamy consistency.
  • Measuring cups: Accurate measurements ensure the perfect balance of flavors.
  • Tall glasses: Perfect for serving your delightful milkshake.
  • Spoons and straws: For easy sipping and enjoying every last drop!

Serving Suggestions

This strawberry banana milkshake can be enjoyed alone or paired with various snacks:

  • Cookies: Pair with chocolate chip cookies for a sweet treat.
  • Fruit Salad: A fresh fruit salad adds a refreshing contrast to the creamy milkshake.
  • Sandwiches: A light sandwich can complement the milkshake for a satisfying meal.
  • Breakfast: Enjoy it alongside pancakes or waffles for a delicious breakfast option.

In conclusion, creating a super creamy strawberry banana milkshake at home is an easy and rewarding experience. With just a few simple ingredients and a little creativity, you can whip up a delightful beverage that’s perfect for any occasion. Whether you’re treating yourself or sharing with friends and family, this milkshake is sure to bring smiles all around. So gather your ingredients, blend away, and enjoy the blissful flavors of summer in every sip!

Super Creamy Strawberry Banana Milkshake

Prep Time 5 minutes
Total Time 5 minutes
Servings 2 glasses
Calories 350
A deliciously creamy and fruity milkshake perfect for a quick treat or breakfast.

Ingredients

Fruits and Dairy

  • 1 large ripe banana (peeled, sliced, and frozen)
  • 1 cup frozen strawberries
  • 1 cup whole milk or unsweetened almond milk
  • 2 large vanilla ice cream (about 1/2 cup)
  • 1 tablespoon honey or maple syrup (optional, for extra sweetness)

Toppings

  • to taste whipped cream
  • to taste fresh strawberry slices
  • to taste banana chips

Instructions 

  • Add frozen banana, strawberries, milk, ice cream, and honey to blender.
  • Blend until smooth and creamy, adding more milk if needed.
  • Taste and adjust sweetness, then blend briefly again.
  • Pour into two glasses and top with whipped cream, strawberry slices, or banana chips.
  • Serve immediately and enjoy!

Notes

For a thicker shake, add more frozen fruit or ice.
Calories: 350kcal
Cost: $8
Course: Beverage, Dessert
Cuisine: American
Keyword: Banana, milkshake, Strawberry

Start Your Day Right with This Energizing Strawberry Banana Smoothie Bowl

Are you looking for a delicious and nutritious breakfast that will energize your morning? Look no further! This Strawberry Banana Smoothie Bowl is not just a treat for your taste buds; it’s also packed with vitamins, minerals, and the perfect blend of flavors that will make you feel great. Within just minutes, you can whip up a vibrant and creamy smoothie bowl using simple ingredients that you probably already have at home. Let’s dive into why you’ll love this recipe and how to make it!

Why You’ll Love This Recipe

This strawberry banana smoothie bowl isn’t just visually stunning; it’s also incredibly versatile and easy to prepare. Here are just a few reasons to love it:

  • Quick and Easy: Ready in just 5 minutes, making it perfect for busy mornings.
  • Nutritious: Packed with vitamins from fruits and healthy fats from almond butter and chia seeds.
  • Customizable: You can easily adjust ingredients to suit your taste preferences or dietary needs.
  • Vegan-Friendly: This recipe can easily be made dairy-free and vegan with simple substitutions.
  • Deliciously Creamy: Achieves a thick, soft-serve consistency that feels indulgent yet healthy.

Ingredients for Your Smoothie Bowl

To make this delightful smoothie bowl, you’ll need the following ingredients:

  • 2 frozen bananas: Peeled and sliced for ease of blending.
  • 1 1/2 cups frozen strawberries: Choose high-quality berries for the best flavor.
  • 1/2 cup unsweetened non-dairy milk: Almond, oat, or soy milk work great.
  • 1 teaspoon pure vanilla extract: Adds a lovely fragrance and depth of flavor.
  • 1 scoop protein powder: Optional but recommended for a filling breakfast.
  • 1 tablespoon almond butter: For creaminess and healthy fats.
  • 1 tablespoon chia seeds: Boosts fiber and omega-3 content.
  • 1 teaspoon cacao powder: Optional for a chocolatey twist.

Substitutions: If you’re out of any of these ingredients, feel free to experiment! Here are some suggestions:

  • Use any frozen fruit you like, such as mango or blueberries, in place of strawberries.
  • Swap almond butter for peanut butter or sunflower seed butter for a nut-free option.
  • Use any plant-based milk to suit your taste.

How to Make Your Strawberry Banana Smoothie Bowl

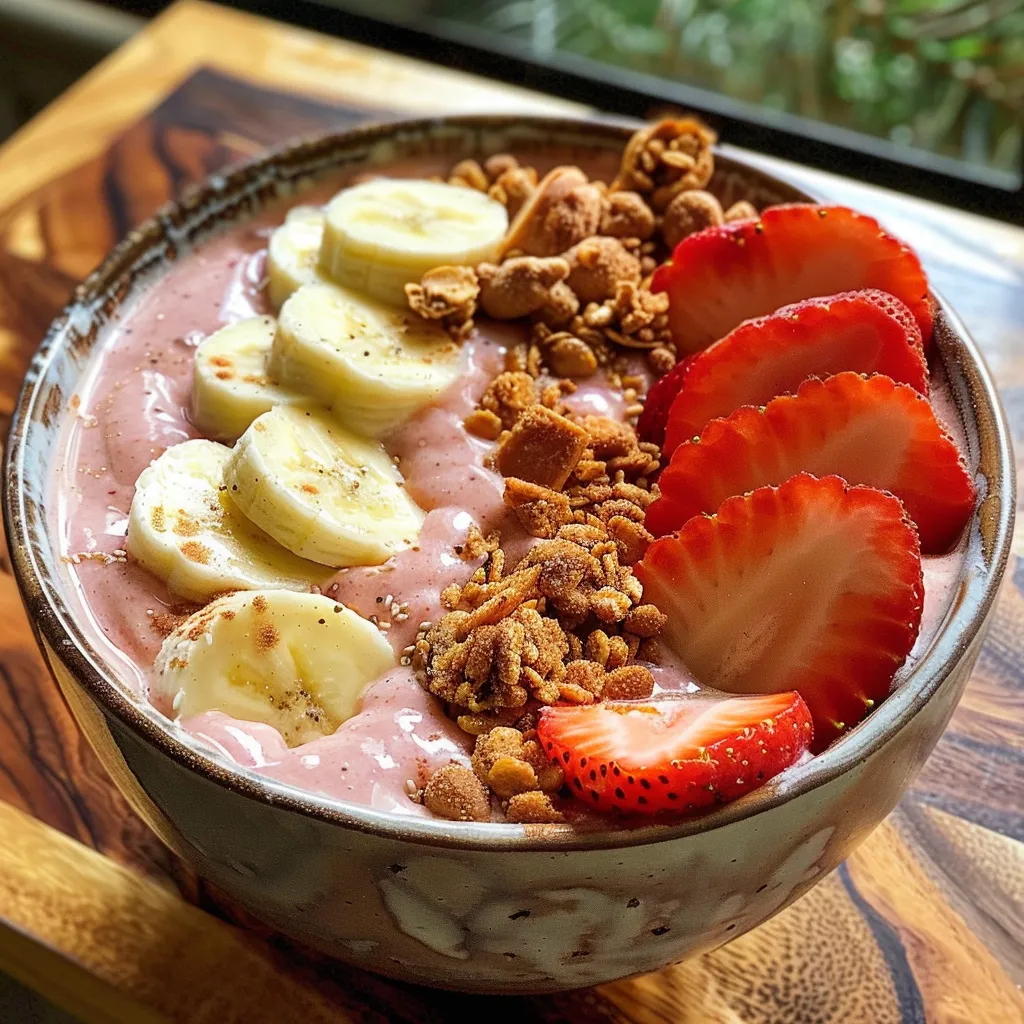
Close-up of a creamy smoothie bowl filled with strawberries and bananas, garnished with chia seeds.

Now that you have your ingredients ready, let’s get blending! Follow these simple steps:

  1. Combine Ingredients: In your blender, add the frozen bananas, frozen strawberries, non-dairy milk, vanilla extract, protein powder, and almond butter.
  2. Blend: Start blending on low speed, using a tamper if available, to help push the ingredients toward the blades. Scrape down the sides as needed.
  3. Achieve a Creamy Consistency: Gradually increase the speed and continue blending until you reach a thick, creamy, soft-serve consistency. Add more milk sparingly if needed.
  4. Serve: Pour the smoothie base into a bowl, smoothing the top with a spatula.
  5. Garnish: Sprinkle chia seeds and cacao powder over the top. Feel free to add other toppings like fresh fruit, granola, or shredded coconut.

Pro Tips for the Best Smoothie Bowl

Here are some expert insights to ensure your smoothie bowl is a success:

  • Use Frozen Fruit: Always use frozen bananas and strawberries for the best thick texture.
  • Add Liquid Gradually: Start with less milk and add more if the blender struggles; this helps maintain the creamy texture.
  • Invest in a Good Blender: A powerful blender will make a smoother and creamier consistency.
  • Experiment with Toppings: Get creative with toppings! Fresh berries, nuts, and seeds not only enhance flavor but also add nutrition.
  • Don’t Over-Blend: Blend just until smooth to avoid a watery consistency.
  • Chill Your Ingredients: For an even thicker smoothie, chill your ingredients before blending.
  • Try Different Protein Powders: Experiment with different flavors of protein powder to add variety.
  • Make it Ahead: Prepare your smoothie base the night before and store it in the freezer for a quick breakfast.

Common Mistakes and Troubleshooting

Encountering issues? Here’s how to troubleshoot common problems:

  • Too Thin? If your smoothie is too thin, add more frozen fruit or a handful of ice and blend again.
  • Not Sweet Enough? Add a natural sweetener like honey, maple syrup, or a few dates to enhance sweetness.
  • Too Thick? Add a splash more of your chosen milk to loosen the mixture.
  • Grainy Texture? Ensure your blender is powerful enough to fully blend all ingredients until smooth.

Variations to Customize Your Smoothie Bowl

You can easily customize this recipe to keep things exciting! Here are some variations:

  • Chocolate Banana Smoothie Bowl: Add 2 tablespoons of cacao powder for a rich chocolate flavor.
  • Green Smoothie Bowl: Add a handful of spinach or kale for an extra nutrient boost without compromising flavor.
  • Nutty Banana Smoothie Bowl: Swap almond butter for cashew butter or add a tablespoon of chopped nuts for added crunch.
  • Berry Blast Smoothie Bowl: Incorporate other frozen berries like blueberries or raspberries for a mixed berry flavor.

Storage and Make-Ahead Instructions

This smoothie bowl is best enjoyed fresh, but you can prepare it in advance:

  • Make-Ahead: Blend the base the night before and store it in the freezer. Just let it sit for a few minutes before serving to soften slightly.
  • Storage: If you have leftovers, store them in an airtight container in the fridge for up to 24 hours, but note that it may separate.

Nutrition Tips and Dietary Adaptations

This smoothie bowl is not only delicious but also nutritious! Here are some tips:

  • Boost Fiber: Add a tablespoon of flaxseed or oats for extra fiber.
  • Protein-Packed: Use Greek yogurt instead of protein powder for a creamy texture and added protein.
  • Low-Calorie Option: Use less almond butter or skip it entirely for a lighter version.
  • Allergy-Friendly: Substitute almond butter with sunbutter for nut allergies.

Equipment Recommendations

To make your smoothie bowl experience even better, here are some handy kitchen tools:

  • High-Speed Blender: A quality blender is essential for achieving that creamy texture.
  • Tamper Tool: If your blender comes with a tamper, it can help push ingredients down for better blending.
  • Smoothie Bowl: Use a wide, shallow bowl to make serving and decorating easier.

Serving Suggestions

Serve your smoothie bowl in style! Here are some ideas to enhance your presentation:

  • Colorful Toppings: Use a variety of fresh fruits, nuts, and seeds for a beautiful and appetizing look.
  • Drizzle of Honey: A light drizzle of honey or maple syrup on top adds a touch of sweetness and elegance.
  • Edible Flowers: For a special touch, add edible flowers for a pop of color and visual appeal.

Frequently Asked Questions

Here are some common questions regarding the strawberry banana smoothie bowl:

  • Q: How do I make my smoothie bowl thicker? A: Use frozen fruits, and add liquid gradually to maintain thickness.
  • Q: Can I make the smoothie bowl ahead of time? A: Yes, prepare the base the night before and store it in the freezer.
  • Q: What can I use instead of non-dairy milk? A: Any milk, including dairy or nut milks, can be used based on your preference.
  • Q: Are there any other toppings I should consider? A: Absolutely! Try granola, nuts, seeds, or even a sprinkle of coconut flakes.
  • Q: How do I store leftovers? A: Store in the fridge in an airtight container for up to 24 hours. The texture may change slightly.
  • Q: Can I use fresh fruit instead of frozen? A: You can, but it will change the texture. Frozen fruit gives a thicker consistency.
  • Q: Is this smoothie bowl suitable for kids? A: Yes! It’s a fun and nutritious option that kids will love.
  • Q: Can I add other vegetables to the smoothie? A: Definitely! Spinach or avocado can be great additions for nutrition without changing the flavor.

With this comprehensive guide to making a delightful strawberry banana smoothie bowl, you’re ready to impress yourself and others! Explore the flavors, experiment with toppings, and most importantly, enjoy every spoonful. Cooking should be a joyful experience, and this smoothie bowl is sure to become a staple in your breakfast routine. Happy blending!

Strawberry Banana Smoothie Bowl

Prep Time 10 minutes
Total Time 10 minutes
Servings 2 bowls
Calories 350
A delicious and nutritious smoothie bowl perfect for a quick breakfast or snack, packed with fresh fruit and protein.

Ingredients

Fruits

  • 2 pieces frozen bananas (peeled and sliced)
  • 1.5 cups frozen strawberries

Liquid

  • 0.5 cup unsweetened non-dairy milk
  • 1 teaspoon pure vanilla extract

Add-ins

  • 1 scoop protein powder
  • 1 tablespoon almond butter
  • 1 tablespoon chia seeds
  • 1 teaspoon cacao powder

Instructions 

  • Combine frozen bananas, strawberries, non-dairy milk, vanilla, protein powder, and almond butter in a blender.
  • Blend on low, then increase speed until smooth and creamy. Add more milk if needed.
  • Pour into a bowl and smooth the top with a spatula.
  • Sprinkle chia seeds and cacao powder over the top.
  • Optional: add fresh fruit or granola as toppings.

Notes

Use frozen fruit for best texture and chill the bowl before serving for an extra refreshing experience.
Calories: 350kcal
Cost: $10
Course: Breakfast
Keyword: Fruit, Healthy, Smoothie

Unlock the Secrets to a Delectable Grilled Chicken and Broccoli Rice Bowl

If you’re on the hunt for a quick, satisfying, and nutritious meal, look no further! This Grilled Chicken and Broccoli Rice Bowl is an all-in-one dish that’s perfect for busy weeknights. With its juicy grilled chicken, vibrant broccoli, and fluffy rice, it’s a delightful combination that’s sure to please everyone at your table. Plus, drizzled with your favorite sauce, it becomes an irresistible feast. Let’s dive into what makes this recipe not only delicious but also a fantastic choice for meal prep!

Why You’ll Love This Recipe

This dish isn’t just about taste; it offers a host of benefits that make it a standout choice for your dinner table:

  • Quick and Easy: With minimal prep and cook time, you can whip this meal up in under 30 minutes!
  • Healthy Ingredients: Packed with lean protein and vibrant vegetables, this bowl is a nutrient-rich option.
  • Meal Prep Friendly: Make a large batch and store it in the fridge for easy lunches throughout the week.
  • Customizable: Swap out ingredients to cater to your dietary preferences or pantry staples.
  • Family-Friendly: A dish that even picky eaters will love, making it perfect for family dinners.

Ingredient Breakdown

Let’s take a closer look at what you need to create this delicious Grilled Chicken and Broccoli Rice Bowl, along with some helpful substitutions:

  • Chicken Breasts: 2 boneless, skinless chicken breasts are recommended for lean protein. You can substitute with chicken thighs for a juicier option.
  • Broccoli Florets: 3 cups of fresh broccoli florets provide essential vitamins. Feel free to use frozen broccoli if you’re short on time.
  • Cooked Rice: 2 cups of cooked rice serve as the base. Brown rice or quinoa can be used for a healthier twist.
  • Olive Oil: 2 tablespoons enhance flavor and help with grilling. Avocado oil is a great alternative!
  • Garlic Powder: 1 teaspoon adds a savory depth. Fresh minced garlic can also be used for a more robust flavor.
  • Lemon Juice: 2 tablespoons brighten up the dish. Lime juice works as a delicious substitute.
  • Salt and Pepper: To taste, season to your preference!
  • Fresh Parsley: 2 tablespoons, chopped, for garnish. Other herbs like cilantro or green onions work well too.
  • Your Favorite Sauce: Drizzle over the finished bowl for extra flavor—teriyaki, BBQ, or a spicy sriracha sauce all pair wonderfully!

Step-by-Step Instructions

Colorful grilled chicken and broccoli rice bowl with fresh parsley on top.

Now that we have our ingredients ready, let’s get cooking! Follow these simple steps:

  • Pat the chicken dry, brush with olive oil, and season with garlic powder, salt, and pepper.
  • Toss the broccoli florets with olive oil, lemon juice, salt, and pepper.
  • Preheat your grill or grill pan to medium-high heat.
  • Grill the chicken for 6-7 minutes on each side until cooked through (internal temperature should reach 165°F or 74°C).
  • Allow the chicken to rest for a few minutes before slicing it.
  • Grill the broccoli for about 5 minutes until it’s crisp-tender and slightly charred.
  • Divide the cooked rice into bowls, top with sliced chicken and grilled broccoli.
  • Drizzle with your favorite sauce and garnish with fresh parsley.

Pro Tips for Perfect Results

To elevate your Grilled Chicken and Broccoli Rice Bowl, consider these expert tips:

  • Let the Chicken Rest: Allowing the chicken to rest after grilling helps retain its juices.
  • Char the Broccoli: For added flavor, grill the broccoli until it has nice char marks.
  • Use a Meat Thermometer: To ensure chicken is cooked perfectly, check that it reaches 165°F (74°C).
  • Mix and Match Sauces: Experiment with different sauces to find your favorite flavor combination.
  • Prep Ahead: Cook extra chicken and broccoli to use in salads or wraps for lunch.
  • Flavor Boost: Marinate the chicken in olive oil, lemon juice, and garlic for a few hours before grilling for extra flavor.
  • Store Leftovers: Keep any leftovers in an airtight container in the fridge for up to 3 days.
  • Make it a Full Meal: Add in other vegetables like bell peppers or carrots for more color and nutrition.

Common Mistakes and Troubleshooting

Even the best cooks can run into hiccups in the kitchen. Here are some common mistakes and how to avoid them:

  • Overcooking Chicken: Keep an eye on the chicken! Use a timer and a meat thermometer to prevent dryness.
  • Undercooking Broccoli: Make sure the broccoli is grilled long enough to achieve that crisp-tender texture.
  • Skipping Seasoning: Don’t skip salt and pepper; they enhance the flavors beautifully.
  • Not Preheating the Grill: Always preheat your grill to ensure even cooking and nice grill marks.

Delicious Variations to Try

Feel free to mix things up with these tasty variations:

  • Spicy Kick: Add chili flakes or sriracha to your olive oil for a spicy grilled chicken.
  • Southwestern Twist: Use taco seasoning on the chicken and serve with black beans and corn.
  • Asian Inspired: Use soy sauce and sesame oil for a different flavor profile, and top with sesame seeds.
  • Vegan Option: Substitute chicken with grilled tofu or tempeh for a plant-based version.

Storage and Make-Ahead Instructions

This dish is perfect for meal prep! Here’s how to store it:

  • Refrigerating: Store in airtight containers in the fridge for up to 3 days.
  • Freezing: Freeze the chicken and broccoli separately from the rice for up to 2 months; thaw overnight in the fridge before reheating.
  • Make-Ahead: Prepare the chicken and broccoli a day in advance and assemble when ready to serve.

Nutrition Tips and Dietary Adaptations

This Grilled Chicken and Broccoli Rice Bowl is naturally nutritious, but here are some tips to cater to specific dietary needs:

  • Low-Carb: Swap rice for cauliflower rice or zucchini noodles.
  • Gluten-Free: Ensure your sauces are gluten-free and opt for tamari instead of soy sauce.
  • High-Protein: Add chickpeas or edamame to boost the protein content.

Equipment Recommendations

Here’s what you’ll need to make this recipe a success:

  • Grill or Grill Pan: A good-quality grill or grill pan is essential for that perfect char.
  • Meat Thermometer: Ensures your chicken is cooked perfectly every time.
  • Sharp Knife: A sharp knife makes slicing the chicken easy and prevents tearing.

Serving Suggestions

Here are some creative ways to serve your Grilled Chicken and Broccoli Rice Bowl:

  • On a Bed of Greens: Serve over mixed greens for a fresh salad option.
  • With a Side Salad: Pair with a simple side salad to balance out the meal.
  • In a Wrap: Wrap the chicken and broccoli in a tortilla for a delicious lunch option.

Frequently Asked Questions

Here are some common questions about this recipe:

  • Can I use chicken thighs instead of breasts? Yes, chicken thighs will add more moisture and flavor to the dish.
  • What can I substitute for rice? Quinoa, cauliflower rice, or even farro are great alternatives.
  • How long does this dish last in the fridge? It can last up to 3 days when stored properly in an airtight container.
  • Can I make this dish dairy-free? Absolutely! Just skip any dairy-based sauces and choose a dairy-free option.
  • Can I use frozen broccoli? Yes, just ensure that it’s thawed and drained before grilling.
  • How do I make this dish spicier? Add chili flakes or sriracha to the olive oil before grilling.
  • What sauces pair well with this bowl? Teriyaki, BBQ sauce, or a spicy garlic sauce all complement the flavors well.
  • Can I prepare this in advance? Yes, you can grill the chicken and broccoli ahead of time and assemble the bowls later.

Conclusion

There you have it! A Flavor-Packed Grilled Chicken and Broccoli Rice Bowl that’s not only easy to make but also bursting with flavor and nutrients. Whether you’re cooking for yourself or feeding the whole family, this dish is sure to become a favorite. So grab your ingredients, fire up the grill, and enjoy this delightful meal that’s perfect for any occasion. Happy cooking!

Grilled Chicken and Broccoli Rice Bowl

Prep Time 10 minutes
Cook Time 20 minutes
Total Time 30 minutes
Servings 4 servings
Calories 450
A healthy and flavorful rice bowl featuring grilled chicken, crisp broccoli, and fresh herbs, perfect for a quick lunch or dinner.

Ingredients

Protein

  • 2 pieces chicken breasts

Vegetables

  • 3 cups broccoli florets

Carbohydrates

  • 2 cups cooked rice

Fats & Oils

  • 2 tbsp olive oil

Spices & Seasonings

  • 1 tsp garlic powder
  • 2 tbsp lemon juice
  • to taste Salt and black pepper

Herbs

  • 2 tbsp fresh parsley, chopped

Sauce

  • Your favorite sauce for drizzling

Instructions 

  • Pat chicken dry, brush with olive oil, and season with garlic powder, salt, and pepper.
  • Grill chicken 6-7 minutes per side until cooked through. Rest and slice.
  • Toss broccoli with olive oil, lemon juice, salt, and pepper. Grill 5 minutes until crisp-tender and charred.
  • Divide rice into bowls, top with sliced chicken and broccoli. Drizzle with sauce and garnish with parsley.

Notes

Use your favorite sauce for added flavor.
Calories: 450kcal
Cost: $15
Course: Main Course
Cuisine: American
Keyword: broccoli, Chicken, rice

Get Ready to Experience the Best Zucchini and Corn Fritters!

Welcome to the ultimate guide for making **crispy zucchini and corn fritters** paired with a **refreshing yogurt sauce**! Whether you’re looking for a quick weeknight meal, a delightful appetizer, or a creative way to use up summer zucchini, this recipe is here to inspire you. With a perfect blend of flavors and textures, these fritters are sure to become a favorite in your kitchen.

In this comprehensive guide, we’ll explore everything from ingredient breakdowns to expert tips, and even ways to customize your fritters. So, roll up your sleeves, and let’s dive into the delicious world of zucchini and corn fritters!

Why You’ll Love This Recipe

  • Quick and Easy: You can whip up these fritters in under 30 minutes, making them perfect for busy weeknights.
  • Versatile Dish: These fritters can be enjoyed as an appetizer, side dish, or even a light main course.
  • Healthy Ingredients: Packed with veggies, they’re a fantastic way to sneak more nutrients into your diet.
  • Kid-Friendly: The mild flavors and crispy texture make these fritters a hit with children.
  • Customizable: Feel free to swap in different herbs or spices to fit your flavor preferences.

Ingredient Breakdown

Here’s what you’ll need to make these delicious zucchini and corn fritters:

  • 2 cups grated zucchini: Fresh zucchini is best; you can also use frozen, but make sure to squeeze out excess moisture.
  • 1 cup corn kernels: Use fresh corn in season or frozen corn for convenience.
  • 1/2 cup all-purpose flour: This helps bind the fritters. You can substitute with a gluten-free flour mix if needed.
  • 1/4 cup grated Parmesan cheese: Adds a savory depth of flavor. Nutritional yeast is a great vegan alternative.
  • 2 large eggs: These provide structure. If vegan, consider using flax eggs.
  • 1/2 teaspoon garlic powder: For a subtle punch of flavor. Feel free to use fresh minced garlic for a stronger taste.
  • 1/2 teaspoon onion powder: Enhances the overall flavor profile.
  • Salt and pepper to taste: Essential for seasoning.
  • Oil for frying: Use olive oil or canola oil for frying the fritters.

Step-by-Step Instructions

Side view of zucchini and corn fritters garnished with fresh herbs and yogurt sauce.

Step 1: Prepare the Mixture

In a large mixing bowl, combine the grated zucchini, corn kernels, flour, Parmesan cheese, eggs, garlic powder, onion powder, salt, and pepper. Mix until everything is well combined. The mixture should be moist but hold together when scooped.

Step 2: Heat the Skillet

In a skillet, heat oil over medium heat. A small drop of the batter should sizzle when it’s ready. This indicates the oil is at the right temperature for frying.

Step 3: Fry the Fritters

Drop spoonfuls of the batter into the hot oil and flatten them gently with the back of a spatula. Cook until golden brown, about 3-4 minutes on each side. Avoid overcrowding the pan to ensure even cooking.

Step 4: Make the Yogurt Sauce

While the fritters are frying, prepare the yogurt sauce by mixing the plain yogurt with lemon juice and chopped dill (or your preferred herbs) until well blended. This sauce is the perfect complement to the fritters!

Step 5: Serve and Enjoy!

Remove the fritters from the skillet and place them on paper towels to drain excess oil. Serve warm with the yogurt sauce for dipping.

Pro Tips for Perfect Fritters

  • Choose the Right Zucchini: Select firm zucchini for the best texture. Avoid overripe ones that are soft.
  • Drain Excess Moisture: If using fresh zucchini, sprinkle it with salt and let it sit for 10 minutes before squeezing out moisture. This prevents soggy fritters.
  • Control Temperature: Keep the oil at a steady temperature. Too hot, and they will burn; too cool, and they will absorb oil.
  • Test a Small Batch: Always fry a small fritter first to check the seasoning and texture before cooking the whole batch.
  • Experiment with Herbs: Fresh herbs like chives, parsley, or cilantro can enhance the flavor of the fritters.
  • Use Parchment Paper: For easy cleanup, line your baking sheet with parchment paper when draining fritters.
  • Keep Warm in the Oven: If frying in batches, keep the cooked fritters warm in a low oven (around 200°F) until ready to serve.
  • Make Ahead: Prepare the fritter batter in advance and store it in the fridge for up to 24 hours before cooking.

Common Mistakes and Troubleshooting

Even the best cooks can encounter challenges. Here are some common mistakes and how to avoid them:

  • Soggy Fritters: Ensure you drain excess moisture from the zucchini. This is crucial for achieving crispiness.
  • Fritters Falling Apart: Adding too much flour can lead to dry fritters. Start with the recommended amount and adjust as needed.
  • Uneven Cooking: Frying too many fritters at once can lower the oil temperature. Fry in small batches for even cooking.
  • Flavorless Fritters: Don’t skimp on seasoning. Adjust salt and spices to your taste, and remember that the Parmesan adds saltiness too.

Variations to Try

Feeling adventurous? Here are some delicious variations to consider:

  • Cheesy Zucchini Fritters: Add shredded mozzarella or cheddar cheese to the mixture for a gooey, cheesy center.
  • Spicy Fritters: Incorporate diced jalapeños or a pinch of cayenne pepper for a spicy kick.
  • Herbed Fritters: Mix in fresh herbs like basil, cilantro, or thyme for a burst of fresh flavor.
  • Sweet Corn Fritters: Add a teaspoon of sugar and a dash of cinnamon for a sweet variation that pairs well with syrup or honey.

Storage and Make-Ahead Instructions

These fritters can be stored and prepped for later use:

  • Storing Leftovers: Keep leftover fritters in an airtight container in the fridge for up to 3 days. Reheat them in the oven for maximum crispiness.
  • Freezing: Freeze cooked fritters in a single layer on a baking sheet, then transfer to a freezer bag. They can be stored for up to 3 months. Reheat directly from the freezer in the oven.
  • Make Ahead: The batter can be made ahead and stored in the fridge for up to 24 hours. Just give it a good mix before frying.

Frequently Asked Questions

Here are some common questions about zucchini and corn fritters:

  • Can I use frozen zucchini? Yes, but make sure to thaw and drain it well to remove excess moisture.
  • What can I serve with fritters? They pair well with salads, dips, or as a side to grilled meats.
  • How do I make them gluten-free? Substitute all-purpose flour with a gluten-free flour blend.
  • Can I bake the fritters instead of frying? Yes, place them on a parchment-lined baking sheet and bake at 400°F for about 20 minutes, flipping halfway through.
  • What oil is best for frying? Canola oil or vegetable oil works well due to their high smoke points.
  • How do I know when they are done? Fritters should be golden brown on both sides and cooked through in the center.
  • Can I add other vegetables? Absolutely! Shredded carrots or bell peppers can add color and flavor.
  • What’s the best way to serve fritters? Serve them warm with the yogurt sauce, garnished with extra herbs for a beautiful presentation.

Nutritional Tips and Dietary Adaptations

These fritters can be adapted for various dietary needs:

  • Low-Carb Option: Substitute the flour with almond flour or coconut flour to reduce carbs.
  • Dairy-Free Option: Use a dairy-free yogurt alternative for the sauce and omit cheese.
  • Vegetarian/Vegan: Replace eggs with flax eggs and use nutritional yeast for a cheesy flavor.

Kitchen Equipment Recommendations

For optimal results, consider having the following kitchen tools ready:

  • Non-stick Skillet: Essential for frying without sticking and for easy cleanup.
  • Mixing Bowls: A large bowl for mixing the batter and a smaller one for the yogurt sauce.
  • Spatula: Perfect for flipping fritters and ensuring they cook evenly.
  • Measuring Cups and Spoons: Accurate measurements lead to the best results!

Serving Suggestions

Serve these zucchini and corn fritters warm, accompanied by the yogurt sauce. For an extra touch, consider:

  • Fresh Herbs: Garnish with chopped parsley or dill for a pop of color.
  • Salad: Pair with a simple arugula or mixed greens salad for a balanced meal.
  • Lemon Wedges: A squeeze of fresh lemon juice adds brightness and enhances flavors.

Final Thoughts

Cooking should be a joyful experience, and these **zucchini and corn fritters** are a fantastic way to enjoy the process! With simple ingredients, clear steps, and endless variations, you’ll find yourself making these fritters time and again. Remember, cooking is all about experimenting and having fun, so don’t be afraid to make this dish your own. Happy cooking, and enjoy your delicious creation!

Zucchini and Corn Fritters with Yogurt Sauce

Prep Time 10 minutes
Cook Time 10 minutes
Total Time 20 minutes
Servings 4 servings
Calories 250
Delight in crispy zucchini and corn fritters served with a tangy yogurt sauce, perfect for a quick and flavorful meal.

Ingredients

Main Ingredients

  • 2 cups grated zucchini
  • 1 cup corn kernels (fresh or frozen)
  • 0.5 cup all-purpose flour
  • 0.25 cup grated Parmesan cheese
  • 2 large eggs
  • 0.5 teaspoon garlic powder
  • 0.5 teaspoon onion powder
  • to taste Salt and pepper
  • for frying Oil
  • 1 cup plain yogurt
  • 1 tablespoon lemon juice
  • 1 tablespoon chopped fresh dill or herbs

Instructions 

  • Combine grated zucchini, corn, flour, Parmesan, eggs, garlic powder, onion powder, salt, and pepper in a large bowl.
  • Heat oil in a skillet over medium heat until a small batter drop sizzles.
  • Drop spoonfuls of batter into the hot oil, flatten gently, and cook until golden brown, about 3-4 minutes per side.
  • Mix yogurt with lemon juice and chopped herbs until well blended.
  • Remove fritters, drain on paper towels, and serve warm with yogurt sauce.

Notes

For extra crispiness, fry in hot oil and serve immediately.
Calories: 250kcal
Cost: $12
Course: Appetizer, Main
Cuisine: American
Keyword: Corn, Fritters, Zucchini

Are you ready to elevate your weeknight meals with a dish that’s as satisfying as it is simple? Welcome to the world of cold noodles with shredded chicken! This delightful recipe combines the comforting textures of noodles with the savory flavor of poached chicken, all tossed in a vibrant sauce. Perfect for busy nights or when you want something light yet fulfilling, this dish is not just a meal; it’s an experience. Let’s dive into why you’re going to love making this dish!

Why You’ll Love This Recipe

  • Quick and Easy: With a preparation time of just 15 minutes and minimal cooking involved, you can have a delicious meal ready in no time.
  • Customizable: This recipe is versatile. Swap out ingredients based on what you have at home, whether it’s different proteins or vegetables.
  • Perfect for Meal Prep: Make a big batch and store it for a quick lunch or dinner throughout the week. Cold noodles keep well in the fridge!
  • Fresh and Flavorful: The combination of fresh vegetables and a zesty sauce makes every bite refreshing and satisfying.
  • Healthy Options: Packed with nutrients from the veggies and lean protein from the chicken, this dish is a wholesome choice.

Ingredient Breakdown

Before we get cooking, let’s take a closer look at the ingredients you’ll need, along with some handy substitutions to personalize your dish:

  • Chicken Breast: Use one chicken breast, ideally left at room temperature for 1-2 hours for optimal texture. Feel free to substitute with rotisserie chicken for even less prep time.
  • Ginger: Two slices of ginger add a fragrant touch. You can skip this if you’re not a fan, but I recommend it for flavor depth.
  • Scallion: One scallion cut into 3-inch lengths not only adds flavor but also a beautiful pop of color.
  • Noodles: You can use almost any noodle or pasta, but for authenticity, go for Asian noodles like soba or rice noodles.
  • Cucumber: One seedless cucumber, julienned, adds crunch. If you can’t find a seedless variety, just remove the seeds from a regular cucumber.
  • Bean Sprouts: A cup and a half of raw or blanched bean sprouts provide a fresh crunch. You can also use shredded carrots as an alternative.
  • Peanuts: Use 1/3 to 1/2 cup of dry roasted peanuts for that nutty flavor. Almonds or cashews work as great substitutes.
  • Cilantro: A small handful, chopped, adds a fresh herbal note that brightens the dish.
  • Sugar: Two teaspoons help balance the flavors. Honey can be a great alternative.
  • Sesame Oil: One tablespoon for a rich, nutty flavor. If you’re avoiding oil, omit this.
  • Garlic: Four cloves, finely minced, bring depth to the sauce. Adjust to your taste!
  • Rice Vinegar: Four tablespoons add acidity and brightness; apple cider vinegar can substitute if needed.
  • Soy Sauce: Use three tablespoons of light soy sauce for seasoning. Tamari is a gluten-free option.
  • Chili Oil: 2-3 teaspoons for heat, or omit if you prefer a milder dish.
  • Salt: To taste, enhancing all the flavors.

Step-by-Step Instructions

Ready to whip up this delightful dish? Follow these easy steps:

  • First, poach the chicken breast. Fill a small pot with enough water to submerge the chicken, and add ginger and scallion. Bring the water to a boil, then add the chicken, cover the pot, and turn off the heat. Let it sit for 22-25 minutes.
  • While the chicken is poaching, prepare the sauce. In a bowl, mix together the sugar, sesame oil, minced garlic, rice vinegar, soy sauce, and chili oil until well combined.
  • Cook your chosen noodles according to package instructions. Remember, nobody likes soggy noodles! Drain them and rinse under cold water to stop the cooking process.
  • If you’re not ready to eat right away, toss the noodles with 1-2 teaspoons of oil to keep them from sticking.
  • Once the chicken is done, shred it into bite-sized pieces.
  • In a large bowl, combine the noodles, shredded chicken, julienned cucumber, bean sprouts, chopped peanuts, scallion, and cilantro.
  • Pour the sauce over everything and toss gently to combine. Serve immediately or chill for a refreshing take!

Pro Tips for Perfect Cold Noodles

A side view of a bowl of cold noodles featuring shredded chicken, cucumber, and bean sprouts.

To make your cold noodles truly exceptional, consider these expert insights:

  • Don’t Rush the Chicken: Poaching the chicken gently ensures it stays tender and juicy, enhancing the overall texture of the dish.
  • Chill the Noodles: After rinsing, chilling the noodles in cold water helps maintain their texture and prevents sticking.
  • Adjust the Sauce: Feel free to play with the proportions of sauce ingredients to match your taste preferences. Add more vinegar for tang, or increase sugar for sweetness!
  • Fresh Vegetables: Use seasonal vegetables for a fresh twist. Bell peppers or carrots can add color and crunch.
  • Garnish Wisely: Top with sesame seeds or additional chopped peanuts for added texture and presentation.
  • Heat Adjustment: If you like more heat, add extra chili oil or a dash of sriracha to the sauce.
  • Meal Prep Friendly: Store individual portions in airtight containers for easy grab-and-go lunches.
  • Don’t Skip the Herbs: Fresh herbs elevate the dish. If cilantro isn’t your thing, try basil or mint!

Common Mistakes and Troubleshooting

If you encounter any issues while making your cold noodles, here are some common mistakes and how to avoid them:

  • Overcooked Chicken: If your chicken is dry, it’s likely overcooked. Stick to the poaching time and check with a meat thermometer (165°F for safety).
  • Soggy Noodles: To avoid this, rinse thoroughly and toss with oil immediately after draining.
  • Unbalanced Sauce: If the sauce tastes off, adjust it bit by bit. Add more vinegar for brightness or sugar for balance.

Variations to Try

Looking to switch things up? Here are four delicious variations of cold noodles with shredded chicken:

  • Spicy Sesame Noodles: Add a spoonful of peanut butter and extra chili oil for a creamy, spicy twist.
  • Vegetable-Loaded Noodles: Toss in bell peppers, carrots, and broccoli for added nutrition and color.
  • Asian Peanut Sauce: Swap the sauce with a peanut sauce made from peanut butter, soy sauce, and lime juice for a nutty flavor profile.
  • Cold Noodles Salad: Incorporate mixed greens and a variety of veggies for a vibrant salad version of this dish.

Storage and Make-Ahead Instructions

To make your meal prep even easier:

  • Refrigeration: Store leftovers in an airtight container for up to 3 days. The flavors will continue to meld!
  • Make-Ahead: Prepare the sauce and chop vegetables a day in advance for quick assembly when you’re ready to eat.

Frequently Asked Questions

Got questions? Here are some common queries regarding cold noodles with shredded chicken:

  • Can I use other meats? Absolutely! Try shredded pork, tofu, or even shrimp as alternatives.
  • What noodles are best for this recipe? Soba, udon, or rice noodles work wonderfully, but feel free to experiment with your favorite pasta.
  • Can I freeze this dish? It’s best enjoyed fresh, but you can freeze the chicken and sauce separately. Thaw before serving.
  • Is this recipe gluten-free? Yes, simply use gluten-free noodles and tamari instead of soy sauce.
  • What can I serve with this dish? Pair it with a light salad or fresh spring rolls for a complete meal.
  • How do I make it vegan? Substitute chicken with marinated tofu and use tamari to keep it plant-based.
  • How spicy is this dish? The spice level can be adjusted easily by modifying the amount of chili oil.
  • Can I make this dish ahead of time? Yes, it tastes even better after the flavors have had time to meld!

Nutrition Tips and Dietary Adaptations

To align this dish with your dietary needs:

  • Low-Carb Option: Use zucchini noodles instead of traditional pasta for a lighter version.
  • Low-Sodium Version: Opt for low-sodium soy sauce and reduce the salt added to the dish.
  • High-Protein Boost: Add a boiled egg or extra chicken for a protein-packed meal.

Equipment Recommendations

Here’s what you’ll need to get started:

  • Pot: For poaching the chicken.
  • Mixing Bowl: To combine the sauce and ingredients.
  • Colander: For draining and rinsing the noodles.
  • Knife and Cutting Board: Essential for chopping veggies and shredding chicken.

Serving Suggestions

When it comes to serving:

  • Garnish: Top with extra scallions, sesame seeds, or cilantro for a beautiful presentation.
  • Side Dishes: Serve alongside a light cucumber salad or steamed edamame for a refreshing meal.
  • Serving Temperature: Enjoy cold or at room temperature to fully appreciate the flavors.

Conclusion

Now that you have all the tools to create your own cold noodles with shredded chicken, it’s time to get cooking! Remember, cooking is about experimenting and enjoying the process. So, gather your ingredients, follow these steps, and enjoy a delightful meal that brings joy to your table. Happy cooking!

Cold Noodles with Shredded Chicken

Prep Time 15 minutes
Cook Time 25 minutes
Total Time 40 minutes
Servings 2 servings
Calories 550
A refreshing and easy-to-make cold noodle dish topped with shredded chicken and crunchy vegetables, perfect for a quick meal.

Ingredients

Protein

  • 1 piece chicken breast (left at room temperature for 1-2 hours)
  • 2 slices ginger
  • 1 piece scallion (cut into 3-inch lengths)

Noodles

  • 2 servings noodles (almost any noodle or pasta)
  • 1 1/2 cups dry roasted peanuts
  • 1 seedless cucumber julienned
  • 1 1/2 cups bean sprouts (raw or blanched)
  • 2-3 teaspoons chili oil (omit if you don’t like heat)
  • 2 teaspoons sugar
  • 1 tablespoon sesame oil
  • 4 cloves garlic (finely minced)
  • 4 tablespoons rice vinegar
  • 3 tablespoons light soy sauce

Salt

Instructions 

  • Poach the chicken breast in boiling water with ginger and scallion for 22-25 minutes, then shred.
  • Mix all sauce ingredients: sugar, sesame oil, garlic, rice vinegar, soy sauce, chili oil, and salt.
  • Cook noodles according to package instructions, rinse under cold water, and toss with 1-2 teaspoons oil to prevent sticking.
  • Combine noodles, shredded chicken, cucumber, bean sprouts, peanuts, scallion, and cilantro in a bowl. Pour sauce over and toss.

Notes

For extra flavor, chill the dish before serving or add a squeeze of lime.
Calories: 550kcal
Cost: $12
Course: Main Course
Cuisine: Asian
Keyword: Chicken, cold, Noodles

Discover the Joy of Making a Classic Shawarma Chicken Sandwich

If you’re looking to elevate your sandwich game, you’ve landed in the right place! The Classic Shawarma Chicken Sandwich is a delightful twist on traditional flavors, bringing together juicy chicken thighs, a *creamy garlic sauce*, and fresh toppings—all wrapped in warm pita bread. This recipe not only satisfies your taste buds but also adds a touch of excitement to your weeknight dinners or lunch breaks. In this guide, we’ll walk you through every step of the process, ensuring you feel confident and inspired to make your own delicious shawarma chicken sandwich.

Why You’ll Love This Recipe

This recipe offers more than just flavor; it’s a complete experience. Here are five compelling reasons to get started:

  • Flavorful Marinade: The combination of spices, lemon juice, and garlic creates a *marinade* that infuses the chicken with rich, vibrant flavors.
  • Customizable Options: You can easily adjust the ingredients to suit your taste, whether you prefer more heat or extra creaminess in your sauce.
  • Quick and Easy: With simple steps and accessible ingredients, this recipe is perfect for busy weeknights or a quick lunch fix.
  • Healthy Ingredients: Packed with protein and fresh vegetables, this sandwich is not only delicious but also nutritious.
  • Fun to Assemble: Get creative with how you assemble your sandwich. With various toppings and sauces, each bite can be a new flavor adventure!

Ingredients You’ll Need

Let’s gather everything you need for this mouthwatering shawarma chicken sandwich. Here’s a detailed breakdown of the ingredients, along with some helpful substitutions:

  • 1.5 lbs boneless, skinless chicken thighs: Cut into 1-2 inch strips. *Note*: Chicken breasts can be used but may result in a drier texture.
  • 1/4 cup olive oil: A high-quality oil adds flavor and helps keep the chicken tender.
  • 3 cloves garlic, minced: Fresh garlic is key to the marinade and sauce.
  • 1 tbsp lemon juice, freshly squeezed: Adds brightness; bottled juice can be used in a pinch but won’t be as flavorful.
  • 1 tsp ground cumin: Provides a warm, earthy flavor.
  • 1 tsp ground coriander: Complements the cumin beautifully.
  • 1/2 tsp smoked paprika: For a hint of smokiness in your chicken.
  • 1/2 tsp turmeric powder: Adds color and a subtle flavor.
  • 1/4 tsp cayenne pepper (optional): For those who like a little heat!
  • 1/2 tsp salt: Enhances all the flavors.
  • 1/4 tsp black pepper: Freshly ground for the best flavor.
  • For the creamy garlic sauce:
  • 1/2 cup mayonnaise: Use a good quality mayo for the best taste.
  • 2 cloves garlic, minced very fine or grated: Ensures a smooth sauce.
  • 1 tbsp fresh lemon juice: Brightens the sauce.
  • 2 tbsp water: To achieve your desired sauce consistency.
  • Pinch of salt to taste: Adjust to your liking.
  • 4 large pita breads or flatbreads, warmed: The vessel for your delicious filling.
  • 1/2 cup shredded lettuce: Adds a nice crunch.
  • 1/2 cup diced tomatoes: Freshness and juiciness in every bite.
  • 1/4 cup thinly sliced red onion: A bit of sharpness to balance the rich flavors.
  • 1/4 cup chopped fresh parsley (optional): For a fresh finish.
  • 1/2 cup pickles (dill or Persian style), sliced: Adds a tangy crunch to the sandwich.

How to Make Your Shawarma Chicken Sandwich

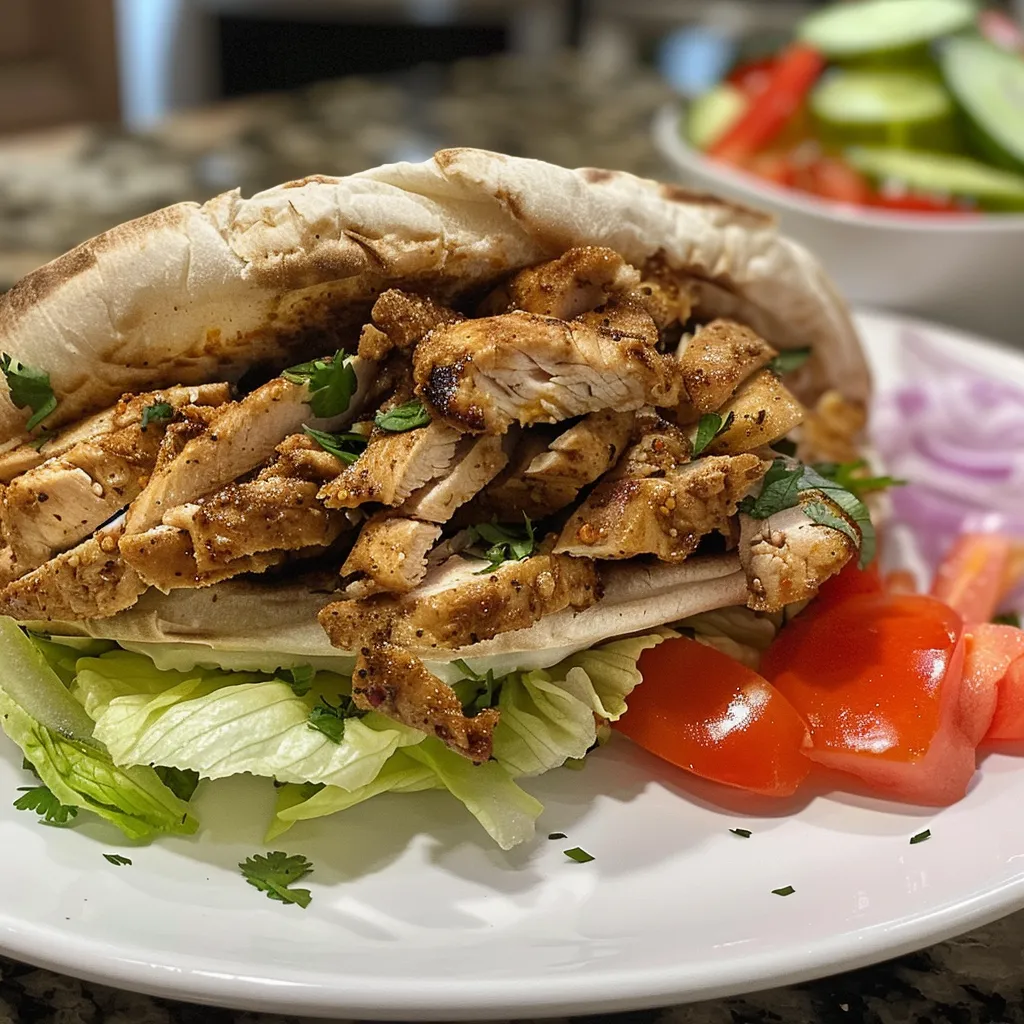
Side angle of a delicious shawarma chicken sandwich filled with vibrant vegetables and sauce.

Now that we have all our ingredients ready, let’s dive into the preparation process. This is where the magic happens!

Step 1: Marinate the Chicken

In a large bowl, combine the chicken strips, olive oil, minced garlic, lemon juice, cumin, coriander, smoked paprika, turmeric, cayenne (if using), salt, and black pepper. Mix well to ensure all the chicken is evenly coated. Cover the bowl with plastic wrap and let it marinate in the refrigerator for at least 30 minutes, or up to 2 hours for maximum flavor.

Step 2: Cook the Chicken

Heat a grill pan or skillet over medium-high heat. Once hot, add the marinated chicken strips in a single layer, ensuring not to overcrowd the pan. Cook for about 5-7 minutes per side, or until the chicken is fully cooked and has a nice char. The internal temperature should reach 165°F (75°C). Remove from heat and let it rest for a few minutes before slicing.

Step 3: Make the Creamy Garlic Sauce

While the chicken is resting, prepare the creamy garlic sauce. In a small bowl, whisk together the mayonnaise, minced garlic, lemon juice, water, and a pinch of salt. Taste and adjust the seasoning as needed. If you prefer a thinner sauce, add a bit more water until you reach your desired consistency.

Step 4: Assemble the Sandwich

Warm the pita breads or flatbreads. Place a generous amount of sliced chicken in the center, drizzle with the creamy garlic sauce, and top with shredded lettuce, diced tomatoes, sliced red onion, parsley, and pickles. Fold the pita around the filling, and you’re ready to enjoy!

Pro Tips for Making the Perfect Shawarma Chicken Sandwich

  • Marination time matters: Allow the chicken to marinate longer for deeper flavors. Overnight is ideal if you have the time!
  • High heat for cooking: A hot pan helps achieve that coveted char and keeps the chicken juicy.
  • Use fresh ingredients: The quality of your ingredients, especially the garlic and herbs, makes a significant difference.
  • Adjust the sauce: Feel free to tweak the garlic sauce with additional spices or herbs to suit your taste.
  • Serve immediately: These sandwiches taste best when fresh, so assemble them right before serving.
  • Experiment with toppings: Try adding grilled vegetables or feta cheese for added flavor.
  • Make it spicier: Add chopped fresh chili or a dash of hot sauce to the chicken for an extra kick.
  • Try different breads: While pita is traditional, flatbreads, naan, or even baguettes can work beautifully!

Common Mistakes and Troubleshooting Tips

Even the best of us can run into hiccups while cooking. Here are some common mistakes and how to avoid them:

  • Dry Chicken: Overcooking is the main culprit. Use a meat thermometer to ensure you don’t go past 165°F (75°C).
  • Flavorless Sauce: If your sauce lacks flavor, try adding more garlic, lemon juice, or even a splash of vinegar.
  • Bread Too Tough: If your pita bread feels tough, warm it up in a pan or microwave just before serving.
  • Overloaded Sandwich: Be careful not to overfill the pita; too much filling can make it hard to eat!

Variations to Try

Get creative with your shawarma chicken sandwich! Here are a few delicious variations:

  • Spicy Shawarma: Add more cayenne pepper or a splash of sriracha to the marinade for heat.
  • Vegetarian Option: Substitute chicken with grilled eggplant or portobello mushrooms for a satisfying meat-free version.
  • Hawaiian Twist: Add grilled pineapple slices and teriyaki sauce for a sweet and savory combination.
  • Greek Style: Incorporate feta cheese and olives into your toppings for a Mediterranean flair.

How to Store and Make Ahead

If you’re planning to enjoy these sandwiches over a few days, here are some storage tips:

  • Refrigeration: Store leftover chicken in an airtight container in the fridge for up to 3 days.
  • Freezing: Cooked chicken can be frozen for up to 3 months. Thaw overnight in the fridge before reheating.
  • Make-Ahead Sauce: The creamy garlic sauce can be made in advance and stored in the fridge for up to a week.

FAQs About Shawarma Chicken Sandwiches

Got questions? Here are some common inquiries about this delicious dish:

  • Can I use chicken breasts instead of thighs? Yes, but thighs are juicier and more flavorful.
  • Is this recipe gluten-free? Use gluten-free pita or flatbreads to make it suitable for gluten-free diets.
  • Can I grill the chicken outside? Absolutely! Grilling adds an amazing flavor.
  • What should I serve with shawarma sandwiches? Consider pairing them with a fresh salad or crispy fries.
  • How can I boost the garlic flavor in the sauce? Add more minced garlic or roasted garlic for an intense flavor.
  • Can I make this sandwich in advance? Yes, prepare the chicken and sauce ahead of time, but assemble the sandwich just before serving.
  • What are some good toppings? Try pickled veggies, hot sauce, or avocado for extra flavor.
  • How do I know when the chicken is done? Use a meat thermometer; it should read 165°F (75°C).

Nutrition Tips and Dietary Adaptations

This shawarma chicken sandwich can fit into various dietary preferences. Here are some tips:

  • Low-Carb Option: Serve the chicken and toppings in a lettuce wrap instead of bread.
  • Dairy-Free Version: Replace regular mayonnaise with a dairy-free alternative or avocado for creaminess.
  • Low-Calorie Choice: Use less oil in the marinade and skip the sauce for a lighter meal.

Recommended Equipment

Here are some kitchen tools that will make your cooking experience easier:

  • Grill Pan or Skillet: A non-stick pan is ideal for achieving that perfect sear on the chicken.
  • Meat Thermometer: Helps ensure your chicken is cooked perfectly.
  • Mixing Bowls: Essential for marinating and mixing ingredients.
  • Whisk: For blending the creamy garlic sauce smoothly.

Serving Suggestions

To make your meal extra special, consider serving your shawarma chicken sandwich with:

  • Homemade French Fries: Crispy fries complement the sandwich perfectly.
  • Tabbouleh Salad: A refreshing salad to balance the rich flavors of the sandwich.
  • Hummus and Veggies: Serve as a starter or side for a complete Middle Eastern feast.

Now that you have all the tools and knowledge at your fingertips, it’s time to roll up your sleeves and get cooking! This Classic Shawarma Chicken Sandwich with its creamy garlic sauce is sure to become a new favorite in your home. Remember, cooking is all about having fun and experimenting. Enjoy the process, and most importantly, enjoy your delicious creation!

Classic Shawarma Chicken Sandwich with Creamy Garlic Sauce

Prep Time 20 minutes
Cook Time 30 minutes
Total Time 50 minutes
Servings 4 servings
Calories 650
Enjoy a flavorful shawarma chicken sandwich topped with a creamy garlic sauce, perfect for a quick and satisfying meal.

Ingredients

Chicken

  • 1.5 lbs boneless, skinless chicken thighs (cut into 2-inch strips)
  • 0.25 cup olive oil
  • 3 cloves garlic (minced)
  • 1 tbsp lemon juice (freshly squeezed)
  • 1 tsp ground cumin
  • 1 tsp ground coriander
  • 0.5 tsp smoked paprika
  • 0.5 tsp turmeric powder
  • 0.25 tsp cayenne pepper (optional, for heat)
  • 0.5 tsp salt
  • 0.25 tsp black pepper

Creamy Garlic Sauce

  • 0.5 cup mayonnaise (good quality)
  • 2 cloves garlic (minced very fine or grated)
  • 1 tbsp fresh lemon juice
  • 2 tbsp water
  • Pinch salt (to taste)

Sandwich Components

  • 4 large pita breads or flatbreads (warmed)
  • 0.5 cup shredded lettuce
  • 0.5 cup diced tomatoes
  • 0.25 cup thinly sliced red onion
  • 0.25 cup chopped fresh parsley (optional)
  • 0.5 cup pickles (dill or Persian style, sliced, for serving)

Instructions 

  • Marinate chicken with olive oil, garlic, lemon juice, cumin, coriander, paprika, turmeric, cayenne, salt, and pepper. Cook until browned.
  • Prepare creamy garlic sauce by mixing mayonnaise, minced garlic, lemon juice, water, and salt. Set aside.
  • Warm pita breads and assemble sandwiches with cooked chicken, lettuce, tomatoes, red onion, parsley, and pickles. Drizzle with garlic sauce.

Notes

For extra flavor, marinate the chicken longer and toast the pita for added texture.
Calories: 650kcal
Cost: $15
Course: Main Course
Cuisine: Middle Eastern
Keyword: Chicken, Sandwich, Shawarma

Discover the Ultimate Strawberry Banana Smoothie Bowl

If you’re looking for a quick, delicious, and nutritious breakfast or snack, you’ve landed in the right place! This Strawberry Banana Smoothie Bowl is not only easy to whip up, but it also packs a flavorful punch that will energize your day. Made with wholesome ingredients like frozen bananas and strawberries, this smoothie bowl is perfect for busy mornings or a refreshing afternoon treat. Let’s dive into why this recipe deserves a spot in your regular rotation!

Why You’ll Love This Recipe

Here are just a few reasons why this strawberry banana smoothie bowl will become your new favorite:

  • Quick Preparation: Ready in just 5 minutes, perfect for those hectic mornings.
  • Customizable: Adapt the recipe to your taste by adding your favorite toppings and add-ins.
  • Nutrient-Rich: Packed with vitamins and minerals from fruits, making it a healthy start to your day.
  • Deliciously Creamy: Achieve a thick, luxurious texture that feels indulgent without the guilt.
  • Dairy-Free Option: Easily made vegan with non-dairy milk, catering to various dietary needs.

Ingredients Breakdown

Let’s look at what you need to create this delightful bowl:

  • 2 frozen bananas: Peel and freeze ripe bananas for the best creaminess.
  • 1 1/2 cups frozen strawberries: Use high-quality frozen strawberries for natural sweetness.
  • 1 tsp vanilla extract: Adds depth and enhances the natural flavors of the fruits.
  • 1/2 cup non-dairy milk: Choose almond, coconut, or oat milk based on your preference.
  • Optional add-ins: Consider adding protein powder, almond butter, chia seeds, or flaxseeds for extra nutrition.

How to Make Your Strawberry Banana Smoothie Bowl

A colorful smoothie bowl featuring strawberries and bananas, with a creamy texture visible.

Follow these simple steps to create your smoothie bowl:

  • Add all ingredients: Place frozen bananas, frozen strawberries, vanilla extract, and non-dairy milk into your blender.
  • Blend until smooth: Start blending on low, gradually increasing speed. Use a tamper if necessary to ensure everything blends evenly.
  • Check consistency: If the mixture is too thick, add a little more milk. If too thin, add more frozen fruit.
  • Transfer to a bowl: Pour your thick smoothie into a bowl, creating a lovely canvas for your toppings.
  • Add toppings: Get creative! Top with fresh fruit, granola, nuts, seeds, or a drizzle of honey.

Pro Tips for the Perfect Smoothie Bowl

Here’s how to elevate your smoothie bowl game:

  • Use frozen fruit: For a thick, creamy texture, always use frozen bananas and strawberries.
  • Blend in stages: If your blender struggles, blend in smaller batches to ensure everything mixes well.
  • Experiment with textures: Try adding oats or nut butters for a different mouthfeel.
  • Chill your ingredients: Using chilled ingredients can help maintain that refreshing coolness.
  • Layer flavors: Don’t hesitate to mix in a tablespoon of cocoa powder for a chocolate twist!
  • Don’t skip the tamper: If your blender has one, it’s a game-changer for achieving that thick consistency.
  • Adjust sweetness: Taste your smoothie before serving; you can add a little honey or maple syrup if you prefer it sweeter.
  • Mind your toppings: Choose toppings that complement the flavor of your smoothie, like shredded coconut or sliced almonds.

Common Mistakes and Troubleshooting

Here are some common pitfalls and how to avoid them:

  • Too thin?: If your smoothie bowl is runny, add more frozen fruit or reduce the amount of liquid.
  • Over-blending: Be cautious! Blending too long can make your smoothie too thin; stop once it’s smooth.
  • Not enough flavor?: Always taste before serving. Adjust sweetness with honey or a pinch of salt to enhance flavors.
  • Stuck ingredients?: If ingredients get stuck, pause the blender, shake it gently, and blend again.

Delicious Variations to Try

Feeling adventurous? Here are some variations to switch up your smoothie bowl:

  • Berry Blast: Swap strawberries for blueberries or raspberries for a different fruity flavor.
  • Chocolate Delight: Add a tablespoon of cocoa powder or chocolate protein powder for a dessert-like treat.
  • Nutty Banana: Include almond butter or peanut butter for a protein boost and nutty flavor.
  • Tropical Twist: Use mango and pineapple instead of strawberries for a sunny, tropical vibe.

Storage and Make-Ahead Instructions

This smoothie bowl is best enjoyed fresh, but you can prepare components ahead of time:

  • Freeze ingredients: Pre-portion and freeze bananas and strawberries in zip-top bags for easy access.
  • Store leftovers: If you have leftovers, store them in an airtight container in the fridge for up to 24 hours. Note that the texture may change.

Frequently Asked Questions (FAQ)

Here are some common questions that might help you:

  • Can I use fresh fruit? While fresh fruit works, frozen fruit creates a thicker texture.
  • What if I don’t have a blender? A food processor can work in a pinch, though results may vary.
  • Can I make this smoothie bowl without bananas? Yes! Use avocado for creaminess or yogurt for a different base.
  • How can I make this smoothie bowl higher in protein? Add protein powder, Greek yogurt, or nut butter.
  • Is this smoothie bowl suitable for kids? Absolutely! It’s a great way to sneak in some fruits and nutrients.
  • Can I make it in advance? You can prepare the ingredients in advance but blend fresh for the best texture.
  • What toppings do you recommend? Fresh fruits, granola, nuts, seeds, or coconut flakes work wonderfully!
  • Is this recipe vegan? Yes! Simply use non-dairy milk and avoid any animal products in your toppings.

Nutrition Tips and Dietary Adaptations

This recipe is naturally low in calories and high in vitamins, but you can adapt it further:

  • Boost with greens: Add a handful of spinach or kale for extra nutrients without altering the flavor.
  • Low-carb option: Replace bananas with avocado or use unsweetened almond milk for a lower-carb version.
  • Gluten-free: This recipe is inherently gluten-free, making it suitable for those with gluten sensitivities.

Essential Equipment for a Smoothie Bowl

To make the perfect smoothie bowl, consider having:

  • High-speed blender: A powerful blender is key to achieving that creamy texture.
  • Tamper: If your blender has one, it helps push ingredients down for even blending.
  • Serving bowls: Choose wide, shallow bowls for an aesthetically pleasing presentation.

Serving Suggestions

Enjoy your strawberry banana smoothie bowl as:

  • Breakfast: A refreshing way to kickstart your day.
  • Post-workout snack: Perfect for replenishing energy after a workout.
  • Afternoon pick-me-up: An ideal treat to beat the afternoon slump.

With this guide, you’re all set to create the ultimate strawberry banana smoothie bowl! Remember, cooking is about experimentation and fun. So, go ahead, customize, and make it your own. Enjoy the process, and happy blending!

Strawberry Banana Smoothie Bowl

Prep Time 5 minutes
Total Time 5 minutes
Servings 2 bowls
Calories 250
A delicious and healthy smoothie bowl made with frozen bananas and strawberries, perfect for a quick breakfast or snack.

Ingredients

Fruits

  • 2 pieces frozen bananas (peeled before freezing)
  • 1.5 cups frozen strawberries
  • 1 tsp vanilla extract
  • 0.5 cup non-dairy milk

Optional add-ins

  • to taste protein powder, almond butter, chia seeds, etc (add as desired)

Instructions 

  • Add all ingredients to a blender.
  • Blend until smooth and creamy, using a tamper if needed.
  • Transfer to a bowl and add toppings of choice.
  • Enjoy!

Notes

You can customize toppings and add-ins for variety.
Calories: 250kcal
Cost: $10
Course: Breakfast
Keyword: Fruit, Healthy, Smoothie

Start Your Day Right with the Ultimate High-Protein Berry Smoothie Bowl

Are you looking for a delicious and nutritious way to energize your mornings? Look no further than this High-Protein Berry Smoothie Bowl. Packed with creamy Greek yogurt, nutrient-rich chia seeds, and vibrant fresh berries, this smoothie bowl is more than just a meal; it’s a delightful experience that will leave you feeling revitalized and ready to tackle the day. Whether you’re a busy professional, a parent, or simply someone who loves to start the day on a healthy note, this recipe is designed with you in mind.

In this article, we’ll dive deep into what makes this smoothie bowl so special, how to prepare it, and why it’s a fantastic choice for anyone looking to boost their protein intake, especially women over 50. Plus, we’ll cover essential tips, variations, and common pitfalls to avoid. Let’s get blending!

Why You’ll Love This Recipe

This High-Protein Berry Smoothie Bowl is not just another breakfast option; it’s a powerhouse of nutrients that offers numerous benefits:

  • High in Protein: With Greek yogurt and chia seeds, this bowl delivers a satisfying dose of protein that keeps you feeling full longer, aiding in weight management.
  • Loaded with Antioxidants: The berries are rich in antioxidants, which help combat oxidative stress and promote overall health.
  • Easy to Customize: You can tailor this recipe to your taste preferences with various toppings and ingredient substitutions.
  • Quick and Simple: Perfect for hectic mornings, this smoothie bowl can be whipped up in just 5-10 minutes.
  • Kid-Friendly: This recipe is not only healthy but also fun for kids to make and eat, making it a great family breakfast option.

Ingredients You’ll Need

To create your High-Protein Berry Smoothie Bowl, gather the following ingredients:

  • Greek Yogurt: Use plain or flavored Greek yogurt for a creamy base.
  • Chia Seeds: These tiny seeds are packed with omega-3 fatty acids and provide a nice texture.
  • Fresh or Frozen Berries: A mix of strawberries, blueberries, and raspberries works beautifully.
  • Pumpkin Seeds (Optional): For added crunch and nutrition, sprinkle some on top.

Ingredient Substitutions

  • Yogurt Alternatives: If you’re dairy-free, try coconut or almond yogurt.
  • Fruit Variations: Swap berries for banana or mango based on your preference.
  • Nut Butters: Adding a spoonful of almond or peanut butter can elevate the flavor and protein content.
  • Milk Alternatives: Use almond, oat, or soy milk for a different liquid base.

How to Make Your Smoothie Bowl

Side perspective of a delicious smoothie bowl featuring Greek yogurt and chia seeds.

Now that you have your ingredients, let’s blend them into a delicious smoothie bowl:

  1. Chop up your fruits if using fresh ones.
  2. In a blender, combine Greek yogurt, chia seeds, and your choice of berries.
  3. Add a splash of milk to help with blending, if necessary.
  4. Blend until smooth and creamy.
  5. Pour the smoothie into a bowl and layer it with chopped fruits, pumpkin seeds, and any other toppings you desire.

Pro Tips for the Perfect Smoothie Bowl

  • Frozen Fruits: Using frozen berries can lead to a thicker consistency, ideal for smoothie bowls.
  • Blend in Stages: If your blender struggles, blend the ingredients in batches for a smoother texture.
  • Adjust Consistency: If you prefer a thicker smoothie, reduce the amount of liquid; for a thinner consistency, add more.
  • Layer Creatively: Get creative with your toppings—consider granola, nuts, or shredded coconut for added texture.
  • Prep Ahead: You can prepare your toppings the night before to save time in the morning.
  • Mind the Sweetness: Taste your smoothie before serving, and adjust the sweetness with honey or maple syrup if needed.
  • Use a High-Speed Blender: A powerful blender will give you the smoothest results.
  • Garnish with Fresh Herbs: A sprinkle of mint can add a refreshing twist to your bowl.

Common Mistakes and Troubleshooting

Even the best cooks can face challenges. Here are common mistakes to avoid:

  • Too Much Liquid: Adding too much milk can make your smoothie bowl too thin. Start with a small amount and add more as needed.
  • Over-Blending: Blending for too long can make your smoothie warm. Blend just until smooth.
  • Not Using Enough Protein: Ensure you’re adding enough Greek yogurt or protein powder to meet your needs.
  • Ignoring Texture: Pay attention to the texture; it should be thick enough to hold toppings.

Delicious Variations to Try

If you want to mix things up, here are some exciting variations to the High-Protein Berry Smoothie Bowl:

  • Coconut Chia Bowl: Incorporate shredded coconut and top with coconut yogurt for a tropical twist.
  • Banana Breakfast Bowl: Add a ripe banana for natural sweetness and creaminess.
  • Chocolate Berry Bowl: Blend in a tablespoon of cocoa powder for a chocolatey treat.
  • Green Smoothie Bowl: Add a handful of spinach or kale for a nutrient boost without sacrificing flavor.

Storage and Make-Ahead Instructions

You can easily prepare this smoothie bowl in advance:

  • Refrigeration: Store the blended smoothie in an airtight container in the fridge for up to 24 hours. Stir well before serving.
  • Freezing: Freeze the blended smoothie in ice cube trays for quick smoothie prep later. Just blend the cubes with a splash of milk when you’re ready to eat.
  • Topping Prep: Prepare your toppings in advance and store them in separate containers for quick assembly.

Frequently Asked Questions

Here are some common questions about smoothie bowls:

  • Can I use fresh berries instead of frozen? Yes, but frozen berries create a thicker consistency.
  • How can I increase the protein content? Add protein powder or nut butter to your smoothie.
  • Is this recipe gluten-free? Yes, all the ingredients listed are gluten-free.
  • Can I make this vegan? Absolutely! Use plant-based yogurt and skip the honey.
  • How long does it take to make? This smoothie bowl takes about 5-10 minutes to prepare.
  • Can I prepare this the night before? Yes, just keep the toppings separate until you are ready to serve.
  • What toppings do you recommend? Fresh fruits, nuts, seeds, and granola are all great options!
  • Can I substitute chia seeds? Yes, flax seeds or hemp seeds are good alternatives.

Nutrition Tips and Dietary Adaptations

This smoothie bowl is naturally nutritious, but here are some tips to enhance its health benefits:

  • Boost Fiber: Add oats or flaxseed to increase the fiber content.
  • Healthy Fats: Incorporate avocado for creaminess and healthy fats.
  • Low Sugar Options: Use unsweetened yogurt and limit added sweeteners to keep sugar low.
  • Watch Portions: Be mindful of portion sizes, especially with high-calorie toppings like granola.

Equipment Recommendations

To make this smoothie bowl, you’ll need:

  • High-Speed Blender: For a smooth and creamy texture.
  • Measuring Cups and Spoons: To ensure accurate ingredient amounts.
  • Bowl and Spoon: For serving your delicious creation!

Serving Suggestions

When it comes to serving your High-Protein Berry Smoothie Bowl, here are a few ideas:

  • Breakfast Treat: Enjoy this smoothie bowl as a nourishing breakfast option.
  • Post-Workout Recovery: Ideal for replenishing energy and nutrients after exercise.
  • Share with Family: Make multiple bowls for a fun family breakfast together.

Conclusion

In conclusion, the High-Protein Berry Smoothie Bowl is a delightful way to start your day with energy and nutrition. Its versatility, ease of preparation, and health benefits make it a go-to recipe for anyone looking to enhance their breakfast routine. So gather your ingredients, get blending, and enjoy a deliciously healthy morning treat that you’ll look forward to every day!

High-Protein Berry Smoothie Bowl

Prep Time 10 minutes
Total Time 10 minutes
Servings 2 bowls
Calories 250
A nutritious and delicious smoothie bowl packed with protein and fresh berries, perfect for a quick breakfast or snack.

Ingredients

Dairy & Seeds

  • 1 cup Greek yogurt
  • 1 tablespoon chia seeds
  • 1 tablespoon pumpkin seeds

Fruits

  • 1 cup berries (mixed berries like strawberries, blueberries, raspberries)

Instructions 

  • Chop up the berries.
  • Layer berries over yogurt in a bowl.

Notes

Feel free to add honey or granola for extra flavor and crunch.
Calories: 250kcal
Cost: $10
Course: Breakfast
Keyword: Berry, High-Protein, Smoothie