
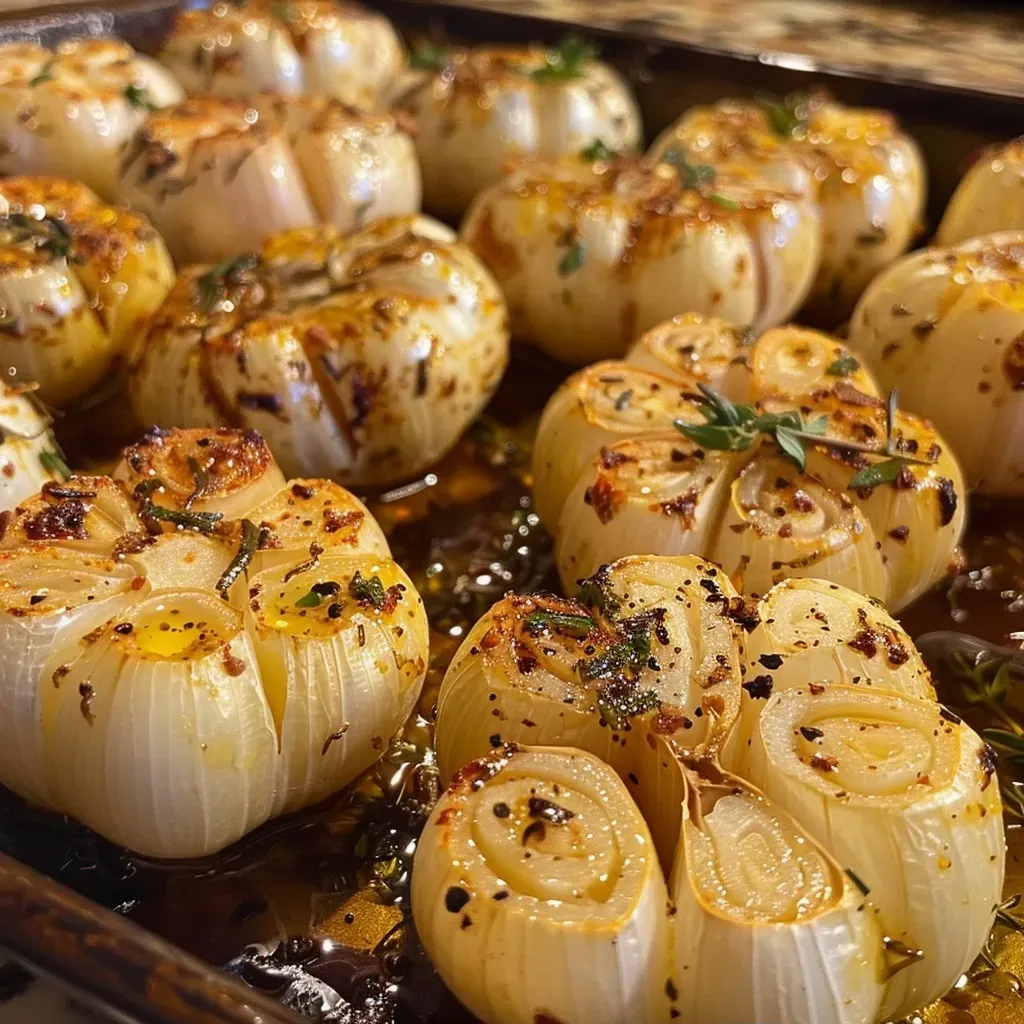
Unlock the Flavor: Your Guide to Baked Garlic
Welcome to the delicious world of baked garlic! If you’ve ever experienced the rich, sweet, and mellow flavor of roasted garlic, you know it can elevate any dish from ordinary to extraordinary. In this guide, we will dive deep into the art of baking garlic, showing you how to create this culinary treasure with just a few ingredients. Perfect for those busy weeknights or special occasions, baked garlic is versatile and incredibly easy to prepare.
Why You’ll Love This Recipe
There are countless reasons to love baked garlic, and here are just a few that make it a must-try:
- Mellow flavor: Baking transforms the garlic, giving it a sweet and gentle flavor that’s perfect for those who find raw garlic too pungent.
- Versatile usage: Use baked garlic in dips, spreads, or as an ingredient in pasta, mashed potatoes, or roasted vegetables.
- Easy preparation: With just a few steps, you can prepare this delicious addition to your meals without any stress.
- Health benefits: Garlic is known for its health benefits, including boosting the immune system and providing antioxidants.
- Impressive presentation: Serving baked garlic makes you look like a culinary genius, impressing friends and family with minimal effort.
Ingredient Breakdown
Understanding the ingredients is key to mastering baked garlic. Here’s what you’ll need:

★ Recommended Kitchen Tool
Digital Kitchen Scale
Make this recipe even easier with a quality Digital Kitchen Scale — a must-have kitchen staple!
- 4 whole garlic heads: Choose firm, unblemished heads for the best flavor.
- 2 tablespoons olive oil: Extra virgin olive oil adds richness and enhances the garlic’s flavor.
- 0.5 teaspoon kosher salt: This helps to draw out moisture and intensifies the flavor.
- 0.25 teaspoon black pepper: A dash of pepper enhances the overall taste without overpowering it.
- 1 teaspoon chopped fresh rosemary: This herb adds a wonderful aromatic component, complementing the garlic beautifully.
Feel free to experiment with substitutions. For instance, you can use thyme or oregano instead of rosemary, or try flavored olive oils for a unique twist.
Step-by-Step Instructions
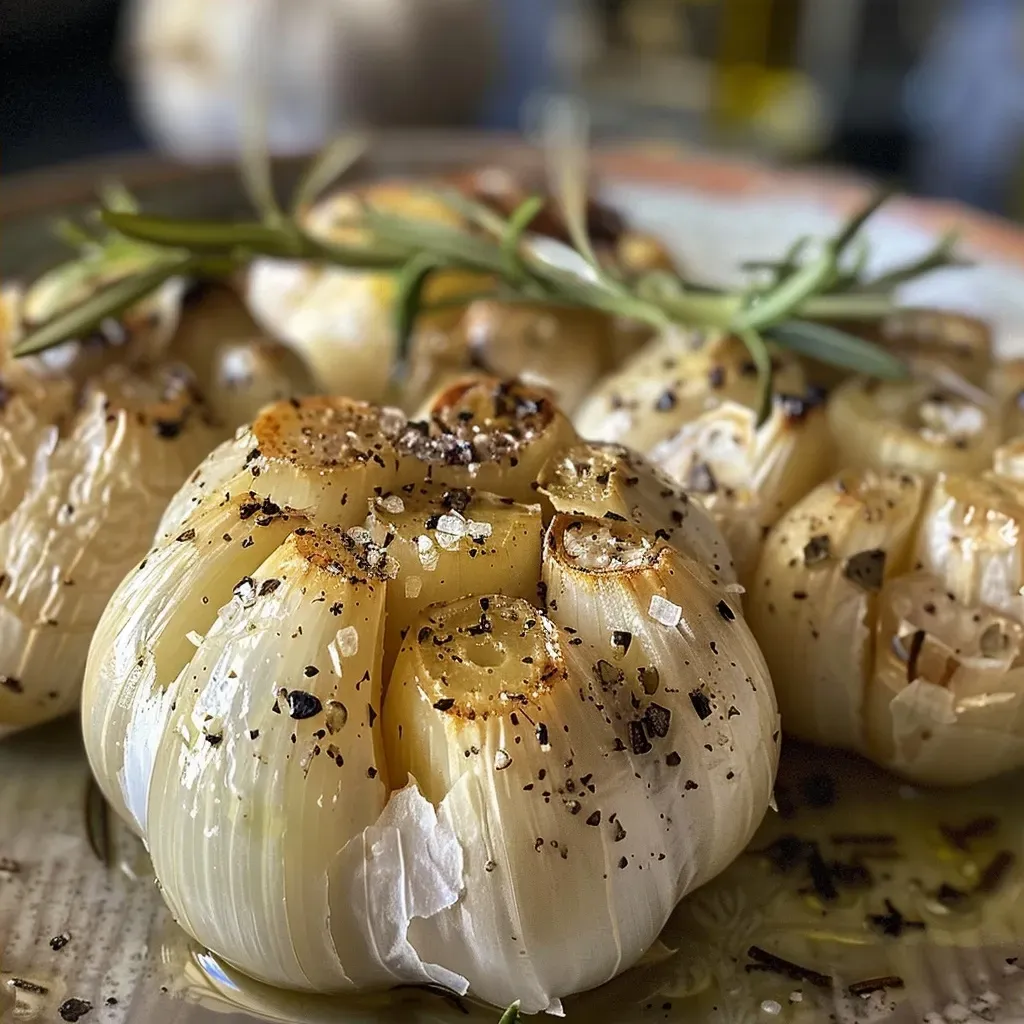
Ready to bake? Let’s break down the process into easy steps:
- Slice the top off each garlic head and place on a piece of foil.
- Drizzle with olive oil and season with salt and pepper.
- Wrap loosely in the foil, creating a sealed packet to keep in moisture.
- Bake in the oven at 400°F (205°C) for about 40 minutes.
- Unwrap the garlic, add the rosemary, and return to the oven uncovered for an additional 5 to 10 minutes until golden brown.
- Allow to rest briefly before serving; then scoop out the softened cloves for a delightful spread.
Pro Tips for Perfect Baked Garlic
To ensure your baked garlic turns out perfectly every time, consider these expert tips:
- Don’t rush the roasting: Slow baking allows the cloves to caramelize, enhancing their natural sweetness.
- Use fresh garlic: Older cloves may have a stronger flavor and are less sweet; fresh garlic yields better results.
- Check for doneness: The garlic is done when it’s soft to the touch and golden in color.
- Experiment with herbs: Try adding other herbs like thyme or sage for additional flavor profiles.
- Serving temperature matters: Baked garlic is best served warm on crusty bread or stirred into hot pasta.
- Make ahead: You can roast garlic in advance and store it in the fridge for up to a week.
- Don’t discard the skins: These can be used in stocks or broths for added flavor.
- Adjust the baking time: Depending on your oven, you may need to adjust the time slightly.
Avoiding Common Mistakes
Even simple recipes can have pitfalls. Here’s how to avoid common mistakes:
- Overbaking: Watch closely; burnt garlic can taste bitter, ruining the dish.
- Using too little oil: Ensure the garlic is well-coated to achieve that melt-in-your-mouth texture.
- Not wrapping properly: Make sure the foil is sealed to trap steam; this helps the garlic soften.
- Skipping the resting time: Letting the garlic rest allows it to finish cooking and makes it easier to scoop out.
Delicious Variations
Want to shake things up? Here are some creative variations to try:
- Spicy baked garlic: Add a pinch of red pepper flakes for a kick.
- Herbed garlic: Mix in fresh basil or parsley with the rosemary for a fresh twist.
- Cheesy garlic spread: Mix softened garlic with cream cheese or goat cheese for a rich spread.
- Garlic-infused oil: After baking, blend the soft cloves into olive oil for a garlicky drizzle.
Storage and Make-Ahead Instructions
Proper storage ensures your baked garlic stays fresh:
- Refrigerate: Store in an airtight container for up to a week.
- Freeze: Baked garlic can be frozen in small portions for up to three months.
- Thawing: Allow to thaw in the fridge overnight before using.
Frequently Asked Questions
Here are some common questions about baked garlic:
- Can I bake garlic without foil? Yes, but wrapping it in foil helps retain moisture and ensures even cooking.
- What can I do with leftover garlic? Use it in dressings, sauces, or mix into mashed potatoes for extra flavor.
- Is baked garlic healthy? Yes, it retains many of garlic’s health benefits while being easier on the stomach.
- Can I roast garlic in advance? Absolutely! Roast and store for easy meal additions later.
- How do I know when it’s done? The garlic should be soft and caramelized; you can test it with a fork.
- Can I use pre-peeled garlic? While it’s convenient, fresh heads yield better flavor.
- What’s the best way to serve baked garlic? Spread it on warm bread or stir it into sauces for a delicious flavor boost.
- Can I bake garlic with other vegetables? Yes, try roasting garlic alongside potatoes or root vegetables for a flavorful side dish.
Nutrition Tips and Dietary Adaptations
For those considering dietary needs, here’s some info on baked garlic:
- Low-calorie addition: Baked garlic is a low-calorie way to enhance flavor without extra calories.
- Vegan-friendly: This recipe is completely plant-based, making it suitable for vegan diets.
- Gluten-free: Enjoy this recipe without worry if you’re on a gluten-free diet.
Essential Equipment for Baking Garlic
Having the right tools can make your baking experience smoother:
- Aluminum foil: Essential for wrapping the garlic and sealing in moisture.
- Baking sheet: A sturdy baking sheet ensures even cooking and easy cleanup.
- Sharp knife: For cutting the tops off the garlic heads easily.
- Oven mitts: Protect your hands when handling hot garlic!
Serving Suggestions
Now that your baked garlic is ready, here are some great ways to serve it:
- Spread on bread: Serve with warm, crusty bread for an irresistible appetizer.
- Mix into pasta: Stir into your favorite pasta dish for a burst of flavor.
- Pair with vegetables: Drizzle over roasted veggies for enhanced taste.
- In dips: Blend into creamy dips for a sophisticated twist.
In conclusion, baked garlic is a simple yet powerful way to elevate your cooking. With its mellow flavor and versatility, it’s a game-changer for everything from comforting weeknight meals to elegant dinner parties. So gather your ingredients, embrace the process, and enjoy the delightful experience of baking garlic. Happy cooking!
Baked Garlic
Ingredients
Main
- 4 heads whole garlic (heads)
- 2 tablespoons olive oil
- 0.5 teaspoon kosher salt
- 0.25 teaspoon black pepper
- 1 teaspoon chopped fresh rosemary
Instructions
- Slice the top off each garlic head and place on foil.
- Drizzle with olive oil and season with salt and pepper.
- Wrap loosely in foil and bake at 400°F (200°C) for 40 minutes.
- Unwrap, add rosemary, and bake uncovered for 5 to 10 minutes.
- Let rest and scoop out softened garlic for serving.


