

Discover the Joy of Making Apple Hand Pies
There’s something magical about warm, flaky apple hand pies. Perfectly portable and utterly delightful, these treats are a fantastic way to celebrate fall flavors or simply indulge in a sweet moment. With just a handful of ingredients, including apple pie filling and soft caramels, you can create a delicious dessert that feels special yet is incredibly simple to make. In this guide, we’ll walk through everything you need to know about making apple hand pies, from the essential ingredients to expert tips and variations. Let’s dive in!
Why You’ll Love This Recipe
- Quick and Easy: With minimal prep time, you can whip up these pies in less than an hour, making them perfect for last-minute gatherings.
- Kid-Friendly Fun: This recipe is a great way to get kids involved in the kitchen. They’ll love assembling their own hand pies!
- Customizable: Feel free to experiment with different fillings and spices. The potential variations are endless.
- Deliciously Comforting: Each pie is filled with warm apples and gooey caramel, creating a comforting treat that’s sure to please.
- Perfect for Any Occasion: Whether it’s a holiday gathering or a simple family dinner, these apple hand pies will impress your guests.
Key Ingredients & Substitutions
Let’s break down the ingredients for our apple hand pies and explore some substitutions that can enhance your baking experience:
- Double Pie Crust: You can use homemade or store-bought crust. If you’re short on time, store-bought is a great option!
- Apple Pie Filling: While a 21 oz can of apple pie filling works perfectly, you can also use homemade filling for a fresher taste.
- Soft Caramels: These add a delightful surprise in each pie. If you prefer, you could use chocolate chips or a sprinkle of cinnamon instead.
- Egg for Egg Wash: This helps achieve a beautiful golden brown finish. If you’re avoiding eggs, a brush of milk or cream works well too.
Pro Tips for Perfect Apple Hand Pies
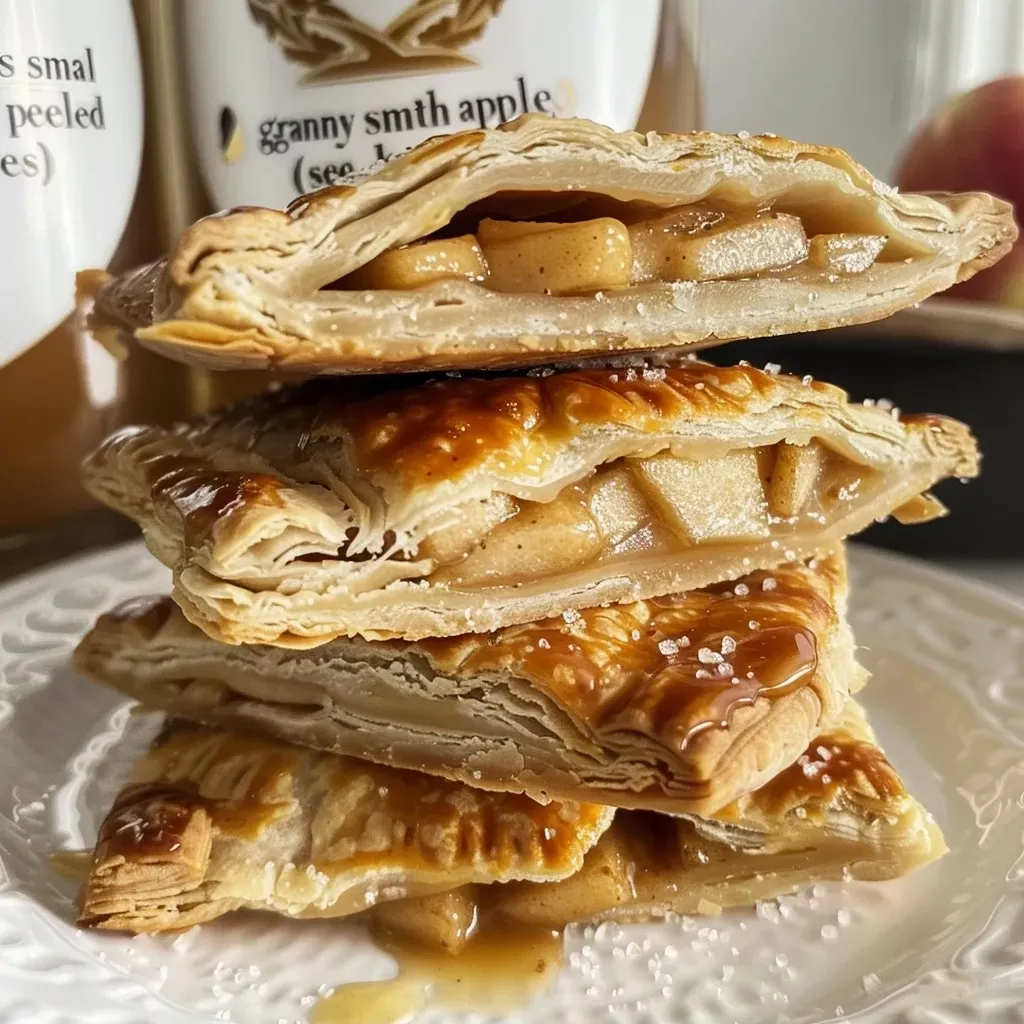
Now that we have our ingredients sorted, here are some expert tips to ensure your hand pies turn out perfectly:

★ Recommended Kitchen Tool
Silicone Baking Cups Set
Make this recipe even easier with a quality Silicone Baking Cups Set — a must-have kitchen staple!
- Keep the Dough Cold: Ensure your pie crust is chilled before rolling it out. Cold dough is essential for flaky crusts.
- Don’t Overfill: Use about 1 tablespoon of filling per pie to prevent overflow during baking. Less is more!
- Seal Edges Well: Press edges firmly and crimp with a fork to keep the filling inside. This will help avoid any mess.
- Brush with Egg Wash: This not only enhances color but also gives a lovely sheen to your pies.
- Use Parchment Paper: Line your baking sheet with parchment paper to prevent sticking and for easy cleanup.
- Watch the Baking Time: Each oven is different. Keep an eye on your hand pies and remove them once they turn golden brown.
- Cool Before Serving: Let your pies cool for a few minutes; the filling will be hot!
- Experiment with Spices: Adding a pinch of nutmeg or allspice to your filling can elevate the flavor profile.
Common Mistakes and Troubleshooting
Even the best bakers make mistakes! Here’s how to troubleshoot common issues:
- Soggy Bottoms: Ensure your filling isn’t too wet. If using fresh apples, toss them with a little flour to absorb excess moisture.
- Crusts Not Flaky: Avoid overworking the dough to keep the layers light and fluffy. Remember, less is more!
- Sealing Problems: If your pies are leaking, check that the edges are properly sealed. A little water on the edges can help them stick better.
- Burnt Tops: If your pies are browning too quickly, cover them loosely with foil for the last few minutes of baking.
Flavor Variations & Add-Ins
Don’t hesitate to mix things up! Here are some fun variations to try:
- Spiced Pear Hand Pies: Substitute half of the apple filling with pear for a unique twist.
- Cranberry Apple: Add dried cranberries to the filling for a tart contrast.
- Nutty Crunch: Sprinkle chopped pecans or walnuts into the filling for added texture.
- Chocolate Drizzle: Once baked, drizzle melted chocolate over the pies for a decadent finish.
Storage and Make-Ahead Instructions
Planning ahead? Here’s how to store your hand pies:
- Storing Leftovers: Keep leftover pies in an airtight container at room temperature for up to 2 days. For longer storage, refrigerate for up to a week.
- Freezing Unbaked Pies: Assemble the pies and freeze them on a baking sheet. Once frozen, transfer to a freezer bag. Bake directly from frozen, adding a few extra minutes to the baking time.
- Reheating: To reheat, place in a 350°F oven for about 10-15 minutes until heated through.
Comprehensive FAQ
Here are answers to some common questions about making apple hand pies:
- Can I use fresh apples instead of canned filling? Yes! Just peel and slice your apples, and toss them with sugar and cinnamon.
- How do I know when my hand pies are done? They should be golden brown and bubbly. A visual check is key!
- What can I use instead of caramels? Chocolate chips, peanut butter, or even a sprinkle of brown sugar can work well.
- Can I make these hand pies gluten-free? Absolutely! Use a gluten-free pie crust and ensure your fillings are gluten-free as well.
- How long do these pies last? They can be stored at room temperature for 2 days or in the fridge for up to a week.
- Can I bake these from frozen? Yes! Just add a few extra minutes to the baking time.
- What’s the best way to serve these pies? They’re delightful warm, but you can also serve them at room temperature with a scoop of vanilla ice cream.
- How can I enhance the flavor? Consider adding spices like cinnamon or nutmeg to your filling for an extra flavor boost.
Nutritional Tips and Dietary Adaptations
Here are some tips to make your apple hand pies healthier:
- Lower Sugar: Use less sugar in the filling or opt for natural sweeteners like honey or maple syrup.
- Whole Wheat Crust: Substitute part or all of the pie crust with whole wheat flour for added fiber.
- Fruit Options: Experiment with other fruits like berries or peaches for a different taste.
Equipment Recommendations
To make your baking experience smoother, here’s a list of handy tools:
- Rolling Pin: A good rolling pin will help you achieve the perfect dough thickness.
- Cookie Cutter: Use a round cutter for uniform pie shapes.
- Parchment Paper: Essential for preventing sticking and easy cleanup.
- Baking Sheet: A sturdy baking sheet is crucial for even baking.
Serving Suggestions
Ready to serve your delicious apple hand pies? Here are some ideas:
- With Ice Cream: Serve warm with a scoop of vanilla or caramel ice cream for a heavenly dessert.
- Dust with Powdered Sugar: A light dusting can elevate the presentation and sweetness.
- Pair with Coffee: These hand pies make a perfect treat with your morning coffee or afternoon tea.
Finally, remember: cooking is all about having fun and experimenting. Don’t stress about perfection—enjoy the process and savor each bite of your delicious creation. Happy baking!
Apple Hand Pies
Ingredients
Dough
- 1 set double pie crust (homemade or store-bought)
- 1 can 21 oz apple pie filling
- 10 pieces soft caramels
- 1 egg egg for egg wash
Instructions
- Preheat oven to 400°F (200°C). Roll out dough and cut out 20 circles.
- Place 1 tablespoon of apple filling on each of 10 dough circles. Top with a caramel.
- Cover with remaining circles, seal edges, and crimp with a fork. Brush with beaten egg.
- Cut small slits on top, sprinkle with sugar if desired, and bake for 18–20 minutes until golden.
- Let cool for 5–10 minutes before serving. Enjoy!