
![['Close-up view of a slice of gluten-free quinoa bread showing its texture and crust.', 'Side view of gluten-free quinoa bread highlighting its moist interior and golden crust.', 'Juicy and delicious gluten-free quinoa bread displayed on a wooden board.', 'Textured quinoa bread slice with visible air pockets, emphasizing its freshness.']](https://simpleflavoria.com/wp-content/uploads/2026/07/gluten-free-quinoa-bread_1_U1.webp "Wholesome Quinoa Bread: A Simple Gluten-Free Delight")
Discover the Magic of Wholesome Quinoa Bread
If you’ve ever dreamed of baking your own gluten-free bread that is both delicious and nutritious, you’re in the right place! This Wholesome Quinoa Bread recipe is not just easy to follow; it’s packed with wholesome ingredients that are sure to delight your taste buds. In this article, we will guide you through the process of making this delightful bread, packed with benefits and versatile enough for any meal. Plus, we’ll share tips, variations, and answers to all your burning questions about gluten-free baking!
Why You’ll Love This Recipe
Here are just a few reasons why this gluten-free quinoa bread will become a staple in your kitchen:
- Nutritious Ingredients: Made with quinoa flour and almond flour, this bread is rich in protein, healthy fats, and essential nutrients.
- Versatile Flavor: The subtle nutty flavor of quinoa pairs beautifully with various toppings, making it perfect for breakfast, lunch, or dinner.
- Simple Steps: With straightforward instructions, you’ll find that baking bread at home is easier than you might think!
- Gluten-Free Goodness: This recipe is entirely gluten-free, making it suitable for those with gluten sensitivities or celiac disease.
- Freezing Friendly: Bake a batch and freeze slices for easy access to homemade bread anytime you want!
Ingredients Breakdown
Let’s dive into the ingredients you’ll need to make this wholesome quinoa bread:

★ Recommended Kitchen Tool
Digital Kitchen Scale
Make this recipe even easier with a quality Digital Kitchen Scale — a must-have kitchen staple!
- Almond Milk (1 3/4 cup or 420g): A great dairy-free alternative that provides moisture without adding any dairy. Feel free to substitute with other plant-based milks like oat or soy if desired.
- Tahini (1/4 cup or 60g): This nut/seed butter adds creaminess and depth of flavor. If you prefer, you can swap it with almond butter or sunflower seed butter for a different twist.
- Apple Cider Vinegar (1 tbsp): This ingredient reacts with baking soda to help the bread rise and adds a touch of tanginess.
- Maple Syrup (1 tbsp): A natural sweetener that balances the flavors. You can replace it with agave nectar or honey if you’re not strictly vegan.
- Quinoa Flour (2 1/2 cups or 315g): The star ingredient that gives the bread its structure and unique flavor. It’s gluten-free and packed with protein.
- Almond Flour (1 cup or 110g): Contributes to the bread’s tender texture. You can substitute this with oat flour or other nut flours if preferred.
- Flax Meal (1/4 cup or 30g): Acts as a binding agent, especially in gluten-free recipes. It also adds Omega-3 fatty acids to your bread.
- Salt (1/2 tsp): Enhances the flavor of the bread.
- Baking Powder (1 tsp) and Baking Soda (1 tsp): These leavening agents work together to give the bread a light and airy texture.
Step-by-Step Instructions
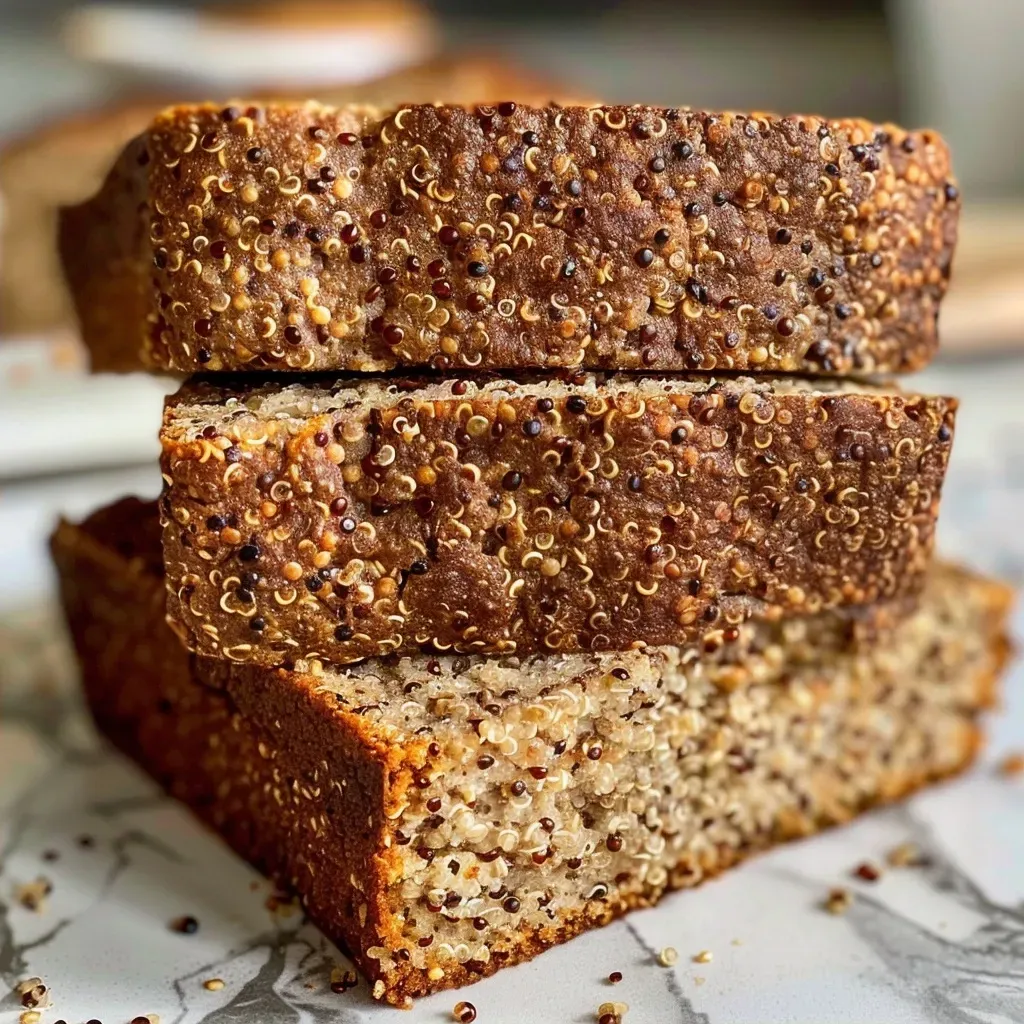
Follow these simple steps to create your gluten-free quinoa bread:
- Preheat the Oven: Preheat your oven to 350°F (175°C) to ensure it’s hot and ready for baking.
- Mix Wet Ingredients: In a small bowl, whisk together the almond milk, tahini, apple cider vinegar, and maple syrup until well combined.
- Combine Dry Ingredients: In a large mixing bowl, combine quinoa flour, almond flour, flax meal, baking powder, baking soda, and salt. Stir until evenly mixed.
- Combine Wet and Dry: Add the wet mixture to the dry ingredients and mix until a sticky dough forms.
- Transfer to Loaf Pan: Pour the dough into a loaf pan (8×4 inches) that has been sprayed with non-stick spray or lined with parchment paper.
- Baking Time: Bake in the preheated oven for 1 hour or until a toothpick inserted into the center comes out clean.
- Cool Before Slicing: Remove the bread from the oven and let it cool in the pan for at least 30 minutes before transferring it to a wire rack. Allow it to cool completely before slicing to prevent it from being crumbly.
- Enjoy!: Slice and enjoy your wholesome quinoa bread! Store leftovers in an airtight container in the fridge to keep it fresh.
Pro Tips for Perfect Quinoa Bread
Here are some expert tips to ensure your quinoa bread turns out perfectly every time:
- Measure Accurately: Use a kitchen scale for precise measurements, especially when dealing with flour.
- Mix Thoroughly: Ensure that wet and dry ingredients are combined well to avoid any dry pockets in the dough.
- Do Not Overmix: While thorough mixing is essential, overmixing can lead to dense bread. Mix until just combined.
- Allow the Bread to Cool: Always let the bread cool completely before slicing; this helps it set and prevents crumbliness.
- Experiment with Flavors: Add herbs, spices, or seeds to the batter for a unique twist on your bread.
- Store Properly: For best results, store the bread in an airtight container with minimal air exposure.
- Check for Doneness: If you’re unsure if the bread is done, tap the bottom of the loaf—if it sounds hollow, it’s ready.
- Use Quality Ingredients: The quality of ingredients can make a significant difference in flavor and texture, so choose wisely!
Common Mistakes and Troubleshooting
Here are some common issues and solutions you may encounter while baking quinoa bread:
- Dry Bread: If your bread turns out dry, it may be due to too much flour or not enough liquid. Adjust your measurements next time.
- Dense Texture: Overmixing the dough or not using enough leavening agents can lead to dense bread. Follow the recipe closely!
- Crumbly Slices: This often happens if the bread is sliced too soon. Ensure it cools completely before cutting.
- Uneven Baking: An oven temperature that’s too high or too low can cause uneven baking. Use an oven thermometer to ensure accuracy.
Delicious Variations to Try
Feeling adventurous? Here are some variations you can try with this quinoa bread recipe:
- Herb-Infused Bread: Add 1-2 tablespoons of your favorite dried herbs (like rosemary or thyme) for a fragrant twist.
- Seed Topping: Sprinkle sesame, sunflower, or pumpkin seeds on top of the dough before baking for added texture and flavor.
- Nutty Delight: Mix in chopped nuts or seeds into the dough for an extra crunch and nutrition boost.
- Savory Add-ins: Incorporate finely chopped sun-dried tomatoes or olives for a Mediterranean flair.
Storage and Make-Ahead Instructions
Here’s how to store your quinoa bread and make it ahead of time:
- Room Temperature: Store in an airtight container at room temperature for up to 3 days.
- Refrigerator: For longer freshness, keep the bread in the fridge for up to a week.
- Freezing: Slice the bread and freeze in an airtight container or freezer bag for up to 3 months. Thaw at room temperature or toast directly from frozen.
- Make Ahead: You can prepare the dough a day in advance and refrigerate overnight before baking.
FAQs About Quinoa Bread
Here are some frequently asked questions about making quinoa bread:
- Can I use cooked quinoa instead of quinoa flour? No, the recipe specifically requires quinoa flour to achieve the right texture and consistency.
- What can I substitute for almond flour? You can use other nut flours like cashew flour or sunflower seed flour for a nut-free option.
- Can I make this bread without flax meal? Yes, but the flax meal helps bind the bread. You can substitute it with chia seeds or psyllium husk.
- How can I tell when the bread is done baking? Insert a toothpick into the center—if it comes out clean, the bread is ready.
- Can I add sweeteners? Yes, feel free to adjust the maple syrup based on your sweetness preference.
- Is this bread suitable for freezing? Absolutely! Slice and freeze for later use.
- How do I enhance the flavor of quinoa bread? Consider adding spices, herbs, or seeds to the dough for extra flavor.
- What’s the best way to slice the bread? Use a serrated knife and let the bread cool completely for the best slices.
Nutritional Benefits and Dietary Adaptations
This quinoa bread is not just delicious; it’s also nutritionally beneficial:
- High in Protein: Both quinoa flour and almond flour are rich in protein, which is essential for muscle repair and growth.
- Rich in Healthy Fats: Almond flour and tahini provide healthy fats that support heart health and improve satiety.
- Gluten-Free: This recipe is perfect for those with gluten sensitivities or celiac disease, ensuring no discomfort after enjoying your bread.
- Fiber-Rich: Flax meal contributes to your daily fiber intake, aiding digestion and promoting gut health.
Essential Equipment for Baking
Before you start making quinoa bread, here are some essential equipment recommendations:
- Mixing Bowls: Have both small and large mixing bowls on hand for wet and dry ingredients.
- Whisk: A good whisk is crucial for combining ingredients smoothly.
- Loaf Pan: Use an 8×4 inch loaf pan to shape your bread properly.
- Measuring Cups and Spoons: Accurate measurements are key to baking success!
- Oven Thermometer: Ensure your oven temperature is accurate for even baking.
Serving Suggestions
This quinoa bread pairs beautifully with various toppings and meals. Here are some serving ideas:
- Avocado Toast: Top a slice with smashed avocado, a sprinkle of salt, and a drizzle of olive oil.
- Nut Butter Spread: Slather with your favorite nut butter and add slices of banana or apples for a hearty snack.
- Soup Companion: Serve with a warm bowl of soup for a cozy meal.
- Breakfast Toast: Enjoy as toast with a spread of jam or honey for a delightful breakfast.
Conclusion
Now that you have the ultimate guide to making Wholesome Quinoa Bread, it’s time to roll up your sleeves and get baking! With its nutritious ingredients, simple steps, and delicious results, you’ll feel confident and excited to create this gluten-free delight in your own kitchen. Remember, cooking is about experimenting and having fun, so don’t hesitate to make it your own. Happy baking, and enjoy the journey of creating something delicious!
Gluten-Free Quinoa Bread
Ingredients
Wet ingredients
- 1 3/4 cup almond milk
- 1 tbsp apple cider vinegar
- 1 tbsp maple syrup
Dry ingredients
- 2 1/2 cups quinoa flour
- 1 cup almond flour
- 1/4 cup flax meal
- 1/2 tsp salt
- 1 tsp baking powder
- 1 tsp baking soda
Instructions
-
Preheat oven to 350°F (175°C).
-
Mix wet ingredients in a bowl.
-
Combine dry ingredients in a large bowl.
-
Mix wet and dry to form a sticky dough, then transfer to a loaf pan.
-
Bake for 60 minutes, then cool before slicing.

![['Close-up of a slice of Southwestern Quinoa Casserole with melted cheese on top.', 'Side view of a hearty quinoa casserole, showcasing ground beef and colorful vegetables.', 'Juicy Southwestern Quinoa Casserole sliced, revealing layers of quinoa and toppings.', 'A dish of quinoa casserole filled with red bell peppers, corn, and cheese, served in a baking dish.']](https://simpleflavoria.com/wp-content/uploads/2026/07/southwestern-quinoa-casserole_1_U1-150x150.webp)
![['Close-up of baked eggs with colorful diced vegetables on a plate.', 'Side view of high protein baked eggs with bell peppers and spinach.', 'Juicy baked egg dish with vibrant vegetables, served on a white plate.', 'Freshly baked eggs surrounded by diced onions and peppers in a skillet.']](https://simpleflavoria.com/wp-content/uploads/2026/07/u6426281249_close_up_photo_side_view_from_reddit._taken_with__7d63186f-50ef-453f-b85e-63fb63e211b8_0-150x150.webp)